https://www.youtube.com/watch?v=yE0krmQt5MY
Milk Texture - How to get beautifully silky steamed milk
It's not just milk , it's silky smooth steamed milk .
Perfect for pouring latte art and Chris here is gonna show you how to get it just right today , I'm gonna be doing the talking Chris is gonna be showing you how to get beautifully silky steamed milk .
Now , in our last video , Paul went through the six most common mistakes that people make when they're trying to pour latte out .
And what we found is that the one that trips up new baristas the most is getting the texture of the milk , right ?
So that's what we're gonna focus on today .
We're gonna give you a step by step guide and point out some of the things you need to know to get really silky milk texture .
Now , before we get into the process , let's take a look at our ingredient milk and starting out it's best to use full cream milk for best results .
It's a lot more stable to work with , you know , and it tastes good too .
Of course , you can use light or nonfat milk .
It's just less forgiving .
If you inject a little bit too much air , you're gonna end up with a mountain of foam at the end .
So , what about milk alternatives like almond soy or oat milk ?
Yes , you can get great results .
But it's worth noting that it really depends on the brand .
Some brands just aren't designed to work with coffee .
They either produce big bubbles , they don't produce any foam at all or they just completely curdle when you add them to coffee .
Don't take it personally .
It's probably not .
You just pick a different brand and try again .
Now we're working on a comparison of which milk alternatives work best for coffee .
So stay tuned for that one .
Next is the milk jug .
Now , for best results , you wanna pick a milk jug that's around 2 to 3 times the size of the cup or the cups that you're pouring into .
So for a classic 1 60 mil flat white or cappuccino , you wanna pick a 400 mil jug while for an eight ounce takeaway cup , a 600 mil jug is gonna be a better fit .
Now , the size is important because we need enough room for the milk to expand .
On the other hand , if the milk is sitting too low in the jug , you won't be able to get a good whirl port , which is essential to get a great texture .
It also helps to pick a milk jug with a nice defined spout .
This will really help if you want to pour a nice tight pattern on your coffee .
Ok ?
So let's get down to business .
We'll go through each step in detail and then we'll run through the whole process again at the end .
So first up , you wanna clear the steam on with a quick blast of steam .
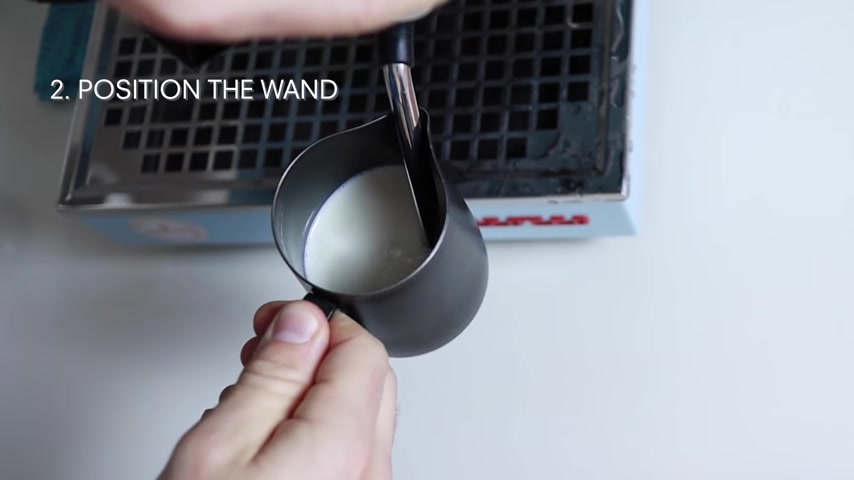
Next , we wanna submerge the tip of the steaming wand into the milk position , the steaming wand off to one side of the jug on a slight angle .
This is gonna help create a whirlpool .
I find it helps to rest the wand in the spout of the jug just like this .
Next .
We're gonna crank the steaming wand on full .
It's a classic trainee mistake to turn the steaming wand on just a little bit and then it sounds like a plane's landing .
Not fun .
Now , once the milk is spinning around , we want to lower the jug down a little bit to start injecting the air into the milk .
You'll know you've hit the right spot .
When you hear a steady kissing sound .
Next , when the milk has expanded around 20% we wanna raise the jug just a little to stop the kissing sound and let that milk continue to whirlpool .
Now , when the bottom of the jug is too hot to touch , we wanna turn off the steam .
If you like a more measured approach to temperature , then you can use a thermometer like this .
Well , my pick is to use a temperature sticker that changes color when the milk hits 65 degrees .
Of course , you can heat it a little more or less , but it tastes and it works best at around 65 °C .
Now , before you get too excited about your creamy creamy milk , it's time to wipe and purge that steamer every time .
No excuses .
Now , we're gonna give the jug a tap on the bench and a little swirl just to make that milk even creamier .
Ok .
Now we're all ready to pour .
Let's just recap that whole process in real time .
First , we're gonna purge the steamer .
Then we're gonna position the steaming wan so that it creates a whirlpool .
Within the joke , we're gonna crack the steam on full .
We're gonna lower the jargon till we hear a steady kissing sound .
When the milk's expanded by around 20% we're gonna raise the jag a little and continue to spin that milk .
When the jug it's too hot to touch , we're gonna stop the steamer .
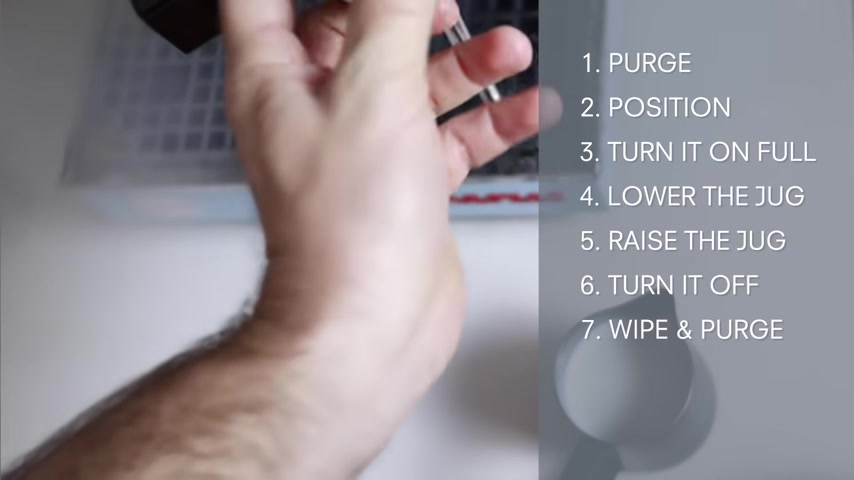
We're gonna wipe and spray the steamer to clean it off and then we're gonna tap and spin that jug on the bench .
So that's the whole process .
It's tricky to bring it all together at first .
But after you've done it a few times , all those movements become really natural and fluid .
So just keep practicing .
So here's a tip for practicing without wasting heaps of milk , pour some water into your jug and then add a couple of drops of washing up detergent .
Now start to steam that mixture on the steaming wand and you'll notice that it creates a foam , just like regular milk .
You can even use this mix for practicing latte art .
If you've got some old coffee lying around , just don't drink it .
Ok .
That's all we've got for today .
Why don't you hit the like button ?
If this video has helped you out at all ?
If you've got any questions , pop them down below , we'll do our best to answer them .
But until next time , see ya .
See ya .
Are you looking for a way to reach a wider audience and get more views on your videos?
Our innovative video to text transcribing service can help you do just that.
We provide accurate transcriptions of your videos along with visual content that will help you attract new viewers and keep them engaged. Plus, our data analytics and ad campaign tools can help you monetize your content and maximize your revenue.
Let's partner up and take your video content to the next level!
Contact us today to learn more.