https://www.youtube.com/watch?v=YdJBPRWup1s
How to Create a Blog Website - WordPress Extra Theme Tutorial 2017
Hey , what's up guys ?
This is Nasik from rock to dot com .
And today in this video , I'm gonna show you how to create a beautiful blog or news website using wordpress and extra theme .
And let me tell you one thing , extra theme is created by the creator of DVI theme .
So basically , you have all the features over here which are present in the DVI .
The plus this theme , the extra theme is specialized for blog .
So this is just an amazing theme .
So let's see the website which you'll be creating in this particular video .
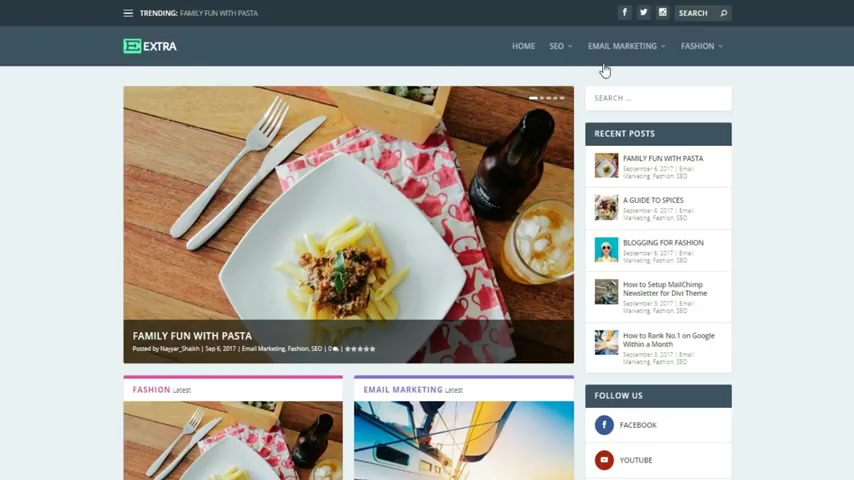
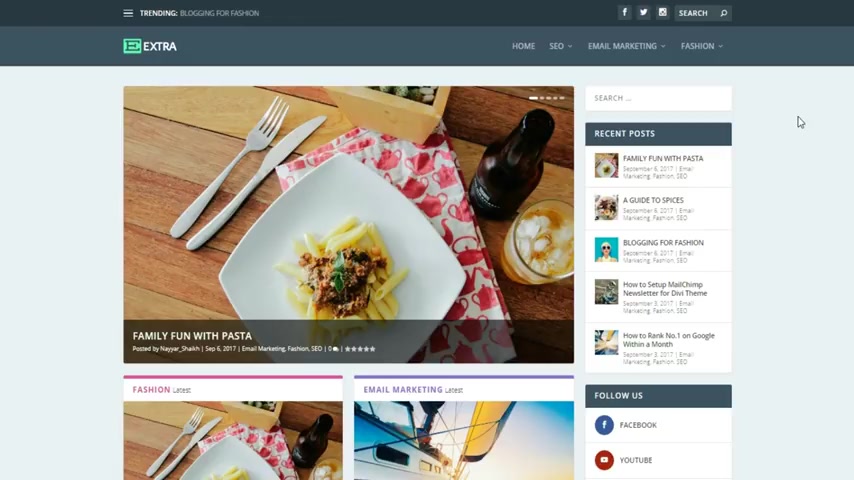
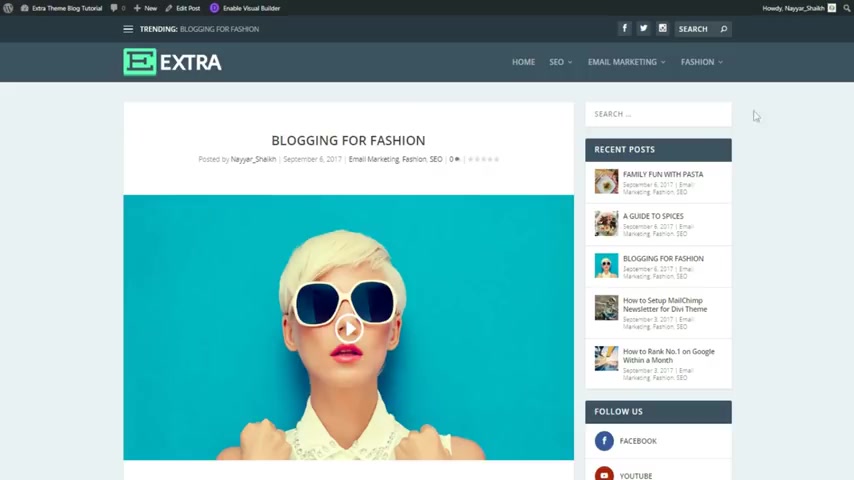
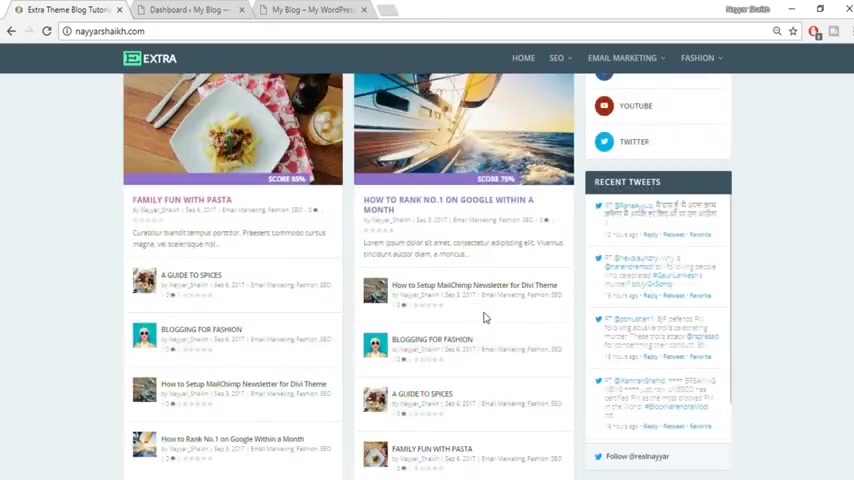
So as you can see on your screen , this is the website which you'll be making in this particular video at the top .
We have this trending section , all the blogs , all the posts that are trending will be shown over here .
Then we have some social icons over here , a search button , then we have our logo over here .
And this is the head of the menu section .
You can increase or decrease the size of this section .
You can increase or decrease the size of this icons and size of this logo and so on .
Obviously , OK .
Now let me show you one beautiful thing .
As you can see , this is a mega menu , a very beautiful mega menu .
And this is also a mega menu .
It has sections , all the three are blog and here we have three sections to our blog .
And third one is a list .
And as you can see , there is a very thin line , a purple line over here .
And when we come over here , this line changes the color changes .
So basically , we are using a very beautiful theme or a very colorful theme .
We can change and control the color according to our needs .
And when someone sees these beautiful mega menus , they think man , you have to do a lot of coding and so on for the for that .
But that is not the thing guys , believe me , there is just a single box , you tick mark on that box and you have this thing , you don't have to do anything whatsoever .
And before proceeding , let me tell you one thing .
If you see in the video description below , you'll see an index , you know , you'll have the timing and the title .
For example , if you don't want to see the demo website , which I have created and you just want to go to the host hosting section where we'll be purchasing the domain name and hosting , then you can just click on that timing and you will be redirected to that one .
And if you don't want to see that thing .
Also , you just want just want to start from where we install wordpress .
Then you will see that section .
Also , you can click on that timing and you will be redirected to that in this video .
You will be you'll go to that timing where we'll start creating the website .
So you can check the description below .
That will be really helpful .
But I would personally suggest you to watch the complete tutorial .
Don't miss out if you can .
If you don't have time to watch two hours , three hours tutorial , then what you can do , you can watch something today and leftover portion tomorrow and this kind of thing .
But I would personally recommend you to watch the complete tutorial that would really help you .
OK ?
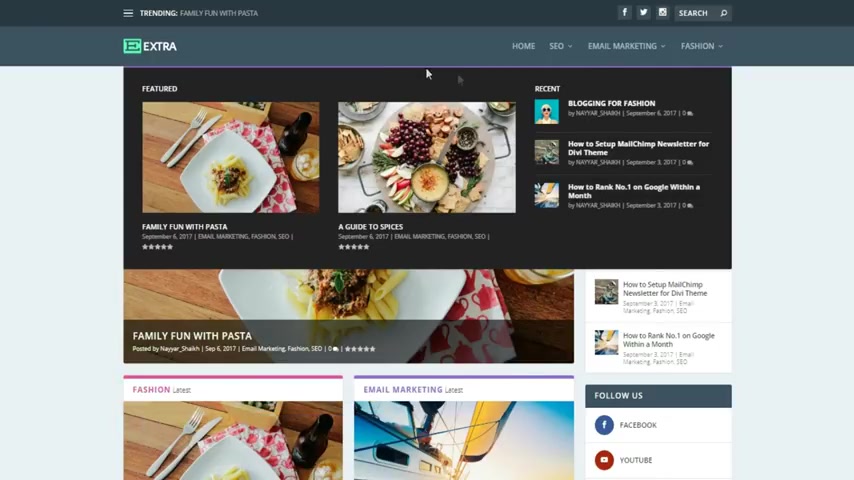
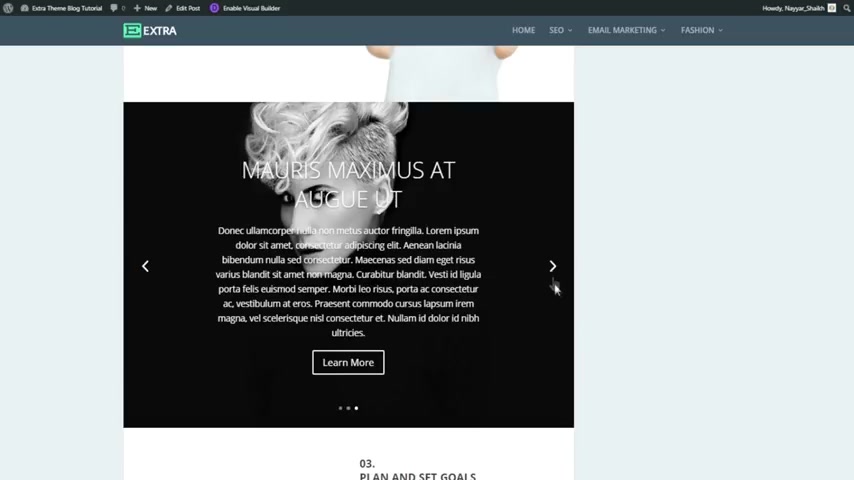
Now , here is a slider , a very beautiful post slider .
If you see , you know , we have different post title author date , you know , all this category and so on .
And here also again , let me tell you you don't have to do any coding .
You don't even have to create a slider .
There is a module , there's something called modular year and there is a post slider module that is automatically present .
You just have to add that and that is really simple .
Now , after a few minutes , I'll show you how easy to create this kind of website .
OK ?
Now when we scroll down , we have two different sections and here there are two different categories .
For example , this section contains all the fashion category and this section contains all the email marketing category .
And as you can see again , the color for both this section are different , we can , we have all the control on this color .
We can change the color according to our need .
Obviously , then when we scroll down , we see this section , a post carousel section as you can see a very , very beautiful section again and very useful also .
And this is again the same section which we saw here .
But here , as you can see , there are only two things over here and there are only two columns .
And here we have three columns .
So basically we can have one column , two column , three column , five column , anything we want and doing that is really easy , stay tuned so that you can see how easy it is .
OK .
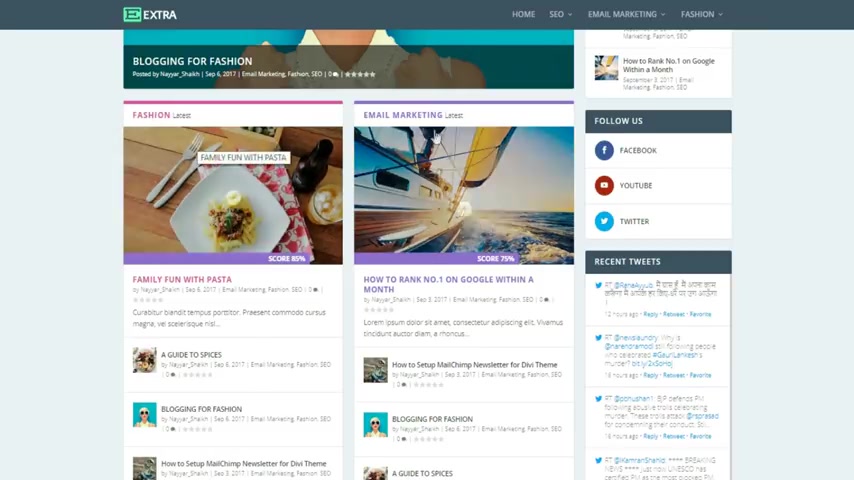
Then at the end , we have put this tab section .
As you can see there are different at present .
It is on the fashion category .
Now when we click on this , it goes to the email marketing category and you see all the posts related to email marketing .
And also you can see the color also changes at present .
It is purple color and when we click on , so it becomes orange .
So this is just amazing .
And this is the sidebar as you can see at the top , a very important thing which is a search bar .

Then we have this recent post with thumbnail and extra information .
Then we have this follow us button over here , recent tweets .
I'll show you how to configure this thing .
Then we have different authors .
So basically I'll show you how you can add different authors .
You can invite other people to write for your website or to write for your blog .
And that is very important .
OK .
Then we have recent reviews .
As you can see over here , there are three different reviews and we also have a recent video when you click on this video , it starts playing , OK .
As you can see over here it is video , my own video .
Yes .
OK .
So this is how it is OK .
Now let's see how different posts would look like the most important thing , how your blog would look like .
OK .
So let's see that .
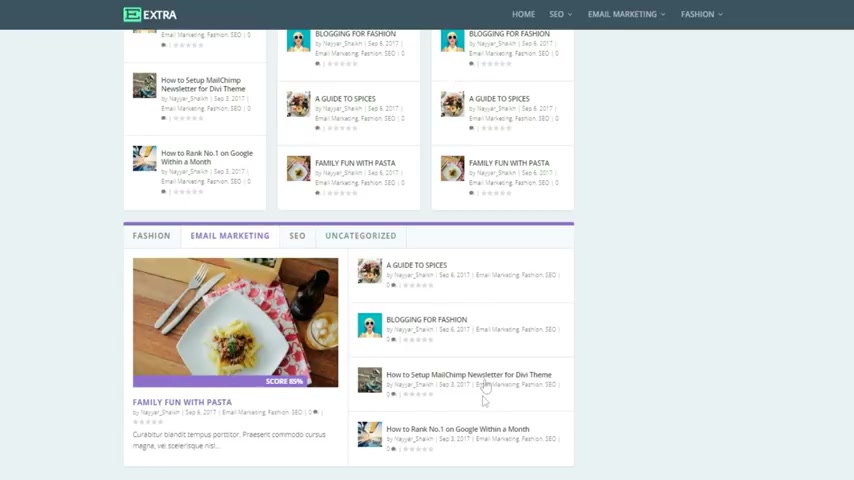
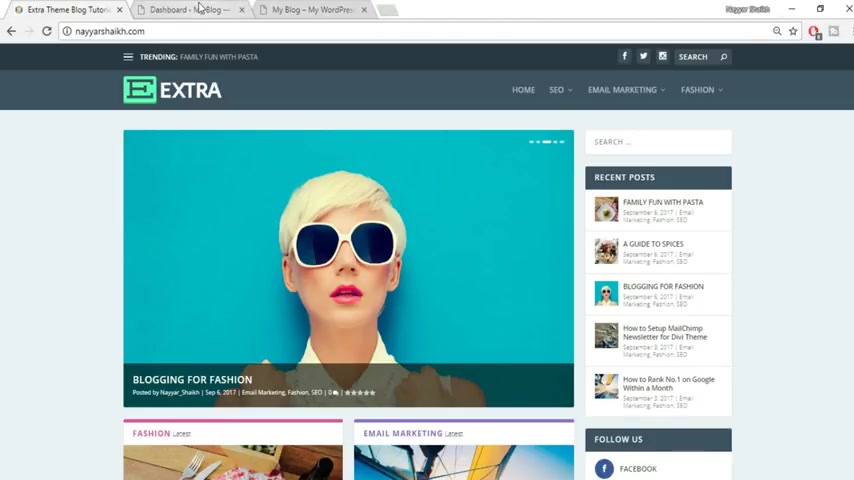
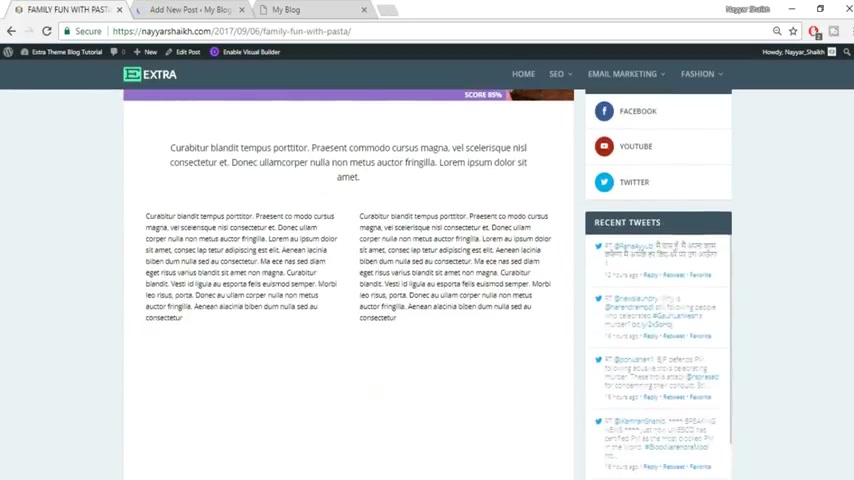
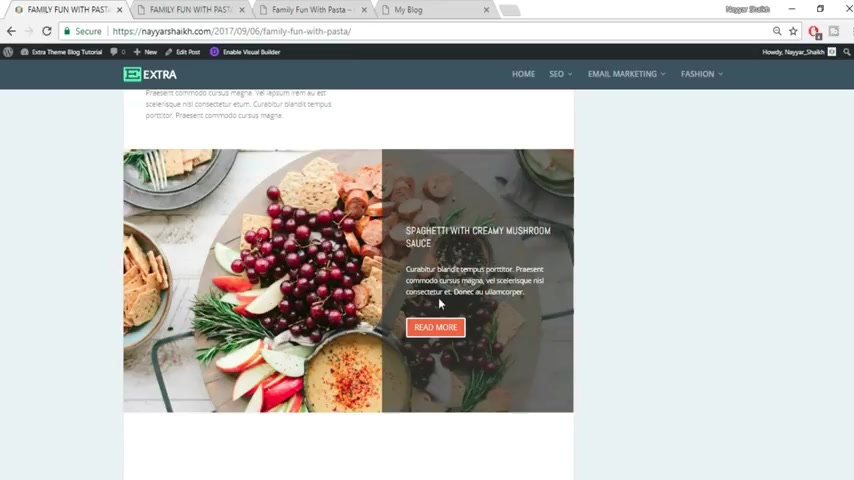
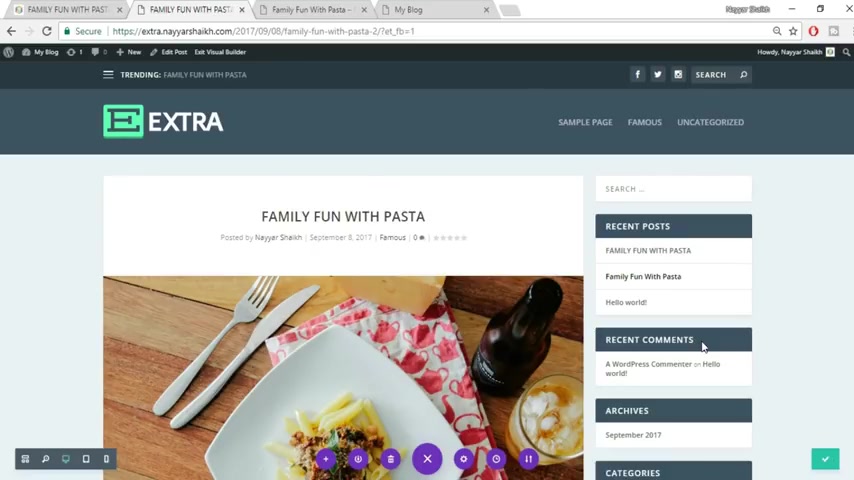
For example , this is a blog family fun with pasta .
So this is basically the title we have this author date category and so on .
This is the featured image .
Then we have this section and when I scroll down , make sure you see the animation because there is a lot of animation used in this particular website .
OK .
Then there is a single column over here , then we can divide this into two different columns as you can see .
And as you can see there is an animation and this looks really beautiful .
You know , there are two different images over a year .
OK ?
Then again , you can see the animation , OK ?
You have an image , you have this text over a year , you have some text subtitles , separators , subtitle at the top .
And similarly , when I scroll down , this is how you can see the beautiful beauty of this particular blog .
And as you can see this is a parallax effect over a year .
And we have divided this also into two different sections and this one has a dark background color and we have a light text or that and also a call to action button .
And believe me guys , these are post , you would have seen post , but they basically the blogs and post looks like just text , you know , some text and few images .
But here as you can see , we have made these things so beautiful and I'll show you how to do all these things .
We can also kind of put this circle counter over here .
As you can see , we can do a lot of things .
OK ?
Now we can put these things also this fact question , you know , when you click on this , it maximize this question , it answers the thing over here and we can give this rating this review , OK ?
And at the bottom , someone can even reply by typing their comment over year and clicking on this simple post comment button .
And let me show you how easy it is to create or to make changes in this particular website to do .
So you just have to click on this button which says enable visual builder .
OK ?
Now let's make some changes for you .
OK ?
So let's scroll down and suppose you want to make this change .
You can you want to change this text .
So what you can do , just select this thing and change the text to whatever you want .
OK .
As you can see anything , it is that simple .
OK ?
You can also change this , you want to delete this portion .
So just select this click on this delete button , it is deleted .
And you say man , there is a lot of gap over here or there is a very small gap .
So what you can do just drag this thing to the bottom and you have a lot of space over here and you say I want to change this image OK .
So just how all this image you have this gear I can click on that , you know select this image , select any one of the image you want .
For example , let's select this one , click on upload an image , click on this plus and you will see the changes over here as you can see the image changed .
So it is that easy , my friends , it is really , really easy .
You can change the animation .
You can also change this side column over here .
For example , let me show you when you how are you , you get this thing ?

You can increase or decrease all these columns , all this gapping , all this thing over here .
So it is that simple changing any image , changing anything over here .
So creating a website like this is really , really easy .
And basically most of you guys might know how easy to create the website with TV theme .
And this is the same exact theme .
We have the same module , we have the same , same , basically the same structure .
OK ?
Now let's see a different post how a different post would look like .
OK .
So this is the second post , a guide to spices .
Now let's scroll down .
This is obviously the featured image first section as you can see counter .
Then there is an image , a full width image .
Then we have some text over here .
I'll create a call to action button again a full width image .
OK .
Then we have some text over here , this bar counter over here .
OK ?
Full with image , then some text over here .
Number three and there is a circle counter over here .
OK ?
So basically you can see , I don't have to explain you this , you can see and make out that this is so gorgeous .
So awesome .
OK ?
Now let's see the third post .
OK .
So this is the third post .
This is a video post actually and this is actually a video .
OK .
So when you click on this , the video place , then this is the section as you can see a very beautiful section , the image , both the image are overlapping each other and I'll show you how to do that .
It is really easy .
OK ?
Then there is an audio here , an audio file .
And then again , we have some text audio .
Then there is a full width image in the background and we have some text over a year .
I'll show you how to do this obviously , then again , a full width image over a year .
OK ?
And then some text to a year , we also have a slider .
So you know , this is really crazy .
You can use a slider in a blog .
This is really crazy man .
OK ?
So we have a slider inside a blog .
We have counters inside the blog .
We have full width images inside the blog .
This is just awesome .
OK ?
Now let's scroll down , you can see all these beautiful things over here .
So basically you get the idea of what I'm trying to say .
This is an amazing , super awesome thing .
OK ?
So now let's start making this uh website , start making this blog .
OK ?
So I hope you guys like this demo video .
Make sure you give a thumbs up to this video .
So let's get started to create any kind of website , whether it be a blog website , a simple business website , an e-commerce website , a social networking website , whatever it is , we need two basic things .
One is a domain name and second is a hosting plan .
OK ?
So basically a domain name is just the name of the website .
For example , Naha dot com , blog to dot com , google dot com , youtube dot com .
These are domain names and what are these hosting plans or web host ?

So basically , if you see youtube , if you you are seeing my video , so basically this video is stored somewhere in some computer in the world .
And you know , whenever anyone wants to see my video , they can see the video any time they want .
OK ?
So all these files , all these videos , all the images are actually saved somewhere in the world .
So basically that is what a web host is .
You have to save all your data , all your images to some computers , to some art that is 24 7 running .
OK ?
So basically that is what a domain and a hosting thing is .
And that is a compulsory , you cannot proceed without that .
And there are many different companies providing many different uh plans and many different features .
Now let's see the company which I prefer .
So go open a new tab and type in B block two dot com slash T MD .
OK .
It's B block two dot com slash T MD and press enter when you do .
So you'll be redirected to this particular page .
So let's scroll down .
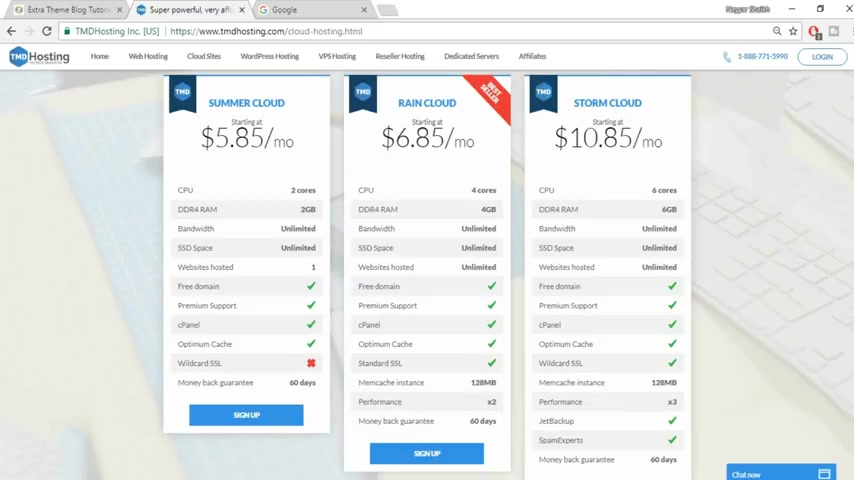
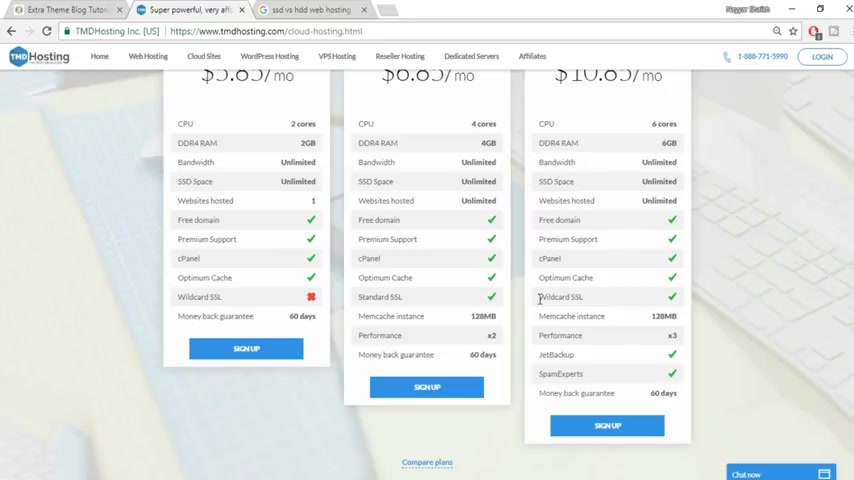
And here as you can see , there are three different plans , summer cloud rain , cloud , storm cloud .
And you might be thinking , why do I prefer T MD hosting ?
Because there are so many different companies , you know , there are so many different companies .
Why do I prefer T MD ?
Let's see why I prefer that .
So basically , it is not the basic , the regular shared plan that you get with other companies .
For example , there is a plan which you have purchased .
But on that same plan on that same hosting , there are many people using the same hosting .
So you have a limitation , you cannot use more than 25% of the CPU , you cannot more use more than 25% of the processes .
OK ?
So that is a limitation here .
You don't have that kind of limitation .
Also the computer or the the server that these guys are using is very strong as you can see six calls for six GB ram and you get unlimited bandwidth .
The most important , the most amazing thing is this SSD space .
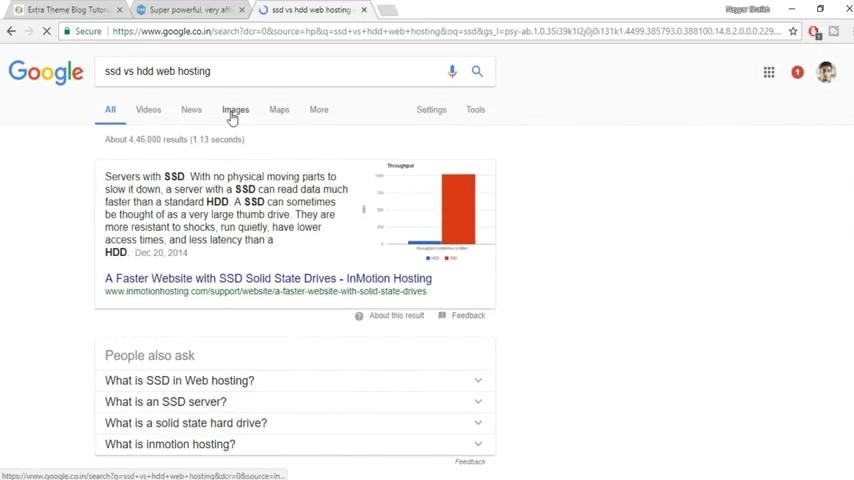
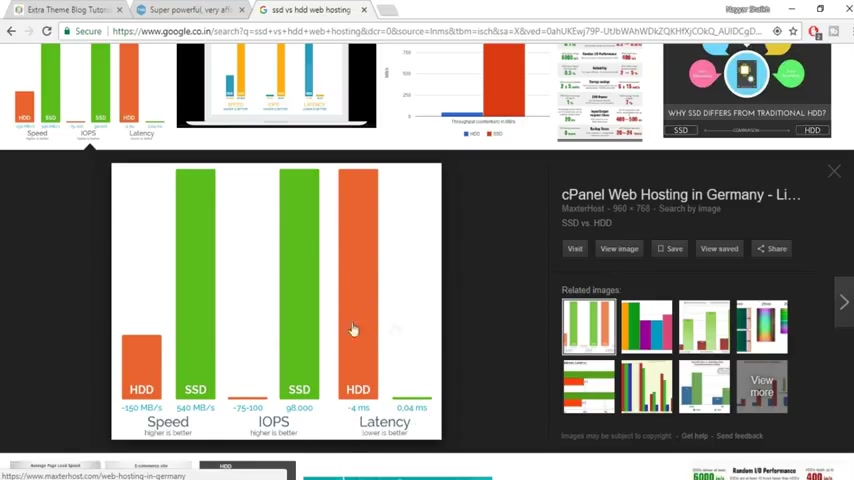
You know , you guys might know if you don't know , you can go to Google and search for SSD versus HT D web hosting and you will know the difference between the , this particular plan and the regular website .
So let's select this first result .
Let's see what it says .
So as you can see guys , the difference is just just mind boggling as you can see .
The first one is speed .
So basically the speed of your website will be around 20 times faster than the regular website or the regular hosting which you're purchasing .
I know .
Also this is IOPS basically that is uh I think the refresh rate , ok ?
So that is basically see it says higher is battery and you can see the difference , you can barely see this red bar and this green bar is so big .
Lettin see it says lower is better .
Again as you can see it says 0.04 milliseconds and it is four milliseconds .
So there is a huge difference between all these things , you guys can do your own research .
And believe me guys , this is the best thing and at this particular price , you just cannot expect anything more than this .
OK ?
Then you also get a free domain .
For example , naik dot com was given to me as free domain by these guys when I purchase this Tom cloud , OK ?
You get a free domain on all these three packages , whether you purchase a summer cloud , rain , cloud , storm cloud , whatever , OK ?
Then you have premium support , you have C panel , optimum cash .
You also have a wild card SSL .
For example , as you can see over here , this is a green socket which says http S this is the SSL certificate , this is really important , OK ?
And this is wild card SSL .
It means you not only get one SSL but you get multiple SS SSL S OK ?
So suppose you want to make four different websites , then you can host , host all the four websites on this particular plan and you will get SSL certificate for all the four websites .
Ok .
And whereas if you go in the market to purchase an SSL certificate , it will cost you around 30 to $40 .
Ok .
So that you're saving a hell lot of money over here .
Ok .
Then you have this jet back backup performance more than three times better than spam experts , money back guarantee of 60 days .
So this is just amazing .
So you can select any of this package .
I don't recommend the summer cloud because here you can host only one website .
Whereas in rain cloud and storm cloud , you can host unlimited website .
I am using the storm cloud .
So I'll go with storm cloud , you can go with rain cloud .
Also , it's all up to you , but I would prefer going with storm cloud .
So just click on this sign up button .
Now , here you have to select the domain name which you want for free .
For example , I can select any domain name like Nay Shak one or two whatever dot com dot in .
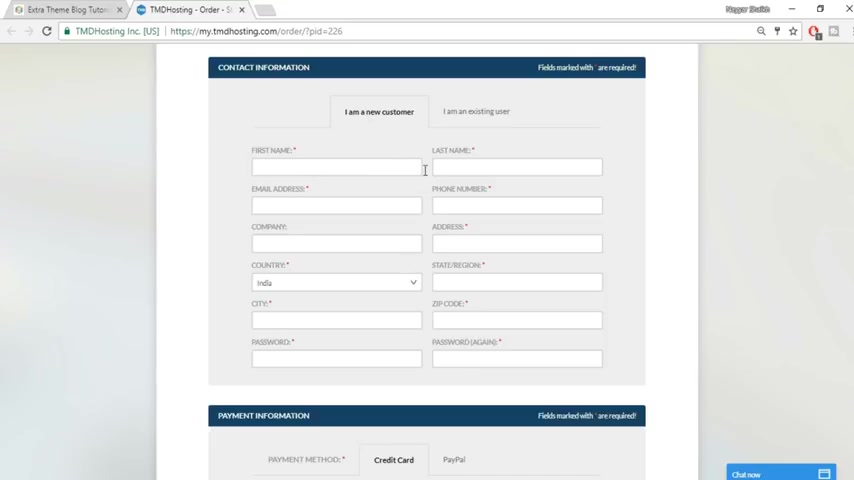
You can select everything that from here and once you select your domain name , just click on proceed and here you have to fill in your basic information .
Ok ?
Contact information , like your first name , last name , email address , phone number and so on all this basic information .
Ok .
Then you have this payment information or your your credit card , debit card details .
Suppose you want to make payment through your credit card or your debit card .
Then you can uh enter all this information a year .
You can also pay through paypal .
You have this paypal option over year also .
OK .
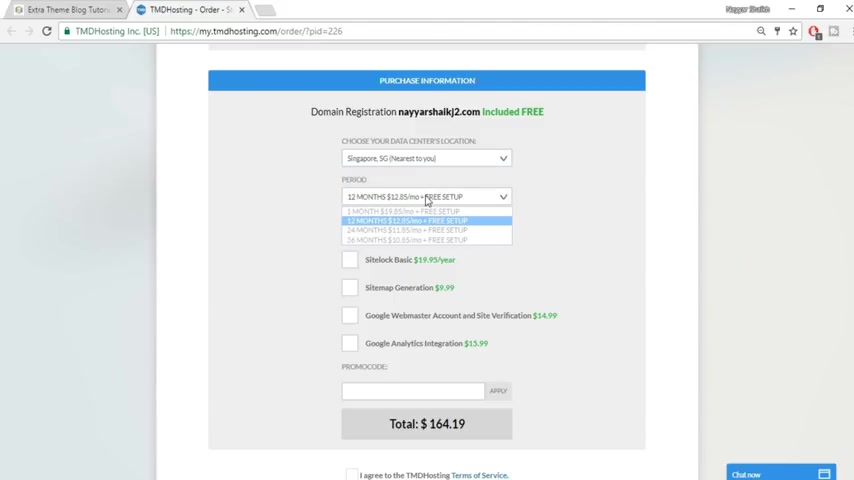
Then here we have this domain registration .
You have to choose your data center location from your .
So select the one which says nearest to you for me .
It says Singapore is nearest to me .
And if you are living in a different place , uh you will see different thing over here .
So basically you have to select the one which is nearest to you , ok ?
Fine .
Then you have to select this period at present by default .
It is selected 12 months and even I prefer the 12 month plan .
So you can just go with 12 months and you don't need all these things , ok ?
So just and don't make sure everything over here is untied .
Then a very important thing which says promo code .
So I have a very special promo code for you guys .
Just type in Nay YTN , a double Yaryt , ok ?
And click on this apply button .
Basically it stands for a year , youtube , ok ?
And as you can see , it says this promo code gives you 7% of this purchase .
Ok .
So basically you're getting seven percent discount on this particular purchase and 7% by the way is the highest discount that T MD gives .
Ok .
So you guys are lucky now , just click on this or tick mark this .
I agree to the T MD hosting terms .
Of services and click on this check out button , right guys .
Once you click on that check out button , you will receive a very important mail from T MD hosting .
This is the most important email address that you will receive from these guys .
Ok ?
Because you have all the important information , your name , servers , your server IP , your hosting package , your FTP , user name , password , everything , all the important things for yours .
So make sure you save all this information somewhere .
If you have more than one email address , then you can just forward all this particular mail to those email addresses .
Ok ?
Do whatever you think is safe for you and just make sure you save all this information somewhere in your computer .
Now what you have to do , you see this control panel link or you click on that link or make sure you open that link in a new tab and basically that is nothing but your domain name slash C panel .
So basically it is for me , it is neo shake dot com slash C panel for you .
It will be your website dot com slash C panel .
Ok .
Now here from your uh from this mail copy and paste your user name and password over here , ok ?
Just copy and paste your user name and password over your unclicked and click on this login button .
Ok , guys .
So this is the C panel .
This is the beautiful C panel of the MD O sting .
This is your C panel .
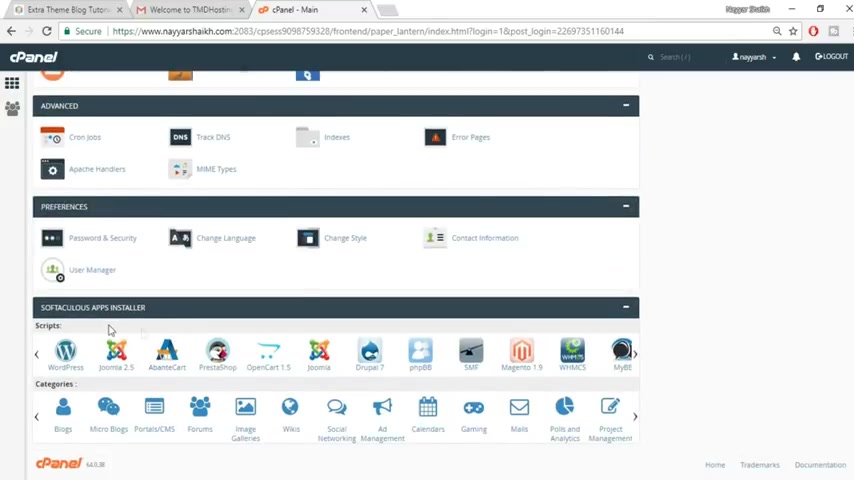
Now what you have to do , you just have to scroll down until you reach this section , soft track app , install a section .
And the first option is wordpress .
Just click on that wordpress .
Now we have to install wordpress on our website .
Ok .
So as you can see , you have this option which says install now , just click on that option .
Ok .
From here , you have to choose the domain name .
It will be only one domain name , your name or domain name or here .
But because I am using this for quite a long time and I have many different domain names .
So I'll use my domain name from here .
Ok .
It is extra dot dot com and just delete everything from your .
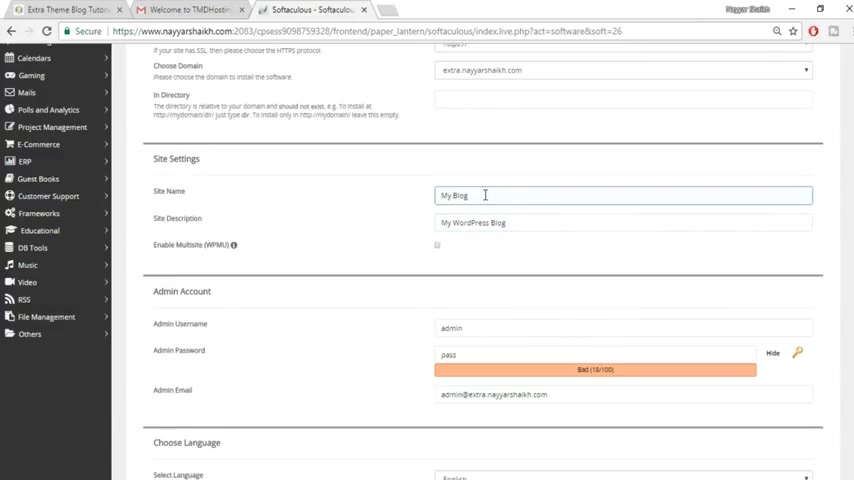
So make sure indirect , everything is empty .
Ok ?
There is nothing in this over here .
Ok ?
And you can leave this thing for now , the site name and site description , we will be changing this later on .
You can change this thing .
Now also , ok , for example , when you come to my website , as you can see , the site name is extra the block tutorial .
Ok ?
So you can just name anything in your site name .
Ok , a site description or a tagline .
Ok .
Then we have this admin user name and password .
Just don't leave this thing as it is .
Ok ?
Make sure you change the user name and password and select a very difficult uh to guess very difficult to , you know , uh , anyone for anyone to guess a user name .
Ok .
So select a difficult one .
Ok .
Now you can select any user name and password .
Let me select mine .
Ok .
And now you have to change this email address .
Ok .
Change this email address and put in your email address , the email address to which you have access .
Ok .
Which you can access , which you are using .
You receive email address from there , you send mails , ok ?
So that particular email address so that you can uh you know , get all the important information related to your website on this particular mail .
Ok .
Now scroll down and click on this install button .
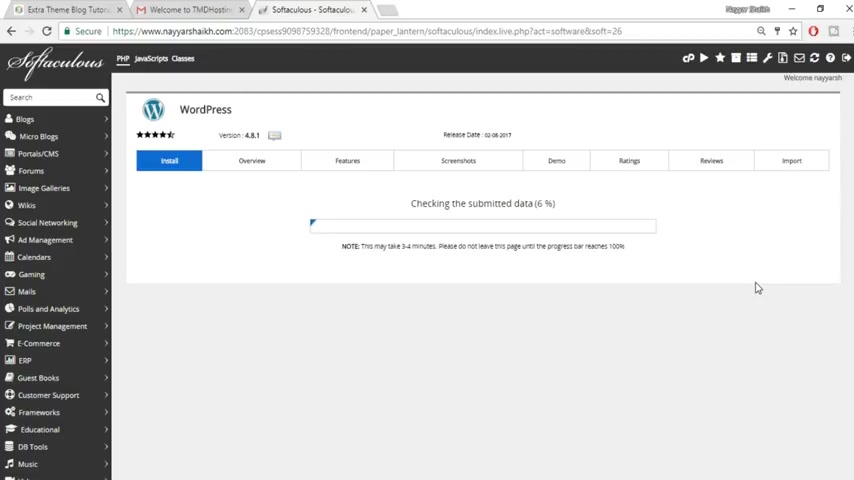
Ok .
As you can see guys , it just took around 3 to 4 seconds to install wordpress on our website and you have two different links .
So your one is the website link and second is the administrative URL the back end or the dashboard link .
Ok ?
So just open this dashboard link in a new tab .
Ok ?
So as you can see , this is the dashboard , this is your dashboard .
This is how our dashboard looks like .
Now , let's see how our website looks like .
Ok .
So just how here , which is my blog and here you'll see this visit side option , open this link in a new tab , ok ?
As you can see , this is how your website looks like at present , but don't worry we'll change everything over here .
And as you can see you also have this SSL certificate over here .
Ok ?
So this is just amazing .
Now , let's again , come back to your website .
Now it's time to install the theme .
OK ?
The theme which will change the look of this website and it will make the uh this like this a beautiful website like this .
Ok .
So for that , we use a theme .
So what you have to do again , open a new tab type in B block two dot com slash DV 10 .
Ok .
It is DIV I 10 10 .
Ok .
So basically this will give you 10% discount .
That's why I'm using the DV 10 link .
Ok .
Here you have two different packages , a yearly access and a lifetime access .

You know , there are many themes , for example , the DV theme , the extra theme and there are many different themes in this particular package .
You can click on this link , you'll see all those things .
There are many different plugins also which you get .
So basically whether you purchase this plan or this plan , you will get access to all the themes , all the plugins premium support theme updates and so on .
Ok .
This is a one time fee you don't have to pay again .
Ok .
This is the lifetime package fee .
This is the yearly access .
But don't worry many people think when you're purchasing the yearly access after one year , your website will just shut down and you have to pay these guys some money .
Then after that , your website will be active .
That is not the case .
My friends , what it says that after one year you won't receive update unless you purchase or renew your plan .
Ok .
So basically , if you're happy with your website , you don't need any update , then you can continue this thing as long as you can .
Ok ?
So that is awesome .
And you can use this particular team on unlimited websites .
You have no restrictions whatsoever .
OK ?
So you can select any one of these .
For example , I'm , I , I would recommend to go with lifetime access , but yearly access is also fine .
It's all up to you .
Just click on the sign up today button .
Ok ?
Now you can select any user name , email address and so on and you can make the purchase and you can just download the extra theme from there .
Ok ?
I won't be doing that because I have already downloaded that .
So after you download that theme , what you have to do , just go , go to these appearances and click on these themes .
Ok ?
Now click on this add new button from the top .
Now click on this upload theme button .
Now choose file .
OK ?
Now you have to select the theme file from here .
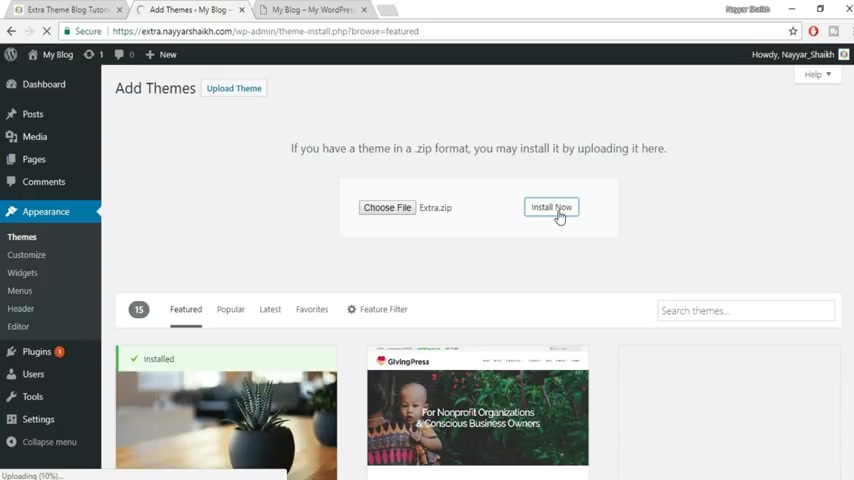
So this is the theme file and click on open and click on install now .
So basically this will start installing your theme on the website .
And after that , we can start creating and making changes on our website .
So by the time this theme is getting installed , you guys can uh now just press that subscribe button so that you don't miss anything uh in in future .
OK ?
Because I make really amazing websites and you can see my channel .
There are many different websites , e-commerce website .
I also have a multi vendor website .
OK ?
So you can see all those things that is just amazing .
OK ?
So you can subscribe to my channel .
You can give a thumbs up to this video .
If you have any doubt , you can comment in the video in the comment section below .
OK .
Oh , yes .
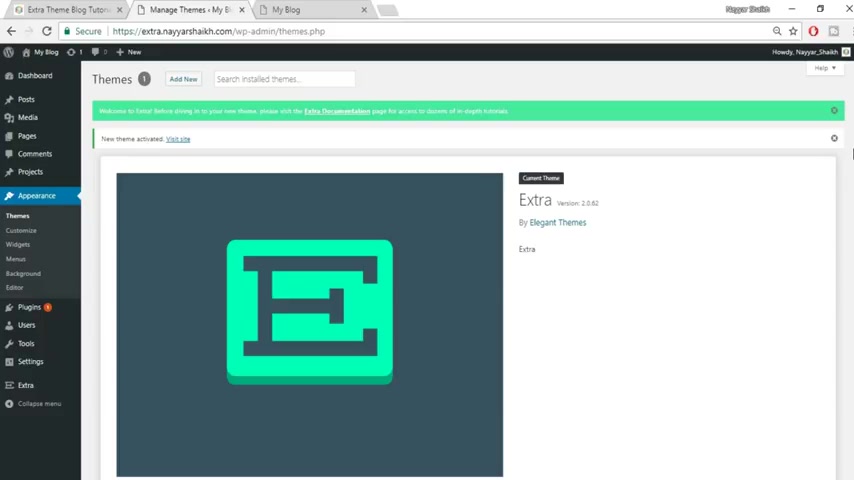
So the theme is successfully installed .
Now it's time to activate the theme .
Just click on this , activate link over here .
OK .
So our extra theme is successfully activated .
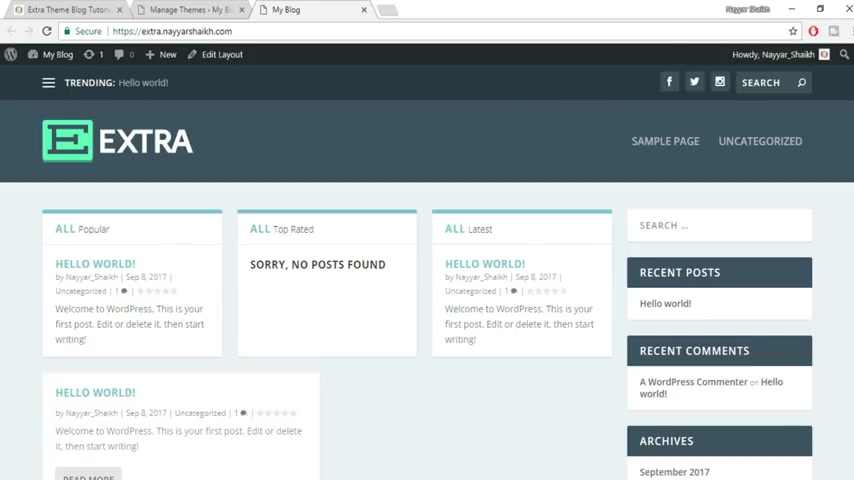
Now , what you have to do , you have to just delete all these things because we don't need these themes , just select this click on this delete button .
OK ?
Delete all the themes because we don't need these themes obviously .
OK .
Fine .
Now let's come back to our website refresh and let's see how our website looks like .
Now , as , as you can see , this has started looking awesome .
OK .
So it is already looking awesome .
Uh We haven't even started the uh creating the website , but it still has started looking awesome .
OK .
Now what I have to do , we have to convert this thing into something awesome like this .
OK ?
So let's do that , come back to this website to the dashboard .
And before proceeding further , let me tell you one thing first .
Uh Now I'll divide the further section into two different sections .
First , I'll show you the basics of making a post or creating a post .
Then we'll see the advanced post .
For example , the thing the post which you saw on the demo tool was where all the advanced post , you know , where you use different animations , where you use sliders , where you use , you know counter circle , counter bar counter .
So that is all advanced thing .
First , I'll show you basic things .
If you guys are using wordpress , you basically are aware .
I know most of you guys will be aware with the basic thing .
So what you can do go to the uh even in the video description that there you will see next link which will say advanced thing .
So you can just click on that advance and you can skip this basic section .
But if you want to watch this , just continue .
OK ?
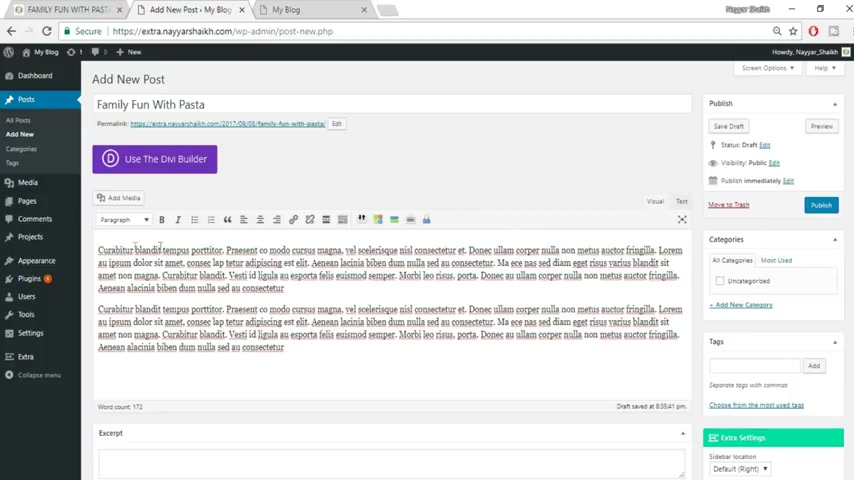
So what you have to do first you have to create some post .
So over here at the left hand side , you will see this post option , how all that and click on add new as you can see over here .
Now first , let's see how a post looks like .
OK ?
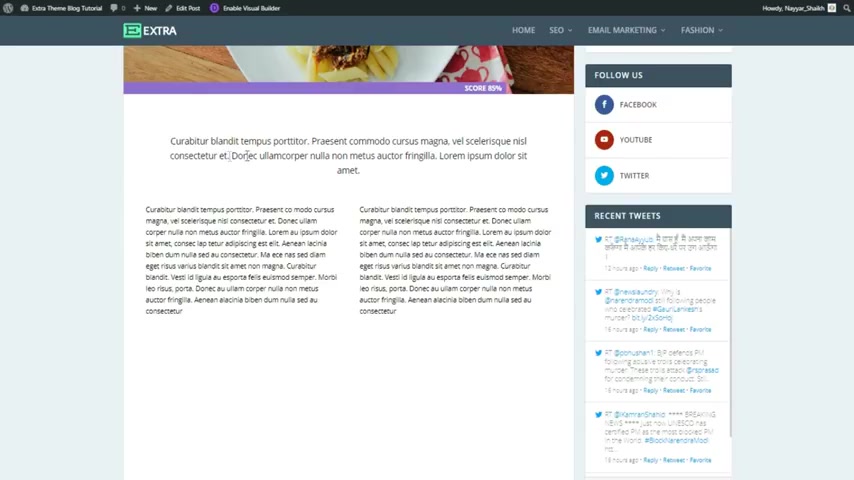
So now let's open this post fun family fun with past pasta .
OK ?
So this is how our post would look like .
Now let's start creating this post , this amazing beautiful post .
OK ?
This is the basic section first , as I told you at present at the top , there is a title .
So your , your title will come .
You can put in any title .
For example , let's put the same title , Family Fun or with pasta .
Fine .
And here you will put all the content to a year .
OK ?
All the thing which you want to type , which you want to come under your blog .
OK ?
So let's copy some dummy text from here .
You know , let's copy this dummy text and paste it over here .
OK ?
Again , based it over a year .
So now this is the basic thing , OK ?
So this is the title .
This is all the things that will come over here and you have some options over here .
For example , uh if you select this thing , uh this particular portion , OK ?
And if you want to make this heading to section , you select from your and select heading to from your , OK ?
And we don't want all this thing heading to .
So what you can do , we can select all these things from you and from your select paragraph .
OK ?
Now , if you want to make anything bold italicized , then you can just select that uh that particular letter and make this bol italicized and so on .
You can also have these bullet points .
This is basically , you know , if you have used and you might have surely used Microsoft word .
Then this is exactly the same thing .
OK ?
You can center a line , left a line , right , a line , all these things .
For example , now you have more options .
When you click on this toggle toolbar , you will have more options .
This the first one is strike two .
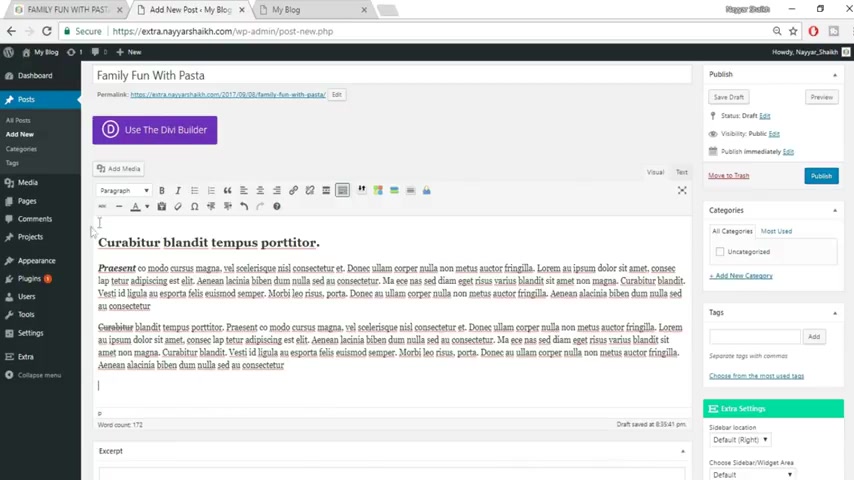
So let's select this letter , this word and click on this strike through .
So you can see over here only this sentence , this letter is tried .
OK ?
Now you have a horizontal line .
So let's put a horizontal line over here .
So just select this horizontal line .
And as you can see , there is a horizontal line over here , you can also change the color text or change the font color and so on .
So just select that font which you want to change color , select this text color from your select red or whatever color you want .
So you will see all these options over here .
OK ?
And you have some more options like this uh special characters , you know when you click on this , you have some special characters , you can use these characters also .
OK ?
So it's all up to you .
So this is the basic thing , you have the title a year , all these things which you want to type would come over here .
Now , here is the category .
So which category this belongs to ?
For example , let's put a category called famous .
OK .
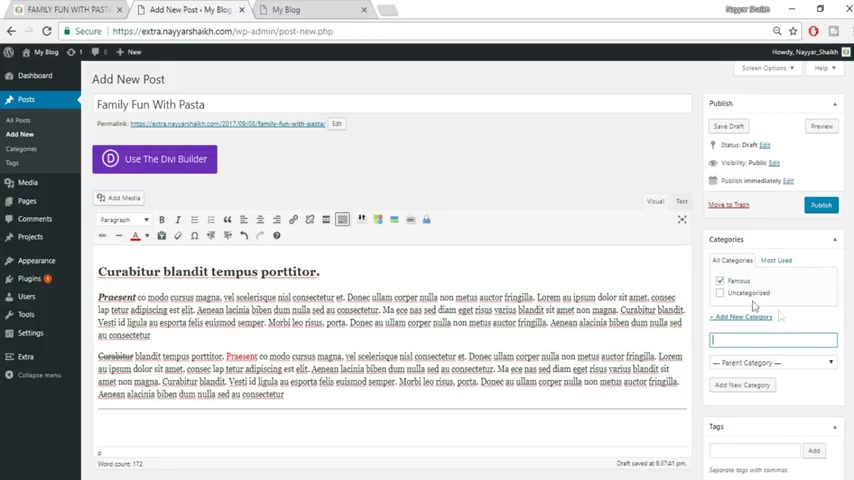
So this is this particular post belongs to the famous category .
OK , you have some tags .
So basically what does tag do ?
For example , this uh this post , a single post might talk about many different things .
For example , it would talk about sports and it would talk about some player and whatever it is .
OK ?
So what basically suppose you're typing an SEO thing I know .
So basically it is type uh talking about SEO , it is also related to website because SEO is related to websites .
So you can have two or three different tags for this one would be seo then you can put a comma to add more tag and second could be website .
OK ?
So it is also talking about SC and also talking about website .
Now click on add .
So you have two different tags .
Now what happens ?
Suppose someone wants to read all the post or want to see all the posts related to websites so they can click on this website tag and they will see all the post in which you have put this tag , website tag .
OK ?
So this is also very important .
OK ?
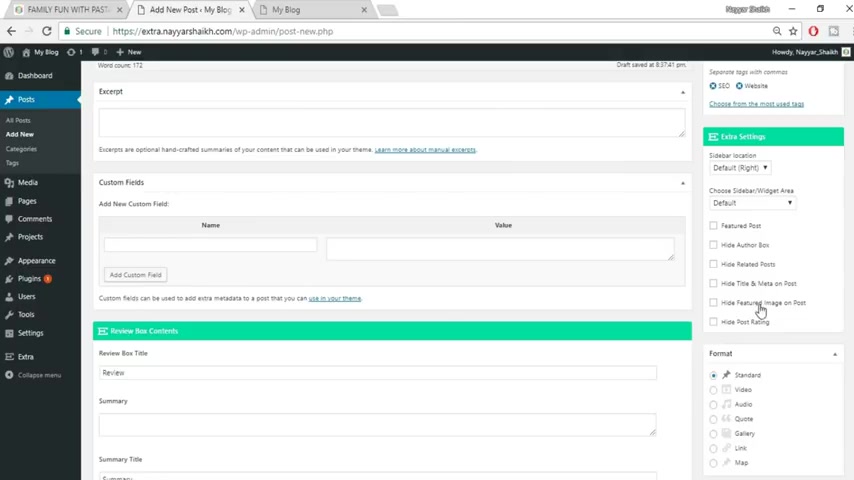
Then you have this sidebar location at present .
It is set to , right ?
You can change this to no sidebar , left , sidebar , whatever .
OK ?
You can make this post a featured post , you can hide the author box if you want .
This is the author box .
Let me show you , OK .
Here it is , this is the author box shake .
So you can hide that .
I don't know why would you do that ?
But you can do that .
Obviously , you can hide the title and meta on Post .
OK ?
So let's see the title .
This is the title .
You can hide this title if you want , ok ?
Hide post rating .
If you saw at the bottom , that was some rating , ok ?
You can hide this thing also .
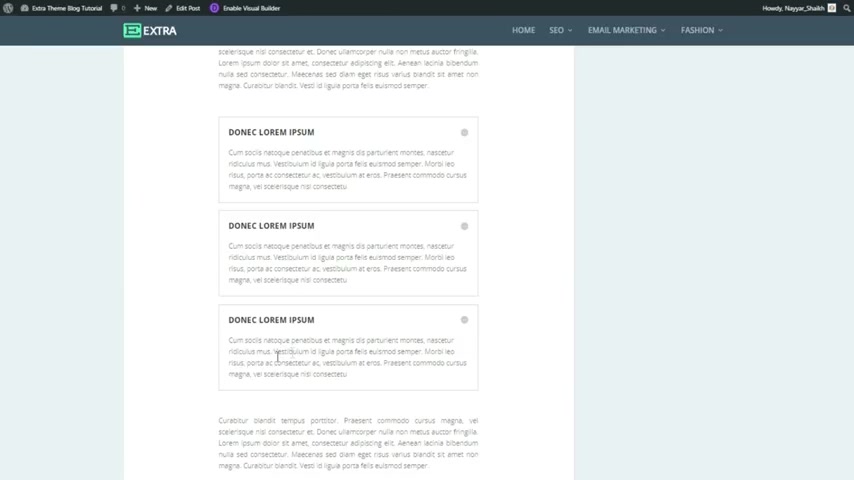
So basically , if you want to hide something , you can hide this thing , then we have at the bottom as you can see this thing .
So let's see where you put this thing .
OK ?
Here it is .
Break down .
OK ?
So basically if you say if you're talking about an EO post , OK ?
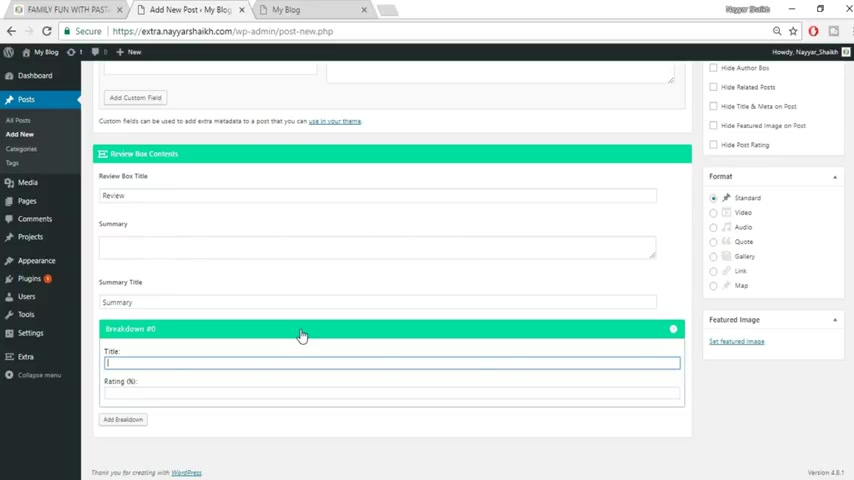
Then what you can you can have some breakdowns or if you , for example , let me give you a very clear example .
I'm talking about extra theme , OK ?
I'm writing about extra theme in this particular post .
So what I can do , I can read something for example , the design of the theme .
So I , I can type in the title design of the theme , OK ?
And I can give you some rating for example , 90% OK ?
And I can add some more breakdowns , just click on this add breakdown button .
And now I want uh no easy how easy it is .
So I can just type in easy or difficult and just type in some percentage .
For example , 80% .
It is really easy .
OK ?
Then we have some uh what what what could be another thing um mobile friendly , ok .
So one thing could also be mobile friendly , how whether it is mobile friendly or not .
So again , I can type in mobile friendly and I can give you give this thing a something rating , for example , 70% ok ?
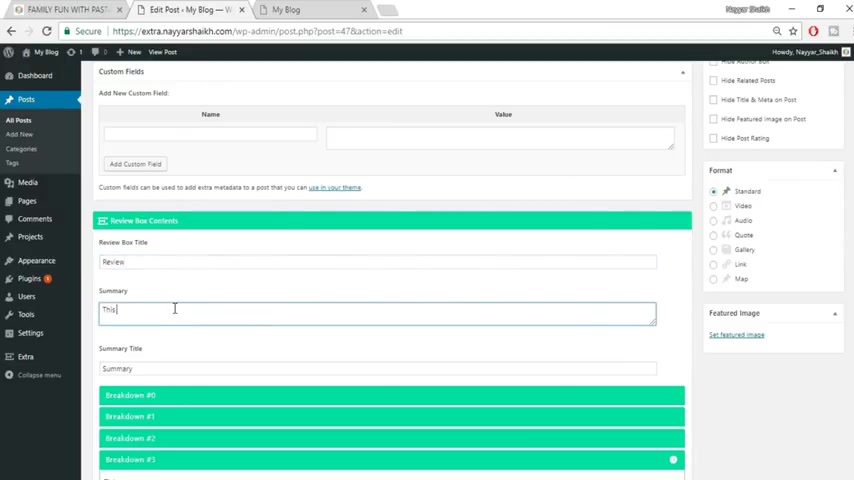
So this basically this is what it is , ok ?
You can also have this review , for example , you can change the title review and you can also have a summary .
Uh Let let us put a review this theme .
It's just amazing , fine .
So you can have a review over here .
OK .
So this is how it was now you have different formats formats at present .
This is the basic format , the standard format , you can have you know video format , audio format which are basically not very much used .
OK ?
You use the standard format most of the time now let's see the featured image if you see at the top .
This is the featured image and all these things that the thumbnail which you see over here .
These are all the featured images .
OK ?
So this is what the featured image is and all the images which I have used in this particular website .
I have given that on my website , blog to dot com .
I have given a link to that page in the video description below .
You can check out that link , you can download all these images which I have used over here and you can use that freely without any restrictions .
OK ?
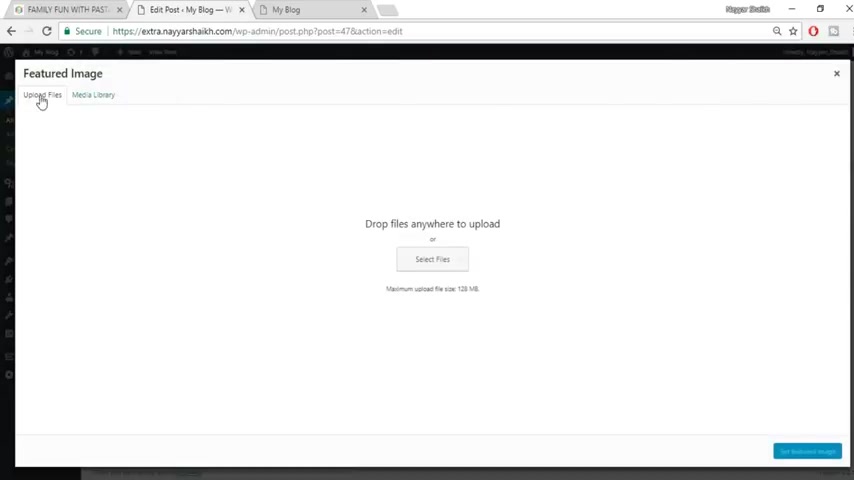
Now let's add a featured image .
So just click on this set , featured image , select files .
OK ?
Let's select any image .
For example , let's see .
Let's select this one .
OK ?
This one now click on open now , click on set featured image .
Now once you are done with all the things you just have to click on this publish button .
So basically this would publish your post .
Now your post would be live and anyone who visits your website could see this post .
Now , let's see how this post looks like .
OK , so just you have this view post option , open this link in a new tab .
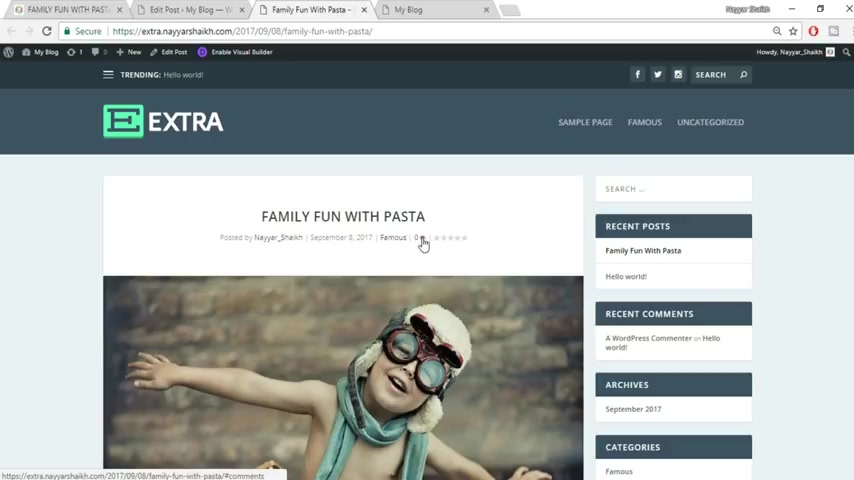
OK ?
So this is how your post would look like .
As you can see over here , you have this title over here .
This is the author date category and you know all these different things over here , you have this featured image over here .
You have the rating 60 years , the average rating is 60% .
OK ?
Then you have this which we typed everything over here .
This is the thing this is striked out , this is changed color , this is heading to and as you can see , this is bold and italicized .
OK ?
Now let's scroll down .
You have all these ratings over here , OK ?
Design 90% easy , 80% mobile friendly , 70% .
OK ?
And you have the featured image over here .
So basically this is how you create a post .
Uh Now , let's see uh how to make changes in the author , how to add different authors and how to make changes in the author .
For example , if you see at the bottom , your name is there , but there's nothing over here .
Whereas if you see my website over here , the demo website , you have a very short description , you have social links and so on .
So let's add that .
So come back to your dashboard and at the left hand side , you will see this users option , just click on users .
OK ?
As you can see guys at present , we have only one user that is you , you know , basically your email address to your role as administrator .
So first add some descriptions , some social icons to yourself and then we can see how to add different other authors .
OK ?
So just click on this edit button , OK ?
You can change this color , for example , coffee , you know plasm , whatever it is .
So you can see this color changes , sunrise and so on .
I'll keep this thing to default .
You can change this thing according to your if you want .
OK ?
Now coming down , you have your first name , your last name , basic things , OK ?
So Shake , OK ?
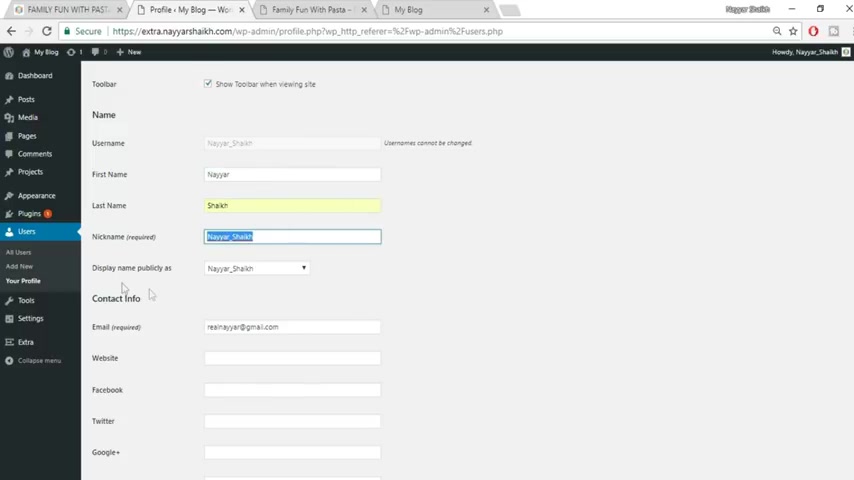
You can choose in your nickname , OK ?
Display name publicly as Shake or whatever it is .
OK ?
Then you have your email address , your website .
So my website is block to dot com , your Facebook URL .
My Facebook URL is Facebook dot com slash Nayar shake , ok , dot com .
Actually , it is ok .
My Twitter ID is also Twitter dot com slash shake or real .
Sorry , it is Twitter dot com slash real .
So whatever it is you can put in your URL or your Facebook , Twitter , Google plus whatever you want , ok .
Now you can choose your profile picture from here .
You have to change your grava , you can see that how to change that and here you have to type something about yourself .
For example , let's come over here in this uh demo site .
You'll see .
OK , very short description about yourself .
For example , a professional blogger , youtuber , freelancer , whatever it is .
OK ?
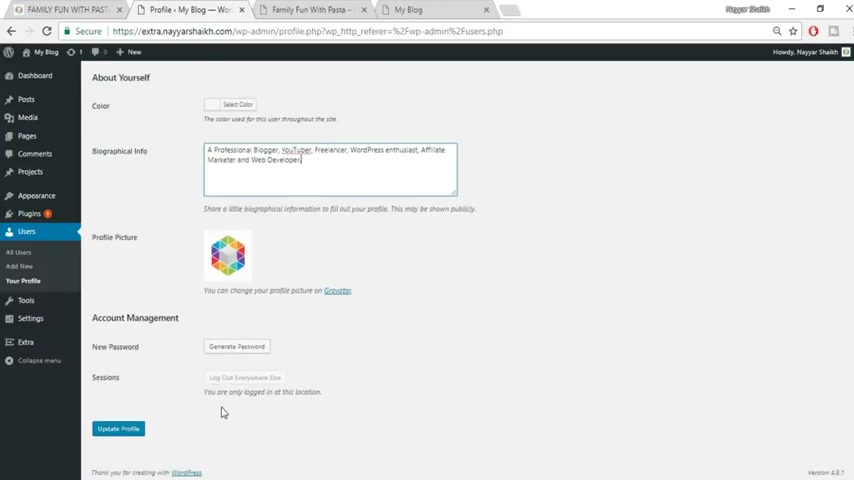
So just type in anything about yourself , you can generate your new password , but we are happy with our own password .
So just click on this update profile .
OK ?
Now let's refresh this page , this post and see whether these changes have taken place or not scroll down .
And as you can see , we have the Gravatt , we have our name , we have this uh description , we have both R I can .
So here now let's add a new user .
So as you can see under the user , you get this option , add new , just click on this add new .
OK ?
Now choose any user name .
For example , let me select Nay triple seven , OK .
Email address .
Nae triple seven at gmail dot com .
First name Nae .
No , not let's change the name .
OK ?
So that we can have two different uh user names .
Ok .
And here it can be google dot com .
You can put in any website obviously .
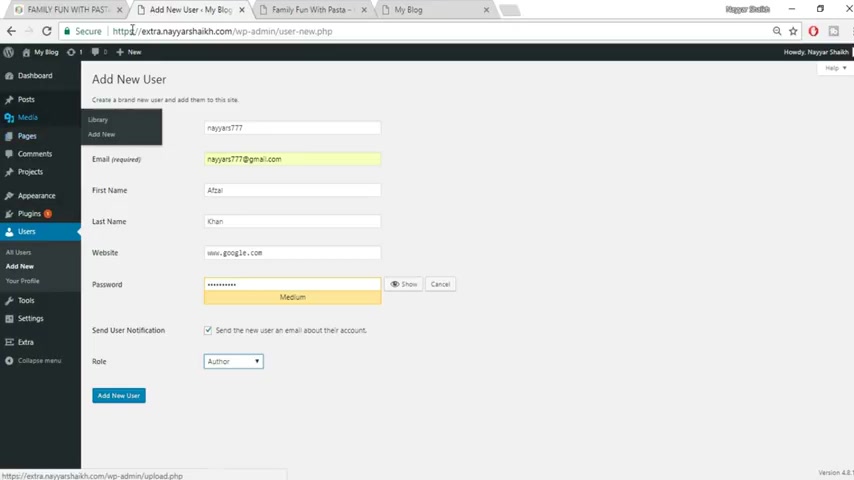
Ok , you can show set password by yourself if you want .
Ok , so let's set a password over here .
Ok .
So when you take mark this thing , send the new user and email about their account .
So basically the person who owns this particular email address will receive all this information , their user name , first name , last name , their password and so on .
Ok .
And here you can select their role .
So make sure you select author .
Ok .
Basically the one who are is the author will only have the right to know , write a new post .
You can type a new post .
OK ?
So he can do that thing for you .
Ok ?
Arrest anything he can't do for you .
Ok ?
For example , if you , if you think he , he cannot make any changes to the website through the design of the website , he cannot create any page , not create any category or so on , he just have the authority to type in new posts for you .
Ok ?
And if you select him as administrator , then he has the same rights that you have .
He can delete you as an administrator as an administrator .
So that is dangerous .
Make sure it is author and click on adding user .
Ok ?
Ok .
Now you have successfully added that person , that person will receive that email address and he can log in and he can create a website uh blog just like you created .
OK .
So we have seen the basic things about blog , how to do all these things .
Now let's start making the real blog .
OK .
The advanced thing , the real blog which uh I mean , like this , you know , a blog which has all these beautiful things .
So let's make this exact same blog .
OK .
So again , come back to this website , how our blogs , our post and click on add new post .
Now let's copy this title based in this title over a year .
OK .
Fine .
Select any category .

So let's select the famous category .
Scroll down .
OK ?
Select a featured image .
Let's select which this is the one .
So select this featured image , click on upload file , select files here it is , select it , click on open now , click on this set , featured image .
OK ?
We have our featured image over here .
You can add title and reviews as I showed you earlier .
OK ?
Now just click on this publish .
Now click on this , use the DV builder button , OK ?
Now click on use visual builder .
OK .
OK , guys .
So we are on the visual builder .
OK ?
As you can see .
So this is how it would look like .
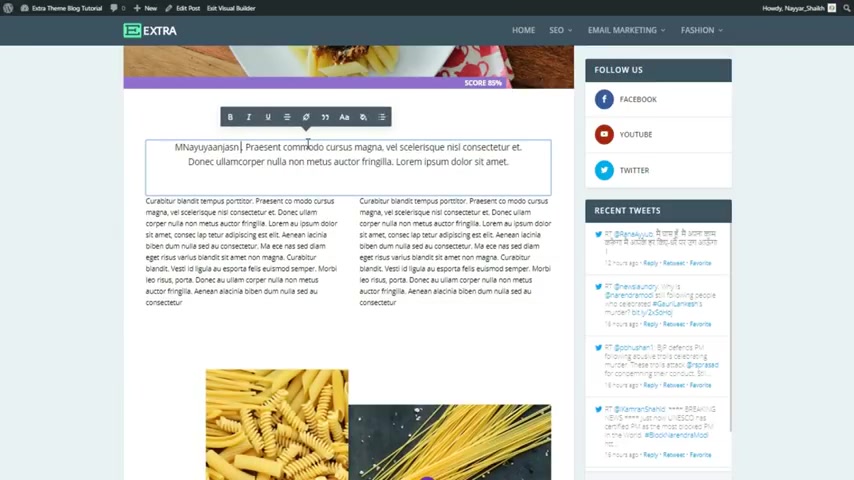
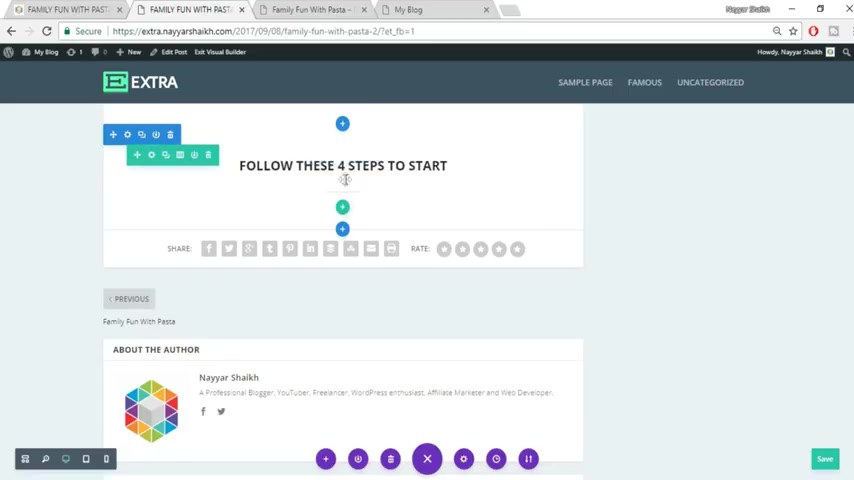
Now , now let's see what we have to add , we have to add this text first .
So let's copy and come over here .
So uh first let's delete this and let me show you from the beginning .
OK ?
To add anything first .
OK .
Fine .
Uh We , we will have to add these things .
OK ?
Now , suppose you want to add text to a year .
This is a simple text .
So you want to add text .
So you search for text to .
So there is a module called text .
So just select that paste in or type in the text which you want .
OK ?
And you can see you can drag this thing over here or anywhere you want and you can see the changes over here .
OK ?
So we have the text over here , but it is center aligned as you can see .
So let's make this center align , just click on this .
And you can , there are also other ways to make this center align .
And if you see the font is quite bigger and it is black here .
It is , the font color is black gray and here in the demo website , it is black and it is a little bigger .
OK ?
So let's do that .
So click on this design section .
Now go to this text .
The text color is dark , dark basically means uh black .
And when you select light , the text color will turn into white .
OK ?
Text orientation .
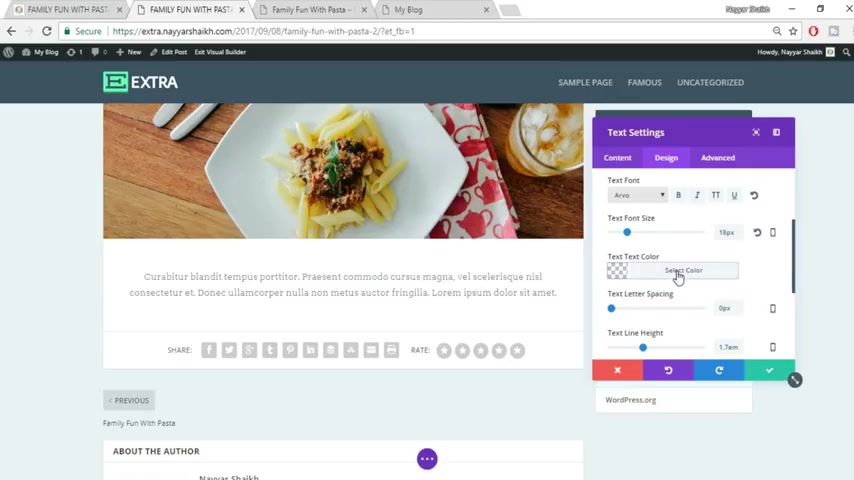
You can select center from here also .
OK ?
Now , font size , now let's select 18 over here .
So as you can see it changes and you can also change the font , for example , Bitter Fond to uh a , there are many different fonts as you can see over here .
OK ?
So you can select any font .
Let's make this thing that only and now let's change the text color .
OK ?
So select this and make this black .
So as you can see now it is black color , just a light , OK ?
A little bit lighter black .
OK ?
So you can change all these things from here .
You can change the text size , line height spacing and so on .
OK ?
You can have a border but that is not uh we have not used all those things over here .
OK ?
This is it .
Now click on this OK button .
Now , as you can see there is some gap from both two sides .
So let's add that just however here you'll get this option .
Now , suppose we are selecting 60 pixels from here .

So also select 60 60 pixels from this side .
OK ?
So whatever you are selecting from one side , make sure you select the same from the other side also .
So let's make this 60 pixels OK ?
Fine .
So this is looking awesome , beautiful .
OK ?
And there is some gap at the top also .
So you can just add some gap from the top .
Fine .
Now let's add these two things .
So a year we have two different sections .
So a year now , so for that , just click on this plus button regular and select this thing two columns .
OK ?
Because we have two different columns with two different texts .
Now let's select this demo text from here and you all again , search for text , OK ?
Select this one , OK .
Paste the text over here , OK ?
This is how it looks like .
Now again , let's make this plaque and let's do all those changes .
Go to text dark color , obviously , orientation justified .
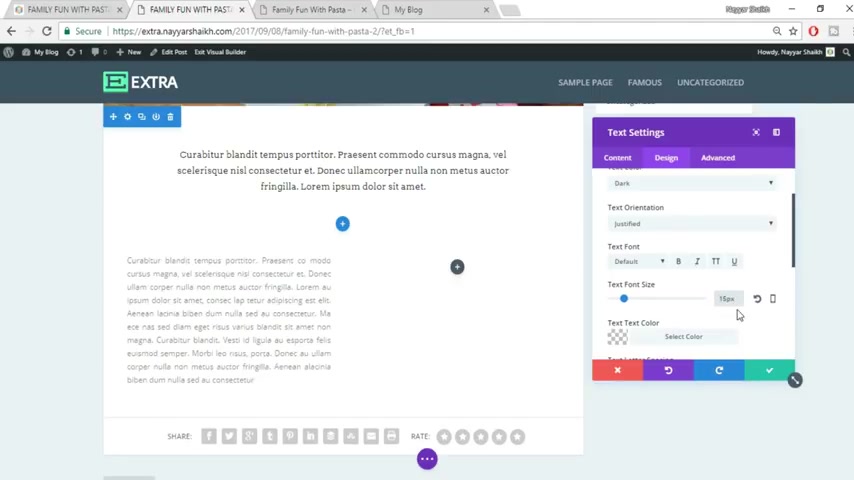
Make this justified .
That would look much better .
Yeah , you can increase or decrease the size of the font .
Let's make it 15 pixels or maybe 16 pixels fine .
So 16 pixels looks uh good .
Uh Let's make this black , OK .
OK .
So this is black in and you can light uh or make it dark from here .
OK ?
This looks fine .
Now let's click on this side .
OK button .
See if change changes .
And now there is again a beautiful feature in this particular DV builder .
You can see our visual builder by this elegant thing .
You just , you can just copy this thing and just drag this thing over here .
OK ?
So you don't have to type and do all the things again , you just have to just copy and paste it over here or drag this thing over here .
And as you can see there is a lot of gap in between .
So what you can do , you can decrease this gap , OK ?
And you can decrease it more from here .
OK ?
So this is an amazing thing .
And after you do so make sure you keep on save saving changes .
There are two type there are two different ways of , you know , saving changes .
First is to click on this button .
OK ?
And here you'll get this save option .
So just click on that .
And second is just to control , just to press the control button and S button together .
So control would save this page fine .
Now , let's see what comes next .
So this is the next section .
As you can see , there are two different images .
They are all uh both are sticking to each other but they are not overlapping .
OK ?
So let's see how to make that for that .
Just add a new row from here .
OK .
Click on this click select regular two different columns .
Now the first one is an image .
So select for image , OK .
This is the one .
Now click on this upload button and upload that image .
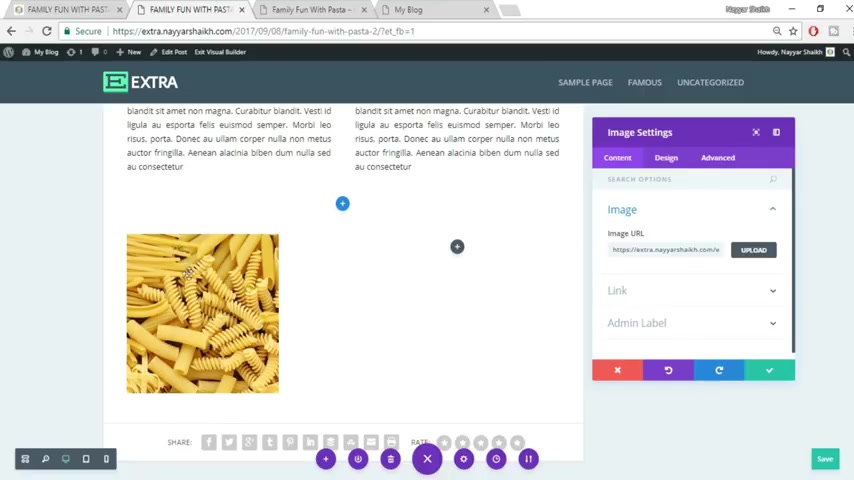
This is the one click on open upload an image OK .
As you can see here it is now as you can see this is not , this is at the left but we want this at the right and that two at the extreme , right .
OK .
So let's do those changes .
Go to design spacing .
OK ?
Let's first make this alignment OK .
Alignment is left , make this as right .
OK .
But this is not still at the extreme , right .
OK .
So what you can do go to spacing , OK ?
Then right margin just put it as zero OK .
OK .
Now click on the save changes button .
Now , however , you However , here you'll see this thing .
OK ?
So click on this gear icon .
Now this green type of color gear icon , OK ?
Now go to design spacing .
OK ?
Then here you have different options .
For example , column , one custom padding .
So at the right put in zero , OK ?
So we don't want any padding at the right .
So right , custom padding for the first column and for the second column , left , custom padding should be zero .
OK ?
Fine .
Now go to this uh sizing and you make this thing .
Yes , use custom gutter width and at present it is set to three , make this thing as zero fine .
This is the most important thing .
Basically gutter is the space between different columns .
So we are saying we don't want any space between columns because here , as you can see there is no space , this is a different column , this is a different column and there is just no space between both these images .
OK ?
That's why we are making a custom data as zero .
Now click on the save changes now select this add button and again search for image module , select this image , select the image you want upload files , select files .
Now this is the one we want click on open upload an image .
OK ?
So as you can see it is already set to left align by default .
But here if you see this is just a little bit below this image .
OK ?
So we'll do some spacing setting over here .
So go to spacing under design and at the top of padding at the top margin put in 30 pixels .
OK ?
So this will make bring bring this thing down .
If you want to make it more down , then you can put in 60 pixels or 100 pixels whatever you like .
OK ?
And after you're satisfied , just click on this save changes .
So as you can see guys creating this kind of thing is so easy , so simple .
OK ?
Now let's see the next section .
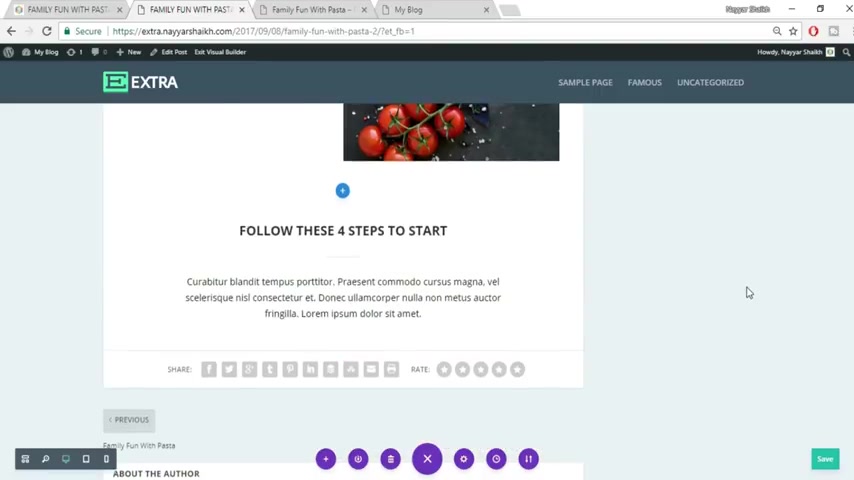
So this is the next section .
We have this beautiful title .
There is a Separator and a subtitle .
Then all these things forward .
OK ?
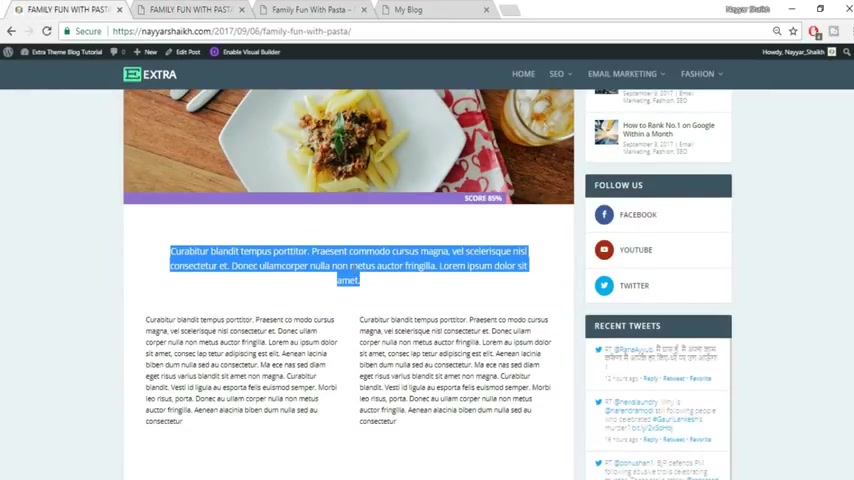
For that again , click on this plus button , regular single column and search for text because this is simple text , just copy this text from your OK ?
Paste it over here or type in over here .
OK ?
Now go to design to make changes to this text , OK ?
Select this text section alignment should be center .
OK ?
Fond , you can change the font for this thing and make this thing a bigger , for example , 20 pixels or maybe more than that .
Uh let's make 25 25 looks fine and let's make this thing darker .
OK ?
So you can change the text color from your , you can make it any color , red , blue , green , whatever you want .
But we are using black color , a little bit lighter black color .
OK ?
So this is fine .
OK ?
And as you can see , this is also bold .
So just select this thing from here , this bold section from here and this looks awesome .
Now , exactly like this .
OK ?
Now , after this , if you see there is a small divider over here , so what you can do , go to this text section again .
OK ?
Now click on this add media , upload file and in that file which I told you you , I have given link to all these images and you will have this divider your divider to click on open select .
OK ?
So as you can see , we have the divider here .
Let's put the enter button over here .
Fine .
So as you can see the divider over here , fine .
So this looks awesome .
Click on save changes .
So we have the title separator and let's add this text now .
OK ?
So again , now click on this button , this add button because we want to add a new , a new element or new module under this same section , OK ?
Under this same column .
So just click on this gray add new module button and again search for text , OK ?
Now paste in this text , OK ?
Now again , go to design to make changes .
Let's increase the size to 18 pixels , fine color should be black .
OK ?
Alignment will be center fine and rest .
Everything looks fine .
Just click on save changes .
And as you can see , it has some gap from both the side , some padding from left And right .
So let's do that how over here .
OK ?
And just drag this thing a bit over here .
So let's make this 100 pixels from both these sides .
It's all up to you .
You know , I have not written all these numbers anywhere .
I'm just creating the website and whatever I think looks beautiful .
I'm doing those settings so you can make this 90 pixels , whatever you want .
I think 100 pixels looks fine .
So I am putting 100 pixels from both the sides .
OK ?
Now let's see .
So this is the next section we have at the left hand side , an image and at the right hand side , some text .
OK ?
So again , click on this plus button , click on regular two different columns .
At the left hand side , we have the image .
So select for image , select this image , upload image and let's select this is the one OK ?
So click on upload file , select files , search for that image here it is click on open upload an image and you have the image over here .
Click on save changes .
Now click on this add new module button , this plus button and click select text from here .
OK ?
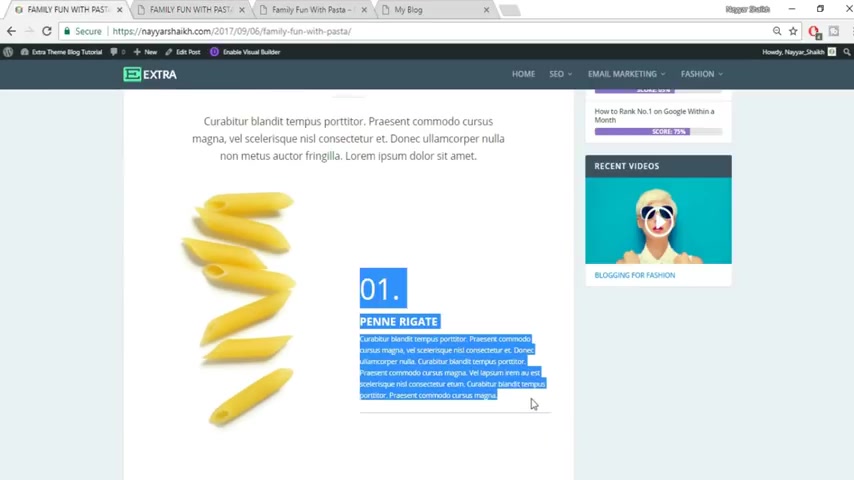
Now let's copy this text and let me show you how to put all this color and so on .
OK ?
Now just paste it over here fine .
So you have this thing over here .
And as you can see , this is quite bigger , OK ?
This font is quite bigger .
So what you can do and this is uh just uh a little bit bigger .
So what you can do , just select this font first , OK ?
And make this thing as heading two and select the top one and make this thing as heading one .
OK ?
So this looks bigger .
But if you see in this website , in the demo website , this is more bigger than the heading one here as you can see you did heading one , but it is still not that bigger .
And here it is just nice , you know , it is looking nice .
This size is fine .
So what you can do there is a very small and a very simple trick over here .
So instead of heading one , let it be paragraph fine .
Now go to this text section , just click on this text over here and here you'll see this one written over here .
So before this one just type in P or what you can do , just go to this visual section again , select this and let's change the color first .
For example , here you have this color fine .
So select this thing from here , the font color and let's select this orange color fine .
Now go to this text section and you can see this thing over here .
There's some code over here , OK ?
It says style is equal to color .
So and so now what you can do after this thing , OK ?
Put in font dash size colon space and you can put any number for example , 30 pixels , OK ?
And as you can see when we put 30 pixels , the size increased , but we want more bigger size .
So let's put 60 pixels .
OK ?
So as you can see this size looks awesome .
This is now looking exactly like this .
So we want 60 pixels fine .
Now everything looks fine .
We all these fonts looks fine .
Just click on save changes now .
And if you see below this , there is a small divider .
So let's add that divider also again , come back over here , click on this add button , add new module button and search for divider .
OK ?
Here it is divider and here visibility is this by default , don't show a divider select show divider go to design change the color , OK ?
Some light color as you can see from here , this looks cool , click on save changes .
And now again , if you see there is some gap at the top .
OK ?
So at the top of this text , there is some gap .
So what you can do , select this , click on this gear icon to make changes to this particular module .
Now go to design spacing and at the top you want some spacing , OK ?
So what you can do at the top padding , you can put 60 pixels or maybe 100 pixels or 100 and 50 pixels .
OK ?
So we are putting 100 and 50 pixels and let's see , OK ?
This looks fine or maybe let's make this 200 pixels fine .
So this looks awesome .
Now , this looks exactly like a demo website .
OK ?
Now click on save changes and there is , you know , a little more gap per year .
As you can see here , there is no such gap and here there is a lot of gaps .
So let's decrease this simple as that just , you know , as you can see really simple thing fine .
So everything looks awesome .
Click on save so that you don't miss any changes .
Now let's see what you have next .
So again , there is some text over here and here we have some image .
OK ?
So let's add that what we can do .
You know there is a very more easy way for that .
You can copy this section , paste it again and you can just have to change this simple text .
For example , let me show you this copy , click on this duplicate row button .
And as you can see this same row has been duplicated .
Now what you can do , we want this time the image at the right hand side .
So drag this image , put it over here fine .
As you can see the image has come to the right hand side .
Now select this thing , the text , drag this thing and put it to a here .
OK ?
Also the divider drag this thing .
Put it to a here .
OK .
OK .
Fine .
OK .
So we have the divider and text over here .
We have the image over here .
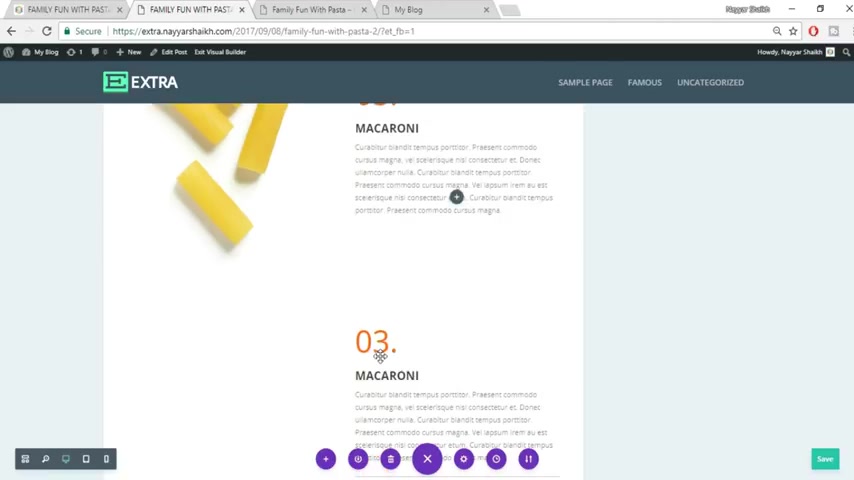
Now we have to change the text , for example , it is 02 .
So instead of one , just type in two just like this .
OK ?
So that is really awesome and copy this text from here and instead of this text based in that particular text .
So as you can see guys , this thing really makes your life so easy , you know , you don't have to create the same thing again and again and again and you know just easy thing .
Now let's add or let's change this image .
Let's see which image you want , we want this one .
So again , come by code , you click on this key .
I can to change the image .
Click on upload button , select the image from your .
This is the one select click on open upload an image and as you can see all the changes have taken place now click on save changes .
Now we have to add this section this one .
OK ?
But first let's add some gap between this .
As you can see there is some more we want some gap over here .
So let's add some gap fine .
This looks cool .
Now let's again , copy this same section .
OK ?
So just click on this copy what you can do , you can just drag this section about that section .
OK ?
Fine .
So let's do that .
OK ?
Fine .
OK .
Now we have this section over here .
So the duplicated section is now at the bottom .
Now let's change this text over here as you can see here .
It says three macaroni , OK ?
Fine .
Just copy this text instead of this font , just make it macaroni .
And instead of one just type in three fine really simple .
Click on save .
OK ?
Now let's add this image again .
Click how here click on this gear icon , upload an image , select the image you want .
Fine .
This is the one click on open upload an image save changes , everything is done .
Just add some gap between below this fine .
This looks cool .
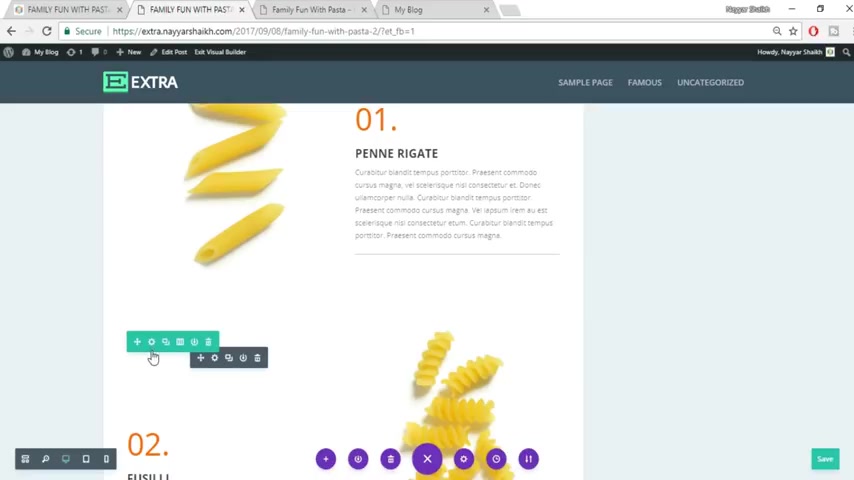
Now , now let's see the fourth section .
This is the fourth section .
As you can see this is a image and this text is coming actually at the image .
Let me show you when we create , you'll understand better .
So now click on this add button regular , not , not regular , full width image because this is a full width image .
OK ?
So select full width image and fill with image from your OK ?
Now select the image , upload the image , you know all the images are given to you .
OK ?
Select this is the one click on open fine .
Click on upload an image here you have the image .
It's loading , fine , everything looks fine .
Just click on save changes .
Now let's add this text to a year .
OK ?
So what I'll do , you know I'll first add a new section .
So just click on this add new section , regular fine , select this two by two column .
OK .
Now just cut this thing .
Now what you can do , you can just copy this single , this thing , this text we created , just copy this fine .
So we have this thing over here .
Now drag this thing over here .
So we don't have to create it again and just put it over here fine .
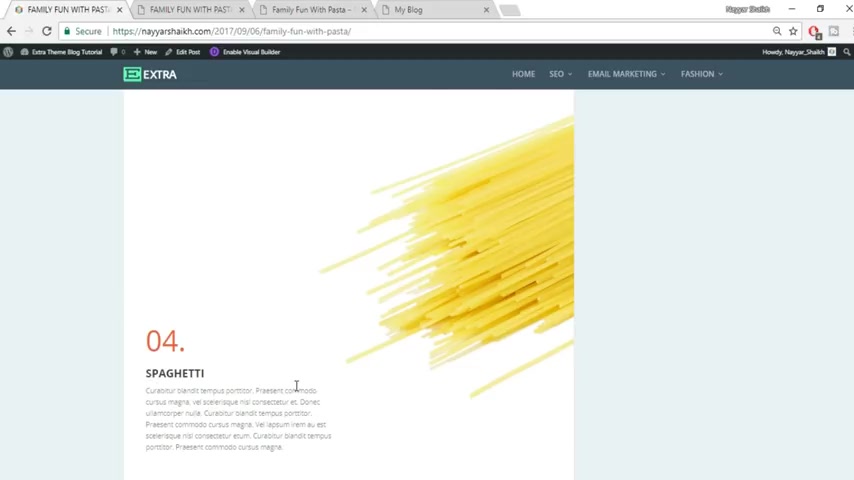
So we have this thing over here and as you can see this says four and I don't know what it is , spaghetti , what it whatever it is just type in that .
OK ?
And this is four , not three .
So just make these changes .
And as you can see in the demo website , this section is coming at the image .
So let's do those changes over here .
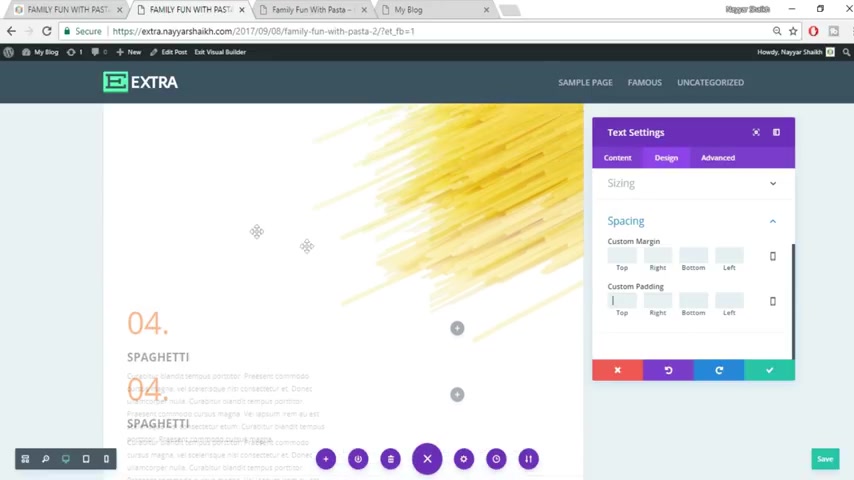
Again , click on this gear icon , design spacing now just delete this section top and instead of this thing , now we have to , you know , make this section up little at the top .
So we have to bring this text over this image .
OK ?
So what we'll do , you'll go to custom margin and at the top you'll type in minus 100 pixels .
OK ?
So as you can see this thing has moved up and it is actually on the image .
If you want to make it move more up , you can increase the pixels , for example , 200 pixels .
Now , as you can see if you click on save changes , this section is actually on the image .
As you can see this whole section is an image you know this purple section , what you're using is the image section and this thing is actually on the image .
So this looks really awesome .
OK ?
Now let's see the next one .
So this is the next section which we have to do .
So again , come back over here , click on this add new section button and let's see we have two different rows over here , regular two different columns .
Fine .
There is nothing it over here .
It is plain and we have to add something over here .
OK ?
On the second one , so click on this add new module .
Search for text , OK ?
Not text exactly .
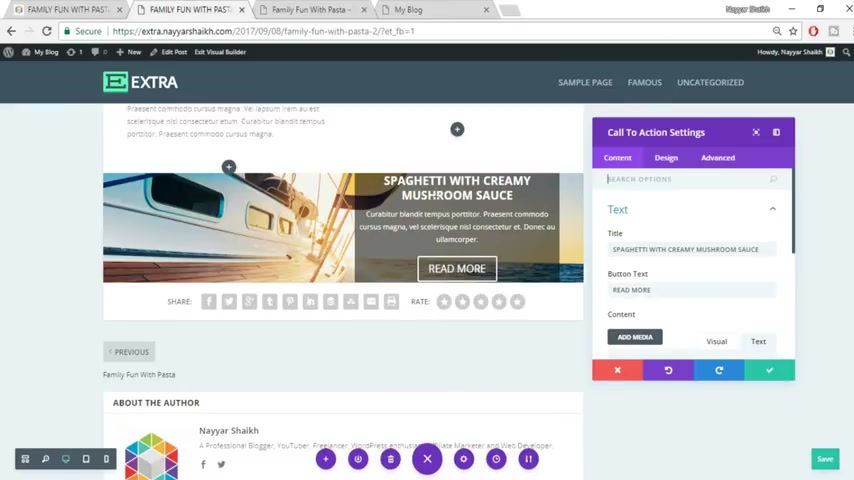
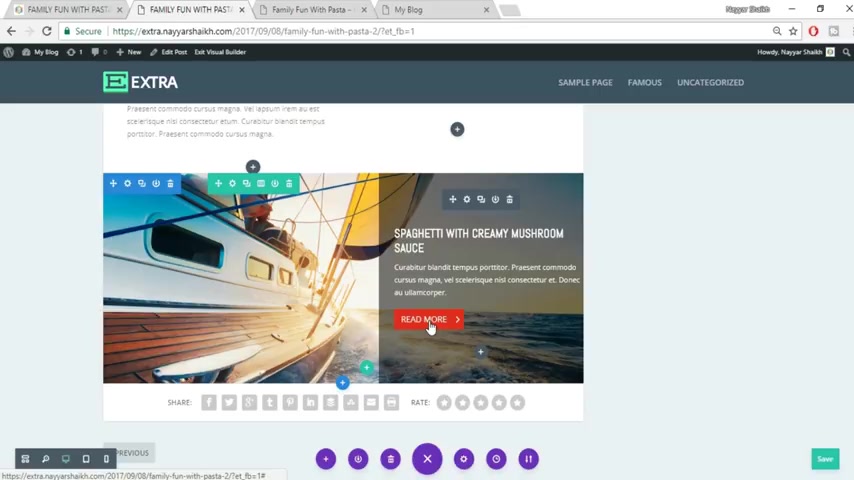
Uh We want this uh call to action button .
OK ?
So search for call to action .
This is the one title as you can see , this is the title , whatever it is , just copy this , paste it over here , then we have the text .
This is the text .
OK ?
Here comes the text and button button says read more .
So button text will be read more type in , read more over here , fine scroll down link .

You can type in the button viral over here .
And as you can see , this is how it looks at present .
OK ?
Now go to design OK .
Let's first remove this background color .
We don't want any background color .
So just remove this click on this settings button .
OK ?
We don't want any background color .
So just make this no use background color .
No as you can see everything disappeared because all our text is white .
But don't worry , we'll fix this thing .
OK ?
Come to design and when you see there are many different options over here .
OK ?
So what do you have to do ?
OK , just leave it and click on save changes for now .
OK ?
Now select this section , click on this gear icon .
OK ?
Now we have this background image , OK ?
Background option , select this scroll down .
This is background one , OK ?
And this is column background two .
Now select this plus button and select this black color .
Now as you can see we have a background color , but let's make this a little bit transparent .
OK ?
As you can see a little bit transparent and let's increase the blackness fine .
This looks fine .
Now let's click on this design button now and spacing and so on .
We'll see that later .
First , let's add a background image as you can see over here .
Then after that , we'll say we'll see more changes for now just click on the save changes .
OK ?
And now select this thing , this blue section for selecting the whole section .
OK ?
So click on this gear icon background and this is the image OK ?
This is the background color and this is the background image .
So select this one .
Click on this plus button .
Let's see this is the image OK .
Click on upload file , select files .
Now select that particular image .
Let's search for that one where is it .
OK ?
Do we have it or not ?
I think we don't have that image fine .
I'll fix that .
You will see that image basically , I'll fix this thing .
OK .
Now let's select some other image .
For example , for example , let's select this one fine .
Let's select this image and click on open , click on upload an image .
OK .
As you can see there is a background image .
Now now click on save changes and what you have to do , you have to remove all the gapping from your .
So just remove all this gapping , you know , you know , it is really easy , just remove all this gapping all this space , all the space between this thing .
OK ?
Fine .
So this looks much better .
Now what you have to do , you have to select this gear icon to make changes to this particular section .
OK ?
Now first let's change all this text and so on .
For example , over here , as you can see , the text is quite beautiful here .
It looks quite terrible .
So select this design , select text , OK ?
Light color , it is fine and this text orientation is left over here .
As you can see it is all left oriented fine .
Now had a text .
This is the text you are talking about .
Now let's change the font to able OK ?
Now let's not make this bold .
So just deselect this one fine .
This looks beautiful .
Now , OK ?
Now what you can do just scroll down to the bottom .
And here we have this button option , select this and make this yes , use custom style for button .
OK ?
And as you can see this button color is different to a year .
And what you can do first decrease this button size from 20 to maybe 16 .
OK ?
16 looks fine .
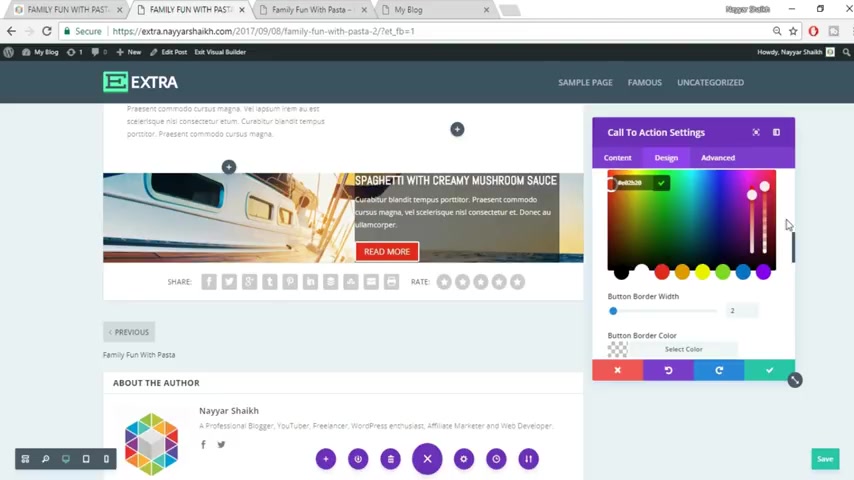
And let's change the button background color .
OK ?
Here it is something like red color .
So let's select this red color .
OK ?
So this is how you change the button background colors and so on .
Now let's select this spacing things .
OK ?
Because we need some space at the top bottom and all the sides over here .
So go to spacings and now select top padding maybe 100 .
OK ?
Now , right side padding , let's select 30 .
OK ?
Left also 30 fine and bottom again 100 fine .
So as you can see , but still there is some gap over here .
OK ?
We we don't want this gap also at the extreme right side .
So first let's delete this thing , the right thing , just delete it , click on save changes .
OK ?
Now come to this thing , uh this section , the interior section options , click on this gear icon , row settings , design spacing , OK ?
And custom margin at the right side , put zero pixels .
And as you can see this thing has shifted over here and there is no gapping at all .
Now , OK ?
Now click on save changes .
So this is how you create this kind of sections , you know , it was quite complicated .
I do agree .
But if you know , if you understand how to , you know , make changes , how to create something that becomes really easy and really exciting as well .
You know , you enjoy doing this , you enjoy creating website after that .
OK ?
Now let's see the other section .
So this is the next section .
Now let's start creating this thing before doing anything .
Let's first save this section .
Keep on saving the sections again and again so that you don't miss any saved changes .
OK ?
Now let's add this one .
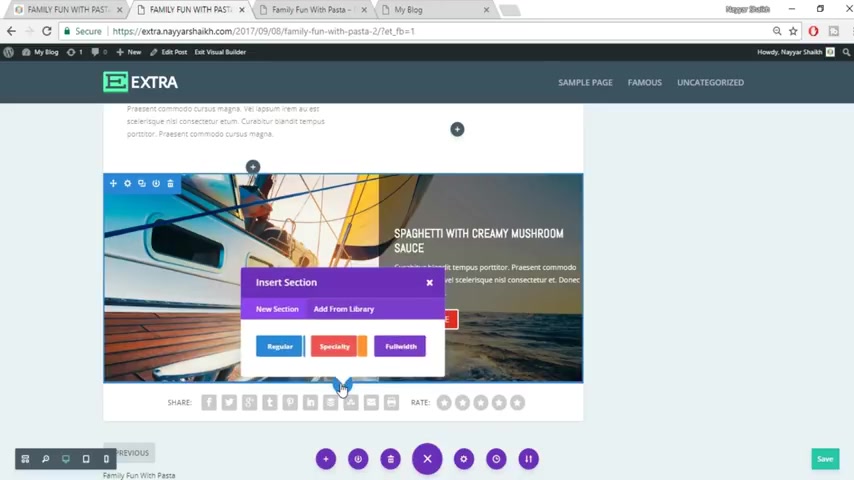
So again , click on this plus button to create or to add a new section .
Now click on this regular OK .
As you can see at the top there is a title and a divider .
Then we have some text fine .
Click on this single column , search for text , OK ?
Past in this text over here , go to design text , orientation center .
OK ?
Make this 25 pixels , the size of the font and font color should be black .
OK ?
And just minimize this fine .
Now let's see what is written , OK ?
Make this as bold also fine .
This looks exactly like this .
Now , now let's add this divider .
I have given this image OK ?

So come to content text and below this uh just uh just press , enter to come to the next line and click on add media and select this divider .
Click on select OK , you have this divided .
Now click on save changes .
Fine .
Now let's add this uh de dummy text , fine , click on this add button , add module button .
Again , search for text paste in this text .
Fine .
Go to design text orientation should be center click on save changes .
Now again , we have some padding from both the sides .
And actually this is not uh this is justified .
OK ?
So again , go to this uh here I can design text orientation , make it as justified .
Click on save changes .
OK ?
Now let's add some gap over here .
OK ?
Maybe 100 pixels from your and 100 pixels from here as well .
OK ?
You can obviously increase and decrease these pixels .
It's all up to you .
I am using 100 pixels , you can use more or less .
Now let's add some space from top .
So as you can see making this is really amazing , you can see the changes actually in front of your eyes watching is uh you're seeing basically in different kind of website .
You just have to put some number at the background at the back at the back end and you don't know what changes that will occur .
And here you can do everything you know visually .
So this is really amazing .
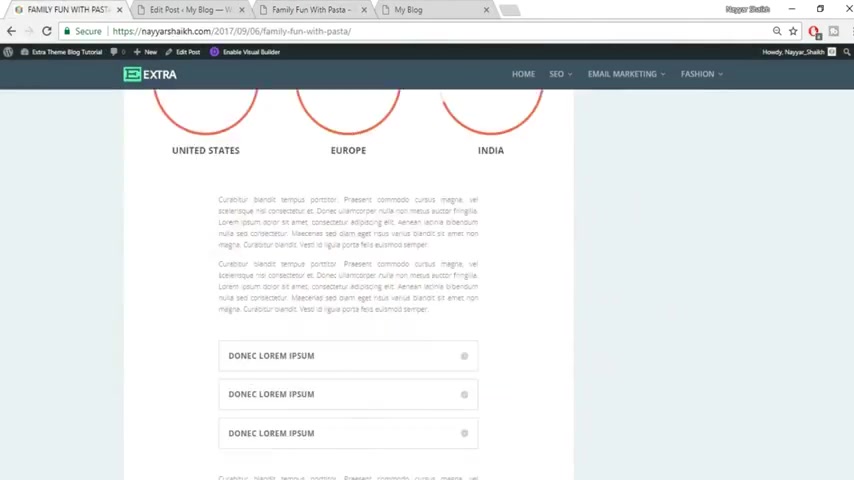
Now let's add this thing , this circle counter .
So again , click on this add button regular .
And as you can see here , we have three different columns .
So select this three columns .
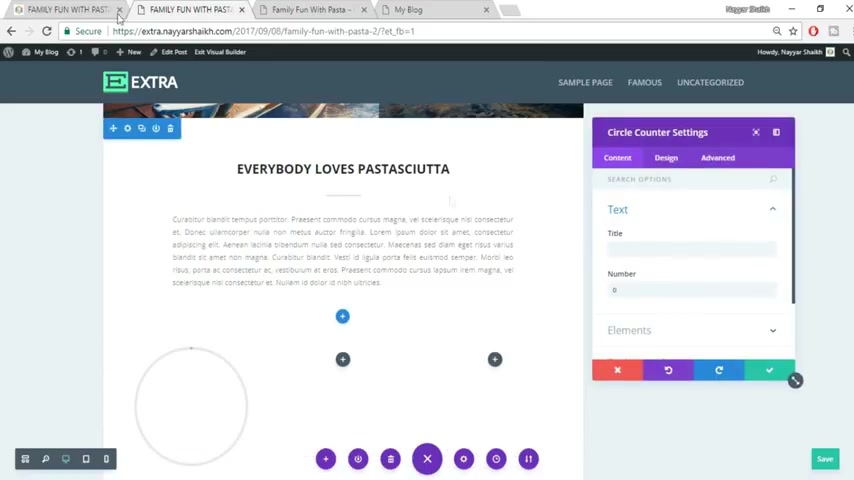
So here and search for circular circle counter .
This is the one , the title ou is United States .
So type in United States .
So your number is 88% .
OK ?
So just type in 88 and here it is OK ?
Now go to design , let's change this color to this red or orange , whatever it is go to circle circle color .
Make this thing as red fine .
OK .
Wait , wait , wait , don't select this right .
Just delete this , this is not the one actually go to content again and background OK ?
Background color .
So you have to change , change this thing bar background color , OK ?
Select this red , OK ?
So this is the one which you have to change , OK ?
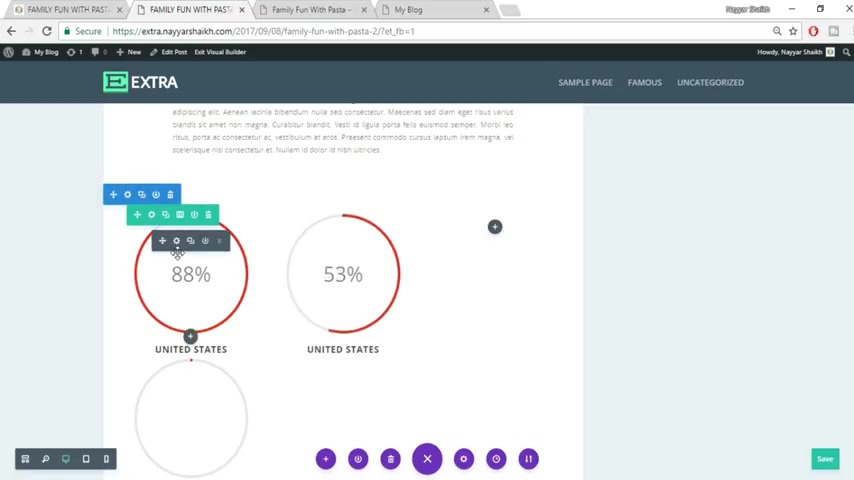
Under content background color , bar background color .
So this is what you have to change .
Just click on save changes , OK ?
Now let's make this Euro 100% India 68% .
So let's just copy this thing two times and drag this thing over here so that you don't have to create it again and again again , drag this thing over here , just uh change this to Europe and change this to India fine .
Now let's change the percentage .
So just click on this gear icon and let's put this 99% .
Come over here .
Select this gear I can make this as 70% or whatever percentage you like .
OK .
Fine .
Click on save changes , control Ns obviously .
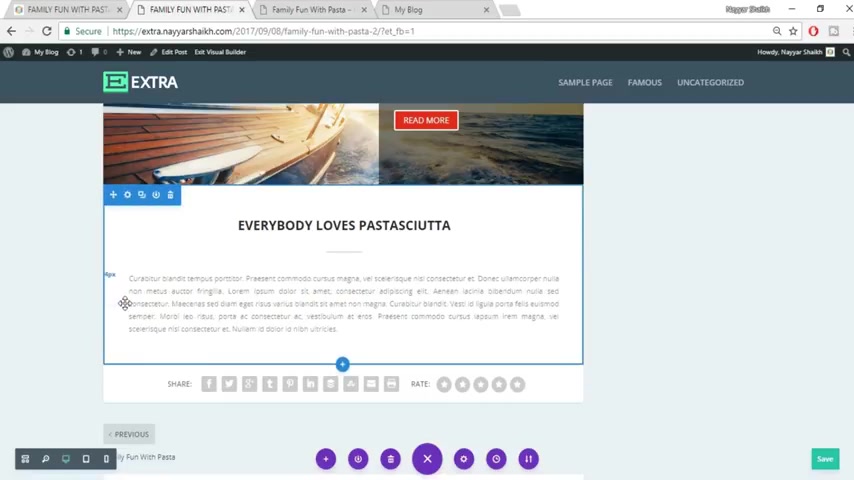
Now let's add this section some text to a year find .
So again , click on this plus button .

Uh add a new section , select regular single column , search for text element obviously and select this text now paste in any uh dummy tags over here .
OK ?
Like we have over here , click conceive changes and let's add some right side and left side padding .
OK ?
Maybe this time 150 pixels fine from both the sides .
Fine .
So this looks cool and this is justified actually .
So just click on this here , I can design and text and orientation should be justified .
Save changes fine .
Now let's copy this thing again .
As you can see , we have this thing through two times .
So just copy it again .
And now let's add these things .
OK ?
So click on this plus button over here .
Add to add a new module , OK ?
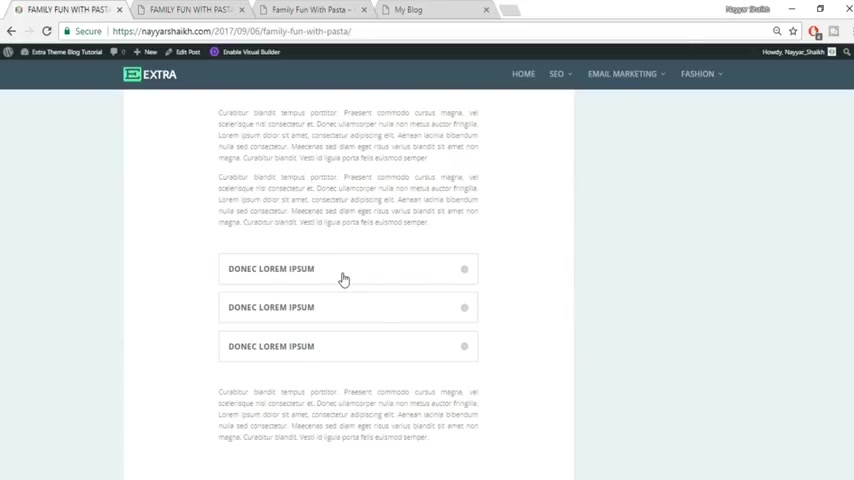
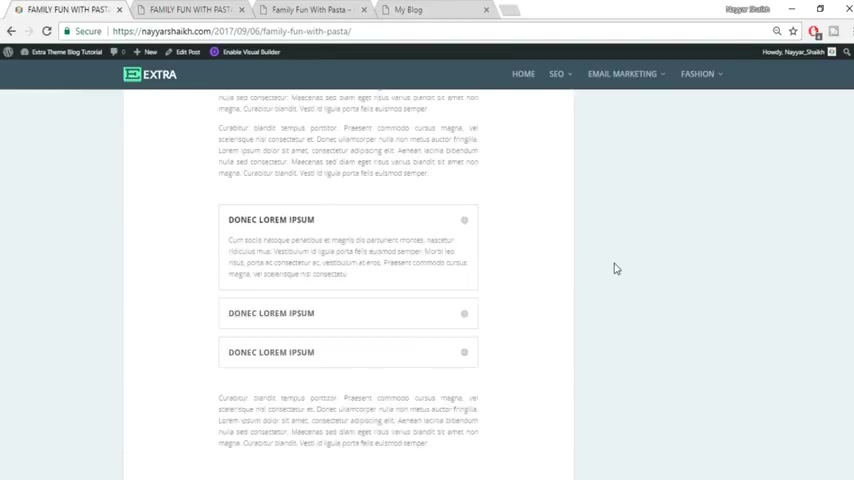
And go at the bottom and select this thing toggle .
OK ?
Now select the title , for example here , as you can see the title is whatever it is , Donny Lore Epsom and let's select this thing .
OK ?
This is the interior content placed in over here .
And as you can see , this is the interior content over here .
Fine .
So just click on save changes again .
And now similarly , you can create two or three different styles , just copy these things three times fine .
Click on save changes , control S and you have this thing over here .
Now , do we have OK .
Again , we have the same thing again .
So what I'll do is I'll copy this thing and drag this thing at the bottom so that we don't have to create this thing again .
OK ?
Make this thing or fine .
OK ?
Everything looks awesome .
Super amazing .
OK ?
Now let's add some gap actually over here .
So just press this enter button , OK ?
As you can see , we have some gap over here .
OK ?
From here also , you can add some gap , so we have some gap now and this really looks awesome .
OK , guys .
So this is how you create a blog in 2017 or 2018 or 2020 whatever , you're , you're watching this thing .
OK ?
So all those old style things are gone and the new style is this , you know , you don't have that simple as I showed you in the basic thing that when we are doing the basic thing , if you watch that , if you are , if you are watching the complete tutorial , you saw that basic thing where you had only a few options , like just to make that thing as bold , just to add some basic things .
But here you have so many different options .
OK ?
So we have successfully created our first blog .
Make sure you save all these settings .
OK ?
Fine .
Now , what do you have to do ?
Now , let's create the second one .
OK ?
Let's select this one , a guide to spices .
Fine .
Now let's create this beautiful blog .
OK ?
So again , come back to your website and here you have this option which says new , OK .
So how about that ?
And select post ?
So from here also you can add new post , new pages and so on .
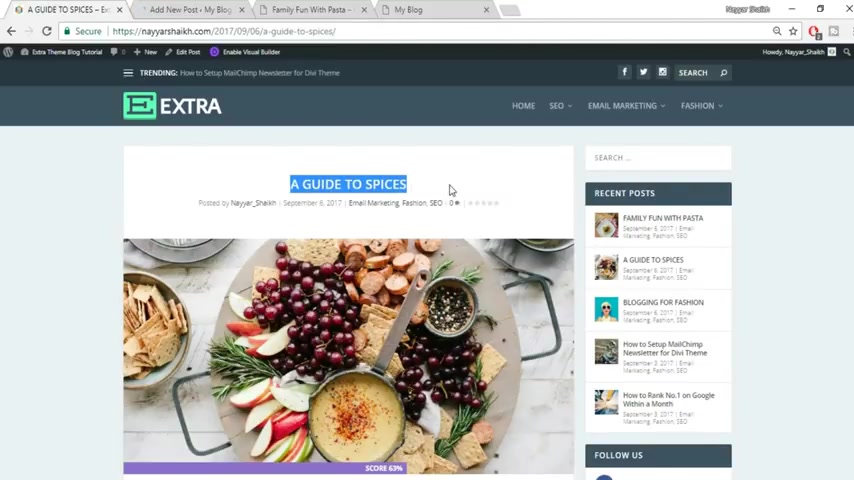
Now let's see the title , a title says a guide to Spices .
So based in this title , a guide to Spices , OK , select any category .
You can select multiple category .
For example , for this , it could be spices .
Also it could be famous .
Also click on add new category , OK .
OK .
Rest everything looks fine .
Select a featured image for this .
OK ?
This is the one OK ?
Upload files , select files , OK ?
Select a good featured image for this one .
Let's select , yeah , this is quite smaller actually .
OK .
This is the one .
Let's select this one .
OK ?
Click on open now , click on set , featured image .
So you have our featured image over here , click on publish .
Now click on this .
Use the visual builder .
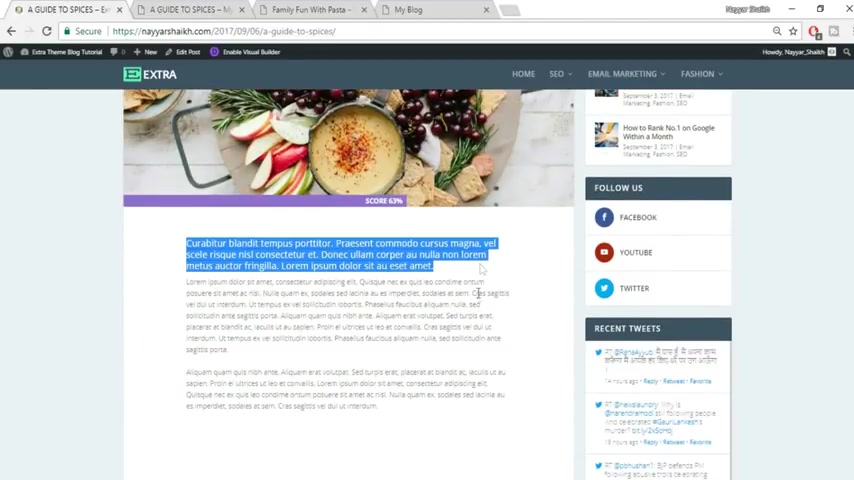
Now click on use visual builder , right guys .
So let's scroll down and see what we have to do .
So here as you can see , we have to add some text to your first , some bigger text and two smaller text or two regular text paragraphs .
OK ?
So again , click on this add button from your OK .
Uh We want a single column from you .
So select a single column .
Click on this module , select text OK ?
Past in this text over here .
Now let's see this is a center line .
So come over your text instead of left orientation , select center find and let's increase this size audio text to a year as you can see .
So come over here , the text size , let's make it as 18 pixels fine .
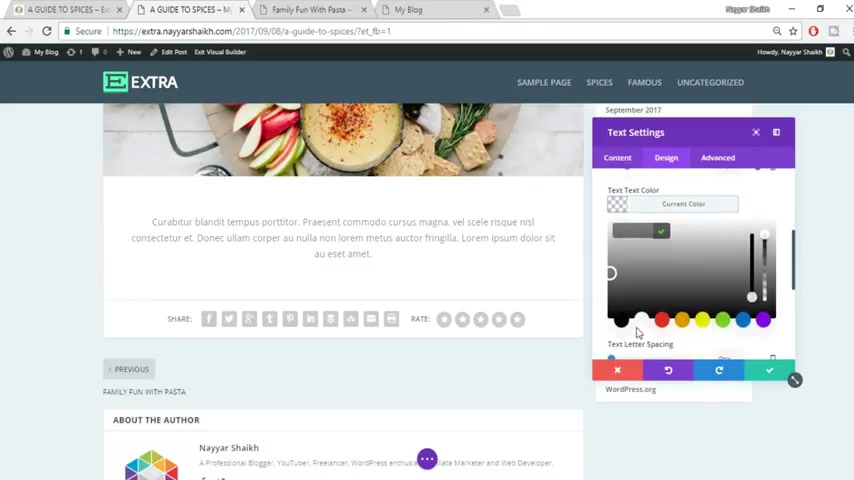
And let's also change the color to black color .
Fine .
Now click on save changes .
Now let's add these things over here , this simple text .
OK ?
So again , click on this plus button .
Again , search for text module and select this one past in the text .
OK ?
Now , here we don't have to do anything .
Just make this thing as justified .
OK ?
OK .
Now what you have to do , just copy these things again and delete some lower portions from your fine .
So this looks awesome .
Now let's add some padding from both the sides .
OK ?
So let's just select Aio drag this thing 200 pixels or whatever you want .
I am selecting 100 pixels , OK ?
From both the sides fine .
So this is 100 pixels from both the sides .
Now , let's see what we have next .
We have this thing .

Actually , if you see here , there should be one more , but we haven't added just to make it look beautiful .
OK ?
So there is three counter boxes and then an then a full width image .
So click on this add button regular and select four columns .
OK ?
And select counter .
OK ?
So this is basically the number counter as you can see .
OK ?
So select number counter , OK ?
There is a title which says LA so just type in LA .
So a year and in the number type in 2 23 fine and in the element just make this thing .
No , because we don't want this person to sign fine .
OK .
What you can do , you know , as you can see this comes under the same uh uh padding section .
So instead of adding a new section , uh let's make this thing .
Yes .
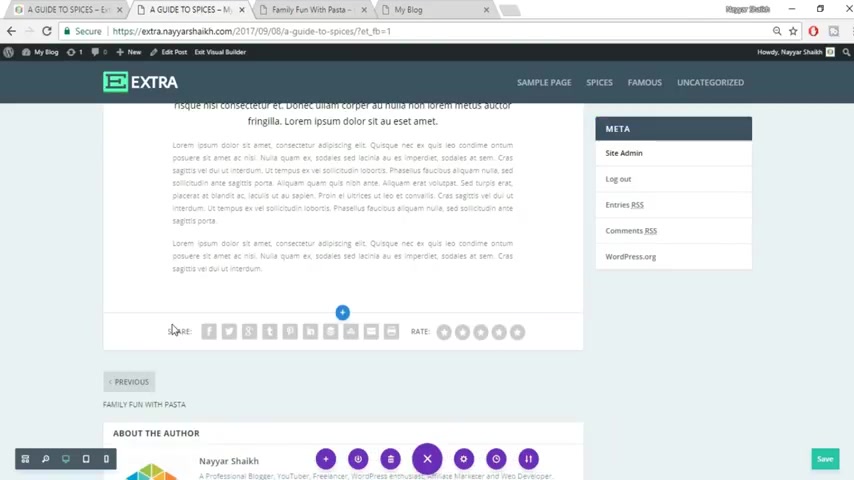
First let's delete this section and let's add these counters under these sections only .
OK ?
Because we don't have to do this padding setting again .
OK .
So now click instead of this clicking on this blue plus button , click on this green plus button .
OK ?
Now select four columns .
Now select counter the circle counter , sorry , the number counter , Laurie ma 2 23 and we don't want this percentage element .
So make this .
No , OK ?
Now let's change the color from your design text , OK ?
Title text , color , red , orange , whatever you want .
OK .
Here , the color uh title text is actually black .
So let's select black .
OK ?
And your the title is quite smaller .
The font is also different .
OK ?
So let's select different font from your , let's select able OK .
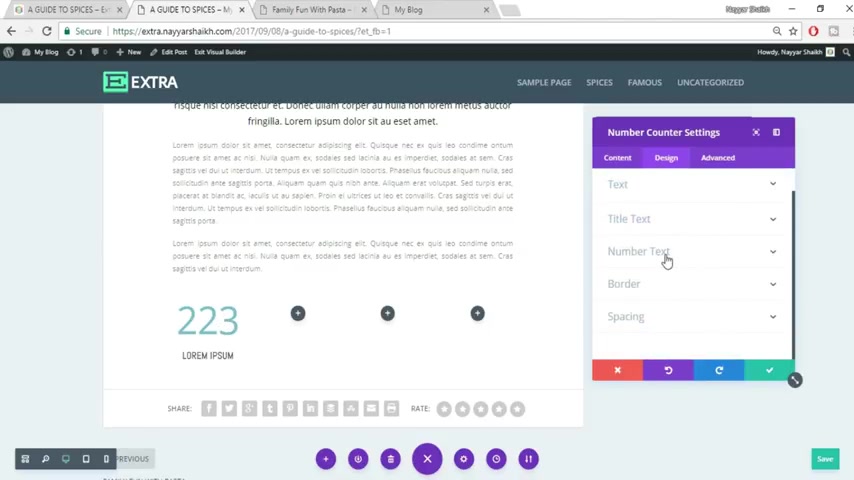
So this looks fine and let's make this , this is quite dark .
So let's make this thing a little lighter .
This looks good .
OK ?
Now let's change the font for this number .
So number takes over a year .
Now let's decrease this size .
OK ?
To maybe 65 .
OK ?
65 looks fine .
Now , also let's change this color , OK , to this color and make this thing a little bit lighter so that it looks nice .
Click on save changes .
Now , instead of doing most of the settings , what you can do , you know , just copy this thing .
Two time drag this thing over here again , drag this thing over here .
Now , we just have to change the title and the number .
We don't have to do all those color settings again and again .
OK ?
So here , let's see the title over here .
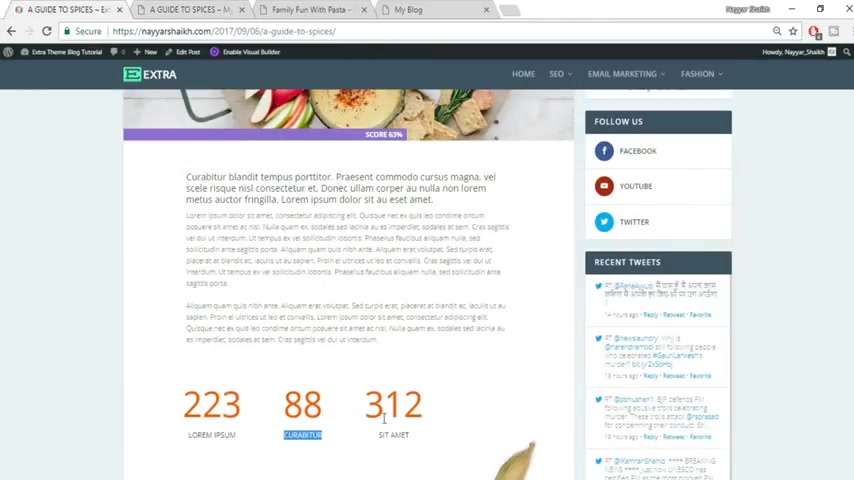
I used to do a job fine again , the title past it over here .
OK ?
Now let's change this text 88 and 312 .
OK ?
So select this button instead of 2 23 put in 88 and instead of 2 23 select 312 , fine , click on save changes .
So this looks amazing .
Now let's add this image .
This is a full we image as you can see .
OK ?
So click on this add button , full width full with image , select this image , upload files , select files .
OK ?
Where is it ?
Let's search for that one .
OK ?
Here it is .
As you can see , click on open upload an image and as you can see , we have this image over here , we're gonna save changes .
Let's see .
Let's come down .
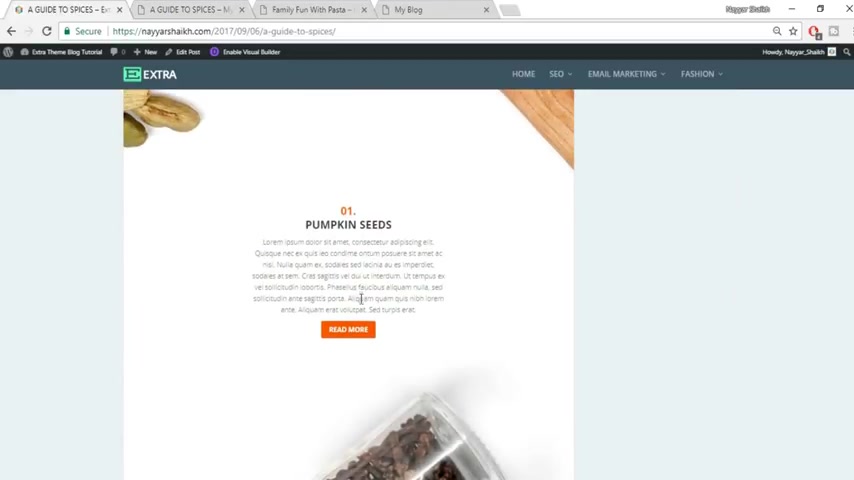
Now we have to add this section over here .
OK ?
So come back where you click on this plus button .
Regular single column , select text , OK ?
Uh Select this one and copy these things .
All these things over here , paste it over here , go to visuals fine .
Now let's put some gap between all these things , OK ?
Make this 01 S header one , OK ?
Pumpkin seeds as header two .
And this all will be paragraph which is fine .
And also let's change this color of number 12 orange .
OK ?
And as you can see , this is all center aligned .
So let's make all these things select everything and click on this center align button .
OK ?
So this looks fine .
Now click on save changes .
There's also a button over here .
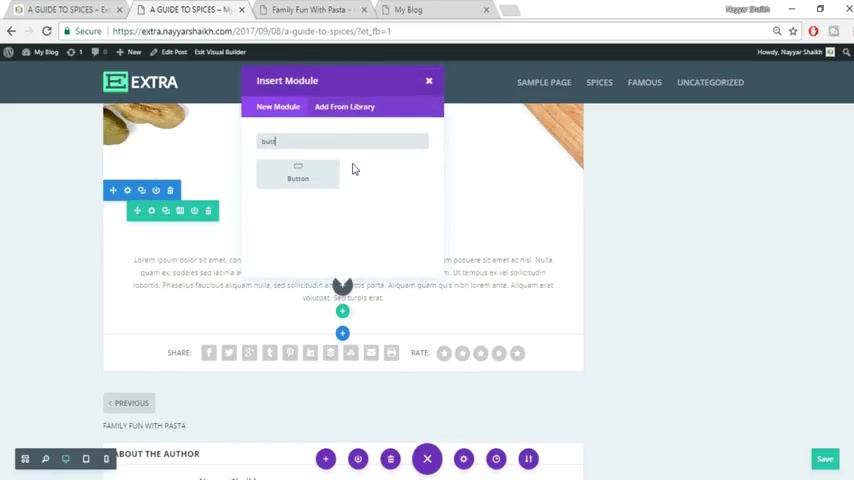
So let's add this button , click on this add new module button and select for button .
OK ?
Here it is button text , it says read more .
So just type in , read more .
Hey , fine go to design to change all these things .
So your button use custom style .
Yeah .
Now button size should be 15 pixels .
OK ?
Just to make this thing smaller .
And as you can see the color is orange color .
So background color you can change anything .
Let's make it red , OK ?
And button text color at present .
Here it is blue , we will change this to white .
OK ?
So as you can see this looks fine now , OK ?
Now let's make this thing at the center .
So button alignment center .
So this looks fine .
Click on save changes .
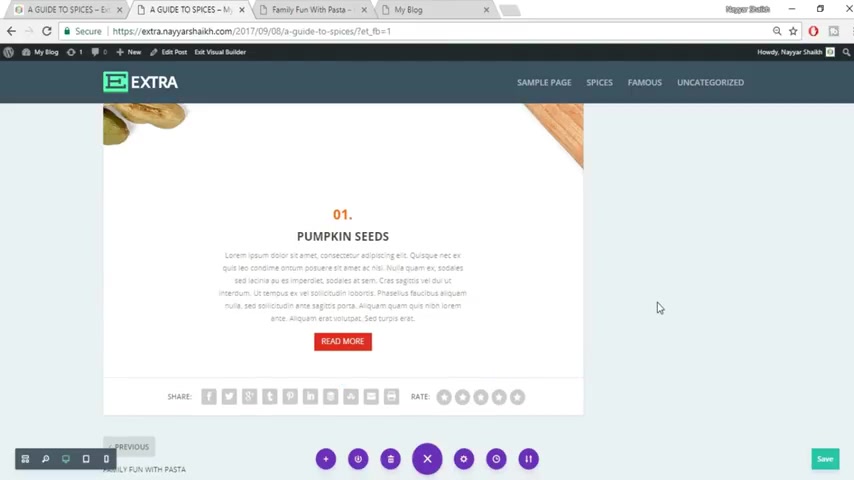
Now let's add some gap or maybe a lot of gap from both the sides , a lot of padding left and right padding .
So just drag this thing make this 200 this time again from this side also 200 fine click on save changes so that you don't miss any changes over here .
Now let's drag this section over here as you can see between this image .
OK .
There is a wide section here in the image .
So let's drag this thing over here .
That would really look nice .
OK ?
So click on this gear icon , design spacing and top margin .
Let's put it minus 100 and 50 .
OK .
As you can see , this looks amazing , it looks like you know this gap was for this only .
And if you see this image section , when you have this image , you can see the title and some of the texts are actually on the image .
OK ?
So that really looks nice .
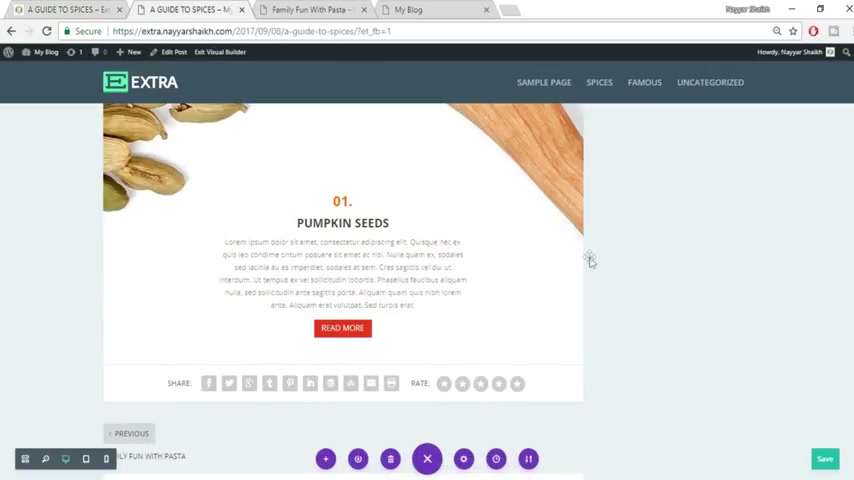
Click on save changes so that you don't miss any changes .
Now let's see what is the next section .
So we have another full weight image .
OK ?
So again , click on this plus button , full width , full width image and let's select this is the image .
So upload image , upload files , select files and this is the one click on open upload an image .
OK .
Here we have .
Now let's see what we have next .
Then we have this thing .
OK ?
Now let's do these things .
Now click on save changes , click on add new section , regular two columns .
But as you can see , the left column is blank and we have everything at the right column .
So let's cut this thing .
We want , we don't want anything in the left column , select this right column button , click on add me module .
And at the top we have this text .
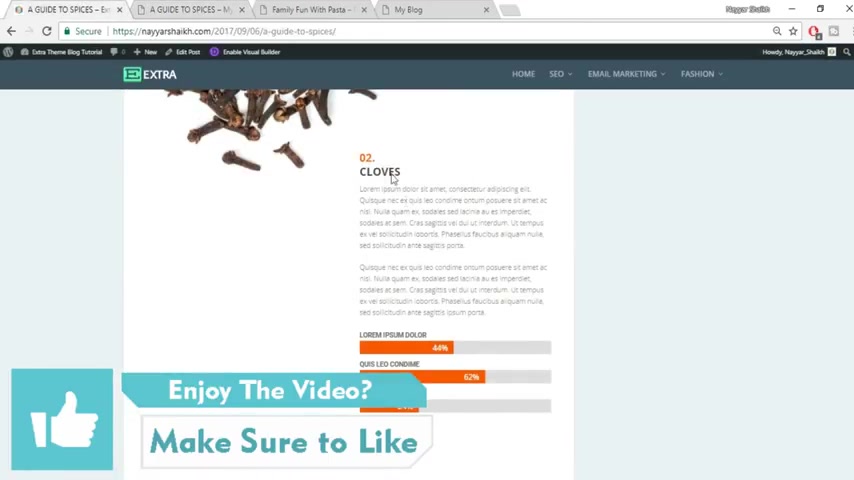
So search for text module , select this one , copy all the text .
OK ?
Come back .
Will you paste it ?
OK .
Now let's see .
This is header one , header two and the color of this number is orange or whatever it is .
OK ?
Select this header one .
OK ?
First let's add some gap between all those things .
OK ?
Now select this header one heading to OK ?
And rest everything is fine .
Now let's change this color to orange .
Fine , click on save changes .
OK ?
Now let's add these bar counters .
OK ?
So click on this add new module , search for bar counters .
This is the one OK ?
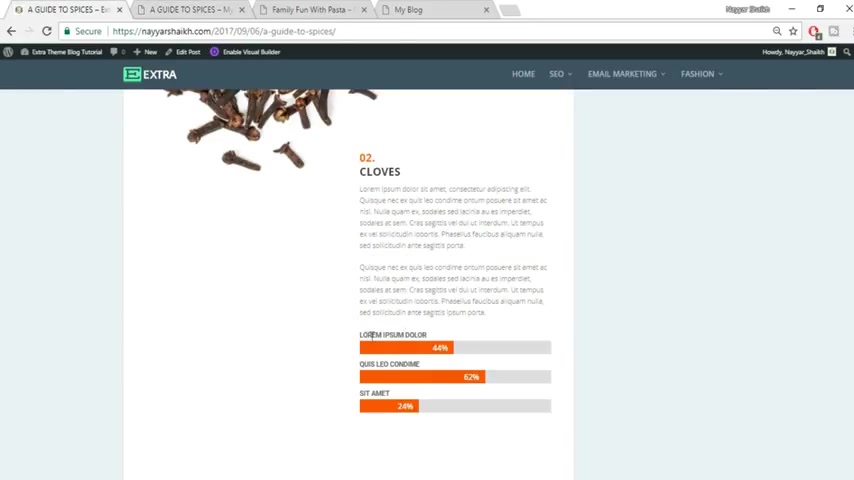
Now what you have to do , click on this uh add button to add first one .
The title here as you can see is Lori Epsom dollar .
Select that percentage is 44 pixels , 44% .
OK ?
Fine .
Now click on save changes again .
Come back , click on .
Now let's click on this uh add button again and here now this time it says QLED , I don't know what it says .
OK ?
6 to 2% just type in over there .
And let's see the third one .
OK ?
Now let's do all these uh designing changes .
Now , OK ?
The first one is element we want to use percentage to make this thing .
Yes .
OK .
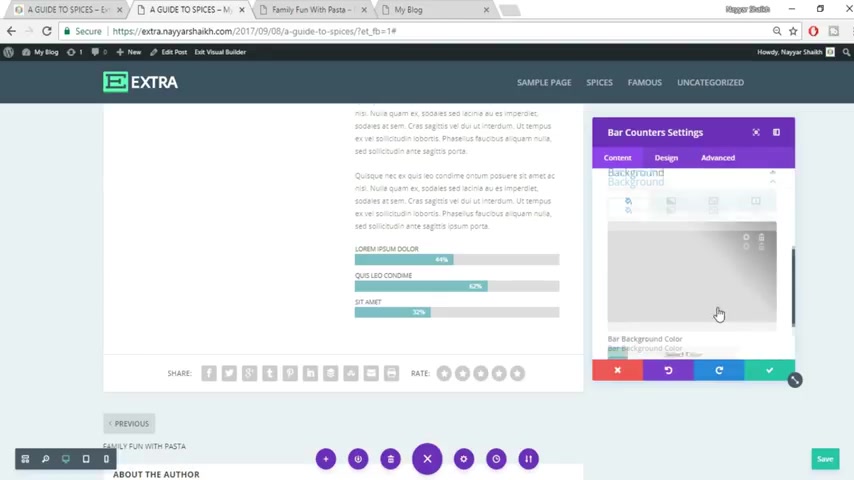
Now background , so select this thing and this will change this background color over here .
OK ?
Now , here we have the bar background color , select this thing , OK ?
Select red , orange , whatever color you want , OK .
Sign any color you want fine .
So this is the color .
Now go to design text , title text fine as you can see here .
The title text is bol .
So make this thing as bol .
Also let's increase the font size to 15 or maybe 14 15 looks quite bigger fine .
And here also as you can see the size of this bar is quite bigger .
OK ?
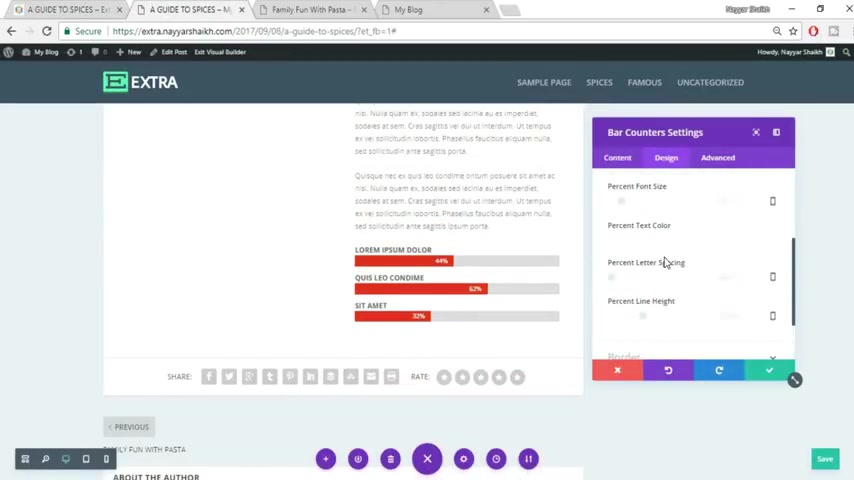
So let's do that go to this percentage text and increase the percentage font size to 15 or let's increase this to 18 .
Now , as you can see it is quite bigger .
Now click on save changes .
So this is how you do all these changes , OK ?
Now let's add this image again , full width image .
So again , click on this add new section , full width , full with image upload again , click on select files , OK ?
Now let's search for that image here it is click on open upload an image , click on save changes .
OK ?
Now first let's do one thing as you can see this section is coming on this particular image .
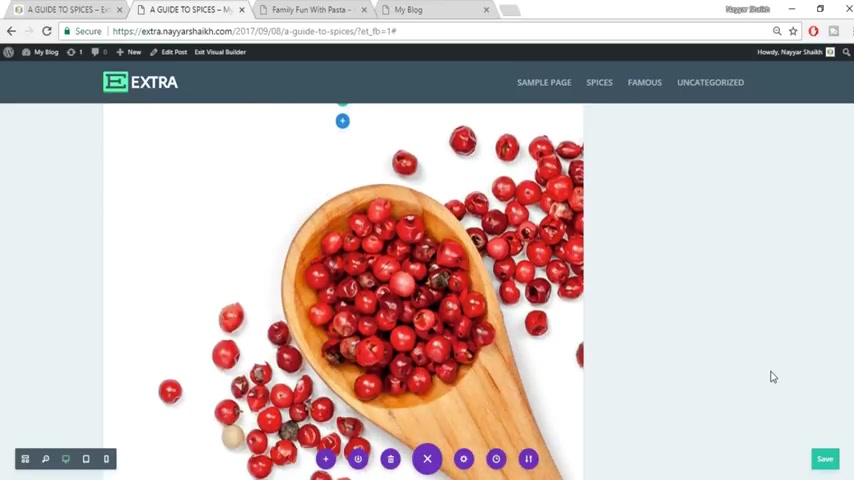
So let's do that click on this gear icon design spacing top margin minus 100 maybe OK .
Minus 100 pixels looks fine .
Click on save changes , fine .
And let's see what we have after this image .
OK ?
We have two different sections we have at the left hand side , this text and at the right hand side , we have this particular uh progress bar .
OK ?
So what I'll do , I'll just copy this text from here so that I don't have to do this text again and again , come back over here , click on this add button , regular two columns .
Fine .
Cut this thing because I have already copied it .
OK ?
Now drag this text to the bottom , OK ?
To the column which we have created , drag this thing over here or over here whatever you want .
Fine .
Now what do you have to do ?
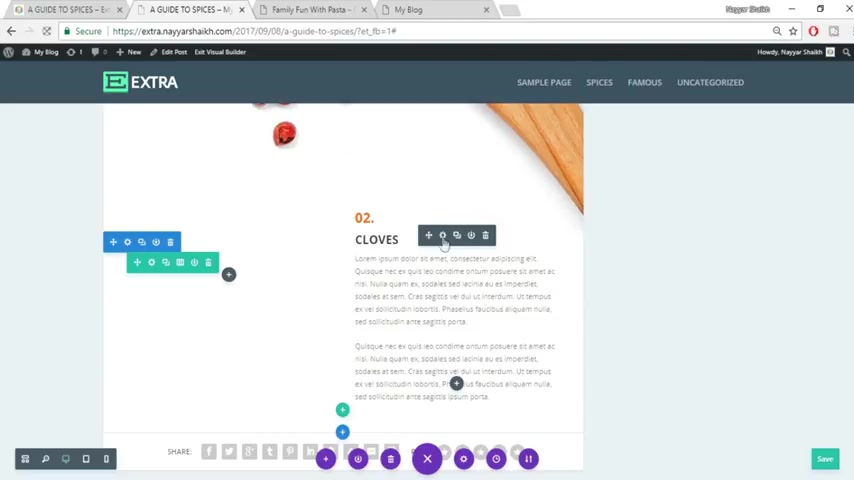
First , let's change these settings .
As you can see when we copied , we had this setting the top margin setting , just delete this , make this as default .
Click on save changes .
Let's bring this thing over here fine .
OK ?
So this looks fine .
Let's change just the text , OK ?
Whatever it is three instead of two .
OK ?
And instead of this select this chain and click on save changes again and again .
Now let's add this circle circle counter .
Click on this add module , search for a circle counter .
This is the one OK ?
So it says MFM 78% find LA MFM 78% background color we have bar background color .
You can select any color from your and click on save changes .
OK ?
Now let's see what we have .
We have another full width image .
So let's add that click on this add button , add new section , full width forward with the match upload , upload files , select files .
This is the one click on open , click on , upload an image .
Fine , click on save changes .
Now let's see what we have after this .
We have another text to here .
So again , I won't be doing that again .
What I'll do is copy this thing from here .
Come on here .
Add a new section .
OK ?
Regular two columns .
OK ?
Cut this thing and drag this thing which we copied over here .
OK ?
Oh You and just make this four instead of three and what we have , we have chilies .
OK ?
Spelling is wrong .
That's all right .
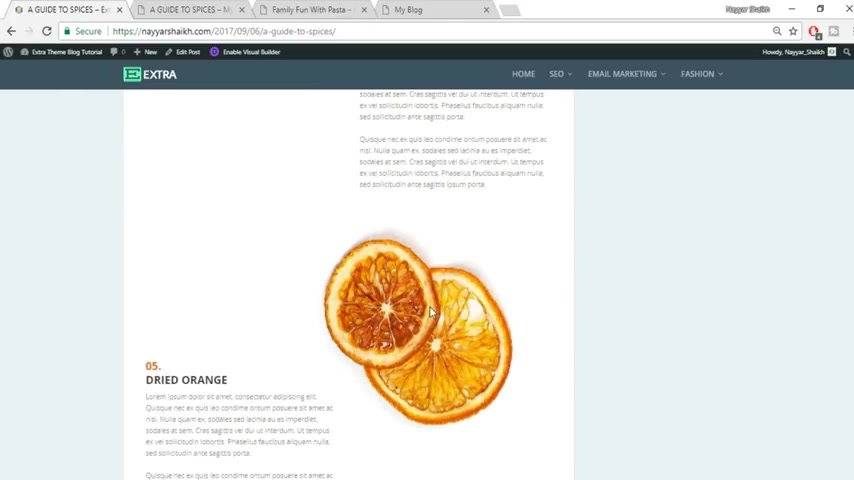
Fine .
Now let's add this image , the oranges image , click on this add new section regular .
OK ?
Not regular .
Actually , let's delete this first .
We have to add a full width image .
So click on this , add new , full width filled with image , upload , upload files , select files .
This is the orange image clear .
Select that click on open upload an image .
Fine , click on save changes .
Now again , we have some text over a year .
So again , I won't do that again .
What I'll do first , let's add a new section , regular two different columns and instead of creating everything again .
What I'll do , I'll just copy this from here , drag this thing at the bottom and fine .
Now , five dried oranges fine .
So instead of four , let's make it five instead of chilies .
Let's make dried orange fine .
OK ?
After this , we have this , we have seen how to add this thing in the earlier page .
So I won't , I don't think there is any need to show that again .
Now let's add this image , the bottom image , click on this add new button full with image , OK ?
Upload image , click on upload file , select files .
OK ?
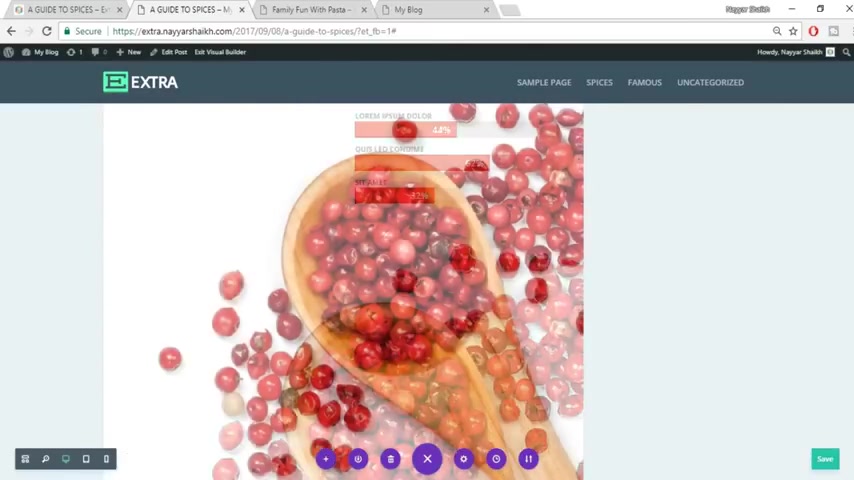
Now let's select for that image .
Where is it ?
This is the one click on open upload an image save changes .
So with these guys , we have successfully created this post also and another amazing post .
Now click on save changes .
OK ?
Now as you can see guys , this is the post .
OK ?
So what I'll do instead of creating everything again , what I'll do , I'll give you a layout .
In fact , I have given a link in the video description below that there you'll find all the layouts .
For example , the last two posts which we created , you can find those layouts also .
So you don't have to create those post .
Also , I just showed you because I wanted you to know that this is how you create it .
OK ?
Now let me show you how to use a layout .
So what do you have to do ?
Go to this website , your website .
OK .
And this again , how are you click on this add new post ?
Let's see the uh title from your blogging for fashion .
Let's add this title .
Fine .
Now you can create any different category for this fashion and you can select multiple categories .
OK ?
Now let's select a featured image as you can see .
In fact , this is a featured video .
OK ?
So I'll show you how to do that .
First , let's select a featured image , click on upload file , select files .
OK ?
So this is the one fashion blogger .
Click on open , select featured image .
OK ?
Now here instead of standard format select video .
OK ?
And you put in the video URL .
For example , if you click on this , this is linked to a video URL for example , go to my uh uh my youtube channel naas shake dot com , uh youtube dot com slash na shake .
And here you have so many different videos .
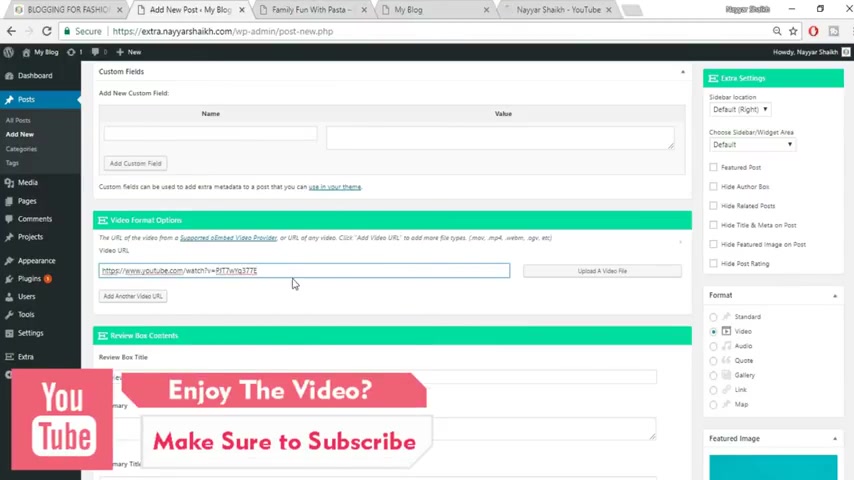
Hi , I'm Vicky .
I'm with Condi and I'm gonna make a clock face .
This is the clock face we're gonna make and I'm gonna show you exactly how to do that .
Um In this Carell draw application , this would work in any version of Carell .
The tools are the same .
We're gonna start off with making our first circle and using the eight inch disk here at Condi .
Um We're gonna go by that template .
So I'm gonna zoom in on my document .
I'm gonna grab my circle , hold my control key down and drag across the page were dis locked .
I can just type eight press enter and I have eight for horizontal and vertical .
And what I wanna do now is create uh center from our , from our radius .
So I'm gonna click one more time there .
That's gonna give me this rotation ability and I'm gonna grab , I'm gonna zoom out .
So you can see I'm gonna put my cross hairs over the very center there .
And just so you can see that says center and we're gonna drag that to the center of the clock face that creates the center of my radius .
OK ?
And I'm gonna go 30 degrees to the left on my angle of rotation .
And once I type my 30 up here .
I can press enter and that creates the , the uh 30 degrees to the left and to duplicate that .
I'm gonna press control .
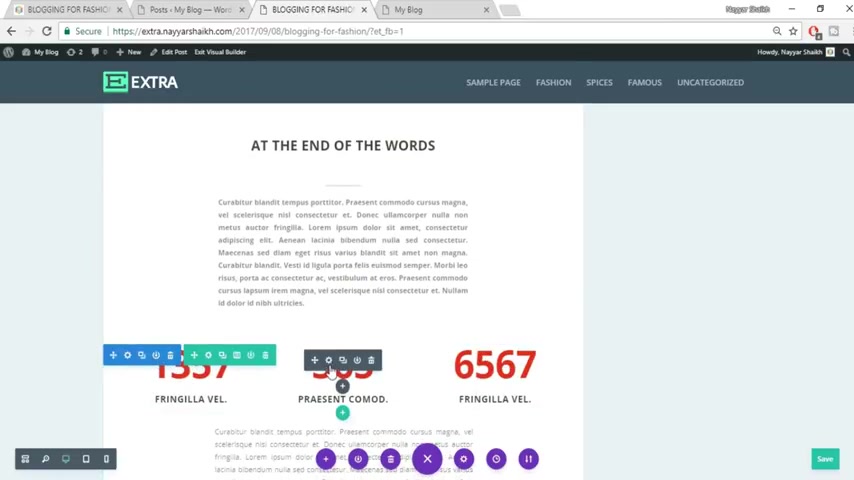
Now go to your layout options .
OK ?
Now select that layout fashion post , click on open , click on import DV builder layout and it will import everything for you .
OK , guys , as you can see , it has imported all the things which we needed as you can see all the sections , everything , all the images , the audio , everything is imported .
Now , OK ?
You have this slider also here .
Now you can make any changes anywhere you want .
OK ?
So if you have seen how to create all these things , you want to make any changes , go to this Grik and change everything .
OK ?
So I have given you all the three layouts , you can , you don't have to create the layout one by one , You can just use it .
OK ?
Fine .
So let's click on save changes .
So we are done with this uh on how to create a blog .
Now , let's see how our website looks like .
So go to your website .
Now , let's look at the website .
OK ?
Now let's change the front end .
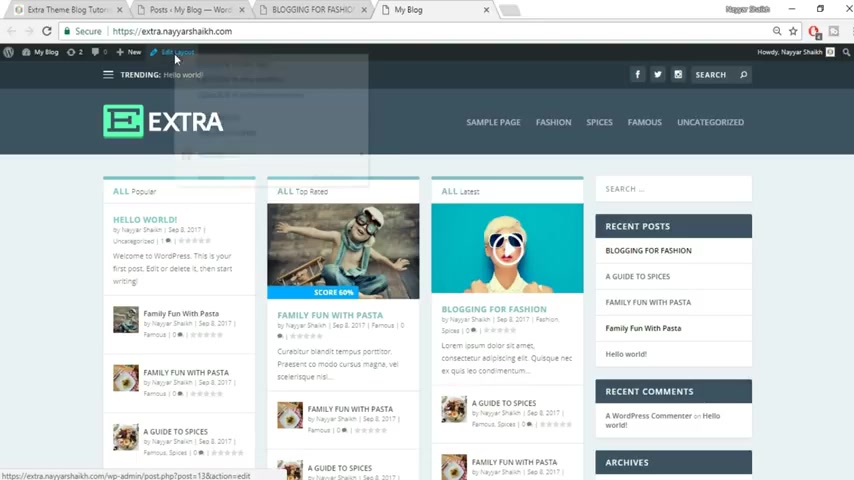
D go all the way around .
So I have 12 of them .
Now , what I wanna do is go over here to my text tool and I'm gonna create a , I'm just gonna type A L just to create my first line and I'm gonna drag it .
I'm sorry , I'm gonna drag it here , but I'm gonna get closer so I can see .
OK .
And now I want to size it um so that it fits perfectly between these two lines here .

So again , I need to duplicate it because we're gonna repeat what we did with the square this time creating , we're only gonna create more of these lines for the , the minute hand .
So I'm gonna do control D I'm gonna zoom out so I can see it and I'm gonna place it right over the top of the first one just like I did with the square .
Now , I'm ready , I'm gonna zoom out so that we can see .
I'm gonna click one time on the center that gives me these rotation errors .
And now I am ready to , well , first , I want to , I'm sorry , first , I want to drag this down to the center of my clock face .
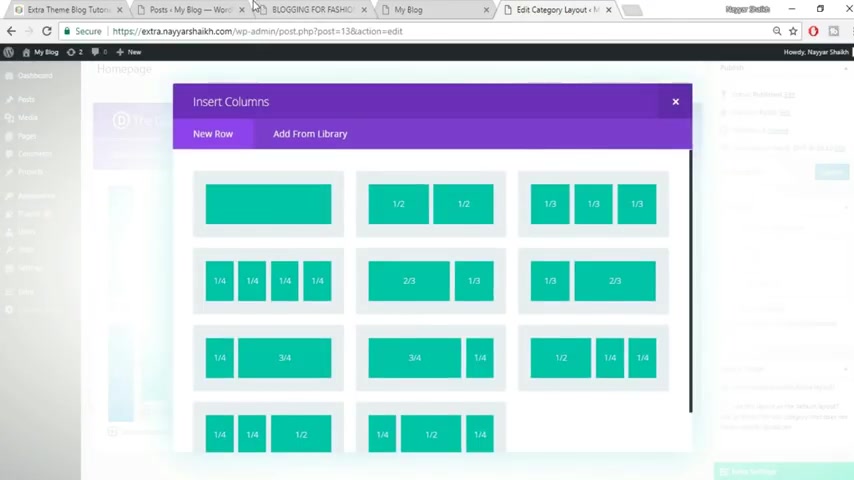
So as you can see , we have the uh slider over here .
OK ?
Now , as you can see six different post or if you have less than six , then obviously we have only four .
That's why it is showing only four posts over here .
So we have the slider .
Now let's delete this thing and let's add these two things over here .
OK ?
So again come back over here , delete this section , delete this section .
Also .
Now click on uh this uh add standard section .
OK ?
Now click on two columns over here because as you can see here , we have two different columns .
OK ?
Now select the first column , click on insert module and select post from here .
OK ?
Now select the category , for example , I want the famous category in this particular post find post limit .
You can limit the post .
For example , let's limit it to four number of post .
OK ?
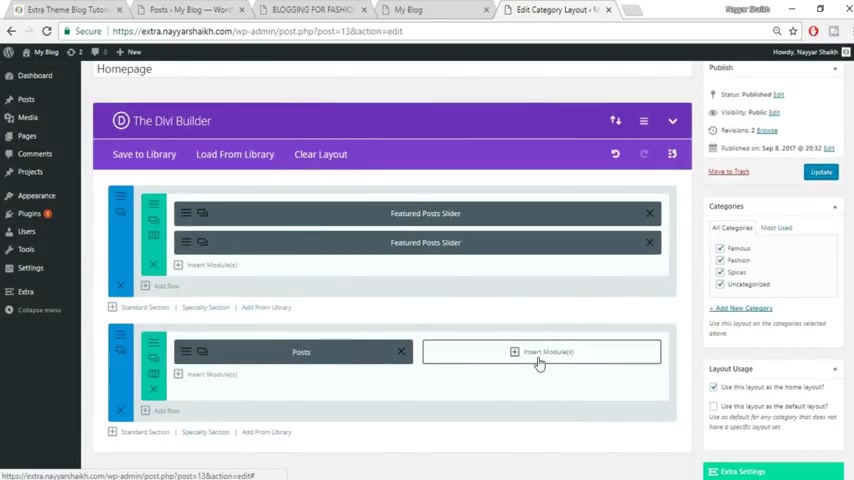
So get your cross hairs over the center and now we've created the center point for the lines and we're ready to uh type in our six degrees here because I know that's gonna be six if I divide that by 60 .
So we're gonna make 60 lines all the way around the clock .
Um , so I'm ready to press enter and that creates my first one and now I'm gonna to duplicate it .
I'm gonna go all the way around the clock face zoom out so you can see what's going on a little better and we're gonna go all the way around till we get back up to the top again .

Ok .
So now we have our , our hour blocks here and then we have our minutes .
So what I wanna do to kind of uh fine tune .
This is what I can do is I can come back and delete these lines just over the uh the squares because I don't really need them .
If you want to be precise , you can leave them or delete them .
I like to delete them .
You just click on them and delete them using my wheel on my mouse to zoom in and out .
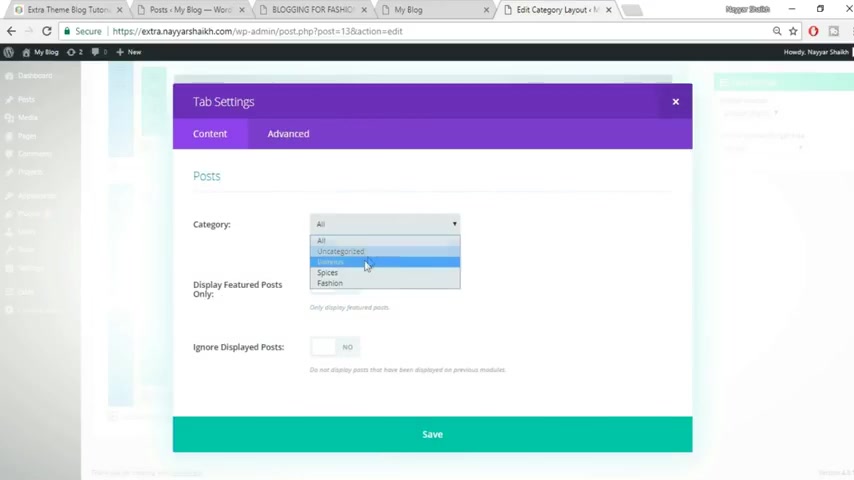
So , uh if you're wondering how I'm zooming in and out , that's how I'm doing it .
And finally this one .
OK .
Now I'm ready to uh fit to page so I can see what's going on .
All right .
So now I'm ready to uh incorporate my numbers here .
I've already typed up the numbers to save us some time .
You can use any type of font you want .
I chose these .
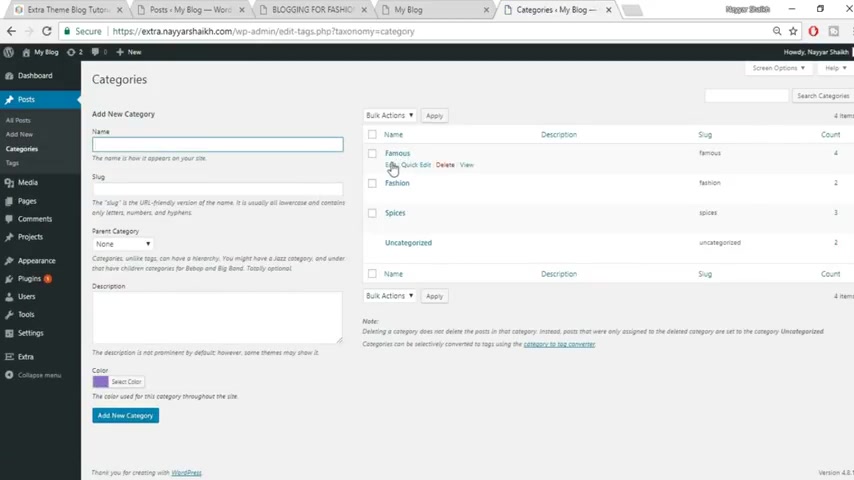
Oh no , here it is blue , all blue , blue , blue .
But here we have different color color for different sections .
So let's do that .
Come back to your dashboard or here and go to categories OK ?
That you will find under post .
So under post , you'll see categories go to categories , OK ?
Select the first category famous click on edit and you can select any color .
For example , here it is purple .
I want the purple , click on update .
OK ?
Now , back to categories .
I select the second one fashion and here it is uh I think pink , whatever that color is , click on update so you can change different color for different categories .
OK ?
Now select these spices , red , click on update .
Now again , come back to your website and refresh the page .

But uh , now that I have them already typed , all I have to do using these cross hairs is I'm gonna first , um , place these , I'm gonna get a little closer here and I'm just gonna kind of place them in here .
So I have them all .
So I have them all , um , where I can zoom in and we can tweak it or fine tune it once I have everything closer together .
So give me just a second .
We'll get all these down here and then we can start perf perfecting it .
Should we say shame .
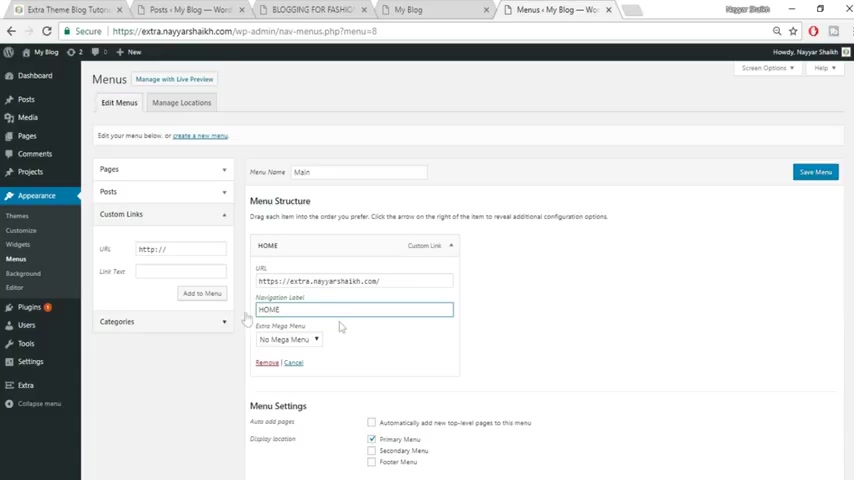
And just so we know exactly where these go , we'll just get a little closer and we'll start placing these whoops .
And when you mess up , the great thing about undoing something is control Z or you can use your undo key here .
OK ?
And I kind of place it a little bit away from this line here .
Oops , we did it again .
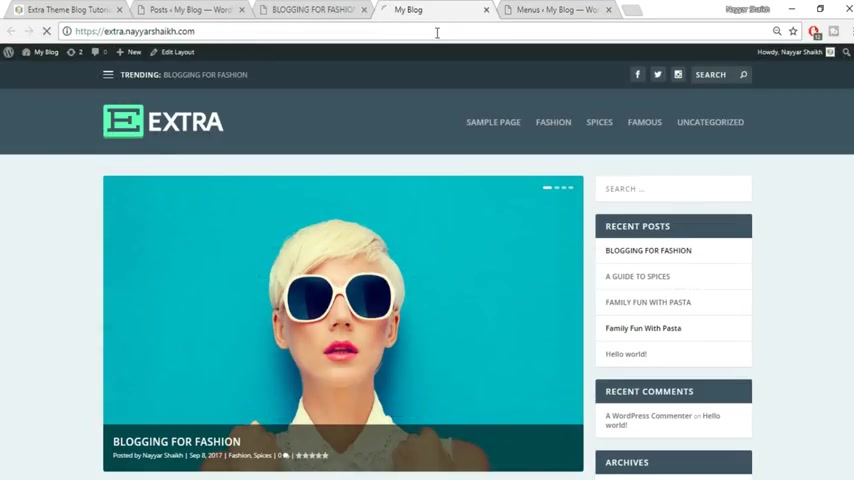
So if you mess something up , control Z is the answer .
And then finally 11 and there we have it and we have created a clock face .
And again , if you want to use this as a template here , what I would do at this point um is I would probably delete these lines because we don't need them anymore and then hold my left mouse button and drag this area because we need to group it .
And once we've gotten everything by dragging across left click and then group that way if you click something , the whole thing moves to see how that works .
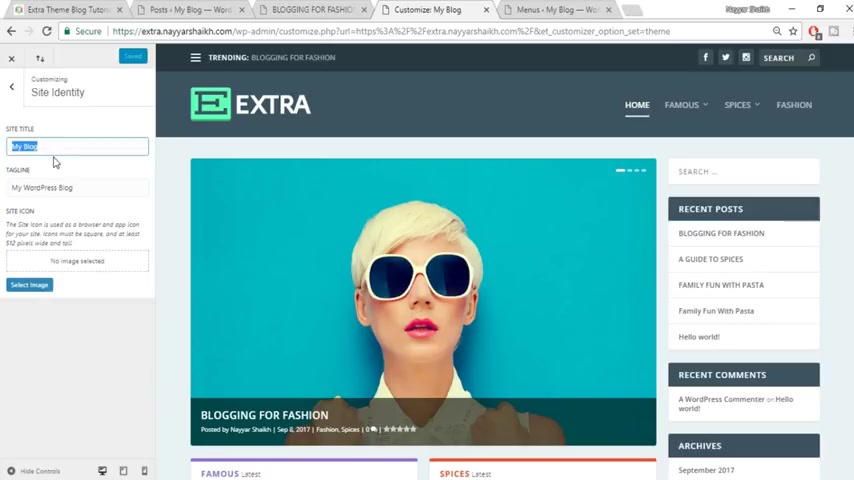
And you , as I said to you earlier , when we were purchasing the T MD hosting that we can change the site title in tagline later on .
So you can change that from your , for example , your website name or it can be block to OK .
OK ?
And tagline tagline can be , for example , best place for bloggers .
Fine .
Now we have this site icon over here .
This is basically the fab icon if you see the demo website at the top , this small icon , if you follow my cursor this small icon , that is the five icon .
So come back over here , go to click on this select image , click on upload files and select a square uh size uh square shape image .
OK ?
For example , I have my image over here .
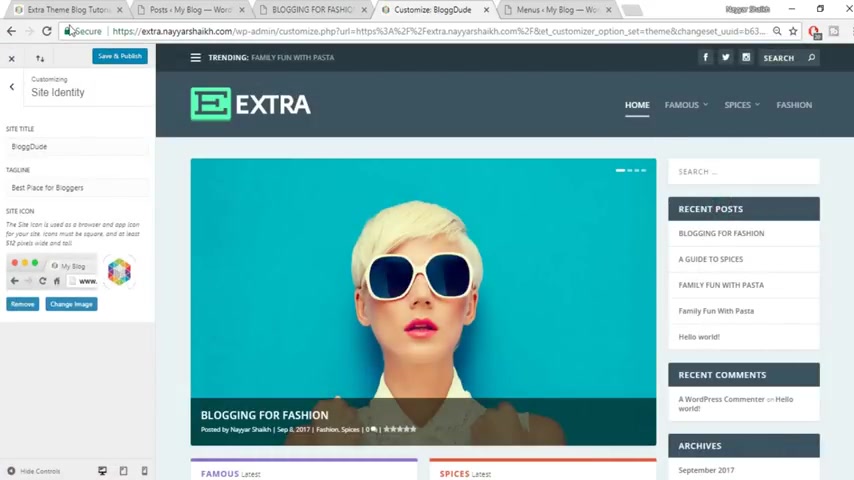
And control Zia , move me back to the center .
OK ?
And now you can use this as a template for your clock faces .
This is an eight inch disk .
However , this would work with a 12 inch uh five inch um however big uh clock face or small that you want to make it , it would work if you uh angle or rotate your lines and squares as you should .
Again , my name is Vicky .
I hope this has helped and if you have any questions , feel free to call me .
Condi is 1 808 266332 and I'm Vicky and my extension is 3 20 again , as always .
Thank you for your time .
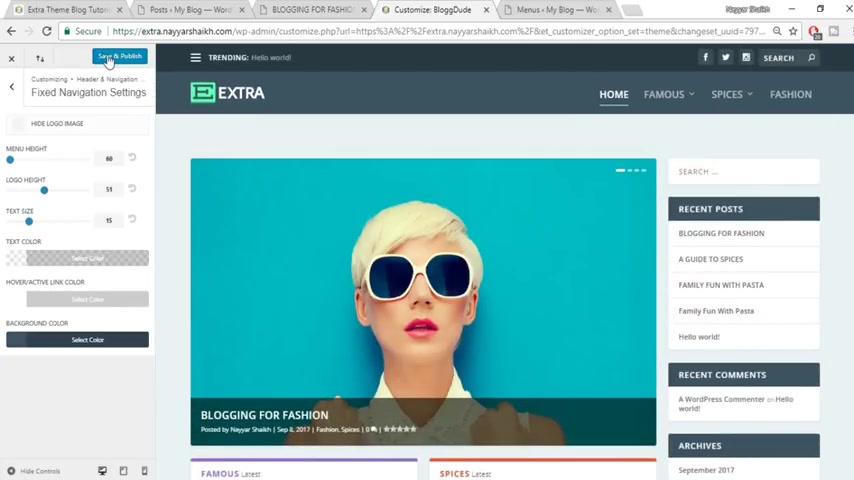
You can increase or decrease this text size from your fine .
Then we are letter spacing and some different options .
OK ?
Now click on save and publish and when we scroll down , as you can see this is uh the of the sticky header , OK ?
Now we can also make some changes for you .
For example , let's come back and fixed navigation setting .
So basically this is uh the basic navigation and when we scroll down , this is a fixed navigation .
So you can change these settings over here .
You can make uh this headers , this section quite smaller .
You can also decrease the text size because you know , you don't want the same thing for both .
When this user is using the website , he's scrolling down , he should see a small head , a small menu .
And when he's at the top , he should see a big menu .
OK ?
After you do so just click on save and publish .
Now click on this button .
OK ?
So we have done that .
Everything looks fine .
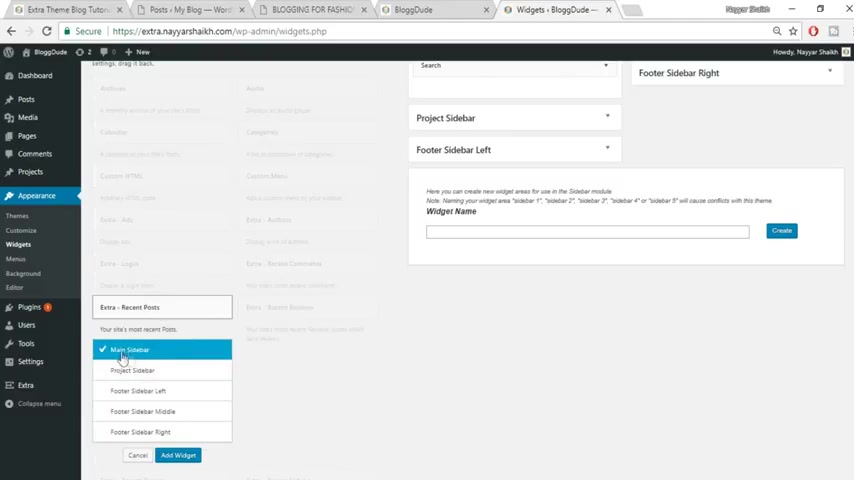
OK ?
Now let's do some changes over here at this sidebar .
As you can see over here , we have a beautiful sidebar , the recent post with all the thumbnail , this follow us thing , this Twitter and so on everything we we have over here .
So again , come back to the dashboard , how appearances and under appearances you will see witches , click on that .
OK ?
Now accept search bar , delete everything because we need the search bar .
The search bar is there at the top rest , delete everything , just click on your your delete , click on your delete and similarly for meta , OK ?
Now let's see after search we have recent post .
OK ?
So what you have to do , you have to select extra decent post .
Here it is extra decent post from your click on that and make your main side bar is selected .
Now click on add widget .
OK ?
So here you can add a title .
For example , here , the title is recent post .
So we can add a title .
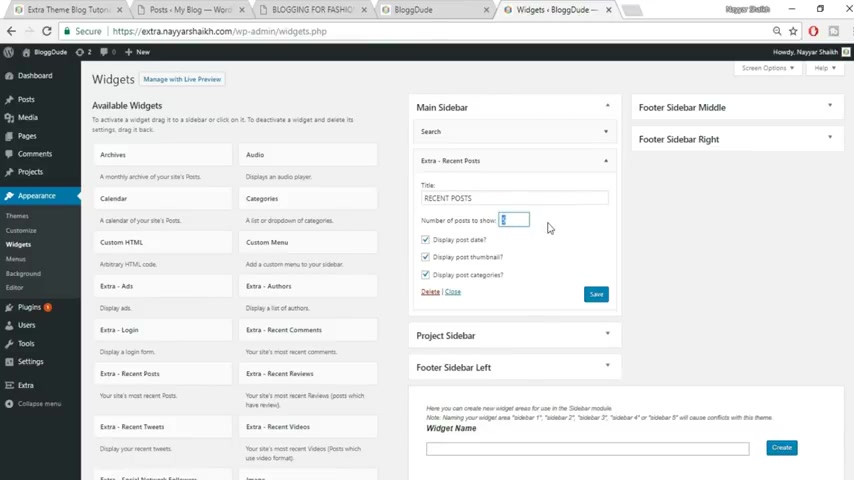
We can select how many posts to post to show five posts or four posts or three post whatever you want .
Now click on save changes and after that , we have follow us .
OK ?
So again , come back over here .
Now here we have extra social network followers .
So select that , make sure main side but is selected , click on add widget .
OK ?
Now we have different , for example , here , the first one is Facebook .
So you can put in your Facebook uh URL over here , for example , my Facebook URL S Facebook dot com slash shake or real sorry .
OK .
So you can have this over here .
Now , after that , uh there is Google API then you have youtube and so on .
So my youtube URL is youtube dot com slash shake .
OK ?
We have and so many different uh actually websites you can select all those things .
I will select only two or three which I really use , for example , Twitter and youtube and those kind of things and Facebook .
OK ?
Now Twitter , so my Twitter URL is Twitter dot com slash dealer .
Fine .
OK .
Everything is fine after that , just click on save .
Now , the third one or the fourth one is this recent tweets .
OK ?
So for that , we have to go first , let's minimize this click on .
Oh , here it will minimize this .
Now , here you see extra recent tweets , select that make sure main site is selected , click on add widget , OK ?
Fine .
Now we here we have to create first , create , create uh an app .
OK ?
You'll if you maximize this thing , the social network followers and go under Twitter , you'll see the link .
OK ?
Where is that Twitter ?
Here it is .
Here , there is a link .
OK ?
You click on this link , this link will help you uh to create uh uh your application .
That is very easy .
Let me show you how to do that .
OK ?
When you click on this link , you first thing what you have to do , go to apps dot twitter dot com .
So let's open this link in a new tab and make sure you are logged in .
OK ?
As you can see , I'm already logged in .
Now , click on create new app .
OK ?
Now you can uh name this app anything .
For example , I can name this as block to , OK ?
You can put in some description , let's add some dummy text .
Come on .
You don't have any tummy text to what ?
Let's add this text .
OK ?
Put in your website .
OK ?
Let's put this website over here .
OK ?
And you don't have to do anything .
Just take mark this create , click on create your Twitter application .
OK ?
Your application has been created now what you have to do uh you OK ?
Wait to wait a minute .
Yeah , here it is .
Now , click on all your keys and access tokens .
Fine now click on generate consumer key and secret .
OK ?
Again , click on generate consumer key and secret .
Fine .
Now you have all these things over here .
Now what you have to do , go to this section or this widget section and paste in all this information .
For example , let's minimize this .
OK ?
Here .
The first one is consumer key .
OK ?
So here it is consumer key copy this thing from your paste it over here .
Next is consumer secret .
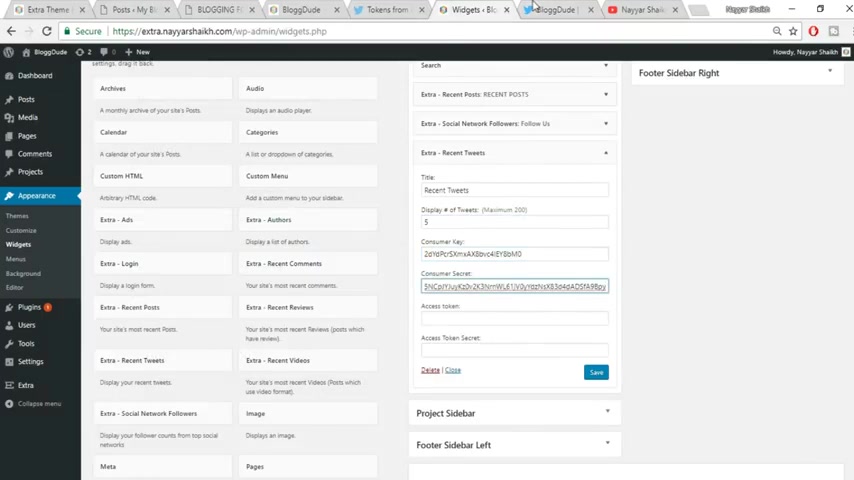
This is the consumer secret copy this paste it into your access token .
OK ?
So let's first .
OK .
Here it is the access token .
Now what do you have to do under token actions ?
Click on create my access token .
OK .
So let's see .
OK .
Here it is access token copy this paste over your access token .
Secret access .
This is the one access token secret copy and paste it over your click on save .
OK ?
Once you do so you will create your recent t to its like this .
OK ?
Now let's add this authors again come to widget .
Now let's delete this .
We don't need this .
OK ?
Now again , minimize this go to extra and authors .
OK ?
Here it is extra authors , main side by selected a widget .
OK ?
Click on save and after that we have recent reviews .
OK ?
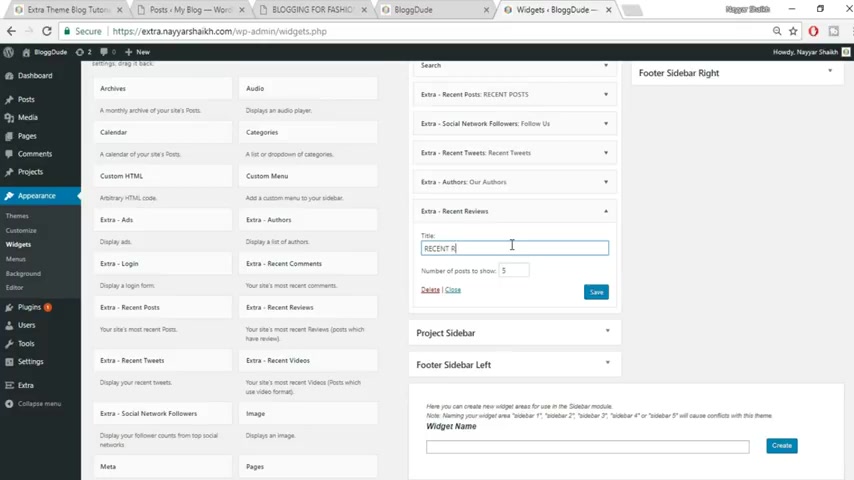
So extra recent reviews .
This is the one click on ad widget .
You can type in any uh you can give it any title , for example , recent reviews .
Click on save and the last one is recent video .
OK ?
So here it is recent videos , click on add number of post to show one and title recent VDO .
Ok .
And I click on save .
Ok , so everything looks fine .
Let's refresh the website and see the changes .
Oh guys , as you can see , everything is awesome .
Now we have the uh search bar .
We have the recent post .
We have our followings .
We have this Twitter over here as you can see all my recent we are showing over here .
We have our authors , recent reviews and recent video .
OK ?
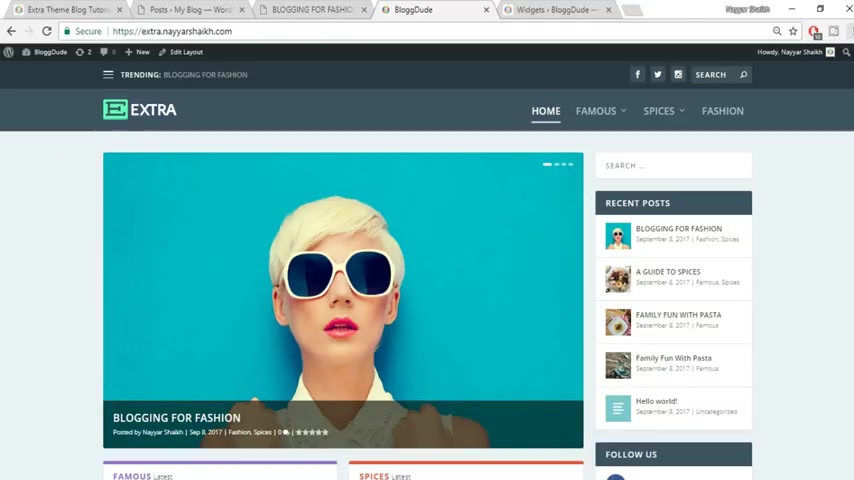
So I think everything is fine .
Everything is OK .
I think we have completed everything .
Yeah , we have completed everything guys .
So this is how you create an amazing and awesome blog or a news website , whatever you call it .
OK ?
So make sure you guys subscribe to my channel .
Also give a thumbs up to this video that would really help me and really help this video to spread .
Also share this video with your friends on Facebook , Twitter wherever you like it .
OK ?
And hope to see you guys next time .
Take care .
Are you looking for a way to reach a wider audience and get more views on your videos?
Our innovative video to text transcribing service can help you do just that.
We provide accurate transcriptions of your videos along with visual content that will help you attract new viewers and keep them engaged. Plus, our data analytics and ad campaign tools can help you monetize your content and maximize your revenue.
Let's partner up and take your video content to the next level!
Contact us today to learn more.