https://www.youtube.com/watch?v=eeJtoCPyQ5A
PROCREATE DRAWING - How to draw a face in side view!
Hi guys and welcome to Bank and draws today .
In this video , I want to talk about how you can draw a human head in a side view angle .
Um And the reason that I want to do this is because this is something that I have struggled with for a while .
But I think I finally cracked a method uh as to how to do it .
So let's just go in here and I think we're gonna stick with this brush .
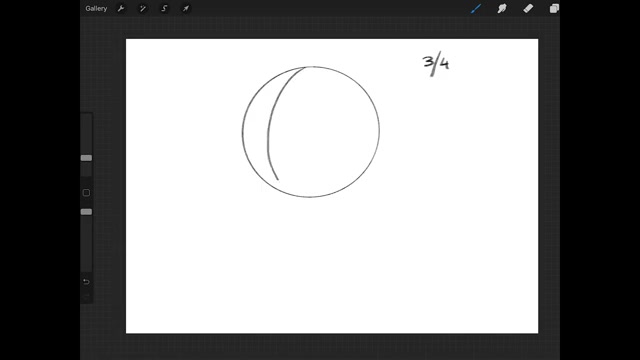
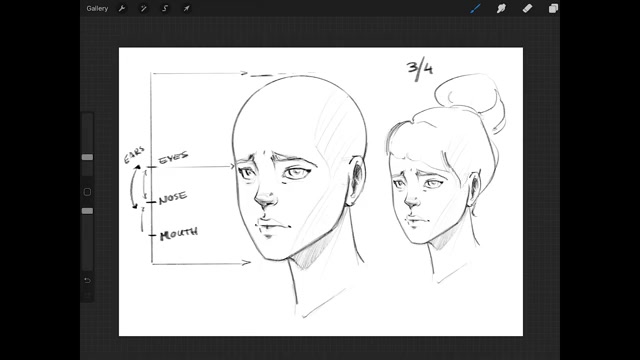
And so what I usually start with when I draw ahead is always the circle of the skull .
And this is also true for this method .
So if we go ahead , uh-huh , go ahead .
OK , I'll see myself up .
Um We draw a circle like this and remember , procreate has this great ability that even if you do like this and you can't figure out how to draw a circle .
If you just don't release , it will just naturally make a circle for you .
That's really amazing .
OK .
Since we're at an angle here , um we call this third of a quarter , I want to sort of outline like where the middle of my face is gonna be I think this seems about right .
I also kind of want something to indicate the side of the skull .
So I'll make a line here that will help me later with figuring out where I'm going to put my ear .
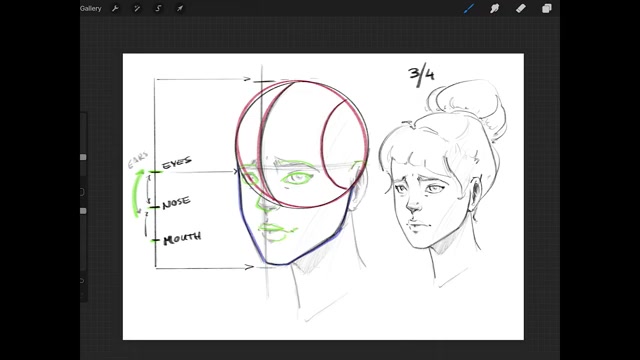
So then I want to plot in the jaw of this face and this is , this is where it becomes a little difficult because then you have to figure out where do you want your forehead to be and where do you want your jaw to be ?
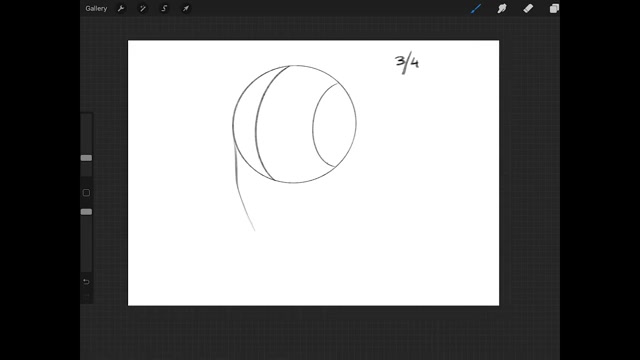
So I usually make a shape like this .
And then when I draw up the jaw right here , I make sure not to go all the way back to the school because you want this part right here to stand out .
Now , if you're having trouble with the jaw , I usually try to say that we have like one , 234 like angles in this jaw .
So it becomes shape like this .
Those are the points that you follow .
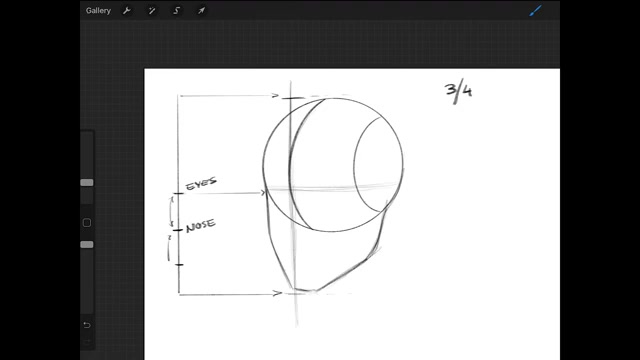
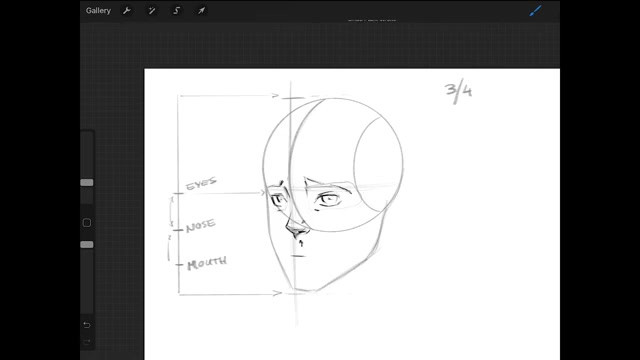
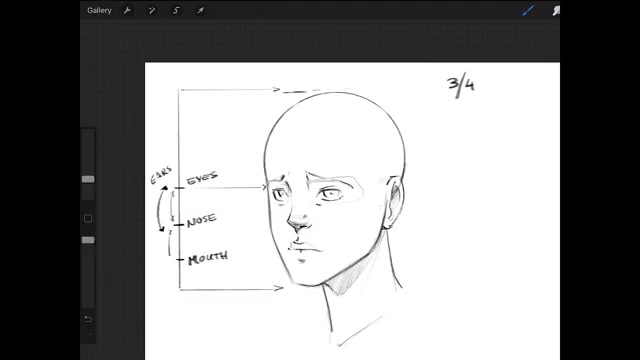
Now , when you plot in the facial features , the eyes , the nose and the mouth , um there are some help methods that you can sort of use .

Like , for example , if you draw a line down like the middle of the face , almost the middle of the face , it has to sort of make a tangent with the line right here .
And then if you take this spot right here , maybe that was a bit too big and make it align with the top of the skull and then the chin , you can just make some arrows to show it better right here .
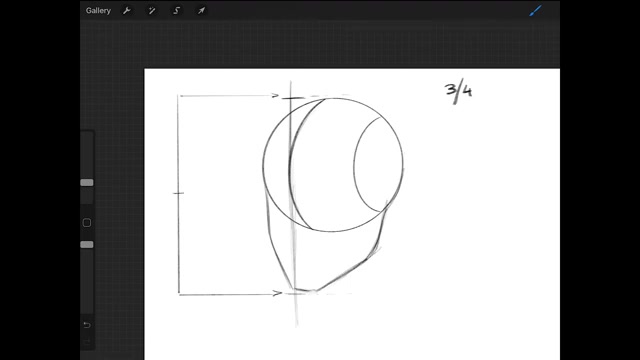
That then if you take that line and you find like approximately the middle right here , maybe this line right here is a little bit smaller than this one , but it's somewhere in the middle and it's sort of tangents with this part right here where you have the start of your chin meeting the circle , that's where the eyes are going to be .
So we would just plot that in like that .
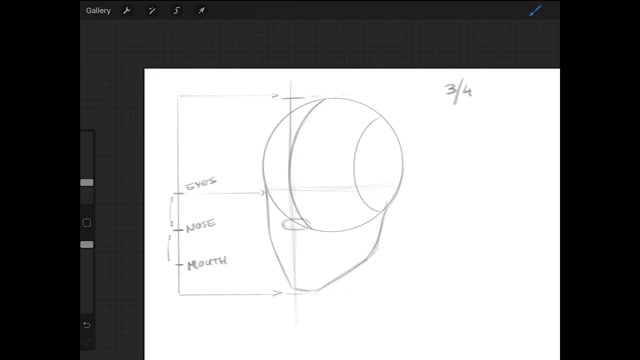
And then we make two lines here .
They approximately have the same distance between , between them .
Oh We just tried eyes there here .
We have the nose and they , these are just , you know , helping lines .
It doesn't mean that it has to be at this exact spot , but it's , it's just a nice guideline .
But if you want to put , for example , the nose here a little on top , I mean , that's fine as well .
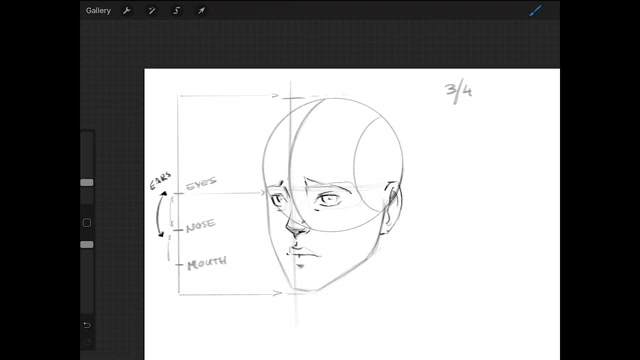
But as long as you stay in this kind of area now for drawing the , oh sorry , we just gonna write mouse here for drawing the eyes and the nose and the mouth and ears .
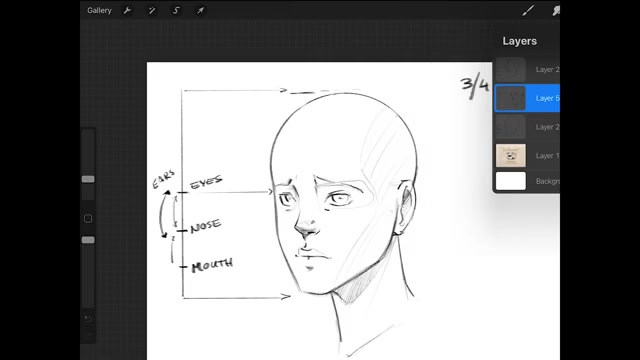
I usually like to make another layer , turn down the opacity of the first layer where you have like the lines of the face .
This is just to help you see a bit more of what you're doing .
I think I'm gonna place the note around here , I think that seems right .
Right .
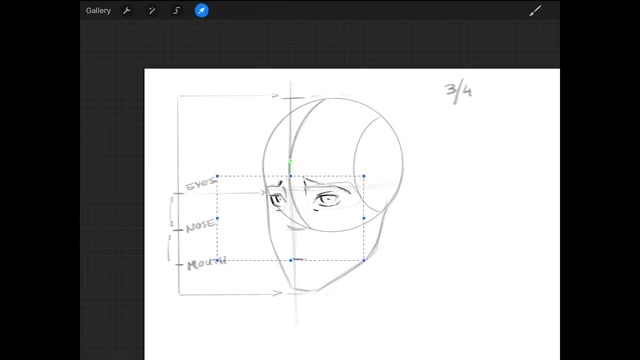
So maybe I'm a little bit above this line right here and then the mouse approximately here and then for the eyes , the eyes can be a little bit tricky , but usually it becomes a little bit easier if you plot in like the rid of the nose first .
So if you know that the rich is gonna be right there here , then the eye sockets somewhere around here and that makes it a little bit easier to make the eyes .

Now , for starters , we're not gonna put that much detail into the ice .
Just want something that we can work with .
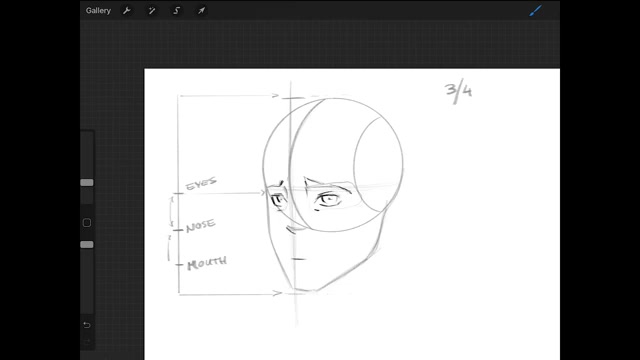
Now , for the shape of the eyebrow , this is something that kind of forms the face a lot actually .
So if you wanna make a person angry , you maybe raise the brow a little .
If you wanna make person sad , you make the right part in this case a bit lower .
Let's say we're going with sad .
Ok ?
I think that looks about right ?
So let's just stay with that .
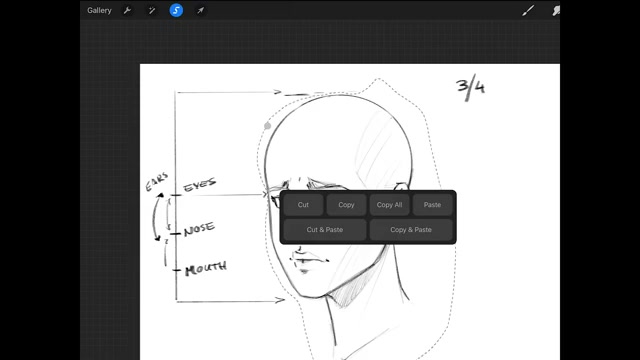
But the good thing about procreate is that if you feel like you're doing it wrong , you can always go in and select what you're doing and then you can move it around a little bit .
But I feel that for this purpose , you know , it's quite right .
Maybe , maybe we should take it out just OK .
Thank God for digital painting , right ?
OK .
And not in the nose .
What I usually do with the nose is I make sort of like a triangle , the nostril I tend to make noses that looks a little bit like , like it's a cat person or something .
Usually when you draw the nose , you can sort of tell whether the mouth is too low or too high up .
And I think the line that I did for my mouth right here is it was a little bit too low , So I'm gonna raise it a little .
And the reason that I can tell this is because usually the distance between the nose and the mouth is not that it's not that wide .
So I'm gonna take it up a little bit .
Now , when you get to the mouth , that's also usually where , at least for my part , I decide if I'm drawing a female face or a male face .
And that is because if you want to draw a male face , you don't really have to do that much with the mouse .
You can leave it like this .
Usually when you are drawing a female , the lips become a little more plum .

So this is sort of what makes or breaks the face for me .
Can you even say that ?
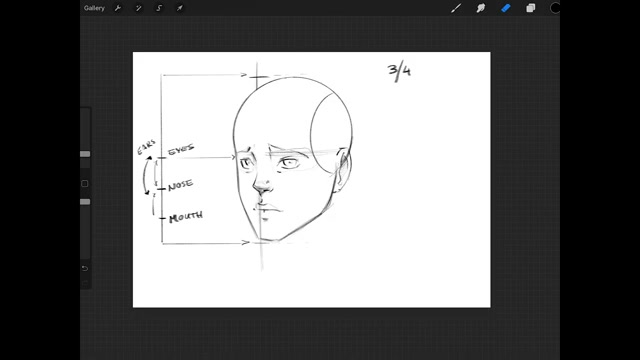
Well , I think you get the picture now for the ear , there are a little bit of a shortcut as well .
Um What I usually tell myself with the ears is that I want the ear to be at a distance from around the eyes and then somewhere down to a little below the nose ears are usually bigger than we tend to draw them .
So that would mean that we would be around here to hear with our year .
And this is also where it becomes really helpful that we have this sort of nuked right here because we know that the ear is going to be resting on the jaw here .
So now we plot in the ear just like that .
OK .
So far so good .
Now , another benefit of keeping these layers separate is that now you can go back to this layer .
I'm just gonna to duplicate it for the sake of showing something later on .
Um But now you can go back to this layer and you can erase some of those annoying lines that you're not gonna use anymore .
So you can sort of see what you've been doing , see that kind of helped a little bit .
Now I'm gonna make another layer again and now I'm gonna try to give this person like a neck and a good trick for the neck is that just around the ear here , you draw a line down just behind the chin , usually have like a little bit of the throat right there .
I'm just gonna indicate that this uh area right here is in shade like , so that little thing we did before with the skull right here can actually be pretty helpful too to also help us plot in where we have a shade usually .
So this area right here will usually be a little bit darker .
Now , we're at a point in our face sketch where we can sort of merge the whole thing together if we want to , I'm still gonna keep this there with the underlying sketch because maybe we are gonna return to that layer .
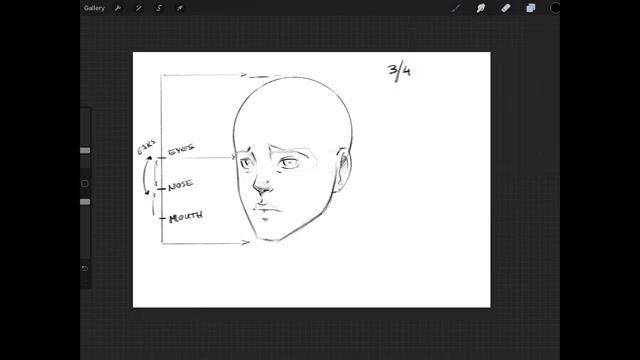
But for these features right here , I think we're just gonna merge those pieces together and then I'm just gonna go in and mildly erase I outlined for the eye sockets .
And now we can go in , we can refine it a little bit .
Maybe since we decided that this is a girl , we can make the chin a little smaller , a bit more feminine like that , right ?
So OK , let's say that that's enough for now .
Um just like a quick mini tutorial on hair , not that it's that necessary for drawing the the sculpture of the face .
But I think it's nice to just show you guys a little bit of a hairstyle trick because the good thing about having uh the layout of the skull like this is that now you can pretty much shape the hairstyle .
After that , you just have to keep in mind that the hair will usually add a little bit of volume to the skull .
So let's say we're making a very simple like straight face or not straight face , straight hair , straight hair is not , it doesn't have that much volume So we're just gonna add a little bit of extra like that .
And then afterwards you can go in and you can erase this line right here .
Of course , if you have a hairstyle with a bit more volume , we can try that .
Maybe we can make a hairstyle that has a little bit for you .
For example , maybe you have , then you can go in and you can erase , let's go with that .
Maybe we should even add a little bit over over here .
So yeah , there are many different kind of uh hairstylist that you can put on a face as soon as you have the skull , all you have to take um into account is that little bit of volume on top and then of course , the hairstyle matters as well .
So if you have straight hair , it's really close to the skull .

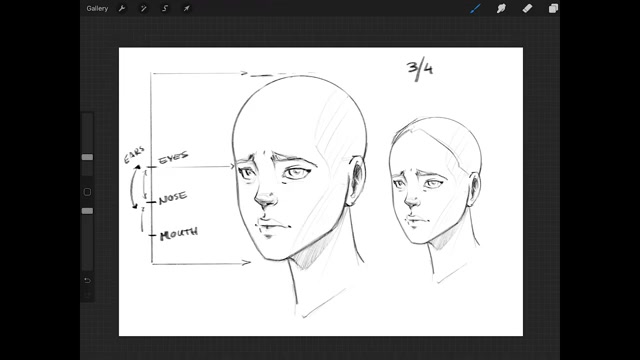
If you have a bit more curls or hairstyle like this to it , it raises a little bit from the skull , just a quick recap to it , start out by drawing a circle for the the top of the skull , drawing those helplines figure out where you want to be like this .
So you guys can follow after that , make sure that you create some lines that are gonna help you with pinpointing your eyes , nose and mouth , sorry , and also ears .
Make sure you find out what kind of look you want for the face and those facial features will be the timing of that and then lastly put in the neck .
So those are the simple steps and also try to keep in mind that the length of the face , the eyes are almost always at the center of that face .
And that doesn't matter if you draw it from um a side view angle or if it's in profile , if it's straight on the face , eyes always around the center , if you're curious about this brush that I used for this , um I'm afraid that I'm not using any of the brushes that is in the original procreate .
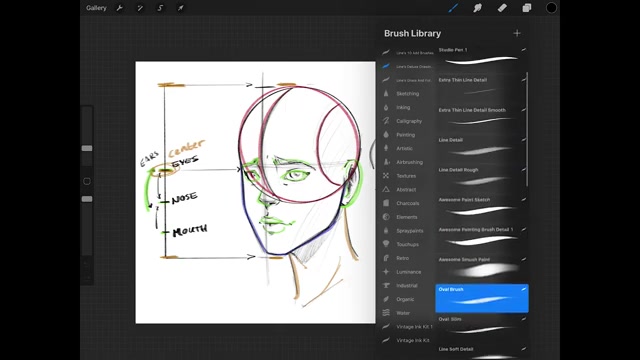
I'm using my own oval brush , which is really good for sketching .
And this brush is part of a pretty extensive brush set that I used , which is called delux drawing brush set .
And of course , this is something that is available um at the mere amount of I think it's $11.10 euros and you can find a link to this um in the description of this video .
So thank you so much for watching guys .
If you like this , then give it a like and subscribe if you want to see more of what I'm doing .
And if you have any comments on this , if you have any advice for me , if there's something that you felt like I could do easy or you have a trick yourself , then please comment and share it not only with me but with all of the subscribers right here .
So yeah , thank you .
For this .
Have a very lovely day .
Bye .
Are you looking for a way to reach a wider audience and get more views on your videos?
Our innovative video to text transcribing service can help you do just that.
We provide accurate transcriptions of your videos along with visual content that will help you attract new viewers and keep them engaged. Plus, our data analytics and ad campaign tools can help you monetize your content and maximize your revenue.
Let's partner up and take your video content to the next level!
Contact us today to learn more.