https://www.youtube.com/watch?v=hN_H263niWY
How to Draw a Female Face - Art Tutorial【My Sketching Technique】
Hello , everyone .
Welcome back to my channel .
I'm brushes and bunnies .
And in this video , I'm going to show you how I draw the female face .
There have been a lot of requests in my previous videos asking me to show you guys how I draw a face in my own style .
So in this video , I'll be showing you the front facing view , the three quarter view and the profile view , which I'm actually not that great at .
But I figured I would show you the technique that I used .
Please note that this is for female faces only .
I will be doing a separate video for male faces as well .
I'm going to try to explain this as best as I could .
It's always a bit hard for me to explain my actions and words , but I did draw some really handy guides .
They are rough guides , but they are mostly the the guides that I use when drawing faces .
You can find this on my Patreon and it is available for my Patreons .
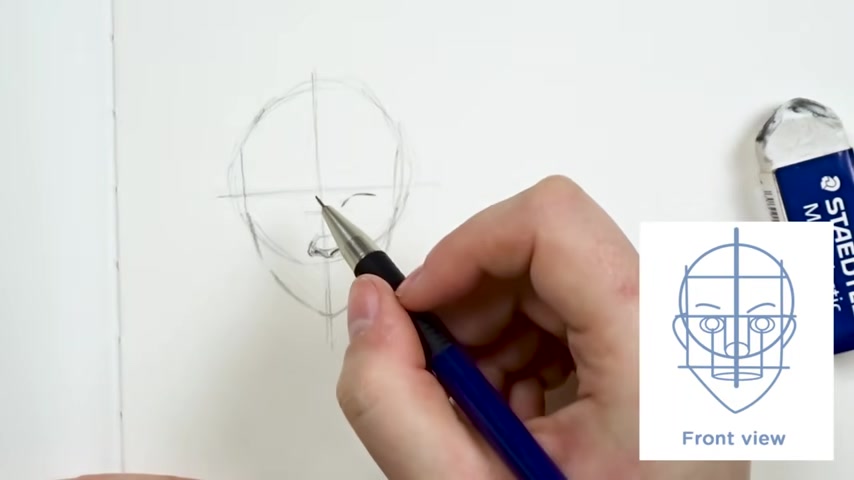
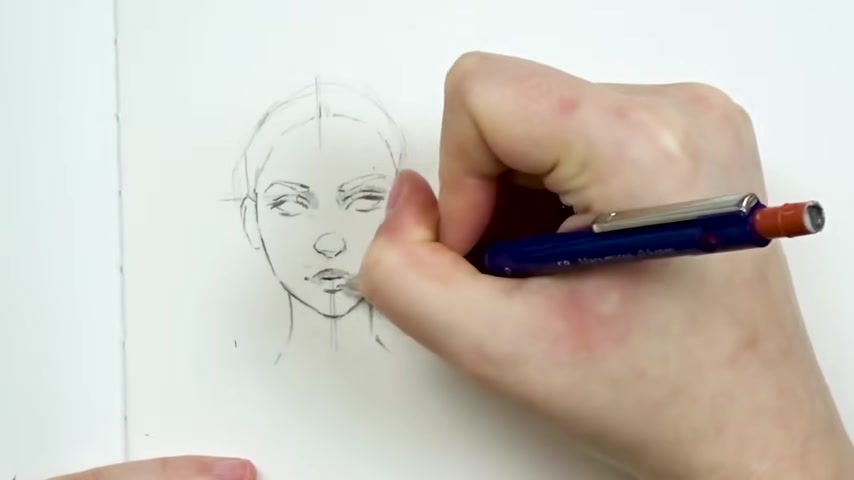
I will try to explain it as best as I could starting with the front facing view of the face when drawing a face no matter what sort of angle I will be drawing , I will always start with a circle shape and this is just the general base of the head for myself .
And then I will then expand with a reference line that typically cuts down the center of the circle .
And this will determine the angle of the face and where I will draw the facial features for the front view .
This is typically right down the center .
I will then start with the nose and the nose will appear directly on the line at the very bottom line of the circle .
Sometimes it will appear above , sometimes it will appear directly on the line .
It really depends what sort of features I'm going for .
But typically I will draw it above the circle in terms of placing the eyes in the correct location .
I usually use the ends of the nostrils .
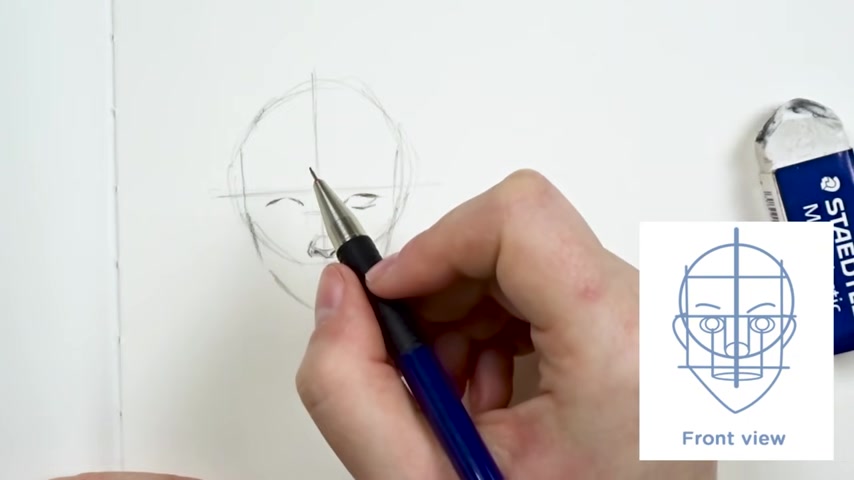
So where the nostrils end , this is my indication if I were to draw a line straight up to the eye location , this is where I would start drawing .
So I would place the corners of the eyes to align directly with the the ends of the nostrils or the tips of the nostrils .
In terms of the shape of the eye .
This will be of course , according to what you want to achieve .
But I tried to base it on the width of the nose itself .
I will tend to draw a little bit bigger , but that's just my stylistic preference .
But this is sort of a easy way of kind of proportioning your eye to your nose shape .
As for drawing the lips and mouth , I typically use the eyes or the pupils of the eyes as an indicator of where the corners of the lips will end .
So basically , if you take the pupils , if you draw the pupils of your eye and you draw a straight line downwards down the face , you will basically align the corners of your lips with that line .
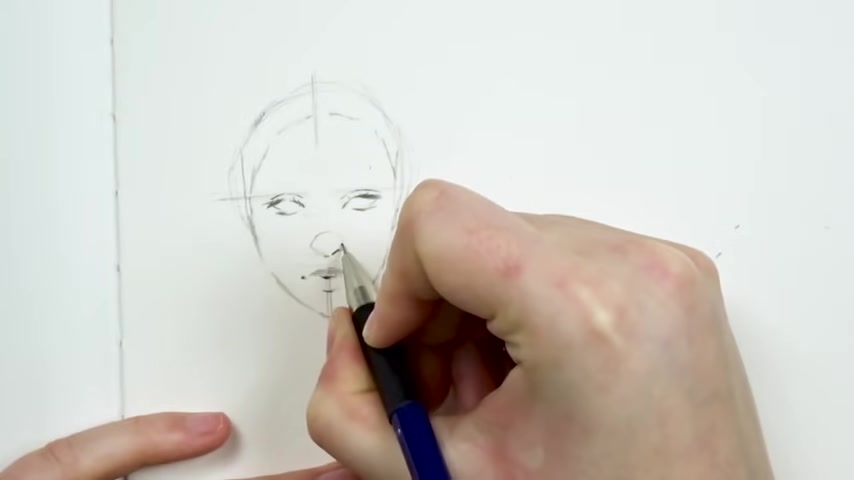
Um that lines up with the pupils of the eye .
So that's how I determine the width of the mouth as for the location or placement of the lips in general or of the mouth in general , I basically take half of the length of the nose to determine how much space will appear between the nose and the upper lip .
And from then on , I basically will um draw or place the mouth using that space size .
I hope that this makes sense .
It's a little bit hard to describe as for the eyebrows , they are generally much longer than your eye shape .
Again , this depends on the character you're drawing .
I typically like to start drawing them before the eye and extend them out outside or further than the eye is drawn .
Um So I like to have longer eyebrows in , in general for the year .
I have to be honest , I don't really know how to draw them quite properly yet .
So a lot of you guys have been letting me know that I'm not putting them in the proper location from what I understand .
You have to start drawing them to align with your eye and also um kind of basically draw them so that it aligns with the nose .
So the entire space between the eye and the nose is where the ear should be .
Please correct me if I'm wrong or if I got this wrong down below in the video .
Comment .
Uh But I , I I've been trying my best to learn this for the hairline .
I typically like to take the space between the eyebrows and the top of the circle and cut it more or less in half .
And this is where I will start the hairline in the top of the circle is where I will basically have the top of the head or draw the hair .
And from then on , I will just draw the hairstyle .
And again , this does depend on the character or the sort of angle of the face .
But generally speaking , this is what I will tend to do in regards to the three quarter view .
I really love drawing this view .
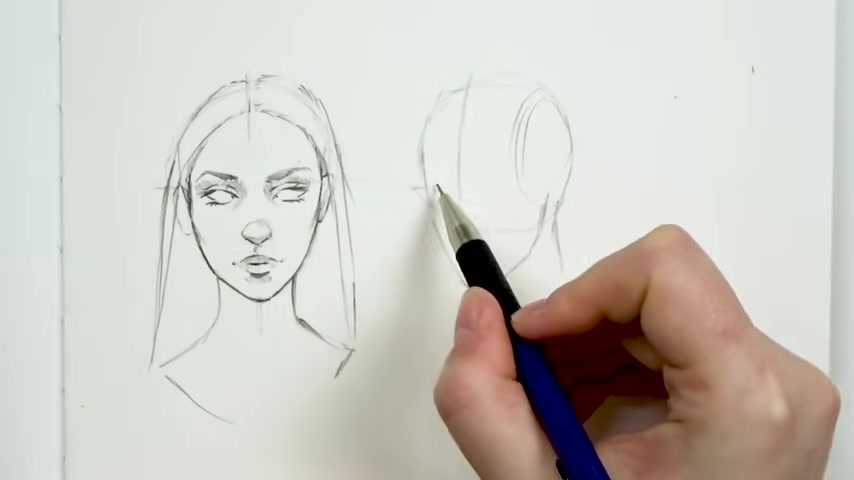
It's one of my favorites and it's actually the easiest one for me .
I think there's a lot of expression that you can capture with the general angle of the kind of the three quarter view and the trick to drawing the three quarter view is actually using the reference lines , the line that I draw down the middle of the face and also across to indicate where the eyes will appear .
This is where you can really play around with the angles , the general kind of angle or shape of the head .
And it actually provides you with a kind of the the the key location of how to start drawing your facial expressions on where exactly on the face , you should draw this sort of angled kind of um profile or angled kind of facial expression .
In terms of the rules of drawing in the three quarter view , it's pretty much the same as the front view that I talked about .
Already .
More or less you want to utilize the circle as an indicator of where to draw the nose .
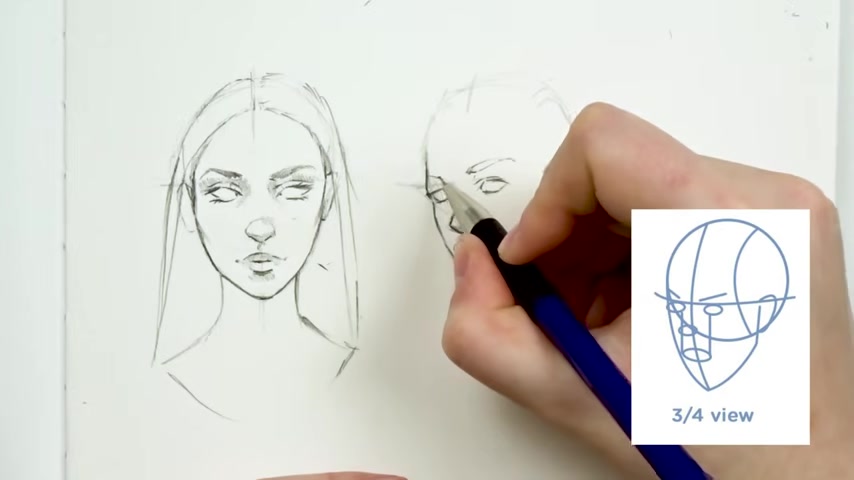
And from then on , you want to draw the eyes according to the width of the nose , of course , you need to adjust according to the actual angle .
So for example , the the eye that is kind of hidden behind the nose needs to be drawn a little bit more um maybe a bit smaller or on a different type of angle .
And this honestly comes with practice .
There's nothing really that I could show you how to do perhaps in a more detailed video , but more or less the rules still apply in terms of how to um uh basically draw , where to draw the mouth , where to add the eyes , where to like the length of the mouth .
For example , everything I talked about already is applicable for the three quarter view .
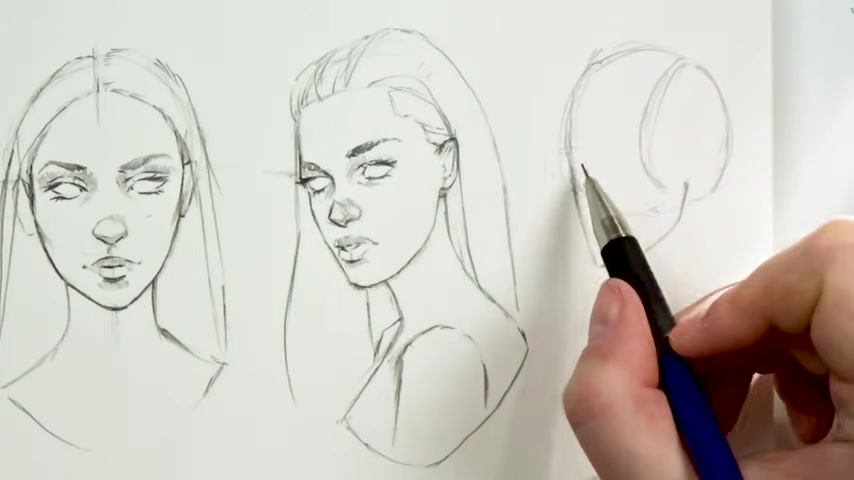
The profile view is perhaps one of the only views that I don't practice nearly enough as I should and I probably need to practice a lot more .
Um So you're gonna see it right now that I'm drawing something , but I had to kind of refix it halfway through because the , the base of the skull was just not large enough for her head or for her facial features .
But generally speaking , the rules do apply the same , you start off with a um with a circle and instead of using the reference lines like the profile and three quarter view by drawing in the center or across , in this case , you want to use it as um uh to , to basically just draw up a draw right away .
Um So , II I start with a kind of a curved line from the top or the front of the face and then I would immediately draw the jaw and it would end about halfway through the back of the circle .
Um So , yeah , this is more or less how I would start drawing the profile .
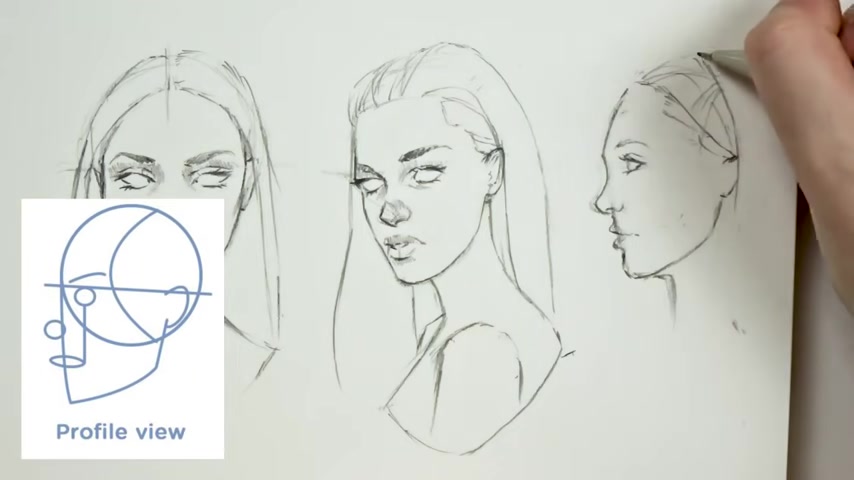
And um yeah , from then on , I would start drawing the facial features like with the same sort of rules that I've already applied with the three quarter and the profile and the the front facing view where the nose aligns with the end or the bottom line of the circle .
Um And then the mouth as well is essentially like the corners of the lips aligned with the pupil of the eye .
More or less the same rules that I've already talked about .
I do find this the trickiest one .
So I do apologize if I don't explain this properly or if I'm lacking some of the basic fundamentals of drawing this face um or the , the profile view .
Um There are like I need to say that there are a lot of wonderful resources out there that you can look at on Pinterest and also just drawing books in general .
I do find just drawing it for yourself first .
Really does help and then you can look at more help guides in terms of um learning more of the fundamentals of drawing the faces in general .
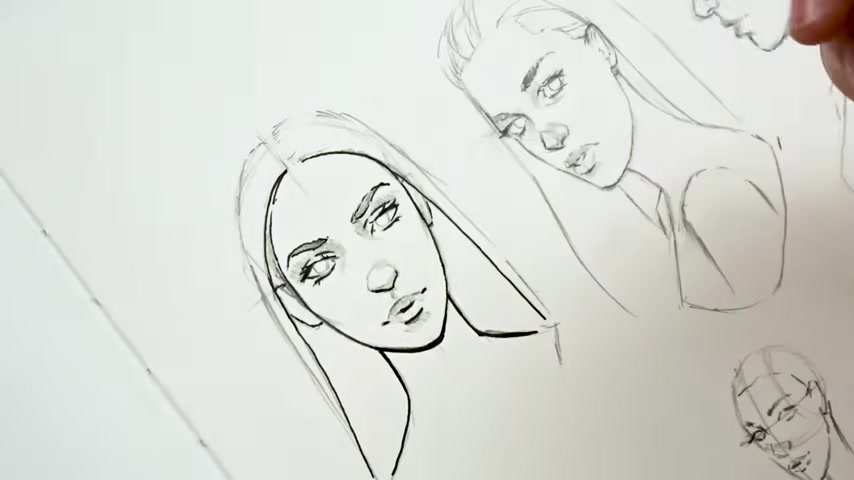
I hope that this video is helpful for you to give you sort of like insights to the way that I draw characters and draw faces in general .
Again , this is only for females .
I will be working on a male version very soon .
Um If you guys have any other sort of requests on what you want me to show you , please let me know in the comments down below .
I love reading your ideas and what you would like for me to do .
And yeah , I'll see if I can , if I can do it .
Just keep in mind , I can't draw everything yet .
So I've been practicing very , very hard to get this sort of portrait work , right ?
But yeah , I hope that this video did help you also to learn some of the basic fundamentals .
I'm sorry .
And I do apologize if I missed out on specifics .
I'm really not good at explaining like on a technical perspective of like exactly , you know , yeah , like from this like point on like you need to split it to three quarters or like , you know , just getting into the really nitty gritty details .
I find this kind of complicated for even for myself to learn from .
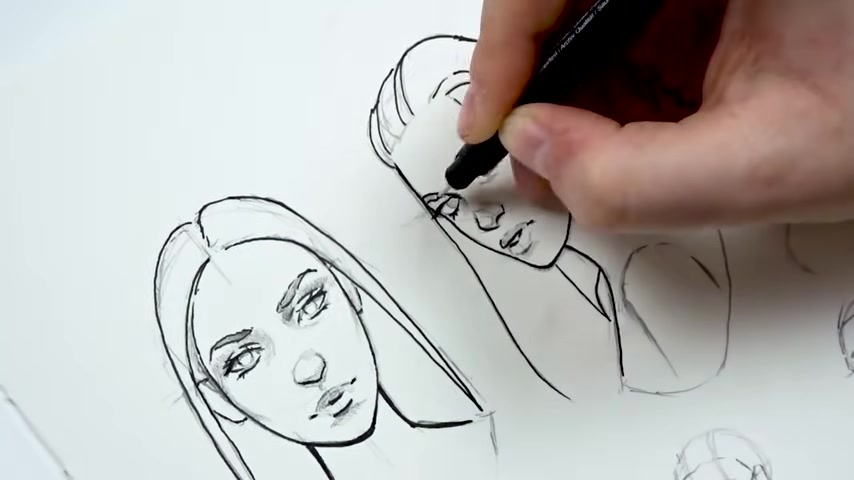
So I try to break it down even further than that by just going to , you know , simple , using simple geometric shapes and also using simple reference lines .
So in that case , my drawings may not be as accurate as they as they should .
But then again , I'm not going for a realism look .
And this is more of like showing you guys the , the style that I I do or the style that I'm actively pursuing .
So I do hope that this video did help you .
Thanks once again for watching this video .
Um Please give it a big thumbs up if you did , don't forget to subscribe to my art channel for more art videos , live streams and uh product reviews .
And yeah , I wish you guys all a lovely day and keep trying , keep being awesome and we will see each other very soon .
Bye .
Are you looking for a way to reach a wider audience and get more views on your videos?
Our innovative video to text transcribing service can help you do just that.
We provide accurate transcriptions of your videos along with visual content that will help you attract new viewers and keep them engaged. Plus, our data analytics and ad campaign tools can help you monetize your content and maximize your revenue.
Let's partner up and take your video content to the next level!
Contact us today to learn more.