https://www.youtube.com/watch?v=5lkXFqN9r1E
How to Master Digital Art on Your iPad - Procreate Tutorial
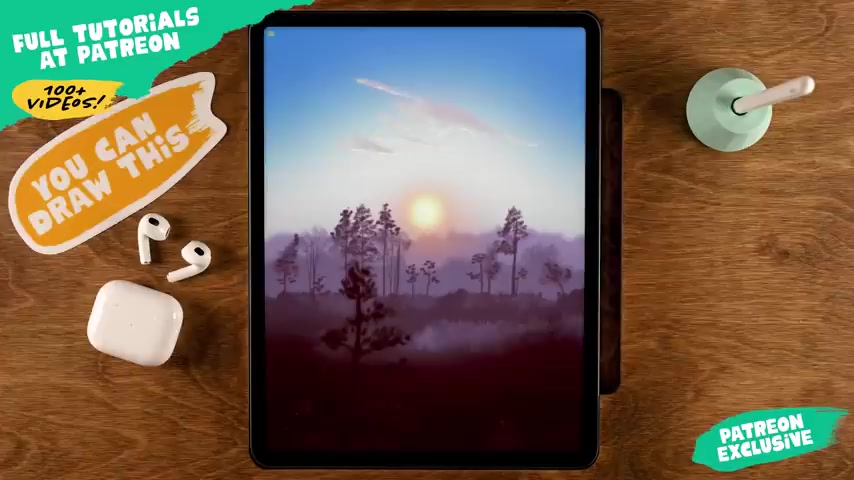
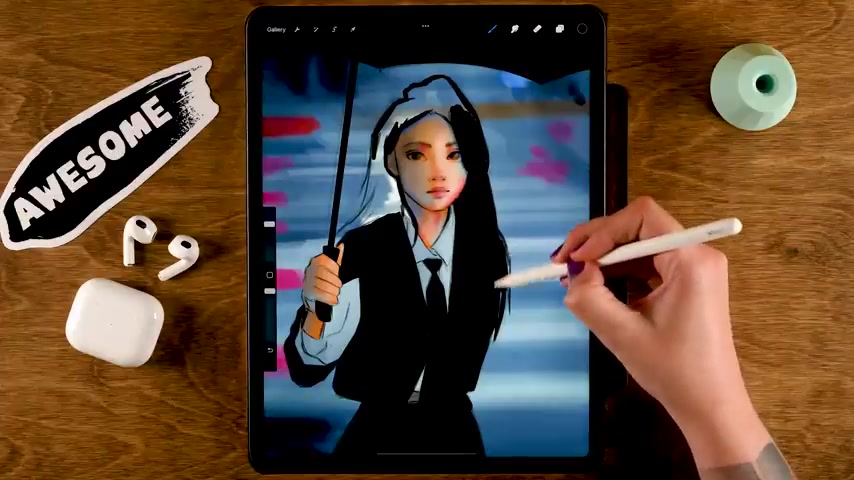
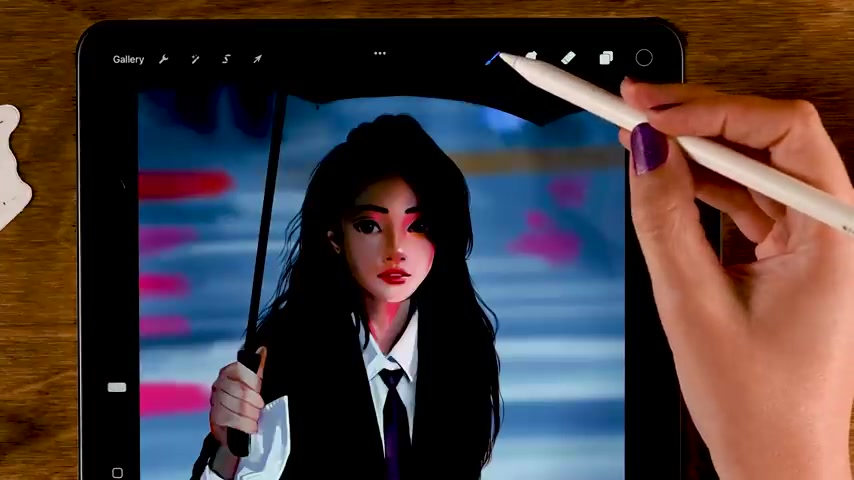
You can draw this too .
I've never been more excited about a video in this video .
I will show you exactly how you can approach creating an artwork like this one .
So it's not a step by step , but you don't want to skip this video because it's packed with super valuable information .
It's a complete breakdown of my painting process and I made a summary of the most important steps so you can start creating your own masterpiece .
And if you are hungry for more after watching the video , then come and join me at Patreon .
I have more than 100 procreate tutorials there .
Let's get started .
I started this artwork with a sketch and to create the sketch , I used a reference image which I have links in the description .
It's a way to get your idea down on paper or all your digital canvas without committing too much to the final results .
Yet .
Now when you follow a tutorial , everything is broken down into easy steps .
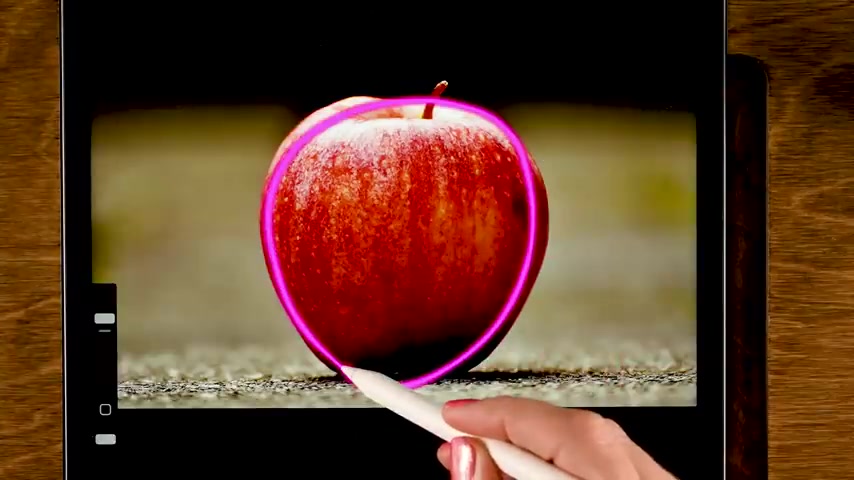
Now when you sketch yourself , you need to do that it for yourself , you need to break things down into easy digestible steps and you can do that by figuring out the basic shapes of your subject .
Now , you can find basic shapes like on the inside of a subject .
For instance , an apple has a circle inside or when you draw a house , you'll see a block and you'll see triangles , you can build your subject up from the inside to the outside that way .
But you can also work from the outside to the inside at finding negative shapes .
And it's kind of like trapping your subject inside of a shape .
And by combining these two things , you have a really powerful tool .
And while you do that , while you use those basic shapes from the inside to the outside , outside to the inside , always make sure to compare sizes and angles .
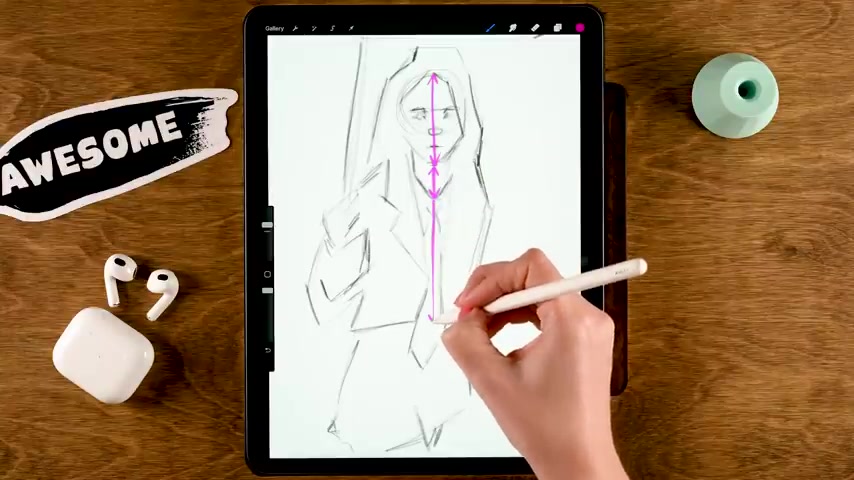
I'm constantly trying to compare the size of in this case , the head compared to the full body for I try to compare angles for the jacket is one angle a bit different than the other angle .
And how long is one part of the jacket compared to another part of the jacket for instance .
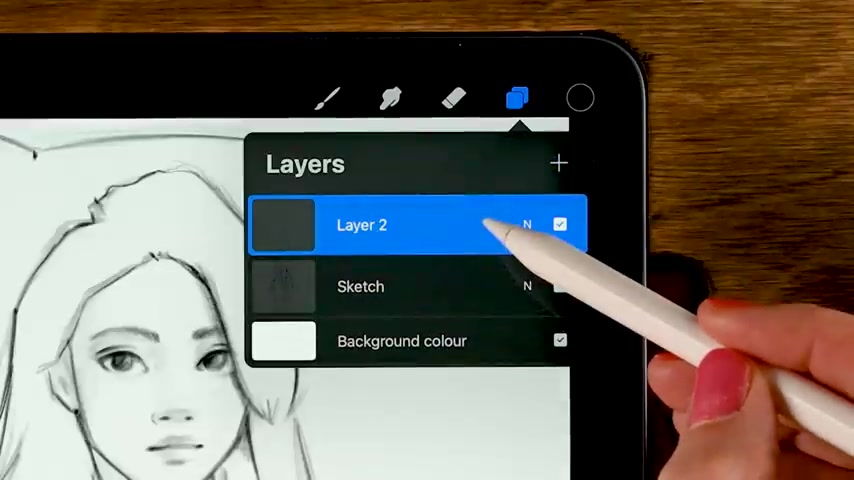
And the great thing about sketching digitally is that you can layer your sketches .
So you can start with a really rough sketch , just trying to find those , those big shapes , those basic shapes and those angles .
And then making a new layer on top of it , you lower the opacity of the first sketch .
And then on a new layer , you can start refining your sketch .
You can take an even closer look at those angles , compare sizes and use those first lines that you have put on your cameras , use those as a guide as a rough guide to refine your sketch .
And I often like tune this multiple times .
Actually , when I sketch a complicated subject , I usually make about three sketches .
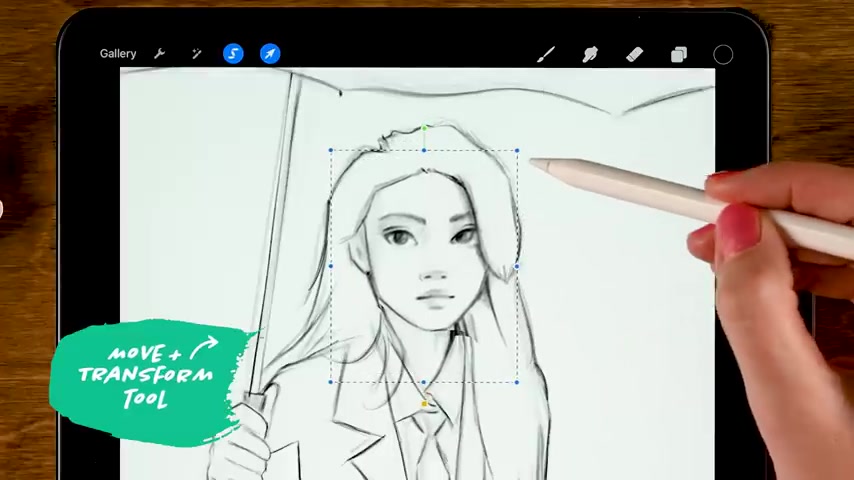
First one is really rough just so that I have something down on my canvas and I'll make a second one on top , which is a bit more refined and then I'll make a third one and I try to make that one as refined as possible because if you try to get your sketch , if you try to get that right in that early stage , it'll save you a lot of pain later in the process in the early stages of sketching , it's still easy to make adjustments .
For instance , you can easily use the move and transform tool appropriate or use liquefy to move parts of your sketch around .
Well , if you do that later in the process , once you have made a lot of details , things will look more distorted when you do that .
So try to really take your time to get a proper sketch before you move on to adding the colors to your painting .
Now , if you feel like you struggle a lot with sketching , then try to start with simple objects .
First , you can just sketch everyday objects around your house to improve your sketching skills .
And even if you just have 10 minutes a day to sketch every minute you sketch , you will be improving your skills .
Now , once I have my fully refined sketch , I like making a new layer underneath my sketch layer .
And the next process is a little bit like sketching in this stage .
I like to explore what colors I would like to use and I roughly lay them down .
So there's really no need to get the exact color that you would like to have in your final piece .
What I like to do is just get a color that is relatively close .
So if I want an area to be blue , for instance , I'll just grab a blue and it doesn't have to be the exact blue , but it'll be like a starting point for me .
And then at a later stage , I can paint over with different colors .
I just like adding a bunch of colors using Gaussian blur in between to get a vague blurry background .
And when adding those base colors to a painting , it's really important to have like a logical order of layers .
I try to think of what areas or what parts of the painting are like a bit challenging where I don't want to paint to blend with each other .
Like for instance , around the hair , I don't want to have to be very precise around that area .
I want to be able to just lay that down without worrying about the background for instance , same goes for the face and for the ear and for the jaw area , I want to be able to paint over there with without worrying about going over the hair .
So for these different areas , I make separate layers .
So I make a separate layer for the face and for the hand , because that way when I have it on a separate layer , I can later use alpha lock or a layer with clipping mask and just paint on those areas with bigger softer brushes without going over other areas .
So for instance , now over here on this layer , I have alpha lock turned on and I can easily add different colors .
I'm adding blue for the shadow area , for instance , without having to worry about going over the hair area , not that there really is a hair area yet , but still try to plan your layers this way .
Now while I'm still in that phase of laying down the base colors , I already try to lay down some of the shadow areas and some of the lighter areas , but I'm not worrying too much about the color shed just like what the base goes for the background .
I am trying to add some variety like adding some warm tones like these pinks and some blue tones for the shadows , but it's all still very rough .
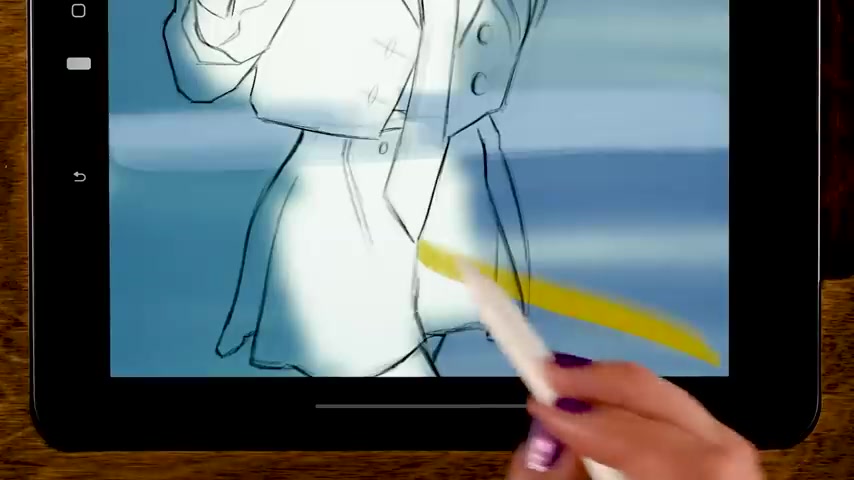
And when you want to create big areas of color , like for instance , the jacket and the skirt , it can be handy to use the selection tool for instance , also because I want the outline of the jacket to be nice and crisp and the selection tool does that for me .
So I'll just trace the entire outline of the jacket and then I'll just use color fill .
So I'll have the base color of the jacket and the skirt right away .
Now , for a jacket and a skirt , I'm working on one single layer , you could make a separate layer for like the blouse that's underneath the jacket .
But I'm trying to use as few layers as possible to keep things simple .
And also these areas aren't too complicated .
It's mostly with areas like hair that I like to work with separate layers .
This hair has like a hairy edge and it's just more difficult to keep an area like that clean and with hair .
I just want the freedom to paint wherever I want paint as much hair as I like without worrying about edges .
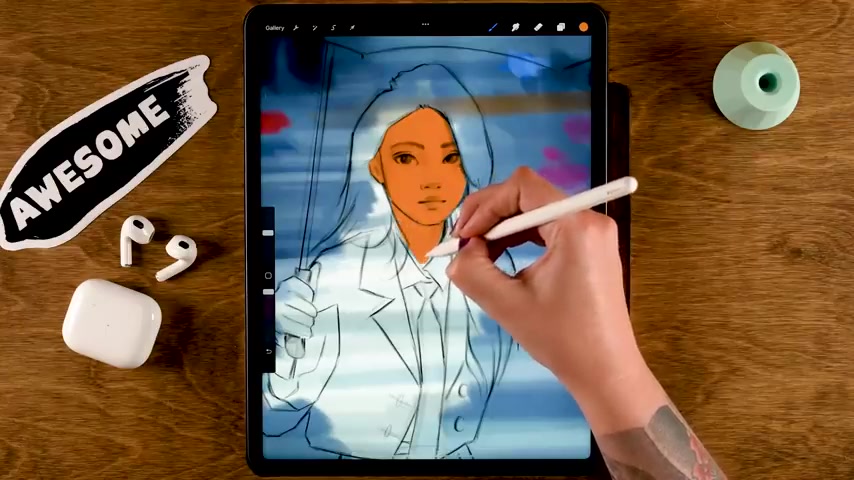
So once we have all the layers with all the base colors for the background , the umbrella , the clothing , the face , hand and hair , that's why we can start refining everything .
I always like using my overlay brush for my basic brush pack .
For instance , with this pink , I'll add some warm glow to the face without messing with any of the brush strokes that I already have in there and using this much tool .
I just soften these transitions blend the colors together a bit and I'll slowly start tweaking the features , adding brighter highlights .
For instance , light is hitting the nose , it's hitting the cheek in this area .
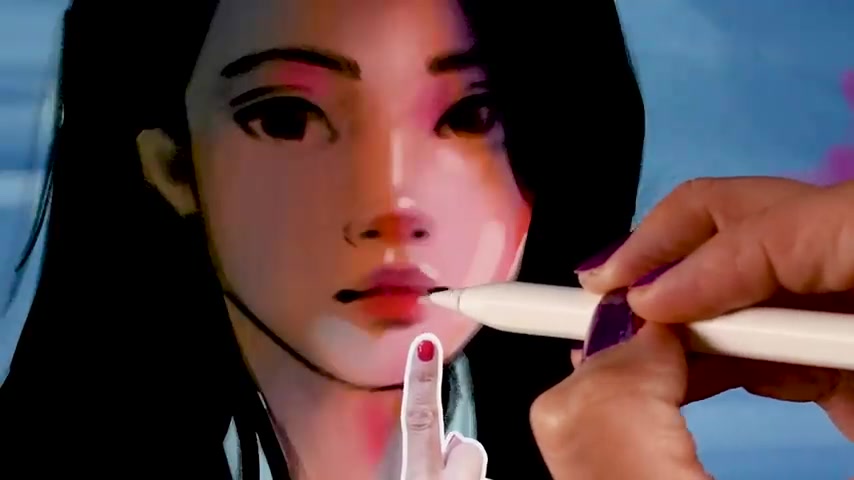
There's also some light hitting here right at the top of the lip and a little edge around the jaw .
Now , while we are still in this relatively early stage , it's important to fix mistakes when you spot them .
Everything on the face still looks pretty rough .
It's not super defined yet .
So I'm using liquefy at this point to play around with the proportions a bit and to just tweak little things , I have liquefy set to push to just push and pull some parts of the face .
And then once you have done that , once you're happy , you can start tweaking again and build that detail on top of the painting .
Now , what's important when painting highlights and shadow especially on skin is to not grab that , that mid tone of the skin , that base color that you have put down and simply grab a darker or lighter shade of that base color .
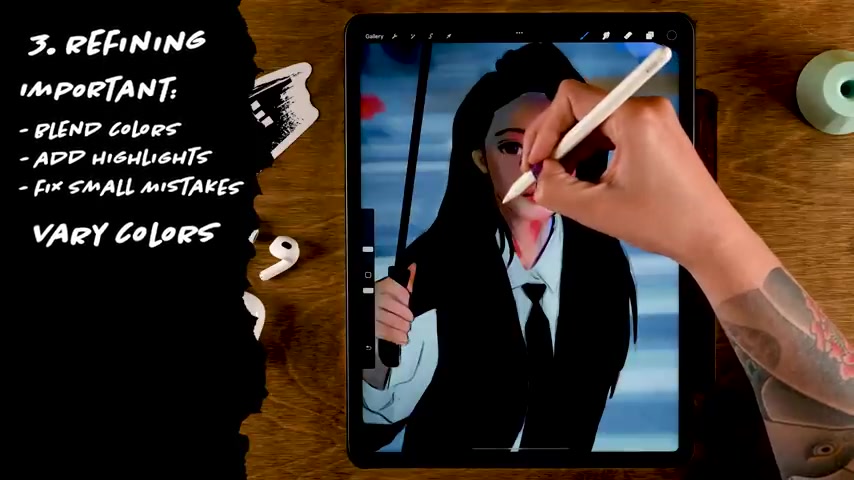
Your painting will look a lot better if you vary the colors in the shadows and in the highlights .
So try adding warmer tones and cooler tones instead .
So don't be afraid to use bold colors .
I have also added some pretty bright pinks on the face and some pretty cool blues , but it'll definitely make the result look more lively if you would just use the base color and and use a darker or lighter shade , your result will look very muddy and dull .
Now , while I work on detailing a face like this , for instance , or like the painting in general , I like to work from big to small and from very messy to more detailed .
So as I work , my brush will get smaller and smaller , just try to not go too small , too fast because like I said earlier , it's easier to fix mistakes in the early phase when you're still using a big brush .
And once you have added a lot of detail , it just gets more painful to make adjustments or to remove parts or to paint over parts and also don't add stuff and details when it isn't necessary for this painting .
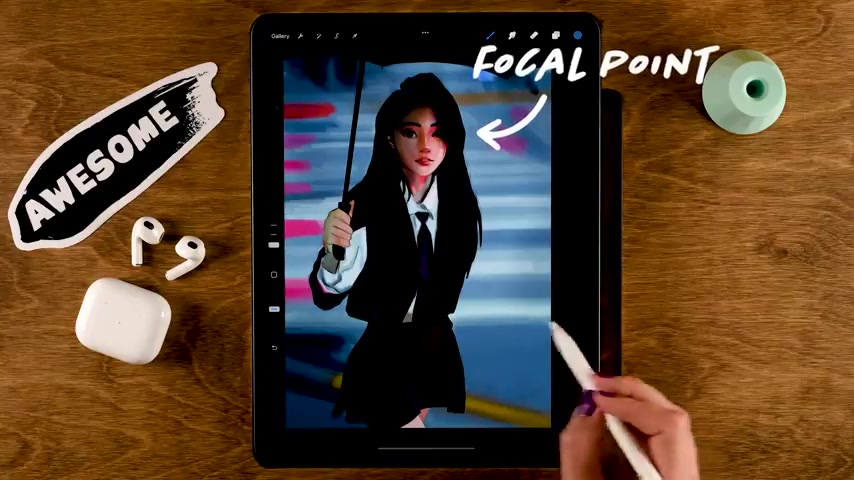
The focal point is definitely the face of the girl .
So I try to add more detail there and less detail in the other areas .
For instance , the background is very blurry .
We don't need super crisp detail there and you don't need to worry about the exact angles or the exact shapes there .
We just don't want to distract from the girl .
Now , at this stage , I'm super happy that I have the hair on a separate layer .
I don't have to worry about anything .
I can just use a hairbrush and add these nice little details around the hair , adding stray hairs , wispy hairs around here and when I want to work on the background again , no worries because that's on a separate layer .
Imagine having this on one layer and needing to on that background area .
Again , that will be a disaster .
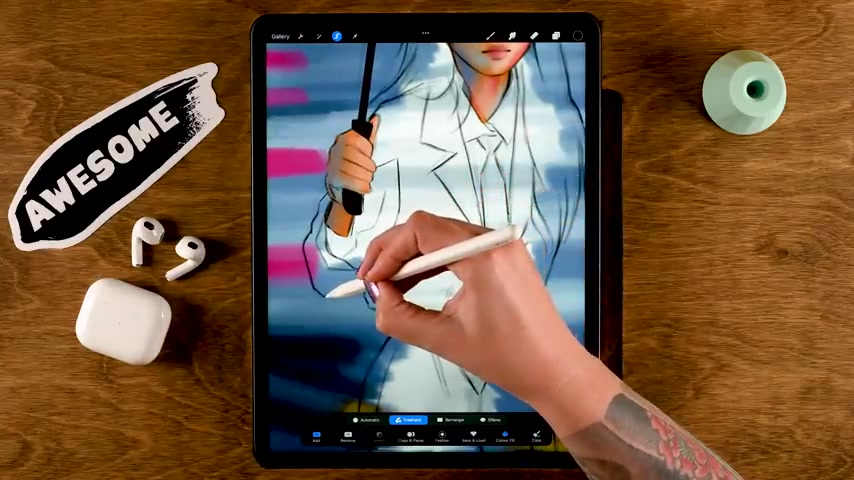
Now , I want to add some final tweaks to that background .
I'll use a brush for my basic set , the lights and brush and I want those pinks to , to get a little bit brighter .
So I'll just use that brush to go over there and add a few little touches Also lighten up this area .
I want to give it a bit of like a glowy effect because it's raining obviously .
So everything is wet and the lighting , those reflections on the street , they will be a bit glowy .
And for some more tweaks on the background , I would like to go to Curves and I will set it to pencil here at the top and use soft brush under airbrushing .
And now while using that brush , I can lighten up some of the parts of the background and this enhances that glowing effect of that wet street .
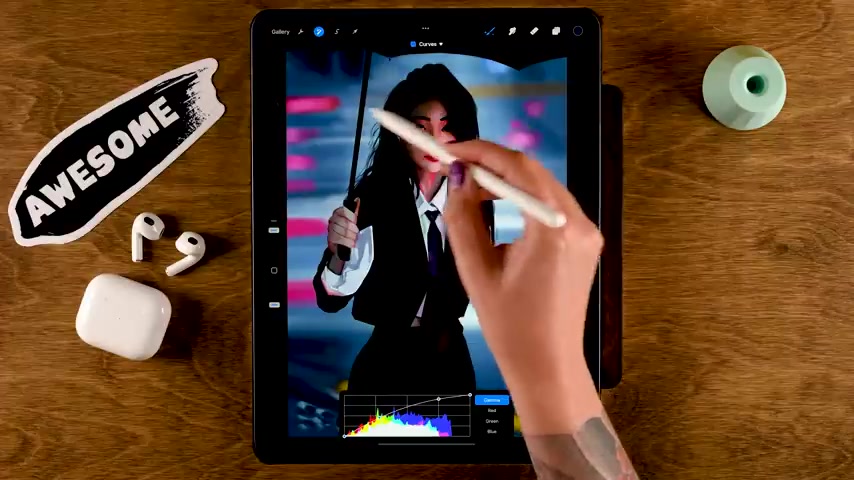
It also emphasizes the face of the girl because everything around her face is pretty light .
So it'll help guide the attention of the viewer to her face .
Now , using the multiply brush also for my basic brush pack , I'll just go over there and add a little , a little bit more of that shadow , more darkness .
Now , while I was working on the painting , I noticed that the hand of the girl was a little bit too big .
I just made a selection of the hand by using the free hand selection tool .
And then I went to the move and transform tool .
I made it a little bit smaller and I changed the hand a little bit , but I did need to fill the gaps over here for the umbrella .
I needed to fill these gaps for the clothing as well .
And then once you have fixed any mistakes , once you have added all the detail that you wanted to add , it's time for final tweaks .
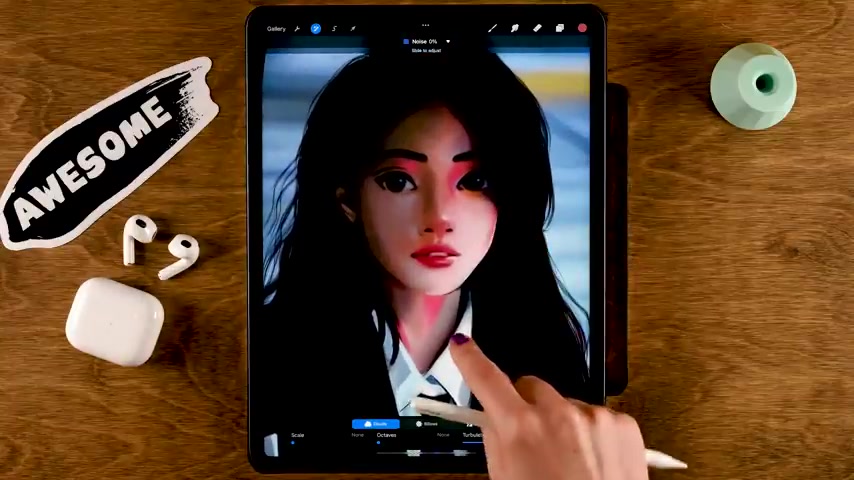
What I like to do for my paintings at the end is had a little bit of noise really subtle , but it gives a bit more of a detailed effect , more photo like .
So I wouldn't do this for instance , when I would be making very clean stylized line art for instance , but for a painting like this with like a realistic scene , that little bit of noise can really add to it .
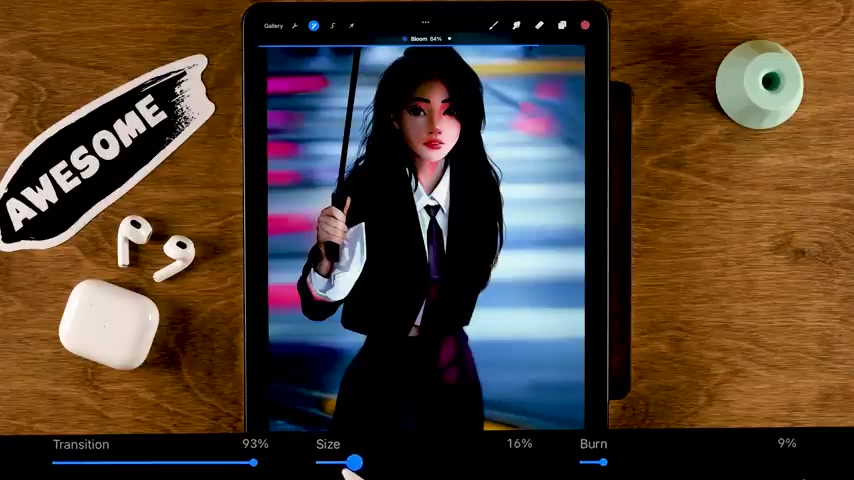
And the bloom option appropriate is also my friend .
I thought it added this really nice extra glow to this painting .
So my advice would definitely be to just check out these options under the magic wand and procreate and just play around with them a little bit , just make sure you duplicate your layers before you do this .
So if you don't like the effect , you can always go back and that's my painting process in a nutshell .
But don't worry if you still struggle creating your own art pieces .
You can always go back to following tutorials or very things up just so you can stay motivated and have fun during the creative process .
Now , for your info , the brushes I have used during this painting process are available in my store and also through Patreon .
So I will leave links in the description .
I would like to thank you for watching .
Let me know what you thought of this video in the comments section .
I would really appreciate it and I will see you next time .
Are you looking for a way to reach a wider audience and get more views on your videos?
Our innovative video to text transcribing service can help you do just that.
We provide accurate transcriptions of your videos along with visual content that will help you attract new viewers and keep them engaged. Plus, our data analytics and ad campaign tools can help you monetize your content and maximize your revenue.
Let's partner up and take your video content to the next level!
Contact us today to learn more.