https://www.youtube.com/watch?v=FOE-q60eD0Q
How to Draw an Elephant the Easy Way

Hey , everyone .
This is way and welcome back .
Let's do another animal and this time we're gonna draw out the elephant .
So let's get started and I'll talk about the process along the way .
All right .
So let's get this elephant .
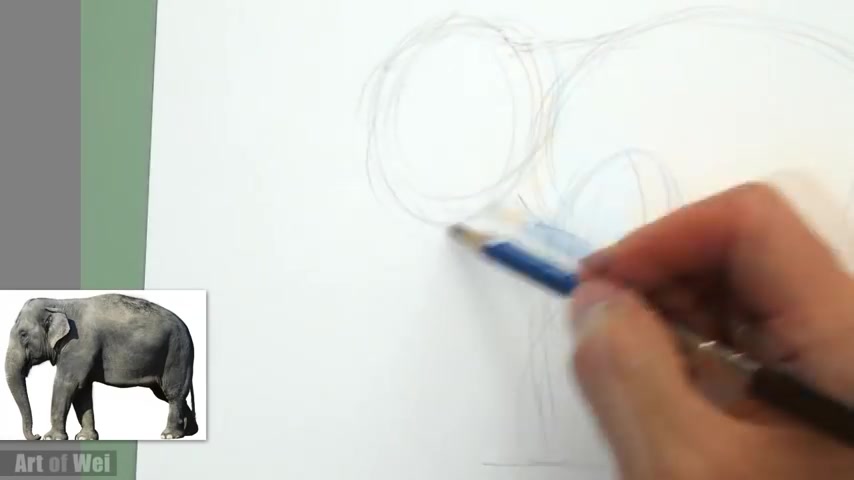
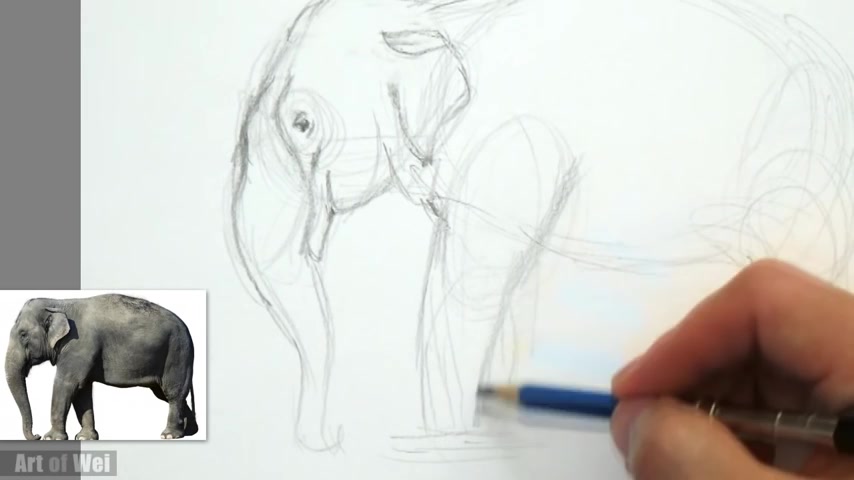
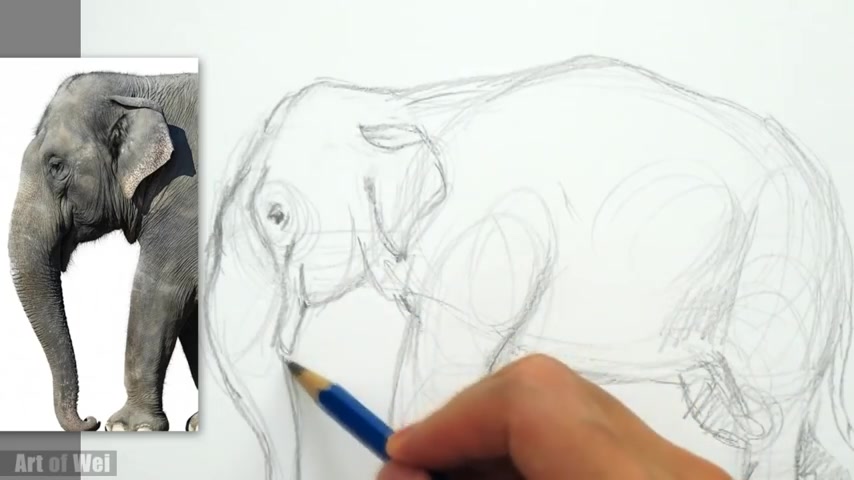
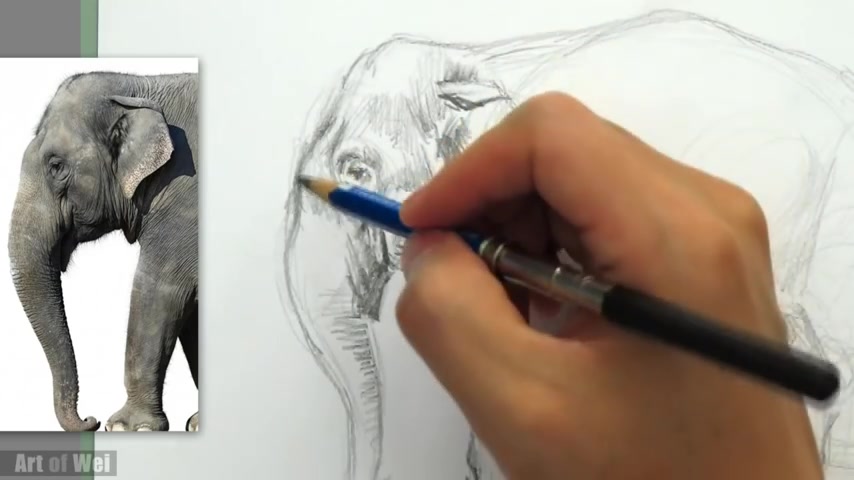
Um So whenever we see any kind of creature like this , you know , we want to just kind of block in the basic shapes , kind of like what we did with the dinosaur .
So with the elephant , um his average biggest shape is his , his whole body .
So I'm just gonna rough it in , I'm just gonna do a little kind of almost like an egg shape because that's kind of what it looks like in the reference , right ?
So we're gonna do this and then we can start um putting in more reference points .
Well , let's , let's do the head .
We can also do , let's see before we put in too much detail .
Let's we , we can do the head like that , right ?
That kind of give gives you like an overall .
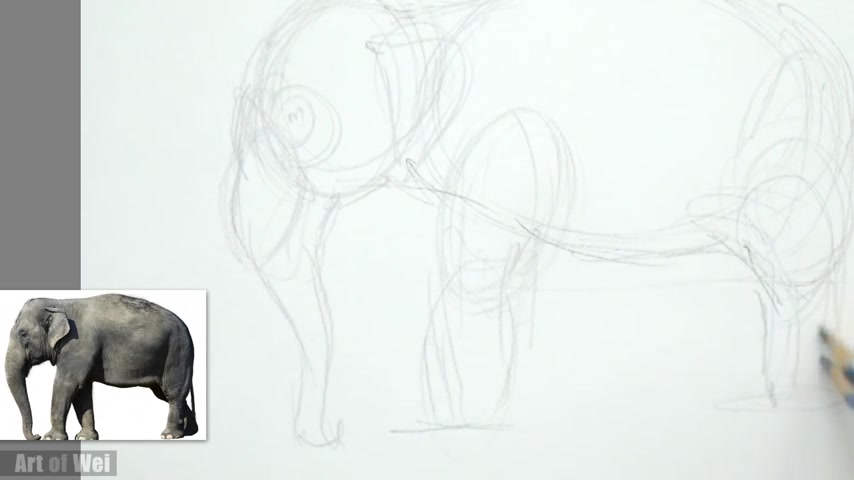
So here's the body and here's the , here's the head and then we can do the legs , let's see , legs is part of like right here is upper leg and then it's gonna go straight down .
So it's almost like a trunk .
Right .
Here's , here's the second part and then I see the hind legs goes up from , from the , from the , from the top pretty far , right ?
And it kind of comes down .
Ok , we're measuring and it just kind of come straight down .
Ok .
So it looks pretty weird .
Um , I guess if you , when you , when you look at it closely , you know , the , the joints are really pretty weird looking .
So I can let's move on to the head so we can break up the head .
Uh Let's see , this is the head and then here's this trunk again , I'm just trying to see some of the basic shapes .
So here's a little bulge .
All right , here's his eye here .
This , here you kind of like this , it sags a little bit and then coming down this trunk .
So as you're doing this , um it's OK if things are off , I mean , this is the whole roughing in process , you know , and it looks like I am pretty off here , like on the bottom , this leg should be a little bit lower .
All right .
OK .
His front legs are lower than his hind leg .
There is a little bit of perspective in this drawing .
So , all right , let's , let's just go for it , you know .
Um Since we don't have to be that exact anyway , with these animals .
All right .
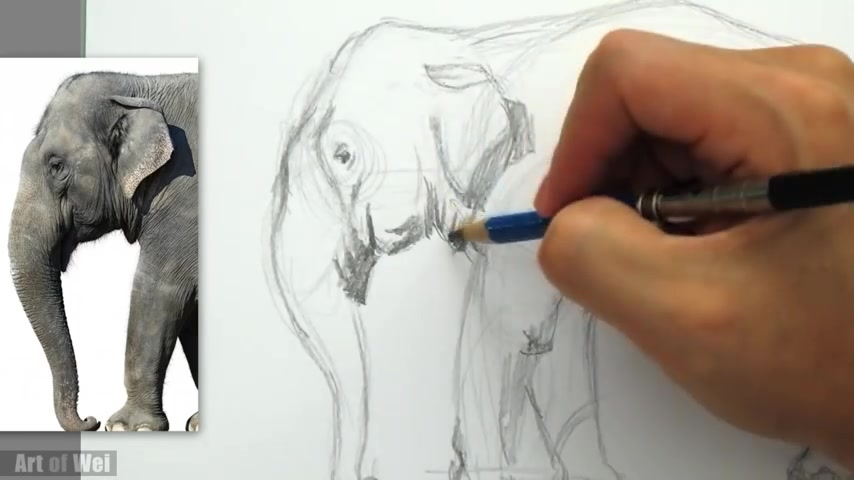
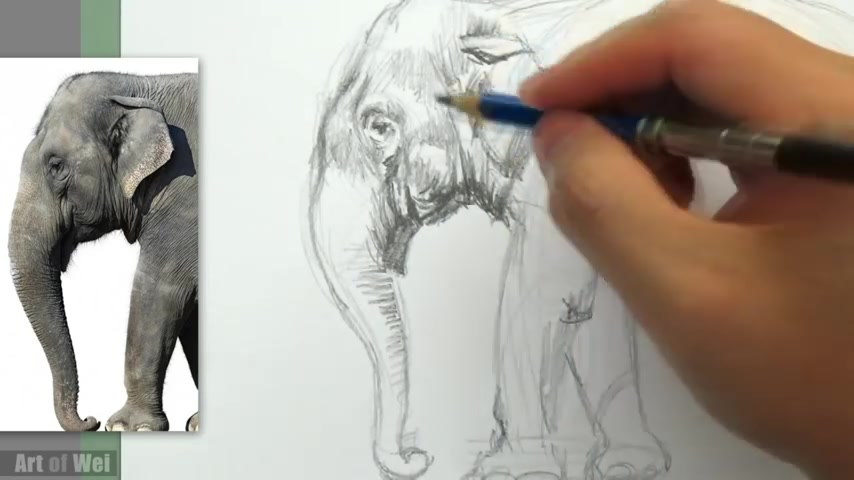
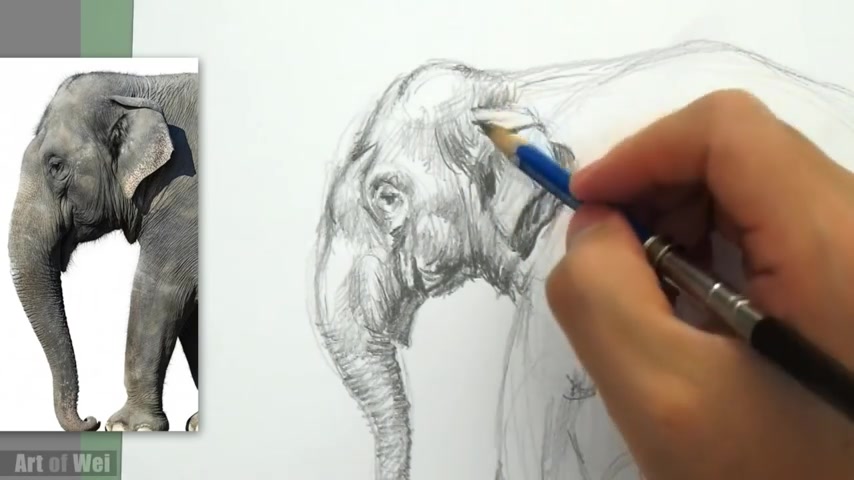
So let's let's fill in some of the , a little detail .
So here's this little hump on his head and I'm just kinda star in the head .
Um , it is the most interesting part .
Ok ?
And here's the little bump and then let's get his eye .
You see that little brow area in here , this is this whole area kind of comes forward and then his eyes in here .
Ok .
With that looking down , there's all these little circles around .
Obviously , we're gonna skip that .
OK .
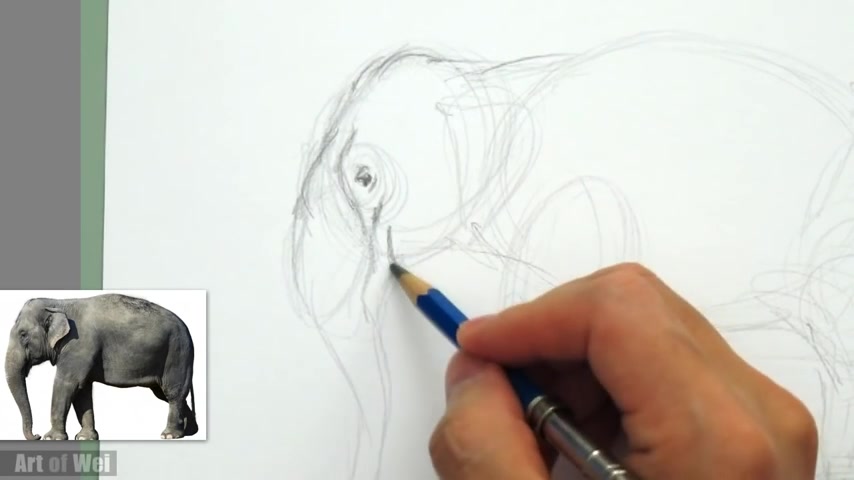
There's a little dark area right here .
It looks like it , this is where his trunks and slip his mouth is right here .
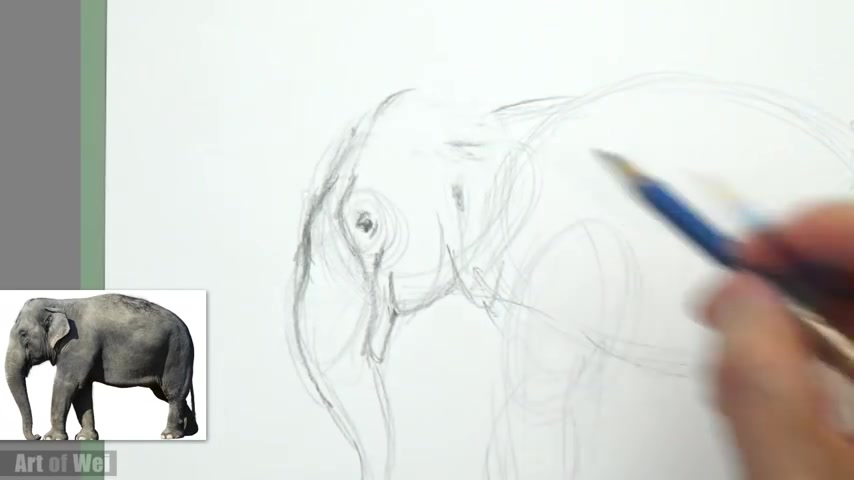
All right , this thing goes down all the way here .
I think this , this whole his whole bottom lip area .
It's kind of hard to see in the reference because it's all dark .
OK ?
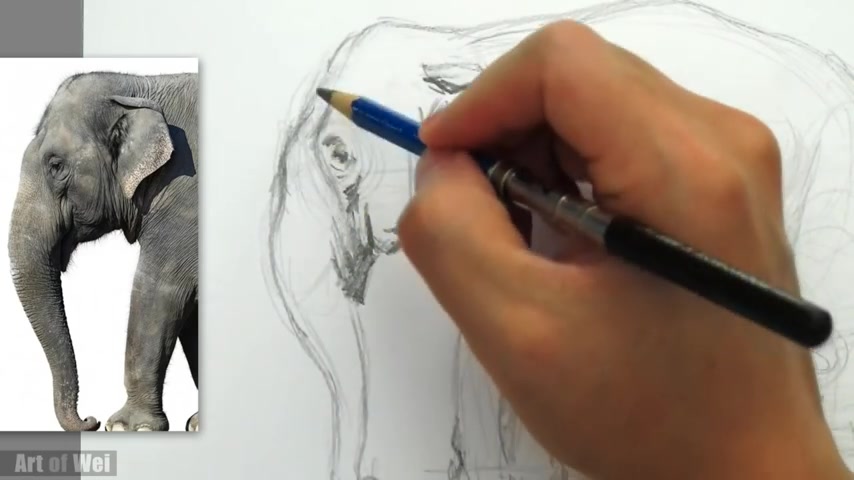
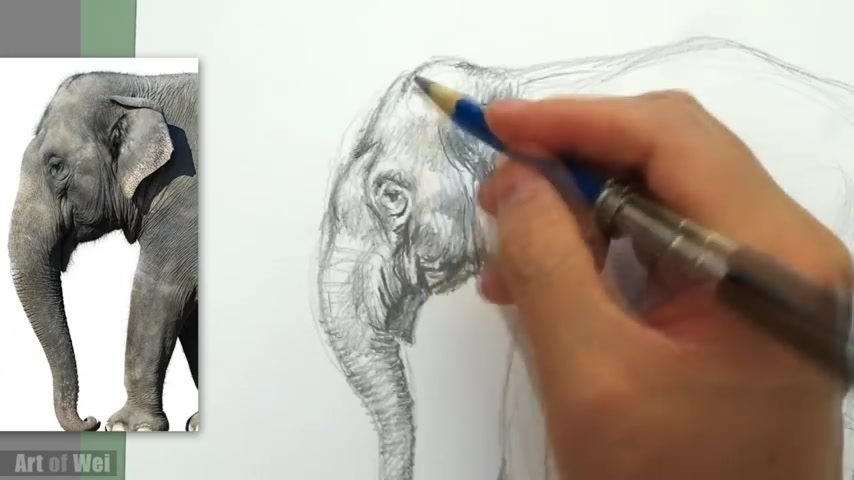
And then now we can go down and see this little hump right here right in front of the eye and kind of flats in goes in a little bit and his trunk comes all the way down , ok ?
And then we , we , we don't have to do the bottom of the trunk because , you know , again , it's like um these are the smaller details we can fill in , you know , we , we can do that after we put in the lake , which is more important .
So let's do because if you end up doing this and then you realize your , your leg is , you know , let's say higher or lower , then you might have to redo the trunk .
So the , the trunk is more flexible .
So we're gonna skip that for later .
It's kind of like in figure drawing , the head is more flexible .
We always skip that .
We always do that for the , the last , last stage .
All right .
So let's see .
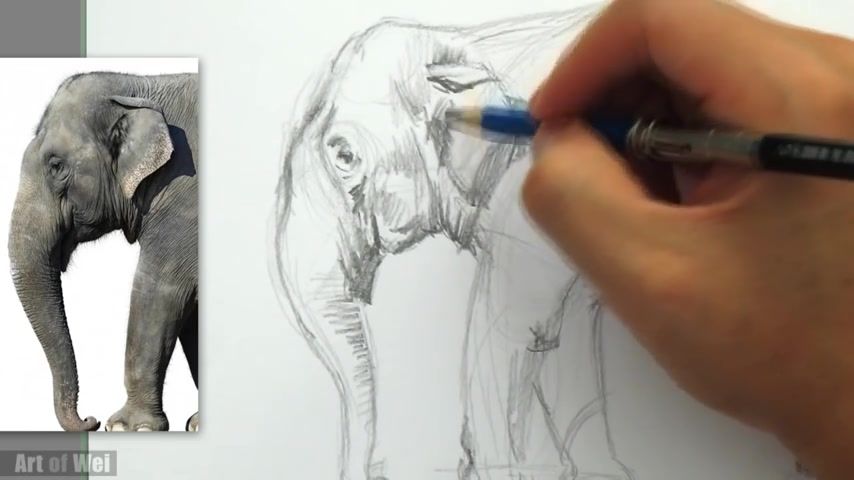
His ear probably could be a lot higher .
I think I probably done this .
Uh When I look at it , it's , his hair needs to go a little bit higher .
OK .
So I'm just gonna adjust that real quickly .
So that's why we , we , we sketch slightly , you know , at the beginning , it's just that , you know , we don't , it's a lot easier to erase and his , his ear coming down .
Ok ?
Not to , his eye comes down to here .
So I'm just , I'm just seeing reference points , you know .
Ok , so that's his ear .
Now we can go back , let's do , we can actually do his leg right now since we work in the front here .
Ok .
So his legs , it's pretty straight , looks like it's coming forward like that right in the back .
I know there's some detail , but you can actually just go like this first and then fill in the gaps later .
OK .
Its legs .
All right .
So it's probably around this tall .
Ok .
I'm just kind of approximating , you know , the distance from here to here kind of taking the halfway point .
So again , even if it's off , it's OK .
It's a little from here in and here you have his foot and his toe so his toe , I , I'm gonna skip that for now .
Ok .
Just concentrate on the big stuff first because there , there is a danger when you concentrate on the little stuff you get caught , you get caught doing that and you , you know , you , you end up forgetting the big shapes and then that's when you are and then you realize , uh you know , a lot of your joints actually off , then you have to do a lot of erasing or , or it just come out really disproportionate .
All right .
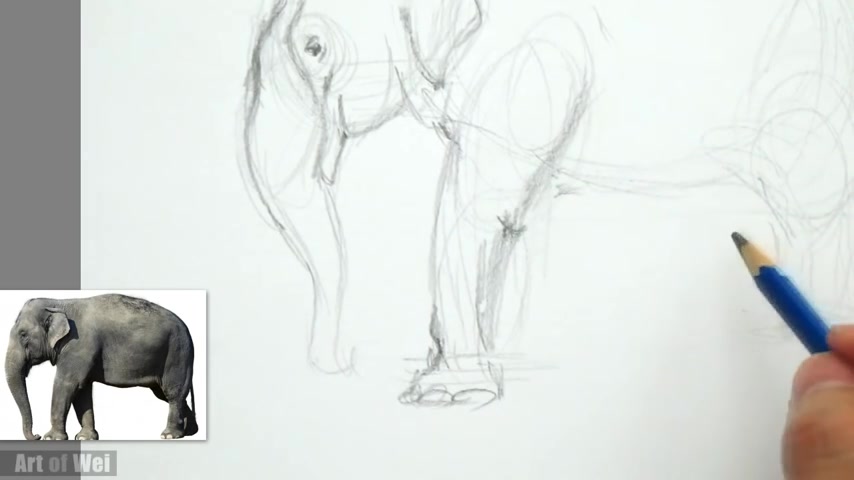
So now let's work on the hind legs .
Now , this thing comes down , I'm gonna measure just kind of the angle , it kind of goes up a little bit .
OK .
So this is gonna be where his hind leg is gonna hit .
So I'm just kind of measuring that angle .
All right .
So his weird legs coming down , here's his knee coming down like what's right around here .
So it's just kind of , there's , there's a little bit of perspective .
So it's not flat .
You see how I did that round ?
So it's kind of like a cylinder and , and these would be like kind of contour lines and it's actually OK to have them on , on them , you know , because it helps you visual , to help , to visualize the , the actual shape .
OK .
All right .
So let's , so you notice I , I didn't do any of the , the back legs .
That's kind of the way I like to do it because once you have the front legs , the back legs are very easy .
Right .
All right .
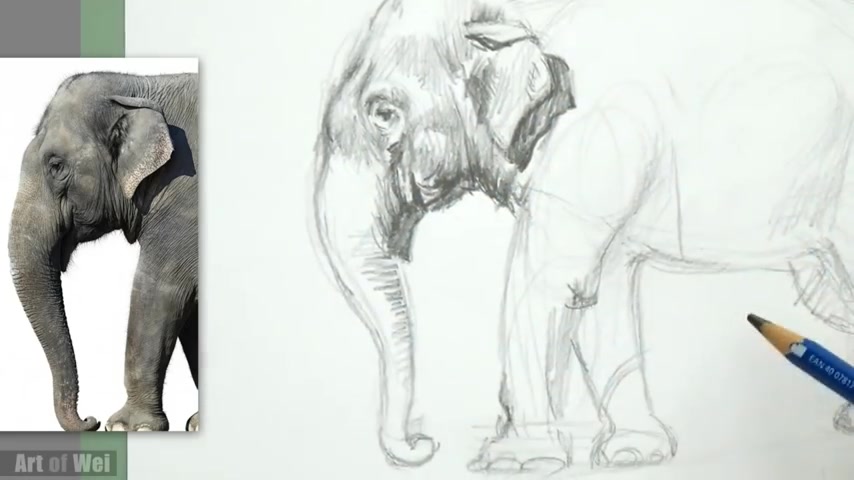
So now , now that we have this , let's go , um , let's rough out the back legs , so his back legs and see his foot right here .
And I don't even have to do this yet because his foot position is more important .
So if I just do this position here , then now I can , now I need to .
Now I know I just have to just kind of connect these points , right ?
So it's just kind of like that .
So once you have the , the front legs , it's really easy to do the hind legs because all the reference points are there already .
Ok ?
So here's a shadow area like that .
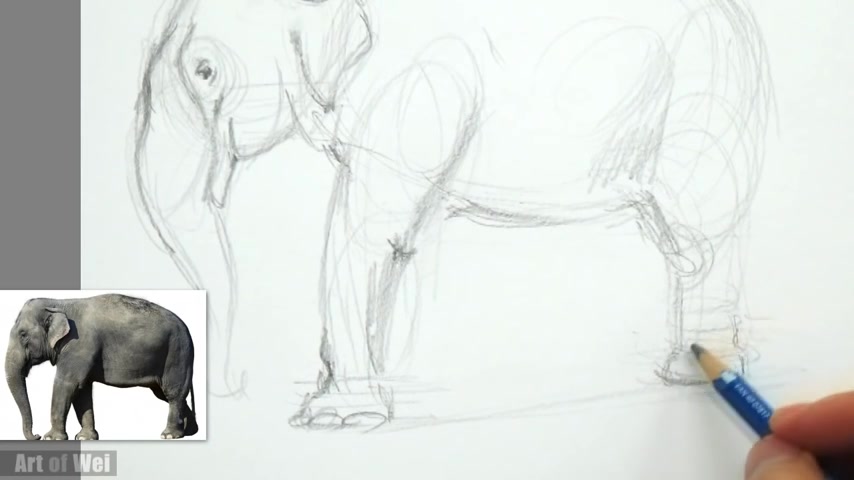
So let's do the rear hind leg even easier .
So this is just kind of like a little bump right here , right ?
This is gonna be dark , ok ?
And then his legs coming back here , I can do the bottom again , it just comes down from there like this , ok ?
And then this is pretty much all dark except for this little shadow area .
So I can almost just do something like that .
So again , uh very easy hind legs that the and there was anything easy to do it or , or things in the back because there's so much reference points in the front , right ?
So his , his tail .
I don't like his tail like that and we can always flat it out later .
All right , just leave it .
Ok .
Now we can work on the trunk .
You see .
Um , now , now we know the trunk is gonna hit the bottom somewhere right here , right ?
So we can actually do the bottom here like this again .
It's , it's kind of like doing the , the foot first before you do the leg , right ?
So now we're gonna do this little trunk .
It kind of curls looks like it's probably picking up something .
Ok ?
And now we can just kinda connect it .
All right .
Let me see how that looks .
Ok ?
I mean , proportion wise , it looks like an elephant .
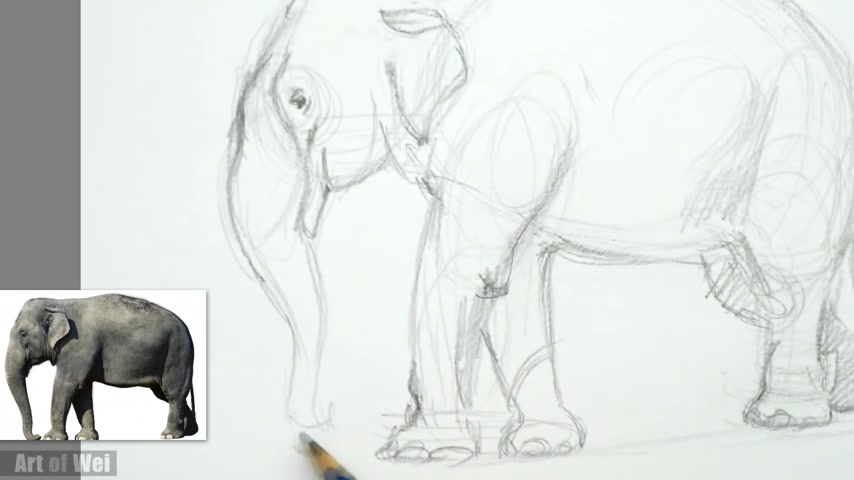
I mean , yeah , I think my head is a little bit too um , too small so I can just quickly adjust that .
Ok .
But I think overall it's good uh close enough .
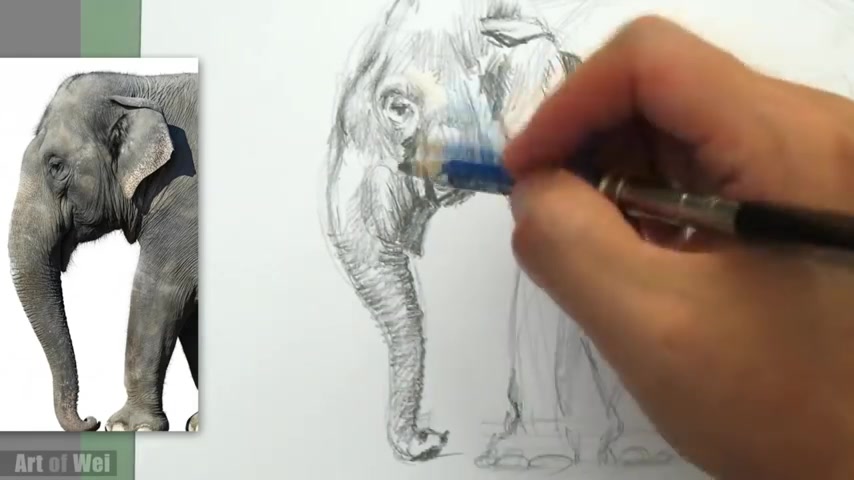
So now we can start doing the shady and this is where , you know , kind of the fun part is .
So the lighting here , you know , obviously is coming from this way .
Uh We can actually do if you want , we can actually do this first , you know , marking the shadow .
I'm just gonna shade it in real quick .
Let me get rid of this .
Some eraser marks here .
So we can actually show these steep shadow ends first .
Yes , it um mouth here is dark .
So again , uh not too much stuff I'm gonna , I'm gonna leave this relatively rough because I wanna finish this rather quickly .
There's a lot of little detailing so you can actually do little marks at that .
You see how I can kind of fix those kind of lines that by shading .
So it's one thing about shading , you know , if you can shade it in a way where , you know , it , it also gives you the texture as well .
So it's kind of like this .
And here is the dark part of the ear flat flapping over .
Ok .
So I'm just roughing in , you know , some of the darker areas that I see .
Ok .
And then his eyes here , some smaller lines here , I can , I can hit some of it but not too much .
Ok .
So this trunk coming down back to the trunk , there's some shading here in the back and then I'm seeing like little lumps here .
So here is like kind of the middle , middle tone , mid tone area and then behind the ear is darker .
So that one , that one's easy , right ?
You can see that one .
I can actually erase this to show it a little bit better .
Ok .
So this part is dark .
So his trunks got a lot of little marks here and it's darker on this side .
So I'm just gonna go like this .
So normally I would probably , you know , sketch in the shadows on the back and , and and kind of shade it .
But let me just concentrate on the front a little bit so that I can give you a little bit , uh , more of a complete demonstration and I can always finish the back on my own .
Ok .
So I'm , now I'm seeing like smaller little things .
Uh , let's see , there's a lot of little lines , looks like there's some hair in his ear .
So here is a shading , let see , there's a bump here .
So I'm , I'm , I'll try to exaggerate certain things , you know , that's , that's one of the things you kind of have to do .
It's a very good process quick because , you know , the , again , the lighting itself is very flat and if you can see the shapes , uh , shade it and exaggerate the shapes because in the drawing that really helped , you know , normally you don't , you don't want to do it .
Um , exactly as you , as you see it , you know , just kind of , I guess in the photo it looks ok .
But if you draw it and it's not as , it's kind of subtle and it kind of takes it away , you know , it just looks kind of flat and , and people just kind of wonder if you know what you're doing , but if you're exaggerated , they'll be like , oh , that's cool .
You know , look at , you can , you can feel the shapes , you know , you can see it and it's , and it's neat , you know .
So I'm gonna try to see .
Yeah .
And actually I should talk about more of that too , especially like in figure drawing , you know , a lot of musculature is greatly exaggerated and that's why it looks really good too .
All right .
So this part is dark , a little line here lining .
I can turn in my pencil so I can get sharper lines .
Ok .
Here's a shadow and very dark trying to shade it .
Terminator darker because it's a little bit more interesting that way and kind of leave the bottom here a little bit lighter because generally there's a little bit reflective lighting that comes back up .
So it's like this would be the Terminator and I'm kind of exaggerating a little bit .
I exaggerate the Terminator .
See how if on the bottom here it feels like it's a little bit of Boli and it gives you a , a little bit more life .
So this underneath here should be a little bit darker .
A again , it's an exaggeration .
Ok ?
And then here is a shadow .
This in here is dark .
It's casting a shadow a little bit wavy because of his skin .
It's kind of wavy , it's not a flat area and I just kind of rough that in .
I didn't , you know .
Yeah .
Don't try to follow it .
Exactly .
You spend all your time pulling your hair out because you'll be so frustrated .
All right .
So let's go back to the chunk .
Uh If I'm concentrating on the head , I need to do this .
So this looks like this whole part on the bottom is slightly darker .
It's not catching as much light .
So I can kind of see there's just like a little , you , you , you see a little bump right there , you know , this part is lighter and this is lighter .
So this must be a little bit darker .
And then here is this have to do a little bit of these lines , this part of the feature and then here's the his trunk in , in , in the shade , right ?
So I'm just kind of wiggle wiggle shapes in .
So I get a little bit of shading in there .
You don't do a straight line because it isn't a straight line .
There's a lot of little subtleties , little folds and so it's here on this side .
Ok .
So you kinda , it's very easy and , you know , very quick , you know , don't , don't , don't baby it , you know , just , just go in , there's a shadow area right here here , shadow and that one's in shadow .
Let's see , looking at the camera .
Ok ?
I mean , you can , now you can start feeling it right now .
Now it looks like I need more shading in here .
I said there's a lot of little things going on the eyes a little bit darker and make it a little bit more attractive .
So focus your eye into it .
And then here is the back , there's a couple of lumps up here , right ?
You see that the lump ?
So I'm sorry .
So I see this little lump up here .
So I'm gonna exaggerate that I get a little bit more shading in here .
And this is kidding .
Now , now I'm seeing that this should be a little bit darker .
Yeah , because now that , now that shade all the other area of the face , you know , this , this area needs to be darker .
So that's how it goes , you know , it's like , um , everything goes in stages .
So , don't worry if you're , if your drawing doesn't come out correctly in the beginning , just keep going .
And uh if you say it correctly , you know , just a little bit of good visual visualization and seeing where the talks are , you know , he'll come together so you can see it .
My my shading is not very accurate , right ?
It's just , it's just very , I'm just hitting certain areas as long as you get close it , it will look OK ?
That's still a little bit more texturing up front over here .
This part needs to be a little bit darker with maybe a little bit more harder lines , just kind of push it in underneath his eyes .
A little bit more folding , turning my pencil to get a nice clean , nice sharp edge , doing a little bit more edging here , darker looks like some kind of thing going on there .
OK ?
Behind it here .
And I'm gonna make it slightly darker just because it's so I can push , you know , push this ear out .
OK .
So I'm gonna so now you start , you start to feel it right .
I mean , this , this whole structure is coming out , you know .
Yeah .
So it's , this is getting there .
So I'm just gonna finish out the body the same way that I'm doing here .
And then uh I'll be right back to show you how it looks .
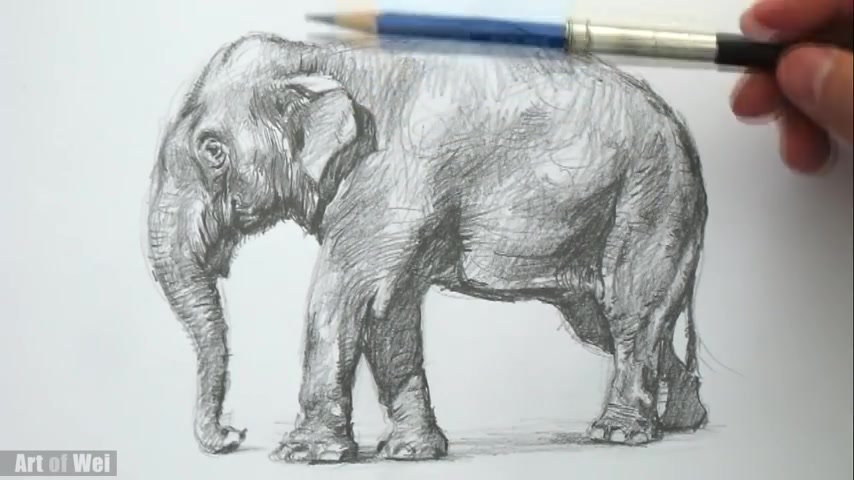
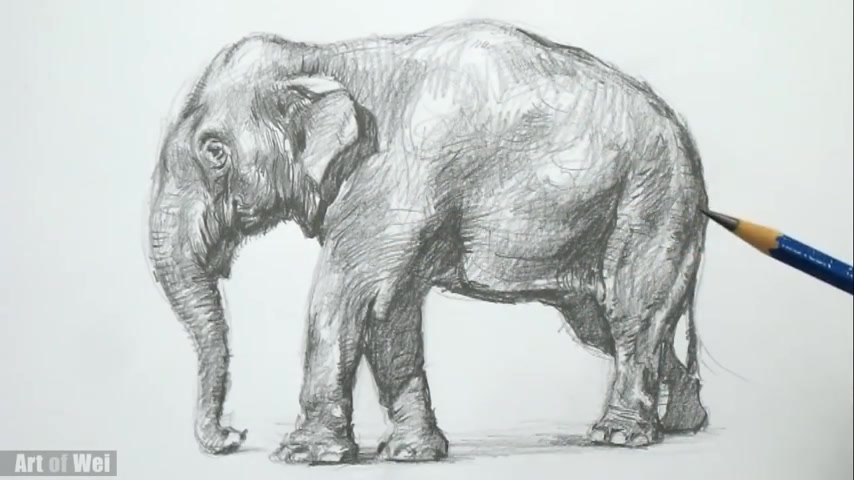
All right , I'm back and here's my final drawing for this elephant .
And I just kind of went in with a Sharper six B and just kind of give it a little bit more texture , but everything was pretty much shown in front of the camera .
So actually it came out , OK , it's very rough , but , you know , from afar , if you look at it , it looks kind of realistic , right ?
Which , so which is kind of the process of drawing , you know , it could be rough .
Um because I didn't spend too much time on the little details and if you look at , you know , kind of far away , it does it look kind of realistic .
So if I go in and actually , you know , put in a lot more detail , then , you know , it'll look more realistic closer up .
But uh I mean , I'm not gonna go for that anyways , I'm just kind of want to have some fun sketching .
Um So this is a really good exercise again , you know , just six speed pencil all the way through .
You're able to uh be very rough with this , you know , because the I mean , the reference is roughest of elephant skin .
So this is the kind of stuff that , you know , it's really fun to do and it's really good to just sketch and forget about , you know , what you're doing , forget about the accuracy , you know , don't worry about that and just kind of have fun with it and just try to visualize all the shapes , you know , all those little subtleties that you , that you see and that's really what you're shading .
And if you can exaggerate that , then you're gonna give this uh uh joining a lot more life than , than it is in the actual reference actually .
So , so definitely give it a shot and see how it goes and I will see you next time .
Are you looking for a way to reach a wider audience and get more views on your videos?
Our innovative video to text transcribing service can help you do just that.
We provide accurate transcriptions of your videos along with visual content that will help you attract new viewers and keep them engaged. Plus, our data analytics and ad campaign tools can help you monetize your content and maximize your revenue.
Let's partner up and take your video content to the next level!
Contact us today to learn more.