https://www.youtube.com/watch?v=j_28O9hIduM
How to Make a Wedding Website with WordPress _ Step-by-Step 2020
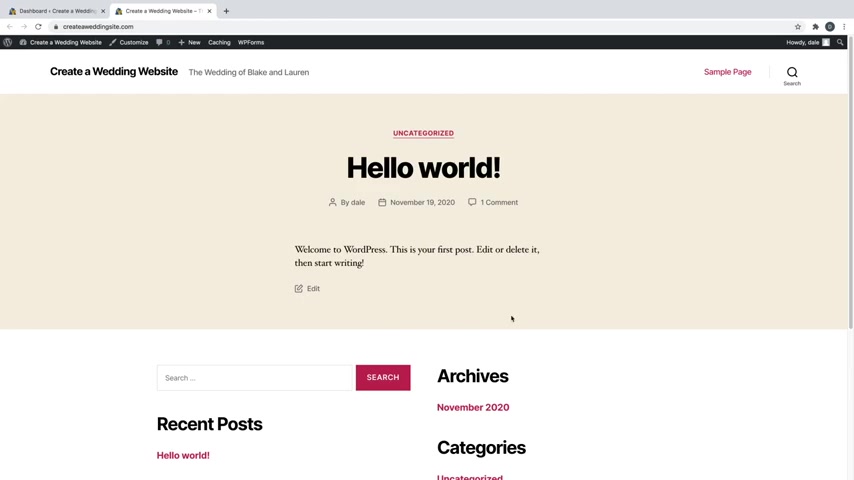
In this video , I'm gonna show you how to create a wedding website with wordpress just like this step by step .
This website has an elegant and clean design complete with a story section , a quote , a section for your registry , which I'll show you how to create and hook up with this button .
It also has all the most important information about the wedding with these really nice icons which can link to different pages .
It also has an RSVP contact form , an image gallery and a when and wear section for the ceremony and reception details .
So , welcome to Creative Pro website .
I'm Dale and I'll be walking you through this tutorial step by step .
It's OK if you're a complete beginner because we're gonna make this whole website with an awesome dragon drop page builder that's very easy to use and extremely customizable .
So you won't need to know any coding or have any previous website experience .
I'll show you how to get your very own custom domain name and web posting for your website so that you can publish it live as well as how to install wordpress , how to customize the website and how to edit it for mobile and tablet view .
And if you're watching on a computer , you can also use the right and left arrow keys on your keyboard to go forward or backward by five seconds .
I also put the time stamps in the description so you can skip ahead or go back to any step at any time .
All right , with that said , let's get started .
Step .
Number one is to get a domain name and web hosting , a domain name is just the address to your website .
It's what people will type in to get to your site .
So it could be something like your website dot com .
And web hosting is basically just renting space on a server somewhere that's connected to the internet so that you can store that server with all the media for your website , such as text pictures , videos , themes , plugins , et cetera .
And there are web hosting companies that have buildings full of these servers and they also offer you 24 7 support in case anything were to happen to your website .
If you want to own your own website and have a custom domain name for it , then you have to have web hosting , which is anywhere from 3 to $7 a month depending on the plan that you choose .
And if you follow along with this tutorial , because I have a special code for my viewers here on create a pro website that will get you a huge discount .
Now .
Yes , you can get a free website , but it comes with a lot of limitations and I don't recommend it .
Like , you won't be able to own your own domain name .
It will be something like your website dot wix dot com or dot squarespace dot com or whoever is hosting this website for you .
Or it might even be a random string of numbers and letters that you don't get to choose .
You also can't upload new themes and to customize your website exactly how you want .
There's usually very limited options .
You can't upload plugins to increase the functionality of your website and your website could be deleted at any time because you don't technically own it .
So this is why I highly recommend web hosting .
So in order to get it , just click on the very first link in the description or you can go to create a pro website dot com slash hosting and this is how you'll get that discount that I mentioned .
And this is my affiliate link .
So I do receive a commission as well whenever you use it , but it also saves you a lot of money and it helps me fund these free youtube tutorials .
So it's a win win for both .
And this will take you to a special co branded landing page that I have with host gator dot com and host Gator is where I host all my websites .
I have dozens of websites with host Gator .
Because they're fast , reliable and affordable and they have 24 7 customer support in case anything were to happen to your website .
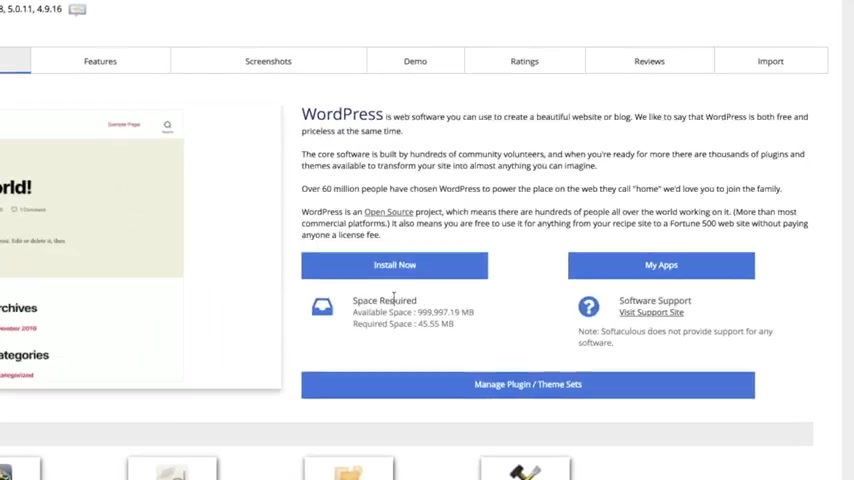
Now , you can see that we've got three different plans here .
Really ?
What I recommend and what they recommend is just to start with the cheapest plan , which is the hatchling plan .
It's gonna give you a single domain , which is enough for your wedding website .
And then you're also gonna get a free SSL certificate .
So it's going to be secure with this little lock symbol .
So we're just gonna go ahead and click on it by now for that one .
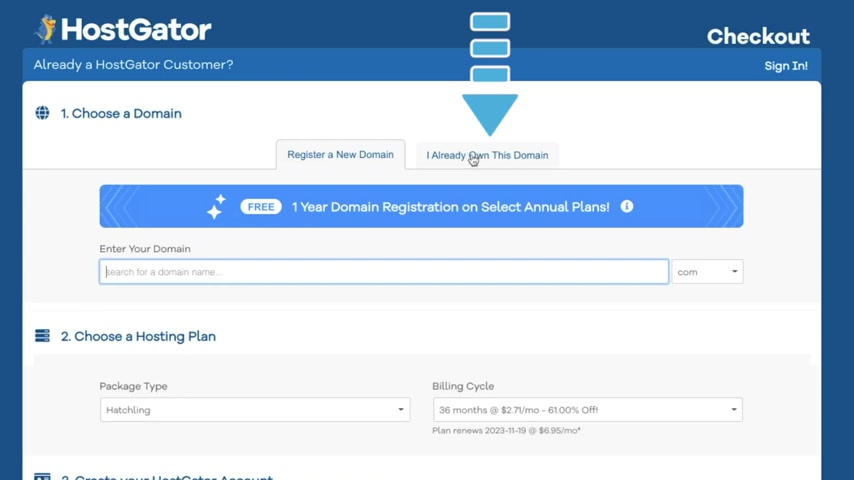
And here's where you can get a custom domain name for your wedding website or if you already have a domain that you want to use , you can just go ahead and click on this tab right here and hook that up , but I'm gonna get a brand new one .
So for this one , I'm just gonna do create a wedding site dot com and you can see here in green that it is available and if it's not , it's gonna come up in red and then you just want to try searching for a new one .
Now , if you're doing a wedding website , it'll likely be the last name and then wedding dot com , but you can choose whatever you want .
So I'm gonna just go ahead and use this one and then they've got like dot club dot site dot online .
All these crazy ones down here , but dot com is the most legitimate and professional looking and it shows people that you're serious about your wedding .
So let's go ahead and just choose that one and we'll just go down here and make sure that you check the domain privacy protection .
This is already enabled and I highly highly recommend keeping this checked .
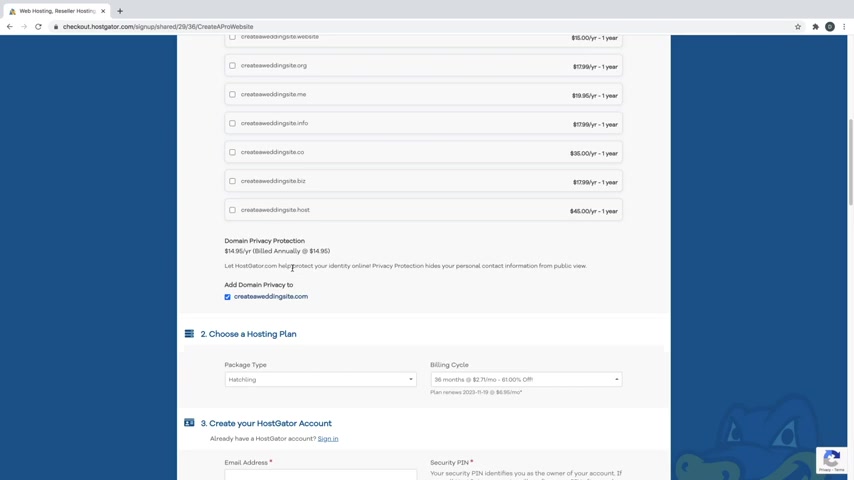
And if it's unchecked , then that means that your email and your phone number and information like that is going to be public for solicitors and telemarketers to be able to call you and try to offer you all these services for your website that you don't need .
So I highly recommend keeping this checked because I didn't the very first website that I made and I really wish I did .
I got called and spammed way too much .
So host gator offers this protection for you .
So I'm gonna go ahead and leave that checked and then just come down here to choose a hosting plan and make sure that it says hatchling or whichever plan that you did end up choosing .
And then the billing cycle you can see is automatically set to 36 months , which is going to give you the biggest discount .
Now , if this is a wedding website , likely , you know , you're gonna plan the wedding out about a year in advance , so you can go ahead and do the 12 months , which is still going to give you 55% off if you're using the Creative Pro website dot com slash hosting link that's in the description or if you typed it in so you can go ahead and do 12 months or if you're like .
Alright , my , my wedding's only a few months away .
I'm just gonna go ahead and do the one month or the three months or whatever it might be .
You're still gonna get a big discount with these as well .
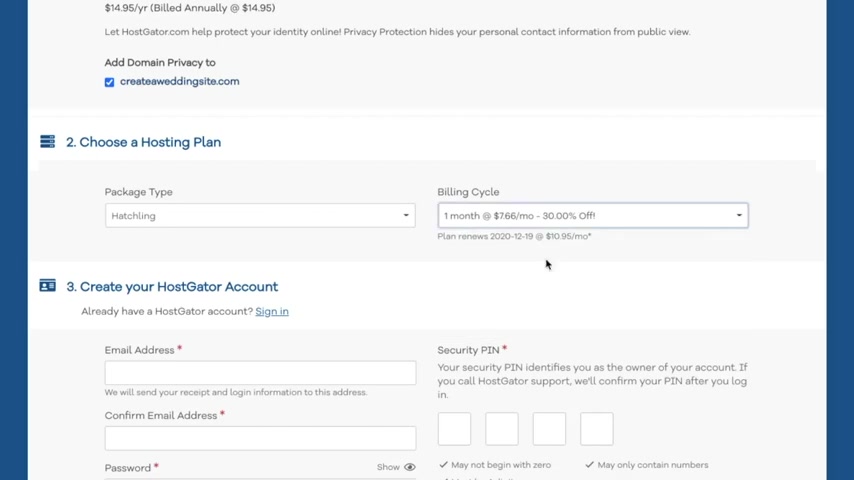
So I'm just gonna go ahead and choose the one month just to get started and then we're gonna come down here and create an account .
So I'm just gonna put in an email and then just confirm that , create a password and then just put in a security pin , then just go ahead and scroll down to enter in your billing info , which you can use a credit card or paypal .
So I'm gonna go ahead and use a credit card and do that right now and then just scroll down to the add additional services section and we're gonna go ahead and uncheck both of these ones that are checked , which is secure , your website and back up your hard work and make sure that these are all unchecked because I have videos on my channel which I'll link in the description that show you how to do all these things completely for free .
So you don't really need to add any of these to your order much like get a professional email .
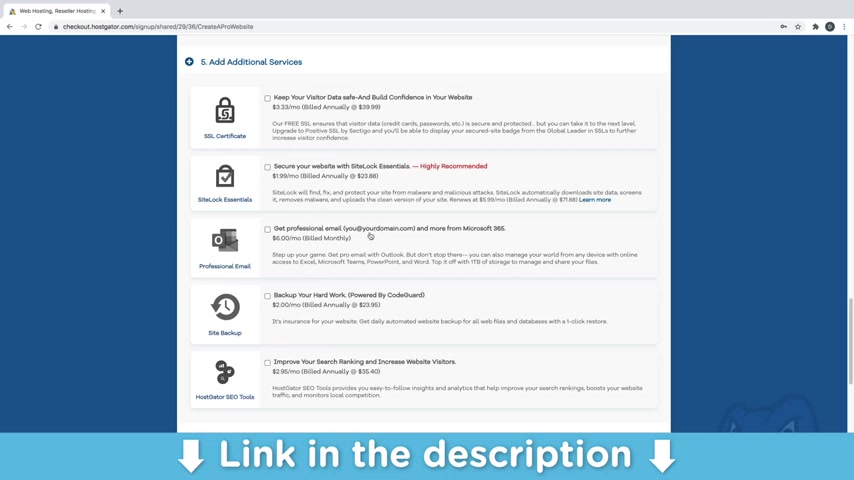
I have a whole video that shows you how to get that .
But for a wedding website , you're really not gonna need much of these anyway .
So we're just gonna go ahead and scroll down and make sure that your coupon code says create a pro website , which it does .
And this is what's gonna get you that massive discount that I was talking about .
And this is my affiliate link .
So I do receive a commission whenever you use it .
But it also helps fund these free youtube tutorials that I put out and it saves you a lot of money .
So it's a win , win for both .
But if you don't want to use it , you don't have to .
So you can see that our domain went from $18 down to just $5 and our one month of hatchling plan went to 10 95 over to 767 .
And if you did the 12 months , then this is going to be an even bigger discount and then you will be paying for it up front .
But all in all $29 it's not bad .
So we're going to go ahead and scroll down and just agree to the terms and click on .
Check out now .
Cool .
So now host Gator is just setting up your account .
So just give that a minute .
Cool .
So now it's gonna say , hey , tell us about your goals .
You don't really need to do any of this , you can just go ahead and click on the X and then from here , you can also just click on this X right here .
Cool .
So now you're inside your host gator dashboard and you can see that your hatchling plan is right here with your custom domain name hooked up .
So now we can move on to step number two , which is to install wordpress .
Wordpress is the free software that we're going to be using in order to build our site and launch it live .
So in order to do that , you can just go over here to install wordpress and click on that and then just click on install now right here .
And from here , just make sure that you're on the latest version of wordpress , which we are and then just make sure that you've got your domain name right here and then we're just going to scroll down and you can give your site a title .
So you could just say , you know , whatever the last name is and wedding for this .
I'm just gonna say create a wedding website .
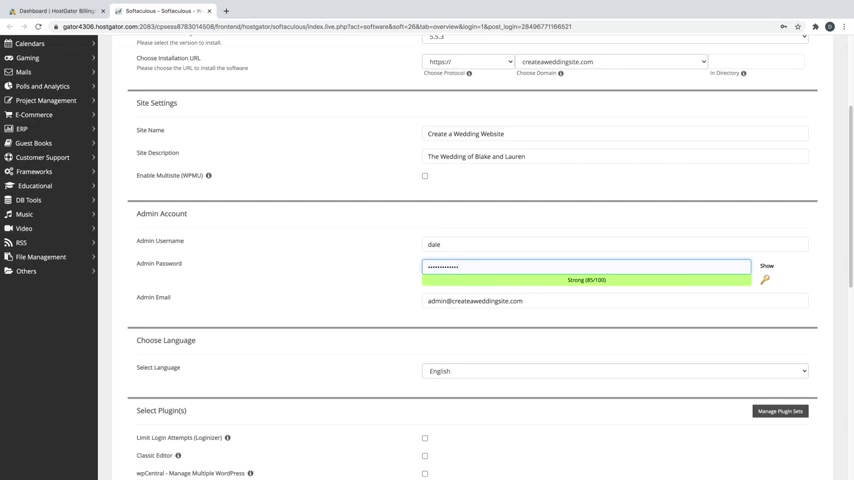
And then for the site description , you could just say something like the wedding of , I'll just give two random names , Blake and Lauren like that , but you can write whatever you want .
And then we're just gonna go down here and you can always change the site name and description as well later if you want to , but just put in whatever you want right here for now and then just come down here and just put in your name for the admin , just like that , you can just use your first name and then a password and this is the password that you're going to use to sign into your site anytime that you want to make changes .
And then for the admin email , just make sure that you use the same email that you use to sign up for host gator with .
So just go ahead and delete the one that they give you and just put in your own email and then just scroll down and you can select your language here and then you can just skip the rest of this stuff and come down here to install .
And now Wordpress is installing .
Cool .
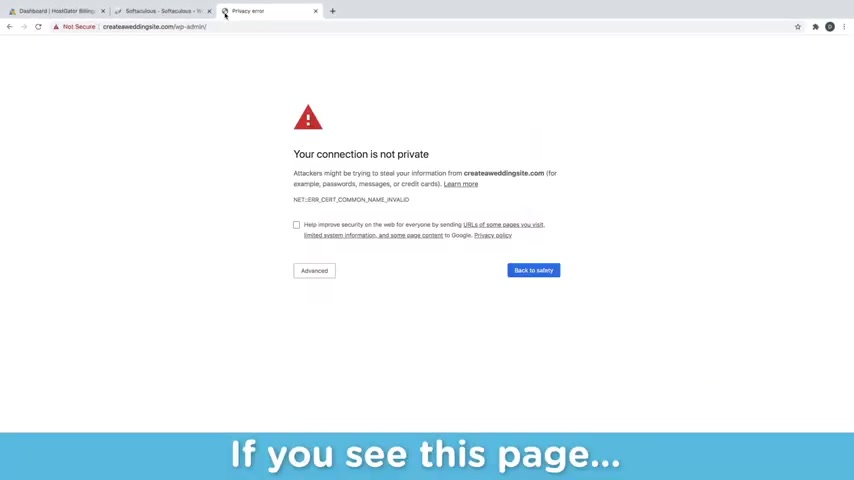
So now Wordpress has successfully installed and if you want to access your site , you can just click on this administrative URL here or the way to really get used to it is to come up here to a new tab and type in your new domain name forward slash WP dash admin .
And this is the way that you're always going to sign in to your site .
And if you get taken to a page that looks like this or anything other than the word press sign on page , which looks like this , then that means that your site is propagating .
And what this means is that host gator now has to send out your new domain name across the entire world and let every server in the world know that , hey , this new domain name exists and it's live .
So this process can take anywhere from 30 minutes to an hour .
And usually for me , it's really only about 10 minutes , but it can take up to 24 hours .
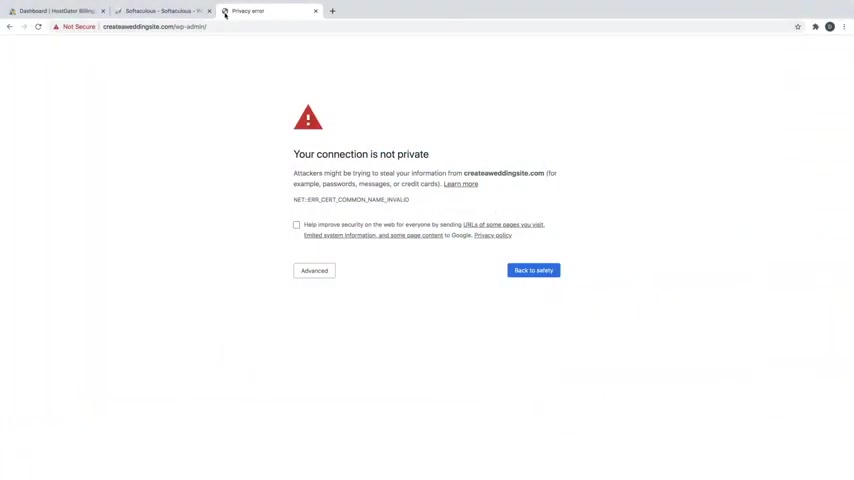
So don't panic if you don't see the word press log in page and you're brought to a page that looks like this or maybe something that says coming soon , anything other than the sign on .
So just every 10 minutes or so , just go ahead and refresh this URL here and check on your site .
Ok ?
So here we are on the wordpress sign on page .
So I'm gonna go ahead and log into my website .
So I'm just going to use my name , which is the admin name and then my custom password and then just click enter and here we are inside the wordpress dashboard .
So from here , we're just gonna go ahead and clean up this dashboard because it looks a little daunting at first .
So I'm gonna just go ahead and dismiss this and just kind of close all of these boxes that you see just to kind of clean up our working environment , just like that looks a lot better .
And now everything that you need to access for your website is going to be over here on the left hand menu .
So what we're gonna do first is move on to step number three , which is to install and activate the Astra theme .
Astra is an awesome , easy to use beautiful theme .
So first , what I want to do is show you what our current website looks like before we get that theme .
So I'm just going to go up here to my site name and right , click on visit site and just open that up in a new tab and we can go ahead and close out of these host gator ones up here .
So here is our current site and obviously it looks nothing like a wedding website .
It's kind of ugly .
So let's go ahead and fix that by getting the Astro theme .
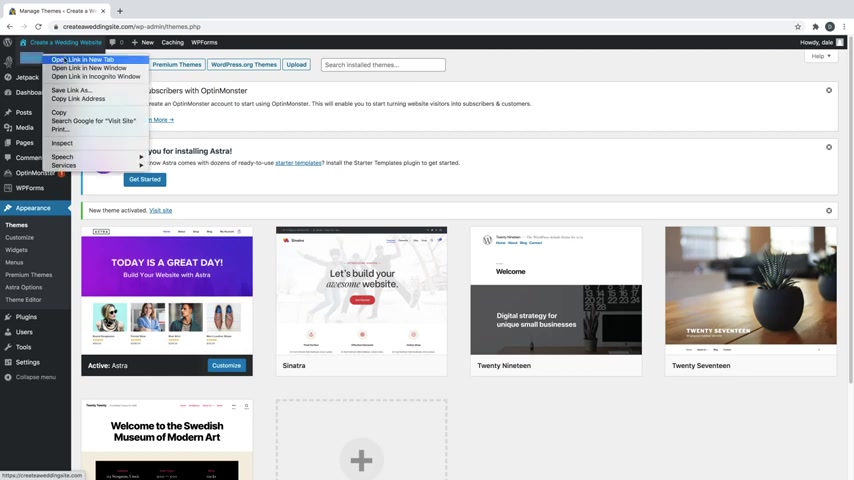
So what we're gonna do is just going over to appearance and then go to themes and here you can see the active theme is 2020 .
It's just the default theme and you've got a few others here installed as well .
What we're gonna do is click on add new theme right here and I'm just gonna go over to the search bar over here at the top , right and type in Astra and then you can see Astra right here .
Just go ahead and click on install and then click activate .
Cool .
So now let's just go ahead and take a look at the website .
It's going to change a little bit .
It's still not going to be an attractive website yet , but it's going to be a little bit cleaner .
So you can see we've got a lot more white space and it's a bit cleaner .
So now what we need to do is get some special plugins that's gonna allow us to actually build this wedding website with the drag and drop software and that's all free .
So let's go ahead and just close out of this and we'll move on to step number four , which is to install plugins .
So , like I said , we're gonna get that Dragon drop plug in .
So let's go ahead and start with that and we'll just go over to plugins and then go to add new .
And then we're going to go over to the search bar over here and just type in element or , and you can see element or website builder right here .
It's got five stars , tons of reviews , 5 million active installations .
It's a great page builder .
So we're gonna go ahead and click on install now and then click activate and then we're gonna get another plug in that's gonna work well with element or it's gonna give us a few extra tools for element to .
So let's go ahead and go back over to plugins and go back over to add new and then just go up here and you can just type in or again and then you'll see essential add-ons for mentor right here .
And this is just going to give us some awesome extra widgets and tools in order to customize your website even further .
So we'll just go ahead and click on install now and then click activate .
Cool .
So now we can move on to step number five , which is to select a starter template .
So the astra theme comes with some awesome starter templates that does a lot of the upfront work for you .
So that all you have to do is drag and drop and replace text and images and things like that .
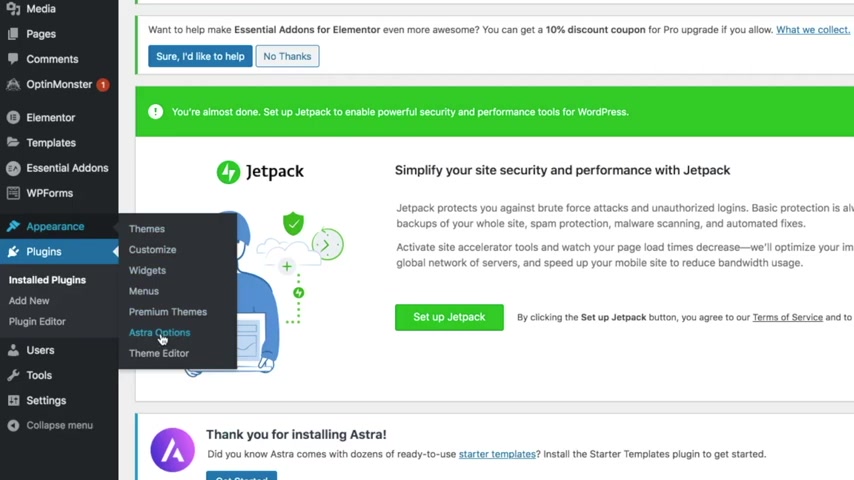
So let me show you what I mean , what we're gonna do is just going over to appearance and we're gonna go to Astra options and you'll see .
Thank you for installing Astra right here .
It's got this little get started button .
If you want to get these ready to use starter templates , we're going to go ahead and click , get started and that's just going to activate another little plug in for us to give us those templates .
And then all we have to do is select our page builder and we installed mentor .
So we're gonna go ahead and click on that one .
And here you can see we've got tons of these starter template websites and there's all sorts of different types of these websites and they're really cool .
And anything that says agency on it is going to be a paid one .
But if you want to search for free ones , you can just go up here to all and then we can just change that to free and Now here you've got a list of all the free ones .
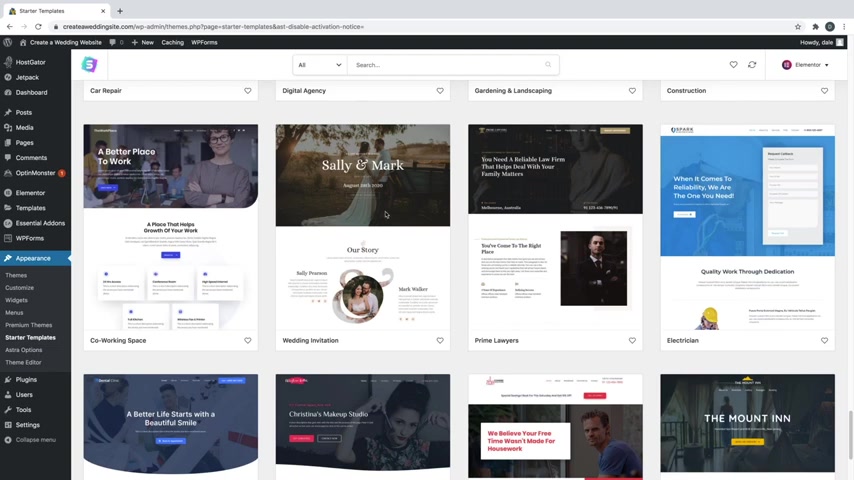
So , what we're gonna do is scroll down and you should see the wedding invitation one right down here .
And if you want , you can always just type in wedding up here in the search bar and you'll be able to find it as well .
So once you get the wedding invitation one right here , we're just gonna go ahead and click on that and you can kind of get a little overview of what that looks like .
If you just scroll down , you can see what the website looks like .
It's really nice .
So we're gonna go ahead and click on import complete site .
And then from here , all you have to do is just click on import and now it's gonna be importing that entire wedding website with all the images and everything built already .
And then all we gotta do is just go in and drag and drop and replace things .
Cool .
So now it was successfully imported and now we can just click on view site and now you can see that we've got this awesome template to start from which looks beautiful and I will show you how to edit everything .
So that takes us to step number six , which is to customize your website .
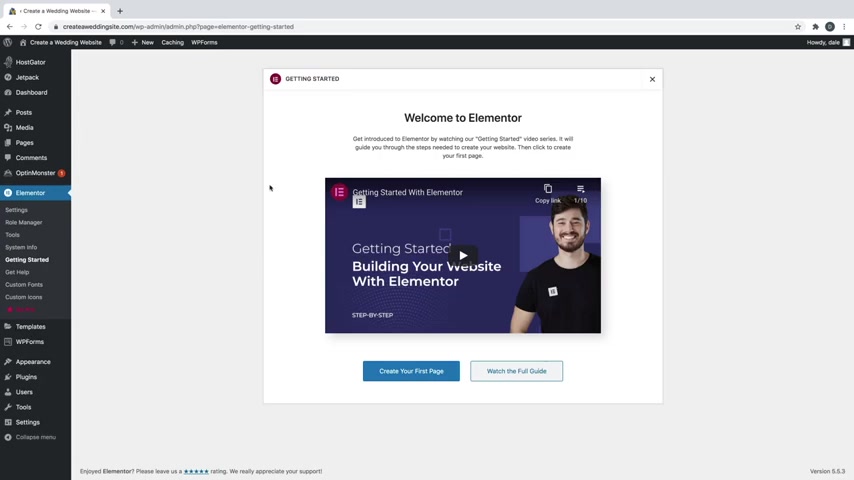
So in order to do this , all we have to do is just click on the edit with element or button right here and that's gonna open up the element or page builder .
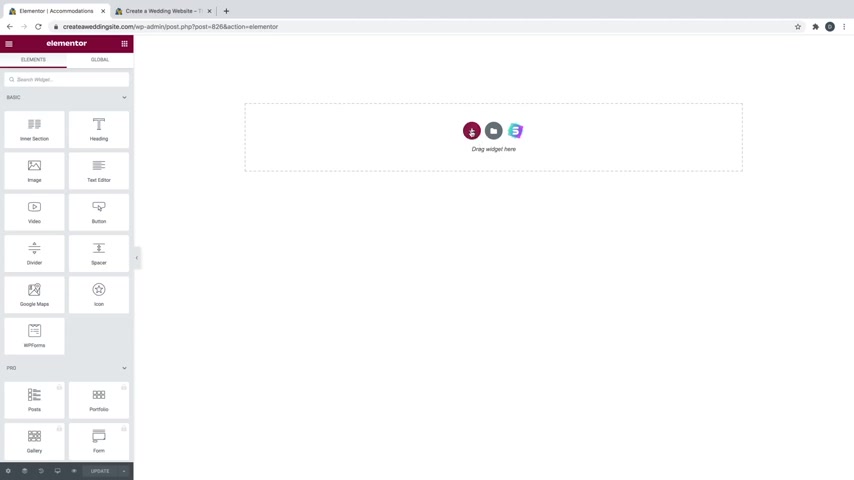
And you can see over here on the left hand side , we've got our editing menu with all of our widgets that we can drag and drop in here .
So what I'm gonna do first is show you how to use element to so that you're comfortable with it and then I'll show you how to edit all this info here , change images , buttons , all sorts of stuff .
So first in order to actually use element to let's just go ahead and create a new section .
So we're going to go up here to the very top and click on this little plus button to add a section that's just gonna add one up above here .
And what I'm gonna do is just kind of show you how to recreate this header area up here , this hero image with texts and everything on it .
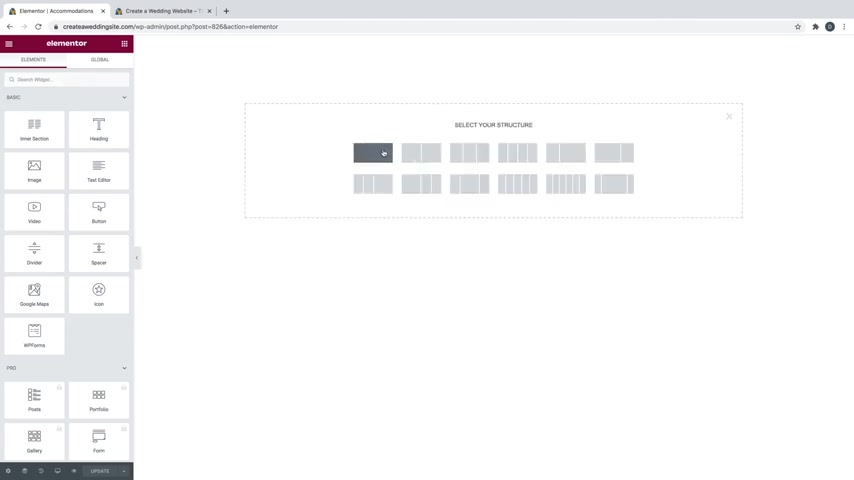
So to do that , just click on the plus button that's gonna ask you to select your structure .
And this is how many columns that you want within that section .
So this is just one column really , you can see that we've got a column here .
So how this works is you've got the section , which is this big one in blue up here .
And then you've got a column within that , which is this kind of gray dotted line .
And then you've got widgets inside of each column .
And that's these other blue boxes in here , which is going to be text and buttons and things like that .
So it goes sections , then columns , then widgets .
So we're going to select one column and it's gonna be a pretty small column .
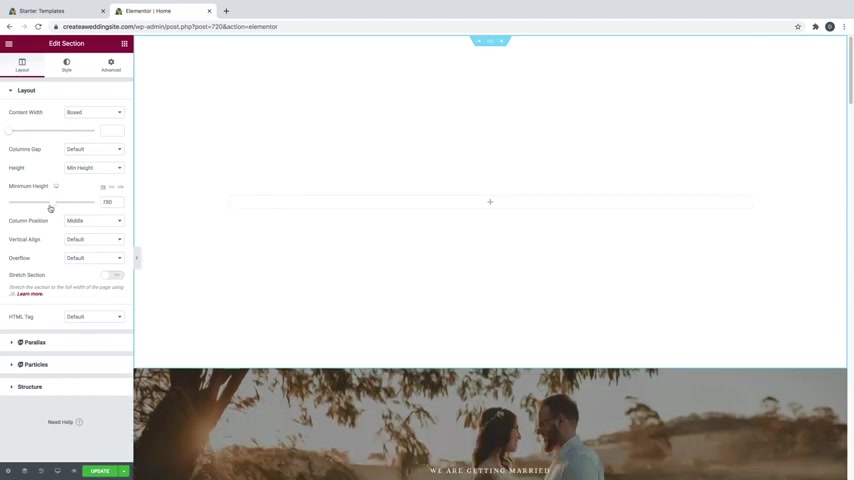
So if you want to increase the height on that , just go over here to height and change it from default to minimum height and then you can just drag the slider up and down to see how big that you want to create this section .
So I'll just do a nice big section like that .
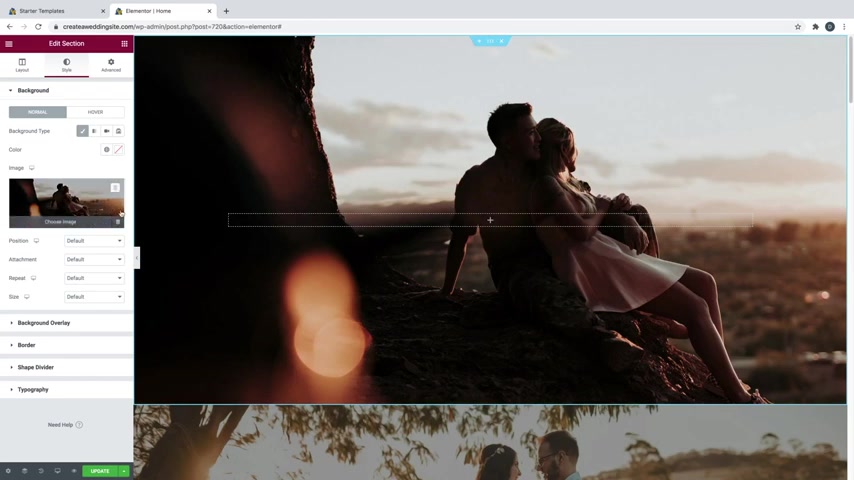
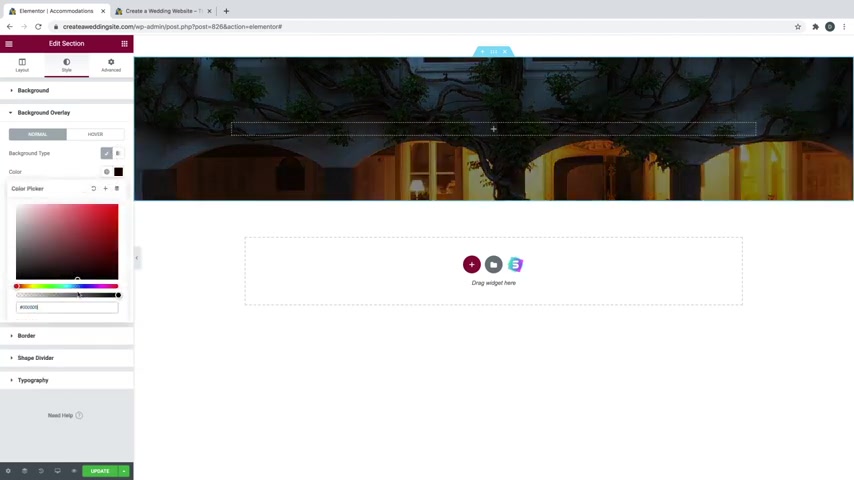
And what we're going to do first is put in a background image .
So I'm just going to go to the little six dots right here to edit the section and that's going to pull up the editing section over here , which we're already on .
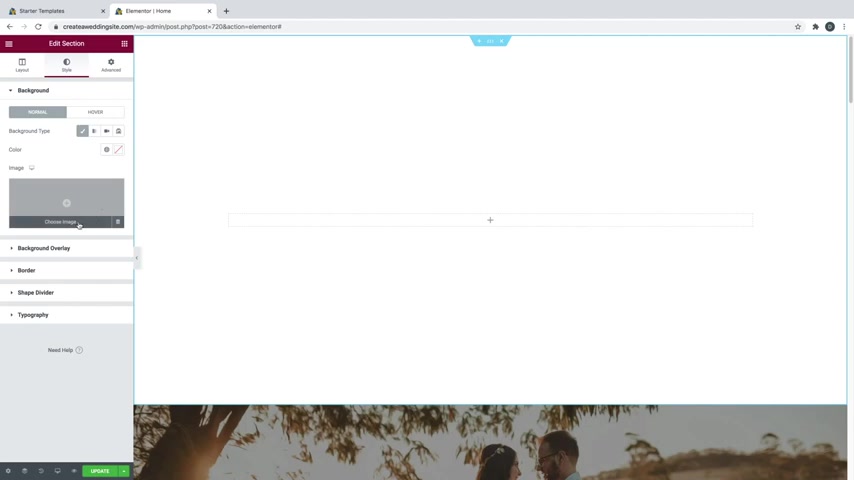
And all we need to do is just going over to style and then you can see background .
We're just gonna click on the classic and you can do either a color or an image , but you can also do a gradient , you can put a video in there or do a slide show .
So I'm gonna put in an image .
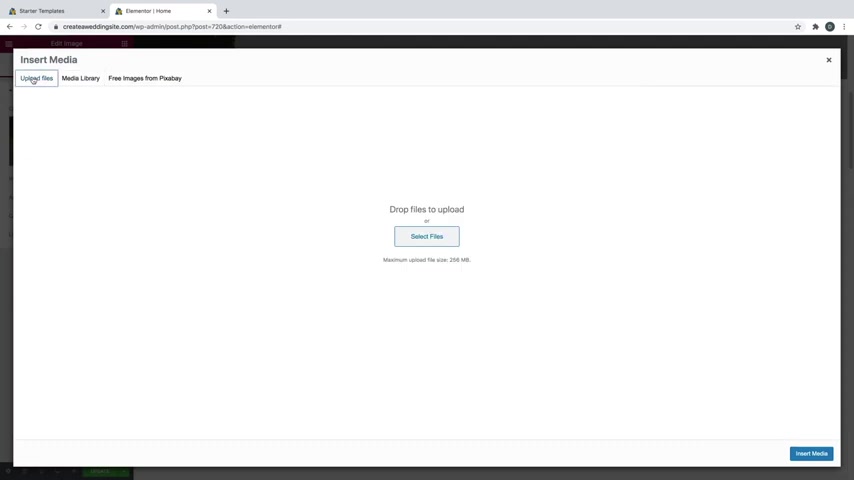
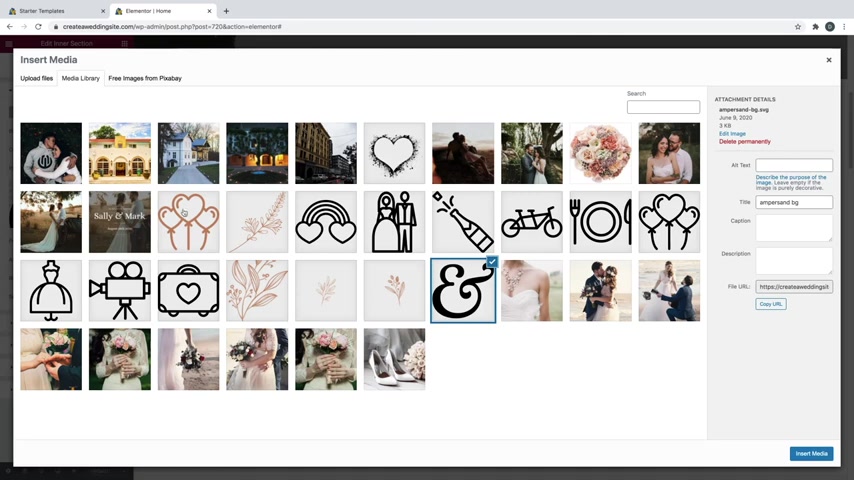
So I'm just gonna go ahead and click on choose image and then it's gonna ask me to upload files .
So I'm just gonna go over to select files and I've provided the follow along images if you'd like to follow along with me in the description .
So you can just go ahead and click those and get an instant download of those images and you will end up with a folder like this that has created pro website wedding website images .
And I'm just going to select that and I'm just gonna choose the main image right here and click on open and here .
You can see all of the images that were already imported with the demo site .
And then our new image right here , which this image is 1920 by 964 .
You could even get away with going lower like maybe 1500 pixels .
But really , you don't want to have a really high quality image like a 3000 pixel image because then your website's gonna load a little too slow and it's not gonna look very good .
So sticking somewhere around this size is gonna be just fine .
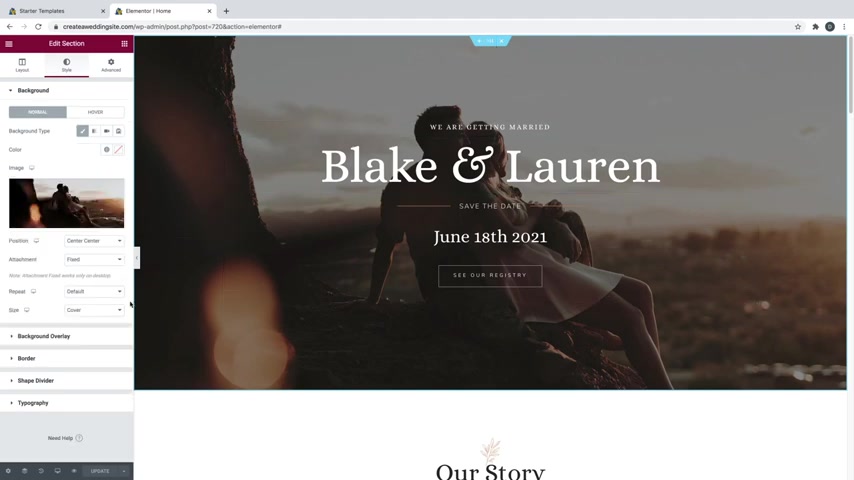
So I'm going to choose this main image and click on insert media that's gonna put the image in there and then you can kind of edit how the image sits in here by going over here to position and we can do center center and that's gonna move it towards the center .
And then for the size we're gonna change that to cover and that's gonna kind of zoom it out a little bit and it's gonna cover all the way from the left to the right side .
And no matter how ma how big you make this box , it will resize to cover this whole space and you can see that the image is actually going to scroll with the rest of the site .
Now , what you can do is create a whole parallax effect by going over to attachment and changing this to fixed .
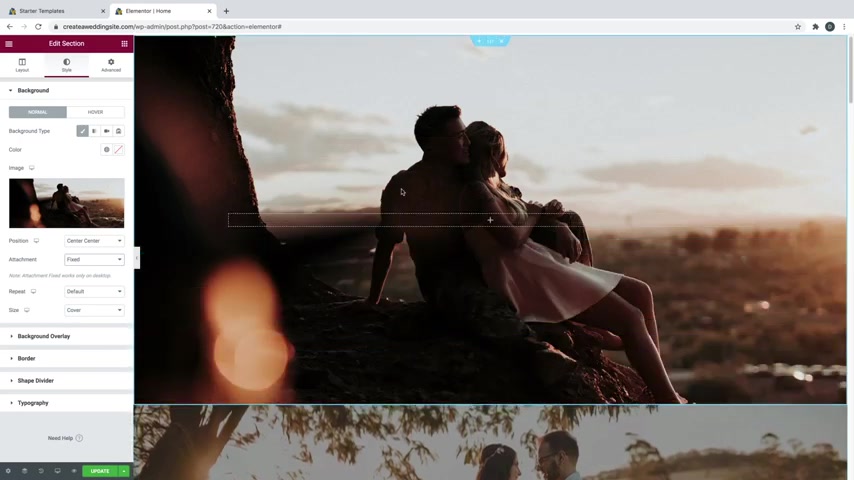
And then now whenever you scroll , the image stays in place while the rest of the website moves , which is really cool .
I really like the way that looks .
So I'm gonna go ahead and keep that and then you can just close background and come over here to background overlay and we can just add an overlay .
So we can just click on classic and add a color .
I like to do black because I like to do white text .
So you could add black in here or you could do some sort of off color like some red or maybe some orange or pink , whatever you wanna do .
But I'm gonna go ahead and do black and then you can change the opacity , which is how strong you want that overlay to be .
So you can bring it way down and it's gonna be fully transparent or you can add just a little bit in there .
So I think adding a little bit somewhere around like a 0.25 is pretty good and then we can add some text and buttons and stuff over this .
So in order to do that , you can just go over to the little Rubik's cube looking symbol here , click on that and here you've got all your different widgets .
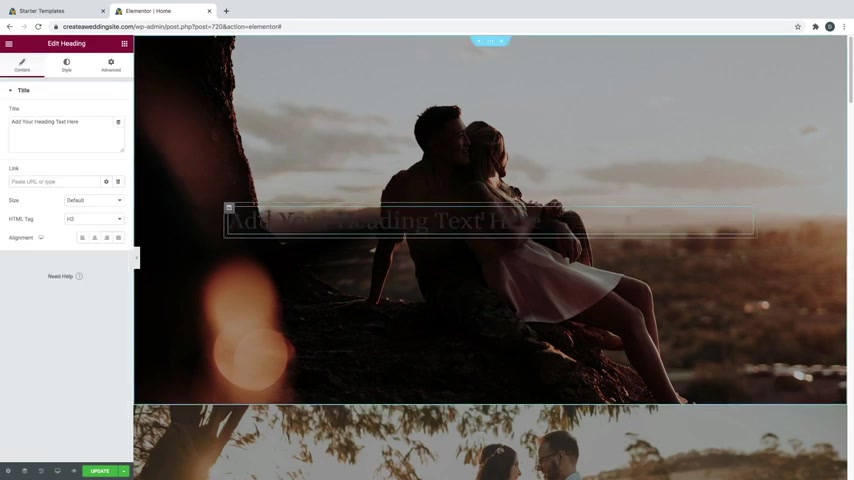
So if we wanted to add some text like some heading text , we can just drag this in and then you'll see the blue line that's going to indicate where we're going to drop it .
And now you can see we've got some text here .
So first thing I'm gonna do is actually just change it to be white so we can see it .
So I'm just gonna go over to style and then text color .
I'm just gonna change that to be white just like that .
And if you want , you can just double click and you can type right here on the screen or you can just go over to content and you can type in this box as well .
So I'm just going to change the text and then you can just come down here to the alignment and you can put that in the center if you want to or the left or the right .
I think the center looks pretty good .
And if you go over to style , you can come down here to and you can change the font by clicking on family .
And you've got all sorts of Google fonts in here , which you can see if you just scroll down and give them a second to load .
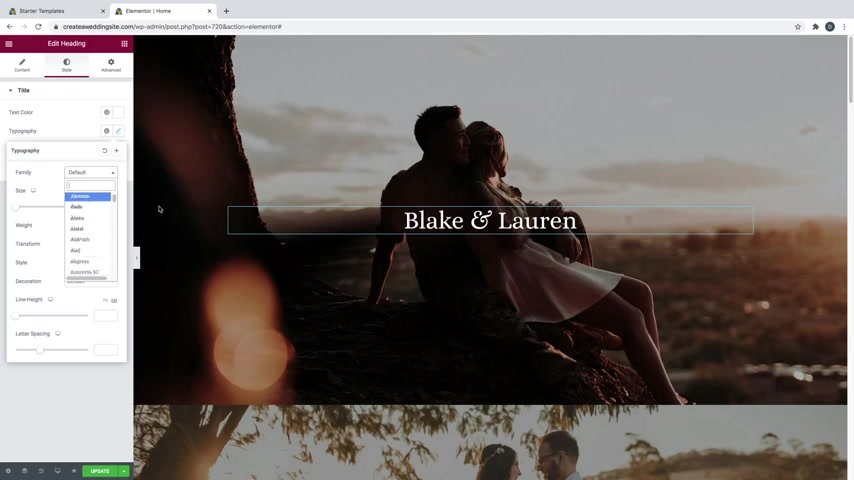
You can see a kind of a preview of what they look like , but I like the default font .
I think it looks great .
So I'm gonna go ahead and leave it then you can change the size here by moving the slider up or down , which is really cool .
But I like the default size .
So I'm just gonna do command Z if I'm on a Mac and if you're on a PC , you can do control Z and that's going to undo any of your changes .
Actually , you know what , I am gonna make this a little bit bigger , maybe something like that .
And you have some other editing options in here like the weight and style the line height , the letter spacing and you can feel free to play around with these however you want .
So I'm gonna go ahead and close this and you can even add a tech shadow if you want as well .
I've already got a black overlay on this thing , so I really don't think a shadow is gonna show up too well .
So I'm not gonna put one in now .
What I'm gonna do is just duplicate this text .
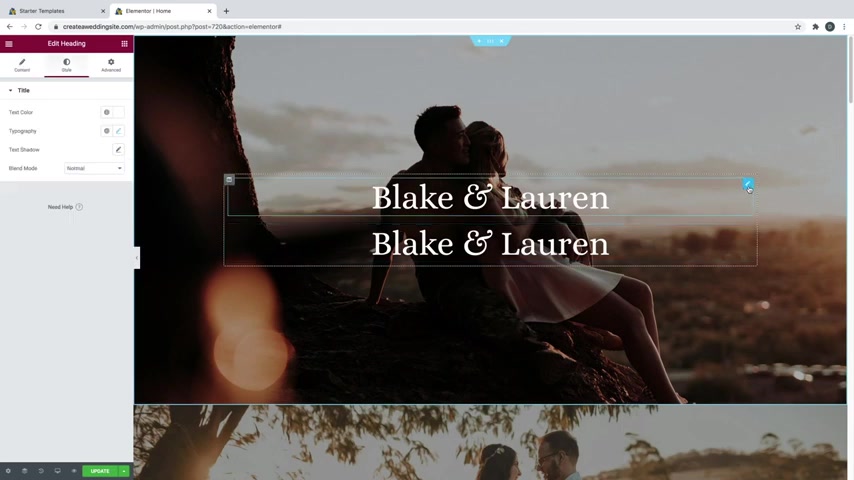
So I'm gonna go over here to the little pencil icon and just right , click on it and click on duplicate and I'm gonna take this top text up here and I'm just going to click on the little pencil icon and I'm just going to go back over to typography and I'm just gonna drag the size down to be something like this and then I'm just going to change this text to say something like we're getting married , something like that .
And then I'm actually gonna bring the size down again .
So I'm gonna go back over to typography and just drag this down to be something more like that .
And then what you can do is just duplicate this text again and we're just gonna drag that down below .
So it's on the bottom and then you could put in like the date here to be something like that .
And then if you want to add in a button , let me show you how to do that .
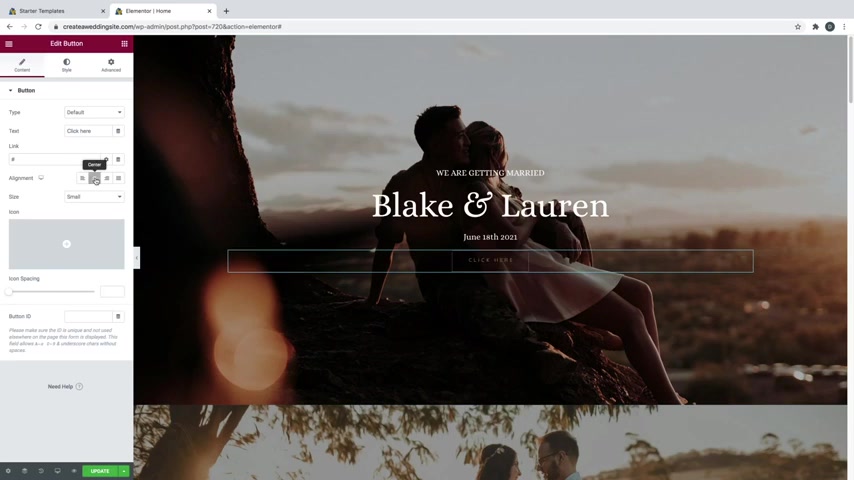
So I'll just go over to the Rubik's cube looking symbol and then just come down here to button right here and just drag that in just like that .
And then you can just go ahead and align that in the center .
And if you want to change the button , text , you can do that right here .
So we could see something like cr registry just like that and you can change the style of the button by going over to style and then you can change the typography .
So if you want to put different text in there , you can .
But what we're gonna do is go over to normal tab right here .
So you've got normal and hover and hovers whenever you hover the mouse over it .
So first with normal , we're gonna change the text color to be white like that , which looks a lot better .
And then you can also change the background color if you want as well .
But right now it's clear and I kind of like the way that , that looks .
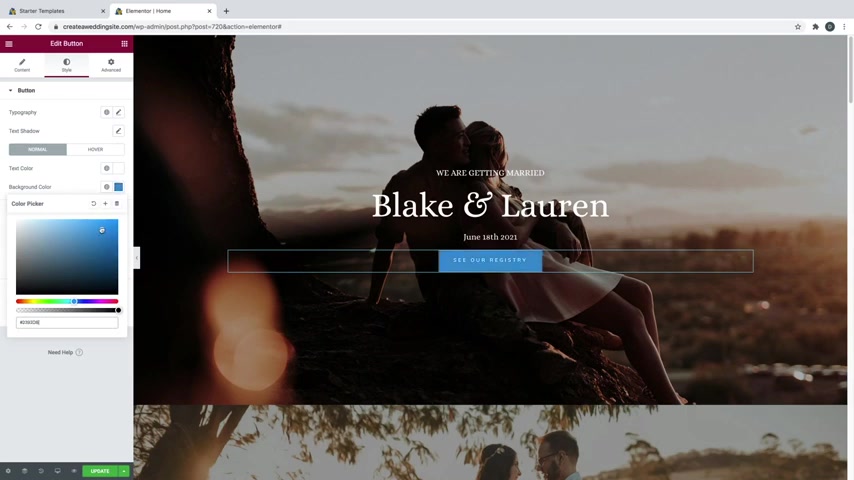
But if you wanted , you can just click on background color and you can change it to any color that you want , which is really nice .
But again , I'm just gonna command Z and go back to clear and then you've got the hover .
So if we just click on the hover tab right here , whenever you hover over it , nothing really happens .
So what we could do is go over to hover animation and we could change that to grow .
And now whenever we hover over it , the button just gets a little bit bigger , which is pretty cool .
And you can also change the background color as well .
So let's say that whenever we hover over it , we want it to change white .
So I'll just change the background color to white and then I'll change the text color to black .
Yeah .
And now whenever we hover over it , the whole background turns white and the text turns black and you can also change this border color here as well .
So right now it's kind of this orange color .

It's kind of hard to see what you can do is just go back over to normal and then just come down here to border type and we can just change that to solid and just change the color and we could do maybe like a white like that .
There we go .
So now our border colors change , which looks really good .
And now I do think that this button is a little too close to the rest of this text .
So a good rule of thumb with websites is group things together that are meant to be together .
So text is meant to stay together .
So we're going to leave this text as close as it is to all the other text , but the button should have some separation .
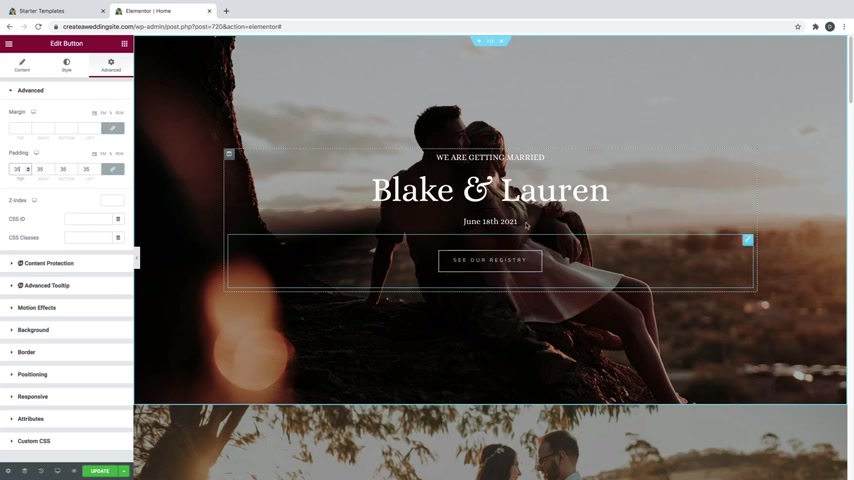
So to do that , just make sure that you're on the button and just go over to advanced and then just come down here to padding and make sure that the little link values together button is gray and then just add some value here and that's gonna add some space around that button .
So somewhere around a 35 I think looks pretty good .
And another cool trick is you can change the animations of these .
So whenever the website were to load for the first time , you could have this text and this button kind of fade in which looks really nice .
So let me show you how to do that .
You can do it for any individual widget that you want or if you want , you can just take the whole column here by clicking on the little column button .
And then you can just go over to advanced and then just down to motion effects and then the entrance animation , we can just change that to fade in and just like that it's gonna fade in whenever you first load the website , which is really nice and you can do a normal speed , slow or fast .
So that was the slow , which I think looks pretty good as well .
Or you can do it fast .
And if you want to get a full view of what your website is looking like as you're editing , you can just go ahead and close this little tab right here to hide the panel and you can see what that looks like .

So I think this is looking fantastic , but we've already got it built right here .
So what we're gonna do is just open this up and we're going to delete this whole section by clicking on the X right up here .
I mainly just wanted to show you how to use mentor so that you are comfortable editing your site however you need .
So what we're gonna do is just start fresh with this whole template website .
So first thing I'm going to do is just replace this image again by clicking the little six dots up here , going over to style and then just choosing a new image , which I'm going to choose the main image here and click on insert media .
And I'm also going to change that attachment to be fixed so that it's got a nice parallax effect just like that , which looks really nice and I'm gonna change the text up here .
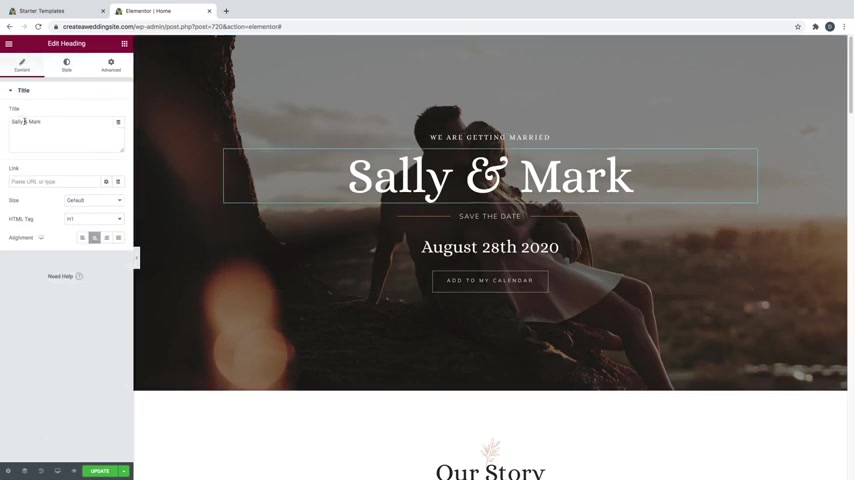
So I'm just gonna click on the text and then I'm just gonna change the names and then same with this text .
I'm going to change the date .
And if you want to edit these little lines here that are on the side of the save the date , you can just go ahead and click on that little widget right here and you can see that we've got a divider on here .
It's set to solid and just go over to style and you can change the color here .
So if you want , you could just kind of drag this over to be something more like a pinkish color like that .
And now you can see it's going to update and change how that looks on here as well , which is really nice .
But I'm gonna go ahead and just leave it as the default .
So I'm just gonna command Z and we're gonna go ahead and change our button here .
So I'm just gonna go ahead and click on the button and then change this to something like cr registry .
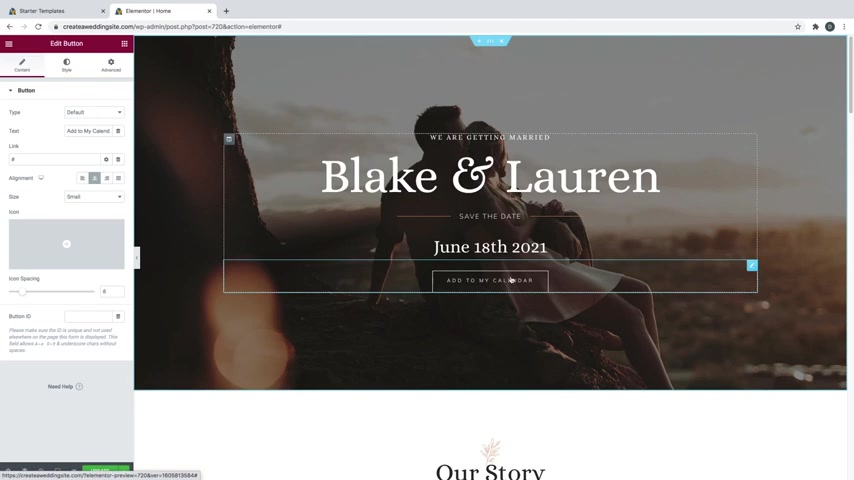
Because if you have an ad to my calendar button on your website , that means that it's going to be a public calendar event and anybody can just come to your website and add your wedding to their Google calendar and you really don't want wedding crashers showing up to your wedding .
So instead we're going to change this to a registry button and I'll show you how to set up a registry with Amazon So first , I'm just going to change this text to cr registry and this link box here is where you're going to put in that URL .
So what you'd want to do is just delete the hashtag and you'd want to put in a URL like this and then that button is going to take them to whatever that URL is .
So I'll go ahead and show you how to set up a registry and put that in here .
But first we're just going to edit the style of our button again real quick .
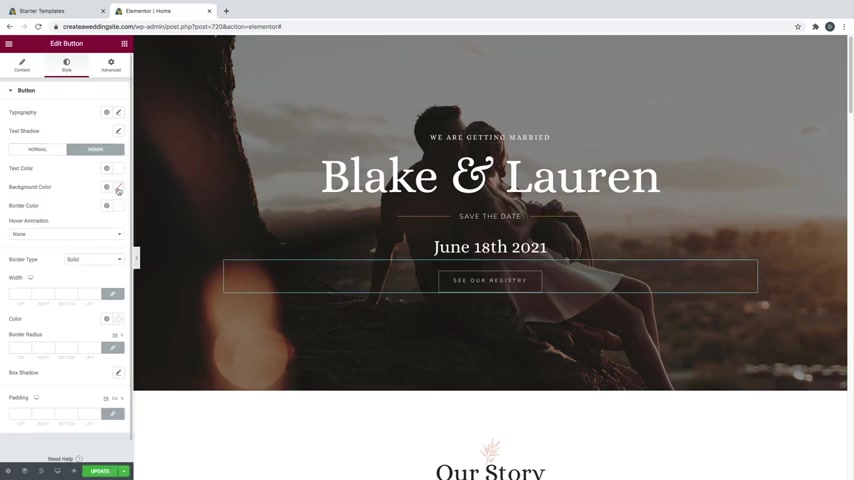
So I'm gonna go over to style and then go over to hover and just change this to a white background and some black text so that whenever we hover over it changes just like that .
And I'll also do that grow animation again .
And I'm also going to add some more space around this button as well .
So I'm just going to go over to advanced and then just add some padding and what you can do is actually get rid of this margin .
You can see there's some space up here at the top .
So we're gonna go ahead and get rid of that and then just add some patting just like that .
And I'm actually going to show you how to create the registry coming up here in a few minutes .
I just want to move on to this section down here and show you how to edit this before we jump into that , but we will be coming back to this button .
So just go ahead and go over to content and just leave this link space blank right here .
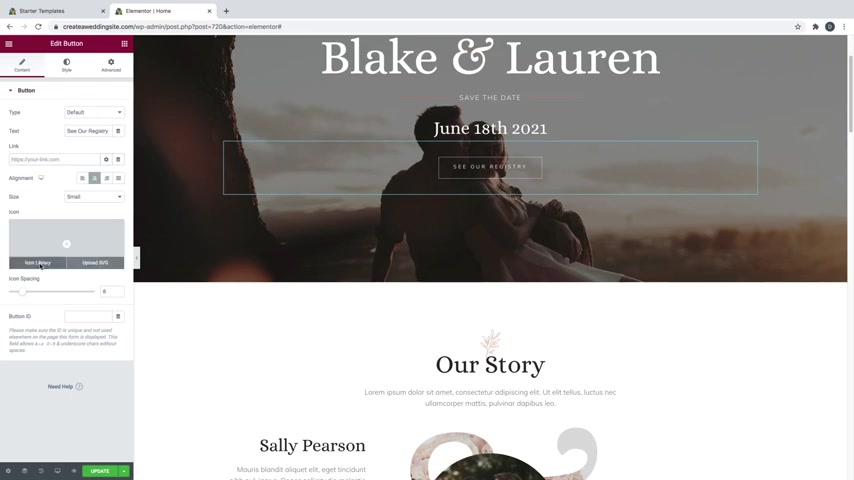
And also another fun tip is you can also add an icon if you want to your button .
So you can just go over to icon library and select any sort of icon that you want .
Like , I'll just pick one at random for right now .
Uh Let's do maybe like this little gym and just click on insert and now you can see that it's going to put that little icon on our button , but I don't really want an icon on it .
So I'm just gonna go ahead and click on the delete button and make sure that you're always saving your work by clicking on update .
OK ?
So let's scroll down and edit this section here .
So like I showed you how to do , you can change the text up here and we're gonna go ahead and just change these names and I'll change this one as well .
And I'm just making this up as I go and you can edit this text by simply clicking the same way you would any of the other text and you can edit it up in here or you can just triple click and edit it right on the screen and you can edit these social buttons by just clicking on this widget here and you can just open up any one of these and you can change the icon here and then you can put a link to the Facebook pages of each of these people or their Instagram , Twitter , whatever it is that you want , and you can change it to anything .
And if you want to edit the color of these things , you can just go over to style and then you can change the primary and secondary colors right here .
So the primary color is gonna be the background and then the secondary color is going to be the actual icon itself .
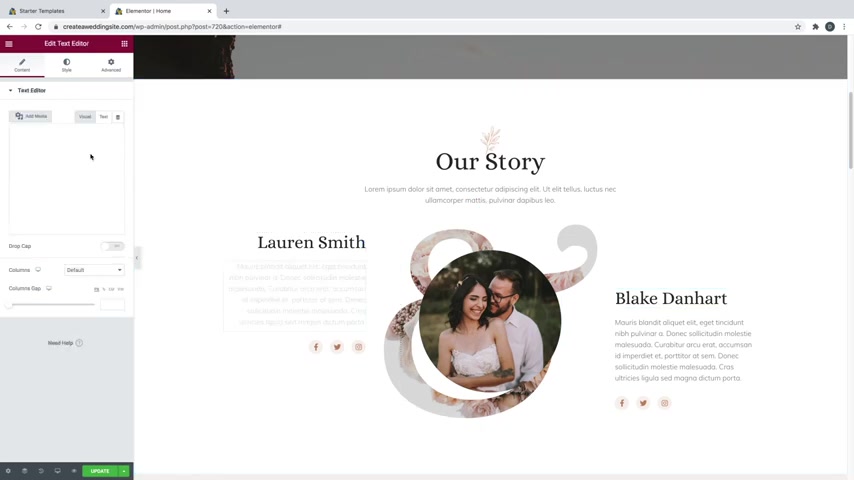
And let's go ahead and change this image here .
So I'm just gonna go ahead and click on this little image widget right here and we'll just choose a new image , go over to upload files and then select files and you can actually upload multiple files at once .
So I'm going to go ahead and select all these other files and I'm just going to click on open and that's going to import all of these at one time .
And I'm just gonna grab this image of the two people and just click on insert media and make sure that you're using a square image for this .
Because if you don't , it's gonna come out kind of looking like an oval and it's gonna look a little funny .
So if we just go over here to choose image , you can see that this image is 700 pixels by 700 pixels .
And if you need to edit any photo without needing any sort of software like Photoshop or anything like that .

You can just go up to a new tab and type in photo with an F dot com and you can just click on edit a photo right here and we'll just say try it now on to 2.0 looks like they made an update and then in order to upload one of your images , click on open and then just go to computer and I'll just select one of these other images so I can show you how to crop it into a square .
So I'll just select the main one and click on open .
And then we're just gonna go ahead and skip this little tutorial over here .
And if you want , you can just crop the image by going over to crop and we'll just change this from free form over to a square .
And now it's gonna create a square which you can drag around anywhere that you want .
And then if you want to kind of center them more , you can make it smaller by dragging from the corner .
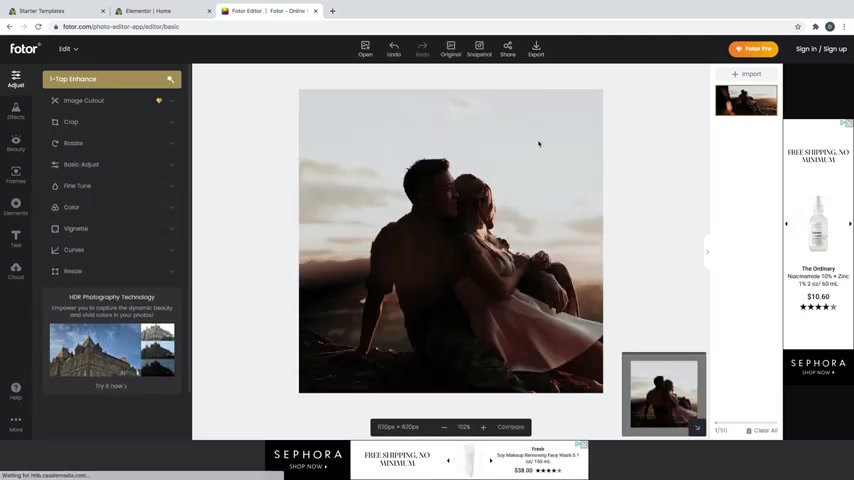
And then you could just grab that right there and click on apply and that's going to crop your image into a square and then you can just click on export and then all you have to do is just sign up for an account which takes two seconds .
You literally just put in your email and password .
It's not going to ask you to pay for anything or you know , confirm anything or anything like that .
And then you could just download the image , but I've already got my images .
So I'm just gonna go ahead and click on the X and then if you want to find royalty free images to use on your site , you can just go over to pia bay dot com and these are all free images that you can get away with .
You can even use them for a business as well if you want because they're all royalty free .
So you can just search for whatever you want , like wedding and you can find all sorts of wedding images that you can use as backgrounds or any sort of creative content on your site , which is really cool , but I've already got all my images .
So I'm gonna just go ahead and click on the X and I'll just click on the X here as well to hop out of here and again , just make sure this is a square because otherwise the oval is gonna look a little funny .
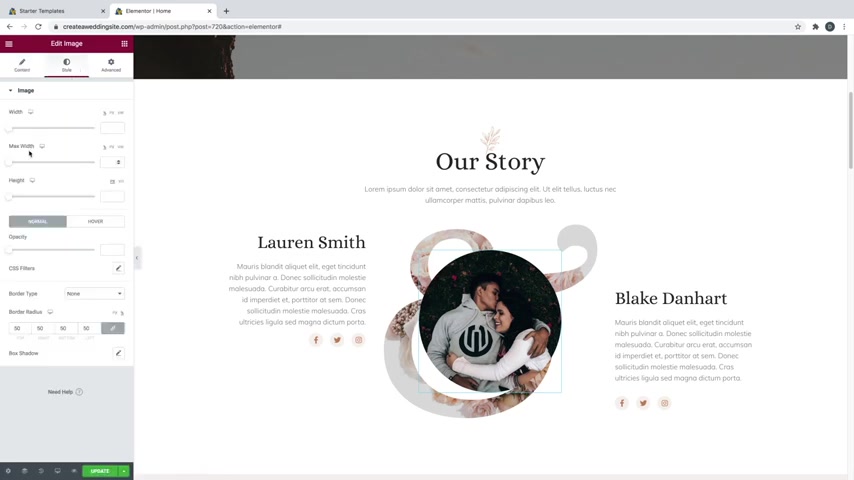
And then you can also go over here to style and you can change the sides of your image over here by using mac width , you can make it smaller or bigger however you want .
But I kind of like the default .
So I'm just going to command Z and go back to how it was .
And then you've got this little and symbol in the back back here and you can change that as well .
So if you just go up here to the little six dots for this section , which is an intersection , we're just going to click on that and then go over to style .
You can see that we've got the background , which is this , you know , an symbol right here and then the background overlay is what has these flowers images over it .
So you can see that the flower images are kind of built into that little an symbol .
So you can change both of these however you want .
So if we just go over the background , we can just click on choose image .
And just as an example , I'll show you this image with the heart .
It's kind of got like these paint splatters on it .
I'm just gonna insert that one and now you can see it's kind of in the background , but it's kind of cut off here on the side .
So in order to fix that , what you can do is just go over to size and change that to custom .
And then we can just drag this down this little slider down to fit within that area .
So now you can see that we've got our flower images over top of this black heart and you can change the flower images if you want as well by simply going to background overlay and just choosing a new image here , but I think the flowers look really nice .
And I'm gonna go ahead and put it back to the little Ann symbol because I think the an symbol looks really nice .
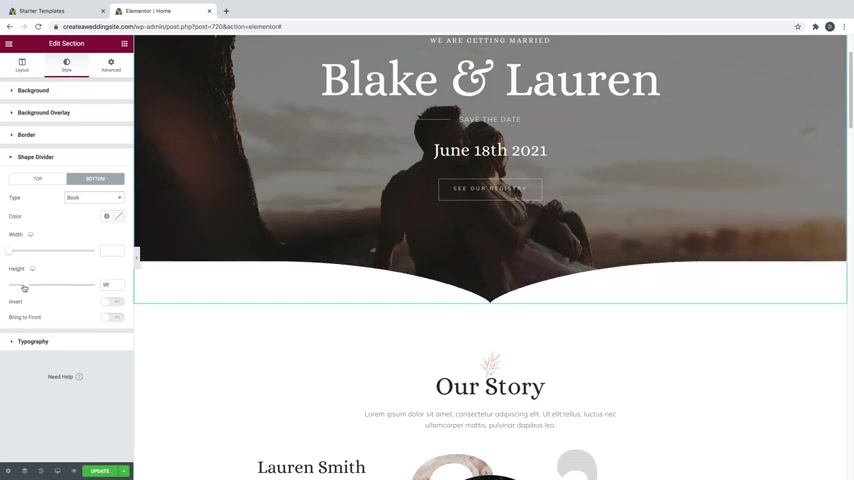
And another cool trick I want to show you up here for this whole hero image section up here is to add a shape divider .
So what I'm going to do is click on the six dots for this section .
And I'm gonna just go over here to shape divider , which is underneath style , I click on shape divider and I'm gonna go to the bottom .
So you've got the top of the section and then you've got the bottom of the section down here .
So I'm gonna do the bottom and I'm gonna change the type to , you know , start with something like tilt like that and it's going to add this shape here and then you can just determine the height right here and you can do some fancy ones .
So you could do like a book which looks kind of nice for a wedding website to have a book .
Kind of looks like the pages of a book are open .
And again , you can just change the height on that as well if you want to , you've got mountains and clouds and all sorts of stuff .
So you've got , you know , let's say mountains kind of got this cool uh transparency effect going on with different layers .
So you can change this .
However you want but I'm gonna just go ahead and leave it blank .
Ok .
So let's keep scrolling down and you can go ahead and change this quote if you want .
So , I think better to have loved and lost than to have never loved is a little depressing for a wedding website because they're getting together , they're not breaking up and this is something you usually say when you're breaking up .
So I'm gonna go ahead and change that to something else .
Let's see , what can we come up with ?
How about maybe something like that ?
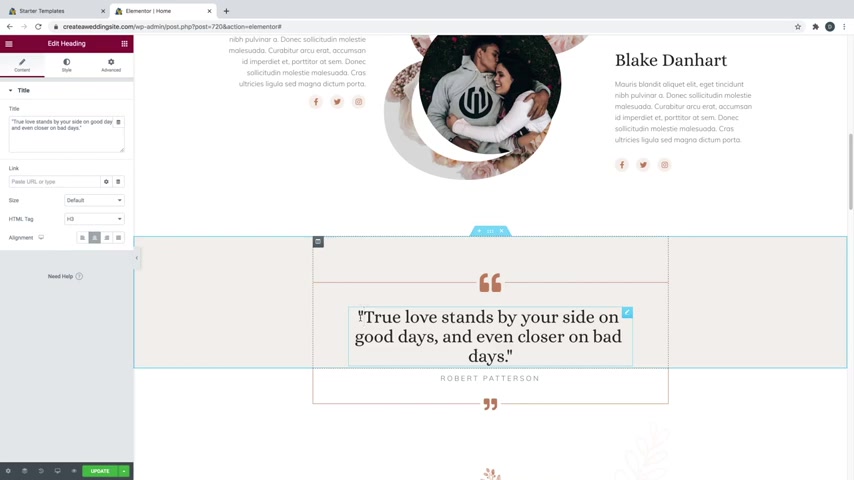
It's a little bit happier , feel free to , uh you know , let me know in the comments if this was a cliche or cheesy , but you know , it's a little bit better than the quote before .
So we're gonna go ahead and stick with that one and you can change whoever said this quote , I'm gonna change it to the internet .
And if you want to change the background of this , you can just go over to the six dots and then go over to style and then you can just change the color right here to whatever color that you want .
But I'm gonna go ahead and leave it the way that it was and you can also change these symbols here .
So if you just go ahead and click on this little uh edit icon button right here , you can change the little quote symbols or you can go over to style and you can change the colors of these as well .
So you can just drag this around and make it any color that you want .
But again , I'm gonna just leave it as the default and then same with this border around all this stuff as well .
You can change that by just going to the column and then go over to style and then just down to border and you can change that border color as well to match these little quote icons for whatever color that you chose for these .
Ok .
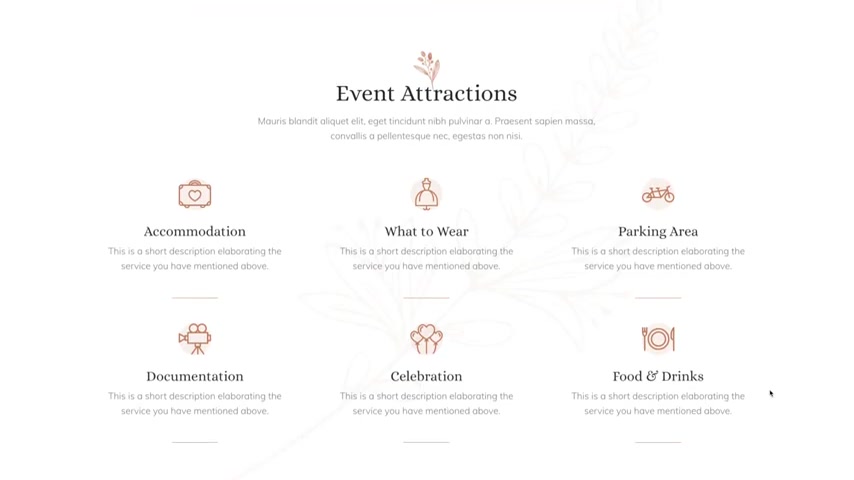
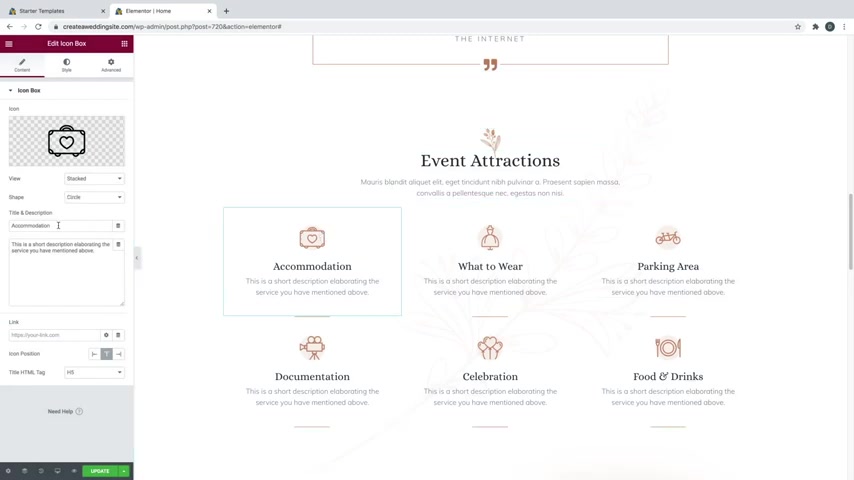
So let's just keep scrolling down and here we've got all the details for the wedding here with these different icons .
So what we can do is change these icons if you want .
So just go ahead and click on one for the little pencil icon for that widget and you can change the icon right here , which I showed you with the icon library .
You can also search for anything that you want , but I'm gonna go ahead and leave the icons the way they are .
You can change their shape over here and the text that's within these .
You can write a little short description about accommodation in here .
So this would be things like nearby hotels and things like that .

And you can change the style of the icons by going over to style and you can choose the primary colors here .
So we'll do secondary first and we can just change that to be kind of like a pinkish or reddish sort of color like that where you can do blue green , whatever it is that you want to do and then same with the primary color , you can just change that to be whatever you want as well .
But I kind of like just the way they are because it matches the whole style of the site .
So whatever color that you choose for your website , you're gonna want to make sure that all of your icons and borders and everything matches that same color and you can edit the spacing and the size of the icon as well by clicking on this uh little slider right here .
And let's say that you just wanted to add a little short description , but you wanted kind of some more information on each of these like what to wear or where to park things like that .
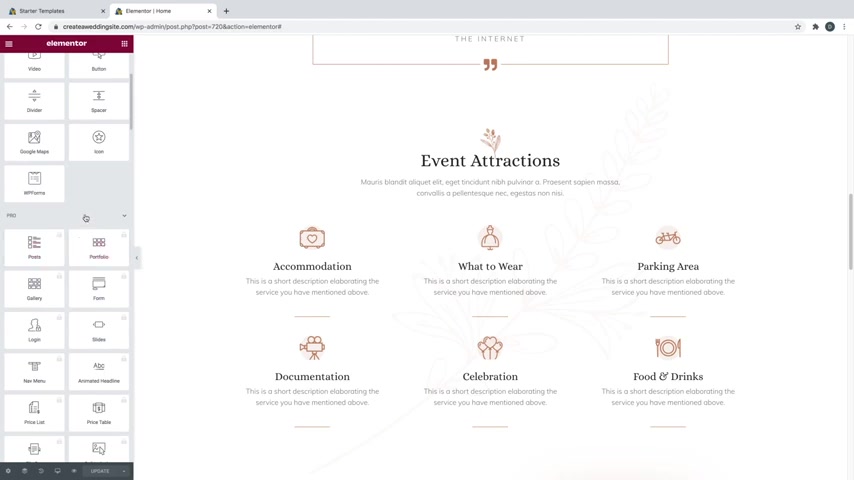
You can write them in here if you want to or what you can do is just go over the little widget uh Rubik's cube looking and symbol right here and we'll just scroll down and we're going to close the pro tab because these are all locked .
These are for Element or pro if you wanted to pay for it .
But we're gonna go ahead and close that and come down here to the General and we are just going to grab the toggle right here .
We're just gonna drag that in underneath .
Now , you're gonna see you've got these two little toggle buttons .
So we're actually going to get rid of the second one and just keep the first and just click on it and you can change this to something like read more .
And then down here you can write a lot more information about which hotels and everything , uh , are the best ones to stay at nearby .
How far away they are , how much they are per night .
So that your guests that are coming to the wedding can kind of get an idea of where they should stay .
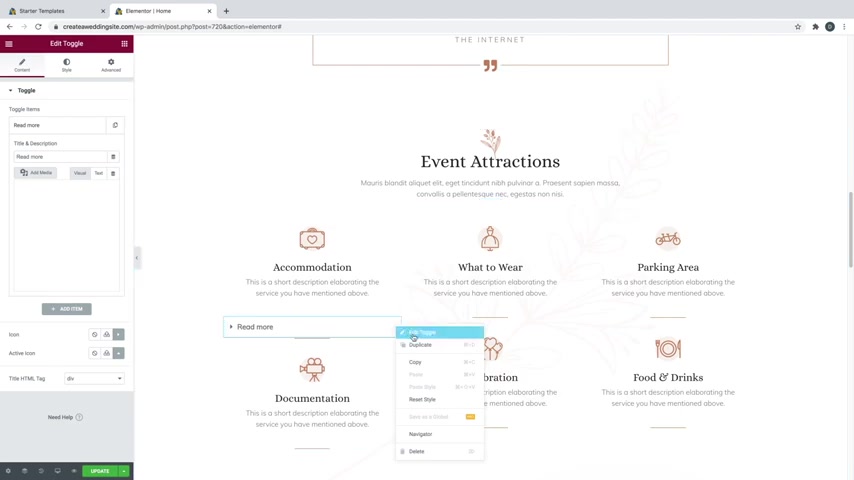
And then if they want , they can just toggle this to be open or closed to kind of keep things clean and you can do this on everything .
So you could just duplicate it and then you could just drag it over to another one like underneath what to wear .
And then underneath here , you could just write what the attire should be or which colors that you might want , your bridesmaids and everything to wear , whatever it is that you want to put in here , people can just toggle these on and off so they're always looking clean like this and then they can get some more information .
So that way everything is all on one page .
But what we're gonna do with this website is actually create different pages for each of these and I'm actually just going to do one and show you how to do it and hook it up .
So where whenever somebody hovers over this icon , it will take them to that page .
But I just wanted to show you this in case you wanted to keep everything on one page .
But I'm gonna go ahead and delete these because I do think it's important to show you how to create new pages outside of just this home page .
OK .
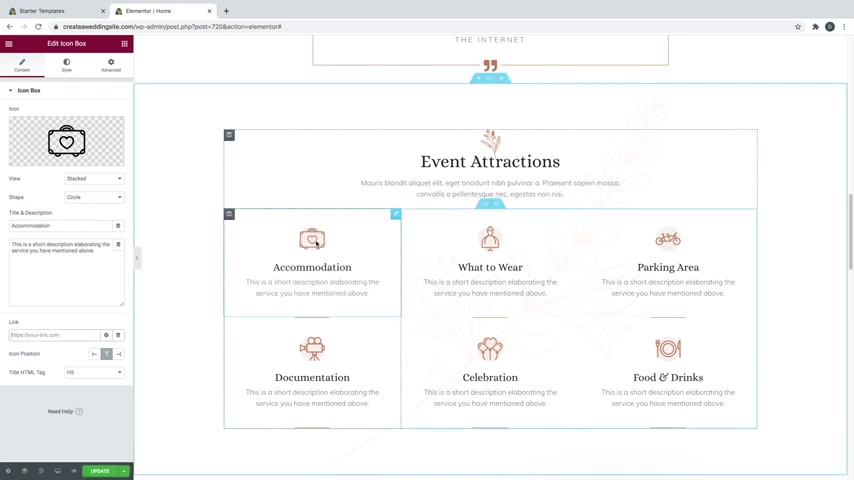
So I'm gonna go ahead and click on update to save my work .
And what we're going to do first is just edit this icon so that whenever you hover over it , it grows .
So I'm just going to go over to style for this icon and go over to hover .
And I'm gonna go over to hover animation and make it grow just like that so that whenever somebody hovers over it , it grows a little bit meaning that they can click on it .
And then whenever we create a new page , you can just come over here to content and then down here for the link is where you can put in the link .
So that whenever somebody hovers over and clicks on it , it will take them to that page .
But I'll show you how to put that in later .
Whenever we actually create that page first , we got to continue with the rest of the home page .
So I'm gonna click on update and save my work again and we'll just keep coming down and here you can edit this info by just simply triple clicking and you can also replace the images in the back as well if you'd like .
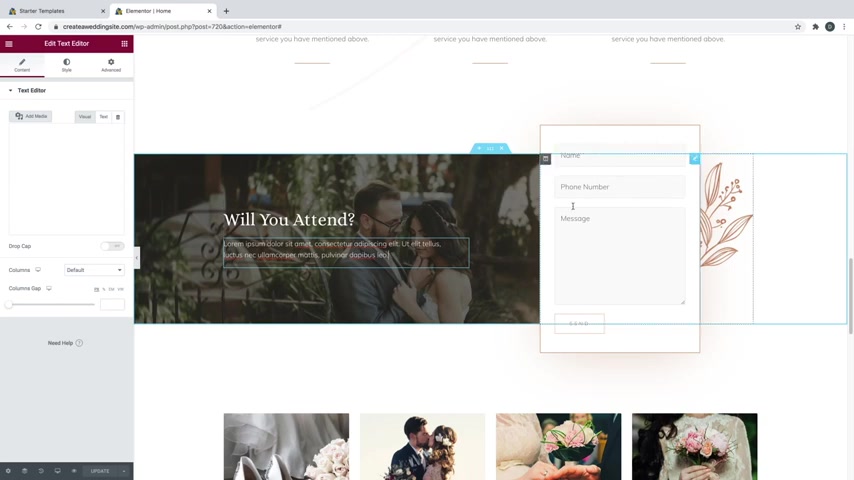
And I will show you in one of the next steps how to edit this contact form so that it will actually go to your inbox so that if people want to send you a message or RSVP to your wedding , they can do that here , but that's coming up in one of the next steps .
So we'll just keep on scrolling down and here you've got an image gallery .
So if you just go ahead and click on the little pencil icon for these images , you can see that you've got eight images here selected .
So if you want to change these , you can just click on the little pencil icon and here are all your images and you can drag and drop these and switch them around however you want or you can just create a whole new gallery by deleting these images and putting in your own .
Now , the only thing I want to point out is that you want all of these to be the exact same size .
So you want them to be all squares like 3 50 pixels by 3 50 pixels .
If one of them is a square , one of them is a rectangle , it's gonna throw off the spacing and kind of the look of the gallery .
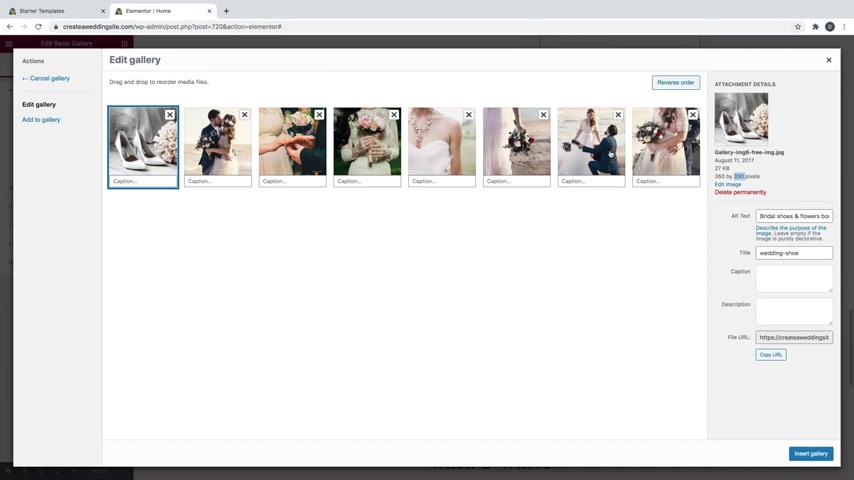
So just make sure that you're using photo to dot com or if you've got anything like Photoshop or any sort of image editor that's free on your computer just to crop the images to make sure that they're all the same size .
But I like all these images here and I don't want to waste your time by uploading , you know , eight new ones and showing you how to do that .
It's all pretty simple .
You can just simply do it by going over to a to gallery and then you can just go over to upload files and just select new files .
But I'm gonna go ahead and leave the ones that are in there and you can change how many columns there are with this little tab right here .
So you could do something like two columns and now it's gonna put them all like this so that they're a little bit bigger , but I think four columns looks pretty good .
So I'm gonna go ahead and leave that and then we're just going to scroll down and we've got our when and wear section which shows some more uh information about the ceremony when it's starting where it is the reception , things like that , which I already showed you how to change these icons .
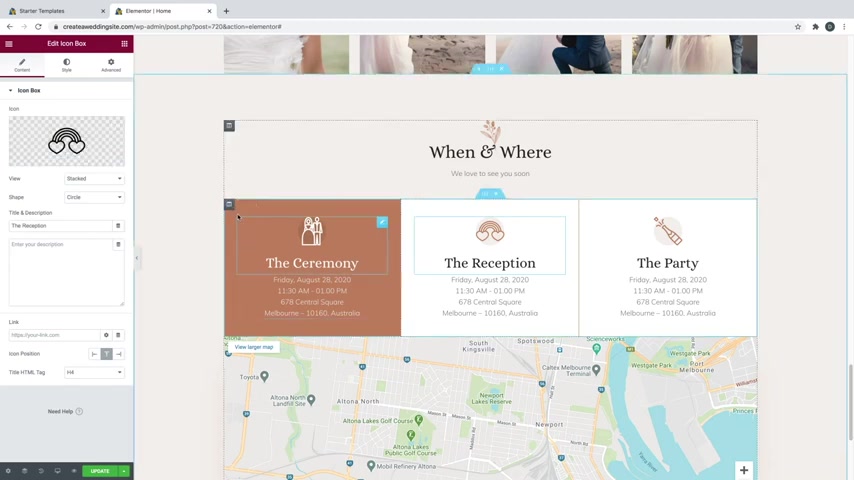
You can just click on the little icon box and you can change the icon here .
You can change the color of this .
So this whole like orangeish looking color , you just go over to the edit column button and then you can just go over the style and you can change the color here to whatever you want .
But again , I'm gonna go ahead and leave it and editing this information here is pretty simple as well .
You can just go ahead and click on it and then you can just click on these boxes here and just replace this text here with all the details for your ceremony and reception .
Or you could do the party as well .
Or if you don't want to have a party section , maybe you're not doing some sort of after party .
You can always change this section to something like uh have any questions , question mark , feel free to contact our wedding planner , you know , and then you can put their information in here .
And then as far as the map , you can just go ahead and click on this widget up on the little pencil icon at the top , right ?
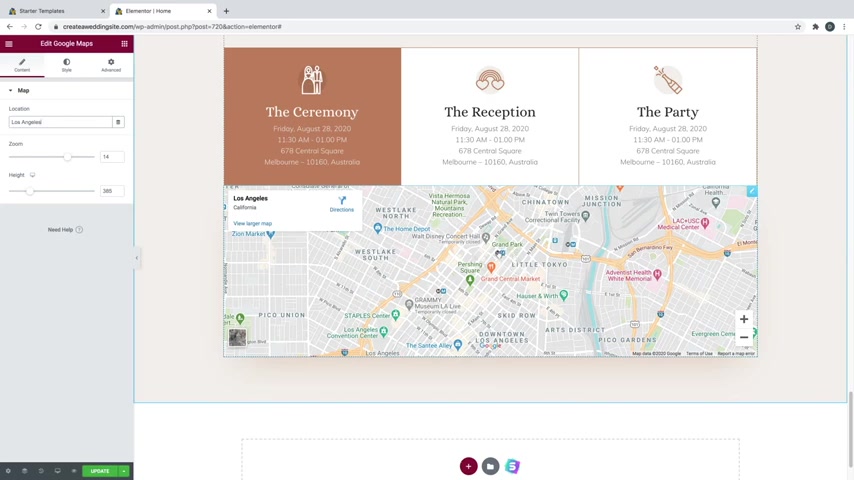
And then you can change the location here by just simply clicking and typing in whatever you want .
Like Los Angeles , California .
Now you'd want to put the actual um address to your actual reception on here , but I don't actually have a wedding coming up .
So I'm gonna just go ahead and leave the city in here and you can change the zoom and the height of the map here as well .
So let's go ahead and click on update to save our work .
And now let's go ahead and hook up our registry button by creating a registry .
So let's just go ahead and go up to a new tab and we're just gonna type in Amazon registry , but you can use any site that you want for your registry .
I just think Amazon is a good one because then you can get any product pretty much anywhere , which is really cool .
So we're gonna come down here to Amazon Wedding and this is just Amazon dot com slash wedding slash home .
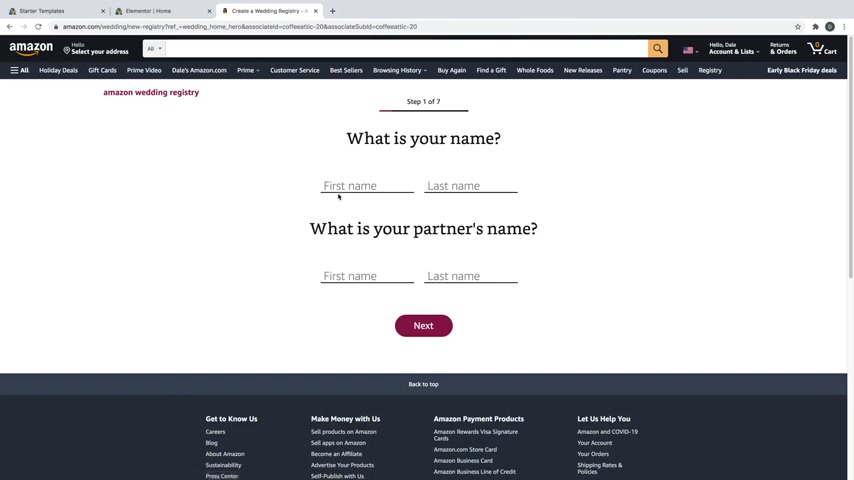
And then you can just go ahead and click on create your registry .
So we're just gonna put in the names and then just click next and then we'll just put in the date of the wedding and then click next .
And then you want to just put in how many people are attending ?
Let's just say this is something like I don't know 50 people and we'll say next .
And then are you registering anywhere else ?
You can say yes or no .
I'm just going to say no and then click next and then you would select the address where you want your new gifts to be sent .
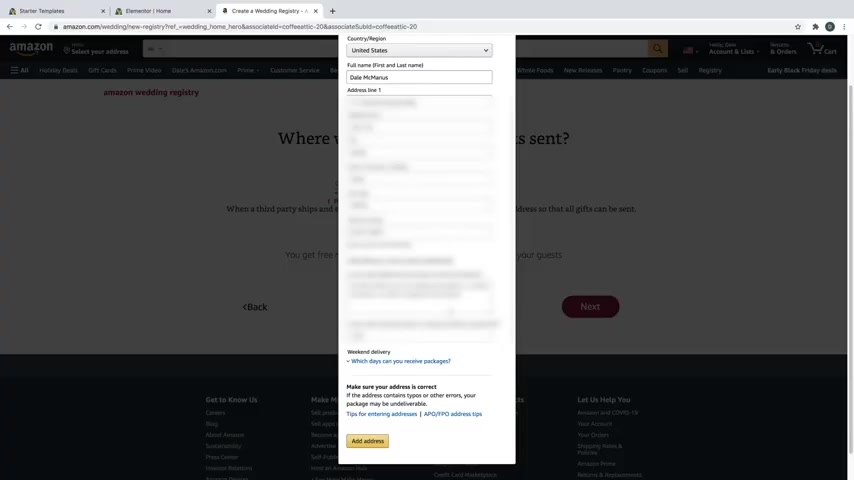
So I'll just put in an address and then we'll just say next and then you can choose whether you want it to be public or private .
I'm just going to go ahead and leave it as public and click on next .
And then I'm just gonna say create your registry and there we go , it's now created .
So we can just click to get started and then you can go through this tutorial .
If you want to just gonna tell you that there's a little add to wedding registry button .
Whenever you search on products , it is pretty straightforward .
So I'm just gonna go ahead and get through this and just click on start registering .
So you can just come up here and search for whatever product you want .
Let's say I want like a knife set .
You can just figure out which one that you want and just go ahead and click on it .
And then there's this little button down here that says add to wedding registry right here .
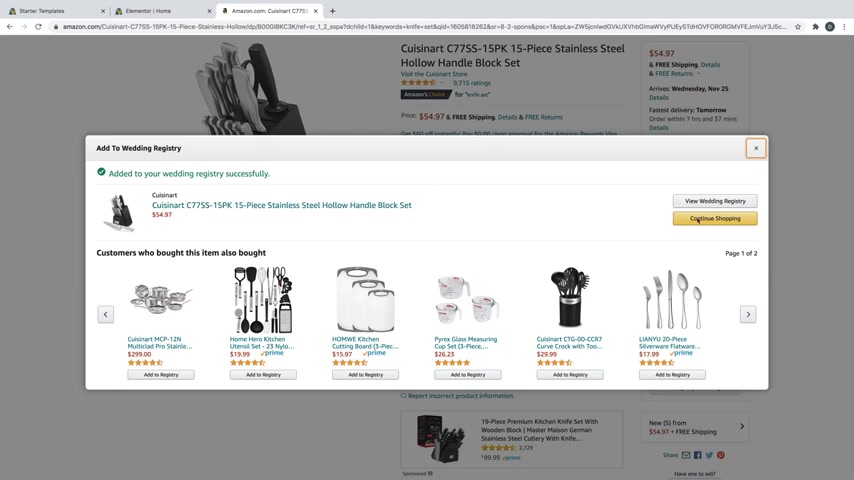
You can just go ahead and click that and it's gonna say that this was added to your wedding registry successfully and it can give you some other recommended stuff as well .
But I'm not going to go in here and you know , add a bunch of products , just kind of wanted to show you how you can add things to your registry .
So once you add your products , you can just go ahead and click on view wedding registry .
And then if we want to grab the URL and hook it up to that button on our website , all we gotta do is come up here to the share button and then we can just come over here and grab that URL or you can even change it by clicking on this button here .
And then you could say something like like that and then click save and then all you gotta do is just copy this URL and then we'll just come over to our website .
We're just gonna hook it up to this button .
So we're just gonna go ahead and click on the little pencil icon for that button and we're gonna put it in the link section right here and then just go ahead and click on update and we're just going to click on preview changes right here And that's gonna open up our website in a new tab .
Cool .
And then we can just hover over the button and click on it .
And there we go , it's gonna take us over to our registry , which is really cool .
And if you want , you can just go ahead and close out of this and you can actually make this open up in a new tab if you just click on the little gear icon and you can say open up a new window and then that way it'll open up in a new window and then your wedding website will still stay there .
So we'll just go ahead and click on update .
Ok ?
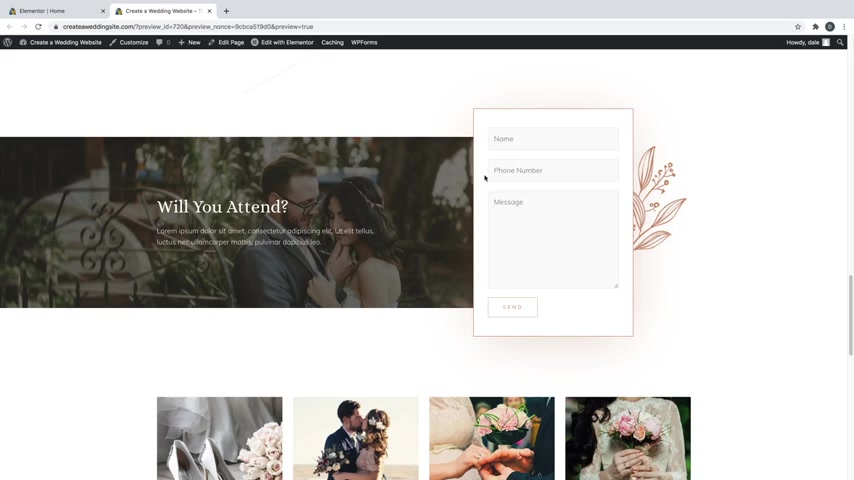
So now let's move on to step number seven , which is to create an RSVP contact form .
So if we just scroll down on our website , you can see that we've got this contact form here , but right now it's not hooked up to anything .
So it's not going to go anywhere .
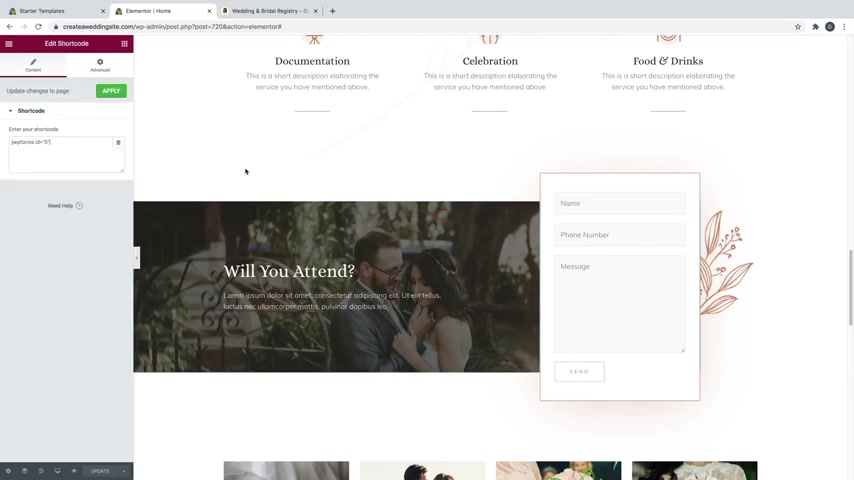
So if we actually just click on this little widget right here .
You can see that there's a little short code that says WP forms and then a little ID .
So let's go ahead and go into our WP forms uh plug in which should come free with wordpress automatically .
And let's go ahead and set up this contact form .
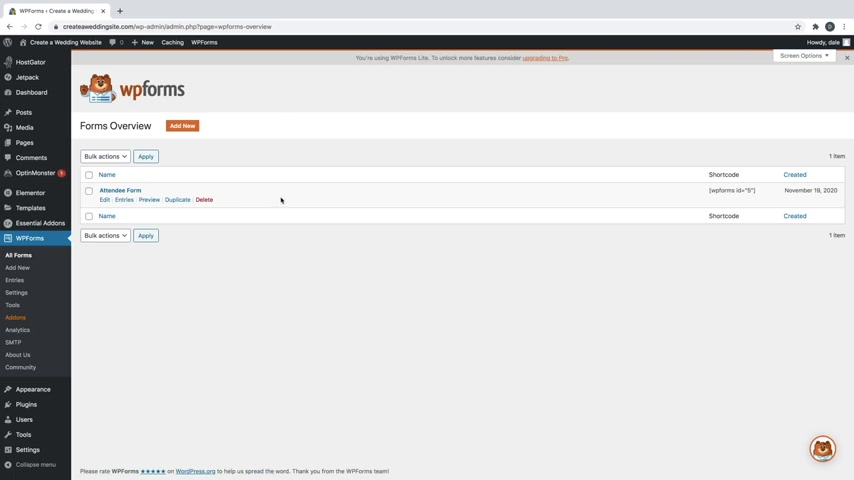
So I'm gonna go up to the little hamburger looking symbol and I'm gonna say exit to dashboard and then you can just go ahead and X out of this .
And then we're just gonna click on the little wordpress symbol and we can just close out of these other tabs up here , kind of keep things clean .
And then we're just gonna come down here to WP forms and we're gonna go to all forms and then we're just gonna click on the attendee form and then here you can edit the form fields and let's say that you wanted to add a new one .
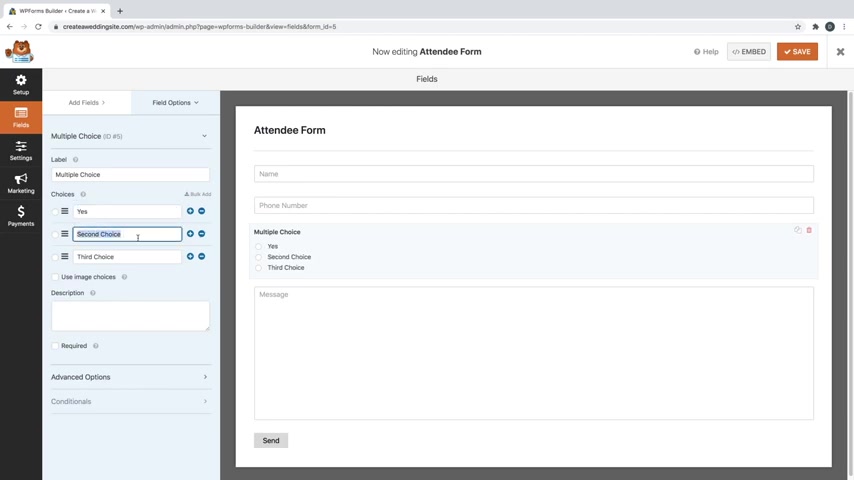
Like maybe you want to ask if they're bringing a plus one or not , you can click on something like multiple choice and that's gonna add that in down here and you can drag and reorder these however you want by just clicking and dragging and then if you want to edit it , just go ahead and click on it and then you can change the first choice here .
So we could say something like yes and then we'll say no on this one .
And then we'll just delete the third choice and then for the label , it'll say , are you bringing a plus one ?
Something like that ?
And then if you want to delete any one of these , all you have to do is just click on the little trash symbol .
So I'm not actually gonna leave the plus one in there .
I'm just gonna go ahead and delete it and then you can just say OK to delete a field .
So that's how you can add different fields to your form .
And then if you go over to settings , you can change the name of the form up here , but nobody really sees this name .
So it's OK to go ahead and just leave it the way that it is , you can change the send button to something like submit .
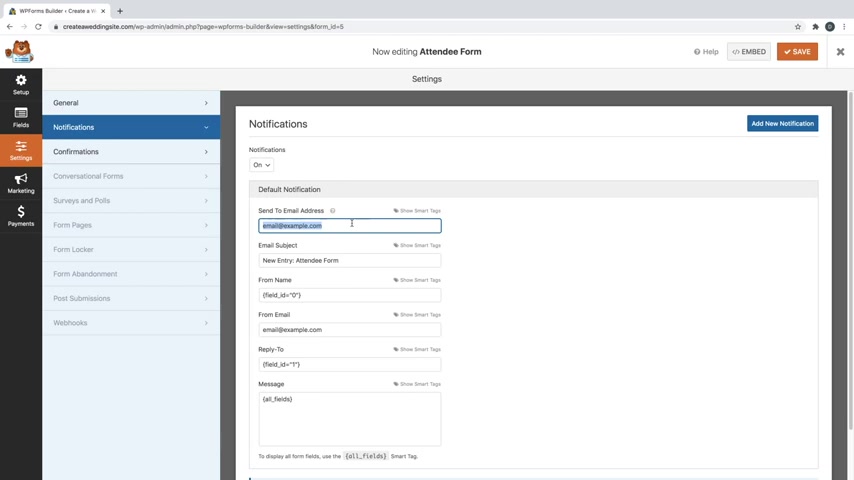
And then you've also got the submit button processing text which just says sending so you can change these if you want to and then just go over to notifications .
And here is where you're gonna want to put in the email that this form is going to go to .
So here's where you'd want to put in your own Gmail account .
So you can just go ahead and delete this current email that's in here and put in a new one just like that .
And then you can lead the rest of this the way that it is and then just go over to confirmations and here is the thank you message .
So you could say something like thank you for attending , you could write whatever you want in here , but I'm just gonna go ahead and just leave it as the default .
And then whenever you're done , just click on save and then the X and then now that contact form is hooked up to your home page and it's going to go to the email that you put in so that if anyone says that they're coming to your wedding or that they can't make it for whatever reason you'll receive that email .
Ok .
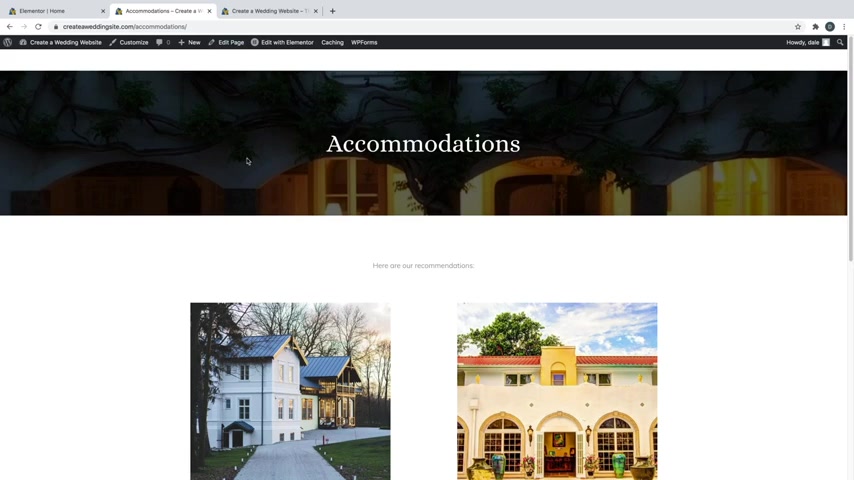
So now let's move on to step number eight , which is to create a new page .
So if I just go up to my website and I'm just going to open this up in a new tab , as you can see if I scroll down , we've got this whole section here about accommodations and what to wear parking area , you can create different pages so that whenever somebody hovers over this , it will take them to a page all about accommodation or a whole page about dress code , things like that .
So let's go ahead and just create one for accommodation just so I can show you how to create a new page .
So we'll just go over here back over to wordpress and we're going to go down to pages and we're gonna add new and I'm just gonna title it accommodations .
And then over here on the right hand side , you'll see page attributes , just go ahead and open that up and change it from default template over to element or full width just like that .
And then underneath the Perma link , just go ahead and open that up and you'll see the URL slug is accommodations .
So it'll be create a wedding site dot com slash accommodations or whatever your website is dot com slash accommodations , which is what we want .
So once that's done , just go ahead and click on publish and then publish again .
And then from here , we're gonna click on edit with mentor and you can create a whole new page exactly like we did with the home page by simply creating new sections with columns and widgets .
So I'll start with something that just says accommodations up at the top with a background image .
So I'm just gonna add a new section and I'll grab just one column and I'm gonna go ahead and bring the height to minimum height and then I'll leave it somewhere around there , maybe a little bit smaller .
And let's go ahead and put in a background image .
So I'll just go to the six dots and then we'll go over to style and then background type .
We're going to click on classic and just add an image and I'll just go to my media library and I'm just gonna select one of these hotel images and keep it simple .
We'll just say insert media , something like that and we'll just change the position to be something like center center or you could do top center hover you want to put this in here .
But we're gonna put a nice dark overlay over this .
It's really just for kind of a aesthetic appeal .
So let's go over to size change that to cover .
And then we're gonna go to background overlay and we'll just add in a classic background with a black color and we're gonna make it nice and dark , something like this .
And then we'll go ahead and put in some text .
So we'll go over the Rubik's cubic and symbol and drag in some text and then I'm gonna change the style to be white .
Then we'll go over to content and we're just gonna put in accommodations just like that and then we'll just put it in the center .
And then the cool thing about mentor is that you don't have to create everything from scratch .
What you can do is click on this little folder icon right here and you can select whole pages from the templates or you can do blocks .
So whole pages are going to be complete websites which you can see little previews of them here .
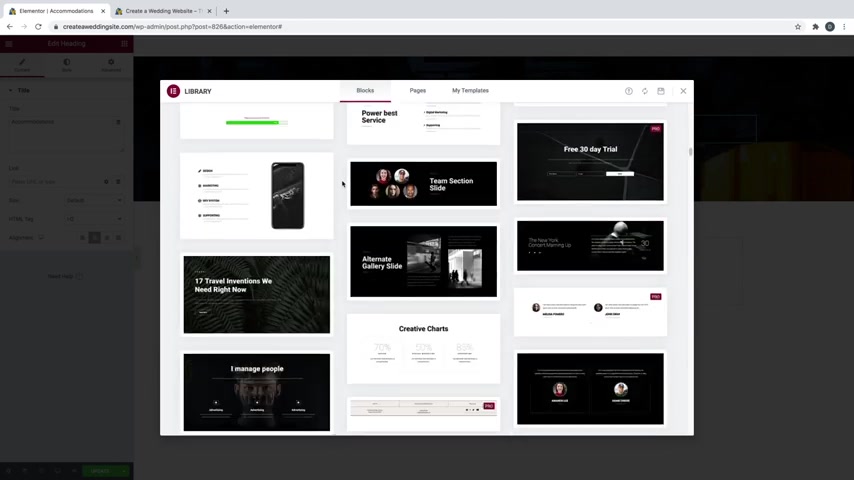
But what we're going to do is click on blocks and these are going to be smaller sections that you can add into your website and anything with pro is gonna be paid everything without it is gonna be free .
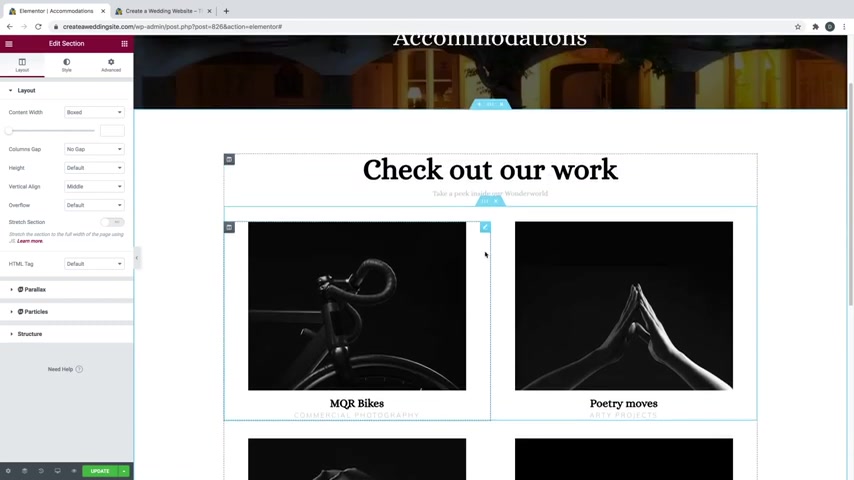
So we'll go ahead and scroll down and find one that's gonna work to maybe show off some hotels , maybe something like this one .
It says check out our work .
It's got four different images on it .
I think this one will work so we can just go ahead and click on it and kind of get a preview of what it looks like .
It looks pretty good and we'll just say insert and it's gonna say connect to Temple Library .
This is really easy .
Just go ahead and click on , get started and it's gonna say , hey , do you want to use this email in order to connect to it ?
And then you can just uncheck this become a super contributor and we'll just say connect and then just like that , it's going to put it into our website , which looks really nice .
So I'm gonna start out by actually deleting this text up here .
So I'm going to right click and just delete and then I'll also delete this text up here as well .
So I'm just gonna come up here and right click and delete .
And I'm just gonna grab a text editor widget and we're just gonna throw that in up top up here and we can just change this to be something like here are our recommendations and we'll just go ahead and center this .
So we'll just go over to style and then put the alignment in the center .
So let's go ahead and put in some pictures of hotels here .
So I'm gonna go ahead and click on this one first .
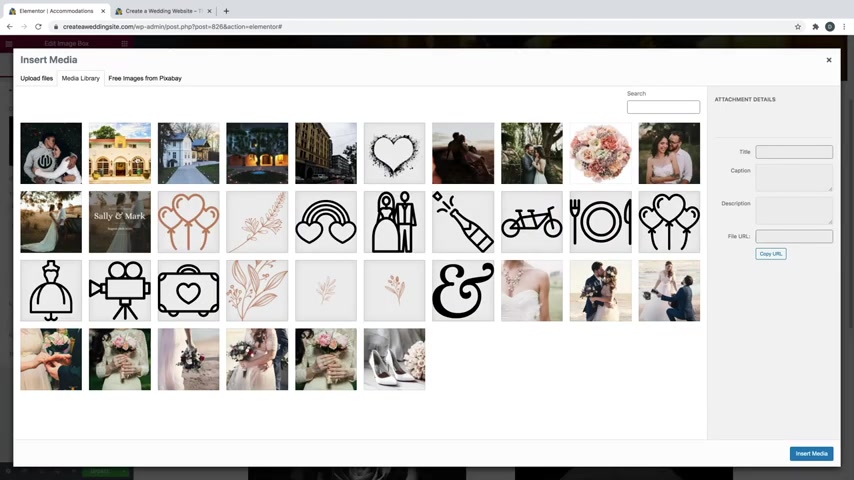
And we're just gonna choose a new image and we'll just grab one like this one and click on insert media .
And these are all the same size 8 53 by 8 53 8 56 by 8 56 .
They're all squares .
So they might be different size images , but they are all squares .
And this was on purpose .
So I can show you how to edit the sizing of each one of these .
So I'm gonna go ahead and click on this one and say , insert media and then once that's in , we can go ahead and change our title .
And then underneath here , you're gonna wanna put something about how far it is away from the ceremony or how much it is per night just like that .
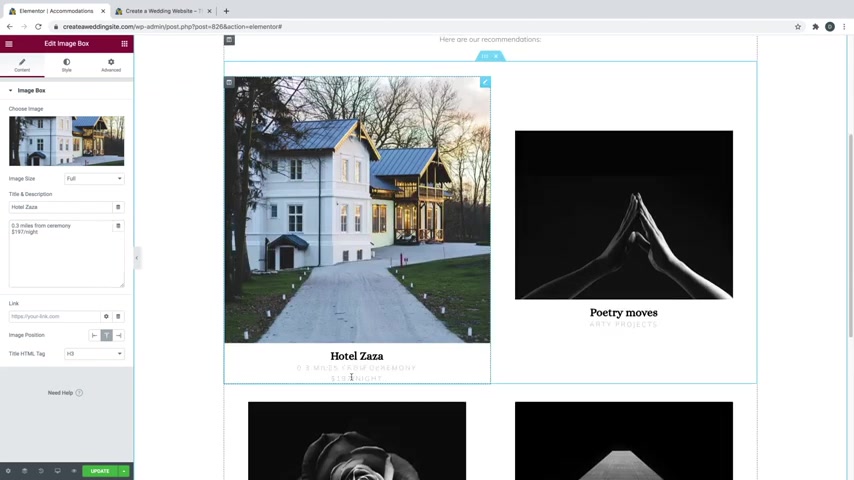
And if you don't want these to be on the same line , you can just come in here and you can put your cursor in front of the little money symbol and then you can just do the enter key and that's gonna put it underneath , which also adds this little short code that says open bracket , br close bracket and that just means break .
So it's just adding a line break right there .
And then if you want to change the size , you can just go over to style and then you can just grab the width and you can bring that up or down .
So we'll just do something like maybe a 75 .
And then we also want to add a button .
So let's go ahead and do the little Rubik's cube looking symbol , then we can just add in a button underneath and we're gonna change the alignment to the center and we can just say something like book a room or just maybe book now , just like that .
And I showed you how to edit the button .
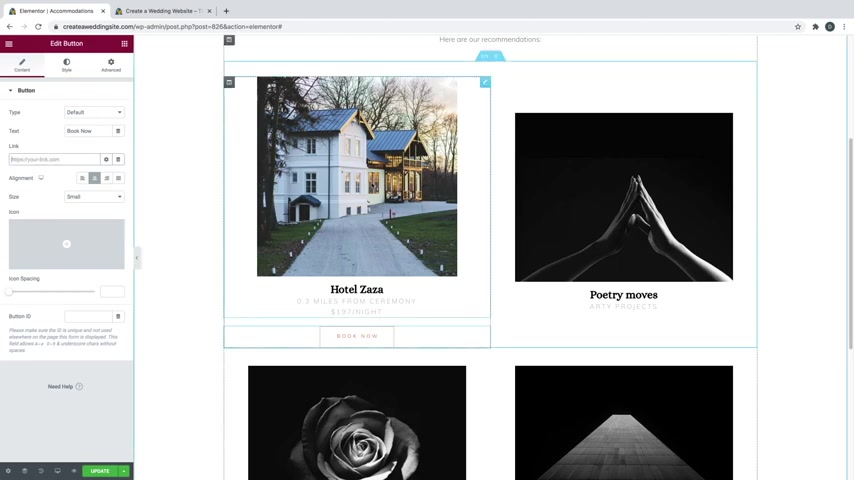
So if you want to change the button style , you totally can .
And what you'd want to do is just remove this little hashtag and then you would want to put in the URL .
So you could just go over to this hotel's website .
This is obviously a fake hotel .
So they don't have a website , but you know , it might be something like the Ritz Carlton or Holiday Inn , whatever it might be , you can go ahead and put in the URL here and then that will take them over to that whenever they click on this button .
So now what you can do is actually just duplicate this one right here and we're just going to drag it on top and we'll just delete this other one underneath .
So we'll just right click and delete that one .
And now all you gotta do is just go in and change the image .
So we also want to make sure that we duplicate this button and we drag that underneath as well .
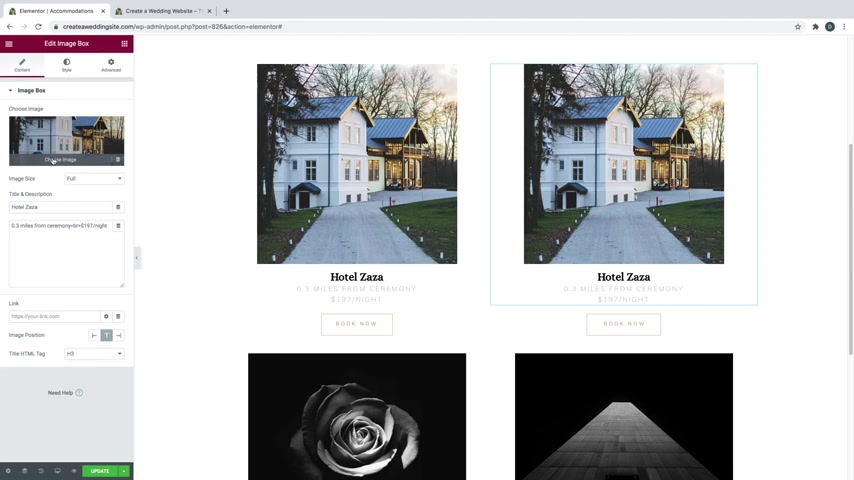
There we go and we'll just go in and change the image and I'll just grab like this one and then say insert media and then just change the name and then obviously change the information about it as well underneath here .
So I'm gonna go ahead and do these other two real quick .
OK ?
So now that these are created now , what we want to do is take the URL for this page and hook it up to that button that's on our home page .
So let's just go over to the little hamburger symbol and we're going to exit the dashboard and you can see that we've got our little URL over here , which is just our website dot com slash accommodations .

So I'm gonna go over to the little wordpress symbol and I'm going to go up to my site and click on visit site and then I'm just gonna click on edit with element to and then I'm just going to scroll down to where that button is and I'll just click on that widget and for the link , I'll just type in that new URL just like that .
And then I'm just gonna say update and then I'll just go click on preview changes and we'll test this out .
So I'll just go ahead and scroll down and if I wanted to know more about accommodation , I'll just click on this and there we go .
Here is our accommodations page , which is really cool .
So that's how to create a new page .
Ok .
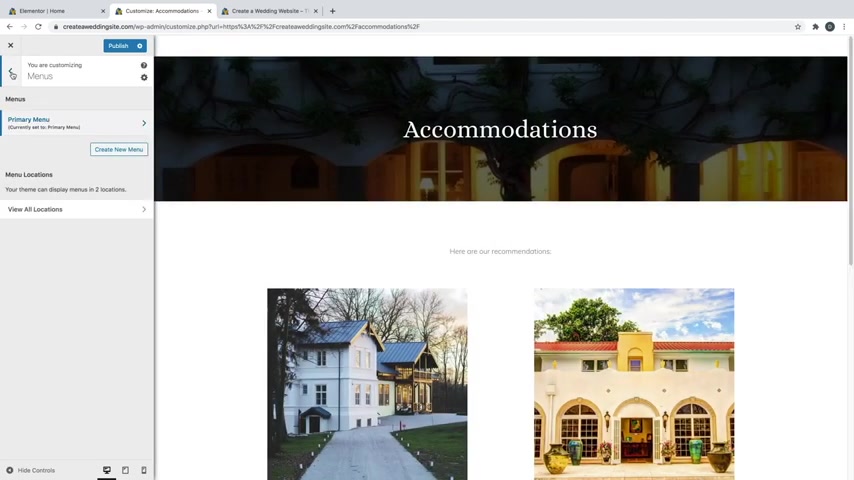
So now let's move on to step number nine , which is to create a navigation menu .
So the reason that we want a navigation menu is because if we go to this page , which is accommodations , we don't really have a way to get back to the home page .
So let's go ahead and do that .
We're just going to go up here and click on customize and here is where we customize the Astra theme .
So the whole time we've been building the website with the Element or Page builder , but these settings are within Astra , which is actually your theme .
So let's go ahead and go over the menus and we'll just say , create a new menu and we're just gonna call it primary menu and then we're gonna say primary menu right here for the location , which is just going to be up at the top and then click next and then just click on add items and we're just going to say home .
Now , if you did create more pages , like maybe a what to wear , page , a page about the parking area , things like that , they're all going to be here in the pages category .
So you've got custom links , pages , posts , et cetera .
So you'll find them here underneath pages and then you just want to add those as well if you created those .
But for now , all I really want is just a home button so that once they go to this page , they can go back to the home .
Cool .
So now just click on the back button and then back button again and we're just gonna go down to header and then just go to primary menu and then you're just gonna uncheck disable menu .
And there we go .
Now it's gonna add that little home button right up there and if you created other pages , it will show them here as well .
And if you wanted this to maybe be on the right side of the screen where our usual website menus are , what you can do is just click on the back button and then go over to primary header and then you can just change the layout to be one of these .
So we'll just click on this one and that's going to put the menu over on the right side actually just like that .

But since we only have the one home button , I'm just gonna go ahead and leave it in the middle .
Cool .
So now just go ahead and click on publish and this is going to save your work .
Cool .
So now that our menu is created , we can move on to step number 10 , which is to edit for mobile and tablet .
So believe it or not , more than half of website searches are actually done on a mobile phone nowadays rather than just a desktop computer .
And especially if you're sending this to people that are going to RSVP for your wedding , they might be on the go whenever they get that link .
So you want to make sure that your site looks fantastic on mobile tablet and desktop and it's really easy .
So let me show you , I'm just going to go ahead and click on the X and we can go ahead and close out of these other tabs , keep things real nice and clean .
And I'm just going to click on home to go back to the home page and I'm gonna say edit with mentor again .
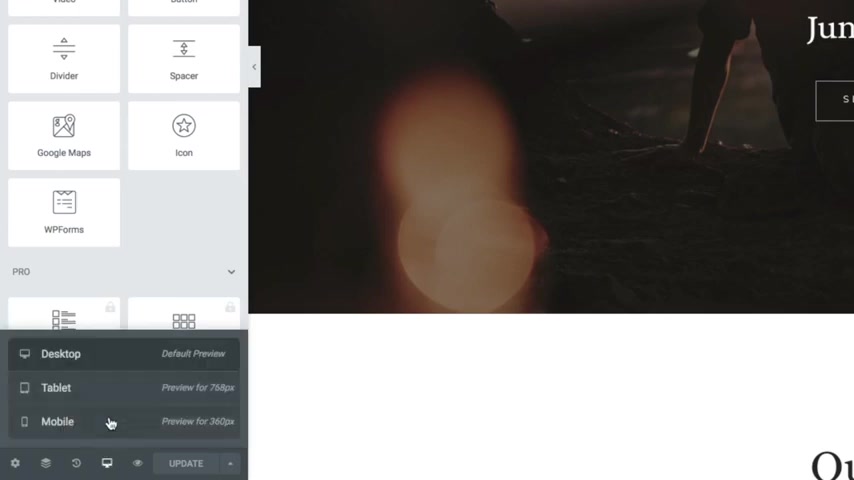
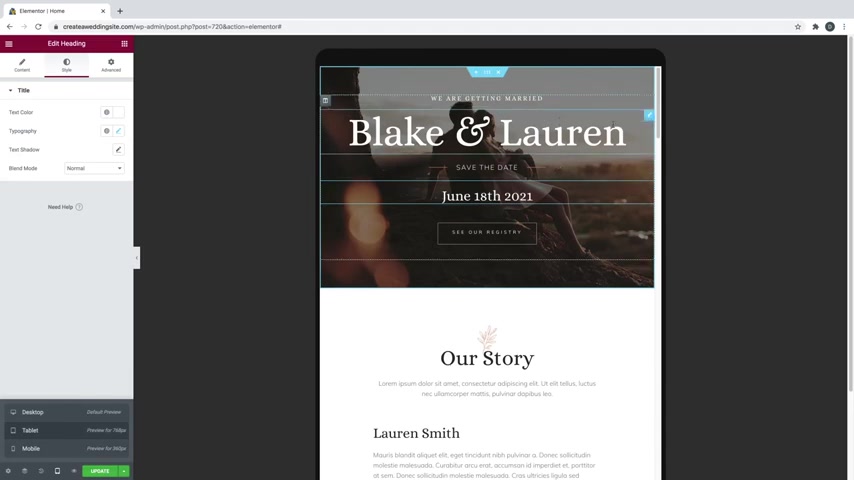
And from here , if you just come down all the way to the bottom left , you'll see the responsive mode button that looks like a little computer .
Just go ahead and click on that and you can change it to tablet or mobile .
So we'll start with mobile and that's going to give us a little phone mock up and it's going to show us what our website is going to look like on mobile .
So you just want to scroll down and make sure that everything looks ok , make sure that none of the spacing or sizing is off .
Things don't get all broken and wonky .
So it's kind of looking like this is all looking really good because these starter templates are built to be responsive automatically , which is why I recommend starting with a starter template .
So this is all looking pretty good .
I do think the title up at the top needs to be fixed .
So I'll show you what you can do is if you just go ahead and click on the names here and then we go over to style and then we'll just go over to typography .
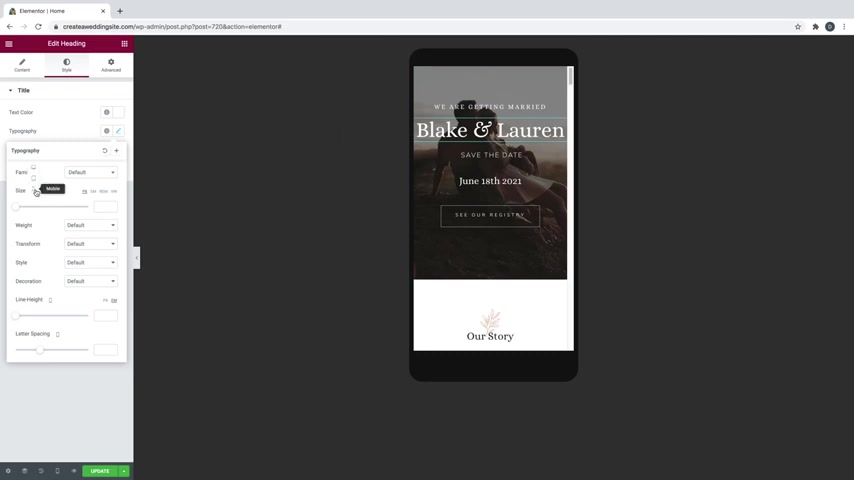
You can see that anything that has a little mobile phone symbol on it , you can change this only on mobile and it's not going to affect the desktop or the tablet view .
So as long as it has this little symbol for whichever device that you're editing , it's only going to change it for that one device .
So for mobile , I'm just going to drag this up to be maybe something more like that .
And then I will also make these smaller .
So I'll go up to this text up here .
I'll go over to style typography and I'll change this to be a bit smaller , maybe like that .
And then you would just want to do this with this text as well .
So I'll also make maybe the date a little bit smaller .
So I'll just go ahead and click on that , go over to style typography and I'll make that a bit smaller as well .
Maybe I don't know , something like that looks pretty good .
So now everything on our mobile site is looking pretty good .
So let's go ahead and check on tablet .
So we'll go over to responsive mode change to tablet .
Now you can see everything went back to being bigger for the tablet .
So if you do want it this big , you can leave it or just do the same thing , you can edit it and it's only going to change it on the tablet view , but it's looking like everything is looking pretty good on tablet .
So I'm just gonna go ahead and leave it , but that's how you want to edit for each device .
And if we just go back to desktop , you can see that nothing has changed for desktop , everything is still looking fantastic .
Cool .
So once you're done , just go ahead and click on update and let's go ahead and preview our website .
Awesome .
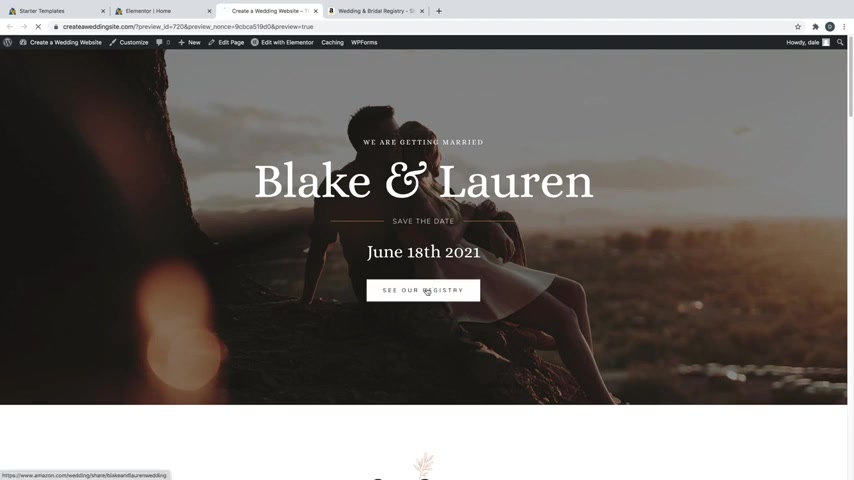
So our website is looking beautiful .
We've got our whole hero section up here with the image in the background and the nice text .
We've got our cr registry button which is hooked up to our registry and works , which we can click on .
Awesome .
And we go back , we've got our story section .
We've got our quote section .
Our buttons here for the event attractions are all working and we can click on those and go to our accommodations page .
And again , if you created more pages , you can hook them all up to these buttons with those links .
We've got our working contact form now which I do recommend sending yourself a test email to make sure that it goes to the inbox for the email that you put in .
And if it didn't , if it went to the spam folder , just go ahead and mark it as not spam and everything should show up in your inbox from there forward .
We've also got our gallery section , which is really cool .
If we click on these images , they open up in a light box which is awesome .
And then our when and wear section for all of the wedding details with our map .
All right guys .
So that was how to create a wedding website with wordpress .
If you enjoyed this video , please smash that like button and feel free to subscribe to the channel .
If you want to see more videos on how to create professional websites from home or how to make money with websites .
My channel is full of helpful videos like that and feel free to check out creative Pro website on Instagram and tiktok for more quick tips , web design inspiration and behind the scenes .
Fun .
All right guys , thank you so much for watching and I will see you on the next video .
Are you looking for a way to reach a wider audience and get more views on your videos?
Our innovative video to text transcribing service can help you do just that.
We provide accurate transcriptions of your videos along with visual content that will help you attract new viewers and keep them engaged. Plus, our data analytics and ad campaign tools can help you monetize your content and maximize your revenue.
Let's partner up and take your video content to the next level!
Contact us today to learn more.