https://www.youtube.com/watch?v=DQb5O18dYxc
How to Make an Online Store (eCommerce Website) _ Step-by-Step Guide!

What's going on guys in this video ?
I'm gonna show you step by step how to create an e-commerce website .
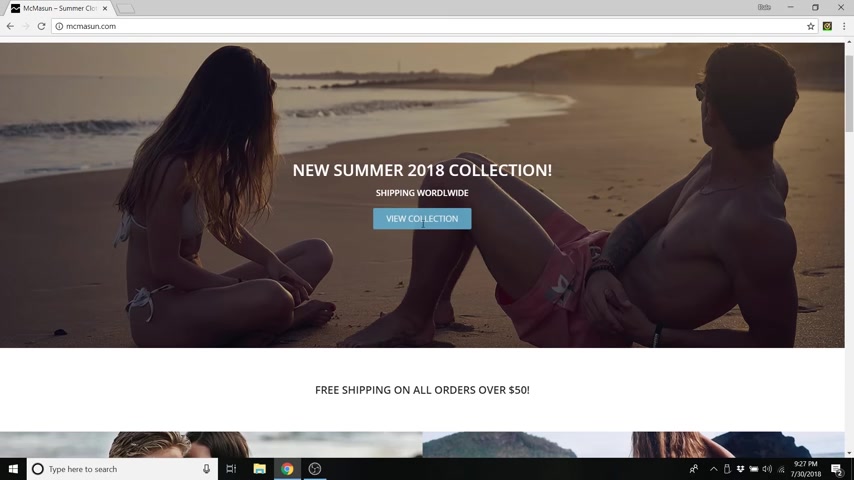
So the website , I'm going to show you how to make has an awesome sleek design .
I'm gonna show you how to change these backgrounds , how to change the text , all of the colors , how to change your buttons .
And I'm gonna show you how to create your very own products with the product images .
I'm gonna show you how to make sale items as well as show you how to create product cat stories for these drop downs so you can shop men , women and so on .
I'm going to show you how to create your my account page and set up your cart .
And I'm also going to show you how to make your own logo for your website and you don't need any software to do it .
And I've also included a latest product section as well as a sale product section .
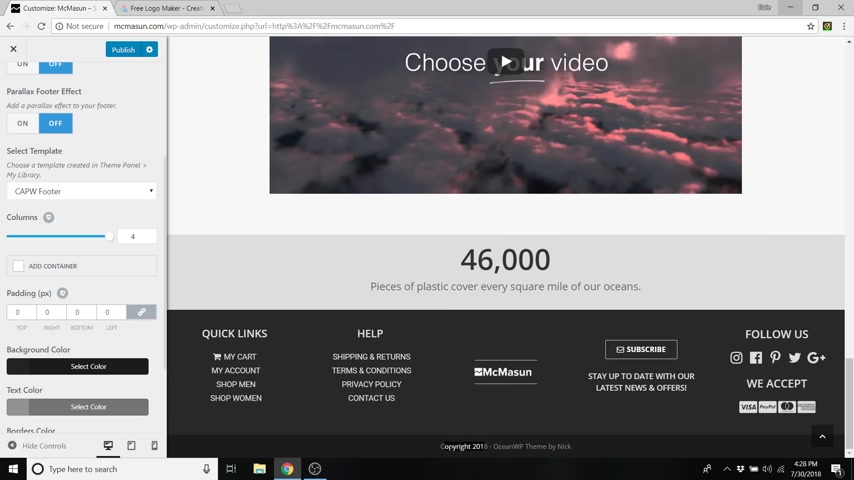
I'm also gonna show you how to change these banners , change this video as well as the counter and set up your own custom footer .
So without further ado , my name is Dale mcmanus , I'm a web developer , a youtuber and I love to make awesome websites and I'm here to teach it to you .
So , think of me as your spirit guide through this tutorial .
I'm gonna show you step by step what to do to come out of this with an awesome e-commerce website .
So whenever you're ready , let's get started .
So before we begin , let's just give this site a little demo .
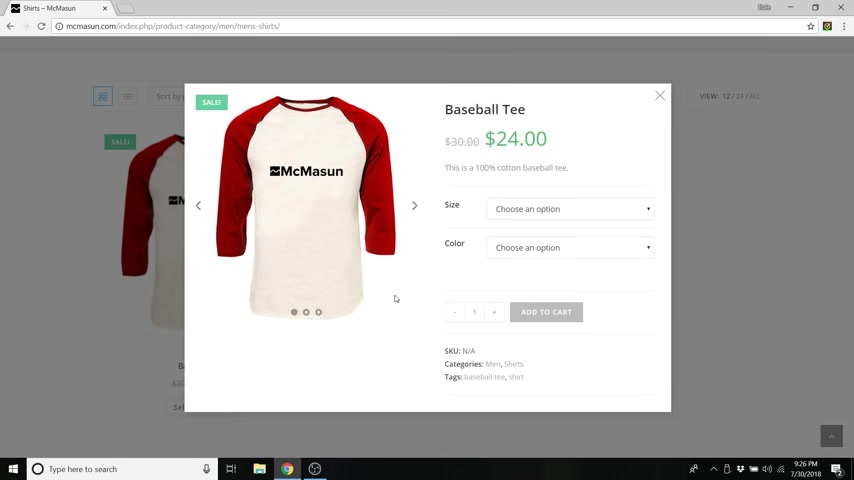
So if you wanted to go onto the site and shop by men , you could just click on shirts , under men and shop by shirts .
And if you click on it , it comes up with this awesome pop up that allows you to select different colors or sizes and you're able to add them to your cart .
I'll also show you how to make these items go on sale .
I'll show you how to set up your cart page so that you can add or subtract quantities of items from your cart .
And I'll even show you how to do cross sales and up sells , which is just how to promote different products before your customer checks out .
I'm gonna show you how to change all of these buttons as well as their backgrounds , all of the colors and every customization that you could think of .
I've also already custom coded these sections so that your sale products automatically show up down here as well as your latest products automatically get added up here .
I'm also gonna show you how to use an awesome page builder called mentor to build your own pages .
It's a drag and drop software and it's super easy to use .
And the best part , this website is also 100% mobile and tablet responsive .
So no matter how much you resize it , everything perfectly fits within the window on your phone .
I also created a custom template for mentor that you can download in order to get the look and the style of this website .
So before we begin , we're just gonna need a few things first and I'm gonna show you how to get them .
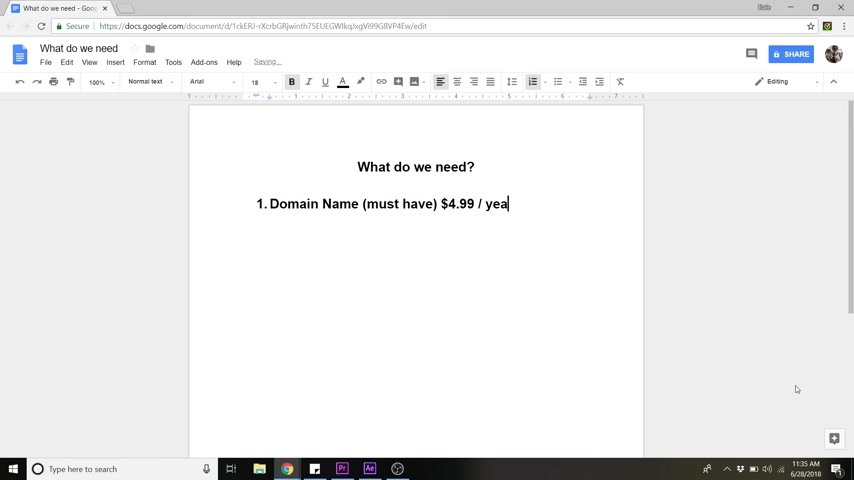
So first you're gonna need a domain name and a domain name is a must have , you really can't have a website without this .
So normally this is about 12 to $13 in a year , but I partnered up with host Gator and got an awesome discount for you guys for this .
It'll be about 4 99 instead .
So in case you don't know what a domain name is , let me explain it .
So every website has an IP and that's just a random string of numbers .
So when you register and purchase a domain name , it's kind of like saving your home address as home into your phone .
It takes this ridiculous set of numbers and assigns them a very simple name that you can type in any time you want to go there .
Ok ?
And you're also gonna need we web hosting , web hosting is also a must have .
Normally , it's about somewhere between 7 to $10 in a month .
But again , with this discount that I'm gonna provide you , it's gonna be somewhere around 2 to $7 in a month depending on which plan that you choose .
So if you don't know what web hosting is , let me explain that too .

Web hosting is just a service that allows you to rent space on the internet , fill it with all of your media and go live much like renting space out of a shopping center if you wanted to open up a shop .
So when you want to start a website , all of your text pictures , buttons and so on have to be stored on a server somewhere that's connected to the internet .
No , if ands or buts about it and web hosting companies have buildings filled with these servers .
They also provide you with design software , security and support .
Next , you're gonna need to install wordpress .
And this is also free wordpress is just what we're gonna use to design our website .
And number four , we're gonna need to activate a new theme and this is a free theme called Ocean WP .
So whenever you're ready , let's get started .
All right .
So step number one is to secure a domain name and web hosting plan .
All right .
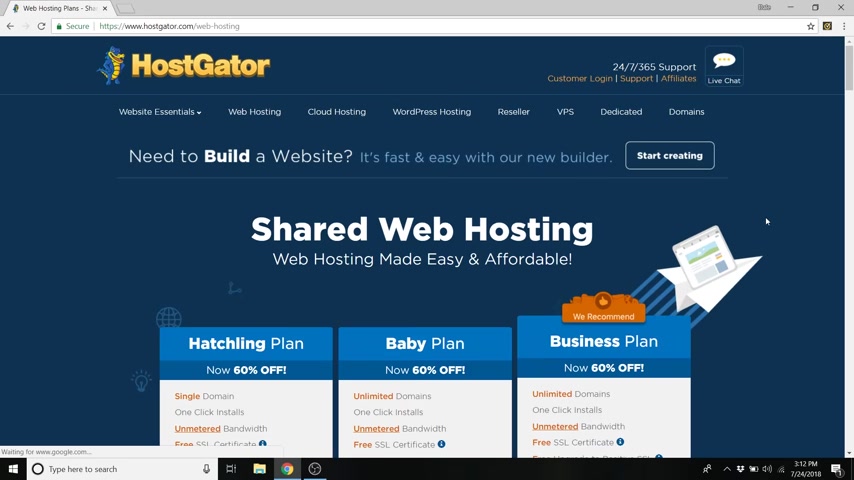
So to do this , just go over to host gator dot com and you'll see this page pop up , just click on web hosting and Host Gator is an awesome company .
I've been using them for a while .
I actually use them for all of my websites .
They are quick , easy and affordable and they also have awesome customer service .
And if anyone reads my about page or my website , I am all about no BS .
So I'm not gonna pitch you anything that I don't actually use myself and I use Host Gator for all of my websites .
All right .
So once we're on this page , we're just gonna scroll down and you'll see the hatching plan , the baby plan and the business plan , the baby plan is best .
If you have multiple domains , you see it comes with unlimited domain names for that web hosting plan and business plan is best for if you're pulling in a lot of money with your website , you might want to consider switching .
There's a lot of awesome tools in the business plan that will really help .
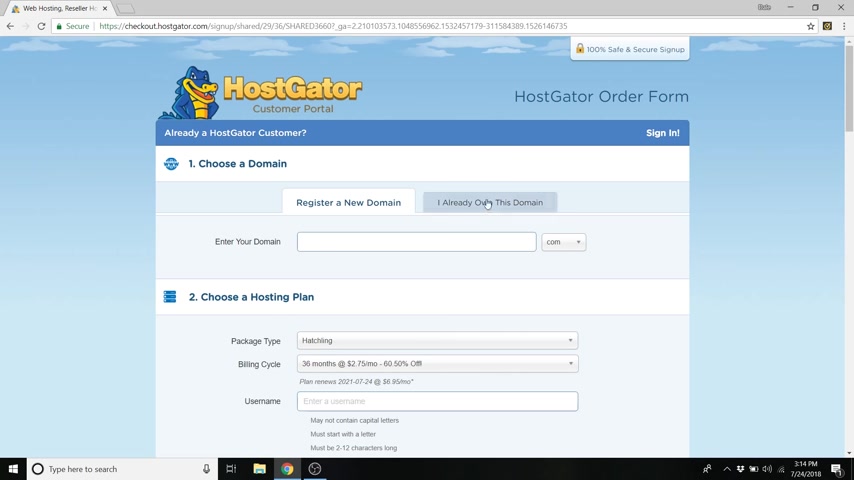
But for the sake of this lesson and if this is your first e-commerce site , we're gonna go ahead and select the hatchling plan .
All right .
So now that you're on this page , you can enter in your domain name .
And if you already have a domain name , you can just click on this tab right here .
So if this is an e-commerce site , I wanted to do my last name .
A lot of people do last names as kind of like a luxury brand sort of thing .
Uh but my last name is taken .
So if I put in my last name dot com , you'll see , it'll tell me it's unavailable and it'll suggest all these other ones and , you know , dot club dot site , I highly recommend sticking with a dot com if you can .
That's what legitimizes your website .
And a lot of people don't go to the , they don't think to type in dot site for instance .
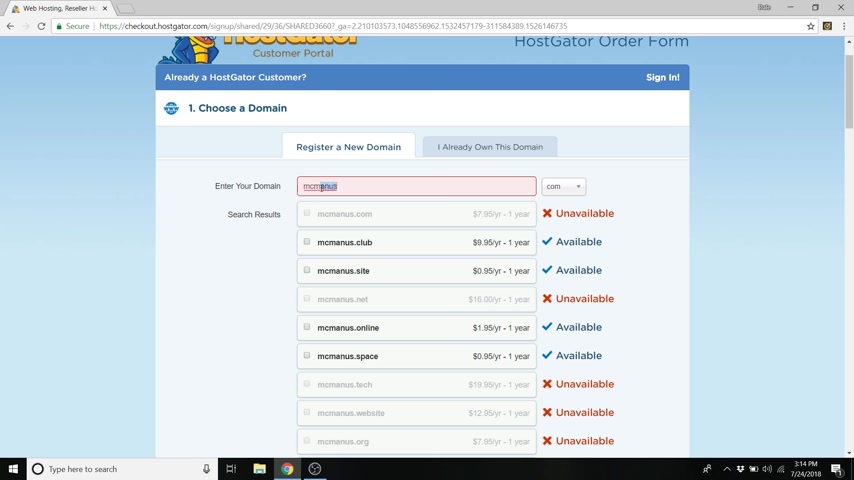
So what I'm gonna do is switch around a couple of letters in my last name and do Mick mason dot com , which is available and you want to make sure that domain privacy protection is checked .
I highly highly recommend doing this .
I did not do this on the first website that I ever bought and my phone got bombarded with solicitors trying to sign me up for their plan to design website and all this other nonsense , literally like 10 phone calls a day .
It was awful .
So I highly recommend checking that it's only a dollar 25 extra a month .
So you really should do it .
So that is checked .
We're gonna go down to choose a hosting plan and we are on Hatchling , which is correct .
And here is where you can choose your plan .
So the more months that you do , the less it is .
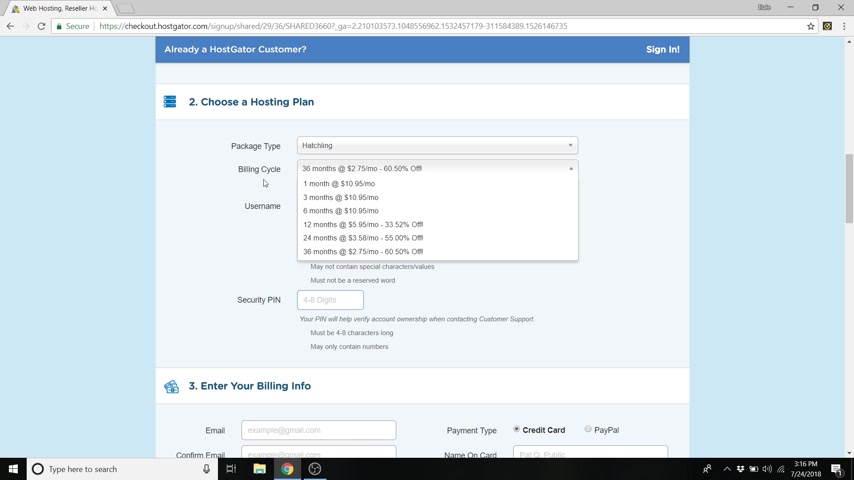
So you can see 2 75 here versus one month , which is 10 95 all of these will actually be lower than they are because I worked out an awesome deal with host Gator .
I met up with those guys and told them what I was doing and they put together an awesome coupon code that will save you at the time .
I'm recording this about 60% depending on which one of these plans you pick .
So I highly recommend going with the 12 months because you're buying your domain name for 12 months .
So you might as well buy your hosting plan for 12 months too or if you want to commit to the 36 and save even more money .
That is great .
But for the sake of this lesson , I'm just gonna go with the one month just so I can show you guys how to sign up for this and get your website going .
So now just create a user name , which for me is just going to be my name and enter in a pin and now you can enter in all of your billing info .
So you can also pay with paypal or credit card .
So I'm gonna put all of this information in right now .
All right .
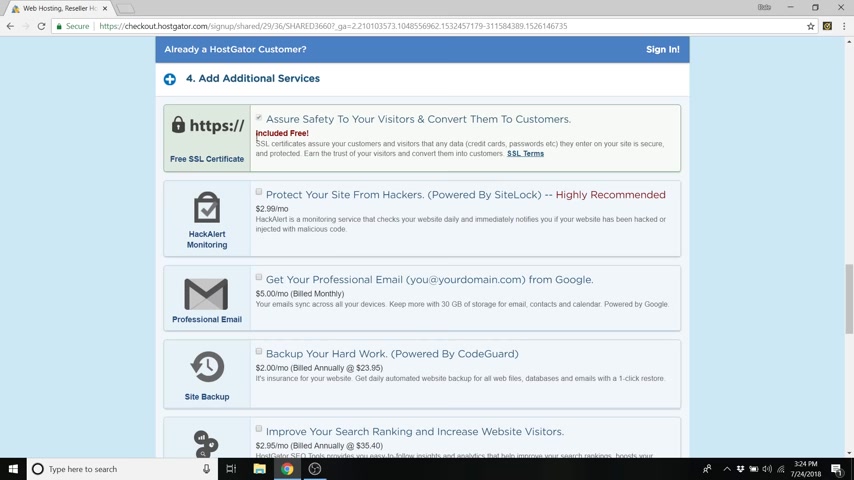
So scroll down and you will see add additional services and at the top you'll see assure safety to your visitors and that's included free .
This is an SSL certificate and what this is is this little secure tab up on the top of your website and it lets people know that this is a safe website .
You're not gonna scam them .
Uh Especially if you have an e-commerce website .
I highly recommend leaving this checked host gator will do it all for you .
It's pretty awesome .
So , so we can also go down and uncheck , protect your site from hackers , uncheck , get your professional email back up your hard work and so on .
We don't need these things right now if you want , I have other videos on my site that show you how to get some of these things for free .
Sorry , on my youtube channel .
So if you want to check that out , go ahead and now we can go down and enter in our coupon code .
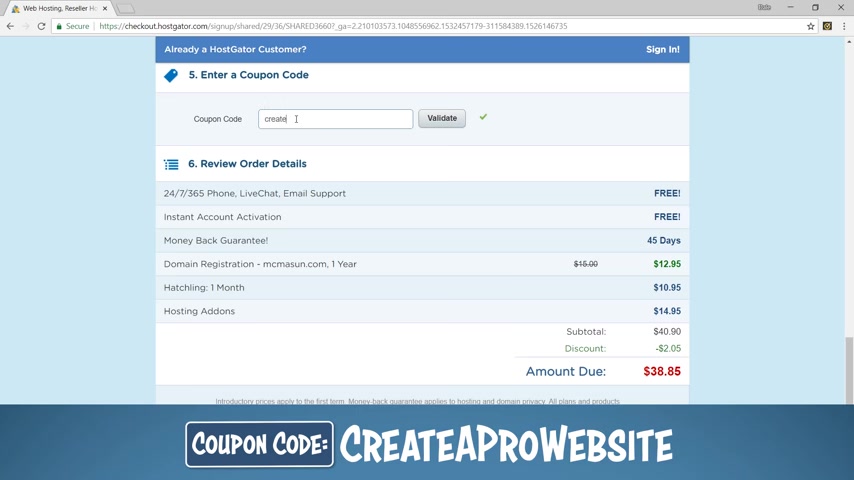
So it'll say something like shared 366 or some sort of number , just delete that and you can type in create a pro website .
So this discount code is my affiliate link with host Gator and they really hooked it up at the time .
I'm recording this .
It saves you about 60% depending on what plan that you choose .
And this coupon code also gets me a commission which helps fund these free tutorials and videos that I put out .
So it's a win , win for everybody .
So once that's put in , you can hit validate and you can see our price just dropped .
So instead of a $15 domain name , it's now 4 99 and our plan per month also went down .
So again , if you choose the 12 months , this will be more like a 60% discount regardless , it drops you from 40 down to 27 for this current plan .
So once that's done , we can agree to the terms and just click , check out now .
All right , cool .

So it says payment completed , get ready .
We're setting up your account .
So you just gotta let it build for a second .
All right .
And here we are .
So now that you're in the host gator customer portal , which is also called your C panel , you can now go up to the hosting tab .
So once you're in hosting , just confirm that your hosting account is on your new domain name right here .
And the next thing that we want to do , which is step number two , install , Wordpress .
Simply put Wordpress is just a software that you use to design and publish your website or your blog .
Wordpress is by far the most popular website builder on the market and it powers about 30% of the internet .
Wordpress comes with over 11,000 different themes that you can choose for your website .
And also over 55,000 widgets and plug ins to help you optimize the functionality and the tools on your website .
And wordpress is free .
It's an open source software .
So there's tons of developers all over the world working on it every day to make it better .
So to install wordpress , just go over to wordpress one click installation down here and now just select your domain name and leave this empty and click next and just give your site a title .
I'm just gonna say Mick Mason admin .
I'm gonna put my first and last name , first name , last name and then the same email then just agree to the terms and click install .
Cool .
Now , wordpress is installing and now it's done .
So first thing you want to do before anything else is to copy all of this information right here and put it somewhere , write it down , copy it over to a note section , whatever you need to do because you are going to need this ridiculous password later and you're gonna be happy that you saved it .
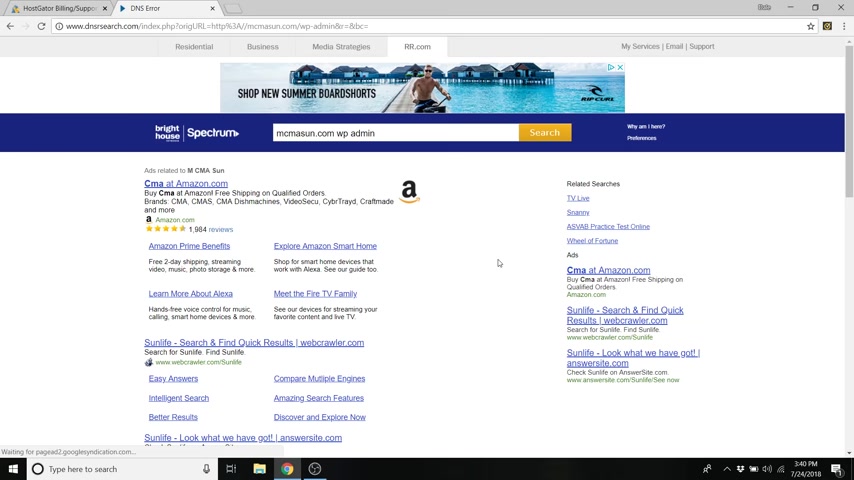
So now just go ahead and click log in and you're brought to this site because once you purchase a new domain name and hosting plan , basically host gator needs to send this new domain out across the entire world to let it know that it exists so that every DNS , every server can go and find it .
So while this is happening , it takes about two hours at the most .
Uh they say it could take up to 24 hours .
I've never actually had it take any longer than maybe 20 minutes .
So in about 20 minutes could be two hours come back and we will pick up where we left off .
All right .
So we're back .
And the way to check on your website is to just type in your new domain name and you will be brought to this page whenever it's ready .
So that's awesome .
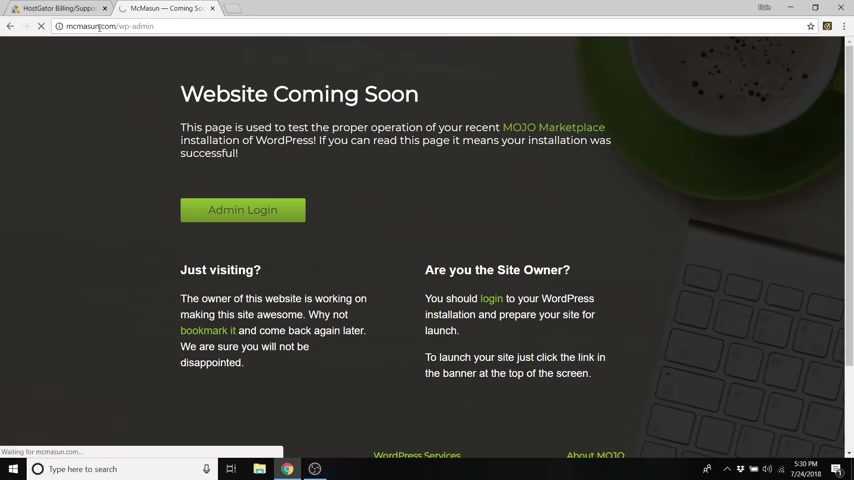
Instead of logging in to wordpress through this admin login button , the way that you should get used to logging in is by going up to the top and just typing in slash WP dash admin after your domain name and then clicking enter because this page is gonna go away once you publish your website .
All right .
So cool .
Now we can log in and we're gonna log in using that ridiculous password that I told you to save from earlier and your user name .
So my user name was just my name and that password .
Let's just copy and paste that and just click log in .
Bam .
There we are , we are in the wordpress dashboard .
It looks a little daunting right now , but we are going to clear up all this nonsense on the dashboard .
So just go ahead and dismiss you can dismiss this ad just literally click out of everything , close everything up , bam .
So that's what we want it to look like .
Nice and clean .
Now , step number three is to reset your wordpress password .
This is an important step because you don't want to use that ridiculous password that you had to say from earlier .
Every single time you want to create something that you can remember .
So in order to do this , just go down to users , go to all users and just click on your name and scroll all the way down to the bottom of this page and you can see new password and just click , generate password and delete that ridiculous one that they give you automatically and you can create your own .
So I'm just gonna create my own now and then just click on update profile and that's it pretty simple .
Now , you can use that new password any time you want to log on to wordpress and remember to use your domain name slash WP dash admin .
All right .
So step number four is to activate a new theme and page builder .
A lot of people get confused between a theme and a page builder because they are pretty similar .
But I'm gonna explain the difference right now .
So a theme is usually just what determines the look and the style of your website .
But in this case , we're using a page builder to edit this home page .
So really the theme that we're gonna get is strictly just for the header , which is this whole white section here at the top and the page builder is what builds all of this content down below that's in between the header and the footer .
And even then we're still gonna use a page builder to do this footer as well .
So let's go get ourselves our theme .
We're gonna be using a free theme called Ocean WP .
So in order to get this theme , just go over to appearance and click on themes and I'm just gonna close out of this .
So it's a little bit cleaner and we can click on add new theme and you can see there's all these different themes that wordpress is suggesting .
For us , you can search by popular latest , all that stuff , but we're gonna be using Ocean WP , which is an awesome theme and it's free .
Uh If you would like to use a paid theme , which paid themes have a lot of advantages .
They're way more customizable with almost every aspect and my favorite paid theme to use and it's well worth it is called Divi .
Divi has a drag and drop builder .
Much like what we're gonna use today , but just a little bit more powerful .
It's very beginner friendly .
So I highly recommend this .
If you would like to spend the money on a theme , it's about $89 right now .
I think .
So I spent days looking through free themes and testing them out for this e-commerce tutorial .
Only to find out that there was really no good free themes out there that would give you the customization that I wanted you to have .
And what I came to was using Ocean WP and using a page builder to build the whole home page for you .
And I made it into a template that you can just download .
So it's very simple to use and I'll show you how .
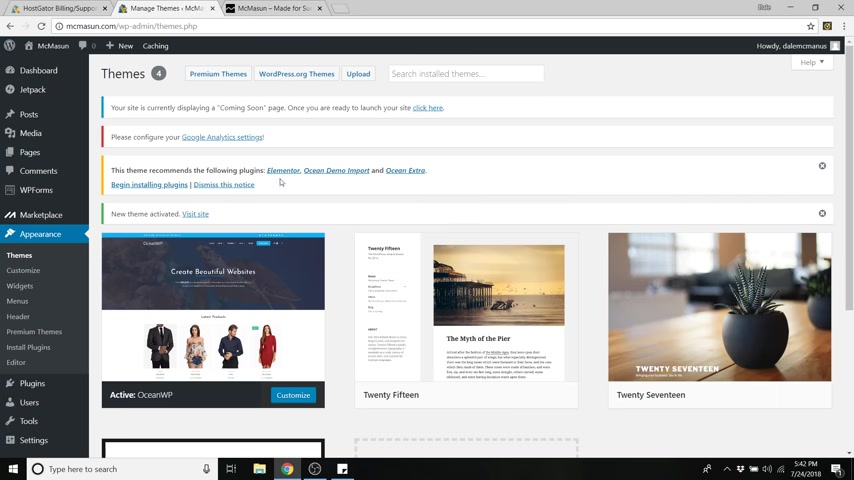
So first we're just gonna need to install Ocean WP and now you can just activate it .
All right , cool .
So now it's activated and you can see there will be a notice up here .
This yellow one that says this theme recommends the following plugins and it says mentor , which is the page builder that I was talking about .
So we're gonna need that ocean demo import and ocean extra .
These are just extra features to this theme which I highly recommend getting those as well .
So you can just click on begin installing plugins and it will install all three of those .
So just click on all three , go to bulk actions , install , hit a play and that will now install all of those plugins and there it goes .
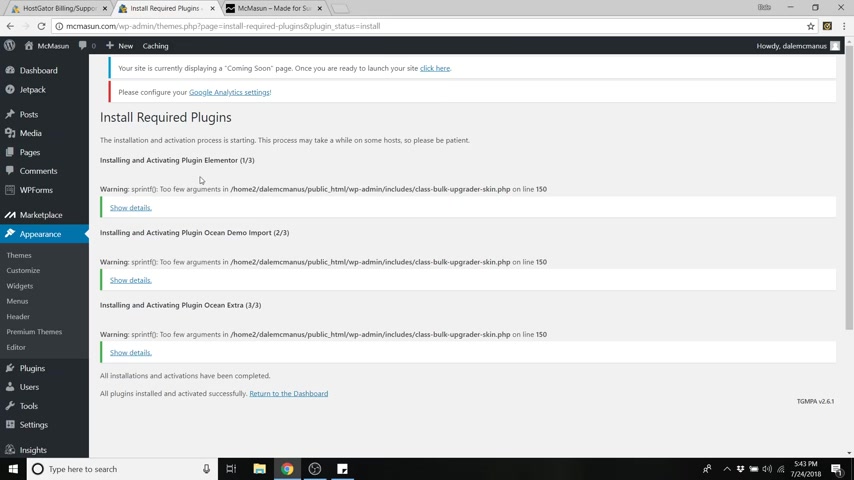
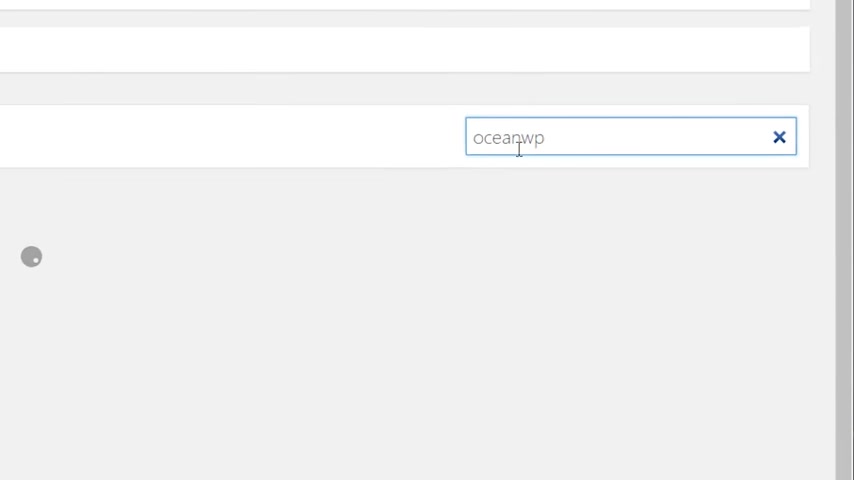
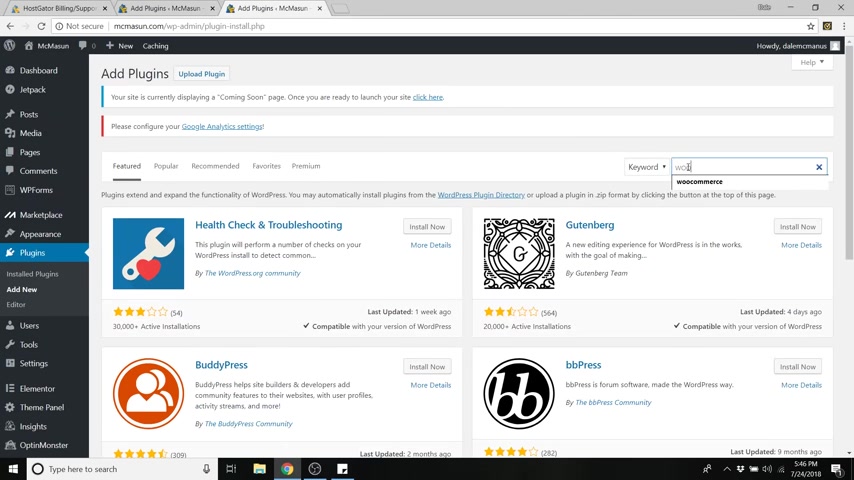
So if you don't have that notice at the top and you need to download those plugins , all you have to do is go down to plugins and go to add new and you can just search in the search bar right here for mentor click search and you can see Element or page builder right here .
I already have it activated , but you'll see an install now button there .
So you can just click that .
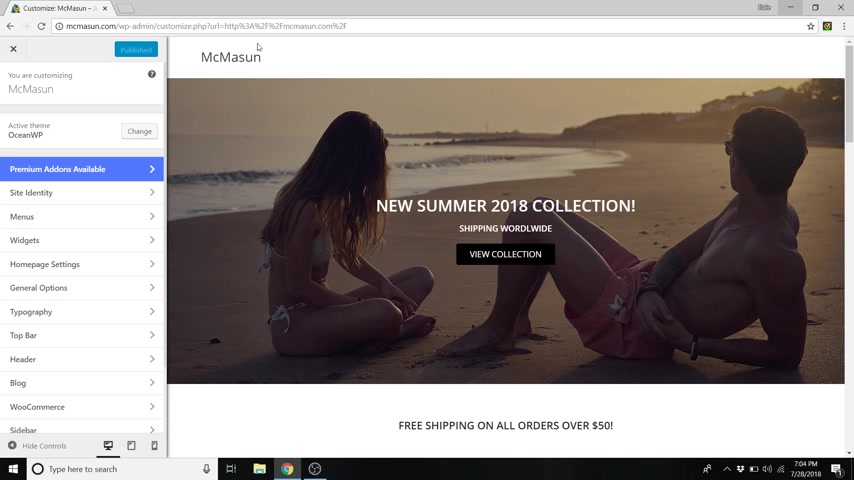
So now that we've activated the theme in our page builder , you can just go up to your title here and click visit site .
I'm just gonna open it up in a new window so you can see our site here is pretty boring , but we are gonna fix that in a couple of steps from now .
So step number five is to install Woocommerce .
So , first , before we do any customizing with the home page , we need to set up Woocommerce , Woocommerce is just a plug in that allows you to create products and product categories , set prices , do all the fun stuff with e-commerce .
It's what adds the e-commerce to your website .
So let's go download it .
So just go back to the dashboard and go down to plugins , go to add new and we're just gonna go to the search bar and type in Woocommerce and now you'll see Woocommerce .
It's the first one .
It's got over 1 million active installations .
So let's just install that and activate it .
All right , cool .
So we just activated Woocommerce and we are also going to go into plugins , add new again and we're gonna activate Stripe .
So Stripe is what allows people to enter their credit card information to pay for products .
So I'm gonna show you how to set up paypal and do Stripe so that people can pay either way .
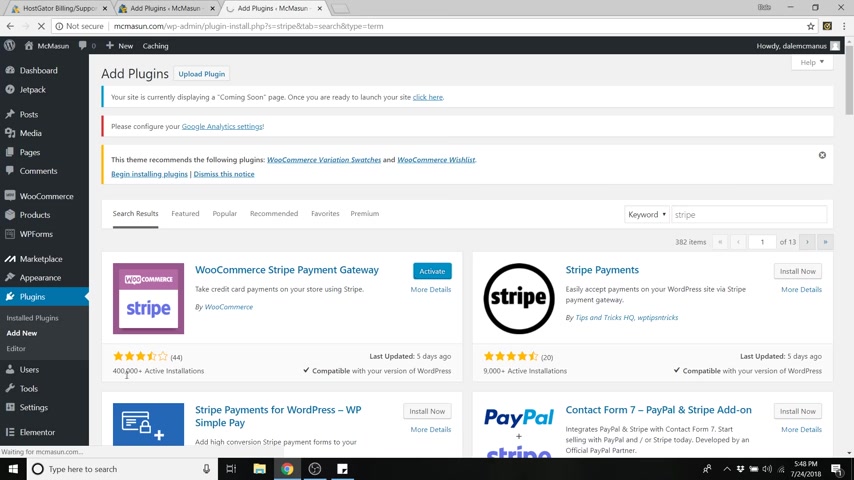
So to get Stripe , just type into the search bar stripe and you'll see Woocommerce stripe payment gateway , just click install and then click activate and it's got 400,000 active installations .
So , you know , it is not a sketchy plug in and cool .
So that's done as well .
Now you can ignore this following theme , recommends these plugins and now I'm just gonna go through the Woocommerce settings in order to show you everything that you need to configure .
So just go to Woocommerce and click on settings .
Ok ?
So I'm gonna go through all these different tabs and first one is general .
So in general , you've got your store address .
So I'm just gonna put in whatever my store address is now selling locations , you can determine where you want to sell to .
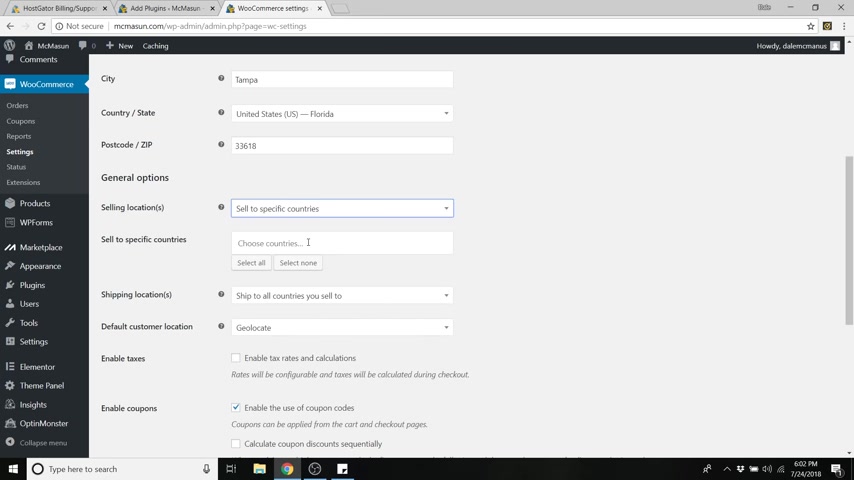
So all countries , all countries accept four and you could type in whatever country that you don't sell to or you could do specific countries if you've only got a few and you want to put those in and not do except for every single country .
So it'll save you some time .
In this case .
I'm gonna put select all countries , sorry , sell to all countries shipping location .
So ship to all the countries you sell to or you can determine , uh , ship to specific countries only , same thing as selling .
So default customer location .
I would keep that as GEO locate .
So there's a few other options here .
GEO locate will search their IP address and determine where exactly they are .
So I would keep it there .
You can enable taxes for this if you'd like , not gonna get too far into that , uh , coupons .
Yeah , we want to use coupons .
If you don't , you can uncheck that our currency .
I'm gonna put that as us dollars .
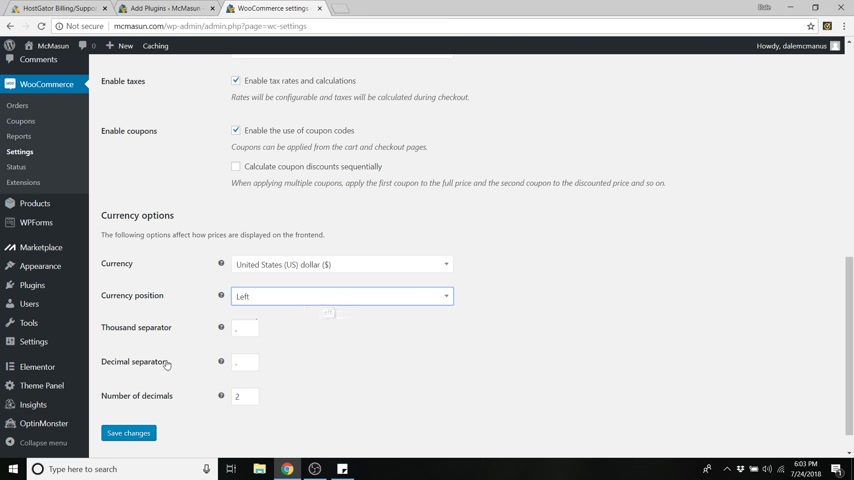
So USA oh , sorry .
Uh , let's just try dollar and let's just go down to United States dollar currency , you can determine whether the dollar sign is going to be on the left , right or so on .
It's always on the left in US dollars .
So I'm leaving it on the left .
Uh , same with the 1000 Separator decimal Separator and so on .
I'm going to keep that as a comma and a period and then just click , save changes .
Cool .
Now we can go up to products .
So , in products , the first thing we've got is our shop page which we don't have one yet .
So let's go ahead and just make one now .
So just go over to pages which is up top , go to add new and just type in shop and we're just gonna scroll down and make sure that our content layout in the ocean WP settings is at a full width and just click publish .
Cool .
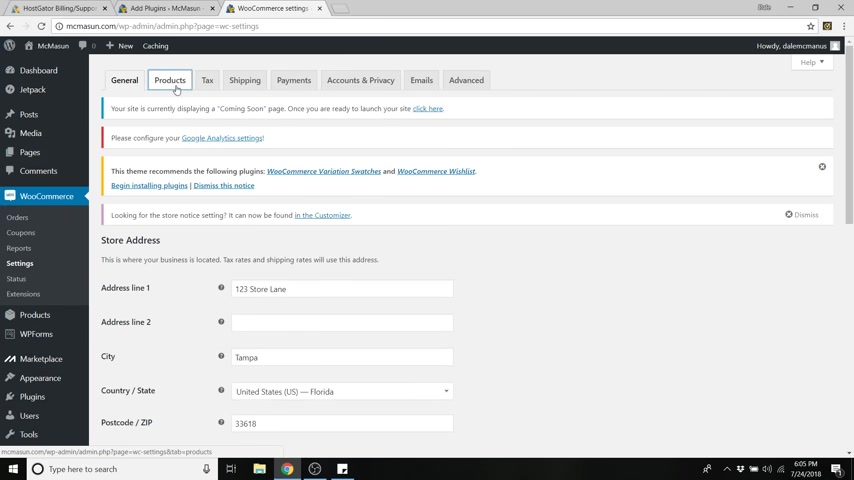
So now let's go back to Woocommerce , go to settings and go back to products and now select your shop page .
We'll just click shop .
We will be able to edit that page later .
But for now , we're just gonna sign it here .
So add to cart behavior , you can redirect to the cart after a successful edition .
Uh that'll take them away from any other products they might want to buy .
So I don't recommend doing that and under measurements we're gonna put in how we want to weigh and measure our products .
So us , I'm just gonna do pounds and dimensions I'm gonna do inches .
So if you're on the metric system , you can put in kilograms or centimeters , whatever you want to use .
And here we can do enable reviews and reviews are just what somebody can type in to rate your product and the product ratings down here .
They can also leave a star rating .
So one through five stars , I'm assuming your product is gonna be awesome .
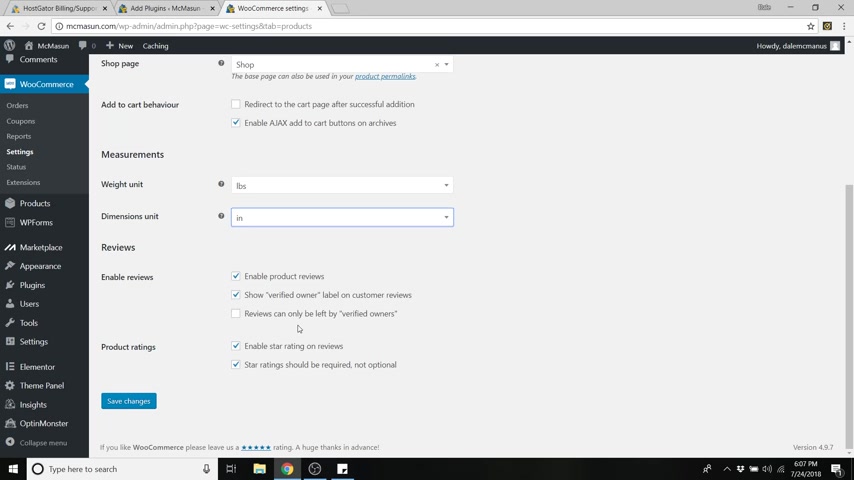
So I'm gonna leave enables star rating on and reviews and you can also do show verified owner label .
So they have to be a verified owner .
They have to sign up in order to actually leave a verified review .
So if you want to do that , you can enable reviews can only be left by verified owners , but I am not gonna do that .
I just want anyone to do it .
I just hope some guy comes along and rates my product five stars so that other people will buy it .
So now we're gonna go up to tax .
Oh , sorry .
So it's gonna say do you wanna leave site changes may not be saved , click cancel , go down , save changes , almost forgot that .
Now go over to text and here you can determine all of your tax information .
I'm not gonna get too far into that , but you can tell it whether you want to enter prices inclusive of tax or exclusive of tax .
You can tax it based on their shipping or billing address and so on .
So , now , I'm just going to click save changes when we're done and go up to shipping and here you can add a shipping zone .
So if you would like to put in wherever your products are coming from , you can enter that in here .
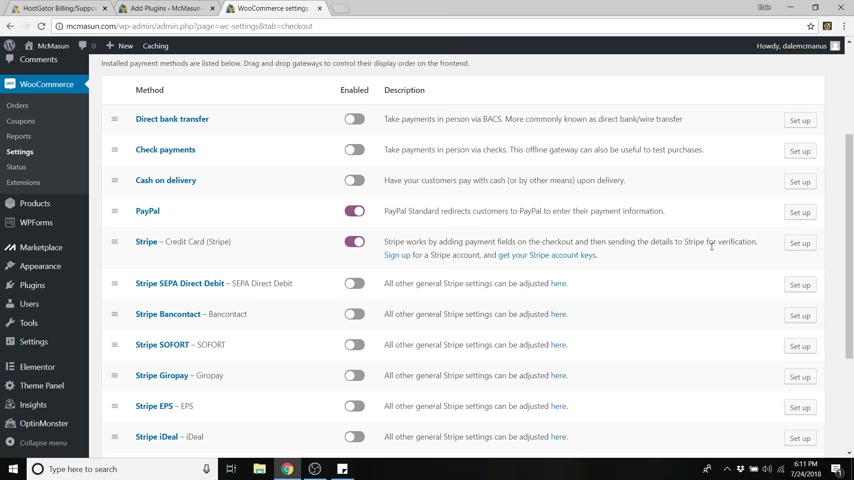
But for now I'm gonna move on because I don't have an actual manufacturer yet and I'm gonna go to payments and now you can determine how people will pay .
So this is where I told you about paypal and Stripe .
So we are going to enable paypal and we are also gonna enable Stripe , which is the credit card .
So if anyone has a credit card , they can enter in their information and you'll just want to run the setup for both of these .
So it'll ask you about your information , it'll hook up your paypal account and with your credit card account , you'll have to create an account with Stripe so that the money can be sent to your account and then you can transfer it to your bank .
So this is an important step if you actually want to get paid for the products that you're selling .
Cool .
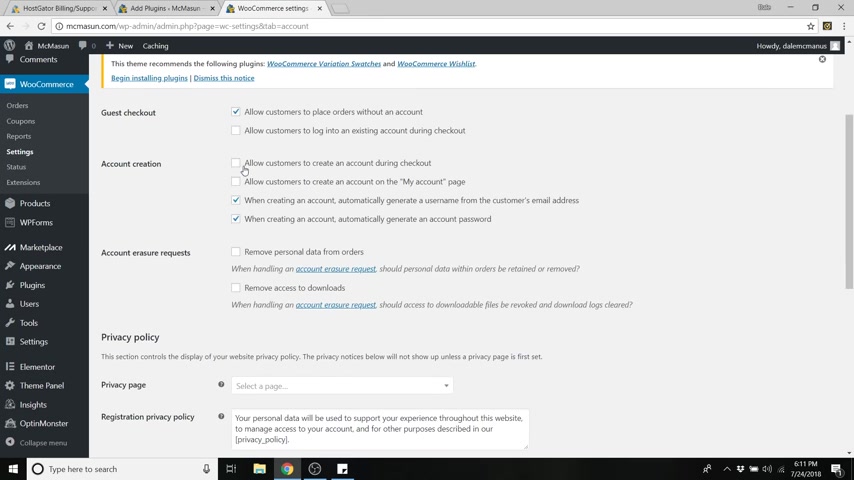
So click save changes and go up to accounts and privacy and you can do guest checkout which I would allow um account creation .
So if you want people to be able to make an account on your website so that returning customers can have all their information saved , you can do that .
So you can do allow customers to create an account during checkout .
You can also allow customers to create it on their my account page , which I'm gonna show you how to set up later .
So you can also set up a privacy policy and you can just create a page for that and then select it in this drop down .
I don't have one right now .
You can actually Google how to write up the correct privacy policy page for whatever your industry is .
And if you go down , this will determine how long you want to keep your customer's personal information .
So let's say after a year , if they haven't bought anything , you can determine that here and it'll get rid of their information or if you want to keep it indefinitely , you can just leave it all unchecked .
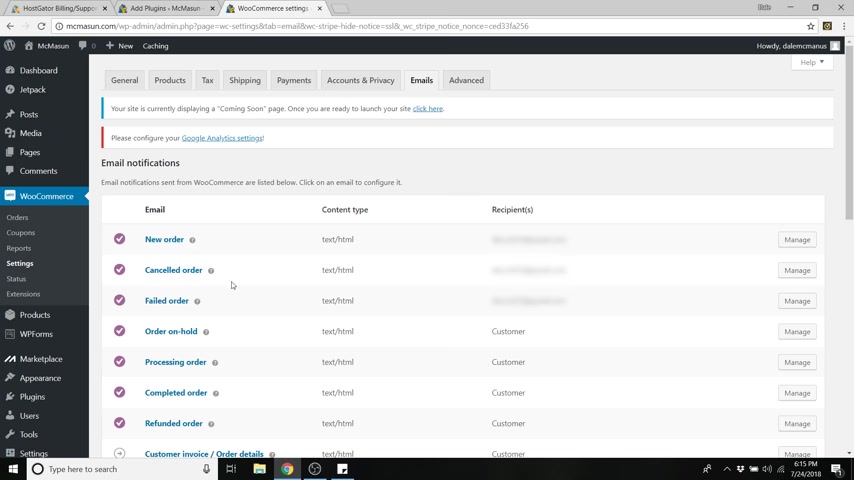
So I'm just gonna leave that unchecked and click save changes and we can go up to emails now .
Ok .
So now that we're in email , you can see that if we get a new order , it'll go to our email .
If somebody cancels an order , it'll go to our email as well as failed .
And the rest is what goes to the customer .
So if we put an order on hold , refunded it , yada yada , all this stuff right here and you can manage them and change the emails just by clicking on , manage .
And if we go down , you can see that .
Now we can determine who the order is coming from .
So if we're sending an email to a customer , we've got our , our company name here .
You can change it if you want and you can put in a whole email template here with an image and text and all that stuff .
But I'm not gonna get too far into that .
It's pretty self explanatory .
So click save changes and just go up to advanced last but not least .
And from here , we can determine our Cart page and check out my account and so on .
So step number six is to add new pages .
Ok .
So in order to add these pages in , we're gonna have to create them .
So let's go back to pages and go to add new .
All right .
So we are just gonna call this one cart .
And what we need to do is add a small short code here that will allow Woocommerce to put in some tools on the cart page for our customer .
And I'll show you what I mean in a second .
So just type in open square bracket .
Woocommerce underscore cart close bracket pretty short and simple .
Wouldn't really even call that coding and just scroll down and change the content layout from default to full width .
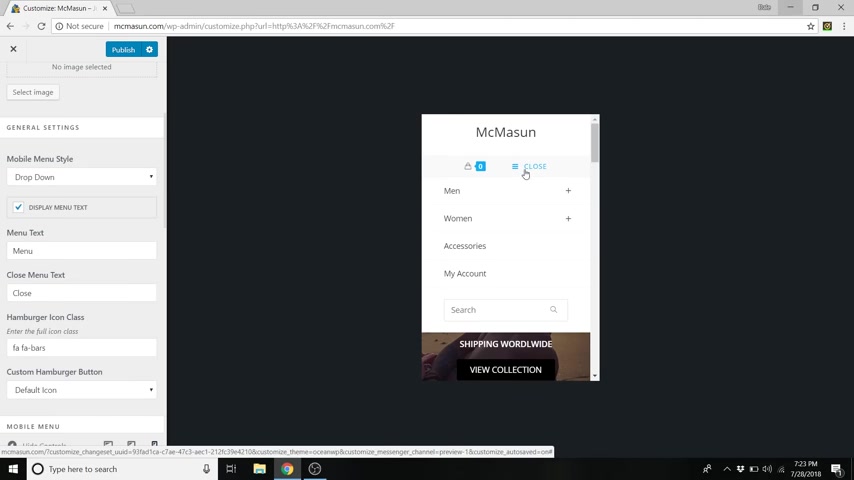
And that is very important .
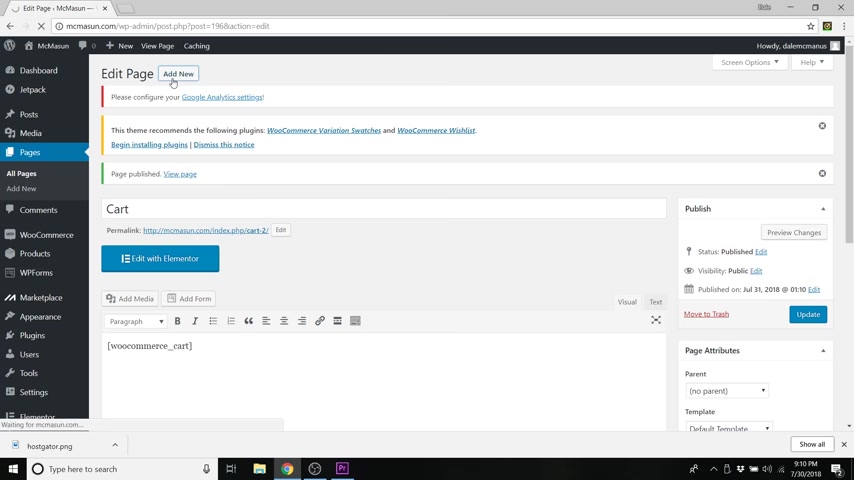
Do not forget that and then just scroll up and publish , then go to add new and we're gonna do my account and then short code is open bracket .
Woocommerce underscore my underscore account pretty simple , scroll down and make sure you change the content layout to full width and then go up and publish and click , add new .
And while we're here , we'll also do a terms and conditions .
I'm not gonna go too far into that with creating that , but you might as well make it while you're here .
Just click publish and again , add new and we'll do a privacy policy as well .
Click publish .
OK ?
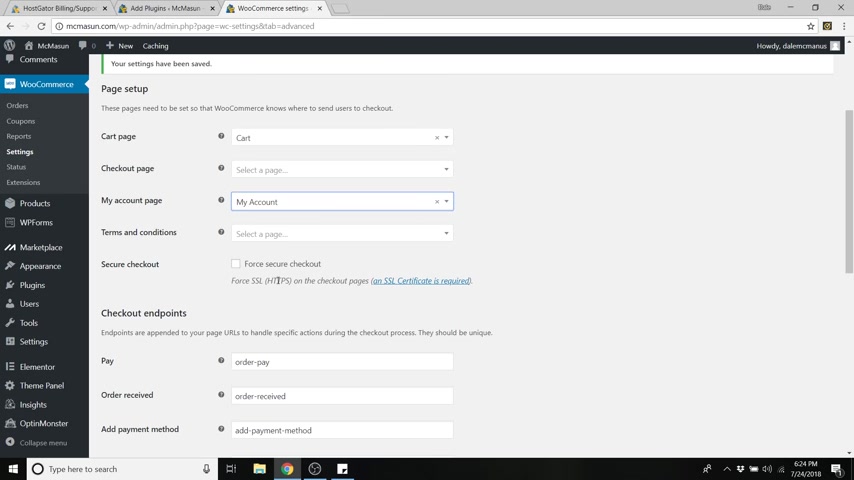
So let's go back to woocommerce and go to settings and we can go back to advanced .
Ok ?
So now we're just gonna put in the cart in the cart page .
We didn't do a check out .
We'll do my account and terms and conditions and here you can also force a secure check out .
So they need that SSL certificate on their page to be able to check out .
But I'm gonna leave that unchecked and just go down to save changes .
All right .
And to show you what I'm talking about , you don't actually have to do this part .
I'm just gonna show you if I were to click on my account on our website , it would then take me to my account page .
And these are the tools I'm talking about .
So you've got your orders , your downloads , etcetera .
And again , if you go to cart , you've now got your Cart page , it's currently empty right now .
But these tools in here will allow you to add or subtract things from your cart .
So that was how to add new pages .
So you don't just have to add customer tools pages .
You could also do an about Us page or a new collections page .
It could be literally anything .
All right .
So let's move on to a fun part .
Now we're gonna do Step seven , which is customize your website .
I'm gonna show you how to get your home page set up with all your images and your text and your buttons show you how to change fonts , all that fun stuff .
So let's jump in and do that .
So in order to customize a home page , we got to make a home page .
So just go to pages and then go to add new and we're just gonna call this home page , then you're just gonna scroll all the way down to the ocean WP settings down here .
And we are going to make this a full 100% width in the content layout and then just go to header and we're gonna disable that top bar .
Top bar is just this little tiny bar at the top where you can put some extra widgets .
We don't really want it .
And we're also gonna go to title and we are going to disable the page title .
So we don't want our home page to say home page on it .
Now , just go up to publish and once that's published , just go up to your name up here , your site name and go to visit site .
All right .
So here we are .
And wordpress writes up this automatic post called Hello World and it sets that as your automatic home page .
So we have to tell wordpress to go reset to our new home page .
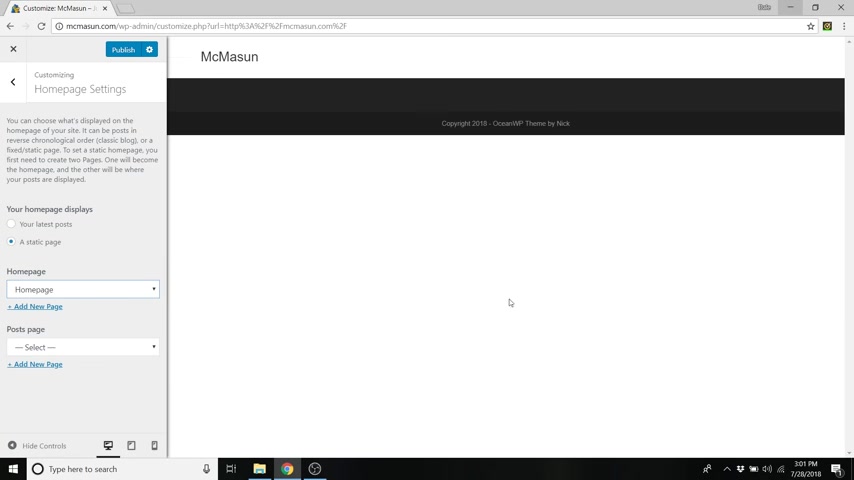
So just click on customize up here .
All right .
And we're just gonna go down to home page settings and we're gonna tell it to be a static page and it's gonna say home page , we're gonna want to select our home page page and now we have our new homepage container .
And what we're gonna do is build our home page with mentor .
And again , I have a free template for you guys .
So all you have to do is just replace the pictures , replace your text and so on .
It's really easy .
I'm gonna show you how to do it right now .
So go ahead and click publish .
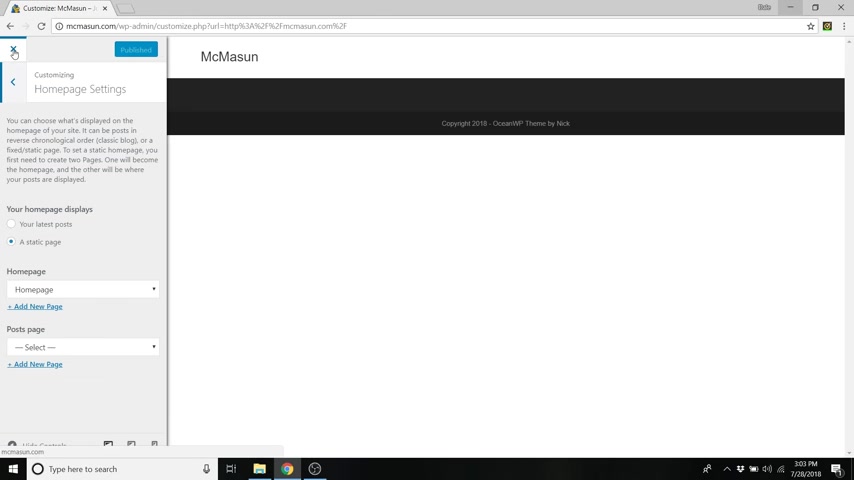
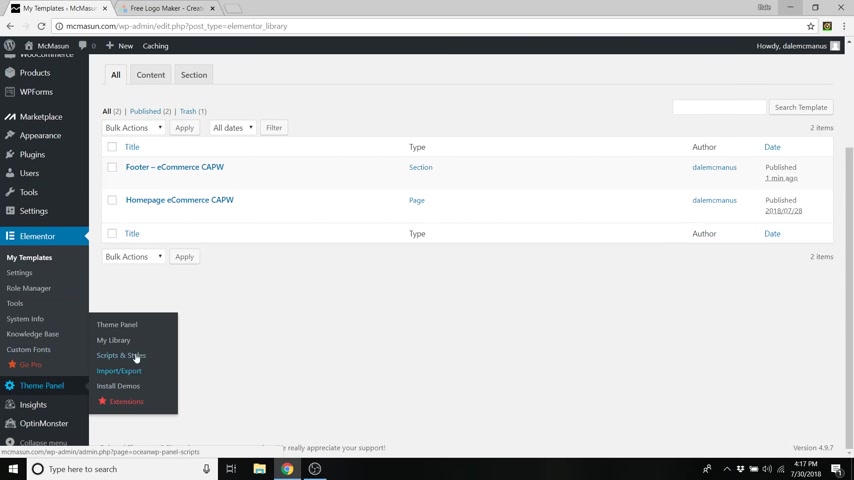
So first , what we need to do is upload the template .
So we're just gonna click on this X and we're gonna go back to our dashboard and we're gonna go all the way down to mentor and then just go to my templates and we're just gonna click on this import templates button at the top and then just choose the file .
And again , I provided this template for you .
So if you haven't downloaded it , go download it and it's right here , Element or templates , e-commerce , and we're gonna click on home page and then import now .
All right , cool .
So we just imported our new home page template .
So now just go back up to your site name and click visit site and then just click edit with mentor .
All right .
So this is mentor and this is the drag and drop page builder .
And what we're gonna do is add our template here .
But first before we do that , I just want to show you you can grab all of these different widgets .
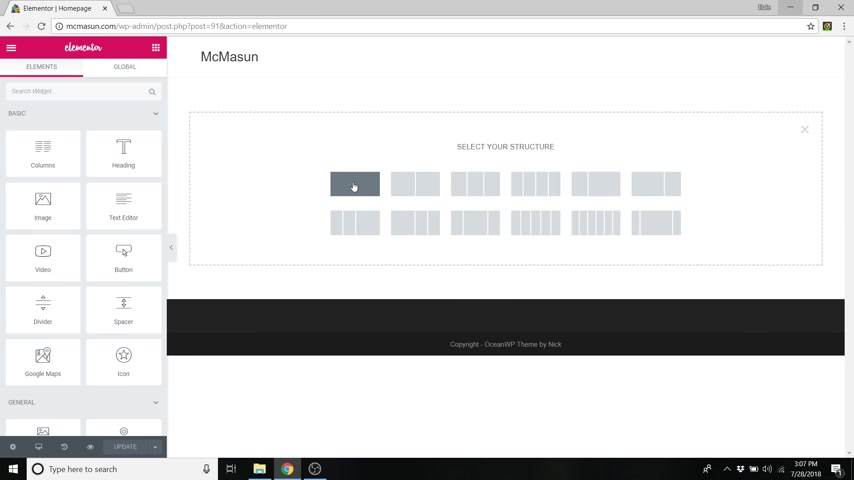
So if you click on this plus sign and you create a new row or structure , you can now add stuff to that box .
So if you wanted , you could click on this Rubik's cube thing up here and you can add heading and you can change the color , you can change the uh the font , everything about it .
You can add widgets , you can add buttons , all sorts of stuff and you just drag them in and you can see there's like a blue line whenever you are gonna place it above or below something .
So that's pretty cool .
And you can just delete by clicking this X but like I said , I have everything built for you .
So just click on this add template button and go over to my templates .
And now you can see the uh template that we just imported .
So click insert and it'll ask you if you want to import the document settings .
Just click .
Yes .
And here we go .
So this is the page I built for you .
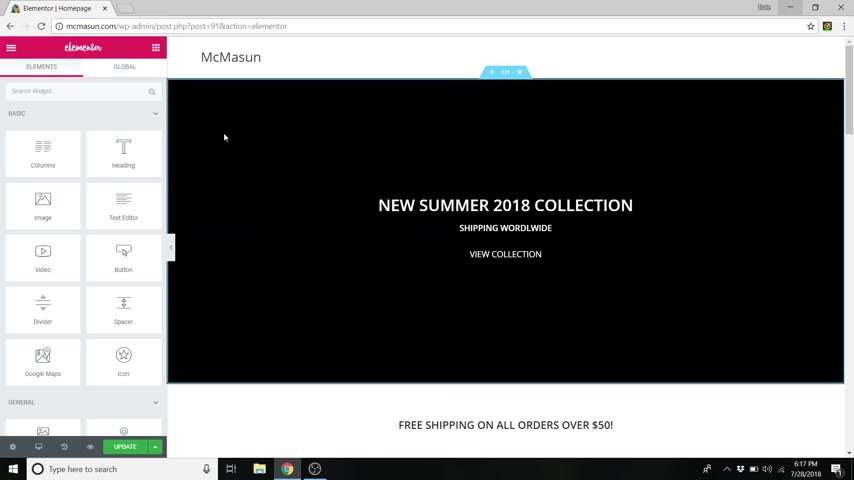
There's no pictures on it yet , but I'm gonna show you how to add all of those pictures , replace the text buttons and so on .
So let's get started .
So first we are just going to right click within this main section .
So you've got this main container and then you've got these widgets inside of it .
So we're just going to click right in here and click edit section .
That was a right click by the way .
And we're just gonna change the background .
We're gonna go over to the style tab and it's not the background tab because the background is actually black .
It's background overlay because we have a black that's behind it .
And then we change the opacity so that the image is a little bit darker so that our tech shows up .
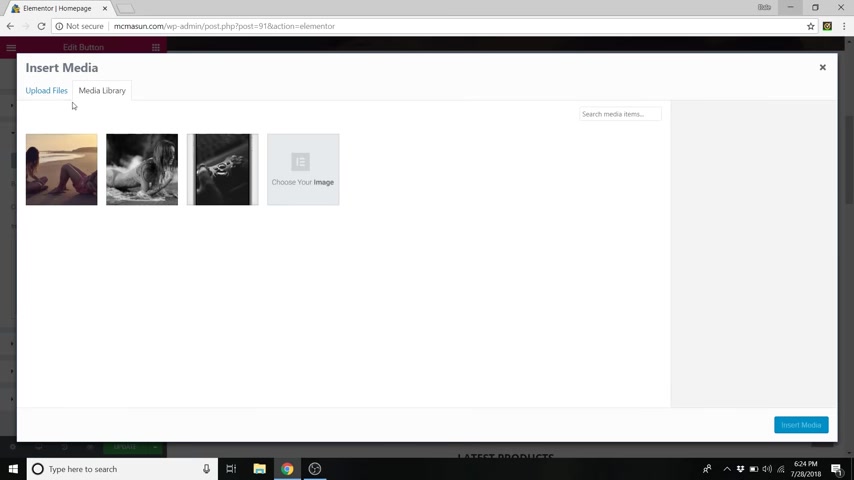
So in order to change the background , just click on this plus symbol in here and you can now upload your files .
So we're just gonna click upload files , select files and then just navigate to the follow along images that I provided and just go to page images .
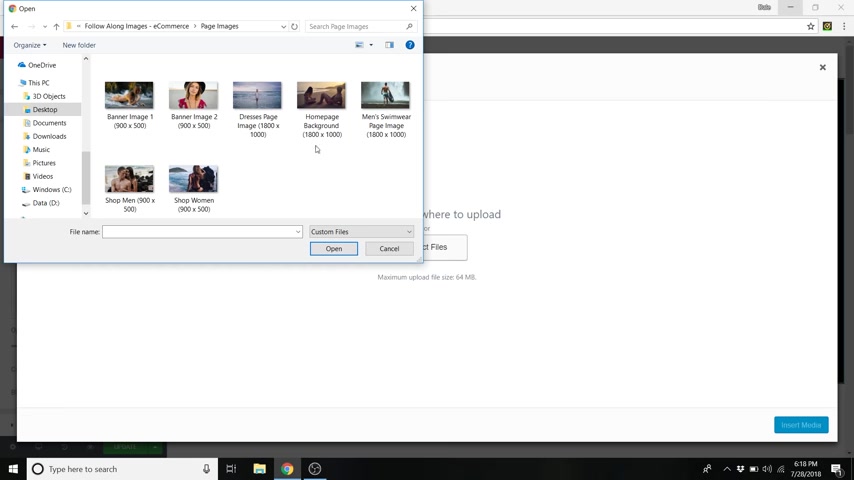
And we're gonna do home page background which is 1800 by 1000 pixels .
This is about the perfect size for this homepage image .
So we're just gonna open that and you can click insert media so you can change some of the settings down here .
You've got the position the uh size and you can also do the opacity .
So if you want to make it darker , you can do that here .
Uh I had it around a seven .
And again , this is background overlay only for this home page image , this uh top image .
So that is how to change that background image .
And now you can change this text by simply clicking on it right here and you can edit it to whatever you want to say .
So I can add an exclamation point .
You could say uh new releases , you know , whatever you want to put , I'm just control seeing that and you can also edit it here in this box as well .

And you can also put a link on it .
So if you click on it , it will take you to that link , you can change the size .
So if I wanted it to be medium text , small , large uh and then the heading one .
So heading one is your largest heading all the way down to heading six , which is your smallest .
But changing these here won't uh change the size whenever you have this size set to small , medium large XL or double XL .
If it's on default , then those will change .
But I have it set too large as well as the alignment here .
You can do left or right , which is pretty cool .
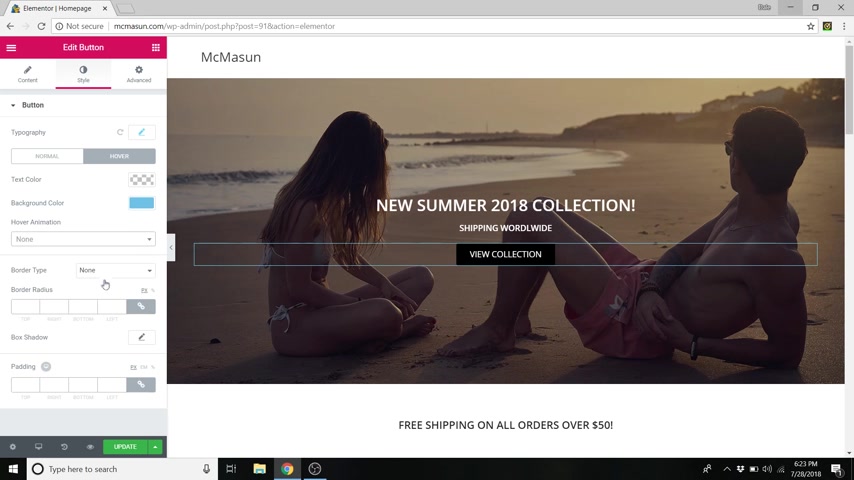
Same with the text below it , the subtext , you can change it the same way and now the button .
So if you come over here and right , click on here and click , edit widget .
You can now edit the button so you can put whatever you want in here .
So you close , you know , whatever you'd like to put , let's just go back to that .

Uh You can put the link here so you can link to a different page on your site or you can link to a whole different URL if you want .
But you just take that hashtag out and put your link in there and you can also change the size .
So an extra small button , a large button and so on whatever you'd like to do , and you can also add an icon here .
So you can look up whatever icons , let's just say Facebook , just as an example , you can add the little Facebook icon .
There's a bunch of choices in here .
So just go nuts and you can also change the style .
So if you go to the style , you can change the typography .
And again , you can do this for the heading as well .
I forgot to mention that , but you just click on the typography pen and you can go in here and select any font that you want .
Um You can just type one in and find it and you can change the size .
So that's pretty huge .

I'm just gonna delete that , go back to default and you can change the weight .
You can do all sorts of stuff with it , the height the letter spacing , you know , get creative with it , whatever you'd like to do .
And if you click on that again , it will close out of that window and you can select your text color .
So I have this just set to default right now , which is a white .
Uh you can select any color that you want .
So it's changing that text right there and you can also do the background color of the button , whatever you'd like to change it to .
I had it set to black and you can also click on hover and whenever you hover over it , you can change those colors as well , which is pretty awesome .
And you can also add an animation to it .
So if I wanted it to grow a little bit when I hover , it kinda pulses out .
Uh Let's see what else ?
Sorry , here is a pulse .
You can do all sorts of cool different animations .
So just kind of flip through those .
This is a reason why I really like element or there's a lot of customization .
You can add a border to it , a shadow to it , all this fun stuff .
And again , you can change the typography of the uh header as well just by going to style and doing the exact same thing .
So we're just gonna scroll down again .
This is a header as well .
You can change that and now we're gonna add images to these uh buttons here .
So shop men shop , women , changing these backgrounds is gonna be a little different .
So same thing , just click , edit , widget , right , click and click , edit widget .
And you can change the text which I showed you how to do earlier .
But to change the background , we're gonna go to advanced and under advanced , you'll see background .
So this is a little different .
We're not doing background overlay and it's also not in style , it's in the advanced tab .
So we're just gonna add an image here and upload files , select files and we're gonna add the shop men which is 900 by 500 pixels .
So if you're creating your own images for these , I highly recommend downloading these images and mimicking the same sizes .
So click open insert media and there we go and we're gonna change this other one as well .
So same thing , right ?
Click edit widget and go over to advanced and go down to background and just click here , upload files and we're gonna click the shop women , which is the exact same size and insert that as well .
And I wanna add once in a while , you might want to click update .
It will save your work , which is very helpful .
It sucks to build an entire page and then lose all of your work because something happened .
So you can also resize all this .
So if you go down to responsive mode , it's this little uh computer symbol down here .
You can click on mobile or tablet .
And you can also look at how this is gonna look on mobile .
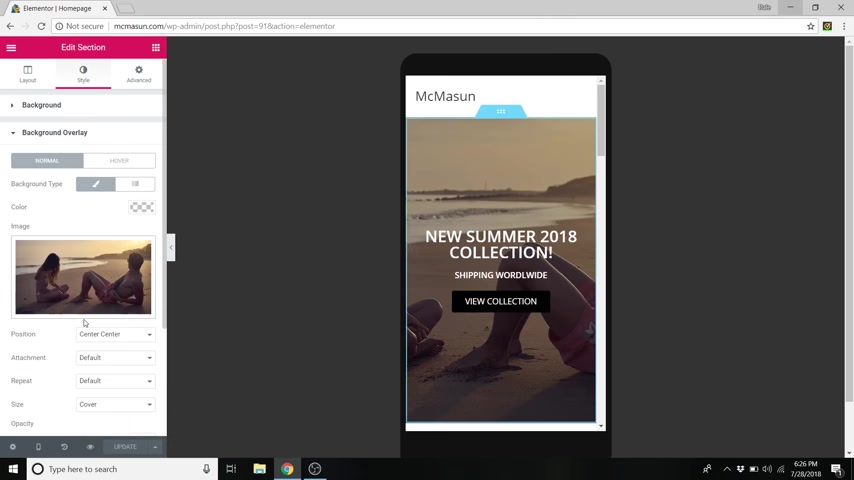
So right here , I don't really like the way it's just this guy's legs sticking out here .
So maybe I want to change that .
So in this mobile menu here , I'm just going to right , click and click , edit section .
And I'm gonna go over to style background overlay and instead of center center , I'm gonna change it to center , right .
So that this guy is more centered in that uh in this window now .
So now I'm just gonna go back to desktop .
Actually , let's check the tablet real quick .
So tablet looks pretty good .
Same thing .
So I'll go back to desktop again .
Another reason why I love element or you can edit for all devices .
So let's roll down and now our latest products and our sale products , I'm gonna show you how to set up your products soon .
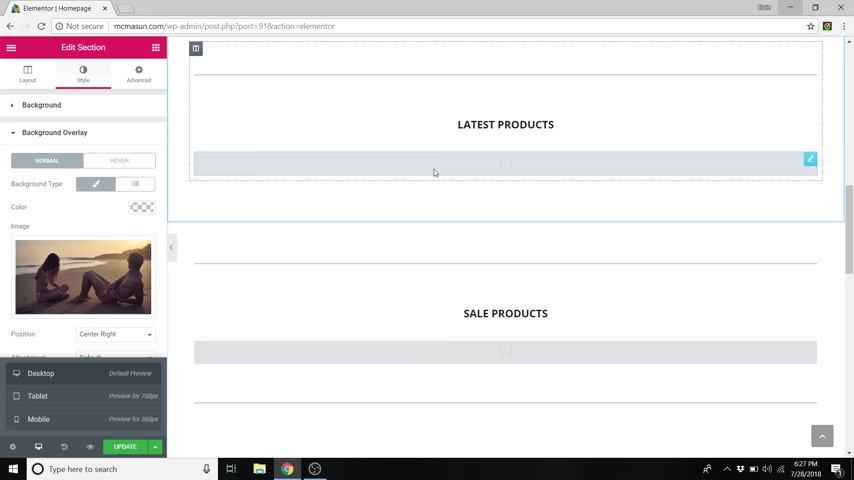
But basically I have this auto coded so that when you create products or you put products on sale , all of the recent ones get put into this section .
So again , I will show you that later .
So scroll down and we are gonna edit these banners now .
So these banners are just headings with backgrounds .
So they work the same as the button .
So just click edit widget and then go up to advance background and then just put an image in there .
So we're going to upload files , select files and we're gonna do banner image one open insert media and same with the other one edit widget which again , I'm right clicking go to advanced , go down to background , put in an image banner image too open again , those are 900 by 500 pixels as well .

Go to insert media and there we go and I'll show you one extra setting that you can also play with .
So let's just close this background here and go up to advanced .
You can also add a little bit of a margin here .
So if you don't want this to be flush with each other or against the window over here , you can add a little bit of margin .
So just click this link button and then you can just add some space to that .
So that'll add some space there and you , you should do the same to the other to keep it symmetrical .
But I'm just gonna take that off .
I just want to show you that real quick .
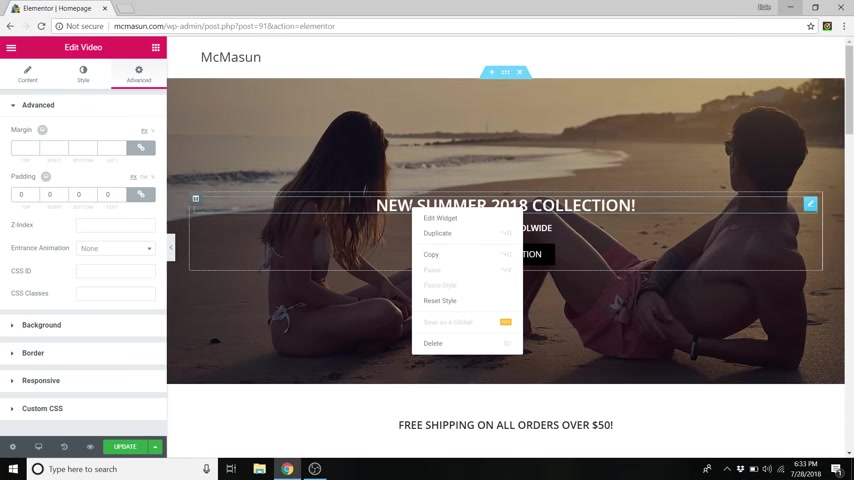
And next we're gonna go down and change this uh video here .
So right , click on the pen , sorry .
So if you right click here , you're gonna activate the video .
You wanna right , click up on this pen tool and then select edit widget and you can change the video URL here .
So it's set to youtube .
You can do Vimeo Daily motion or self hosted .
Most videos are on youtube .
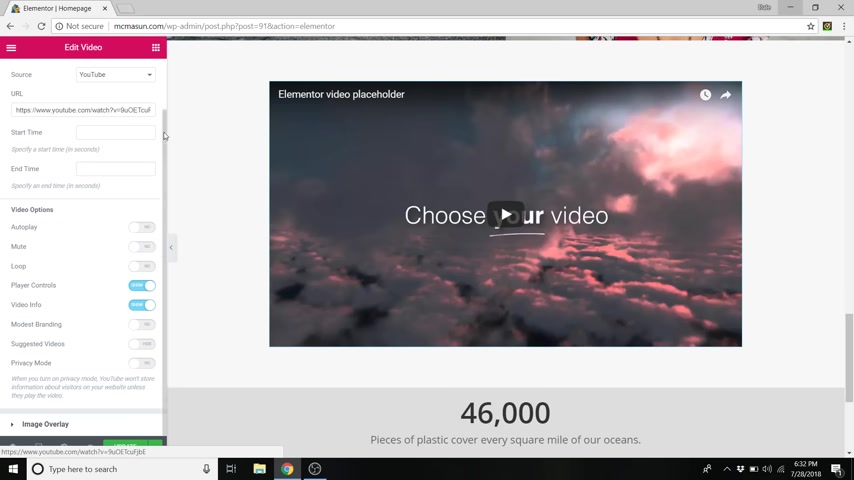
So I recommend youtube , but you can just go into youtube and grab a new URL and then just paste it in here and it will change that video and you can set your own custom start time and end time to it .
You can do all these options here like auto play or loop the video .
You can get rid of the player controls so nobody can pause the video , um all sorts of stuff .
And again , let's click update to save our work .
And if you'd like to change the size of this video , all you have to do is go up to advanced and then you can just add your own custom margin to it .
And that will also make the video smaller and just make sure that you have this link button uh checked because if not , you're only gonna change individual values like just the top or the bottom , et cetera .
So link that I'm just gonna delete it because I like the size and another fun trick that I forgot to tell you about on the text and pretty much anything really , you can do it with the video as well .
Uh But if you select the text , you can go to advanced and then go to an entrance animation .
So right now I have this set to a fade in .
So whenever you restart the page it will fade , you can also add zooms , bounces slides , all sorts of fun stuff , right ?
So we're gonna go back down and last , but not least we're gonna change this banner here .
So if I just click on that , it will go to our edit counter or you can just do right click and then edit widget and you can change the number .
So if I wanted to do , let's say 23 568 , I don't know anything .
It will count up to that exact number .
So I'm gonna change that back .
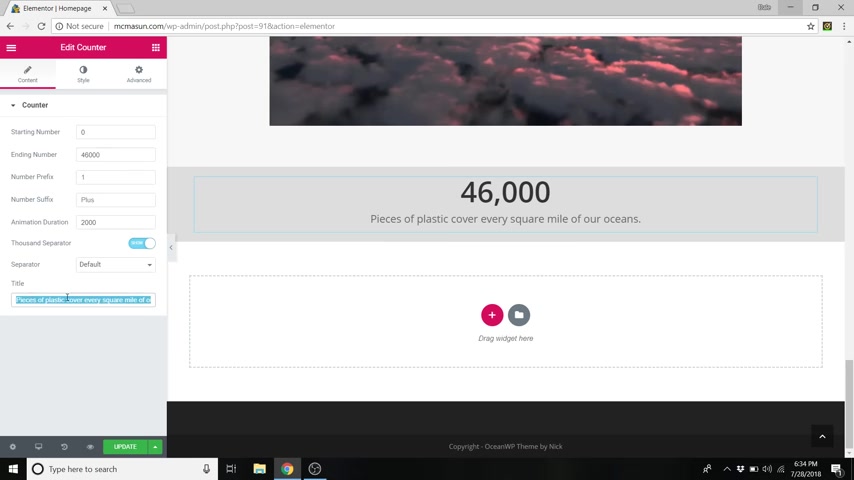
You can change the starting number , the speed at which it counts and so on and then you can change the title down here , so you can edit this however you want .
And if you'd like to change the background of any of these sections .
So this one's white , this one's kind of a light gray and so on .
You can do that just by clicking on the outside here , going to edit section and then go over to style and on background .
It's set to this light gray color .
So you can change that as well to whatever color you'd like .
Obviously , this doesn't look very good .
So I'm gonna put it back to DS across the board .
There we go and again , update , gotta get in the habit of that .
All right .
I'm also gonna show you how to make a footer down here as well as a header with your own logo and everything .
But first , we need to create some product categories .
So let's go ahead and do that .
Now , make sure that this is updated and then just go up to this little hamburger symbol up here and go to exit to dashboard .
All right .
So step number eight is to create product categories .
All right .
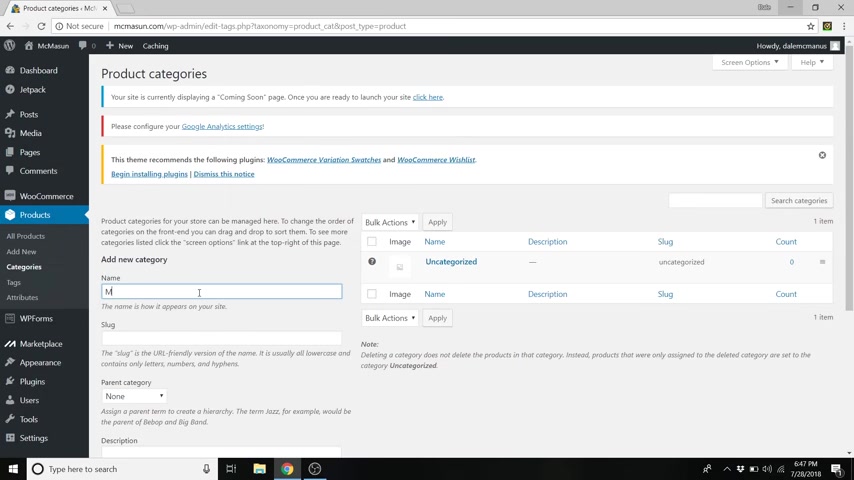
So now we're just gonna click on products and then go to categories .
So we don't have any .
So we're just gonna start by making our first one and these product categories are gonna appear at the top of your page .
So that when somebody goes to your website , they can go click on it and say I wanna shop men or women or so on .
So we're gonna start with men in the name uh section and the slug is just gonna be men .
So the slug is what goes after this uh Mick mason dot com or your uh domain name dot com slash and it'll say like shop slash men or so on .
So we're just gonna put men and parent category is none and we're not gonna add any description .
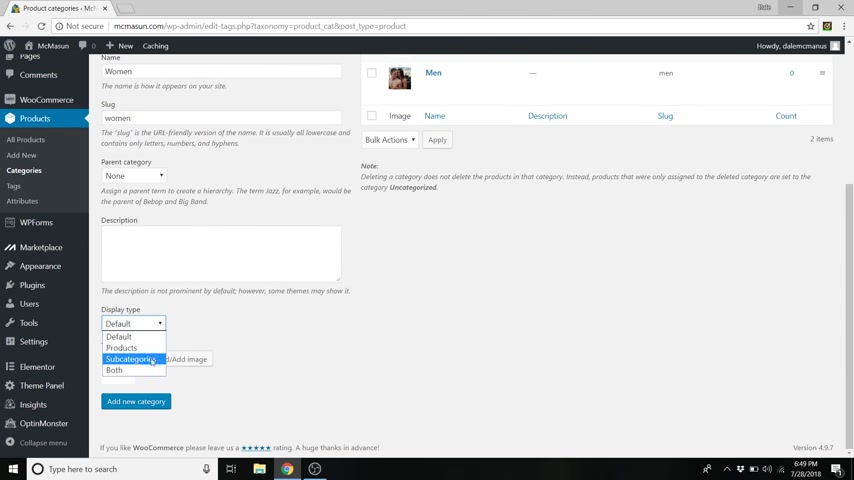
We're gonna do display types .
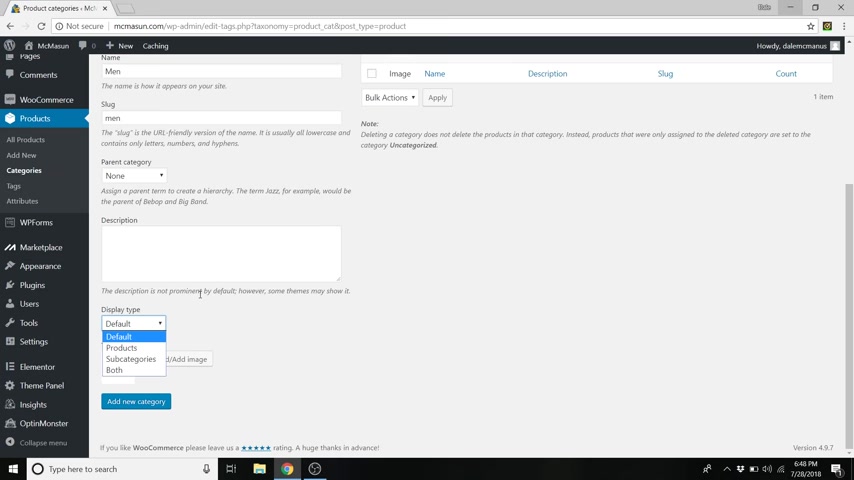
So this is the what you want to display on that page .
So when somebody clicks on it , what I wanna do is display subcategories .
So instead of so if I go to a subcategory , like let's say shirts , then I would want to display products .
But if we click on men , we want to see things like shirts , pants , accessories , and so on .
So I'm just gonna do subcategories and then you can also add a thumbnail image if you'd like .
And I'm just gonna click add new category actually , you know what ?
We're gonna go add a thumbnail to that right now .
So just click on edit right here underneath men and go all the way down .
And we're just gonna add the same thumbnail image that we used on the home page .
So just select that one and then click , use image and just go to update now back to categories and let's create another one .
So let's do women .
Slug is women and we're gonna do display type , subcategories , add an image , upload files , select files , sorry , media library , uh women and add new category .
We're also gonna do accessories .
Slug is accessories , display type this one .
I'm gonna do products because there's not a lot of sub categories to accessories .
I mean maybe you could do bracelets or sunglasses or things like that .
But in this case , I'm just gonna leave it as products because I only have a few um accessory products that I want to display on that page .
So let's just do products and we're going to upload a new image that we don't have yet .
So go to upload files , select files and instead of page images , we're gonna go back and do product images and we're just gonna upload .
Let's say this bracelet right here .
That's an accessory .
So open and then go to use image and then add new category .
All right , cool .
So now we've got men , women and accessories .
We've got these base categories .
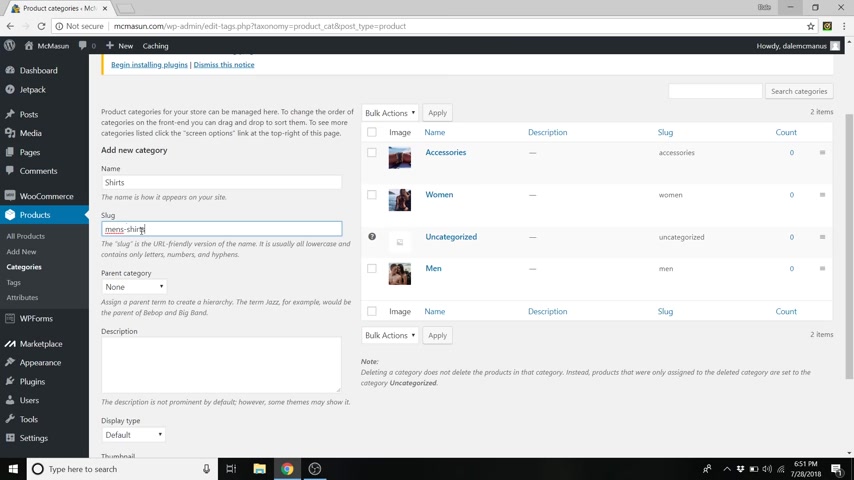
So now we're gonna add a few subcategories .
So under men , we're gonna do , let's say shirts and slug will be men's dash shirts .
And parent category is now going to be men because we want it to show up underneath men and then display type .
We want it to be products because once somebody goes to men , then they click on shirts , we now want products to show up on that page .
So cool .
And you can also add um images to these as well .
So we can just upload an image of a shirt .
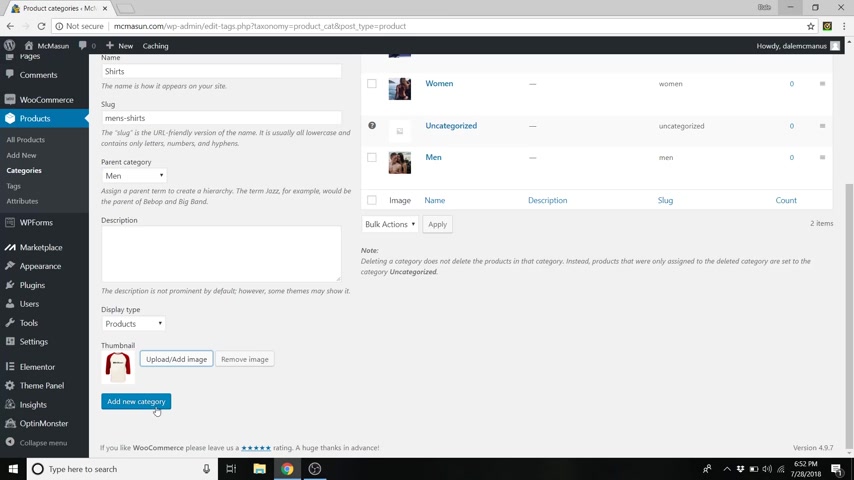
So just go to upload files , select files and we'll just do this red shirt here , click open and then go to use image add new category .
So I'm gonna do this again for pants .
I'm gonna do this for dresses , for women and so on .
So I'm just gonna speed this up real quick .
All right , cool .
So we've now created all of our categories and subcategories .
So you notice here , I've got one that does not have a thumbnail image .
So let's say I need to go find an image .
What I'm gonna do is just go to a new tab and then type in Pisa bay dot com .
Click enter and Pixar bay dot com is all free images .
So non copyright .
So you can use them as much as you want and you can make money off of them and so on .
And you're not gonna get penalized for it .
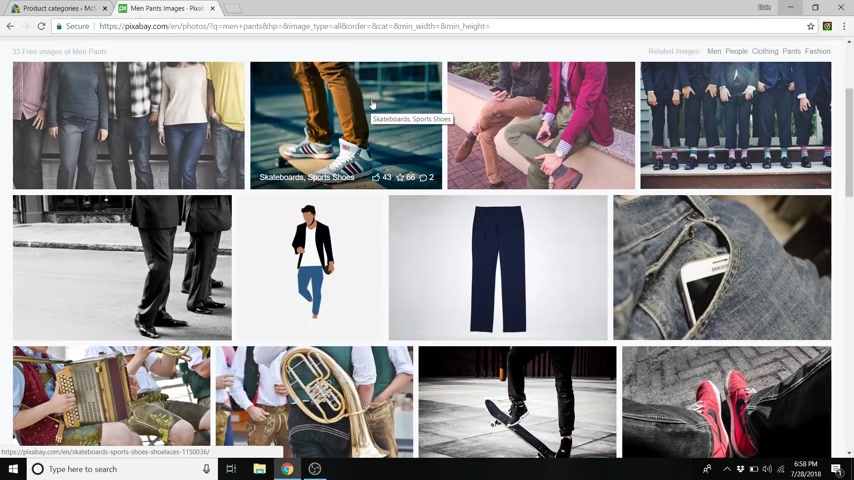
So you can search for anything like let's say men pants , maybe let's try that .
And then we could just select an image .
So I like this one right here .
So then you can just go over to free download and I'll just download , let's say the 12 80 by 8 53 and click download .
So we can go back and we'll just go over to pants and shorts , click edit and we'll go all the way down and just add in that new image , click use image and then update .
All right .
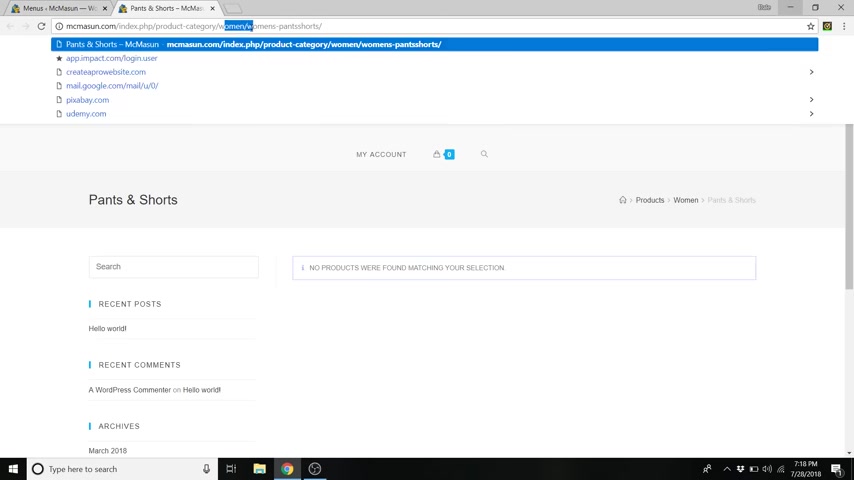
So now just go over to your website and I'm just opening up in a new window .
And if we were to click on a full category like men or even men shirts , for instance , you'll see that our page has this sidebar right here and we want to get rid of this .
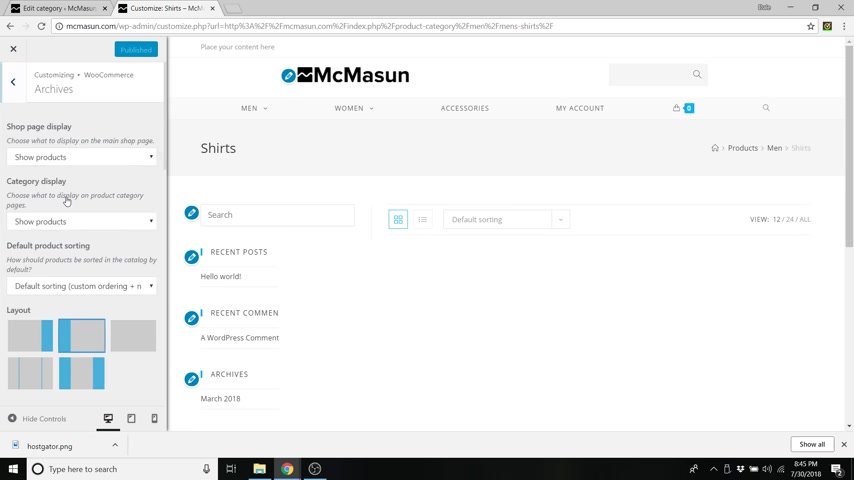
So to do that , just go up to customize and then just scroll down to Woocommerce and then go to archives .
I know it's kind of a weird place for this .
So all we want to do is change the layout to a full width and there we go .
So pretty quick and simple .
So just click on publish and we can go back to our category .
So that is how to create product categories as well as get royalty free images .
So now step number nine is to build a header , a menu and a footer .
So let's start with the header .
So just go up to your website title and go to visit site and I'm just gonna close out a Pixie Bay .
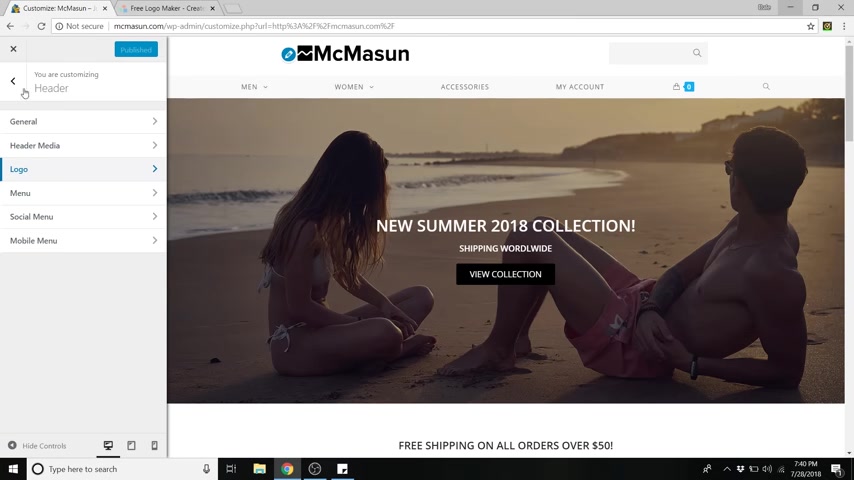
So instead of editing with mentor , which is the page builder for all this area right here , what we're gonna do is use the customized tab because this is for the header , which is this white area at the top , it's got its own edit menu .
So let's just go to customize .
Now , before we begin , I just want to explain that a header is a little different from a menu .
So the header is basically the container , it's just this white area and a menu is what we're gonna put inside of the header , which is all the buttons that you click .
So the menu is uh buttons that you click like men or women or accessories .
So we're gonna go ahead and get that set up right now .
So first we're just gonna go over to header and then we're gonna go to General and we're gonna go to style and change it to medium and it just added this search bar up here .
And I'm also gonna show you how to replace this with your own custom logo .
But for now we're just gonna scroll down and you'll see elements positioning and we're gonna change it to logo first and then social buttons and then search form .
Well , we're actually gonna turn off social buttons because we're gonna have our own social buttons on our footer and you can turn off any of these just by clicking on the eyeball .
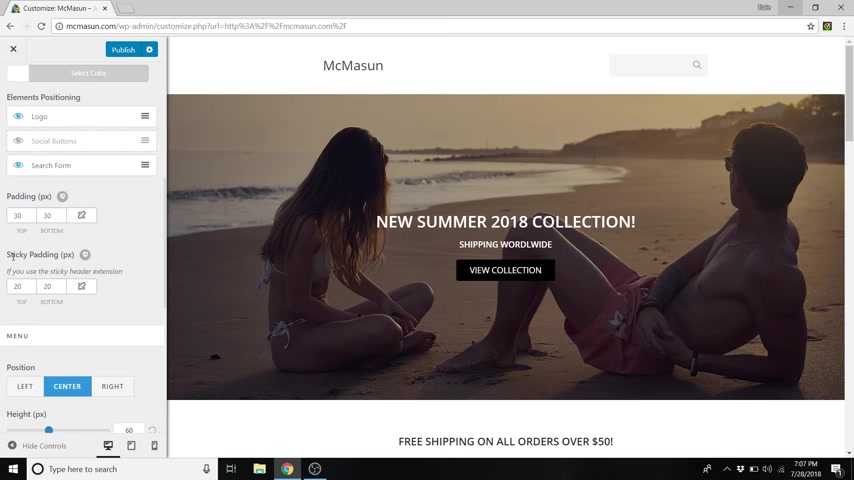
And while we're still in this menu , we're also gonna change the padding right here to about a 10 by 10 .
So just click this link button and then just highlight that and change it to 10 because we want it to be a little bit thinner .
So if you notice , you can change it to be really small , which is a zero or you can really boost it up to 44 which is huge .
I'd say a 10 is a pretty good spot .
So now just go up and go to this back arrow , go back one more time and then just go down to menus right here and we're just gonna create a new menu with this button right here .
So again , the menu is what's gonna go underneath here , it's gonna be all those buttons that you click .
So we're just gonna call this primary menu or actually let's call it header menu .
So you don't get confused and just go down and check on main .
We want this to be our main header and then just click on next and we're gonna add some items to this .
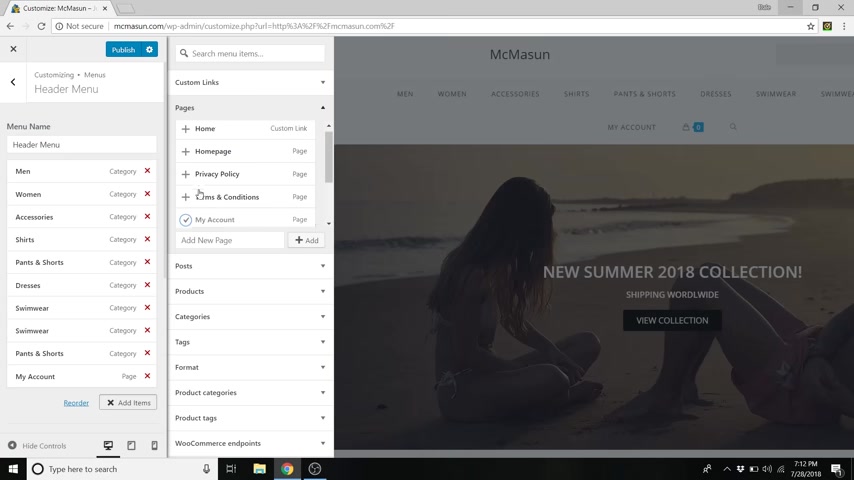
So just click the add items button and we are gonna search for our product categories .
So right now we're under pages .
So we're just gonna close this little arrow and we're just gonna go down to product categories right down here and just expand that .
So what we're gonna do is add men , women accessories and then all of our subcategories .
So we're just gonna go down the list and add them all .
And while we're here , we're also just gonna close this product category section , go up to pages and we're gonna add my account and you could also add Cart if you want or you could create your own page .
So you could just type in a new page here and you could add a new one , but I am not gonna add Cart because we've actually got a little symbol right over here , which is for your cart .
Um So you can click on that and actually get to your Cart page and I'll show you that later .
So while we're here , we now have to uh categorize these correctly .

So right now they're all showing up on our header right here in a row .
And what we want is to be able to hover over men and get to a drop down of shirts , pants , et cetera .
Same with women .
We wanna hover over it and get to dresses , swimwear and so on .
So in order to do this , let's just go up and publish our work so that it's saved and we're just gonna click on this X and we're gonna go back to our dashboard and then just go all the way down to appearance .
Where's appearance right there .
Appearance and we'll go to menus and now we're just gonna restructure these by dragging and dropping .
So we want , let's say , uh , shirts to be a subcategory of men .
So instead of being right underneath it , we're just gonna drag it to the right and that is now a sub item .
So we'll do the same with dresses for women .
Drag it to the right as well as these other sub categories .
So if you want to check and see which one the slug belongs to under pants and shorts or duplicates , just click on this arrow and you can just go down and click on the original , uh right here , just open that up in a new window and you'll see this is uh under the women's slug .
So close that and add this under women's .
So that means we can add these other pants and shorts under men .
So we'll do the same with swimwear .
We'll just go down , open that up .
That is also women's .
So we're just gonna close that , drag that underneath women .
So we'll add swimwear for men .
We've got accessories and my account .
So this is looking pretty good now .
So we'll just save menu and then go back to our site and we'll click on customize again .
So now you can see if we hover over these .
We've got these subcategories in a dropdown menu , which is pretty awesome .
So we're gonna change a few more things to the style of this menu .
So what we're gonna do is go over to header , then go to general scroll down and we're gonna change the menu height all the way down here to about a 40 .
We want that to be a bit smaller and then we're gonna change this menu items padding to about a 60 each .
So make sure you click that link button and then highlight these and change them to 60 .
So we want these to be spread all the way out .
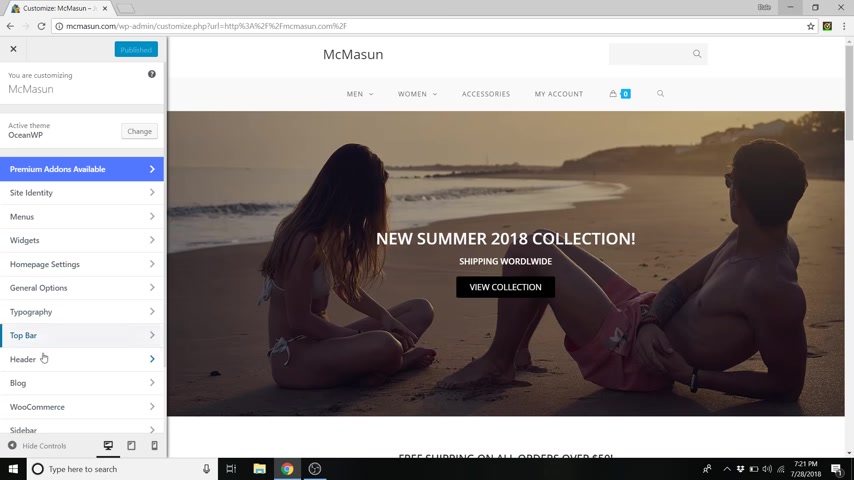
So you can see if we decrease it , they get closer to the middle and as we increase , they become all the way spread out and 60 is actually the highest you can go .
So let's go back to the header and we'll go to mobile menu and we're gonna change the mobile menu style to instead of a side bar , we're gonna do a dropdown .
So now if you just go all the way down to the bottom right corner of this menu here and click on the phone , you can now see if we click on this .
It comes as a drop down .
So before it looked like this , so you could do that if you like , I'm not as much of a fan .
So I'm gonna go back to drop down .
So let's just go back to desktop and we're gonna publish our work .
So that was how to create a menu for your header .
Now I'm gonna show you how to make a logo and put that on the header as well as your site identity .
So instead of having this plain old text here that has the name of your company up there , we're gonna replace it with a really cool logo .
So in order to do this , just go to a new tab and just type in logo maker without the E dot com and hit enter and you can just skip this tutorial because I'm gonna show you how to do it .
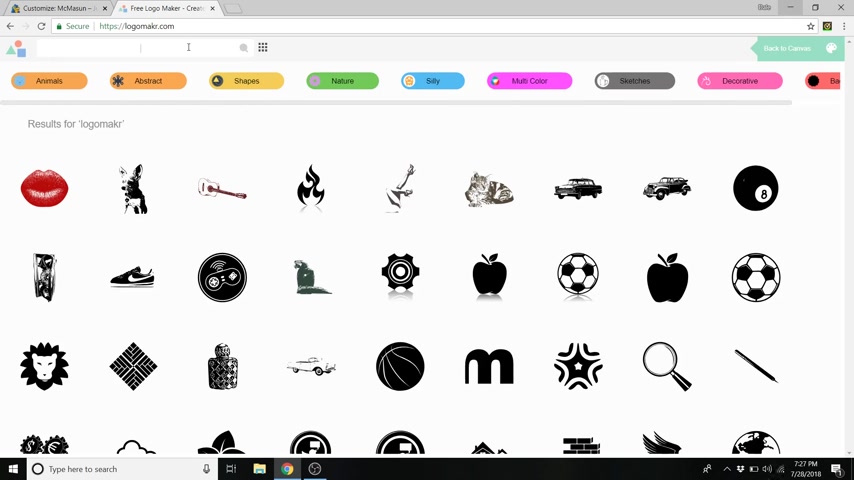
So this interface is super easy to use .
It's really clean .
So what we're gonna do is just go up to the top here and you can browse by all these different categories of logos and it gives you just almost an endless page of good simple logos and you can also type in any sort of keyword for whatever you're looking for .
So for me , it's kind of a summer clothing uh company .
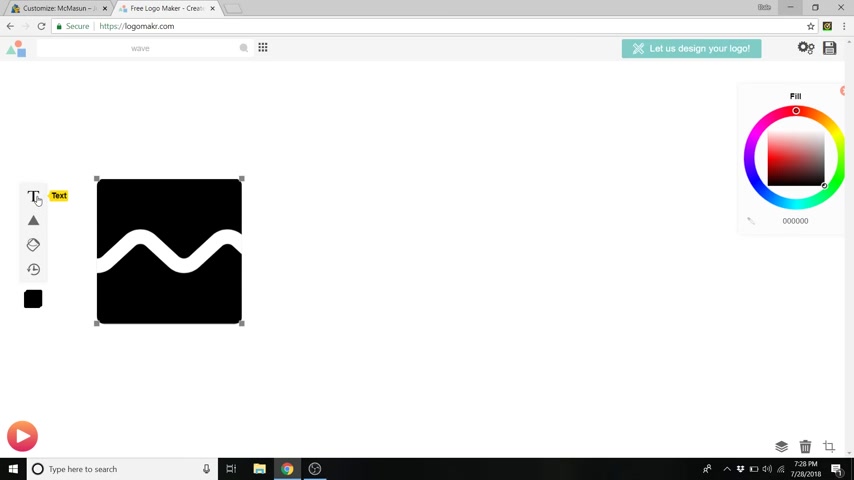
I'm gonna do like a wave for instance and just hit enter and then you can scroll through all these different symbols and the simpler that you stay the better because you really don't want a distracting logo .
You just want something really clean and simple that your customer is gonna remember and every time they see it , they're gonna associate good products with that symbol .
So for me , I'm gonna pick this square mountain wave symbol and you can just resize it by just going up to one of the corners and just say drag to resize , you can resize that up .
So I'm just gonna drag that off to the left and I'm also gonna add some text just by clicking on this T and I'm just gonna type in Mick Mason and I'm also going to make that black .
So I am just going to go over to the color wheel and you can drag around and select any color that you'd want .
So with this outer wheel or you can do the saturation with this inner one .
So I'm just gonna go all the way to black and I'm just gonna drag this up so I can see it and you can also move it .
So if you drag inside , so you gotta click out and then you can drag this whole title around anywhere you'd like .
So in order to change the font family , you just go up to here to font category and you can select all these different categories .
So you've got fun and funky and you can select all these crazy ones if you want .
Uh I am not gonna do that .
I want this to be a very clean brand .
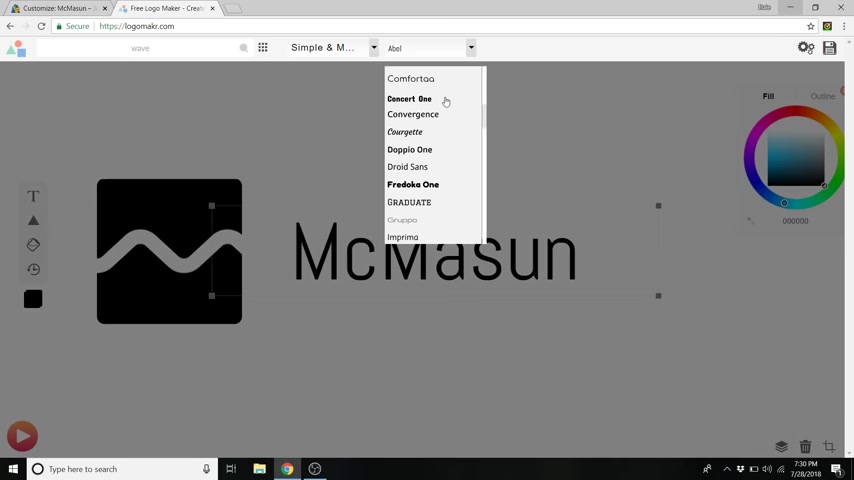
So I'm just gonna stick with simple and modern or maybe something like traditional , but let's see what's in simple and modern and we'll go down to the font family and let's just pick something real nice and clean .
I'm gonna go with something like open sands , extra bold .
So I want , this is kind of bold .
I want my text to be equally as bold .
So if you have a really thin logo , you're gonna want thinner text .
So let's just drag that and resize this .
So it's about the same drag that up a little more .
We'll select them both and move it over .
Actually , I'm gonna make this a little smaller .
All right .
So there we go .
That was really simple .
So what we wanna do is just go up to this little save logo button .
We'll click that and you've got option one where you can buy it , it comes as a vector file .
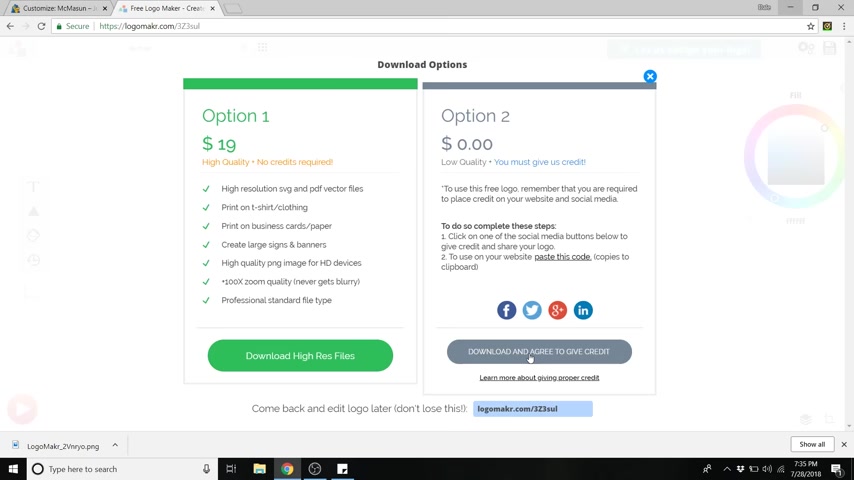
So you can scale it as high as you want without losing quality and it's just $19 or you can do option two , which is free and all you gotta do is credit logo maker .
So it'll just say download and agree to give credit .
So we'll just do that .
And while we're here , we're also going to make a white one .
So let's just exit out , select both of these , drag the color to white and then go up to save logo and do the exact same thing .
Download and agree to give credit .
And now we're gonna go back to our website and put the black logo up on our header .
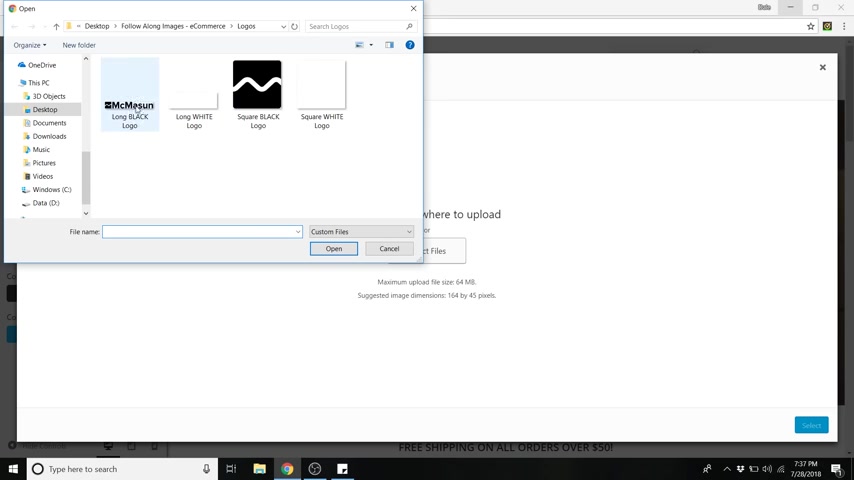
So in order to do this , just go back and just go over to logo and you can just select logo , upload that file , just go back to the follow along images if you're following along , go to logos and we're gonna do the long logo , black open and go to select and you can just skip cropping and we've got our logo up here now .
It's a little huge .
So let's make that a bit smaller .
So just go over to Max wi so we're gonna go down to about a 200 .
So I'm actually just gonna type in 200 and you can also do this by height as well .
But I'm just gonna leave that uh back at the default .
Actually , I'm gonna put that at a about a 30 .
There we go , click publish .
Now we're just gonna go back and we're also gonna add our site identity , which is what this little gator symbol is right here .
We're gonna change that to our own logo .
So just go back again and we're gonna go over to site identity at the top and we're just gonna select an image upload files , select files and we're just gonna take this square black logo , open it and click select skip cropping and there you go .
So now we've just changed that to our own logo .
So if anybody's on our tab , this is what will pop up on their browser and again , click publish and you can also change your site title and your tagline .
So right now it is Mc Mason , which is fine by me .
Uh You can change it to whatever you'd like .
I'm also gonna add a tagline .
So I'm just gonna say summer clothing , I'm just gonna leave it at summer clothing because what we want to do is hit keywords .
So the site title and the tagline are what could pop up in Google .
So you want these to be keywords that people are searching .
So clothing is a good keyword as well as summer clothing is a good keyword phrase .
So go ahead and click publish .
All right .
So now it's time to set up our footer and I actually made this footer for you and I included it in the downloads .
So let's go ahead and do that now .
All right .
So we're just gonna click on this little X so that we can go back to our dashboard and let's just go back to dashboard .
So from here , just go down to mentor and then just go to my templates and we're gonna import a new template .
So go to choose file and we're gonna go to the element or templates and we're gonna do footer e-commerce , create a pro website open and then just uh select import now .
All right , cool .
So we just added our footer over here .
So from here , we're just gonna scroll down and go to the panel and then just go over to my library and from here just click on add new .
Now we're gonna just call this create a pro website footer .
Now we're just gonna go down and make this content layout 100% full width and then just go up and click save draft or you can publish it either one and then just go to edit with element to .
All right , cool .
So here is where we're gonna import our new template .
So just go to add template with this little folder icon , go to my templates and there is our footer .
So we're just going to insert that , import the document settings .
Yes , we want to do that and it is actually not going to be spaced like this .
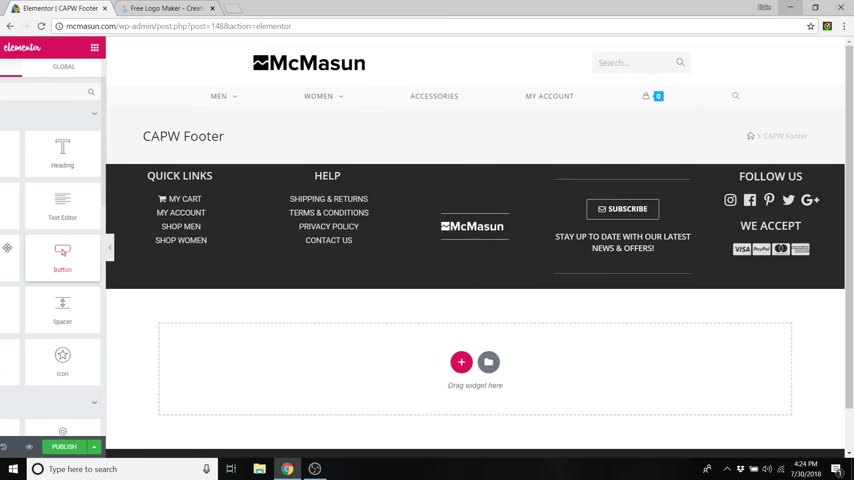
Uh It's actually gonna look a little more like that , minus this darker area at the bottom .
So we're just gonna open that back up and click publish .
Now , go up to this little hamburger icon and go to exit to dashboard .
Now we're just gonna add that to all of our pages .
So let's just go up to visit site and we're gonna click on customize .
Now , just scroll all the way down and go to footer widgets and there's gonna be a bunch of settings here .
You can kind of ignore all of these .
And the only thing we really want to look at is the select template area and one other thing .
But for now click select template and go to capw footer .
Cool .
So now if we go all the way down , you can see we've now got our footer but looks a little bit funny still .
So we're gonna fix that and it's real quick .
So all you gotta do is uncheck a container which makes it full width and then just simply check this uh link values button on the padding and just change the padding to zero .
And there we go .
So now we've got this nice clean footer and we've also got our copyright here at the bottom , which is really cool .
And if you'd like to change that , just go back up , click on the back arrow , then just go down to footer bottom right underneath footer widgets and you can change that here .
So we could just do Mick Mason copyright .
Uh let's just say 2018 .
So there we go .
And it's updated down here .
Now , I'm just gonna show you real quick how to edit these things to make it your own .
So just click on publish , click on the X now , just go back to the dashboard and we're gonna go all the way down again to theme panel in my library .
This is where we added that footer uh template .
So we're just gonna select that or click on it now , just do edit with mentor .
So what we're doing here is editing the individual footer page and not the entire home page .
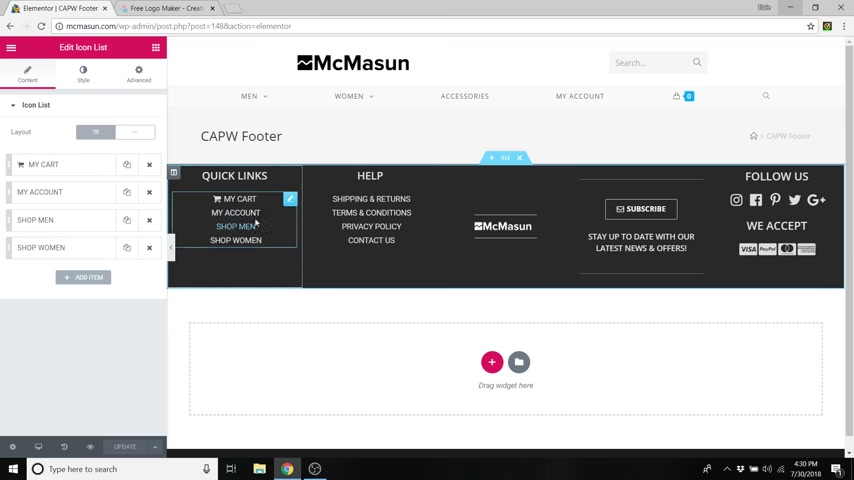
So the footer and our home page are two separate things , but just like the home page , you can actually click on any of these just right click and do edit widget and you can change all of the text if you do this widget right here .
If you right click and edit on the links here , it's an icon list .
So you can actually just click on whichever one of these you want like my cart and you can change the name here .
You can also add a completely different symbol here if you'd like and you can put the link .
So you'll want to link , none of these are linked right now .
You're gonna want to link these to your cart to your account and so on .
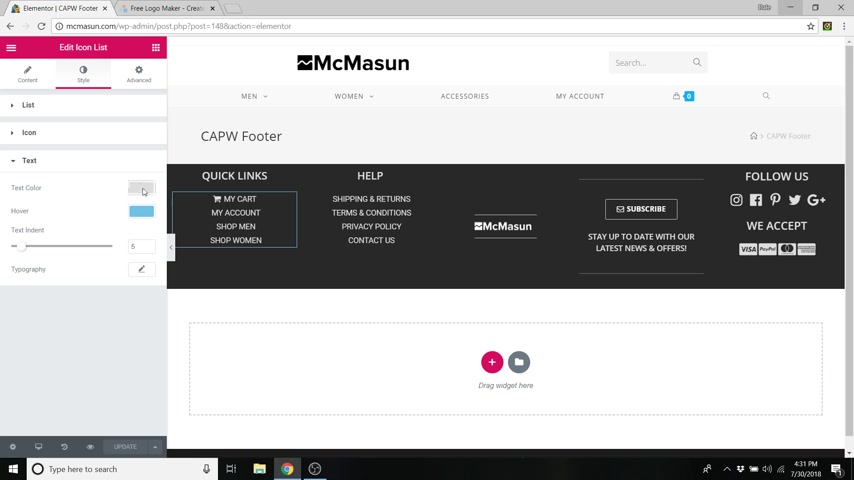
And you can also go up to style and then just go down to icon or text , you'll have to do them both if you're changing the colors , but you can change the colors here .
So the text color is kind of this light gray , you can change it to whatever you'd like or the hover over color .
I have it kind of set as a light blue , you can change that .
And as well as the font , if you click on typography and you can do that for all of these items .
Now , if you'd like to change this logo here to your own , just right click and edit widget and you can just choose a different image right here and you can also change the image size .
So I have it set to full , you can change it to any one of these sizes or do custom and you can actually enter in your own values .
So I'm gonna go back to full .
And this button if you want to change that , just right click edit widget and you can add a whole different link .
So I put subscribe there just as kind of a filler template .
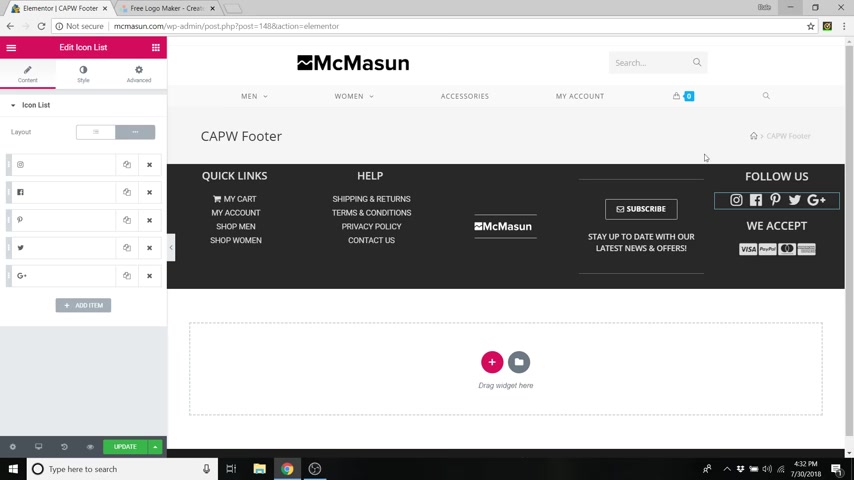
You can make it any other button that you like as well as change that icon here as well .
I have it set to an envelope as well as change that icon here as well .
Same with your social icons and so on .
It's all kind of the same you just right click edit widget and you can change all these , you can actually add text so that it's not just the symbols but all pretty quick and simple to make your own .
And once you change it here , it will change throughout all of your pages .
Awesome .
So let's just click on update .
So next is the step that you've probably all been waiting for .
It is step 10 , create products .
All right , cool .
So let's do this .
So let's just go up to this little hamburger thing and go to exit to dashboard .
So from here just head on over to products and then go to add new .
So there are a few different types of products that we can make .
Number one is a simple product and a simple product is probably what you'll use most often .
I'll get into it in a minute and number two is a variable product .
So a variable product is if you need to change like a shirt size or color as a customer , number three is a grouped product .
So that's many products combined into one sale .
And number four is the affiliate link products .
So let's get started with a simple product .
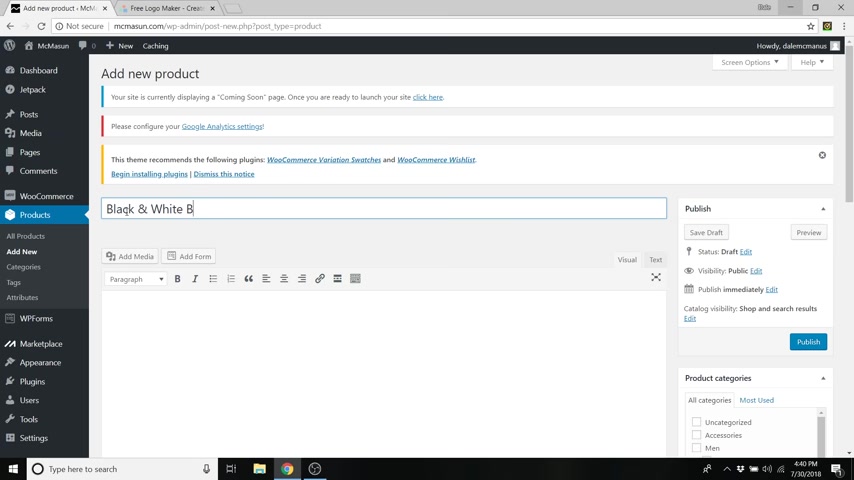
So for our first simple product , we're just gonna make a black and white bracelet real simple .
I already have the image laid out for you as well .
So if you'd like to add a description of the product here , you can , I'm just gonna insert some dummy text and this is the long description of the product .
Now , if you go down , you actually have a product short description all the way at the bottom .
So we could just say this is a super awesome bracelet .
Now , going back up , let's just clean this area up a little bit and get rid of the ocean WP settings just close that and you'll see product data here .
So we're already on simple product .
If you're not , then make sure you're on simple product .
And if it's virtual , you can check that here .
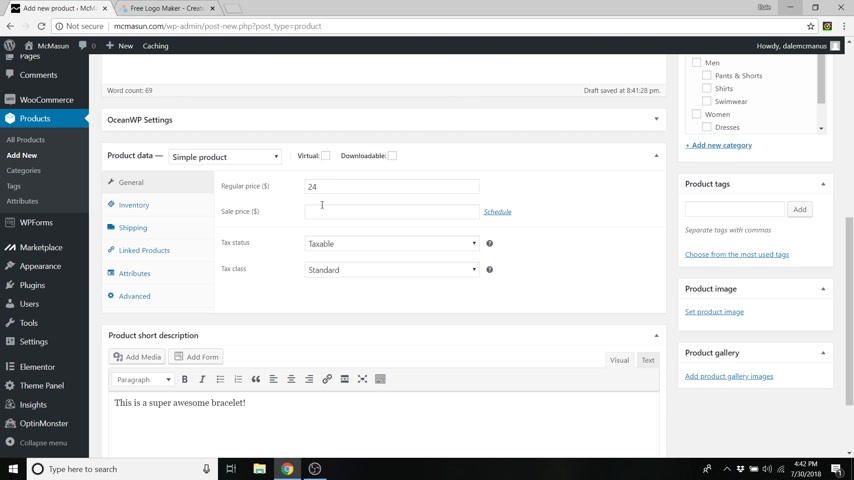
So we're just gonna set a price for this .
So we will just say that this is a $24 bracelet and let's just say the sale price is $19 .
So when you have a sale price , it'll actually x out the regular price and show the sale price .
And when you create a sale price , uh product here , you will actually have these automatically added to your home page under the sale product section , you can determine your taxes down here .
And if we go over to inventory , you can set a SKU number , you can manage your stock .
So if you check this , you can actually tell it how many you have in stock .

So we'll just say we have 20 left in stock and this will actually show up on the page .
Well , whenever somebody goes to that product , you can allow back orders or not allow them .
And if we go over to shipping , you can determine its weight and dimensions .
So we'll just say that this is a £0.5 bracelet that might be heavy , but I don't know .
And we'll just do , these are in inches .
By the way , we'll just do these dimensions as I don't know , uh four by four by four and now just go over to linked products and here we have up sells and cross sells .
So I'm gonna explain this .
A customer will see an Upsell whenever they go to that product to go check out .
And an Upsell is basically just a higher end version of that product .
So in this case , I can create an up sell for an even better bracelet .

It's a little bit more expensive while a cross sell is whenever they're actually in the checkout page and about to check out all of their items and it will promote a completely different product .
So up sales happen on the individual product page and cross sales happen on the checkout page .
It's just a way to say , hey , you're about to check out , do you want to buy maybe one more thing ?
Cool .
So you can actually add those in here and you would just type in the product that you want to look for .
Right .
Right .
Now , we don't have any made .
So we're just gonna leave these blank .
Now , we're gonna skip attributes for now because we're gonna get into that in the variable products .
And we're just gonna go over to advanced and you can add a purchase note like thank you for ordering or so on .
And you can also determine if you want to enable reviews for this product which are the like five star ratings that people can leave because your product is gonna be awesome .
So moving on over to product image , we can now set this product image .
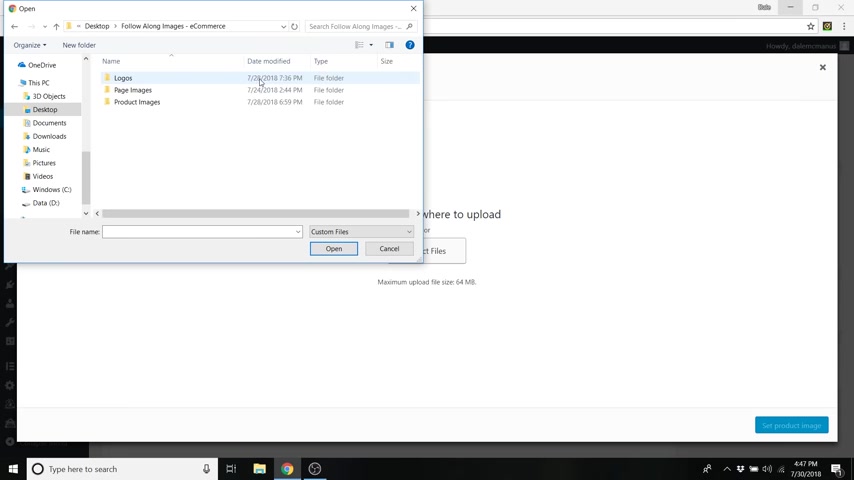
So we're gonna just click that and we're going to go up to upload files , select files and we're just gonna go up to where we have our images .
So go to follow along images .
We're gonna go to product images and we're gonna do black and white bracelet which is 600 by 600 pixels , which is about the perfect size for a Woocommerce image , thumbnail .
So click open and now set product image .
All right , cool .
So right above that , you can now add product tags .
So if somebody typed into the search bar on your website , they can type in a bracelet for instance and get a bracelet .
So we're just gonna type in bracelet and we're gonna add that and we'll say maybe accessories and add that and so on , you can add as many as you'd like .
Now , we're just gonna add these two categories .
So this is very important .
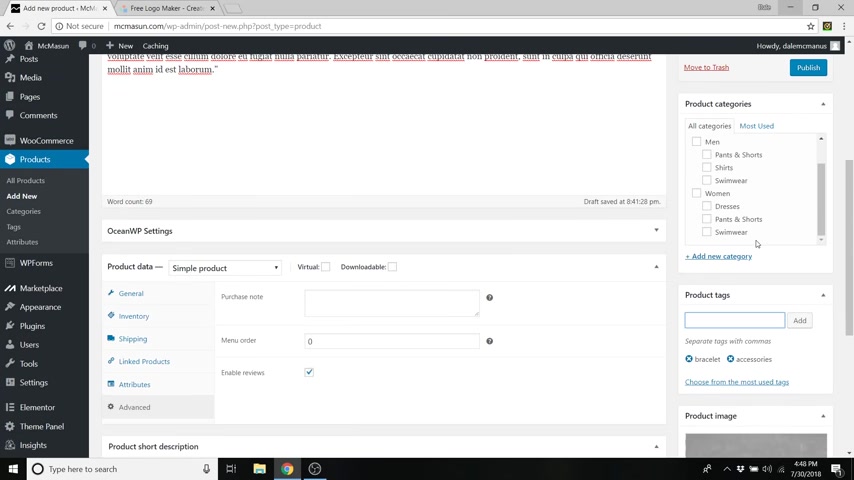
If you don't add it to a category , it's just gonna show up in this unc categorized section , which is not very sexy to look at on your website .
So we're just gonna add this bracelet to the accessories and let's just go ahead and add it to men and women as well just for the heck of it .
So now just click publish .
All right .
So before we move on to variable product , let's just go check on that .
So let's just go over to visit site and open that up in a new tab .
And if we scroll all the way down , you will see it just automatically shows up in our latest products .
And you can see we've got the sale price here .
We've got our categories that it's in as well as the name .
And they can just add it to cart here or they can click quick view as a customer and you can see that we've now got our product and you can just add as many of them as you'd like .
And it also shows how many we have in stock .
Awesome .
So let's go back and do a variable product .
All right .
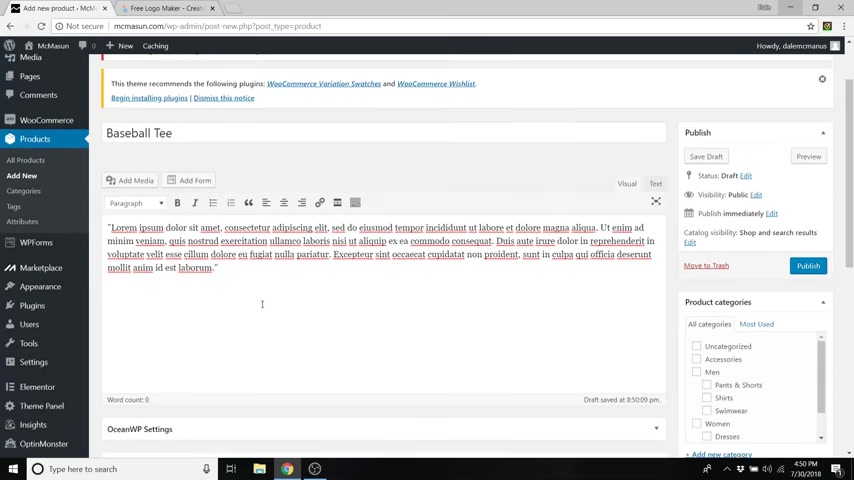
So just go up to add new and we are just gonna call this , let's say baseball team .
I'm gonna add some dummy text and I'll go down and you could add a short description .
So this is a 100% cotton baseball tea .
I don't know , you can add whatever you'd like .
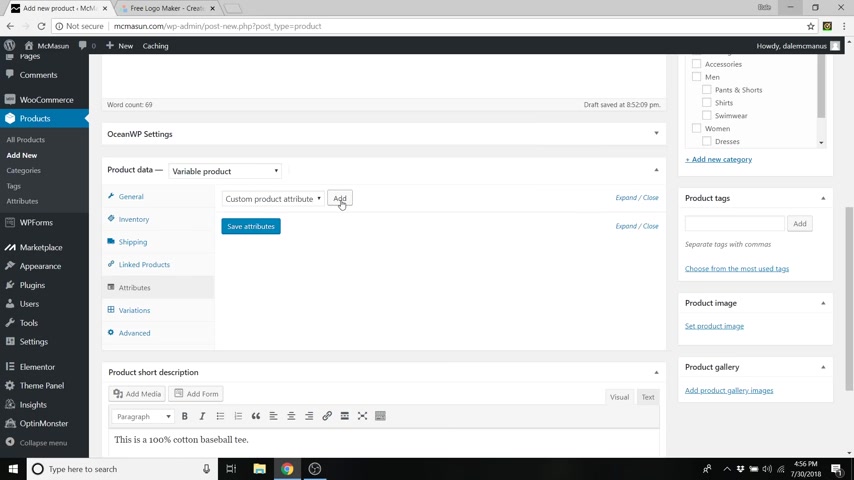
Now , going back up , let's make sure that this is changed to a variable product that is very important .
So we just lost our pricing , but we're actually going to set the price depending on the attributes .
So we're gonna go over to first let's do linked products .
So now that we have that other product , we can set that bracelet as a cross sell .
So when they go to the checkout page , we will be like , hey , you want to buy this bracelet so we'll do black and it should pop up there .
It is black and white bracelet .
Just select that .
Now here is the fun part .
So we go over to attributes and we're just gonna add a new attribute .
So we're gonna do a size attribute .
So just click add and we're just gonna name this size and it says enter some text or attribute , separating it with this little symbol here and that symbol is right above the enter key and you have to hold shift in order to get it .
So we're just gonna add small , small .
There we go .
And that symbol , we'll do medium , that symbol and large and we're just gonna click uh use for variations , make sure that you click that and we're gonna add another one and we're gonna call this one color .
And again , do so we'll do red and use that symbol to separate .
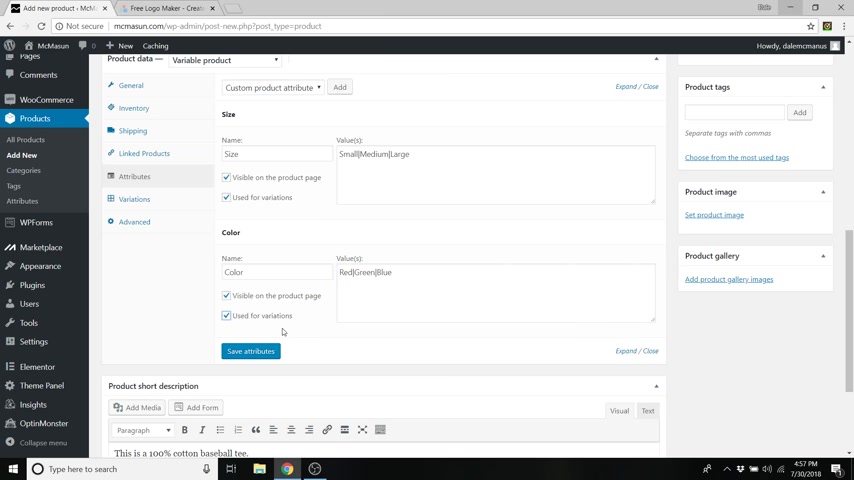
We'll do green , use that symbol and we'll do a blue and make sure you click , used for variations .
Now just click on save attributes and then just head on over to variations and we're just gonna add a new variation .
So just go over to create variations from all attributes and then click on go and what this is gonna do .
Sorry , just click .
Uh Yes , it says , are you sure you want to link all these variations ?
Just click on .
OK ?
It's gonna take all these attributes and make combinations out of all of them .
So a small red , a small green and a small blue as well as medium and large .
So nine variations added .
OK ?
And there we go .
So small red , small green , small blue , medium , red and so on .
So now we have to set images and prices for all of these .
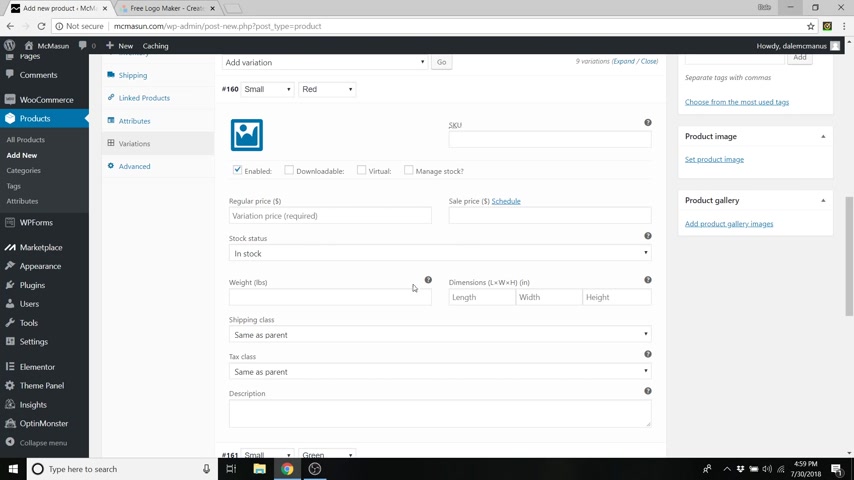
So what you need to do is just go up to whatever the row is for the small red and just expand that and you can add your SKU number , all the same stuff here .
You can do the weight and the dimensions .
So we're just gonna set a price , we're just gonna call this $30 and we'll do a sale price of 24 and to add an image , just go over here and click on , upload an image and then select upload files .
Actually wait , we already have that red one in there .
So we'll just click on that red shirt because we added that earlier in the tutorial .
So do set variation image and now just to stay organized , we're going to uh close this and we're gonna go down to the next one , small green again , same thing .
We're gonna do regular price of 30 sale price of 24 .
We want all these shirts to be the same price .
We don't want somebody to get dipped just because they chose a green shirt or a medium shirt for instance .
So also add the image .
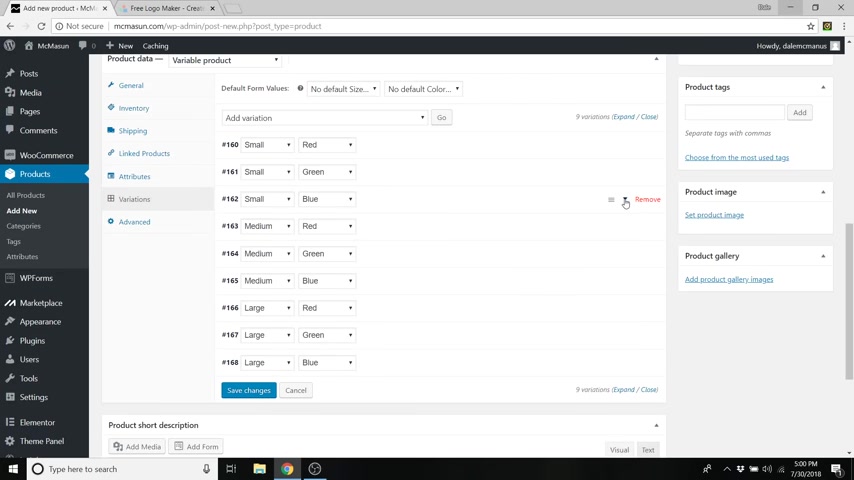
So go up to upload files , select files and we're just going to add that green shirt , click open and then set variation image , close that and we'll do the blue , same thing 30 sale of 24 upload an image , upload files , select files , blue one and set variation image .
And now we'll close that one .
Now , I'm just gonna speed up and do all of these right now .
All right , there we go .
So a little bit tedious .
So the more variations that you have , the more of that you're gonna have to do .
So keep that in mind .
So just go over to save changes .
Now , we are gonna go do our product image over here .
So let's just set the product image and this is our base image .
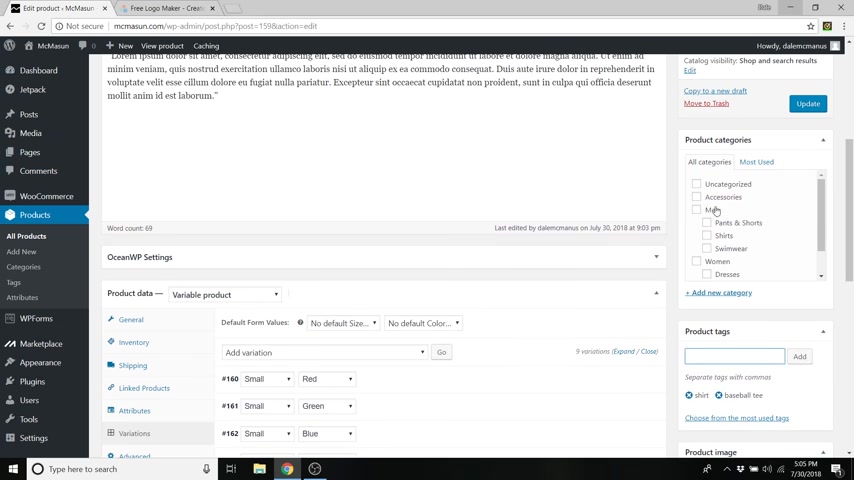
I'm just gonna pick the red one and we'll also do our tags .
So we'll just say shirt add , we can do baseball T A and we'll do our categories .
So here it's important whenever you create a product to not only add it to the subcategory of shirts , which is under men , but to also add it to the men category .
So if somebody clicks on men , it may show up with all of those products .
If you choose to show products under the men page , which again , you can edit in the product category section .
So let's go over to publish and let's go check out that product .
So just go over to your main home page and let's just click visit site and I open that up in a new window and then scroll down and there it is , there's our new product .
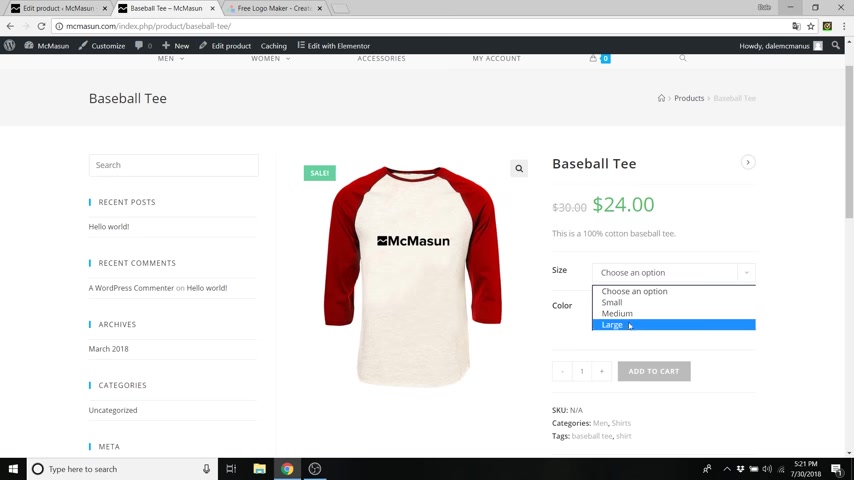
So if we just go to select options , so you can kind of zoom in on it , you can select the different options here and you're probably thinking , well , why does this page look so terrible ?
There's this big old column over here that we don't even want uh and where's our different colors ?
So if I choose green , why doesn't it go to green ?
Well , let's go fix that .
So just go back to our page with our baseball team .
And in order to make that a full width page , what you need to do is go to Ocean WP Settings .
We closed earlier and expand that again .
And you'll see content layout just change that to a full width , not 100% full width .
Because then your product , your shirt will be all the way up against the side of your window here .
We just want it to be a regular full width .
And in order to get the different colors , we need to set a product gallery .
So if you go to add product gallery images , what you want to do is select the other two .
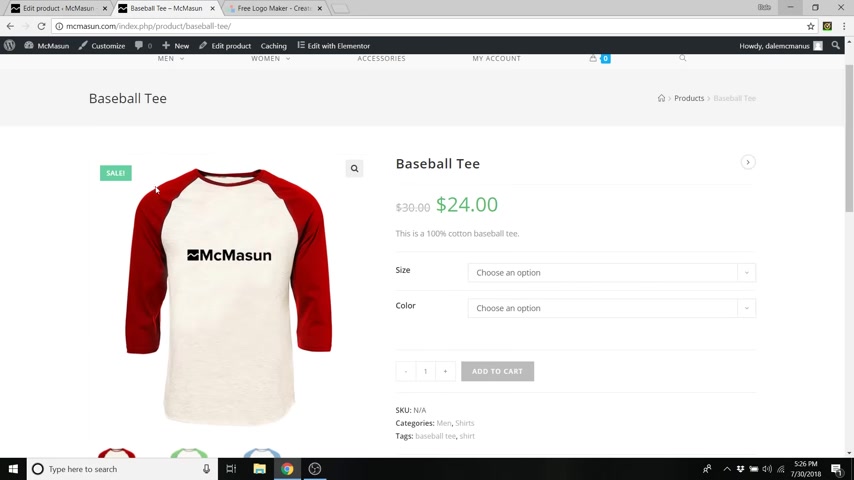
So the regular product image is the red .
We want the green and the blue to be added as well .
So if you hit control and hold it down and then select both , you can select both of those at the same time and then click , add to gallery .
And you can also change their order just by dragging and dropping and these actually go in order .
So we wanna actually drag the green first so that it goes red , green , blue and I'll just go up to update and now I'll go over and refresh this other page .
All right .
So we've got our new page over here .
It looks a lot better .
It's more centered and we can also select a size and do a color .
So we'll do green and it changes to green .
Same with blue .
And it is very important that you make sure you have small or medium or large selected before you select the color .

So if you have both of these set to choose an option and you just go to color , it's not gonna do anything .
You actually have to select a size , but it's all right because they can't even add it to their cart without selecting a size like medium or large .
So that is how to create a variable product .
So now I'm gonna show you how you would create a grouped product and an affiliate product .
So let's just go over to add new and let's just say our grouped product would be an entire collection of shirts .
So we'll just say the summer collection and you can add in a description here and again , make sure that your settings are on a full width and go down and change this to a grouped product .
So you've got the same inventory as simple and variable .
And if you go over to uh linked products , you can now put whatever products you want to put into this group .
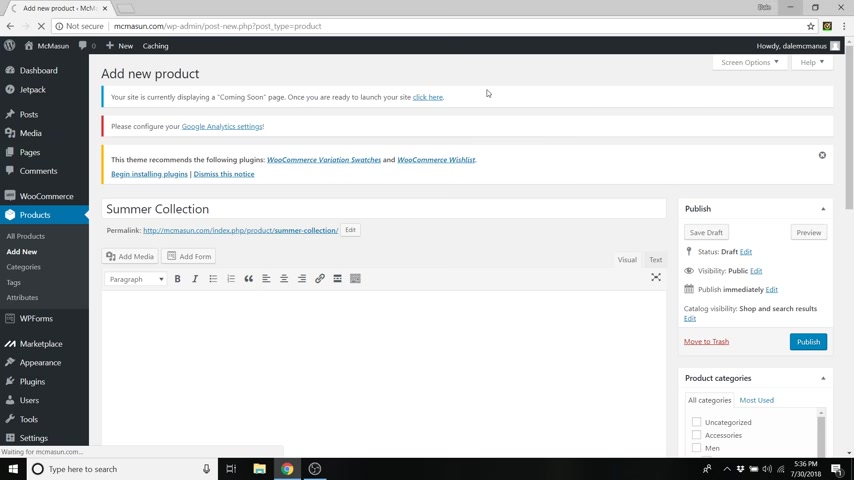
So I could just say that shirt uh sorry , it was called baseball T and I can add that .
And if I had two or three more shirts , I could add those in as well .
And you can also add attributes to this exactly the same as variable products and set prices like that .
And as everything else you can do a short description , your images , your tags and categories .
So I don't actually have any images to put in this .
So I'm not going to publish that , but that is how to make a grouped product and we'll just refresh this page and we'll just say reload because we're not gonna save those changes .
All right .
So here we will do our affiliate link and an affiliate link is basically just taking somebody else's product and selling it for them and then they give you a commission for bringing in the sale .
So to do this , you could just create your product name .
So let's say I sell uh web hosting through host gator for instance , which I actually do do .
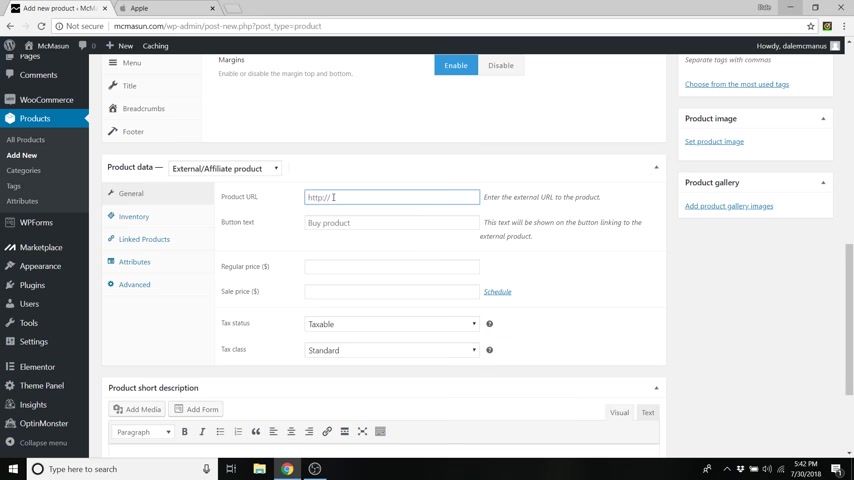
So I'll just put host gator , web hosting and you can also add in your description same thing .
And if you go down , make sure that this is in full width , don't forget .
And if you go down , change this to a affiliate link , so external slash affiliate and you can add in the URL here .
So when you sign up with an affiliate program , uh you'll be given a affiliate link .
So I'm just gonna add mine in here .
Paste that and you can also change the button tag .
So it'll say byproduct , you could also do um get hosting , I don't know whatever you want to put and you can set the price here .
We'll just say a dollar for now and I'll do a description here .
So I'll just say uh 60% off web hosting , don't miss out .
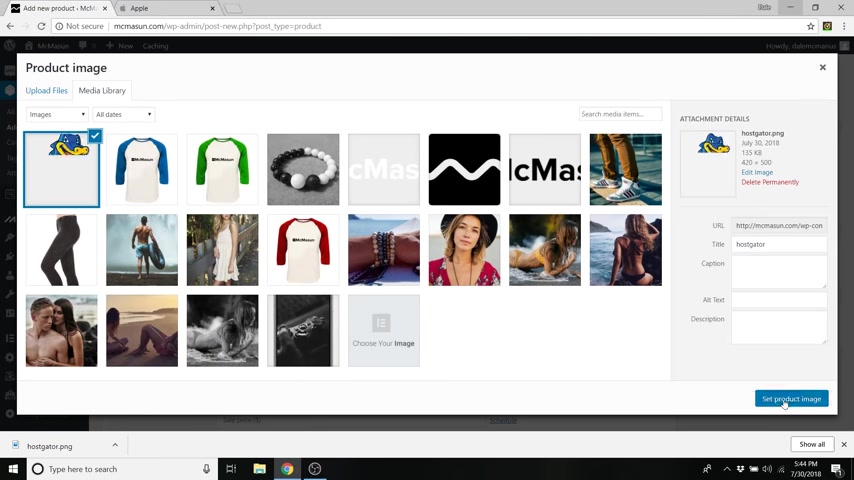
And then you can do your product images and your tags and so on .
So I'll just set a quick product image here .
Just go up to upload select desktop set product image and then make sure you put in your tags and your categories and then just click on publish .
Now , I'll just go over to our site and preview this .
So here you can see it and we can just click on get hosting and it just took us directly to that link that I put in there or if you go back , you can also click on the image and it'll take us to our own separate page for this as well .
So that was how to create products for your e-commerce website .
So step number 11 is to publish your website .
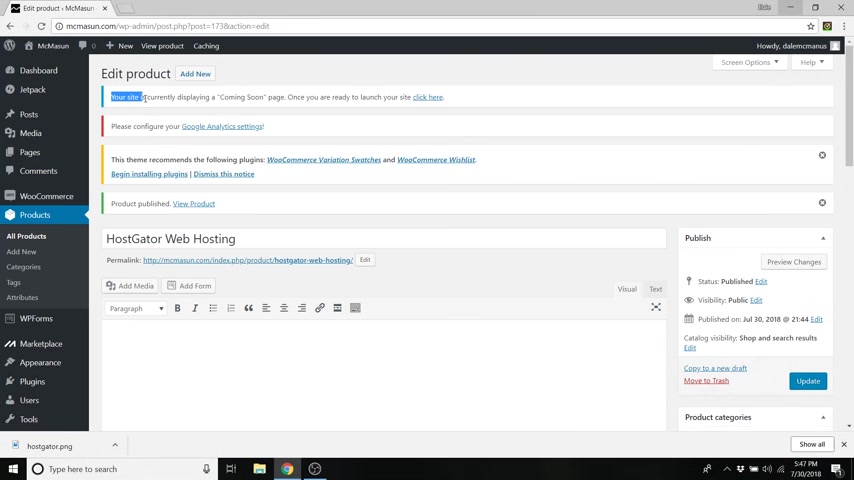
So whenever you're ready to publish on any page , you should have this message right here that says you are currently displaying a coming soon page whenever you're ready to launch , just click here .
So just click here .
Cool .
So once that's published , let's just go take a look at our site .
All right .
So our site is completely done .
It looks awesome .
And these uh images here , the ones that have galleries , they actually change to other images .
So that's pretty cool .
And you've got your sale products , uh most likely not all of your products will be on sale like mine are so you'll have different products here in the sale products and different products under latest .
And the other awesome thing is that this whole thing resizes for mobile perfectly .
So like that we can scroll down and see all of our products perfectly aligned , which is really cool .

Even our video here and our counter everything is looking awesome .
So that was how to make an e-commerce website .
Thank you guys for sticking around through the whole tutorial .
I know it was a long one .
But before you go , every new subscriber that I get to my channel helps my tiny channel blossom into something decent .
So please subscribe if you haven't already or give this video a like if you found it helpful .
Alright guys see you on the next video .
Are you looking for a way to reach a wider audience and get more views on your videos?
Our innovative video to text transcribing service can help you do just that.
We provide accurate transcriptions of your videos along with visual content that will help you attract new viewers and keep them engaged. Plus, our data analytics and ad campaign tools can help you monetize your content and maximize your revenue.
Let's partner up and take your video content to the next level!
Contact us today to learn more.