https://www.youtube.com/watch?v=2a--cSeMjfE
How To Create A Killer Ecommerce Website In 2023 _ Complete Webshop Tutorial
Hello people .
My name is Shirty .
And in this tutorial , I will show you step by step how you can create an amazing e-commerce website , using wordpress Woocommerce .
And the theme , we will create this high converting e-commerce website .
And in my case , I will be selling game consoles .
And of course , I do not expect you to sell the same things .
But through the principles I teach you in the tutorial , you will be able to sell anything to anyone in the world .
And the great thing is that we can put everything on autopilot .
So first I will show you how to create six different kinds of products .
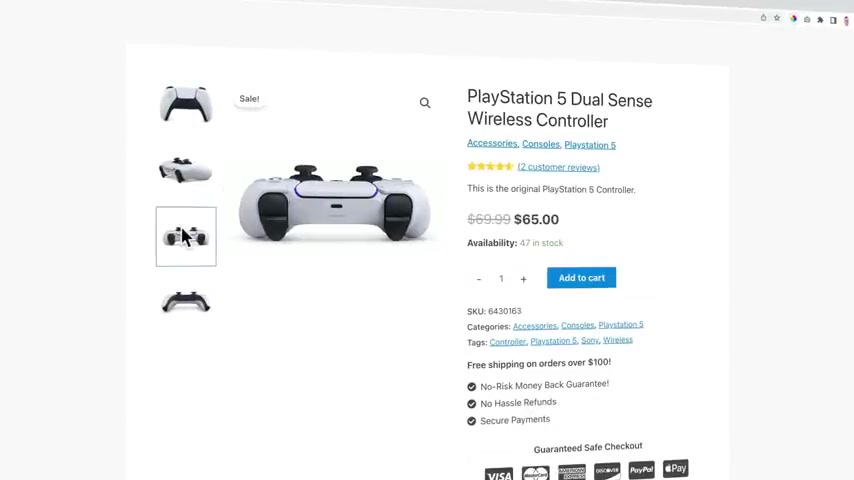
The first product we will create is a simple product .
What does it mean ?
It only has one option in this case , a playstation five controller .
It can also be a cap or sunglasses , any product that only has one option .
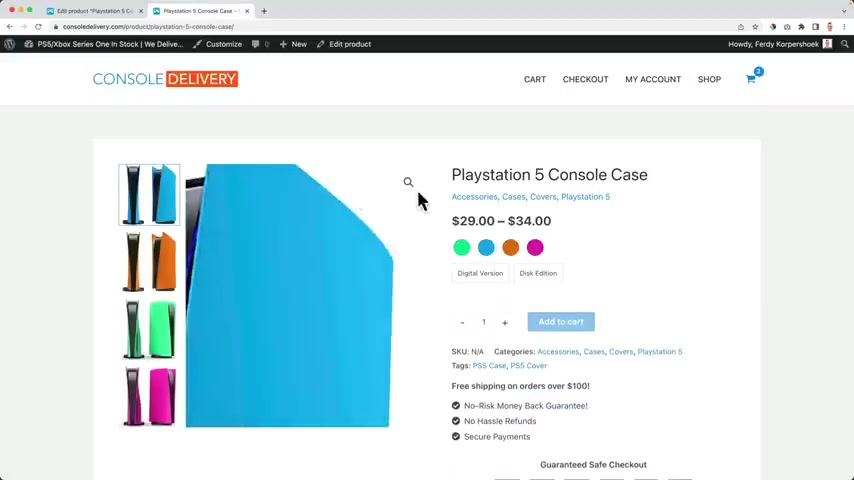
After that , we will create a variable product .
What does it mean ?
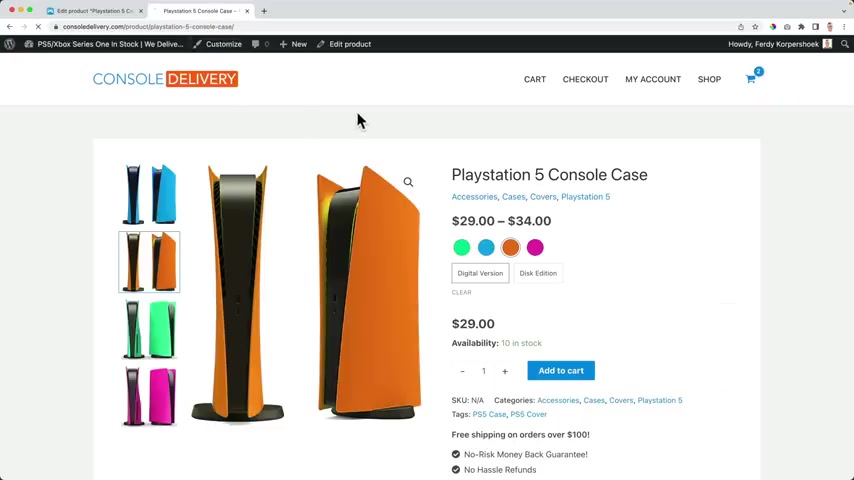
There are multiple options so I can choose a different color for this case , but also a different edition .
So the digital edition or the disc edition .
And when I click somewhere , you see that the image adjusts .
And also when I go for the disc edition , you see that it costs more money .
So for every variation right now , there are eight , I can adjust the price , the stock , the image and that will help the visitor to navigate to all the products you have to offer on your website .
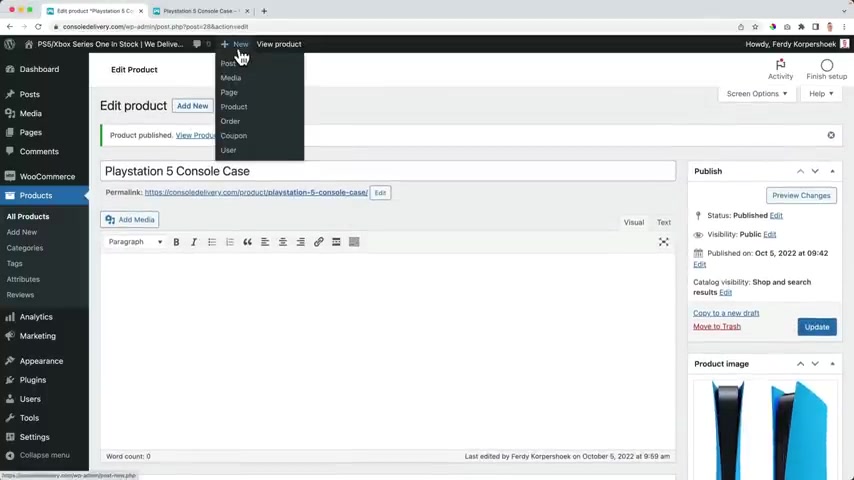
The next product is a digital product .
It can be a coaching call or a service that you offer .
The fourth product we will create is a digital downloadable product like an ebook stock images , software or anything digital that you want to sell .
We will create an affiliate product that means that you promote someone else's product or service .
And when you sell that through your unique affiliate link , you get a commission .
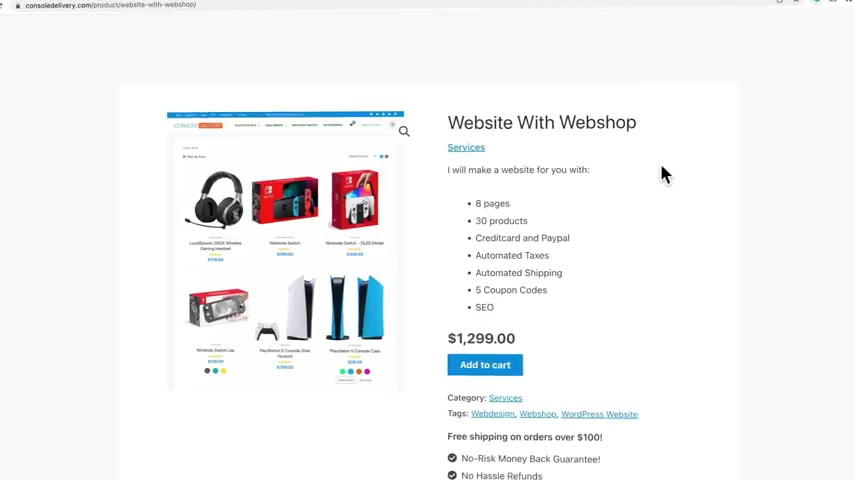
So over here at my affiliate link , if I click on it and somebody buys this through my unique affiliate link , I get commission and let's create a group product where you can have multiple products on one page .
So the playstation with three extra controllers and a wireless headset .
And using the extra theme , we will configure our product page in a way that it will look better and it will increase the sales , then we will configure the shop page that displays all of our products .
We can change the amount of columns , the way we display our products , the information that we show about our products and much more .
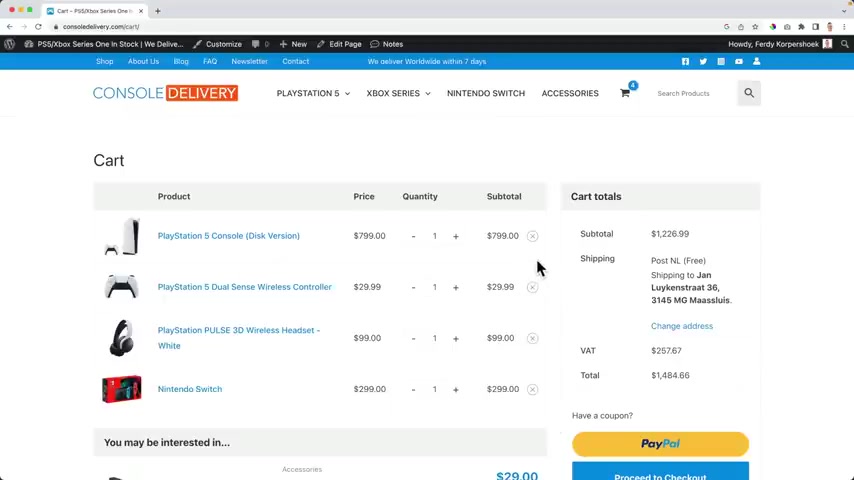
And then when people visit our website , they can browse through all the products , through the home page or through the category pages or by searching , they can add products to their cards and then they can view their cards and adjust things .
And when they go to the cart page , there's a beautiful overview of all the products in the cars and the total price you have to pay .
And if a visitor wants to adjust something , they just click and everything will be updated here below .
People can add coupon codes and I will show you how to config coupon codes .
It's a great way to increase your sales for new and returning visitors .
And there are a lot of things we can do .
We can work with a fixed discount in money or in percentage .
We can create a free shipping coupon code .
We can create coupon codes for specific products and limit the use of coupon codes .
For instance , only the 1st 20 people can make use of this coupon code or every user can use this coupon code twice and every coupon code can also be activated for just a specific time .
We will make sure that our website calculates the shipping of your customers on auto pilot based on the weight of their order or based on the total amount or based on the shipping address of the buyer .
We can also give away free shipping from a certain amount .

So when people will spend more than $100 they get free shipping and that can motivate people to buy more stuff on your e-commerce website .
Using the extra theme .
We will make this check out experience real smooth for both new visitors and returning customers .
And if they want to change something in the cart , they just click here and they can adjust everything and then everything will be updated .
I'm really excited about this part of the tutorial payment methods .
I'll show you how the money that people pay in your web shop goes directly to your bank account .
Visitors will be able to pay with credit card , paypal and a lot of other payment methods .
And then at the right , you see Texas , we will configure the taxes in a way that people will pay the amount based on where they come from or if they buy it as a company or as an individual and also tax will be put on autopilot .
So everything will be calculated automatically .
We'll talk about the emails people get when they buy something on your website and how to sell those emails and how to handle and process incoming orders .
We will also create a header from scratch and take inspiration from the most successful web shops in the world .
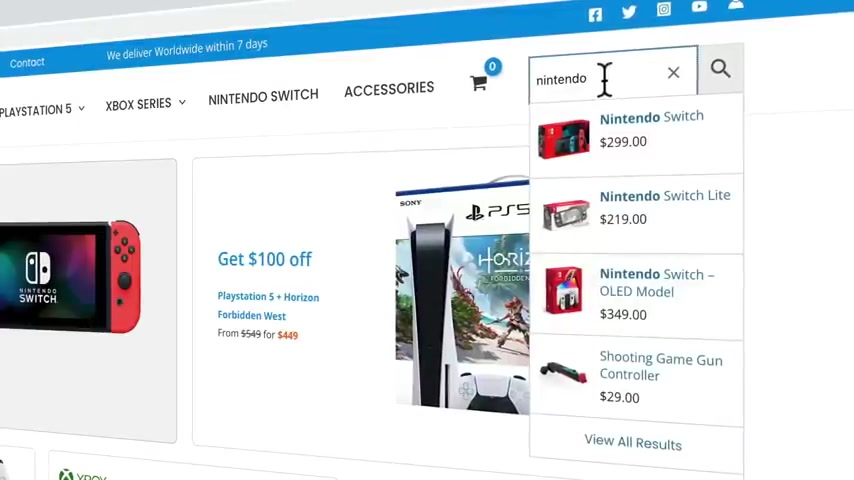
Visitors can navigate through the categories and products , check their card and search for products with a smart search filter .
They see the first results already and when they click on a few old results , they will see all the results that match the search term .
Also a great way for visitors to find the products they are searching for .
We can make the header sticky transparent and also decided that only certain parts of the header will stay with us .
After that , we will take a look at the footer with more information about our web shop through the tutorial .
We will talk about designing your website the right way why and how you can add blog post to your website if you want to , how to give visitors discount when they sign up for the newsletter .
And of course , we will talk about making your website responsive for all devices last , but at least we have a professional looking home page where you can highlight certain products , make sure that people can find the products they are searching for and with global pallets , it's really easy to change the look and feel of the website just like that .

So changing your website from this look to this look or this look or this look is just a matter of a few clicks .
When you follow all the steps in this tutorial , you are able to create an amazing e-commerce website , automate everything and start selling products to your local area , to your country , to your continent or to the entire world .
If you like what you've seen so far , then please like this video .
Feel free to subscribe .
And if you have any questions , feel free to leave a comment in the video or maybe you want to thank me , feel free to thank me in the comments when you think that is a great tutorial and a good fit for you .
So two more practical things when I go too fast for you , you can go to the settings of the youtube video and change the playback speed to a slower one or you can click on the left arrow on your keyboard and go back five seconds in the video .
In the description of the video , I have time stamps .
So if you want to go to a certain part of the video , you can click on one of the time stamps and you go directly to that part of the video .
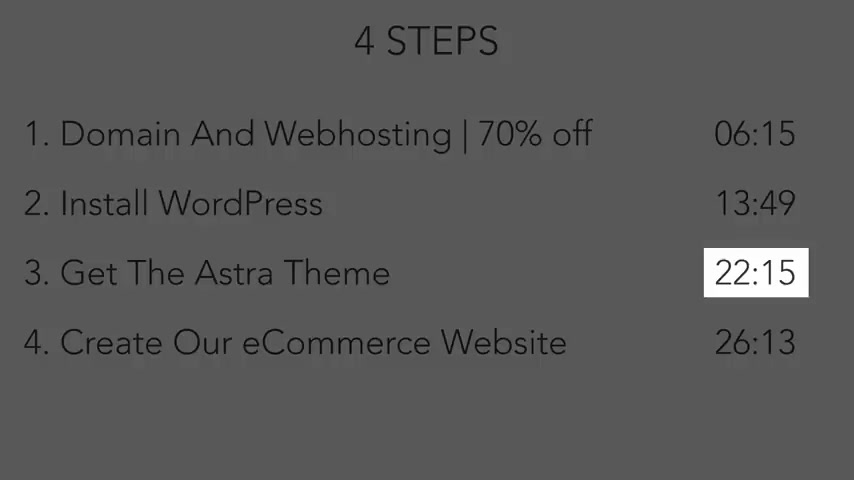
Ok , let me show you the four steps we'll take in order to create an amazing e-commerce website .
So there are four things we need to do .
If you don't have it yet , I will show you how you can get your own domain name or web hosting and I can give you 70% discount .
After that , we will install wordpress , then we'll get the theme and then we will create our amazing e-commerce website .
If you already have a domain name , a web hosting and you have already installed wordpress , I will show you on the screen right now where you need to go in order to continue with this tutorial .
Now it's really time to get started .
The first things we need are a domain name , web hosting .
Let me tell you what a domain name is and what web posting is .
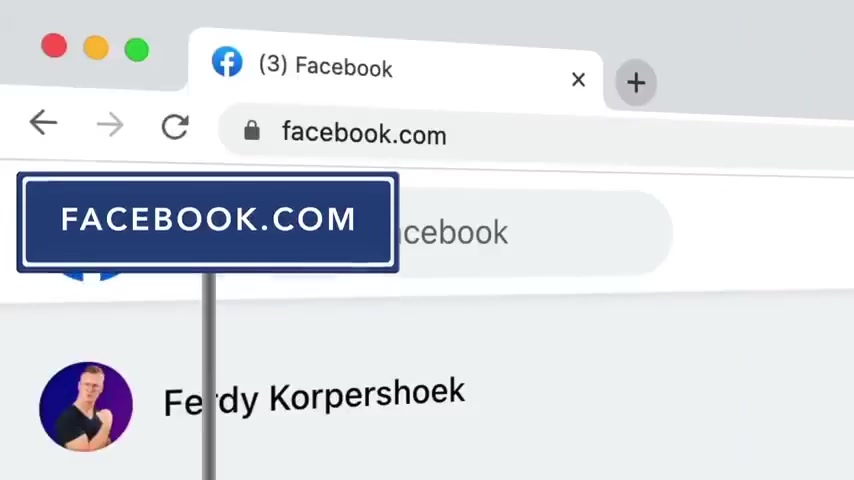
A domain name is the address of your website .
So if I would go to facebook dot com , Facebook dot com is the domain and everything you see on this website is the web hosting .
Web hosting is a really false computer that is turned on 24 7 with all the information on your website and you can rent it for a few dollars per month .
It's like having a house .
If you want people to visit you , you need to give them your address .
And your domain name is the address of your website .
So your domain name is address of your website and everything you see over here is the web hosting .
If Facebook would have no domain name , it would look something like this and that can be quite a challenge to remember by heart .
And that's why we need a domain name .
And when we have a domain name , we want to display things on our website .
And that's why we need web hosting .
If you have that already .
That's great , then you can skip this part .
If you don't have it , go to web hosting 20 dot com hit enter and then you can click on the link , go to side ground .
I love grocy growth is in my opinion , the best web posting provider there is and I'm not the only one with that opinion .
In a Facebook web hosting group with more than 5000 members side is mentioned most when it comes to the best web hosting provider and I agree with them , I scroll down a bit and there are three plans you can choose .
And the best value for your money is the Grow Big plan .
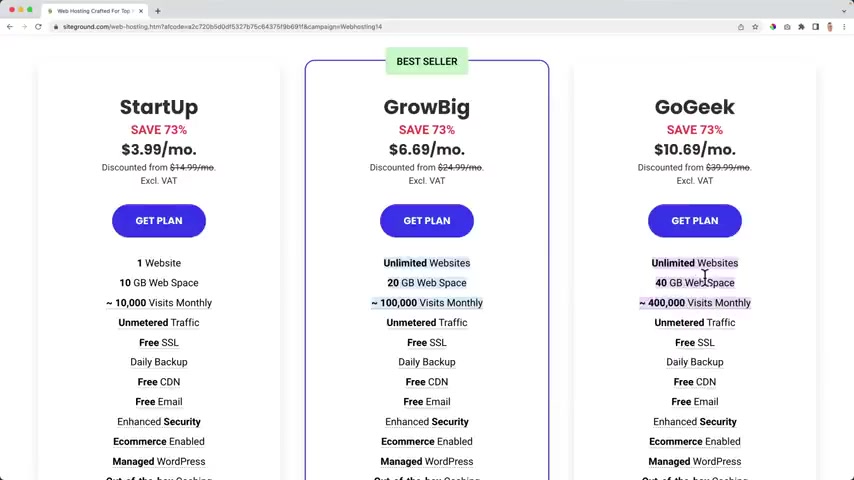
And what is the difference between the grow big plan and the startup plan here with the grow Big plan , you can have unlimited websites .
Look at this unlimited websites with the startup plan , you only have one website and all the time people are upgrading from startups to grow big because they want to create more websites .
So I suggest real big and you can always upgrade later if you want to .
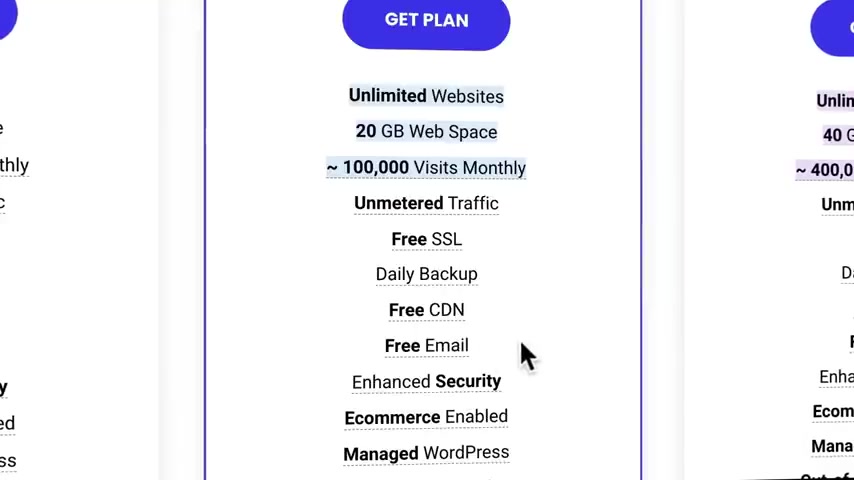
Over here , you can have unlimited websites , 20 gigabyte of web space .
Well , most websites are 200 megabytes .
So you can have up to 100 websites .
With this plan , you can have up to 100,000 visits per month .
And I hope you will get that because that will mean a lot of business for you .
And then if you have it , you can always upgrade to the go gig plan and then you will have 40 gigabytes of webspace and you can have up to 400,000 visits per month .
This is the plan I have right now because I have a lot of websites and a lot of visitors .
But keep in mind , you can always upgrade later .
So I will start with the big plan and more great things about it is you can have free SSL so your website will be secured with some web posting providers that cost money here .
It is free .
You have daily backups .
That's amazing .
If you somehow mess things up side , got you cover .
You will have a backup of the day before and after the day before that free CD N .
That means that your website will be fast throughout the whole world .
No matter where the visitors come from , your website will be blazing fast .
You can have unlimited free email accounts and really important .
This is great for e-commerce .
And if you somehow really don't like it , you have a 30 day money back guarantee .
So there's no risk for you .
So I will choose to grow a big plan by clicking here .
Now , we need to choose a domain name .
If I would say facebook dot com , I want to buy facebook dot com .
I click on proceed .
Of course , it will say if chosen an invalid domain name because it's already taken .
So you need to choose a domain name that is still available .
What I would advise everybody in the world to do is get your own domain name with your first name and your last name .
I hope it's still available for you and otherwise you can use a company name or a custom name .
And if you offer a local service .
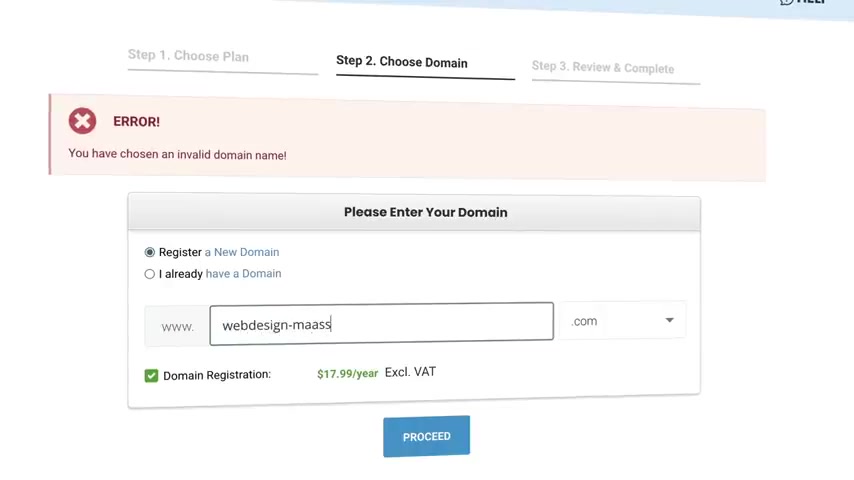
You can place your hometown in domain , for instance , web design .
Great thing is that you can choose a lot of different extensions dot com dot net dot org .
I always just use dot com or the local one from your country .
I go for console delivery .
So let's see if it's still available .
I click on proceed .
Yes , it says , congratulations .
Your domain is available for registration with your hosting accounts .
Let me make this a little bit bigger for you .
Now , I can leave some details over here .
First , my email address JK 24 co at gmail dot com .
I need to create a password and I need to confirm my password .
And then over here , I need to say from which country I am .
I'm from the Netherlands and I will fill in my details or F and Anna Media .
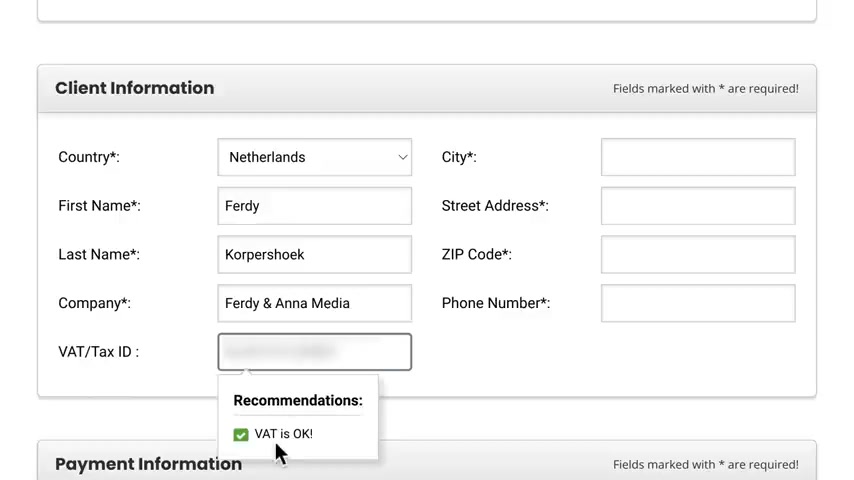
If you have a company filling your name over here in your fat slash text ID , if you fill in your tax ID , you don't have to pay taxes for this order .
It's ok , great .
Uh gives feedback at once , which is nice .
I'm from this city , this street and my zip code .
If I would say is wrong , it will correct me .
It will say , hey , you need to remove the space and then over here I need to fill in my phone number and it's really important that it's the correct number .
So you say plus 316 and then your phone number really important to have this over here .
The the country code I scroll down and depending on where you come from , I can be a local payment provider .
So if I would enter this website from the Netherlands , I would see I do over here .
You will maybe see paypal , I will use credit cards .
So I will fill in my details and then we go to the purchase information , we go for the Grow Big plan and the data center .
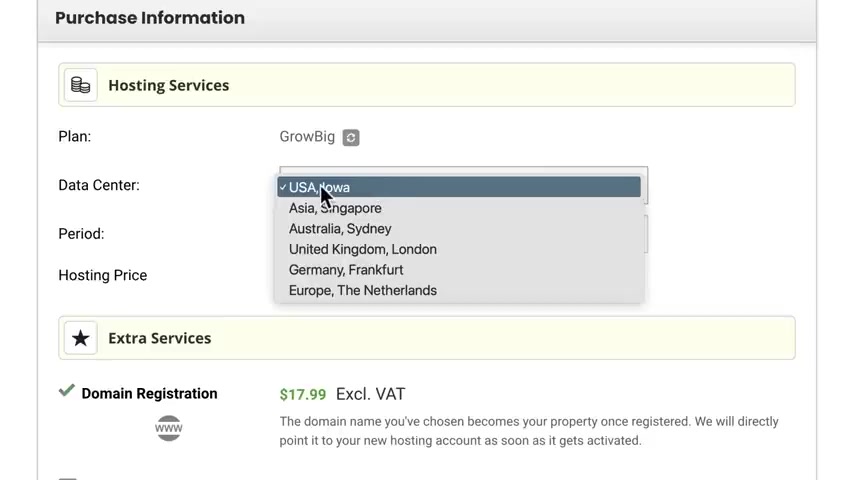
We can choose a few depending on where you want to focus on .
If you want to focus on people from the United States , keep it in the United States .
If you want to focus on people from the Netherlands or somewhere near the Netherlands , choose Germany or the Netherlands .
I want to go for , for people worldwide .
So I choose the U A in the period is 12 months .
We pay $6.69 per month and then we can have unlimited websites on our big account , which is amazing .
And then if we scroll down , I highly urge you to get domain privacy , it will cost you $12 per year , but it will save you so much spam because if you don't turn it on , a lot of companies can see that there's a new domain name with your personal information , with your phone number , your address , your email account , your email address , and then they can send you spam emails like , hey , I can make a logo for you .
I can do seo for you .
You don't want that .
So for $12 you don't have that .
Then I scroll down and I will pay a total amount of $110.27 .
It can be a little bit more or less with you depending on where you come from .
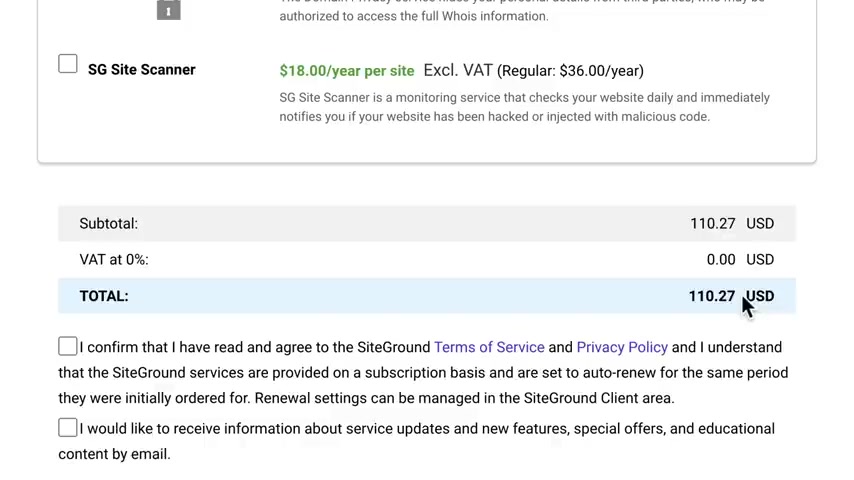
And with this amount , you have a domain name or web hosting for a complete year and you can add more domains to your account and create multiple websites and they're all blazing fast .
And there's a great support if you get stuck somewhere .
I confirm that I have read the terms service and I agree with them and I would like to receive news updates from side grounds .
If you got it through web posting 20 dot com , you don't pay more and you get amazing discount and I do get credit for it .
So it's a win win situation and then I click on pay now .
And then the great thing is that our website will be live immediately .
We don't have to wait for 24 hours .
It will be live at once .
If everything goes right , you should see this right now .
And that's amazing .
And then I want to congratulate you with your domain name and web hosting .
If you don't see that it can be that you see something like this .
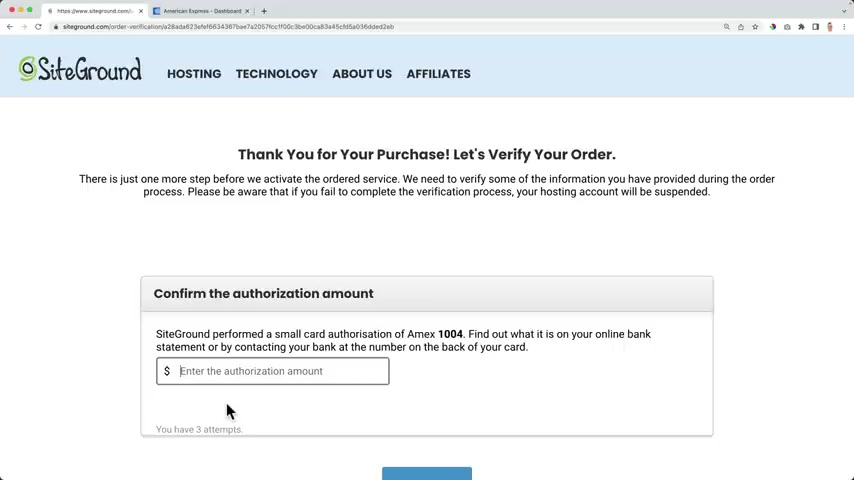
If that's the case , fill in the confirmation number you get in a text message and then you should be able to proceed and in some cases uh will put an amount on your uh credit card account and you need to fill in that number .
So they know for sure it is your credit card account .
You can do that by going to your account or your credit card account or by calling your credit card company .
I had to call them .
I want to check everything .
So you know exactly what to do in every situation .
I hope both of those confirmations do not appear for you .
But now you know what to do when you see those two strings .
So let's continue .
And my account was successfully created .
How great is that I can proceed to the customer area .
Then I need to log in with the details .
I use to sign up for side grounds .
Now it says welcome Ferdi and here we can set up our website .
But what I'd rather do , I'd rather go to websites then set over here , uh set up incomplete .
So I click on finish site , set up .
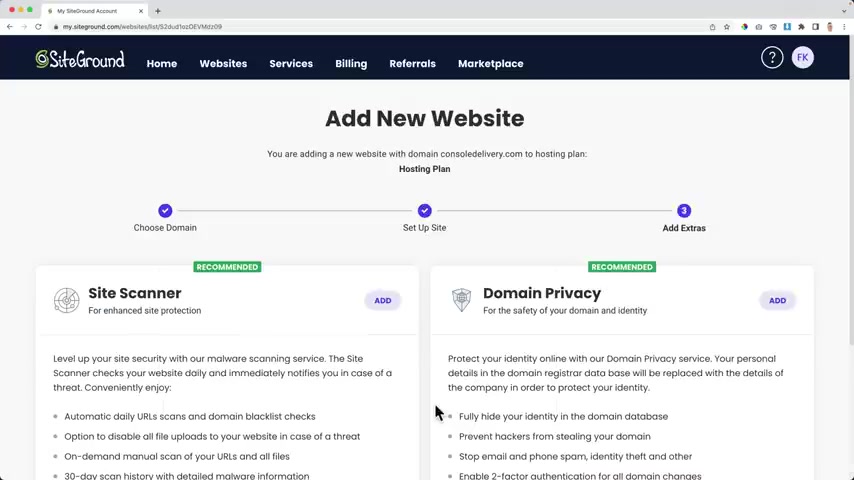
Then I choose my domain name which I have over here .
I click on continue and I want to skip and create an empty site .
I don't need those two tools I scroll down and I click on finish and it says it will take less than two minutes before your website is created and that says your website which your domain is created and I want to go to the site tools by clicking here .
The first thing I want to do , I want to make my website secure .
So I go to security SSL manager .
Then I select my domain name and then I select lets encrypt .
I click on .
Get this can take a minute .
So we have to wait .
There it is .
Now , I can configure the A PS .
But what I rather do here below , I go to actions and force HPS and then I turn this on and that's it .
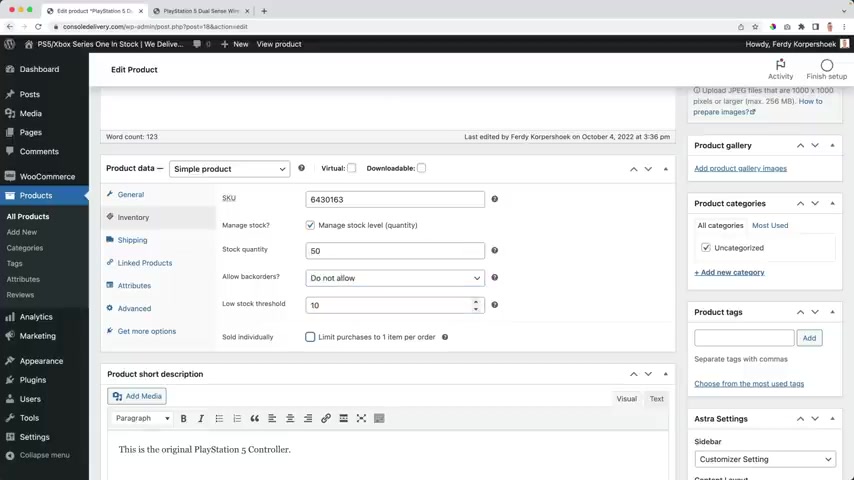
Now , I go to Wordpress install and manage .
Then I want to install wordpress .

Even if I'm gonna install woocommerce , I'd rather start with wordpress .
So I click on select that I choose my domain name .
I can choose the language from my website , the installation path that means that I can install the website on my domain name dot com forward slash new or test .
But I'd rather install this on my main folder .
And then I need to create a login name for wordpress and a password and an email address .
Then I scroll down .
I don't need to have uh the wordpress starter .
I click on install and Wordpress will be installed on our brand new domain name and there it is now , Wordpress is installed on our brand new website .
So what we have , we have an admin panel .
I open it in a new tab and we have the website .
I open it also in a new tab .
Then I close this window .
What we see over here is the back end of our website here .
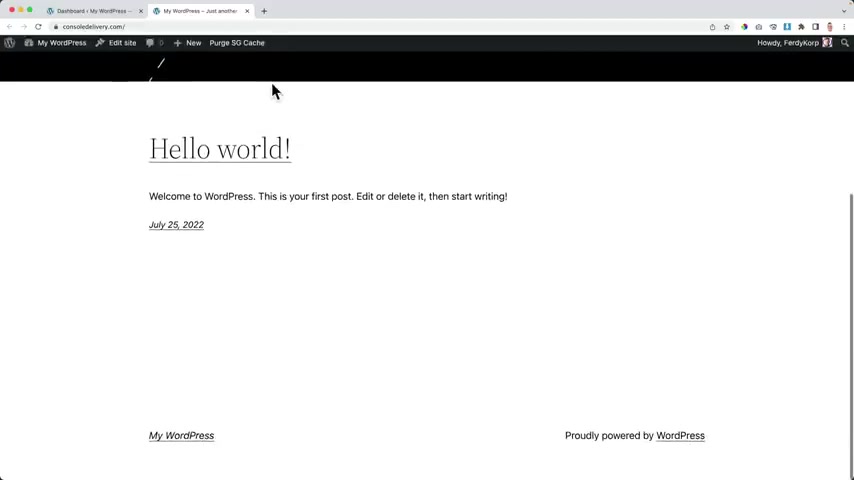
We're going to configure our website , create pages , create blog posts , upload images .
And then over here we can see the front and this is what people will see when people enter your domain name right now .
They will go right to this page .
We are alive .
And the great thing is that our website is also secure .
So this is what people will see when they enter your website .
And this is where we can configure our website .
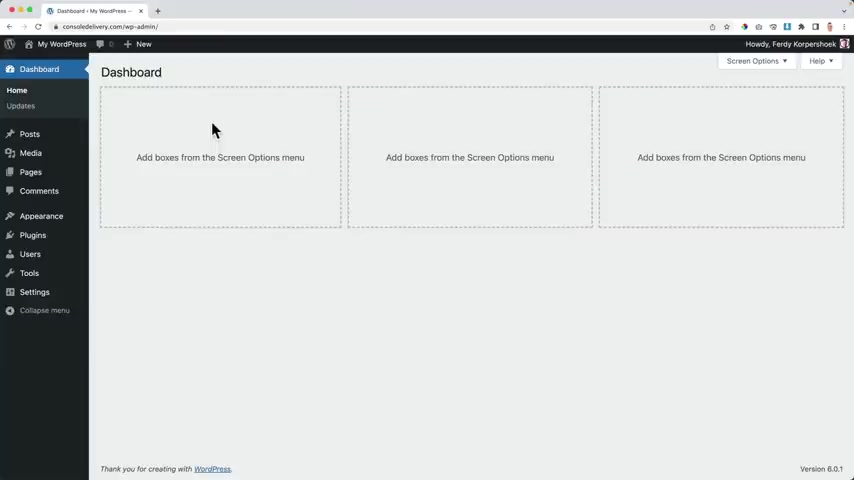
Well , the first thing I want to do , I want to clean up my website .
So what I will do over here at the back end , I will dismiss this message .
Then I want to collapse all this stuff over here or even better , go to the screen options and check everything .
So it will not be shown .
So our dashboard is clean .
Then I want to go to the plugins .
And for now , I want to remove all the plugins by selecting this checkbox .
Build actions , deactivate .
We first need to deactivate plugins before we can remove them .
Apply .
And since I deactivate them , I see that my menu is a little bit cleaner .
Those two things are not active anymore , build actions again , delete apply .
I'm OK .
Great .
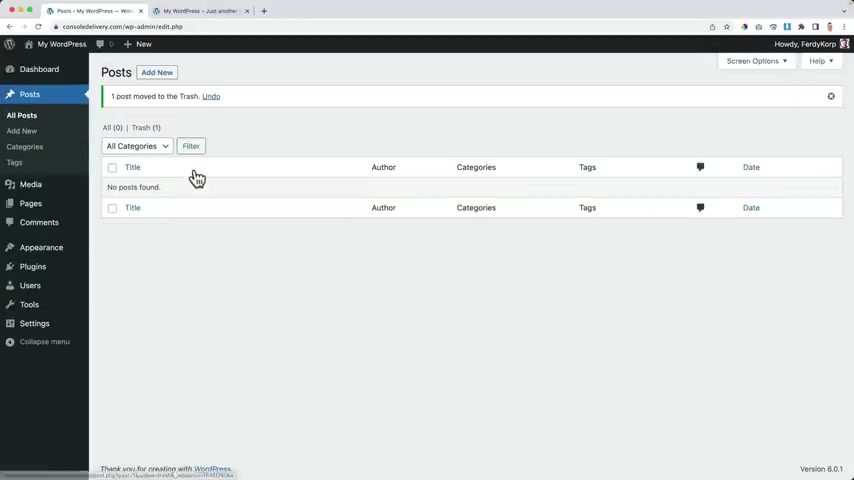
Then I go to the posts .
There's one example post , I want to bring it to the trash go to the trash and empty the trash .
The same with pages .
I go to the pages , select both pages , move to the trash apply .
Then I go to the trash and I empty the trash .
I go to appearance themes and the themes I do not use right now .
This 1 2020 I don't use that .
I deleted .
OK ?
And this one , I will leave it for later because I want to show you an example of what you can do with themes .
Then over here at the right top corner , I can edit my profile , I can change the look a few of the back end .
So you can choose something you prefer .
I prefer the default one right now .
It says Howie Ferdi Corp .
So when I write a blog post , it will say written by Freddie Corp .
I'd rather use my full name .
So over here , my first name is Freddy .
My last name is Corpus and then I can change my display name , publicity S 30 Corpu .
And that's what you now see over here .
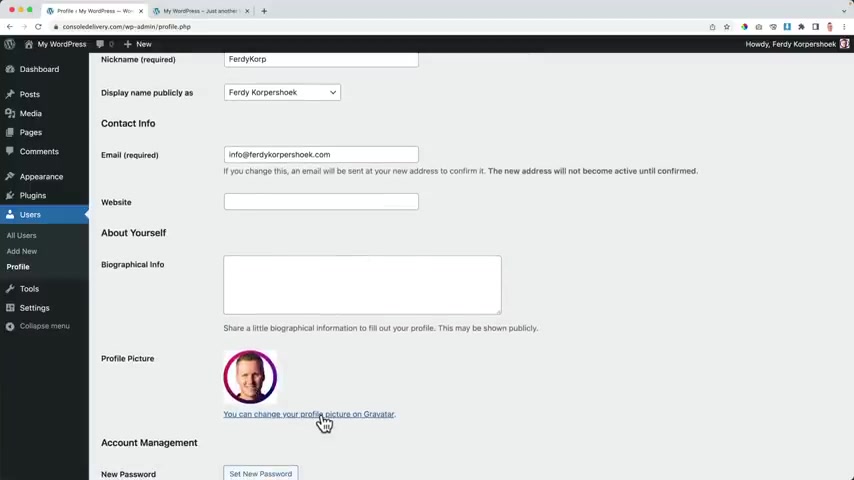
Then over here I can have an email address and this email address is linked with a grave account .
I'll talk about it in a minute and , and because it is , it has a special profile picture , I can change it by clicking here and then I go to graph I can sign up .
And if I sign up with the same email address I use over here , then the image I upload at grav will be displayed over here and also in your website where you want to display this .
So if I've written the block post and I want to show my face , it will show this image , I can say something about myself .
So if I created a block post and it says something about the author , this text will appear and I can create a new buzzword and I can update my profile .
If I want to go to the front end , I click over here .
If I want to go to the back end , I click over here .
So I actually don't need this .
So this looks better , in my opinion .
This is how it looks .
This is how it looks right now .
It's cleaner and it helps me to be productive in creating a beautiful website .
I want to go through a few more settings over here at settings general .
I want to make my website secure over here .
So I will add an S over here and over here .
I probably need to log in again .
So if I click on save changes , oh , it's all fine .
Sometimes you need to log in again and then uh we're gonna talk about the site title on the decline later in a few minutes .
And then over here , I don't want people to register the sign language .
I can change over here , the time zone .
Well , I live in the Netherlands so I search for Amsterdam .
There it is and then automatically in the winter and in the summer , the right time zone is selected .
And how do I want to show the date ?
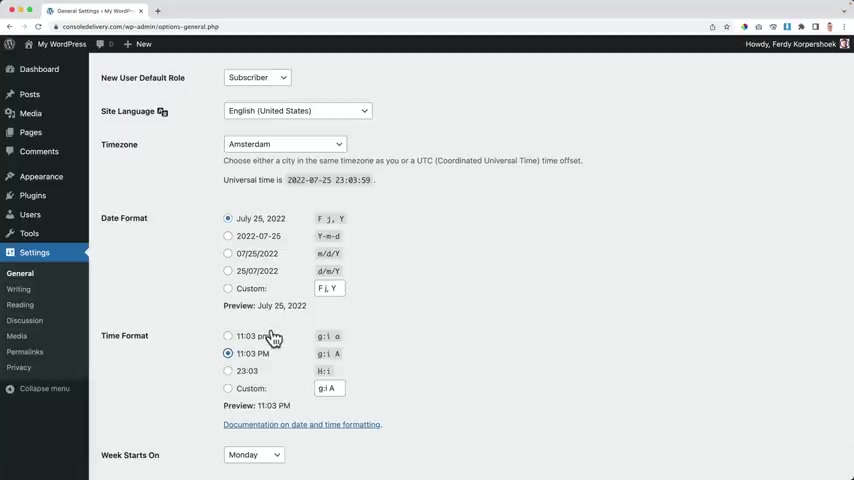
July 25 2022 or different ?
Uh like this one , you can also create a custom one with those codes , but I prefer this one .
And in the time format , I like to work with BM and AM with capitals .
My week starts on Monday so I save the changes .
So I want to give my website a name right now .
It's called My Wordpress .
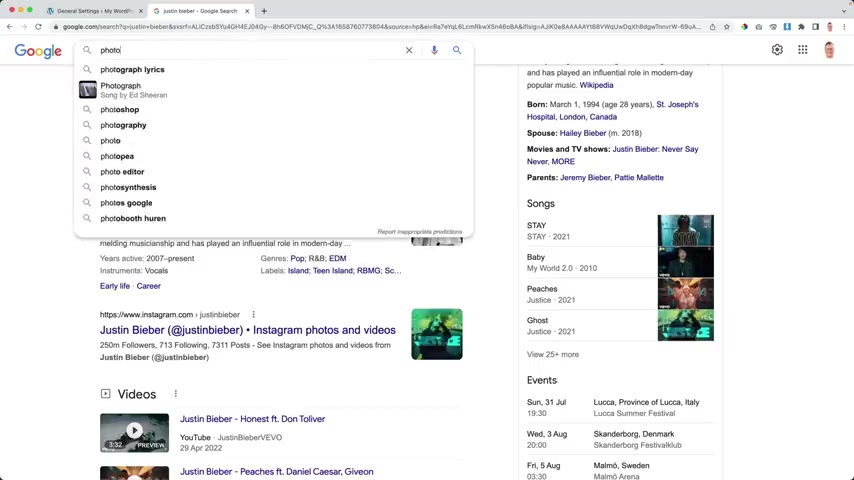
If I go to google dot com and I search for Justin Bieber .
The first Organic Result over here is Justin Bieber music .
It's the website of Justin Bieber .
And what do I see over here ?
What's the title ?
The title is Justin Bieber .
So if you want to be found on something on a specific keyword , the best you can do is place it at the left of your title .
So if I go to my website to Settings General , I want to give this website a title and I'm a photographer , I should not say welcome on my website .
I am 30 because then people have no idea what I'm doing .
And then when they search for a photographer , let's say in Amsterdam , I scroll down organic results .
I see photographer Amsterdam , photographer , Amsterdam , photography , Amsterdam .
Amsterdam .
Photographers .
So be really clear in your site title about what you offer So in my case , in this case , PS five forward slash Xbox one series one in stock , we deliver globally .
So I bought a lot of consoles and now I will deliver them throughout the whole world .
That's my unique selling point .
And the tech line can be something like re receive your console within a week .
I save it and I close this .
And now if I take a look at the website , it looks like this .
So you have your own domain name , you have your own web hosting and you have installed wordpress .
Well , it doesn't look too appealing .
Let me show you how we can make it look so much better .
Using the extra thing .
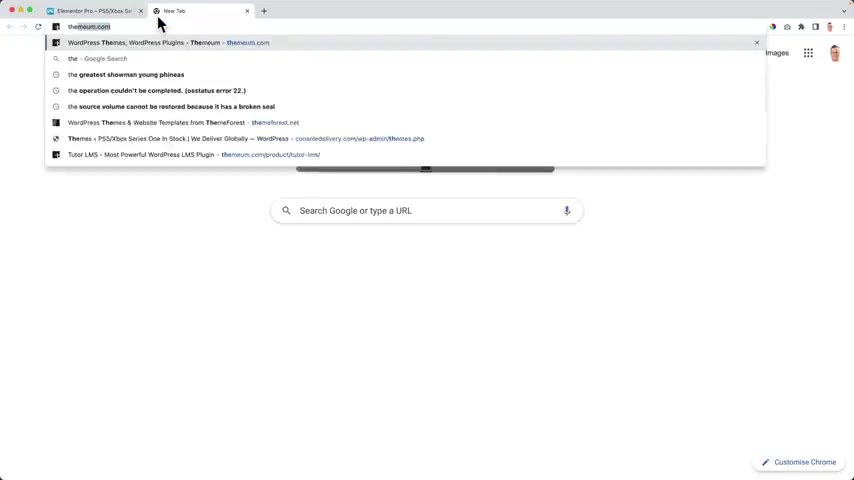
Let me show you how to get the extra thing .
So in order to make it look better , we need a theme and I've chosen because enables you to create an amazing e-commerce website within wordpress .
So in order to get it , we go to 30 Corp dot com forward slash pro hit enter and you'll be redirected , then you can go to pricing and there are a lot of different packages and I want to make use of pro .
This is also great .
This is amazing , but we don't need that for the website we have in mind .
And the great thing is when you get extra pro or the essential bundle or the grow bundle , you can use it on unlimited websites .

So you could become a web design agency and start making websites like crazy for other people .
Make a lot of money with it or you can just make it for yourself .
It costs $47 per year and it will enable you to create an amazing wooer website in wordpress .
And I will show you step by step in the store how you can do that .
So you pay per year or you can go for the lifetime .
Do I personally use this one ?
I bought it like five years ago and I can still use it on unlimited websites and when there are updates , I still get them .
So I really love lifetime deals because then you pay once and you can use it for the rest of your life and you get updates and support .
So if you do the math , this is $47 per year .
So if you would have a website for five years , you pay around $250 .
And if you would go for a lifetime , you pay $227 .
So if you assume you will have your website more than five years , then I would go for a lifetime .
Do if you just want to try it , you're not sure you can always upgrade later and you can go for the $47 per year .
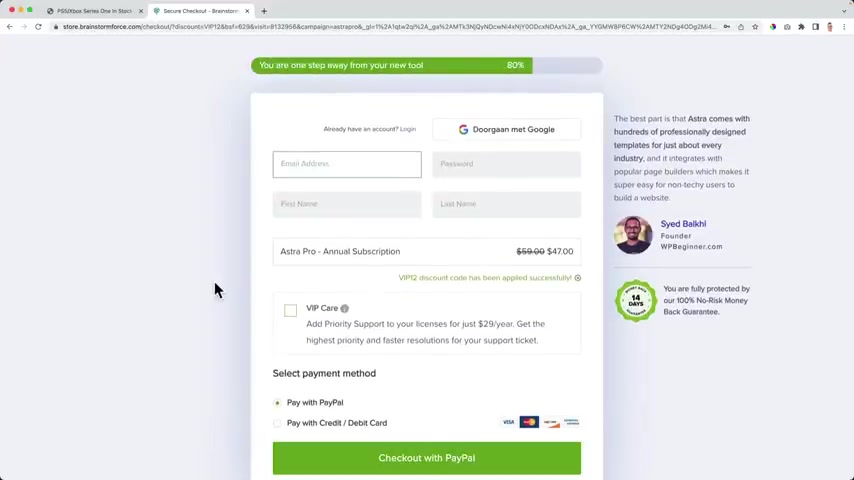
So I click on buy now and then I need to fit in my details .
So I say 30 Corpus Hook at Gmail .
I need to create a password .
My first name and my last name allowed to go for a pro annual subscription .
And I want to pay with credit cards and also pay with paypal .
I leave my details over here and I want to check out with cards and now I'm redirected .
I want to get extra pro over here , extra pro and I want to go for the extra pro and I'll log in .
I click here .
I go to my website to the back end .
I go to appearance themes .
I click on add new .
And over here I search for there it is .
I click on install now .
Then I activate it .
I want to get rid of this one .
I don't need this anymore .
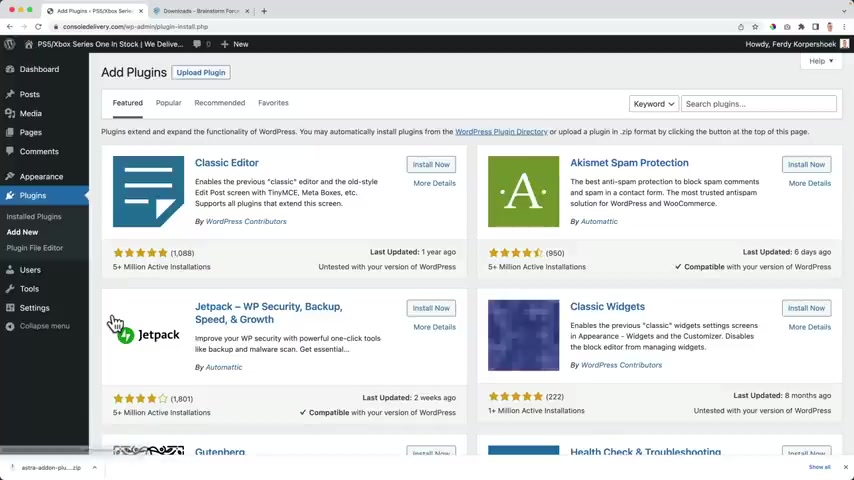
Now , I want to go to plugins at new because pro is a plug in as an addition to the theme .
I go to upload plug in .
I dragged this file which I just downloaded over here and I click on install .
Now over here , I can close it and then I can activate the plug in .
Great .
And now I can activate my copy of pro to get update , notifications , access , support features and other resources .
So I click on activate .
Then I go to brainstorm force again .
I scroll up , I go to the licenses .
I scroll down in here for a pro , double click or triple guppy .
And over here as a pro license .

Not active , I base it , I activate the license and now it is active and we see over here that we have so much more options .
Right now , we can make a next level website using Sr Pro and also for Woocommerce , there are a lot of amazing additions , but we need to install Woocommerce in order to make use of all those additions .
Woocommerce is a free plug-in that will extend your website with a web shop so you can start selling products on your website .
It is amazing .
And when you combine it with pro , you can create an amazing website .
So let me show you how to install Woocommerce .
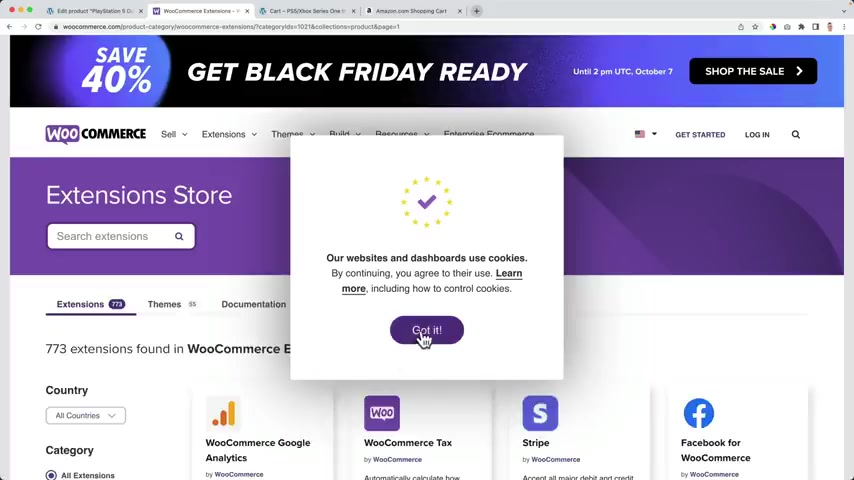
So in order to do that , I go to plugins at New Who Commerce .
And the great thing is Woocommerce is free .
I click on install now and I activate the plug in .
So now we need to set it up .
So we need to fill in a few details .
I will do that .
So I click here .
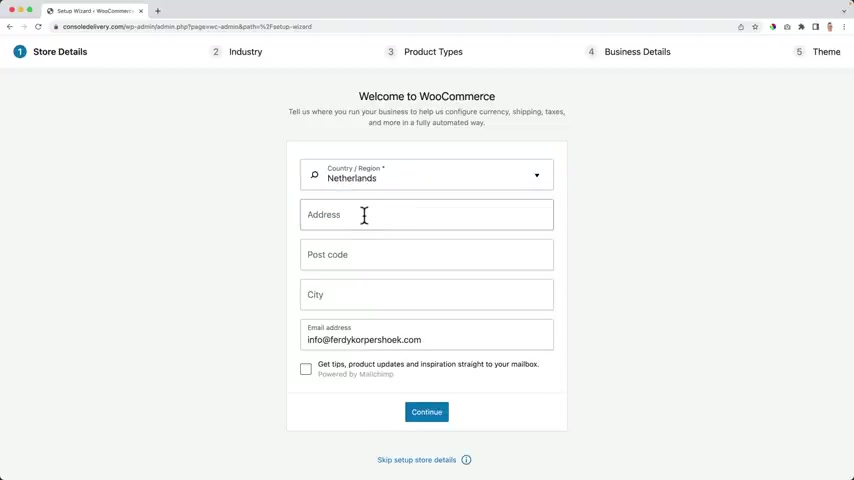
I come from the Netherlands is my address .
I don't need any tips .
I click on continue and I don't want to share my data with workers to make worms better because I don't want it to become too good because then we get overwhelmed like wow , how amazing is this ?
And I don't want that .
So in which industry does the store operate ?
So what kind of products are you gonna sell , food and drinks , home , furniture , garden education , online learning .
You can also say other and describe it .
I go for electronics and computers .
I click on continue .
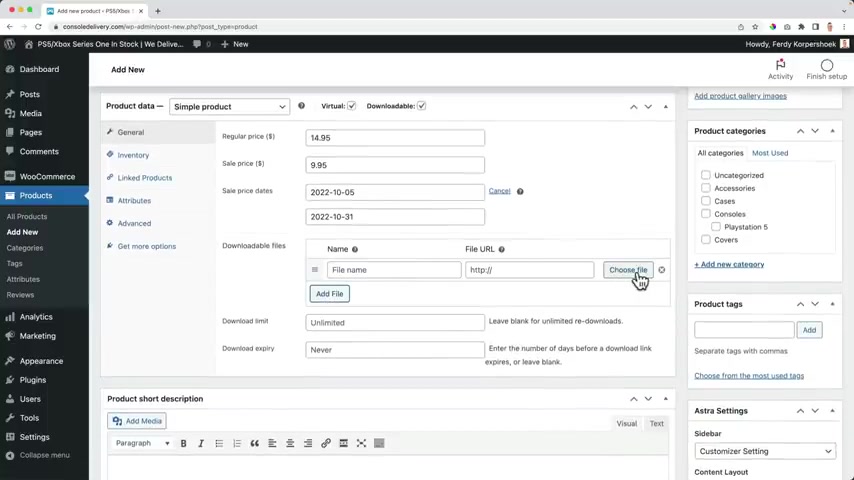
I want to sell physical products and maybe downloads .
If that's something you want to do , you can click over there .
Don't use these money and you just don't need them .
There are free alternatives for this .
So I click on continue and I don't want to give any information about this .
So I just said I don't have any product yet and I'm not selling anything anywhere else .
Continue .
I don't need this .
I turn it off and I click on continue and I want to use the extra theme which I have already installed .
So I click on continue with my active theme .
Now we've configured V commers and what happens ?
A few pages are created in , in a minute , I will show you which pages are created and how we can make them look so much better using a pro .
So the first thing I see , I don't like those numbers because then I think , hey , there's a new message for me .
Uh And I'm gonna show you step by step what you need to do .
So you don't need those five messages .
So I click on the three dots over here .
I say hide the set list .
Now I refreshed the page .
They are gone so much better .
So this is how our website looks right now .
There's room for improvement .
And before we continue , I want to go to the back end go to appearance , extra options .
Then I scroll down and I want to activate Woocommerce .
And now ladies and gentlemen , book commerce is on steroids , which is totally fine because it will make our website better .
And before we start to create products , I want to make this look better because we need to take a look at this all the time .
So how can I do that ?
I go to the customizer and then I click over here .
What I can do now , I can upload a logo or maybe you have a logo .
Maybe you don't .
If you want to follow along with the images I use in the tutorial , you can go to 30 corp dot com forward slash images hit enter and there they go .
And then over here , I want to select a logo .
So I click here and then I can select files from my computer .
So let me open this , bring it to the desktop .
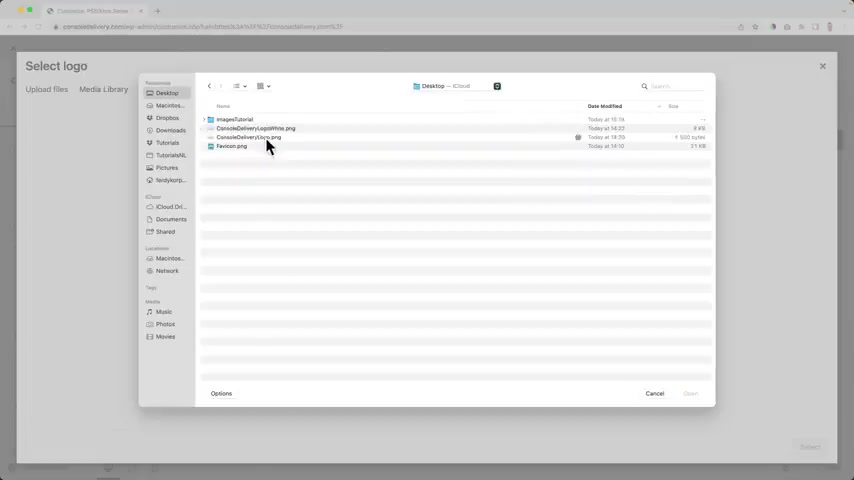
Then I go to my image of tutorial folder console shop and there I can find all the images .
I have them right now on my desktop .
So it's like my colored logo open .
They don't want to optimize it copy based in the all text and in the description , I want to select it , skip the cropping and there's my logo .
Now , I want to get rid of this .
So here below , I can turn this off display the side title .
Then I want to change the logo to 300 and I can decrease it like that .
And then I see how big it will be .
So let's say 260 great .
And then I want to go to the primary menu over here .
I click on it .
We're gonna take a look at the header later .
Right now .
I just want to make it look a little bit more appealing because we're gonna look at this all the time .
And then I go to the store , I go to the design tab .
So I click here .
I go to the design tab .
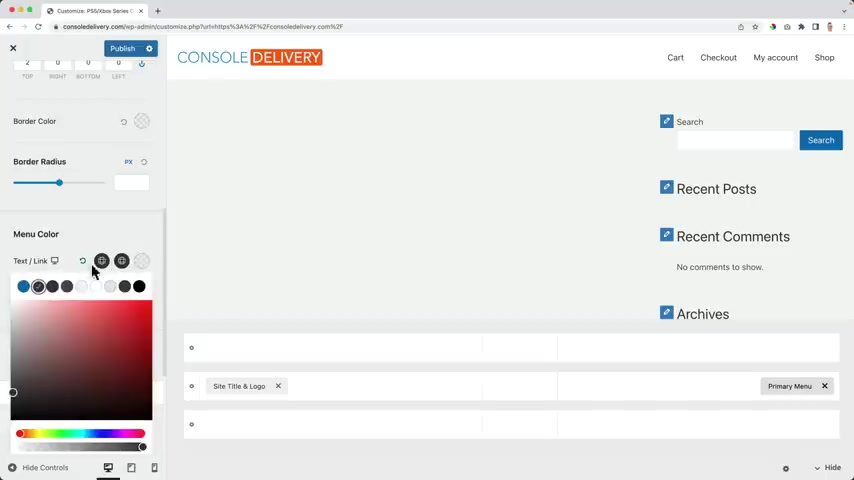
I scroll down and I want to change the colors , the text link color .
I want it to be this dark one .
And when I hover over it , I want it to be the second color and that's it .
Then I scroll down .
I go to the menu fonts .
I want to make it upper case .
So the text transformation , upper case how to make it a little bit bigger or thicker boulder .
So I go to medium 500 .
Great .
Now I go back and I go back and I go to the global settings to colors and I want to use this global palette .
That means if I create a color over here .
So I make this green everywhere global color while it's chosen , it will appear .
So in that way , I can change this color and it will change on a lot of places in the website over here over here .
So that's a great way to save time .
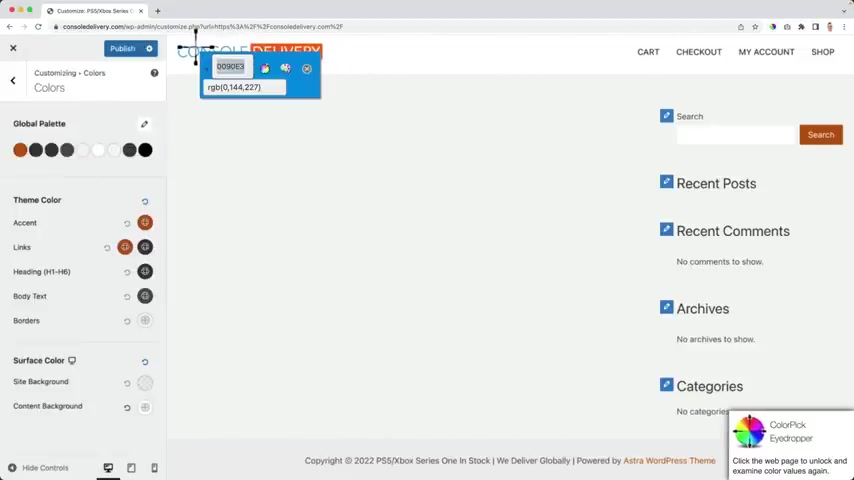
I will use a color big eye dropper .
It's a chrome extension .
It's free .
I grab this blue color copy it .
That's the main color in my website .
So I go to the color , click on this icon and I paste this color and then the second color it is this orange one .
I copy it .
Go to the second one , this icon I past the code , all the other colors .
I like them .
So now this is blue when half over it , it becomes orange .
So this looks a lot better .
And since we use Woocommerce , I want to go back , go back to the Heather builder .
And then over here , I want to click on the plus I scroll down and I want to edit the , the cart .
Yes , I click on the cards and change the icon and I can also turn off the , the card counts .
So I'll take a look at this later right now .
I'm OK with this , I click on publish closes .
Great .
OK .
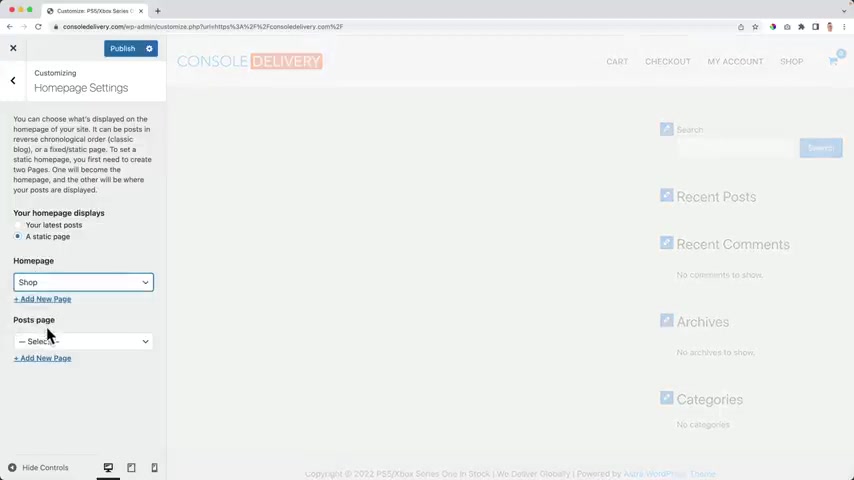
What I want to do , I want to make the shop page our home page .
So I go to the customizer later .
We're gonna change that for now .
I like that .
So I scroll down , I go to the homepage settings now to choose a static page as the home page and then I select the shop page .
Publish , close it .
So now if we click on the logo .
We go to the home page and it says this is the shop , but there are no products yet .
So we need to create a few products .
And before we do that , let me take a look at the pages that are created by Woocommerce .
The first one is the shop page .
That's this one right now .
Then we have the cart page .
So if we have products in our basket or in our cart , it will appear over here , then we have the checkout page .
Everything is empty yet .
And then we have our account page .

So if you bought something , you see your orders , your downloads your addresses .
So it is time to create our first product .
Well , you can create six different kind of products within woocommerce .
Let me show you the first one , a simple product .
So the first product I will create is a simple product .
It doesn't mean it's a product with only one option .
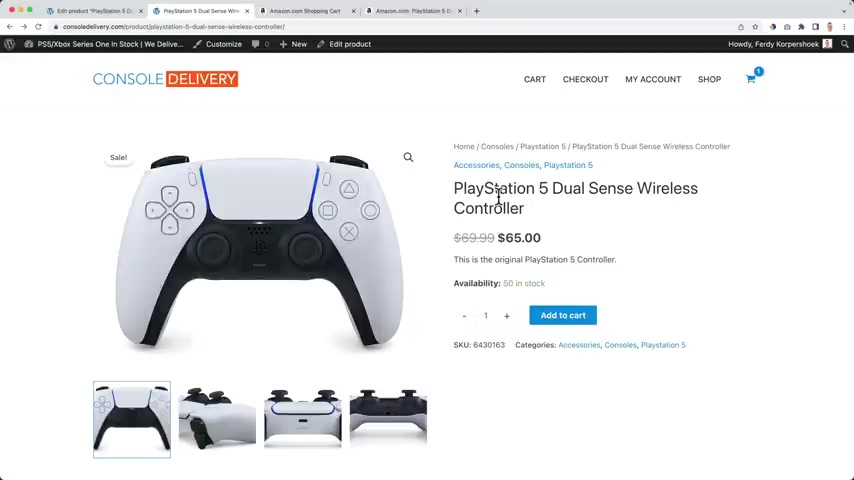
It can be a cap or sunglasses or a playstation five , dual sense wireless controller .
So that's what I will create as my first product .
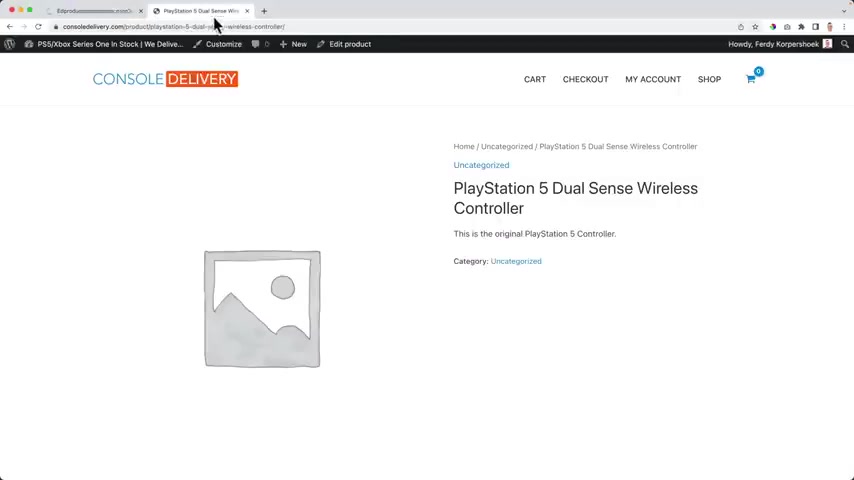
It's the Play Station five , dual sense wireless controller .
That's a title .
If I publish this .
Look at this , look at this view , the product we have created our first product .
Wow .
So if I go to my shop page or I go to the home page , now I see a product over here .
So as you see , we only have a title , no categories , no add to cart button yet .
So let's configure this further .
But right now , since we create our first product , it's over here .
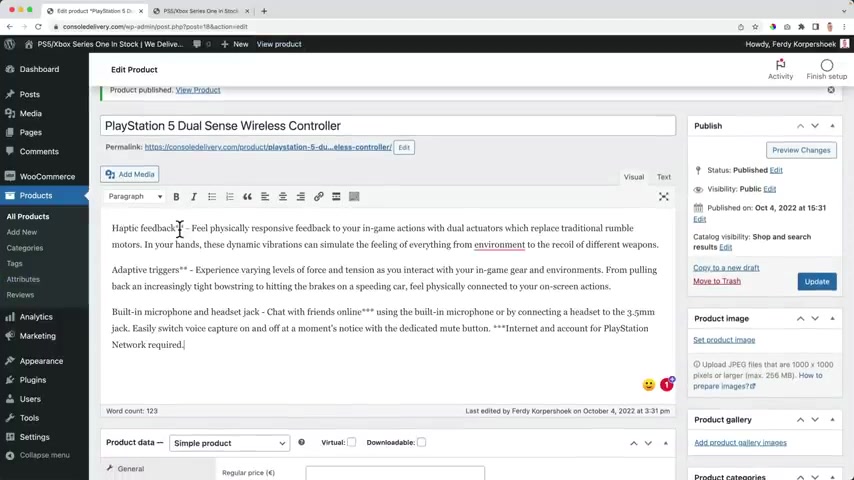
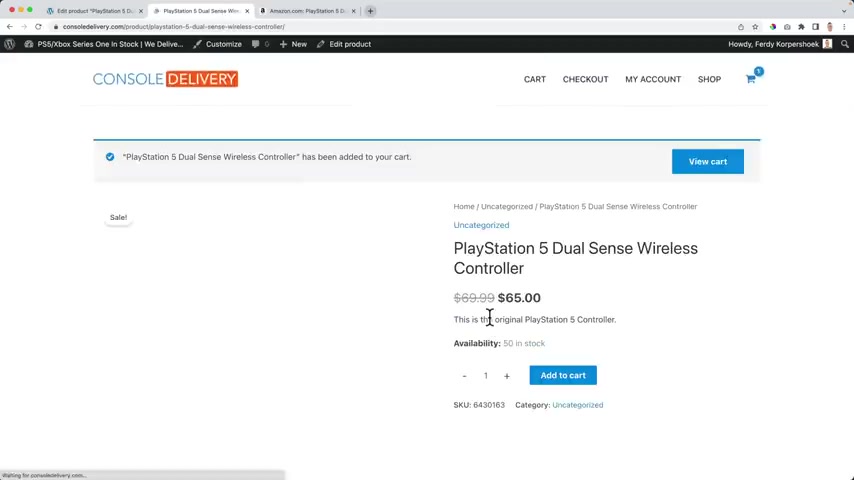
So what is next now , we can have a description of this product ?
So I have this text over here about this amazing duals and wireless controller for the playstation five .
And if I would update it , let me see how it will look .
Click over here , I see the description over here .
What I also can do , I can scroll down and then over here there's a product short description .
This is the original Playstation five controller .
So where does that appear ?
If I refresh the page , that is what will appear over here .
So here we can have a small or a short description and then below there's a long description right now over here , we can have different kind of products .
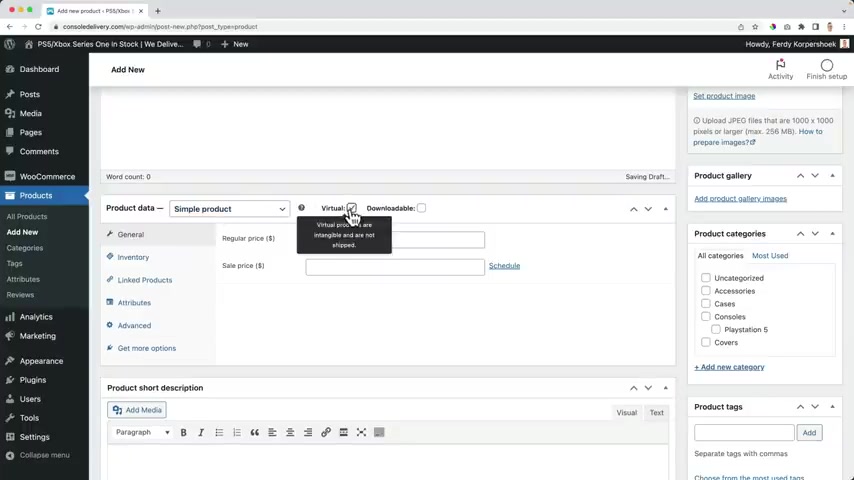
Well , we start with a simple product .
It's not virtual , it's not downloadable , it's a real physical product .
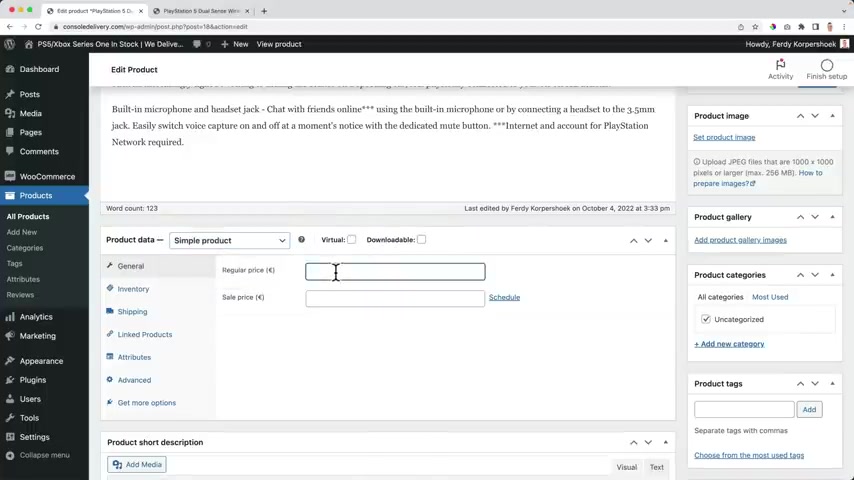
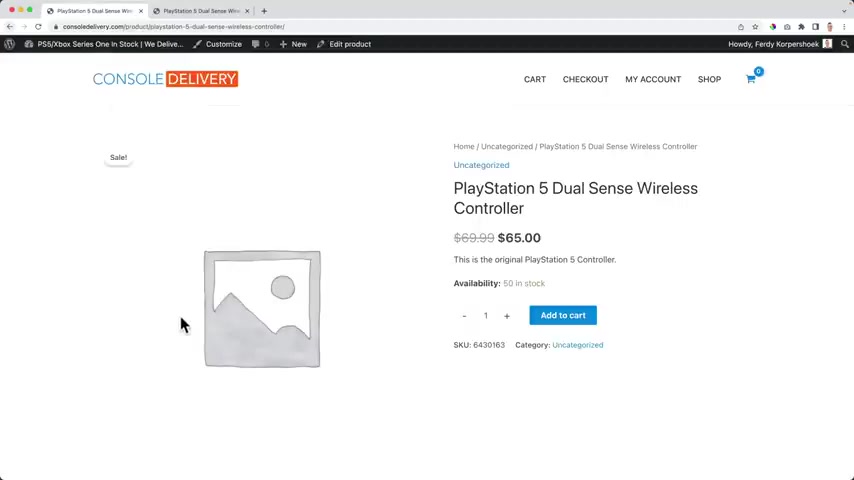
So I don't check this on the regular price is $69.99 .
The sale price is $65 .
But what I don't like over here , I see a comma I want to have a point .
And over here I see euros .
So let me update it .
And if I want to change that , I go to Woocommerce settings , I scroll down and I change this to United States dollars and the currency position , the dollar sign I wanted without the space .
And 1000 separator is a gamma and decimal separator is a point .
I want to have two numbers of decimals because those are the , the amount of cents .
So I go back to the website to the product and I edit the product .
So right now I have a point over here and when it will be a $2000 there will be a come out .
As you see , there's a lot of discounts .
It's not true .
So I will remove this .
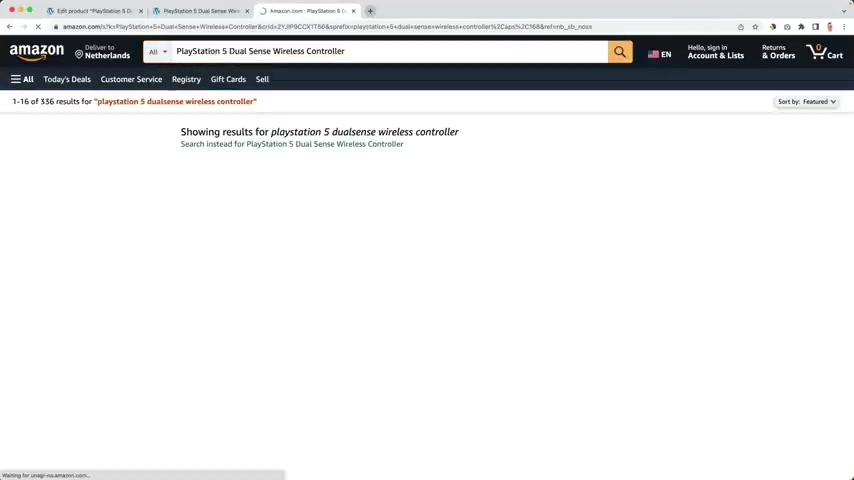
Then let's go to inventory the SKU , what you can do if you sell a product from Adidas or from playstation or it's a known product , you are reselling it .
What you can do , you can search for playstation five dual sense controller or wireless and then search for SKU .
And then if you scroll down , you can find uh the SKU over here .
It is this number and you can use it .
And why would you want to do that ?
Well , maybe people are searching for the controller but it's out of stock everywhere except at your place .
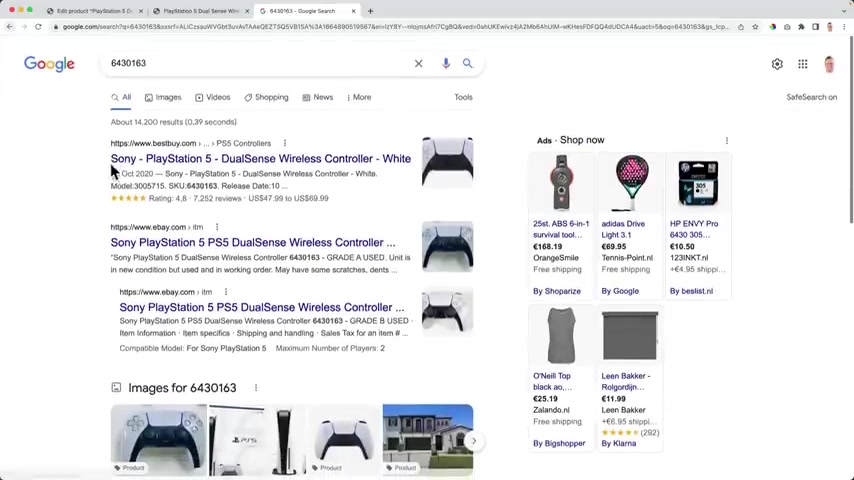
So what they can do now , they can search for the SKU number and when they do that , look at this , they can find your website based on the SKU number .
And if you create your own products , then you can give this your own number .
Stock keeping unit .
Do we want to manage stock level ?
Do we want to work with a stock Well , I bought 50 of those controllers .
So if I would update it and I refresh the page , it says we have 50 in stock .
When somebody buys one or two , it will be 49 or 48 .
So woocommerce is keeping track of that automatically .
So let's go back over here when I sold all the 50 controllers .
What should happen ?
Can people still buy it right now ?
I say it's not allowed .
So when it's out of stock , people cannot buy it , I can also say they can still buy it , but I will notify the customer saying , hey , right now they're out of stock .
You can still buy them , but it can be that they will arrive later or you just say nothing , they still can keep uh buying and you do your best to send the products as soon as possible .
Well , I turn is to do not allow , but I want to get an email when there are only 10 left in stock because then I know I need to reorder them right now .
It says 10 .
If I say nothing , I will get an email when there are only two left .
So I want to change it for everything in my website because I never want to run out of stock .
And for me , it takes some time before the new playstations and the new Nintendo switches arrive .
So I want to get a notification when there are only 20 products left in my stock per product .
So I can go to Woocommerce settings .
Then I go to products over here inventory .
And then I want to get an email when I only have 20 left in stock and that email will go to this email address .
Save the changes .
And since we're here , I want to go to products in general .
I want to change the weight unit from kilograms to ounces and the dimensions from centimeters to inches .
Save the changes .
I go back to the website back to my controller , edit the product .
So now we talked about general and inventory , what I can say over here , people can only buy one product per time for this product .
And then it will not say add this amount to the card , but it will say add to the car .
So they can only buy one .
Well , if it's up to me , they can buy 50 .
So I turn this off update .
Now , I want to go to shipping .
So here I can place the weight of the controller .
Well , I know it's 15 ounces , 15 0.2 and the length you can just Google it .
So if I would say Google for um Amazon , I search for this .
Amazon always has a lot of information about these products .
So I can scroll down 7.44 inch by 2.67 and 7.56 .
This can help when you want to ship things and you can create automatic calculated shippings based on the weight or dimensions .
So we'll we'll talk about shipping later .
We can link products up sales and cross cells .
So when we're on this page of this product , we can say , hey , if you buy this controller , maybe you also want to buy the super charger for the controller .
So and then as cross cells , if you add this to the cart and you view the cards , they can also show over here , what else do you want to sell ?
So if I would buy this add to the car , I want to build to the cards .
It says customers who bought items in your recent history also bought this .
So something like that can be shown over here when you use cross cells attributes .
We're gonna talk about later when we use variable products advanced .
Maybe when people buy this particular product , you can say , hey , enjoy , enjoy gaming on the PS five and you can change in many orders .
So um over here I have my card , I have multiple products , I can say which product should be on top .
I leave it as it is and I want people to be able to leave a review .
So I turn it on and there are more options , name or price , let's plug in .
So there are extensions that you can use , you can browse all the extensions .
But uh for now , this is perfect for me , everything I need .
Well , I talked already about short description .
If I want to , I can have my own review as an administrator , but I will talk about the reviews later .
Then there's the right area over here .
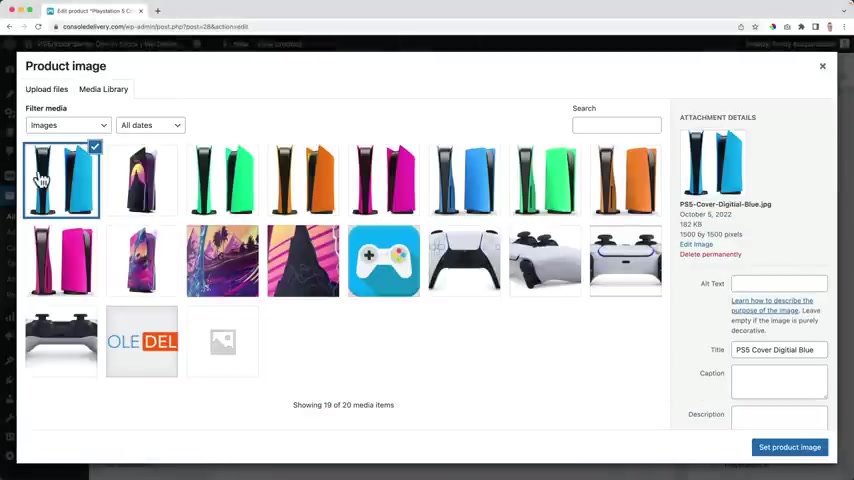
You can select the product image set , the product image .
Well , you can download this one by clicking here , save image fis and then rename it .
I will go to my computer console shop .
I have four images over here .
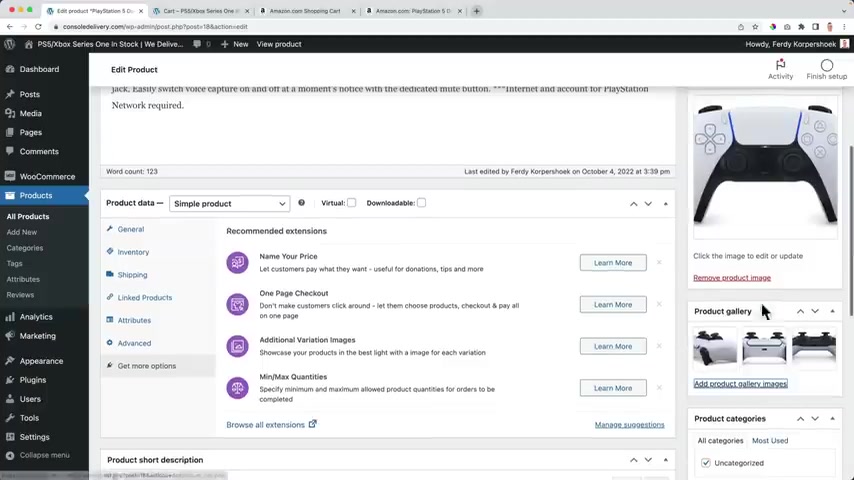
I opened them and then I said this one is the product image brother gallery .
I select all the other ones and I hold shift , then I can select those three and this will make the website look so much better because look at this , I see this image now .
So I go to the product now .
It looks like this .
It's starting to look better already .
So let scroll down a bit further .
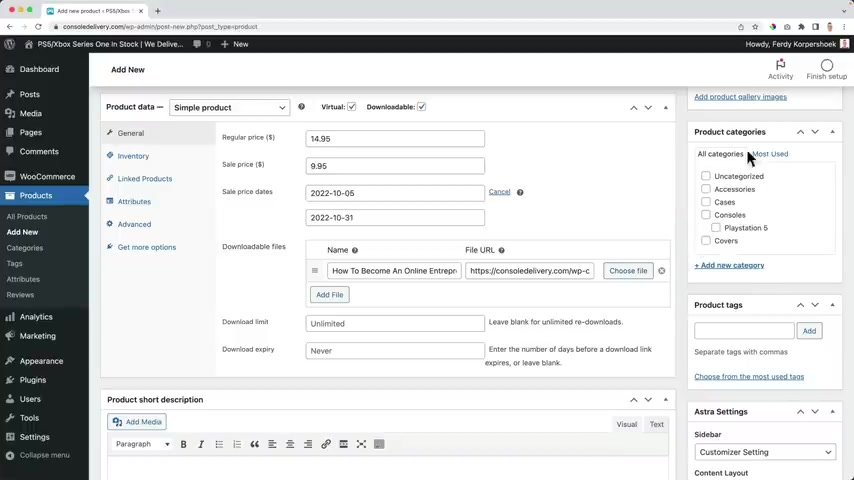
Let's talk about categories right now .
We have the category UNC categorized , well , that does not sound or look professional .
I uncheck it .
I create a new category , I'm talking about consoles .
So I create a category consoles .
They don't want to have a sub category playstation five , which is a subcategory of consoles .
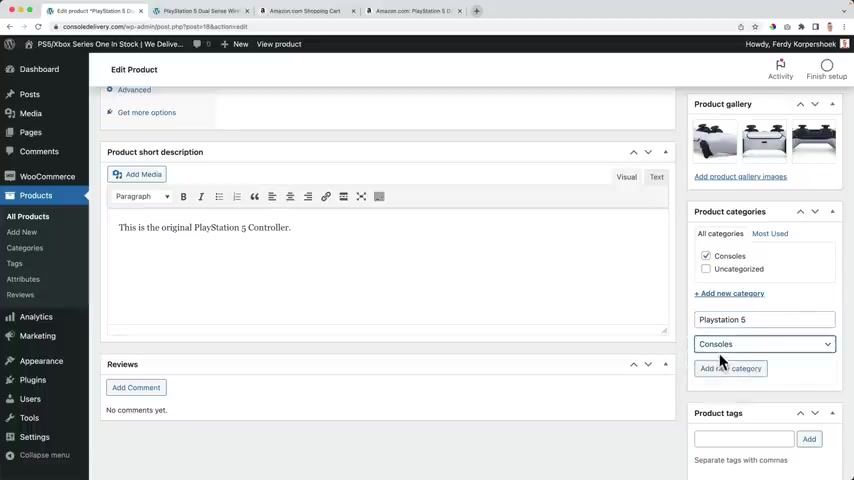
And in that way , I can create a beautiful structure in my website .
So I select consoles as my subcategory and look at this .
Now playstation five is a subcategory of consoles .
And I think this also falls in a different category which is accessories .
Sometimes I find it hard to write .
So I just copy it and go to Google , I get the right version , copy it and paste it , add the new category .
So I have three categories , two main categories and one subcategory .
And now if I would update this , I refreshed the page .
You see home consoles , playstation , five playstation , five tools and wireless controller .
And if I would go to one of these categories , I see all the products that are in that category .
So when I create a new product and I give it the category accessories , it will appear over here when I click on accessories .
So that gives uh your website a really nice structure and helps your visitors to buy the things they are looking for .
What else have we got here below , we have product text .
It works the same way I can create a text so I can say controller , comma space playstation five , Sony Wireless .
And if I click on I updated , I'll see the text here below .
Now , if I click on playstation five , I will see all the products that have the Tech playstation five .
So in that way , you have categories and tags that will help people to find products on our website .
So maybe somebody buys a playstation five for the first time .
He clicks on playstation five and sees everything he can buy the console , the controllers , the chargers , the headphones .
So that's a great way to uh create some structure in your website and it's all made possible thanks to Woocommerce , but over here we have extra settings .
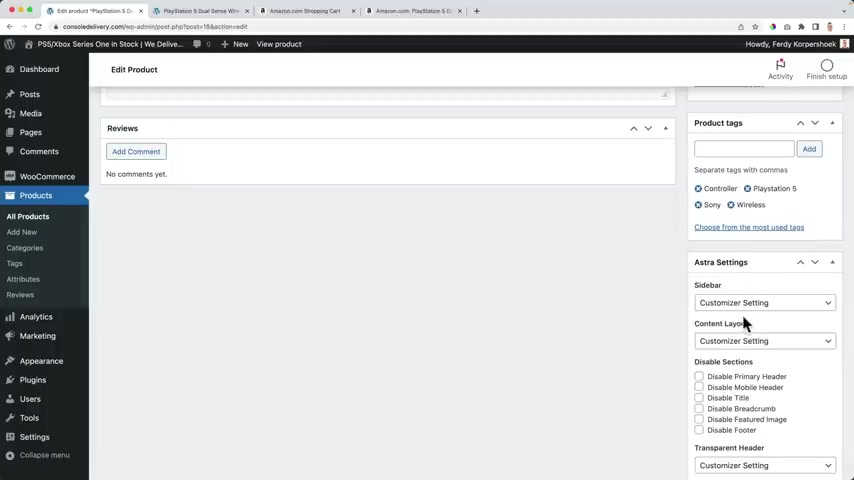
So maybe for this particular page , I do not want to have a heather .
So I disable the primary header , update , refresh and then it's gone .
So uh hey , it is possible .
So right now it looks like this .
We have our image , our still we can click over here and navigate through the images can zoom in , click here or here and zoom in we see the bread Crump , the categories , the title , the price with the discount , then the short description , the stock , how many products we want to add to the card , the SKU number , the categories , text and then the description , additional information and reviews .
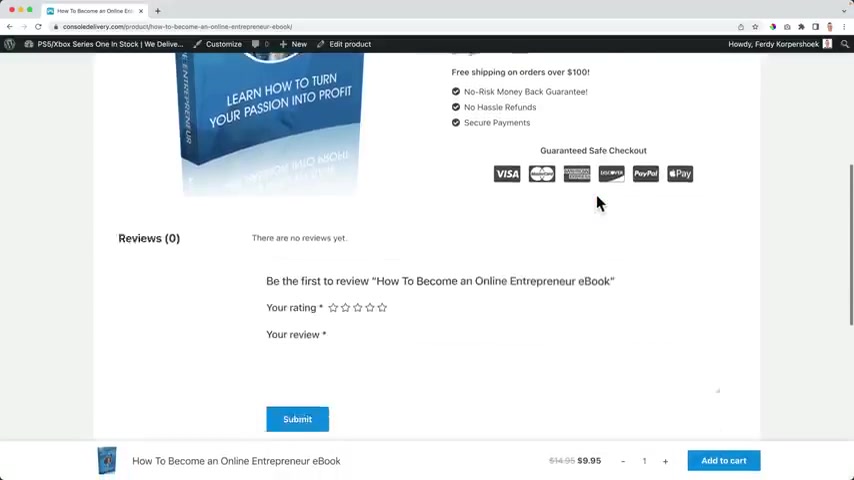
So let's talk about reviews and create one .
So I say it's five reviews .
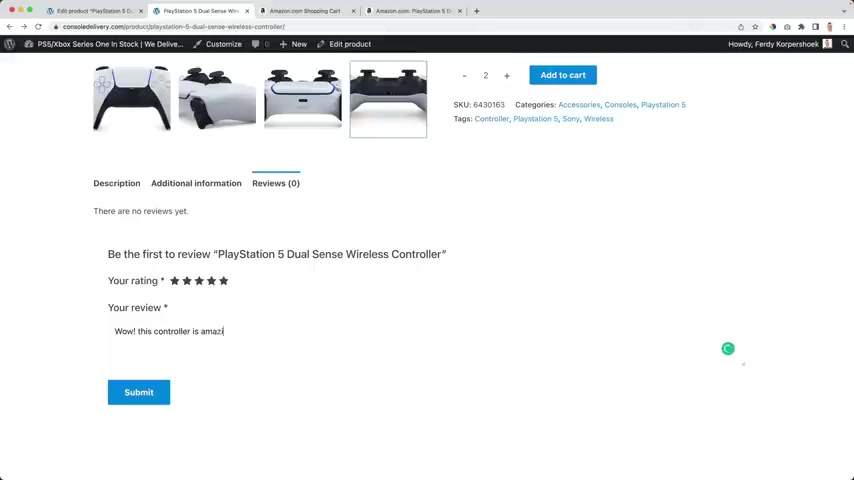
Whoa This one's all our , it's amazing .
It feels so good in my hands and I do not get sweaty even after gaming for 16 hours straight .
Submit .
And since I'm the administrator , it will be replaced immediately .
But now you see how it looks .
So if I would go to the console page , it looks like this .
I see it's a seal .
I can add it to the cart .
I see it from the accessories , the title , the amount , the star rating and then the price and I can add it to the card or I can click over here and then I go to the page .
So that's how it looks , but I can make it look better .
We'll talk about it later right now .
I want to have my icon over here .
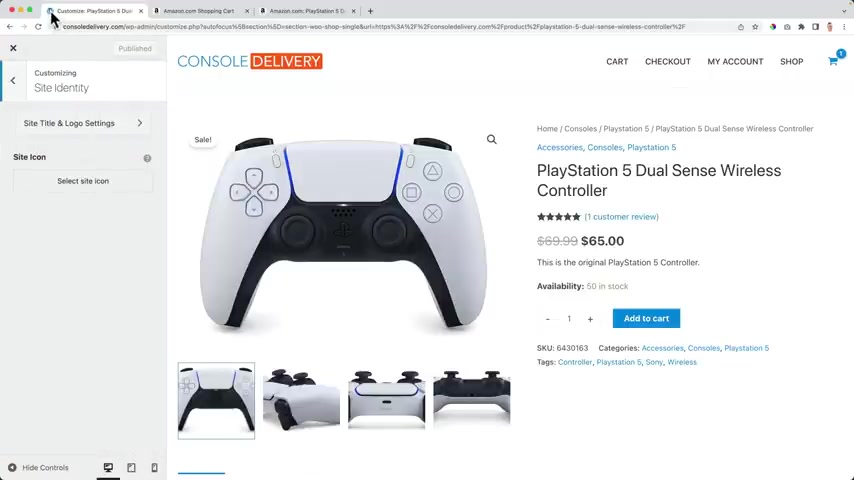
So I go to the customizer and then ultimately , I will go to all the settings about this page , but I want to go back and back , scroll down , go to site identity , select the site icon which will appear over here , upload files , select files and I go for my favorite I can , it needs to be B and G and it needs to be square and at least 16 by 16 pixels minus 200 by 200 .
I selected , I skipped the cropping .
Now they appear over here .
So if I'm in this step , I see here , I want to go back to my playstation five console website and then I can go there , right .
Go there at once .
Now we've created our first product .
We can change , look a few of the product page right now .
It looks OK .
People that know woocommerce , they immediately see this is definitely woocommerce .
We can make it look better using pro .
Let me show you right now how to do that .
So how to make this look better using S A pro .
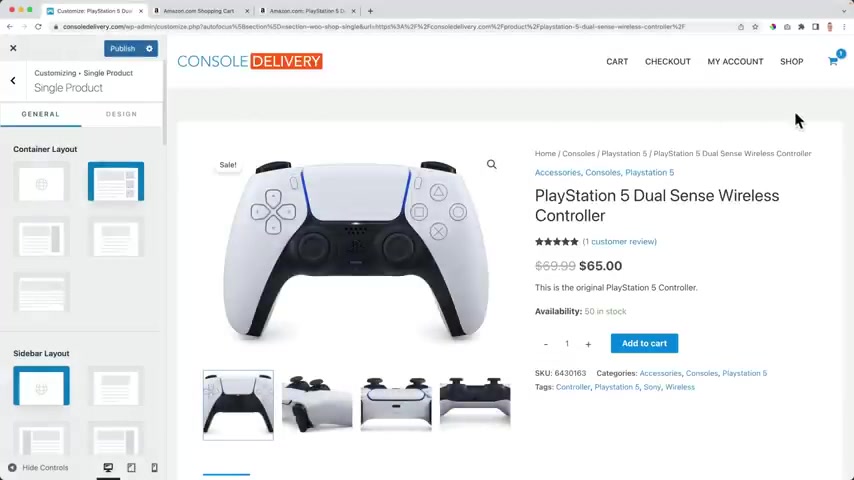
So I click on the customizer .
So what I can do , I can make this uh boxed .
So I have this area around it and I have to say I like it .
So I leave it with that .
I can also make it full with and contained .
That means if I make this website smaller , it stays within those areas , but it's full with , it takes all the width of this website , then there's also fluid stretched and then it will be completely from the left to right .
And that's what Amazon does .
So , if I go to this product and I make you watch it smaller , ok .
There , there is a boundary over here but it's really wide .
So when you make your upset smaller , it stretches .
But , um , I don't want that just then , I don't know , I just want , don't want it .
I can choose what I want .
So I like this one boxed .
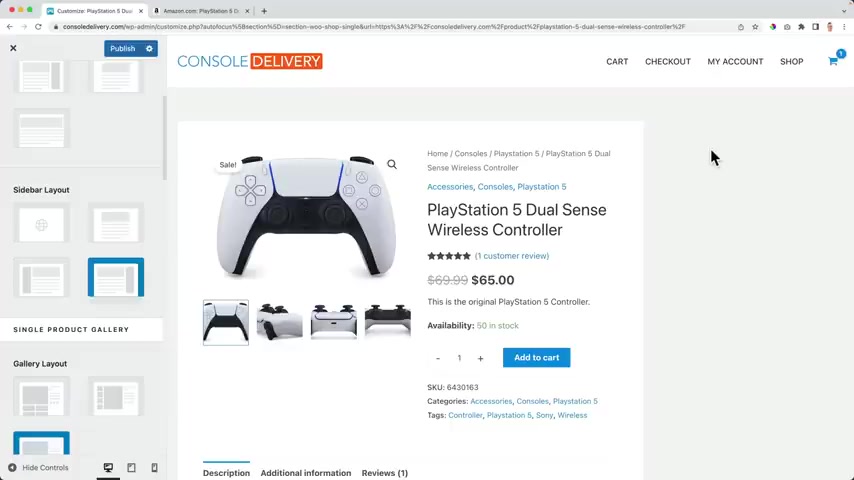
Then if I want to have a side bar , I can have a side bar and those cyber , which is well pair over here .
It can be , uh , most featured products , best sold products , filters categories , uh tag helping people to navigate through your website .
Well , if I take a look at Amazon , the focus is on this pro this product right now and here below it's a related product .
So I want to do that .
Uh , Amazon is doing a lot of work in order to make their website convert better .
So I like to stick with them .
No cyb bar on the product page .
And then we have the gallery over here .
And also here I can take a look at the different options .
I like it .
But if you take a look at Amazon .
They have this over here at the left .
I'm sorry if I say Amazon the wrong way , sometimes I want to go and do the same thing .
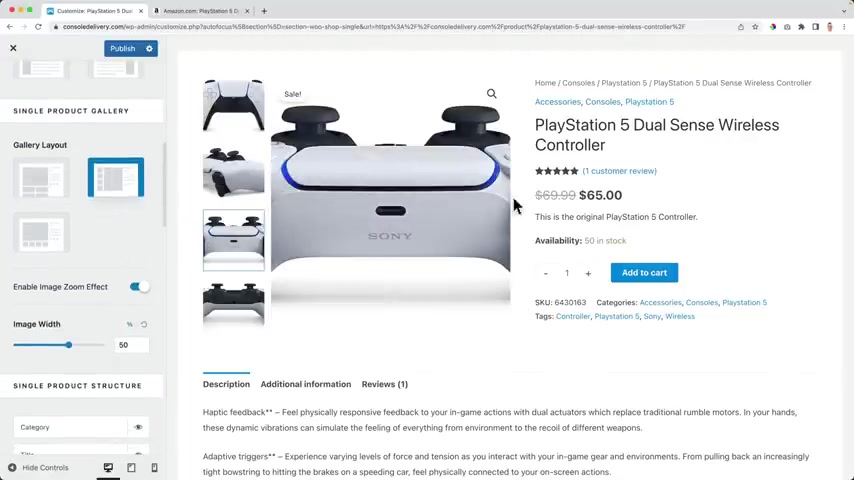
So the vertical slider just like this and I want to enable the zoom effects .
When I hover over it , I see , see it from close by the image wide right now or the width right now .
It's totally at the center .
If I make it smaller , there's more space for the text , less space for the image , I can also make this bigger and I bring it to 50% .
And then over here , what do I want to display first ?
Well , I want to display the title first .
So I bring that that to the top .
They also have that , then I want to have the categories , then the rating , then the price , you know the above I out of the short description that to the card button .
And if I see this , that means I can adjust a few things .
And then here I can change the button button with , I can say 100% and then we'll have the whole space .
But um I'm ok , I'll bring it back .
The more information .
Do I want to show this or not ?
If I do not want to show this , I turn it off and it's gone .
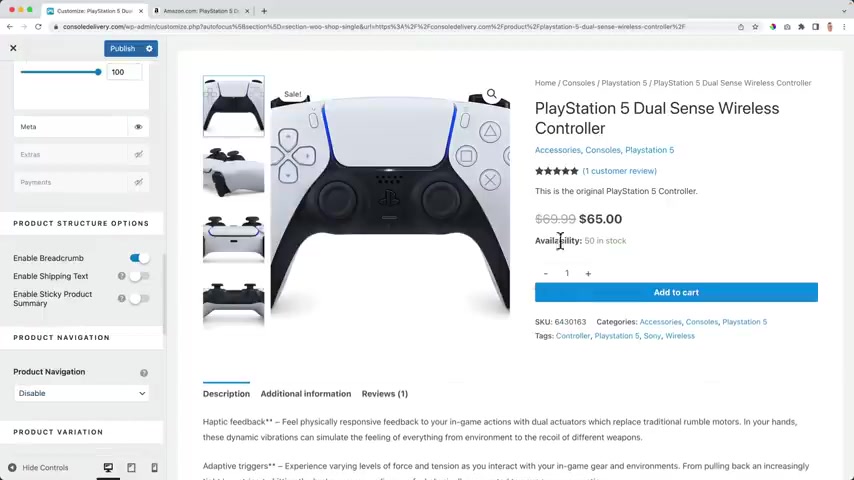
I want to show it and there are also some extras which can be really nice .
Look at this free shipping on orders over $50 .
So , what I can see from $50 and more , there's free shipping .
Well , let's bump it up a little bit to $100 because that will increase , the amount of people will spend on my website because people want to have free shipping .
There's no risk , money back guarantee .
Well , since I'm , uh , shopping worldwide , I wonder if that's a smart plan because then people need to send things back from all over the world .
It cost a lot of money .
So I wonder if I should do that .
But if you want that do that , if you don't want it close it , no hassle .
Refunds and secure payments .
Well , about payments , I can turn this on and I can say you can pay with Visa Mazar American Express .
If I turn this on , I can also show Baba and Apple Bay .
I also want to make it great skill because I don't want to attract too much attention to those scholars .
I want to have this as my big attention point .
So I make them gray skill .
Uh Maybe I don't use this discover or I only want to show that the most popular ones .
Yeah , this included great .
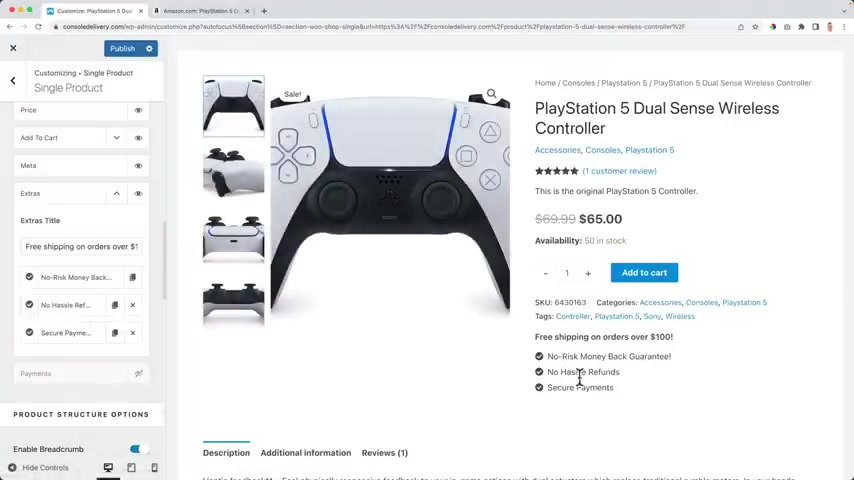
So enable the bread crumb .
That is this over here .
I want to turn it off then enable the shipping text after the text it says and free shipping .
Well , it's not the case because uh if people's uh order for just $65 .
There's no free shipping only when people pay more than um $100 and then they will sticky product summary .
Well , if I scroll down , ok , let me , let me go to the gallery , put everything below each other .
Look at this .
There's a little bit of space over here .
Ok ?
I cannot show you that well , but let me show you uh enable product sticky summary .
That means that this area will be sticky .
You see , it's a really small area because there's a lot of information .
But if I would get rid of , let me see if I would get rid of the product description and you see um extras the payments , then you see better .
It will stick with us .
So um that's what I want .
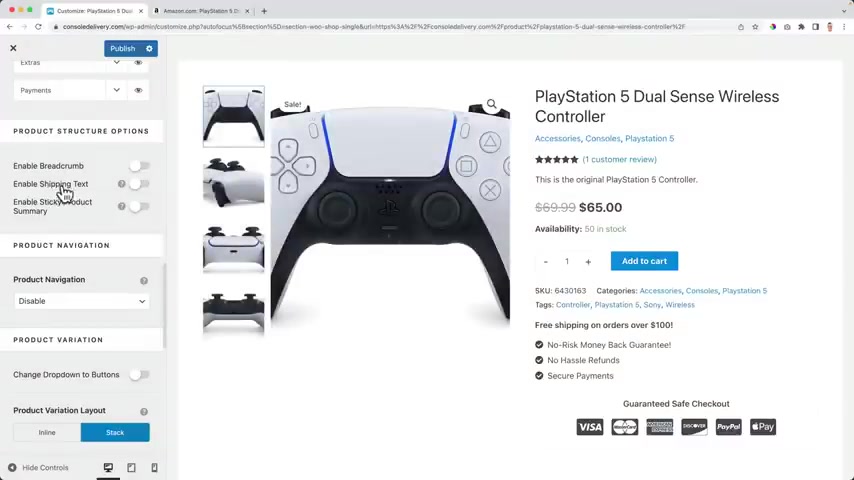
I want to turn these on and changes back to left area .
Ok .
Prog navigation over here , we can have prog navigation in a circle like that's so we can go to the next product .
But I , I don't want that .
I don't want people to go from a playstation five duo controller to a Nintendo switch because it's not relevant to them because they're searching for something about playstation five .
So I turn this up and hey , you can turn it on and if you turn it on , you can even turn on previews when you hover over it .
Only products and there's only one product right now .
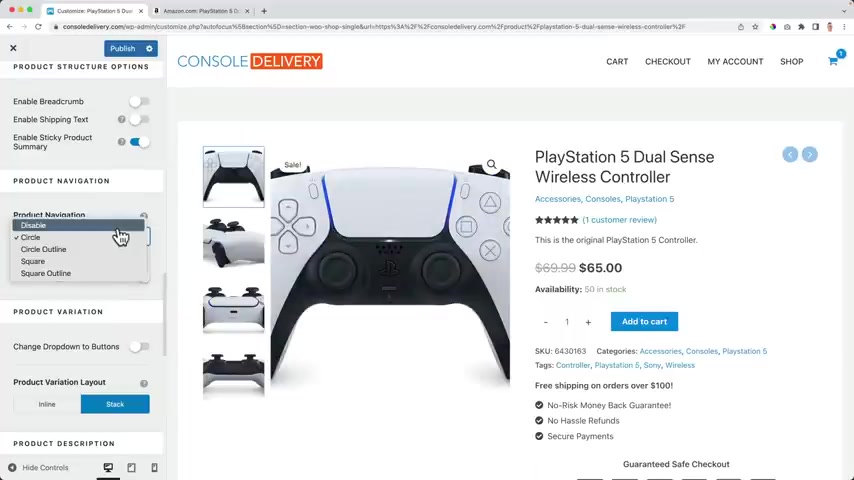
So you don't see other products , but I don't want it .
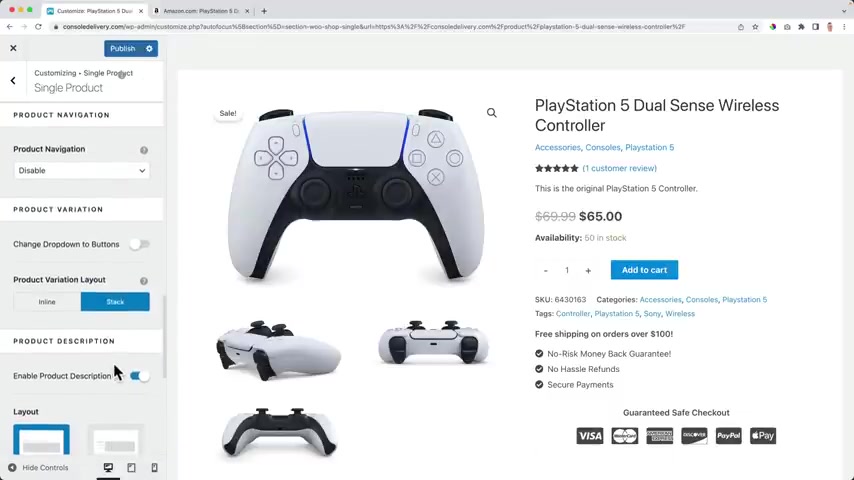
So I disable it and product variations .
We'll talk about it later .
We enable the product description .
There's everything here below and what I don't like is those steps .
It's just weird .
People don't want to click there .
So what I prefer is to distribute it , show everything like this , display up sales over here , display related products definitely want to do that just like Amazon , a lot of related products and the amount of columns for the related products , let's say four and also show four related products .
If you say eight , there are two rows with related products .
That's what Amazon does .
Maybe no .
But if you want to do it , you can do that .
We want to stick at two cards .

That means when we don't see the end of car E two card button anywhere on the page of the product , it will appear over here or at the bottom .
So it will disappear when I see the add to cart and when I don't see it anymore , it will appear over here .
So all the time people can click on the ear button .
I think that's a great addition .
So that's it for the product page .
We're gonna take a look at a lot of other settings right now .
I think this looks great .
People go to my website , they see a product and this displayed beautifully .
You can add it to the cards , they can view the card , they can view the card over here , get to Greece and into the car button , the description , they can pay safely , more , more information , reviews , people go at a rating .
So I think this looks great .

Now , we will create a variable product , a product with multiple sizes colors and now you'll start to see the power of vomer .
So let's create a variable product unless you really don't want to have a variable product on your website or maybe you want to learn it but you don't use it on your website .
Well , feel free to skip this part or to watch the part , just watch it .
It's better for the the the few time on my youtube channel .
And that will make this video go viral .
So please watch it , do it for me .
Even if you run away , go away , do something else .
Keep the video playing and please like the video because it's all about the algorithm of youtube .
OK .
Weird .
Let's create a variable products .
It's time to create our second product .
This time it's a variable product .
So I have over new click product .
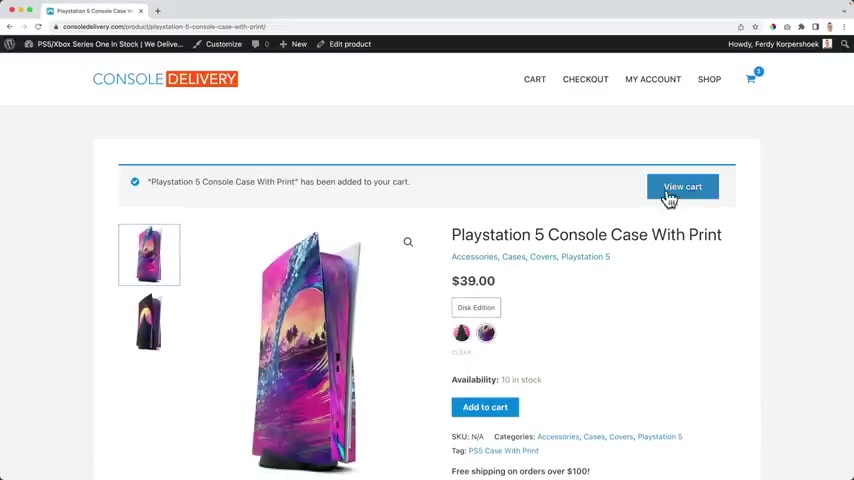
This time , we're gonna sell a playstation five console case .
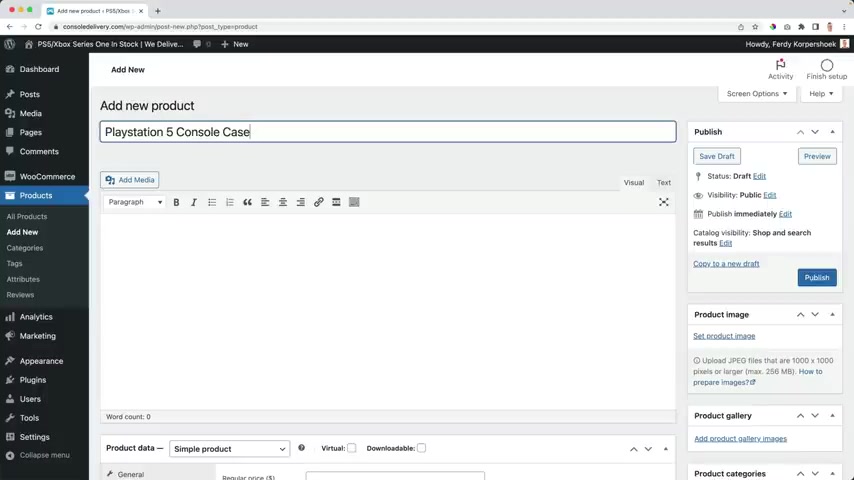
So not a console but a case , we can have different cases for the playstation five .
So you know the drill long description , short description .
But right now , I want to take a look at the product there at this time .
It's not a simple products with one version a gap or glasses or controller no , it's a variable product .
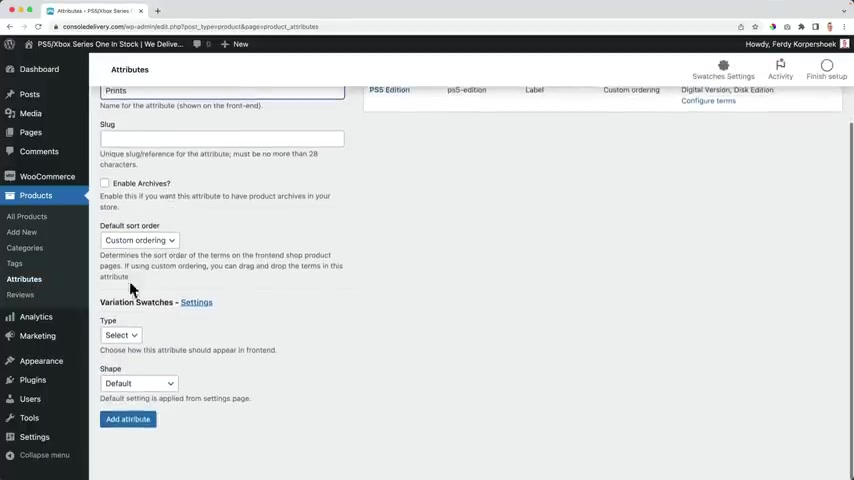
And instead of talking about the same things , I want to go to attributes and I want to work with attributes .
What is an attribute ?
It can be a color and then you can have multiple colors .
It can be a size and then , and you have multiple sizes .
It can be a certain edition , you can have multiple editions so we can create attributes over here .
But a better way is to go to products .
So let me save it first or update to products and then attributes .
Before I'm gonna create a new attribute , I want to download a plug in that will make everything look better .
All the attributes can be displayed as image label or color .
Maybe I'm overwhelming you like crazy .
Like what are you talking about ?
Let me show you step by step what we are talking about .
I go to plugins at new and then I search for boot commers , swatches and then garth flows .
There is variation switches for comers by card flows , install .
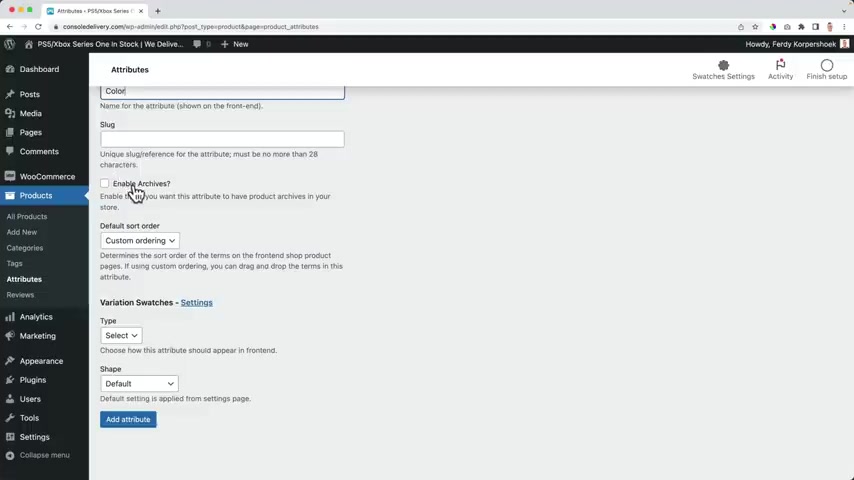
Now activate , then I go to products , attributes and now I create the first attributes and that is a color .
I leave this luck .
I don't enable this sort of archive .
The default sword order is custom .
And now over here , this is from the plug-in .
What kind of variation switch do I want to have ?
I can have a label that's just a simple text .
I can have a color and then I can select the color or I can have an image .
So let's start with the color and the shape I wanted it to be a circle and the size I wanted to be 36 because that's my age .
What ?
Really ?
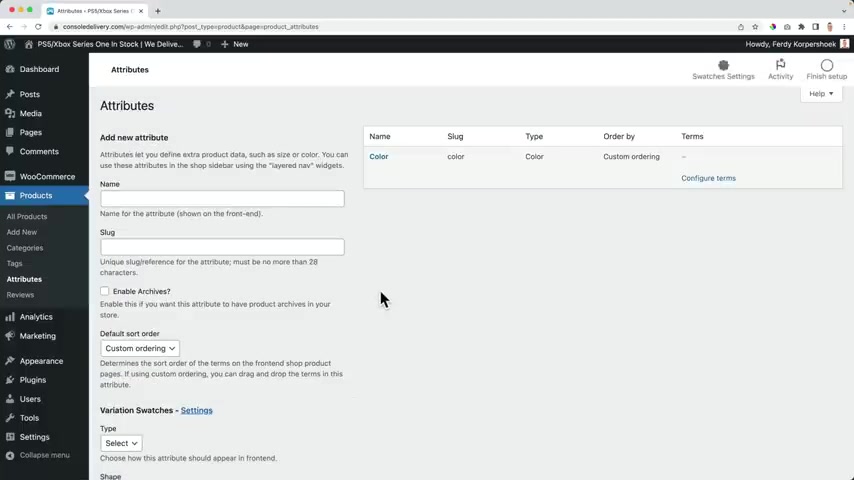
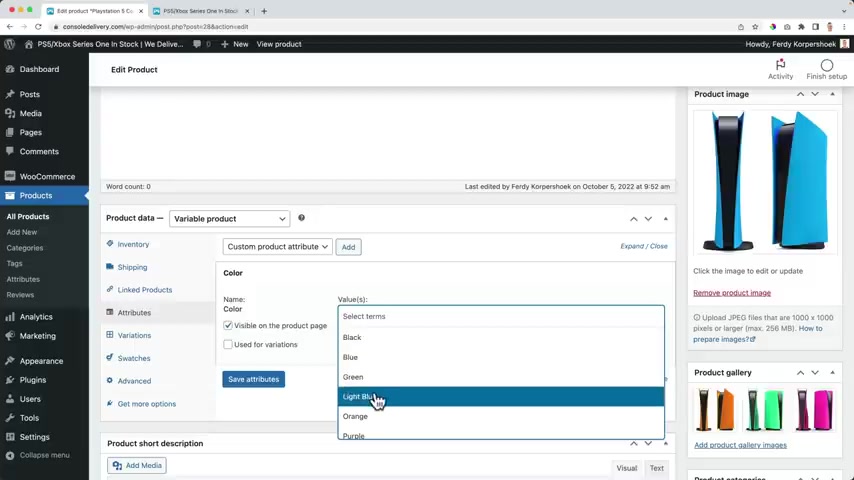
Yes , it is at the attributes and now I can configure the terms and I can create colors .
So let's start with black and then I select black over here , add a new color and then white .
And you can place here all the colors you think you're gonna use in your website , not only for a specific product for all the products .
And then at the product area , we can select the colors we have for our products .
So why let me show you what I mean ?
So here I say light blue because I have a light blue case for the playstation five .
And I grabbed this color , which is exactly the same color as the playstation case .
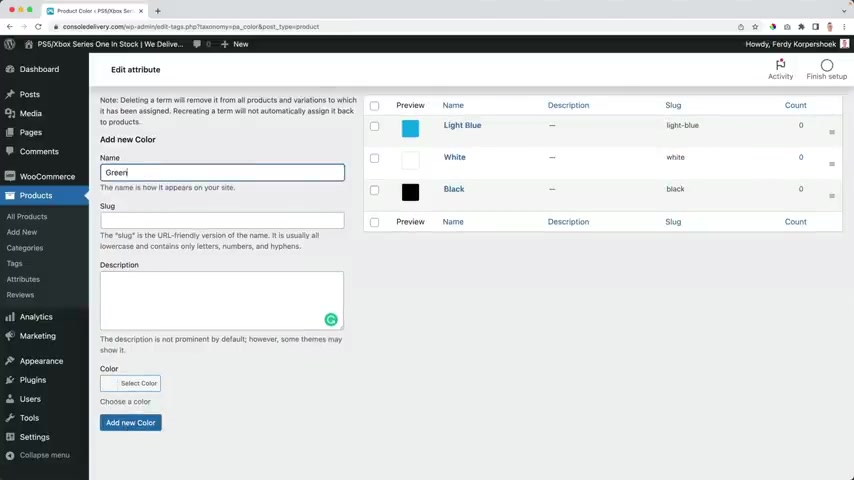
And I added that color next one green and the color next purple and then orange .
OK ?
Well , then I can add red , normal blue , I think for now this is a fine , OK .
Let's let's uh let's add yellow , yellow , great .
So this is a color swatch .
Then I go back to the attributes .
So with color , I want to have something else .
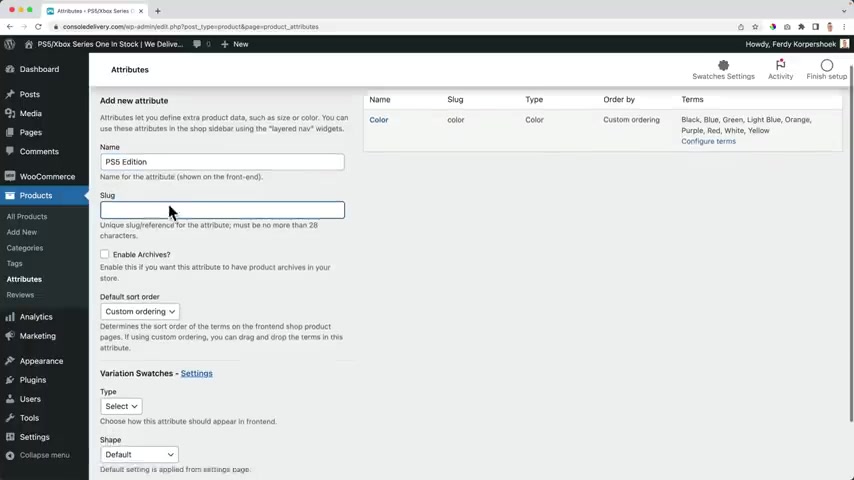
I say playstation five edition because there are two editions , this edition and the digital audition .
So the type and in this case is a label .
I want a label to be custom which is 36 and then this one , OK .
Also 36 at the attributes .
Now I configure the terms and I have two terms , the disc edition and people that know uh buy playstations and controllers and stuff in cases they know if they have a digital version or the disk version .
So the second one is the digital version .
That's it just a simple label .
And I go back to the attributes .
The third one we can have , let me call this Prince is an image .
So what people can do ?
People can click on an image and then see a variation , the shape .
I want it to be a circle of 30 six .
I can't make it bigger but let's try 30 36 edit .
So now if I configure the prints , I need to upload an image .
So the first one is mountain , upload an image , upload files , select files .
Is this a mountain ?
It's a palm tree .
This is the mountain .
So Prince two small square , the 63 by Tuna 63 added a new print .
And then the second print is palm tree .
I upload an image is one .

OK .
Add a new print .
Great .
So if I go to the attributes , we have three kind of kinds of attributes .
The first one is color , the type is color and you see all the colors .
The second one is image .
The third one is label and I can always change it so I can add new colors if I want to .
Now I go back to my product , I can go to the front end to this product or I go to the back end to book and and below products , I select a new product .
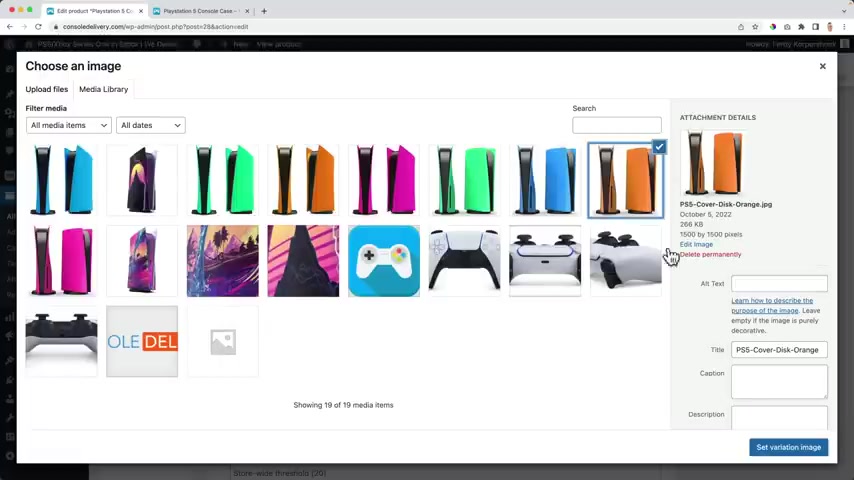
So let's go to the right area product , image , upload files , select files .
Let me add all these images and then the Mountain Prince and palm trees print and then this one .
Oh So I use this as my featured image and then be like kind of a gallery with multiple editions .
Great categories .
I can say uh covers our cases and it has to do with playstation five and accessories .
DEX PS five case PS five cover updates .
So if we take a look at the products , it looks like this , it is out of stock .
So let's talk about variations .
I go to attributes .
We've created three .
So I select the first one color and I click on add .
Well , I don't have all colors .
So I just select the colors I have over here .
So I have a light blue one , I have an orange one , a purple one and a green one .
I want to use it for variations and make it visible on the product page and I click on save the attributes .
Then I want to create a second variation or add a second variation .
That's the playstation five edition I edit and I select them all the digital version and the disc edition safety attributes and what I want to do now , I want to create a variations for all the options over here .
So I want to have a green cover for the discon condition , an orange cover for the digital version , a purple cover for both .
So I want to have a different variation for all the possibilities .
So there are four options over here .
Two over here .
That means that there are eight different options when you combine those .
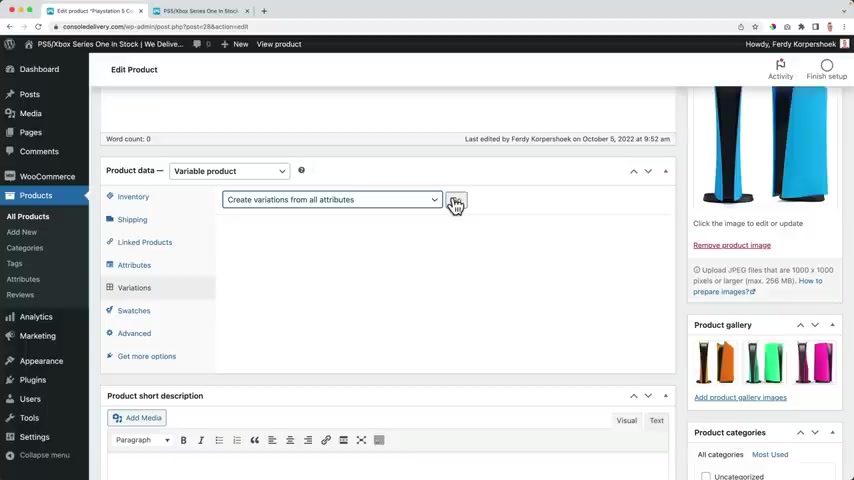
So I go to the variations , then I click on add variation and I say create variations from all attributes .
So now it's gonna create all the combinations which is a total of eight .
So I click on go .
I can have a maximum of 50 per run and it says there are eight variations , add it and now the fun start begins .
I can expand them all .
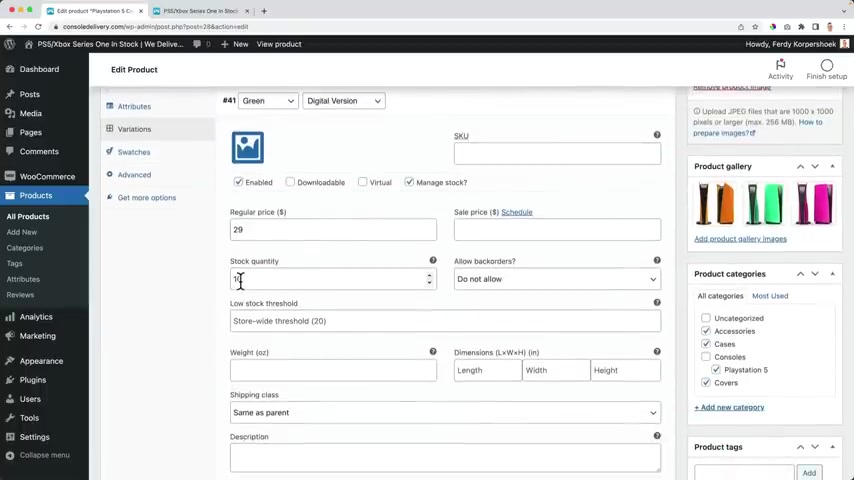
I want to set a price .
So I click on add variation .
I want to set a regular price , click on go and I say they should all be $29 .
But the disk version is a little bit bigger .
So it is a cost more to make it .
So I want that one to be a bit more expensive .
So I can expand this and all the digital or this versions .
I want to make them more expensive .

So 34 .
So the this version 34 34 and 34 .
And then over here I can save it .
Then what else I want to enable the stock ?
Because right now if I open this , it is not enabled .
So I click here .
I want to toggle manage , stuck .
Yes .
So now everywhere it is enabled and I want to set the stuck for everything .
Oh , wait stock .
I want to set it to 10 because I want to have a lot of stock of everything .
So now if I open this stock quantity of every variation is 10 , of course , uh only if that's the case .
So I have a total of 80 different covers .
I want to have that because I want to never run out of stock .
So I take the risk , I buy a lot of , of those cases and then I never want to run out of stock .
And if I see , hey , there are only three left .
I need to order new ones and then I can fill up my stock again .
Now now comes a nice part in my opinion .
If I uh update it and I take a look at this product , I have a nice image over here over here and I see the variation so I can have a live Blue playstation with a digital version .
And when I have the digital version , it's $29 .
But when I have the disc edition , it's $34 .
But if I go to the purple one , this does not change .
And I want this to change to the purple one .
So when I click over here on an edition , you see the result immediately .
In order to do that , I go to the variations , I open them all by clicking here and I see the green digital version .
So I click over here .
I see the green digital version .
The digital version has no CD , no disc area and the this version has one .
So I select this one .
I scroll down green disc , li blue digital .
So li blue digital , light blue disc .
This one uh you have to set it up once and I know it's , it seems to be a lot of work .
I like to work because I'm building a website .
I'm building my own web shop that can make me money .
So I like the process .
It can be that you think , man , it's a lot of work .
But I hope you can keep in mind that you're working on something amazing .
You're gonna sell things on the internet or maybe you're making this website for clients .
You're making money with that .
So either way , I hope you are making money .
I think that's something we all like to do and we can provide for the people we love for ourselves .
So I hope you can enjoy this process .
I always , I always like it just like I make like making these tutorials .
I don't know , I just like it now , ladies and Gentlemen , look at this , I refresh the page .
If I select a green edition with the digital version , look at this , it , it becomes green if I make it blue , become blue .
If I select a disc condition , I see the disc condition if I want to have the purple disc condition .
So look at this .
People see immediately what they are buying .
So that's what I really like about these options .
I can clear them .
And by default , people can select the orange one and then you see nothing and they like , hey , the website broken .
But you also always need to select uh both uh variations .
So in order to fix that because not everybody knows that we can go over here to the variations and say by default , we want to select the library version of the digital version .
So now it becomes even better .
I refresh the page and by default , the blue digital version is selected .
So now when I click on purple , I see the purple one , the orange one , the green one , but I want to have the green one for the this edition .
And now you see everything works fine .
And that's the great power of variable product .
When I learn pro products .
When I learned this , I think it was in 2013 , I was like , wow , this is so cool .
Now I can make websites for clients and I did , I just love it .
And if I scroll down I see this , everything seems to be so clean .
I , I really like it .
I know it's Vomer and Omer Can .
It's already 10 years old and they did not approve , improve a lot of things .
But with this thing and with the pro plug in , I think it looks really nice .
So that's what you can do .
Let me show you another example .
If I go to new product and I create a product , Golds , playstation Play Station five console case with print .
OK ?
So now again , a variable product , I go to attributes .
I select um the PS five edition and it's only for the disc version because I only have prints for the , the the disc edition .
I use it .
Save it .
Then the second one , this time I choose the prince .
Remember those are images .
I add them , I select them all the mountain and the palm tree and I use it for variations , save your attributes .
Then I go to variations .
I create variations from all attributes to a total of two , two very anxious .
And that's by default .

Hi .
Welcome back to the channel .
I'm tiny , and today we're going to talk about how to write a good resume to get the job that you want here in Australia .
I'll be covering everything that you need to know in detail , and I will give you tips that not many people are talking about .
So if you're interested , keep watching OK .
Before you start writing your resume and your cover letter , I recommend writing a list of all your transferrable skills .
What are transferrable skills ?
These are the skills that you gained in your previous jobs or any other volunteering work or during your studies , and these are the skills that you can transfer to another job .
For example , if you worked at a restaurant or at a cafe serving tables , you probably had to take customer orders .
Make them feel welcome .
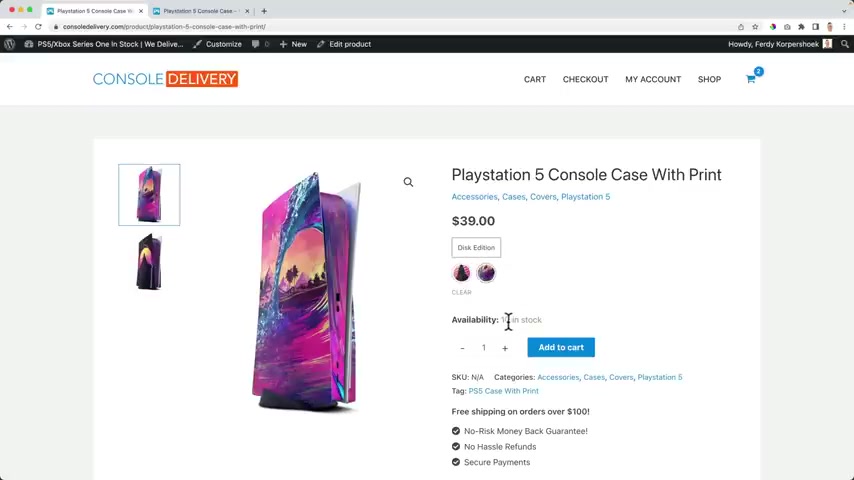
It's a playstation five cover and case PS five case with print .
OK ?
So now it looked like this and you all this one is selected .
This edition is the only edition we can choose and then I can select this one or this one .
They both are $39 .
And here we have 15 in stock and here we have 10 in stock .
If I want to make sure that people can only buy one right now , they can buy a lot .
But if I want people to only buy one , I can edit a product and I can go to inventory and say sold individually .
So I can only buy one per order .
I view the products , they can add it to the card but they cannot bite them .
So if I added it to the car and I view the card , I cannot say , OK , make it 10 .
Now I can only buy one .
So this is what you can do with variable products .
Oh This is also what I like .
Look at this over here , we see in the overview already the color .
So I can select orange in this version also here .
So in the overview in the on the shop page , we can see those options and I think that's really nice and we're gonna talk a lot about this layout later because we can make this look so much better .
But right now I'm happy with these options .
So that's how we can create a variable product .
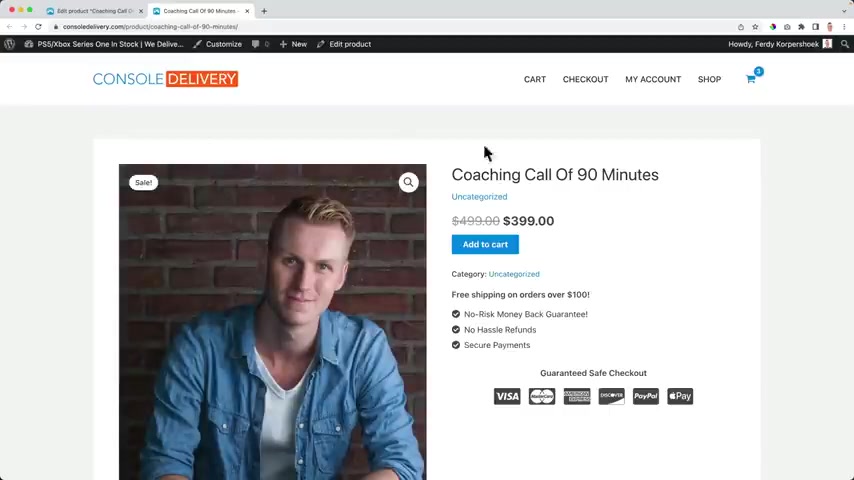
You can also create digital products within workers like a coaching call or a ticket to a event to an event .
So let's dive right in .
OK .
Next product , new product , I'm not gonna go through all the options again because I covered those already .
In other words , this job allowed you to develop good customer service skills , and these are skills that you can transfer to any other job .
For example , a sales job or a job as a receptionist or any client facing job .
OK , but how do you identify your transferrable skills ?
You just need to use your memory try to remember all your previous jobs and try to write down all the different tasks that you were responsible for .
Try to remember if you had any challenges or problems that you had to deal with while you were at that job and think , if you gained any skills that could be transferred to another job , that is customer service skills , teamwork , skills , leadership skills , communication skills , you name it OK .
After trying to brainstorm all your transferrable skills , you feel that you still don't have much work experience or any of these skills .
And my recommendation is to use Microsoft Word templates because they're really good and they give you a really nice structure to get started .
Let's jump on the computer .
I'll show you OK , As you can see in the first section , you need to write your contact details such as your name and surname , your address , your mobile number , your email address .
Make sure that this is professional and it's not a crazy email .
You're linked in URL and your work rights .
That is your visa type .
What visa do you have here in Australia ?
OK , and the next session is your career profile or objective , and this should be 3 to 4 sentences no more .
The purpose of this statement is to briefly introduce yourself , mention how many years of experience you have and the skills you can bring to the role Focus on soft skills , that is , your communication , your customer service .
Let me give you an example .
You can introduce yourself by saying , I'm a recent marketing graduate with two years of experience in the hospitality industry in client facing roles , which allowed me to develop a high level customer service and interpersonal skills .
If you're a graduate , this could be a really good example .
If you are applying for higher level jobs , maybe you can write .
I'm a professional with four years of experience in the real estate industry , which has required excellent interpersonal customer service and analytical skills , you know what I mean ?
So it's about briefly stating What skills can you bring to the role ?
Sometimes in this section , you can also add the type of company that you're looking for .
For example , if you want to do a career change , you can briefly explain in this section .
What do you want to change careers ?
You can clearly explain what's your purpose and what you want to do .
Always remember you need to sell your skills .
You need to show that you can add value to that company , so tap into your strengths .
And don't say I don't have enough experience .
I'm not good enough .
You have to say I can transfer these skills and add value to your company .
But warning please don't use cliches or words .
What are these ?
For example , I'm a very detail oriented person with a creative mind .
I'm very open minded with a strong work ethic .
I I'm real No , these are shares that don't really say anything .
And if you really want to include a statement like this , you need to make sure that you are able to prove that you are all those things .
So my recommendation is not to include them and only include the key skills that are relevant to that specific job .
And this comes down to my main point .
You need to tailor your resume to the specific role and company you are applying to .
What does this mean ?
It means that you need to use keywords that match the job description .
Why is that ?
Because many employers scan job applications using automated systems based on keywords .
Let me give you an example .
Look at this job .
A .
They want a candidate who knows Ms office .
So when you're on the skills section of your resume , instead of writing Microsoft Office or MS work , you should write MS office exactly the same as in the job app .
Another example .
They want someone who has an interest in the solar industry .
So if you have experience or knowledge about the solar industry , you need to make sure that the word solar is on your resume and in the skills section , you need to make sure that you highlight and you emphasise the hard skills or technical skills that are relevant to this specific specific job that you are applying to .
What's the difference between hard skills and soft skills ?
Soft skills are personal qualities such as good communication and customer service skills , whereas hard skills are technical knowledge and capabilities that you have for example , your computer skills or your ability to use a specific software .
So in the skills section , for example , you use your hard and technical skills .
You can indicate the type of skill that you have and the level OK .
This leads me to the Work Experience section , and this is one of the most important sections of your resume .
In this section .
You should include all your work experience , including any volunteering or internship opportunities .
You have done this your work experience in chronological order from present to past that is the most recent .
First , you should include dates from and two in month and year .
You also need to include the name of your role or position .
Title the company , name the city or country , and you need to list all the experience you have from your country or region as well .
If that's relevant to the job .
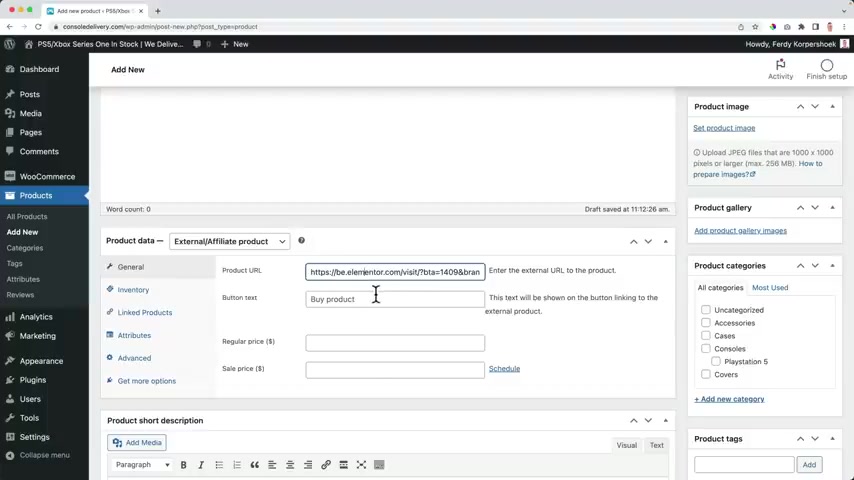
So if I go to the forest , all those products over here are all affiliate products .
So when people buy this through you , you get a commission so you can use all those themes , place them on your website , uh link people to your affiliate links on the forest .
Now when people buy it by clicking here .
This is my affiliate link .
When people buy this , I get a commission .
So that is a fitted marketing .
If I go to 30 Corp 30 Corp dot com , I don't use it anymore .
But and I go to resources , look at this thing .
So I click over here more details .
And when people buy this , I get a commission .
So that's how it works with affiliate marketing .
So there is the sixth products we can create .

Also use dot points to list your tasks and start your tasks with a verb and in past tense , especially if you are no longer working there and mention any achievements that you have accomplished .
For example , if you worked at a fast food restaurant and you were chosen employee of the demand , you need to include that .
Check my example here .
Crew member , Fast food restaurant You .
You would have the name of the company .
Here you have the list of your tasks , and then your achievements was elected employee of the month for my ability to process orders in a quick manner without compromising quality and ensuring customers remained happy .
You see what I'm doing there ?
You're basically highlighting your achievements , and you need to think about that .
If you were recognised by your manager if you got a promotion , even if it was a small recognition , you need to show the employer that you have those skills and that you were valued in your previous jobs .
And if you have metrics , that is achievements or results that can be measured .
That's so much better .
Usually , this is not necessary if you are just starting .

That is time of work .
People may take a gap year to travel overseas volunteer work on a person project or study something else .
So if you do have a gap in your resume , I recommend including that year on your work experience and briefly explaining what you did during that year .
And if you can come up with examples of any transferable skills that he gained that is going to really add value to your CB , OK , and the next section is your education or qualifications .
Here , you need to list all the degrees or certificates you have completed from most recent to oldest and include the name of the qualification and the name of your institute and university , the country where you're on the trip that degree and your start and completion dates .
You can also include your GPA or final average or the name of your final thesis , OK , and then we move on to other sections where you can include rewards and recognitions .
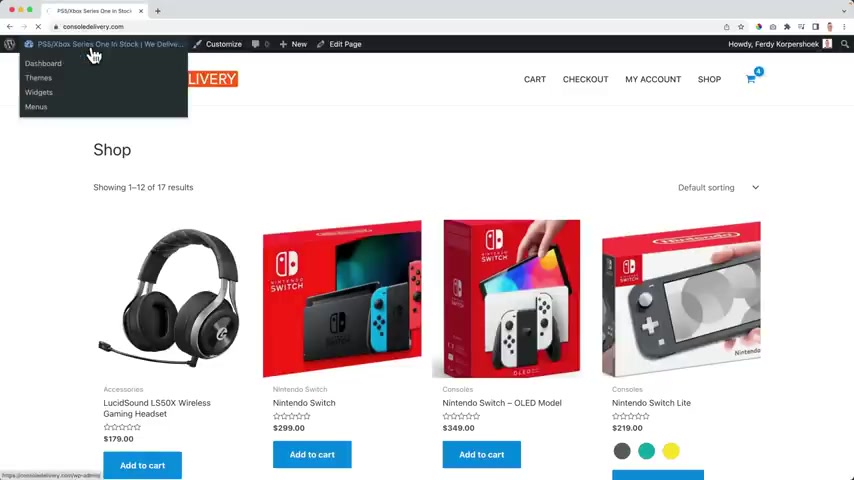
If you want to add these products to your website , go to the back end of your website , go to products , all products import , choose a foul , then go to images , tutorial console shop and select console products dot CS V .
Click on open and then continue and import all that stuff .
And you should be good to go since we have quite some products in our website , I want to talk about up sales and cross sales .
What are they ?
And why do they appear in your website ?
Right now ?
I have this product over here and it has the category consoles and playstation five .
So here below , I'll see related products .
Why it also has something to do with playstation five .
So I can have four related products over here .
So that's the first thing .
The second thing is I can edit the product .
I can scroll down , go to linked products and I can have an up sell .
So if I sell this playstation , I can say , hey , maybe you want to have an extra controller .
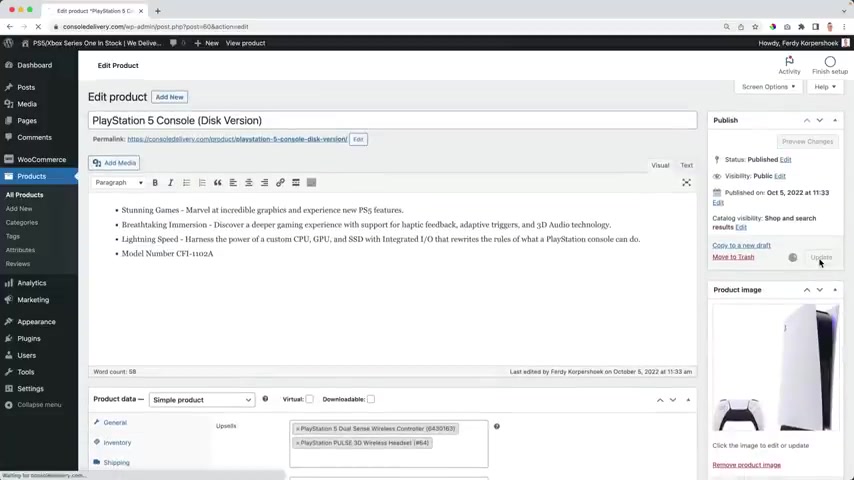
For example , If you received a scholarship or an award for university project or if you published a paper in a well known journal article , you should include all those achievements here as well , because it makes you stand out from other applicants .
And , of course , you can include any extra curricular activities or interests that you have .
But be careful .
You should only include this if you think that it's relevant to the job that you are applying to , and if you think that it can help you stand out .
For example , if you're a recent graduate and you were the leader at your local sports club or a university club , this shows leadership skills that could be relevant to a graduate job .
Or , for example , if you are applying to work at a company that manufactures bicycles and outdoor equipment , you might want to mention that you cycled for three months around Europe and that you love hiking .
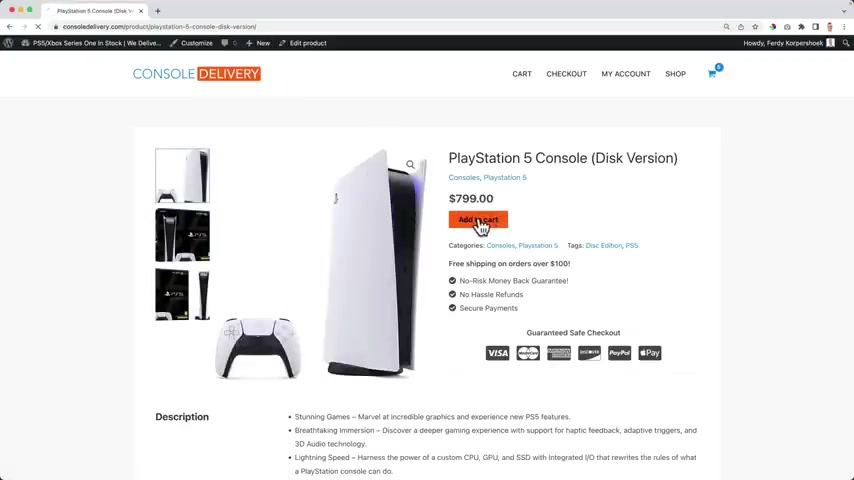
If your passions and hobbies align with the company's value and the company's services , it could mean that you are a good fit , and that's a positive sign , and employers want to see that .
Another example is that if you love going to conferences and industry events for networking or keeping up to date with the latest about your industry .
This also shows passion for your job , so yeah , definitely include that .
But again , make sure that it looks professional and make sure that it's relevant to the job that you are applying to .
Otherwise , don't do it OK , and the last section is references .
I recommend creating a title and writing references available upon request .
Why is this ?
Because employers usually ask for references after the interview once they are prepared and ready to give you a job offer , and not before that .
So I wouldn't recommend putting your references contact details on your resume because this is a waste of space and it doesn't really add any value .

Also , if you're putting someone as a reference , make sure that you have their permission and that you give them a heads up and let them know that you're applying for this specific job and that you want them to be your referees .
And your references should be a manager or a supervisor or , for example , a teacher .
And it doesn't matter whether it is a supervisor from volunteering work or from your paid work as long as they are not a family member or one of your friends .
OK , and my last point .
What things you shouldn't include on your resume .
Any personal information such as your photo , your age , your gender , your marriage status and whether you have Children or not .
These are things that don't add any value to your application , and it's not common practise here in Australia .
Why is that ?
Because if you put a photo of yourself , this can lead to someone to judge you based on your appearance or any other personal factors instead of your skills .
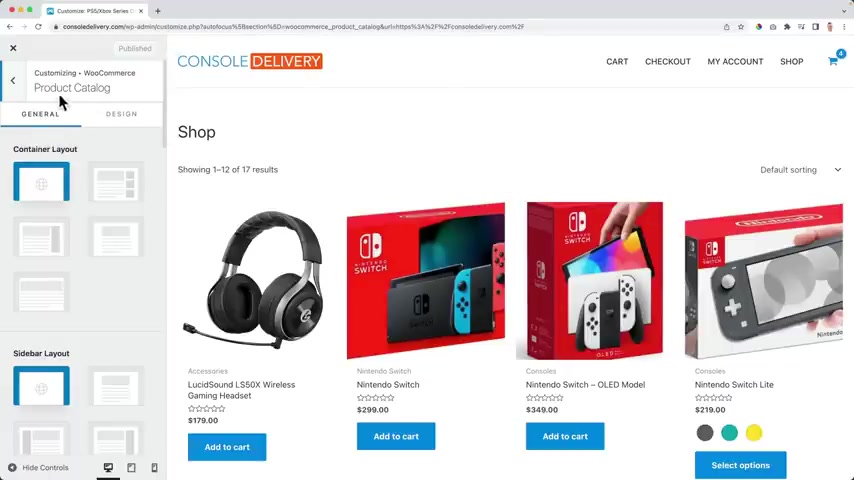
I know that this is very common practise in some countries , but not in Australia .
So please don't bonus step .
Have someone to proof .
Read your resume and tell them to give you feedback .
Is it clear ?
Is it professional enough ?
Are there any spelling mistakes ?
I highly recommend using this tool called Gramma .
This is not sponsored by Grammy , but I highly recommend it because it's a really good free tool that allows you to automatically correct your spelling mistakes and grammar .
Use it OK , this is all for now on how to write a resume .
I have another video on how to write a cover letter .
Check that out .
I really hope these tips are helpful to you .
If you want to show your support for the channel , please subscribe .
And like the video , this really helps me make more content for you .
And also , you'll get a notification when I publish new videos .
Um , that's it for now .
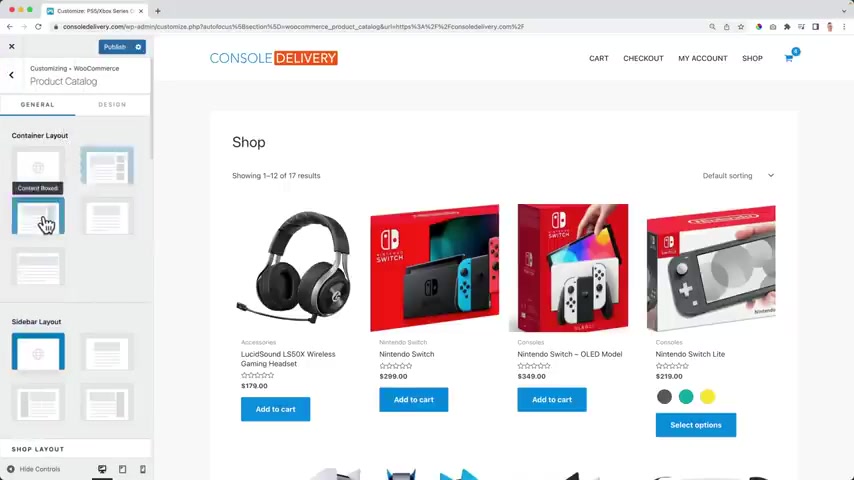
Then I go back , go back and I go to the settings product catalog and then we continue , you can also stretch the website like this .
If I make the website smaller , this will still still be full with , well , I stick with the boxed version and if you have a sidebar , you can choose the layout .
I don't use a sidebar , my shop page .
So I leave it like that .
Then there's a shop layout right now .
It is displayed like this .
I can change it to design one .
I don't see any difference .
I can change it to design three .
I definitely see a difference over here and this is the version .
I prefer , not just kidding .
I like design two .
When I hover over it , I see this , I can add it to the cards .
And when I go to design one , I don't see that .
So I just choose design too .
How many columns do I want to have ?
Well , I can have six , I can have one and I choose three and there it is .
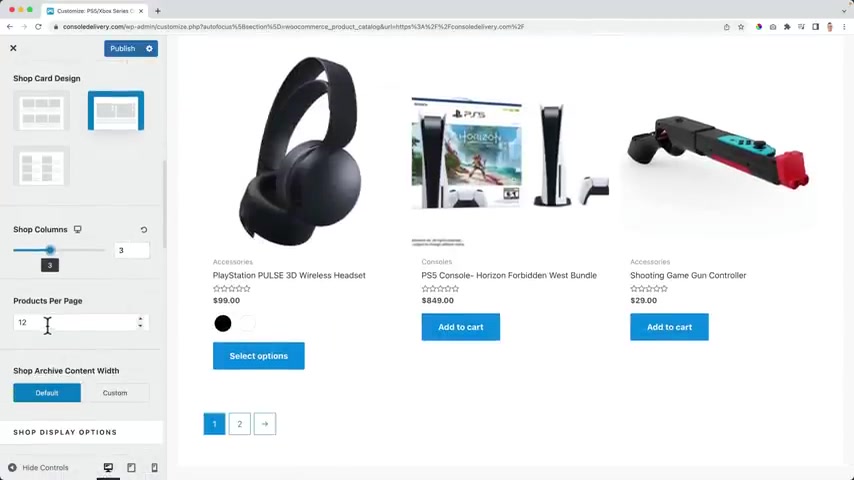
How many products do I want to have per page ?
So right now I have 12 and after 12 , I can go to the second page or what I can do .
I can say uh for instance , nine .
So now , now I have nine products and I can go to the next page or I go for an infinite scroll .
In order to fix that , we need to scroll down a bit all the way .
And then there's a shop right now , we can go to a different number .
I like infinite scroll .
And well , I'm scrolling more products up here .
So I scroll down and when there are more products they will appear over here right now .
They don't because I'm in the editing mode .
Let me publish it .
Let me scroll up again through the settings where we were nine products .
And when I scroll down , let me show you more products will appear .
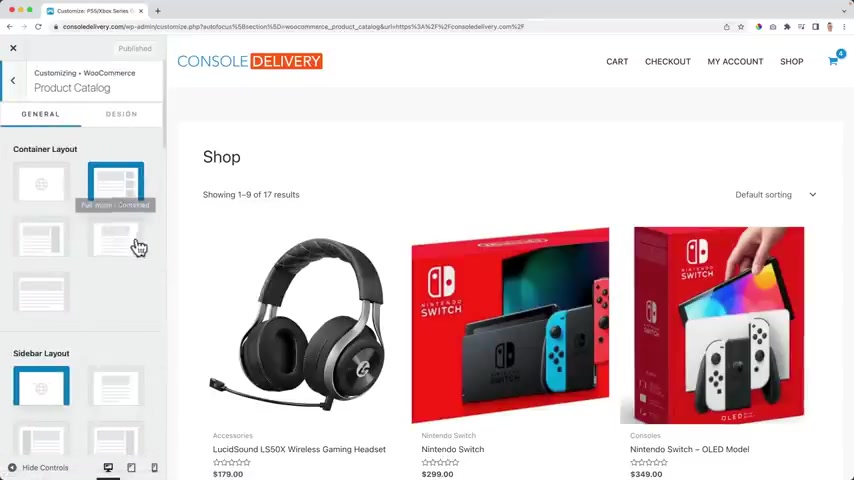
So I scroll down there .
They are automatically how great is death customize .
And then automatically we go back to that product catalog configuration settings .
I scroll down the shop , archive them with , I can make it smaller if I want to .
So I can bring it down like that's but I prefer to have the default width .
This one .
What do I want to display over here ?
Well , of course , products I can say categories but I don't want that .
So I say products also on the category display .
So if I would go to a category page with all the products that contain this category , I also want to show the products and the default products sorting it is custom ordering plus name .
It is this one .
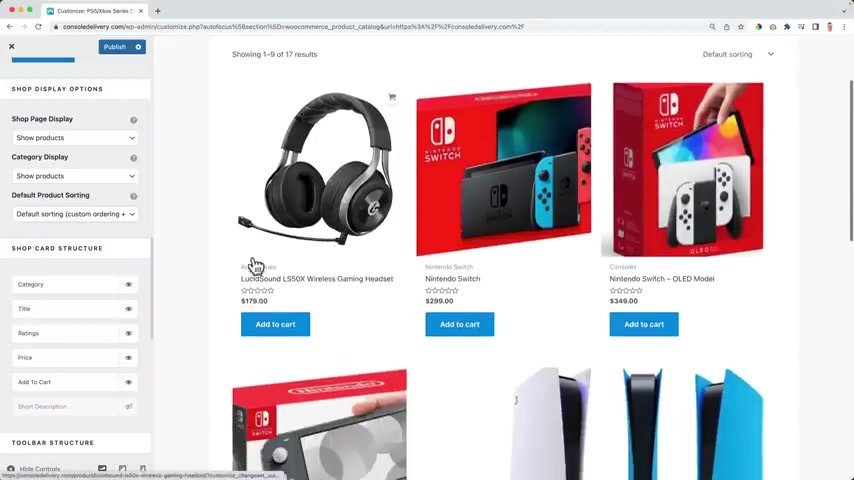
So which one should be shown by default ?
So I can also say by default , the most expensive products should appear this one .
Then this one , this one , et cetera .
I prefer the default sorting and then people can choose to change it .
What else over here ?
I see the category first , then I see the title and if I uncheck this the title will be gone .
Well , I want to show the title .
I do want to show the ratings and I want to show the price .
I do not want to show the two car button .
So I turn it off because people just need to click over here in order to go to that product page .
And if people want to add it to the card , they can click over here when they hover over it , they will see it great .
Then there's the two bar structure .
That's this area over here .
Do I want to have the results counts ?
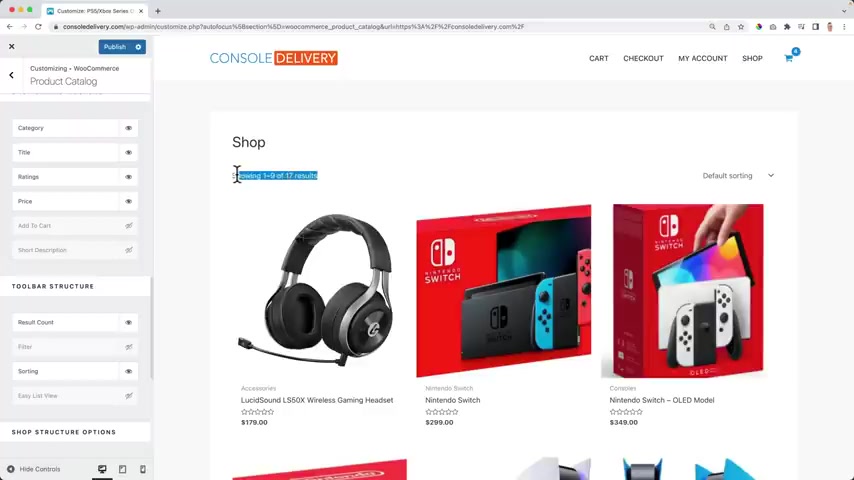
Well , if I have a small website , I prefer not to do that because I think only 70 products .
So , no , thank you .
I don't see the value of that .
What needs to be refreshed ?
Uh Do I want to show a filter ?
Yes .
So there will be a filter .
We need to configure it .
Do all the sorting .
If I turn this off , it's gone , I want to turn it on .
And what I also like is the easy list view .
If I turn it on that means that people can watch this in a list view like that , then they can decide how many columns there should be .
So if I would say one , I go to list view , it's will display like that .
I like that .
So uh let's make it too .
And then to the other settings , do I want to show that this is a shop ?
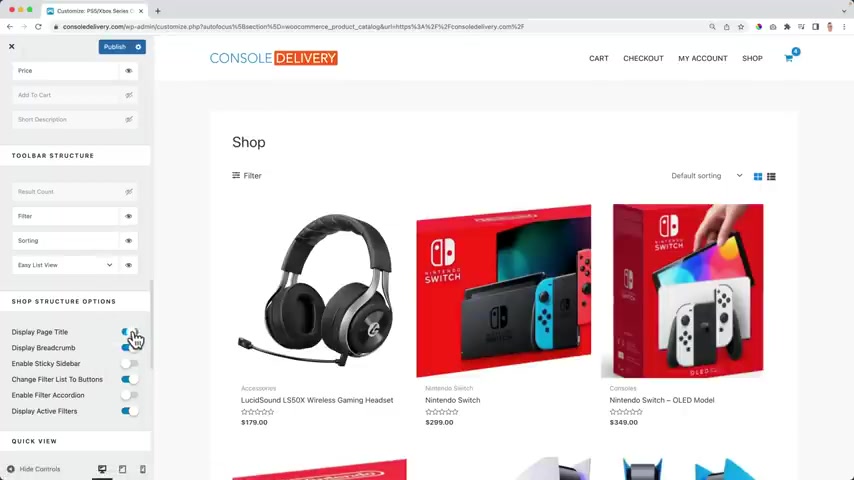
No , I don't want to show the title .
So I removed that .
Do I want to display the bread crump that ?
Then you would , uh , if I go to ?
Ok .
So if I would go to this page and then do the category Nintendo or a deck , then it'll say where we are .
If I turned it off , it's gone .
Well , I want to show its and people know where they are .
And if I would have a sidebar , do I want my sidebar at the right or at the left to be sticky ?
Well , I don't have a sidebar but hey , if you have one , you can choose it over here .
Enable the filter accordion on right now .
If I click it appears over here , that means if I click on the filter , it will open over here instead of here at the left , I'll show you in a minute how to configure this and display the active filters and I keep it on .
I'll talk about a filter in a minute .
There's also a quick view .
That means if you click over here , you see a pop up with the information .
Make sure it appear when you click on the image .
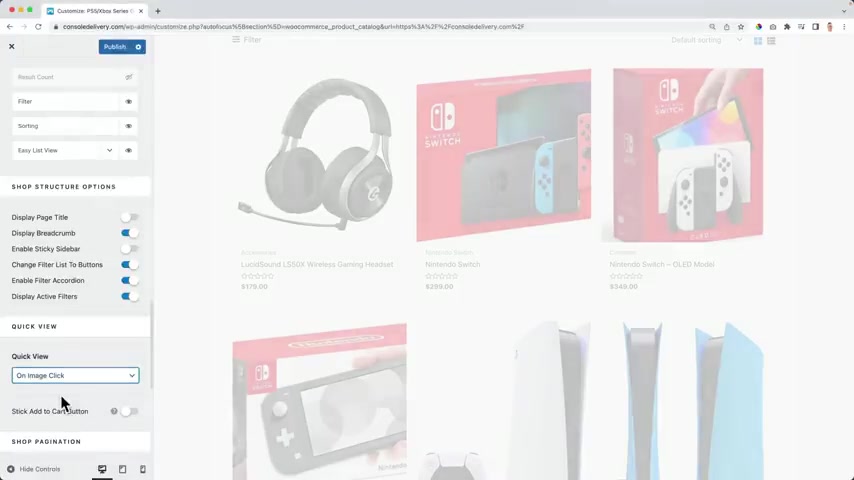
When you click on the image .
For instance , then you can have an add to cart button .
So let me publish it and close it .
Now , if I click on the image , I see a pop up and I can add it to the card , view the card .
Let's go back to the home page .
So that's an option .
I prefer not to do that .
So um I scroll down all the way and I turn it off or I disable it .
Well , we talked about the infinite scroll even to trigger infinite loading .
You can click over here and load more products or when I scroll automatically , all the other products will appear .
That's why I prefer the shop filter button right now .
It's a link .
I can make it a button and it gets more attention or I can create something custom .
But I like the link .
I want people to focus on this area .
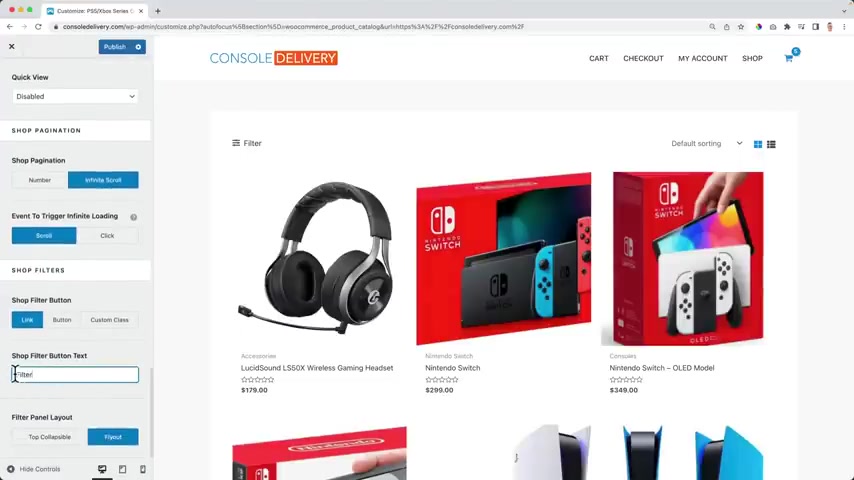
Not on the filter , the text , I can also say filter by price and then I can only have the option to filter my price .
Uh Is the flyout or should it be top collapsible ?
Oh , I prefer that .
So it will appear over here .
Well , there's no filter yet .
In order to fix that , let's go back .
Let's go back and then go to widgets and I go to the shop filter widget .
I click on the plus and I click on browse all and I search for filter and in my case , I want to filter by rice .
Let me publish it .
Now .
If I click over here , I can say I want to spend a maximum of $500 .
So I don't see any product that is more expensive than $500 .
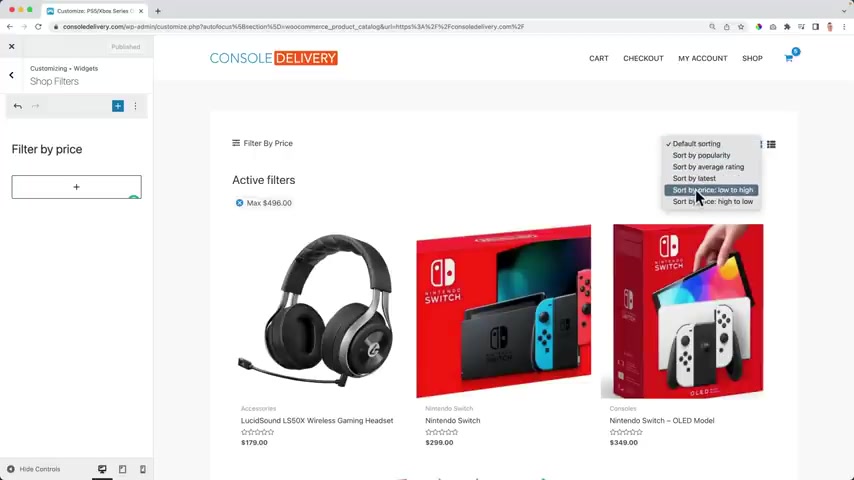
So if I would go to sort a price high to low the highest one will be lower than $496 as you see over here .
So that's how we work with filters .
I go to Woocommerce product catalog , scroll down all the way and there's a new option , the filter column , I want to have one column .
Maybe that's too wide .
OK .
Let's change that to two .
And now it is easier for people to uh create a nice filter .
OK ?
Then we go to design , we can change the product title .
So if you make it orange , you see what will change , I can make blue .
Well , I prefer to leave it as it is .
On the other hand , everything is a little bit the same .
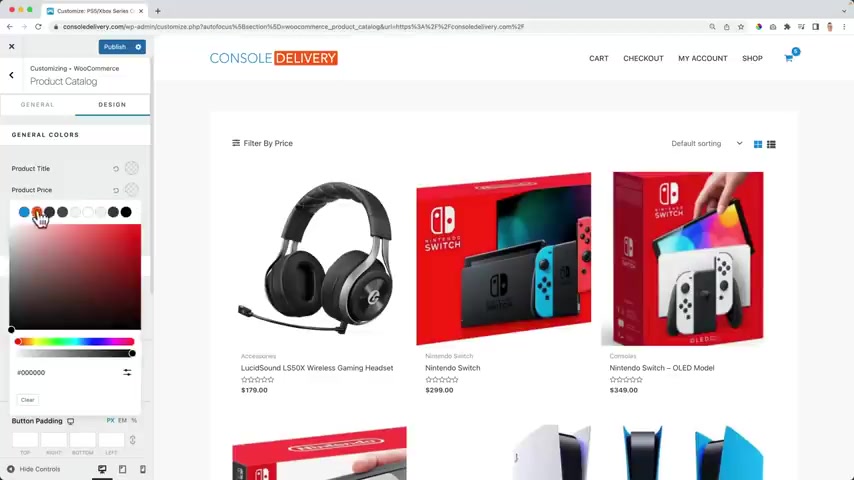
So what I prefer to do the price , I want it to be blue and the color of the ratings .
I want to be another color .
Let me show you in a minute how to do that , how to bring everything to the center .
OK ?
But what I see those switches are not in the center .
So in order to do that , I publish it , I close this and I go to the back end to Boomers variation swatches .
There are some settings .
Look at this .
It's my video .
I'm I feel humbled that they use my videos .
I go to the settings and to the shop page styling and I bring the swatch alignment to the center guys and ladies , it's getting better and better .
Don't you think I'm excited because right now if I scroll , it looks like this .
So I'm happy with that .
Let's go back to the customizer and then to the design tab over here .
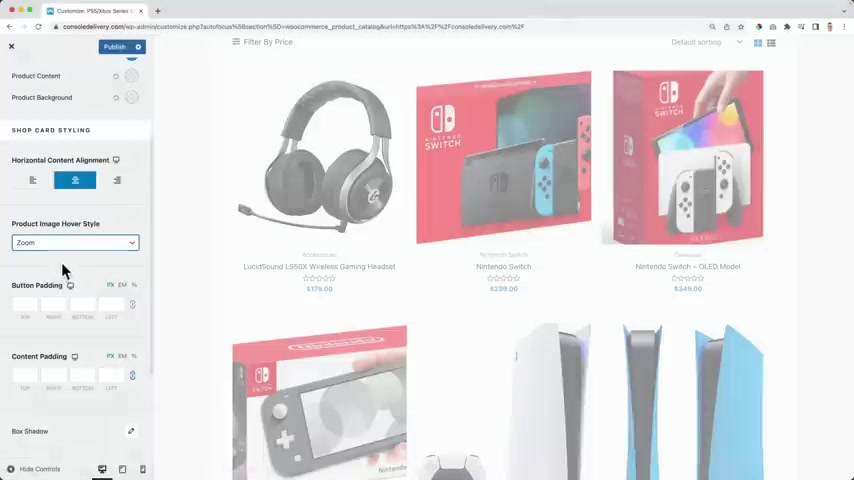
If I scroll down , do I want to have a product image hover style ?
What , what I can do ?
I can swap images so or swap .
So if I hover over it , you see another image .
What I prefer is to have a small zoom like that .
There's the button betting .
Well , we don't have the button anymore to add to cart .
There's a content betting so we can create more space in this area over here .
There's the buck shadow .
So right now there's no line , there's nothing but I can make that .
So I can increase this to two .
I can increase the blur like that .
And then , or I can um make a 000 , let's make it 22 and four and then I want to decrease the opacity .
So make it a bit lighter .
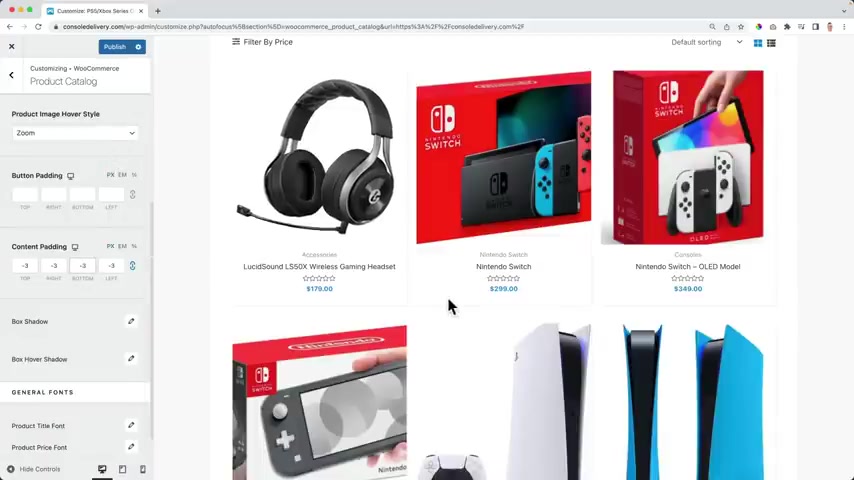
So is she small shadow they play around with the blur a little bit more ?
OK ?
Can also have the hover when I hover .
So somewhere I can have the hover when I hover .
OK .
So let me , let me increase this like this a little bit more visible and then this will happen and let's decrease the color because it's a lot .
OK ?
You know what ?
I don't either .
Then the product title font , I think it's getting even bigger .
Not that big .
What I like with the pro theme or the R pro plug in plug in , everything will stay in the same card .
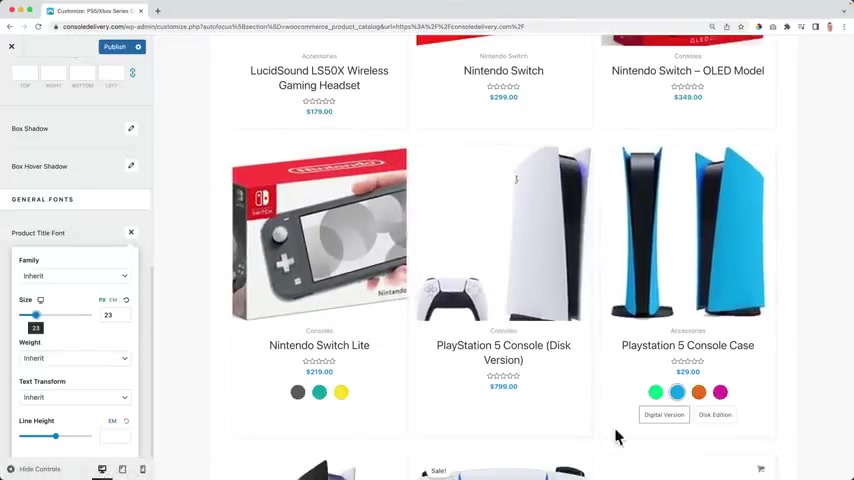
So even if you have two rows and you're only one row , the height of all the products is still the same .
I like it design wise , the price funds .
Um I think it can be bigger and then the content font , if there is a text , you can have uh make it bigger or smaller .
So we'll do some CS S I found this .
OK .
Let's go to one of the products over here .
I have five stars , right ?
Mouse click inspect .
I use Google , Google Chrome and I scroll down until I see a color .
It's the same color , see over here .
So if I click here , I think it's a bit yellowish .
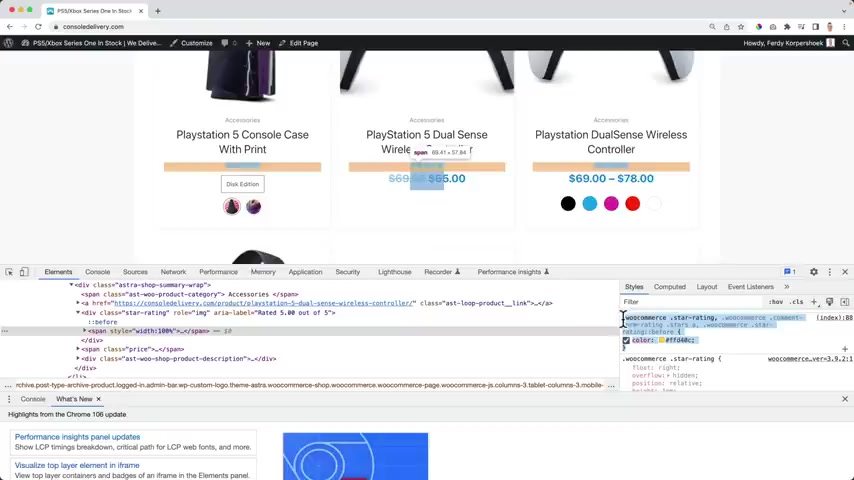
Yes , I can copy this .
I customize the website and it's black again .
Then I go back and back to the additional CS si base .
This now it is this color .
So right now it looks really nice and I want to talk about one more thing and that's the image .
I go to the customizer , go back and go to the product images right now .
The quality is OK .
I can change this to the 600 is OK .
The thumbnail , I want it to be 600 as well .
So the quality is better .
I think that's really important for your website .
Look at this , this looks so much better .
Then we can change the crop right now .
It's a square .
The image is one by one .
I can make it custom like four by three .
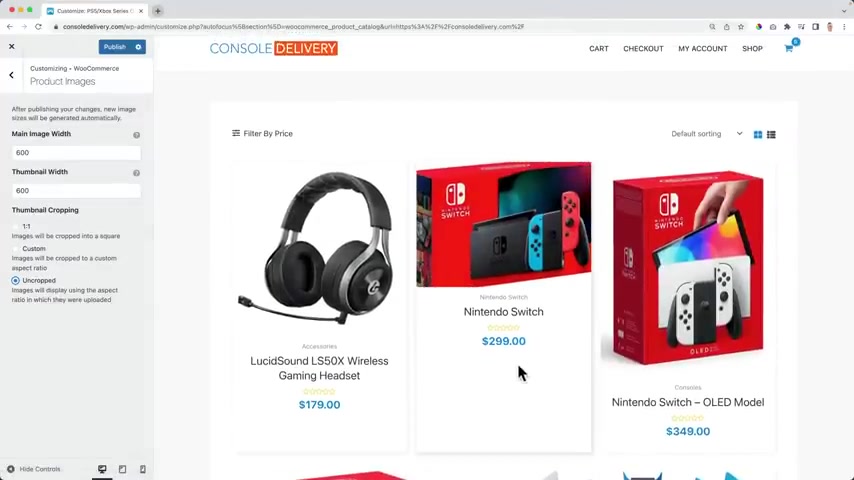
I can make it three by four like that .
I can also make it un cropped .
So the image will be displayed as a fool , but that makes the text go shift everywhere .
I don't want that .
So what you can do when you upload your images , make sure they're all the same size and then it will look really nice .
I prefer one on one or one by one .
Then when people click on the image , they can see the complete image , they can click here .
Navigate .
Wow , I'm really happy with how everything looks .
And right now we see also the the related products and the more products you , you um offer the more related products you will see .
So if I scroll down related products and the bigger your website , the more will be shown there .
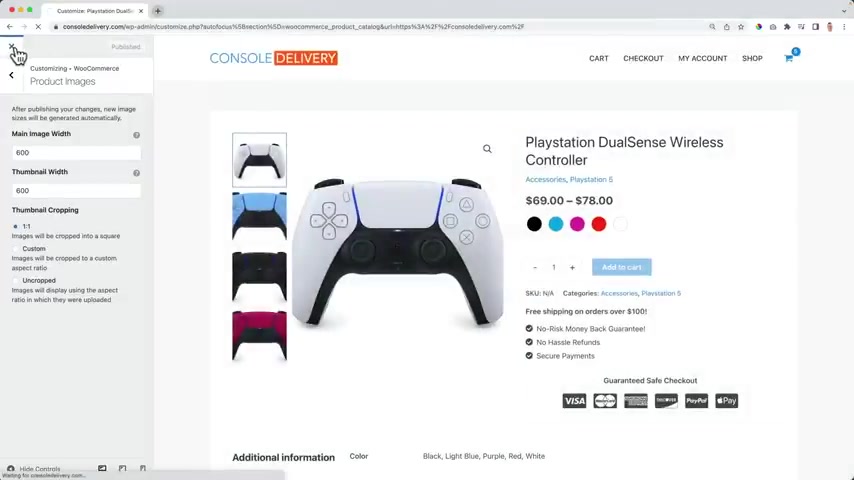
So I click on publish close its and this is our website , we can filter things , we can change how it is displayed and we can sort by popularity and by prices high to low .
And I'm happy with how everything Lukes using a pro you can make the Woocommerce pages look so much better .
We already talked about the product page , the the archive page .
Now let's take a look at the car page .
And after that also the checkout page and the account , my account page .
So let's take a look at that what I want to do .
Now , I want to show you the website using the free version of with commerce and the pro version with .
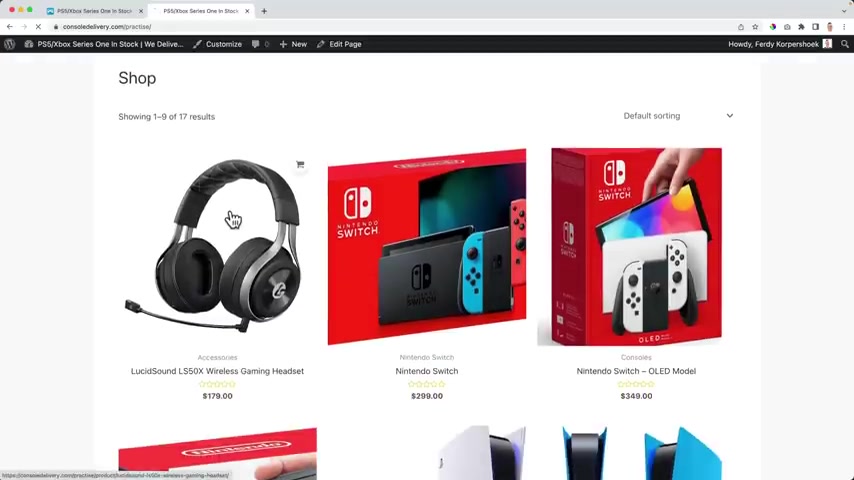
So this is the free version website and if I add this to the card , so I click over here and I add it to the cards , I can view the card and this is how the card looks in a free version of Booker and Sra .
And there are a few things I don't like .
Keep in mind we want to make sales and we want to make the process of buying things on your website easy .
But there are a few things I don't like if I want to change the amount .
So I want to buy an extra controller .
I click on the plus nothing happens .
I need to scroll down and click on the update .
I think that's weird .
I want to click and then it will change .
But I also don't like , I don't see an overview of how much I bought .
I need to scroll down and then I see the overview .
What I also don't like is that there's a really big area with a button , apply coupon .
So what people can do ?
They think , hey , I want to buy a lot of stuff , but maybe there's a coupon code .
So they're gonna Google like , hey , is there a coupon code for console delivery ?
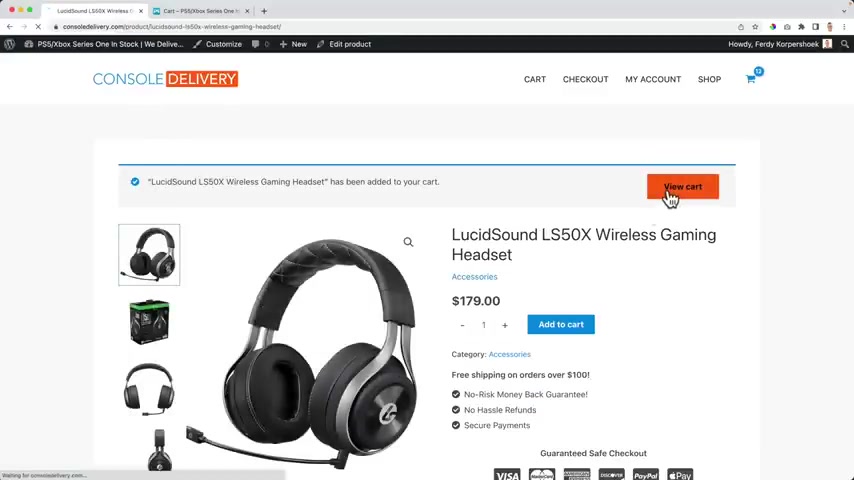
And they don't find a coupon code and then they can get distracted and they can leave the website if I , they look at the pro version and I buy this one I added to the cards and I view the card , look at this and once I see an overview of what I spent total .
If I want to have an extra controller , I just click on the plus , you see the skeleton loader and it will appear over here .
So it's updated , the price has changed .
If I scroll down , I still see the car totals .
So everywhere on the space where I am , I can see how much I've spent .
And if there's free shipping or not .
And by the way , if you want to uh promote free shipping , like , hey , if you spend 10 more dollars or 20 more dollars , you get free shipping .
There's a two I will talk about in a minute that will help you to increase the sales on your website .
But right now , I think it looks amazing already .
So I still can remove things just as over here here is at the left , here .
It is at the right .
So if I want to get rid of this one , it's gone over here .
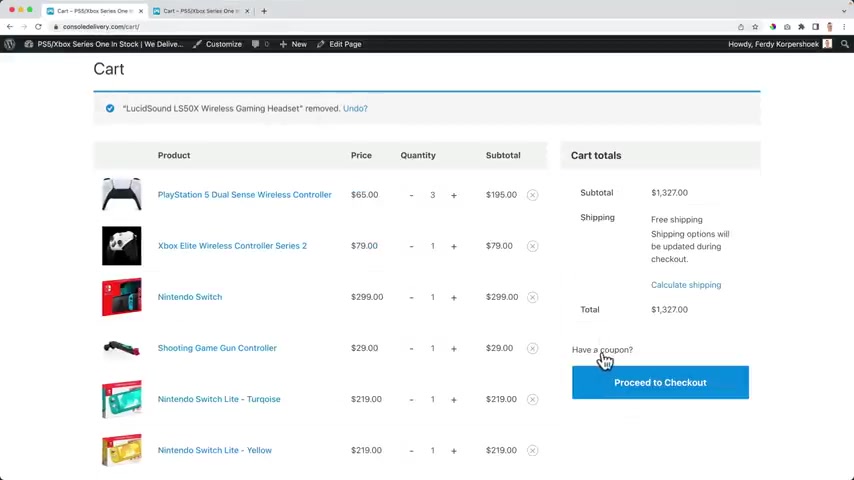
I need to click here and then it's gone .
And if I take a look at the coupon code , small text , have a coupon .
If you click on it , then you can apply the coupon .
I think that's better than really big button over here , like apply the coupon code and then over here we can proceed to the check out .
Oh , there are a few things we can do .
Uh we can go to the customize and actually we can remove all the great benefits .
There are on this page so I can enable or disable the mother card lay out .
So if I turn this off , it all look like the free version I turned it on do all the sticky car toles .
If I turn it off , this area will not stick with us .
Well , I want to have the real time quantity updater .
If I turn it off , I click on the plus , nothing happens until I click on update cards .
I turned it on again and we can change the text over here .
Proceed to the checkout .
I think that's better than checkout because it talks about an action .
Click here to proceed to the checkout .
It can also change this text .
So I closed it because I did not change anything .
Now , let's take a look at the checkout page and the my account page using pro and then in the free version , if I will go to the checkout , it looks like this .
Do you have a coupon ?
Click here to enter your code again ?
I don't want to use a coupon area .
We can fill in our details over here .
Ship it to a different address .
It all standard woocommerce .
Information , we can have notes optional .
And over here we see an overview of our order .
I don't like it .
It looks weird and uh I have no payment method , but if I have one , it looks amazing .
We'll talk about payment delivery later and then we can place the order over here at the new version .
I click on , proceed to check out the pro version .
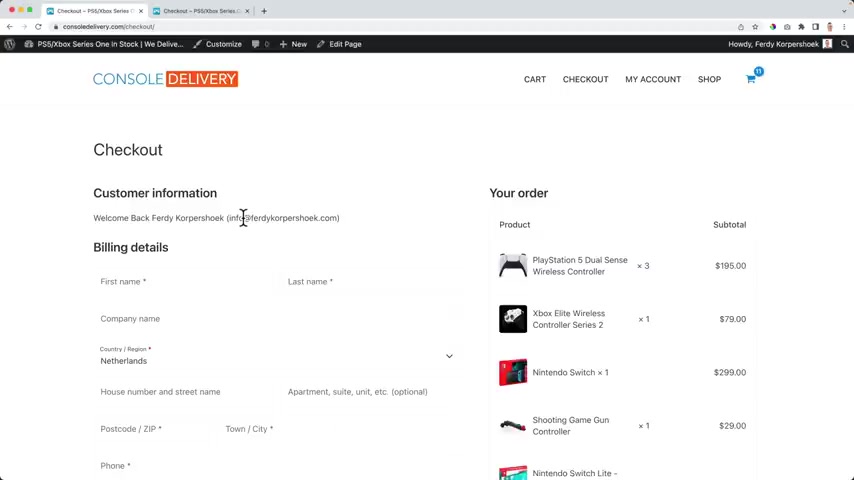
I mean , there's no uh question .
I have a coupon code .
Just my information .
If I'm already logged in , you'll see , show my information over here .
If I'm not logged in , I can click here to log in .
Then the first name and last name .
Look at how beautiful it looks here .
It's the first name and the last name and I can fill it in over here over here .
It's in the area already .
So if I fill this in first name , then it will appear over here , last name , then there's the company name .
Maybe I don't want to have a company name , then I can get rid of it , but it all looks a little bit better .
So later on in the story , we'll talk about payment methods and then it will look like this .
You have your credit card details , pay with pay with paypal and we have paypal .
There are more options you can have over here and I think it looks great and healthier at the right , an image of the product , you see the amount at the right .
You see the price , I think that looks better than this .
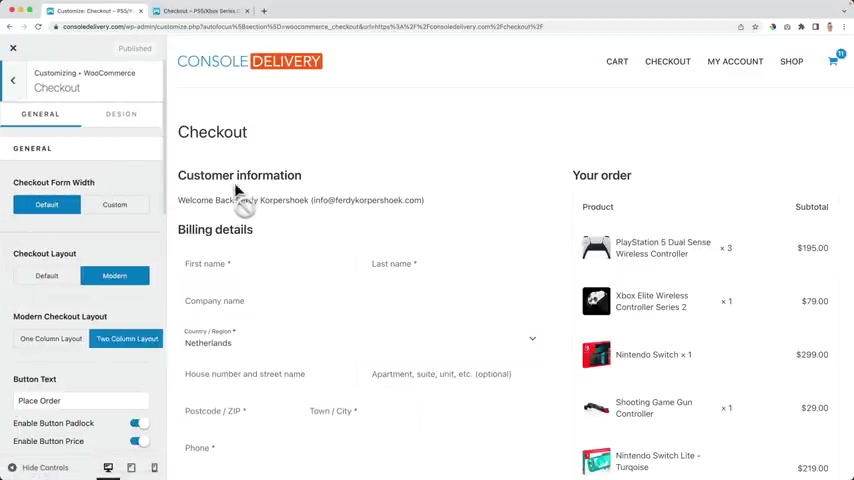
This looks ugly .
This does not look professional .
So pro is doing an amazing job in making this all look better .
And then later I will show you how to have payment options and I will show you how that is displayed with Pro .
So let's go to the customizer over here because at the checkout , we can also adjust a lot of things .
I could change the form width so I can make it smaller .
Let's bring it back to default , check out a layout .
Of course , there's more and I can bring it back to default .
And then there's the ugly version .
Let's bring it back to modern , I can have uh a one column layout .
So first people need to fill in the details and then there's a reason why you can make this smaller , makes a lot of sense .
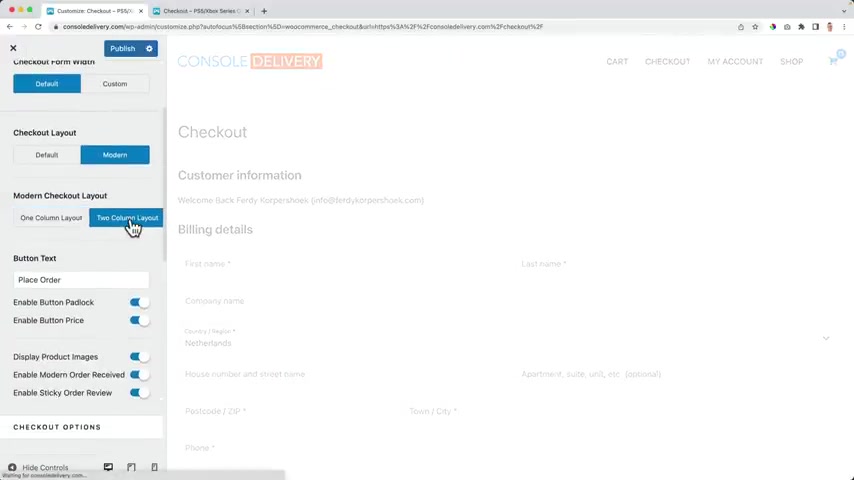
So if you want to have it like this , you could do it or bring him back and I have two columns , you can change the text over here uh place order and then you can say uh do you want to have this secure payout it again ?
No , and it's gone .
And they , with the button price , you can turn it off .
I turned them both on and I leave the text as it is over here at the right .
Do I want to have the product image ?
If not , it will look like that , I want to enable the modern order received layout and then enable sticky order review .
So if there are less products over here than the length of this area , then this will stick with us .
And I like that , we can also have multiple step layouts .
So if I turn it on , the first step is shipping and then the second area is payment , you can give them all a different name .
Oh , you can do that .
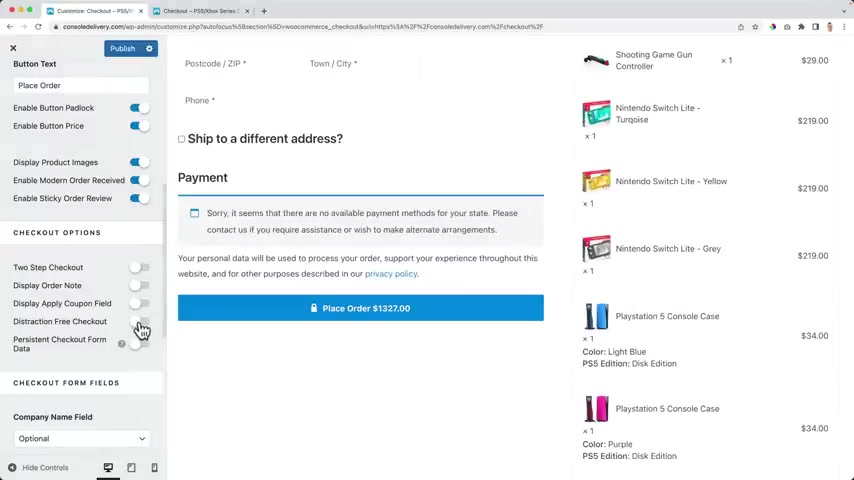
If you are applying for an open work permit as a spouse or common law partner of an international student , you are required to submit many supporting documents in your application .
In this video , I am going to show you how to write an effective letter of intent that you need to upload in the purpose of travel section .
This is the most important element for the approval of your open work permit application .
Please like follow and share my Facebook page and subscribe to my youtube channel for more videos .
First , let me tell you the meaning of the letter of intent .
This is a letter that helps the visa officer understands the reason why you are applying for a visa to travel to Canada .
It gives the visa officer a brief overview of why you want to accompany your spouse or common law partner to Canada .
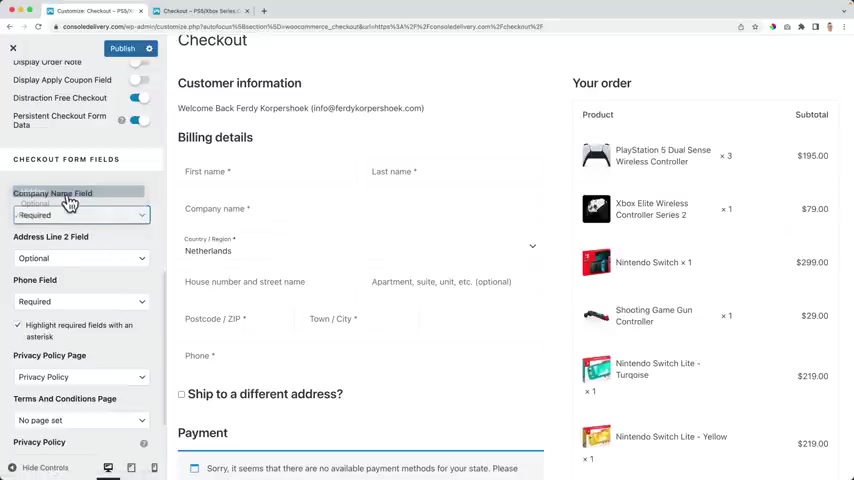
If you have mention that your spouse or common law partner has received an admission as a full-time student , provide the name of the school , details of the intended program of study intake .
And when the classes of your spouse will start .
This section is very important , especially for those who got married recently or couples who do not have Children .
You need this to show the visa officer that you are in a genuine relationship .
You may include photos with your spouse or in-laws , screenshots of chat messages , et cetera .
Sometimes providing a marriage certificate , doesn't convince the visa officer that your relationship is genuine , especially if you got married recently or you and your partner belong to different nationalities .
In this section .
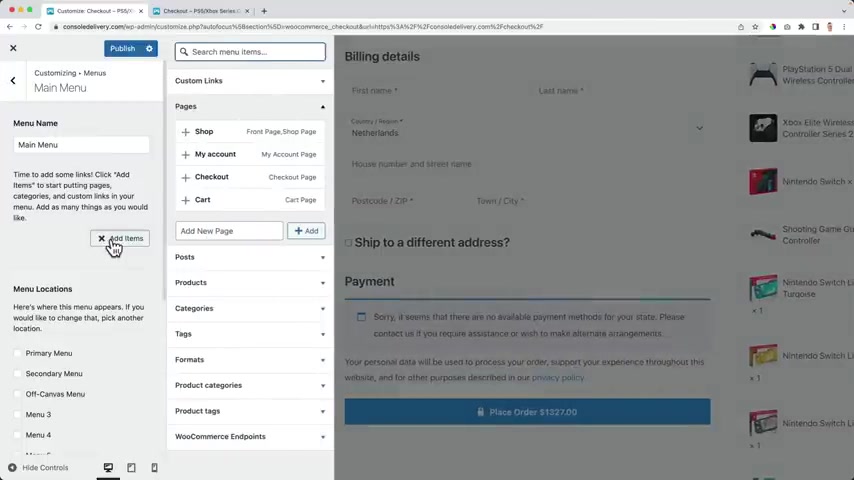
You need to mention that it is very important for you and your spouse to be together for the following reasons .
You will have unlimited time for one another .
You will experience new things together and you will celebrate your partner's academic achievements together .
If you have Children , it is very important to state that your Children need to grow up in a two parent family .
In this section , mention that you will support your partner physically and emotionally .
You may also state that you will look after your child .
You don't need to mention that you are going to find a job .
The visa officers expect that you have enough fund for your expenses during your stay in Canada without the need of working .
Focus on your intention to stay with your partner and child .
This is the most important section for your visa approval .
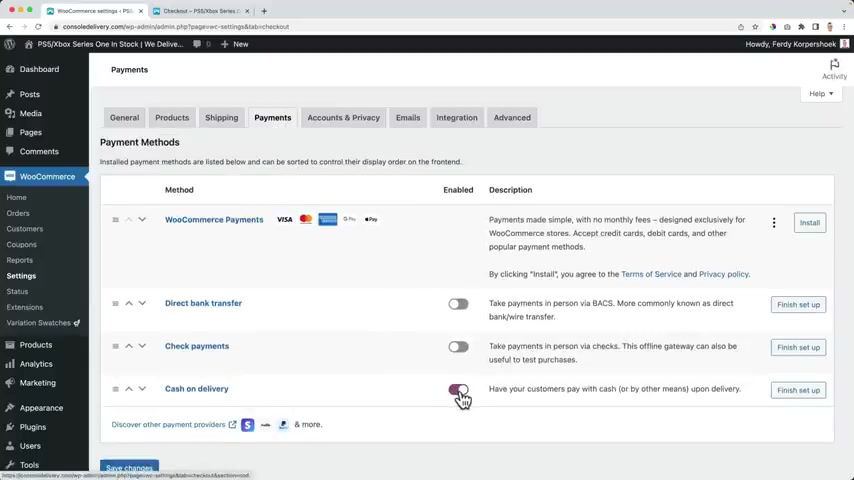
Tell the visa officers that you will get involved as a volunteer in the available organizations and use your experience to support the Canadian community .
You may say that you did a research and found many non-profits , charities and community organizations that offer volunteer opportunities in Canada and mention the province .
You are going to , you can mention the following activities in your letter .
I will teach high school Children safe social media practices .
I will give it help to local adults .
I will coach youth sports teams .
I will organize books at the libraries .
Try to do some research .
You will find a lot of volunteer activities and community service projects .
You may attach some photos or certificates of volunteer activities that you did in the past .
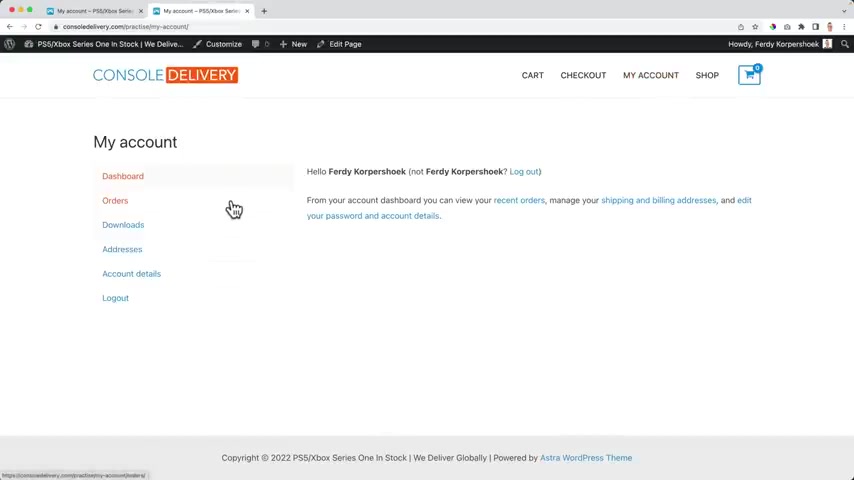
And in my opinion , it looks better and then the billing address and the shipping address .
So what I can do now , I can go to the home page and then into my account and things like this .
If I would go to my account on the free version , it like this , the standard commerce layout with our orders , our downloads , if we downloaded digital products , our addresses our account details and we can log out over here with the pro looks like this it's a bit personalized .
Hello , Fred , the corpu the orders .
It looks better with an image .
You see the status , you can view it what you've bought and there are the downloads .
Yeah , the rest of us account details and you can log out and if you want to adjust that .
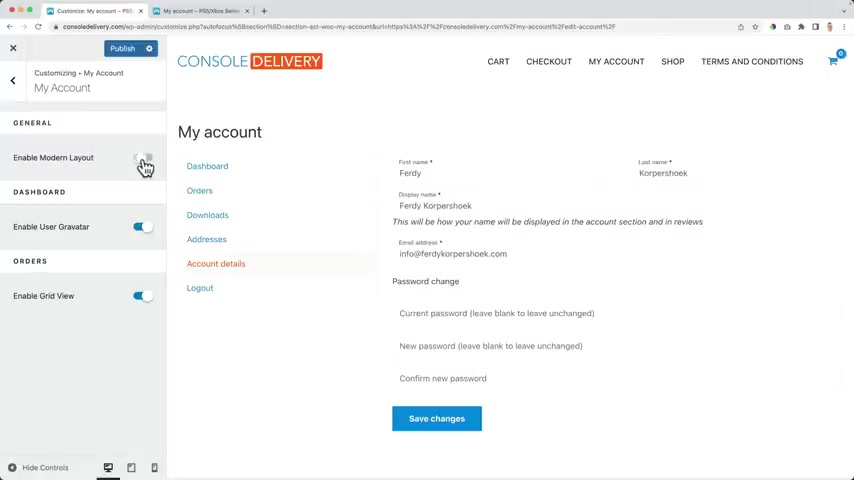
The first table is for the source of funds and the second one is the table of expenses in your table of expenses .
You need to show the following items , living expenses for you , your partner and accompanying Children , tuition fees and books , return transportation for all the family members and estimated medical insurance coverage for the open work permit applicant and the Children .
Here is a very good example of source of funds .
Table .
You need to make sure that you convert the currency of your source of funds to Canadian dollars .
You need to start your source of funds with your bank savings account .
If you want to include your partner's savings bank account , your partner needs to write a letter of financial support saying that you will have an access for his or her money and you may use it for your stay in Canada .
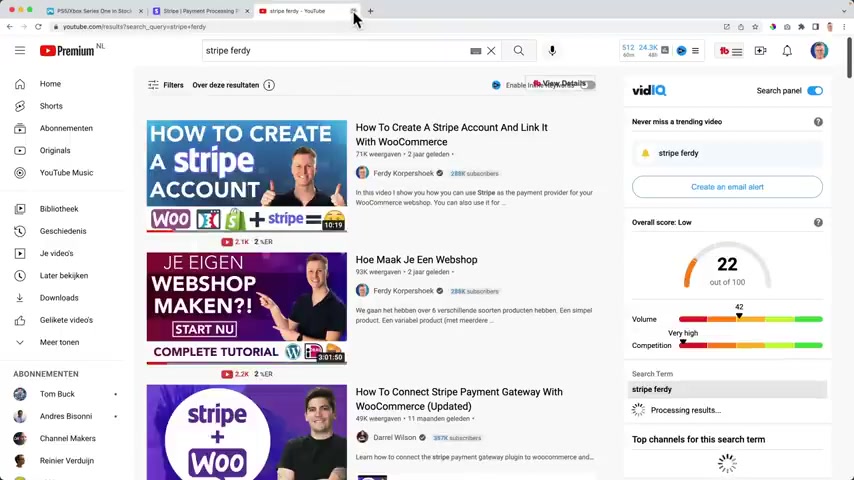
If the tuition fees of your partner is paid included in your table , add your partner's guaranteed investment certificate , G IC to your table .
If you and your partner are currently working , you can still include the total expected salary from the date of your visa application until the last working day with your company .
You can also include the expected end of service benefits or indemnity .
If you own a car or any property that you plan to sell , it would be good to add its expected market value to your table .
If you own shares of stocks include the market value that's stated in your stock certificate .
If someone is going to sponsor the study of your spouse , you also need to add the amount you are expecting to receive from the sponsor and you need to attach a letter of financial support from the sponsor together with his or her bank account certificate .
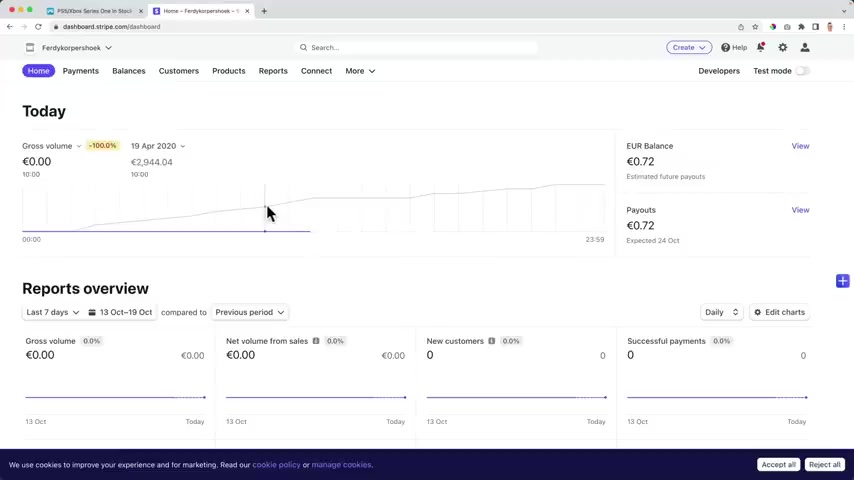
Do not forget that you need to provide all the supporting documents for each source of funds written in your table .
Here is the best format of a table of expenses for a two year program of study with the current COVID-19 situation .
I suggest that you include a fund in your table to cover your quarantine expenses .
Here is the table of the minimum required fund to cover the living expenses per year to support yourself and the family members who will come with you in Canada .
This amount is for applicants who will stay outside Quebec .
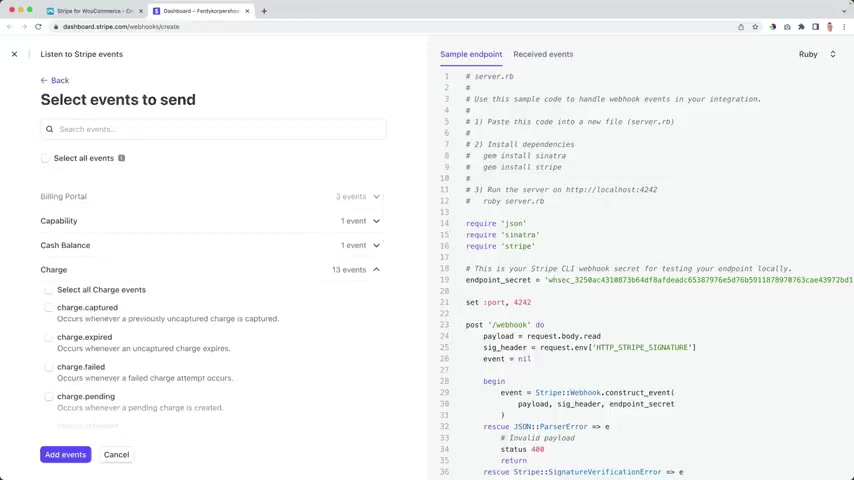
That means that on a Mac you can pay uh really easily .
And on a PC also with Google pay here with apple pay here with Google pay , I want to enable express payouts and this is important .
I want to enable the web hook so I copy this and I go to the stripe dashboard I based this code select events charge like more edit at the end points .
I copied this code .
And by the way , we're not in test mode , we're in the live mode .
So I select the live mode , I past the webhook secrets save and continue .
Great .
Your store is set to accept payments .
We provide lots of customization options to meet your needs .
Don't forget to explore them .
It's customizing .
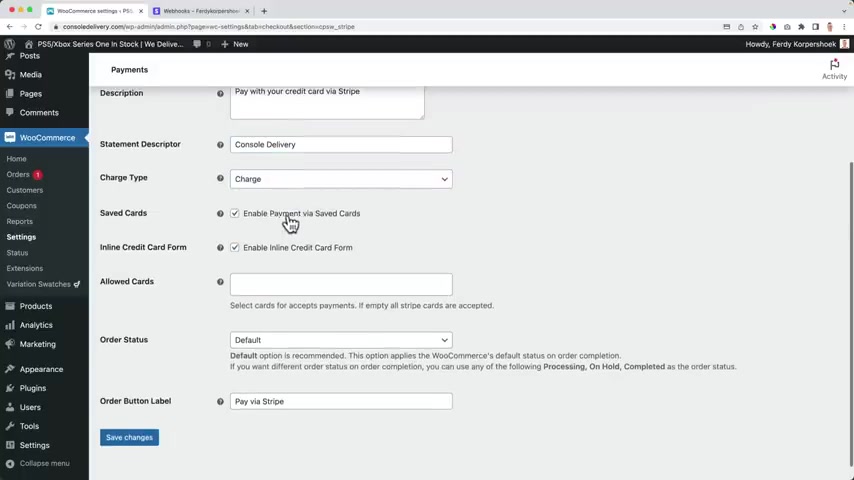
In this section provide the details of your highest educational attainment if you have attended a college or a university state , the program completed and date of graduation , you may also include any professional development training courses that you have attended because this is your chance to show that your skills are valued and needed in Canada .
In the travel history section , mention all the countries you have visited and lived highlight the fact that you did not overstayed and did not violate any immigration laws .
If you do not have any international travel history , you can say that you prefer to travel locally within your home country to save up money and that you are a law abiding citizen and will show the same respect to Canada .
It would be very good .
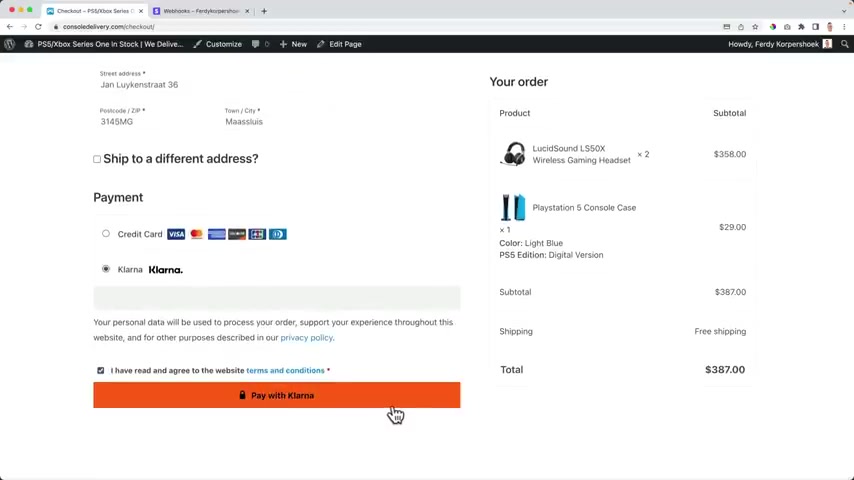
If you include some photos of your travel history in your purpose of travel file in this section , you have to show that you have sufficient ties in your home country .
The immigration officer must be satisfied that you are likely to leave Canada when your permission to stay expires .
Significant ties can include personal assets such as house , land , car ownership of an active business in your home country that is under your name and investment in shares of a company's stock .
You can include also your close family members who live in your home country .
If you are not a citizen of the country where you currently live , your immigration status in your current country of residence has an impact on this assessment .
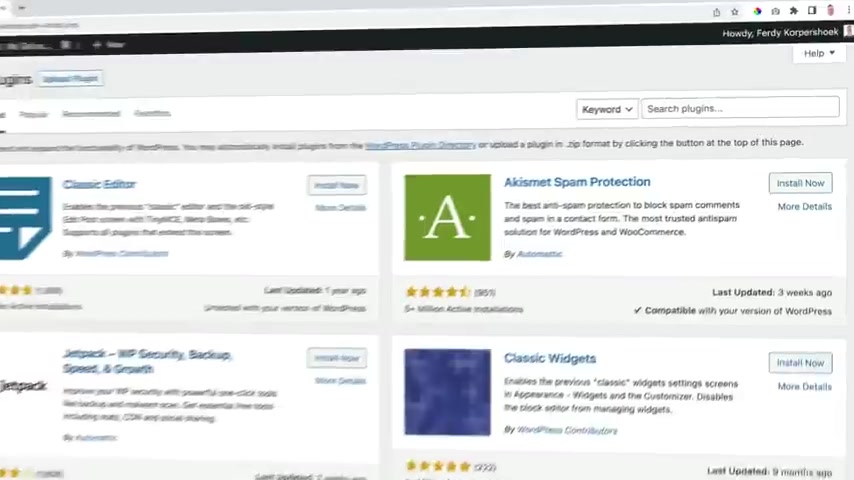
This section is very important for your visa approval .
You need to mention that you will leave Canada after your partner finishes his or her studies and post graduation work permit mention that you are going back to your work in your home country or you will be working with a better company or you will be helping your partner to manage his or her own business .
If your partner is from a different country , mention that you will be going to his or her home country .
There are many things to do in your home country .
It all depends on your skills qualifications .
As well as your previous work experience .
You need to use this section to show the visa officers that all the information written in your letter and all the other forms and supporting documents are true and genuine .
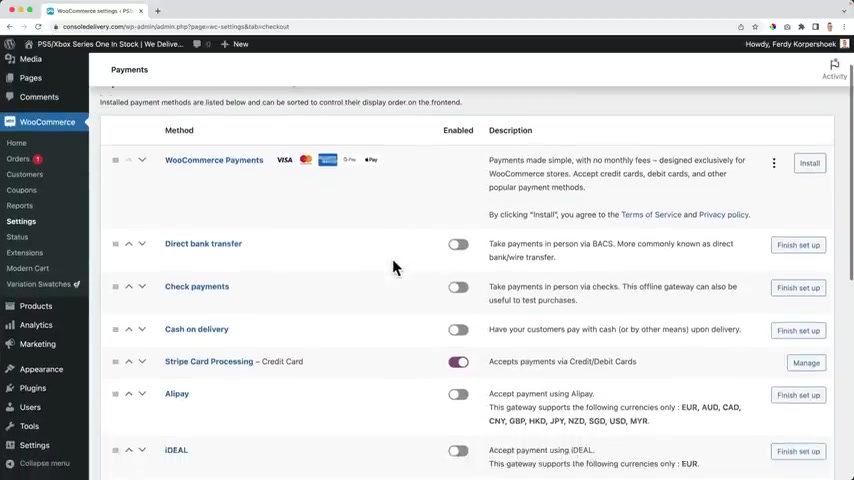
Here is the best declaration format from an approved open work permit visa application .
I hereby acknowledge and declare that all the information given by me .
Here is true , accurate and complete .
I shall utilize my visit only for the purpose of which the visa has been applied for my family and I are fully aware of the Canadian immigration regulations for the temporary visa and we will for sure abide and adhere respectfully my family and I will immediately leave Canada by the end of our authorized stay .
Don't worry about the length of your letter of intent .
The most important thing is to mention all the reasons why you are accompanying your partner to Canada , mention all your qualifications , skills and work experience .
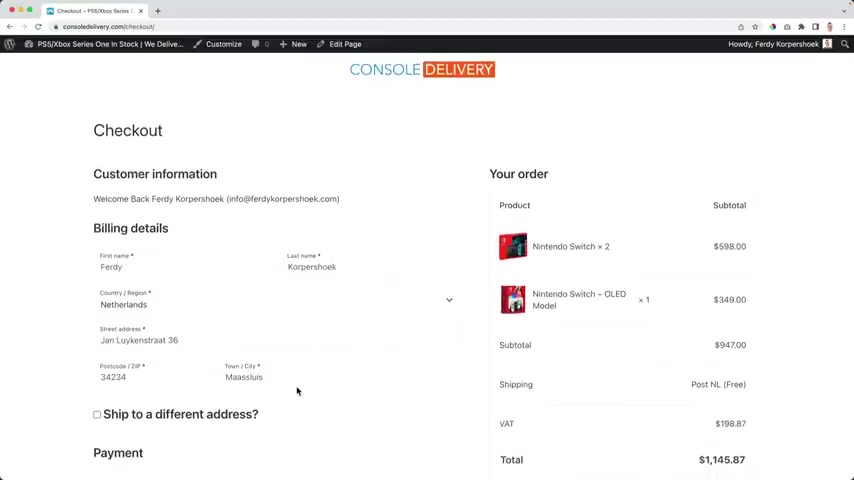
This will give you a higher chance of visa approval proof , read your letter several times to make sure that everything is perfect .
Thank you very much for watching .
Please do not forget to follow my Facebook page and subscribe to my youtube channel for more videos and if you have any question or you need help , please feel free to leave a comment .
Good luck with your visa application .
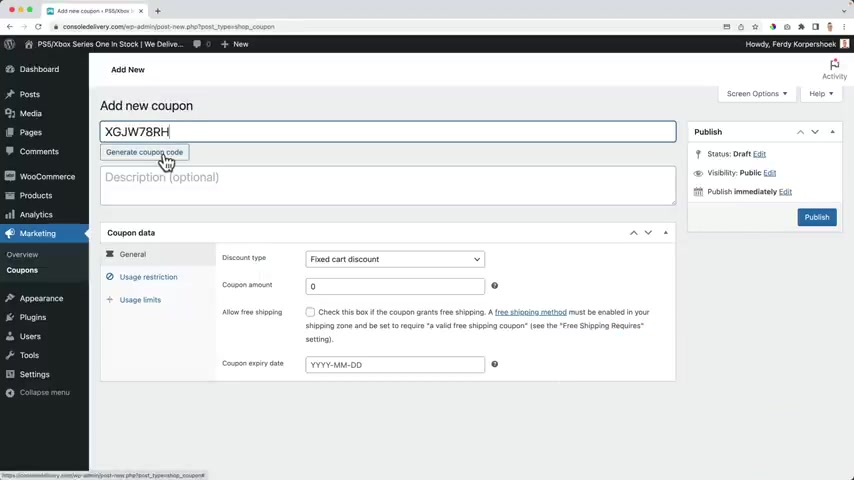
I can also generate a code and I can give the description , get $10 off so I can copy the code .
And when I would publish this code and I go to the website to the arts , I can click over here , I can add the coupon code .
Apply it .
What you'll see , I get $0 discount .
Why over here I need to fill in the amount .
So if I would say 10 update and I refresh the page , you see I get $10 off discount .
So not $29 but $90 .
If we take a look at the discount types , we see a fixed car discount .
We can also say percentage .
So I can also give 10% of discount .
So I can say get 10% off .
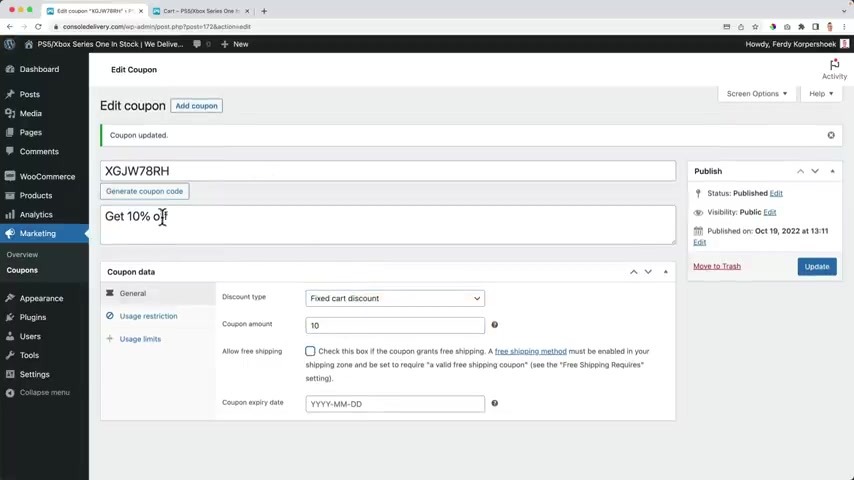
And now if I refresh the page , you get $2.90 discount , which is 10% of $29 .
Let me bring it back too .
Fixed card discount , $10 get $10 off .
What I can say when people fill in this code , they automatically get free shipping .
And I can also say it will only available until the latest day of October 2022 .
Then we can go to the restrictions .
What I can say you get 10% off when spending a minimum of $50 .
So if I would say people need to spend at least $50 update , refresh , they'll say sorry .
It seems that the coupon blah , blah , blah is invalid .
It has now been removed from your order .
Now , if I want to edit , it will say the minimum spent for this coupon is $50 .
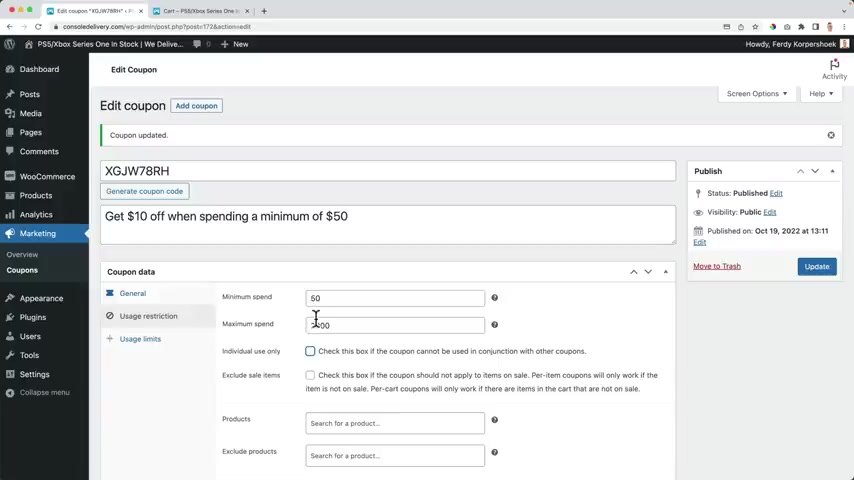
I can also have uh a maximum and that can be nice when you work with percentage .
If you give a 25% discount , you can say , well , only until a maximum of $2000 when people spend more than that , then that 25% will not work anymore .
You can turn this off .
If you say uh this coupon code can only be used on itself , not in conjunction with another coupon code .
So you can have a $10 discount coupon code .
Besides that , you can have a 10% discount coupon code .
And then if you check this , you cannot combine them .
So you have double discount .
You can also say that this only applies to normal items without discount .
So if you turn this on , remove this update and then you go to your website , remove this and go to a discounted product .
This controller , I add it to the cards .
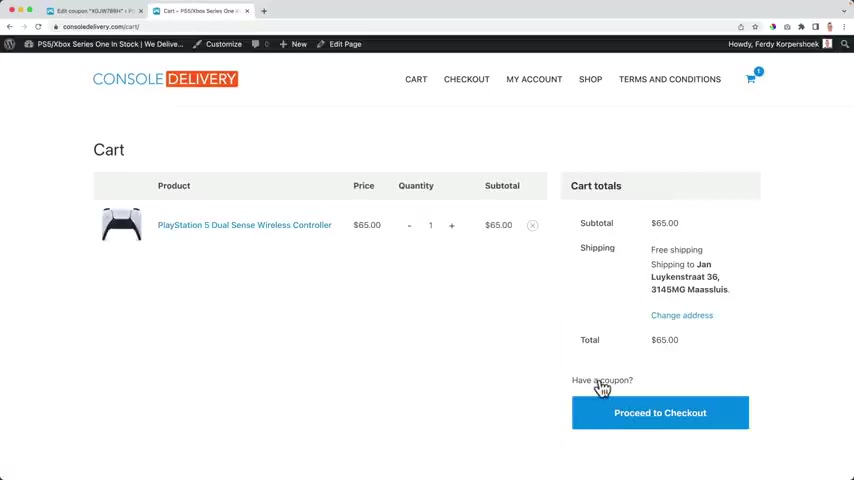
I view the card , I go for the coupon .
It'll say sorry .
This coupon is not valid for sale items .
I can also say it's only available for certain products .
So only for the controllers for instance , or I can exclude a product like it's for everything except for the all the switch products .
You can also include a category or exclude a category .
I don't know why .
But you can also say only people with a GMO account can make use of this discount .
You can also make use of usage limits .
So first I can say there are only one 100 places coupon codes available with this one .
So after it is used 100 times , it is not available anymore .
I can also say every user can use it twice .
So people can buy this .
Of course , I need to update it .
Refresh .
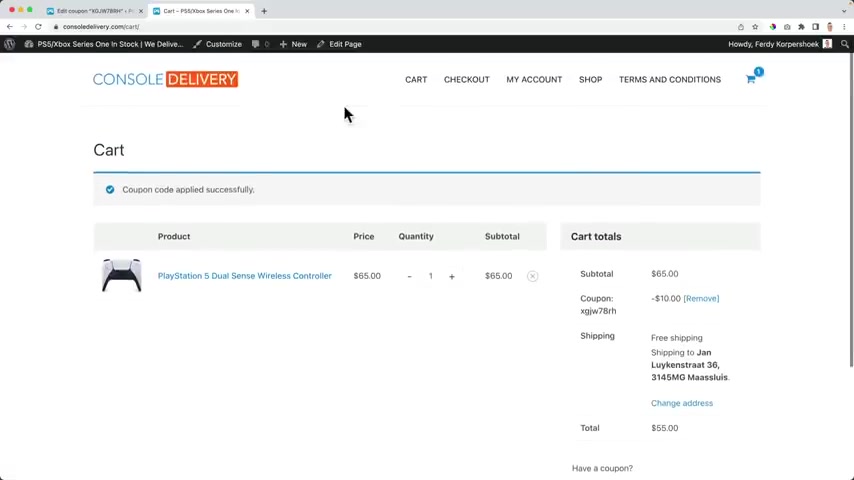
I based the code I was working $55 .
I can buy this , then I can come back , go to a different product , buy it again with the same coupon code and it works .
But after two times , I cannot use it anymore and it will say that you can also make it easier .
You can say $10 .
So copy this update , refresh and I click on have a coupon .
I say $10 apply .
So it doesn't matter if it's capitals or not , but it's easier .
So you can uh have a Facebook or Instagram message saying , hey , if you fill in $10 right now , only until the end of this day for the first 100 people you get discount .
So that's a great way to boost your sales in a short amount of time .
So there's only one coupon code .

I can create a second one and the third one and apply all these principles which I just showed you .
Ladies and gentlemen .
I think I really think that personally , I honestly , I really think that it is time to talk about shipping , how to create the shipping cost based on the place where people buy from on the weight or on the total amount people spend on your website .
So let's talk about that .
So in order to set up shipping methods , we go to the back end of our website to plug ins at new and we search for table or rates and it's probably the first one from octo lies a lot of installations , a lot of stars and loss updated just 90 hours ago .
I click on install now and I click on activate .
I close this uh It's a free version .
There is a pro version but we're gonna use a free version and it's amazing .
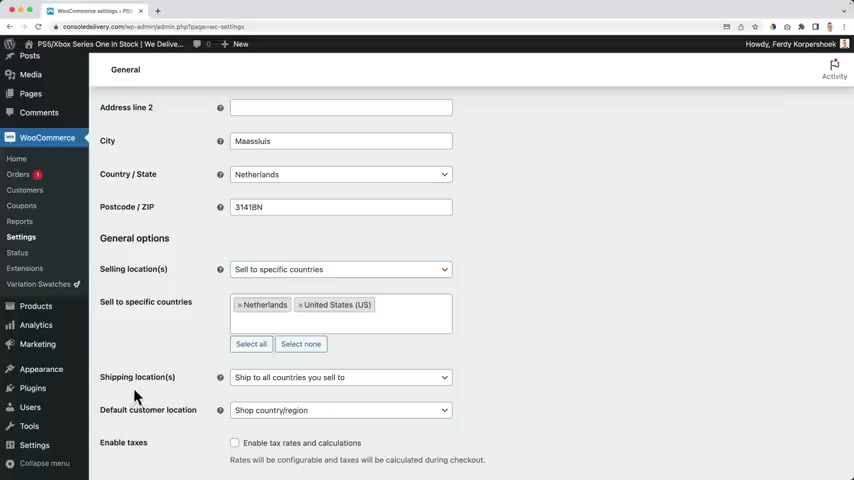
So what I want to do , I want to go to Woocommerce Settings General .
And then over here I want to select to which countries I want to sell .
Maybe you want to sell to all countries .
That's fine .
So let me say specific countries , for instance , I want to send products to the Netherlands and to the United States .
If you send to the whole world , you can also um leave this to all countries .
You can also sell to all countries except for and then say to which country you are not selling .
Uh I do specific countries .
I see the changes and then I go to shipping the third step here in the settings .
Shipping by default , the Netherlands is here .
Let me delete it and start from scratch for you .
So I click on add shipping zone and I start with the Netherlands .
So maybe you sell to the United States and you say United States .
So I start with the Netherlands later on .
I will to United States and then I will link it to the region , the Netherlands .
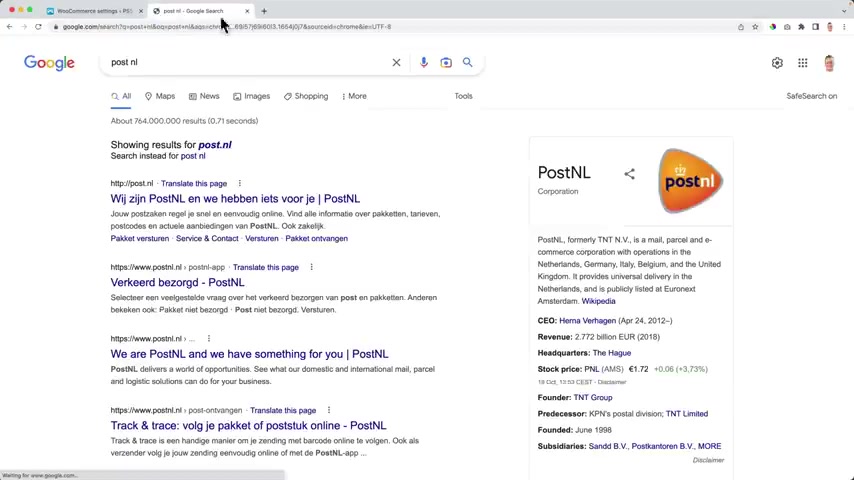
Then I want to add a shipping method and I select flexible shipping and this option is available because of the plug-in table rates .
I added the shipping method and then I click on it .
Now I can configure this .
Well , in the Netherlands , we make use of a company .
It's called bot NL like UPS for the Netherlands .
But over here the method title , I choose my carrier over here , the company that's shipping my products .
So I say TNL , the method description uh will be displayed on your website and I don't want it to have the same uh title twice .
So I leave this empty and then about the shipping cost .
Do I want to uh add taxes over shipping cost ?
You can say yes .
And if you do , you can say it will be displayed inclusive of text or exclusive of text .
You can say none .
And we want to have free shipping from a certain amount on or from $200 and on and more .
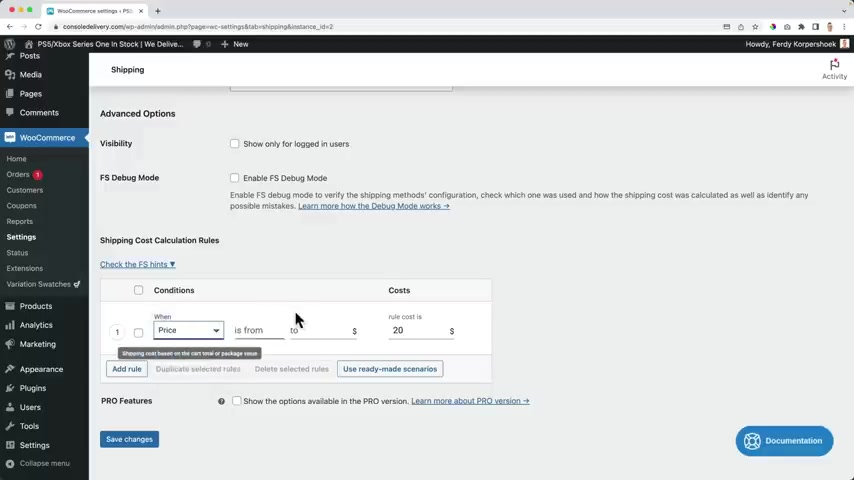
I want to have free shipping and then scroll down all the way closes and I want to create some conditions and it can be done on always .
So the price will always be $20 no matter what you buy , how much you buy , how heavy it is , what you buy always $20 shipping cost .
But I prefer to work with conditions .
So if the price , the total price of my card is between zero and $19 99 then I want to charge $8 shipping cost .
I added the rule , you know , let's make it five and I go to the price and from everything that is within $20.49 dollar 99 I charge $8 .
Then another one I can also do it based on the , the weight .
If you're selling really heavy products , you can do that .
I prefer the price .
That's what I see .
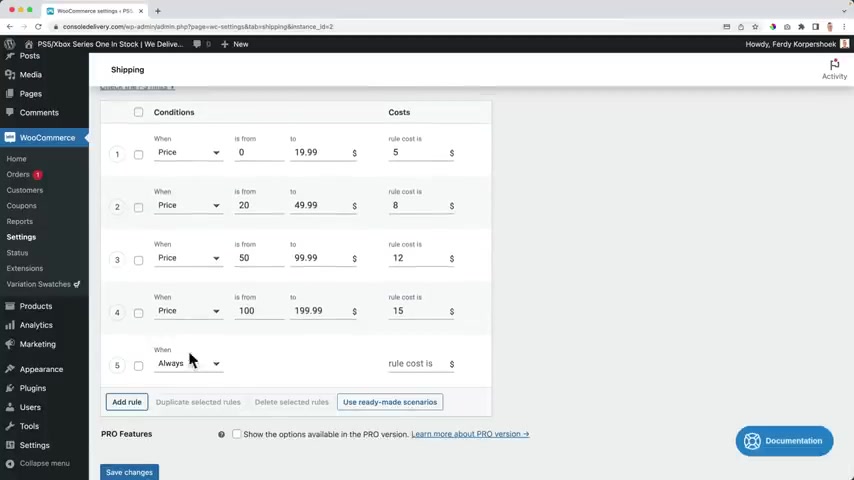
All the big shops doing here from $50 until $99.99 .
I charts $12 and then another one from $100 until 199 .
That's 99 .
I charge $15 and then one more from $200 on until the maximum people pay nothing .
It's free shipping .
So I see the changes and these are only uh applicable for the Netherlands .
So I'm logged in , I live in the Netherlands .
So my address is from the Netherlands .
So if I would go to the card , it'll say based on my price , $65 I pay $12 .
So let me see if that's correct .
It is .
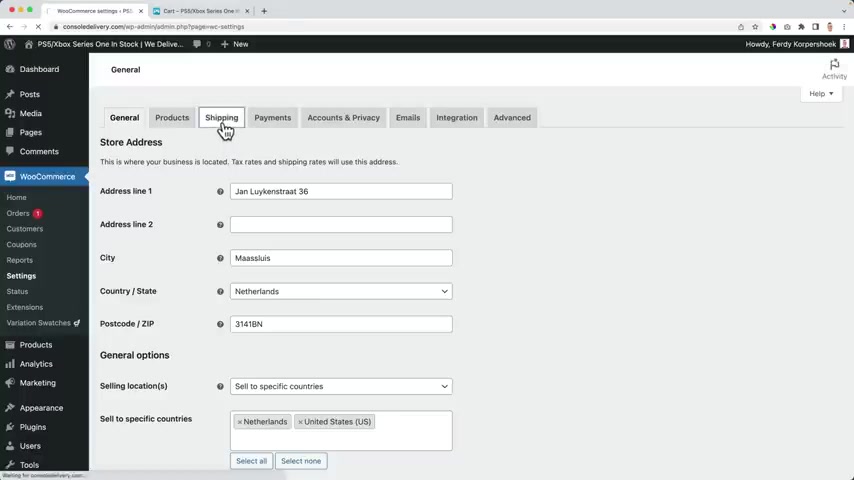
But let me show you why if I go to Woocommerce settings , shipping the Netherlands and when I scroll down , this product is $65 .
So it's between 50 $99.99 .
So that's $12 .
That's exactly what I see over here .
So if I would add a second , one , second controller , I pay $130 .
And now it says automatically I have to pay $15 .
Why ?
Because between 101 $199 I pay $15 .
If I add another one , I will have a total of 195 and I still pay $15 .
But now if I select the fourth one , it's free .
Why ?
Because I'm over $200 .
So let's take it to the next level .
Now , if I go too , shipping is honest and I choose or choose a new one .
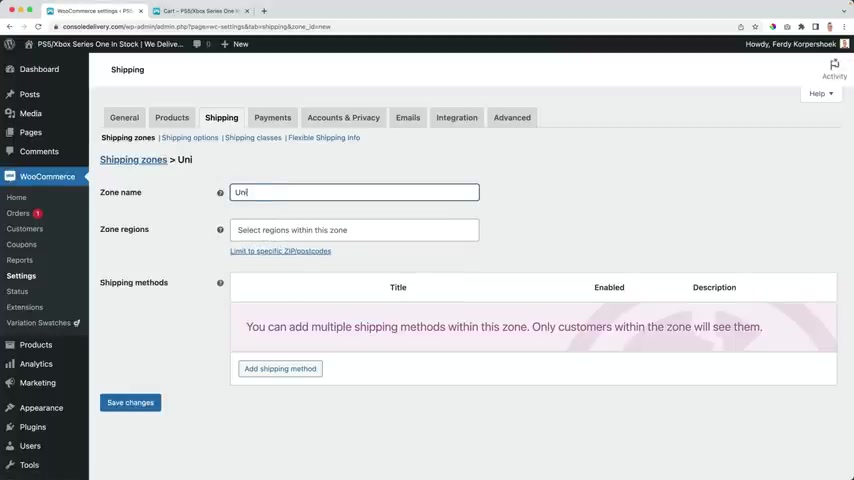
And I say United States , I select the United States , I can add a shipping method , flexible shipping .
And in the United States , I prefer to use UPS and from no taxes , but from $100 on shipping will be free because UPS has different rules and stuff .
So I say the pricing from one until 14 99 will be $4 .
Then from $15 until 29 that's $99 .
It is $6 .
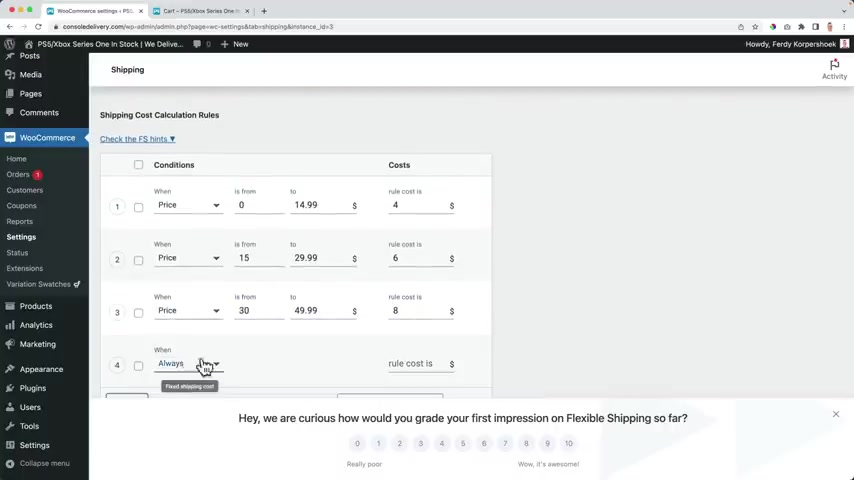
Then from 30 until 49 till 99 it is $8 and I'm from 50 until 100 or 99.99 it is $9 and the latest one from $100 on everything is free , save the changes .
So let me go back to the cart and I will reduce it back to 65 .
Over here .
It says if I send it to the United States or , or if you buy it from the United States , everything between 59 9 , you pay $9 in shipping cost .
So right now it's $12 if I send it to the Netherlands .

But now if I change my address , let me remove this and remove this and I select the United States and I update it now , I pay $9 .
So based on the country or even the region , you can select how much people should pay when they spend a certain amount of money .
I think that is amazing .
So if I bring this back to the Netherlands , I'll pay $12 shipping cost instead of nine because it's sent to the Netherlands .
If I have free shipping , I need to buy four and then says post and free .
So that's how you can work with table rights and shipping .
The makers of the theme are working on a new plug in called modern cards and it does what it says it makes your card modern .
Right now .
We have a card in the corner of the website .
We can click on it .

We see small overview , then we can go to the card , we can adjust things , but there's also a modern card and the modern card is a fly in it flies in from the right on your website and you can adjust it and it seems to um boost the sales on your website because it's so easy to navigate through things , adjust things .
So let me show you how to work with the modern card .
So in order to get the modern car , we go to 30 Corp dot com forward slash MC for modern cars hit enter and I will make sure you will be redirected to the right page at this moment , the plug in is not live yet , but I will make sure you'll get there .
And then when you have downloaded the plug in , you can go to the back end , you can go to plugins at new upload plug-in , choose a file .
And then over here I have mine , I open it install now and then I activate the plug-in .
Then I go to Woocommerce mother and cart over here and now I open the website and new top holding command or control on the PC .

So right now I have this one .
But if I go to the display card options and I set it on entire website , it will be saved automatically and I refresh the page will appear .
So by default , it looks like this .
Review your card , we see the amount of playstation controller we have can add more or add less or subtract .
I see the percentage of discount I have for this product because I get a few dollars of discount .
I can remove it .
I can add a discount code .
I see the sub total without the shipping cost and I can proceed to the check out .
And over here , I see powered by card flows and we can configure this .
So let me walk you through the options , the general settings , I can choose a different style .
So right now I see this area over here at the right .
If I refresh the page and I click over here it is displayed like this .
I prefer that .
So I choose style two , we can enable free shipping .
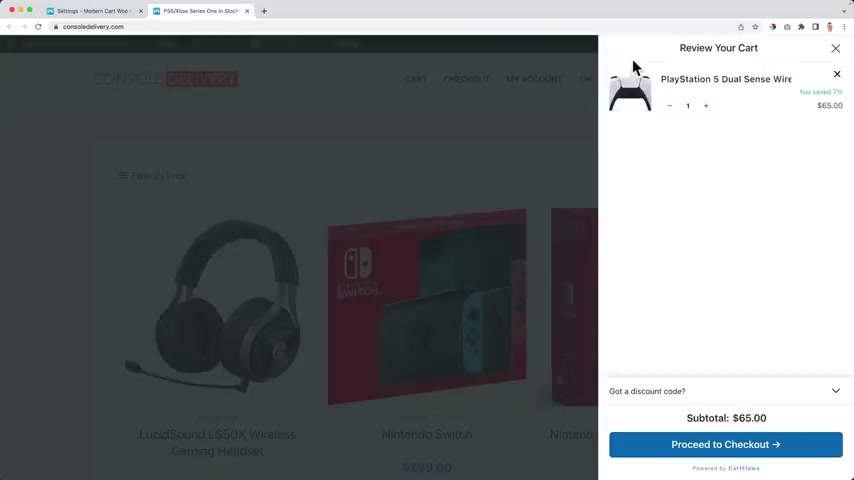
That means that if I would have only $65 it would say over here , spend 135 more dollars and you get free shipping .
Depending on when people get free shipping , you can turn it on and product recommendation .
You can say uh from the up sales , I want to display that like that .
I can add it to the cards and the new ones will appear over here .
I can also say from the cross house refresh and then you can add those .
I will disable it for now .
Otherwise I think it's a little bit crowded over here .
Display coupon field .
Well , right now you see you have a discount code , you can click over here and then it will be displayed .
You can also say show it in a traditional way or disable it .
I want to disable it , show the sub total over here .
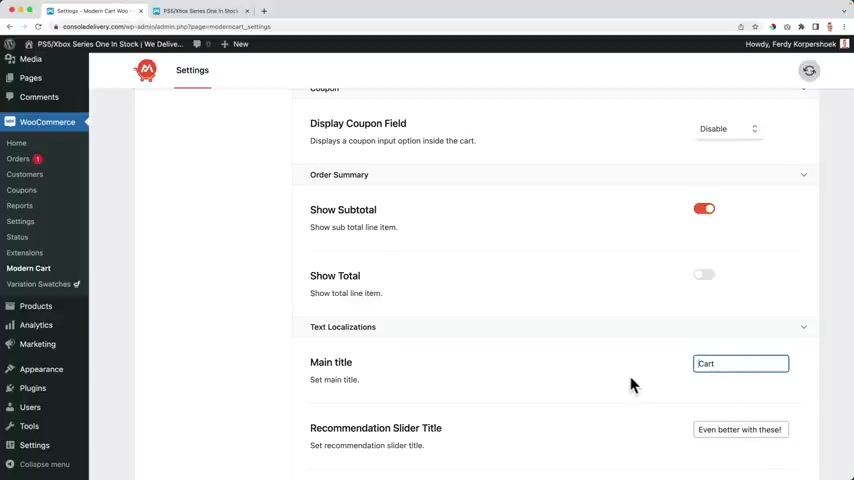
You can also show the the total , but I just want to show the subtitle total .
I do not uh display the shipping costs yet .
The main title , review your card .
I prefer to say arts .
These are some nice options .
You can change the text if you want to .
Also when you have a website in a different language , you can change all the text and the latest one , the free shipping bar text .
We need to fill in the amount .
And with that amount , if you fill in $200 it means that from $200 there's free shipping and that will help ma car to show how much money people should spend more in order to get free shipping .
So it's all automatically saved .
Floating car icon at the bottom , right ?
You can also say at the bottom left .
So will be displayed at the left and hide the card if it's empty .
So if there are no products over here , you can hide it .

Well , I turned it on then I want to go to the styling , the primary color , I go to the customizer to get those colors .
Let me go back and back to global colors .
Copy this color and base is here in the second color .
I copy it can I pay it and I can have the primary text and the secondary font color and I like them as they are , then I can change the slide out to width .
So right now it is this width , I can change it over here and on a mobile it's 80% .
I'm fine with that .
The card section , styling accordion or distribute it .
It's up to you .
Then it looks like this .
I'm OK with accordion , the animation speed how fast shoot to the pair .
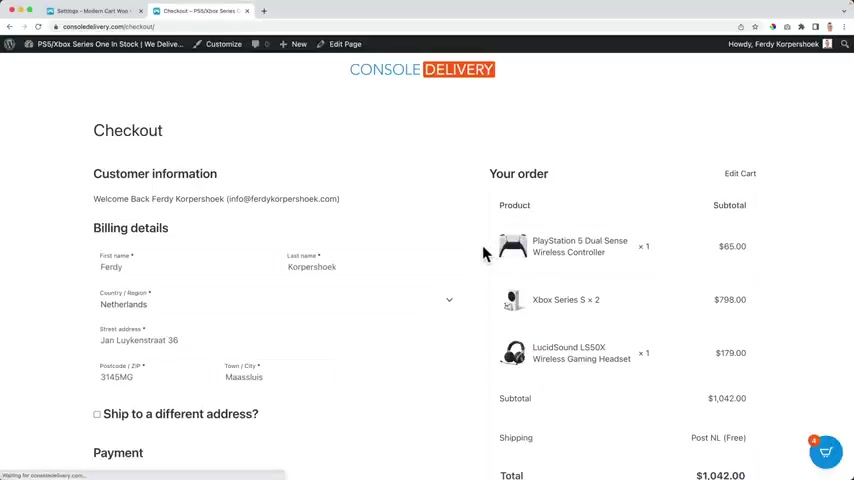
And I'm also OK with that and I want to turn off the power by car flows , text premium plug in .
So I think it's OK , if we do not display the credits , so you can uh make it minimize like this .
And then if I add something , it will be added over here automatically .
And if I proceed , do the check out now I can edit the card .
So if I see something over here like , ok , you know , let's change something .
I can edit the cards like this one and proceed back to the checkout .
There's the skeleton loader and then the price is changed .
So that's what you can do with the modern car .
Here is my favorite subject .
Finally , we're gonna talk about Texas and not the state Texas .
Now , we're gonna talk about paying tax to the government with money .
We work so hard for , to earn .

Wow , I love Texas .
No , but uh it's good that we pay tax in melons .
We pay a lot of tax and that's why the roads are great and stuff and the health sugar things .
So , um I always think the more taxes you pay , the more money you probably make .
So it's OK .
As long as you're happy with who you are as a person because out of debt flows everything else in your life , you know .
No .
OK , let's talk about Texas and I'm gonna talk about uh putting all the uh the Texas information manually and about automated Texas .
So if you want to know how to automate your tax , keep watching .
So in order to configure text , we go to the back end to woocommerce settings .
I scroll down and I see the option and they will text , I turn this on and when I do that and I save it a new ta will appear .
So let's save it .
There .
It is the Texas .
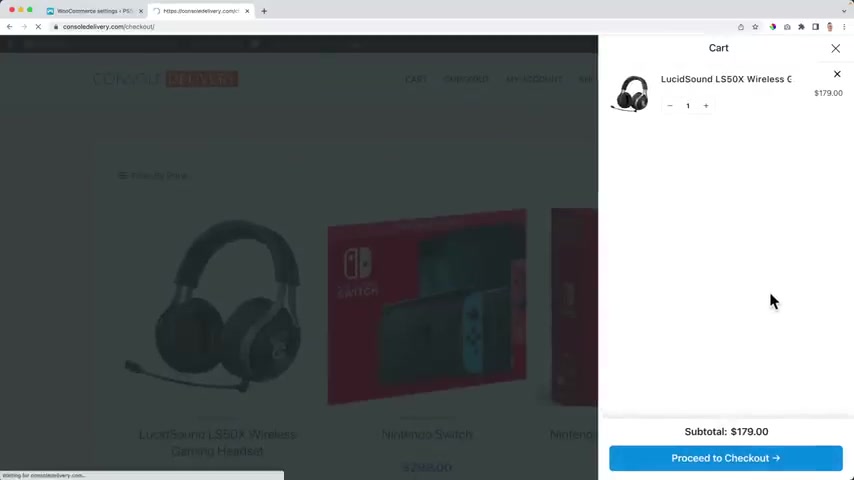
Well , nothing changes yet because we have not configured anything yet .
So also if the anti pseudo cards and we go to the checkout , no tax .
So let me walk you through the options .
And the first option is prices entered with DEX .
So what I can do , I can make sure that this is shown inclusive of tax or exclusive of tax .
And when do you need to do what ?
Well , if you're only selling to companies , you can say this is $179 .
But then at the checkout taxes will be added if you're on and give this option .
No , I will enterprise is exclusive of tax .
In order to see how this looks , we need to talk about the taxes rates right now .
We have three rates , standard rates , reduced rates and zero rates .
Well , let me scroll down a bit .
We have by default , the standard rates .
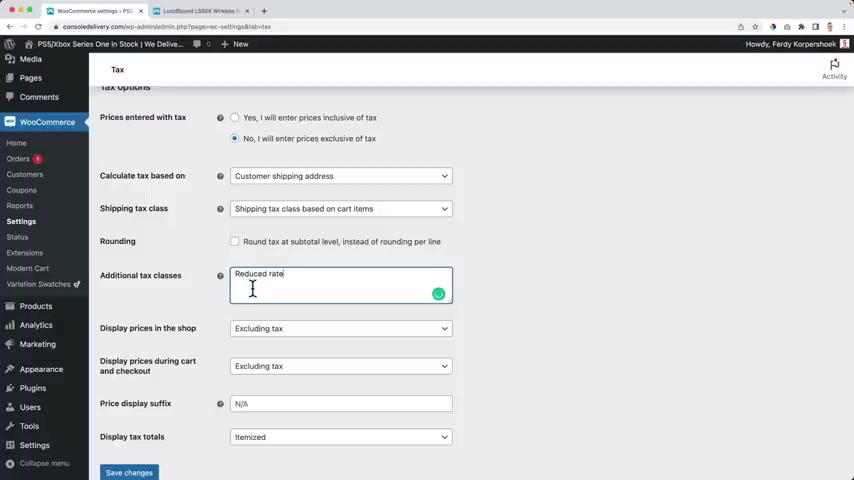
And then over here we can have additional tax class as well in the Netherlands .
We only have two .
So we only have the default rates for a lot of products .
And then we have the reduced rates for books for instance .
So I only have reduced rates and the standard rates .
And if I save it , look at this , I have standard rates and reduced rates .
Well , I will show you how to automate this , but right now I want to show you how to do this manually so I can insert a new standard tax rate for a certain area .
So for the Netherlands , it's NL for all uh Netherlands and then the rate is 21 .
And then I can say that and the question is , do I want to calculate tax on shipping ?
Uh Not , so I save it .
And then I go to the reduced rates .
I can also search for a country Netherlands and I can select it .
And then the reduced rate is 9% that not for shipping , save it .
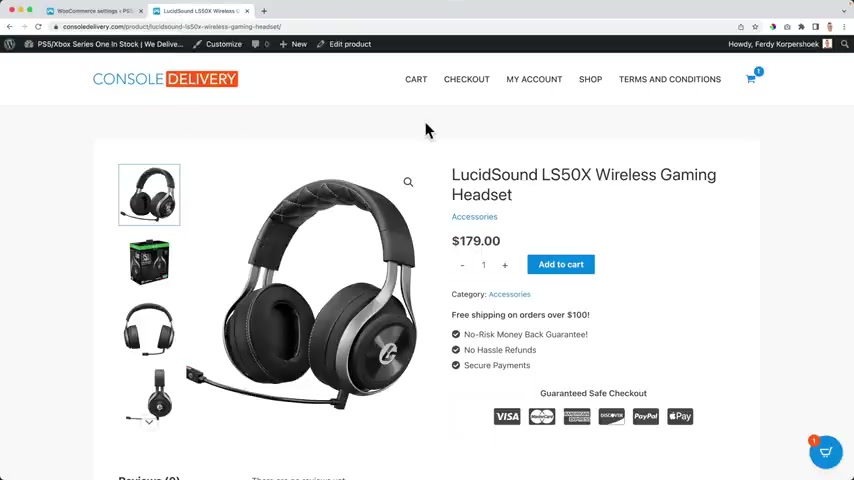
So I'm selling to the Netherlands and I'm from the Netherlands .
So if I would go through the check out and right now it says , uh it's exclusive of vet uh $179 .
And with the vet added , it is a total of $231 .
Why uh we pay this as a company and this money , we will get it back from the government .
That's just the way it works .
So that's a nice way to display the price on your website when you're selling to a company .
And then over here , I say , uh I show all the price exclusive of text .
And over here I can decide , well , the displays in the shop including or excluding the tax .
But I choose excluding excluding , because that money is something that people with a company get back .
So only here it will be displayed and then the total amount you have to pay is this amount .
So the whole website shows everything exclusive of tax .
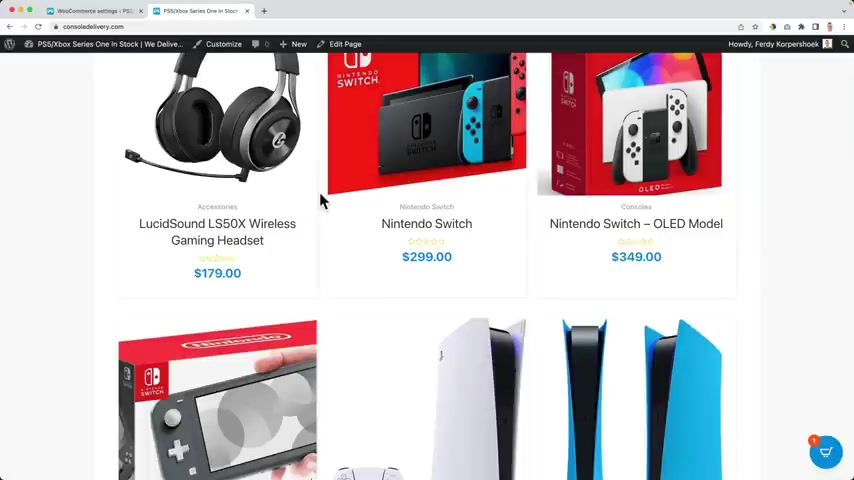
But what we do in the Netherlands , we show everything inclusive of tax .
And then depending if you have a company or not , you can get the tax back .
But if you don't have a company , people will pay 299 for the switch .
So they will not get a surprise like when they buy this as an individual , not as a company , it closes .
So they say , ok , I'm gonna pay 299 they go to the checkout and they have to pay more and they're like , but I don't have a company .
So what I want all of that to be included in the price .
How can we do that ?
Really simple ?
Yes , I will enter the prizes inclusive of tax .
So I save it .
And now when I go to the website , ok , so at the end of the day when we buy this , we pay 2 99 but right now it says 2 47 .
So it's showing the price exclusive of the tax or the vet .

So it's saying over here X vet , now if I go to the checkout , then I will see a total of 299 .
But what I want on the website , I want to show the price inclusive of the text or the vet sorry .
In the Netherlands , we only have one word for that .
So I don't know if I should say vet or text or Texas or Texas , the state .
No .
So how to achieve that ?
Well , over here display prices in the shop page , including the text and also here I want to include the text .
So everywhere on the website , I see all the prices including the text .
So now it's 2 99 .
When I go to the checkout , I do not get a surprise because it will be 2 99 .
And then it will say $51.89 is Texas or vet .
So when I have a company and I buy this and I want to make youtube videos uh and tutorials about switch related videos , switch related games .
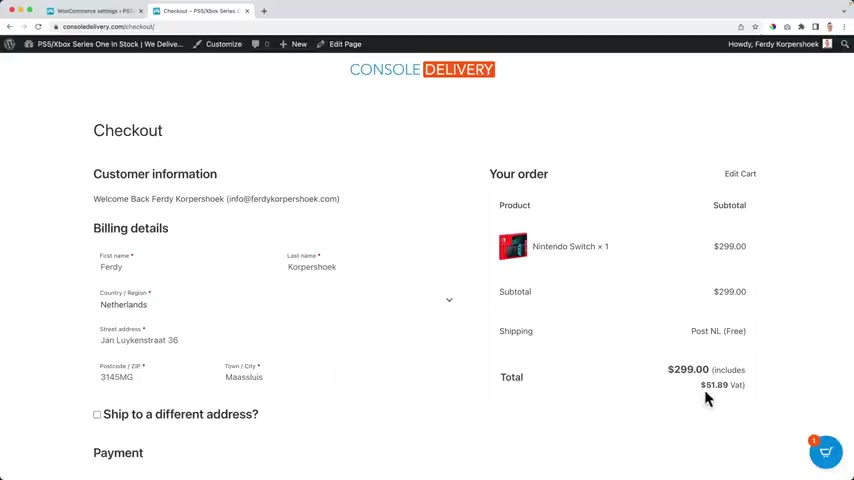
Then I can say , hey , I buy this for my company , then I can get this money back .
But I'm not surprised uh that the price will be more than 299 .
So this is personally how I prefer to do it because when I buy this as an individual , I know I pay 2 99 and I will not be surprised at the check out with additional taxes .
And then if there's a product , for instance , let's say one of the products is a book or all the cases don't have to go for the 21% .
But the 9% I can go to the product , I can edit the product .
I scroll down and then here the tax status is taxable .
But text clause is reduced rate .
So if I'm selling a book in the Netherlands , I know I have the reduced rate of 9% instead of 21 .
So now when I update it , I view the products and I added it to the cards .

I view the car , I get rid of this one and proceed to the checkout .
What I see is that the included tax is $3.22 .
It's only $3.22 which is 9% and not 21% if I would change this .
Now , let me show you , I go to the products or products and I search for cases I click over here and change it back to standard and I refresh the page .
Look at this number .
It's almost double .
This is 21% .
So that's how we can work with rates and reduce rates .
Ok , a few more things I want to do .
Oh , here it is now not reduced .
So let me bring it back to reduced update .
Then I want to go to the settings again .
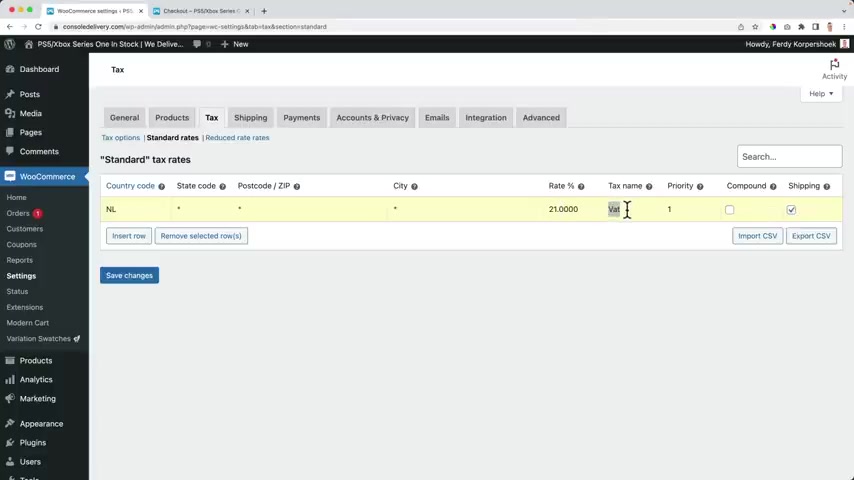
So I go to Woocommerce settings to text and then I want to go to the standard rates and I want to include shipping .
So and this time I say , not say fat .
But since I have two types of rates , uh , tax rates , I want to say 21% fat , save it over here 9% .
So it will be more clear what people are paying for .
So over here you see 9% fat .
So if I go to the website and I buy something with uh the normal rate instead of the reduced rate , I go to the checkout , It also includes 3.22 .
That's 9% fat and $51 .
That's 21% fat .
So that's nice .
If I want to combine this , I go to the settings tax options .
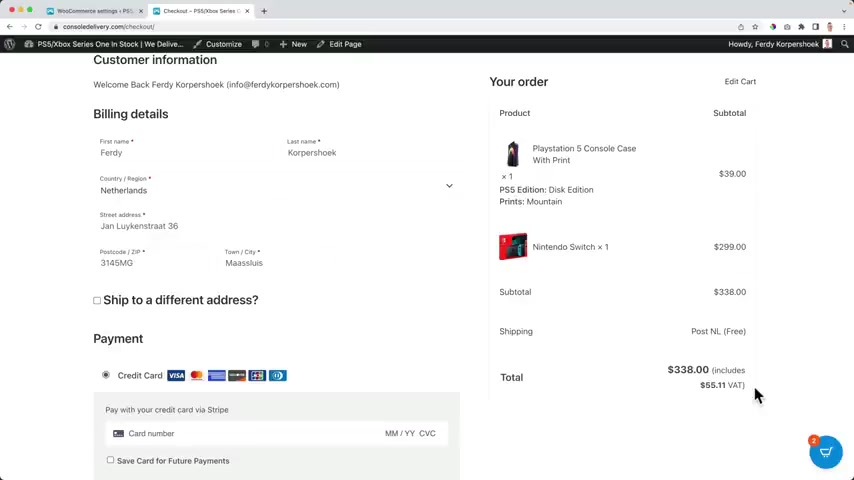
And I say display text totals as a single total .
Save the changes refresh .
Now it's one big pile of that .
And if you're not selling to companies , that's great .
If you're selling to companies , I would definitely say itemized and then another one , the rounding .
If you have a lot of products , look at this , um , let's add them all to the cars .
Take care , click away and I view the gus , I proceed to the checkout right now .
This is the amount of fat .
Let me , um , added the cards , remove this one .
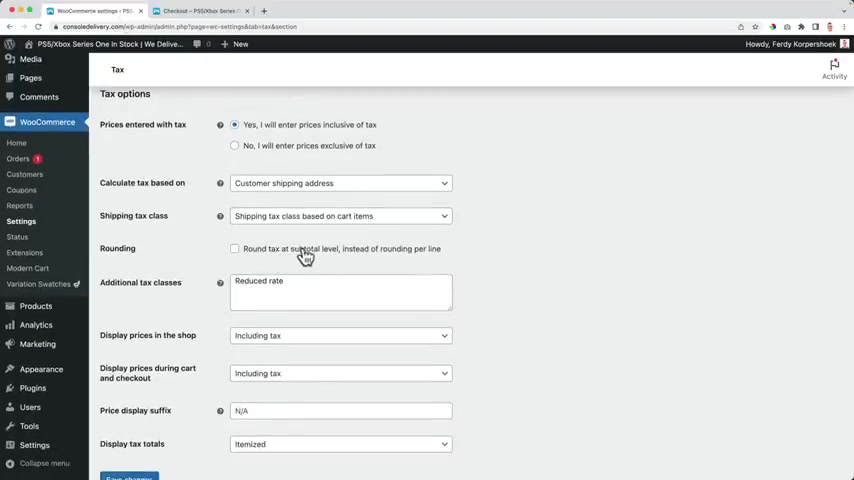
So there's only one type of fat which is 21 403.17 .
Well , if I would say round text at sub total level instead of rounding per line , that's better for when you're selling to companies because , um , right now if I uncheck this , it will round up every vet number per product and then it will be added to this number .
But when I check this , it will round all the taxes , taxes at the sub level .
So it will add all the taxes of all these products and then it will round it up .
I think that's better when you're selling to companies .
I know for sure that's better .
Otherwise you get weird missing numbers of two cents and three cents and you're like , where is it ?
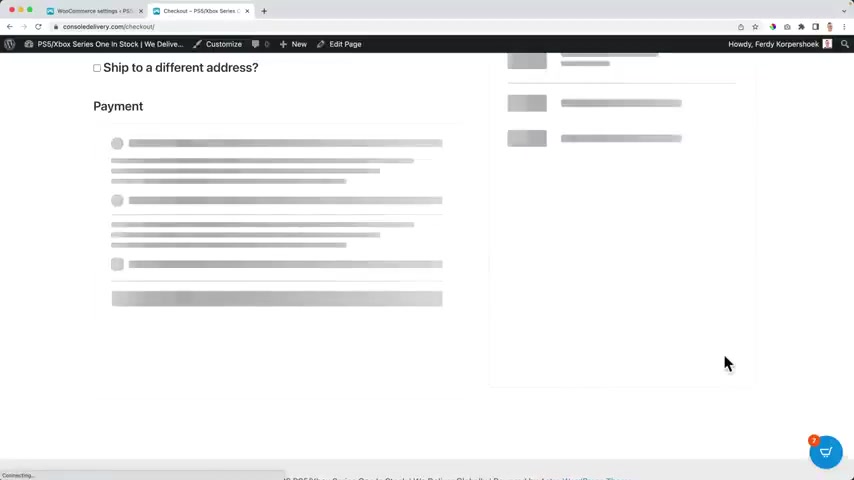
But , uh , if I refresh it now , in this case , it's the same , but it's better to , to calculate , to sum up all the taxes of all these products and then round it up to two decibels after the point , I hope I explained that .
Well , just turn it down .
It's better .
And , um , depending if you , if you , if you sell only to customers , you can use it as a single total and then they'll say it's vet but , but , but wait , I'm selling to the Netherlands .
But what if I'm selling to the United States ?
Where's the vet now ?
Well , in order to set it up , we go to the standard rates and I in a row and I can say us s fifth or 10% 10% 5th , save the change and reduce rates .

Also us , let's say 5% 5% fat , not for the shipping .
Ok .
Now , look at this refresh , this is the amount of tax for the United States .
So that's how you can set up um Texas .
But for every state there is another Texas .
So you can search for de Jar United States .
There go .
And then you see California 7.25 .
So what you can do here's the state code California , you see 7.25 7.25 .
But then you need to do that for all the states you're selling to .
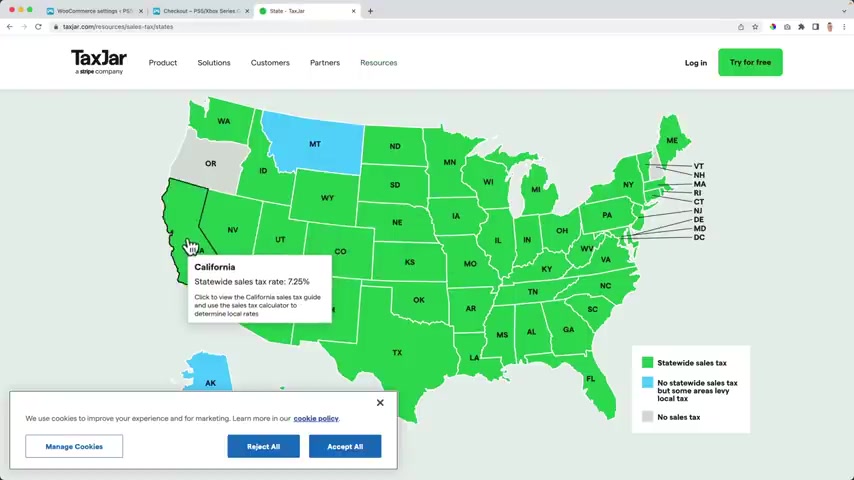
So Washington 6.5 and if you do that , but it was just a reduced rate .
So I need to due for the standard rates .
C A then I need to do something else .
I need to go to the text options and I need to calculate the tax base .
Uh Right now it's the customer shipping address .
That's the best because people that buy from California will pay different tax amounts than people from Iowa .
Iowa .
Let me see , Kansas or rather , I've been to Kansas , I've been to California .
Hawaii .
How much is the tax in Hawaii ?
4% ?
Wow .
So , um yeah , that's what you can do , but there's a better way we can also automate this whole thing .
But what I wanted to say , let me not get carried away .
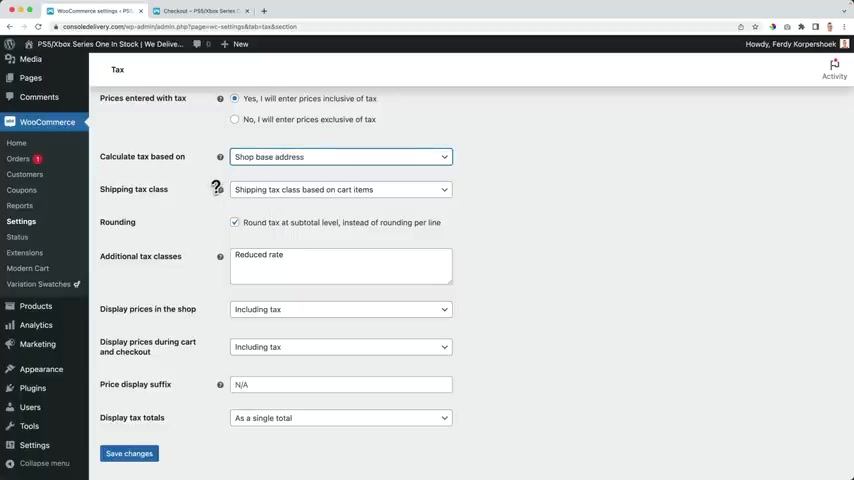
If you're only selling to one country , you can use the shop based address because then all the taxes are the same and it will not change based on where people live .
But I sex , I sex did I say that I can tell it out .
I can also live in , I live in and um it was just an honest mistake out of the heart , out of the bones of the heart flows .
Ok ?
Customer shipping address and leave it as it is .
And by default , we we decide per item uh what kind of rate it should be .
So if you want to change something , you need to go to the products , all products .
Wait , let me save .
First we go to the products , all products do a quick edit and then you can change the text status to taxable and reduce rate .
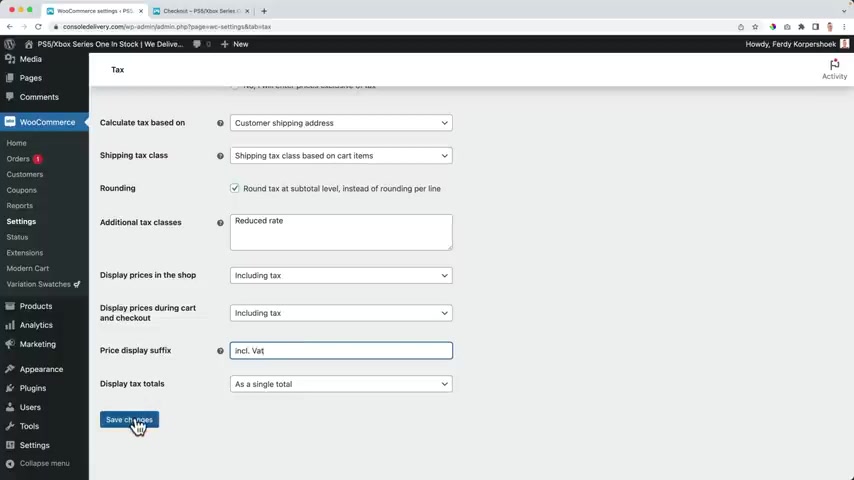
Uh One more thing , you can go to Woocommerce settings X and then if you want to , you can say everything is including the fifth and then on your whole website , it says that but I , I don't want that .
But hey , if you want it , you can do it because it's your store .
Thanks .
Remove this .
So now everything is calculated perfectly for my customers .
And then if they have a company , they can get their taxes back .
And if they don't have it , it's also fine .
In order to automate tax , we go to the back end , we search or we go to plugins at new and then we search for Woocommerce .
Thanks and say , welcome our shipping and tax install .
Now activate and then it will prompt us to install jetpack and connect .
That's what I will do by clicking here .
Ok .
Now I need to log in you also , I already am logged in because they know who I am .
I need to create an account .
I dismiss this .
And now that's it .
Now I go to Woocommerce settings to text and here automated text .
I want to enable it and it will say enable this option will overwrite any text rate you have manually edit .
That's it .
I save it .
And now jet back and Woocommerce will do all the hard work and all the hard calculations for us .
Mary , did you know that there are so much come her settings , Mary did you know ?

I don't mean to be disrespectful to any religion .
I think it's a beautiful song .
I like it and sometimes I like to have some fun .
Maybe you don't like it .
Maybe you like it .
Ok .
I want to talk about the settings .
There are a lot of settings but we covered a lot of them already .
Shipping payments , email .
No , not email yet .
We'll talk about that .
So let me walk you through the options , the settings of ers , there are not that much left and then I'll talk about email .
So we covered a lot of settings already .
Let's take a look at all the other settings .
I go to the back end to media .
Just kidding .
I go to Woocommerce settings .
This needs to be your address .
You can sell to specific locations or to all the countries in the world .
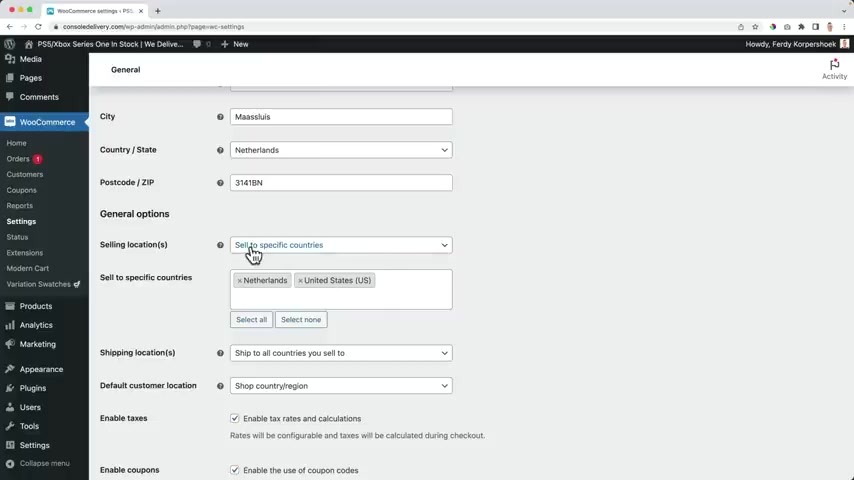
If you do to a specific amount of countries fill them in over here , shipping locations , of course , uh only to the countries you sell to and default customer location leave it by default .
They can fill it in .
We enable taxes , we enable coupons and this is how you can define how your cur currency should be displayed .
For instance , with Euros , we use a , a point as 1000 separator .
That's what I see on my uh bank account .
Just kidding .
And a decimal separator is a comma in , in Europe .
So I filled in as it should be for a country .
Then we go to products .
Uh Actually , I don't need to change anything over here .
You can change the measurements , weight and dimensions and they will reviews and reviews can only be left by a verified owner .
So only people that bought something from our website .
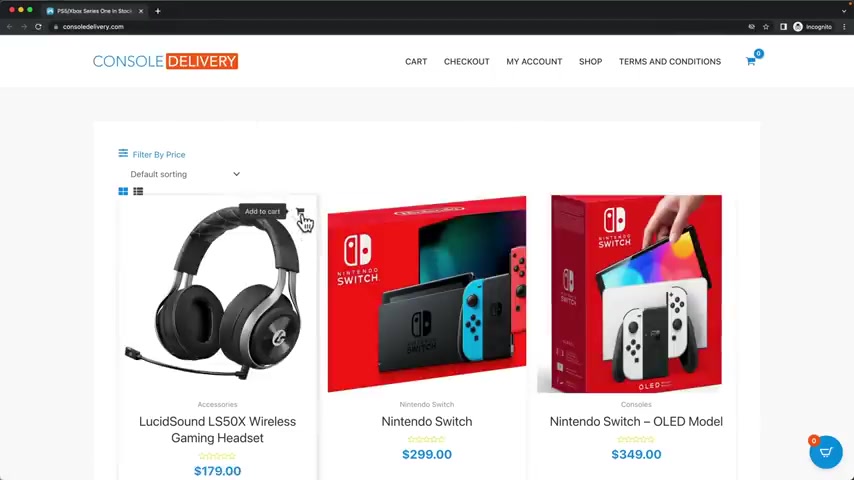
I don't check that and I'm ok with everything inventory we talked about already about that .
I want to get an email when there are only 20 products left of uh a product , downloadable products .
It's all self explanatory .
And at the same time , I don't change anything about all these settings .
We covered tax shipping payments .
Let's go to account on privacy .
And now if I would go through the website and I think I need a window and I add this to the cards and I go to the checkout .
I can fill in my email address and my details and my payment method .
But how good would it be if I allow customers to log in into an existing account during the checkout ?
I also want to allow customers to create an account during the checkout .

And when they create an account , they will get a link from my website .
Like , hey , you can set up a new password because they are a new user .
That's all say the changes , we're gonna talk about the privacy policy in all those pages later and emails , we're gonna talk about that .
So let me go to integrations and I don't need any have any integrations and I go to advanced .
And if you have a website in a different country or a different language , you can change those ULS if you do that .
Uh afterwards go to , let me save it first , then go to settings the links and then save the structure twice .
So they will be saved .
An important part of having ear's website is the emails you sent to people that buy things on your website .
If that looks ugly , if that looks bookers , like it's not that appealing .

There's always uh by by default , there's a ugly purple color story is if purple is your favorite color , it's ugly .
And when you buy something that email looks ugly , so we're gonna make that email look better .
So when people buy things on your website , they get an email that looks beautiful as the right content .
So are you ready for that part ?
I am .
I hope you're too .
Let's go .
So that brings me to the following woocommerce settings and then there are the emails settings .
Well , in order to check how the emails will look , I need to go to the payment options .
I turn off Stripe , I turn off , I turn off paypal and I want to turn on cash on delivery so I can uh process payments so now I can buy something .
So I go to the checkout .
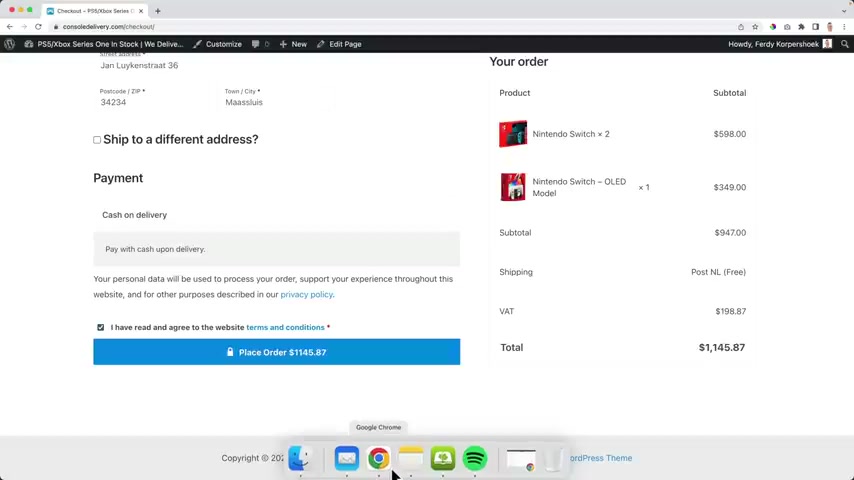
I fill it filled in all my details , cash on delivery .
I agree and I place my order .
Ok .
Uh My email account is turned on .
What is this ?
I placed the order , my email account is turned on .
So I'll get two emails , one as an administrator and one as a client .
This is as the administrator .
I get this email because I'm the website owner .
There's a new order 176 the Nintendo Switch two and the Nintendo Switch model .
So the total amount should be paid through Stripe or paypal .
But right now I set cash on delivery so I can buy things without paying because I'm testing this for the tutorial .
But what I see is that I don't like the colors .
There's a lot I don't like over here .
I don't like the colors .
I don't like all the text over here , but let's take a look at this email .
That's the email , the buyer gets .
Thank you for your order .
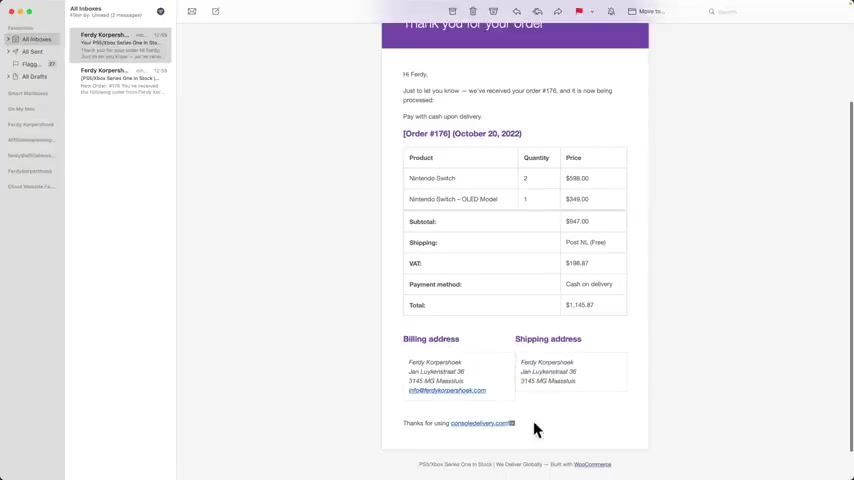
Hey , Freddie , just let you know we received your order , blah , blah , blah .
And it's now being processed the payment method , the date , what the person has bought the price and where it will be shipped to .
Thanks for using console delivery dot com .
And then we see this over here .
Well , we can adjust it , we can make it look better because , um , maybe I think this title is too long .
Maybe I want to change stuff over here .
How can we do that ?
Well , let's go back to the back .
And by the way , this is how it looks when people buy things .
I think it looks beautiful .
Great .
And then they can go their accounts if I take a look at my orders here .
It is beautiful .
So let me go to the back end as an administrator .
I go to woocommerce settings .
I go to emails and there are a lot of emails .
There are three emails I will get as an administrator .
Those three .
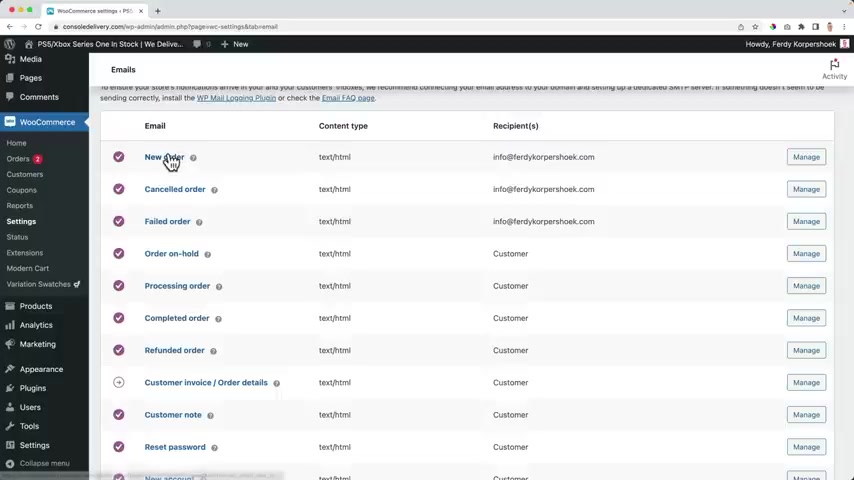
So when a new order arrives , when the order is canceled or when the order is filled or the payment failed , I get an email like , hey , somebody tried to purchase but it failed and I see the reason why it failed when the order is canceled .
I see it and this is what the customer gets all those emails and we can adjust them one by one and we can adjust a few things that will be applied to all the emails that will be sent and that's over here below the from name .
Well , I prefer to say on so delivery we deliver .
I don't , I just like that really easy .
The from address I can change it to info at console delivery .
If you use side grounds , we can go to youtube site Agro tutorial over here 37 also features and here you can see how to set up any email account .

Uh Let's let me keep it with Freddie Corpus .
Who dot com ?
Then there's the Heather image .
OK ?
I open this in a new top tap and I go to my logo .
I think it's really big .
So what I can do , I can copy this , I can paste it in a new tab .
I can save it , then I can rename it to 300 pixels .
I close this , I go to the fell .
It's not there anymore because I renamed it .
OK ?
Let me go to the desktop .
I drag it over here .
Let me make it smaller .
For instance , 300 pixels I click on skill .
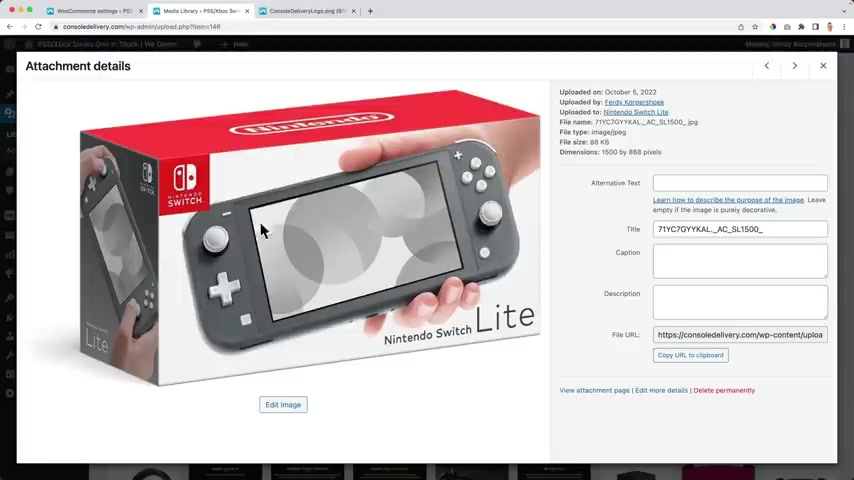
It's it's close , it's and go to the image .
It's 300 in with I copy the UL close this close , this I base it over here and now an image of my logo will appear above the email .
Then there's the footer text with the title built with Woocommerce .
I want to change it .
So I say we wish you a lot of gaming pleasure , something like that .
Then there are the colors .
Let me go to the website to the customizer .
Then I go to Global Global Scholars and I grabbed this color .
I copied it .
Hey , buddy .
Thanks , caller .
I want to make it um 222222 .
Save it .
So we changed a few things already and now we can preview our template .
So console delivery title , the text and it looks a lot more in the style of our website .
But wait , we can do more .
So if somebody orders with cash on delivery order is being processed .
So what I can do , I can go to the processing order email and I can click on it and now I can say your order has been received or thank you for your order , can paste it here , but it's ok .
Additional content .
Thanks for using blah , blah , blah .
That's what we see over here so I can change the text .
Thank you for doing business with us .
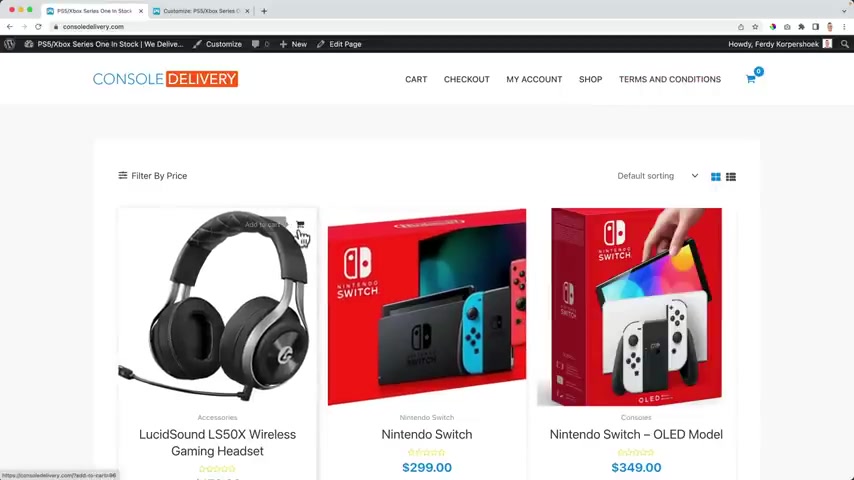
If you have any question , feel free to reach out to us , questions , save the changes .
So how about in the order ?
His headset ?
I would love to have it .
So I go to the checkouts .
I agree .
Place the order .
Ok , I got two new emails .
Here's the one I got and it looks so much better already and we changed a little bit of the text and then here it's for the user and looked like that .
But we can take it a step further right now .
We see it's from Freddie Korps from this email address and that's what we decided to do over here .
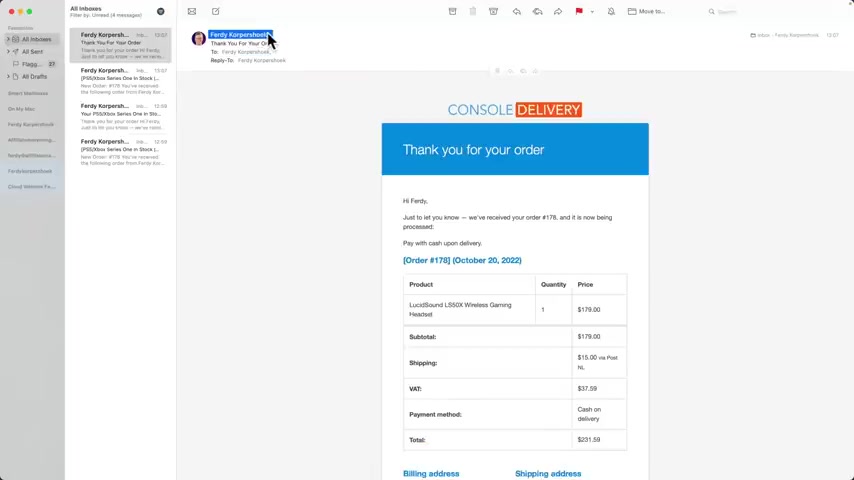
Let me go to the back ends , commerce settings , emails over here from console delivery .
Well , it's not visible over here because I linked this email address to Freddy Corps in my email account .
So normally when somebody else buys it , I'll show you you'll see console delivery so so far so good .
But we can take it to the next level .
If I would go to the um processing order , I can manage it , then I can copy the file to the thing , save the changes .
So now here at emails , customer processing order , I can change the PHP file .
So it looks a little bit technical .
But let me show you what we can do now .
So I go to appearance theme fell editor .
I understand .
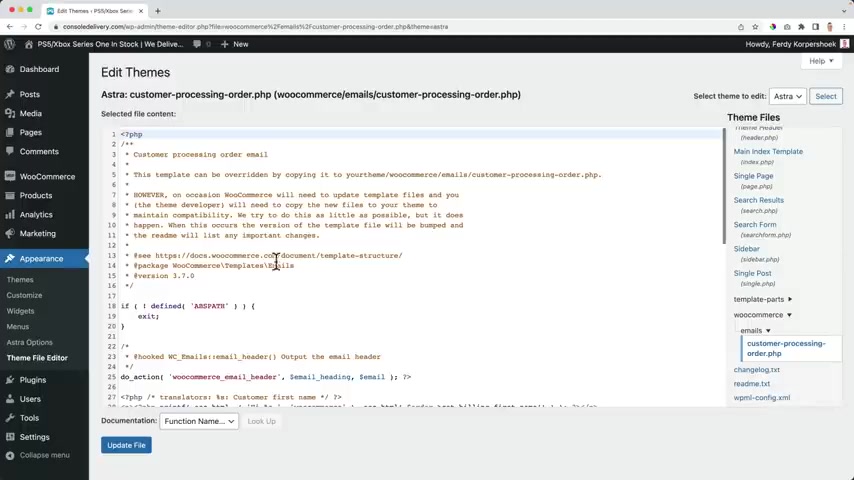
Then I scroll down .
I go to Woocommerce , emails , custom processing order and this BHP file will overwrite the default one from Woocommerce .
So if I change something over here , it will be changed in the email we sent .
So just to let you know we received your order , what I can do , it says just to let you know we received your order and it's now being processed .
So if I change something over here , we want to let you know that we received your order , your order number is this one .
We will prepare your order and let you know when it is sent to your and address .
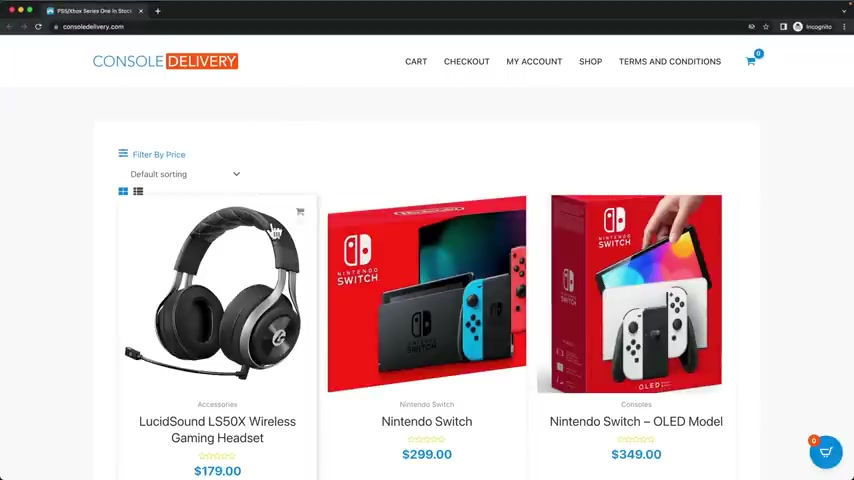
Ok .
That's something different .
Update .
The fell successfully edited .
So now let me buy something this time with a different account different , you know .
So what I want to do , I want to open this in an incognito window .
I want to buy this .
Go to the checkout .
Wait , it's F corpus at gmail dot com .
My first name of course is George Washington from the Netherlands shipped to the same address .
I want to pay cash on delivery and I placed the order .
I get this again .
Nice overview .
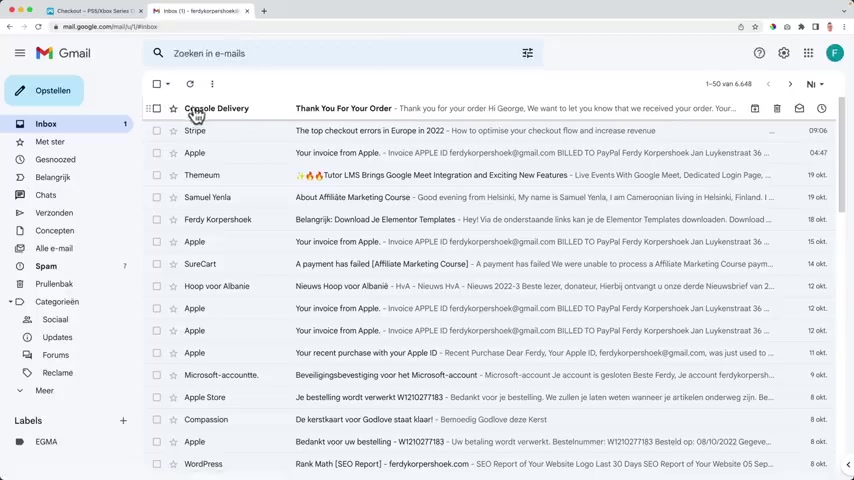
And now if I go to my gmail account there , it is the name is console delivery .
Thank you for your order .
It looks nice and we want to let you know that if we receive your order , your order number is bla bla bla we will prepare your order and let you know when it is sent to your address .
Wow .
And then here thank you for doing business with us .
If you have any questions , feel free to reach out to us .
So we changed a lot even the the PHP stuff and we we can do the same with all the other emails .
Well , there are a few emails I use so I go to um settings emails .
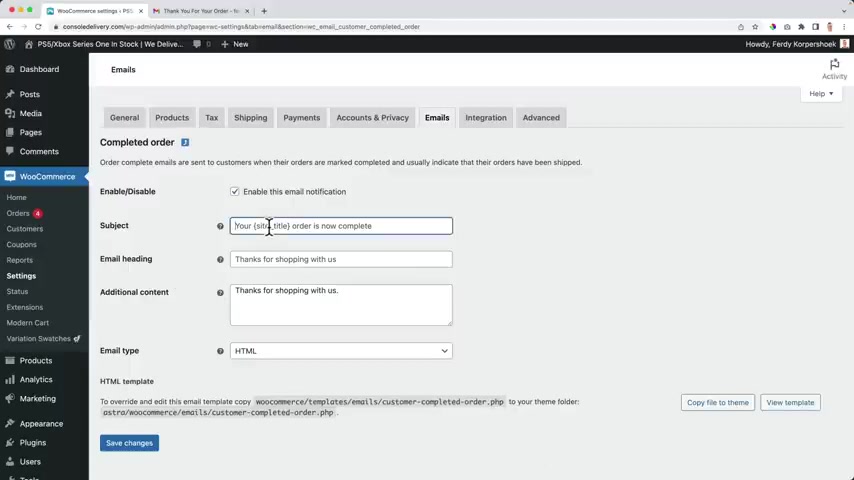
So um normally it's the processing order and then the completed order so I can click over here and I can , um , I can see your products are being shipped safe .
So now as an administrator , uh what I do , I go to the storehouse or whatever .
Maybe I do automated , drop shaking shipping stuff .
What I need to do when I know that the package is being sent to the right address .
I go to the orders .
I go to the order of George Washington .
I check if you paid the money .
If I see it on my account , I pack the stuff , send it to the right address , go to DH L or something else .
Fedex and I change the status from processing to complete it when I do that .
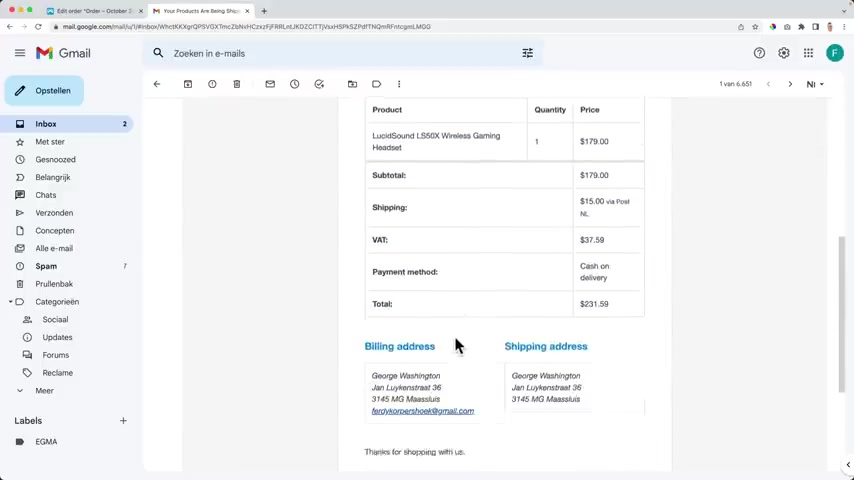
And I click on update , I go to my inbox and I see delivery .
Thank you for shopping with us .
Hey , George , we finished processing your order .
It says the title , the title says your products are being shipped and with the same principles , we can change all this , this and this text over here .
Like , hey , if you have any question , if the product doesn't arrive or I don't want to make people scared .
But if you have any question , feel free to reach out through this phone number or through this email or chat .
So that's how you work with it .
And I think it looks great .
If I click over here , I see it from in Fred Corps because that is what it's saying over here at settings , emails in my address .
So I think it looks amazing .

And now , you know , a lot already we we created the web shop , created different kinds of products , styled everything with pro we talked about Texas shipping , payment methods , emails .
So we're getting further step by step .
So if I take a look at the website , this is how it looks right now and people can buy things on our website .
We have covered so much already .
This tutorial is getting longer and longer .
I'm sorry , I just want to cover everything and actually our website is up and running and people can buy things on our web shop .
But we have a complete website .
We have a website and in the website , we have a web shop .
So I want to focus more now on , on the rest of the website .
So let's take a look at the heather .
Let's create a beautiful header using a pro , it's time to look at the header of this website .
Let's make it better .
We can go to the customizer and make it look so much better .
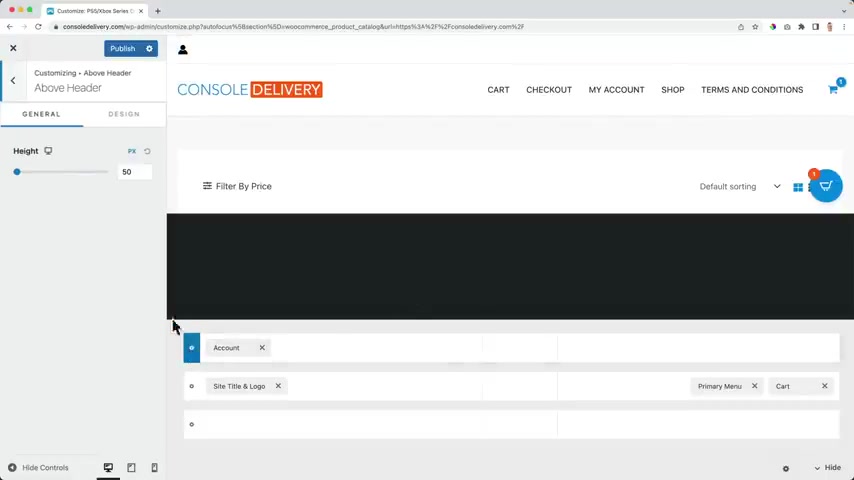
So the first thing I want to do , I want to create a few pages that we can place in our top header menu .
Because right right now we have our primary header area , then we have the top header and we have the bottom header .
So we can have three rows and three colors .
So we can have nine places in our header where we can place things So just to show you if I click on the plus and I go for an account , you see there's a new role and then the row can have certain colors .
So if I click over here , I can go to design , I can change the background color to this blue one , then I can go back to general and I can increase or decrease the height .
So let me make it 30 pixels and then I can go to accounts , then I go to design and I can change the color of the icon so I can make it white .
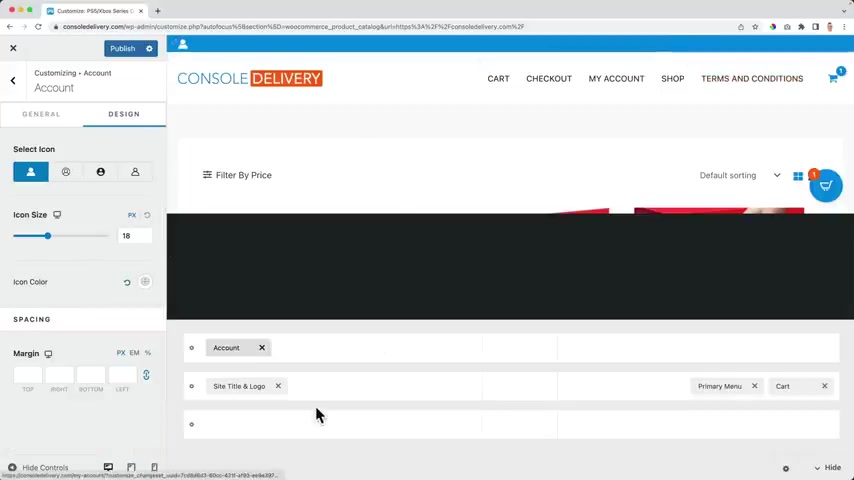
So in that way , we can create a top header , a main header and a bottom header and we can adjust it , we can place a lot of things in it .
So let me walk you through these options .
But I all started with saying that I want to create pages for a minute .
So I go back and then I go to the menus here below .
I want to create a new menu .
So I create a new menu and I call this one the top menu and I want to assign it to the secondary menu .
I click on next .
Now I can add items and if I click over here , I can create new pages by entering them over here .
So we we already have the shop page , the terms and conditions .
My account , check out the cards I drive about out page .
So I click on add and it will be added .
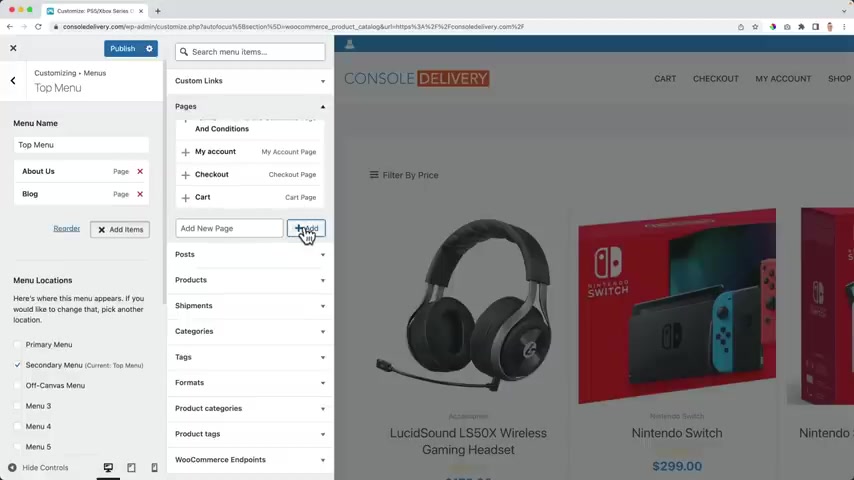
Then maybe I want to have a blog blogging is a great way to get viewers through your website through the search engines and then people can buy things on your website .
So I want to have a blog .
I also have frequently asked questions .
So I say fa Q , maybe I'll have a newsletter , so I'll have a newsletter page so people can opt in to our email list .
And I want people to be able to get in touch with us .
So contact page .
So there we have it our top menu , but we don't see it over here in order to do that .
Let me publish it .
Then I go back back , then I go to the Heather Builder .
I close this .
Then I click on the plus and I want to go for the secondary menu , but I don't see it .
Why we need to configure the colors and stuff .
So I click over here .
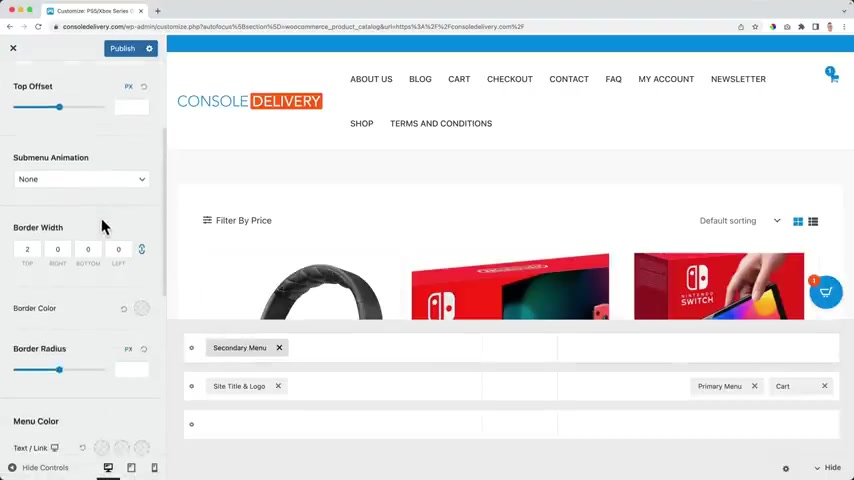
Let me go to design and then I want to say that the color of the text should be white and now it appears when we hover over it , what color should it be ?
Well , I still want it to be white , but if I would say orange , it will be orange .
Let me keep it in white and when it's active .
So when you're on the about page , how should it be colored while still white ?
And if I leave this empty , so I only choose here white , the color , if the color is empty , it will automatically grab this color .
But for the background , I want to have a different color .
When I hover over it , I want it to be orange .
And now look at this .
So when I would go to the newsletter page , what I can do , I can make sure that this is orange .
So people know we're on the newsletter page .
Well , if you want that fill that in over here , I don't want that .
So I keep it empty .
Then I want to go to the font .
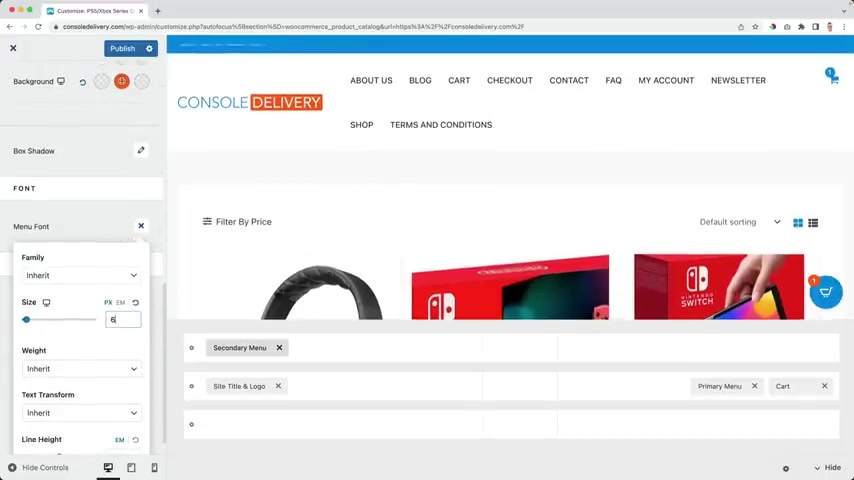
I think I can , it can be a little bit smaller .
So over here the font me fonts and I can increase or decrease the size .
So I start with zero , I think 11 .
It's great .
I can make it upper case if I want to .
But uh I'm ok , let me bring this back to 11 because it's really small .
Now , I don't know why .
So great we can play around with the spacing .
So if I turn this off , I can say from the left , every , every item has more space on the left .
So if I would increase it to 50 you'll see it over here .
This is 50 pixels also divided evenly even Lee how do you say that the tend to also increase the height ?
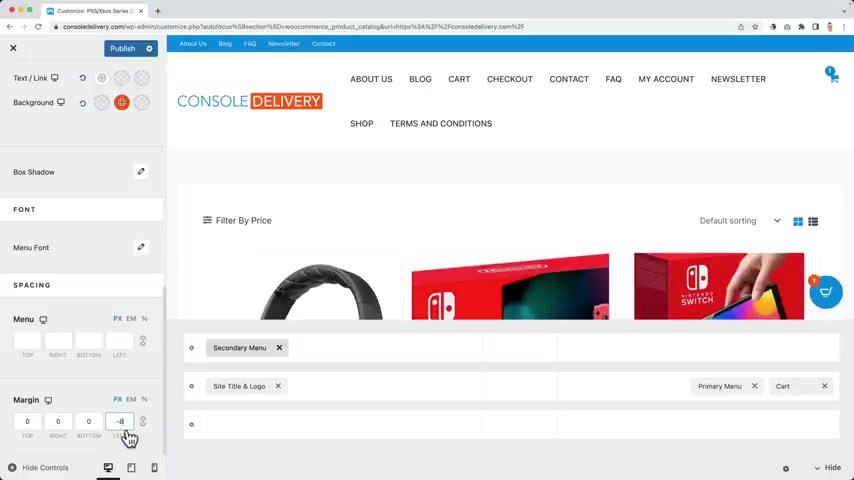
So I don't want that , but I can say top zero , bottom zero and right 20 left 20 And then do I have some space in between ?
Well , I don't need that .
So I leave it all empty and then for the margin , what I can do , I can uncheck this , bring this back to the left a bit .
So it aligns better with the c of console .
I personally prefer it and that's only about the whole menu .
So , uh that is my preference if you want to , you're gonna have a border in between , but I , I don't want that .
So I leave it with this , then we can go to in general and we can change the weight of the sub menu .
So if you have a sub menu , but I suggest you don't use a sub menu because in the top menu , I think it's not a good fit .
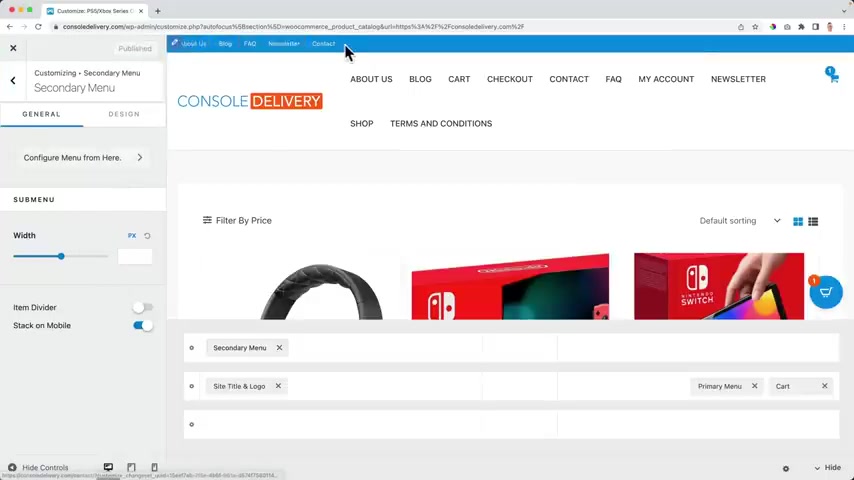
And then if you want to , you can have an item divider for the sub menu .
But I just said sub menu is not a good idea in the top header .
So uh so I look forward to this .
I published it .
So now we have our top header over here , but we can have more things in the same area .
So if I would click on the plus , I could have a divider do this over here and then I can go to click on it and then go to design , make it white , increase the size , decrease the size , increase its to 100% .
That's what I prefer .
Then I go to general , I can change the style and then I can click on the plus or click over here and I can add something else .
So maybe a button for people to sign up for the newsletter or just a simple HTL text .
And I can click over here and I can say sign up for the news leather .
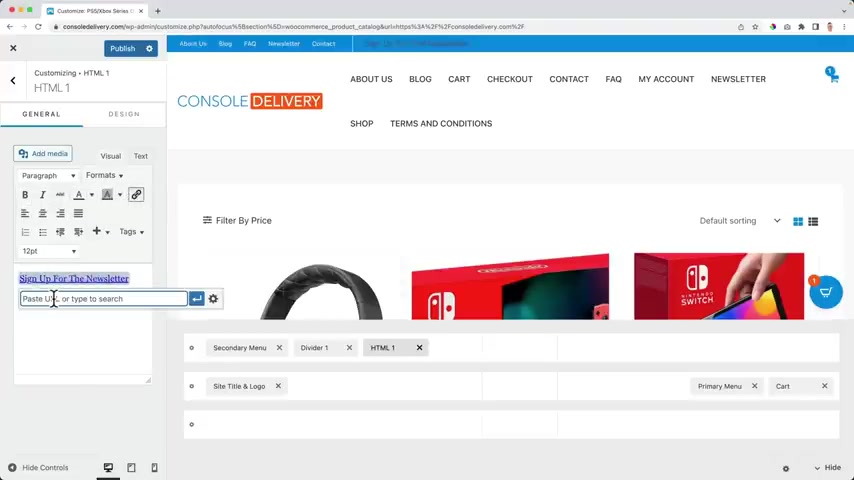
I can make it a link .
I can have the link to the signup of newsletter right now .
I will leave it like this .
Then I can go to the design text color white .
Also the link color white when people hover over it white .
Fun size size .
Let's do 11 like over here .
So that's what you can do .
And then here at the right top area , I can click on the plus and I can go for social .
OK ?
I click on it .
I want it to be white .
Of course .
So I go to design the I can color white when you hover over it .
Maybe again that the the background color can be orange .
See there's not enough space for a margin so I can increase it .
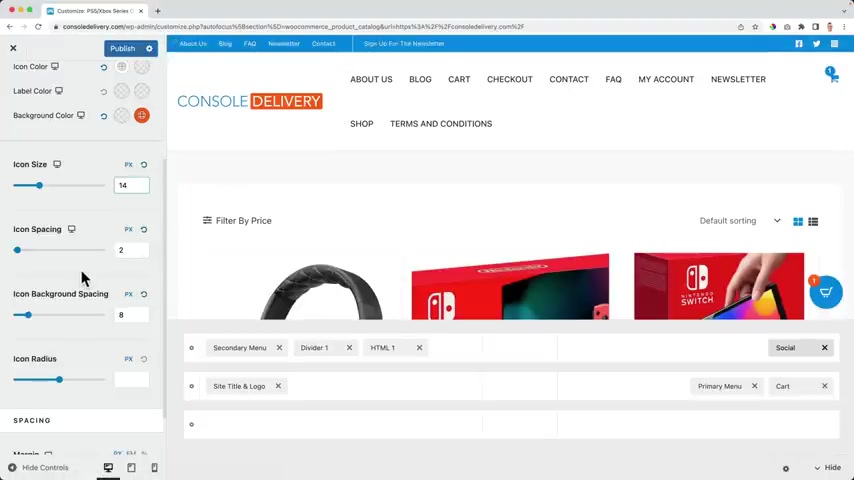
I can spacing , decrease the size , still a margin .
So I can back spacing , increased depth .
But then we should probably make the the the Eigen size bigger , let's decrease the spacing and that way you can adjust everything to your wishes .
And this is what I like .
OK , perfect .
Publish .
And now I want to have one more thing over here and that's my account .
So I click on the plus and I search for account and you see that area over here .
Let me adjust it .
So I'll , I'll do a line with this area .
So how can I do that ?
I can create an avatar .
So if you have that , you will see your image like that .
I use an icon .
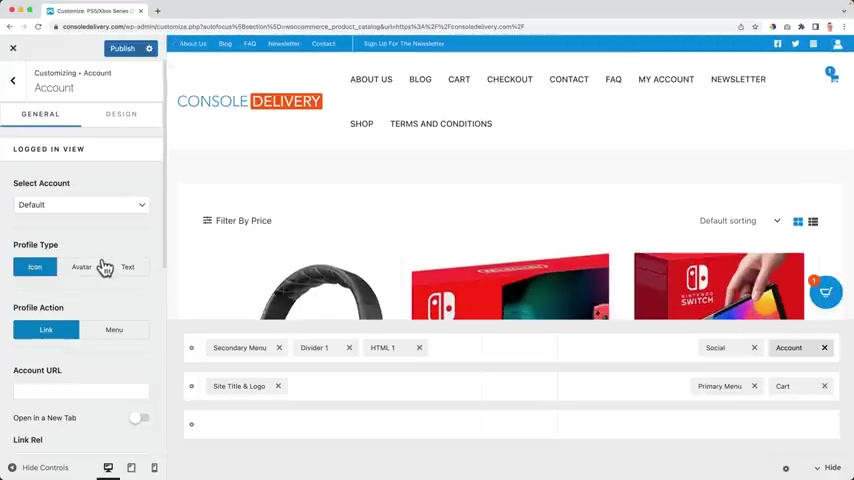
So it lines up with the other style and when you click on it , you will log in over here .
Let me go through the design .
I can choose a different icon .
I choose this one .
I can let's do the same one as the socials which were four thing .
Shall I click here ?
Design 14 , I can color is white and then at spacing , I uncheck it and at the left , I decrease it at the bottom , I increase it and everything I increase .
I want to decrease it at the top .
So let's see it needs to be the same number .
So I think it's aligned perfectly and I think we have done a great job .
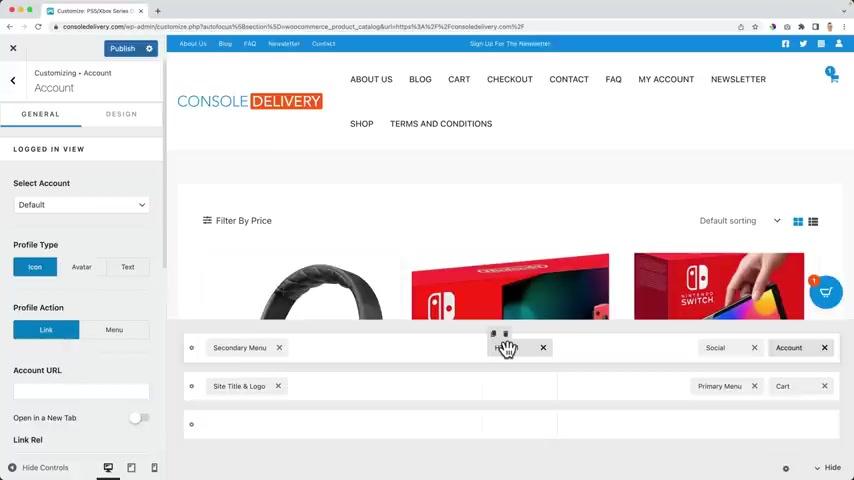
What I also can do , I can get rid of the divider , bring this to the center , sign up for the newsletter and then I can get inspired by other websites .
So I bought my Playstation at gaming dot NL .
Oh , you see , think about the delivery 40 day money back guarantee , two months of guarantees you can pay with ID L credit card .
So I can also have something like this over here .
If I want that , I can just type it over here .
We deliver in every country in the world .
So if I like that or free shipping when you spend $200 something like that , you can have anything , anything over here .
So let's publish it .
Let's see how it looks on the website .
Great .
Before we continue , I want to adjust one more thing or talk about one more thing , which I actually forgot .
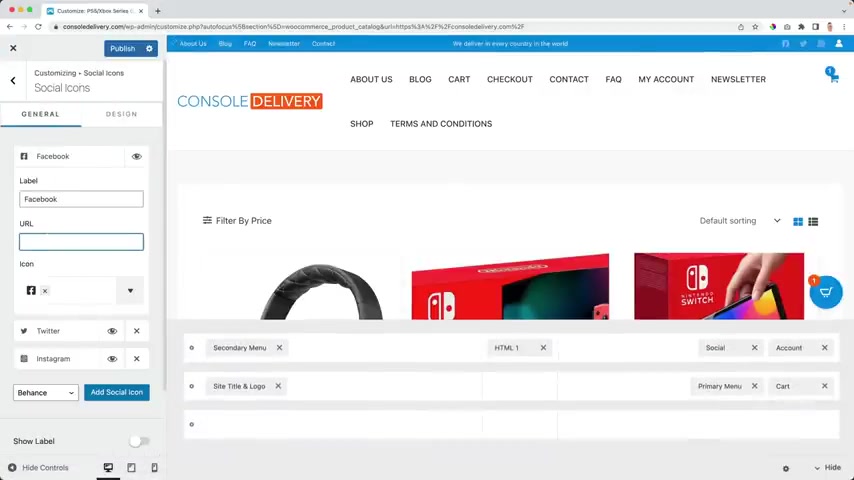
I'm so sorry .
Click over here .
Of course , I can add the UL , I can also add things .
So add on social media .
I can , I can say youtube , they can have the UL .
And then over here , I searched for youtube and there it is publish .
OK ?
And then I can go through the secondary menu and I think you know what you deserve it to be seen .

Like click here , go to the font , make it third thing also over here design 13 and then we can take a look at the main menu .
Well , what we see over here , we already have a card I can because we use modern card .
If you don't , you can use this one .
I get rid of this one because I already have this one .
So I close the card right now .
The primary menu is shown at the left or right .
I want to drag it to the center and then I want to create a menu in order to do that , I can do that by going over here to menus .
I have a main menu and I can add items .
So what I want to add over here are product categories .
I'm selling consoles .
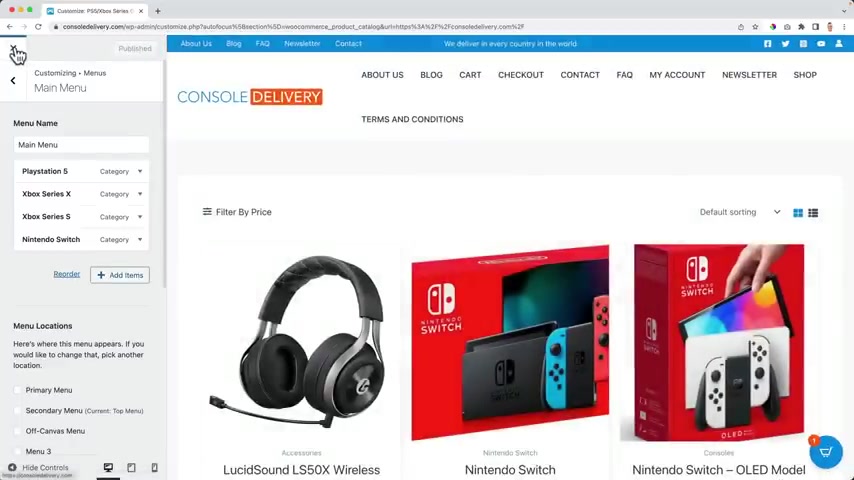
So I want to focus on the playstation five , the Xbox series X , the Xbox series S and then , then they switch and if you don't see this over here , click on publish closes , go to the back end to menus and over here at screen options , turn on product categories , product tax , et cetera .
And when you do that , we also can uh select our main menu over here .
And then here below , we have product categories .
So talking about gay , I did not do that .
Actually , I could talk about it more because right now I have the Xbox series X the Xbox series .
So what I can do , I can go to Woocommerce .
Let me see products and then categories .
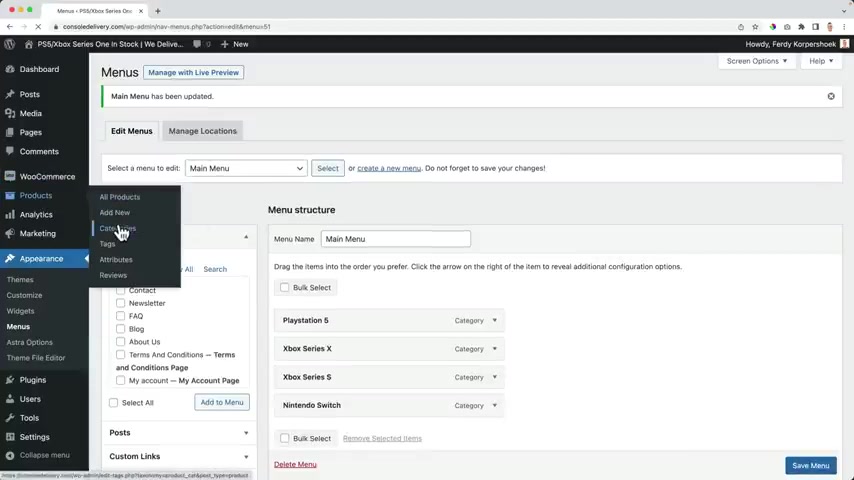
Let me save it first and I can say X box series as a category .
And then over here , the uh series X I click on it and I say it is the parent of Xbox series updated .
I go back to the categories the same with X .
Click on it like the parent Xbox series .
OK .
Then I go to Xbox Series this one and that will be a child of consoles .
What we also can do , we can give all the categories and image .
So accessories click on it , upload an image or grab an image .
So accessories it can be anything .
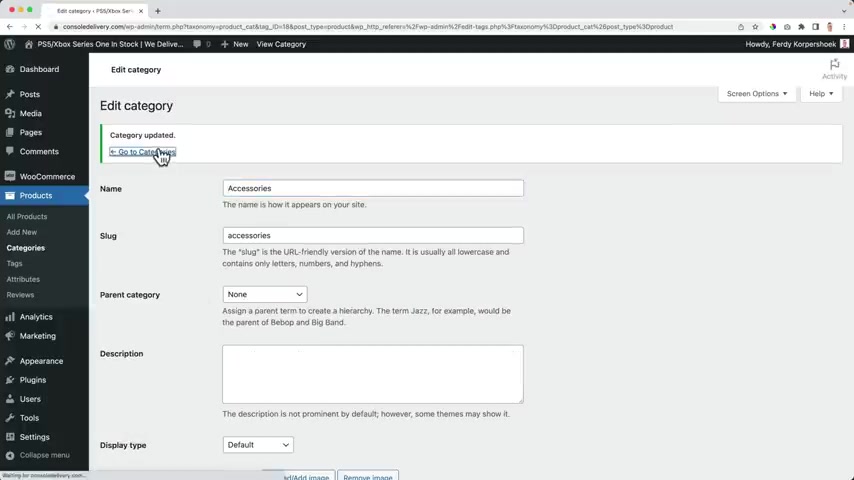
So for instance , controllers update , I go back to cases a case , an instance of a case is this one update I go back so I can give every category and they and then when people sometimes click on the category , they see the right image .
So it goes better .
So let me go back to the menus where we are talking about .
Uh Let me go to the front end , customize , scroll down all the way menus , sorry menus , main menu .
I want to assign the main menu to the primary menu or what will happen .
It will appear over here in the center .
Oh man , I like this .
So playstation five xbox series X Xbox series S Nintendo Switch .
So I want to change the menu .
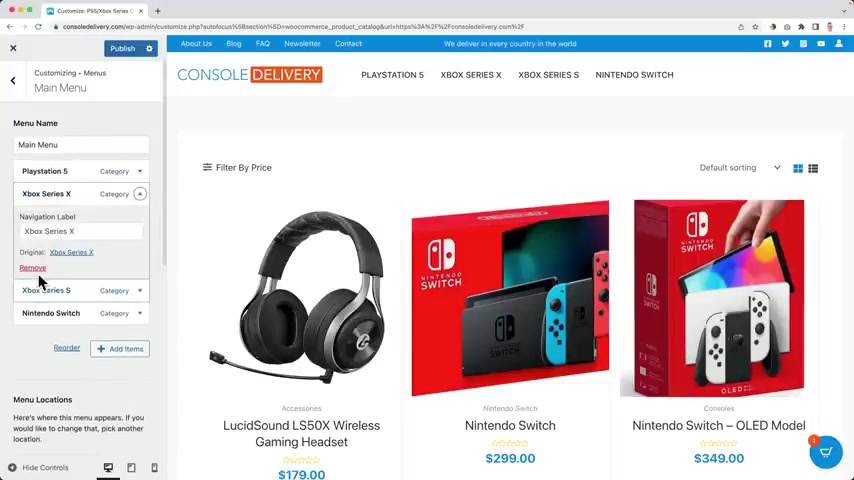
How I remove this category .
I remove this category .
I click on add items rather get grease and I want to add Xbox series and then accessories .
So play the five Xbox series , Nintendo switch and three .
What I can do now look at this , I can have playstation five , I can have a sub category so I can have games below playstation five .
So I can show playstation five games .
I have Xbox series , I can say you know what XNS , I make it a self category .
Let me bring back games to the right place .
Sometimes it can be a little bit clunky .
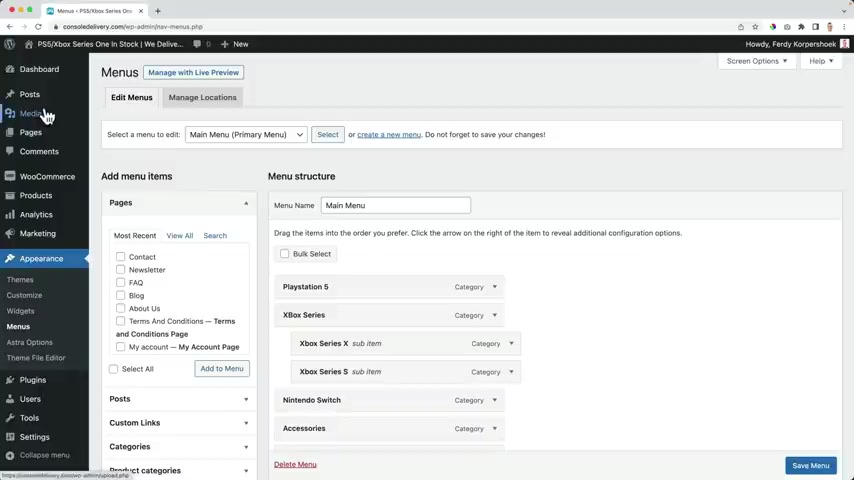
And if you don't like it the way over here , you can go back then go to the menu through the back end .
There it is not clunky .
So there you can really make this subcategory of playstation five .
I say that I go to the website and I see the categories in the sub categories .
So if I click on Xbox Series , X , I only see products .
What Xbox Series X .
How great is that ?
I think it's really great .
If I click on accessories , I see all the accessories .
So no playstations itself , no consoles , self only accessories and I can change look a few , I think , man , it's getting better and better .
Oh man , I , I'm , I hope you're as happy as I am with the results so far .
But this is how our website looks right now .
And as as I said before , we want to make the whole process as easy as possible .
So one other thing I'm thinking of is the search bar .
I want to have a search bar .
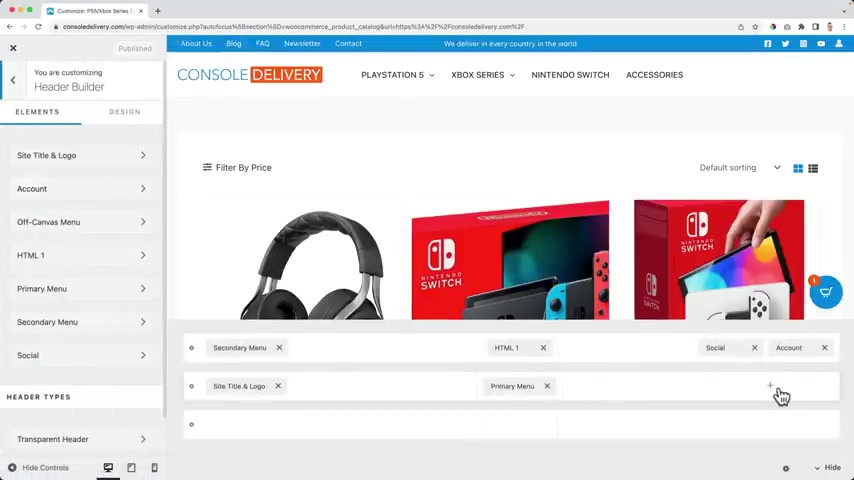
There is one but I don't like it .
It comes standard with Woocommerce .
So if I would go to the customizer to the Heather builder , I click over here on the plus and I go for a search icon .
I polish it and I closed it .
I can search for a playstation and I like the way does this play it over here when I click on search ?
But then it looks like this and I don't like that at all .
So let's make it look better .
First , let me get rid of this customized click over here , remove it .
They can publish .
So what I do , I go to the back end of the website , I go to plugins at new .
Then I search for search .
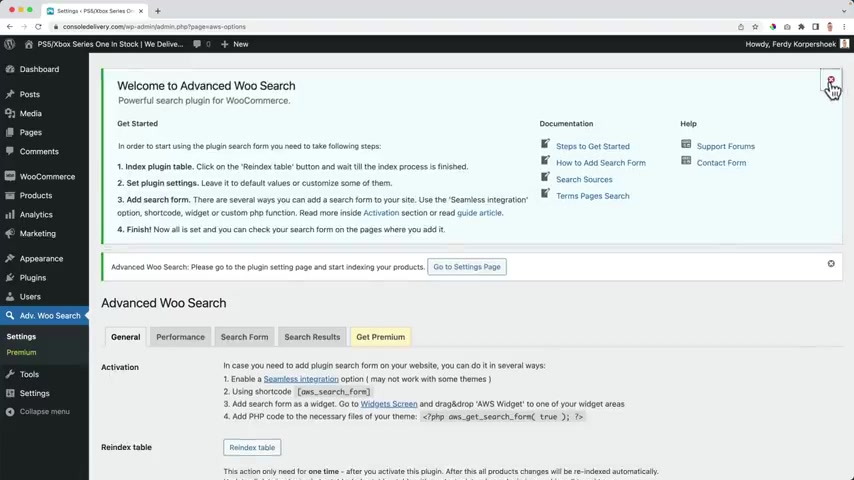
It's a free plug in advanced V search from something like that .
A lot of likes I star reviews install now and activate it .
There's advanced view search , I click on it .
I go to settings , I close this the first thing I want to do .
I want to use this short code , copy it and then I need to re index the table by clicking here .
So now all the products all are indexed .
I go to the website , hold in command .
So I go to a new tab , I customize it .
I go back , I go back , I go to the header builder .
I click here on the plus I go for html .
She lets do HML two .
I click on a TL two and really see if I can paste the code over here and it will add the search bar .
Well , it doesn't look that good yet .
It will make it look better .

So um let's talk about the display over here .
In order to do that , we need to go to the search form and we can show the the form styling .
So right now it looks like this search .
Maybe it's better to have this area , the search , I guess .
So people see better .
That's the search area like that's and now we need to make it look better .
So I go to the customizer , go back to the Heather Builder .
I click on HML two .
I go to design I uncheck this and I want to create some space from the bottom and at the top I do the minus .
So I want to bring it in the center , I can do the pixel perfect by playing around with the margin plus and the margin minus .
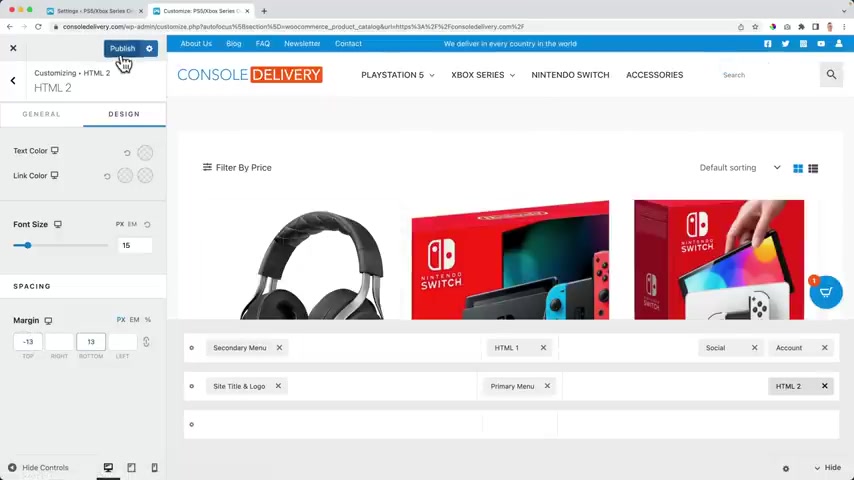
And keep in mind that this should be the same in order for this to be in the center , publish close its so I lose like this .
And if I search for Play Station look at this , this is how it looks .
And I want to view all the results and it will be displaced exactly as I wanted it to be displayed because it , it's the same as when I would go to a certain category .
So that's what I like and it's free and I , I like it when it's free .
I hope you do too .
So let's go back to general .
OK .
Search in if you search over here , where should people , what what should be uh be displayed ?
People can search in the content .
That means also in the long and the short description in the SKU .
So when people search for an SKU , the product will appear .
So to give you an example .
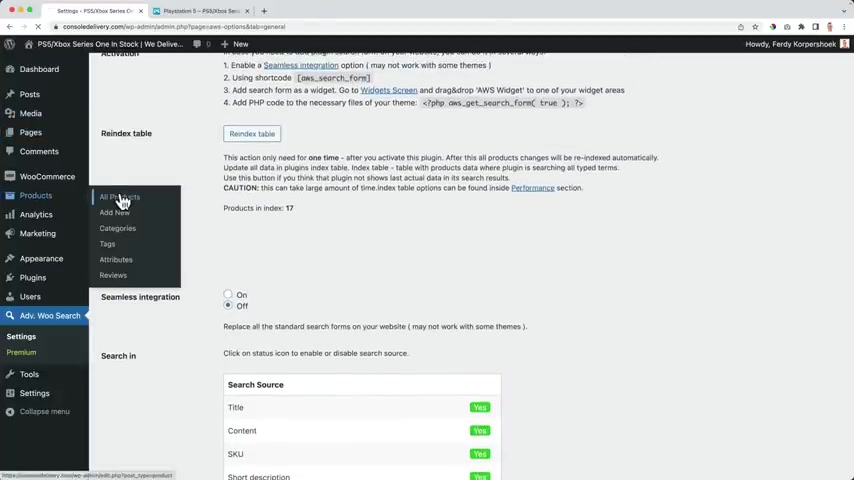
If I go to one of the products , let's go to one of the first ones .
The playstation , dual senses , wireless controller .
The SKU is this one .
That means when I search for this , it's all here .
When I would go back to advance V search and I turn off the SKU and I save it night or refresh the page .
I search for this .
Nothing is found .
So people can search for SKU .
I turned it on cry Yes deck .
Yes ID , no , because the ID is a number .
People don't search for that .
So that's all for now .
And I'm OK with this .
Then I go to the performance .
That is all fine .
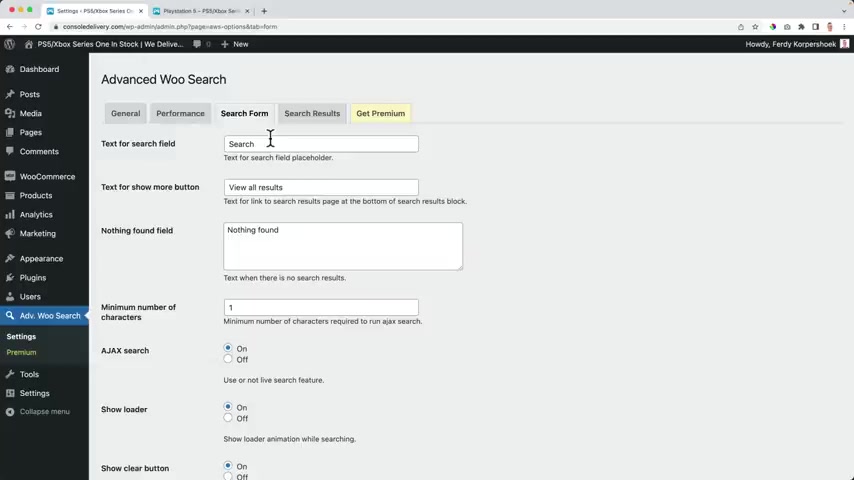
I go to the search form the search field text right now .
It says search , I can also say search for products if I would save it , which I am doing right now .
Search for products , view all results .
That's the text that will be found here below view all results .
I can use capitals for every first letter of the word .
Nothing is found .
This will be displayed , try better .
So um if you want to go this route , do it this way , try better .
OK .
I would not do this but I think it can scare people off .
Nothing found is better .
Minimum number of characters .
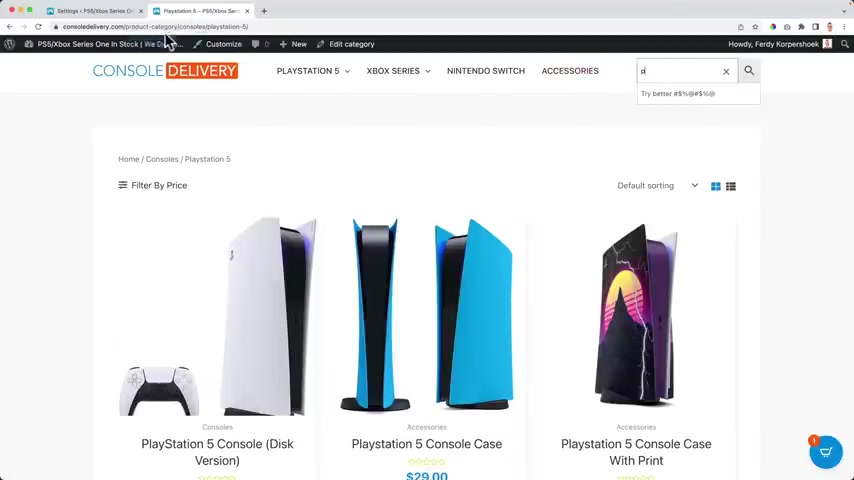
So when you already hit one letter , search results would appear or you can say after three letters that people uh that , that the surge will start .
So if I uh save this and I refresh it , I say bl nothing happens .
But if I had hit the third letter now it starts .
Why ?
Because I said 30 over here showed a loader .
So when I'm searching Joe's loader , show the clear button .
There's X , there's X X fuel results .
Yes .
Uh mobile full screen .
Yes , I like that .
First time we talked about that and then go to the search results .
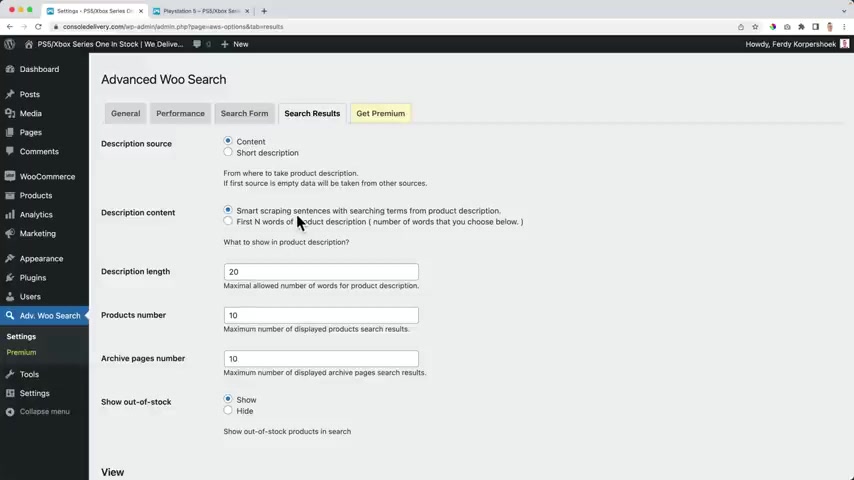
And what I don't like if I search for playstation , look at this all this text .
I don't want to show that .
I actually want to show the title the image and the price .
So in order to fix that , let me go to the view area .
Show the image .
Yes , show the description .
No , show the price .
Yes , seals best .
Yes .
Sku No , no , no .
So now if I refresh the page , I search for Play Station , this is exactly what I want to see .
So that's how you can create a header .
OK ?
The website starts to look better and better .
But let's take a look at how it looks on other devices , like a tablet or a smartphone .
I think this looks great .
Let's take a look at the tablet and if it's not fixed , you're gonna be scared because look at this .
What is this , what is this thing doing over here ?
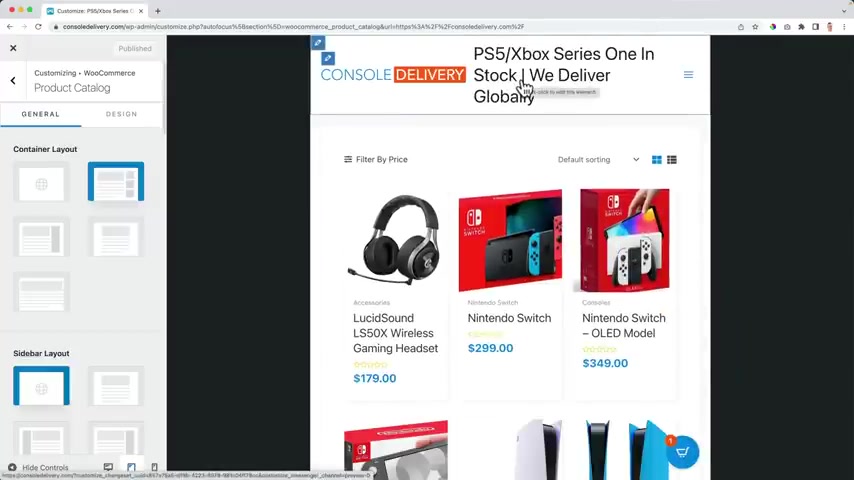
Well , it's a small glitch , in my opinion , you need to go to the logo area .
I told him already .
Can you please shut it off because this looks looks much better .
And then if you go to the smartphone view , it looks even worse .
So um also turn it off over here and since we're here , selecting the logo on the mobile just in decrease the logo a bit or not that much .
But I make sure that this area is feasible and I would make the logo as big as possible .
As long as you only want to use a logo and a to button , as soon as it starts to push , then I will decrease it 200 .
Perfect .
So that's the first thing I want to talk about when it comes to optimization for all devices right now .
It looks like this .
If I go to the , we see our whole menu is gone and it's up to what you want .

If I would go to Ash Gaming dot NL where I bought my playstation and I make the screen smaller .
It looks like this , the menu at the left logo in the center and here search area in a bar .
If I make it even smaller , it stays the same .
Oh , there's room for improvement over here .
All right .
It's on my website .
So that's something I want to do over here .
I still want to have my top bar .
So I can , I can I do that .
I click on the plus .
I want to go for HTML two .
No , sorry .
18 91 because there is a text we deliver worldwide .
So immediately it's uh blue which I like .
I click on the plus over here and I want to add my social icons there they are .
So in a short amount of time , we have our menu back almost exactly the same .
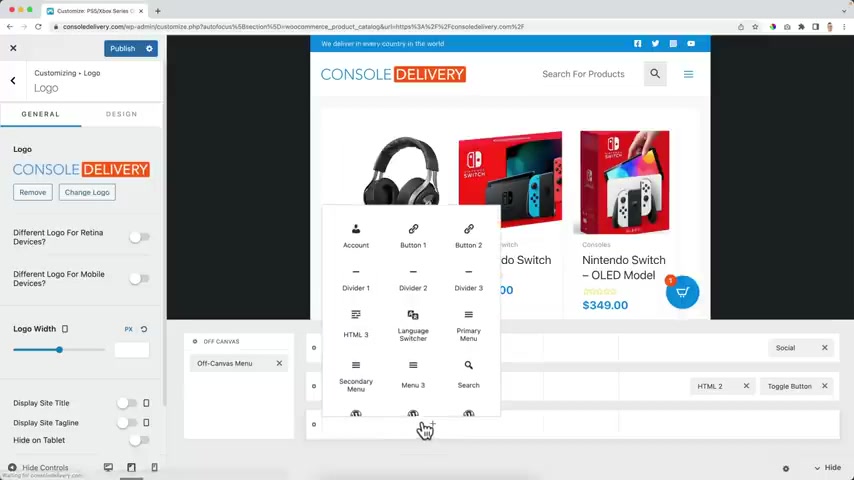
I can also bring this to the center for tablets , bring the menu to the left if I want to .
But I see no reason to do that since it's already at the right .
And I can even bring back my search area and I can talk all that so I can also make it look like this and this .
OK .
So I'm happy with that .
I can even decide to have a different area over here for a tablet .
But I'm happy now I publish it and then I want to go to the smartphone view and then there will be a problem .
Look at this .
So we deliver in every country in the world and that's now in two lines .
So I can decide get rid of the social icons and I can bring this to the center depending on what you think is more important .
I think this text is more important than the , the social icons .
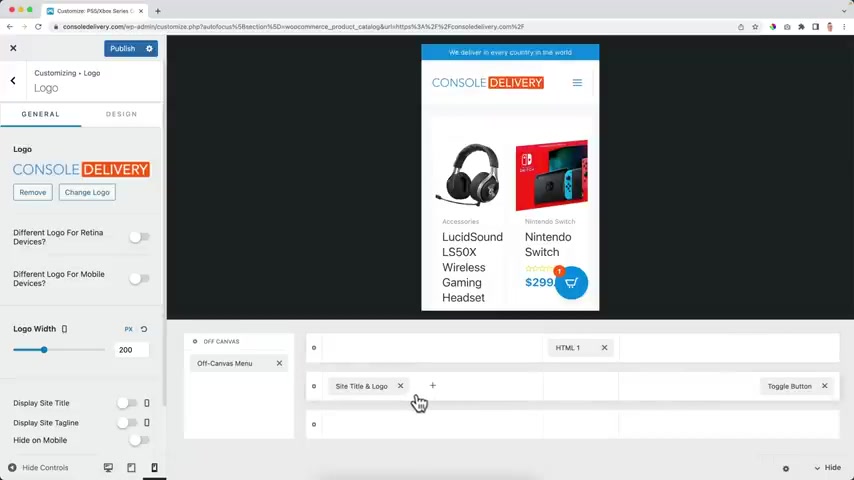
Uh I get rid of HML two and then I have his logo in this area .
Well , right now it's a dropdown .
If I want to fix that , I click on the to go button and get three dots , but I prefer the normal one .
I can also make it an outline or a few area .
I can also make a bigger menu .
Then I need to make the logo smaller again , about 1 80 1 60 1 40 something like that .
It's easier for your thumb to , to click on it .
Um But um I prefer to stick with 200 then over here no text because people by now know that it's the area I need to click on .
In order to get the menu , I like the minimal design when people click on it .
What should happen right now ?
It's a drop down .
So I can click over here of the on off canvas settings because there's an off canvas menu and says it's a drop down .
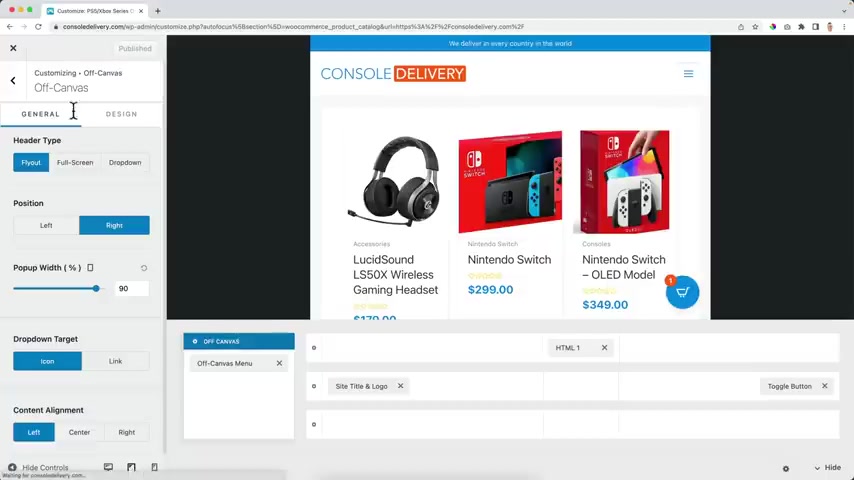
So I can also make it a fly out and this by the way , the same for the tablet .
Sorry , let me publish it .
I can make a full screen like that .
Then I can bring the text to the center like that's I can go to design and I can change the background color , something like that and then have a white .
Well , um that's up to you , but since I don't use that those colors , I prefer to stick with the normal one , I can increase the betting .
So it will be more towards the center .
If I say percentage , everything should be 10% near to the center , that's what you can do .
On check and then I like to keep everything into this and go back to general .
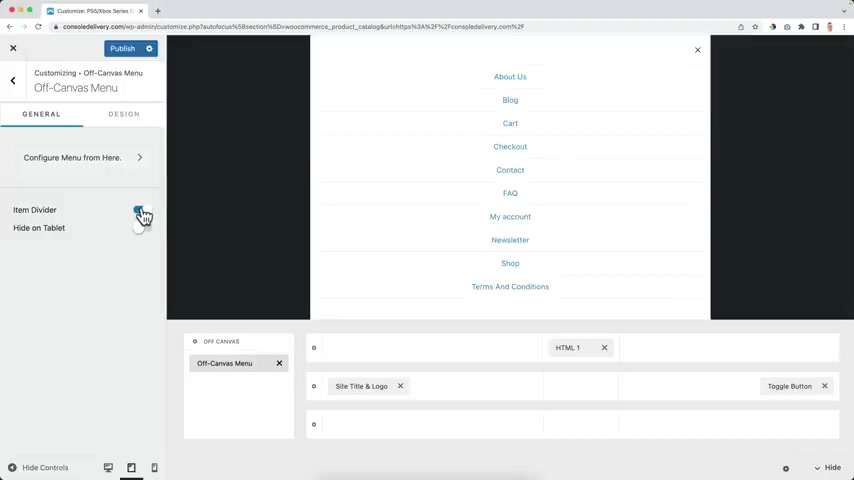
I'm ok with this .
So now I need to go to the menu because what do I want to display over here ?
Or I can have an item divider ?
So you see all those lines , I can hide this on the tablet .
Well , I don't want to hide it on the tablet , but I can do that if I want to and I will explain in a minute why .
So I want to configure the menu .
Let me publish this and then I click on configure the menu from here and it's an off campus menu that will be displayed on a tablets and on a smartphone .
So we have the off canvas menu .
I can select the menu or I can create a new menu .
So what do I want to display over here ?
I call this one the off canvas menu .
I scroll down , click on next and I can add items so I can go the same , do the same thing .
What I do on the home page only show four categories .
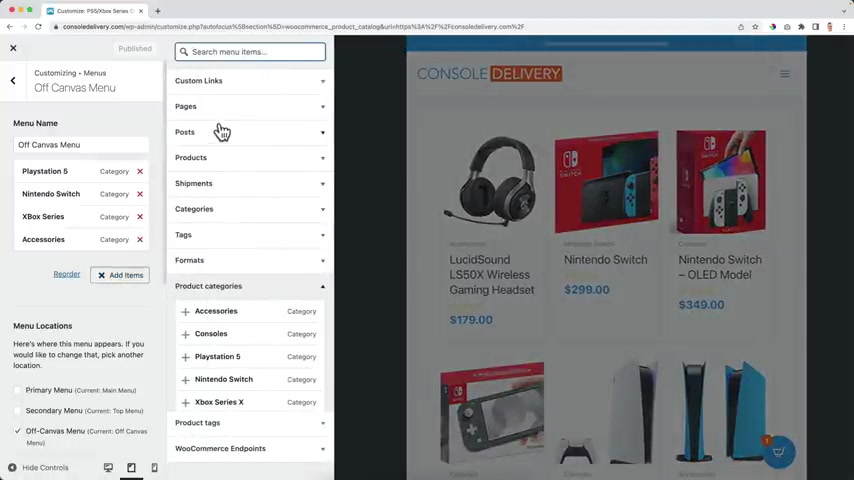
So uh playstation five , Nintendo Switch Xbox series and accessories , Bob .
Now I see this but it can also have all the other pages .
For instance , the shop page newsletter , page , contact page fa Q blog about us .
And then I need to uh make the right order .
Well , keep in mind what is the goal of your website ?
It's to sell stuff .
So I would focus less on the About Us page , focus more on everything you sell .
So I can make it uh look like this .
But that's , that's not all this is only the aca canvas menu .
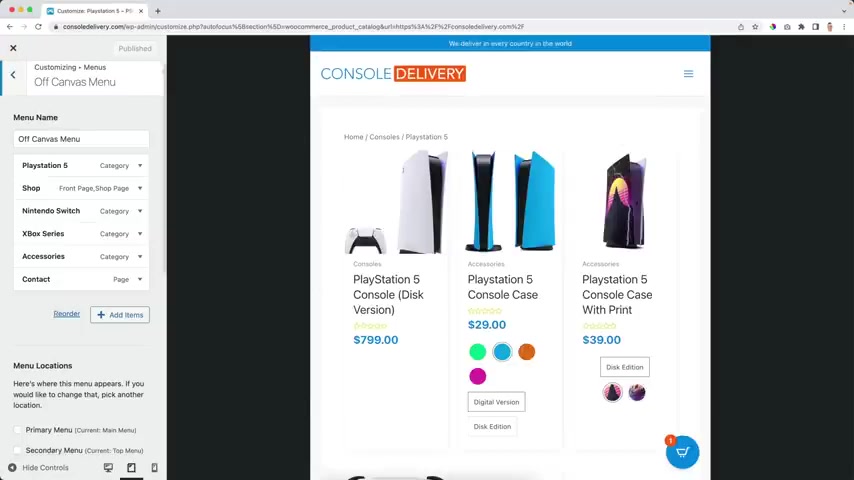
But I also can do , I can go to the Heather Builder .
Then here below , I can click on the plus and I can add the search area .
So if I click here , I see the search area .
So then from the menu , people can search or I can add a divider doing the search and the off campus menu .
Well , I need to configure it , make it horizontal like that .
And then I did I have it or not .
So here you can add stuff and then here he can configure how everything should look .
I think the off game menu should be displayed like this shop , playstation switch .
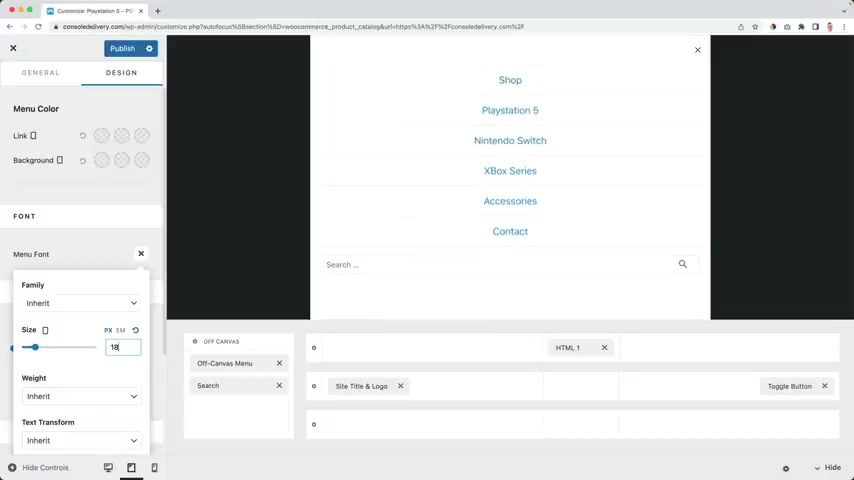
Yeah , like that .
And then below , if you want to have something there , you can edit .
So let me see if I can make this bigger .
I go to design and you fund , I can definitely make this bigger even bolder because uh it's on a tablet or a smartphone .
So it's better when , when it's easy for people to navigate maybe a little bit smaller , then I go to the smartphone .
I'm happy with how it looks great .
What I see over here looks a bit crowded .
So let me go back since we're talking about optimizing websites for all devices .
I go to woocommerce to the product catalog and then let's go back to the tablet field because there are a few settings .
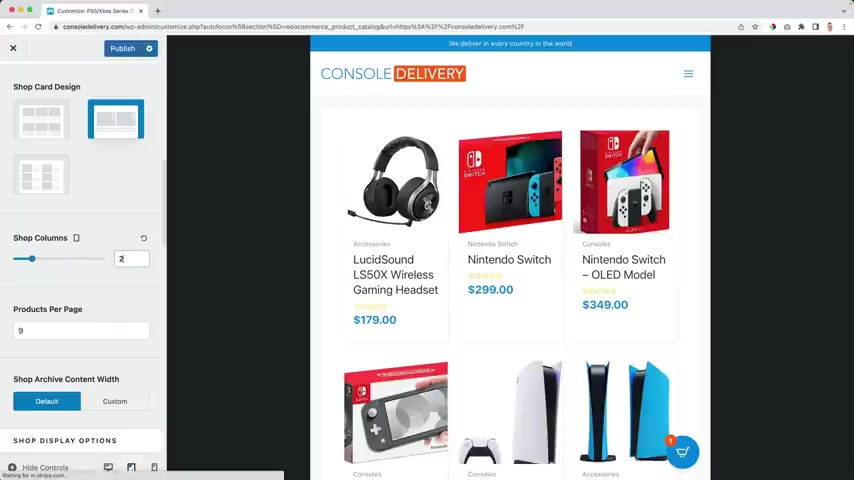
For instance , how many columns should it be on a tablet ?
And I say two much better than for the smartphone .
How many tablets or how many columns should there be one better ?
And then I click on the product .
How should this be displayed on a smartphone ?
Well , I think it looks great .
We see the image first and , and to regard all this information related products .
If I scroll down , I can edit to the card , proceed to the checkout , we can fill in our details , place the order and it all looks great in my opinion .

So I click on publish , bring this back close this and then I'm at the home page and now the header and the website look great for all devices .
We have already configured the header of our website .
Now let's take a look at the footer of our website .
So let's take a look at the food right now .
This is our food and we can make it look better .
And as always , it's not a problem .
It's not bad when you take a look at other websites that do around the same thing as you do .
Because then you can learn , especially when you go to Facebook and you see advertisements and you know those people that advertise probably optimize their website .
So when you see an advertisement , go to the website , see how they put everything together and get inspired by it .
So I bought my playstation on the Dutch website , gaming dot nl .
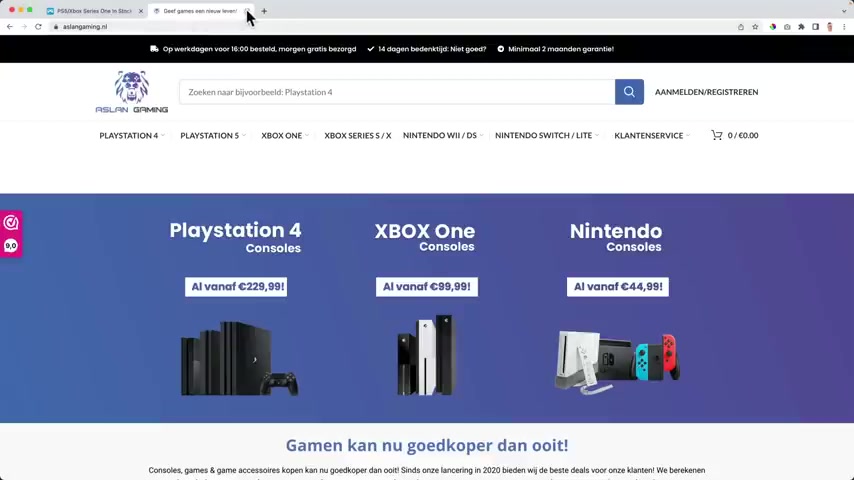
So I take a look over here about us .
We're available seven days per week between 12 and eight number .
You can chat with someone information about the office , how to get in touch .
More information about us , frequently ask questions and dispute page and then there are all the legal pages we need and I'm gonna talk about it in a minute .
So um information about the company and then this beautiful button that brings us over here .
And then they say , hey , I can buy a switch , but I already have one , but I can buy a second one and then I can play together with my son , but he's only three years old , isn't he ?
Too young ?
Maybe .
So I'm inspired .
I go to the customizer and then I click , I go back first and I click on Footer Builder .
There it is right now .
I have my copyright area over here and I can click over here .
And then I go to the settings of this row .
I have three rows or columns now rows up row , middle row and the bottom row .
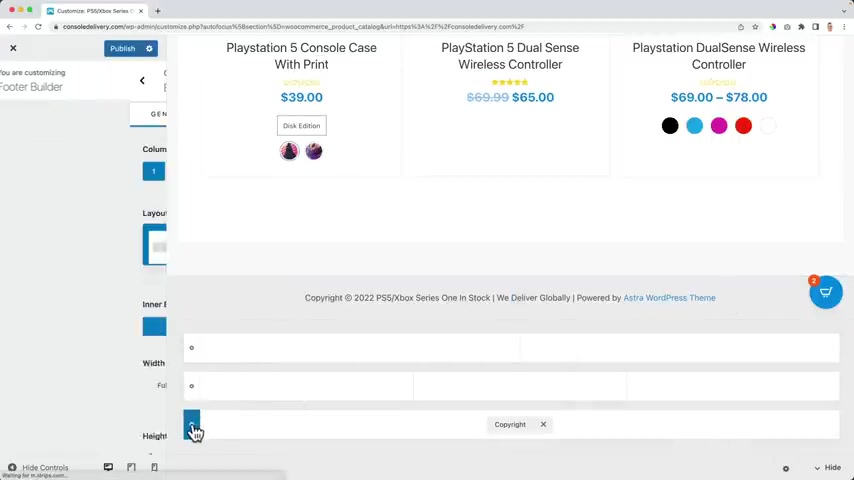
So here at the bottom row , I see this information and I can click over here and I can say I want to have two columns for instance , one at the left and one at the right , but I want to have one column in the center and then the height is 60 .
Then I click on the copyright area .
Then I open a widget and in that widget there's text and I can change the text .
So I want to get rid of copyright because I already have this sign with the current here .
So it will change automatically and I want to create a pipe and I can have the same title .
But I can also say we deliver , you know what , I'll stick with the side title and I don't need to have the power by the other .
So that's it .
I can click over here .
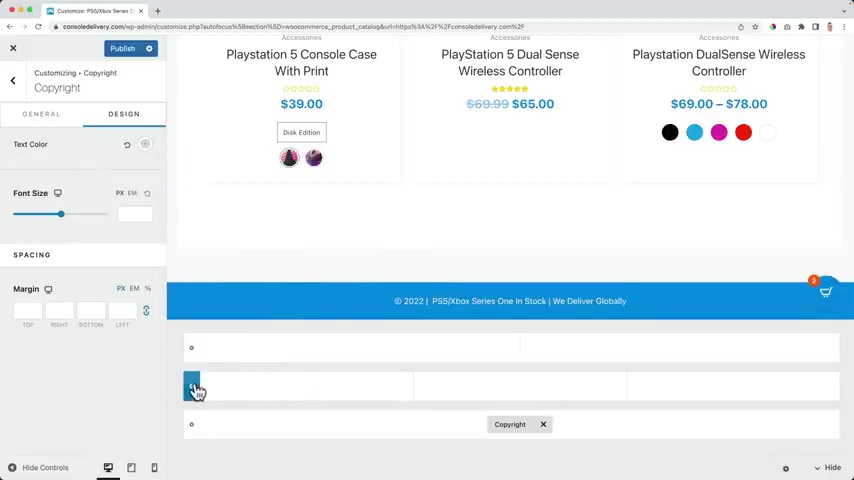
Go to design and change the background color to blue , then I can go to the copyright area , go to the design tab and change the text color to white .
I'm happy and then above there is another area and if I click over here , I can decide how many columns I want to have right now .
I have three .
I want to have four so I can change the column amounts over here .
And I can also change the way it looks so I can make this a little bit bigger than the rest and then we can bring it back really easily .
I want to stick with the content width .
If I do full wi it will go completely from the left of the page to write , even a few would uh zoom out or have a really big computer screen .
So I stick with the content with and I do not want to hide it on a desktop .
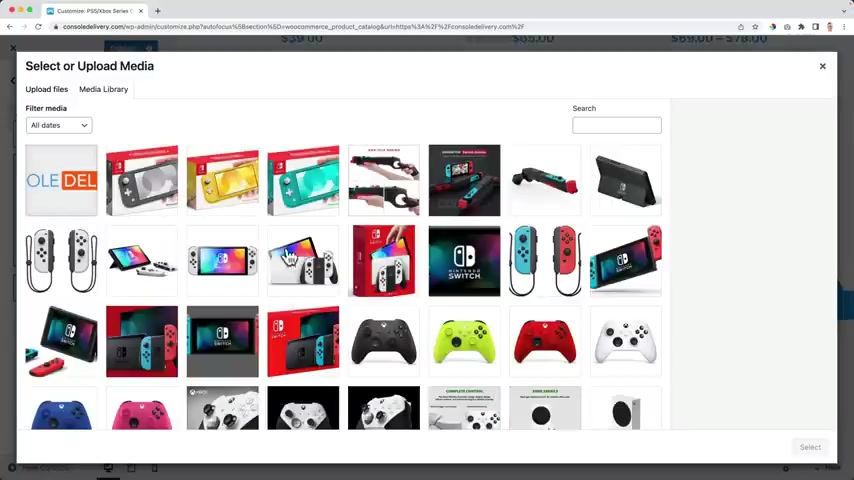
So what I want now , I click on the plus , I want to have a widget area one over here , widget area two over here , widget area three over there and widget area four over there , I click on publish and not a lot is happening right now .
As you see , I only can add the widgets .
So I have four widget areas and in those widget areas , I want to add widgets .
So how can I do that ?
Well , I click on this icon over here , the general icon now I can click on the plus and I want to add my logo .
So I go for an image and I choose one from the media library which is my logo .
I select it and we have a dark background over here or you want to have one , then you can make sure that you use AAA lighter logo as long as the logo is visible .
So what I see in this area is really big because this whole area is bigger than all the rest of them .

So I can go back over here and bring it back to 25% .
So that looks better .
I click back on the widget area on the image .
Then there are three dots and I click on show more settings .
So I can change the size .
That's also what I can do .
Just uh stick with the other and width and then change the size .
But I'm OK with this , I go back , I click over here on the caption and I want to say something about my company .
Great Publish .
Then I want to click outside of this widget area because beside a widget , I can add other stuff .
So I click over here and I want to add socials .
So I click on social and there it is .
I click over here and I can add Facebook , Twitter , Instagram , right ?
Your of course , I can add other stuff as I shown before over here at the top .
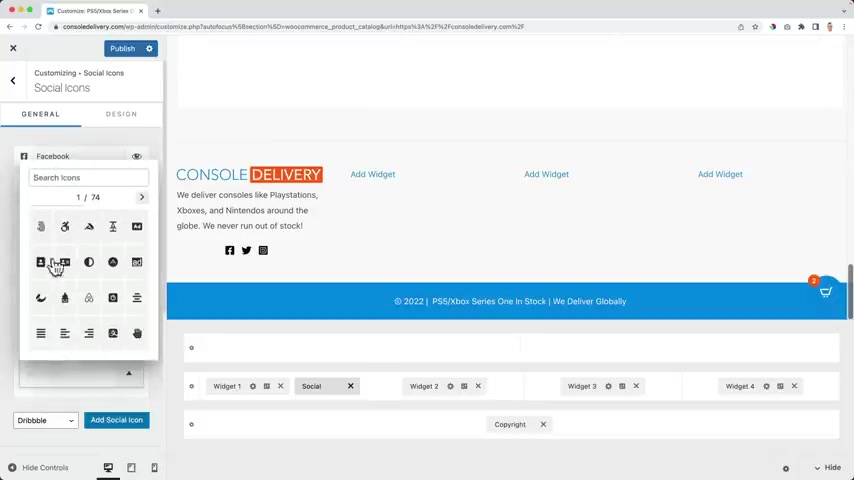
So let's uh add youtube and then I can select the youtube .
I can great .
Then I can show the labels if I want to , I bring them to the left , I can hide them on the desktop .
I can go to design and I want to use the the colors of my website .
So I start with a blue color and when I offer over it , I want them to be white so you don't see them anymore .
But then I want to take a look at the background color and I want to make it orange when I hover over it .
OK , then I want to increase the spacing .
So I scroll down a bit , I can size .
It's OK for now , I can background spacing .
I want to increase it and now it looks like that make a big , bigger .

I can also make them round but I'm OK with the square .
OK ?
That's how we can create an area .
Next .
I want to have useful links , links like uh actually legal links .
So um I go back , I go back , I want to create a new menu .
So I go to menus , create a new menu and I call this one and I assign it to menu three next items .
I already have two of them .
As far as I know that is terms and conditions .
Ok .
Then I need to add a second one .
Shipping and returns , return oc returns plural .
So what happens when people buy something ?
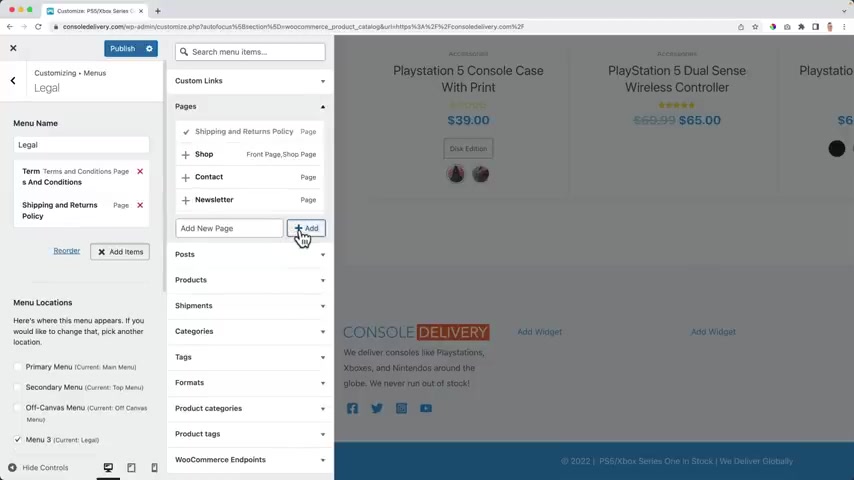
It will be delivered to Africa and they want to send it back because it's broken or something .
What are the terms and conditions and the policies ?
So in the third one , disclaimer the fourth one privacy policy and depending on the country where you come from , there are , there are different things you need to have on your website , different legal pages .
So Google it uh or hire a lawyer or just Google it until you know , uh what is applicable for your country .
I think we're good to go with those four .
So it's called legal .
I go back , I go back and I go to the footer builder , Widget area two , I want to start would heading heading .
Nice .
Got this one legal .
Then they click on the plus .
I go for a menu , navigation menu .
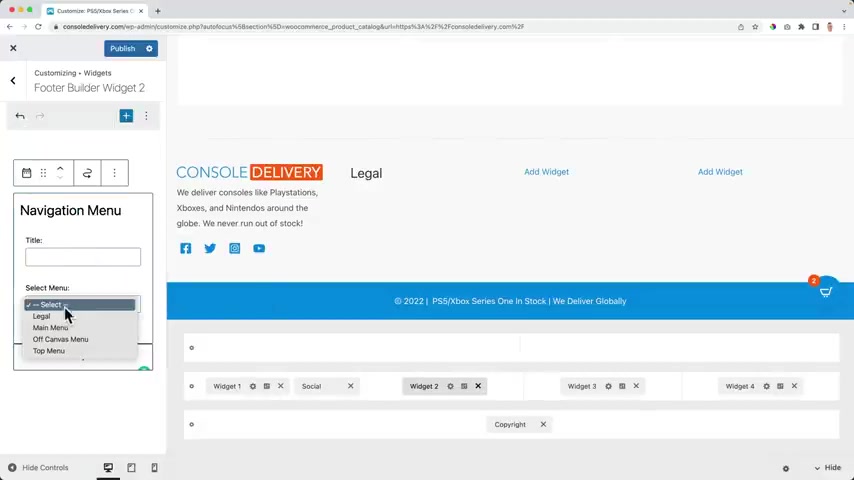
I have no title but I select legal and then disappears .
Ok , great .
Then I want to add another widget area or , or , or over here .
So I click here , click on the plus heading .
Useful links .
Click on the plus and I search for menu and then I want to add the same links as I have on top of the menu .
There they are .
And then the fourth area .
Click over here , click on the plus on the go for a paragraph .
And here I say something about my company address .
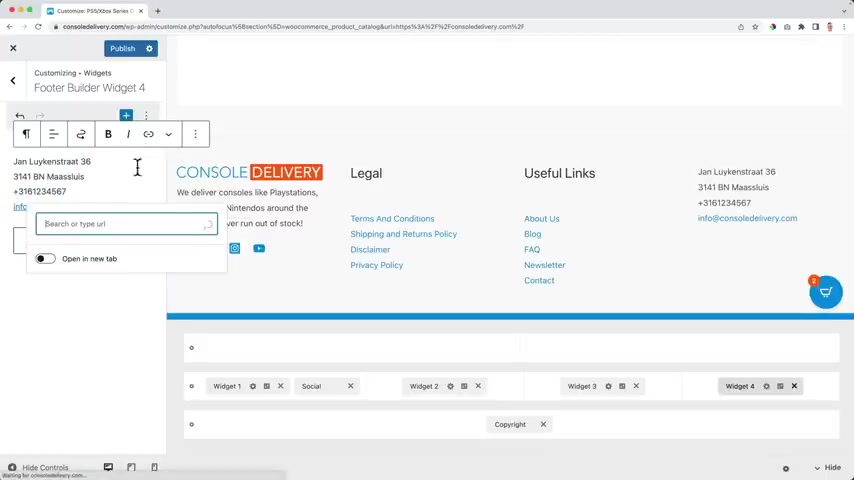
I made this a link also make this a link that was at the heading , contact us and I bring it to the top and I want to bring it from H 42 to H five just like here H five and here H five .
OK .
Publish what we can do .
I can select this whole area .
I take a look at the the design .
I can change the border color to orange for instance and increase the amount of pixels I can increase the spacing .
I can change the background color to something else .
Yeah , that's perfect .
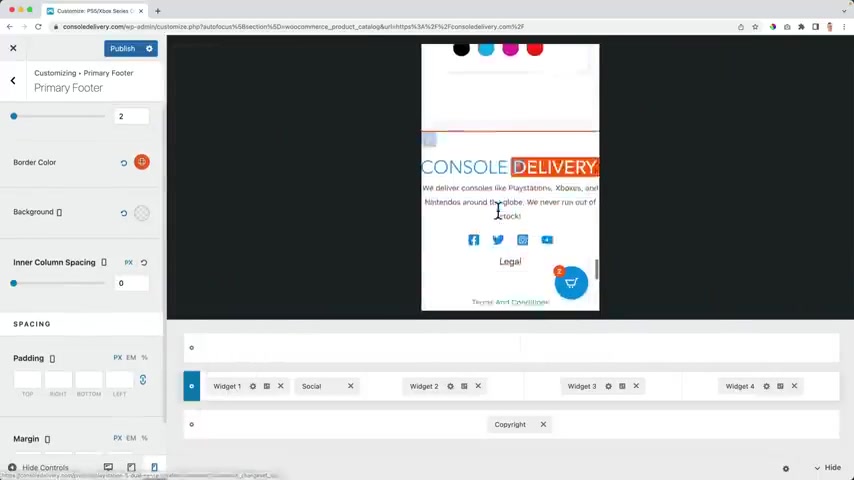
I can make it dark if I want to and then I need to of course , make all the text lighter .
But um I'm happy with white .
So publish .
OK , let me go to the smartphone view .
Let's see what happens and what I see it's totally against the side of the phone and I don't like it .
So on the phone , I want to create some spacing quite a bit .
I don't like it when the things stick to recite .
I think it looks great .
So I make sure it looks great on the , on all devices .
Let me see how it looks on the screen .
So let me close this .
So this is our food , but I don't like is the space over here .
So how can we fix that ?
Well , we can do it through a few ways .
Let me show you right now .
I click , I click on inspect , I use Google Chrome .
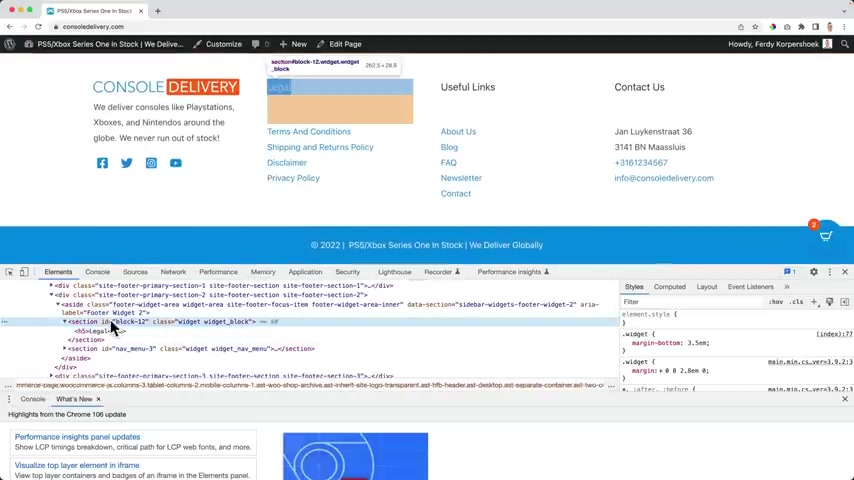
What I see when I hover over here over here is that there is a big space below us .
I don't like it .
So what I can do what I see over here widget margin but is 3.5 em if I would decrease this to zero , it is gone .
If I would say 0.8 it lines up with this .
Er almost , I can also get rid of this and say 10 pixels and then it seems to be lining , be aligned perfectly with this text .
So what I do now I copy this area , come and see close this , refresh the page .
So it's not like this .
And again , then I go to the customizer to the CS , sorry , go back , go back through the additional CS S and I based it over here .
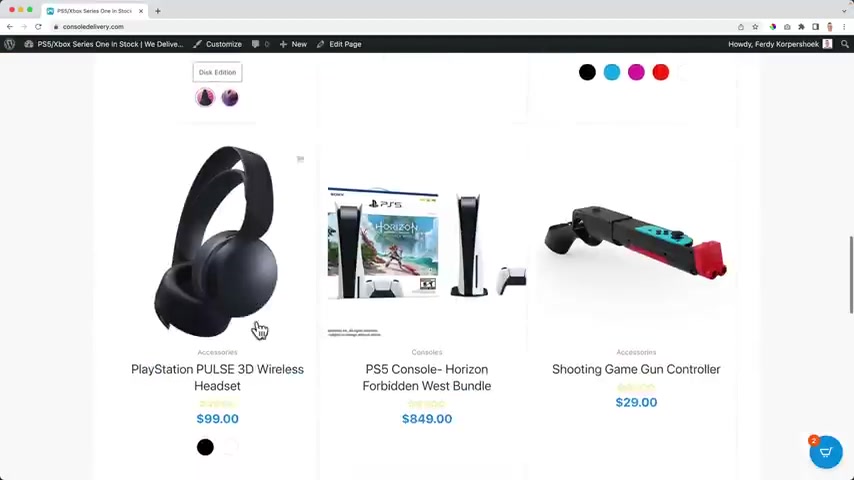
I found to write it dot widget opening parentheses , margin dash .
But then the X like that publish close .
And now it looks like this .
So that is how it looks right now .
I'm really happy with it .
They found to have a button to go back up .
I can go to the back end to appear extra options .
And since we use extra pro , we can activate a lot of extra functionalities .
And one of them is to scroll to top area .
If I activate it , I can go to the website , customize it , go to global scroll to the top .

She I can say , ok , there was a delay .
So let me bring this back .
I want it to be at the left because here at the right , we have the card I can , if I click on it , I will go upstairs or up again , close it .
I scroll down , I can click over here and I go up again .
Great .
I want to congratulate you on reading this part in the tutorial because that means that you're persevering unless you just click here to go to this part of the tutorial .
If that's the case , I may need to disappoint you .
Why ?
Well , I like free page builders and my favorite one is elemental element .
There is an amazing free page bill that will enable you to create amazing websites .
But that page builder is in transition .
What do I mean ?

Right now you create websites in element or using sections , columns and in those columns , you can have elements , but they're changing the way you make websites with element or they're gonna work with um not sections anymore , but with containers and the whole way of making websites with elemental will change .
So if I make a website or a tutorial right now with the current way , then this tutorial will be outdated in a few months .
So I decided to give you a template for free with the container builder , but the container builder is not yet released .
Maybe if you never use elementary , you're like , what are you talking about ?
Well , they will change the way how you make websites .
So I will give you a template and when the page builder , the new page builder element or container builder is ready , I will make in depth tutorials on how to make pages using element or the new way .
So I do not put it in this tutorial because it's , it's a tutorial on its own and this tutorial is getting too long already .
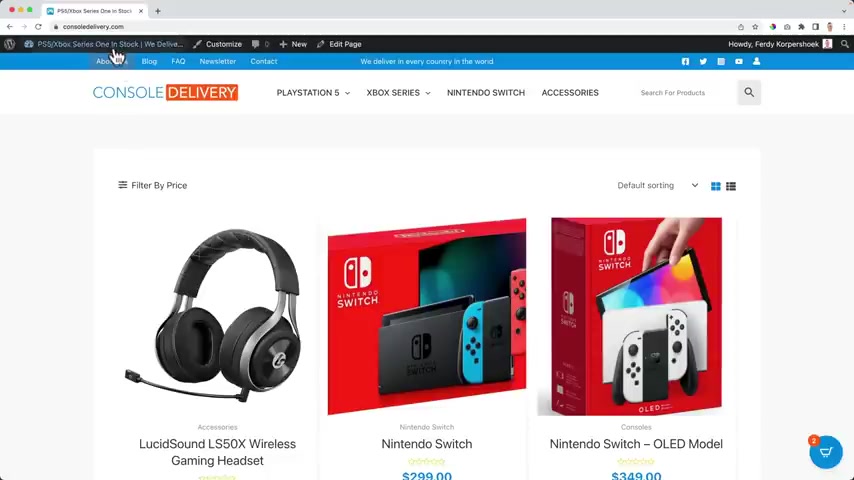
So I will show you right now how to make use of element , how to upgrade it already .
So you have the container builder and then how to import my prem template for you .
So let's do that right now .
So it's time to create a home page .
But as I said , uh element is not ready for the container building yet .
And when it is finished , when it's live , the new container build , I will create in depth tutorials on how to create pages like the page you're gonna import right now .
So what you can do , you can go to the back end , then we go to a new tab , go to 30 corp dot com forward slash mentor hit enter .
And that's the page builder .
I want to use , I go to the home page and if you want to download the free version , we're gonna use the free version somehow they seem to hide it every time .
So I need to go to pricing .
Let me see the page I plug in .
Then somewhere here I should be able to find it .
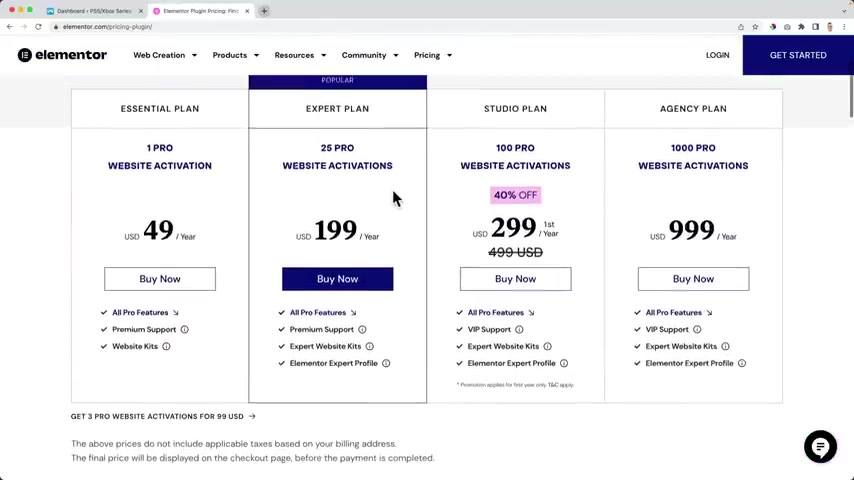
So there's a better way I close this and I go to plugins at new and then I search for at the mentor .
Then I'm gonna install elementary , elementary website builder , a lot of installations and you know what also essential allows for elemental install .
Now , then I want to activate elemental and I want to activate essential accounts .
Now over here , I click on next , scroll down , click on view all and I want to add all the ers related elements .
Next , next , next , next .
No , thanks .
Congratulations .
So now we can use a few beautiful elements that are made for element or now I want to create a new page .
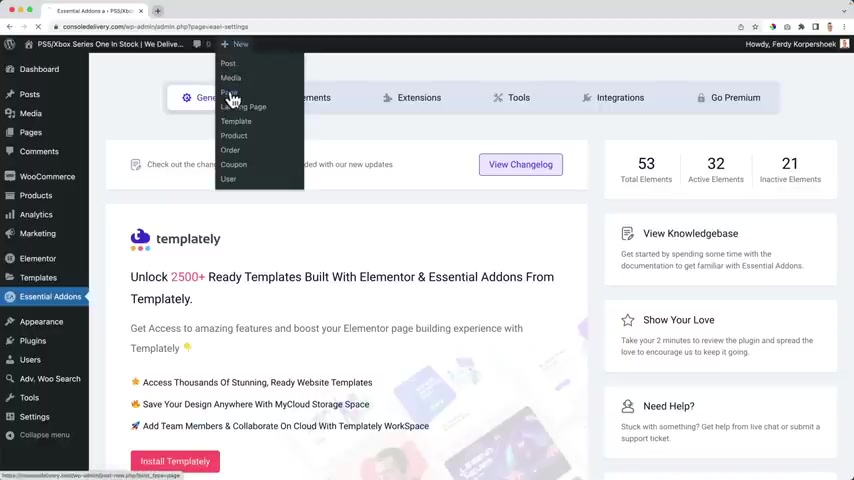
So I hover over a new page and I want to create the home page home I click on publish twice .
Now , I want to go to the website by clicking here , go to the front end and I go to the customizer .
I come back and here below at the homepage settings .
I want to select the static page , which is the home page which we just created .
And then at the post page , I want to select the block page .
Then I go back , I go to the sidebar and I turn it off by clicking on no sidebar .
Publish .
Close out the home page is the page we see when you go to your domain name .
So this page over here .
Now I want to edit the page .
What I are by clicking on this button .
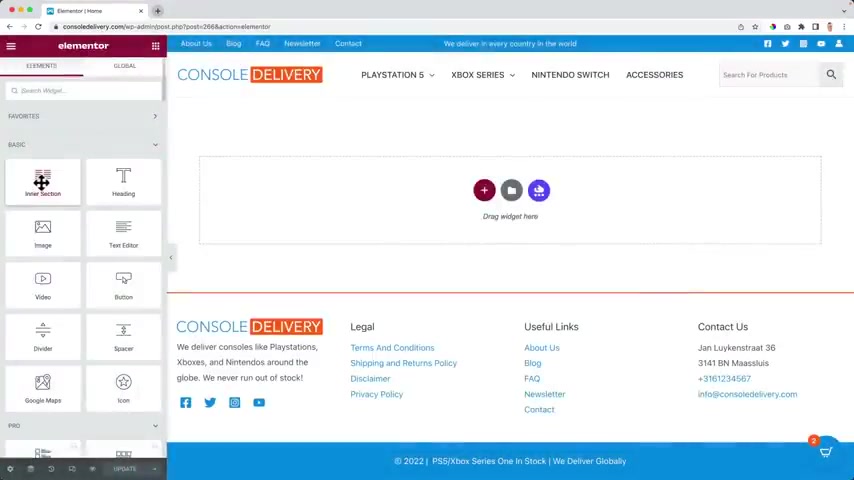
No element is loaded .
What you see in the inner section over here .
It means that the new version of element is still not released .
So what I will do first I click over here on the three lines , I go through user preferences .
I changed the user interface theme to dark .
I turn on editing handles , then I click on update .
Then I click here I go to the page layout and I change it to elementary fluid updates .
I want to make use of the container builder because I created a template for you in the container builder .
I click over here .
I exit element and then I select WP dashboard .
So when we click on XW , we go to the dashboard .
Apply .
Yes .
Leave the site .
I go to the screen options , element .
Or overview .
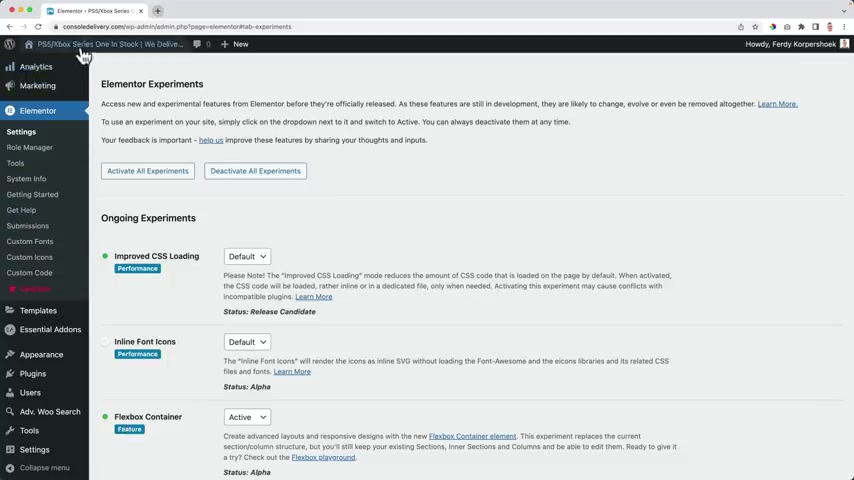
I want to get rid of that and the recent reviews I want to show that in the book status .
How much we have sold ?
Now I go to Element or Settings over here .
Then I go to experiments and I scroll down and then there's the flex box container .
I want to use it by making it active .
I scroll down and I click on , save the changes .
Then I click here to go to the home page .
I edit the home page with element .
And now what we see over here at the left is the container builder .
It's in beta .
It's almost ready .
So I assume you can use it on your website .
I use it on my websites and it's having a , it's creating no problems for me .
And now if you want to import the page I have made for you because right now I don't want to create a tutorial about this because then the tutorial about work becomes so long and people get scared because it's six hours .
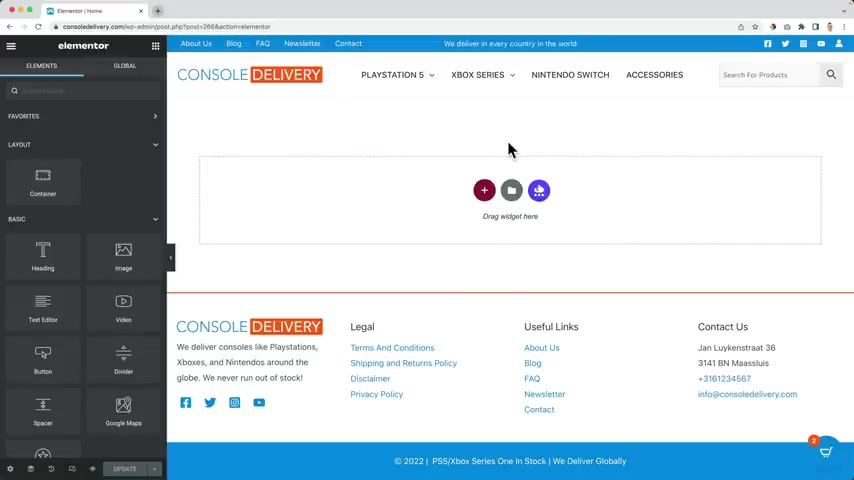
So I have a separate tutorial about it and I will create it when the container is ready .
So if you want to find it , you can go to youtube , search for container tutorial 30 .
I already have one but that's old .
The 18 months .
So go to the one which is uh the newest one .
So uh update it or uploaded a short time ago because I will create a lot when it is released .
No , I go to 30 Corp dot com .
Ford slash container , 10 plates hit enter that goes a zip foul .
I open it and this page appears , then I click on this folder .
I can I click on this arrow up icon .
I select the file I go to my downloads .
Here's the JSON file .

I open it and I enable and import this page .
It's built with a container builder .
Now it appears over here and I can insert it and I click on , apply the settings of this page too and there you go .
So what I know see is this page and you'll see it also .
So what you can do now you can click over here , go to ST into the background overlay , change the image and then I grab something else .
The switch , I can uh bring it down a bit .
Let me see uh position .
It's OK like that a little bit down .
I can even make it bigger over here .
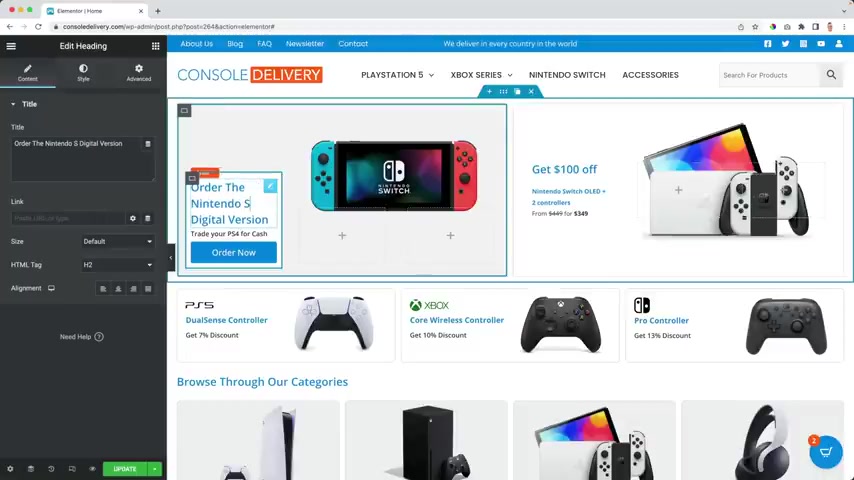
I can say order the the Intendo let me see , switch feature dream tube or cash .
So in that way , you can change the information and get $200 off from this amount for these amounts .
You can change the text .
So just change the content , change the colors and you will be good to grow in this uh inspired by one of the best stores in the Netherlands .
And as I said , I will make in depth tutorials about the container build .
Right now , it's not uh finished with the development .
So I don't want to dive too deep into it and I also don't want to create something in , in the old or the current version of Elemental , which will be outdated in one or two months .
So right now I do it like this and that makes the tutorial not too long because already I think around four hours .
So , um that's it .
Of course , there are also other pages and then the same story applies .
Let's see about us page .
If you want to create one , follow my tutorials about make a website element or 30 .
Yes , I'm watching Charlie put videos and I really like it .
So four years old already , but I show you how to create a lot of different kind of pages .
So go to the the newer ones and then you can learn .
Yeah , look at this three hours .
Let's talk about how to create beautifully designed pages optimized for all devices .
But um right now I have to wait for the container builder and then I will create a new tutorial .
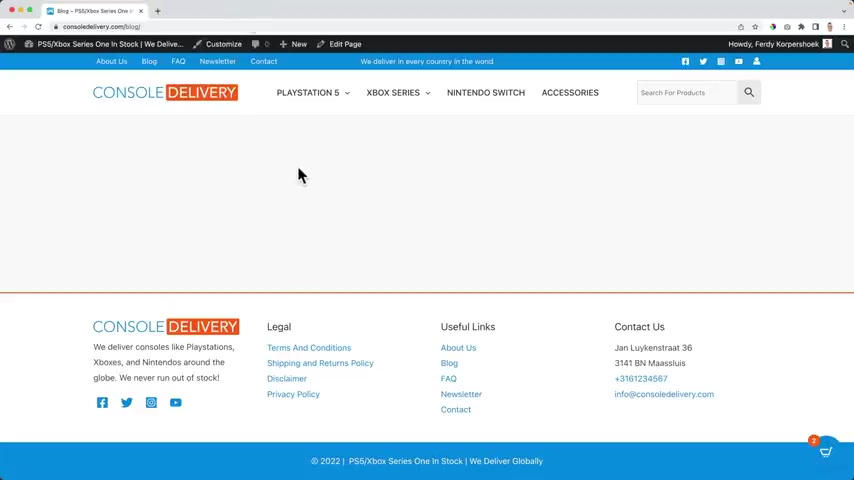
And this was more , I would create an e-commerce website .
Not everybody wants to have an about page , not everybody wants to have a blog or FA Q page .
If you want to have that watch my other tutorials .
And I , I dive deep into that subject .
If you want to have a blog , I have a beautiful tutorial about it , how to write blog posts 30 three months ago .
And then this forfeited marketing , but you can write for anything , draw people through your website and they can buy things from your website .
So uh I think you , I have tutorial about that news leather .
You can work with a meal chimp or convert , get 30 .
And then over here I have a 2.5 hour tutorial on how to create an email list .
And man , the money is in the list .
So feel free to play around with that .
And then this is it .
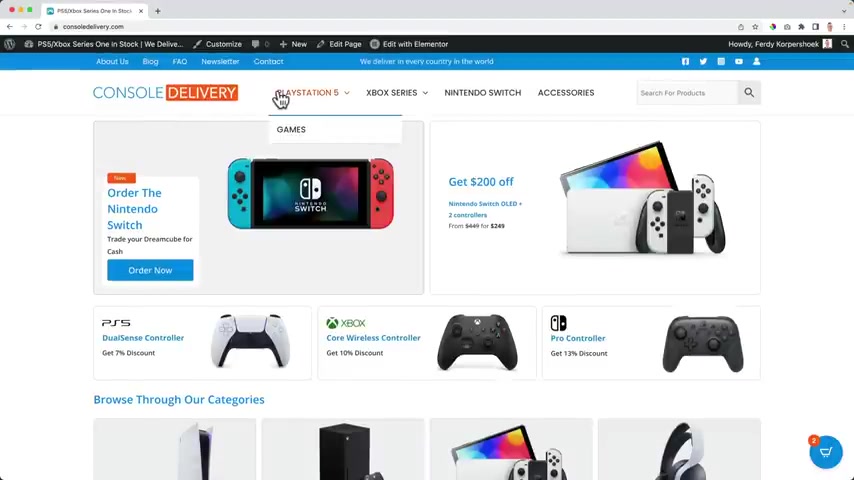
We create a beautiful website with a shop .
So if I go to forward slash shop , we've configured it using , we can filter things , we can change the display .
We talked about creating different kinds of products at a design page like this .
So it looks beautiful .
It's easy to buy things and to the car , we have the modern car , we can go to the checkouts .
We talked about shipping , coupon codes , taxes , payment methods .
And now you have the website up and running .
And the only thing you have to do is make sure that when people buy things on your website , you send the right products to the right people .
Our website is getting better and better .
I said it already a few times but it's true .
It's getting better and then it's getting even better .
There are more things you can do with a pro right now , I focus on all the features in Woocommerce with a pro .

But there are more things you can do with pro to make your website look better as a whole .
So let me talk about a few of those .
So if you go to the customizer , we see all those options over here .
But what we can do , we can close this , go to the back end .
Since we have pro , we can unlock so much more options .
So we go to appearance as options uh over here available extra pro modules , colors and background typography , spacing , block , pro navigation menu , sticky header , so I can activate them .
All right now , they are all deactivated and right now I just activated them .
Now when we go to the website and we go to the customizer and I go to the header builder , for instance , there are more options right now .
It says header type and now I can have a transparent header .
I can have a sticky header .
So if I click on sticky header , there are three levels .
So what do I want to state ?
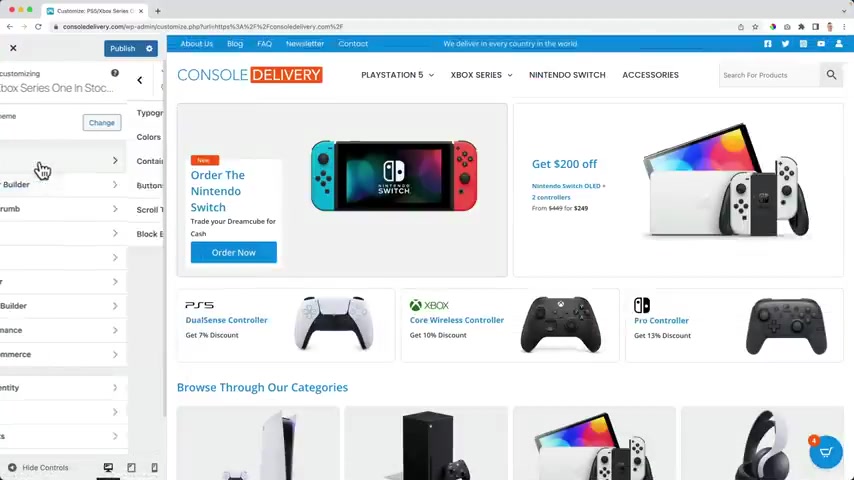
If I say that the primary heather really simple , I scroll down and it sticks with us .
If I say the above header , both he will stick with us .
I can say only the above header should stick with us .
Then a little like that .
I only want to primary have it to stick with us .
So I turn this off .
I can enable a shrink effect .
So when I scroll down , it shrinks a bit not too much .
And I can also hide it when scrolling down .
So what happens ?
I scroll down ?
Nothing happens .
As soon as I screw up , it appears I scroll down , it disappears .
I screw up and it appears I can have a different logo for the stick .
So when you turn on all those premium options , you go to the global area to container and there are more options because you use the pro version , the colors , more options .
So you can play around with those .

And I don't want this to , to be long , too long .
It's already too long .
I think it's around , it's more than four hours .
I will make an in depth tutorial about .
And if you want to uh watch that about Pro , by the way , if you want to watch that click over here or take a look at my youtube channel .
Yes , for now , I'm happy with the results .
When I scroll down , nothing happens .
When I scroll up , it appears magnificent .
Wow .
You read this part of the tutorial .
You've earned my respect .
I already respect you , but I'm happy for you that you persevered .
And I hope by now you have your own domain name with web hosting , your own website , with products .
You're selling things , you have uh shipping methods , you have taxes included , you have payment methods and beautiful emails that will go to your clients when they buy things on your website .
I hope you have coupon codes and I hope the website around your web shop is beautiful .
Congratulations with that .

I make more tutorials on how to create pages with element or on how to optimize your websites for all devices on how to optimize your website for the search results .
I talk about creating an email list and building your email list .
So I have a few tutorials for you that you can watch and um they can appear over here .
Thank you for watching this story .
Feel free to like this video that would help me out a lot .
Feel free to subscribe for our upcoming videos only if you're interested and then feel free to leave a comment if you want to leave your comments saying thank you or asking any question .
Good luck with your website .
Good luck with your business .
Good luck with your life and bye bye .
Are you looking for a way to reach a wider audience and get more views on your videos?
Our innovative video to text transcribing service can help you do just that.
We provide accurate transcriptions of your videos along with visual content that will help you attract new viewers and keep them engaged. Plus, our data analytics and ad campaign tools can help you monetize your content and maximize your revenue.
Let's partner up and take your video content to the next level!
Contact us today to learn more.