https://www.youtube.com/watch?v=ZpM9FzuPWm0
How to Draw Faces, the easyway - Part 1 (Free Course)
Before we start getting into learning the methods and the process for drawing the head , I want to sort of discuss two things , two important things that I keep in mind , which will come in handy in the later parts of the course .
Number one , have you ever drawn a phase or a head ?
When you were a kid ?
You know , when you ask a kid to draw a head , what does he or she do ?
They draw a circle , a little circle where they're drawing like two dots for the eyes and they draw a line for the nose , maybe a triangle if they're intelligent like me and then like a big line for the mouth , either they draw like a big smiley face or the face or the head is sad , like a big small surface , right ?
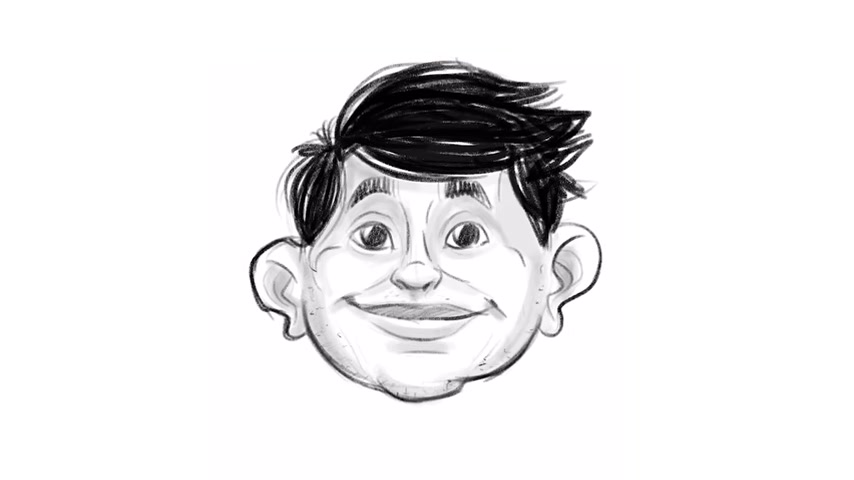
And then you draw these two CS for the years and all of a sudden you get this thing that looks like a face .
You can look at that thing that a kid has drawn and you can say , well , that is a face that is the most raw and authentic expression of a face .
It is the most simplest expression of a face or a head .
And I want us to keep that Kiddish aspect in mind because the kind of heads that I draw , some of them are very cartoon and some of them I have a , a mix of solid forms and proportions mixed into them , right ?
But to get to the part where you're drawing these really fantasy based heads that are very cartoon in nature that are very fun and caricature , right ?
You got to keep the process simple at first or you could at least keep the idea of simplicity in mind with that in mind , you go ahead and learn all the complex processes and methods and systems .
And once you're done with learning all the complex methods , you come back to the simple ways , you take all these complex pieces of information and make it simple .
So that is the first thing that you want that I want you to keep in mind while we are going through this class .
I want you to keep the simple kid drawing a head with a Squire with a circle with like a dot for the eyes with like triangles , for the nose and sometimes other kinds of simple lines and squiggly shapes for the facial features , right ?
You gotta keep this simplicity in mind while we're going through this .
Because from the simple comes the complex , you can take this simple method and turn it into something more complex .
So that is number one , number two is this , which is your head right here .
This thing right here .
This is not a head .
There is a head actually , but there's a skull with all the musculature on , on top of it removed .
Right .
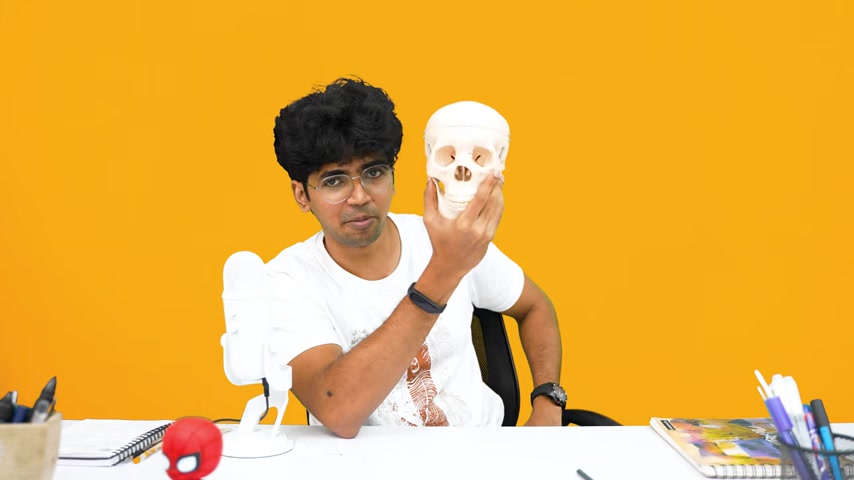
So , Jumbo right here , we're just gonna call him Jumbo .
Right .
Jumbo skull seems to be in its most basic form .
You know , all of the material stripped out of it .
And if you look at it , it's not flat , right ?
It's three dimensional , it's got sides to it , right ?
It's got a back , it's got a bunch of mini forms on top of it .
So that is the thing that I want you to remember when , when it comes to drawing the head , which is the head is made up of very simple forms that are put together .
This is very , very crucial because we've already discussed this in other chapters of drawing camp , right ?
All the things around you in the world that you want to draw can be drawn with simple three dimensional forms .
Obviously , when you put those things on paper , they become two dimensional shapes , but you got to think of them in 3d forms , think about them in 3d forms .
What are the sides to it ?
What are the back to it ?
Right ?
You gotta know it , you gotta be able to draw these forms in perspective .
So once you learn to draw these forms in perspective , you can take those things and be you know , apply them .
Those are the two things , those are the two things that you need to keep in mind before we go into the method of learning to draw that .
So with that said , let's get into learning how to draw it .
So the method that I use to draw ahead is what I call the 36 method .
Well , what is in the name ?
C what is this three ?
What is the six ?
It's , it's , it's confusing .
Let me explain this .
The 36 method is a way for me to sort of easily remember and understand and look out for certain features of the head and follow the process or do the process of drawing the head in a systematic fashion .
So here's how it works .
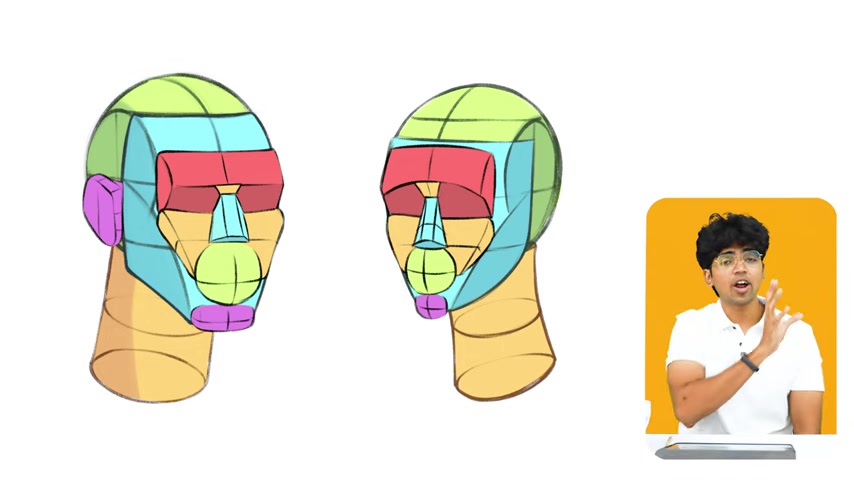
Three , 63 things that you need to base your head on .
Three basic core fundamental forms that you need to base your head on .
And six features six forms that you need to look out for on your head to add more nuances to your head .
So three foundational forms and six features simple before I dive into each of these things in detail .
I want to give you like an overall summary .
So what are these three forms ?
Three forms ?
These three forms form the foundations for your head ?
So what are those three forms here ?
Well , here are the first one is your spear , your sphere is used as a base to represent the bulk of your head or your skull and then you have the face mask , this is the part on top of which you put all your facial features on and you know , building all the different planes of the head , right ?

That is the number two , number three would be the cylinder , the cylinder here is used to represent the neck , right ?
People usually want to learn these two things separately , the head separately and the neck separately .
But I would highly recommend you combine these two things because the angle at which the head is sort of presented at at times , largely depends on the placement and the position of the neck .
And you might want to learn that thing as well .
It's good .
So those are the three things .
Three foundational forms , sphere , face mask , cylinder , sphere , face mask , cylinder , see simple , you need to base that thing , you form the base right now .
Now that is not the complete head .
You need to add things on top of that .
So this is what the six features that you need to look out for .
Come in .
The first one is the ridge on top of your forehead .
Usually most artists cut a little slid inside the foundational form of the head to sort of represent these hollow things .
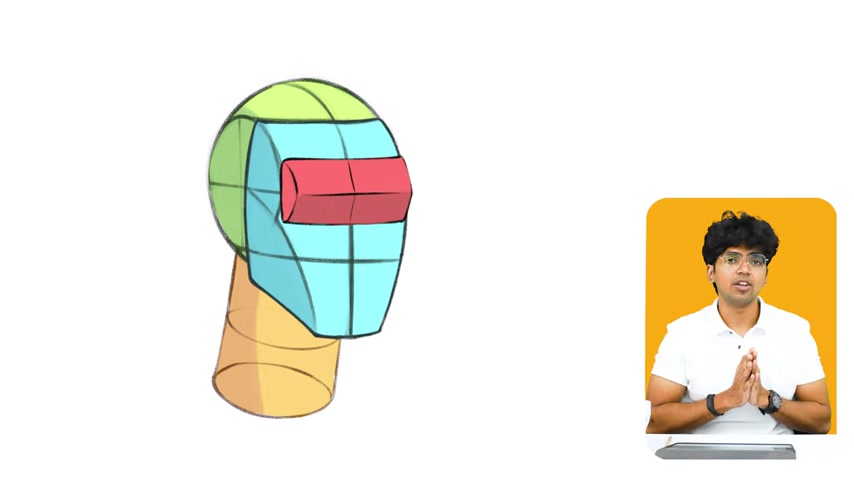
Two hollow eyeball , uh you know , eyes of the head .
But what we are doing is we're placing an entire form on top to represent this ridge on the head .
So that is number one number two would be your cheeks .
We place another form on top of that to represent the cheeks right there .
And number three would be the ball of the mouth or at least that's what I call it , the ball of the mouth because your head right here , it's not flat near the mouth .
It's got a little ball right here or a ball can be used to represent that bulginess right here on the head .
That is number three , number four would be your chin .
You got to draw a little form for the chin .
And once you're done with all that , you have the nose and the keystone , the most important aspect of the hip .
And once you're done with all those five things , the number six is these things , ears .
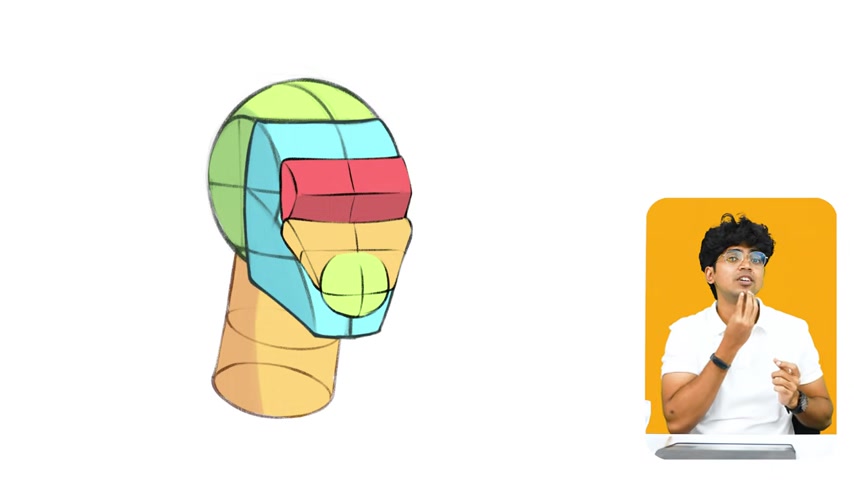
So these are the six features , the ridge on top of your forehead , the cheeks , the ball of the mouth , the chin , the nose and the ears and you remove all that .
You get the basic three core fundamental forms that form the head , the spear , the face mask , the cylinder three 636 method .
You can use this thing to draw your head in multiple different angles in multiple different ways .
With that said , we'll go into the six part of this 36 method tomorrow , the next class in detail .
And today we're going to go in depth into the three ticks .
All right .
So here's how you practically do this method first up I'm gonna draw two versions right here , right ?
I'm gonna show you how to do this from start to finish now .
Just listen , don't draw with me right now .
Just listen , I can told you the first form that we are gonna draw is a spear .
Keep it very , very light , please .
Just , just keep it very light .
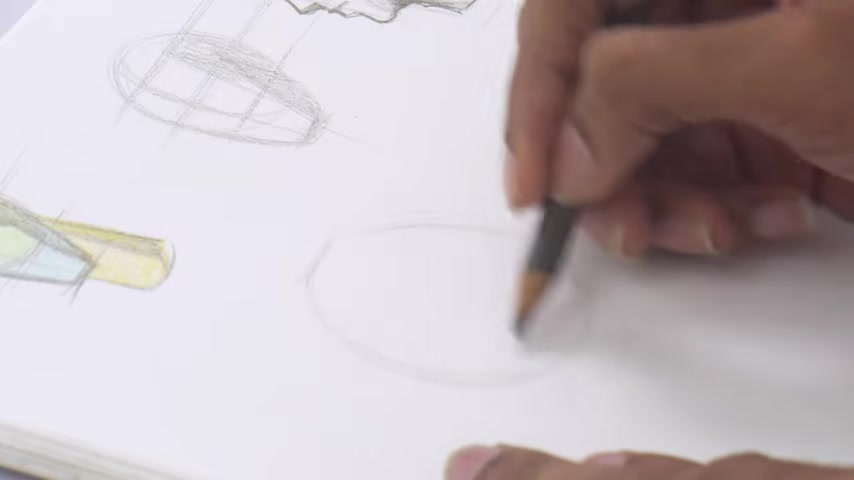
This is gonna be our first form .
So I wanted our two spears like this because I wanted to show you how this method works in both the 3/4 angle and the side .
So , all right , you have two spheres , right ?
That is step one , step two is to draw the contours of the sphere , meaning which direction this uh the spear is facing .
At first , I'm gonna draw the horizontal contour , right ?
So this the spear is at our eye level .
So both right here and right here and the vertical contour , it's gonna approximately come this side or you can just do an entire circle to sort of figure that out .
But I don't wanna do that .
And right here it comes right on this edge , right ?
Because it's this is facing us , I mean , facing that side on the side .
So now you've drawn the contours of the sphere .
Now the third step is to actually cut aside off the spear and this would sort of mark the side of the head because your skull , right , the spear , the flats are actually , I mean , the sides are actually flat , I just messed up my language , right .
So we're just sort of cutting apart right here right here .
And this thing would sort of come out in the exact center right here .
OK .
And you just make sure the height is correct like that , right ?
And what do you want to do is draw that X just to sort of mark the sides .
Now , this point right here , this X right here , this particular point right here at the center , this marks the direction the spear is pointing at and also the head is pointing at .
So here is how you simply draw the head from this point , right ?
It's very , very simple .
Now , before you do that , you go ahead and mark the bottom of the sphere like this , this would be your nose line and this would be approximately your hairline , right ?
Same here , hairline , nose line , the middle part is gonna be your brow line .
We'll get it a proportion state , don't worry , right ?
So your hairline , your brow , brow line and your nose line .
Now , here's how you simply draw the face just simply extend a line right here .
Extend it should be a straight line .
One of the mistakes that people do is like they curve it inside , it don't do that , just extend a straight line , right ?
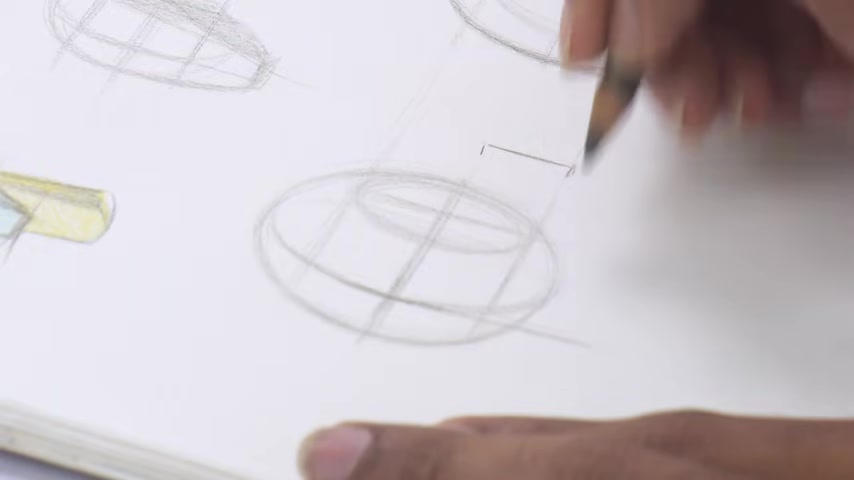
And then you draw a line parallel to this line right here .
This would mark the chin .
Now , where would you exactly draw that simple take the distance of this one .
So you have this right here .
You're going to use this thing as an approximation and mark that , that would be your chin line .
So we can use that right here .
And I actually previously marked it and marked it too high .
So erased it and did it again .
So this is gonna be the chin line .
Now , what you're gonna do is simply extend the line from the side and just connected and connect the sides right here and do the same here .
Extend the line connected , right ?
So you've drawn two things , you have drawn the spear and you have drawn the face mask .
So these are the two of the three key foundational forms that make up the head .
Now , the third thing is you draw the neck , which would come sort of on the bottom of the spear , but the neck is not like a straight line .
It's slightly slanted , slightly standard .
It's not like this .
It's like this .
Your head is sort of the thing sort of goes along with the spine .
So you just draw a slightly slanted nick like that and you have the three forms like this .
So you do it right here as well , likely slanted , you can connect this if you want like that .
So this is how you draw , you have drawn the three main things , spear , face mask cylinder .
And last step is so you connect this point right ?
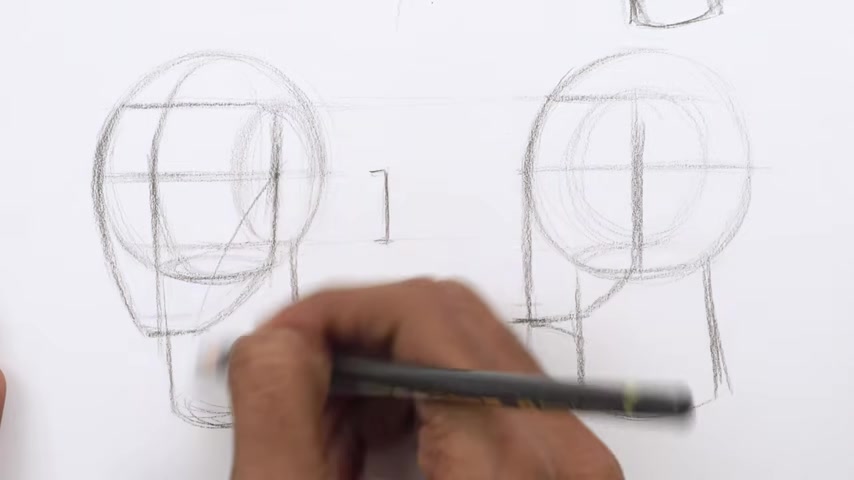
You start from this point the side of the face and you connect it like this , this marks the side plane of the face .
Now you connect it exactly sort of the edge of the uh chin , chin right there , right ?
And then once you're done with that , you can go ahead and share the side playing there , you have it , the three key forms that forms the basic foundation of the head .
Now , some people use boxes instead of spears , you can go ahead and do that .
And on top of this , we're gonna be adding the six features .
Are you looking for a way to reach a wider audience and get more views on your videos?
Our innovative video to text transcribing service can help you do just that.
We provide accurate transcriptions of your videos along with visual content that will help you attract new viewers and keep them engaged. Plus, our data analytics and ad campaign tools can help you monetize your content and maximize your revenue.
Let's partner up and take your video content to the next level!
Contact us today to learn more.