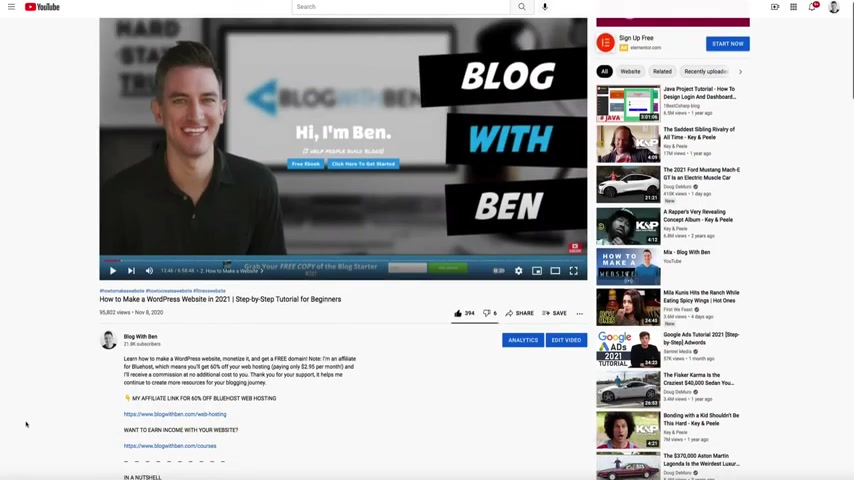
https://www.youtube.com/watch?v=KpQvTKvG1jc
How to Start a Blog in One Hour (Step-by-Step Tutorial)
Hey there .
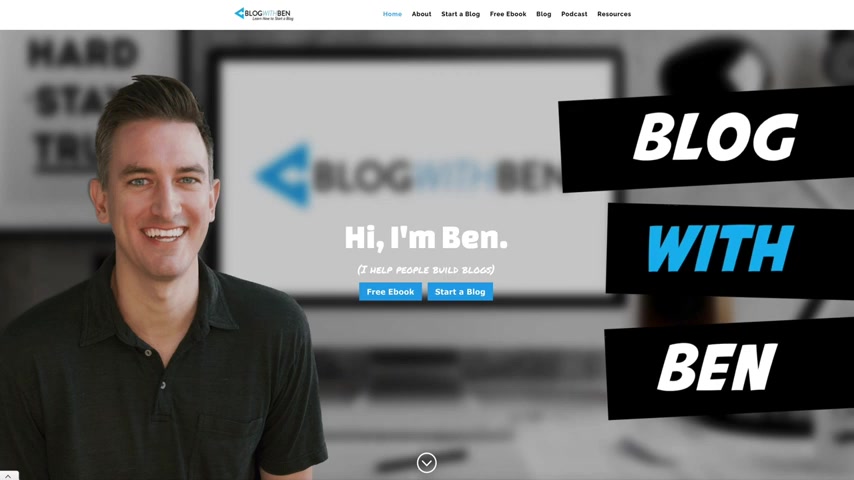
I'm Ben from blog at bin dot com and welcome to this tutorial on how to start your very own self hosted wordpress blog .
In less than one hour in this video .
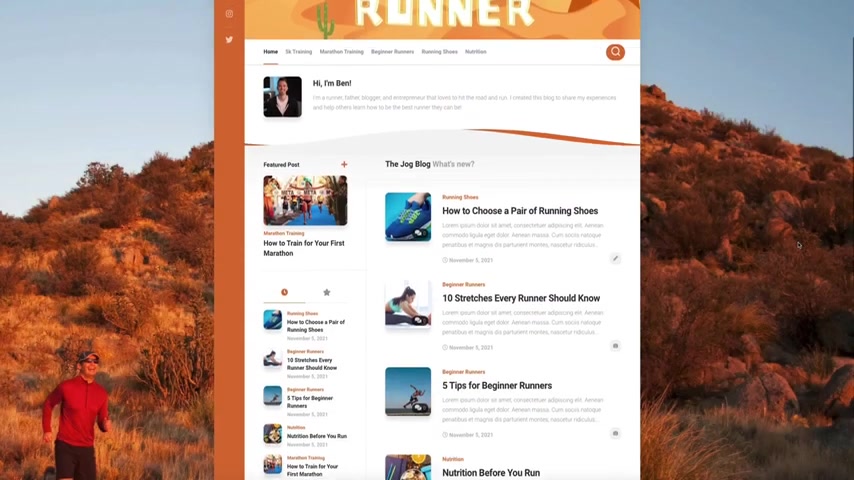
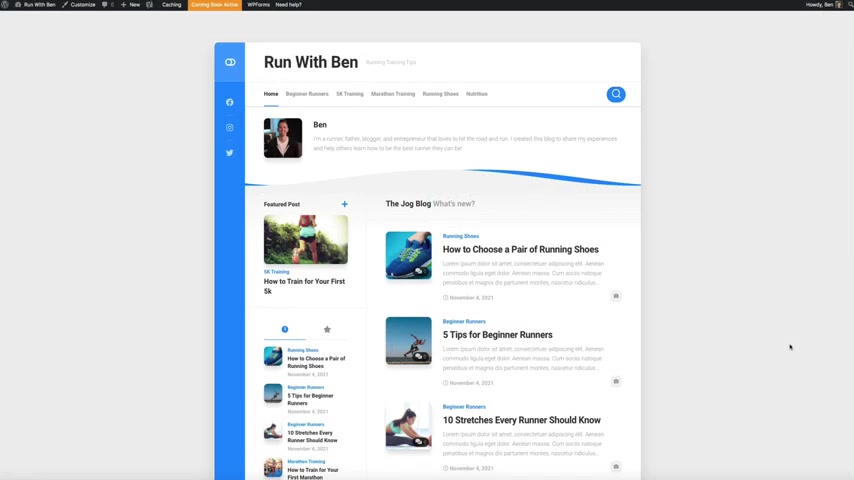
I'm gonna show you step by step how to quickly build a professional digital platform using the free Wordpress theme box style .
Specifically , we're gonna be building a personal fitness blog in this video , but this theme is extremely customizable and can be used for any industry or niche .
As you can see , you have the ability to get really creative when it comes to designing your blog , an overall brand .
And within the next hour , you're gonna launch a professional and responsive blog that can be viewed on any mobile device or desktop while also being optimized for the search engines , allowing you to publish fresh content online and share your ideas with the world .
Now , if you're new to my channel , welcome .
I'm glad you found me here .
You'll find a full length step by step tutorials on how to build grow and monetize wordpress blogs .
And if you haven't done so already , I encourage you to subscribe to the blog with the youtube channel .
That way you can stay up to date with all the videos that come out in the future .
I would also love it if you would subscribe to my mailing list .
And I'll put a link to that in the show notes below the video .
That way you can gain access to my free ebook , the blog starter kit .
So with that being said , I'm glad you're here and let's get started .
All right , the first step in this process is to sign up for web hosting and I use and recommend blue hosts .
They're one of the best web hosting providers in the world .
They power over 2 million websites on the internet .
And the best part about it is that all blog open viewers get 70% off of their web hosting by using my affiliate link .
And all that means is that I'll earn a commission if you decide to make a purchase , but you're helping me keep my blog up and running and you're helping me provide for my family .
So for that , I truly thank you .
Plus , by using my affiliate link , you get to start a professional blog for only 2 95 per month .
You also get a free domain name , a free SSL certificate , 24 7 tech support , a 30 day money back guarantee and much , much more that you'll see here in a few moments .
So to take advantage of this offer , simply click my affiliate link in the show notes below this video and all you have to do is click on show more and that will open the show notes and the link will be the first one listed there .
So go ahead and click on it and that will take you to blue hosts .
And as you can see , this is a special offer for blog with viewers .
So to get started , simply click the get started now button .
And next , you'll be asked to select your web hosting plan .
Now you have the option of choosing the basic plus choice plus and pro .
However , for this tutorial , we're only gonna be using one domain .
So I'll select the basic plan which is only 2 95 per month .
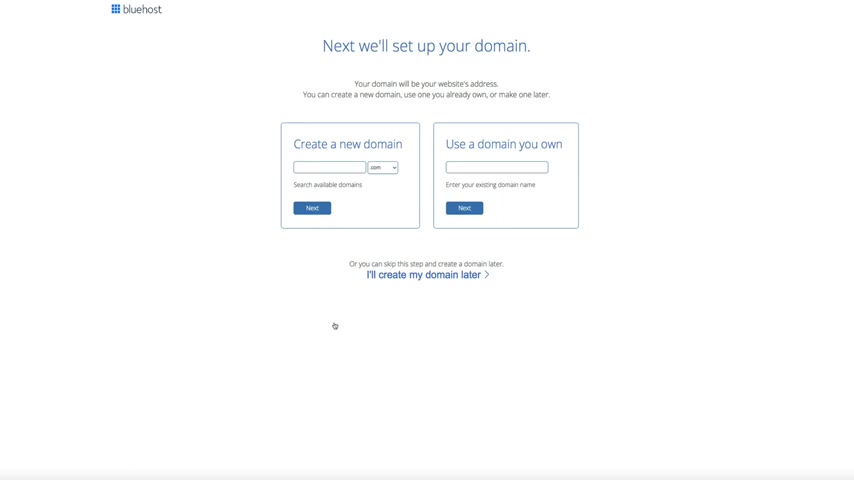
Next , it's time to set up your domain and you can create a new domain or use an existing domain .
If you have one .
And for this tutorial , we're essentially starting from scratch .
So within the create a new domain section , enter your desired domain name and click the next button .
And if the domain is available , you'll get the green notification , letting you know that it's available for you to use on your blog .
Next , it's time to create your blue host account .
So in the fields below enter the required info and that's pretty standard name , address , email , et cetera .
And next , it's time to select your hosting plan .
Again , we're going with the basic 12 month plan where a blog open viewers get web hosting for only 2 95 per month plus a free domain and SSL certificate .
It's pretty cool .
All right .
Then below that are some package extras where you can include some add-ons to enhance your hosting plan .
And I highly highly recommend that you at least get the domain privacy protection add-on .
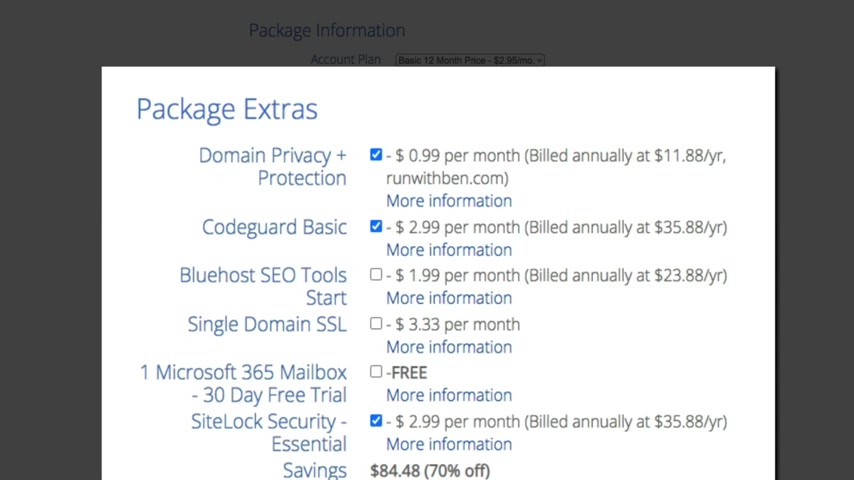
This ensures that your personal information that's associated with your blog's domain .
Like your home address isn't accessible in the who is directory .
So for this example , I'm only going to select the domain privacy protection add-on .
Then one thing I really love about blue host is their upfront pricing .
There aren't any surprises at the end whenever you get your receipt and as you can see , they display your total cost before you make a payment , which is only $47.28 for a full year of web hosting .
That's honestly a really good deal .
Next , you'll be asked to enter your payment information and I'm paying by credit card , but they do have other payment options available if needed .
Then once it's all filled out , check the box stating that you've read and agreed with blue hosts terms of service and cancellation policy and click the submit button and then give it a few seconds to process and we're still processing , but again , just sit tight , give it a few moments .

Uh It always takes a couple of seconds to create a brand new account and success .
You're the new owner of web hosting .
Now , this account confirmation page will show you your receipt , which I've blurred out for security and privacy purposes .
But blue hosts also emails you a copy of this as well .
So keep an eye out for it and always keep this information in a safe and secure location .
All right .
Next , it's time to create a password for your account .
So to get started , click the create account button and then you'll be taken to the page where you'll manage your password .
And this is pretty straightforward .
I'm sure you're familiar with creating passwords , but you'll want to make sure that it meets blue hosts requirements which are listed to the right there .
And then you'll need to enter that password again in the field below to ensure that it matches .

And then once you have the two green check marks , check the terms and service box and click the create account button and congratulations , your account is ready to go .
So let's log in by clicking the go to log in button and this will bring you to the blue host login screen .
This is where you'll log in every time you want to access your blog .
Just make sure you have the hosting login selected and enter the domain and password that you just created and click the login button .
Then once again , it may take a few seconds to load .
So just sit tight really quick .
Then blue hosts has a new onboarding process for all new accounts .
So to get started , click the create your website button .
And since we're pressed for time , we're skipping these questions .
So go ahead and click the skip this step link until you get to the Wordpress installation .
These questions aren't really necessary since you're using my tutorial .
OK .
Now it's time to install wordpress .
And again , we're building our blog with the new wordpress editor .
So click the get started button there within the wordpress section .
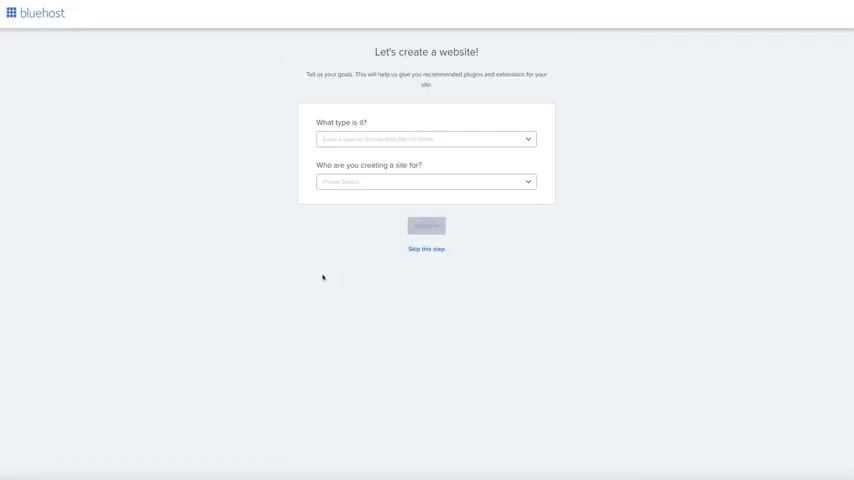
Then there are a few more questions about your site .
Again , these aren't required but feel free to fill it out if you want .
And then I do recommend that you fill these two fields out .
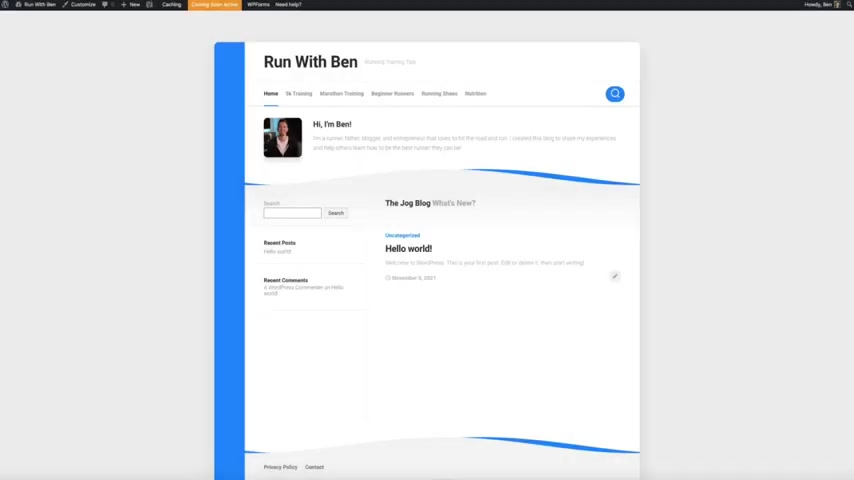
These are for your site title and tagline and they'll be used on your blog as well as in the metadata which will be viewable on the search engines .
So for this example , I'm creating a running blog , so I'll title this run with bin and the tagline will be running training tips .
And once you've entered your title and tagline , click the continue button and then you'll be asked to pick your theme .
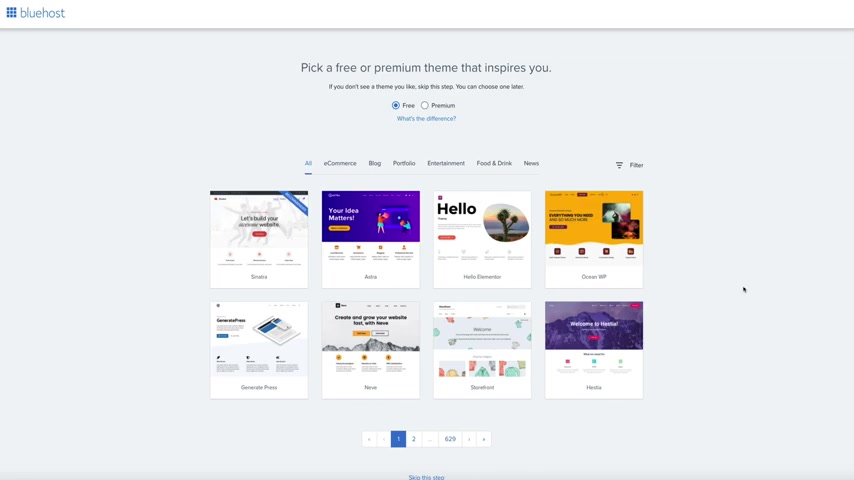
We're actually going to install our theme a little later on in the video .
So you can click the skip this step link at the bottom of the screen and then the wordpress installation will begin and you'll be taken to your blue host customer portal again .
For the sake of time , I'm not going to cover this portal too much .
But in my other videos , I go into greater detail on how to navigate this and use it either way , it's pretty intuitive and easy to learn once you get used to it .
Ok .
Next , let's access your blog .
So click the log into wordpress button and in a few moments , you'll be taken to your wordpress dashboard .
And please keep in mind this is how you'll access your blog every time you want to make a change or publish a blog post .
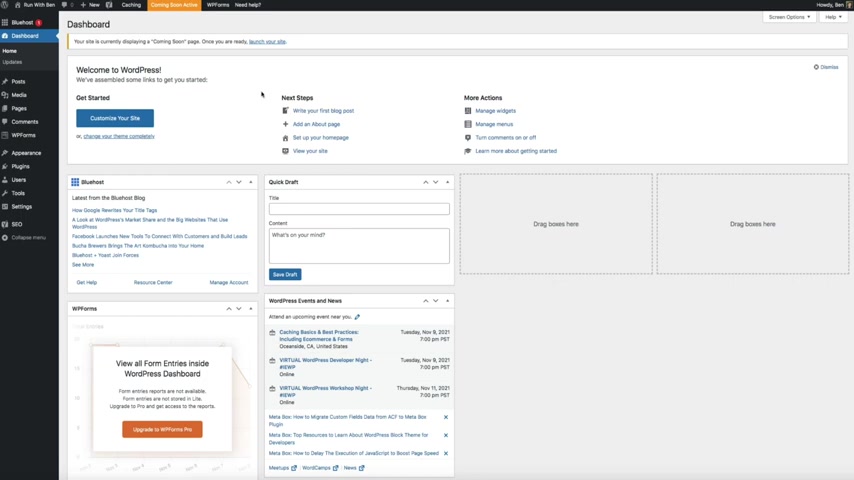
And here we are your Wordpress dashboard .
Now , I know it may look like a lot , but trust me , it becomes very intuitive as you get used to it .
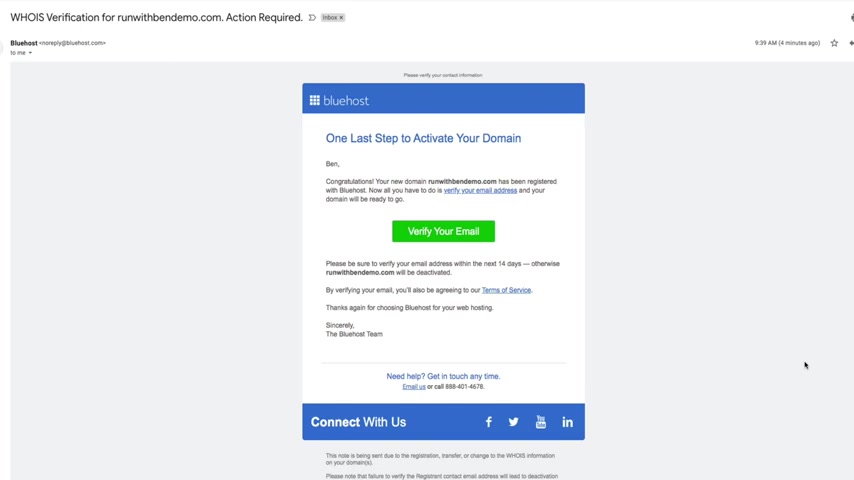
Now , one thing I want to point out is that you may notice that your blog's domain name is looking kind of weird and funky here .
Well , this is because blue hosts uses a temporary domain until your domain is verified , but rest assured blue hosts makes this process super simple by sending you an email , which is what you're looking at right now where all you have to do is click a button to verify your domain .
However , please be aware that you'll only have to do this .
If you registered your domain with blue hosts .
If you registered your domain with a service like go Daddy , then you'll need to follow a few additional steps in order for your domain to work with blue host .
Luckily , I've created a video that walks you through that process .
And the link to that video is in the show notes titled point domain to blue hosts .
Anyways , keep an eye out for this email from blue hosts , you'll need to verify your email with blue hosts within 14 days or your domain will be deactivated .
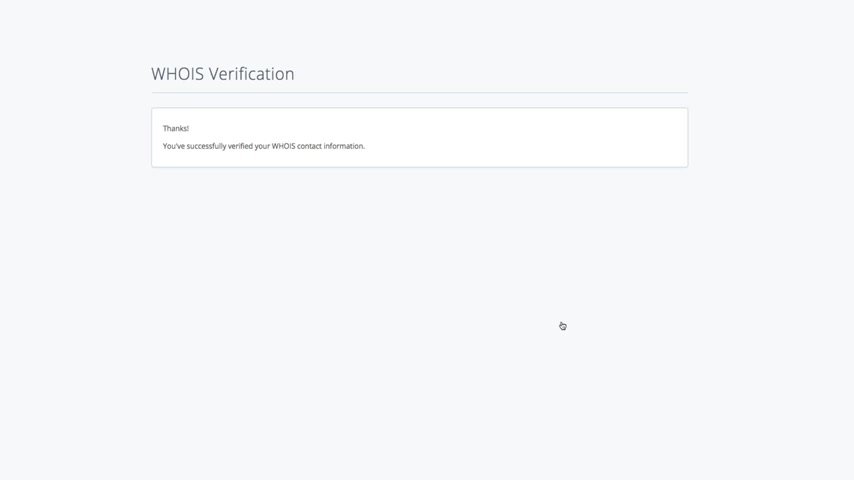
So I'm gonna click the verify your email button and then in a few short seconds , as you can see , the email has been verified with the who is directory in your new domain should show up shortly .
Ok .
Now it's time to start building your blog .
And as you're aware , this video is a quick start guide .
So we'll be going through the wordpress setup process a bit faster than my other tutorials .
But if you need to pause or revisit any part of this tutorial , I've outlined each section of the video and the time stamps located below in the show notes , just click on the desired time stamp and you'll be taken to that specific part of the video .
OK ?
So this is your wordpress dashboard and it's like the home base for your blog .
This is where you'll be making a lot of your changes and edits .
And speaking of that , the first thing we're gonna do is configure a few settings .
The first being your permanents , these are the URL S of your blog and they determine how the search engines present your URL S to the world online .
So let's configure them so that they're seo friendly .
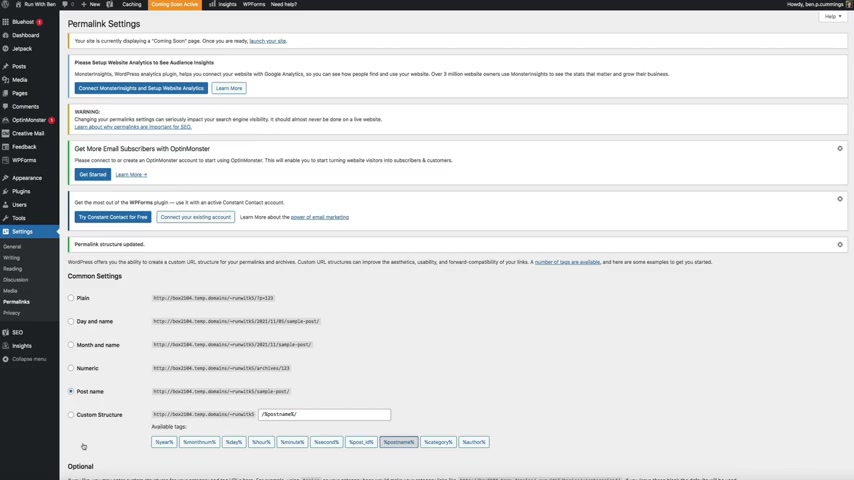
All right , within your wordpress dashboard , hover your mouse over settings and click on Perma links and this will bring you to your Perma link settings .
Now by default , wordpress starts you off with plain Perma links , but we want to use the post name .
So select post name from that list , then click the save changes button .
This will ensure that your blog's URL S are now seo friendly moving forward and you should also get a notification confirming that your Perma links have been updated .
All right .
Next , we're gonna change how your name is displayed on your blog .
And what I mean by this is when we first installed wordpress blue hosts automatically created your user profile using the user name of the email address that you signed up with .
This user name is also used for your display name , which is the name that's shown whenever you author a blog post .
So we definitely want to change that .
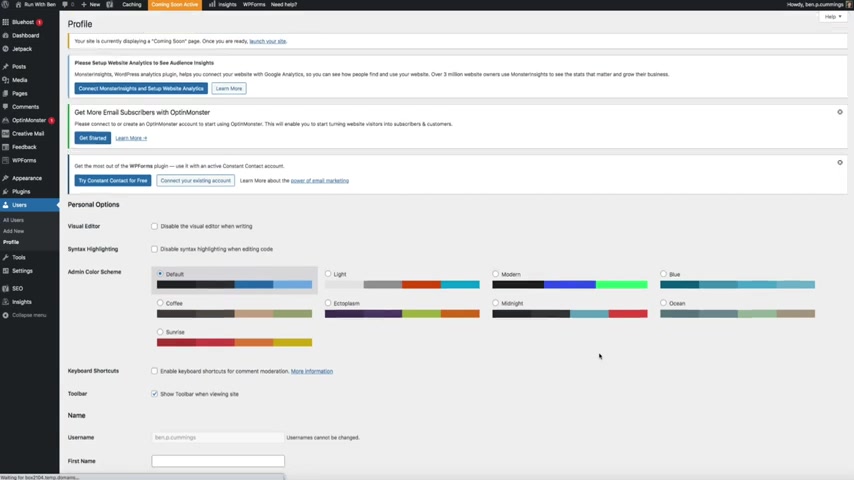
So in order to change the display name on your blog hub , your mouse over users and click on profile and this will bring you to your profile settings where you have the ability to customize certain aspects of your profile .
One of them being how your name is publicly displayed on your blog .
So to update this under the name section next to where it says nickname , remove the default name and enter the name that you want to use for your display name and then directly below that where it says display name publicly as simply select the nickname that you just created from the drop down menu .
Then I also recommend that you update your Gravatt profile and add your biographical information within the about yourself section .
This is used and displayed on your blog within the about the author section of your blog posts .
I should also point out that we're not going to create the Gravitt in this video , but it's a free service and super simple to set up and I walk you through it in my longer blogging tutorials .
So be sure to check that out if you need to by visiting the important links section within the show notes .
OK ?
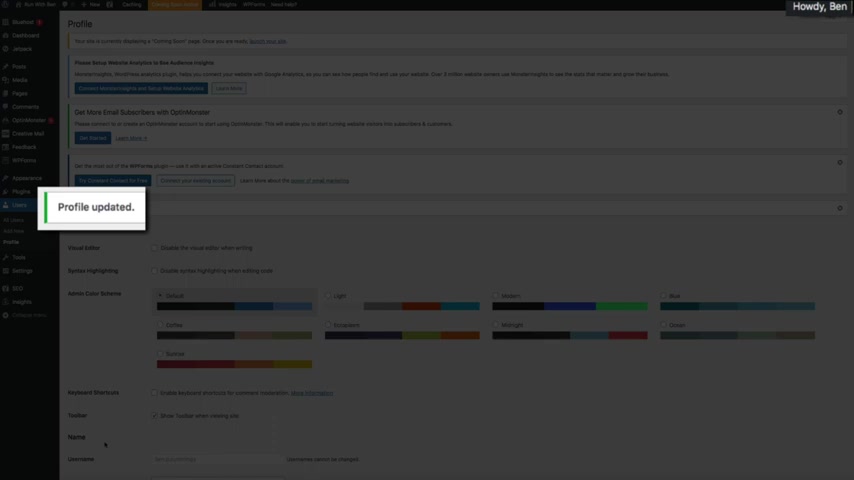
We're good to go here .
So go ahead and click the update profile button to save your changes and let's move on next .
It's time to install the parent theme and create our child theme .
These two things go hand in hand and are extremely important when creating any type of blog because it determines what your blog looks like and will ensure that any design changes you make to your blog will be saved in the event of an update .
So to install your free theme , hover your mouse over appearance and click on themes and this will bring you to your theme management menu .
Now by default , your site comes preinstalled with a few themes , but we're adding a brand new theme .
So click the add new theme icon and then you'll have the ability to browse all of the themes that wordpress has to offer .
However , we know what theme we want .
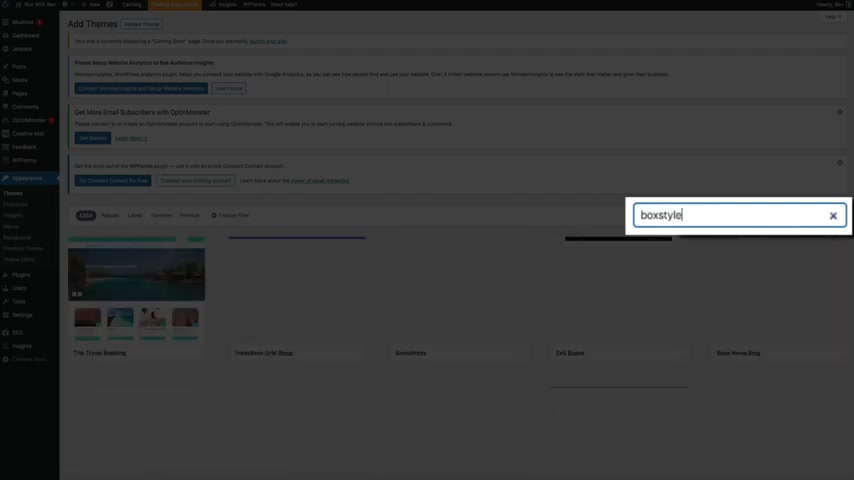
So within the search bar on the upper right hand side of the screen there type in the word box style all one word and our theme will appear next .
Let's install and activate it .
So hover your mouse over that theme icon and click the install button and then once it's installed , go ahead and click the activate button and this will officially activate the theme and make it visible on your blog .
Ok .
Now that the theme has been installed and activated , it's time to install and activate the recommended plugins .
And after you activate the box style theme , you should get a notification alerting you about the theme's recommended plugins and you can install them by clicking the begin installing plugins link .
And this will give you the ability to do a bulk installation of the four plugins that are essential to this theme .
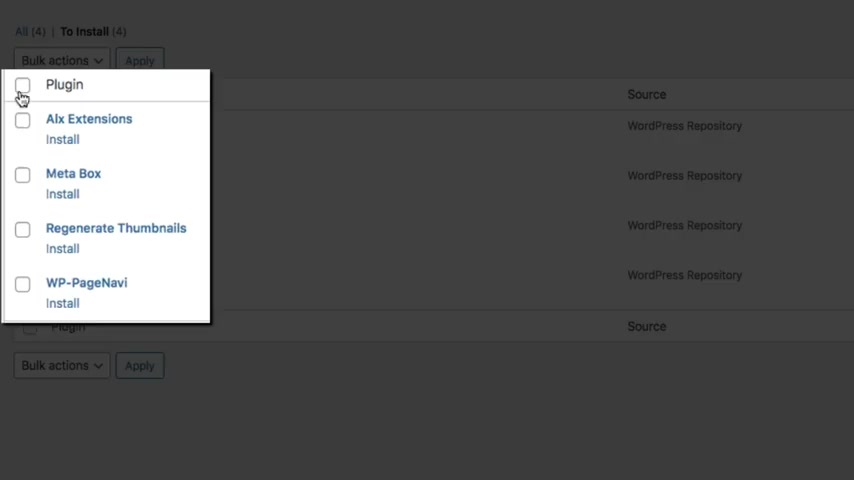
So all you're gonna do is check the box at the top of the list there to select all the plugins .
Then from the bulk actions , drop down menu , select install and click the apply button .
And after a few short moments , the plugins will be installed next .
It's time to activate these plugins .
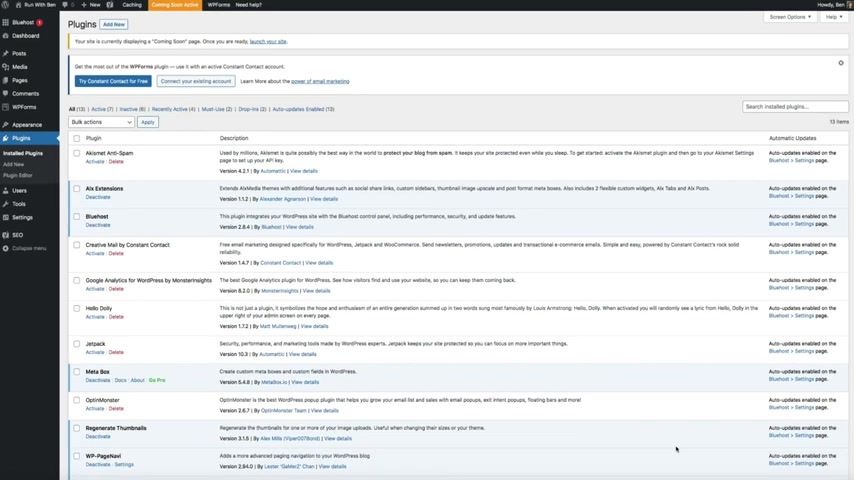
So let's visit our plug-in management menu by hovering your mouse over plugins and clicking on installed plugins .
Then from here , I recommend you deactivate the plugins that you're not going to use .
And in this tutorial , we're not going to use Creative Mail by constant contact Monster insights jet pack or the opt in monster plug in .

So check those boxes next to those plugins and then from the bulk actions , drop down , select , deactivate and click the apply button and this will deactivate all of those plug ins that we're not going to use .
And then you should get a notification letting you know that they've been deactivated .
Next , you'll need to activate the four plugins that we just installed .
So check the boxes next to alt extensions , meta Boxx , regenerate thumbnails and WP page nav .
Then from the bulk actions drop down , select , activate and click the apply button .
And in a few moments , you'll get a notification that those plugins have been activated .
Perfect .
Moving on to our child theme .
Now , if you're new to the concept , a child theme is a theme that inherits the functionality of a parent theme , which is the initial box style theme that we just installed a few moments ago .
Now , the reason that a child theme is so important is because it allows you to modify or add to the functionality of a parent theme .
If you don't have a child theme , every change you make could potentially be lost when there's an update to the parent theme .
But with the child theme , your changes are safe and you'll still inherit the functionality of the parent theme .
Basically , if you're going to be customizing your theme , then you need a child theme .
Now , there are a few ways to go about creating a child theme .
But for this video , we're gonna be using a plug-in called child theme wizard .
And we'll need to install and activate that plug in as well .
So to do that within your plug in management menu , click the add new button at the top of the screen and within the search bar type child themed wizard .
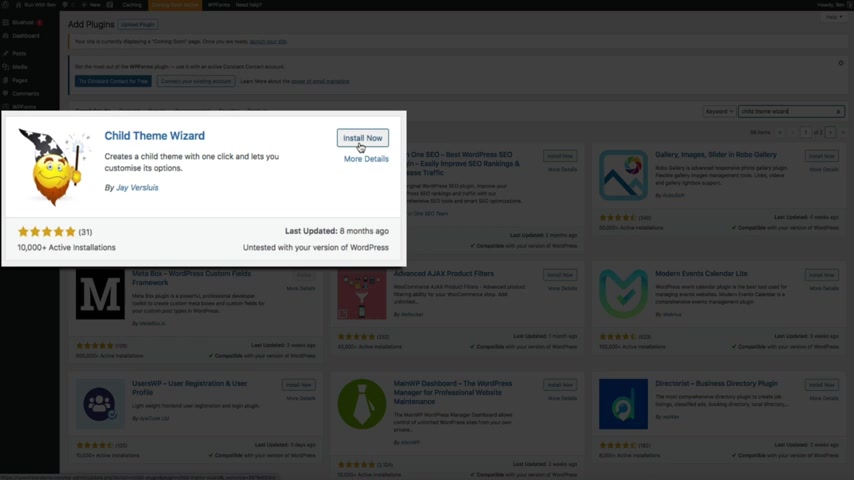
And it should be the first one within the search results .
There it is .
And then go ahead and click the install button to install the plug in and then click , activate to activate it .
All right .
Now that it's been activated , it's time to use the plug in to create our child theme .
So within your wordpress dashboard , hover your mouse over tools and click on child theme , wizard .
Then from here it's pretty straightforward .
Just make sure the box style theme is set as the parent theme and then fill out the rest of the fields .
These can really be anything but you can give your child theme a title and description .

And then for the URL S , you can just use the URL of your blog and then click the create child the button .
And in a few short moments , you have a child theme .
How easy was that ?
Now ?
We still need to activate it .
So hover your mouse over appearance and click on themes and you can see that we now have our child theme then to activate it , hover your mouse over it and click the activate button and now your child theme is active and ready to go .
All right .
Moving on next , it's time to create the pages and categories that we're gonna be using for our primary navigation menus .
And if we fast forward to the end of the video real quick , you can see that we're going to be building two menus .
One that lives at the top of our blog , which will be our primary navigation menu and then one that will live at the footer , which will be our secondary footer menu .
Both menus will consist of pages and blog categories .
So the next thing we have to do is create those pages and categories .
All right back at our blog .
The first thing we're gonna do is create two pages that will live in our menu .
You can obviously have more than two pages if you'd like .
But this tutorial will only consist of three pages total , a home page , privacy policy page and a contact page .
We obviously already have the home page .
So we'll need to create the next two pages which will be the privacy policy and the contact page .
So first things first , let's go to our pages management menu by hovering your mouse over pages and clicking on all pages .
And this is where you can collectively review all of the pages that are on your blog .
And as you can see , Wordpress starts you off with a few pages .
There's a sample page and a privacy policy page .
However , if you have additional pages here , that wordpress created for you , I recommend that you trash them by hovering your mouse over the page name and then clicking the red trash link .
This moves the page that we're not going to use to the trash and freeze up some extra space for our new pages .
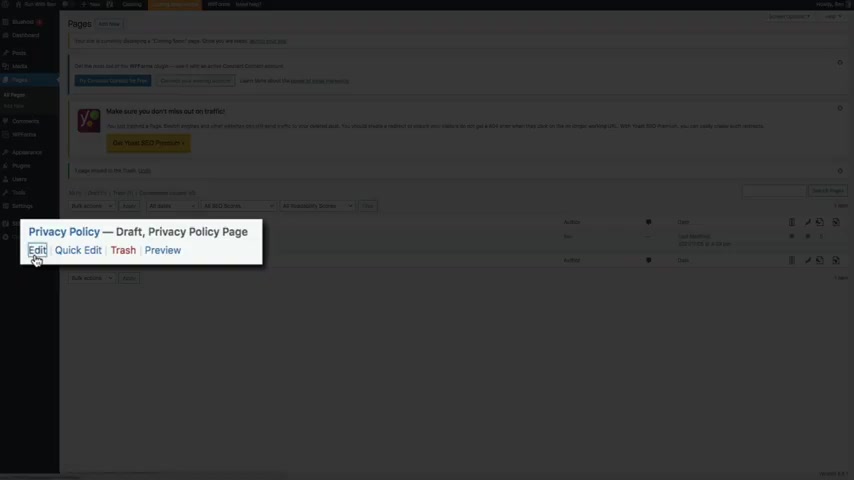
Then for our privacy policy page , it's currently in draft mode .
So we'll need to publish it in order to use it within the menu .
So hover your mouse over it and click the edit link and this will bring you to the Wordpress editor where Wordpress has started your privacy policy page for you .
Now , this is just the baseline to help you get started .
You'll need to fill in the blank , so to speak and configure the content so that it fits your blog's privacy needs .
Now , for the sake of time , I'm not gonna go through the entire process of creating the content for your privacy policy page .
However , Wordpress has a help start guide that I recommend checking out just hover your mouse over settings and click on privacy within your Wordpress dashboard to check that out .
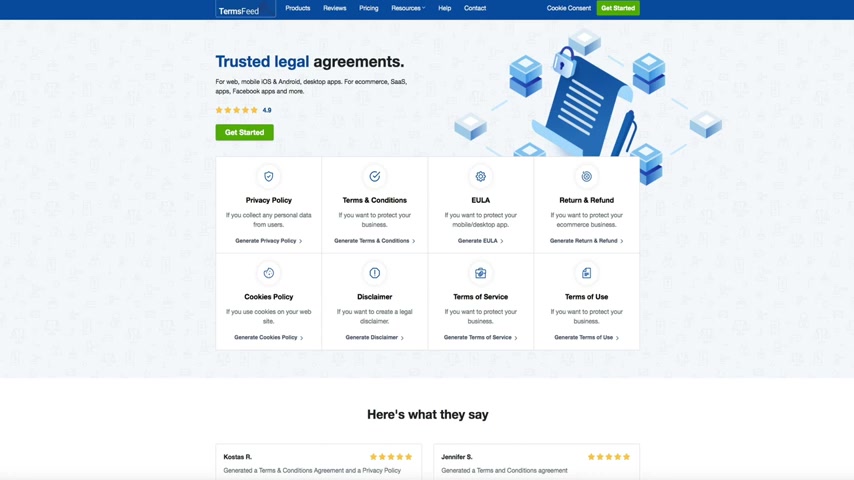
I also recommend using a service like terms feed dot com .
They can help draft up a privacy policy page for you , but it will cost some money .
I will say that it's worth the investment is what I used for my blog's privacy policy page and all of my disclaimers and I am extremely satisfied with their service and I'll put a link to that site in the show notes if you're interested .
And again , that's terms feed dot com .
Either way , once you've updated the content of your privacy policy page , you'll want to make it live by clicking the publish button and just a heads up .
Any time you're publishing a brand new page , you'll need to click the publish button twice and just like that our privacy policy page is live now before we move on , I want to show you something really quick and this is just a personal preference .
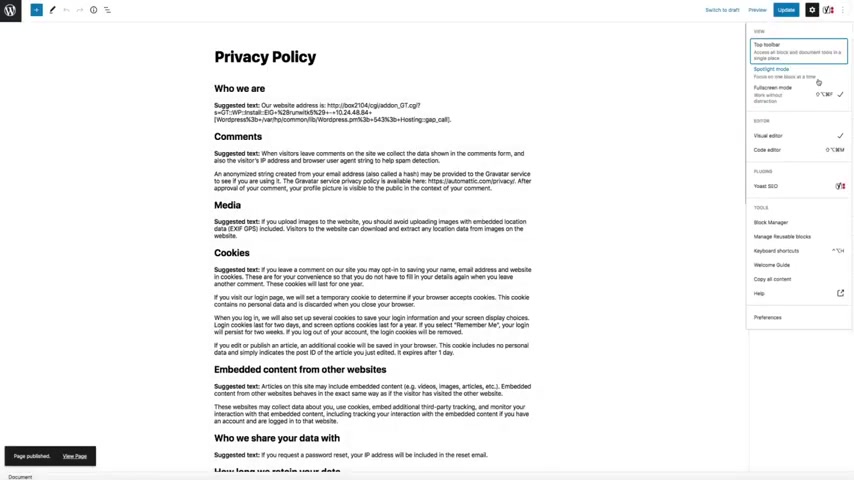
But if you click those three dots in the upper right hand side of the screen , you can change how the editor is displayed , simply uncheck that full screen mode and it will display the wordpress dashboard within the editor .
Again , this is just a personal preference , but it helps me be much more efficient as I'm creating content .
OK .
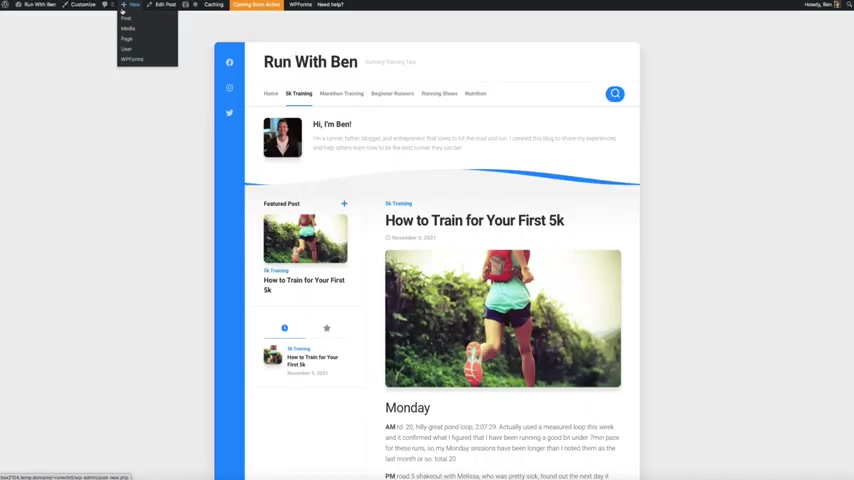
Moving on next , let's create our contact page .
So any time you want to create a new page , you can either hover your mouse over pages and click on add new or you can hover your mouse over the plus new icon at the top of the screen and click on page both of these options will get you to the editor and allow you to create a new page .
All right .
So this will be our contact page .
So let's title this contact , then we're just creating this page so we can add it to our menu .
We'll add the content to the page a little later on .
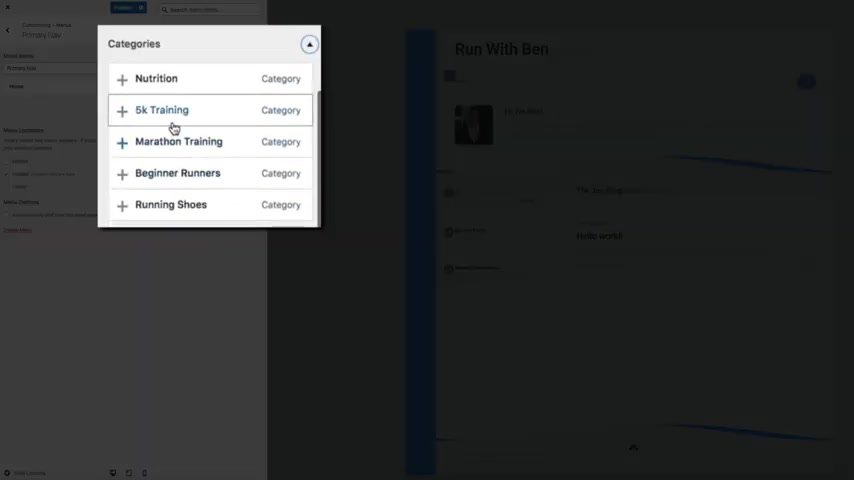
So go ahead and publish it by clicking the publish button twice and there we go next , let's create our categories .
So within your wordpress dashboard , hover your mouse over posts and click on categories .
And if you're new to categories , a category is a group of related blog posts that are about similar subjects .
They help organize your content , enhance the user experience and will be added to our primary navigation menu .
All right .
What you're looking at right now is your categories management page .
And you'll see that wordpress starts you off with an unc categorized category by default , but you can easily create new categories here as well .
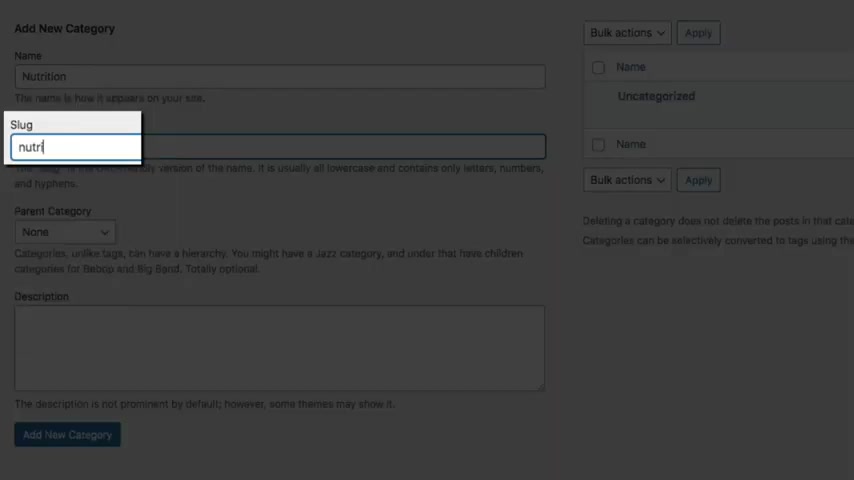
So all you're gonna do here is create the name of the category and the slug , the name of the category will be how it appears on your blog .
So you'll want to capitalize each one .
Then for the slug , which is the URL version of the category , you'll use all lower case letters , then we're not using the parent category or description .
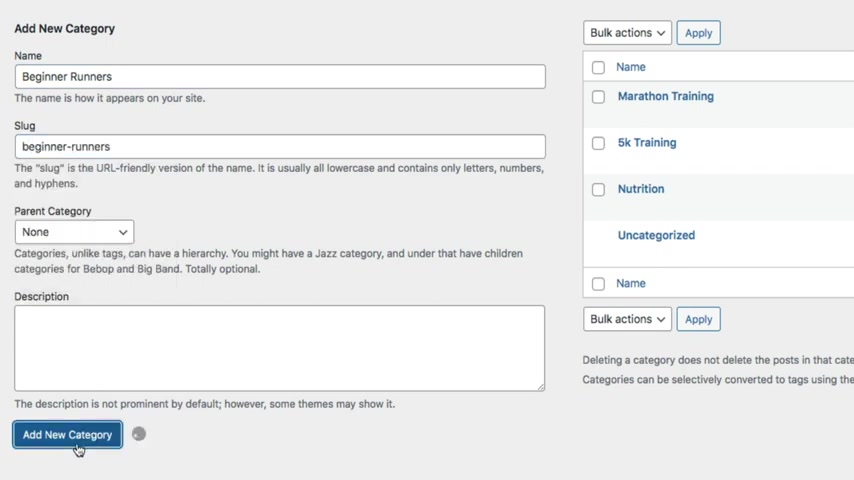
So you can go ahead and click the add new category button and we have our first category then for our next category , it will be two words .
So you'll capitalize each word for the name .
But then for the slug , anytime the category is two words , you'll want to use all lower case letters and put a dash in between each word .
So again , the marathon training slug will be all lower case and have a dash in between each word .
Then click the add new category button and there we go .
Now , as you're creating your categories , think about your content and your target audience , your category should be like a topic bucket for your blog posts .
And remember to use all lower case letters and put a dash in between the words when you're creating the slug , and then I'll add one more category and I'll call this one running shoes and there we go , we have our categories .
OK ?
So now that we've created our pages and categories , let's start designing our blog .
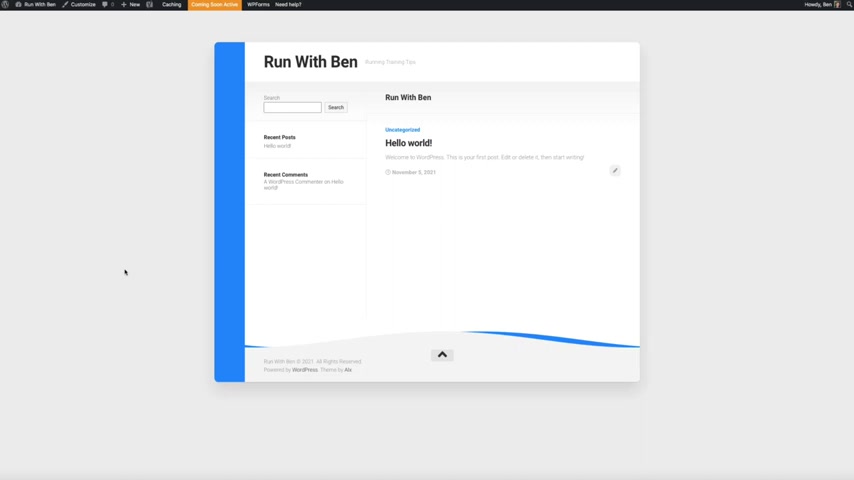
So first things first , let's visit our site by hovering your mouse over the site title in the upper left hand side of the screen and clicking on visit site .
And as you can see our child theme of the box style theme is displaying nicely .
But now it's time to turn this blank canvas into a digital work of art .
Now , I'd like to work from the top down like literally from the top of the blog to the bottom .
So the first thing we're going to update is the facon commonly referred to as the site icon .
This is the small logo that is used in the browser tab and it may seem small , but it's a big part of how your blog is perceived online .
So to update the Facon open your customization menu by clicking customize at the top of the screen .
And if this is your first time here , the customization menu is basically a real time editor for your blog and you'll definitely get very familiar with it throughout the video .
So to create your Facon , open the site identity tab and from here you have a few editing options , you can change the site title and tagline if you'd like and you can also update your site icon .
Now , I created my site icon using cava dot com .
This is a free graphic design website that I'll link to in the show notes , but I use it for all my blog images and design needs and please note that when you create your site icon , make sure it's 512 by 512 pixels .
OK .
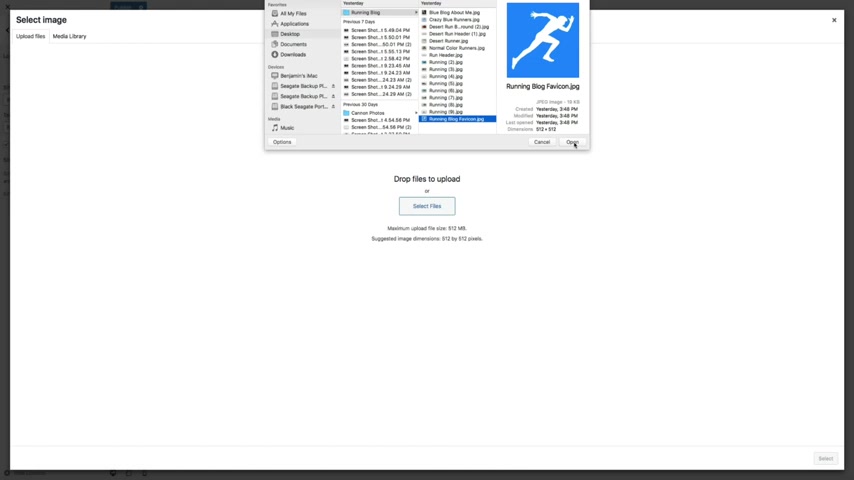
So to add your site icon , click the select site icon button and this will bring you to your media library .
This is where we'll upload and store the images that we're going to use on our blog .
Then to add the image of the site icon , simply click on the select files button and search for the image on your computer .
Then once you found the file and uploaded it to your media library .
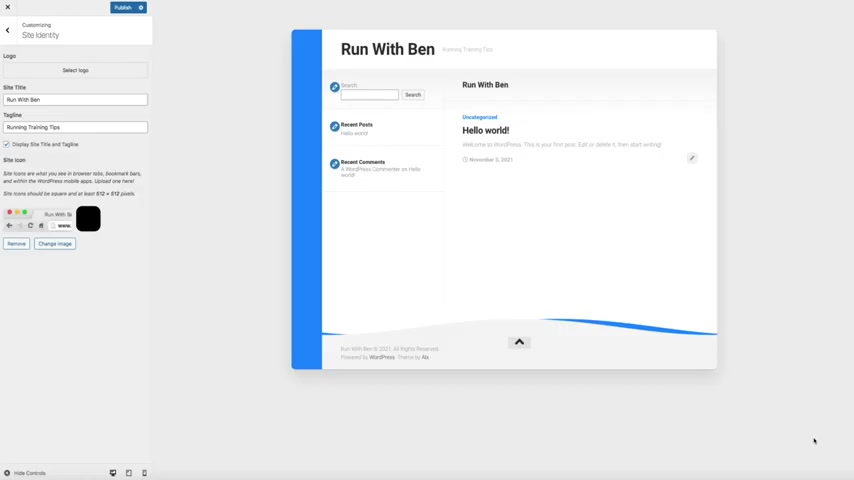
Go ahead and click the select button and as you can see the image I just uploaded is now being used for the facon and site icon looks great and looks a lot more professional .
All right .
So click the publish button to make these changes live .
And if you're not seeing the updated site icon right away , give it a few minutes and clear your browser cache and history .
Refresh the page and it'll show up .
OK .
Moving on to the about me profile .
Now , this theme allows you to add a nice little introduction at the top of your blog .
So to update that , click the arrow to go back a slide within the customization menu and open the theme options tab and then open the header tab .
And from here you'll want to add a profile image .
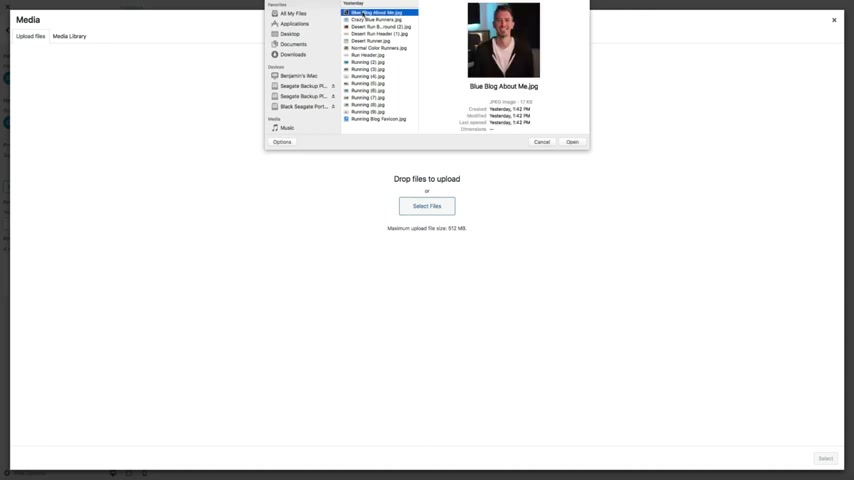
So click the select image button and upload the image that you want to use and to do that , click the upload files , link and then the select files button and then find the image on your computer .
I recommend using a square sized image and this one I'm using is 320 by 320 pixels .
Then one thing I recommend doing to all of your images is updating the title and alt text and without getting into the technical weeds , these two things are good for user experience and seo the title is what the user sees whenever they hover their mouse over it .
And the alt text is what the search engine bot see whenever they crawl your site .
So be descriptive with your alt text .
OK ?
This image is ready .
So click the select button and it looks great .
Next , we have the profile name and description and these are pretty self explanatory .
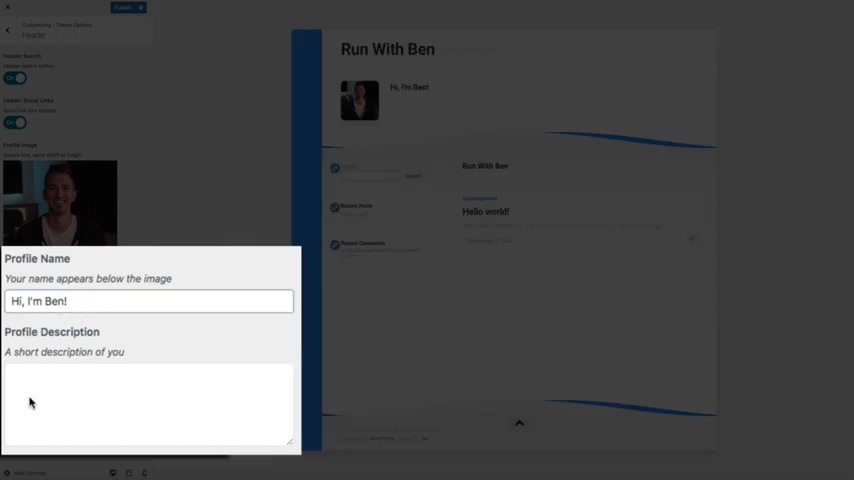
So fill out these two fields and as you're doing that , you'll see the text display at the top of your blog next to the image .
All right .
So let's publish our changes and make this live .
So click the publish button and next let's update the blog heading and subheading text .
So click the arrow to go back a slide within the customization menu and open the blog tab .
Then you obviously have a lot of flexibility here .
But right now , all we're worried about are the heading and subheading that displays above the blog feed by default , it displays your blog's title , but you can edit it here within these two fields and give your blog a little more personality and flair .
I'm gonna have it , say the jog blog , what's new ?
And there we go .
I like that .
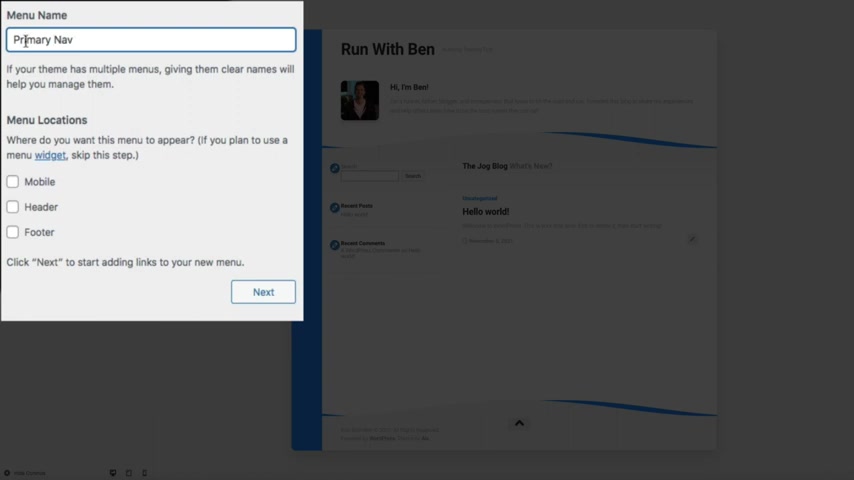
Then click the publish button to make these changes live and moving on to the primary navigation menu .
So this time , click the arrow button twice to go back to slides and then open the menus tab and we're creating a brand new menu .
So click the create new menu button and then give your menu a name .
I'm calling this primary NAV , then to determine where this menu displays under the menu locations , check the box next to header and click the next button .
This will ensure that your primary navigation menu shows up at the top of your blog .
Next , it's time to build out the menu .
So click the add items button and the first menu item will be our home link .
So under the pages section , select the home custom link , then the rest of the menu items will be categories .
So open the categories tab and select all of the categories that we created a few moments ago .
Then you can situate the menu items by dragging and dropping them here if you'd like , that's pretty cool and convenient .
And then when you're ready , click the publish button and you now have a primary navigation menu .
Next , let's create our footer navigation menu .
So click the arrow to go back a slide and then click the create new menu button and then the steps of the exact same , we'll name this menu footer nav and set the location to the footer and click the next button and then click the add items button to add more items .
And then this menu will consist of our privacy policy page and contact page .
So select those two pages and click the publish button and we now have our footer navigation menu .
All right .
The next thing we're gonna do is create a contact form and add it to your contact page .
So let's exit out of the customization menu by clicking the X in the upper left hand side of the screen .
And having a contact form is a great way to keep a line of communication open between you and your audience .
And it's also a great way to build your email list .
So to add a contact form , let's go back to our dashboard by hovering your mouse over your site title on the upper left hand side of the screen and clicking on dashboard .
And we're gonna be using the WP forms light plug in this plug-in came preinstalled when we initially set up our blog .
But if you don't have the WP forms plug-in , please be sure to install and activate it before this part of the video .
OK .
So the first thing we need to do is configure the plug in so that it's GDPR compliant , we'll only have to do this once .
But after we make this quick change , all of the forms we create with the plug-in will be GDPR compliant .
So within your wordpress dashboard , on the left hand side of the screen , hover your mouse over WP forms and click on settings and this will bring you to the general settings of the plug in .
And what we're concerned with right now are the GDPR enhancements .
So , under the GDPR section , all you're going to do is check that box next to GDPR enhancements and click the save changes button .
This will enable the GDPR features for all of our forms moving forward .
Next , it's time to create the contact form .
So on the left hand side of the screen hover your mouse over WP forms and click on add new and this will bring you to the form templates .
Now we're gonna go through this very quickly , but I recommend you revisit the plug in when you have some extra time .
OK ?
So first let's name this form and I'm going to call this contact form for obvious reasons .
Then below where all of the form templates to choose from , and we're gonna use the GDPR contact form .
So click the used template button and this will take you to the form builder again for the sake of time , we're just using the default form and the default settings , which is what you're looking at right now .
But I go into much greater detail on the form builder and the plug in as a whole in my more in depth blogging tutorials .
I recommend you check them out when you have some extra time .
OK ?
So let's use this form .
So click the save button in the upper right hand side of the screen and then let's exit out of here .
So click that X and then let's add this form to the contact page .
So we'll need to access the actual contact page in order to edit it .
So one way to do that is to visit our site .
So hover your mouse over the site title and click on visit site .
Then to access the contact page , simply click on the menu item within the foot or NAV .
And from here , click the edit page link in the tool bar at the top of the screen .
And this will bring you to the wordpress editor .
Then the first thing I'm gonna do is add a quick intro .
I'm obviously using dummy text here .
But you can use this space to tell people your contact policy , hours of operation , et cetera .
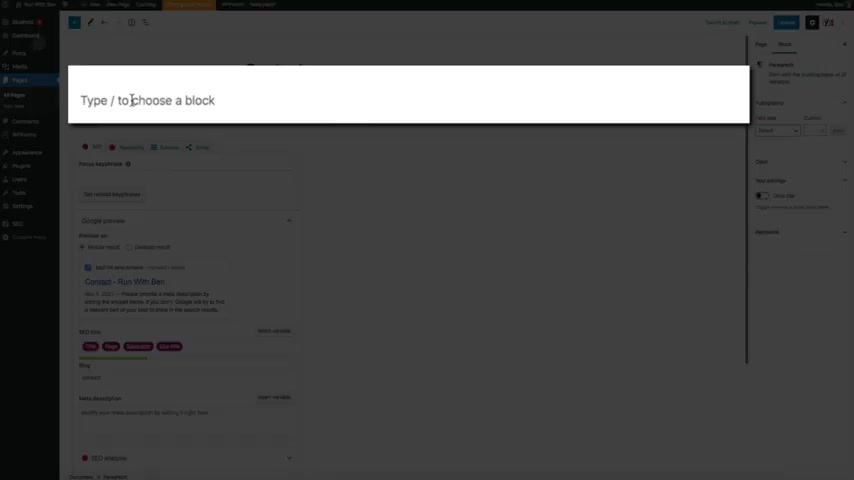
Then to add the form , we're going to use what's called content blocks .
So to add a block , click the plus icon and this will bring up the block menu .
This is where you can browse and search various blocks to use and create unique content like our contact form .
So in the search field type WP forms and there it is , go ahead and click that icon to add the block to the page .
Then to add the form , simply open the drop down menu within the block and select the contact form that we just created .
And in a few seconds , boom , we have a contact form .
Now for the sake of time , I'm skipping over the Yost SEO settings and featured image , but you should get into the habit of configuring your Seo settings and adding a featured image to each page and post that you create .
OK , let's make these changes live .
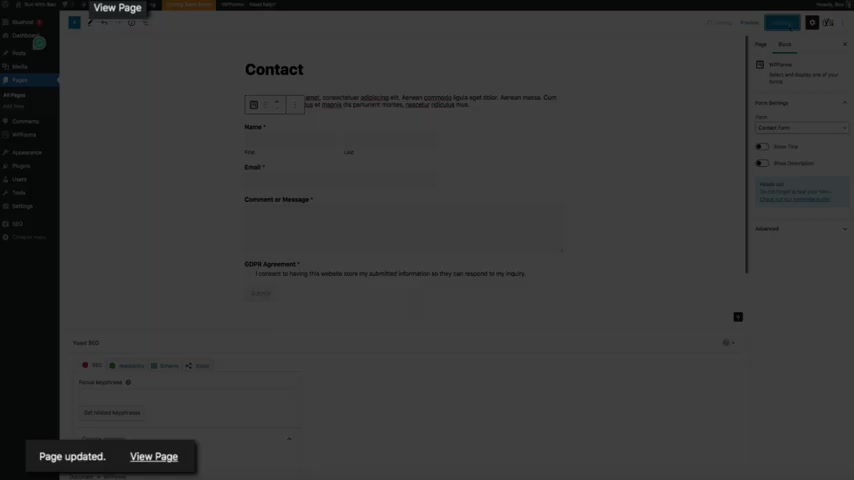
So click the update button in the upper right hand side of the screen .
And then if we view our page , you'll see that we now have a beautiful professional and functional contact form on the page .
Nice work , moving on to the social links .
So one of the really cool features of the box style theme is that it comes with some cool social icons that allow you to link to your social profiles and they're super easy to set up .
So to get started , click the customized link at the top of the screen to open your customization menu , then open the theme options tab , then the social links tab , then click the add new social link button .
Then from here , it's fairly straightforward .
You'll add the title , the icon , name , link and icon color if you want to change it .
And for this example , our first social icon is going to be for Facebook .
So in the title field , I'm going to type Facebook .
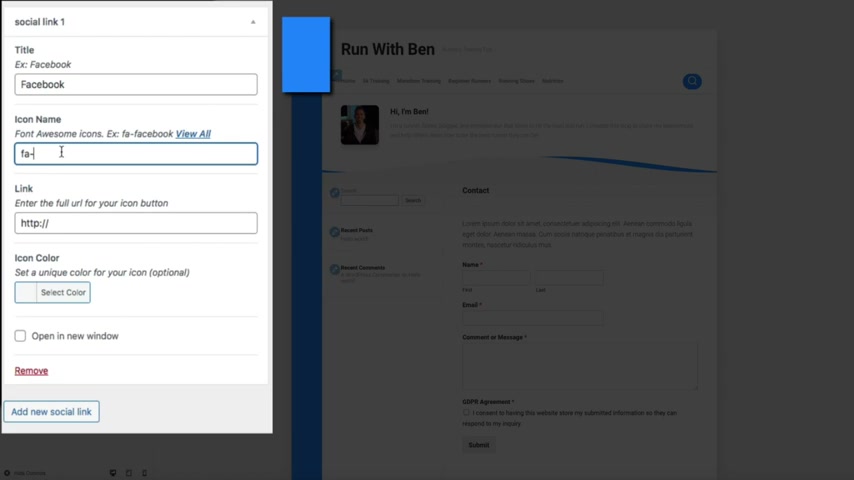
Then below that is the icon name and this is how the theme will know what icon to display .
And without getting into the technical weeds .
Again , just type fa dash Facebook and you'll see the Facebook icon display in your blog and then finally add the link , this is just the URL of your Facebook page and then that's gonna do it for the first social link .
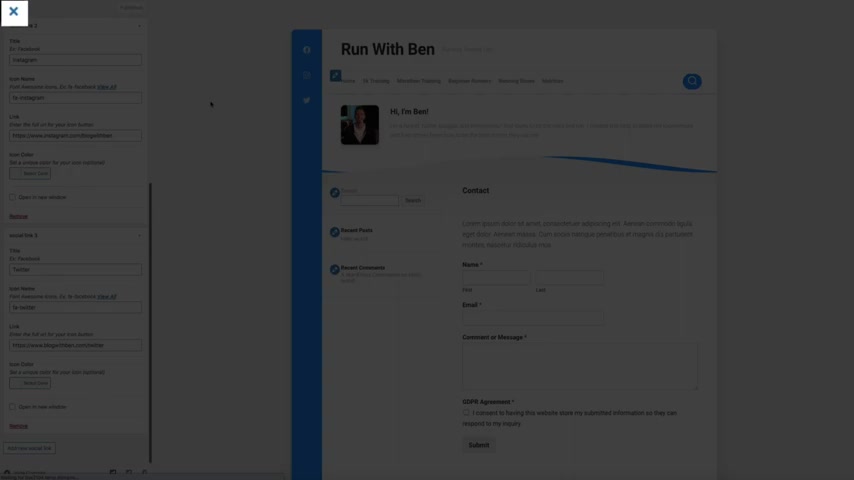
Then to add another icon , click the add new social link button and this one is gonna be for Instagram and the steps are the exact same .
You fill out the title icon , name and link and then let's add one more .
So click the add new social link button and this one will be for Twitter .
So Twitter for the title fa dash , Twitter for the icon and then my Twitter URL and we're good to go .
So click the publish button to make these changes live and then let's exit out of the customization menu and move on to the next step where you'll publish your first blog post .
OK .
Back at our blog , you've probably noticed that wordpress starts you off with the sample post .
This is a published post that shows up in your blog feed .
So before we do anything , we'll want to remove this .
So head over to your wordpress dashboard and then hover your mouse over posts and click on all posts .
And this will bring you to your post management menu then to get rid of the sample post .
Simply hove your mouse over it and click the red trash link .
Next .
It's time to become a blogger .
This is the exciting part .
So to create your first blog post , hover your mouse over the plus new icon at the top of the screen and click on post and this will bring you to your wordpress editor , which is the exact same as when you created your blog pages .
So hopefully you're getting somewhat familiar with this .
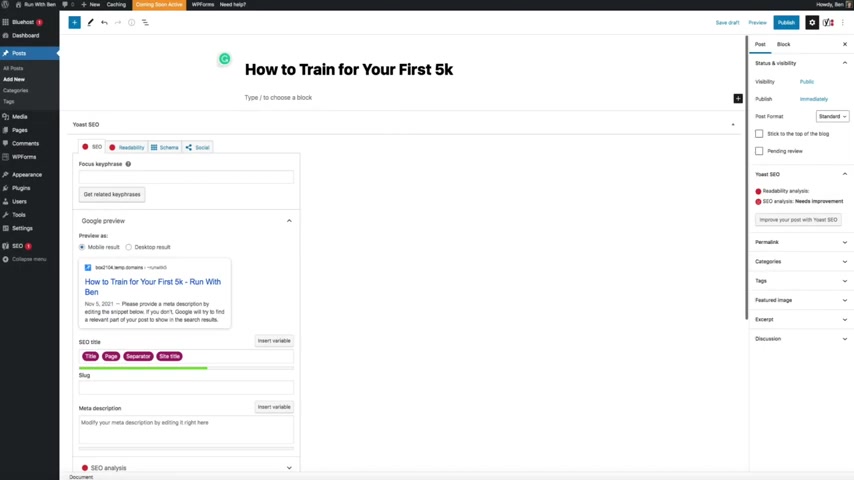
All right , first things first , let's give our post a title .
So in the title field , type the title of your post and this one's going to be how to train for your first five K .
Then for the content , I actually already wrote my post in Google Docs and all I'm going to do is copy and paste the actual content to the wordpress editor .
This is one of the many reasons why I love wordpress and their content management system .
It's super streamlined and it's built for bloggers .
OK .
So I literally copy and pasted my entire blog post from the Google docs to wordpress .
Then you can format the content any way you'd like within the C MS by clicking on each block and editing it like .
So I want these words to be heading .
So I'm double clicking on them to open up the editing toolbar and then changing the default font to a heading .
It's pretty convenient .
All right now you can obviously do much more with your posts like add links , videos , images , et cetera .

But for the sake of time we're gonna move on next , it's time to add our featured image .
So within the post settings on the right hand side of the screen open the featured image tab and click on set , featured image and then follow the steps to upload the new image .
This is the image that will be used in our blog feed and social media and it represents the post online .
So be mindful of that when you're creating your featured images .
And just a side note , I create all of my featured images with caba dot com and I suggest you do the same super easy .
Then don't forget about the alt text and title you'll want to get in the habit of doing this for every image that you upload to your blog .
I know it seems somewhat tedious , but it is very important and then click the set featured image button and boom , we have our featured image .
Then again , for the sake of time , we're skipping over the Yost Seo settings .
But you'll want to configure these for every blog post and page that you create .
I should also mention that I have a detailed Yost step by step video tutorial that I'll link to in the show notes if you want to learn more about how to leverage this plug-in .
OK .
Finally , I recommend setting the post format to image .
This will allow the featured image to display within the post .
It's a personal preference , but I think it looks a lot better .
All right , our post is ready .
So click the publish button twice and then after a few seconds , our post has been published .
So let's click view post to check it out and look at that .
You're now a blogger .
I absolutely love the simplicity of this theme and how it displays the content .
It really takes the leg work out of the content creation process and makes your posts look clean and professional .
Love it .
All right .
Now that we have some published content , it's time to configure the blog sidebar .
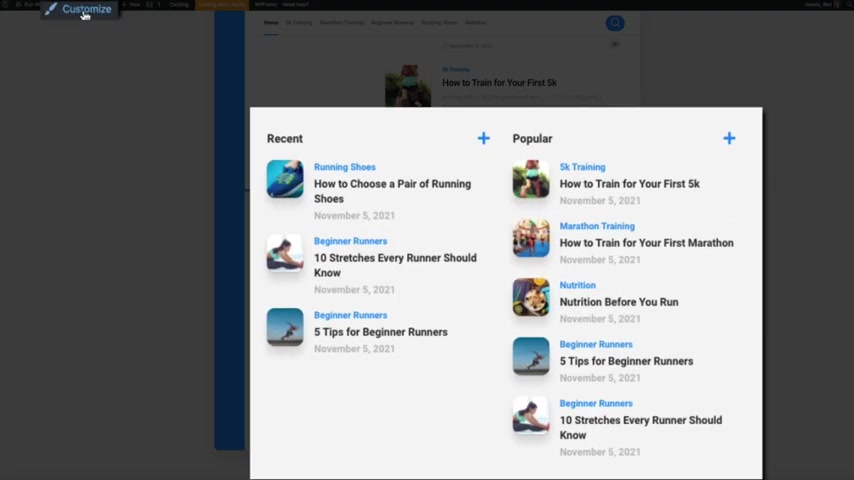
So go ahead and open your customization menu and then open the widgets tab and then you'll notice that wordpress starts you off with some default widgets that are represented by these three blocks within the customization menu .
Now , we're not going to use these for the tutorial .
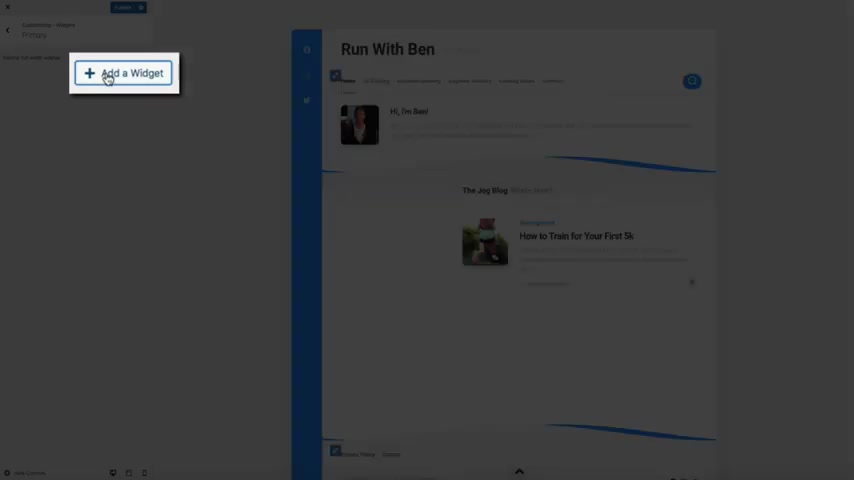
So to remove them , simply open each widget and click the red , remove link and you'll see them disappear one by one , then we'll add a new widget .
So click the add a widget button and select ALCs post from the list .
And this widget gives you the ability to display a featured post within the sidebar .
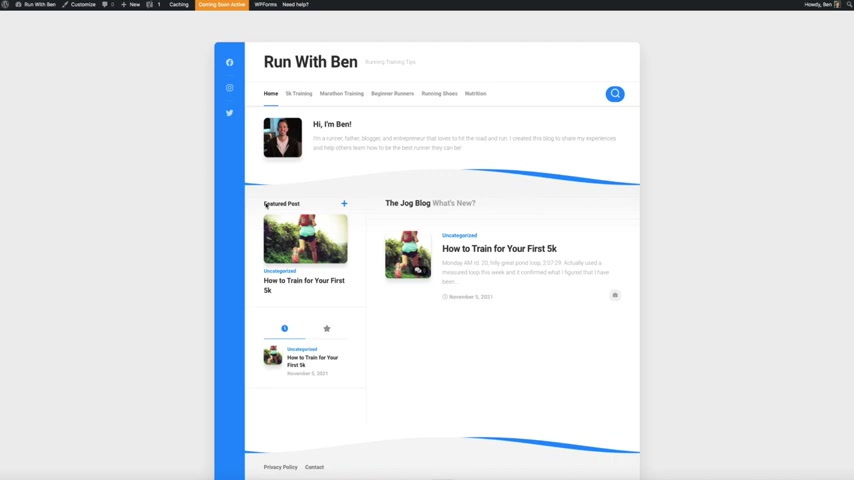
All right .
So go ahead and give it a title .
I'm calling this featured post , then you can configure it any way you'd like .
I'm gonna remove the date and only have one post display at a time and you can also set a specific category to display here as well .

And it looks like I forgot to assign this post to a category because it's only giving us the option to select the unc categorized category .
So we'll need to revisit the actual blog post here in a few moments and set the category .
Sorry about that .
I was going a little too fast .
All right .
But first let's add our next widget .
So click the add a widget button again .
And this time select alcs tabs and this widget gives you the ability to list posts , comments and tags in a cool and unique way within the sidebar .
And as you can see it displays some icons allowing the user to filter through recent posts , most popular posts , recent comments and tags and you have the ability to configure this any way you'd like as well .
But for this example , I'm only going to have it show the recent and popular posts .
So I'll disable the comments and tags by unchecked these enable boxes and this removes these features from the widget and you can obviously do more with this .
But for the sake of time , I'm going to publish our changes and move on .
So go ahead and click the publish button and then let's exit out of the customization menu and so far so good .
Now these widgets will obviously look a lot more complete as you begin to publish more blog content , but you now have a solid foundation for your posts .
And speaking of posts , I forgot to set the category for this post .
So let's do that really quick .
So open the post and then access the wordpress editor by clicking the edit post link and then within the post settings on the right hand side of the screen , open the categories tab and set the category by checking the box next to the category you want this post to be associated with .
And then don't forget to uncheck the unc categorized box .
There we go .
Then let's publish these changes by clicking the update button .
And when we view the post , you can see that the category has been assigned .
And now the logic behind our sidebar widgets and primary NAV will behave as expected .
Again , you'll always want to get in the habit of assigning your posts to a category every time you create a new blog post , just keep that in mind going forward .
OK .
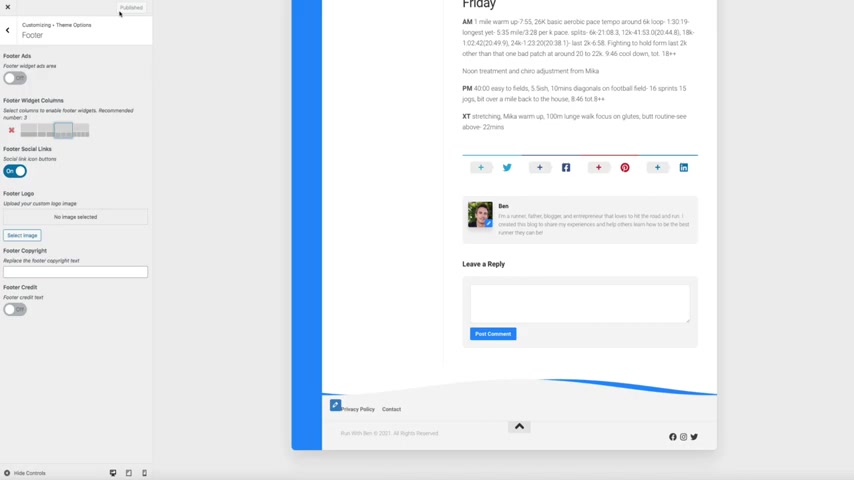
Next , I want to show you how to enhance your footer and add some widgets to it like we did within the sidebar .
So go ahead and open your customization menu again and then open the theme options , tab and select footer .
And this will give you some additional configurations for your footer like adding widgets .
So if you look at the footer widgets column section , you have the ability to add various columns to the footer .
And for this example , I'm adding three columns to the footer .
So I'll select the icon with the three boxes and this will give us the ability to add additional widgets to the footer .
Then before we move on , there's one personal preference thing , I'm going to show you and that's how to turn off the footer credits .
By default .
There are some additional credits that say powered by wordpress themed by aux , but you can remove it by flipping this switch off again .
This is a personal preference , but this allows you to clean up the footer credits if you want to .
Ok , let's publish these changes real quick .
So click the publish button and then you'll need to exit out of the customization menu and reopen it .
I'm not sure why , but I had to do this in order for these new columns to show up .
So click the customized link at the top of the screen and then open the widgets tab and then you should see the three new footer columns where you now have the ability to add widgets to each one .
So to get started , simply click on the footer one column to open it up and add any widgets that you want .
Now , for this example , I'm adding the search widget .
It's pretty straightforward .
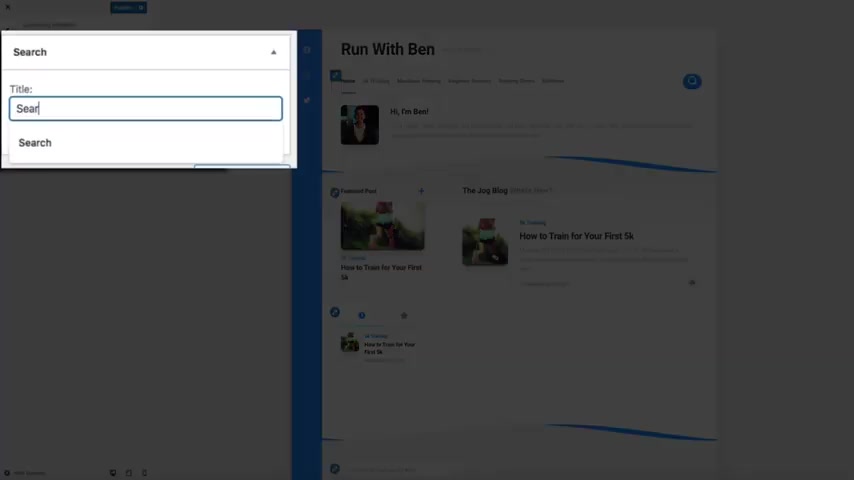
You'll just give it a title , but I think it looks good and it creates a helpful user experience as well .
Then below that , I'm gonna add a quick about me blurb .
So add the custom html widget and then I'll title it about and then add some text within the content box .
This will just be a quick introduction to the reader and there we go , it looks great on to the next column .
So click that arrow to go back and then open up foot or two .
And for this one , I'm gonna add the aux tabs .
So click the add a widget button and open the AK tabs and I'm going to configure it so that it only shows three of the most recent posts .
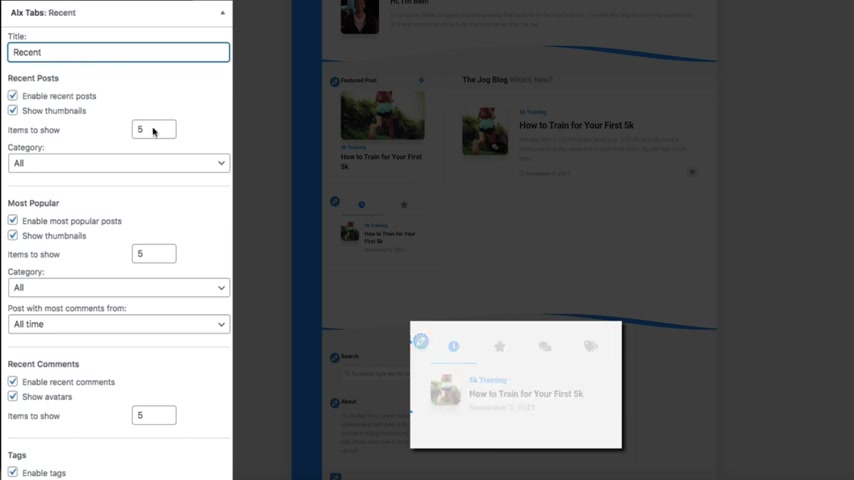
So I'll title this recent and change the number of items to show to three and then disable the most popular comments and tags .
There we go , then moving on to the third column .
So let's go back a slide by clicking the arrow and open the footer three tab .
And this time I'm adding the most popular posts .
So let's add the ax tabs widget again .
And then I'll name this one popular and this time disable the recent posts , comments and tags .
There we go , then let's publish this .
So click the publish button and then exit out of the customization menu and congrats , believe it or not , the foundation of your blog is done .
It's ready for content and you can begin publishing new posts .
Now , you can obviously add more widgets to the sidebar .
You can monetize your blog with affiliate marketing and ads as well as add an email marketing element to your blog as well .
And I know I sound like a broken record , but I teach all of those additional elements of blogging in my more in depth tutorials that I'll put a link to in the show notes .
But you can easily find those videos on the blog within youtube channel as well .
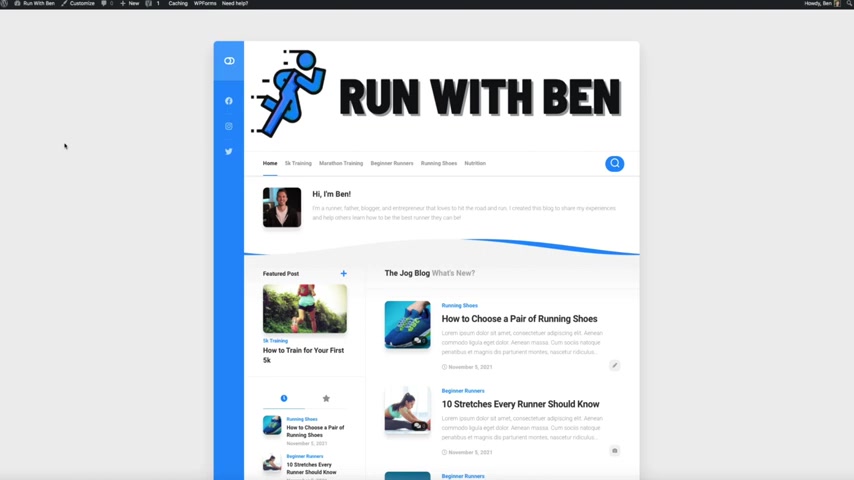
And speaking of adding content , let's fast forward really quick and take a look at what your blog will look like once you start publishing more blog content and as you can see the home page and sidebar really fills out once you start publishing blog posts , I just love how this theme looks .
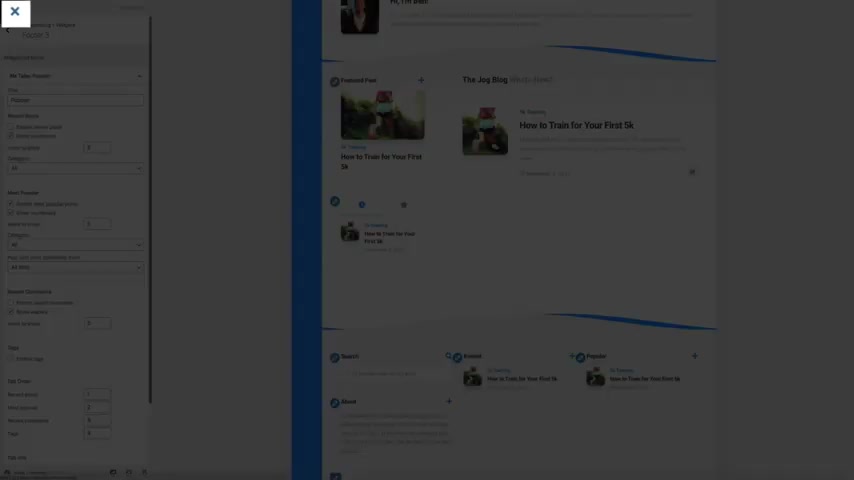
Now , one thing I noticed is that I forgot to change the number of posts to display in the footer column three to only three posts .
It's currently showing five and it kind of looks weird again .
That's my fault .
I'm not used to going this fast , but let's fix that by opening the customization menu by clicking , customize at the top of the screen and then open the widgets tab and click on foot or three and then open the X tabs widget and change the number of items to show from 5 to 3 or whatever number feels right to you .
There we go .
I think that looks much better .
So let's publish these changes .
And then the last thing I'm gonna show you before we launch our blog is how to change the theme's primary colors and change the background .
This is one of the many reasons why I love this theme and having the flexibility to make these customizations goes a long way in your blog's overall look and feel .
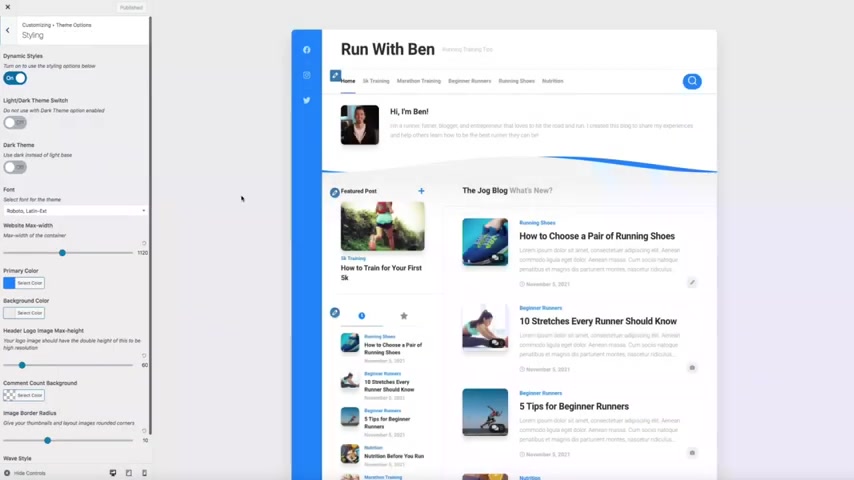
So first things first , let's head back a few slides .
So click the arrow two times and then open the theme options tab and then open the styling tab .
This is where you'll have more creative control over the design of your blog for starters .
And this is really cool .
You have the ability to give your blog's visitors the power to change your theme from a light to dark style theme .
Simply flip this light dark theme switch on and it will add a switch on your blog that will give the visitor the ability to toggle between light and dark versions of your theme .
Now keep in mind that they're only changing how the theme looks to them .
This isn't changing the user experience for other people who are visiting your blog .
Just a cool little feature that can add a unique touch to your blog's design .
Next , you can change the primary and background color by clicking on these two select color tools and this gives you the freedom to change the default blue color to anything you'd like .
As you can see , the primary color is displayed on the edge of the theme as well as those waves .
And through the text , changing the primary color can help match your blog's brand and really enhance how people view your content .
Then the same thing goes for the background color .
Just use the color picker tool to change the background color from gray to whatever you'd want .
Again , these are small changes that can have a major impact on your blog's user experience and you can always go back to the default color by clicking the default button and that resets the colors .
Next , I'm gonna show you how to add a logo to this blog .
So click the arrow twice to go back to slides and then open the header image tab .
Now , technically , this isn't intended to be for your logo .
However , the header image offers a cool way for you to get creative and add a branded logo to your blog .
Now , I should point out that I created this logo using cava dot com and I think it's 11 20 by 300 pixels .
So keep that in mind when you're creating your header image , OK .
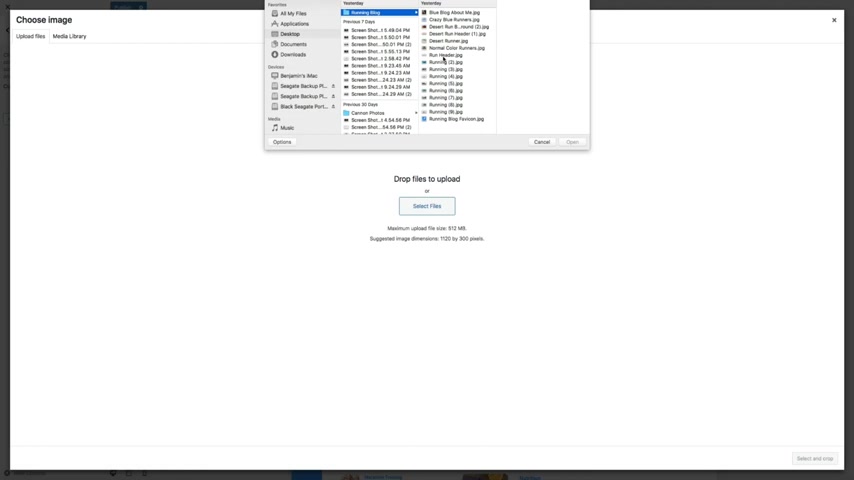
So go ahead and click the add new image button and just follow the steps to upload a new image .
So click the upload files , link in the upper left hand side of the screen and then click the select files button and find the image that you want to use on your computer .
Then don't forget about the title and alt text and click the select and crop button and then we're using the full image .
So click the skip cropping button and check that out .
The header image sits at the top of the blog and gives you a cool and unique way to create a logo .
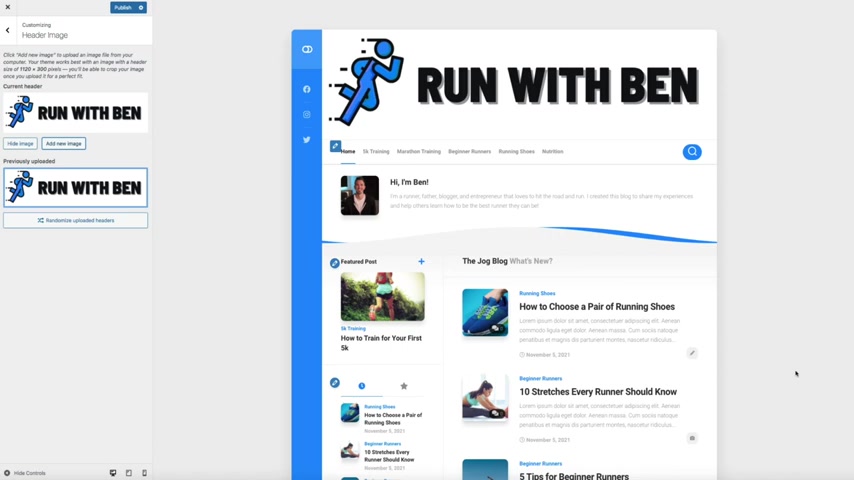
Now , we should point out that the header image replaces the site title and tagline .
So keep that in mind when you're doing this .
Now , if you want to remove it and go back to the default setting just click the hide image button and it will remove the header image .
OK .
Next I'm gonna show you how to add a background image .
So click the arrow button to go back and then open the background image tab .
And this is pretty straightforward .
It gives you the ability to add an image that basically sits behind your blog .
Now , when you're choosing what image to use , keep in mind that it has to be somewhat large .
The image I'm using is 2400 by 17 99 pixels .
And remember you can use cava dot com to size your images accordingly .
Just another heads up about that .
OK .
I'm skipping the alt text and title for the sake of time and then click the choose image button and boom , check that out .
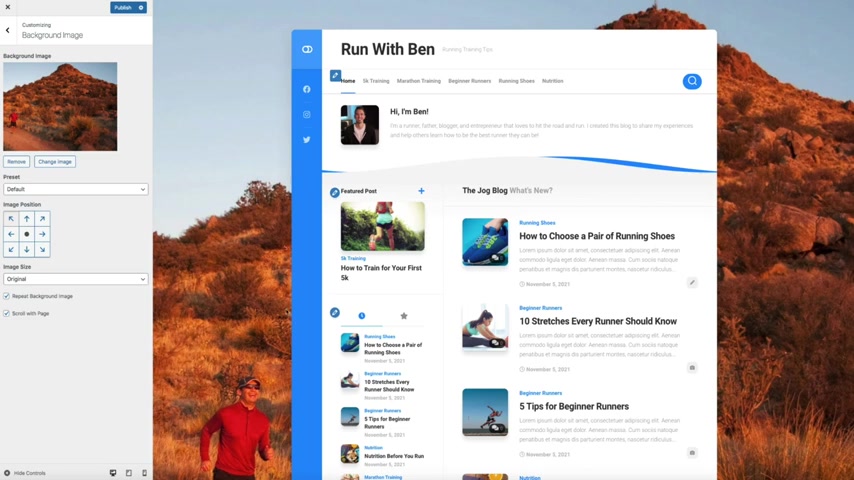
Then the setting I like is to have the image , fill the screen and stay in place .
So under preset , select fill screen and this will fill the screen with the image and also lock it in place but feel free to test different presets and positions if you like .
OK .
So let's publish this .
So click the publish button and then we're not done just yet .
Let's add another header image .
So click the arrow to go back and open the header image tab .
Then this time I'm adding a different header image that matches the look and feel of this background image .
And I'm doing this just to show you how easy it is to configure and mold this theme to match your personal brand and overall style .
And once again , you guessed it , I created this image using cava dot com .
Also , I know I'm going somewhat fast here , but hopefully these steps are becoming familiar to you and beautiful .
OK .
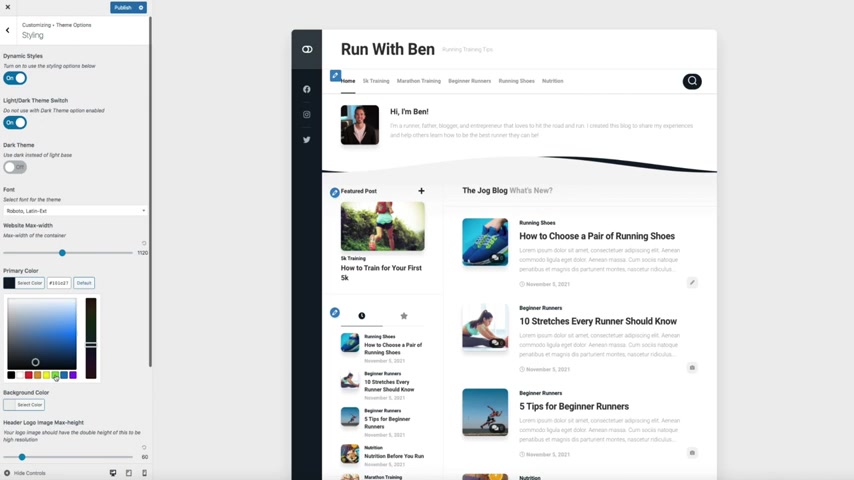
The last thing I'm gonna do is change the primary color of the blog .

So click that arrow and open the theme options tab and then open the styling tab and then open the primary color picker again .
And I'm actually pasting the hex color code since I know the exact color I want and look at that much better .
The color palette definitely gels with the rest of the blog .
OK .
Let's publish these changes and exit the customization menu to check it out and amazing .
It's so cool how a few small tweaks can change the entire look and feel of your blog .
Plus the box style theme makes it super easy to do .
Not so long ago , something like this would have taken hours of coding and a lot of technical know how to pull this off .
But now with the help of the theme and wordpress , you can bypass all of that work and drastically change your blog's design with a few clicks of the mouse .
I love it .
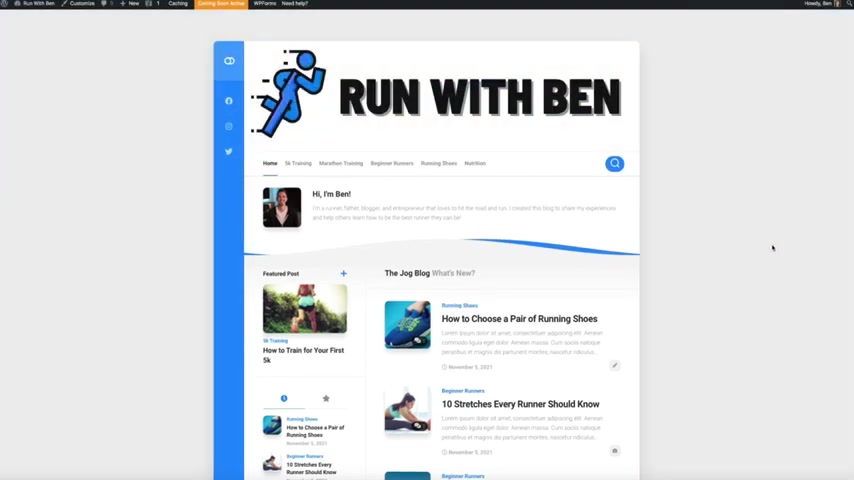
All right , here we are .
It's finally time to launch your blog .
This is it the moment you've been waiting for .
It's time to show the world what you've been working on and it's time for you to shine .
So one thing I always check before I launch is the search engine visibility .
So , head over to your wordpress dashboard really quick and hover your mouse over settings and click on reading , then make sure that that box next to search engine .
Visibility isn't checked if it is uncheck it and click the save changes button .
This helps to ensure that your blog is indexed by the search engines .
OK ?
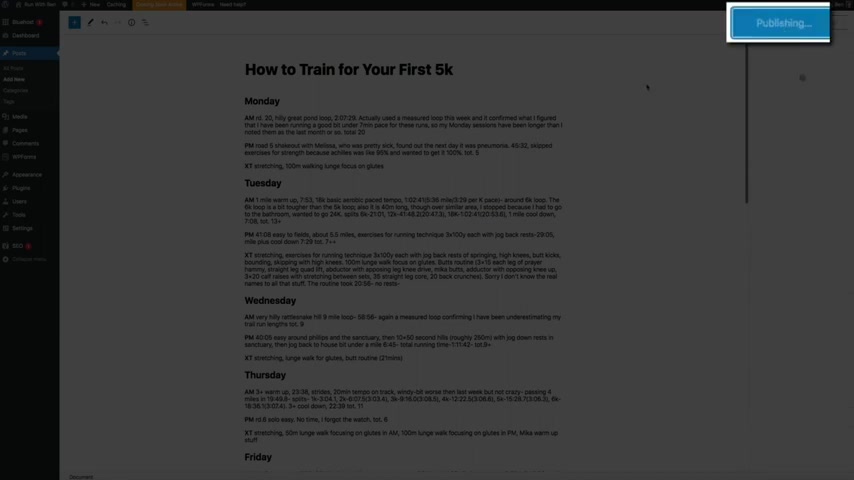
Now it's time to launch .
So if you remember blue host displays a coming soon page in place of your blog .
But now that you're ready to launch , it's time to lift the curtain , remove the coming soon page and showcase your hard work .
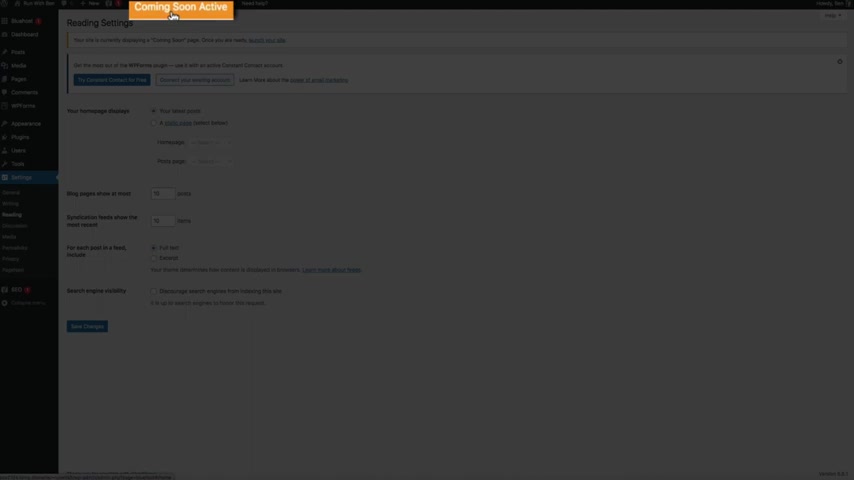
So to officially launch , click the coming soon active button at the top of the screen and it should bring you to your blue host dashboard .
Then from here you'll want to open the settings tab and then under the site control section , turn the coming soon , page off and that's it .
Congratulations .
Your blog is now live and just for good measure .
Whenever we visit our site , you can see that the coming soon active notification is no longer showing .
And now when people visit your blog's domain , they'll see this beautiful work of digital art .
Again , I can't thank you enough for allowing me to be a part of your blogging journey , but it's only just begun .
Now , it's time for you to create blog content and implement the lessons that you've learned in this video .
Also remember to swing by the blog of the youtube channel and check out my in-depth blogging tutorials .
I have multiple videos that can help you with this blog , like setting up your email marketing platform and strategy as well as how to monetize this blog and earn a passive income with it .
So with that being said , I wish you the best of luck with your new blog and please don't hesitate to reach out if you have any questions or need some additional assistance with your blog .
I'm always happy to help .
So that's gonna do it for this video .
If you found it helpful , I'd greatly appreciate it .
If you would like , comment , share and subscribe to the blog of been youtube channel .
Also , now that you've started your blog , check out these two videos on email , marketing and blog monetization .
They'll help you grow your audience and earn a passive income with your blog .
And as always your support means a great deal to me and my family .
And for that , I thank you .
So with that being said , I'll see you in the next video and thanks for watching .
Are you looking for a way to reach a wider audience and get more views on your videos?
Our innovative video to text transcribing service can help you do just that.
We provide accurate transcriptions of your videos along with visual content that will help you attract new viewers and keep them engaged. Plus, our data analytics and ad campaign tools can help you monetize your content and maximize your revenue.
Let's partner up and take your video content to the next level!
Contact us today to learn more.