https://www.youtube.com/watch?v=d0JgWTbWuiQ
ANYONE Can Draw FUR _ Fur drawing tutorial for PROCREATE
Let's paint fur and procreate in this video .
I would like to show you how I approach painting fur and procreate using the brushes that come with the app .
Only for this demonstration .
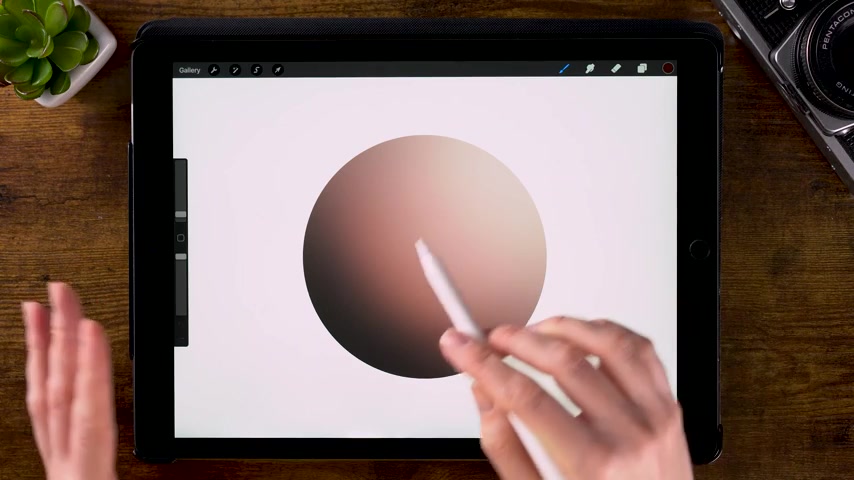
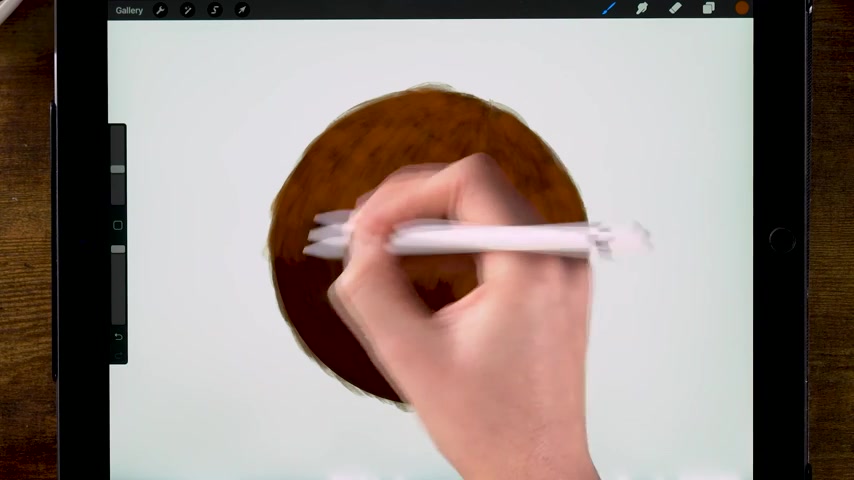
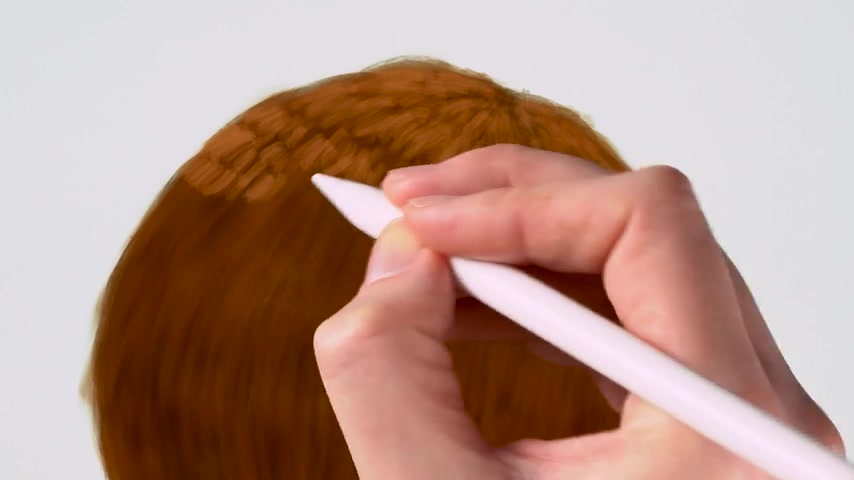
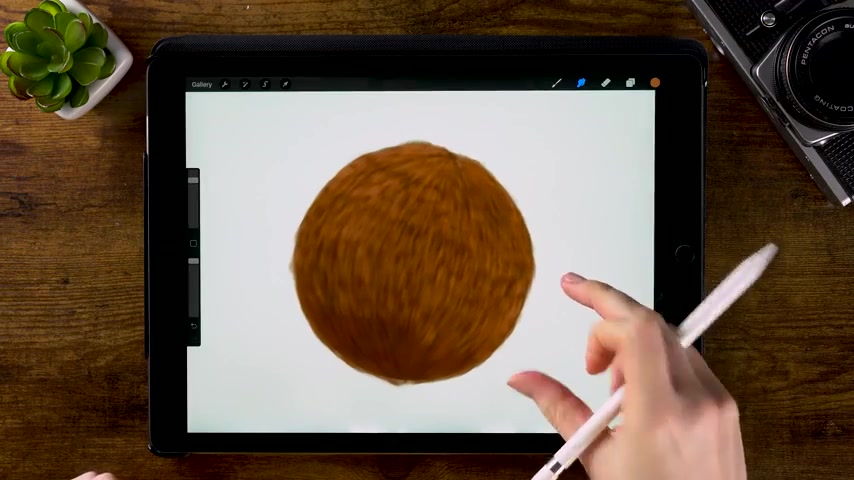
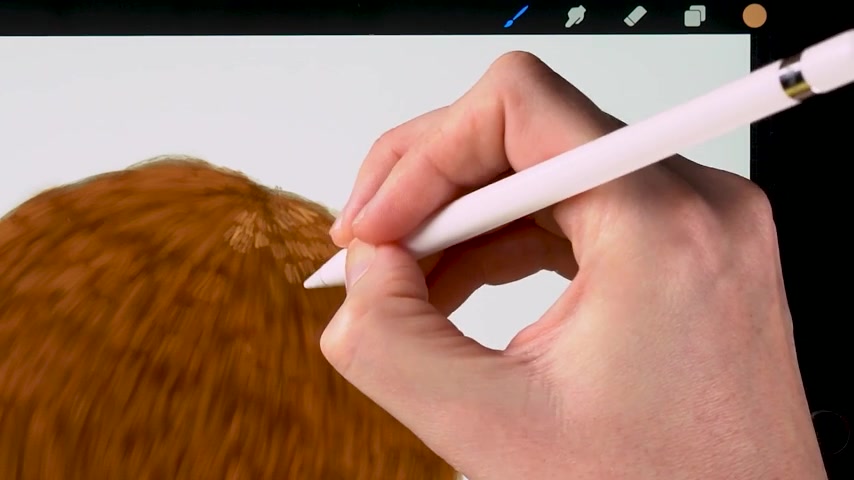
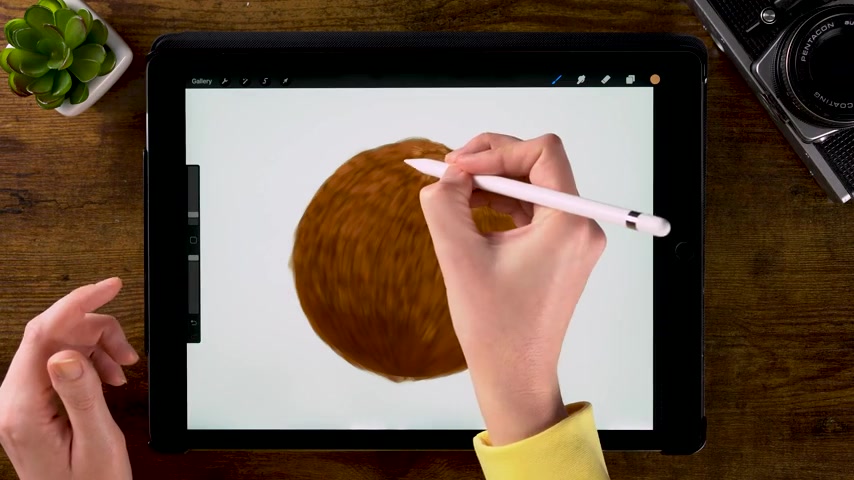
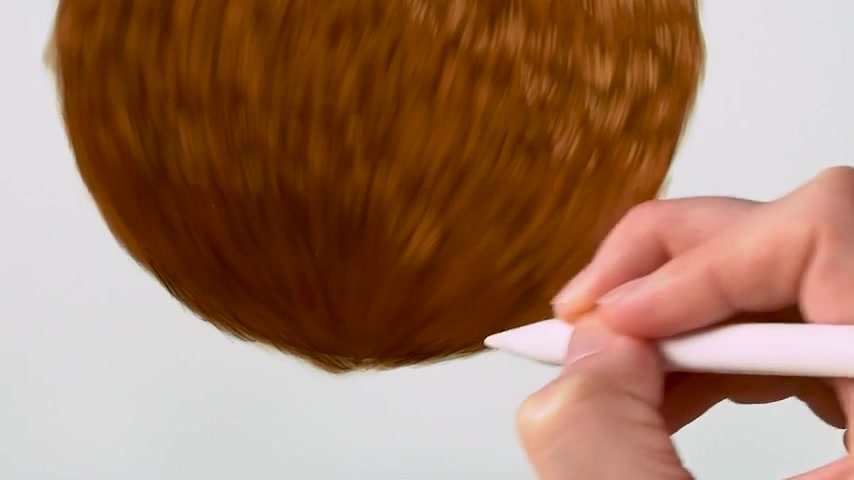
I have created a ball on which I will paint the fur .
First thing I like to do when painting fur is create a dark under fur , a dark undertone .
And I'll do that by using the wet acrylic and you can find it under painting and I'll use a dark brown color .
I'll create a brown fur here .
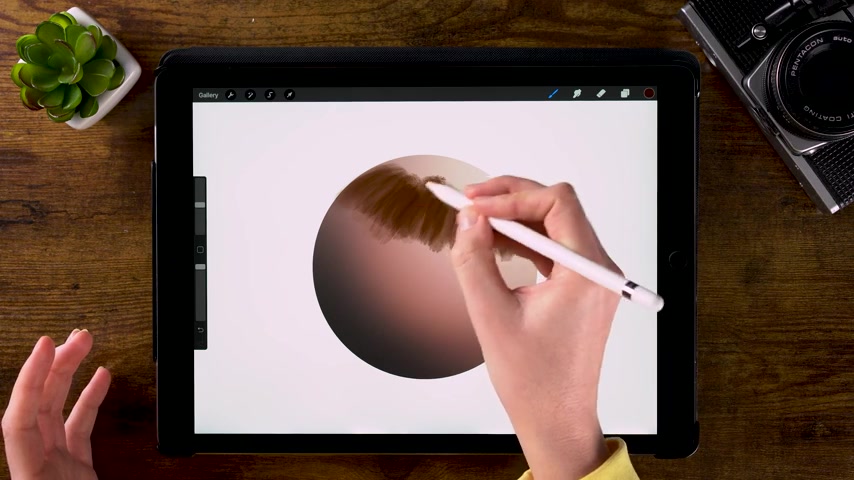
I mean , I like to work from dark to light .
The brush is pretty big .
Let's put it at 25% to lay down this dark base of fur and painting fur .
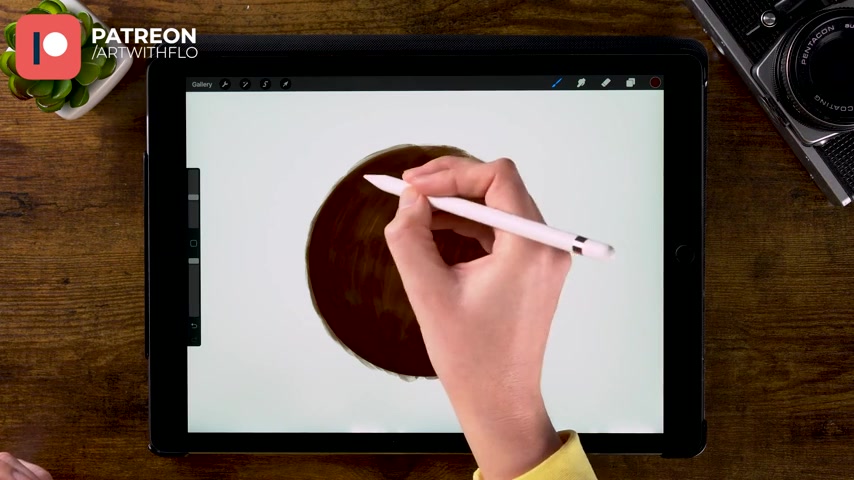
It's important to keep the shape of the body of the animal in mind .
Now , in this case , it's just a ball .
So we'll place this for well in the direction .
Well , it's following that shape of the ball .
So when you're painting an animal , make sure that it , that fur follows the curves of the body .
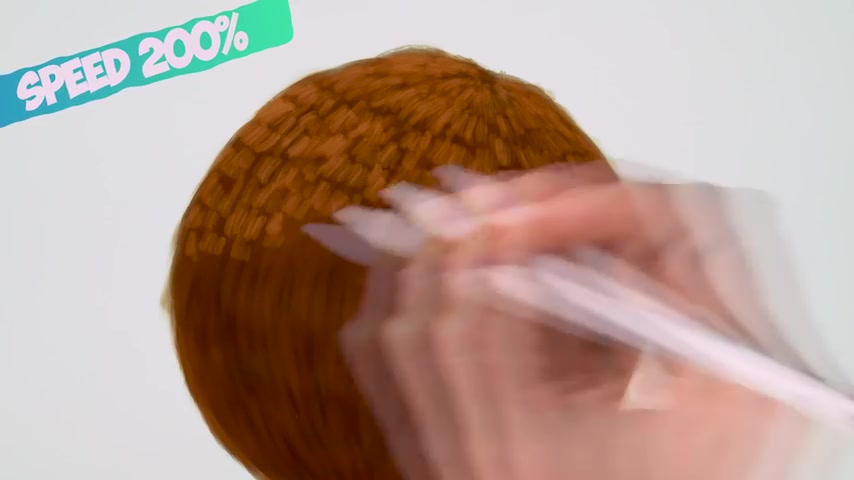
As you can see , I'm , I'm keeping this pretty messy .
This is just the underfur .
I'm making thick strokes all along that ball .
And it's creating kind of that 3d shape because I'm making these curved strokes going all the way to the bottom of the ball .
I actually made a similar video in Photoshop a long time ago , but this time I'd like to demonstrate the fur painting technique for procreate .
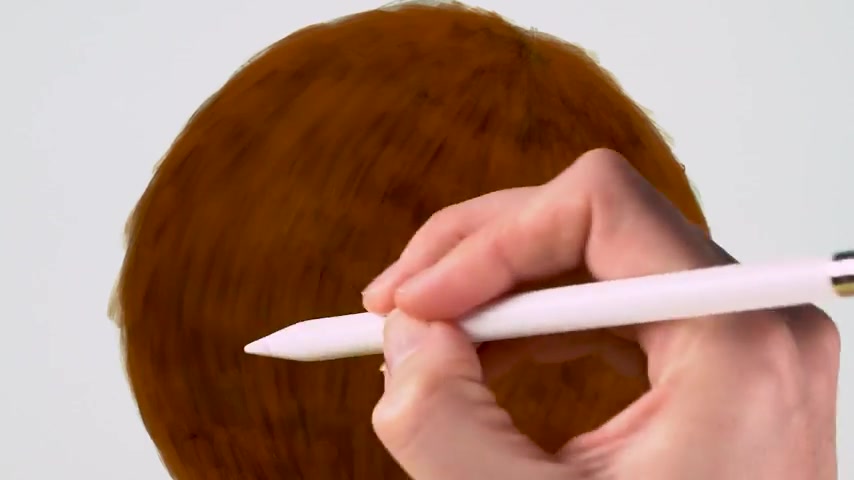
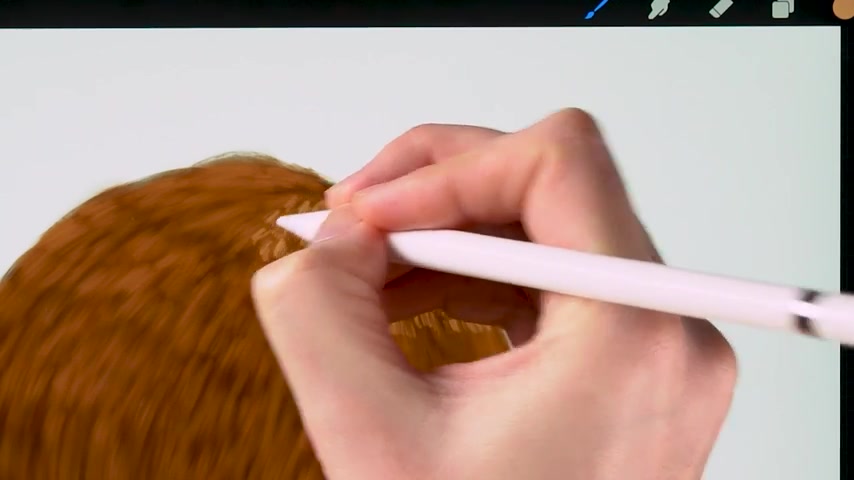
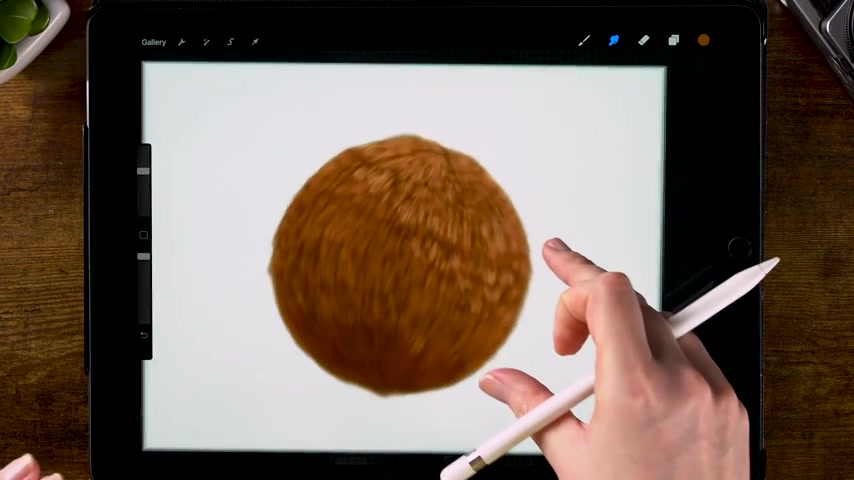
Now , we have a nice underfur .
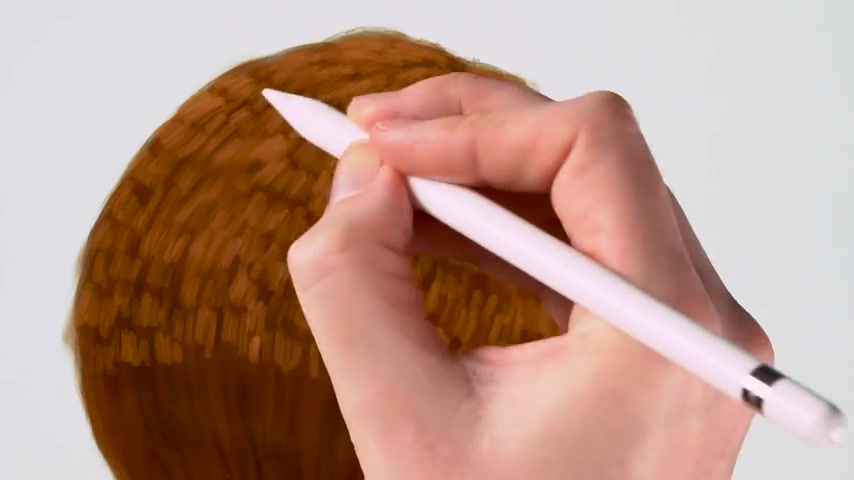
The next step is to go lighter and smaller , lighter with color and smaller with your brush .
So I'll go towards a bit of an orangey brown .
I'll make the brush a bit smaller , will go to 18% and make a new layer on top of this hair .
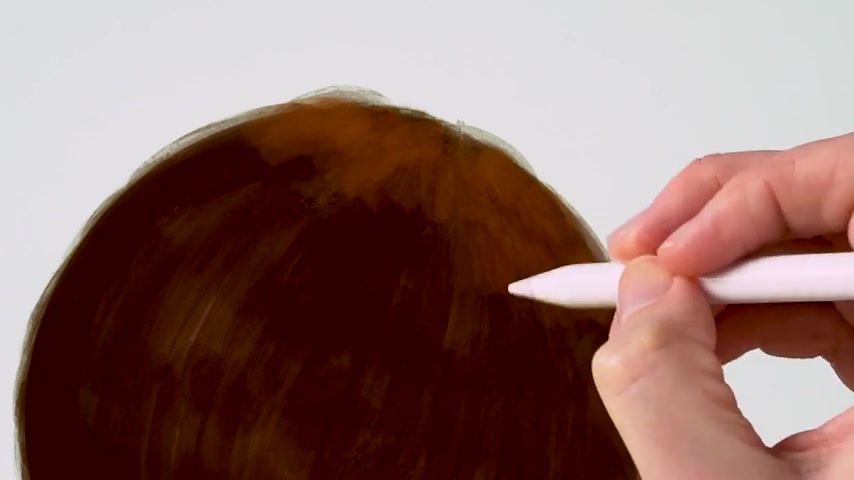
And with these smaller strokes , I'll just do the same , I'll go over this under f but I like to leave some gaps making these overlapping patches of fur .
So I always work from dark to light when painting fur .
Because when you look at animals , you can often see that they have this dark under fur .
For instance , I believe that if you would shave a polar bear that it would be completely black .
That's what I have heard anyway .
So a lot of animals have a dark under fur and using this technique , you can slowly build up the detail in your fur .
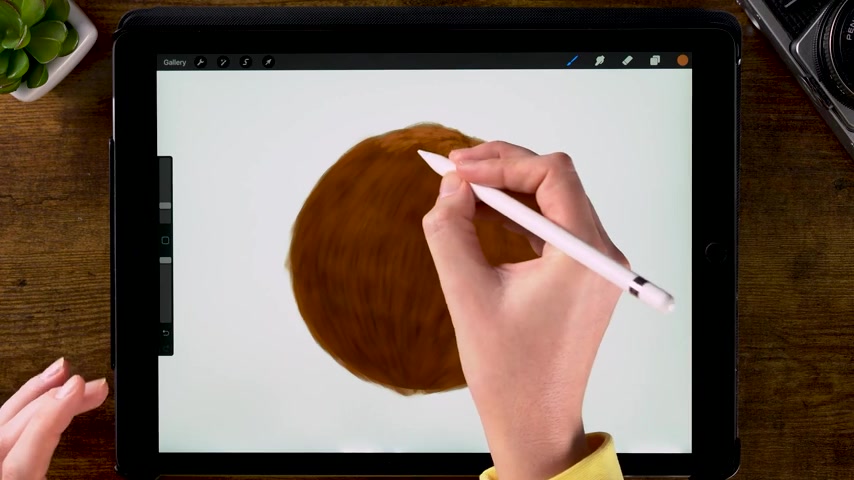
I'm just making overlapping strokes all over our ball , still following that shape of the ball .
And that would be the same as following the curves of an animal's body .
I'm still using that wet acrylic brush , we can go a bit smaller on the under side .
I'm at 9% go over these edges .
So we won't see that sharp edge of that ball anymore to soften everything a little bit .
We could use the smudge tool .
Let's select the smudge tool and use the short hairbrush .
You can find that on our touch ups and I have the size set to 70% .
So let's just go over that hair to smooth it out , but still fall at shape of the body or in this case of that bow , just go over these patches and you can see that everything will start to look softer along the edge .
And now it's time to again go lighter and smaller .
We'll go back to that wet acrylic brush .
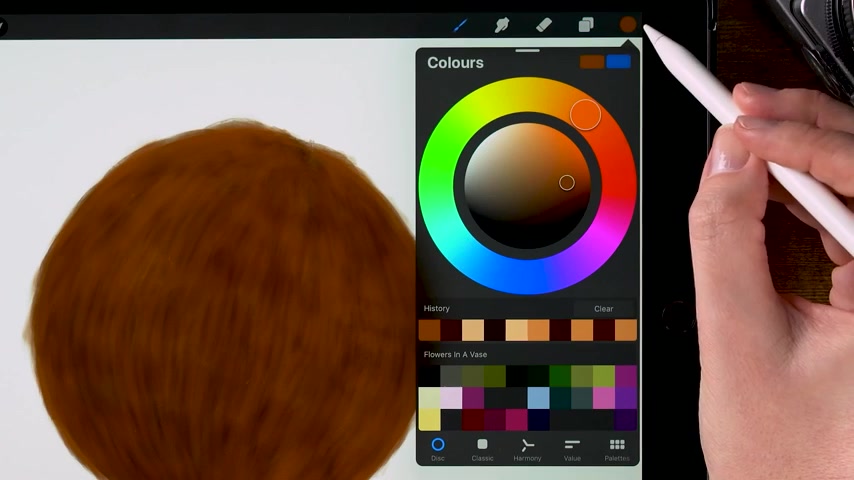
We make a new layer for a lighter color of fur , something like this and I'll make the brush smaller .
Let's go to 6% and let's start adding light patches of fur .
And of course , when painting fur , please just use reference , look at photos of fur , look at photos of the animal that you are trying to paint .
It's very important to study your subject to learn about what looks like .
So making these smaller strokes and still following that shape , it's really important to follow the shape of the body if you want the fear to look realistic , making small overlapping patches of fur and I make sure that they're still dark of that uner visible and also make sure that you don't go making these wines like a line of fur like this .
And then the next one , make sure you vary the places of the fur if that makes sense .
And what I would also always recommend is to zoom out from your work to look at it from a distance to check if it's starting to look like fur or something else if you're painting something else .
But yeah , keep an eye on the overall look of your painting .
It's very easy to get some sort of blindness for your work .
If you are assumed in too much , there is no need to paint in lots of small details .
Just make sure that the overall look of your painting feels correct first and then you can add some detail .
But I think that small details are often overrated .
So painting fur , it takes a lot of patience to paint it , but it's worth it in the end .
And the same technique , the same way of painting fur applies , not , not just to this ball but to any animal .
I use the same technique when painting a tiger , for example , building up the fur in the same way , working from dark to light , I want to make the top part of the ball a bit lighter .
So I won't be making too many patches of light fur at the bottom here .
Just make sure that you keep following that shape of the body or the ball .
And now we can smooth this out again by using a smudge tool again , which is still set the short hair .
We'll just go over this fur in the direction of that ball to soften this hair .
And if you want to use uh a reference photo while painting fur or painting anything , it can be very easily done by just swiping up from the bottom of your screen and then selecting an app where you have your reference photo and slide it to the side of your screen to open a secondary window .
But zoom out a bit to look at the overall view .
I want to add just a little bit more light through here .
You can just add these little patches and then blur them by using that smudge tool .
It's a bit like combing that fur .
Next , let's go even lighter .
We'll still use the wet acrylic , go for a lighter color .
Let's make a new layer and set the brush to 2% and the , the fur will appear lightest at the top where the light is hitting the fur .
You know , at this point , you can really start detailing that for a little bit , but you don't have to create the same amount of detail all over the fur .
It'll look more realistic when you're painting an animal .
If you , if you add the most detail to the focal point around the eyes , for instance , or if you're painting a full body animal around the head , just add some parts of but not all over the body because the human eye can't focus on everything at the same time .
So when you just look at an animal in real life or look at anything , not , well , not the entire thing would be sharp all over .
Just as with a photograph .
When it's taken with a low aperture , you will see that the focal point will be crisp and everything else will have a slight blur .
And when you do that in your painting , you will add more realism .
And hey , it also saves time .
If you don't have to paint all these little hairs all over the right win win situation .
And with this layer as well , you can just in between strokes , you can grab that so much tool , let's make it a bit smaller 40% and you can kind of comb that hair to make it appear softer .
You can just switch back and forth between the brush and the smudge tool .
Just make sure that you keep seeing these little patches of dark underfur .
Otherwise , if you just go over the the entire ball or the entire animal , you won't see that owner fur anymore and you will lose that depth that having it on her fur creates , I can go back to the smush tool .
And if you want an easier way to paint fur , a faster way , of course , you could always use fur brushes to create a furry look instantly .
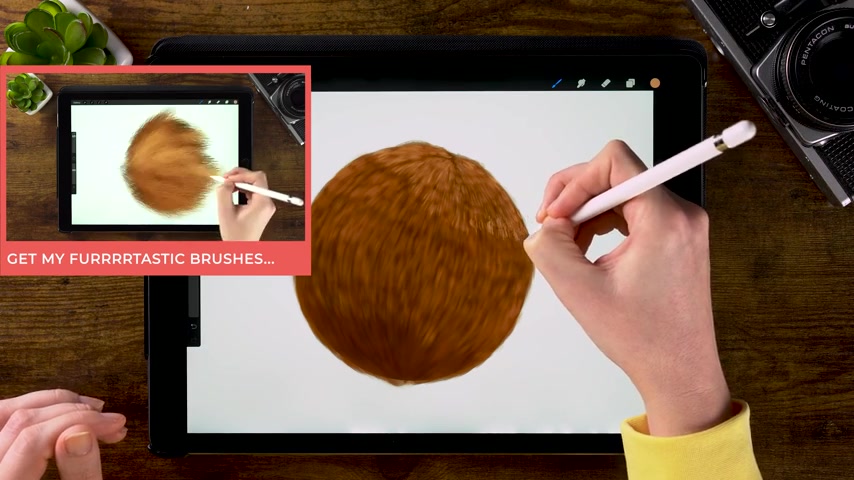
But you can also use the brushes that come with procreate .
It's really not that much about the brushes , but more about your understanding of fur about starting with that dark under fur , about layering different colors on top of each other .
That's the start .
That's , that's the base .
And then if you want to get faster , if you wanna make fur fast and fur brushes sure can come in handy .
Let's zoom out to check that fur .
Let's create some light patches here as well .

Just a few , let's add some darker fur at the bottom a bit darker .
And I want to have some individual hairs that I'll go to 1% for a brush size and add a little bit of fur here .
So we won't see that roundness of the ball anymore following the shape .
I use a SMU tool again to blur it slightly .
We can also just pick up local colors by holding your finger on the screen to add some loose hairs on the outside , using the smart tool to blur it a little bit and then make sure that you zoom out .
Well , to check that overall you of your fur and don't get lost in the details .
And there you have the basic technique of painting fur imp procreate using the brushes that are already in the app .
Have fun painting fur .
And if you like this video , then you might like these two as Well , I will see you next time .
Are you looking for a way to reach a wider audience and get more views on your videos?
Our innovative video to text transcribing service can help you do just that.
We provide accurate transcriptions of your videos along with visual content that will help you attract new viewers and keep them engaged. Plus, our data analytics and ad campaign tools can help you monetize your content and maximize your revenue.
Let's partner up and take your video content to the next level!
Contact us today to learn more.