https://www.youtube.com/watch?v=4KfmA6cEpU0
Drawing Fundamentals - CONSTRUCTION
Good day .
Ladies and gentlemen , welcome to draw with Jazz .
I'm Jazz and this video is one of six as a part of a set that I'm doing on the fundamentals of drawing .
So if you're interested in checking out the other videos , make sure to click the link on the screen and in the description , be , go check those out .
But this video is on construction .
What is construction ?
What do I talk about when I'm saying construction in regards to drawing ?
Well , here is a uh an analogy that I've prepared ahead of time .
Imagine to yourself that you want to build a wall with a window in it .
This is , I don't know , this is just a , an example of something you might want to construct .
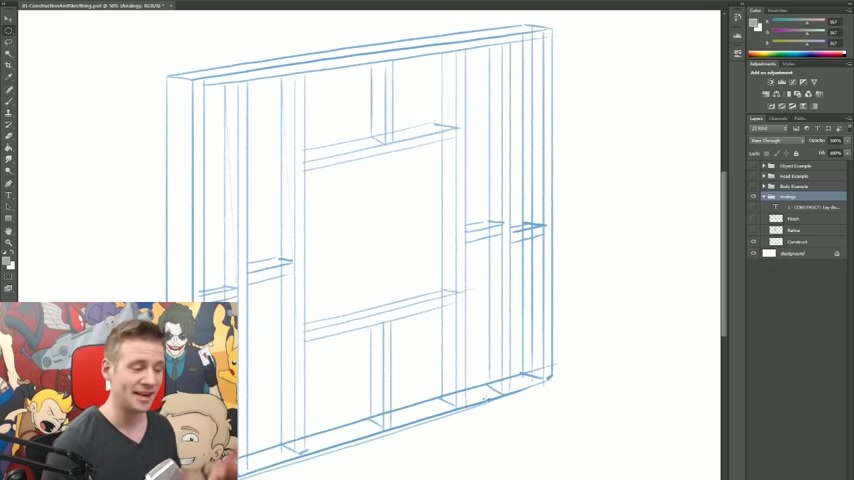
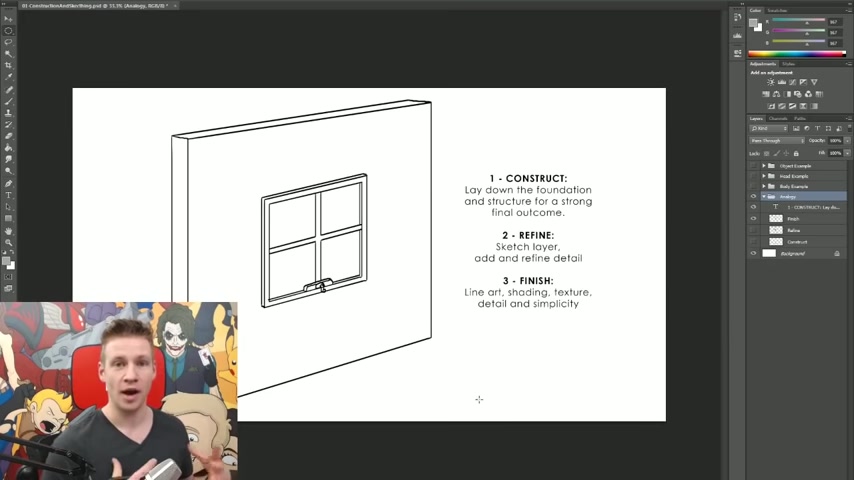
You don't necessarily jump straight in uh and throw in the the solid materials like the finishing touches , you actually prepare it from the foundation up so the foundation might be wood frame and and you also need to make sure that the structure is taken care of and everything's sort of built in a way that it can be stable .
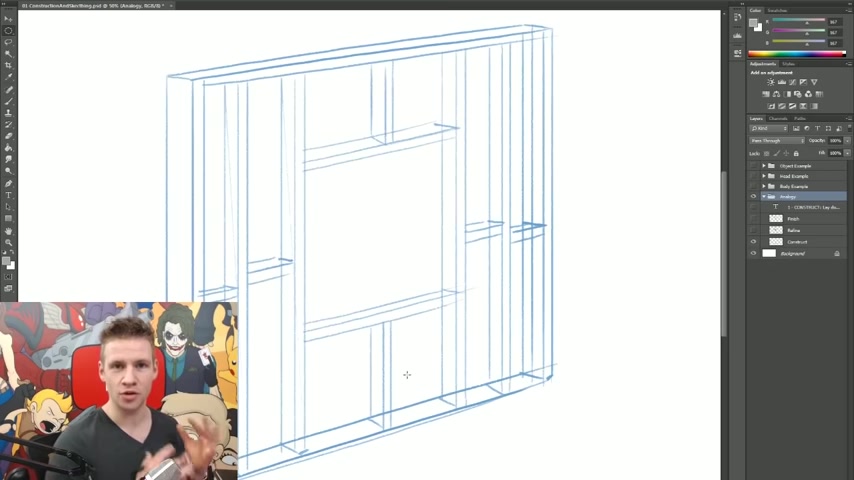
Then the next step might be adding on the dry wall and uh putting in more of the refined details , say the frame of the window itself .
And then finally , we get to that last layer , which is where we put on the coats of paint , we put in the glass , we sand and dry and make sure everything's nice and crisp .
Now , the thing is when we look at people's illustrations , we see this most of the time , we see the finished illustration and it can be really hard for beginning and developing artists to look at that and think , oh I can't do that because when you put pen to paper , it doesn't quite happen that way .
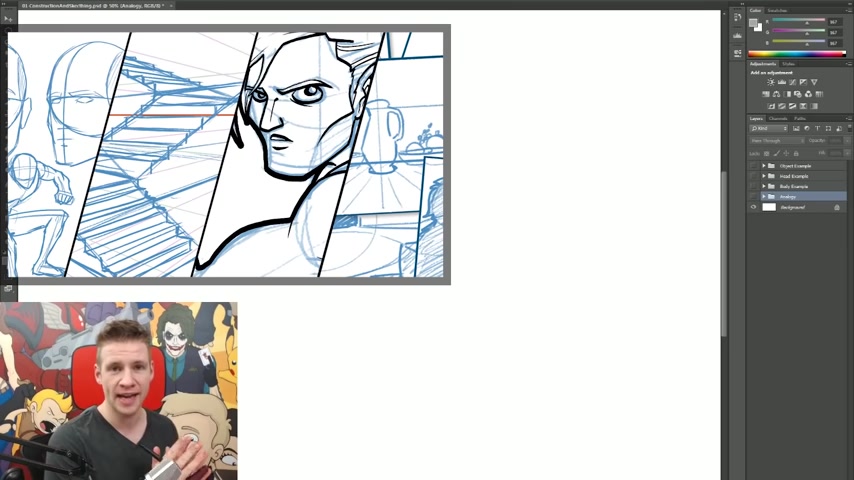
But the reality is most artists and most animators and illustrators start off with the drawing .
Equivalent of this , we begin with a framework , we begin with what we call construction lines .
Then on top of that , we have the the more refinement process .
So that's where we start sketching out details and figuring out forms and , and details in more uh effort than we would do just with the construction .
And then finally , we have the polishing work and that might be uh er line work or painted work in in whether it be traditional or digital .
And then we have the final outcome where the sketch and l and uh construction lines for the most part are usually hidden .
So that's just something to keep in mind .
And I've got uh some notes here on those three different stages of that drawing process and where construction lies within them .
I will also point out that uh in this video along with all the other videos as part of the set and all my other videos , uh all of the raw assets for this video you can get for free and download with the link in the description so you can get this Photoshop file and break it all apart .
So anyways , this is my analogy and I hope it makes sense to you .
And the reason uh it's useful to understand is because you can take this idea and then apply it to figures , to faces and to objects and anything else you want to draw .
So I'm now going to jump to another example , I've prepared ahead of time .
Many of you will have seen something like this around before this is like a an artist's pose doll thing and you can get that from crafts shops and art shops , they're little wooden dolls and you can pose the limbs into different places so that you can use them as an artistic reference to draw a human figure .

The reason I'm using this to further illustrate the importance of construction is to show that this is what artists can use as a reference to uh exemplify something that is in its nature , quite detailed and organic and difficult to jump into the details of .
So in simplifying it , in having it in several different chunks , we have the arm , upper arm and lower arm and then hand , we have the upper torso , mid torso , and then pelvis , all of these chunks uh represent fairly detailed and difficult to sort of explain on their own forms in the human form .
So next to a human figure , obviously , they're quite different .
One of them is very simple and very basic and the other is very intricate .
We have muscle structures , uh we have details but they represent one another in a pretty straightforward way .

So this figure , this um wooden doll is essentially a construction object that artists can use it .
It helps us simplify the details .
So then when we use that uh method , whether it be through a doll or through sketching through using simplified methods of application , first , we can then move it in ways that are easier for our mind to understand without having the details , distracting us .
And then once we're happy with the basics and the form that works well for us , we can add detail on top of that and we can refine silhouette and shape and texture line work color and all of that .
But we begin with the foundation and that ladies and gentlemen is what construction is .
So I hope that my analogies have proven to make a bit of sense .
Now , when you construct , you're essentially working with a deconstructed form of a complicated thing that may sound a little uh complicated to further explain what I mean .
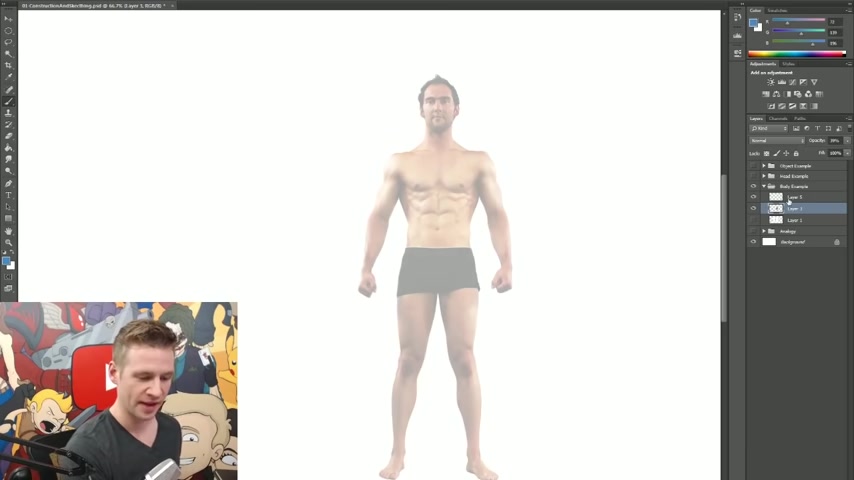
I'm gonna bring down the opacity of my figure here and I'm going to deconstruct this human body .
Oh And for those of you who are interested , I might as well take the opportunity to plug myself .
Uh This figure here is from my anatomy reference and pose pack .
So if you're interested in checking out uh the male and female figure of this person and a woman in loads of different poses with weapons and with uh isolated body parts with muscle structures pointed out .
And all of that , make sure to click the link on the screen and in the description to go check out the anatomy reference and pose pack on the jazz a studios shop .
So as I was saying to construct something from simplicity , we need to know how it's deconstructed .
So the human form , there are lots of different ways that you can essentially have the the deconstructed version of the human form .
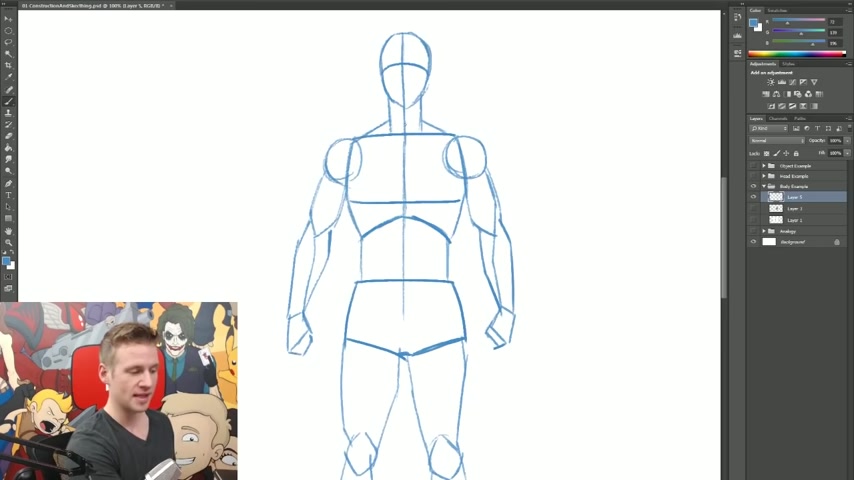
But the most common sort of thing to do is to take very large sections .
The most uh obvious sections like the s the head like this and break it down into a basic shape .
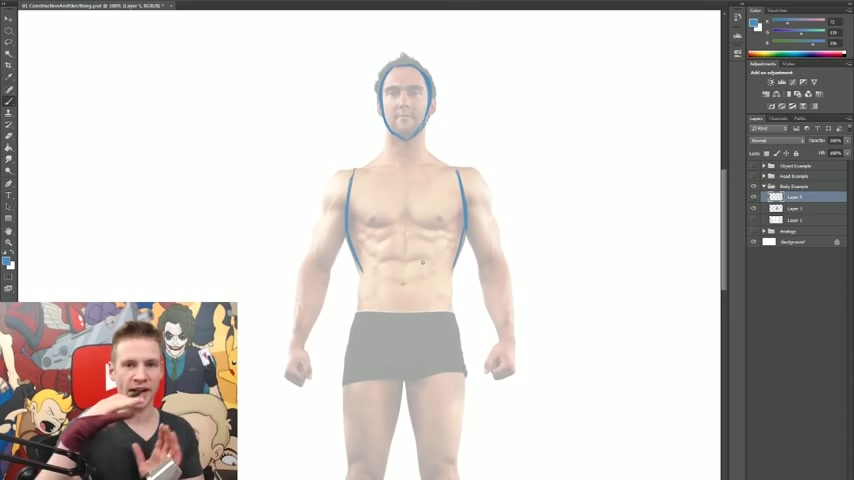
Then we have the torso , the torso is an interesting thing because we have the abdominal area which is sort of like an accordion .
We have the top and the bottom of an accordion .
If you can make , imagine the upper torso being the top of the accordion and the pelvis being the bottom of the accordion the abdominal section is like that springy bit that moves around and the abdominal muscles move the , this is my little dance for you move the uh the torso and the pelvis around .
Uh So they're very flexible .
So it's important to uh separate these three areas .
We have the upper body and I usually shape the construction line , something like this because it sort of exemplifies the rib cage .
Then we have the accordion section and then we have the torso .
Now , I'm not drawing in a solid section for the abdominals .
You can do .
So if you want to , you can sort of sketch it in or you can sketch just a line for the center point of the body , perhaps even where the spine is .
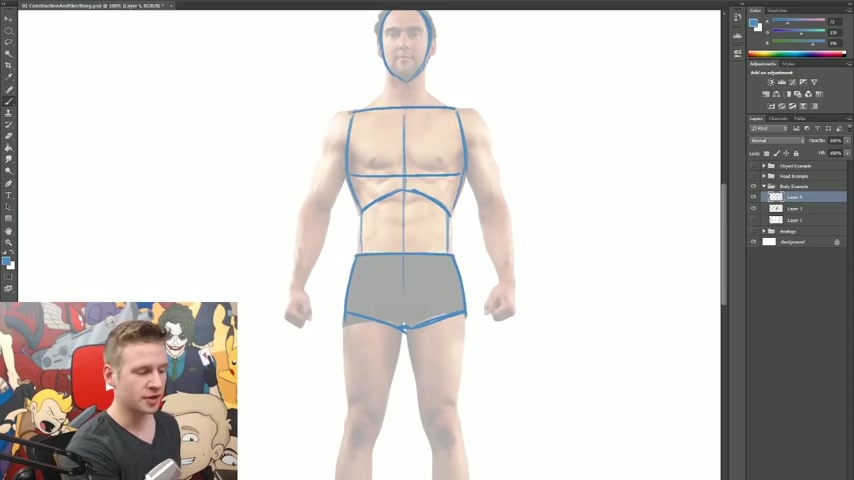
But because it's a very flexible area , it's not important to focus on this section .
What's most important is this rib cage section and the torso and hip section because they're quite large and they take up a lot of mass .
This idea follows on throughout the rest of the body really .
So the shoulder is another one of those sections that's usually a bit larger and you can sort of uh symbolize that with a bit of a circle .
The hand I like to usually do in a bit of a block section .
And then the arms are something that you can sort of do in whatever way works well for you .
Sometimes people like to do sort of like a joint in the middle and do lines joining from the shoulder to the fore to the wrist .
Uh , and then to fill that in with the muscle mass , sometimes it works for people to simply draw in the muscle directly , sort of having a rough idea as to how it would work anyway .
But , you know , whichever works for you to reach their own the neck again is one of those things that , because it moves around so much , it's one of those accordion sections .
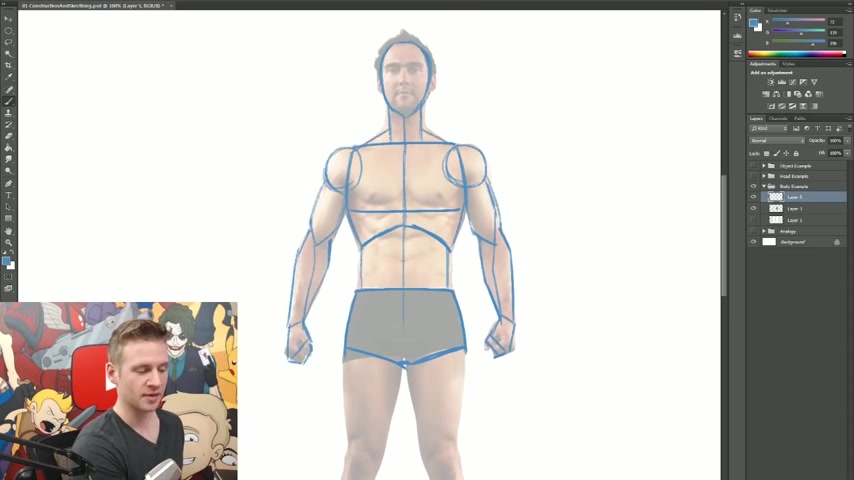
Uh We don't necessarily have to have the solidity drawn in our , in our construction .
But we can , if we want , if we do , we essentially want to make sure that we outline the thickness of the neck and then make sure to sort of roughly indicate the neck muscles that stretch out towards the shoulders , then going in to the legs , similar sort of thing .
We have the knee area .
I usually like to block out the knee in a circular shape like that , do the feet as sort of blocky pads .
And again , as with the arms , you can simply have lines that you fill in the muscle mass with later or you can just simply draw in the mass areas .
And as you get a feel for how the anatomy sort of works with each other , how the muscles flow and how the silhouettes work on different angles that becomes more simple .
So it might be easier to start off with the lines and then add muscle mass , the references or just to work straight with the muscle masses .
If you are familiar with how the human muscle mass works .
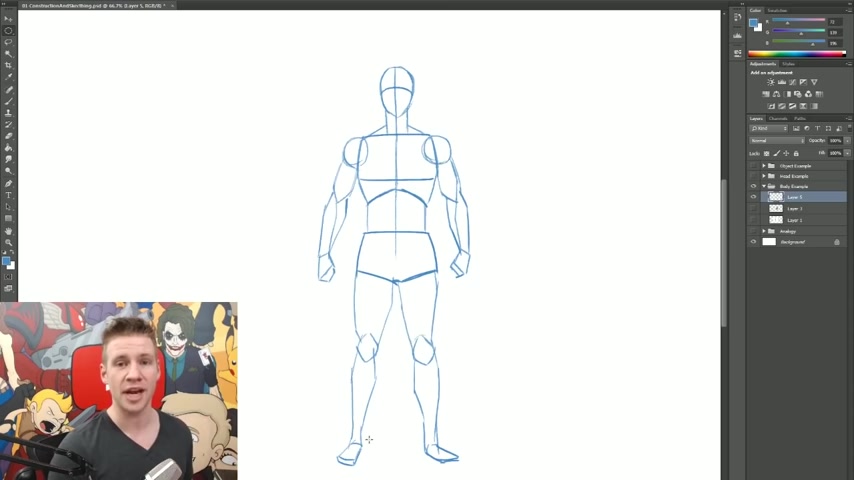
Another thing that's important to note is with the face and torso .
We usually have these things called direction lines .
So if I hide the body , you can see that this face that I've got here isn't much of a face , but we have a center line and an eye line .
We'll get to that in further detail later .
Cos it will go into the head in more detail later .
But as you can see if I zoom out , I've got the human figure that we were just looking at deconstructed .
Now , why is this important to know ?
Because with a deconstructed figure into basic shapes like this , we can then use that as a template as a guide to use that deconstructed form and then reshape it , move the body around , put it in different poses and then from there , add refinement .
This is useful in several ways .
One is that we're not investing a huge amount of time and effort to strenuously add detail and muscle anatomy and all this stuff to figure out only that the pose doesn't work or that we've got the proportions wrong .
But if we draw it in the basic shapes first and we figure it around , and we can realize that if things aren't working , we can remove or reshape or completely start again without losing much of the time that we invested in creating the deconstructed figure .
So as an example , I'm gonna move my deconstructed figure over here and move all my examples over here .
And I'm gonna sketch up two roughly constructed poses using my deconstructed figure .
Now , even construction figures can end up looking quite intricate .
So it's important to start off with the very bare bones and sometimes it's easiest , especially if we're doing a tricky pose to start off with a wire frame figure , meaning only the solid objects of the head , torso and pelvis being used with just basic lines and little joint circles to communicate where the bones and limbs are positioned .
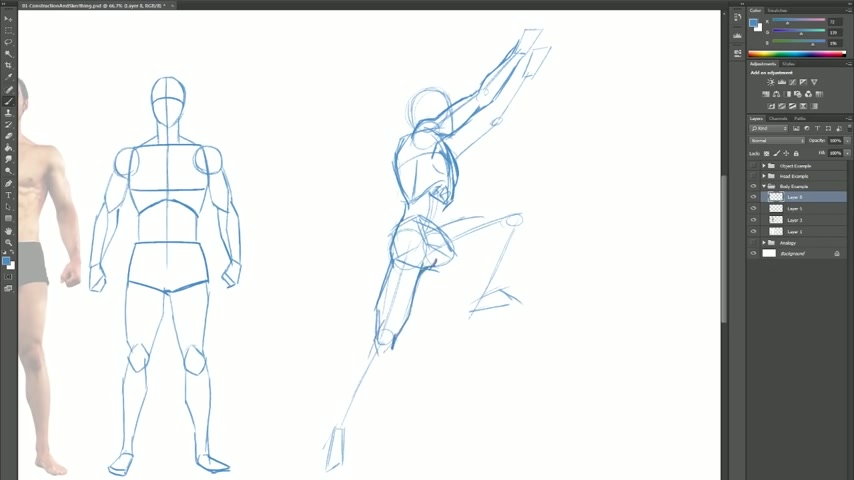
Once you've got the basic wireframe pose in , you can then start doing what I like to call a meat onto the bones , which is where we sort of start to roughly outline the silhouettes of where the muscles connect to each other and where the masses are largest , for example , in the tricep and bicep on the upper arm in the abdominal regions in the torso and so on and so forth .
Finally , after the silhouette is solidified , I can start to add in some placeholder details just of where certain things might be and then also add some nip and and tweaks and then final and then the result is a framework on which I can then go forward and do some sketching and final details and line work .
I'm gonna repeat the process again , with another pose , this time crouching low and with a bit of a different angle facing slightly more to the front , but still off to the side .
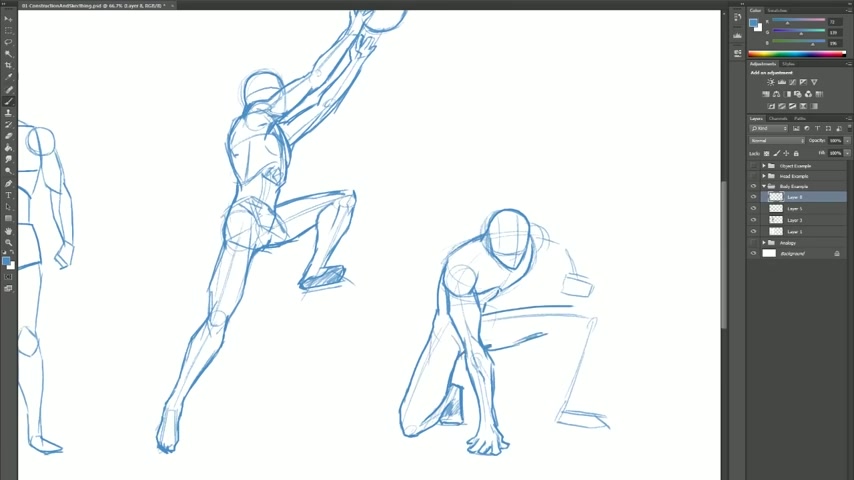
And using really basic shapes and structures , I'm able to create poses on any angle or with any complexity and make simple adjustments quickly and easily without compromising the time that I've put in , which is quite minimal because we're focusing on what matters most before we add the detail , you can see how quickly and easily by using these basic shape , structures and construction lines , I'm able to put together whatever pose I want to or can improvise through the process without it being much of a hassle and then have something that is gonna serve as a pretty solid foundation on which I can then sketch , add line work and have a finished result .
It's a much faster and more reliable and enjoyable way to go about creating a finished piece rather than going straight to line work or color without any sort of previous planning or consideration for uh certain things .
Next , we're going to do the same with the head .
We're gonna deconstruct the head and then I'm gonna show you how quick and easy it is to reproduce the head on any angle that you can think of before we do that .
Of course , I have an opportunity to plug .
So I'm gonna take it , these uh heads are from my faces pose and reference pack .
So if you're interested in checking out faces of lots of different people on three angles with loads of expressions , go check that out with the link on the screen in the description .
Let's get started .
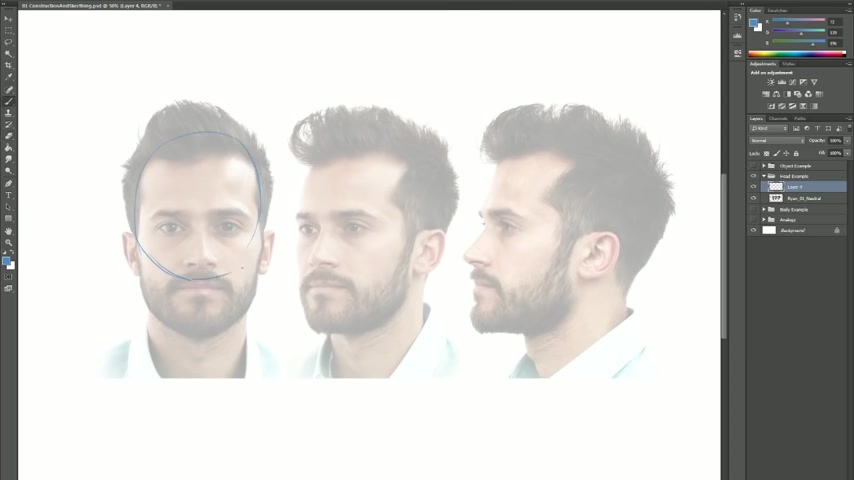
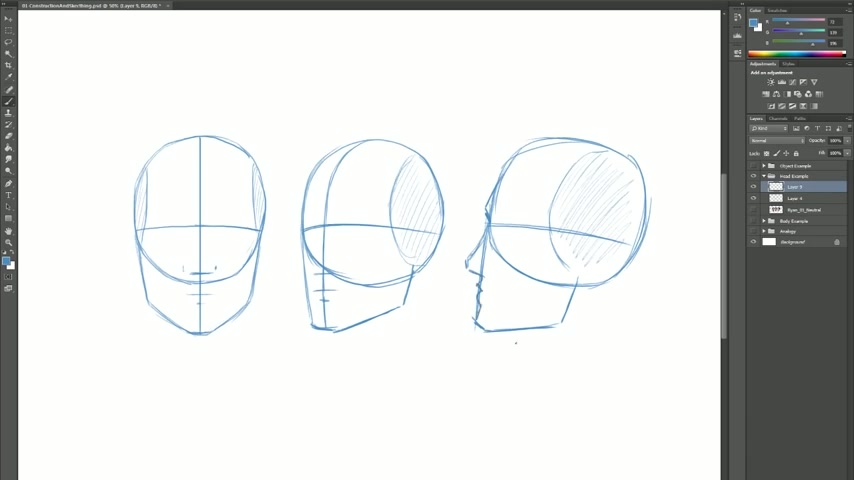
The head can be broken up into two basic parts .
The first is the cranium which most people draw with a circle that represents the larger part of the skull .
The skull itself is in two parts .
We have the cranium and the jaw .
So we're actually drawing these two actual bones , bone parts with our construction lines .
So this is the cranium circle and then we draw the jaw on a front angle .
We just have lines going down but slightly tapered in until we hit the bottom of the jaw which comes forward , still on a downward angle .
And then we reach the front which tapers not quite point but a bit of a softened point .
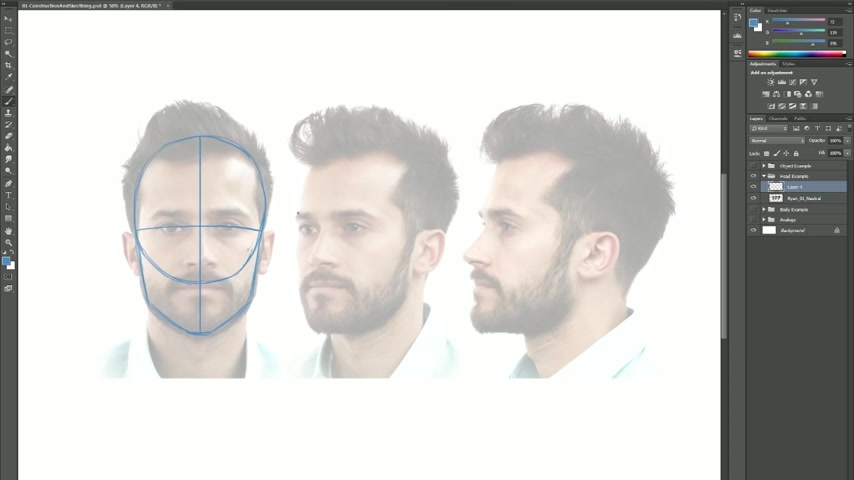
Finally , the two additional things we want to add to our face construction is a center line and an eye line .
These two things help us show quickly and easily which direction the face is facing , so to speak , and then where the eyes are gonna be resting .
We can repeat these steps for these other two angles beginning with a cranium that takes up the larger part of the skull .
Now , the thing to remember about the three quarter and inside angle with the cranium is that it's elongated this way slightly .
So we don't quite draw a perfect circle .
We draw a bit of bit of an ellipse .
Then the jaw , you can sort of break into a few parts to help remember how to draw it .
We have three basic line angles .
We have the front , which is the chin .
Then we have this side angle here , which is the low angle or the bottom part of the jaw .
And then we have this side part that goes up to the ear .
Once again , we draw our center line going down the front of the face , which is showing the direction that the face is going in .
And then finally , an eye line .
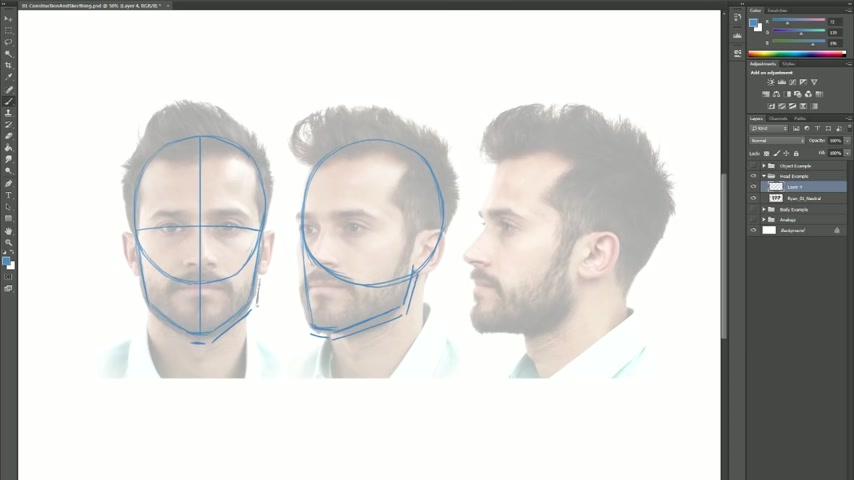
Sometimes people like to sketch in a little a bit of a semi circle here or here or here .
This essentially shows the flat part of the skull , which is the side of the skull .
And it also acts as a bit of an extra direction point for the head because then we can sort of easily see where the side of the head is .
And then finally , the example we're gonna use is the side here as you can see the circle or what was once the circle is now quite a long ellipse .
Now we're going to the jaw , we have the front part of the jaw , then we have that bottom part of the jaw and then the part that goes up to the ear , we don't quite need to draw a center line on a side angle because the center is on the very side .
But we can draw an eye line and we can draw if we want to that little semi circle section .
And sometimes I like to sort of shade it off like that to show where the uh the back part of the skull is and where the side , flat part of the skull is .
And then you can see if I hide the head underneath .
We have three deconstructed heads .
They're all quite easy to see and interpret as a head shape .
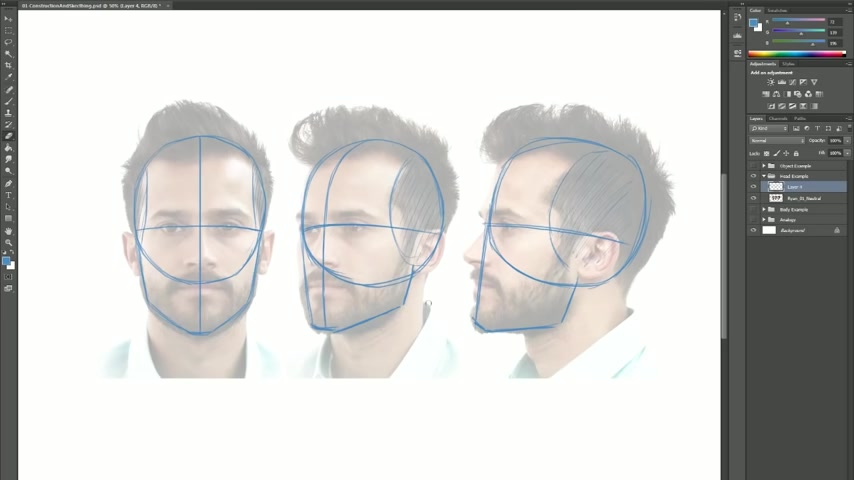
And then from there , we can start to add details .
Now , some people like to really go into the nitty gritty of adding the halfway line between the eye line and the jaw for the nose and then blocking in the nose and then adding in the halfway line for the mouth and the bottom lip and so on and so forth from all of the angles .
You can do that if you want to .
Of course , another thing to remember is that we have silhouette to work with too .
So we can't simply just draw details on that shape and keep them flat as we've drawn them .
We need to start remembering that the profile of the face has certain shapes as well .
And this carries on into the three quarter angle where we have the ridge of the brow that comes out and then we come in and then back out again for the cheek and then in for the jaw and then of course , you can't forget details that are obvious like where the eyes are gonna go and then where the ears are gonna go .
Now , we could go on and on adding things like hairlines and then the nostrils and then the pupils and all that stuff .
But the point I'm trying to make is we've very quickly and easily created a really solid foundation framework on which we can add the details without it being much effort or work .
The advantage of this of course is that we can then draw faces on any angle by repeating the same process .
So I can take that circle , I can add a jaw with that front jaw bit and then this chin angle .
Now this angle is a little difficult to do because the jaw is uh on a bit of a higher angle .
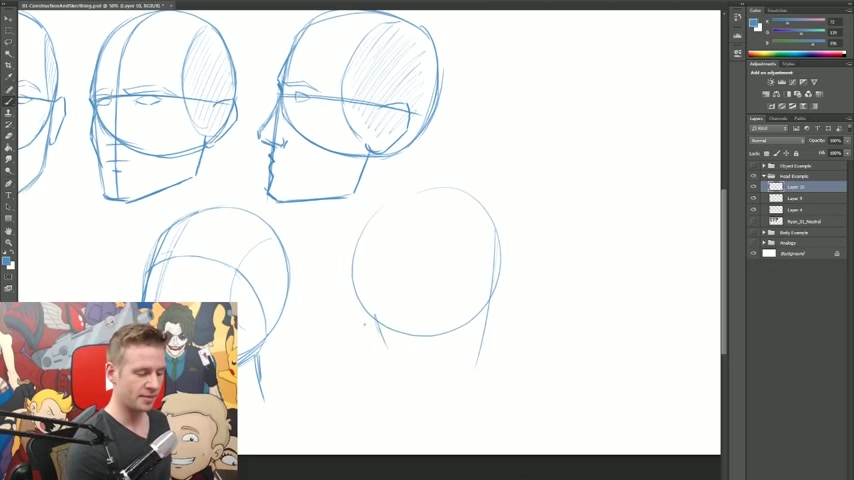
So we don't have that same shape that we normally have .
But the point I'm trying to make is that the whole process is made so much easier by being able to use these tools .
And it's quite a simple , quick way of going about it .
And you can see that with just a few scribbly lines , we can quite clearly define the shape of a head and the direction it's facing on basically any angle .
It's all a lot easier .
It's all a lot quicker and it doesn't need to be done meticulously with the details of the face first because we can lay down the foundation first .
And that's the whole point of construction to simplify that process , make it easier , make it faster and make it more solid and reliable and reusable .
The final example I'm gonna use are with these three everyday objects .
I suppose a lantern isn't so much an everyday object these days .
I'm just gonna break these down into really basic shapes and forms .
And then I'm gonna use that bunch of deconstructed shapes and forms to put the object on a slightly different angle with construction .
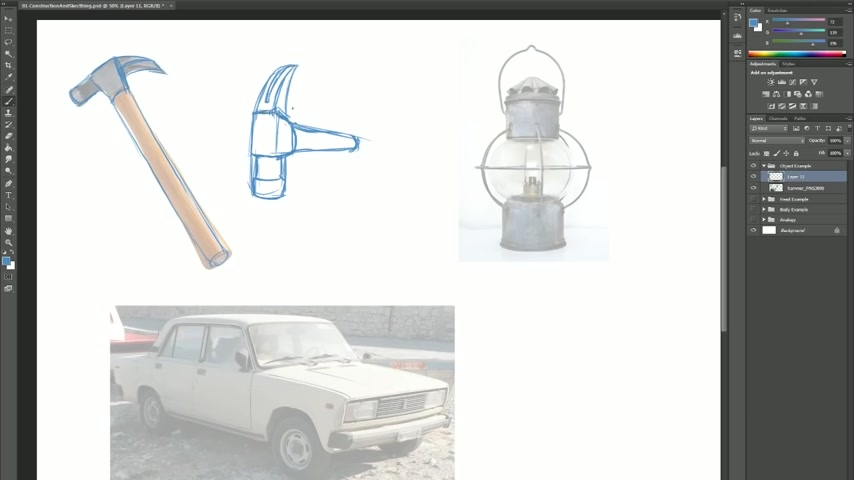
The hammer's gotta be one of the easiest we draw a cylinder to represent the handle .
Obviously , we have shapes of the handle go in and out .
But because it's construction , we don't need to quite worry about that stuff yet , the top of the hammer goes into more of a square , a shape with one end being another cylinder and the other end being a bit of a blocky hook shape .
I can then use those shapes to construct the object on a more extreme angle .
This time , it's gonna be an angle facing towards the viewer like this .
And then once we add our other blocky square shapes and front cylinders and all that jazz and refine the angles and make sure everything feels alright , then we can start to add indications as to where detail is gonna go and voila , we have a hammer on another angle .
The lamp is another fairly simplistic example , we have one large cylinder shape in the center with a spherical shape intersecting into the middle of it .
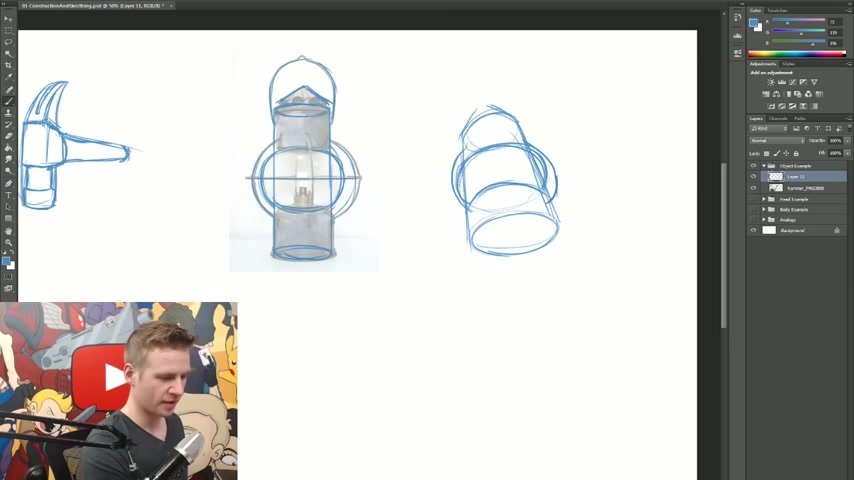
And those are the two major shapes in this object .
That's all really we need to use and no , to recreate our lamp on a more dramatic upwards angle starting off with a cylinder without intersecting spherical objects in the middle there .
But maintaining the upwards angle of the cylinder where it intersects into the lower part of the lamp , adding the shape for the top of the lamp and then indicating finally where the lines are gonna go around it .
Finally , the car's a bit trickier , but we can do it with one long rectangular box and then add it to the middle and top for about a third of its length , a larger box which is a bit of a RBA shape sort of intersects and tapers towards the middle a little bit .
And then of course , we have some short cylinders for the wheels .
This can then of course be replicated on another angle this time , much more extreme and coming towards the viewer .
Now , do keep in mind that I'm using elements of perspective here .
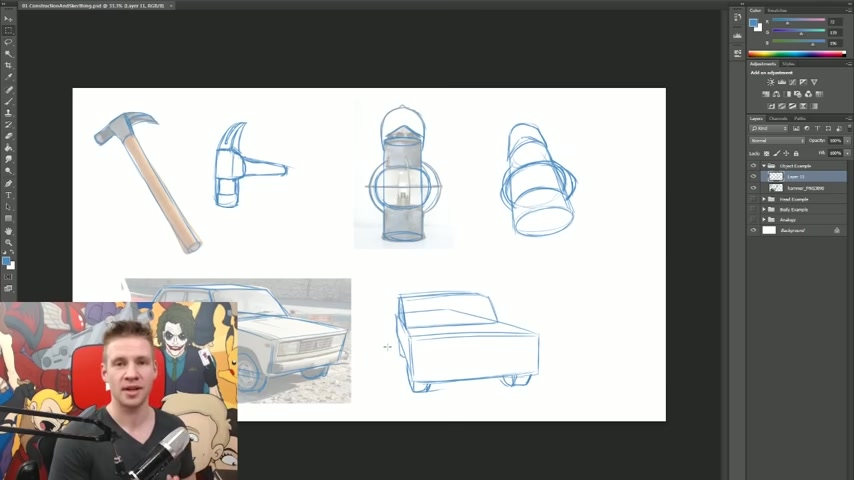
And if you're interested , make sure to check out the video as part of this uh tutorial set on perspective , which will sort of clarify how this is all done in a little more detail .
And then finally there we are , you can see the finished result of all of these objects with some basic deconstruction .
And then using that to construct the simple shapes in a on another angle .
I hope this video's been useful to you guys .
Make sure to check out the other videos part of this basic principles of drawing set , which you can check out once again with the link on the screen and in the description .
Thanks for watching , ladies and gentlemen .
And until next time , I'll see you later .
Thanks for watching .
If you enjoyed this video , subscribe to my channel to see new content every week , check out more of my stuff by clicking the annotations over there .
You can get the reference files for this tutorial by clicking the link in the description .
And if you want the reference files for all the tutorials I've ever made , check out the tutorial archive .

If you're looking for a great place to collaborate , explore or share your own content , head over to new grounds dot com , that's it for now .
And until next time , see you later .
Are you looking for a way to reach a wider audience and get more views on your videos?
Our innovative video to text transcribing service can help you do just that.
We provide accurate transcriptions of your videos along with visual content that will help you attract new viewers and keep them engaged. Plus, our data analytics and ad campaign tools can help you monetize your content and maximize your revenue.
Let's partner up and take your video content to the next level!
Contact us today to learn more.