https://www.youtube.com/watch?v=0ZQ-GfSFAnE
How to Make a Classified Advertisement Listing Website with WordPress 2018 - Adifier Theme

You can always just do the one month payment plan .
So for now I'm just gonna go ahead and stick with that and then scroll down and create a host gator account .
So just put in an email and a password and then just a security pin that you're going to remember and then just scroll down and here's where we're going to put in our billing info and you can use credit card or paypal .
So I'm gonna go ahead and fill this out real quick and then just scroll down to the add additional services section and we're actually going to be unchecked all of these .
So we're gonna uncheck site , lock essentials as well as the backup , your hard work because I have videos on my channel that show you how to do all of this stuff completely for free and I will link them in the description below .
I have videos on how to back up your site , how to get a professional email address , how to secure your website .
And more so once those are unchecked , just scroll down to the bottom and make sure that your coupon code says create a pro website , which it does and this is what's gonna get you that massive discount .
Now , this is my affiliate link .
So in order to install wordpress , just come down here to install wordpress underneath the control panel and click on that and then just click on install now right here and then just make sure that you're on the latest version of wordpress , which looks like we are and then just come down here and give your website a name which you can always change later and then a site description and then for admin user name , just put in your name and then create a password and this is going to be the password that you use to sign into your website every time .
Cool .
And then for admin email , just put in your email , the same one that you use to sign up for host gator with and then just scroll down all the way to the bottom and then click on install .
Cool .
So now Wordpress is installing .
So just give that a second .
Cool .
So wordpress was installed and the way to sign into your website is to click on this URL here or you can just go up to a new tab type in your new domain name and then do forward slash WP dash admin just like that .
And if you're brought to a page that looks like this or anything , that's not the word press sign on page , it just means that your website has to propagate .
And what this means is that host gator has to send out your new domain name across the entire world to let every server in the world know that hey , this new domain name now exists and this process can take anywhere from 30 minutes to about an hour .
Usually for me , it only takes about 10 minutes though .
So every 10 minutes just come back and refresh the page and check on your website once you're brought to a page that looks like this , you know , that you're good to go .
Ok .
So we've refreshed the page and we're at the word press sign on .
So we're gonna go ahead and sign in .
So just use your user name , which is just my name and then the custom password and then just click log in .
And here we are inside of the wordpress dashboard .
Ok .
Now , step number three is to activate a new theme .
So if we just go up to our website name up here and then we just go to visit site , we can see what our current theme looks like , which does not look very good .
So let's go ahead and get a new one .
So we're just going to click on the back button and then just come down here to appearance and then go to themes and you can see our currently installed themes , but we're going to go ahead and click on add new theme right here and we're just going to go over to the search bar at the top , right ?
And we're going to type in Astra because this is the theme that I highly recommend .
I've tried tons and tons of themes through wordpress and Astra is by far my favorite .
So we're gonna go ahead and click on install and then click , activate .
Cool .
So I'm just going to scroll down here in my plugins list and I'm gonna go to starter templates and click on C library and then it's just gonna ask you to select a page builder and we're going to be doing mentor , which is this first one right here .
And here you have a bunch of awesome starter templates to choose from in order to start customizing your website .
So if you want to see what one looks like .
Just go ahead and click on it and then you can just scroll down and get a little bit of a preview of the site as well as the other pages that come with it , like the about services and contact .
And if you want to import this website , you can just go ahead and click on import complete site .
So we're going to do that now and I'm just gonna click on import .
So just give that a few minutes .
So that imported successfully .
So now we're just going to click on view site , ok ?
And now step number five is to customize your website .
So you can see that our website has been imported successfully .
And now all we have to do is just click on edit with mentor right up here and here's where you can use mentor in order to customize your website .
Now over here , you've got a bunch of widgets .
So if you want to use one of them , like let's say a button , you can just click and drag and then you can drop it wherever and you can command Z if you're on a Mac or control Z on a PC in order to undo any of your changes .
And if you want to edit anything on screen , just simply click on it like this text right here and you can type right on the screen or you can do it up here in this box .
And if you want to change the font or the size or the color of the text , you can just go over to the style tab right here and you can change all of that right here .
If you want to change the background image , just simply click on the six dots up here at the top .
And while we're on this page , you can see that you can change the minimum height to bring this whole section to be smaller or larger .
And to change the background image just simply click on the style tab .
And then you can see the image right here .
You can just click on choose image and then you can just upload a new file .
So we'll just click on select files and then just grab the image that we want to import and click on open .
And then with that image selected , we'll just click on insert media .
And now you can see we've got a new image in the background and you can mess with some settings for this image such as the position and the size over here .
And then if we go over to background overlay , you can change this blue hue overlay that's over the image .
So right now we've just got a gradient set , but you can also just click on classic and just do one single color .
So we can just click on the color and you can change this to any color that you want to put over top of that image .
I think black is usually a good way to go and then you can change the opacity to be lighter or darker , but I kind of like the blue .
So I'm gonna go back to the way it was .

You can edit these buttons here just by simply clicking on them and you can change the text over here and then you can put in a custom URL here .
So you can just go over to the link section and just delete the hashtag and you can put in any URL that you want this button to go to whenever you click on it .
And if you want to change the look and feel this button , you can just go over to style .
And here is where you can change the background color of the button as well as the hover color as well .
And you can change any section or widget or anything at all on your website by just simply clicking on the pencil icon for anything that you want to edit and all of the settings to edit that widget will come up here on the left .
And whenever you want to save your changes , just go down here to update and that will save your work .
And then if you want to preview the website , just click on the little eyeball symbol right here that says preview changes .
And here you can get an overview of your final website .
So now you know how to use or to edit this section of your website .

You can also edit your navigation menu over here by just simply going back , going back again , then going down to menus and then just click on navigation in here .
You can reorder or add new items to your menu .
And if you want to edit the footer all the way at the bottom over here , all you have to do is click publish in order to save your work , but I haven't made any changes , so I don't need to and then just click on the X and then just click on the word press symbol and then just come down to appearance and go to header footer and blocks and then you'll see site footer right here and then just click on edit with mentor .
And here is where you can edit your footer using mentor .
And if you'd like to create a new page or edit a page , just go over to the little hamburger looking symbol and exit the dashboard and then just go to pages .
And here you can see a list of all of the pages that are on your website .
And if you want to create a new one , you can just click on add new right here .
But if I want to edit a page , I can just go over to it and click on edit with mentor .
And here I can edit my about page using mentor as well .
OK .
So that's it guys .
Now , you know how to get a domain name and hosting , how to import a demo site and how to edit the content to make it your own .
So if you'd like to get started with building a website like this , just click on the very first link in the description below and feel free to subscribe to my channel for more awesome website tutorials .
All right .
I'm Dale from Creative Pro website and I will see you on the next video .
So if you ever want to create a classified website , this is the perfect tutorial for you .
OK ?
So without wasting any time , let's get started .
And before proceeding further guys make sure you subscribe to my channel so that you don't miss any future videos .
Also , if you think this video is helpful , if this video helps you then give a thumbs up to this video .
If you have any doubt , any queries , any question , any suggestions for me , you can put them in the comment section below .
Now , let's see .
Let's get started .
All right guys .
Now to create any kind of website .
We need two basic things .
A domain name and hosting a domain name is nothing but the name of your website or the URL of your website .
For example , google dot com , youtube dot com , facebook dot com , blog dot com .
All these things are domain name and hosting is nothing but a place where in all your file has saved .
For example , you see these images , all these different images , icons and everything .
All these pages , everything is saved in a computer which is running 24 7 so that whenever someone visits your website , they can see your website live .
OK ?
So both these things are very essential , you cannot proceed further without using these things .
Now , I have a very good uh I know a very good company that you can opt in because there are many different companies out there in the market , you can purchase hosting and domain from .
So what you have to do is just open a new tab and type in blog to dot com slash TMT .
Now when you do so you will be redirected to this page .
This is the page .
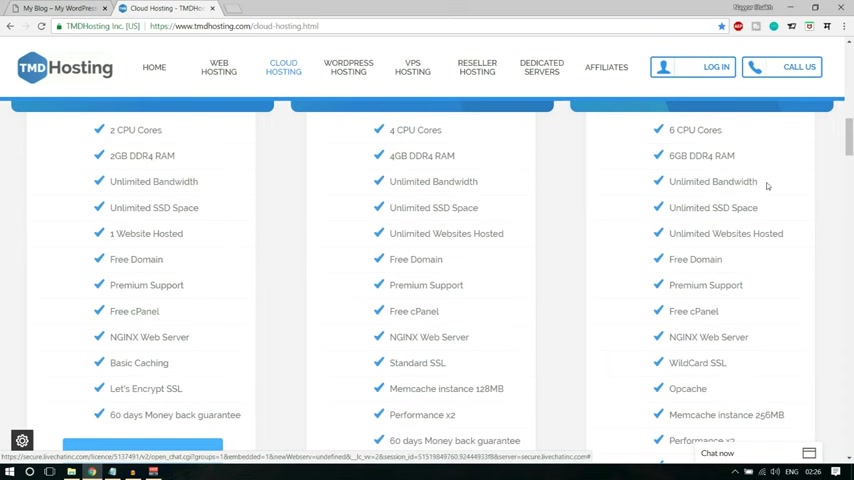
Now , when you scroll down , you'll see the three different plans and this is cloud web hosting .
OK .
Cloud hosting is way more better and way more faster , way , way more reliable and secure than the regular shared hosting .
OK ?
So people , the experienced people and the pro will always recommend you cloud hosting , not the regular shared hosting .
But if you want to save some money , for example , here , the cloud hosting starts at 5 95 around $6 per month .
Or if you want to some cheaper option , you can click on your web hosting , you will get some cheaper option .
Let's see .
What is the price over here here ?
You can start with $3 per month , but I don't recommend this .
But still if you want to save some money , you can go with the shared hosting plan , but I highly recommend cloud hosting .
So here we have cloud hosting .
We have three different packages over a year .
Now , let's see what are the different features that we get with these packages or with cloud hosting and why you should choose T MD cloud hosting or some other company , cloud hosting or some other company hosting .
You know , there are many different companies in the market like side ground host , I , I was in fact , you know , promoting host a year ago , but I thought when I came to know about T MD , I really like T MD and now I prefer T MD or any other hosting company .
So you can uh this is the best hosting company according to me .
Now we have three different plans .
Now , let's see what are the different features .
Now , the first option or the first feature , if you see this two thing version , it is using a six core CPU and a six GB of data for now , I have just explained to you that a hosting is nothing but a computer where in all your website file and data is saved and that computer is running 24 7 .
So the computer that is storing , that has stored our file , our website file is really a strong and robust computer .
You can see that computer is using a six core CPU that is really amazing six GV of DDR four ram .
So the computer which is which these guys are using is really awesome .
Also , we get unlimited bandwidth , bandwidth means the amount of data you can transfer with your website , the amount of data you can upload and the amount of data you can download from your website .
So we have unlimited amount of data upload and download .
After that , we have a very , very special feature which is SSD space .
Now a very special , this is a really special feature and very unique feature .
You don't find this in most of the hosting companies and this is the main reason why I recommend T MD over any other company .
Now , if you don't know the difference between SSD and regular HTD , you can just open a new tab and type in SSD versus HTD web hosting .
You can see the suggestion over here .
Now you can read all these different articles , you'll get to know the difference between them , but you can click on this image , you will see all these things in a graphical form .
Now let's see this , this first result .
Now here you can see this orange bar is HTD and this green bar is SSD .
The first one is speed , it says higher is better .
And you can see SSD is way more higher than the regular HDD .

The second one is , is again , it says higher is better and you can see the difference is around 100 times different .
OK .
So SSD is 100 times better than SSD in IOP in latency , it says lower is better .
Now again , SSD is 100 times better than HTD .
So there is no question between in SSD and HDD .
Now , the great thing is that you're getting unlimited SSD space now , you might be getting SSD space on some other hosting company .
But the thing is they give you a very limited space like five GB , 10 GB or maximum .
I have seen 30 GB .
But here you get unlimited SSD space , which is really amazing .
After that , you get unlimited website hosted .
Now , this is also a very special feature and very important feature .
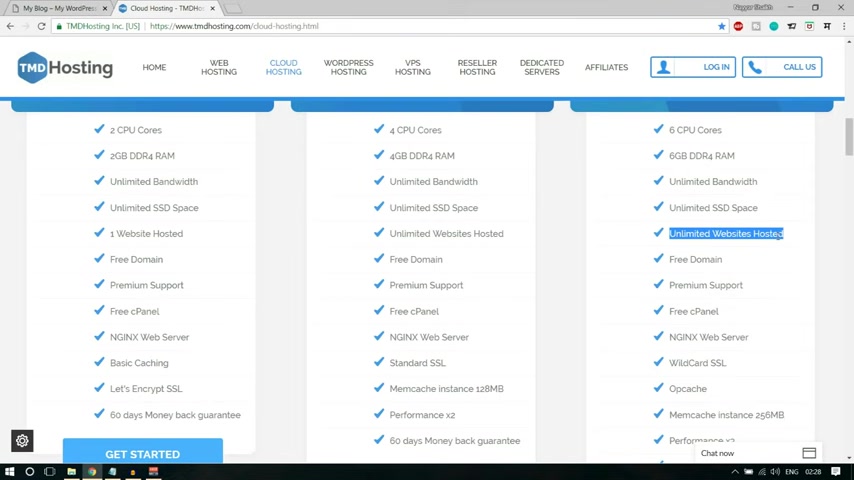
Indeed , because your unlimited website hosting means that you can host unlimited number of websites in one single hosting package or is what happens is , for example , today you're creating this classified ad website tomorrow , you might need to create some business website or e commerce website .
So tomorrow you don't need to purchase a separate hosting account .
You can host those ecommerce websites in the same hosting plan .
In fact , you can host unlimited websites in one single hosting plan .
So this is a very useful and very important feature .
Then we also get a free domain .
When we get any one of these packages , then we get premium support , free C panel NGIX web server and SSL certificate .
Now , this is a very important feature , especially in 2018 from 2018 onwards .
Because first , let's see what SSL certificate is .
You see this green socket over here .
This is the SSL certificate and why I say this is important , especially from 2018 onwards .
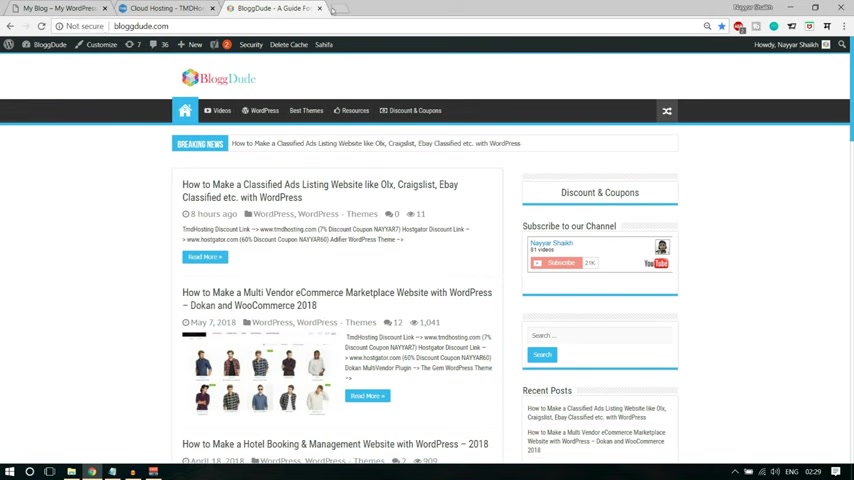
Words because what Google has done is Google has started labeling all those websites without SSL as not secured .
So suppose for example , let me go to my website blog to dot com , which is a very old website .
Now , if you see your chrome says this website is not secure .
I have not yet purchased SSL for this , I , I have a new website dot com and I have all those SSL thing O here .
But just to show you guys that if your website doesn't have this SS L cerf chrome will say that this website is not secure .
And when you click on this , it says your connection to this site is not secure .
OK ?
So this is not a good thing .
And here you can see this is secure and here it says connection is secure .
That's why SSL is very , very important .
Now , we get Wild Card SSL , which is a really crazy feature .
Now , Wildcard SSL means that you can install SSL certificates on unlimited number of domains and sub dome .
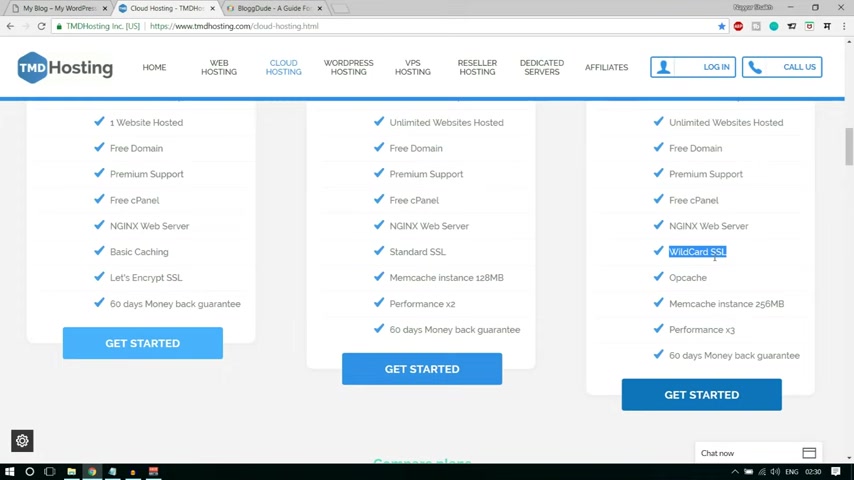
Now , why do I say this is a crazy feature because if you go in the market to purchase a single SSL certificate , it will cost you around $4200 .
And here you're getting unlimited SSL certificates with one single plan , which is really , really amazing .
Then you also get optimum cash which will improve the performance and speed of your website .
We also get memory cash instead of 2 56 MB .
Again , it will improve the performance and speed of your website and the performance of this package .
The enterprise cloud is three times better than these three .
These two .
We also get 60 day money back guarantee .
Ok .
So you can select any one of these packages .
I would not recommend you to select the starter cloud .
The reason is very simple here , you get only one website hosted so you can host only one website over here tomorrow .
If you want to create another website again , you will have to purchase a hosting account .
So that is not recommended .
You can go with business cloud or enterprise cloud .
I , I am at present using the enterprise cloud .
So that's why I'll go with enterprise cloud .
I click on this get started button .
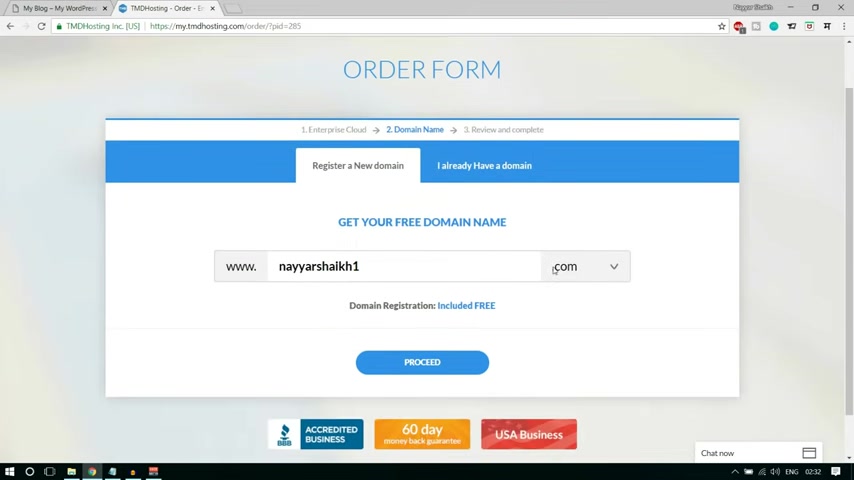
All right guys .
Now , as I said , to you earlier , we get a free domain name with this uh with this account .
So you can type in your free domain name or yours .
So let me type in my free domain name .
I'm typing shake one dot com .
You have to type in your domain name over here .
And from here , you can select the extension dot com dot net dot org .
If you're creating this website for some organization , you can select dot org .
If you're creating this website for country specific , you can select this country specific domain name or domain extension .
For example dot us for United States dot N for India and so on .
But for most of the people I would recommend you to go with dot com .
Ok .
So type in your domain name , select dot com .
Click on proceed .
All right guys .
Now , after this , you have to fill , fill in this simple form .
You have to put in your basic information , like your first name , last name , your email address , phone number , country and so on .
After that , you have to put in your payment information , you have to put in your credit card , debit card detail over .
You can also pay through paypal , but I would recommend you to pay with credit card or debit card .
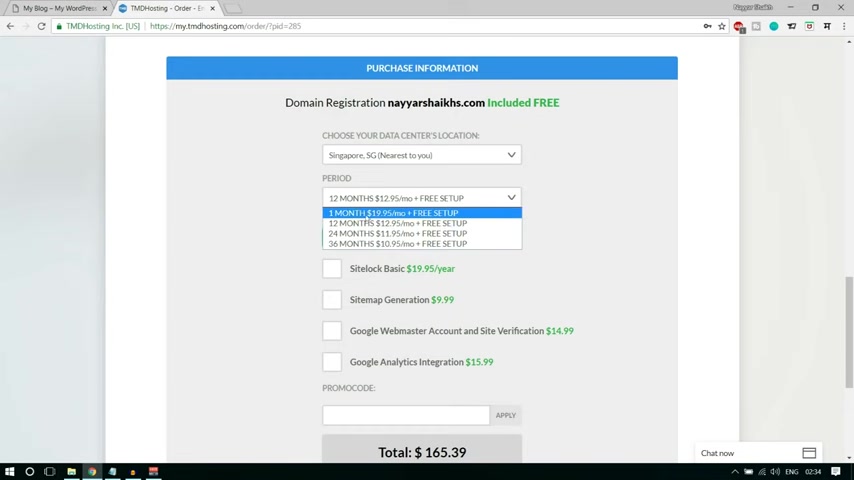
Then after that , we have some more options over here .
These are really important option .
The first one is to choose your data center location and you have to select the one which says nearest to you .
For example , here you can see for me , Singapore says nearest to you .
So I'll select this one .
Then after that , we have to select the period by default , 12 month is selected .
I also recommend 12 months .
Now , if you see , oh , you if you go with one month , you'll have to pay 7 to $8 extra per month .
Now , which means that by the end of the year , you are already paying around $100 extra , which is not a great idea .
So I would recommend you to go with 12 months .
Then after that , this is a very important feature which is promo code .
I would recommend you to type in year seven and a double yar and numeric seven and click on apply .
Now , this will give you 7% off uh on your purchase .
Now , this is very special because you know , 7% is the highest discount that T MD currently offers .
Ok .
So you're getting the highest discount possible after you're done with all these things , just take Marco and click on checkout .
All right guys .
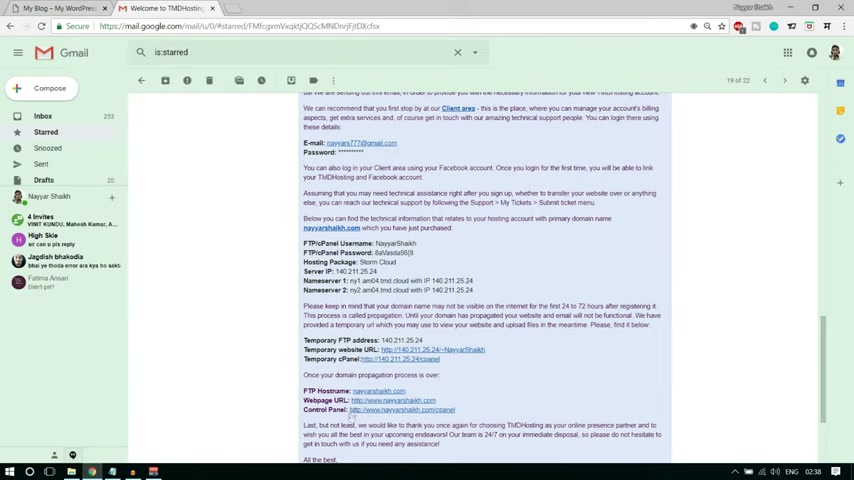
Now , when you click on that check out button , you will receive a mail from T MD hosting which should look something like this .
Now , here you have all your user name , your password , your C panel link , all these different details like your name , servers and so on .
So what you have to do , you have to open this link , this control panel link at the bottom , open this link in a new tab .
Now , by the way , this is a very important meal .
So make sure you save this email somewhere .
If you have multiple email address , you can just , you know , uh just you can just forward this to those different email addresses .

Just make sure everything is safe and secure because these are really important information .
Now what you can do , you can copy and paste your FTP user name and password from here and you know , copy that from here and paste it over here .
Now , click on login .
All right guys .
So this is your C panel .
Now , what we have to do , we have to go at the bottom .
We have soft app installer and the first option is wordpress .
So select wordpress from here because now our domain and hosting is ready .
Now it's time to install wordpress on our domain name .
Now , click on install now from here , you have to select the domain on which you want to install wordpress .
So I have selected the domain and cancel this thing WP OK .
We don't want any WPO here and you have to select this one .
Http S OK .
You have http , you have http S , you have to select the S one .
Ok .
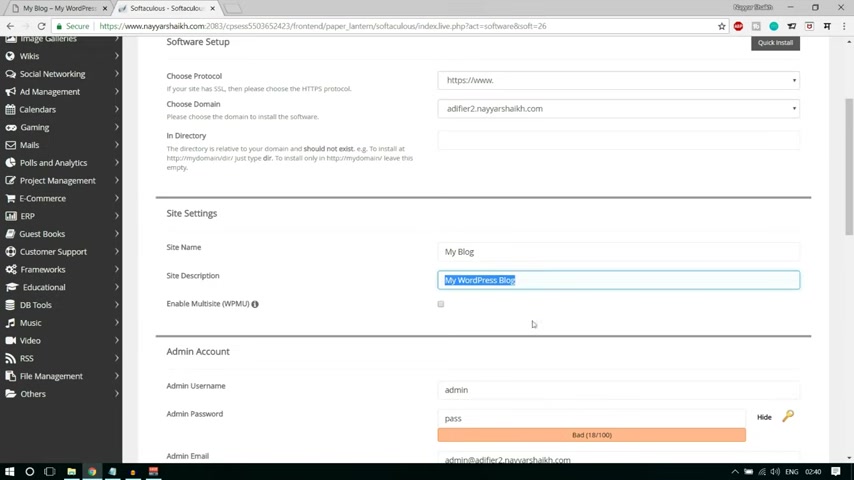
Select this and after that , you can change your site name , you can put in your website name or your company name or , and you can also put a very short description of uh about your website or the tagline of your company or , or your website .
And after that , you have to put in your admin account details , your user name and password .
So I would recommend you to change your user name from here and put some different user name and some different password from here .
Let me hide this thing .
Ok , fine .
And also change your email address from you put in your own email address .
Ok , then go at the bottom and click on install .
Now , wordpress is getting installed on your website .
It will take a few seconds to worry .
All right guys .
Now , as I said , you , it took a few seconds .
Now we have two different links .
So here open this second link , uh the WP admin link and this is our dashboard .
Ok ?
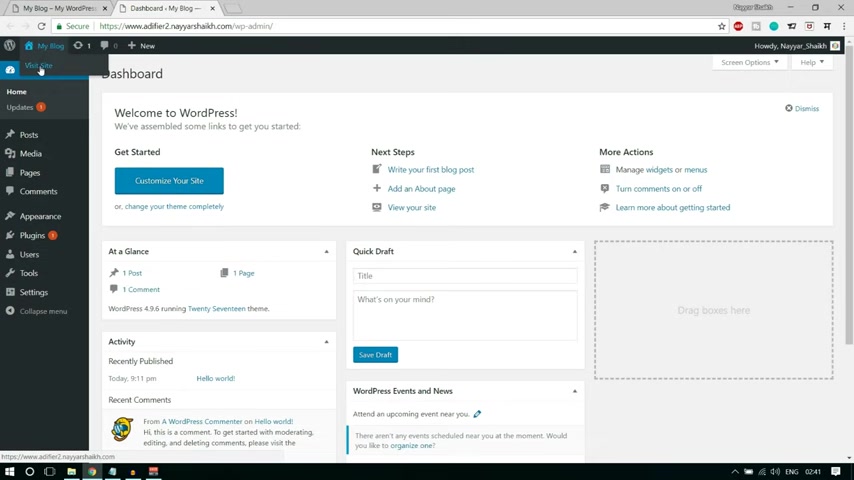
This is our wordpress dashboard , the place from where we will control our website and whenever you want to come over here or come to a dashboard , what do you have to do ?
You have to type in your website name forward slash WP hyphen admin .
Ok .
So when you type this thing over here , you will be redirected to this page .
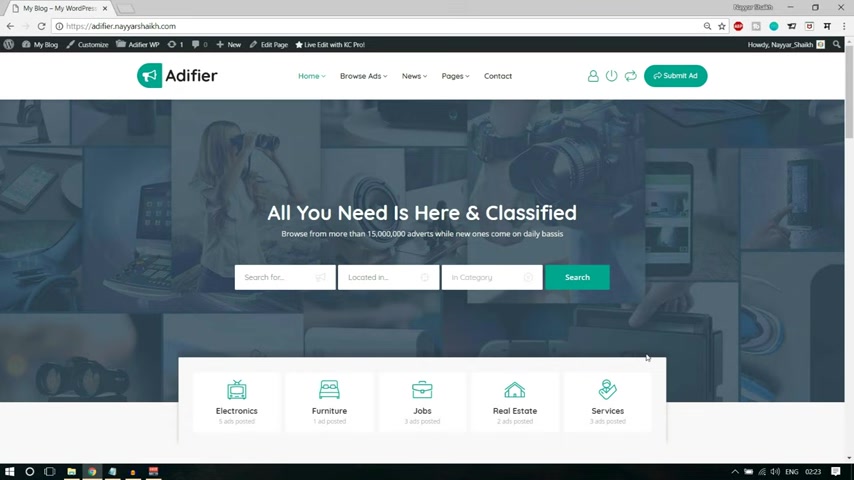
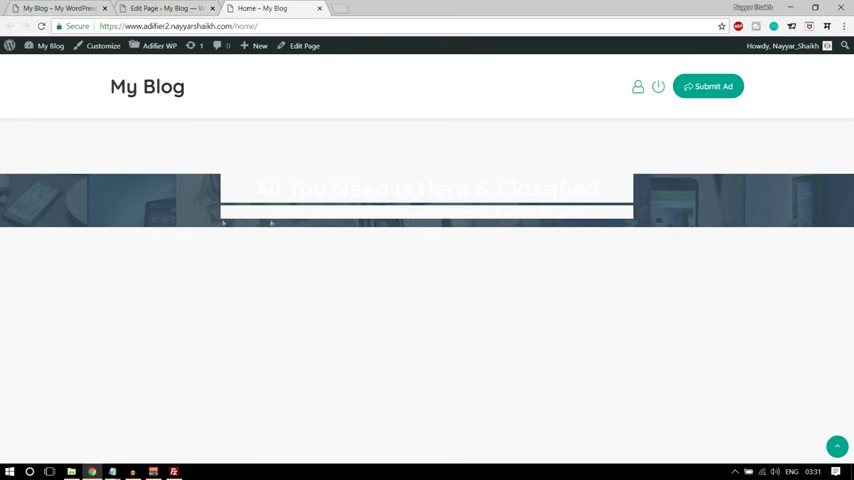
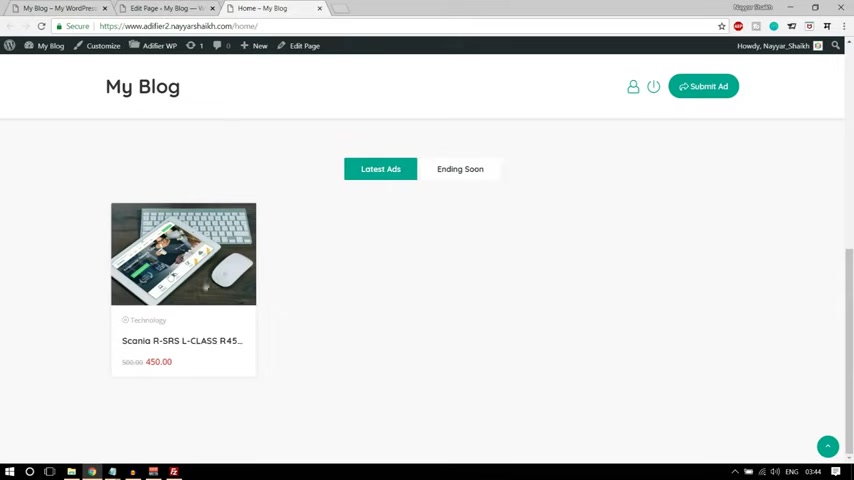
Now , this is , and let's see how our website is looking at present .
So we have this thing over here at the top right corner where when we have this , we get this visit site , let's open this visit site link in a new tab .
So this is how our website is looking at present and this is looking really bad .
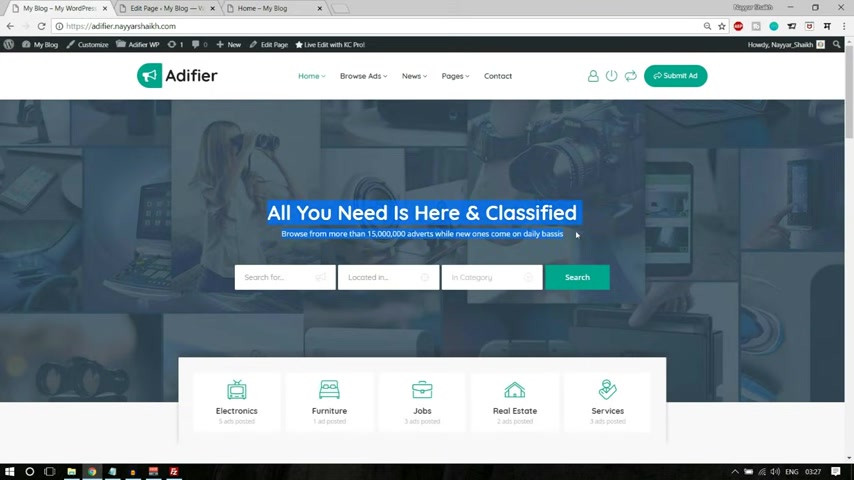
We want to make a beautiful website like this .
Now for that , we have to change the design and also the features .
We need some more functionality and more features because here we have many different features .
Here , we have the future of buying and selling .
You know , we want to accept payment on our website and there are many different things that we have , we have to do over here .
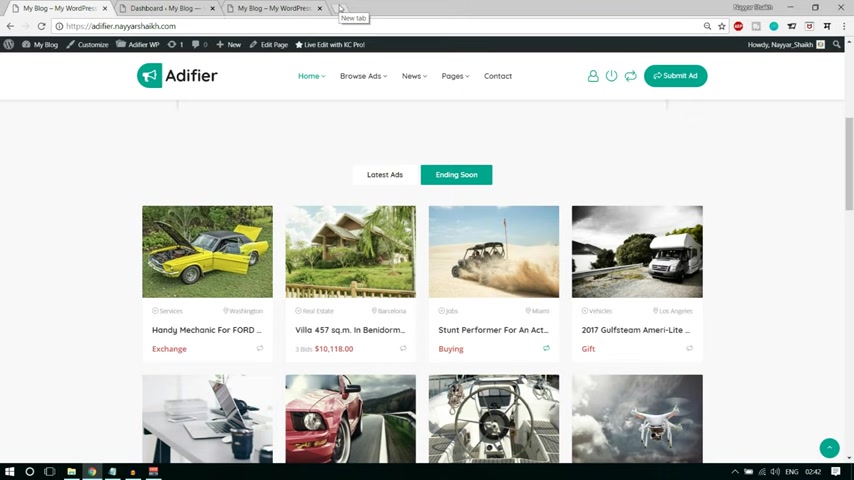
So for that , we need a theme .
Ok ?
A theme will change the design of your website and it will also , you know , give you many more functionalities using premium plugins .
Ok ?
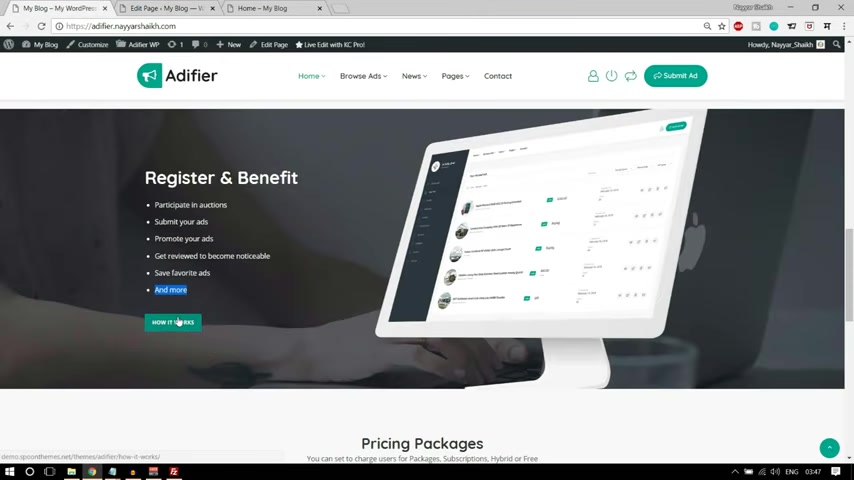
So what you can do is open a new tab and type in plug two dot com slash addi fire A dia D IFI er now you don't have to do anything .
Just uh there is this link will be given in the video description below .
Go at the bottom , open that link in a new tab and you will be redirected to this page .
Ok .
All right .
Now , as you can see , this is the theme , this is a very good theme .
This is indeed a new theme in the market and that's why they are giving this theme on sale .
And this is a very , very good theme .
You can see the rating here is 4.96 which is a five star rating .
Really , really amazing theme you're getting .
If you are getting this for $29 it's really amazing .
And the normal price is $59 but the theme is really good .
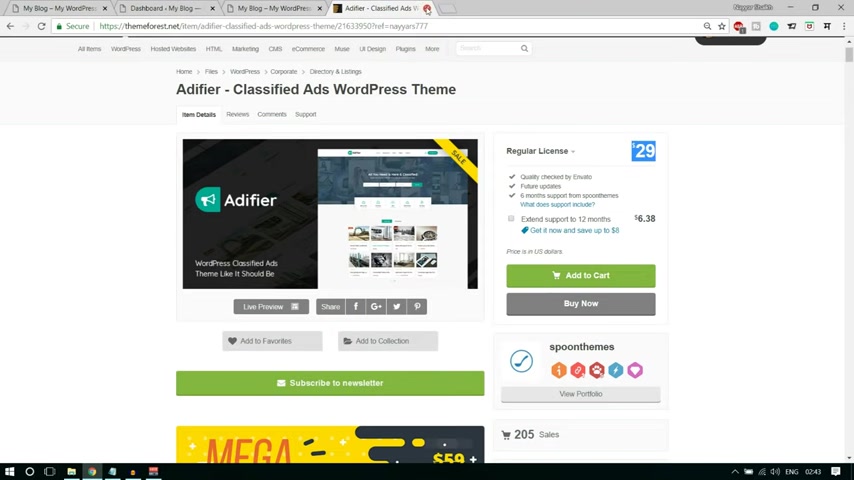
It has a lot of features and so on .
So what you have to do , you have to purchase this theme and when you purchase this theme , you'll get a file , a zip file .
Now , I won't be purchasing this because I already have this theme .
So what I'll do is I'll just cancel this from you .
Come to my dashboard .
Now , let me show you how that file would look like that .
You can , that you have to download .
OK .
This is how the file would look .
Add five WP .
Now you don't have to upload this file .
If you open this file , you'll see that this file has some more files inside .
For example , add file change , log child theme theme .
Now this is the file , a file , the file that you have to upload .
So what you can do , you can select this and you can extract this file .
Now , when you do so you'll get this file over here .
I I five WP open this here .
We have a five team , open it and inside this , we have this file , this Z file .
This is the zip file that we have to upload .
So very easy to do .
Let me show you what you can do .
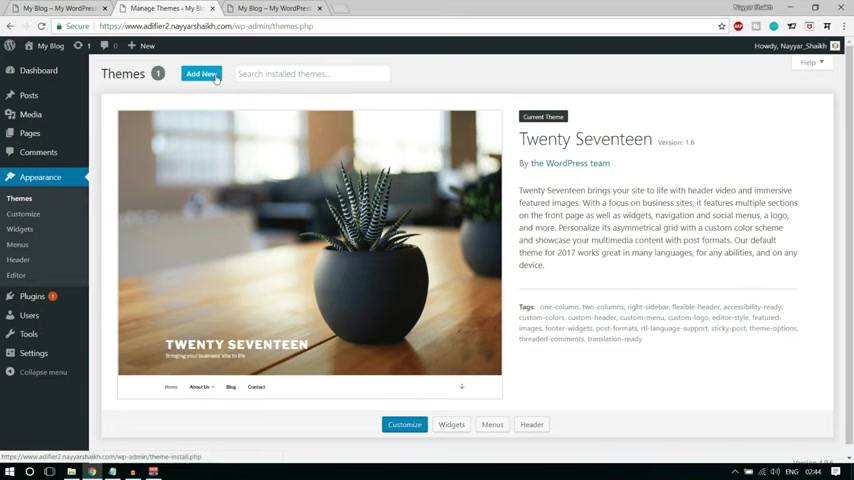
At the left hand side , you have different menus , click on appearances .
Now , by default , 23 themes are already installed , but these are really bad themes .
So we don't need these .
We'll just delete them because we need some .
We don't want anything to be utilizing our data and utilizing extra space .
OK .
So what we'll do , we'll add a new theme .
Click on , add new , click on , upload them , choose file and let's choose that file from here .
This is the file , select this file and click on open now , click on install now .
All right guys .
So the theme is successfully installed now it's time to activate the theme .
So click on this link , activate .
Ok .
So we have this theme installed and activated .
Now , this theme recommends some plugins .
So click on this link which says begin installing plug in .
Now , these are some really premium and good plugins .
So what I'll do is I'll take my code here .

It will select everything now from the bulk action .
Select install .
Click on apply now , click on this link , return to required plug-in installer because we have installed all the plugins .
Now click on this link , return to required plug-in installer .
Now it's time to activate all the plug ins .
So again , select everything from the bulk action this time select activate and click on apply .
Now , as I have explained to you earlier , that theme will change the design of your website and the plugins will add extra functionality to your website .
That is what these two do .
Ok .
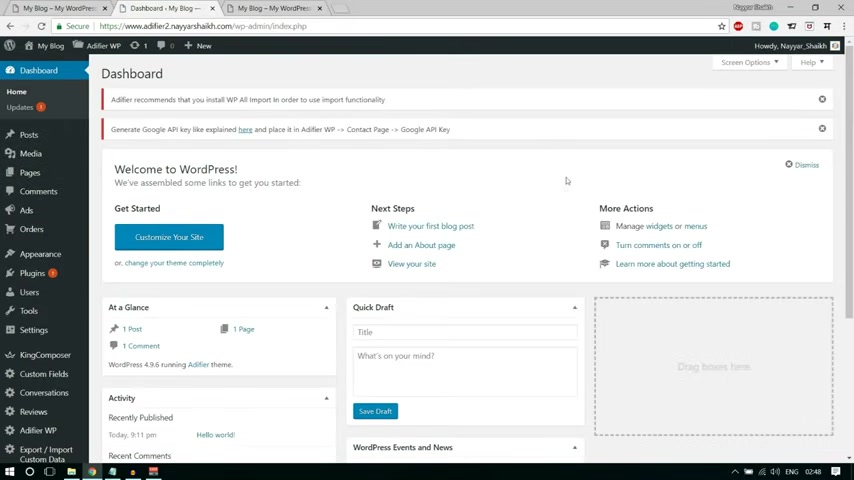
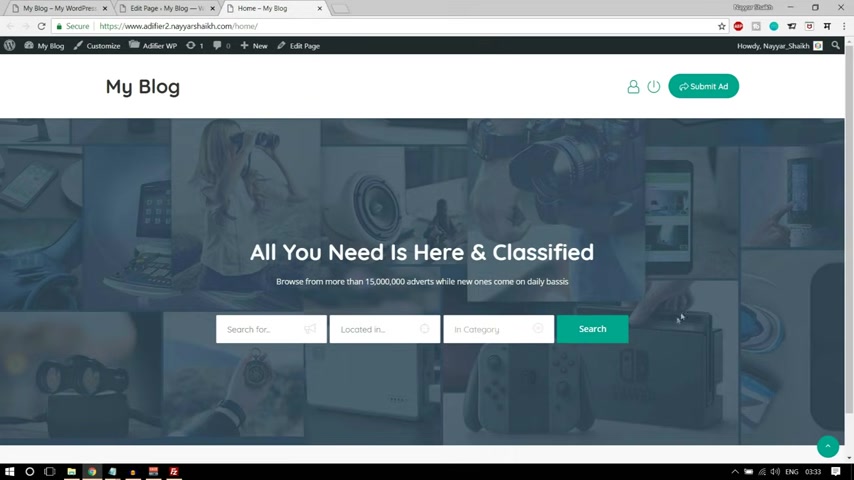
Now let's come over here and let's refresh this page .
Now , as you can see , this is how it is looking at present and this is looking much better .
The design is looking much neater , much cleaner and we have all these buttons automatically present oi so it has saved some time for us and this is looking very much similar .
Now , now let's start creating this website .
Let's start creating how , let's see how to create this .
So come back o and first , let's start adding the posting different ads .
So first what you can do , you can click on this dashboard .
Now , when you do so you'll see there are so many different options or your new options .
OK ?
Like ads orders , reviews so many options over here .
Now , what we have to do first , we have to start creating ads .
So let's see how we can create , create an ad .
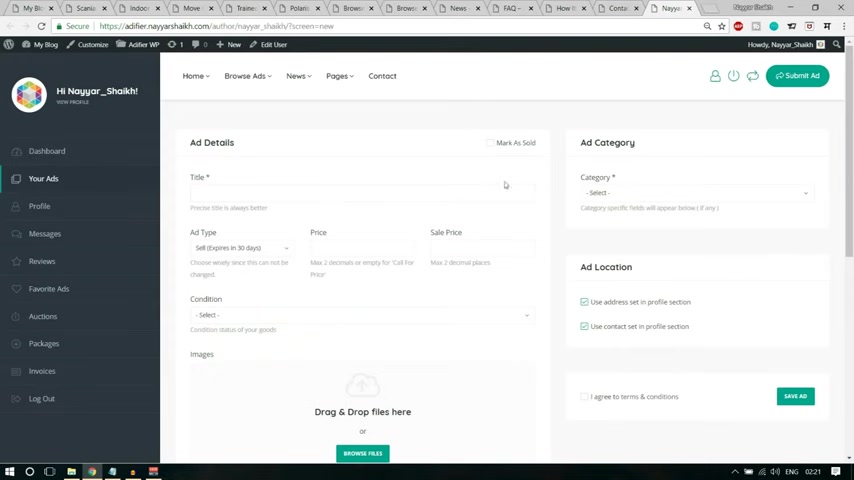
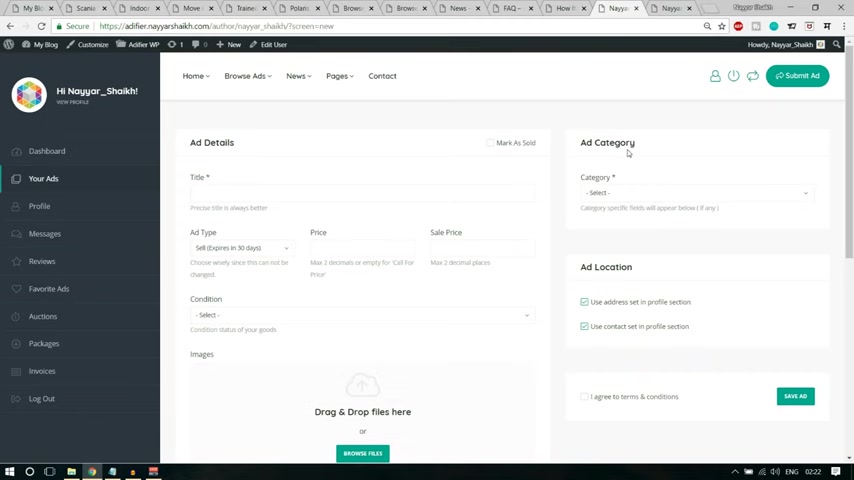
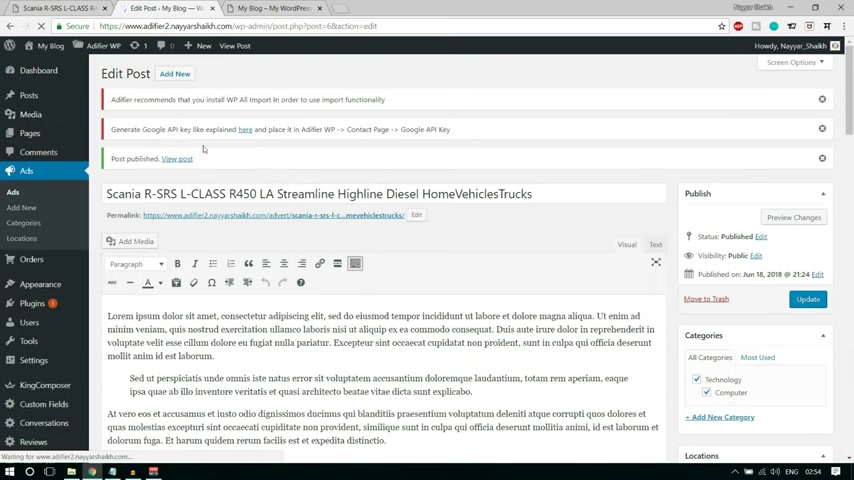
So from the left hand side , you'll see these ads , how ads and click on , add new to add a new ad .
Fine .
Now , we have to give it the title first .
Let's open a simple ad so that we can see how it looks .
Let's open this drone ad .
Let's open this , this is an exchange ad .
You can add any , any kind of ad from here or maybe let's see a simple ad .
Let me search for something , right ?
Doesn't matter .
Let's open the first one .
It doesn't matter what you're adding OK .
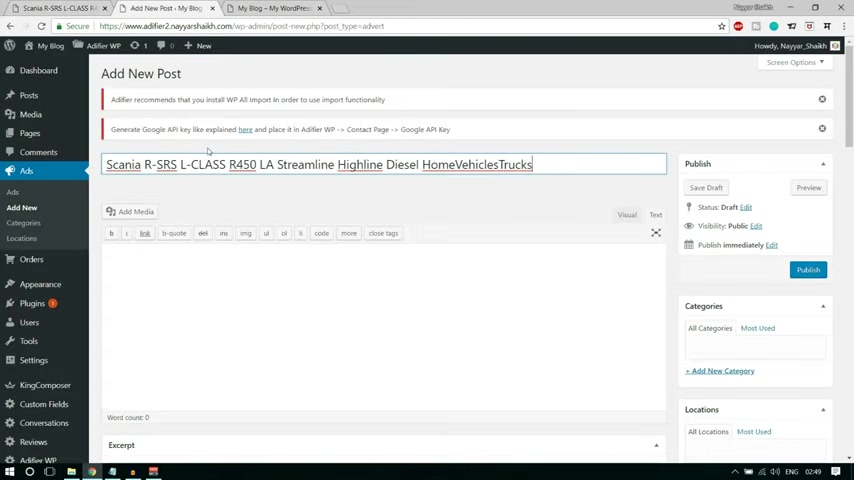
So this is the title or your , let me copy the title from you and we can put in the title .
OK ?
So this is where your title will come .
Then after that , you'll see , we have these images and so on .
But before that , let's add a category .
If you see here in the breadcrumb , you'll see home , vehicles , drugs .
So this is under vehicles category .
OK ?
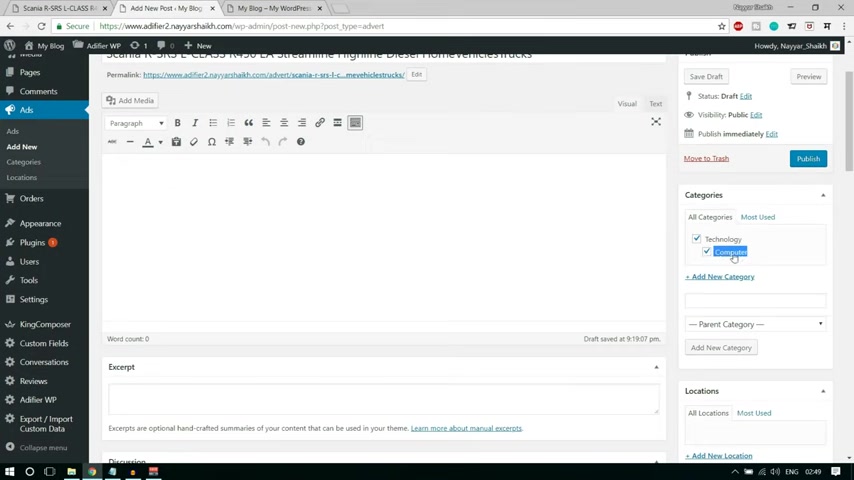
So let's create a new category and you can add different categories .
For example , you can add a parent category computer .
OK ?
Uh Maybe you can add a category technology , OK ?
OK .
This can be a parent category technology .
And in that technology , you can add a subcategory computer .
Now this is not required but you can do so .
And if you want to make this subcategory of or a child category of technology , you can select the parent category as technology .
Click on add new category .
You can see this is how it looks .
Now this is not required .
You can just uh select and accept a , you can just create a separate category as computer .
This is not required but you can do this way as well .
OK ?
I just wanted to show you this .
Now we have to add a location .
So suppose this is add to Mumbai .
So I'm adding Mumbai as the location .
Click on add new location .
Now , after that here , this short description or the description will come .
So let's see what is the description here is the description you can see , OK .
It says the name of the product over here and we have some simple title , some simple text and so on over here .
So what I'll do , I'll just copy and paste everything over here .
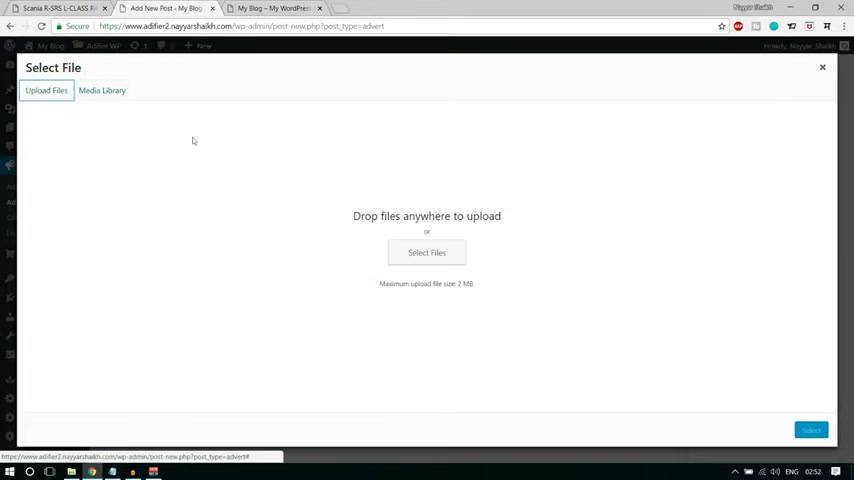
And when we scroll down , we have some more options here , we have to add the images .
So click on , add new .
And by the way , if you want to download all these images , this logo , this marker and everything for demo purposes .
Because when you're creating a website for the first time , there are many , there are very high chances that you don't have any images and so on to post .
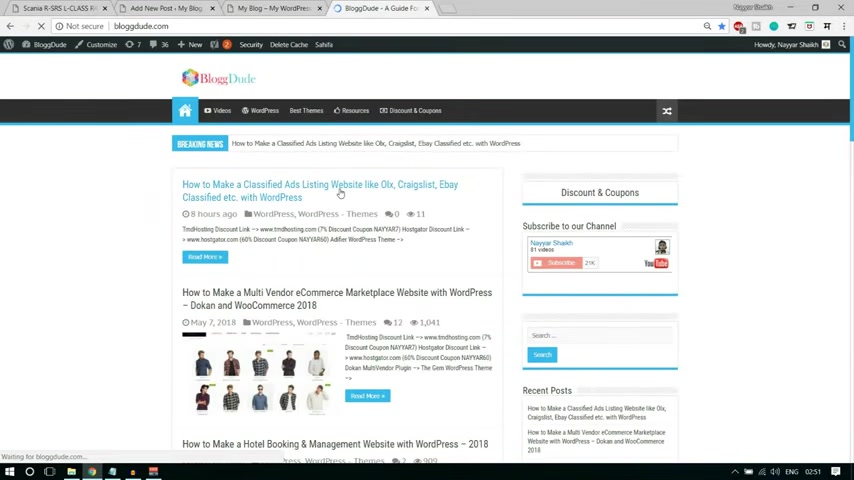
So what I regularly I basically do is if you go to my website blog to dot com , let me show you and click on this link and this link will also be given in the video description below .
You'll see at the bottom .
There is a link which says images , download , you can download this file and you'll get a file where you'll have all the images CS S and whatever I have used in this video .
For example , let me show you how that file would look , it would look something like this , a file .
And in this file you'll have two files , CS S and media and in media , you'll see all the images that I have used in this website .
OK ?
So let me upload a image from you .
So click on add image , select files and let me go over there media .
Let me upload this file .
OK ?
Let us click on open .
This is getting installed and upload it and select this click on select .
OK ?
So we have one image , you can add multiple images from here .
So you can just upload some more images .
For example , if you want to upload these images , OK ?
You can select these click on open and these are also getting uploaded as you can see .
So you can select these two now .
OK ?
Maybe this one upload one more , click on add new and select this one this time .
So we can add multiple images over here .
We can also add a video URL .
So let me go to my website .
This video is related to this product .
For example , we have some iphone ipad or some laptop over here and we have some video related to this product , this laptop on youtube .
So what we can do , we can simply copy this link , a video link and paste it over here .
OK ?
So this is how it is done .
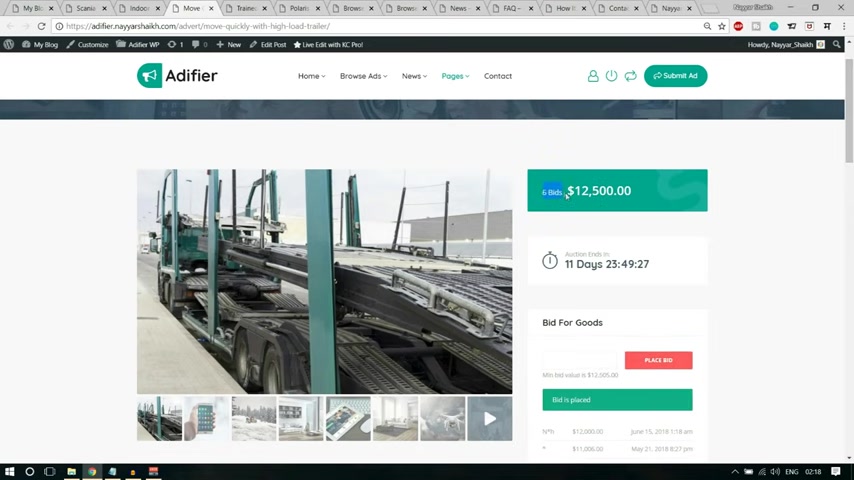
Now , what is the type of ad that you're creating ?
Whether you're selling something , whether you , you want to purchase this product , whether you want to auction it ?
What is this type ?

So I'm selling it and what is the start price ?
Uh This is for auction .
OK .
So we don't need to put any start price and we , we just have to put in the price .
Now , if you want what you can do , you can leave this thing .
And if you leave this thing empty , what happens is it will show instead of this price , it will show call to call to get the price .
Ok ?
So let's see how that works .
Ok ?
Let's not put anything over here .
Let's uh you can also set an expiry date .
So maybe this uh I want to sell this only till the end of this month .
After that .
I don't want to sell this product .
OK ?
It's sold .
No , it's not yet sold .
And what is the condition it is used ?
OK .
So condition is used .
We'll add this location and everything later on .
First , let's see how it is done .
Now , we can add your mobile number over here .
So let me add my mobile number .
Oh , you're fine .
And we have to upload the featured image over here .
So let's select the featured image and let's select the same image , click on set , featured image and this is some promotion thing .
We'll see this later on first , let's publish this product .
Let's see how it looks .
Now , let's weave this post in a new tab .
Let's see how it looks .
OK ?
So it says pay looks like page doesn't exist .
So this is giving us an error of 404 .
And that is basically because we have not changed the Perma link .
So that is very easy from the left hand side , have our settings and click on Perma links .
And by default day and time is selected , you have to select this one post name , select the post name , click on save changes again .
Come back over here .
Let's refresh this page .
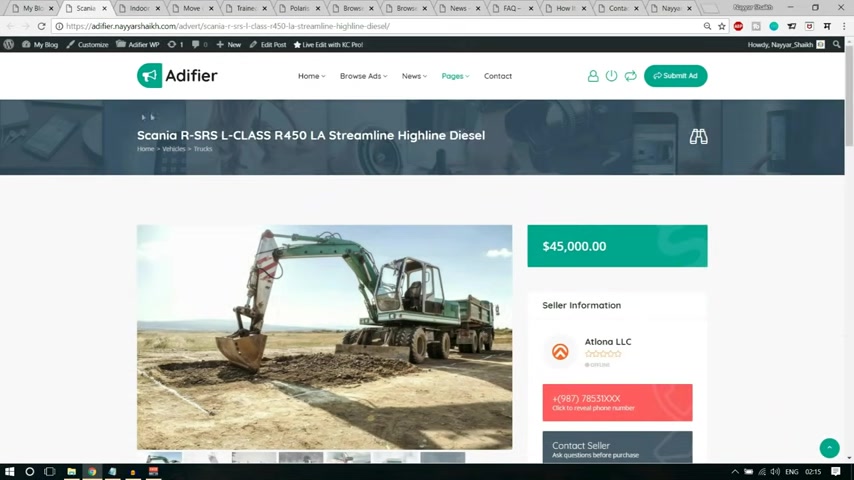
Now we can see the ad is showing Oyo we have these images showing we have called for prize .
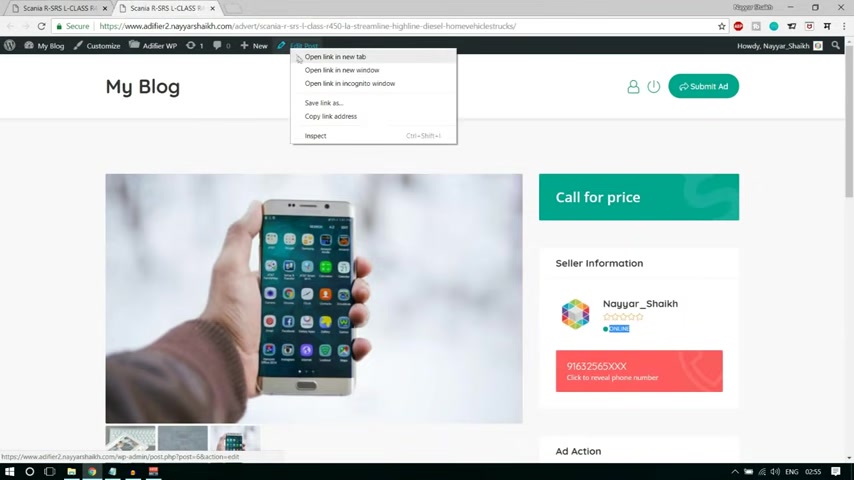
We have number given oi the seller and the seller is online so we can chat with the seller .
Then we have this short description , add action and so on .
Now let's add a price .
So again , let me edit this post .
Now let's add a price of uh here it is .
Let's add a price of maybe $500 .
And suppose if this product is on sale , you can put it away , for example , instead of 500 I'm ready to sell this product for 4 50 then I can do this .
OK .
Now click on update again .
Come back .
Oh , here , let's refresh it .
Now you can see now it's so it it is showing that 500 is striked out and 400 is the price .
Now we don't have any price , simple dollar rupees sign anything a year because we have not yet said that we'll set those things later in this video .
First , let's see how we can create an ad .
So this is how we create an ad .
And here we have some more options .
If you want to promote your ad , you can do it like like this , ok ?
But we'll see these options at the later part of this video because first we'll have to , you know , put some pricing for this .
How if you want to promote your product , what should be the price if you want to make your , make your ad at the top , put your ad at the top , you will have some different price .
If you want to feature your product , uh feature your ad , you'll have to pay some extra money .
OK ?
So we'll see these things later on .
So this is how you create a simple selling ad .
If you want to create a purchase .
A , just simply change the ad type to buy and everything will be same .
If you want to create an auction ad , simply change this to auction and so on .
Very simple to do so .
OK ?
Just change the type of ad .
OK ?
Rest everything will be same .
So this is how we create and add two things are left .
OK ?
This promotion is left , we'll see how to do that later on .
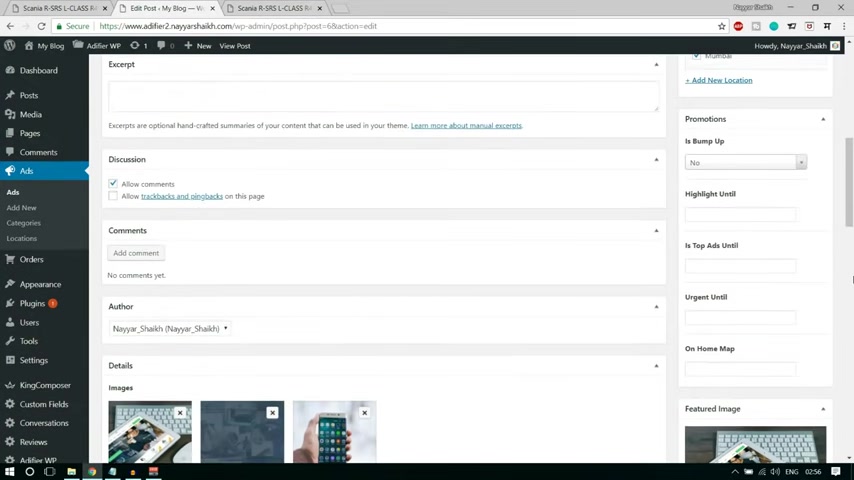
Now , there is one more thing left .
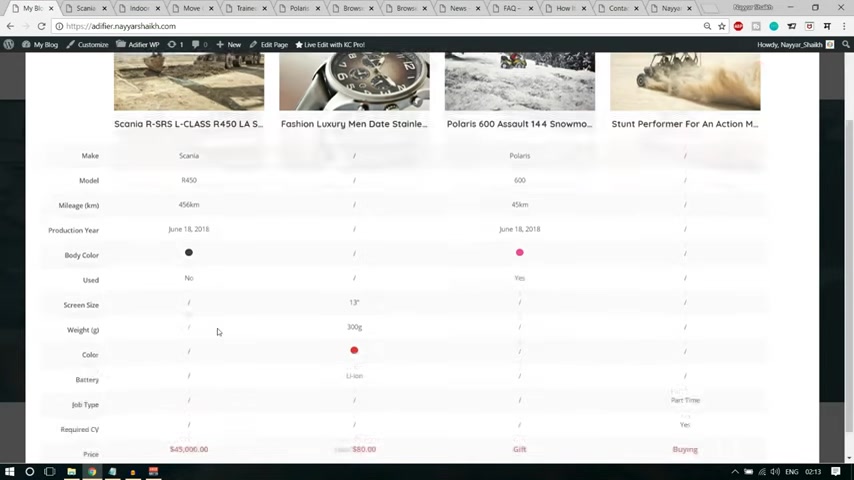
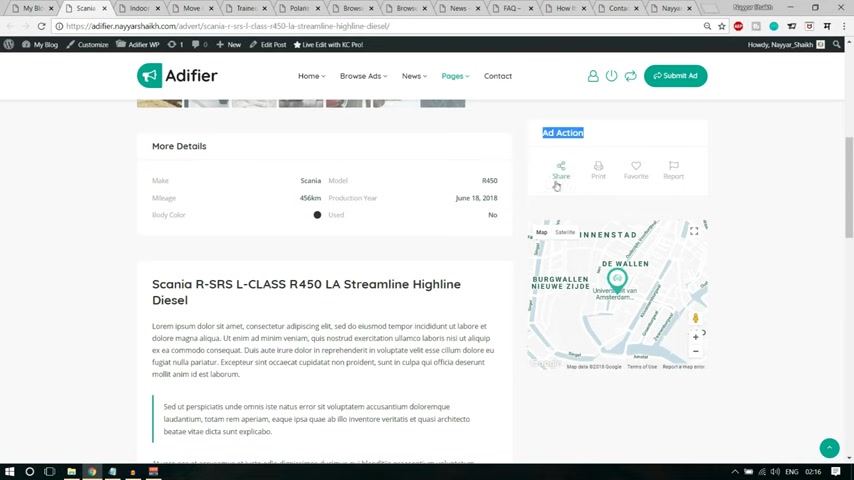
If you see here , we have some more detailed thing .
O for example , they make the body color and all these things .
Now , we can easily put this thing over here .
Now , in it comes under additional information , but at present , we don't see anything and additional information .
Now let's put some more information over here .
So what you can do from the left hand side , you'll see custom fields click on custom fields .
Now , first , we'll have to create a field group .
OK .
So what I'll do is because that was related to computers , I'll type in computers or maybe CF for custom fields and I'll select both this category .
OK ?
And click on add group .
OK .
So we can see this group is added now , we can click on this group and so we can add different custom fields .
Now , for example , I want to add one field for uh maybe screen size .
So let's add one field for screen size .
OK ?
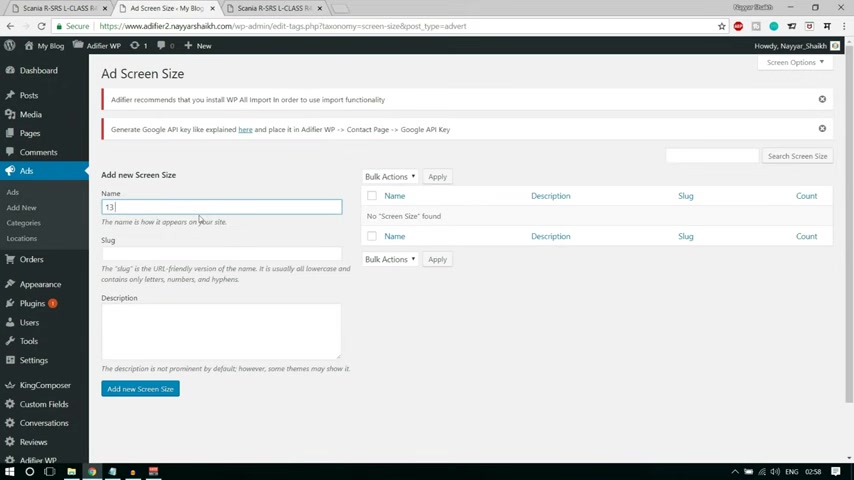
You can name it screen size and in the field type , select single value .
OK ?
And OK .
Fixed field uh field fixed .
OK ?
I think it is not required field .
You did not require click on add field .
Now what we can do , we have this screen size .
Now we can configure this thing .
So click on configure terms and let's add some more options for you , for example , 13 inches OK ?
OK .
Now click on add new screen size then for example , you can have 15 inches , OK ?
Click on add new screen size and this is how it is done .
Now , we have added one .
Let's see how we can add some more .
So again , click on custom fields , click on computer CF Now instead of screen size , we have added this , let's add one more .
Let's add color .
OK ?
Now when you select color , we , you don't , you have to change the field type to color , OK ?
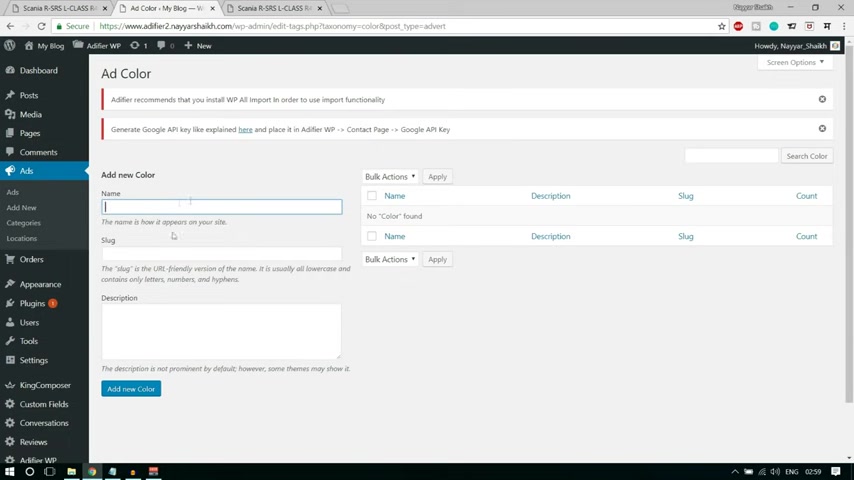
Change the field type to color .
And here at , at present field fixed select , yes , we want to give only fixed color OK ?
You'll see what that means .
OK ?
So just select this field fixed , make it .
Yes , click on add fields .
Now let's add some color .
So go to configure terms .
Now here you can add some colors over here .
For example , if you let me show you how you can add colors .
First of all , go to Google and type in hex color , OK .
HGX color , you'll see this this thing over here .
So for example , if you see this is the code for blue , so you can copy this code from here and come over here and paste it over here .
OK ?
Click on add new color , OK ?
Now if you want some red color , you can go to red section .
This is the red and you can copy this color code from your , this is the color code .
Come copy it over here , paste it over your click on this .
OK ?
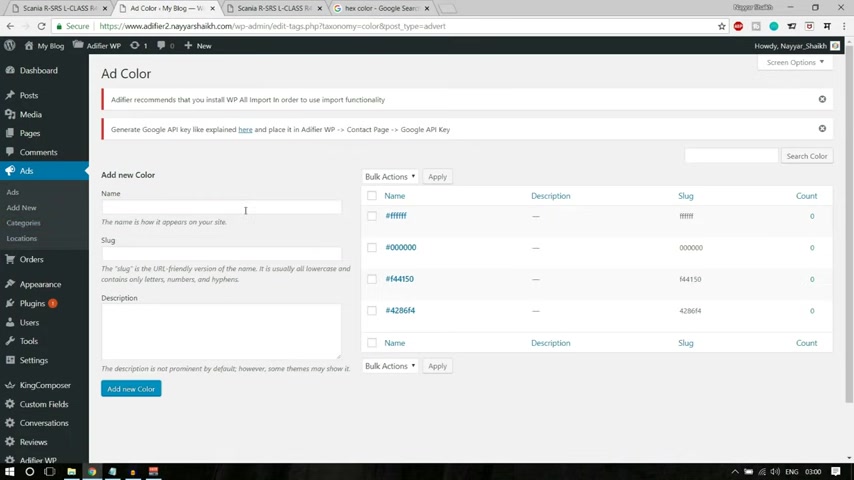
If you want black , so you can select black from here and you can select this color code from your paste it over your click on add new color .
If you want white , you can select white , copy the color code from your and paste it over here .
Click on add new color .
So we have four different color codes over here .
So we have , we are done with two different things , two custom fields .
Now let's add one more .
We have again , come over here .
Click on computer cf we have screen size , we have color and let's select what else can be .
Now , let's add weight .
OK ?
Because we need something related to color .
So I want the weight in gram .
And now instead of field type , I'll select a numeric single value , numeric range search .
OK ?
Select this thing , click on add field .
OK ?
So we have three different things selected over here .
Now again , we can just cut this thing .
Let's edit this post in a new tab .
Let's bring it over here .
Now when we go at the bottom , you'll see more options .
So for example , now we have additional option .
What is the screen size for ?
For example , the screen size is 13 inches .
What is the color ?
Maybe the blue and weight you can type in maybe 400 g .
OK ?
So this is how you add additional information .
Now let's update this page .
Let's see what happens at present .
We don't have anything over here .
Let's refresh and see what happens right now .
As you can see we have this thing .
Oh , you have more details .
We have screen size 13 inches color .
We have this blue color weight 400 g and so on .
OK ?
So this is how it is done .
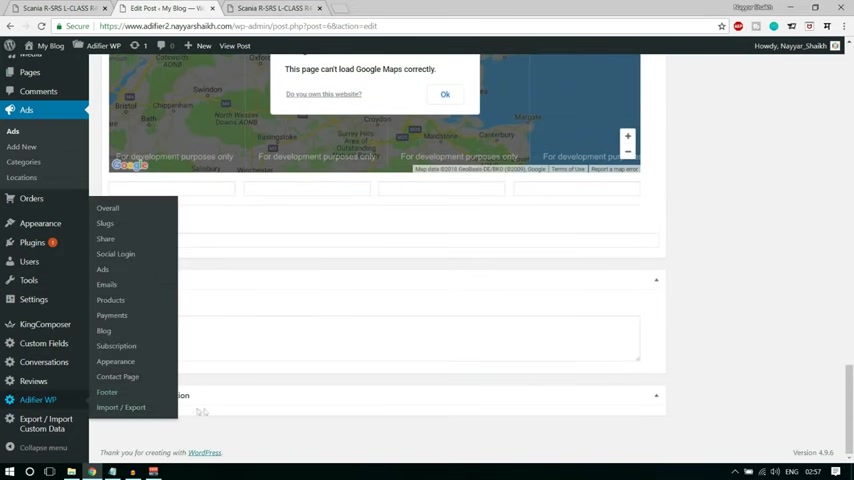
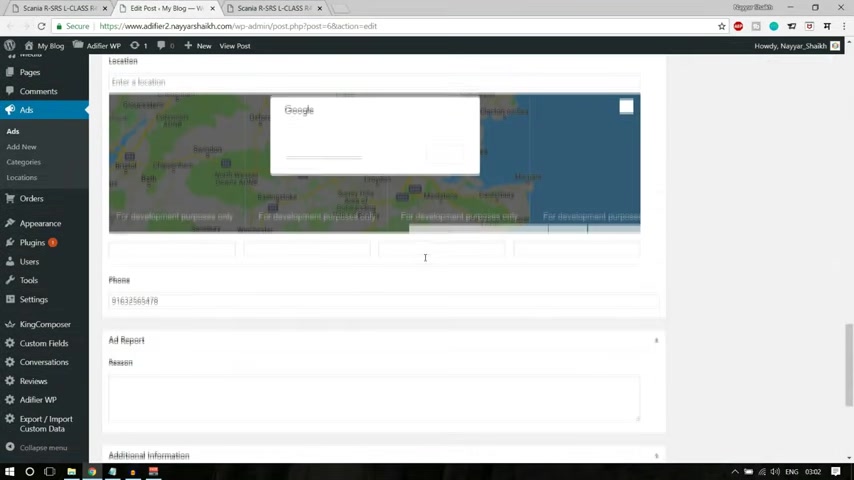
Now , if you see over here , we have this map but here we don't have this map .
We don't have any map and here our map is not working .
OK ?
It says this page can't load a Google map correctly .
OK ?
Because we need something called Google map API for this .
So what you can do , you can open a new tab and type in console dot developers dot google dot com .
All right .
When you click , oh , come over here , what do you have to do ?
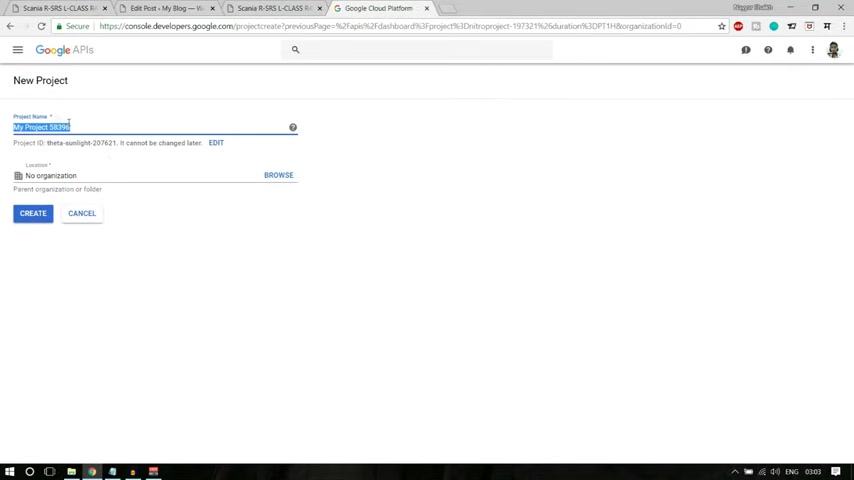
You have to because I have already created so many different projects , you have to create a new project if you're doing this for the first time .
So click on create new project , you can name it anything you want .
OK ?
So by default , it is , it will name something like my project 58396 anything .
OK ?
Select this click on create project .
After that , you have to enable API S and services .
So click on enable A P and services and you have to enable two A P .
The first one is this one maps , javascript A P .
If you don't find this , just type in over your map , you'll see this map , javascript API uh open this and by default , it is enabled .
But for if you're doing this for the first time , it will not be enabled for you .
So you'll see one button over here which says enable , click on that button and after that again , come back and let's add a new one or geolocation .
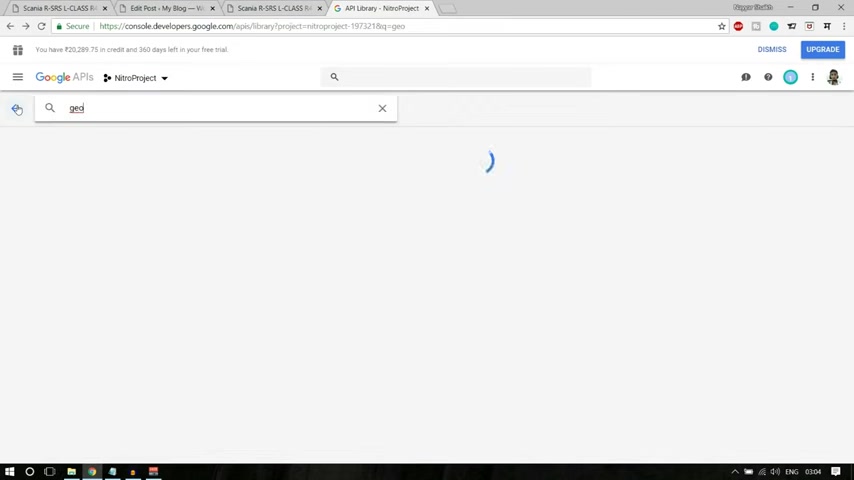
OK ?
Let me search for that .
If you don't see what you are .
Again , search for it , geolocation here we have geo location API , click on this again , you have to enable this one .
This is also enabled for me .
But for you , if you're doing it for the first time , it will not be enabled .
You will see enable button over here , click on enable and come back .
OK ?
So we have to come back to your dashboard .
OK ?
Over here .
Now , after you enable that you have to create an API , so go to credentials .
OK ?
And uh obviously I already have some API S created over here , but you won't have these things .
So what do you have to do ?
You have to create this , click on over here , create credentials and select API key .
This is your API key .
OK ?
So you can just copy this API key from here and paste it on your website .
And before doing that , what do you have to do ?
You have to come over here domain verification and you have to verify your domain .
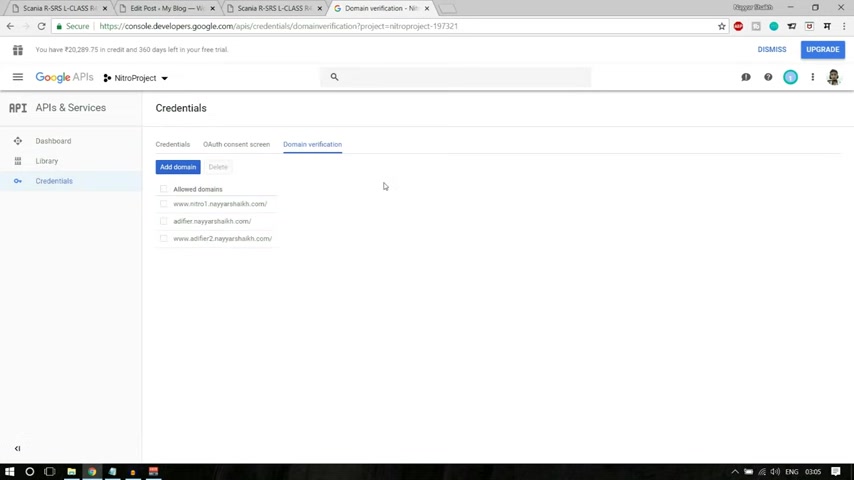
For example , if you see , oh here I have already verified my domains .
But if your domain is not verified what you can do , you can click on add domain and you can paste in your domain name .
So copy your domain name from your past in your domain name , click on add domain .
And for me it is automatically done because I have already done that .
But let me show you what happens if it is not done because that will help you .
OK ?
So let me delete these things .
Click on , delete .
All right , for some reason , I don't know .
It is automatically verifying it , but this does not happen .
OK ?
Let me show you these steps .
By the way , let me add some really some different domain which I don't even know .
OK ?
So I'm putting a 53 dot dot com and this domain doesn't actually exist .
OK ?
So let me put this , suppose you're putting your domain name over here .
Now let's click on add domain .
Now it will uh for you , it will say something like this , verify ownership .
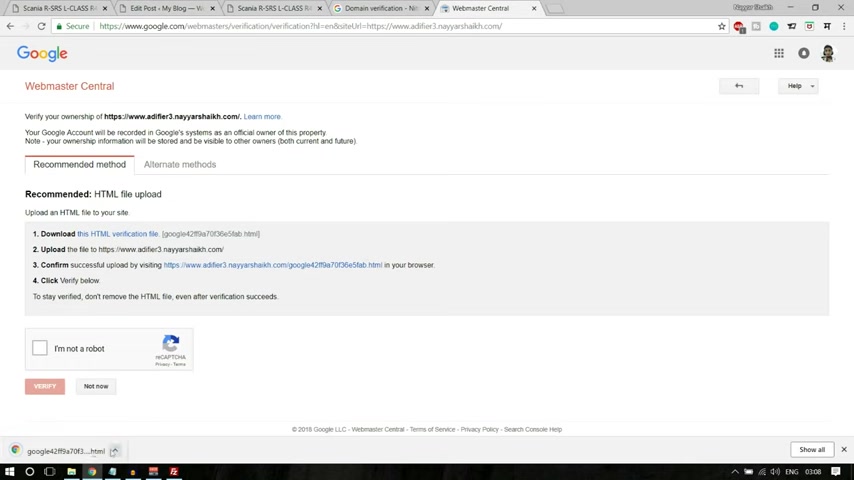
You have to click on , take me there .
Now again , you have to click on add property and you have to put in your domain name or your , whatever your domain name is .
Click on continue .
OK ?
Now we have , you'll get this file , download this file , click on this link and you will download one this file STML file and you have to upload this file on your website folder .
OK ?
So let me do a show you how you can do so open file and let me search for that file .
Here is the file uh where is that gone ?
Here it is Google file .
You have to upload this file on your website folder .
So when you open files , you'll see different folders for different purposes .
For example , for my website , you have this folder I 52 dot dot com .
You simply have to drag this file from here to this folder , your website folder , ok .
It will say process finished , transfer , finished , which is fine .
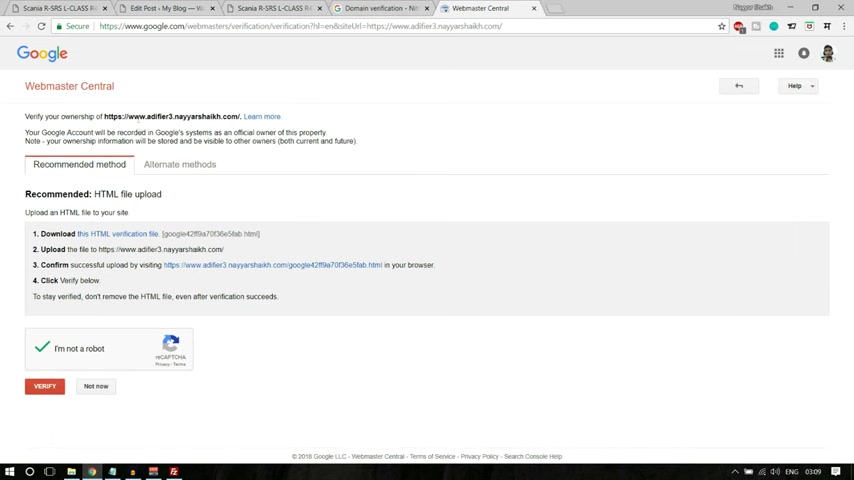
Now , once you are done with this , you can click on , I'm not a robot and click on verify and it will verify your domain .
Then after that you have to cut this thing .
Now , I am not verifying because this domain doesn't exist .
I am just showing you how you can do this .
After that , you can , you have to come over here and paste in your domain and this time it will accept your domain .
OK ?
So this is how it is done .
Now , once you're done with this , go to credentials and copy the link from here .
Let me delete this one .
OK ?
So copy this API code from here , come to your website .
OK ?
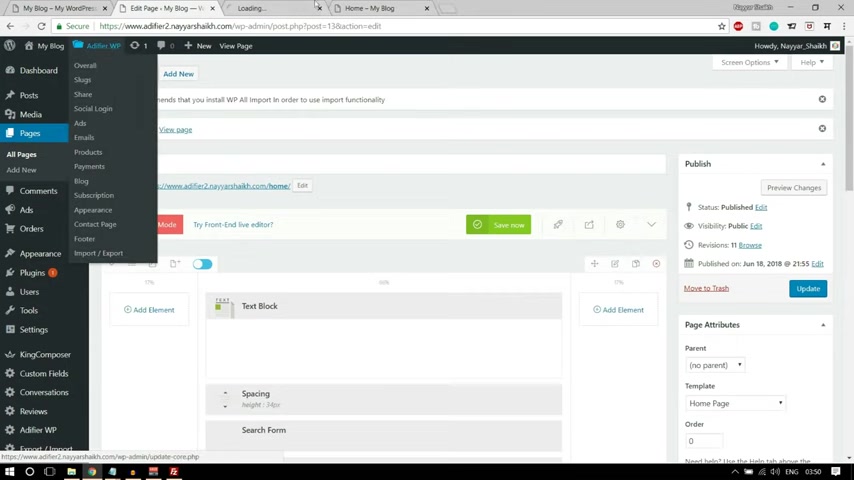
Click on visual add five WP at the top options .
Now we have to paste in this thing .
OK ?
So you can go to contact page and at the bottom in the contact page , you'll see Google API key , paste in the API key over here and click on save changes .
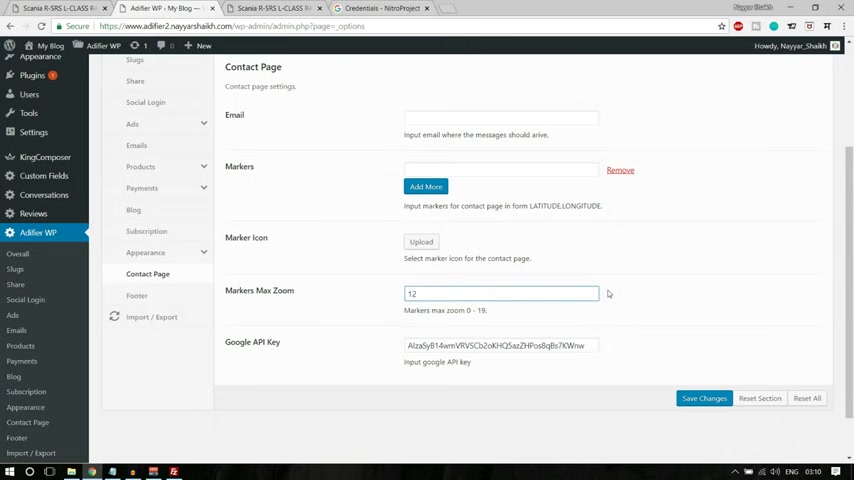
You have some more options over your marker max zoom .
You can put 0 to 19 .
So I don't , I would recommend you something like between 12 to 15 like the zoom .
How much you want the map to be zoomed in .
So if you increase the number , the map will be more zoomed .
If you decrease the number , it will be less zoomed .
OK ?
Now , we can upload a marker I can and some different markers from here .
And you can also put in this page over here .
But we'll see these options later on when we create the contact page .
OK ?
For now , this is enough and only API and Mac Zoom is enough for us .
OK ?
Now let me cut this thing again and let's again , edit this post in a new tab .
Let's see what happens .
Now , let's scroll down .
OK ?
Finally , we have the map showing up over here .
Now we can use this map .
It's really simple .
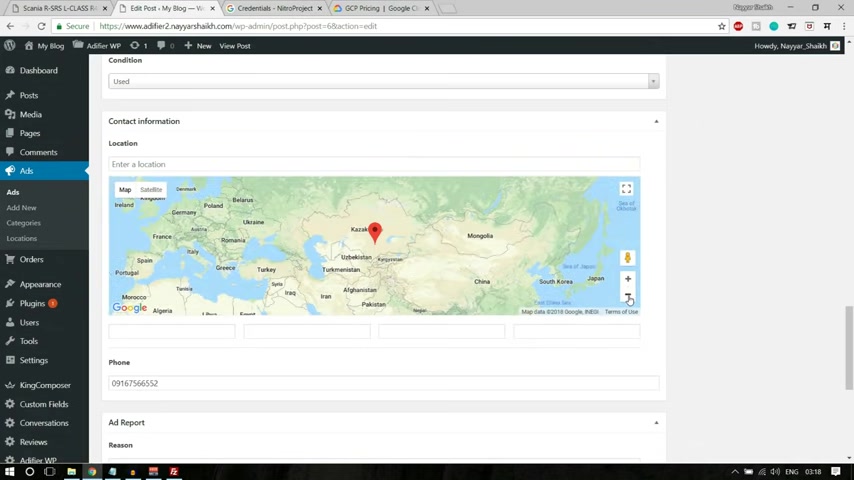
So I suppose if you want to add some new location , what you can do is so you can zoom out from here and suppose I want this in Mumbai so I can drag this thing over here .
Put it over here .
I can just zoom in a bit again , put this marker uh in Mumbai .
Here it is here is Mumbai , OK ?
You can put marker wherever you want , you can again zoom in .
And if you want to specify more where in Mumbai , you can just , you know , just repeat the process .
OK ?
What you want , for example here near BKC Bandra Kla Complex , I'll select this one .
OK ?
Fine .
So I think this map is looking perfect .
Now , let me do one thing .
Let me update this .
OK .
Let's leave this post in a new tab .
Let's scroll down now , as you can see , we have this map showing and we have this marker near BKC .
OK ?
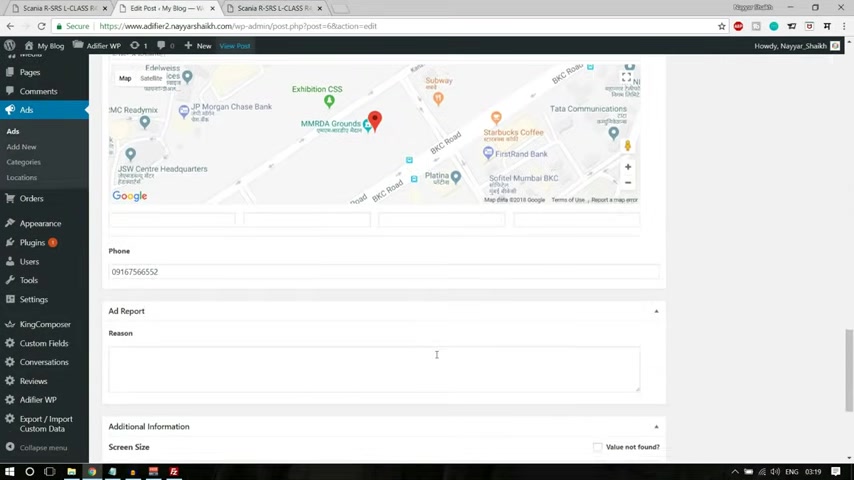
So this map is also working with this .
Uh This is how you create and add , this is how you create a map .
And this is how you do all these additional options .
OK ?
Additional informations .
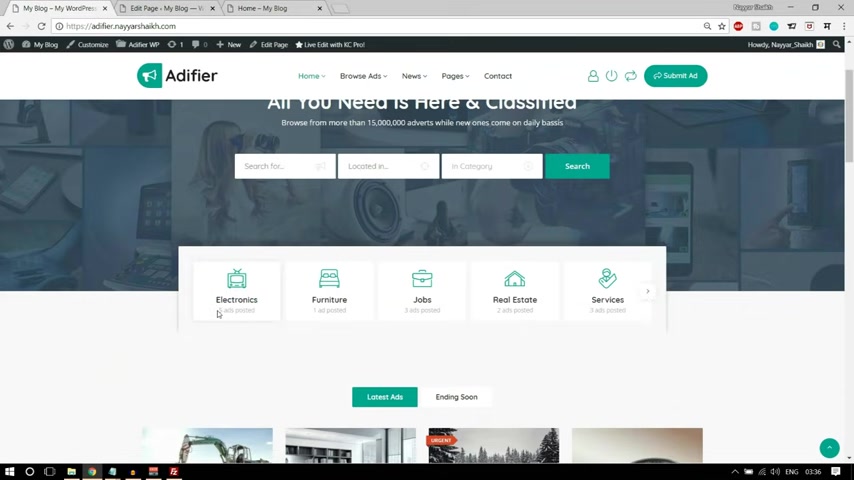
Now , after creating the ads , let's start creating the home page .
Let's see how it looks .
All right .
So this is how our home page is looking at present .
Let's start creating this page .
But before that , what we will do is because if you see oh you are in the categories , these icons are used .
So let's see one .
Let's let us also add icons to our categories .
So under ads you'll see categories , click on categories .
Now here we have technology and we have computers .
So let's select technology .
Let's click on edit .
OK .
When you scroll down , you have category image , category marker , category I can .
So let's select some image for category .
So let me upload file and let me select , OK , maybe let's let's select this one .
OK .
Suppose I want this image as the category image .
So I can select this thing .
Now click on select , then we have category marker , you can select this click on upload file , select files and this is the marker .
OK ?
For electronics looking good .
Let's let me open this .
Now , I'll explain to you in a moment how you can create these markers , different markers .
OK .
So this is how it is looking .
Let let us add category , I can select this thing .
Let's select this one .
Click on open , OK ?
Click on , select , click on update again .
Let's come back to categories and let's do the same with computer category .
Select the image .
Let us select the same image because they fall under the same category .
Then we have the marker over here .
Then we have the category I can let me select this .
OK .
Click on update .
Now it is very easy to create these things .
Now let me show you how you can create this .
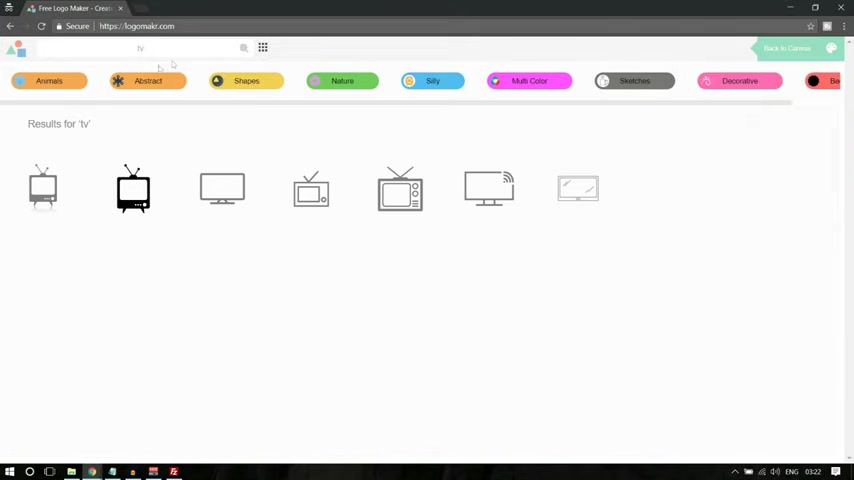
Let me open this in a new in cognitive window , open a new tab and type in logo maker logo ma Kr dot com .
Now you are suppose you want to add a category I can for television .
So you can just type in television or TV , or you'll get so many different icons .
So I think this is looking better , we can select this one .
You can change the color to anything you want .
You can decrease or increase the size .
And I would recommend you to keep size of around 55 pixels of width .
OK ?
Which should be 55 55 pixels , select this thing .
Now after that , you have to crop this .
So at the bottom right corner , you'll see this crop icon , select this thing and save this icon .
OK .
Download in high resolution .
No , we don't want to do that .
We want to download it for free .
So download and agree to give credit and you have your logo audio and you can use this thing .
So this is how you create an icon .
And let me show you how you can create a marker .
So let me reload this .
Ok ?
Let me cancel this .
So first we'll have to select a marker .
So let me select a marker from here .
And uh there are many different markers .
I think this is looking better .
Let's select this one .
Let's change the color to blue and let's copy this color code from here so that we can have same colors .
So copy this color code from here .
You can see this color over here .
Now let me add a shape , a circle .
OK ?
And let's make this circle white , OK ?
Like this , bring this circle over here , decrease the size of the circle .
Bring it over here .
Let's increase the size to yeah , something like this looking .
Perfect .
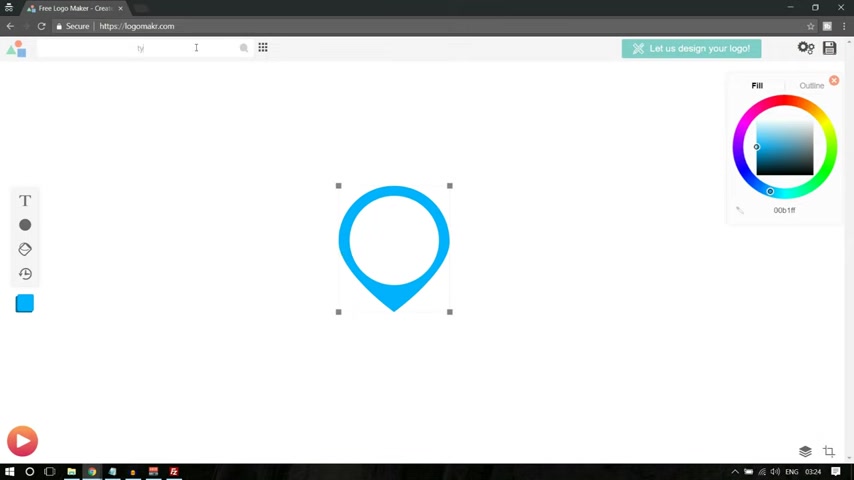
So we have a marker and in this marker , we want the television , I can .
So again , let me search for TV .
Let's select the same one and let's paste in the code over here so that we have the same color .
Let's decrease the size and so easily you can see we have created a marker .
Now what you can do .
You can select everything using your mouse and you can decrease the size again to 55 pixels of width and repeat the same process .
Go to crop , crop this image and save this file .
OK ?
Save this logo .
So this is how easy it is to create these kind of logos , OK ?
This marker and these icons .
This is how I have created them .
OK ?
Now click on update .
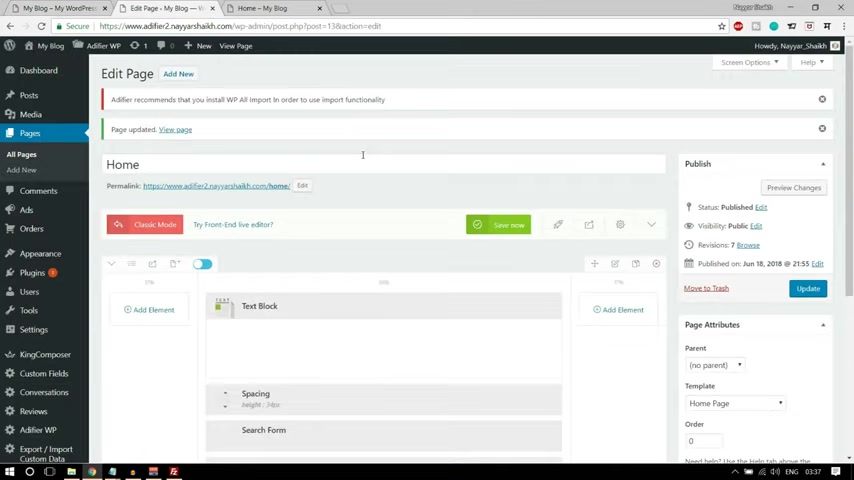
Now we are ready to start creating our home page .
Let's see how we can do that .
First have our pages and click on add new .
Let's give it a title of home because we are creating a home page .
Now , let's click on publish .
Let's cut this thing .
Let's leave this page in a new tab .
Let's see how it looks .
And if you see over here , this is now not how I want my page to be .
We don't want any sidebar in anything here .
We don't have any sidebar as such .
So what we can do here from the templates , you can select home page , OK ?
From the template , select home page .
Click on update again .
Let's refresh this .
Now , as you can see , we have a blank page which is awesome .
OK ?
Now what we can do is we can start adding all these things .
So let's see how we can do that .
So to do so I click on this button which says edit with King Composer .
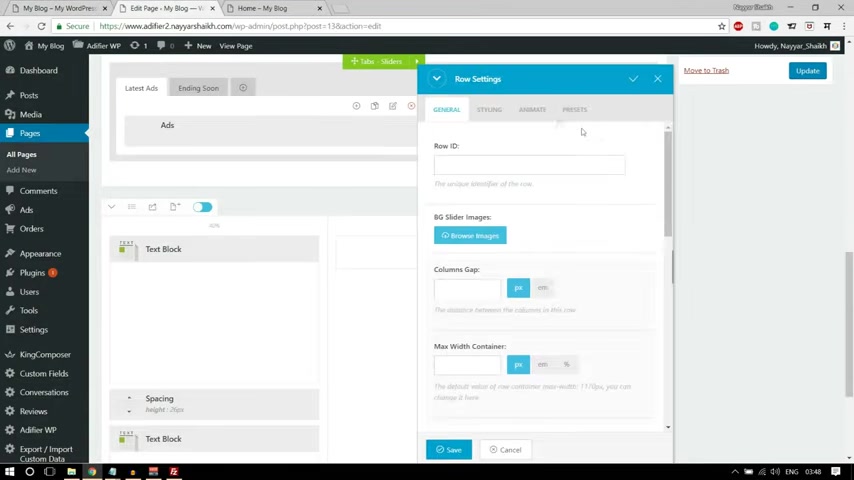
Now we have a blank page .
Let's start adding all these things .
So first we need a new column over here .
So we have this thing .
So your column , one column , two column , three and four columns , we want one single column .
So let's add this one .
And if you notice one thing , we have some gap at both left and right side , you can see the thing , everything starts from here and we have a nice amount of gap at left and right .
So what we can do is if you want to add some gap , you can click over here .
How your set number of columns for this row ?
Click on .
Oh , here .
And you can specify a number of columns you want .
So we want three columns .
But if you see when you select three columns , all the columns are of equal size , we don't want that .
We want little gap from both the side and we want more gap or maybe the column should be bigger in the , in the middle .
OK ?
So what we can do again ho here and click on set number of columns .
And in the example here in the input type in 17% plus 67% plus 17% .
OK ?
Click on apply .
OK , sorry .
I think we have to make it 66 make it 66 .
Click on apply .
Now we can see we have 17% gap from both side and we have 66 person column in the middle .
And in this column , we have to uh type in this thing .
OK ?
Whatever it is , all your , all you need is your and classified browse more than 15,000 or maybe 15 million adverts with whatever it is .
OK ?
We have to type this thing .
So what you can do for this , we have to add an element .
So click on add element and we have to search for something called text block .
So search for this and you'll see this one , select it and paste it whatever you want .
OK ?
Whatever you want , you just have to paste it over here and click on save .
OK ?
Now click on update .
Let's come over here .
Let's refresh this page .
You'll see your text is showing up over here .
OK ?
But this is all right .
That's why we cannot see it .
So let's do one thing .
Let's add this background image so that we can see this text .

So let's do one thing .
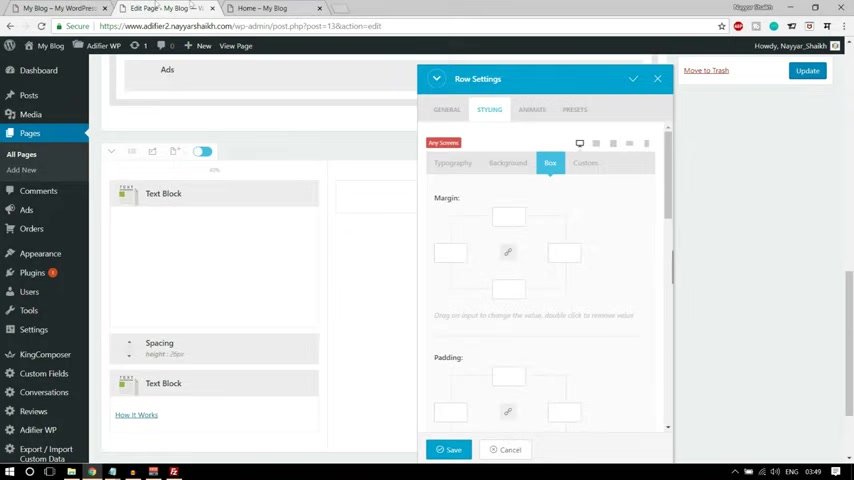
Let's come over here and you'll see this is a section .
When you have all this pencil button , it says section setting , click on section , a section setting , go to styling and go to box and here when you scroll down , you'll see not box , you have to go to background and make this thing on , OK ?
Make advanced background on and we have to add an image in the background .
So select this and select background image .
Now let's upload the image and I think this is the one BG blue , select this thing .
Click on open .
Now , select this one , you can select the size of the image .
So I'm selecting full size .
Click on , select again , it will ask you .
Oh yeah .
Make sure you select the full size .
OK .
Now , do you want to repeat it ?
No , no repeat uh border background position .
I think it it should be center background attachment scroll or fixed .
Now , if you see this one is fixed , if you notice one thing when you scroll up or down , the image remains at the same place .
Whereas when you come over here , the image also , you know scrolls with when we scroll the page .
OK ?
So this one is fixed .
So we'll select fixed over a year and background size .
We have to select cover .
Now click on save , OK ?
Now click on update again , come back away .
Let's refresh it .
OK ?
So we have this thing over here but I understand we have some problem over here .
We can fix this thing .
First , let's edit this element .
We have some problem over here .
Let me just copy it and paste it over here .
OK ?
Let me copy it from here again and paste it over here .
OK ?
Now this is looking better .
So let's make everything center align .
OK ?
We have this everything is center align .

Now let's go to text and here we have style is equal to text .
OK ?
What you can do ?
You can go to this file , you have download this file , CS S file , OK ?
Open this CS S file and we have four different five different CS S .
The number one is style and in style , we have this much copy .
This much style is equal to color whatever it is .
Come back over here and here , paste in this thing , OK ?
After H one , you can see in the screen paste in this thing .
Again , after P paste in this same thing style is equal to color whatever it is .
OK ?
Now click on save , this will solve the problem .
OK ?
Now we need some gap at top and bottom .
OK ?
As you can see , we have some gap at top , we have some gap at bottom .
So let's do that .
So again , click on this pencil button section setting , go to styling and this time we have to go to box .
So first thing what we have to do , if you see we have some extra gap over here , we have to delete this gap .
OK ?
We don't want this extra gap first , OK ?
And after that , we want some gap at top and bottom .
OK ?
So there are two different things .
One is margin , one is padding , we have to make it minus 90 .
OK .
The margin should be OK .
Put 90 before 90 put a minus sign or maybe let's put a complete 100 pixels that would be better .
So just type in 100 pixels and put a minus sign before that .
OK .
Now we have padding .
So put 200 pixels top and 200 pixels bottom .
Now click on save , click on update and let's again , refresh this page .
Now , as you can see , this is looking much better .
We have these 200 pixels padding at top 200 pixels padding at bottom .
And that extra gap was that we have minus that we have deleted that .
OK ?
And I think we have to make these things center align .

Let's see .
Select this thing , select everything , make it center align .
OK ?
Click on save again , click on update .
Come back over here .
Let's refresh it .
OK ?
Everything is center line looking perfect .
Now , after that , we have this form and before this form , if you see after this text and be be between this text and this form , we have a little bit of gap .
So let's add some gap over here .
And after that , let's add this search form .
OK ?
So to add a gap , what you can do , you can click on this button to add a new element and search for separator or I think spacing , search for spacing .
Here it is now we can increase the height whatever we want .
So I want something like 34 35 .
So select 35 0 Here , click on save .
OK ?
Now again , click on this plus button to add an element and search for search form .
OK ?
Here it is search form .
Select this and style .
Let's make it normal , click on save , click on update .
Come back over here .
Let's refresh it .
OK ?
So we have the text , we have the image in the background and we also have this form , search form .
OK ?
This is looking beautiful .
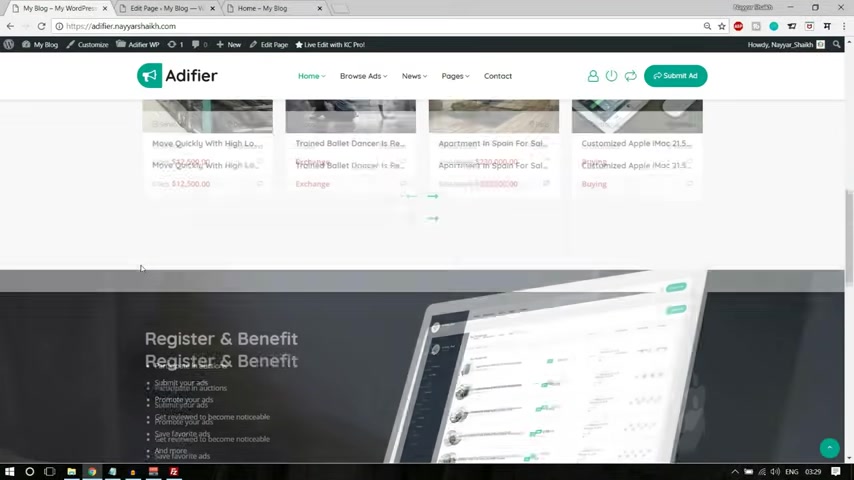
Now , after that , we have to start creating this section .
OK ?
And I'll show you how we can make this section like this because if you see this section is half on this background and half below .
So this is a very simple trick .
Again , we have to use the margin .
I'll show you how to do that .
OK ?
First come over here , first , let , let me do one thing if you see , oh here we have some gap below this thing .
OK ?
Below this search bar .
Also we have some gaps .
So what I'll do is I'll copy this spacing from here .
I'll have oh here and double this element or duplicate this element and I'll bring this element below this search form .
OK ?
So this will add some spacing below this search form as well .
Now let's start creating this one .
OK ?
This column .
So come back over here .
Now let's select this same thing again , uh add a single column .
And here also if you see we have some gap at top left and right , and we have the thing in the middle .
So what I'll do is I'll have over here and click on set number of columns and I'll type in 8% plus I think 83% plus 8% .
Again , let's click on apply .
Yeah , we have 8% gap from both sides and we have 83% in the middle where all these things will come .
OK ?
So let's come over here now because we want to add categories over here .
Let's add uh element and let's search for categories , select these thing , categories and style .
We want top icon because here if you see the icon is at the top , then we have the title and the number of ads .
OK ?
So we want style top icon .
We want to show the number of ads .

Yes , because here also it is showing if you see at the bottom five ads , one ads , OK ?
Uh showing slider .
Yes , we want to show in slider visible item .
If you see a time , 12345 categories are visible at a time and we can use this slider .
OK ?
So I'll type five visible double row .
No , we want a single row and max image with put 40 pixels over here and name font size 16 pixels and count font size maybe 12 or 13 pixels will be fine .
Now I can bottom margin .
Let's put five pixels and box padding , 15 pixels .
OK ?
So this is this setting which I have used over here .
If you want the exact same thing , you can also use the same settings .
OK ?
Item links to search make it .
Yes and click on save .
Let's click on update .
Let's see how it looks .
Come back over here .
Let's refresh it .
OK ?
If you see Oyo , this is how it is looking .
OK ?
We have this thing o here .
Now what we have to do , we have to do some changes .
If you see here , everything , there is some background color , there is some shadow and this section is moved up a little bit .
So let's see how we can do .
So , very easy to do what you can do this time .
You have to select this column , OK ?
Select the column , this category column , select this pencil button , click on this pencil button , go to styling and go to box first to go to background because we have to change the background color over here .
We have some uh light gray background color if you see over here .
So go come over here , select the color and type in F eight F eight F eight , OK .
Type in that you can just type in and come to box .
Now we need to move this thing , this thing at the top .
So similarly , which we have done in the previous section we have to use minus over here because we want to move this thing .
OK ?
So I'll type in minus 90 pixels .

So and padding if you see there is some gap between this box and all these corners , OK ?
So let's add some padding top and bottom , you can add maybe 23 padding , 23 pixels and left and right .
We can add maybe 20 pixels .
OK ?
Fine .
Now let's scroll down and border radius .
For top two , you can just put two pixels and box shadow .
You have to put something over here .
What you can do , you can go to this CS S thing .
You have this shadow thing , copy everything till here , OK ?
From zero to till here , copy it .
Come over here and paste it over here .
This will give this light shadow .
If you could see uh on this column , this light shadow , this will give that .
Now click on save , let's click on update .
Come back over here .
Let's refresh it .
OK ?
Now we can see this is looking really amazing .
OK ?
This is looking nice .
We have this thing and this is a slider .
As you can see we can move it using our mouse .
Now , after that , we have to add these tabs .
OK ?
Very easy to do again .
But before that , we have to add some more gap below between this thing and between this tab .
OK ?
So let's do that first .
Let's add a new column , a new column from yours .
So let's select this one , add one single column .
And this time we don't need any gap from left and right .
Because this is the basic gap if you see uh this gap is the basic gap .
So we don't need to add some extra gap from left and right .
It will be a very simple column .
Now , we have to use uh we have to install or insert these tabs .
OK ?
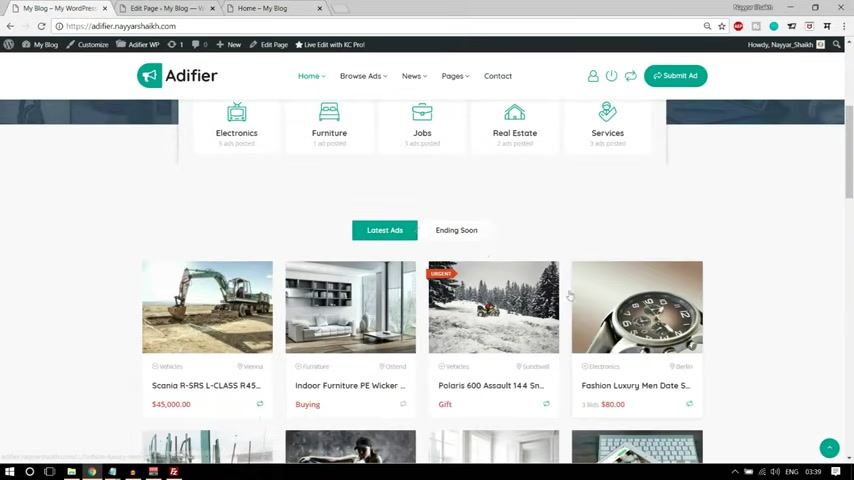
So click on add element and let's search for tabs and select this one tabs sliders .
OK ?
First , we need to change the title here .
It says latest adds and ending soon .
So first let's add latest ads so we can do one thing .
I think we have to change it from here .
OK ?
Select this thing how here and click on this edit button and uh not this , I guess I think over here .
Yeah , select this thing .
OK ?
Select this pencil button and click on this and we have to change the title from here .
So first one is latest adds .
Let's put latest ads , click on save .
And in this , we have to add elements and we have to add adds .
OK ?
Select these element adds and select it .
Now , which ad do you want to add and what should be this style ?
So style should be good , which is fine and we have to show in slider and visible item if you see 1234 , OK ?
And we have one more column , one , we have two more rows .
So one row contains four and the other row contains four .
So total eight .
OK ?
So we want to show eight items and we do want double row because as you can see , we have two rows over here an item in row one which is fine .
OK ?
So click on save .
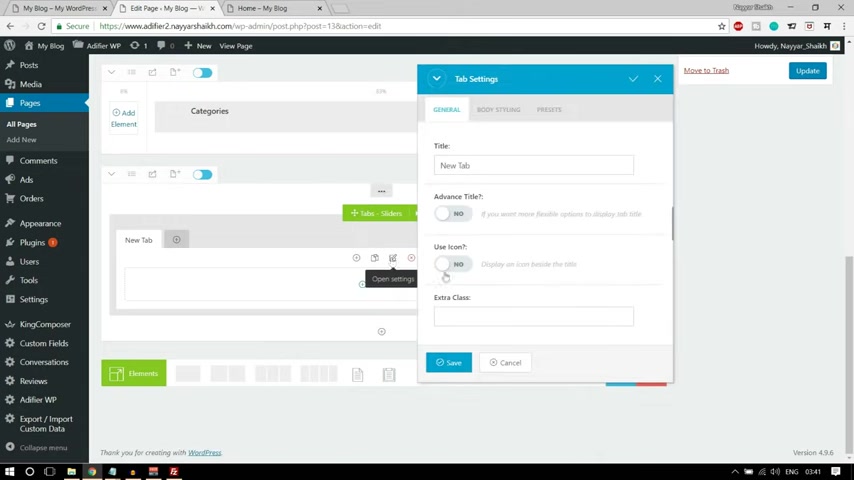
Now , similarly , we have to add one more tab from here .
OK ?
So click on this add button again , click on this pencil button to change .
And this time let's change the title to ending soon .
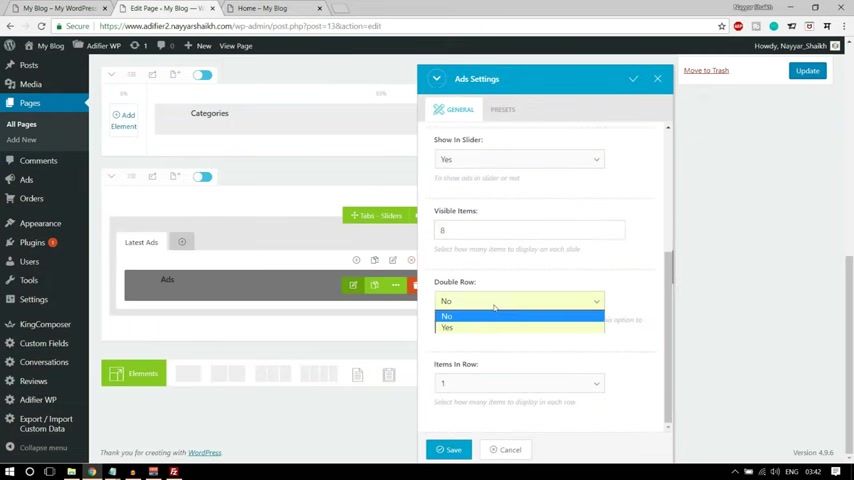
Click on this , click on this add element again , insert adds and uh you can just uh add source , you can select by category by the way .
OK ?
And you can order by this is ordering by expire .
OK ?
The one which is expiring soon because it is ending soon .
OK ?
And rest everything is fine .
Show in slider yes , visible item again , eight and double row , yes and item in row one here .
Also we have to do the same thing .
We have forgotten that latest ads , Kamo edit this ad and add source by category .
OK ?
And you can select a specific category if you want an order by because we want the latest added the first at the top we want by date .
OK ?
And we want the descending because the latest , the last add uh the last date which is added should be at the top .
OK ?
So by date descending rest , everything should be fine .
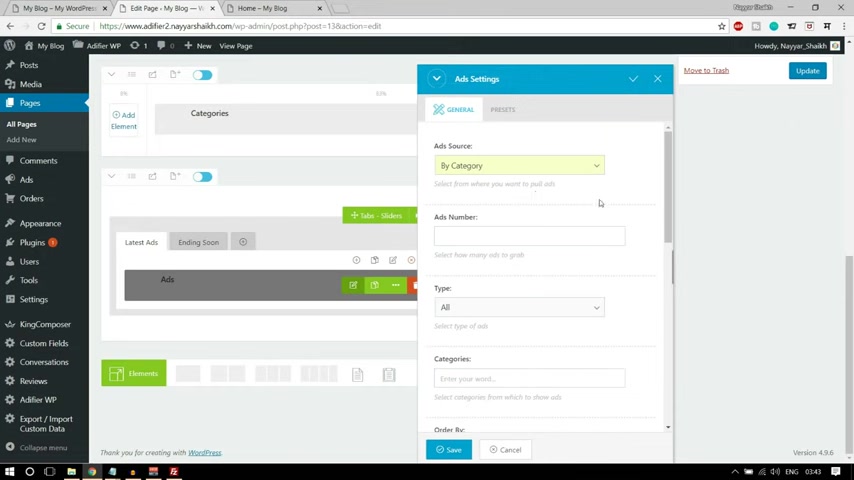
Let's save and let's update this page .
Let's come over here , let's refresh it .
OK ?
So we have OK ?
I think right ?
This is showing very small .
I think we have to increase , decrease that 8 to 4 .
Rest everything is looking fine and we have to add some gap at the top .
So two things are left first , let's make it four .
So again , edit this element and visible item .
Let's make it four .
OK .
Now go to section settings , styling box and let's add a padding of maybe 100 pixels .
Top , click on save , click on update .
Come over here .
Let's refresh it .
OK ?
So we have some gap at the top and this is looking perfect .
This is a slider as you can see .
OK ?
So we have this section as well .
Now , after this , we have this beautiful and very simple section .
Let's see how we can do this .
Come over here again , click on this .
Uh Now we have to click on this 12 columns .
OK ?
So select this 12 columns we have and this column if you see this column is quite smaller as compared to this column .
OK ?
So instead of 50 50 what we can do , we can click over here and maybe let's make it 40 60 OK ?
40% plus 60% .
Click on apply .
OK ?
Now let's add this simple text to a year .
OK ?

Copy this simple text from your click on add element and select this text block and let's paste everything over here .
Let's paste it .
OK ?
So we have this thing .
Now again , you can go to uh this text and after this H two , you can paste in that thing .
This thing style is equal to color white because we want all the text color white .
OK ?
So you can , after the H two , you can paste this thing .
OK ?
And click on save now .
OK ?
We have to do this for this as well for UL as well , select this past this same thing style color white , OK ?
But looking better and we have to add this button , OK ?
And between these things and here we have , we have some gap if you see this thing .
And so here , then we have some gap , then we have this button .
So let's add this gap .
Click on this plus button , add element or search for spacing .
Let's add maybe 25 2025 pixels would be better .
Click on save now again , click on plus button , select text block .
Now we have to add this button .
So again , go to your CS S we have this button CS so you copied from here .
OK ?
Copy the button CS S from here , come back over here and go to text section first , delete everything from here .
Go to text section , OK ?
And paste everything under the text section .
Now , if you see you have to do some changes , if you want this button to redirect to some page , for example , here it says how it works page .
So we'll be creating how it work page later on .
So when we create that page , what you have to do , you have to paste that page link over here .
OK ?
Instead of this link http or this link , how it works , we have to paste that page link over here .
OK ?
And if you want , you can change this thing .
It says how it works .
You can change what it says .
OK .
If you see over here , this is how it will look .
Now , click on save and let's add this image in the background .
OK ?
So select this section setting , go to styling background , make it advance , select a background color and let's upload it .
Let's select files .
And I think it is this one , I guess I think we don't have this image .
I think it is this one .
Let's select this like this , not this .
Yeah , this is the one select this thing I think .
Yeah , this is the one select this one click , click on select and make sure highest resolution is selected and again , no repeat , center center .
And this time it is not fixed , it is scroll , so select scroll and background size , select cover .
And after that , we have to add some gap like we did earlier in the first section , we added some padding at top and bottom .
So you also we'll add some margin of maybe 100 pixels at top .
OK ?
Why ?
Because we want uh some gap between this thing OK ?
Between this section that we have just created and this thing .
So this is margin 100 as you can see this is the margin 100 we want some padding , 100 padding .
100 top and bottom .
Ok .
So let's add padding , 100 top and padding , 100 bottom , click on save .
Let's click on update .
Everything should be fine .
Let's click on refresh over here .
Ok .
Everything is looking fine .
We have 100 top 100 bottom padding and we have 100 margin Ohio .
So we are done with this thing as well .
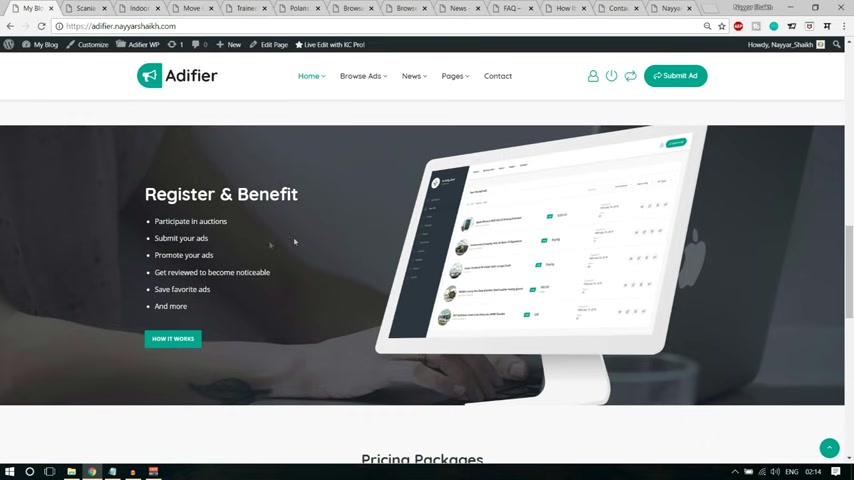
Now we have to create these things , pricing packages again , very easy to create .
Ok .
So what we can do for this , we have to go to these options .
So what I'll do is I'll open this in a new tab .
So let me open these options in a new tab .
Now go to products and here we have pro account payment .
We have to select packages , select packages and free ads .
Now , a number of ads you want to provide for free whenever a person registers .
So maybe one or two ads you can give them as free .
They can post free ads , one or two .
And after that , they will have to purchase different packages .
Ok .
So if you see there are four different packages , bronze , silver , gold , platinum , and they are selling 50 .
If you purchase bronze , you can add 50 ads .
If you purchase this one , you can add 100 ads and so on .
Ok .
So let's create four packages .
Oi here the first one will be bronze .
So let's add bronze .
A number of ads , maybe 50 price .
Let's put ₹50 or $50 whatever you want to put , let's add a new one .
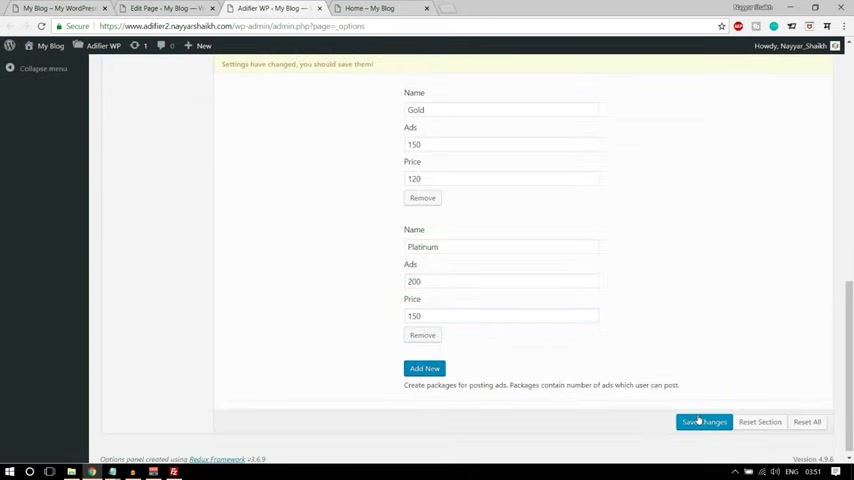
Let this , let us add silver 100 ads and $100 .
Ok ?
Then we have gold and 1 50 ads and maybe 1 $20 .
Then we have platinum , ok ?
200 ads and 1 $50 or 1 ₹50 whatever you want to save over here .
Now , click on save settings or save changes .
All right now again , come back , let's refresh this home page from here and come at the bottom and select this one or maybe not this one because first we'll have to add these things .
OK ?
This simple text .
So copy this text and first let's add a single column , OK ?
Add element , text , block and paste this text over here .
OK ?
Paste it over here .
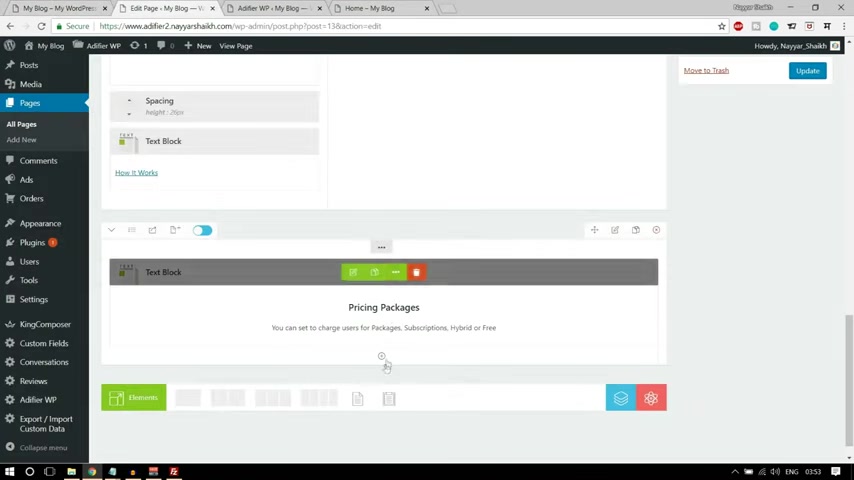
Make everything center line , click on save and below this , we have to add these packages .
So what we can do , we can click on this add element and now we have to select this one row inner .
OK ?
And now we have to divide this into four different columns .
So select this , select four columns , add element .
And I think it is called the price tables .
I think it is called yeah , select bronze and select nonactive , click on save , add element again price table and this time select syllable and make it active .
OK ?
So we have one nonactive , one active , one non active then active .
OK .
Add element price table , OK ?
Again , nonactive , last one price table and this should be platinum and this should be active .
I think I missed gold over here .
So select gold and click on save and we need some gap at the top if you if you see we have some gap over here .
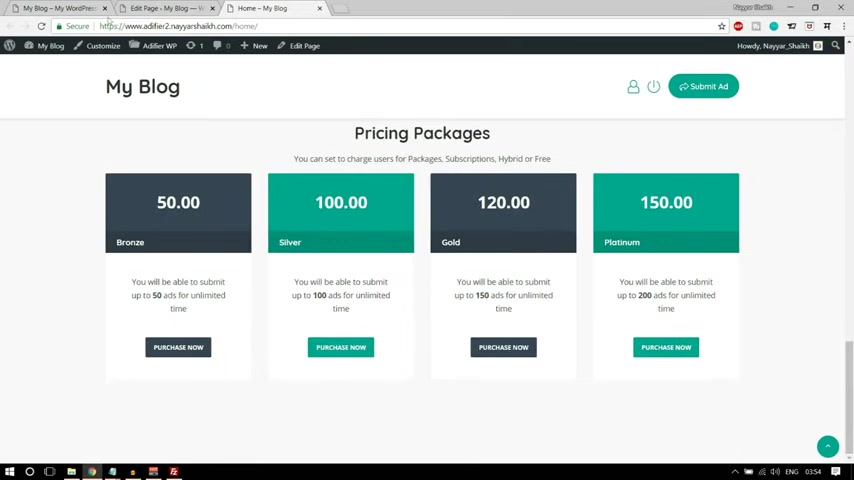
So let's add some gap , select this section setting styling box and let's add maybe I think 70 pixels margin would be fine .
Click on save update .
Now come back over here .
Let's refresh this page .
OK ?
Now we can see we have our packages over here .
OK ?
So this is looking better .
OK ?
So everything is done .
Now home page is done .
We just need to add this section if you see , we don't see this section over here .
Now let me show you how we can enable this section .
Subscribe to newsletter section .
Very easy .
Click on this button .
OK .
First , however , add add five WP and you will see this photo , click on photo and your first one is enable subscription form .
Make it .
Yes , enable photo .
Yes , make it .
Yes .
And we can type in the copyright text .
So again , go to the CS S file and you have this copyright text over here .
You can edit it if you want .
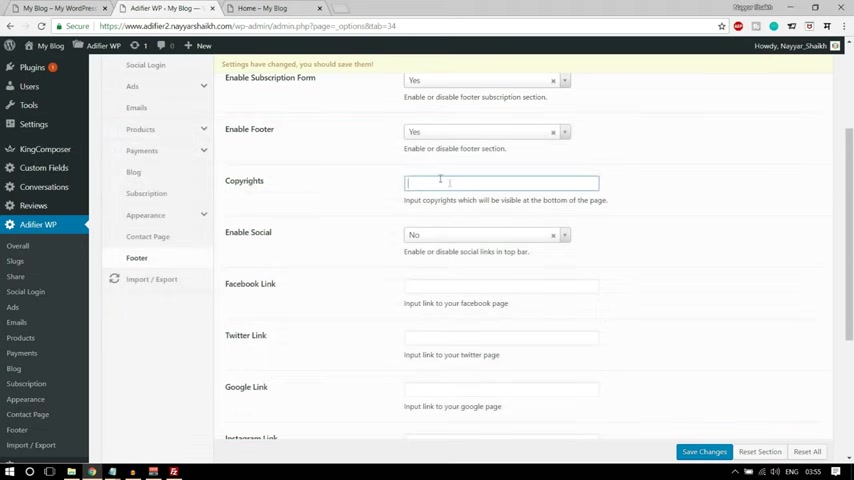
OK , let me OK , fine .
Copy it from your past .
And if instead of a spoon themes , you can type in your name .
For example , a shake crafted by shake , enable social media .
You can make it .
Yes , it will show like this .
OK ?
These are the social media links and you can put in your Facebook , URL , whatever URL you have .
OK ?
Google , Instagram , youtube , Pinterest .
OK ?
Make it uh do it like this ?
Click on save changes again .
Come over here , let's refresh .
Now , we can see we have these things , we have the copyright , we have the social icons and we also have this newsletter thing .
Now , newsletter thing will , will only work if you , if you have mailchimp and all those things .
Ok .
So what first what you can do is uh if you want to learn email marketing for free in detail , free email marketing .
Again , what you can do , you can go to youtube because here we , we don't have so much time to learn email marketing .
We'll just see how to set up that .
And again , you can go to youtube and type in Nay Shak email marketing or mail chimp .
Both things will do .
Ok .
This is the thing , a free email marketing , mail chimp tutorial .
You can watch this one hour long , more than one hour , one or 10 minutes long tutorial on how to do free email marketing .
Very useful video .
Ok , so you , when you do so you'll learn a lot about email marketing .
Ok .
But here we have to just set up .
So what I'll do , I'll just open mail chimp again if you don't know what is mail , what , what does it do ?
Go watch that video .
You will understand everything .
Ok .
But here we are just doing only the core things .
Now , click on login .
All right .
Now , what do we have to do ?
Well , we need two basic things .
First , let's come over here and now click on subscription .
If you see , we need two things API key and list ID .
So if you want to get your API key , click over here and click on profile .
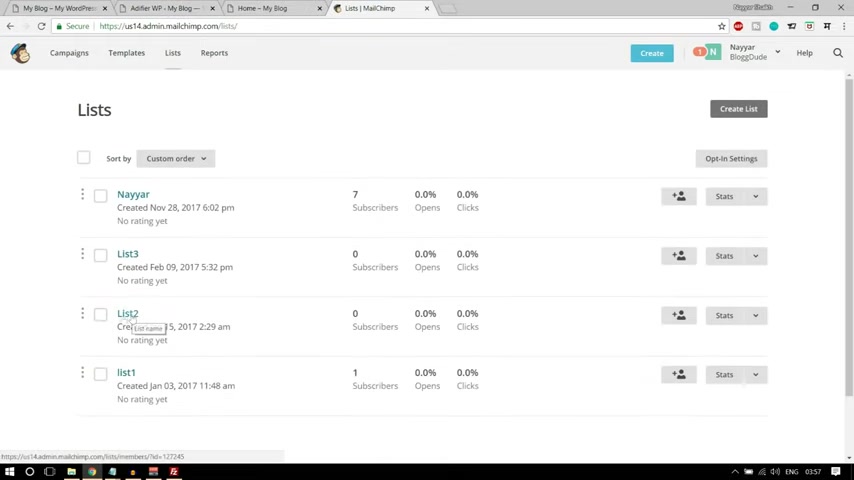
Now , click on extra and click on API key .
Here is your API key .
Copy it from here .
If you don't see your API key , click on this button , create a key .
A key will be created for you copy it from your past it under API key .
Again , come back over here .
Now we need a list ID .
So click on list and I have created different lists here .
I have created several lists .
So here , for example , if I want to select this list , list two , what I'll do is I'll select this thing .
OK ?
And I'll go to settings , scroll down and here we have unique ID for list two , copy it from your paste it over here .
Click on save changes .
OK ?
Now anyone , whenever someone puts in their email address , uh they will be registered to your list number two or whatever list you are using and you can send them your newsletters and all those things .
OK ?
So this is how it works .
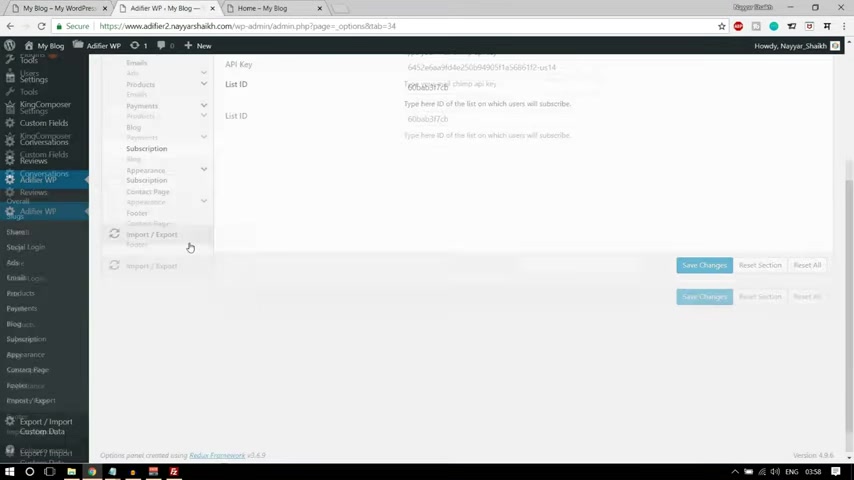
So we are also done with email marketing newsletter .
Now , let's see how to use and how to put all this photo thing .
We have three different photos over here .
So at the first , we have a simple image and we have some text , simple text .
So let me copy this text from here .
Come over here .
And if you want to add these widgets in the photo , very simple from the left hand side have our appearances and click on widgets .
All right .
Now if you see over here , we have this bottom sidebar 123 .
So here we have to put in this thing .
First , we have this image over here .
So first we will need an image visit here .
It is image widget .
Select this , drag it under bottom side bar one and add an image and select the upload the image you have the image over here .
Here it is logo photo , select this , click on open and click on add to visit , save it .
And after that , we have some simple text .
These are some some simple text .
So you'll have to select text from here .
Here it is select text , bring it under bottom side bar one below this thing , image and paste everything over here .
OK ?
Now let me add some gap over here fine .
Now if you see 00 here the color is different .
And for these two , the address and the phone number , the color is white .
So again , very simple , simple thing .
Go over here in the CS S copy .
This style come over here , go to text section and here you have an after UL paste in this style .
OK ?
Here this is how it will look UL paste in this style and click on save .
OK .
Let's come over here , let's refresh this page .
OK ?
We have our logo , we have the text and you can see these two texts are white because we have used that style .
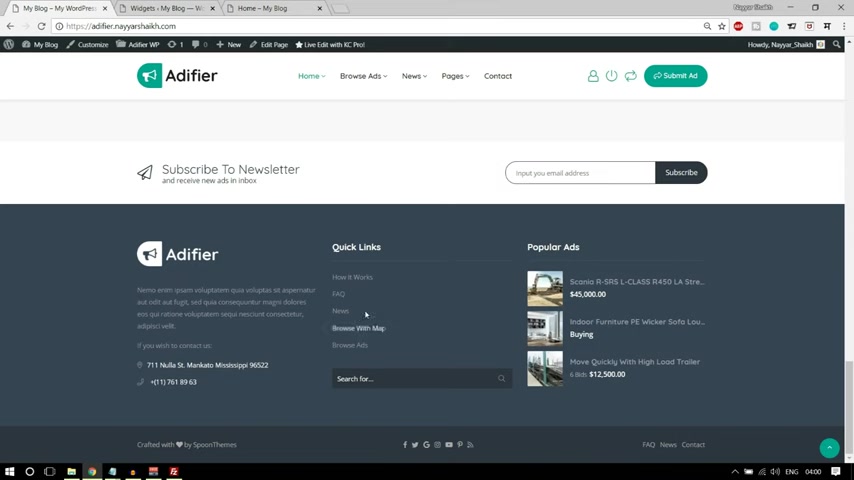
Now , after that , we have these quick links and we have 56 links over here .
These are actually different pages .
How it works is a different page .
Five is a different page .
News , is a different page and so on .
And we have this search bar at the bottom .
So for this first , we'll have to create these five pages and we'll have to convert them into menu and then we can use it over here really easy .
Uh Sounds tricky , but it is really easy .
Let's start creating these pages .
One by one .
Come over here .
Let's open this add new page in a new tab .
First page is how it works .
So let's add this page , how it works .
Don't do anything right now , just click on publish .
Let's add a new one .
Click on add page , fa Q frequently asked questions , page again , click on publish .
Then after that , we have news page , click on add new and type in news , click on publish .
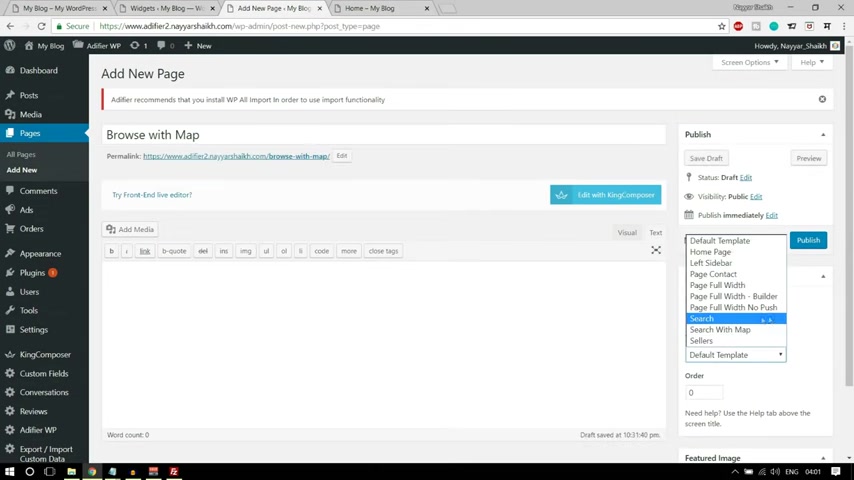
Then we have browse with map and browse adds .
Ok .
So click on add new page and type in browse with map .
And this time don't click on publish .
First , we have to select the template .
Now select this template , search with map .
Ok .
For browse with map , you have to select search with map , click on publish .
Now click on add new page and let's add browse all ads or just browse ads .
OK ?
And this time select this template , I think it is search , I think .
Yeah , that is what it is .
Click on publish and there is one more page which is not mentioned over here , but you'll see that page over here , contact page .
So let's add that page also .
OK .
Click on add new type in contact and from the template , you have this page contact , select this click on publish .
All right .
So we have all our pages over here .
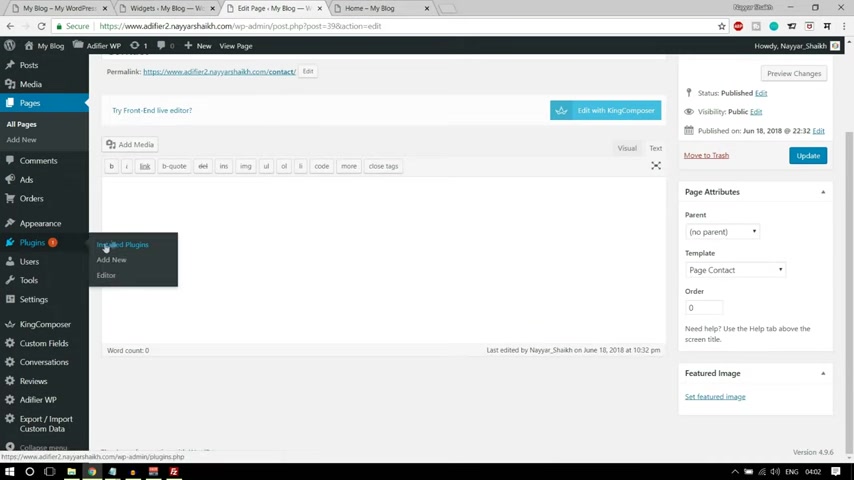
Now we have to create a menu .
OK .
So very easy to do have our appearances and click on menus .
Let's give it a name of a menu .
OK ?
Click on create menu .
OK .
Now let's add whatever you want .
We don't want contact , we want browsed browser map news , fag how it works .
OK .
Add too menu .
You can uh you know , just use this thing and you can , you know , do it like this if you want .
OK , if we want how it works at the top , whatever you want at the top , you can do it according to you save menu .
OK .
Now what we have to do again , come to this widget page and refresh it .
And let's select this thing navigation menu and drag it under bottom sidebar two .
OK .
Here and here .
Select the menu which you have created photo menu and you can give it a title here .
The title is quick links .
OK ?
So let's give the same title .
Click on save .
And after that , we have this search bar .
So let's select this search widget here it is .
Bring it under foot , uh bottom foot , bottom sidebar two .
OK ?
Come over here .
Let's refresh it .
OK ?
We have quick links .
We have this uh sidebar or we have this search bar .
Then we have popular ads .
Very simple .
Again , just simply select uh a file a and bring it under bottom sidebar three and you can give it a title , it says popular ads .
So let's give the same title .
OK ?
Copy it from here .
Paste it number of adds to show maybe three and order by popularity .
Click on save .
Come on here .
Let's refresh it .
OK ?
So we have popular ads .
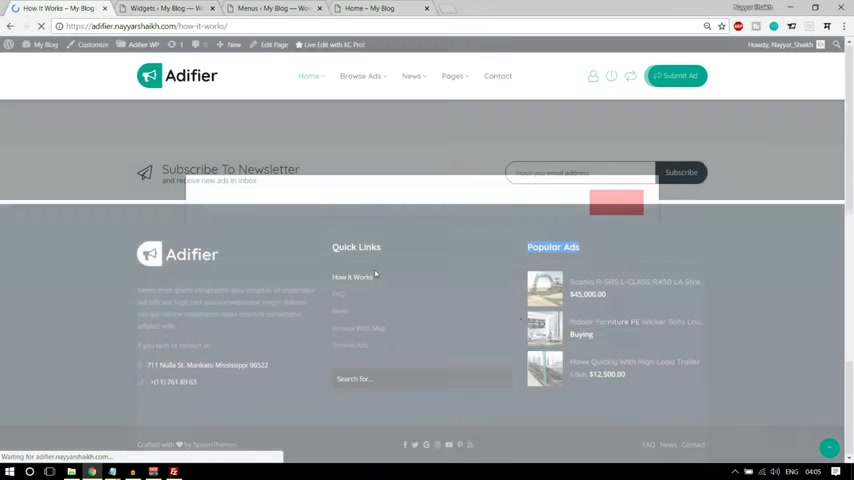
Order by popularity more , more popular and more at the top .
It will be OK .
So by with this , we have completed how to create ads and how to create a home page .
Now , let's start creating different pages .
So first let's work with this one , how it works .
Let's see how this page looks .
So this is how this page is looking .
Now , we have created this page already .
So let's go to that page , click on pages and we have how it works , page , audio , click on edit and let's change the template first .
Let's see how it looks so that you can understand why we changed templates .
OK ?
Let's open this .
OK ?
This is how it looks .
We have this sidebar , we have all these things so we don't want this sidebar .
So that's why we are selecting full width page .
So select this one full width page with no push .
OK ?
Select this , click on update .
Come on , yo , let's refresh it .
Now , as you can see this is full width .
OK ?
Looking better .
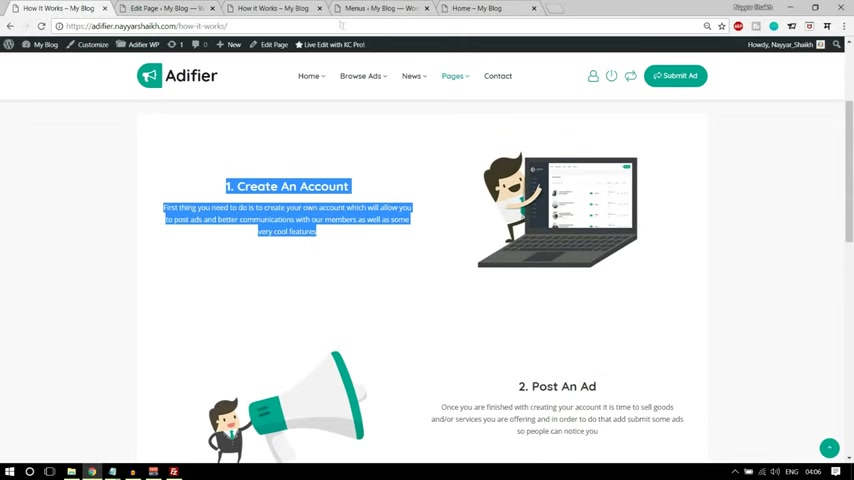
Now edit with a king composer so that we can easily edit using dragon drop .
Now , first thing that we have to do , we have to uh insert this .
Uh We , we need three different rows , 123 and in each row we have two columns , one for text , one for image .
Very simple , very very simple page .
OK ?
So first let's add a two column row .
OK ?
Here it is in the first column , we have to add a text block element , select this thing and paste in your code over here , whatever text you want , click on save .
OK ?
Now select the second one and we want a single image .
So select single image from here , upload the image you want and let's upload and select files .
So you want this one .
And I think we have only oh yeah , we have 233 different images .
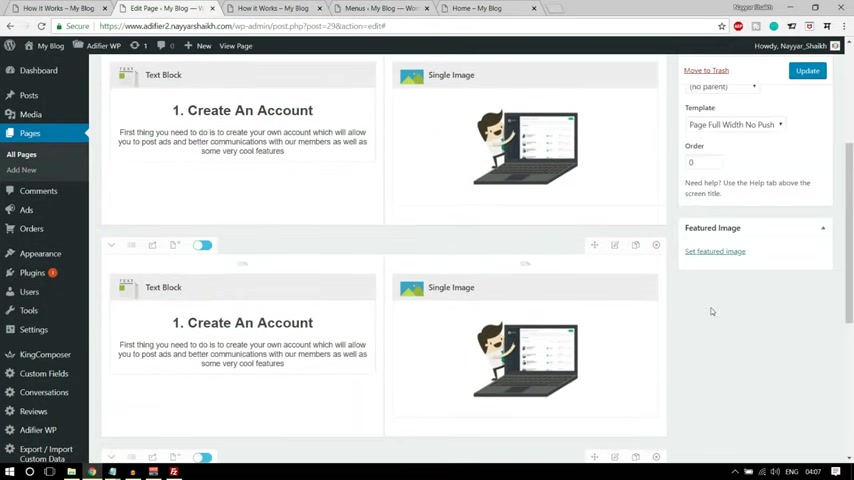
Let's select all click on open and first this is the one select this image and click on .
Select image size is full .
Everything is fine .
Click on .
OK .
Now what I can do is I can simply copy the entire section .
OK .
OK .
Three times .
So we don't have to do most of the things again and again .
Now in this second column or in the second section , what we have , we have the image at the left hand side so we can drag the image over here .
Now let's change the image from instead of this , let's select this one and the text will also change .
Now it says post and add , OK ?
So we can change the text , copy it , select everything and change the ad , make it central line , click on save .
And in the third one , we have some different text .
It says start earning .
OK ?
So select it , select everything from your past it , make it central line , save it and let's change the image as well .
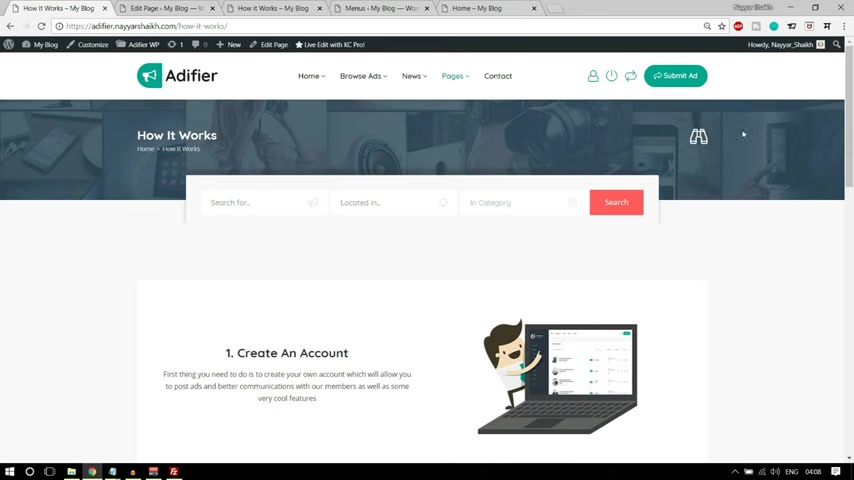
OK ?
This time this image select it , save it .
Let's click on update .
Let's see how it looks .
Let's refresh this page , all right looking better .
But still few things are left .
The first thing if you see the header is totally different over here , we have a beautiful header over here .
We have the search bar , we have bread crumb and everything and here it's all empty .
So first let's do this setting .
Come to your dashboard and how all this added five WP and click on appearances .
All right now under appearances you'll see .
Bread crumbs uh open that and show bread crumbs is on o on No , make it .
Yes .
OK ?
And then we have a show header search .
Make it .
Yes , because this is Breadcrumb .
OK .
This is Breadcrumb and this is header search .
OK ?
This search form which you see .
So we have to make both .
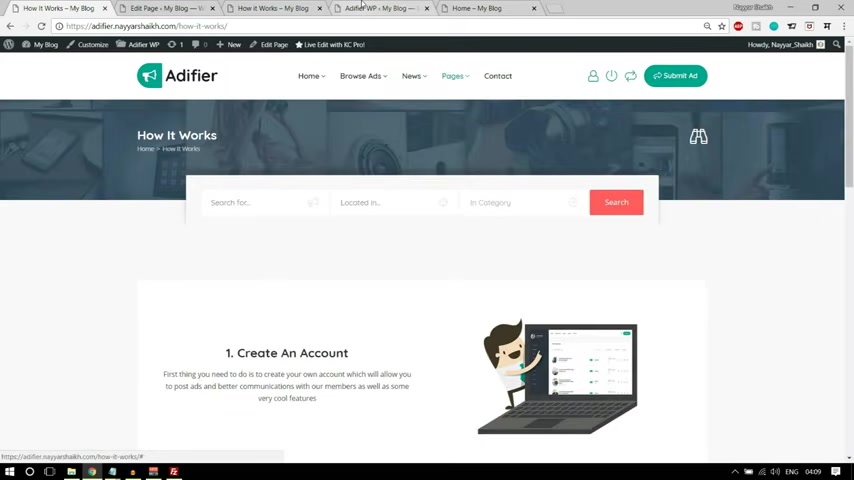
Yes and breco style , we have to style select this one quick search .
I have shown you earlier .
This is the quick search .
When you click on this icon , we get this quick search thing .
OK ?
All right .
Background color can be anything and we can upload a background image like we have a background image over here .
So let's do that .
Upload an image , select files , search , select files and select this one BG two .
Open it .
Now click on select , click on save changes again .
Come back over here .
Let's refresh it .
All right looking .
Perfect .
OK .
Now there are again a few things left .
If you see we need some gap at top because if you see oh here the text is in the middle uh with this image and here we don't have that .
OK ?
So let's do that very simple .
You can select this uh this setting , this single column .
OK .

Uh where we have the text textbook edit this element , go to styling , go to box and you can add some padding or margin at the top .
Both will do .
Ok .
So I'll add some padding .
I think 70 should be fine or maybe let's increase this .
Let's make it 85 90 .
Ok .
This will be better .
Ok .
Same thing for your text block , styling box padding .
Let's make it 85 save , same thing for your styling box and uh 85 padding .
Click on save , click on update , come back , audio .
Let's refresh it .
OK .
Now it is looking better .
Everything in middle .
OK ?
So with this , we have completed the how it works page as well .
And after that , we have I think fax page , let's see how it looks very simple .
OK ?
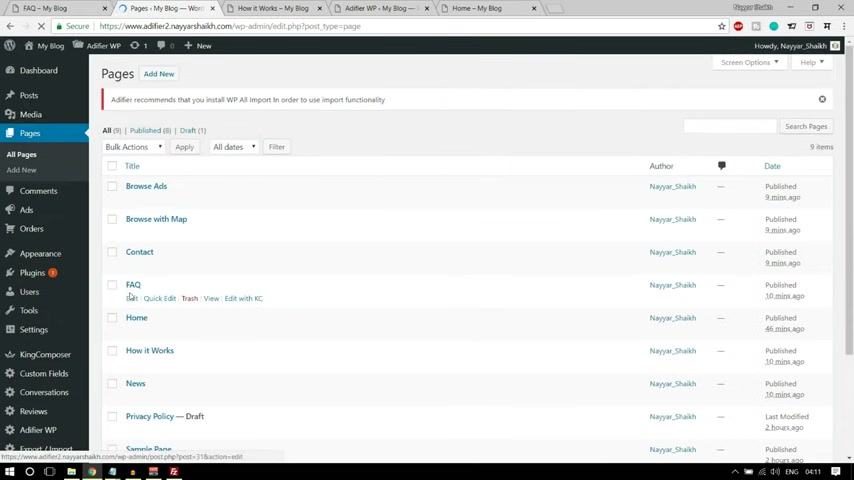
Let's start creating this page again .
We have created this page so we can go to pages here .
We have fact click on edit .
Let's change the template to page full width and you can select no push or full width builder .
You can select anyone let's select builder this time .
Click on update now , click on edit with composer .
Let me delete all these things fine .
So first we'll have to add a new column and in that we'll have to add an element called according here it is accordion , select this thing and we can give a title .
For example , the title over here is types of ads .
OK ?
So we can edit this accordion , click on this plus button and change the title to types of ads .
OK ?
Click on save and inside this according we need simple text like this .
OK ?
So click on add element .
Very easy .
It is OK .
Don't worry .
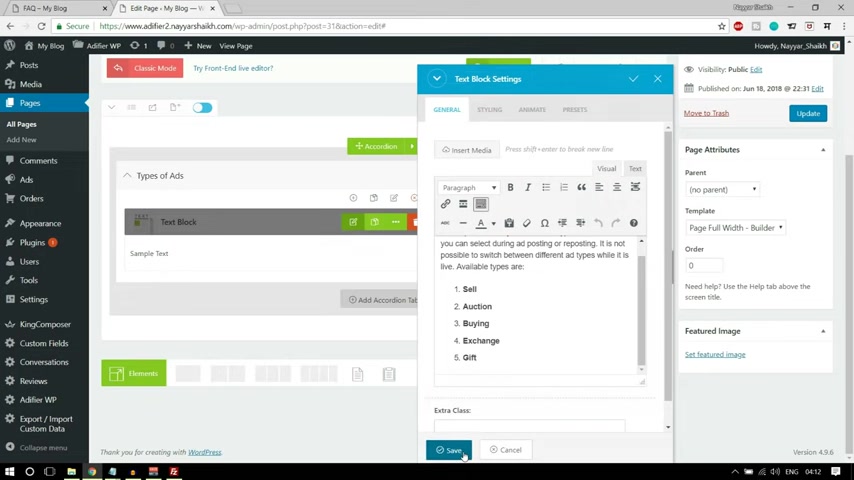
Just search for text block for simple text and paste in your simple text over here .
Click on this .
OK ?
So similarly , you can add unlimited number of accordion .
For example , if you want to add one more tab , like here , we have one tab , 23 , number of many different tabs .
Second one is how auction works .
And we have this thing inside that .
OK ?
So let's add a new accordion tab .
Let's give it a title of how auction works .
OK ?
Save inside this .
We need to add a text block .
So select this , let's paste in this , click on save and click on update .
Let's leave this page in a new tab .
OK ?
You can see this is how it looks , we can open one tab and rest .
Everything will be closed .
OK ?
This is looking better .
So this is how we create a fact page .
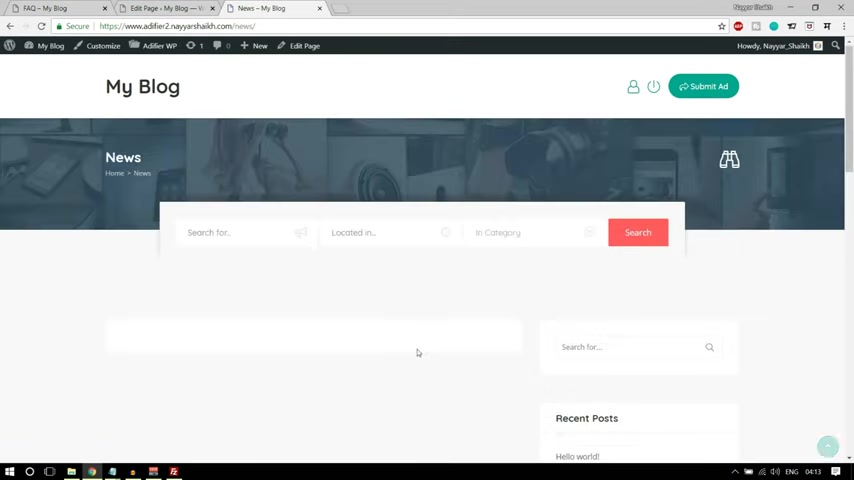
Then after that , we have brows with map .
You don't have to create a browse with map page .
If you see here , everything is automatically present o here because we have selected that template .
OK ?
So this is you don't have to create this .
OK ?
Uh Also you don't have to create the browse a space because we have selected the template for that search template .
So we don't have to do anything .
Everything is done automatically .
Now , we have to work with the news page .
If you see over here , there is nothing present over here .
Ok ?
And there are two things left .
Actually , if you click , if you go to your home page , this is you come to this page , but we don't want to come to this page .
We want to come to let me show you , we want to come to this page .
OK ?
So by default , this is not our home page .
OK ?
Because if you see it is saying your website name slash home .
OK .
So we'll have to make this page as our home page and the news page as our , as our blog page .
OK ?
So very easy to do .
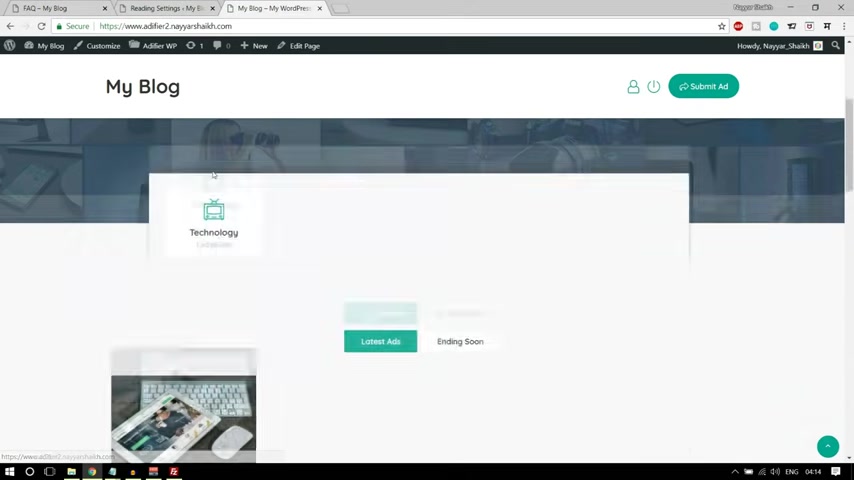
Come back to your dashboard , how our settings , where is it here ?
It is how our settings and click on reading .
Now , instead of your latest post , select this aesthetic page and in the home page , select home in the post page , select news .
Now , click on save changes .
Now , let's refresh .
And when we refresh , you will see this home will be gone and we will still be on the same page .
OK ?
As I said , your home is gone , we are still on the same page .
And when you go to home page , this is your home page now .
OK .
Now let's go to news .
OK .
So this is our news and we have to change a few things .
Ojo at present .
This is the style of showing news .
But if you see Oyo , uh our style is different .
We want this style .
OK ?
We want this style .
OK .
So let me show you first how we can create a news .
OK ?
So we don't have to do anything with the page over here .
We just have to create a post .
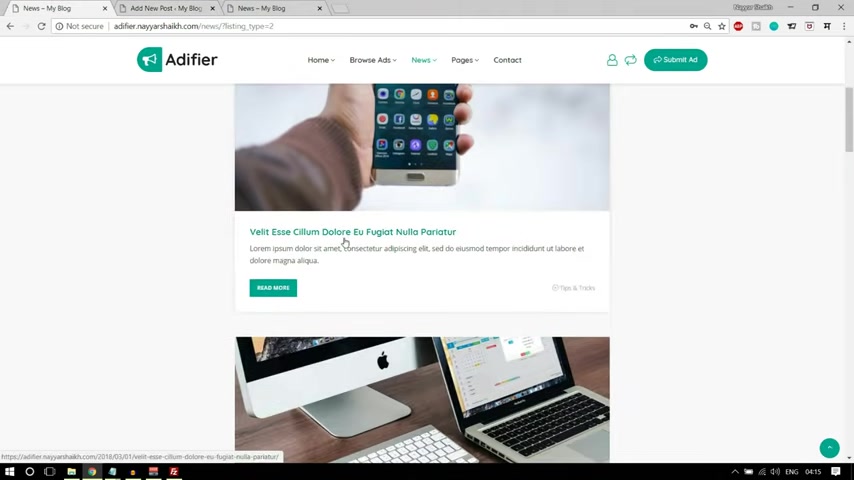
So how our post and click on admin ?
Very easy .
This is a basic stuff .
Let me add this post .
Let us open this one .
OK ?
Copy the title .
This is the title , just copy the title over here and whatever you want to write , you can paste it over here , you can use uh media and so on .
Everything can be used where you can create a different category .
For example , you can put this under technology and remember one thing , these categories are different .
OK ?
These are post categories and earlier which we have created those were a categories .
OK ?
So these two things are totally different .
Now , let's click on publish .
Now , if you refresh our news speech , you'll see one news .
Let's see .
OK ?
We , we don't have the featured image .
Let's see .
OK ?
So this is how to look , let us put our featured image so that it looks better .
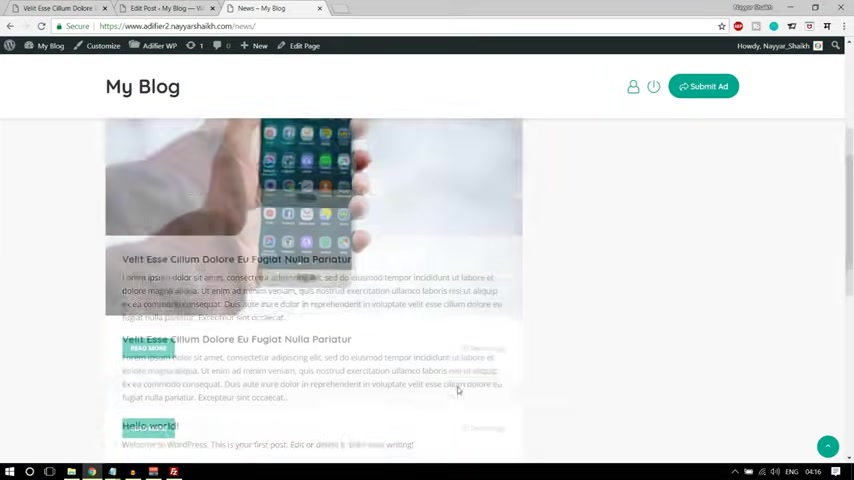
And let's add this one update again .
Let's refresh it now this is looking better but I want this thing in this center .
OK .
OK .
I don't want this extra gap over here .
So there is a very simple technique over here .
What you can do , you can go to pages open news here it is and you can edit this Perma link , edit this Perma link .
And after the news go to CS S and you'll see this new style after news paste in this OK .
Copy it from here and paste in after news paste in question mark listing .
Uh Then we have this dash type is equal to two .
All right .
I think that is what it is .
Let me see .
OK , after news we have to put a slash after news , put a slash then question mark and whatever you have pasted .
OK ?
Click on , OK , click on update .
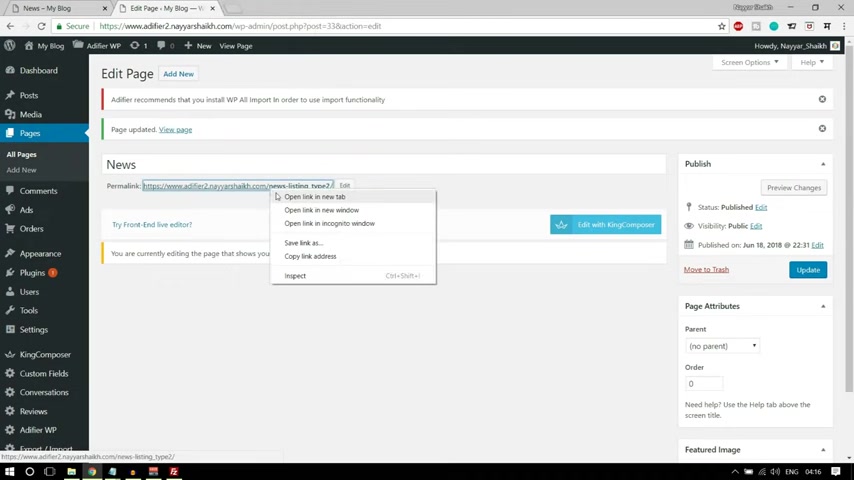
Let's cut this thing .
Let's open this in a new tab .
I think the question mark was not required , I guess .
Let's refresh it .
OK .
Let me again .
OK .
I think question mark was not required .
Oh , sorry , that slash was not required .
OK ?
It's just news .
Uh question mark everything .
Let us try or maybe no .
OK .
OK .
I don't um I'm sorry , we don't have to do anything over here .
We don't have to do anything over here .
We have to do that in the menu .
I'm sorry , click on update .
You don't have to do anything with you .
I'm sorry .
OK .
Oh , just fine .
Not a problem .
We have to do all those things uh later on .
OK , let me see .
OK , when we create a menu , we'll see how it is done .
OK .
So let's see what page is left .

Uh All these pages are done , only the contact pages left .
Let's see how our contact page looks like .
OK , this is how it looks .
Very simple .
Let's , and let's see how our contact page looks .
OK ?
Click on all pages and we have created the contact page here .
It is click on edit now because we have selected the template .
Most of the things will be automatically done .
Let me show you open this page in a new tab .
OK ?
You can see we already have this map .
We already have this form .
We just have to put the map .
I think that that is also not required .
Yeah , we just have to put this map over here .
OK ?
At the top .
Now that is very simple to do what you can do .
You can click over here how over your ID five WP and select contact page .
OK .
Now this is where it is useful .
Now , email address on which email address do you want all these things to come ?
OK .
So I'm selecting my email address over here .
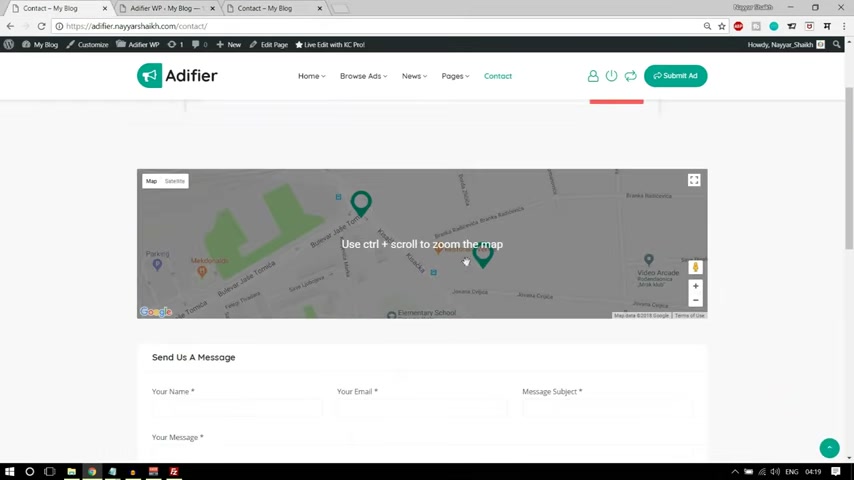
Fine .
And if you want , you can add some marker .
For example , if you see this is the marker , so you can add your own marker images .
OK ?
So let me add my own marker , image , upload files , select files .
And I want this marker , image , select this , click on select .
And if you want , you can specify a marker .
For example , uh let , let , if you want to see that what you can do , you can go to a website called lat long dot net .
OK .
Latlong latitude longitude dot net .
And you can type in your place .
For example , if you type Mumbai over here , let me find it .
You'll see , you'll get these two things latitude and longitude .
You can copy it from here and paste it uh past the latitude , put a comma , then paste , copy and paste the longitude and click on save changes .
Now come back over here on the contact page .
Let's refresh it .
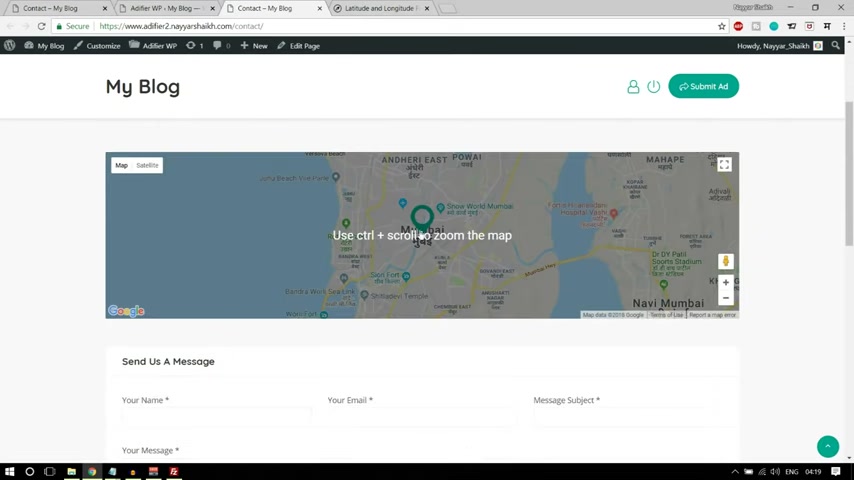
Now we can see we have the map and we have this marker on Mumbai .
OK ?
So this is working .
So with this , we are also done with the contact page .
Now let's do one thing .
Let's create the menu and let's change this logo and so on .
OK ?
We have this thing and we want this logo to be showing over here .
Let's do that .
Come over here .
OK .
So first come over here and first go to this setting overall setting and here we can upload our site logo .
So upload this and let's upload the file .
And here we have our real logo , select this , click on open now select this one and this is quite a big logo .
You'll , you'll understand it .
Now , first let's click on save changes .
Let's go to our home page and you can see this logo is quite big .
So let's decrease the size .
What you can do again , you can click on appearances and if you scroll down here you'll have Yeah , here it is logo width in the logo .
We type in 1 70 pixels .
OK ?
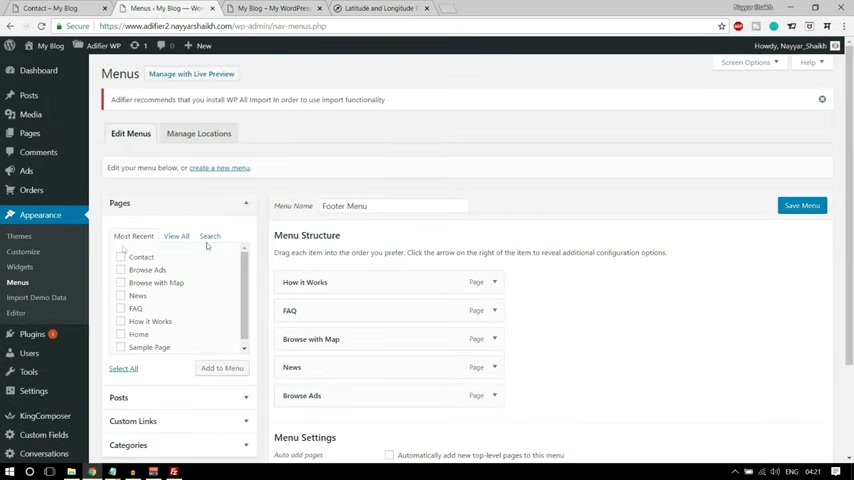
Click on save changes again , refresh it .
OK ?
Now it is looking better .
Now let's create our menu , main menu .
Very easy to do again .
From the left hand side .
Similarly , like we created the this menu , we have to create the same menu .
OK ?
Very easy power appearances and click on menus .
Now this time we have to create a new menu .
So click on this link , create a new menu .
You can name it anything .
I'm naming it .
Main menu , click on create menu and you can add everything you want .
So I want homepage , how it works .
Fact page news , browse all these pages I want , OK ?
So I can I add all this to the home page .
I want the home at the top .
I want these pages like this and maybe all right , I want the contact at the bottom and here we have to do that setting .
OK ?
News .
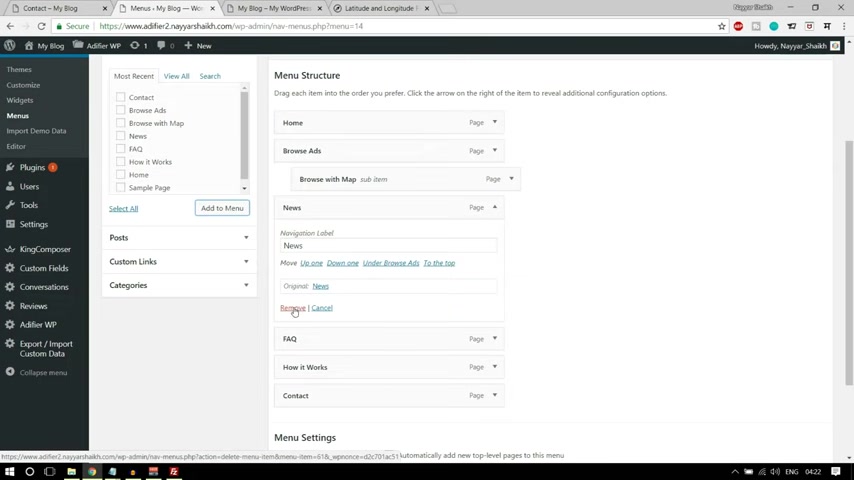
Uh What , what we can do uh I have that is the problem which I was incurring first .
Remove this news , go to custom links and paste in your website .
Link , OK ?
Paste in this link , copy and paste in your link over here and after that type in news slash and then this thing over here , OK ?
Where is that one ?
Here ?
It is a question mark listing and whatever it is after that .
OK .
So we have to do this thing over here and here we have to type in news , click on add to menu and hopefully this time it should work .
And after you do all this thing , make sure you take ma over your main navigation .
Now , click on save menu , come here and refresh it .
Ok ?
Everything is working .
Let's click on news now as you can see everything is in middle .
OK ?
So this is how it is done .
All right guys .
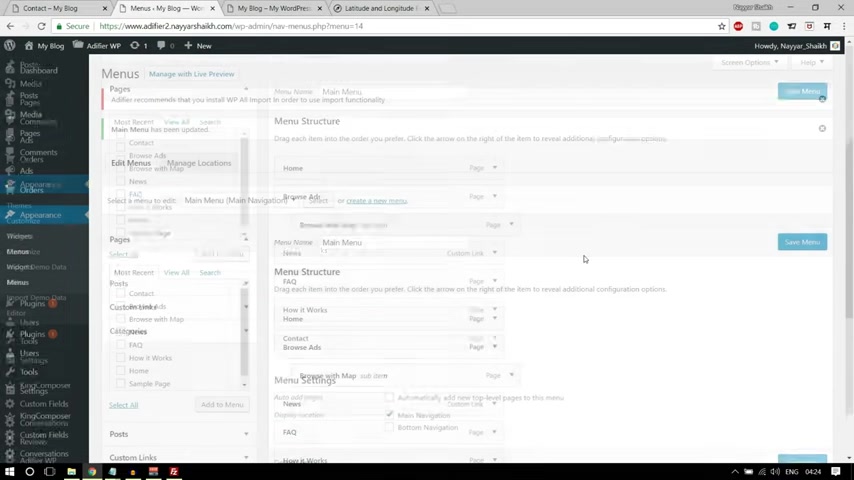
So we are almost done and let's see a few things are left now , one very small and very important setting is left .
What is that ?
Come to your dashboard and click on settings .
Ok .
Very small setting , but very , very important .
And here you'll see membership .
Anyone can register tick , mark that and click on save changes .
Now , if you don't do that , no one will be able to create an account on your website .
And similarly , uh they will not be able to , you know , post ads on your website .
So very very important setting .
Make sure you take mark this , anyone can register .
Ok .
So this was us important setting .
Now , after this , we had left those pump up ads .
Ok .
So let's enable those .
Uh what we can do .
We can click on uh addi fire and I think it is under products .
So how would I add fire and click on products ?
Ok .

We have created the packages now .
Click on ads and here we have bump up a ok .
What should be the price for bump up a if you want to bump up your ad , you have to pay $10 whatever the currencies we will set the currency uh in a few moments .
So whatever it is , $10 or ₹10 just put in 10 .
Uh this , what will this do ?
This will move the ad to the front ?
Ok .
Very , very important .
So this is what it does .
Highlight ads .
How many days the ad should be highlighted ?
So I'm putting 10 days and what should be the price ?
Maybe $5 .
The person has to pay $5 and when he does so his ad will be highlight highlighted for 10 days .
Top ad .
Now whenever someone does some searching , this ad will be on the top .
So how many days I think for five days and we want to charge maybe 10 $12 for this one urgent ad for again for five or 10 days we can put it's all up to you .
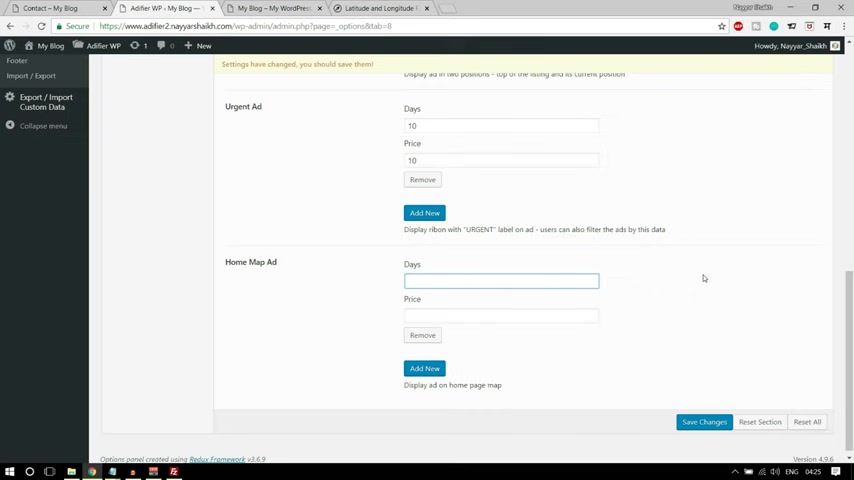
I'm just putting some number over here $10 home page , home map ad .
Ok ?
It will display the ad on the home page or whenever we search that home page , it will display the ad over here .
Ok .
So how many days ?
10 days , $10 ?
Let's save this thing .
Ok .
Now let's refresh it .
Now , let's open this ad at present .
If you see there is no marker over here , no required or urgent market simple ad .
Now let's bump up , bump up this ad .
Let's promote this ad .
OK ?
So what we can do , we can edit this post and now all these things will be uh eligible is bump up .
Do you want to bump up the ?
Yeah , highlight until uh I want to highlight until 26 or maybe 28 for 67 days .
Uh It stop .
Yes , I want to make this top ad as well .
Urgent is as well just just for , you know , just for the sake of seeing how it looks .
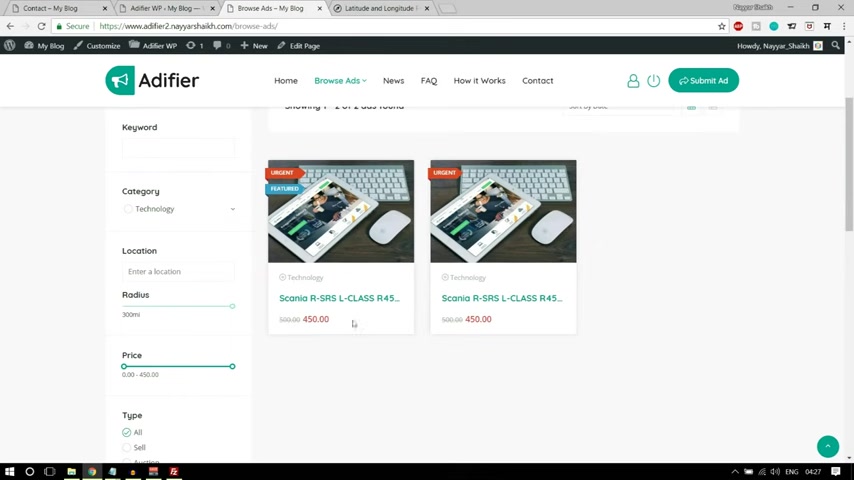
So I'm I'm done everything .
Click on update , come over here , go to your website now as you can see , it says urgent , it is also at the top and let's browse adds again .
You'll see this featured a and it is the first result .
Also when you browse with map , you'll see urgent featured and you'll see this thing bouncing over here .
Ok ?
So this is how it is done .
Now , let's see payment options .
Let's see currency and everything .
So what we can do , we can click on payments over here and 1st 1000 Separator , we have a comma there are a few countries in uh in which they use , I guess full stop as the 1000 separator , you can say select whatever you want .
Currency symbol location before price , currency abbreviation .
If you're using uh United States dollar , you'll use us .
T in India , we use Inr for Indian rupees .
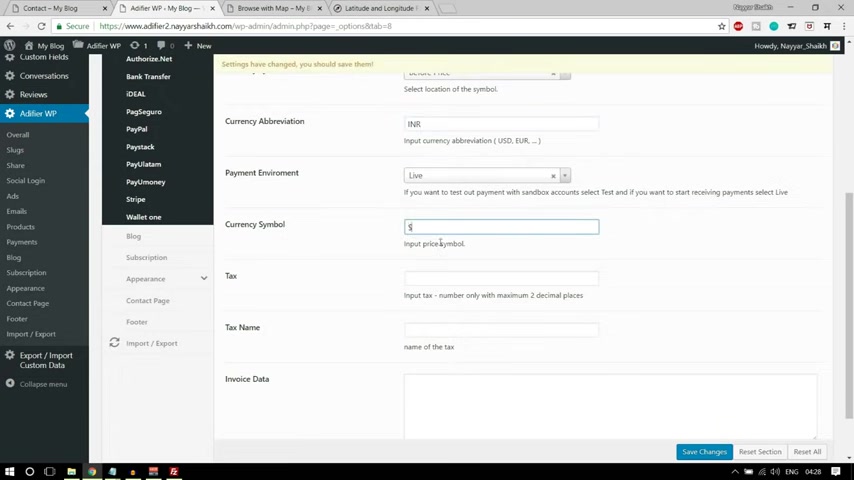
You can select your country uh currency abbreviation on Google .
OK ?
Currency symbol .
You can put in your symbol over here .
So I'm putting Rupe symbol O here .
Let me put it .
Yeah , rupe symbol .
If you want some tax , you can put 10% or whatever the tax is the name of the tax .
For example , GST OK .
Save data .
Now uh earlier it was showing only 4 50 .
Now it will show 4 ₹50 .
As you can see , we have the rupees symbol and 4 50 .
OK ?
Now we can set up different payment method .
For example , you have bank transfer .
If you want to enable bank transfer , you can enable it .
You can type in your bank name .
So I'm typing maybe uh maybe a state bank .
OK ?
We have State Bank of India and Bank .
OK ?
This was account name .
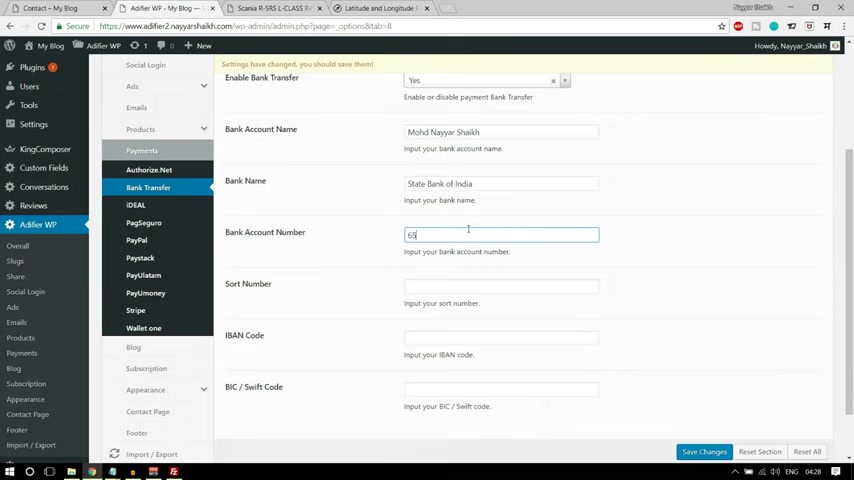
Uh Here is the bank name , account name , um sheikh , whatever it is , account number , I'm just putting some random number .
OK ?
Sort number , whatever you have to put all this Iban uh swift code .
And so OK , now click on save changes .
Now whenever someone first let's refresh it .
Whenever someone wants to purchase something or someone wants to submit an add .
Ok .
They will uh get these options .
Now .
We can also set paypal from here .
You just have to make it .
Yes and put in your client ID and uh client secret token , click on save changes .
And there are many different options for Indians .
The best option is pay you money and for people from America and UK and those countries , I think stripes should be the best option because Stripe enables you to accept payment on your home page .
Not like paypal , where you you have to redirect your customer to some different website .
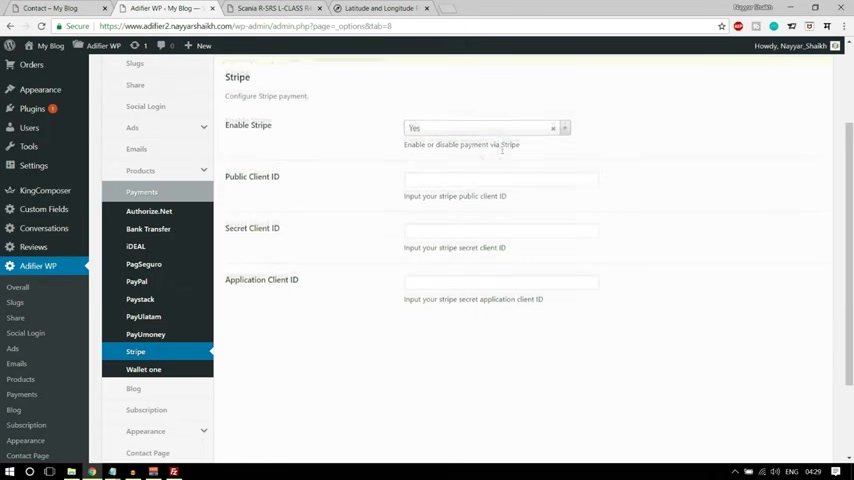
So Stripe is a good option .
Let me enable stripe .
Let me uh put in all these Stripe credentials .
So here .
OK ?
So if you have a Stripe account , what you can do , you can go to your dashboard and under developers , you have this API key .
OK ?
So you have the publishable key .
You have the secret key first .
I think I'll have to put in my password over here to get this key .
I think that is what the password is .
Yeah , that is what it is .
So publishable key , you can copy it from here and paste it under public client key .
Secret key copied from your here is secret key and we we need one more thing , application client ID .
So you'll get that under connect uh under connect , you have this setting , go to setting and you have this thing , copy it from your and paste it over here .
OK ?
Click on save changes .
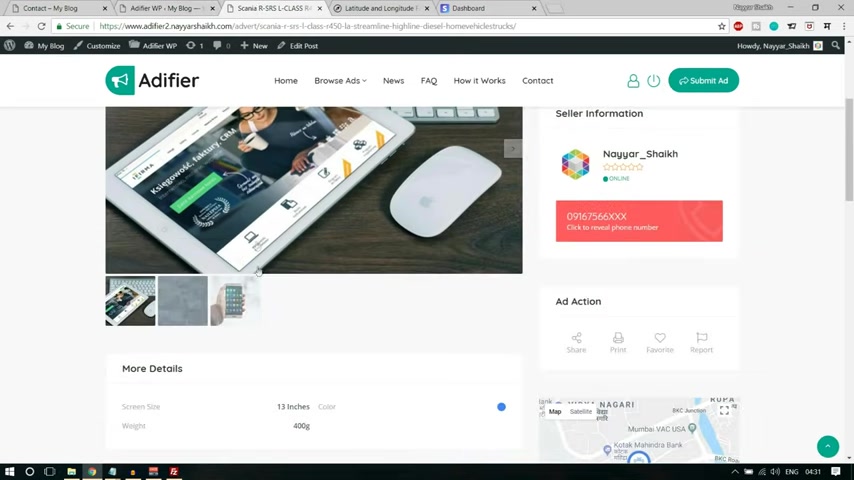
Similarly , you can do all this pay you money paypal , you have authorized dot net and so on .
So whatever payment method you want , you can select this .
So we have saved and edited this .
Now , there is one more thing left .
If you see here , we have three options .
We also have this compare option .
But on our website , we don't have that compare option .
We cannot compare products or ads at present .
So let's enable that compare option .
So click on ads and let's search for that here it is enable compare , make it .
Yes , click on save changes .
OK ?
Come over here .
Let's refresh it .
Now you also get this compare button .
Now if you want to compare some mads , let me show you how you can do that .
Suppose you want to compare this , you can click on this , add this to compare .
Now we can see this thing now because we have only one product .
If you have more , you can add them all and you can see over here under compare , OK ?
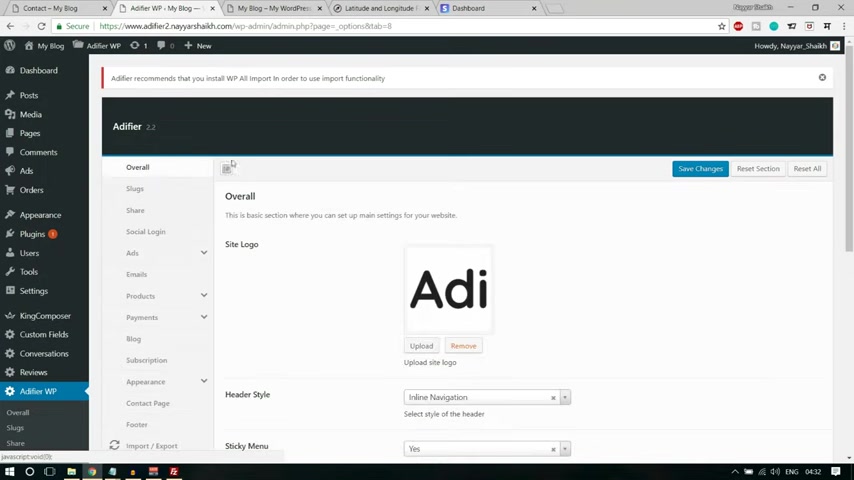
Now let's see rest all settings .
OK ?
We have seen a few settings from here .
Let's see all the settings go to ol first , we have seen this setting .
First , we have the logo header style will be in line navigation , sticky menu .
Yes and all these things slug don't have to do anything and they will share fine social login , I'm not doing in this video , maybe in the next video ads we want to if you want to show or enable only specific type of ads like sell and buy ads .
And if you don't want auction exchange gift , you can just select sell and buy from here .
Ok ?
And if you don't select anything , everything will be selected .
Now , mandatory fields , uh bidding step , maximum , top thing , all these things you can just easily see and understand nothing more .
You know .
Now , here we have one option , location , search geo search .
Now suppose if you see o here people have to search for some location over here .
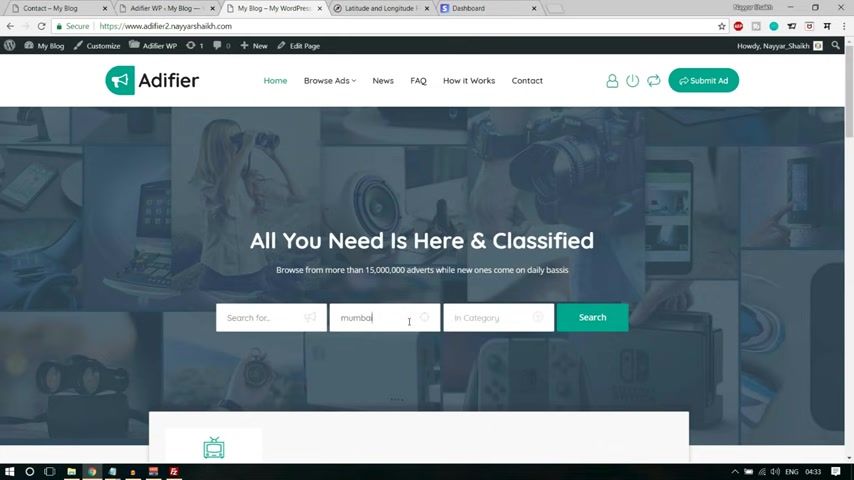
If you want to give a pre specified location that like we have created Mumbai like here when , when we see in category , we have pre specified thing .
Now , in location also , if you want pre specified thing , what you can do instead of geo search , uh select predefined values , click on save changes .
Let's refresh it .
Now , as you can see when I click on , I get Mumbai option like category .
OK .
So it's all up to you then submitting uh approval method .
When someone , when a person submits a on your website , do you want that ad to automatically approve or you want to manually approve it ?
If you want to automatically approve , you don't have to do anything .
But if you , if you want to manually approve that ad , then what happens is you'll have to click on ads .
OK .
Let's see what happens .

Like you have your ad or here , the person will have whenever someone creates an app ad , that ad will also show up over here and here , I'm the author and there you'll see who is the author .
And if , if you go to edit and everything is fine , you can , you know , just make it yes or you can just enable it or publish it .
I think this is not a very important topic so you can leave it to auto .
I think that is fine .
Now show conditions , you can create a terms and conditions page just like we created some other page and you can paste in the link of this page over here .
OK ?
So it's all up to you .
Then we have emails , send email center .
OK ?
So here you have to put in your email address .
OK ?
And your name or your company's name and you can put an email logo if you want .
OK ?
And you can save changes .
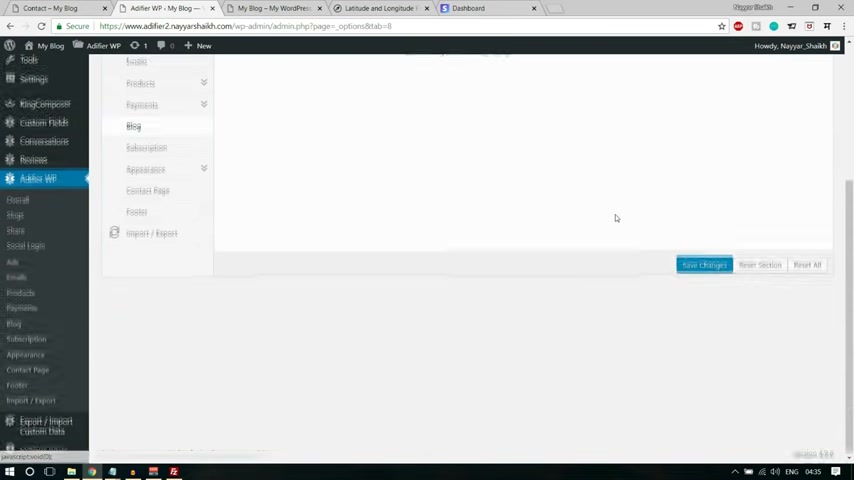
Now go to products .
We have created the packages in the ads .
We have seen all these options in the payment .
Also we have seen all these options in the blog .
OK ?
You can select the blog style but not important .
We have already done that subscription .
We have seen API list ID appearances is nothing but changing the colors .
OK ?
You can change the main color , like copyright color and all these colors .
OK ?
Then contact page .
We have done , done all these settings , foot or also we have done all these settings .
Now , let's see how a person can add an ad on our website .
Ok , so first let's refresh this page .
Let's click on submit a because I have created a .
Now , as you can see when they click on the submit a button , they see that they do not have any credit left .
Please purchase a package .
Because if you remember we have done that subscription .
When you click on , uh when you register an account , you get only one ad for free .
And after that , you'll have to purchase a package .
So let's see how it works .
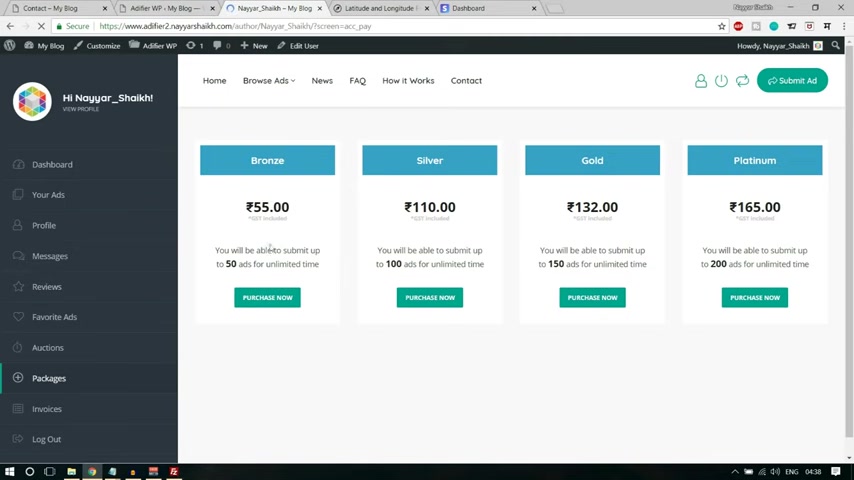
So you can purchase this package .
We can purchase the bronze silver gold package .
Anything you can click on purchase , you can select bank transfer , you'll get all this option .
So you have to transfer ₹50 to this account and you have to use this as your pay , you know , payment or reference .
So that is how it is done .
And or if you want , you can use stripe and when you use stripe , as you can see , you can make payment on your own website on using this pop up .
Ok ?
You can pay ₹55 .
So very useful .
So when you do this , you can easily create uh different ads .
When you see go to your ads , we have these ads .
When you open this , it will show up over here .
If you want to create a new ad because we are thing is expired , we cannot do so , but it is very easy to do .
We have the same steps , same things again and again over here .
OK ?
So very easy .
If someone puts some , if someone , you know , uh gives you some message , you will see it under over here .
If someone puts a review to your product or to your ad , you'll see them over here .
Ok ?
So basically they can contact you , they can message you and everything .
For example , when they , when they go to your ad , let me show when they go to your ad they will see , ok , this is the person they can contact you .
They can have your phone number or they can click on your profile .
And because I , I'm the same person , that's why I'm coming to this page or else they will go to your page and they can message you when they message you , they will be all these messages will show up over here and you can chat with that person .
Ok ?
So that is how it works and I think everything is done .
Let me see or write all the pages are ok , guys , I think everything is done .
We have successfully completed this tutorial .
I hope you guys learned something from this tutor .
I hope it was helpful for you .

Uh If you have any doubt , any queries , any questions , uh any suggestions for me you can leave them in the comments section below and please make sure to subscribe to my channel so that you don't miss more awesome stuff .
All my videos are very , very useful and they give you a chance to make some money .
I almost make sure that you know , whatever I teach , I also give a simple way of making some money .
Ok ?
You can also place some Google ads if you want very easy to do , maybe I'll create a new video , a separate video for that so that you can place Google ads on your website and you can also earn through that .
So very easy way to make some money through your website .
Ok .
So thanks a lot for watching guys .
See you soon .
Are you looking for a way to reach a wider audience and get more views on your videos?
Our innovative video to text transcribing service can help you do just that.
We provide accurate transcriptions of your videos along with visual content that will help you attract new viewers and keep them engaged. Plus, our data analytics and ad campaign tools can help you monetize your content and maximize your revenue.
Let's partner up and take your video content to the next level!
Contact us today to learn more.