https://www.youtube.com/watch?v=oXbdaQR92bQ
How To Draw Easy Cartoon Faces Step by Step for beginners _ Tip and tricks _ Rinkuart
Hello , friends .
Welcome to my channel .
And today I'm going to show you some tips and tricks to design our character .
Let's get started .
First of all , I would like to say you that in my previous video , I have told you to practice circles and other stuff like a rectangle and lines .
So those are very helpful to design a character .
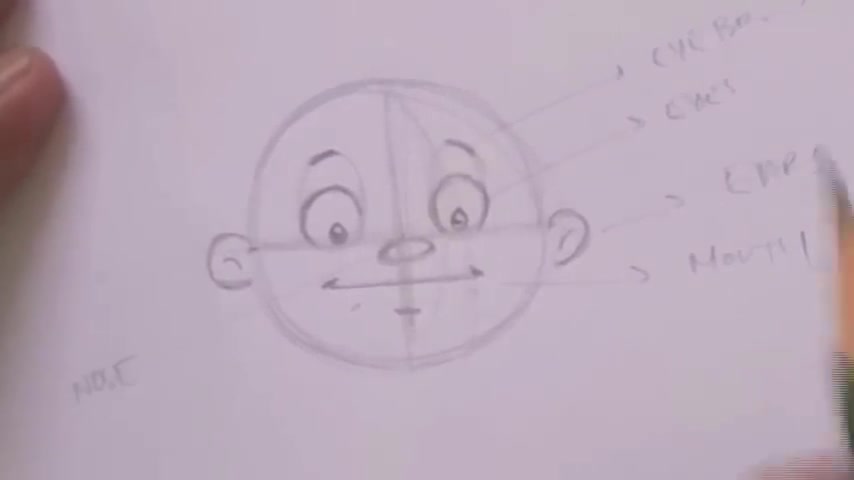
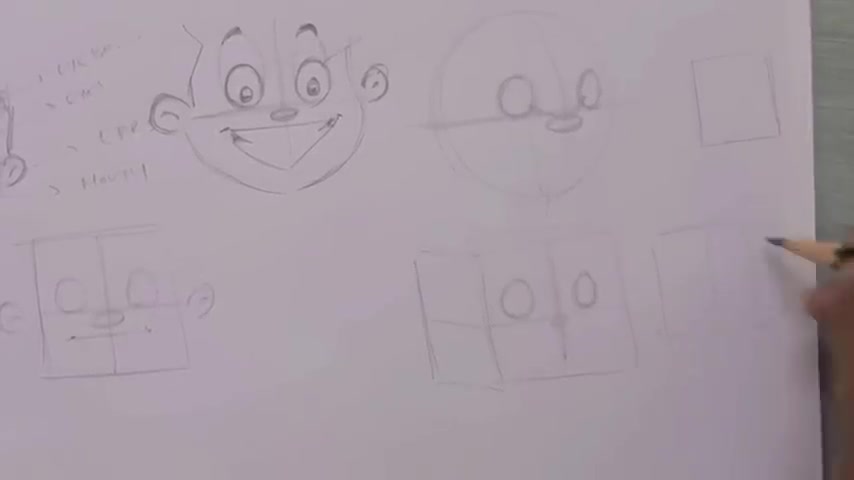
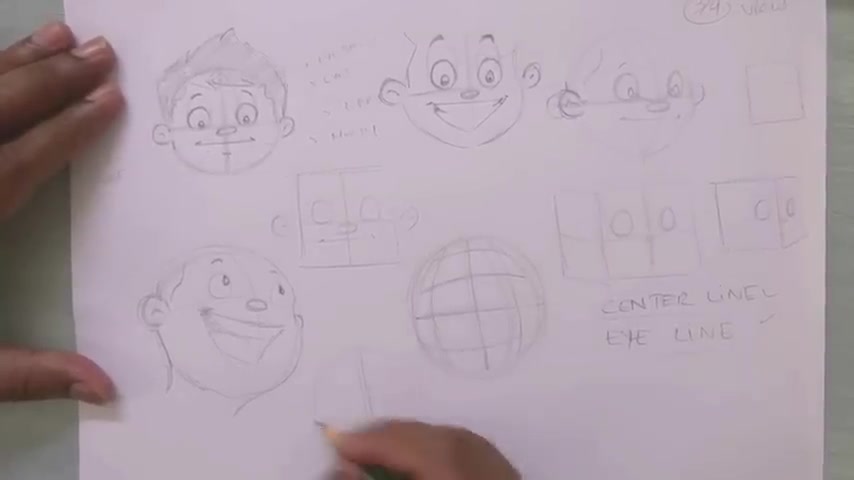
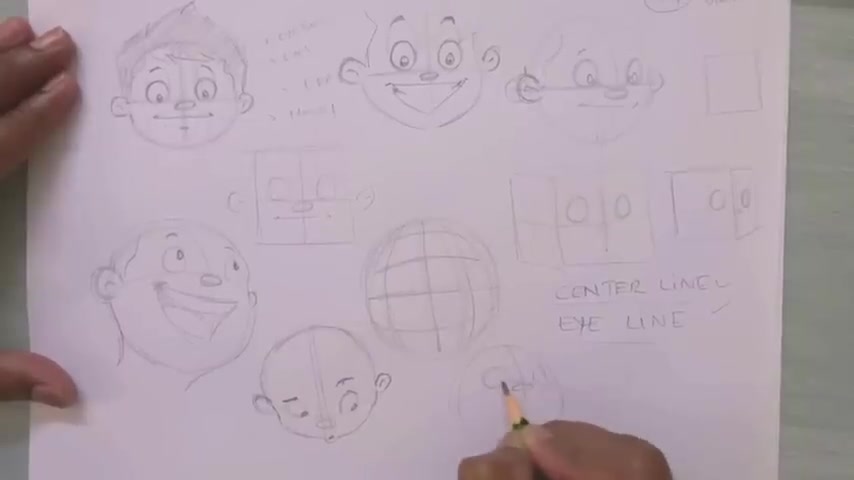
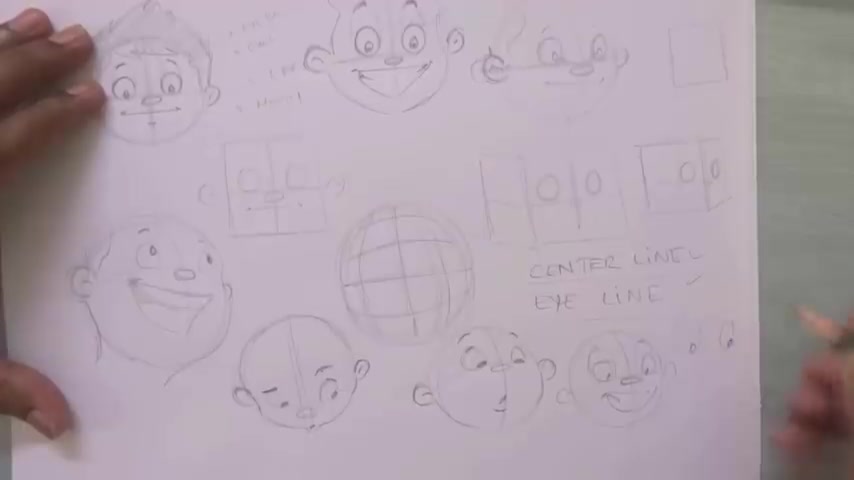
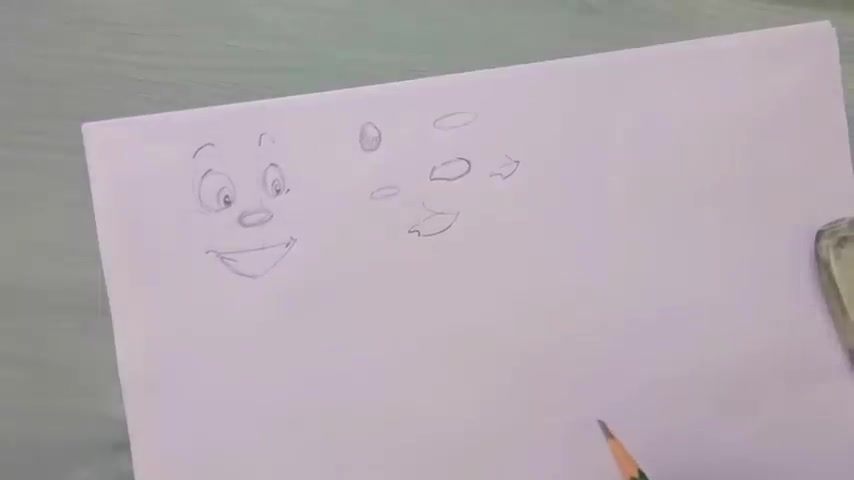
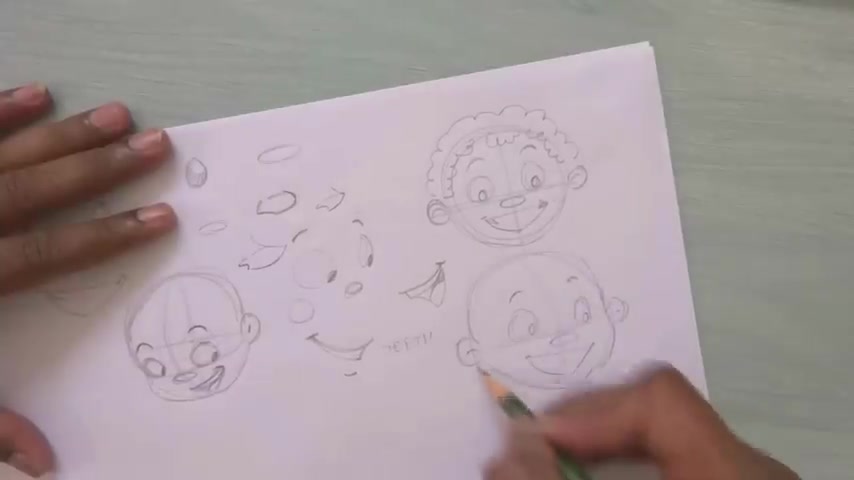
So first of all , in this character , designing the circle is very important .
I'll show you how I'll make a face out of this .
So if I'll take this one as a circle and this one is the middle line , center line and this one is the I line .
OK ?
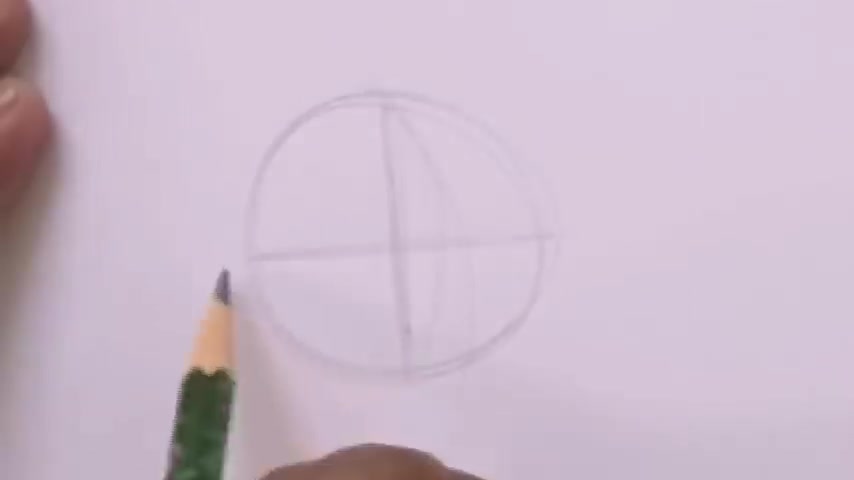
This center line and the center line is the middle line and this I line , we will intersect in one point here .
That is the point where we will draw our nose .
For the time being , we will take this shape is nose .
It may be in different shape .
But for now , I'll tell you the basic thing by which you can draw a cartoon , correct ?
So this is the nose , it will lies on the point where the middle line , the center line and the eye line will intersect .
Now , the next point is the eyes where the two eyes will lie .
It depends because as I told you , this is the eye line .
So on that the two eyes will be there .
OK , I'll put two circles .
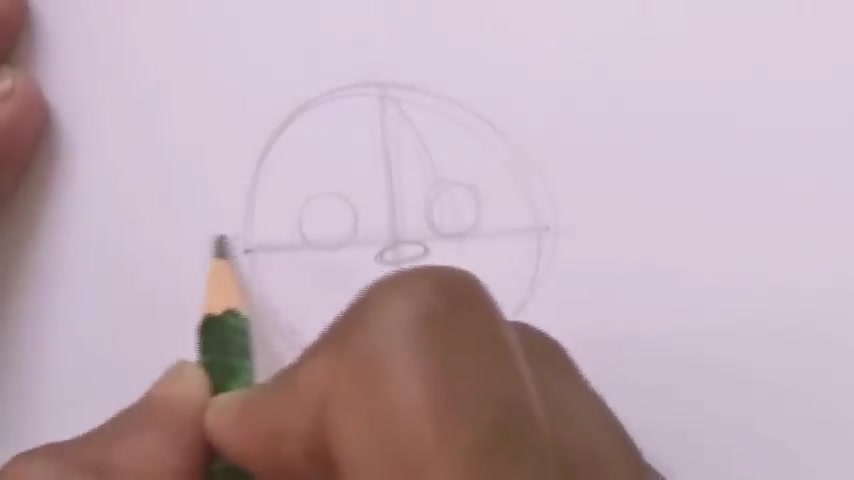
So at this point and this point where the eyeline will touch the circle from both the side , there will put our ears half circle , you can say .
So we got the portion of our eyes , the nose and the ear .
So what about our mouth ?
Mouth could be anywhere because this is the character , a cartoon character .
You can put anywhere you can put over here , you can put over here .
It depends and the lower lips , the eyebrows are missing .
So that will be over here .
If you put an oval with reference to the eyes we have drawn before then we'll get our eyebrows just darken this area .
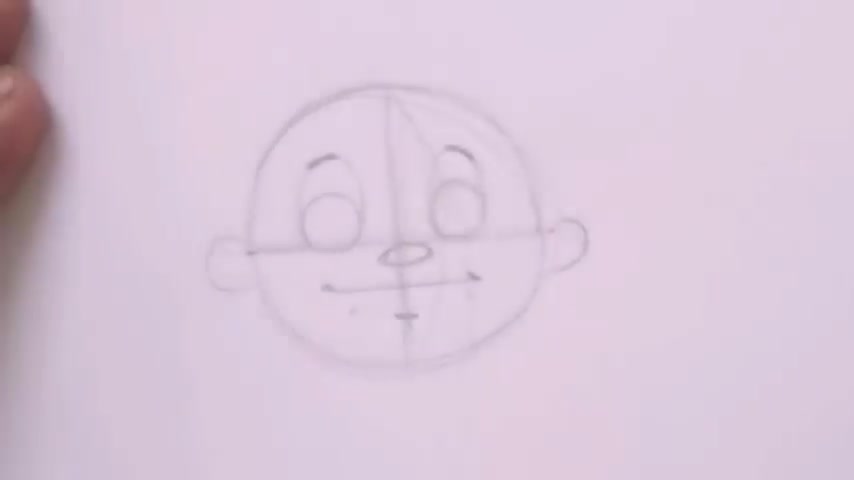
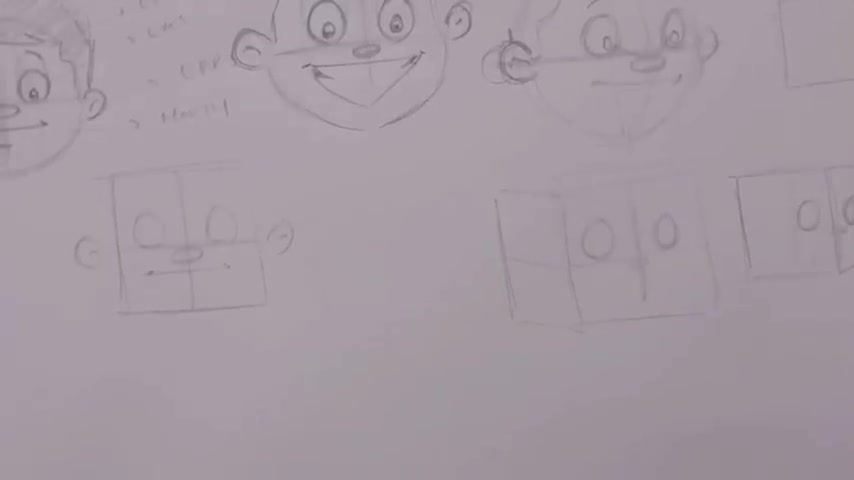
So as you can see , now we have the main things like eyes , eyebrows , you mouth knows .
So these are the basic parts which you need to place it .
Likewise .
So your character will look good .
Eyeline can vary like if you want this eyeline to make it a little down , then also it is OK .
It depends on the style of the character .
You want to design eye balls like this .
I'll make a little dark lane on these eyes .
For here you can put this mark .
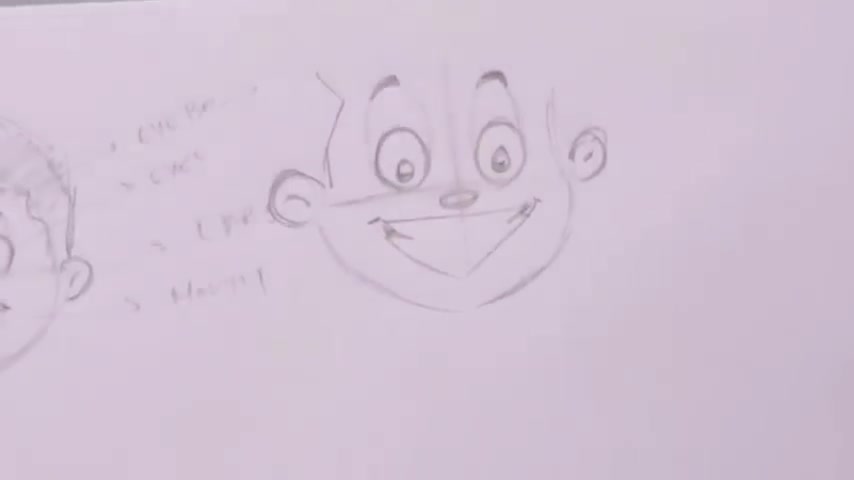
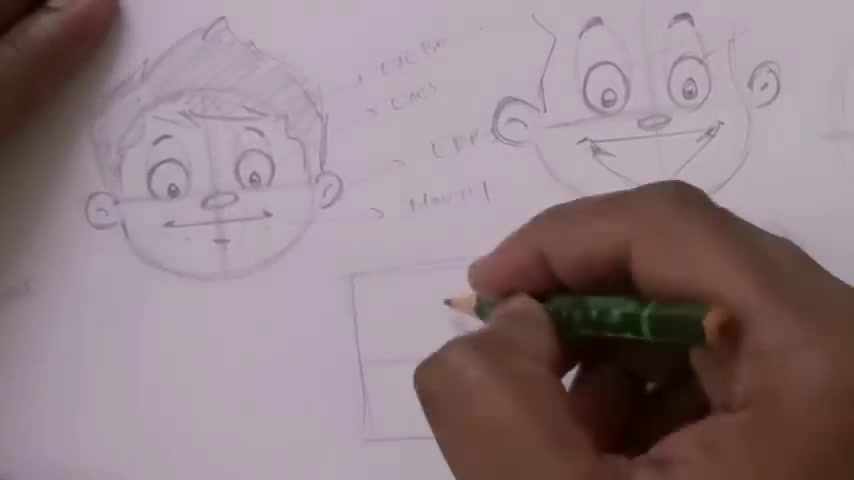
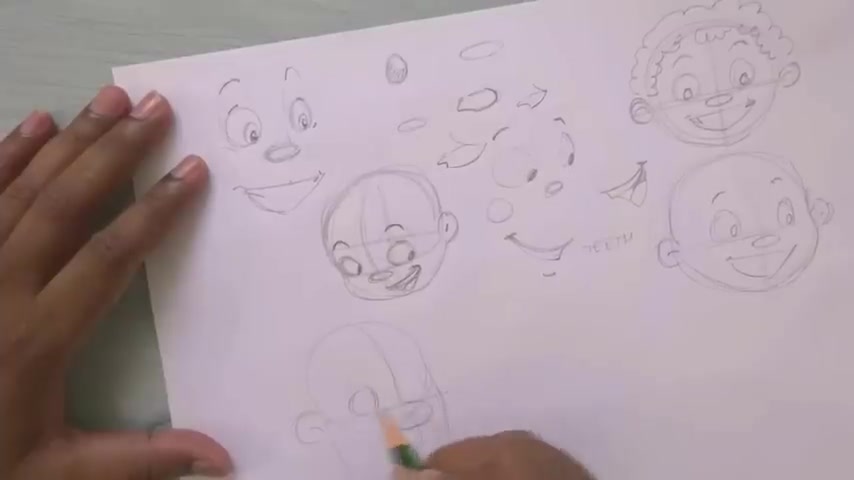
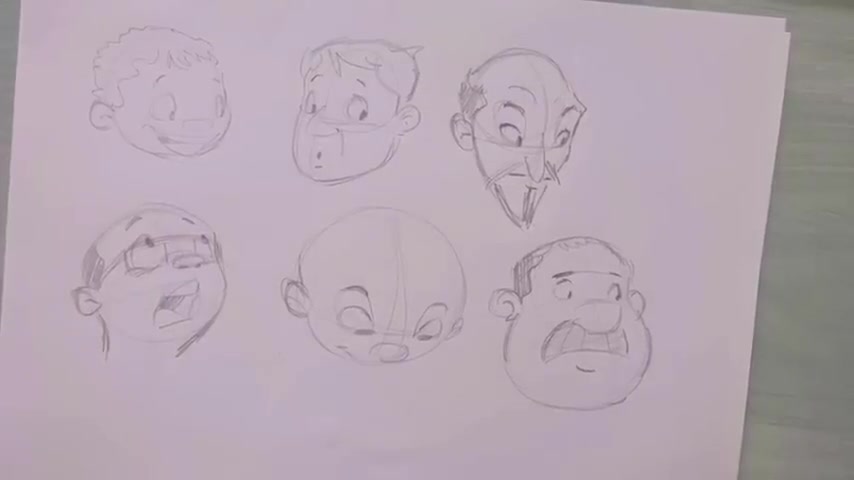
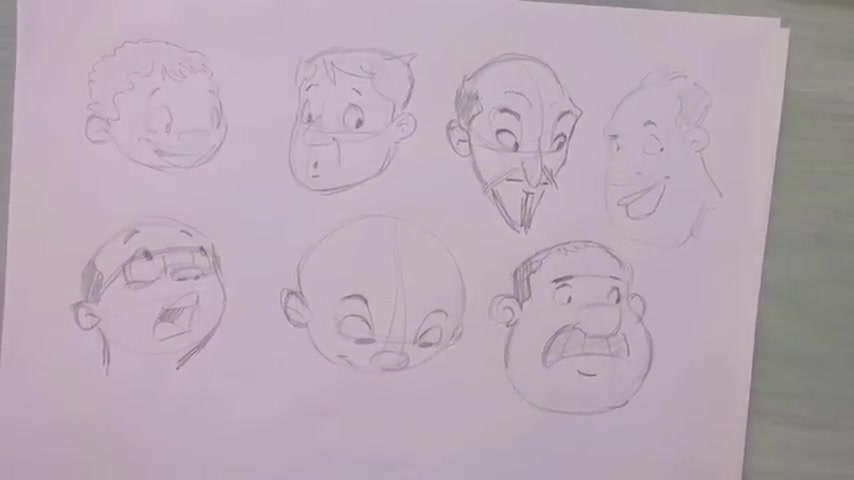
So here you can see that this character is ready and the only thing is missing , I think is the hair .
You can make the hairstyle as you like .
So this is our character .
So you can erase this line or you can share this whole hair .
This is the front face .
So you can make your eyes around like this and you can put the people over here .
It's very simple .
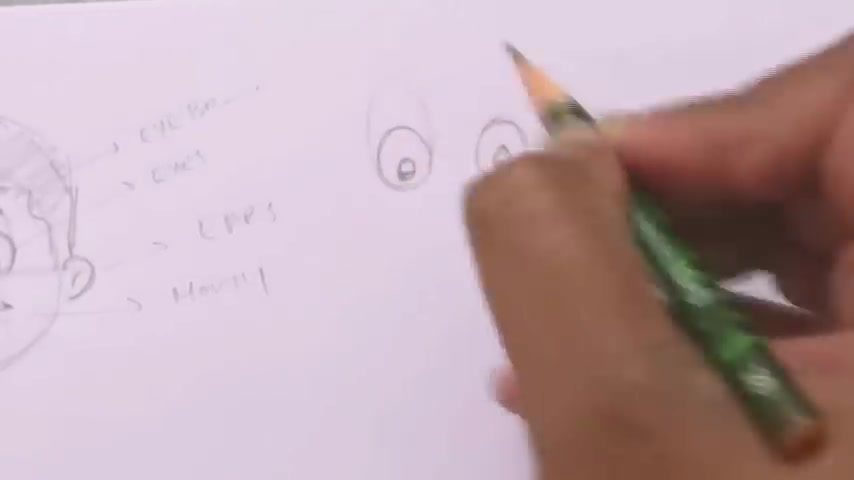
And for eyebrows , you can increase , you can make an oval shape and make your I rules on that line .
OK ?
So this is the eye line and this is the central line and the point where it is intersecting , you can make one nose and as I told you before , you can place your mouth anywhere you like , but it should look good .
So I feel like I can put over here .
It will look more funny .
OK ?
And the this line is there .
Now this line will touch the circle or imaginary circle which I feel it will be here somewhat here .
So I'll make this so I can ship it out .
It is very easy from the front side , it's too easy .
But the only thing you need to keep in mind that the eye should be same .
And because as it is looking towards you all will look a little similar like yours .
If it is perfectly towards you , that is totally front , then yours would be equal .
Eyes should be equal .
So it's not an issue and it is a little flat .
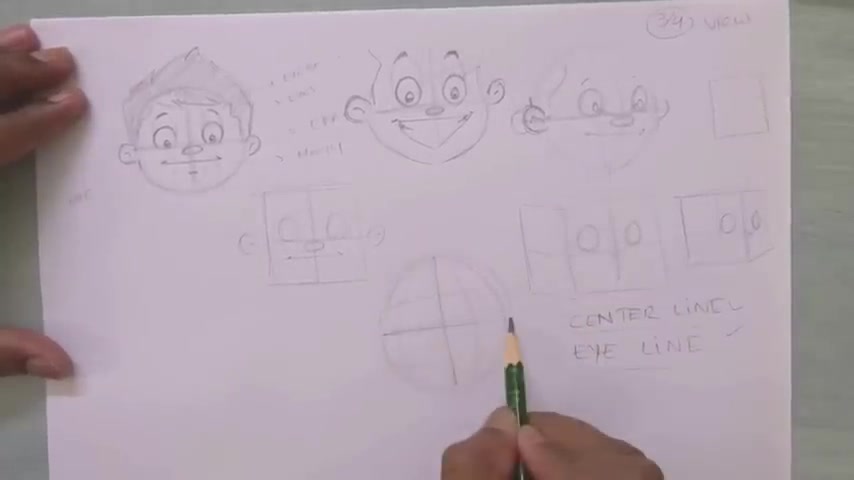
So I usually prefer 34 because it will give you the 3D look .
But in that case , you need to draw two eyes a little differently as this eye and this eye both are similar because it is the front face .
So nothing much difference .
I should say it is exactly the same .
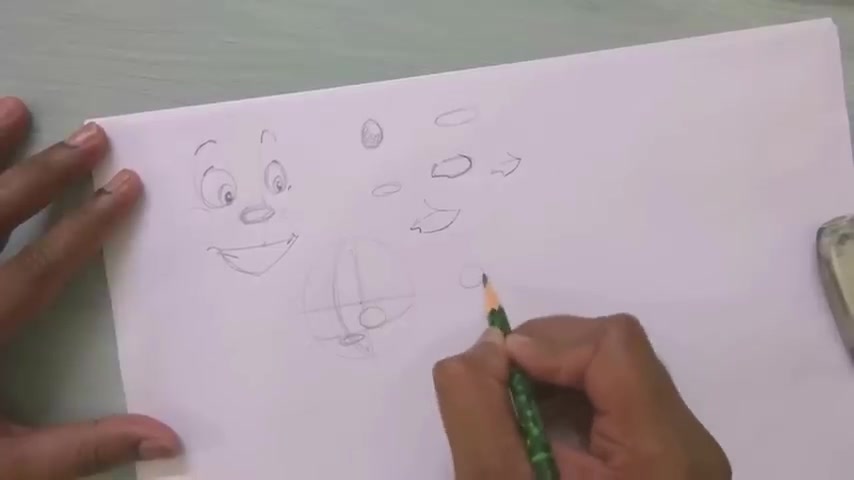
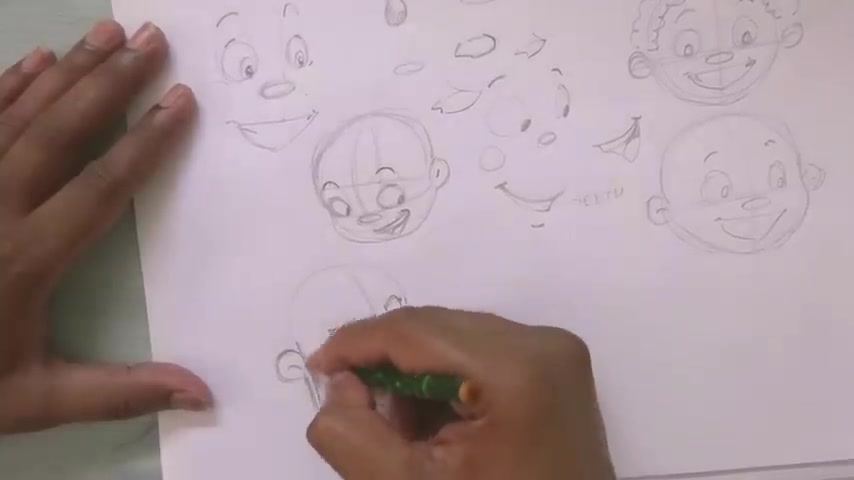
But in case of threefold , again , it is a circle and the eye line this and the center line which was before in the center .
Now , I will prefer to do 24 .

Ok .
Little , it should be centered here .
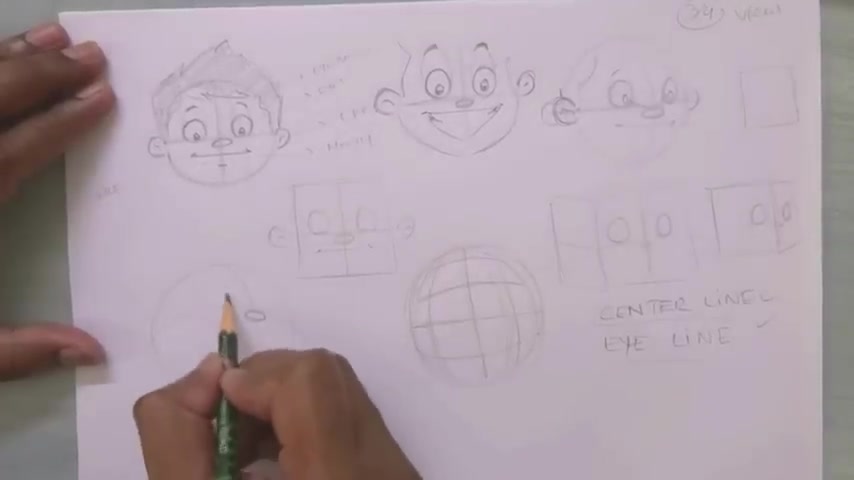
But now I'm planning to shift little side which is 3/4 view .
So I'll place one nose over here where you put your eyes , two eyes .
So mark all V over here V and the line is coming over here .
So there you can put your eyes .
If you can notice over here , I'm putting the circle over year and year , it will be over because the face is little twisted 3 ft .
It's not towards camera .
The eye which will look towards camera will be circle and the eye which is not looking that is not looking as it is that side with the help of square .
I'll tell you this is the front face .
Suppose then what I did , this is equal to this .
There is a central LA .
So this is the island , this is the center lane and here I placed one nose and eyes and again , here one is year the year , year two .
And here this is what I told you here .
OK .
So in this case , again , I will draw are squared center line this time it will be this part OK , that I will explain to you .
So here it will be like this .
So the center line again , it is automatically the side .
So now this is like this because this is little towards centers .
So this will be around and the proper shape , it will be visible because it is towards camera .
And this will not , you may say like this is front and this is 3/4 .
OK .
So if I place one I over here , it will be , this shape will be like this , your nose .
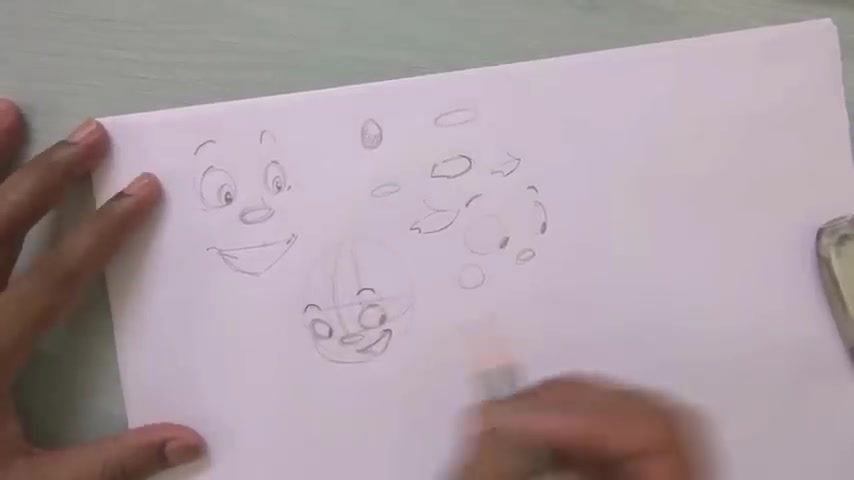
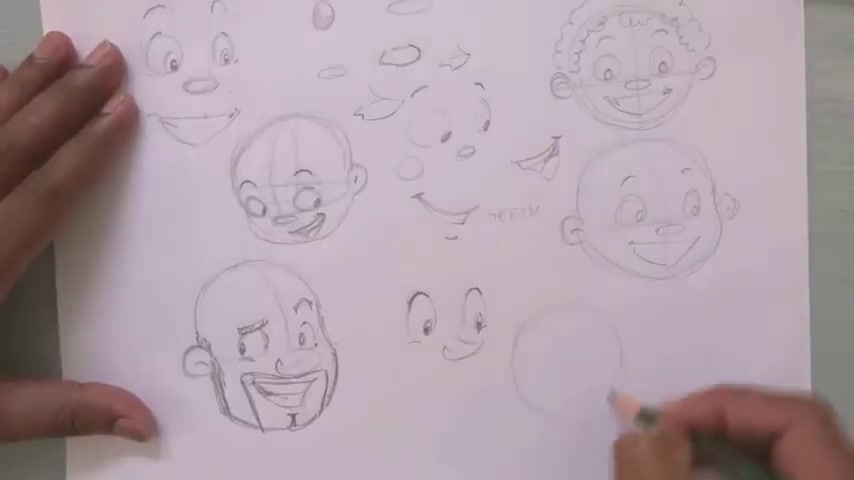
So you can select this and one more thing the year from the front it is here , but from 3 ft , it should not be here .
It should be a little inner area because the head , the head will be visible from backside here .
So uh at the beginning stage , when you will start a character design , keep in mind that you should practice circle and the center line , you can place it from middle side side .
OK ?
This is the basic thing thing you need to practice every time and two things you need to put in your drawing .
That is the center line and the eye line , centerline .
Uh can you vary like if you want to change the eye direction or you want to change the face direction , front to side or 3 ft , then center line will help you .
And eye line means it may be top middle towards camera or down .
This will again help you .
So these two lines are very important .
But keep in mind this is circle .
So lines should not be straight in here because this is the portion where both the line will be straight , the center line and the sorry , the eye line and the center line as it will go up , the curve will be there year two Sam as the center line .
So it should look like b round boards .
So I'll change the portion of the center line and island and I'll show you how it will look .
Suppose the island , I'll place it over here , OK ?
And the center line may be a little like this .
OK ?
So the point where two lines will intersect , I'll put one nose , OK ?
And now I'll place the eyes .
So as you can see if I make , this is a little up , it will look like the head is little upside , it's looking towards up and the head is going upside and the line , if I'm changing , it is a 3/4 angle , it is not the front one .
I will give you another example .
The central line I'm making and down , I'll make the ears first nose and the eyes .
So there are many ways to make a single phase turn around .
So you need to practice these type of exercises every time as I'm doing , you don't need to do the hairs and don't put that much concentration on the secondary thing like hairs .
Why I'm telling you ?
Because you need to make your face more attractive , then you can put more hairs of your own style .
So it's not necessary to do for the time being , the hairs concentrate on the expression and the position .
It is more important .
And for that , you need to practice only circle and placement of the organs like nose eyes .
And at the beginning stage , you should not do the eyebrow directly .
If I'm doing the eyes here and here , don't put the eyebrows anywhere .
You just make it all shape along with the eyes and then you put the eyebrows and it will be correct .
There are many eyes actually to put on your character , but you need to start with the basic eyes that is the circle only circle 3 ft or try to do the front first , then go for 34 .
Again , I'm telling you if you are going for 34 , don't make the two Ys equal .
It will be little over eyes .
You can make different type of eyes .
Again , I rose , I will highlight .
I'm putting a little highlight .
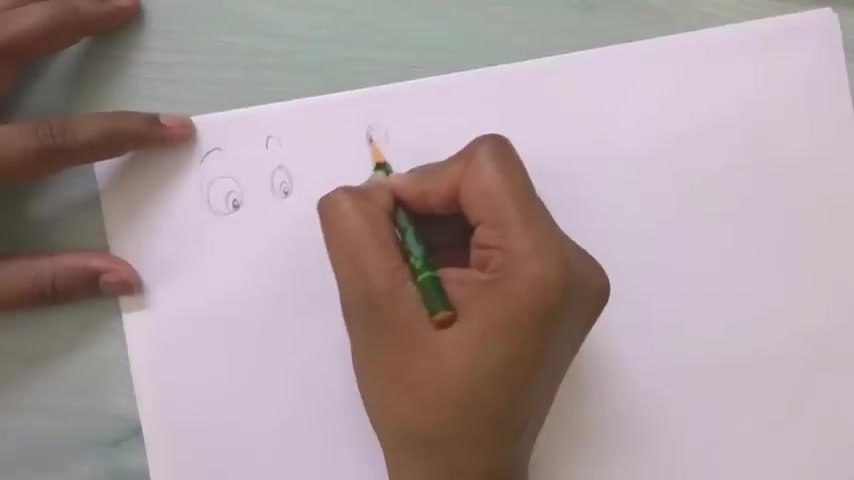
What I'm doing is a little highlight .
Then I'm doing this shading .
OK ?
And then you can put your nose nodes also have different style .
Like if I put this is no , this is also one type of style and this also they sold .
So for the time being , you just do this just a simple , simple like this mouth .
You can make this mo here or I'll show you one another another one because if I'll show it here , you will not listen up for a second .
You use this one and I can show you two different things .
This distance will also matter from nose to mouth .
This distance also matters .
And yeah , you don't try only the organs just place it on the circle , circle .
And why I did like this because this is not the center center is like here , OK ?
Isn't .
But what I did this center line , I place it placed it here and the I line , I placed it here .
So this is the main line .
So this is the point where it is intersecting .
I'll put one basic nose , I'll put the eyes , you can observe .
I'm not doing the perfect circle because this is down .
If it would be here , then it is a perfect circle .
But as it is going down , so the shape of the eyes will change from circle to over here .
And as well as here , see both those shapes are different here as you can see the lines are going like this .
So the shape will also change according to the shape that it will come slowly when you will practice more .
So don't worry about that .
Just concentrate shapes and the placement , sorry .
And for the time being , you can put the eyes direct black , don't put highlight , it's not necessary OK ?
Like this , you can put the shape of the mouth .
Also , I'll tell you see here if the happy mouth is there , always the mouth will go like this up , up direction .
And if you want to open them out , just do like one line from here and it just open and this is the teeth , this teeth , this is a loyal lip .
So likewise , if you want to open this mouth , you can do it with the upper lip , then like this is the tip and open and one tongue .
He been more so here , I'll place it one you .
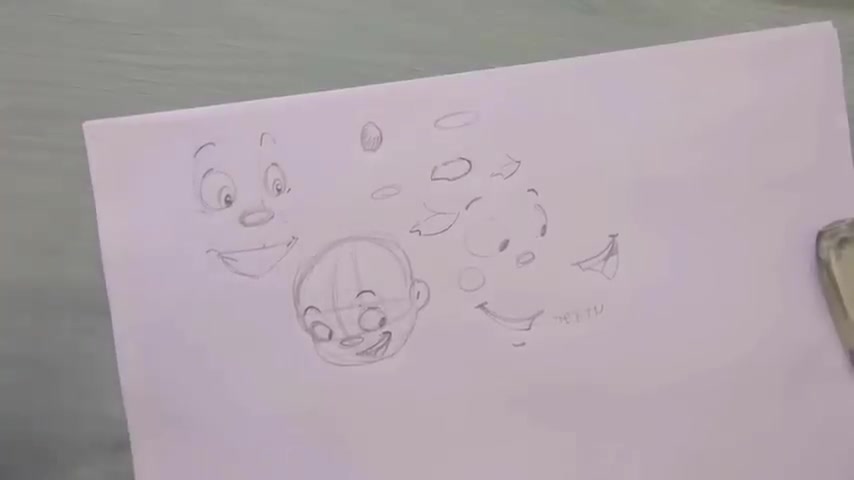
So these are things which you need to follow before doing any character designing .
This is the basic of the head .
I'm explaining to you at first , you need to practice only circles , line line knows eyes , milk , years , eyebrows , eyeball , ha That's it .
If you're not getting this shape properly , no need of worry at the beginning , it will be like that .
OK ?
See first , the base of the phase is the round circle .
You can make some changes with that .
Also , I'll show you how suppose I'm doing a circle and I need some actions of the character like it is not perfectly circled .
Then what I'll do , I'll make some changes .
See I'm doing some changes .
This is a circle .
And here I'll put the year .
Let's see , this is the center line and I'll go along with the shape as it is the 3/4 view front .
No problem , but 3434 front is there .
Then I'll go for the shape .
This shape should follow here .
OK .
So what I did the line from where to intersect , I'll put some nose , any type of noise you can put .
So again , the basic , I , I want to put some expression .
So I'll do like this .
See if I put the mouth here , it will look different and if I'll put them out here , it will look different .
So I prefer to go for this .
OK .
M OK .
Some uh Japanese over here , I'll put some dark shade .
We will make the shape if I want to make the mustache .
Also , I will , I can make it .
Yes .
No , whenever you are going to design your eyes or make sure that the eye , this area , the top area should be more darker than the lower area so that the drawing appeal will come in your dream .
So as I told you just try it out the shapes , only the circle , the lines , the nose , the eyes , so you can make these type of drawings .
So thanks for watching my video and I hope you can um learn out of these type of exercises .
I have told you just try it out and let me know if you get any benefit and stay tuned because in my upcoming video , I'm going to give some tips regarding the organs , like the eyes , nose , mouth , different type of eyes .
I will explain to you and the shape of the character it would be and how to take the shape .
Like if it can be like this out of this , you have to make the character , you can change the shape also .
So how do you like this video ?
Just comment me in the comment section .
Yeah , that's it for now .
Thank you .
Are you looking for a way to reach a wider audience and get more views on your videos?
Our innovative video to text transcribing service can help you do just that.
We provide accurate transcriptions of your videos along with visual content that will help you attract new viewers and keep them engaged. Plus, our data analytics and ad campaign tools can help you monetize your content and maximize your revenue.
Let's partner up and take your video content to the next level!
Contact us today to learn more.