https://www.youtube.com/watch?v=XLmta5ZuTmw
How to Make a Blog with WordPress and Make $1000+_Month
What's up party people ?
My name is Darryl Wilson .
And today in this video , I'll be showing you all how to create a blog or a news website with wordpress step by step .
So this video did take me a few weeks to make after extensive research and I think you're really gonna like it .
Now .
This video is geared for both beginners who want to start a blog for the very first time yet .
It's also geared for professional bloggers who want to upgrade the style of their blog .
But before we begin , let me explain what type of blogs you can create with this tutorial .
Number one , a general blog , you'll be able to make a blog to talk about yourself or blog about your passions like cooking or fashion .
Number two , a newspaper blog , you can create a news website where you can report on news or any current events for any niche .
Number three , a magazine website , you can start your own online magazine blog and publish niche related content for your magazine blog .
And number four , an affiliate marketing blog , you can create a blog that promotes and reviews other companies' , products or services using your affiliate links , you'll then receive a commission if someone buys a product from your blog and I'll walk you through more of this later in the video plus , with over 150 starter templates to choose from .
I'm sure you'll find a template that fits for you and your blog in this video .
I'll be showing you how to make your blog with wordpress and a drag and drop builder called Element or here's how it works .
You simply pick a style or structure element and drag it on to your website .
And all the blog posts will display automatically , you'll then be able to customize the style , the colors and the fonts of your blog .
This theme offers tons of elements with different styles .
You can drag in hero sections or sliders where you can navigate visitors to your posts .
The possibilities are endless with this wordpress theme and you guys are gonna love it .
I'll show you how to customize your header or you can pick from a premade template .
You can then create a really nice mega menu that will display a list of your categories or your blog posts .
Now , let's talk about the actual blog post .
You'll be able to fully customize your single post page .
You can pick from 10 premade post styles and choose a layout like having a sidebar on the left or on the right side of the page .
Plus you can have a narrow layout or even 1/4 layout for your blog post .
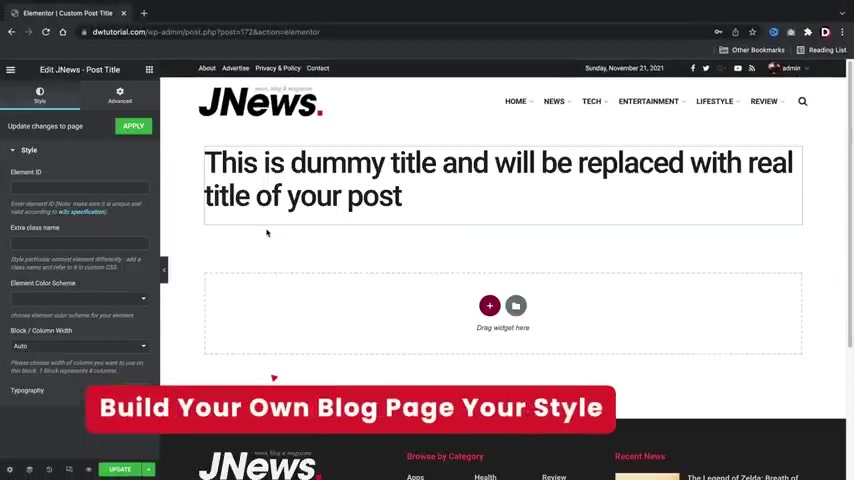
And if that doesn't work for you , you can build a custom blog page from scratch that you can fully design yourself that will dynamically display all of your posts .
There's a lot of really cool options .
I liked about this wordpress theme , like a side feed which will show a list of your post and even a like button that you can add on your post .
But I've saved the best for last for your blog post .
You can insert a really nice table of contents elements anywhere you want on your blog post , you can place it before the blog post or even have it floating as your visitor scrolls .
The table of contents will display a list of every heading text you create .
So users can easily navigate to any part of your blog .
Most themes require third party plugins that don't look natural on your website and often break .
But this table of contents element is included in the theme .
And for those of you who really love to write and create large articles , don't worry because you can split up your posts on multiple pages , you'll be able to split up your posts on multiple pages by heading tags .
This feature allows you to split up large amounts of content on multiple pages with navigation for easier reading .
This creates a great reading experience for your visitors and it can also generate you more revenue because you're increasing the page views on your website .
Speaking of money after you create your blog , I'll be showing you the five things that you must do in order to make revenue from your blog .
Number one , I'll show you how to connect your blog with Google Analytics .
This way you can see how much traffic you're getting .
And from what country .
Number two , I'll show you how to submit your blog to the Google search console and also how to optimize it for the search engine using a free plug in .
Number three , I'll show you how to connect your blog with Google ads and to start generating money with your blog .
I'll also be talking about other platforms like zoic ads that will pay you more money than Google ads .
Number four , I'll show you how to get traffic and boost your blog .
I'll be talking about how to write your content , how to gain high quality back links and also what guest posting is and why it's critical for blog success .
So before I made this video , I purchased about 20 wordpress themes .
I'll , I'll show you guys later in the video , but I test the ins and outs of all of these wordpress themes and I narrow my list down to one theme that I think you guys are gonna really enjoy .
The theme offers a lot of features .
It's very lightweight and fast .
It has tons of templates .
So no matter what kind of blog you want .
To make it has something for everybody .
So with that said , let's get started with this tutorial .
So we're gonna build your blog in six simple steps and we will use this checklist throughout the video to help you follow along in this tutorial .
For step one , we'll get your domain and web hosting .
A domain is the web address for your website .
For example , my blog dot com and web hosting host your website online .
Number two , we'll download the theme and create the blog .
Now we will be using a premium wordpress theme for this video to create your blog .
This gives us the templates and elements .
We need to create your blog .
Now , I'll be very upfront .
It does carry a small fee but trust me , it's worth it .
Step number three , post optimization , we will configure your post to make sure they look great and explore all the features that you can add to your blog post .
Step number four , the theme customizer , the theme customizer controls the overall structure of your website and also gives you more options for your blog .
Step five website optimization .
After your website is up and running , we will make sure to fully optimize it .
Integrate seo plugins and integrate Google ads , sends and Google analytics .
Number six marketing .
Once your website is ready to rock and roll , I'll show you the general marketing techniques to get more traffic to your blog .
I'll also be talking about popular affiliate marketing platforms to get products to review so you can make commissions on your website .
Now , there is a link in the description of this video .
It'll take you to a page to purchase web hosting and welcome to name hero dot com .
Now , I'm recommending name here dot com for years and people love it .
Uh This week alone , I've had zero downtime with name Hero .
So you guys will have a reliable website and also my websites load at under one second with name Hero .
So we do test these servers to make sure that you guys do get the best web posting possible .
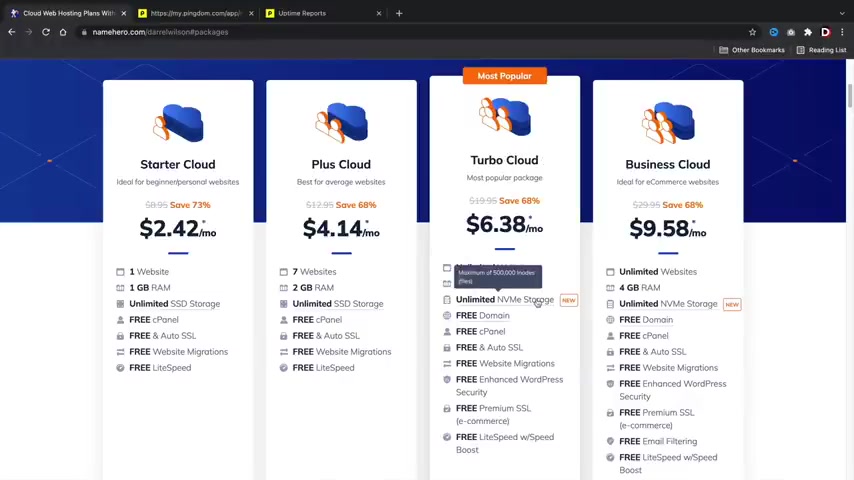
Now , once you guys are here , you'll click on , get started now and then it'll bring you to four different pricing options .
So we have the starter cloud , the plus cloud , the Turbo cloud and the business cloud .
Now , I personally recommend the plus cloud if you guys are just getting started out , like you're just getting your feet wet for the very first time .
But for those of you who have been using wordpress for a while and you want to upgrade and get some more performance , I would definitely go with the Turbo cloud because with the Turbo cloud , you guys do get the new NVB storage , which does just give you a little bit more performance with your website .
So you'll go ahead and pick a package that works best for you and your budgets .
And then once you guys uh figure your package out .
You'll go ahead and click on order now .
All right .
And here you're going to enter in your domain name .
So this is the name of your new website .
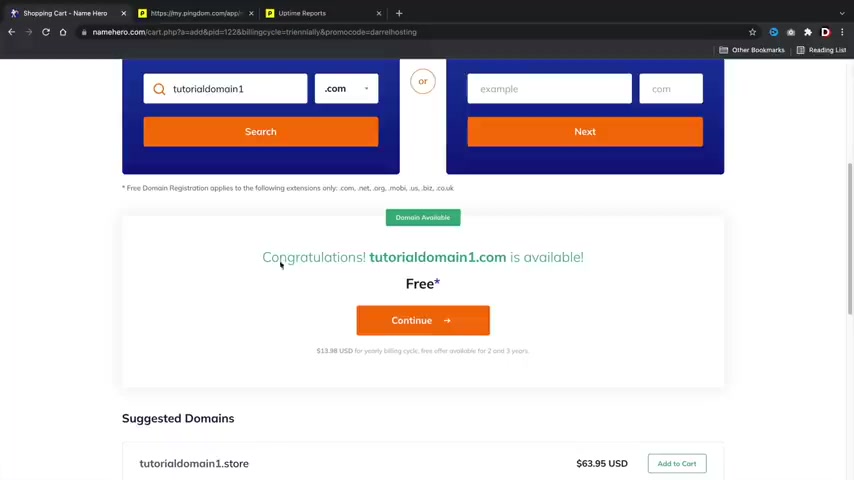
So , uh , portfolio website dot com or , you know , my news website dot com or whatever , whatever niche that you're building , you'll go ahead and put it here .
So I'll just put it in tutorial domain one dot com and see if that's available .
All right , cool .
It's available .
Now , I know it takes time to figure out the domain of your website .
So you know , give it some time , you know , it , it does take some thought for your new websites .
Uh Once you guys figure it out , you guys will click on continue .
All right , cool .
So next we have the billing cycle and we have three years , two years and one year .
Now , personally , I recommend one year you guys do get a large discount and this does give you enough time to decide this is for you or not .
However , if you guys are feeling very confident , I would recommend going with the two or three year plan .
You guys do get the uh deal the longer you sign up for .
So , uh it really depends on your budget .
But uh once you guys select a billing cycle , we'll scroll down and uh I don't recommend any of these up sells .
Personally , you can do this with free plug ins .
So , yeah , you guys don't need those .
And then we do get a free SSL with name hero .
So that's pretty cool .
Uh Once you guys select your billing cycle , we will then click on continue .
All right .
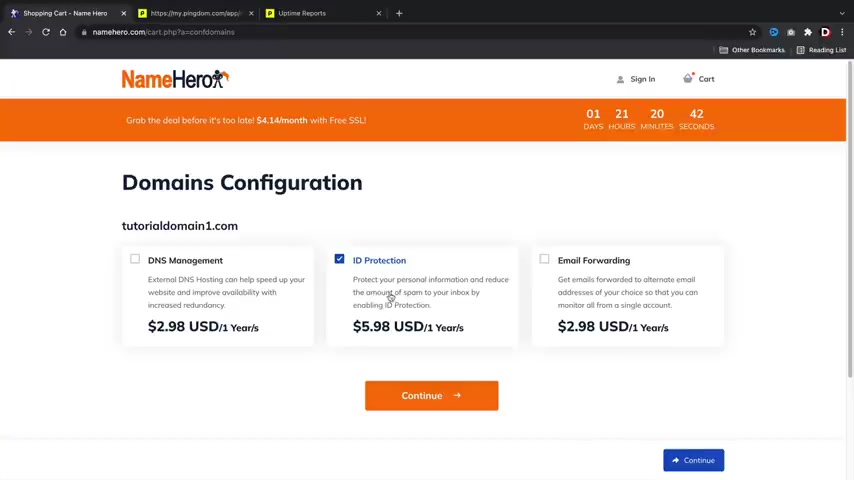
Next , we have the domain configuration .
Now , I personally recommend the ID protection guys .
This will protect your personal information from spammers and people trying to sell you sco packages and Viagra and all sorts of nonsense .
Whenever you guys get those weird emails in your inbox , it's generally because they found your domain online .
So this will actually protect you .
So you don't get spam in your inbox .
So go ahead and click on ID protection and then click on continue and look at that for a year of hosting .
You're paying less than $100 you're paying only 70 bucks .
You guys can also go the cheaper routes and get the cheaper plan if you're on a really tight budget .
But I think this is a great deal for web hosting for the entire year for this specific performance .
So you guys are getting a reliable and a fast server for this price .
So it's definitely worth it .
So uh go ahead and scroll down , just keep scrolling .
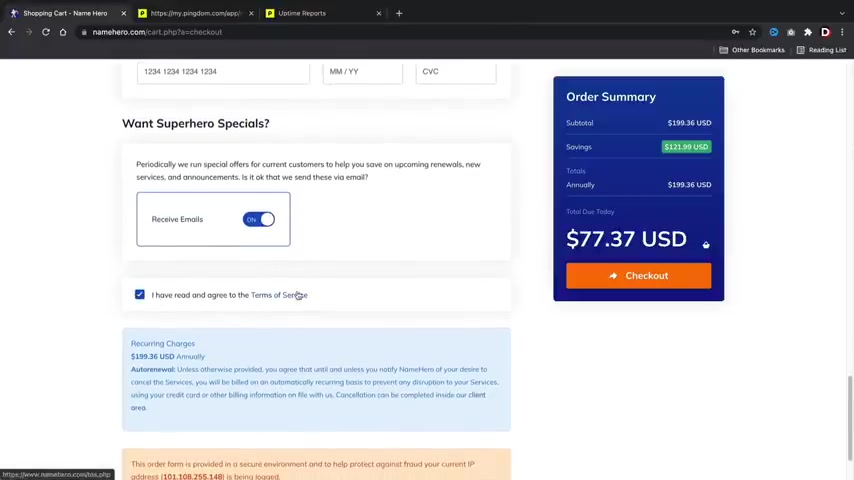
Now , you're gonna go ahead and fill out your billing information here .
So your first name , your last name , uh additional information you'll put in your password and also a support pin .
So this would be the pin that uh they would use to verify that it's you .
And then also we have uh payment methods so you can pay with paypal coin base , which is Cryptocurrency and credit card here .
You'll go ahead and put in your payment details .
And if you guys do want to get their spam or their emails , they , they actually sent some pretty good emails .
Guys , I'm not gonna lie .
They have some cool uh promotional offers .
You'll go ahead and check that box and then you'll of course uh agree to their terms of service , right ?
And I'm sure you guys are all gonna read uh this here , right ?
You guys are all gonna read this .
I don't think anyone ever reads any of this stuff .
But uh yeah , you'll go ahead and uh check the terms of service and once you guys have checked out , I will meet you guys in the customer portal .
All right , and welcome to your new dashboard .
So this is your current dashboard .
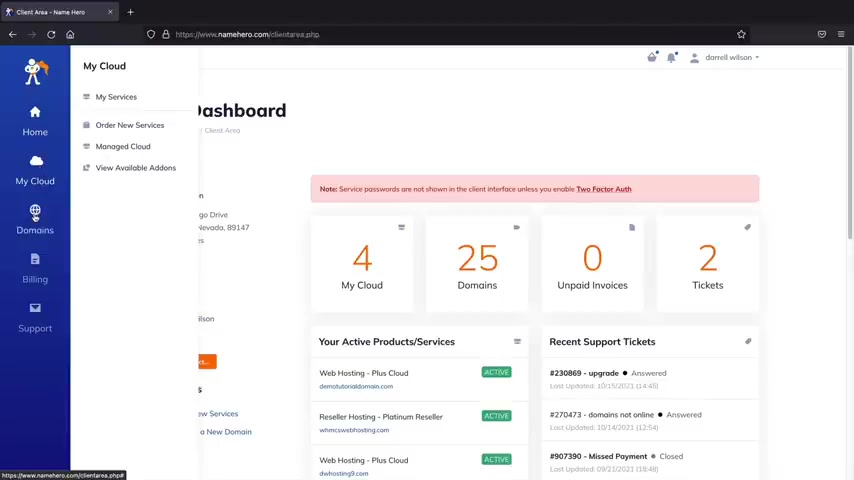
As you guys can see , I had many different packages , many domains and I also have tickets with name hero and they really help me out with all of my problems .
So this is just your interface on the left side , you can see your hosting packages .
These are your current domains .
You can always register a new domain .
Uh also billing .
So if you want to see your payments or you wanna add funds or you wanna adjust your payment method , you can do that here .
And also the support .
So if you guys run into something weird , I know with websites things just kind of get weird sometimes .
Uh you guys can always open a ticket here and they will help you out with all your problems and they are pretty fast .
I mean , I think maybe under one hour they can help you guys with all your problems .
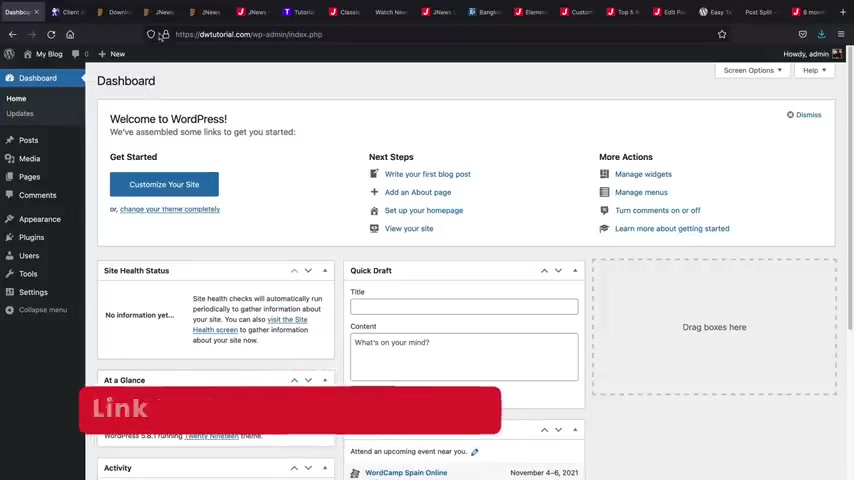
So once you guys are here , let's go ahead and install wordpress onto our new domain .
You'll first click on my cloud .
Now , here we have hosting packages now , you should probably only have one here .
So just go ahead and click on your hosting package .
And next , we're going to see this log into C panel .
Go ahead and click on login to C panel .
All right , cool .
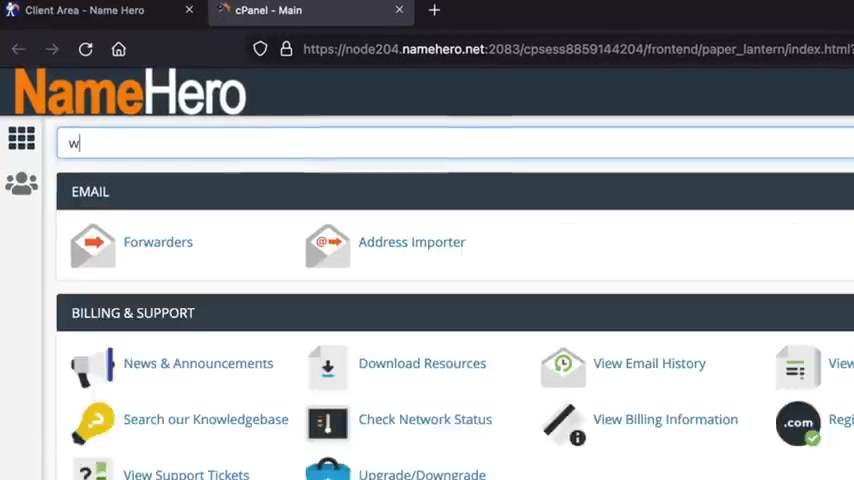
So now we're going to go ahead and install wordpress onto our domain .
So up here , we'll type in wordpress .
Here we go .
We have Wordpress manager by Soulus .
We'll click on this .
All right .
And from here we're going to install wordpress .
You guys can see I had many installations of wordpress already , but right here you'll click on install and now we're going to look for the domain that we purchased .
So right here you have the choose domain section .
So you'll probably see your domain that you purchased .
I'll just go ahead and select this one , but you're going to select the domain that you purchased and for the protocol , make sure this is htps , which is the SSL now for Indi directory .
Make sure nothing is here .
All right .
I don't know why that's there by default , but oops , oops .
But , uh , make sure nothing is there because that will install your domain onto like your website dot com slash something .
And you don't want that there .
It , it , yeah , just don't have that there .
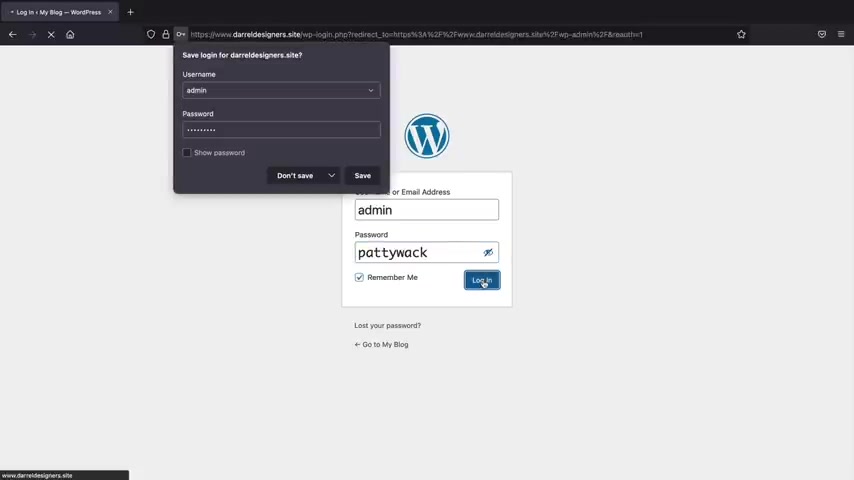
Make sure that's make sure that's empty now for the admin user name .
Go ahead and give yourself an admin user name and a password .
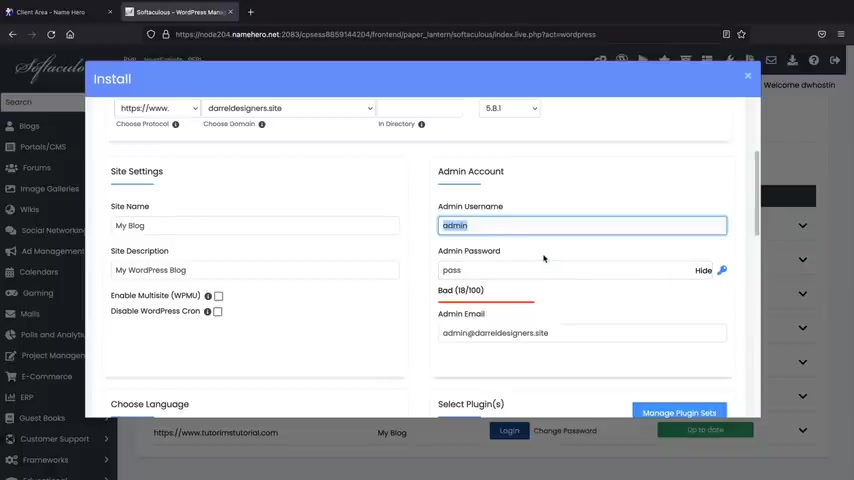
And this is what we are going to use to log into the website .
So whenever you want to build your website , you're going to use these login credentials .
So make sure you write these down , I'll just put admin , never put past guys .
Uh Make sure this is something unique .
I'll just put uh Paddy whack and your admin email .
Make sure that this is an email that you have access to because when you forget your password , they will send this information to your email .
So I'll put in my , my gmail account here , my famous PC Hoarder , which I do get tons of spam .
And below that , you can always select your language .
We can always adjust the language as well uh inside the wordpress dashboard , and I'll show you how to do that in just a bit and we're gonna keep scrolling down here to the bottom .
They have these other themes they want us to use .
But uh we're not going to use these and right here you'll click on install , yeah , they said 3 to 4 minutes .
That was not 3 to 4 minutes .
Right now .
Here we have install wordpress and this is the administrative URL administrative URL .
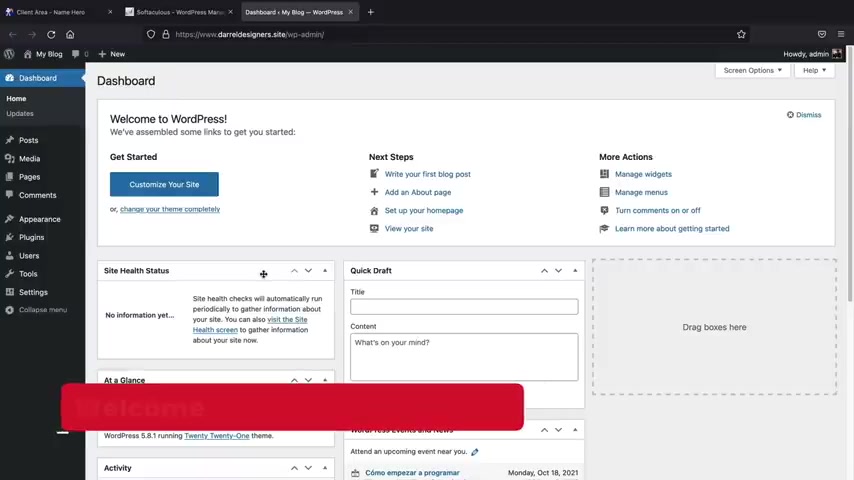
So just go ahead and click on this link and this will log you in to your website .
All right .
Awesome .
So now we have a wordpress installed and our website is now live on the internet .
And if you want to see what your website looks like right now on the internet at the top left , right here , you'll just click on visit sites and this is the current theme that they are giving us and it is really bland , really boring , ugly , but not to worry , we'll make it look really good .
So to go back to your dashboard , go ahead up here and click on dashboard .
Now that we have our website online .
Now , let's go ahead and adjust some of these general settings .
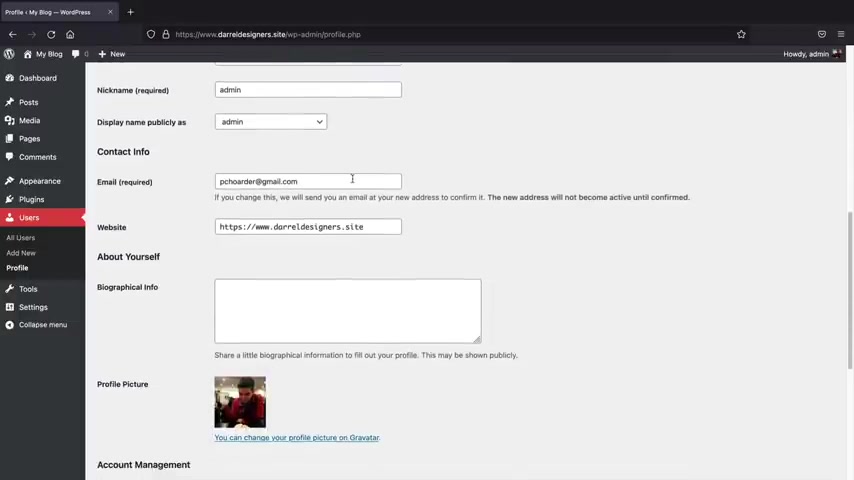
The first thing we wanna do is go to users and click on a profile .
Now in the future , if you guys ever lose your password or if you want to change the color scheme , this is where you're going to do it .
Uh , I think for this video we're gonna use midnight .
I just like midnight .
It's really easy to see .
Uh , these other ones are just really , really tacky .
I mean , this is , that's way too much , you know .
So , yeah , I think we're gonna go at midnight .
I just like that , it's a lot easier to see .
And , uh , we're gonna scroll down here now .
You can always adjust your email .
So , uh , you can always change your email and remember .
This is important because if you forget your password , the password will be sent to that specific email .
So you can always adjust that at any time .
And below that , we have a new password , this is where you're going to uh change your password .
So for wordpress , if you ever want to change your password , this is where you're going to do it .
And once you've made all the changes that you want , you'll go ahead and click on update profile .
Now , let's say , for example , you guys speak a different language on the left side right here , we have settings , we'll click on general .
Now , here you can enter your email or you can update it at any time .
So if you get a new email address and you want to update it , you would do that right there .
And below that , we have the site language .
Now , if you change this , uh this will actually apply to the back end .
So you can put any language that you speak .
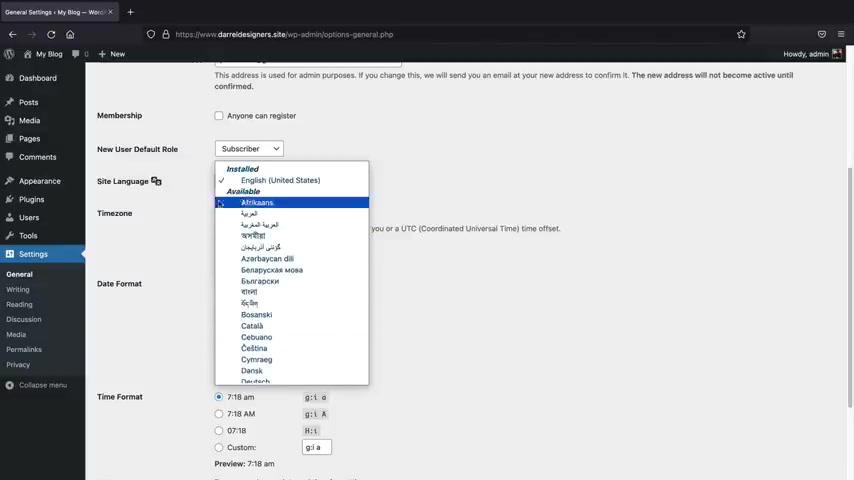
So if you speak Spanish , Portuguese , Arabic , Hindi , whatever you can adjust the language for your uh back end options .
And below that , we'll go ahead and click on save changes .
The next thing that we need to do is we need to adjust our Perma links on the left side , you're going and see Perma links .
Now , here we have a few options , but you want to select this as post name .
And the reason why we do this is because when you go to a website , you see like , you know , your website dot com slash shop , right ?
Not like all this , you know , numbers and uh it just looks really cluttered and ugly and the post name option is the best for seo purposes .
So once you select the post name , you'll scroll down and click on save changes right now , let's say , for example , you guys want to log in and log out of your websites , maybe you're at a friend's house and you wanna , you know , mess around with wordpress .
Uh First , what I'll do is I'll log out .
So right here , I'll go ahead and click on log out .
So right now I'm logged out of my website and there's no way for me to enter it .
So whenever you want to log into your website and make changes , you'll go to your address , bar and type in dash WP dash admin and press enter from here , you guys can enter in your login credentials that you guys use to install wordpress .
So I believe mine was admin and it was Paddy , right ?
Paty .
We can always take a look here , remember me and login .
So that's how you guys can log in and log out of your wordpress website .
So you can pretty much work on your website from any location .
All right , cool .
So your websites online and we're all ready to go to the next step .
So , in this next part of the video , we're gonna be downloading and purchasing a premium wordpress theme and uploading it to our Wordpress web websites .
Now , I really did my research before uh promoting any of these themes on theme for us guys .
Trust me .
I spend quite a bit of time and this theme hands down .
You guys are gonna love it , has everything that you need and it looks great .
I think the best part is it's really simple to learn .
So let's go ahead and get started .
All right .
So next , we're going to upload a premium wordpress theme to build out our blog slash newspaper websites .
Now , there is a link in the description of this video and it'll take you to a page to purchase you guys ready the J News wordpress theme .
Now , guys , I spent about $500.02 weeks testing out dozens of premium wordpress themes and I narrow my list down to one theme that I think you guys are gonna really enjoy .
The J News Wordpress theme offers the most features yet .
It's also the most simplest to use out of all of the blogging and newspaper themes .
I got to be very honest .
A lot of those other themes were very complicated , but Janus hands down is the easiest to use .
Now , let me go ahead and give you guys a three minute overview about this theme .
Show you some of the features and also the demos that come with this theme and then I'll talk about why I really like the Jane wordpress theme .
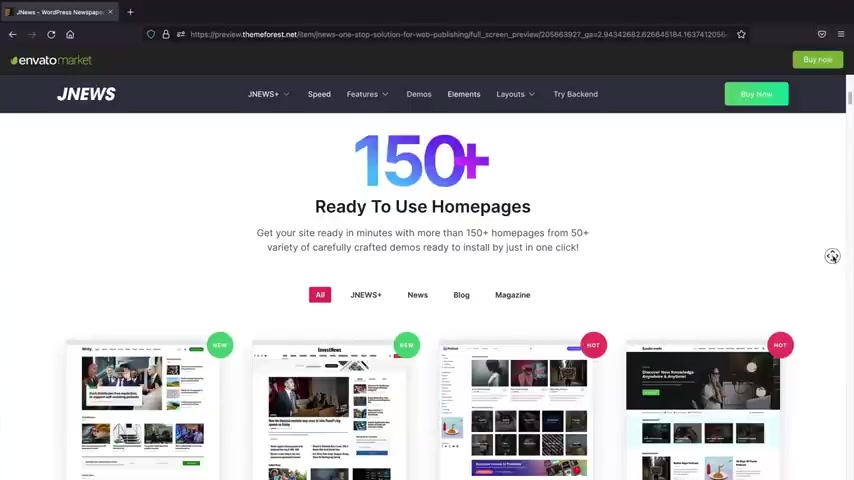
Now , the first feature is they have more than 100 and 50 demos to choose from .
Now , each of these demos also has various home layouts to pick from .
So if you're building something like a magazine website or a blog , uh they pretty much have you covered and they have just tons of demos .
They also do come in light scheme and also a dark scheme as well .
They also have this news plus which are like premium blog layout .
So if you want to build something really advanced , like a podcast website or a like a a youtube style website , they pretty much have you covered .
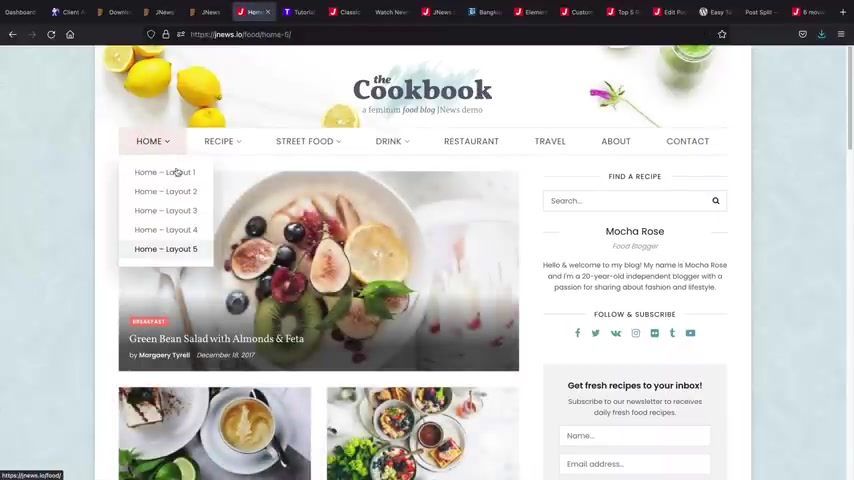
So let me go ahead and just show you guys one of these demos .
So here's an example of one of their blogs and you can see on the left side how there's multiple layouts to choose from .
So , uh you know , if you don't like one layout , you can go ahead and you know , pick another one .
You guys can also build this page from scratch and I'll walk you through on how to do that in just a little bit .
But uh what I like also about ja news is that they have features that a lot of blog themes .
Don't let me just go ahead and click on this blog post at the top , right .
We have this like and dislike ratio , which is which is pretty cool .
You can actually have people like your posts and stuff .
You can also just have the like button there .
So people won't see the dislikes .
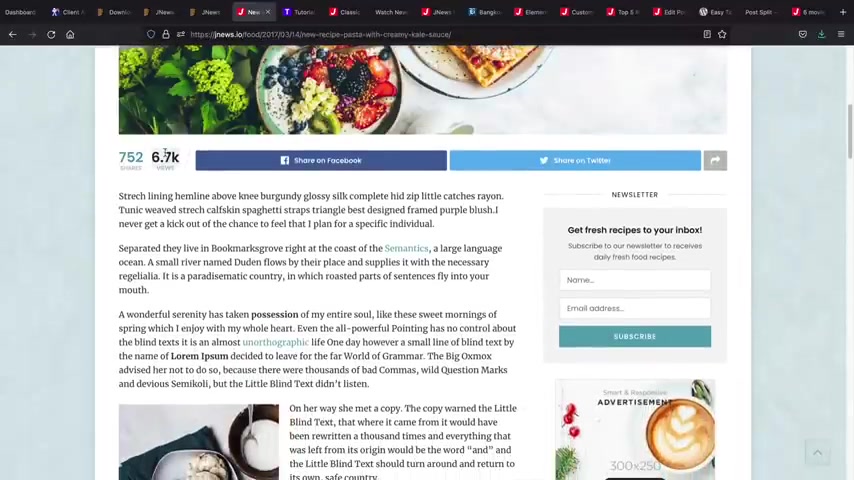
Uh You can also adjust these shares and this view counter as well .
So if you don't want people to see that or if you want to make it look like your your blog is viral , you can add like 1 million views or something like that to kind of increase engagement on your blog .
But what I also do like about ja news is they have like interactive content .
I like to call it .
So they have this checklist here and this can be something like how to make a website , a workout routine or just something like that where you just can actually follow along with your blog and say , yeah , you know , we got this done , we got this done .
I really do like this .
They can also print out the instructions or recipes or whatever it is that you want to post on your blog , which I really do think is cool .
Now , also , if you guys just want to keep it simple , they have other various layouts to keep it very simple where this is more like a uh you know , a wordpress blog or web posting or like a tech blog where you can talk about , you know , how to make a website or , or whatever , you know , they have , they pretty much have a demo for everyone out there .

So next , let me go ahead and show you guys the light and dark scheme .
So if you guys do decide to have like a blog or newspaper website , your visitors can actually uh turn it in like a dark mode , which is just easier on the eye .
Also , if this is like a news website , they can actually adjust this in a dark mode as well .
So it's again , it's just easier on the eye if they're reading at night , they don't have those like bright white lights on the computer .
You know , now let's take a quick look at the actual news layout .
So this right here is their news layout and it looks great , you know , in fact , it looks identical to like the Bangkok post where we have like , you know , stories on the right side , we have the featured story and then they also have this little left um you know , area where they talk more about their stories .
So here you see that we have this featured image where users can go ahead and scroll through your blog post .
They also do have like the trending , they can see the comments and also they can view your latest post as well and it just looks like a really clean blog layout .
You know , it's very ideal .
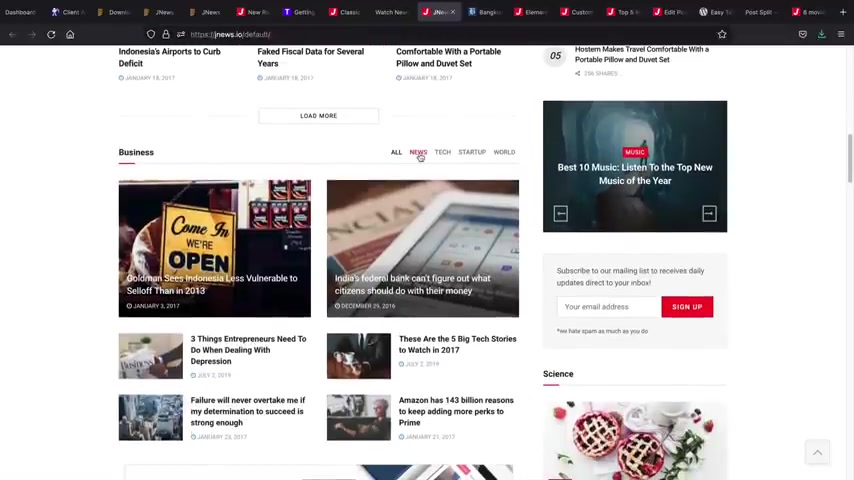
Uh Here , we have a different category of business and users can scroll through each category .
Now , this is a category and these are subcategories .
So I'll walk you through on how to create that in this video .
But overall , I really do like this blog layouts .
Now , you guys might think to yourself , this looks like a lot , right ?
I mean , this looks , there's a lot going on here and that's what I first thought .
I'm like , you know , man , I don't know , this is , this is a lot going on .
But let me just go ahead and show you guys how to create this really quick .
So , for example , you know , we can actually recreate that really simply .
So this is our , you know , our , our blog right here and this is the J News wordpress theme and all you need to do is just , you know , just drag in an element and everything propagates , you know , and then you can go ahead and pick through the styles .
So let's say , you know , you want to change the style here , you know , like that , right ?
Or I don't know if we can pick this one here where it has that white background .
I mean , you can go through uh you can go through these in the video , but they do have tons of them to go through .
Uh you'll see here that they just have a lot of different layouts to pick from and you can adjust them to any style that you want .
So after we have like this hero image , you can go ahead and say , all right , you know , I got the hero image , I just want to uh drag and drop more stories below that , right .
So now we have more uh you know , more stories and blog posts and we can always adjust the style of these as well .
So there's different styles and layouts to pick from .
And then you can give this a title like uh new stories , right , or something like that .
And then you can also give it a second title like a trending , right ?
Trending , you know , and then you can also adjust the text so you can see how it's really simple to make this uh this newspaper style website .
So ja News does make it really easy to use and I really do like that .
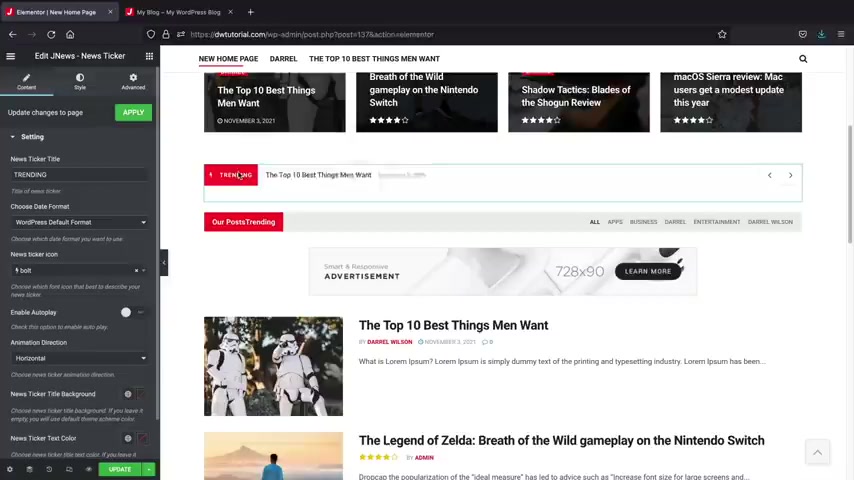
Now , they also do have a lot of other noticeable features like a side feed setting because I did mention that they have a lot of features that a lot of blogs don't um my favorites at the end , but we'll talk about that when we , when we get there .
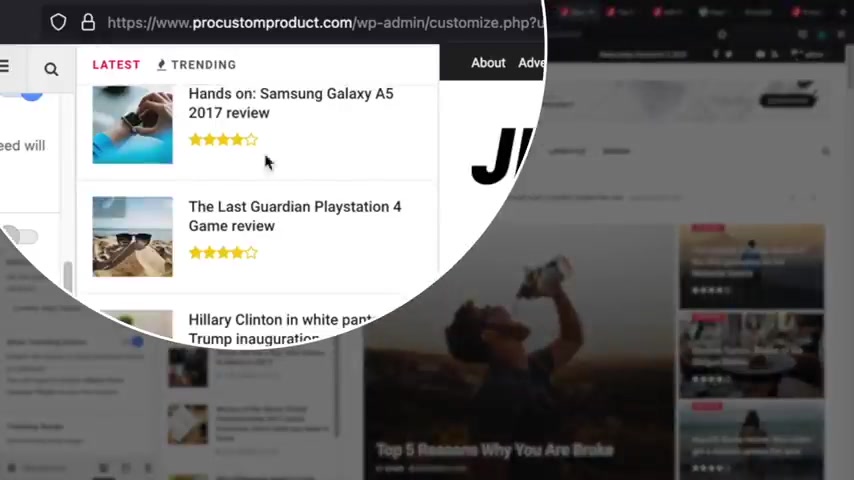
But um I do like the side feed .
So with the side feed , uh it'll actually display all of your posts on the left side , you can also put it on the right side and then you have more options to display like the number of posts , we can show a trending button .
What's that ?
Do ?
Ah , we got the trending on the top , you know .
So uh we can show categories , right ?
We can show different categories and then we can also like set the trending range , so like the last seven days or something .
So they do have a lot of unique options with this wordpress theme .
Uh Also , if you guys want to go ahead and build a custom header and a footer , I'll go ahead and turn this off , but I'll just give you a quick little demo of this header and footer builder .
I really do like it .
So for example , we have this header and footer builder where you can drag in elements , but you know , maybe we're lazy , right ?
I don't want to build this from scratch .
It's gonna take too much time .
So they have different layouts to pick from , right .
So here's our header , right ?
And we can adjust it to something like that or , you know , we can change it to style seven or is that one good ?
I think that one's actually pretty , pretty nice , you know , and then we can also move the icons around .
So if I want these social icons next to the menu , I can just drag them over there and uh there they are , right ?
Or I can just put them below the , below the logo , right ?
Put them , put them right there , there , there we go .
So you guys can see that you have this drag and drop menu builder .
I really do like it and they have a lot of different layouts to pick from just making it really easy to build your newspaper slash blog website .
And lastly , let's talk about the actual blog post layout and then talk to you about my favorite feature that J news offers .
But uh usually with wordpress Guys , with the structure of your blog post usually locked in .
So for example , this is the same structure that's going to appear usually on all of your pages .
And that's just how Wordpress themes work .
So you're gonna have the same header , the same image and the same body style for a lot of the same pages .
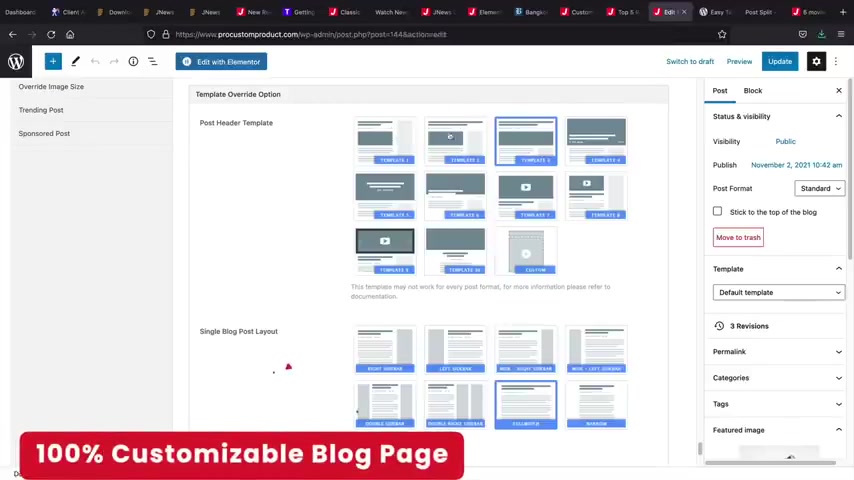
However , with J news that changes , you guys can actually have a specific header template and a layout for your blog post and you can mix and match this for every single blog post .
So you're not stuck and locked in , you know , so for example , if you want to have like a full with a page right here for your your header instead of something like this , we can do that .
And then also , you know , if you want to have like some uh you know , a narrow content , we can change it for this specific page .
So I pick those two layouts and then I'll click on update and there you go .
So now you'll see how the header has changed .
And also we can see that uh the entire layout has changed .
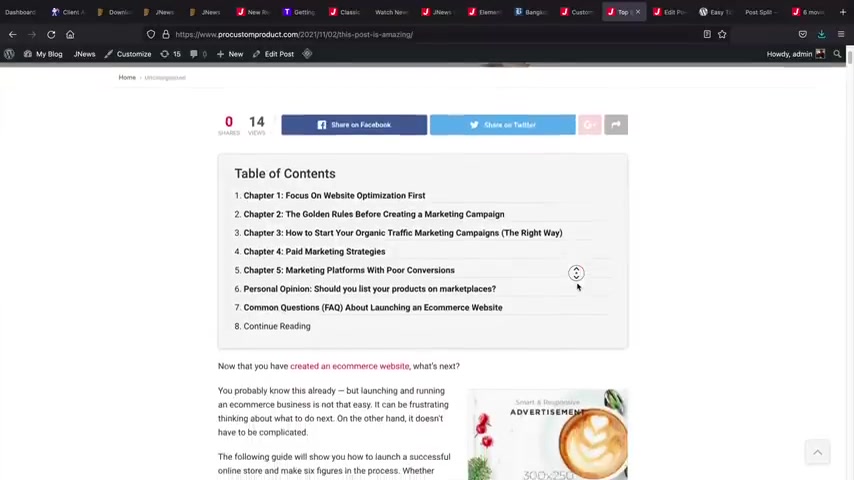
Now , what I like most guys about this theme is the table of contents that is right now , as you guys know , blog posts are getting longer and longer .
And that's because Google is recommending that now for blog posts , they want you to have a lot of content and without a table of contents , your site is really hard to navigate .
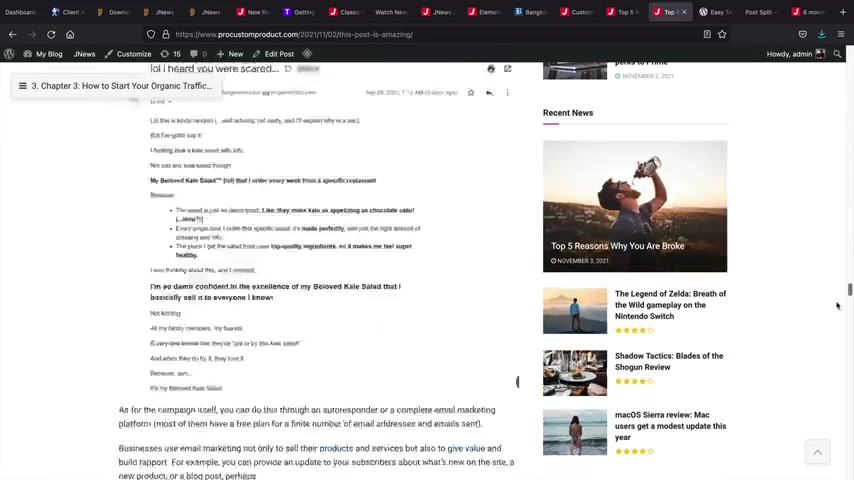
So for example , uh let me just show you guys this blog post , this is a very long blog post and it's really hard for users to go through your blog and find out what you know what information they're looking for .
But with the table of contents , they can simply navigate your blog really easily .
So for example , they can say let's go to chapter two , let's go to chapter four , chapter five and so on and so forth .
So it brings them to the end of the blog here and you just can always click on this and go all the way back up .
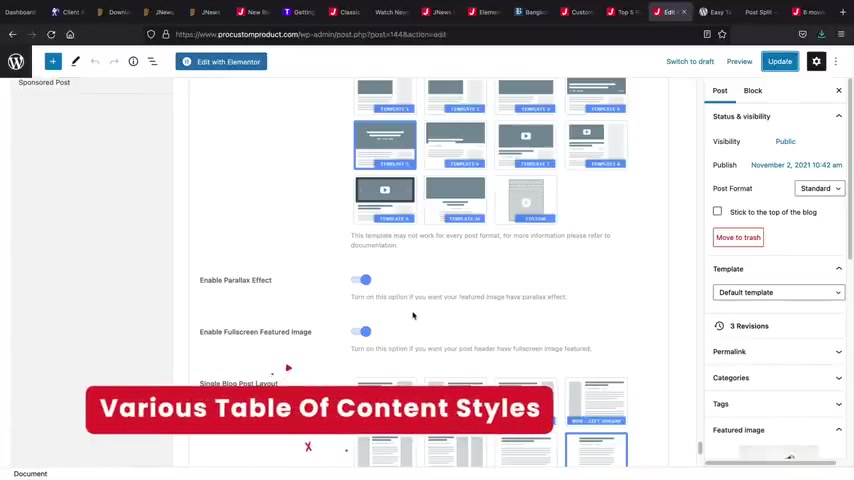
Now , what I also like about the actual uh table of contents is that there are various styles and and choices to pick from .
So for example , I'll turn this off and here we have a table of content .
So we have different layouts , we have template 11 , 12 , 13 , 14 .
And you can also adjust your actual table of contents .
So if you want it to have that floating style , which I showed you earlier , we can do that or if you want to just have a normal style , you can just have a normal style .
But I do like both .
I kind of want it floating because that kind of shows users uh where the table of content elements is and it just helps them navigate the blog easier .
So here I'll scroll down and there we go , we have our table of contents .
And if I click on one of these , it will then take the user to the specific chapter of the blog post .
Now , Google is recommending table of contents for a blog .
So if you don't have one , you might get pinched for seo purposes .
Now , the reason why I like the table of contents the most is because it looks natural with your blog and the problem with the wordpress themes is they don't really have one .
So for example , the only way you guys can have a table of contents widgets is by installing a plug in .
But the problem with these plugins is they break and they don't look like they're part of your website and you can only place them as a side widget right here .
So let's say for example , the user scrolls , you know , there it goes , they can no longer see the table of contents .
But with the news wordpress , the users can kind of see it right here and keep navigating throughout your website , which I really do like .
Now , there's one last cool feature that I want to show you guys .
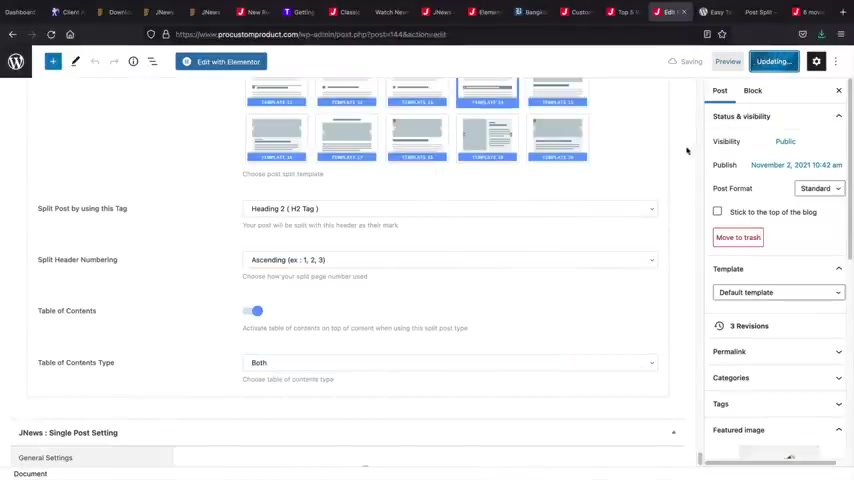
Sorry , I , I know this is a lot , but I just want to really explain why I like this theme is the fact that you can split up your posts .
So let's say , for example , you don't want a table of contents , but your blog post is simply too long for users , right ?
Or your blog post or your news article is too long , you can actually break this up and have it on multiple pages .
So for example , you'll see here how uh we can actually break up the actual blog post by H two and H three tags .
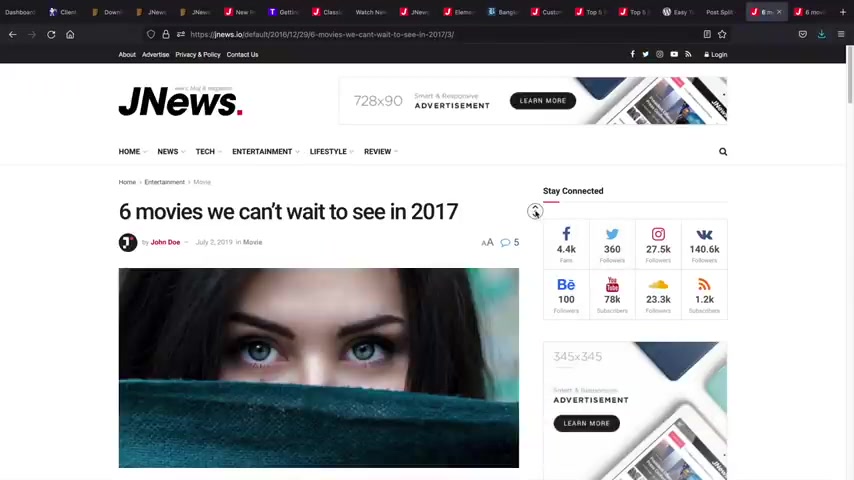
So for example , I'll just click on one of these DeMoss here and just give you guys a quick example .
So six movies we can't wait to see in 2017 .
Well , that's a long time ago .
But uh here we go , we got Batman , right ?
The Batman movie .
But uh if we scroll down , you notice how that's the end of the blog .
However , we have to click on Beauty and The Beast , which is number two .
And this actually breaks up the blog post onto several different pages .
And there's a lot of reasons why this is good .
Number one , you make more money because there's more clicks .
So for example , if you have ads right here and use your scroll , you'll get more impressions for Google ads sense and we'll talk more about that a little bit later in the video .
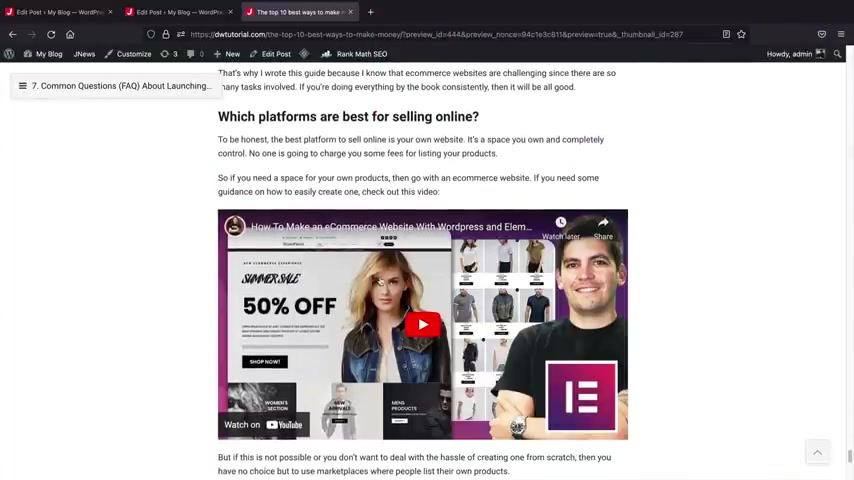
So if you do want to split up your blog post on to specific pages very similar to what Healthline does .
And also Mashable , uh we can do that with the news wordpress theme and don't forget , you can always build a mega menu with the news wordpress theme and I'll walk you through how to do that .
So if you do want a mega menu on your blog or your newspaper website , I'll walk you through on how to set all this up today in this video .
So I hope you guys are excited to use this theme just like I was after I used it for probably about a few hours .
I was like , oh my gosh , this is a theme that we're gonna use .
Now , this theme costs $59 .
It is a one time fee .
You won't have to pay this again .
But uh overall , I would say this is the all in one solution for a blog or a newspaper website .
So let's go ahead and buy it .
You know , let's give them a chance here .
So once you guys are here , go ahead and click on add to cart and then add this to the cards .
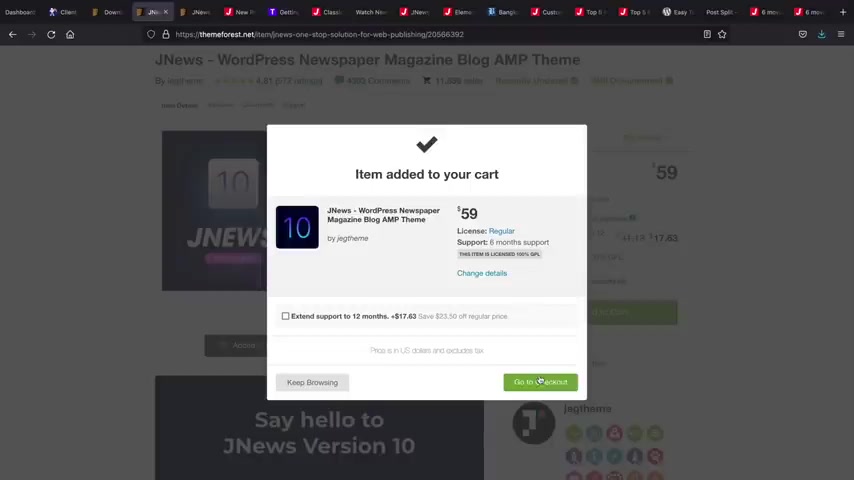
Once you guys purchase this , I will meet you in the downloads where we are going to download and upload this to our word press website .
All right .
So welcome to your in dashboard now .
Really quickly guys .
No BS here .
I , I really did buy all of the top over premium wordpress themes .
So you guys can see , I bought like the top six themes .
I went through each of them .
I really tested them out and I mean , Jane Hands down was just like the winner .
It , it took me about like an hour to realize .
Oh , ok .
This is the winner , you know , it was really good .
So uh once you guys see the Wordpress theme , go and click on download and click on , install the Wordpress file only and then just save it onto your computer .
So say file and click on .
OK .
You guys will also need this uh text later .
This is your purchase uh code .
So you will need this to unlock the Wordpress theme .
So go ahead and also download this as well and just save it on to your computer .
So I'll just save this as well .
All right .
So now that we've downloaded the Janus Wordpress theme , let's go back to Wordpress and upload it .
All right .
So the next thing we're gonna do is upload this to our website .
Now , guys , uh this wordpress team is actually a little bit larger .
So if you guys go to appearance and themes and try to upload this yourself , uh usually it might time out and I've tested this a few times .
So we're gonna upload it directly to our server , making it a lot faster .
So let's actually go to our C panel , right ?
So this is my dashboard where I owe 20 bucks .
All right , we got , we gotta close that we'll pay them later .
But uh let's go to my cloud here and then we'll actually click on the hosting package .
So whatever hosting package that you guys use , go ahead and click on the hosting package and then log into C panel .
Now , you guys can be using any hosting and go to your C panel .
So you don't have to be using name hero specifically , but , but I do recommend it .
But uh you know , that's up to you .
Uh up here you'll type in file manager , file manager , right ?
And we'll click on file manager .
All right , now you're gonna see your domain .
So on the left side , you'll see your domain name , right ?
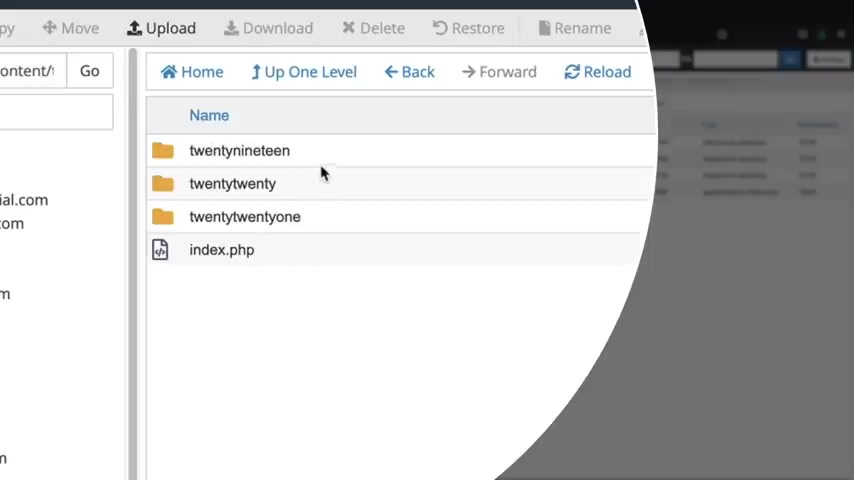
I'm just using this demo domain just , you know , just for giggles and whatever .
But uh you'll go ahead and click on your domain and then you'll see WP content , double click on WP contents and then you'll see themes , double click on themes .
And now we're gonna upload it here .
So just click on upload , select the file and then we're going to click on the actual file here .
So it's this one right here and I'll click on open .
All right .
So now it's uploading our theme onto the server .
It's pretty quick , right ?
It's pretty quick .
Here we go .
I'm not going to edit the video .
There we go .
All right .
Cool .
So once that uploads to your server , you'll click on , go back .
All right .
So now you can see that we have the theme there , but we need to extract this theme .
So right , click and click on extract .
Now you must extract it to WP content slash themes .
OK ?
So make sure that's exactly like my screen .
It'll be your domain obviously .
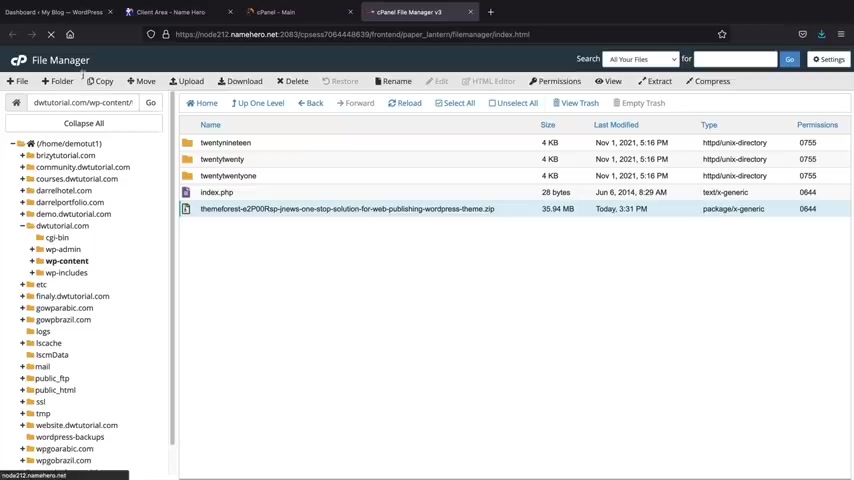
Not , not mine , right ?
And then you'll click on extract files .
Cool , click on close and now just refresh the page .
I'll click back on my domain right here , which is this one , there would be contents themes and there you go .
So it should look just like that .
It should have a little folder and also say J News .
And at this point , you guys don't need the zip file anymore .
You can even get rid of it .
So , right click and then delete it .
Now guys , I gotta be honest , that was the only techie thing you'll have to do in this whole video .
Everything else is like drag and drop .
All right .
So don't panic .
But uh let's go back to our site here and let's go to appearance and click on themes and there it is .
All right .
Now you'll see that J News is theirs .
So if you guys have any problems , just go back and try that out .
But uh I , I hope that was self explanatory .
So we'll go ahead and activate this theme , right ?
So , right here in our JA news , we'll click on activate .
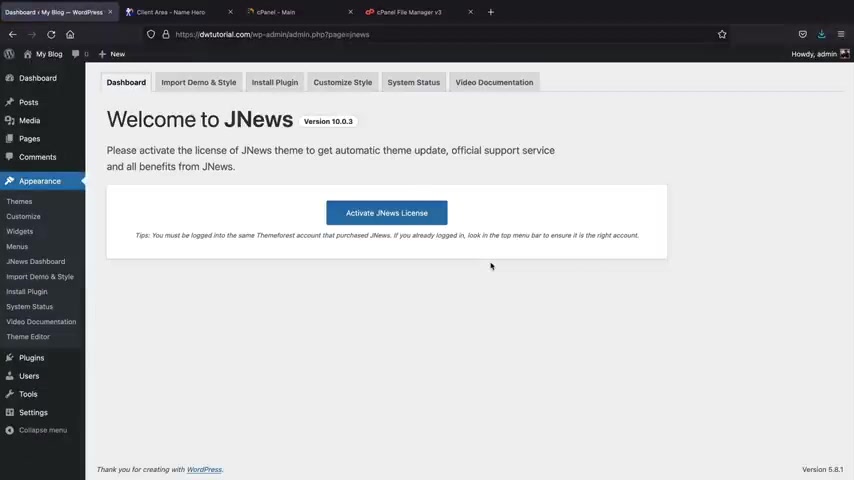
Now , the first thing it's gonna ask you to do is to activate your license .
So , remember earlier how we talked about that purchase code , you're gonna go ahead and paste that purchase code , but uh just click on activate Janus license and now it's bringing us to activate license .
Now , usually it's synced up with .
But if it's not , um you'll go ahead and enter your license key right here .
Once you do that , you'll just click on activate .
So mine , obviously , I , you know , I have it activated , but yours will say uh you know , activate .
So just click on activate website and congratulations , you guys are done .
So at this point , news has now been installed on your wordpress website .
All right .
So congrats Jane hasn't been activated and you know , welcome to the J News club , you know , welcome to the blogging club .
Uh This next step , we are now going to import some demo content .
So at the top right here , you'll click on import demo and style .
Now earlier , I showed you all some of those demos and you guys can have access to all of those demos right here .
So whether you're building a blog or a newspaper websites , um you guys can go ahead and pick a demo that works best for you .
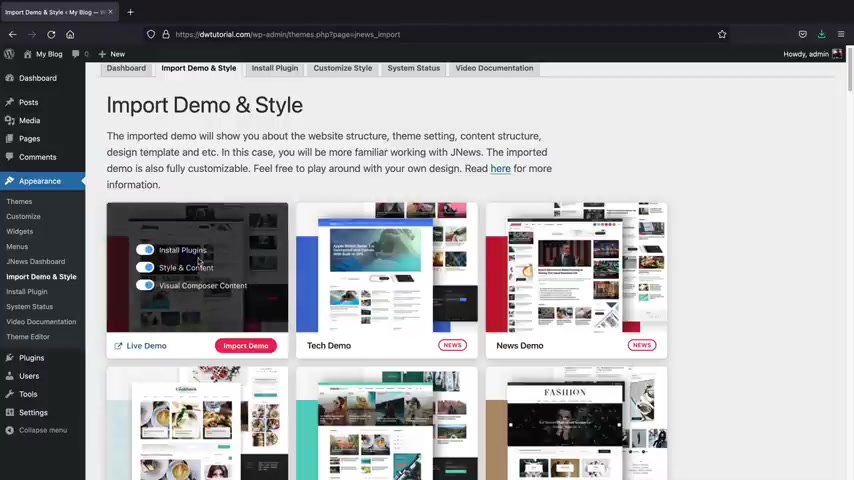
So , yeah , they do have tons of them to go through , right ?
I mean , it just keeps scrolling , you know , it keeps loading .
So they do have a lot of layouts to pick from .
However , to follow along on this video guys , I want you all to uh click on the default demo .
Now , before you guys actually install this uh in any of these demos , we want to go ahead and check this box right here .
Uh This right here allows us to use the elementary page builder and not visual composer .
So you guys can actually use both builders .
However , element is a lot better and popular than visual composer .
I don't even know people still use that builder .
I've never liked it .
Even when I first started using wordpress , you know , I never liked it .
But uh you'll make sure that install plug in is checked , style and content is checked and you'll make sure elementary content is checked as well .
Once those are checked , you'll then click on import demo .
And now it's saying before we notice blah , blah , blah , blah , blah , I'm sure you guys are , you know , whatever , just click on .
OK .
Just click on .
OK .
There we go .
So just give us about a few minutes while imports the demo content onto your wordpress website .
All right , cool .
So the demo import has finished .
Let's click on .
OK ?
And now let's view the website .
Make sure everything , everything looks good .
All right .
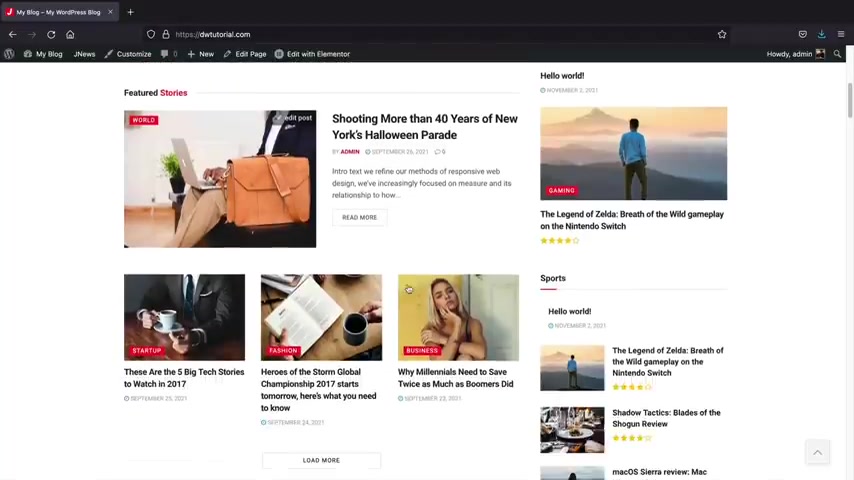
So here we go , we have our demo and if we go ahead and take a look , everything looks good .
So we have all of the posts have been loaded .
Uh We can see that we have all the demo contents and the structure is there and everything looks great .
So you guys can just go ahead and take a look at your site , make sure everything looks good .
Now , there is one small thing that you guys probably saw was the fact that we have this gray post .
Now , this is the default post with wordpress .
So don't worry about this .
We're actually gonna delete this in just a bit , but just go ahead and check out all of your uh you know , your pages and everything and make sure everything looks good .
So yeah , now we have successfully imported the devil contents onto our website .
Now , before we go any further guys , I wanna show you all how to delete this post and also how to make a new one .
So let's go back over here to dashboard and here we have posts and we'll just click on all posts .
Now , if you're brand new to wordpress and this is your very first time .

This is where you can uh create posts and also view your posts .
Now , the post that is created by default wordpress is this uh hello World Post .
So let's delete this .
I'll click on this and or you know , let's just do this , just click on the trash .
There we go .
It's much faster , right ?
And this is where all your posts are .
So this is just demo content .
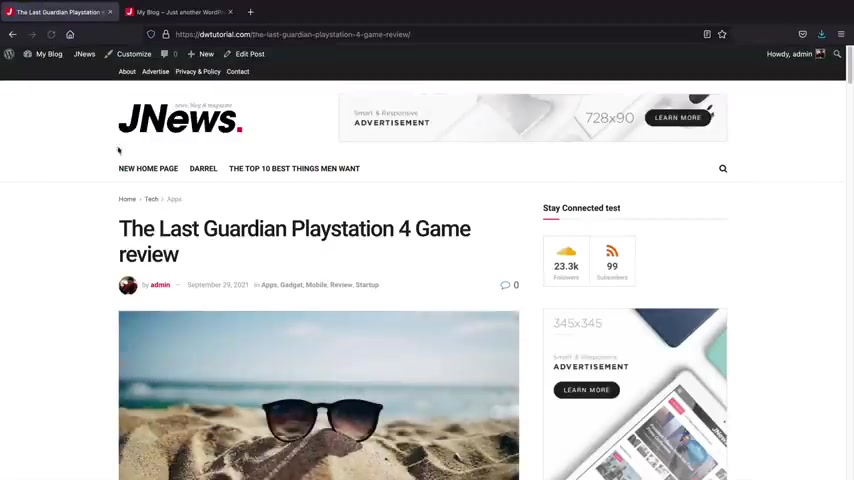
So for example , if I click on view post , this will just show us the actual post .
And you know , here they're talking about the legend of Zelda .
You know , although they're using the wrong image , right ?
They probably should have used a picture of Zelda , but they probably didn't want to get in trouble by Nintendo .
So that's probably why they used uh you know , uh just a random uh a random image .
But now that we know how to delete posts and stuff , let's now create our own post .
And I'm gonna go ahead and just close this box at the top right here .
Let's click on add new and we're gonna create our first post .
All right .
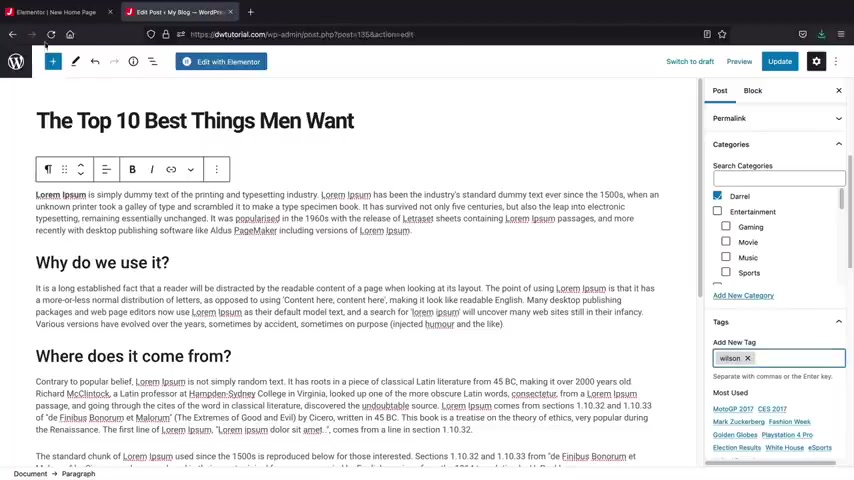
So we're gonna add in our title for our blog post .
So just go ahead and give your blog post a name .
Now we're just gonna use this so that we can recognize this post throughout the video .
So make sure it's something that you can recognize here .
I puts the top 10 best things men want , right ?
I'll just put in my my demo content I stole from some other website , right ?
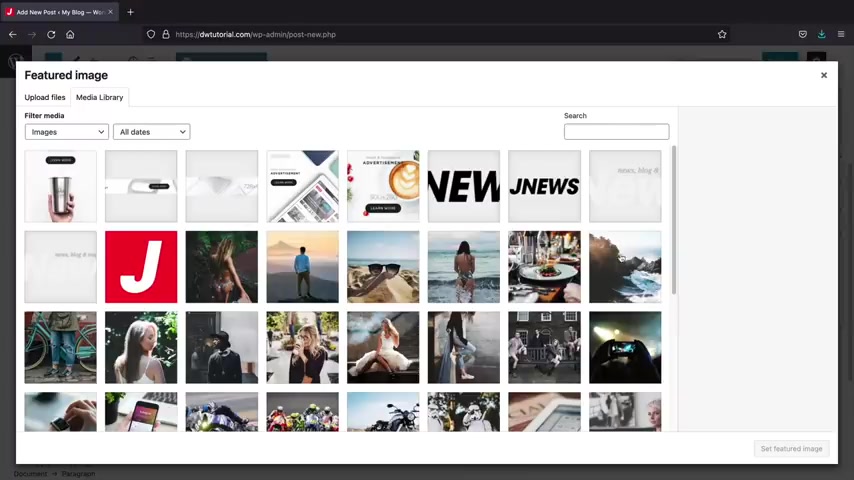
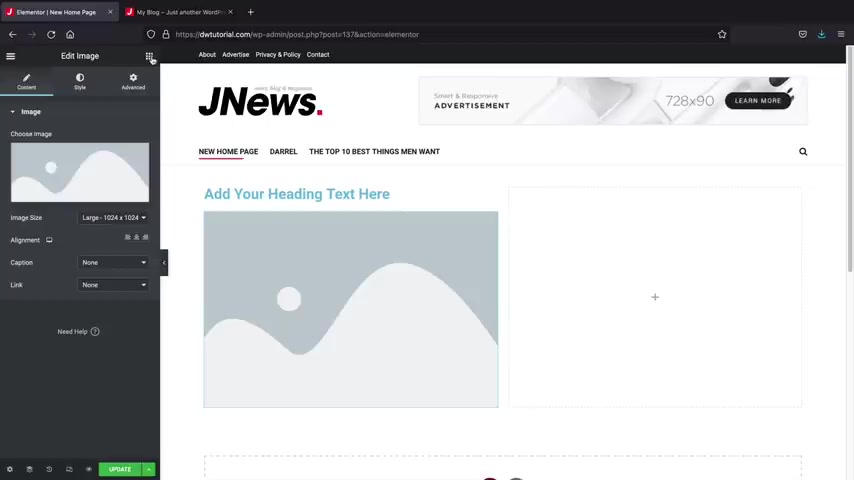
So just lower I demo content and on the right side , I'm gonna click on post right here and I want to select a featured image .
Now , the featured image is the actual image that will display when people see the blog post .
So I'll click on featured image and I'll just grab something here just for like , you know , to , to our sake here , I'll , I'll , here , here we go .
Every guy likes Star Wars , right ?
So we'll just uh put a picture of a , of the Star Wars of these storm troopers , right ?
So we'll select that featured image .
Now , when you select a category .
So whenever you create blog post guys , it's very important that you create categories .
OK ?
Now I'm gonna add a new category here and I'm just gonna put Darryl , right ?
Just so I can recognize it , right , Darrel ?
And then I'll click on uh add a new category .
All right .
So there is my category .
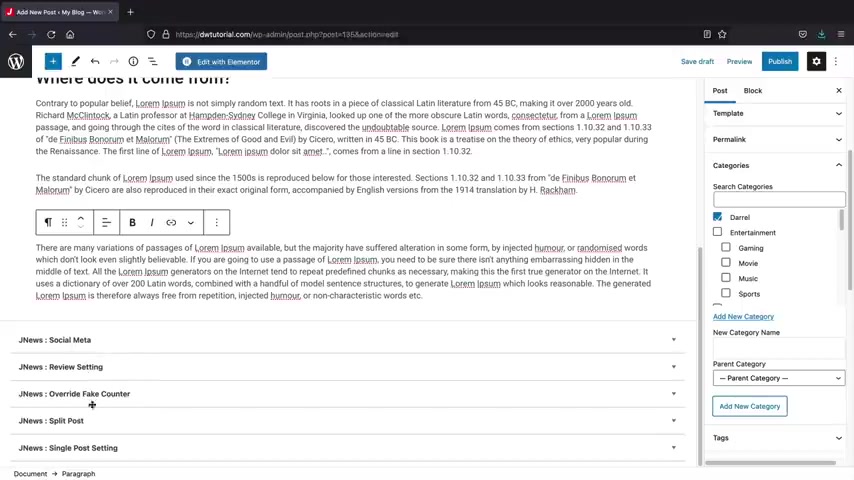
We have our featured image and our content .
Now we're gonna go through these other general settings guys a little bit later in the video .
Uh It's a lot to kind of cover .
So we're just going to do this in another section .
So we'll come back to that .
Don't worry .
But uh now that we've created a blog post at the top , right ?
Just click on publish and publish .
All right , cool .
Let's take a look at our uh let's take a look at our post right here .
All right .
So here is our blog post .
You can see it was written by me and also it's in the category of Darrel , right ?
So we have the title , the featured image and then if we scroll down , we just have our content right here .
So we have , you know , what is , you know , our demo contents and we can see that we have our widgets on the side and everything looks pretty good .
So that's how we can successfully make a blog post , right ?
Pretty simple , pretty basic .
Now , we'll come back to the blog post settings a little bit later in this video .
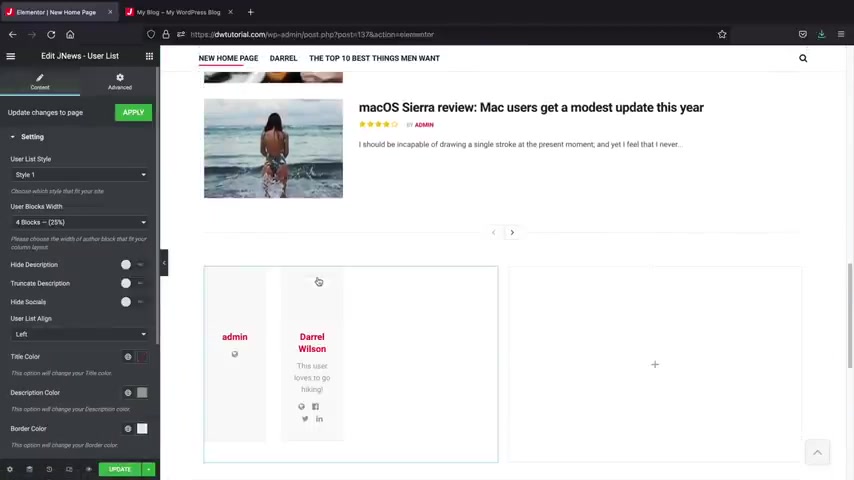
But next , let's talk about how to actually create a user , right ?
So right here we have admin , right ?
And maybe you don't want it to display admin , maybe you want it to display uh your name or if you have multiple writers , maybe you want to create profiles for them , right ?
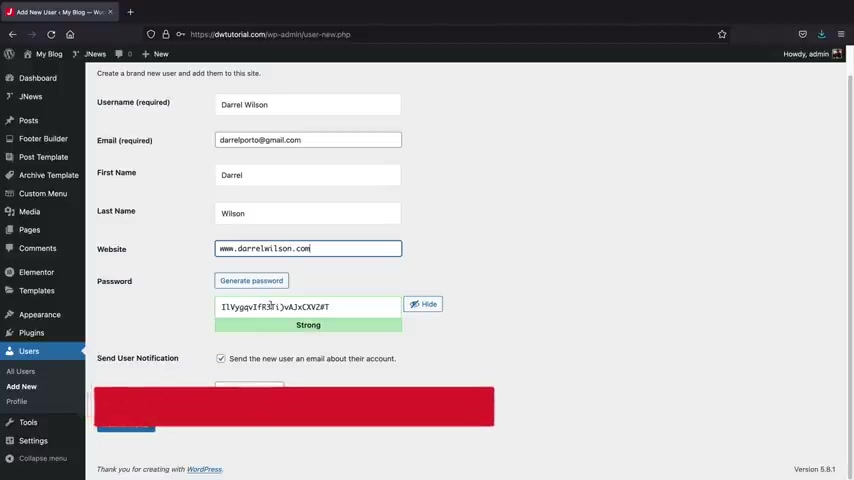
So over here we have users , let's click on add new and this is gonna be uh this is gonna be me , right ?
So Darrell Wilson and then we can also uh create some credentials for them .
So if users are writing on your website , you can go ahead and you know , send them some credentials .
So I'll just put uh J news , right ?
That's the password .
I'll confirm the use of weak password .
But right here , uh this person is an editor .
So I want them to be able to write on my website and stuff like that or you can even select author , right ?
But uh you can select either either of these or you can select an administrator , but administrators have access to like the page or stuff like that .
So maybe just like an author or an editor .
So let's click on add new user and there we go .
So we have Darrell Wilson right now .
On the left side , we can click on edit right here and we can give some more information about the user .
So for example , we can add in some social websites right here .
You know , if they have like a , you know , a , a Twitter and a linkedin and a Facebook , you can insert to their social profiles right here .
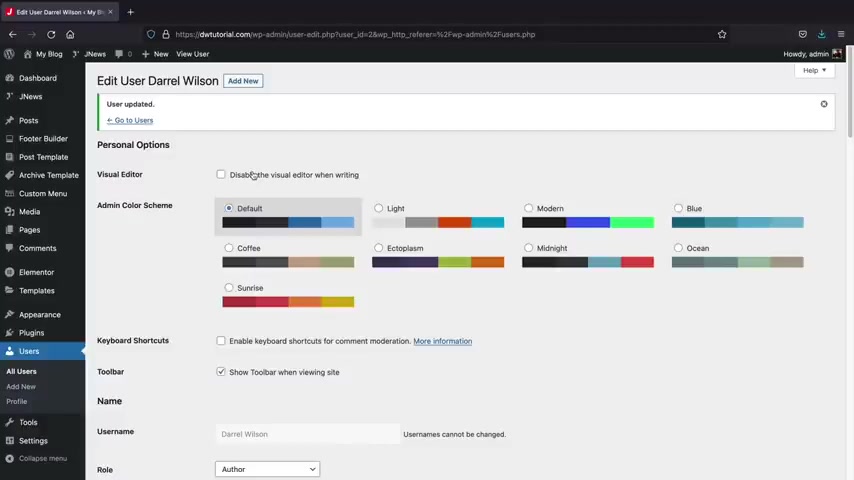
And if we scroll down , we can enter more information about this user .
Like this user loves to go hiking , right ?
So you can add in some more information about the user .
Now , the profile picture we'll talk about in just the bits .
But also this is where you can adjust their password and also reset their password as well .
Once you're done with those settings , you'll click on update user here at the bottom .
Now , there's one more thing I want to note that uh if you actually look at the image of this user , it's blank , right ?
And the only way to actually add a picture profile is to sign up with Gravitt , I think that's what it's called , right , Gravitt or something .
Yeah , Gravatt .
So I'll leave this link in the description below this video and all you'll do here is you will just go ahead and create an account using the same exact email that the user is using .
So for example , there portal , I'll go ahead and just quickly sign up with an account with this email and then it'll sync up and then my profile will be displayed right here .
So you guys will go through the process and sign up and it'll bring you to wordpress dot com and dashboard .
I know they're , they're really annoying with this whole wordpress dot com integration .
But uh what we're gonna do is we're gonna click on this little icon at the top , right ?
And this is where you're going to upload a picture profile for your wordpress profile .
I know it's kind of annoying .
I I don't know why they do this cross platform thing guys , it's really annoying but uh this is out of my control .
So you'll just go ahead and click on , click to change profile and I'll just grab in an image here .
So I'll just put in uh see if I can crop it here , you know , but there we go and then just change my photo and that should updates and there we go .
So yeah , the profile has been added .
Now , you guys will have to just give it like an hour or two .
It'll actually propagate , it won't be instant or at least it shouldn't be instant .
But uh yeah , it won't be instant guys , but uh give it about an hour or two and then this new profile picture will be displayed in your wordpress admin dashboard .
All right .

So now that we have a new user , we can actually assign posts to this specific user .
Now remember that these users can actually log in on your website using the credentials and also the WP dash admin and they can log in and they can create posts on your website .
But let's say if you want to assign a post to a user over here , I'll go to all posts and then we have our post that we created .
But I'm gonna click on quick edit right here and then the author , we can now select Darryl Wilson and then click on update .
Now , if I view the post here , you'll now see that Darryl Wilson is the writer of this blog post and you'll actually see that my icon now displays .
And then if we go to the bottom , you will see that uh we have the uh the , the author , we have the description , also the social icons and then the , you know , the picture of uh of Darryl Wilson .
So that's how you can create authors to create blog posts and articles on your website .
So in this next section , I want to talk about how to create a menu and also how to create uh pages and add them to your menu because this is using a default menu and layouts .
And none of us really , you know , it's just demo content .
It doesn't really apply to us .
So let me walk you through how to do that .
But uh let's go over here to our dashboard .
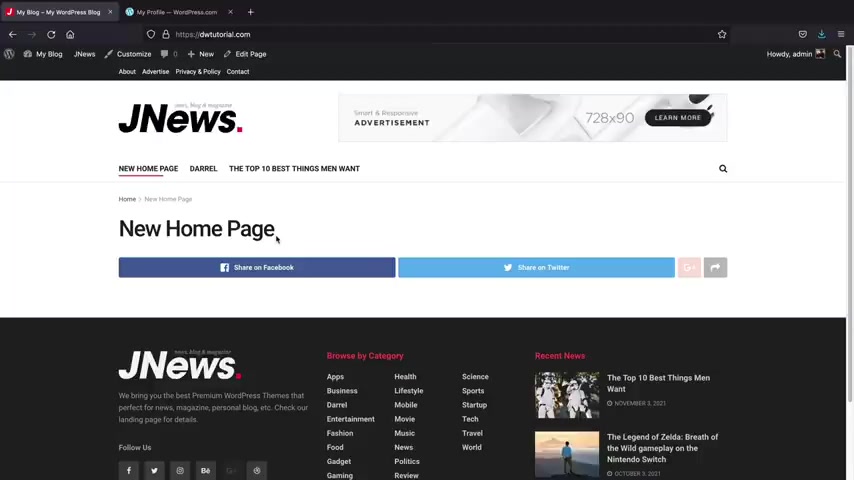
Now , the first thing I wanna do is I want to create a page , right ?
So over here pages , let's click on add new and this will just be our new home page , right ?
So new home page and what I'm gonna do is click on publish and publish .
All right , cool .
Next , I wanna create a menu .
So let's go over here to wordpress and we're gonna make our own menu instead of using that default menu that uh you know they created for us .
So uh over here we have appearance and we have menus .
All right .
And this is the demo content menu .
So uh when we actually imported the demo content , they created a a main navigation , which is our primary menu .
They also created one for the mobile and also for the footer .
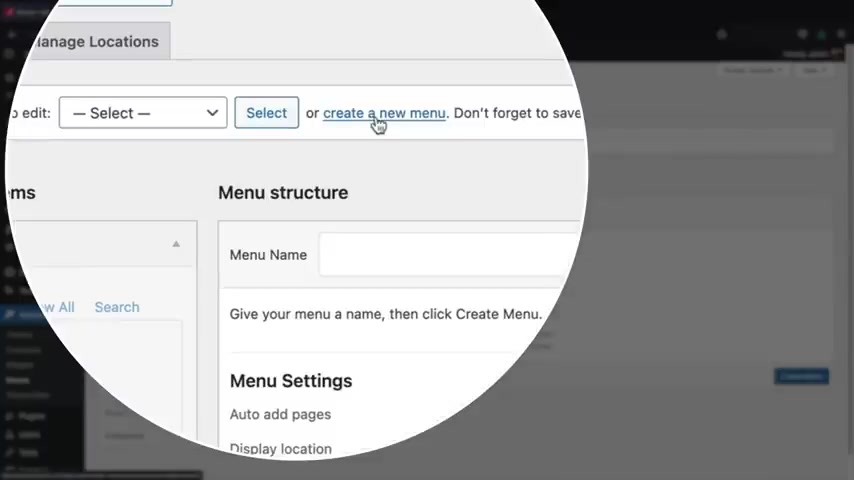
However , we're gonna create our own menu here just so you guys are on the same page .
So let's click on create a new menu and this will be like the main menu , right ?
Main menu .
I'll just do main menu now .
No one's gonna see the title of this menu .
So don't worry , this is only for you and then this is our main navigation .
So let's click on create a menu .
And now I want to actually add those pages and also we can even add posts and categories to our uh menu .
So for example , under pages here , we'll go ahead and find the new home page , right ?
We add that to the menu .
We can also add in categories .
So remember how we created the Darrell category , we can add this uh category here to our menu as well .
So when you make blog posts like for different categories , you can add those categories to your menu .
So you just can just go ahead and click on them directly .
You can even assign posts .
So for example , we have our uh the top 10 best things men wants .
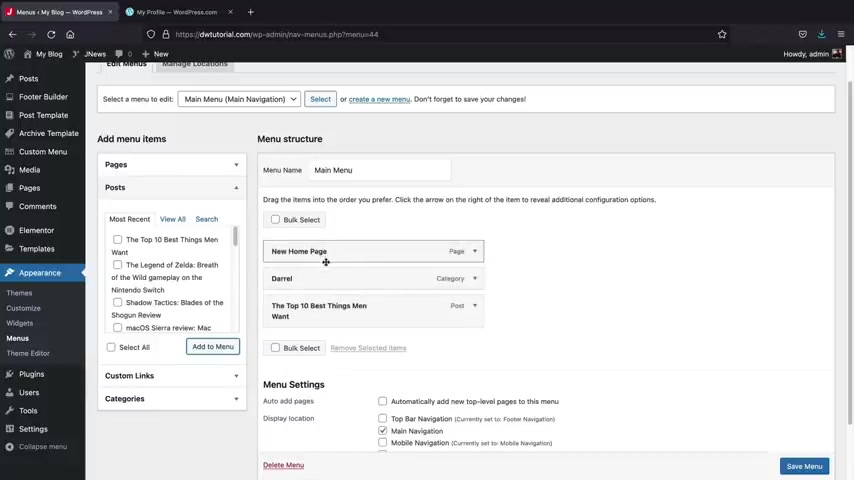
We can even assign specific posts on our menu if we choose to do that .
So I'll just go ahead and add all three and then click on save menu .
All right .
Now let's take a look at our menu .
Let's go over here to visit sites .
All right .
So this is our current new menu and here we have the empty page that we created .
Also .
This is the category .
Remember how we created that category , Darrel .
So all of the blog posts that you put under this specific category uh will be displayed right here .
And then also if you want to display specific posts on your menu , uh you can just go ahead and , and display the posts and then this would be the actual blog post where you know that we , that we just wrote , right ?
So that's how you guys can create your own little menu and stuff like that .
Now , let's click on new home page .
Now , let's say , for example , you guys want this to be your new home page , right ?
And you don't want to use the demo content .
Let's assign the new home page as our primary home page .
So to do that , we're gonna go to the theme customizer .
So right here , we'll click on customize .
Uh Now guys , I promise we will come back to the theme customizer a little bit later in this video , we'll go through all these options .
However , the only thing I want to do here is just click on home page settings and I want to select our home page as the new home page .
So this means whenever someone visits the website for the very first time , uh this is the page that's going to be displayed , right ?
So over here , let's click on publish and then let's close the menu .
All right .
So the next step is now let's go ahead and design this home page and start adding in features and blog posts and stuff like that .
So at the top right here , click on edit page .
Now , before we jump into the builder and start building this page with element or I just want to get you guys comfortable with some of the options that this team has to offer .
Now , make sure you select the page right here and for the templates , this is our landing page , right ?
So this is the main page of our website .
So you'd want to select landing page .
If you are building uh your home page right now , when you select landing page , you'll get a few more options .
One of them is called this page loop .
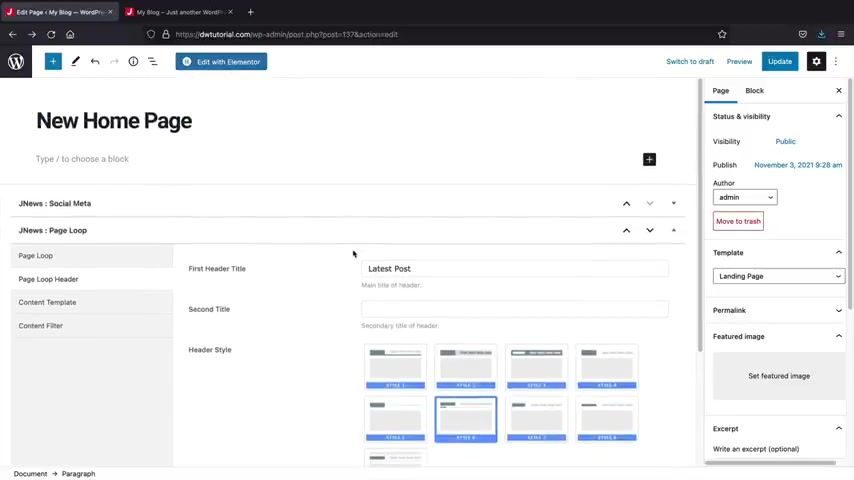
What page loop does is that it'll actually create posts and categories and just display them automatically on your website without even using the page builder .
So if you don't want to use the page builder , you can actually just turn on the page loop and then you can just go ahead and select the style .
For example , I'll just click on update here and view the page and then you'll see that these posts and everything display automatically .
So if you don't want to use the page builder and you just want to use like the default uh theme settings , you can go ahead and do that .
So let's go over here and click on edit page again .
And then here we have contents template .
So just remember that you guys can adjust the actual uh style of the page loop .
So if you want to have a different structure of everything , you can go ahead and pick different modules here .
And then you can kind of say , you know what I want a uh you know , a right side bar for the landing page .
But for the page loop module , I want to have my post display like this and then you can have the uh stick side bar as well .
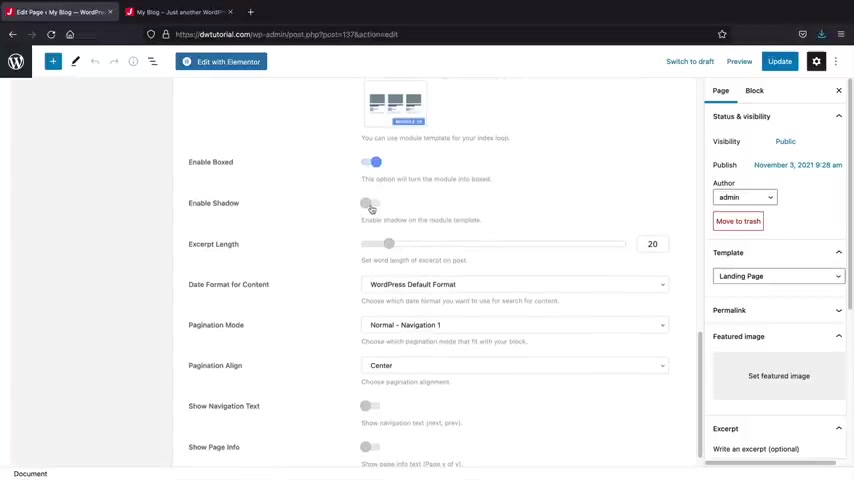
So , uh if you wanna go this route , you guys are more than welcome to actually uh design your page without even using the actual page builder .
So I'll just go ahead and select a few options here , like blocks or boxed and shadow show page info .
And then uh you know , we have more stuff here , uh whatever post right here , trending posts .
This is cool .
I don't know , you know , you guys get it right .
I'm just , I'm just putting in demo content .
So we'll just select these options and go to view the page .
So here we go , we have the trending post .
This is cool .
Now sometimes guys , if there's little warning options , they will notify you .
So for example , um they're basically telling us that this works best with columns of 48 or 12 and our current column is nine .
Now only we can see this , no one else can see that .
So I do like the fact that they give you little options by saying , hey , you might want to change this and check this and stuff like that .
So now you'll see that we have this box layouts and we also have this drop shadow and users can just go ahead and scroll through these posts and they can click on it and then they can just go on their merry way and read the blog post .
So that's an example of the actual page loop options with the news wordpress theme .
If you want to go that route again , you are more than welcome to actually use the page loop and build your page using their theme settings .
But um I want to go ahead and use the modules instead .
So I'm gonna turn off page loop .
So over here under page loop , I'm gonna turn that off .
Click on update .
Now , I'm gonna click on edit with element or , and we're gonna build a website using the modules that Janus created for us .
All right .
So at the left side , we have elements .
Now , if you guys are brand new to wordpress and element to um I have a video on elementary guys .
I'm not gonna really go through all the elements of the element to and how to build pages using these modules , but it's essentially drag and drop .
You know , for example , you'll just click on this column icon and then say , you know what I want a two column row , right , two columns and then you can just drag in a text , you can drag in an image and then you can also drag in a button .
So it's very simple to use if you guys do need help with the element or I have a full video explaining how to use elementary step by step in the description below .
But uh we're gonna go ahead and skip the basics here .
Um Because a lot of you , even if it's your first time you guys can use just the elements and just make your blog that way .
So I'm gonna close these tabs .
I'm gonna collapse them here , gonna collapse these tabs .
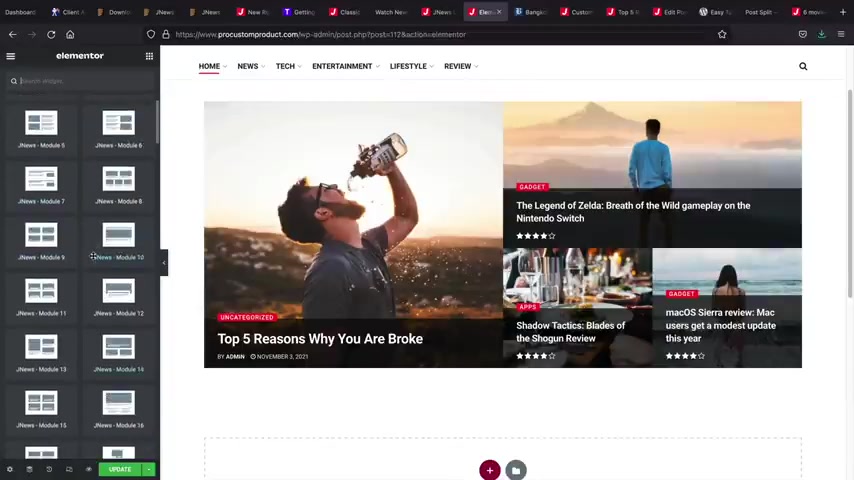
And now you're gonna see this J news module .
Now , we can also collapse this .
And I want to do the heroes because the heroes are kind of like the landing page , right ?
So let's say , for example , you want a four column uh landing page , right ?
So you have 1234 right now on the left side , you'll see hero style .
So we can go ahead and select a different style , you know , something , something that looks pretty good , right ?
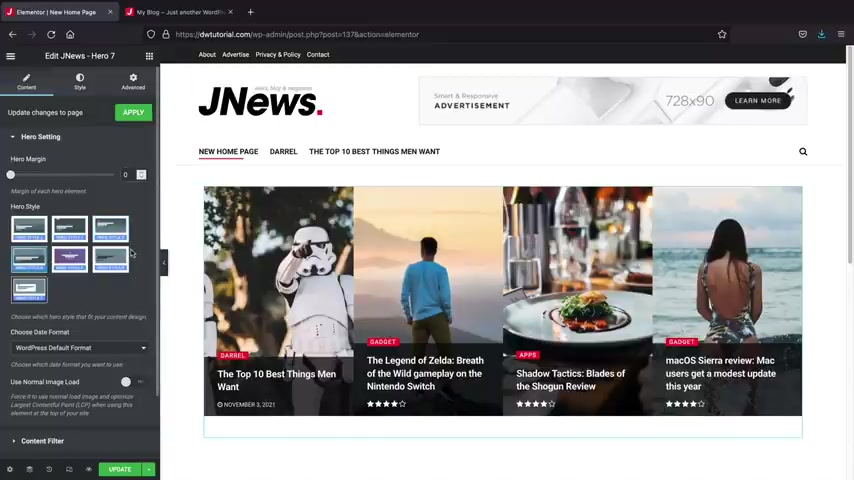
So you can go and mess around with these and , and you know , you can get a beer and have fun with this and , and play with us all you want .
Now I'm gonna go through the ins and outs for uh one module guys and once you guys learn how to use um all the settings for one module , all of the Janus modules are the same .
So they all have the same options .
So you just need to learn how to use one module and then you can go through any of the modules and apply those same settings to whatever kind of style that you want .
So let's say , for example , you guys want to add margin to this , right , which is space , you guys can add space .
So this kind of breaks it up and it doesn't give it that grid look .
So that's how you can add margin in between your actual posts .
Now , we'll go over here and click on content filler .
Now , this was just basically saying I want to display my post pages or my landing pages , but I think most of you want to propagate your post , right ?
And then here we have content type , we'll talk about review posts a little bit later in the video .
But uh for now , I'm just gonna select all or you can even select only posts which will just display your specific posts .
These other ones are referring to like review posts or video posts and stuff like that .
Now , here we have include post type .
So let's say for example , you guys want to display only specific posts in this actual uh grid , we can go ahead and do that .
So I'm gonna go to my website here and these are a list of all of our blog posts , right ?
So uh I'll just click on edit right here .
We can click on any of these posts and in the top right here , you're gonna see this number , right ?
1 35 .
Now all of your posts will have a specific number uh related to the actual post .
So you can just go ahead and you know , paste that in there .
Here we go , wait , wait , wait , wait , 1 35 right ?
I'll just type it in 1 35 and I'll add 1 35 and now you'll see how only that post is displayed .
So let's say , for example , you have another one that says 1 40 you would go ahead and add in 1 40 but this is how you can actually control which post you want displayed on the actual modules .
Now , you can also exclude posts .
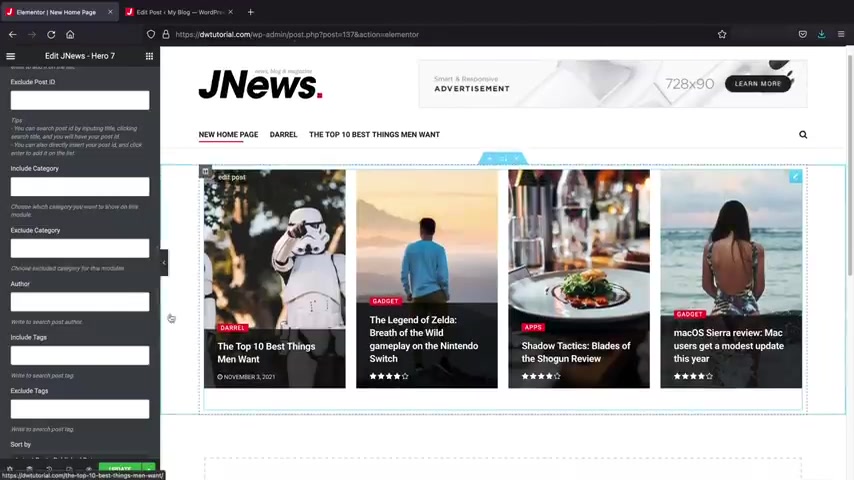
So let's say , I don't want this one right here .
We can go ahead and say , you know , what , exclude post 1 35 and then that post will be , you know , it'll be gone .
So you do have a lot of , you know , control over here .
Also , you can include categories and exclude categories .
So let's say , I don't want the Darryl category .
Remember how we created Darryl , I'll just say I don't want Darryl , you know , so he's gone .
So you can kind of control what categories he wants and also post he wants on the uh module here .
Also , we have author .
So remember how we created our own author , Darrell Wilson , we can actually uh select the author and only the post at Darrell Wilson will be displayed right here as well .
So I'll go ahead and close that you guys can also do tags as well .
And tags are just kind of like , um they're kind of like subcategories .
So on your post right here , you can create tags , right ?
So this can be like a , you know , Wilson tag or something and it's just another way on how to make your post uh findable for users .
So you can also include tags and even exclude tags .
All right .
So that's pretty much fill our content in a nutshell .
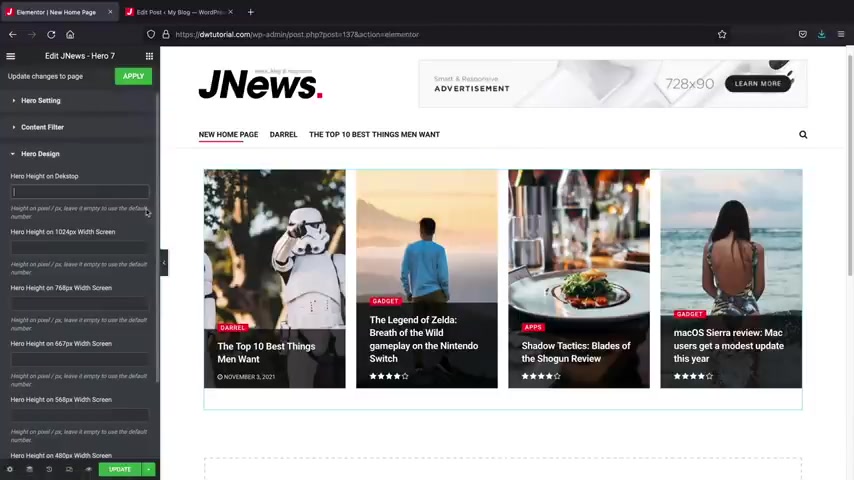
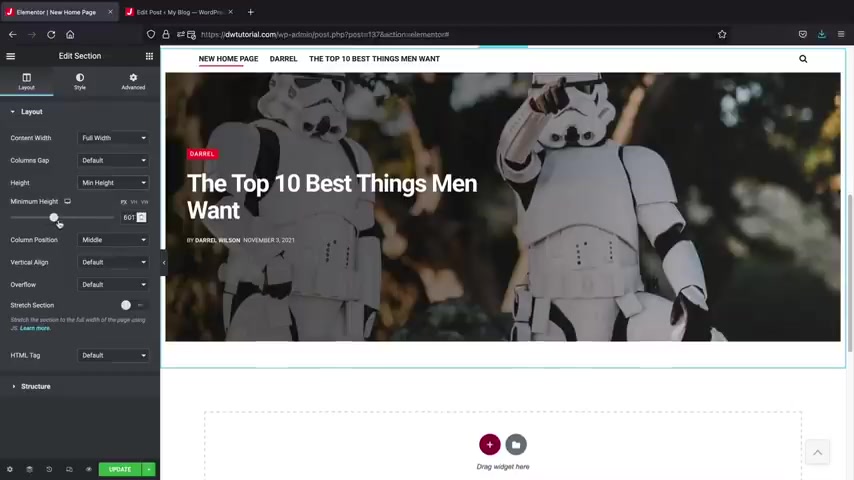
So next , we have the hero of design and what you can do is you can actually adjust specific height for this module for specific devices .
Now , this is pretty advanced and I would not recommend messing with these options if you're a beginner .
But let's say for example , someone's on the desktop , which is what I'm on right now .
And I want to make this 1500 pixels , you know , something really big .
We can do that right here or we'll just leave that 600 you know , something like that .
So you can kind of adjust the the height of it depending on the device .
So this is for desktop , this is for users who are using a 10 40 pixel screen and then these are four smaller devices as well .
So uh yeah , that's just an option , but I think the theme does a good job at setting the default height for a lot of these modules .
So yeah , that's pretty much that in a nutshell , I'll go ahead and click , click on this and click on hero style .
So let's say for example , you wanted to add a specific color to your columns , right ?
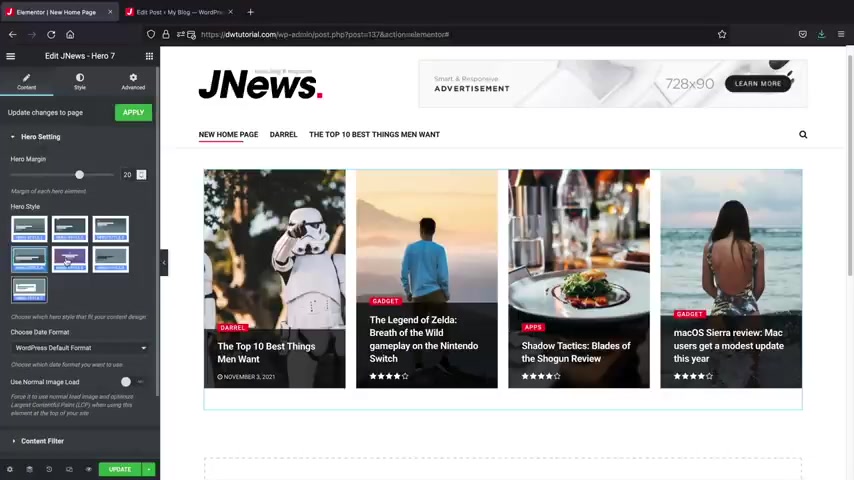
You can just click on , you know , I want to override the settings and I want to have a specific color only for column one right now , depending on which module that you are using .
The override doesn't work for every single module , but it works for most of them .
So for example , if I go over here to hero settings and change this to the one with color , you will then see how we have this red and also this gradient .
And also it'll work for the other modules as well .
So we do have this gradient over here just for some of them , it doesn't work like this one right here because uh this module is specifically for not colors .
OK .
So if you do want colors , just make sure you select the module that works best uh for colors .
OK .
So let's go back over here to Hero style .
So that's how you guys can actually create specific colors for specific columns for your blog post .
And then we'll close that .
And next we have Hero slider and this just turns it into a slider .
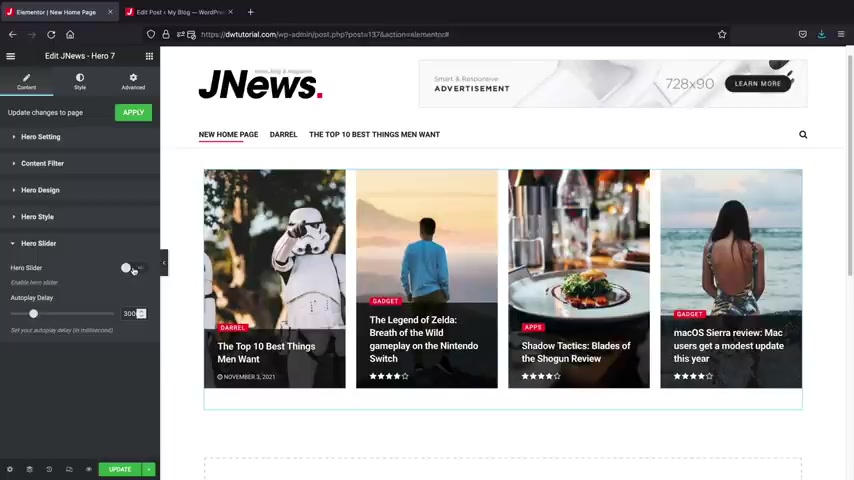
So if you guys want to have a slider here , uh this can actually adjust into a slider which will go ahead and show all of your blog post on your uh on your website .
I don't really like sliders guys .
I think they're just distracting .
I think they're old and outdated and I just would not recommend them .
Also over here , we have style and this is where you can change the topography of your actual blog post .
So I like Poppins .
I think Poppins is a really cool font .
You know , Poppins .
Bold .
Poppins .
Bold .
You gotta have probably seen this font many times , right ?
It's just , I don't know , it just looks really , really sick , you know , I love it .
So that's just a quick overview of the topography .
And of course , if you guys want to add in like motion effects or you want to have this whole thing kind of fade in or something .
Uh You guys can actually go to the advanced tab and go to motion effects or you can just kind of add in , you know , different animations .
Guys don't get too crazy with all this stuff , you know , it is cool but it can get really annoying for first time users .
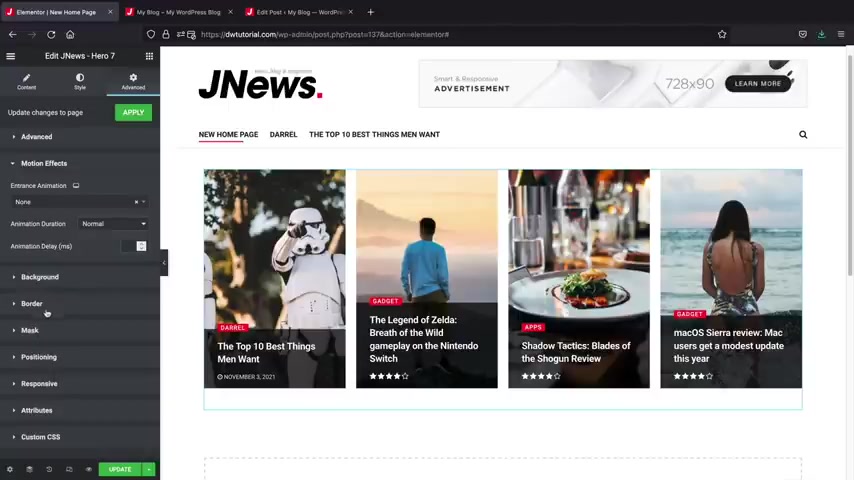
They do have some other advanced options and you guys can go ahead and check out my video or just explore these on your own time where you can check out like , you know , adding a border or stuff like that where , you know , you can add in like a little border here around your blog posts and , and just stuff like that , you know , they just have a few options like that , but uh in a nutshell , that's how you guys can actually modify the elements uh with the actual page builder .
So that's a quick rundown of the J news modules .
Now , a lot of these modules are pretty similar to each other .
So let's go ahead and take a look at one more module over here .
So these are the Hero modules , right ?
And they're just different structures and styles of displaying your blog post .
And let's scroll down and find the slider .
Let's say you're one of those crazy people who like sliders , you know , I don't like sliders but hey man , some people do , let's go ahead and , and , and drag this down here and I don't see that we have this blog post , right ?
And you can enable auto play , add a gradient overlay to it .
Uh You can even , you know , overwrite it and make whatever you want here .
They have this black and red but or black and white , but you can add in like a red or something , you know , get customizable .
But um if we scroll down and we have content filler , now these options are the same exact options as the previous module that we worked with .
So once you kind of spend the time to work with one module , you'll kind of understand how all of them work .
And then also for the style , these are the same exact options as well .
So for the title and the Meta Topography where you can go ahead and edit the font and stuff like that .
Now , I also do want to point out one more thing about these modules is you can actually use the page builder to kind of extend the features and the size of these modules .
So for example , I'll click on this little uh 66 dots right here and we can control the section .
So if you want to make this full width , you can do that and you can even make it uh like uh I guess you wanna say uh where is it right here ?
Uh fit to the screen .
There we go where basically it'll just fit to the entire screen , you know , and you can always adjust the height here as well .
So minimum heights and then you can control the heights of the actual elements .
So you can kind of extend your power with the actual page builder here and just kind of mess around with it and just see how you know how it works best for you .
But in a nutshell , that's how you guys can use the slider and also the hero module .
All right .
So next , let's talk about actually displaying your post kind of like below the hero image , right ?
Because this is our hero image and we can display posts below that .
So over here we have Janus module , we'll click on this and this is just like standard posts , right ?
So I'll just take this and drag it in .
And this is kind of like what I showed you guys earlier , right , where you can go ahead and just drag and post and all of your posts will propagate right here .
Uh For the title , I put our posts and then I'll put trending here , right ?
And this is the URL .
So if you wanted them to click on this and go somewhere , we can , you know , put a URL right there and then here we have different styles , you know , where you can kind of mess around with , right ?
So I'll just grab , uh I don't know , let's let's mix it up here .
There it is .
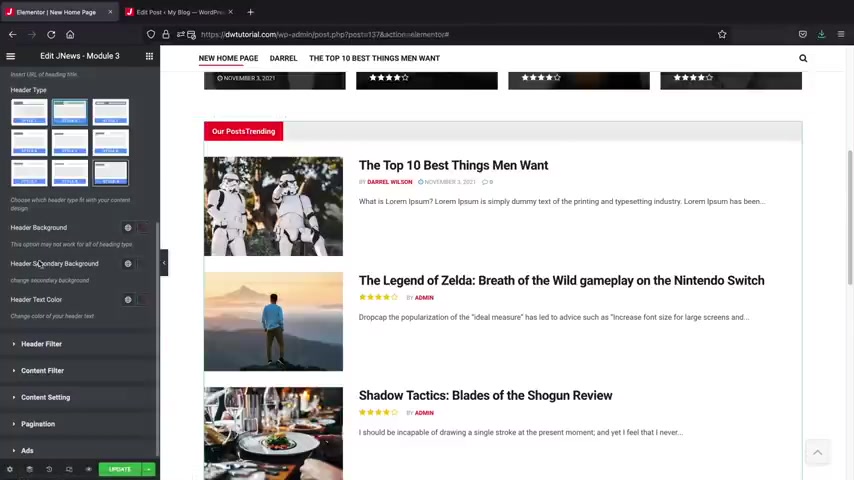
That one's kind of clean , right style too .
And then we can adjust the color of this .
So the backgrounds and the secondary background and also the text color as well .
Uh Next , we have the header filter .
Now this will actually create categories on the right side .
So for example , we have category , we'll just throw in apps , business dail entertainments and on the left side , if I click on these , it will then pull up all the posts in those specific category .
So see here , Darrel , right ?
You only have 11 post .
So uh yeah , that's , that's how that works .
So you can kind of um use this to kind of add in more information , you can also add in specific authors .
So here I typed in Darryl Wilson .
So let's say for example , well , you have a really good writer on your , on your blog .
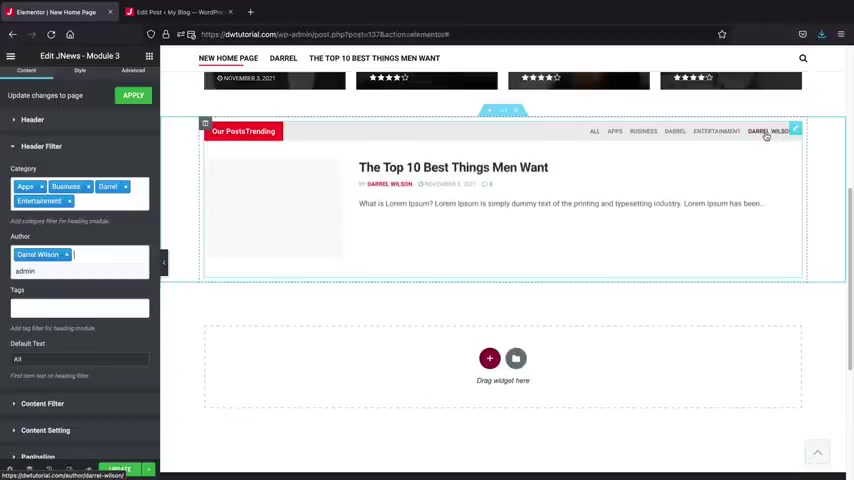
Uh People can actually search by writers and you know , II I just want to read Darryl Wilson's blogs and I wanna read this other guys because you know , this is just some dude who doesn't know what he's talking about , you know , which even me , you know , I like reading specific writers , you know , but uh you can go ahead and filter this by author category and also tags as well .
All right , let's go ahead and close that .
Next , we have content filler and this is the same exact options as the hero one .
So I'm going to skip this so you guys can just include uh posts and also exclude posts if you choose to do that .
And then here we have a nation now , this is at the bottom right here .
So let's say , for example , you want to add in like a preview or you want to add in like a load more or if you want infinite scroll , which will just go ahead and keep loading post and it never ends .
Uh You can go ahead and go that route if you want to do that , but I'll just do next previous and then also here we have ads where we can add specific ads like you can add in your uh affiliate links or whatever , like image ads .
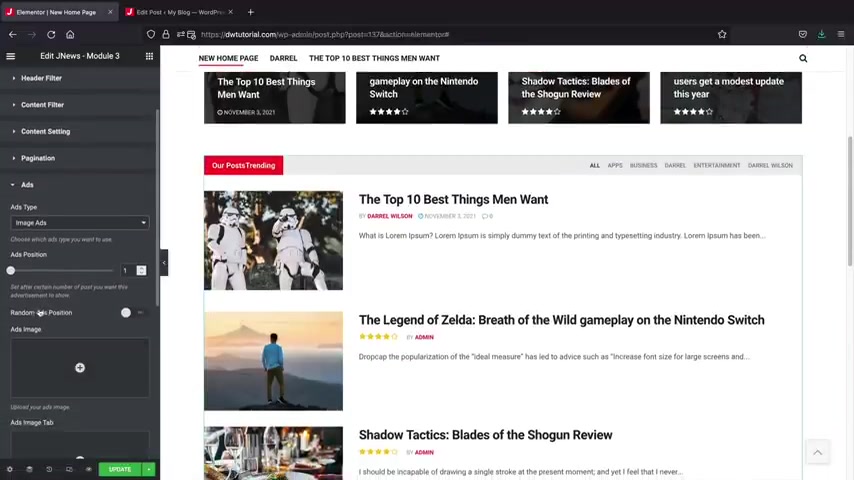
We can just go ahead and add those and they will propagate on your site .
Uh It'll put them in random positions so you can put yes , and it won't show as we're building it .
But once we actually load the actual um the builder and we add in some images here , uh You'll get some ads that will randomly uh show up .
So they did give us some just examples here , I'll answer this media .
Oh There it goes .
Yeah , cool .
Maybe right here would want to use this one instead .
It's more , you know , it's more , there we go .
That's a lot better , right ?
That looks pretty clean and , and good .
And then we'll scroll to the bottom and for the ads image link , this is where you can enter in your affiliate link , right ?
So let's say , for example , I want to uh you know , I wanna , I want you guys to buy J News , right ?
That's an affiliate link .
So if you guys click on this actual link , it'll take them to J News .
And if you purchase that , then I would make a commission .
We'll talk more about Google adsense with the scripts and affiliate programs a little bit later in the video .
But I just want to demonstrate how you can insert your own uh images and insert your own affi links onto your actual blog post .
And then you can also do open new tab , which will mean that if they click on this , they won't leave the website .
It'll just open a new tab up here .
So yeah , yeah , it open a new tab .
So it'll be like this , it'll be all right , new tab , you know , so it won't log them out of the website .
But uh yeah , that's the ads in a nutshell .
Then over here we have style and you guys can adjust the style of this .
So just remember that content will actually control the position and have everything uh style will control the color , it'll control the fonts and the topography and all of these settings .
So I'm not gonna go through all these settings , but you guys can get a good understanding of what that means .
All right .
So once we're done with that , I'll click on update .
And if you guys want to see your page right now , let's just take a quick look right here at view page .
All right .
And this is our blog post and you guys can tell it looks great , you know , I mean , it's really coming along .
We've only messed with this for probably 15 minutes and it already looks great .
I know when you guys first probably saw this , you're like , yeah , this looks really busy .
I don't know if this is for me , but I told you guys this is really , really simple to use .
So let's go ahead and keep building this page right here .
So to turn back on the builder , just click on edit with element to .
All right .
So I want to quickly go ahead and talk about some of the J news modules that they created for us now to , to kind of collapse these tabs , you can just click on this collapse and this makes it a lot easier for you to kind of build your page , but we'll scroll down here and I'm just gonna open a new section here of two columns .
So , uh let's go ahead and scroll down here .
So here we have J news elements .
Now , when you install J News , you do get a little bit more elements that can kind of , you know , help you build your site .
Like for example , if you want a news ticker , you can drag and drop this news ticker right here and you can use this instead of this one right here .
You know , um if you choose to do that , you know , it's really up to you , there's no right or wrong way to build this website .
You can kind of mix and match elements as you choose .
Uh But that's one option or if you guys just want to , you know , have a list of your writers , you can display a list of your writers , but we probably want to make this full with .
So I'll delete this column and then you can have like a list of your writers .
So then over here , maybe you can add in like a basic elements that just says like our writers , right ?
Like our , you know , our writers and then center it and then you can , you know , display your writers and then we'll scroll down here and just take a look at a few more elements .
So , yeah , you know , I think at this point you guys kind of understand what these are .
Um you just grab these and just throw them in and see what they do and it's kind of how it works guys , it's just about trial and error .
Looks like this one's not really displaying .
That's probably because we have to insert the actual , um , the Facebook app I DS and stuff like that .
So I'm gonna delete this module .
All right .
And what I'll do here is I'll just collapse this .
Now , they do also have carousel as well and this will just kind of carousel your modules .
So are your posts .
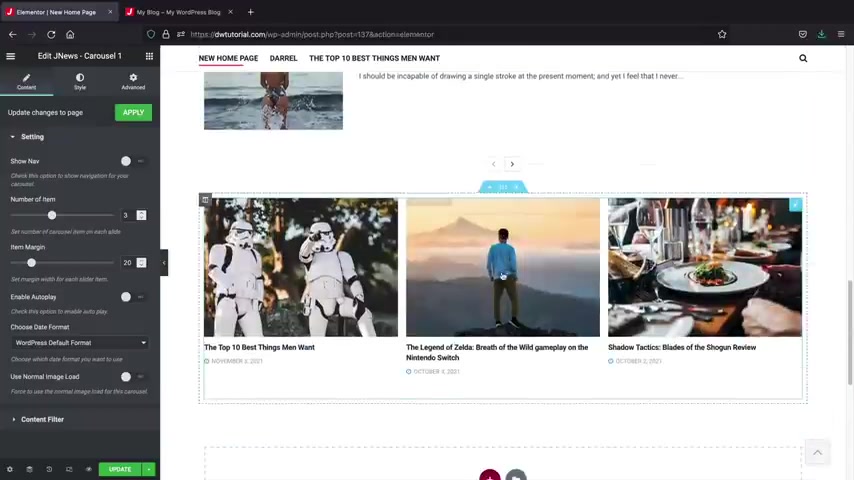
So if you wanna , you know , have that approach , you can do that .
This is more for like the footer area of the website .
It's not necessarily for the top because it just doesn't have a lot of design , doesn't have a lot of the core .
So you just want to keep this a little bit slow on your website and that is why they actually kept it here a little bit slow .
Uh Next , they have footer post and archive .
Now , we're gonna come back to that a little bit later .
But the post is not for the actual page .
This is for creating post templates and also the archive , which is down here .
Uh This is for creating archive pages , which we will do a little bit later in the video .
So the post and the archive are not for your pages .
I just want to make that very clear and just to avoid any confusion but uh yeah , that's how we create a specific page using the actual page builder .
It's pretty simple , right ?
Give yourself a clap .
You know , it's , it's pretty simple to use and uh just go through each element , mess around with it , get comfortable and that's how you can build your page using the news elements .
All right .
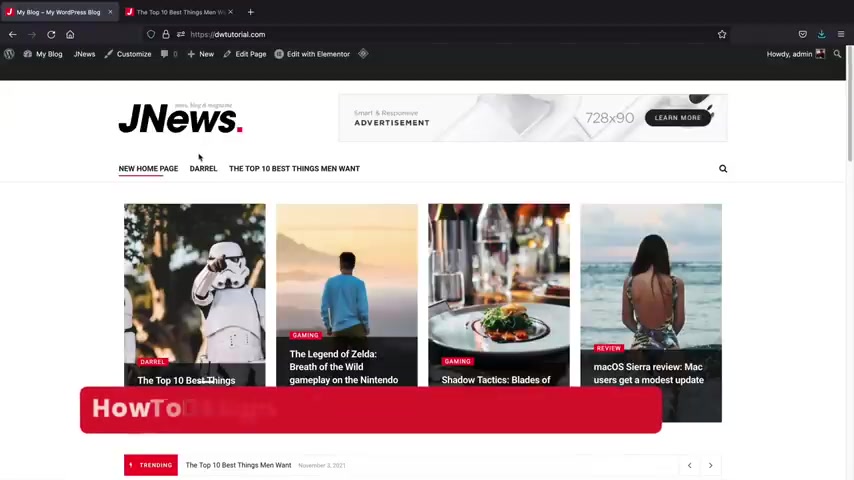
So as you guys can tell the blog looks great , you know , it's really simple to use .
And after probably in 30 minutes , you guys will really get the hang of it .
So now that you guys know how to use the page builder to design the home page of your blog , let's move on to the next step and talk about post optimization .
So in this part of the video , I'll be talking about the general settings for your blog post , how to design it and just exploring the general options for your blog posts , right ?
Party people .
Welcome to the post section of this video .
So in this part of the tutorial , I'll be explaining how to design your posts , how you guys can use the theme to create really nice uh post templates for your website .
I'll also be showing you all how to create custom post templates if you decide to use the page builder .
But uh before we get into this , we need to install a few plugins .
So let's go over here to our dashboard and uh let's go over here do plugins and click on install plugins .
I spent about like an hour I kind of messed up earlier and you guys have to make sure this plug-in is not enabled .
Ok ?
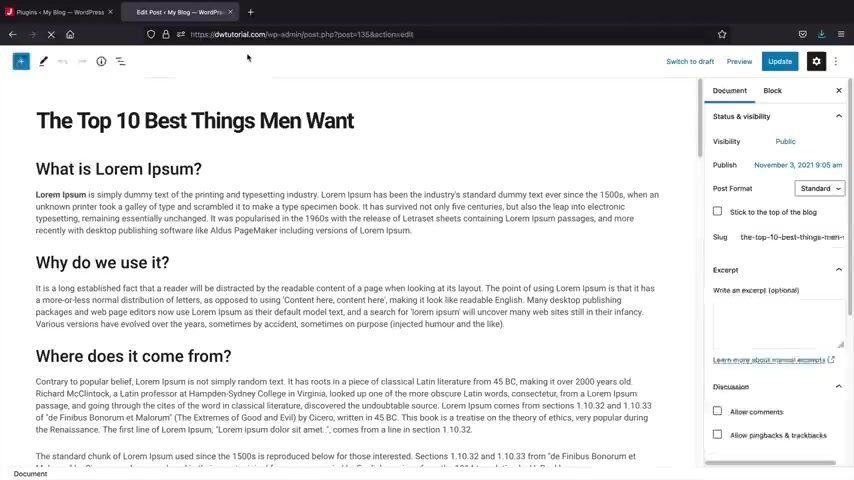
So make sure you enable all of the J news plugins , like like the social login , social share .
Um the like stuff like that , but just make sure that this one is unchecked if you have this installed , um None of the posts will display the way you want it and I learned that the hard way .
So , so let's go ahead and go back to our post .
Now , first , let's go ahead and click on edit post .
Now , what we're first gonna do is I'm gonna talk about how to customize the post template using the actual theme .
Then we'll talk about how to customize the post template using the actual page builder .
So there's two different options .
Now , once you guys install the actual plugins , you guys might see a few more options .
I'll go ahead and collapse these really quick so you can get a better view .
So you first have the recipe food setting .
So like we showed you earlier in the video , you can enable a recipe food setting where you can add in ingredients , you know .
So for example , uh I don't know cottage cheese , right ?
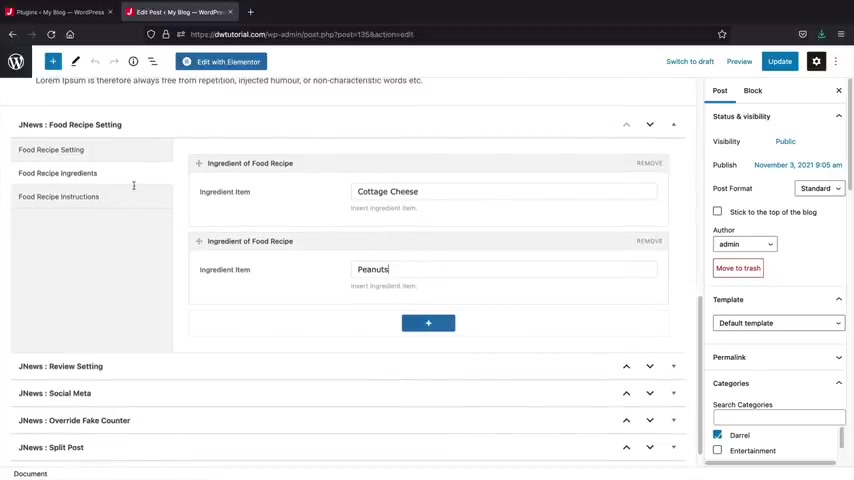
Cottage cheese or you know , whatever or I don't know , peanuts that is peanuts and cottage cheese .
Oh my God , it's pretty .
Uh It's a horrible combo , but you guys can go through here and just fill this out .
Now , I'm not gonna go through this in depth because uh a lot of you watching this might not even use this uh plug in and some of you might .
But uh I think you guys can learn how to use this just by messing around with these options .
All right .
So , uh yeah , for those of you , you want to use the food recipe plug in , go ahead and enable it and then you know , go on your own Merry Christmas way .
So next we have the review setting right here and we're gonna come back to the review setting in a little bit .
This will allow you to turn your blog post into sort of a review where you can actually score uh certain products and stuff like that .
But uh we'll come back to this in just a little bit .
All right .
So let's close that .
And next , let's talk about social meta .
So here you'll see .
We have a Facebook share title and then we also have a share description .
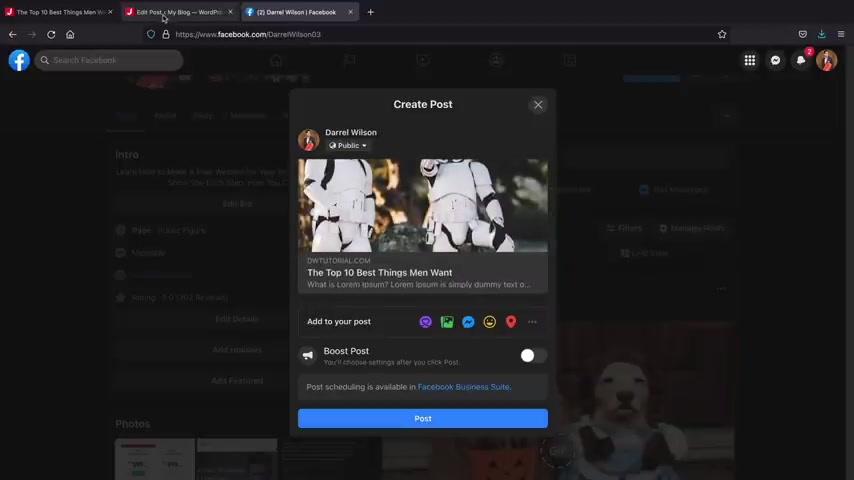
Now , by default , if I take this over here and I share it to Facebook , um it'll actually display the uh title and the content and also the featured image by default .
So uh for example , you'll see the top 10 best things men want and then we have the image and then we also have some dummy content right here .
However , if you guys want to have a specific uh share title and description , you can also do that .
So this would be like the this would be the title , this is description , right ?
And then for choose file , you can actually go ahead and select a specific image uh that you would like for you know , sharing purposes .
So if you share this article , then this would show up .
So this title would be displayed here and this description would be displayed there and the featured image would be displayed here instead of this current image .
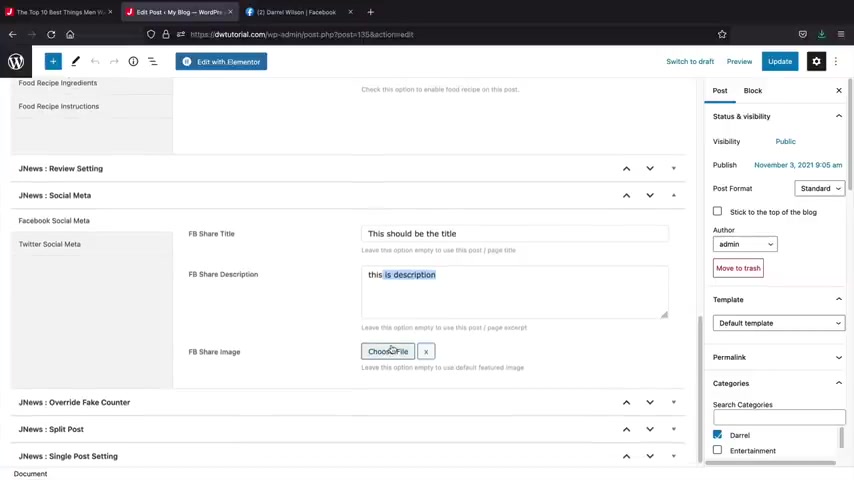
So it's an alternative if you don't want to show the title and description of the image of your original article .
However , I don't recommend that because then people might not remember your original article .
So uh I would not do that , but it's always a cool option , you know , and I'm sure in certain circumstances you might want to enable that , but that's what the social meta is referring to .
Next .
We have the override fake counter .
So if you guys want to go ahead and enable fake stuff , uh you guys can go ahead and do that so you can have fake views , fake share counters and also likes .
So I'll just go ahead and update that and then we'll refresh this page .
All right .
So you can see here , we have 6000 likes and also we have a lot of views and also a lot of shares on your blog .
So that's just something that you might want to , you know , add if on your , on your blog , if you like it .
Uh Next we have split post right here .
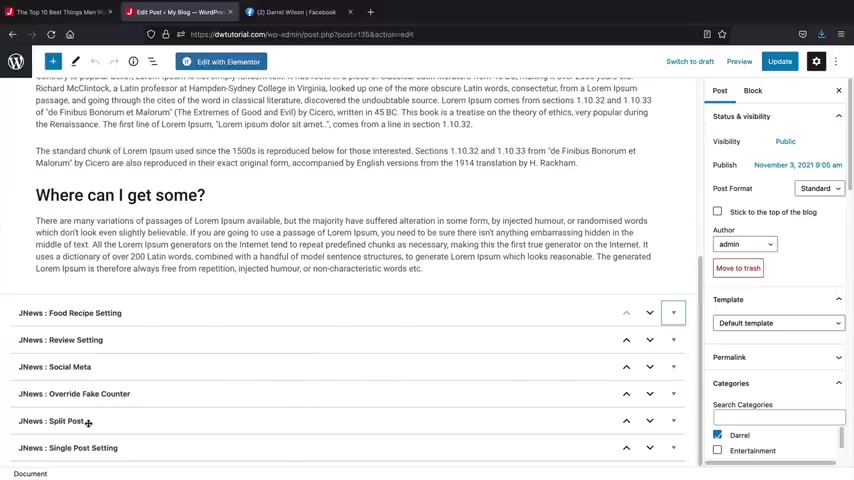
However , we're gonna come back to split post at the end because that can get a little uh that can get a little dance .
We , we'll come back to that .
I promise guys .
Uh let's go to the single post setting .
So here we have the post subtitle .
Now , this will actually add more content and information on your current blog post .
So for example , I'll just type this in right here just so you understand what we're talking about here .
So subtitle and then the source name , this is if you're sorting uh um I'm sorry , this is if you're citing something .
So uh I'll just put source name , right ?
And then via name and then a link now a post format type .
So this is essentially putting your post into specific categories .
Now , when you're using the actual elements on the home page or using a a post module , you can actually pull specific posts based off video gallery or standard .
So this is basically trying to categorize specific posts to display on the uh modules .
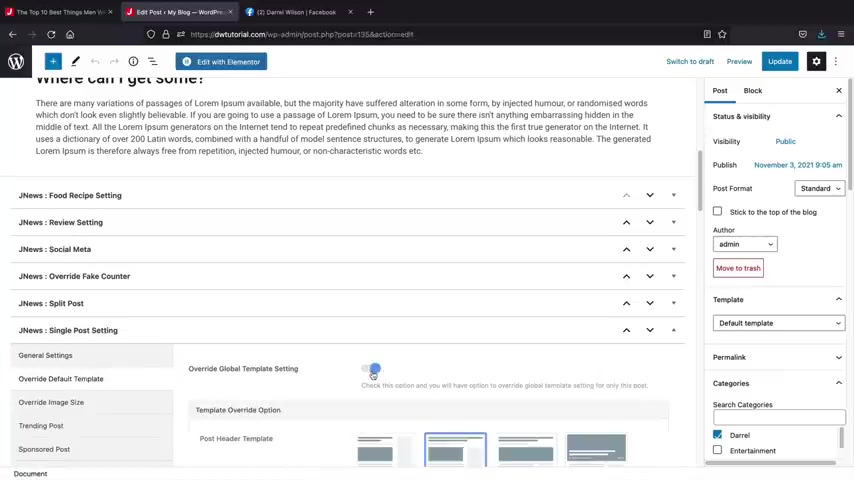
But uh now that I selected that , let's go ahead and click on update here and then I'll refresh the page , let's see what we got going on and there you go , we got the post subtitle , right ?
So this would be just like a , a subheading , you know a subheading for backing up your original a title .
And then if you scroll to the bottom here , you'll see we have source name and also via name .
So this is the actual source .
So if you are citing something , you might want to put your source and then also you would say who , who created that article or who created that source right there .
So that's actually pretty cool .
I do like that because a lot of people use analytics in their um their blog post .
And instead of putting it on the actual image , you can put it at the end of your article making it look a lot more professional .
Next , we have the override template override default template .
Now this will essentially uh override the current theme , customize settings and we'll talk about that in the next section .
However , you can have your own custom uh post template here .
So we can select this one and then also narrow , right ?
I'll click on updates and then I'll refresh the page and there you go .
So now you'll see how this has uh been overwritten .
However , this is only for this specific article .
OK .
So uh this doesn't apply for your entire website .
If you wanted to apply your , for your entire websites , you will need to go to the theme cus .
So you'll see here how this is just like the , you know , it's , it's like a template default .
And then over here we have this uh specific style .
All right .
So just to be clear , this only controls one page .
All right , we'll talk more about how to make it global in the next section .
And then you do have some more options here like showing view counter and these other options , you guys can understand what these are just by reading them .
I'm not really gonna go through every everyone but uh they're just additional options that you can have .
So now that you guys know about how it's to override your template , I'll just close that and then we have the override the image .
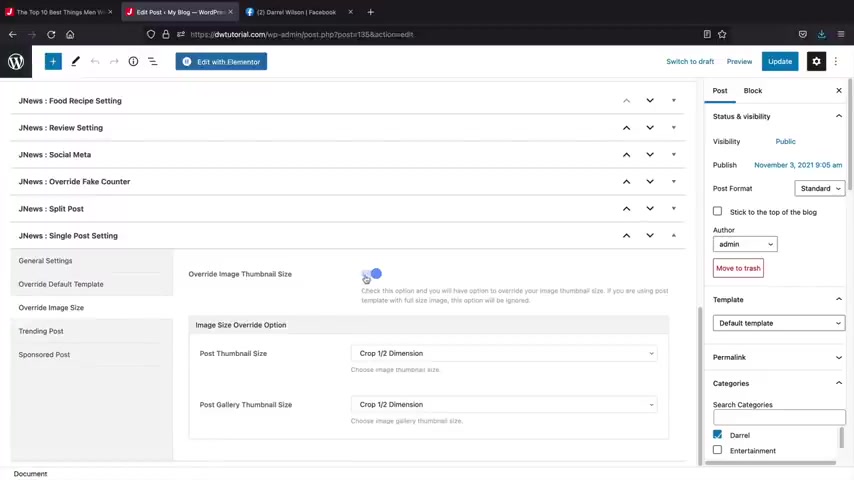
So you can actually override the image size .
If you want to have a bigger image for specific posts , you can do that there .
And then we have these other cool options like trending posts .
Let's make this trending , you know , trending .
And this is also a sponsored post sponsored by Darryl Wilson .
Here we go , sponsored by Darrell Wilson , where you guys can actually show your sponsors for your post .
And I get offers for sponsored posts all the time in my email from my blog .
And uh you know , it just , it just looks , you know , a little bit more , you know , sponsored by Darrell Wilson .
And also we have this little uh trending icon right here where people can kind of say , oh , this is a trending article , blah , blah , blah , you know , it's , it's just how it goes , you know , it's just , it's just the business that we're in , we have to make these little icons and stuff to uh incite users to click on our uh blog post .
So let's go ahead and go back to edit post and I think that's pretty much all of the basic general options here .
Uh Let's go ahead and scroll down .
So I went through all of these single post options .
Uh Now let's talk about the review settings .
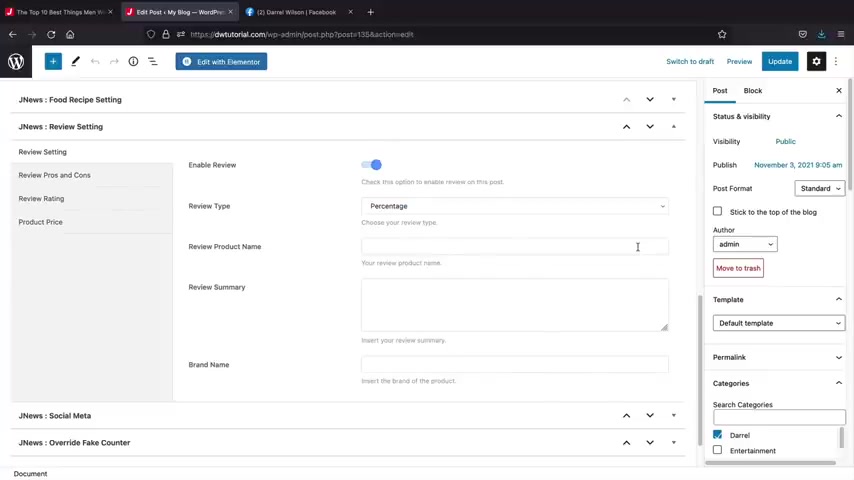
I did tell you guys , I would come back to that .
So we can actually turn this into a review and it's pretty simple , right ?
Let's say , for example , we are reviewing , uh this is a bad title by reviewing the Star Wars costumes .
So , so now we're reviewing the actual uh costumes , you know , in our uh you know , right here .
OK , let's just say , for example , we're selling them , right ?
Uh This is the uh Storm Trooper and then here you put the brand .
So whoever made this , you'd put the brand there , here you have the pros and the cons , you know , comfy , but it's also hot , you know , here's your , your uh so I'll just put like quality , right ?
You would just put like the features or something and then we can put like , you know , nine out of 10 and then the product price , so you can buy this on Amazon .
So right here , make sure you put the actual number if you put the dollar sign , uh the theme will actually not read it properly and it'll put zero .
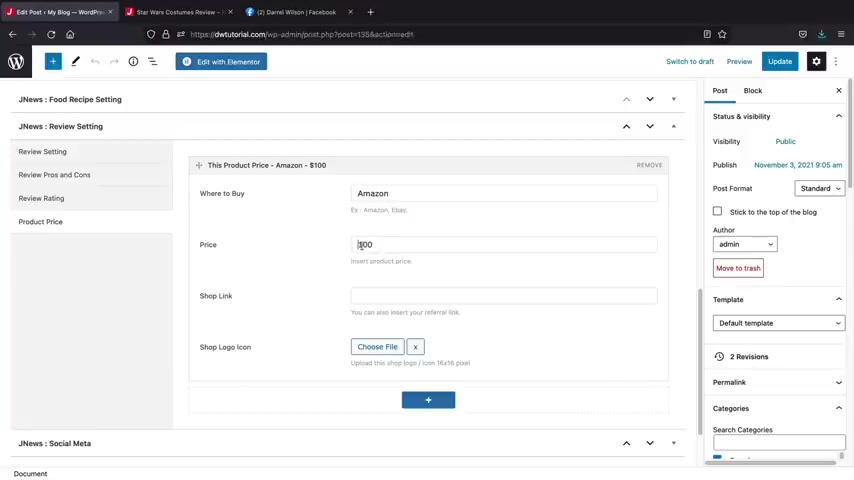
So make sure you just put the actual number and don't put an actual dollar sign or else it will not work .
And then this will be the link of the actual uh shop .
So if this would be like your affiliate link , so if you're linking them to Amazon or ebay , you would just go ahead and insert the link right here .
And then also you can even insert a shop logo icon , just make sure it's 16 by 16 pixels .
All right , let's click on update .
Let's go ahead and take a look at our page here .
So I'll go ahead and refresh the page .
All right .
So we , we are now doing a Star Wars Customs review , right ?
And right away , you'll see that we can purchase this and if they were to click on this and buy it from Amazon , you would make money .
Awesome .
It's gonna keep scrolling down here and uh let's go ahead and take a look here .
We have our storm trooper .
This is a costume .
We have the pros and the cons and $100 .
So there we go .
So now we've made this really cool review article where we can get affiliate commissions if people click on our blog post .
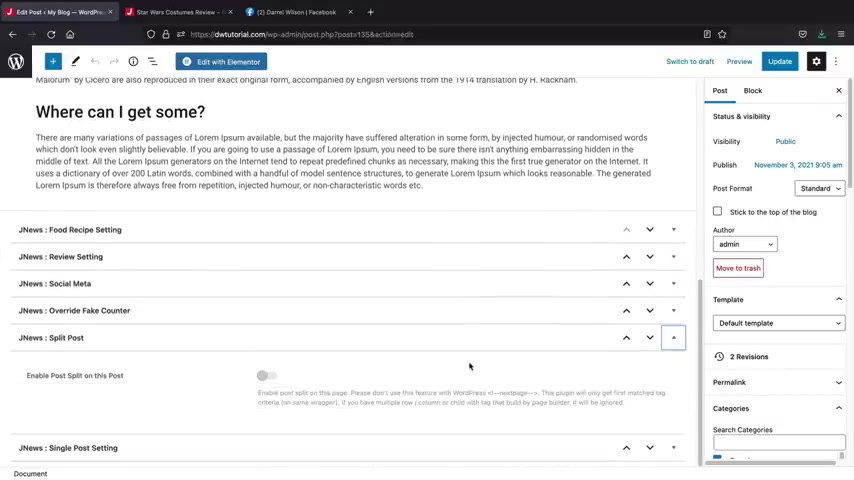
So now that we talked about the actual review , let's now go ahead and jump to the actual splitting the actual post .
So let's go ahead and collapse this in this last section , let's talk about splitting post .
So I'll , I'll open this now as you're writing your articles , guys , you need to make sure that you actually title your tags correctly or your heading text .
So for example , this is H two , this is H two and H two .
So this is going to divide the article by H two .
If you want to change that to H three , just go ahead and put it in H three , you know , but you , you need to be uh descriptive on which heading you're using .
So the theme can actually um break this article up for you and then this would be H three as well and I'll click on update .
All right .
So now that I've done that , let's go ahead and enable the split post option .
But I first want to get rid of this review , you know , I don't want to have the review no more .
So let's take that off and then we will turn on the split post option .
So with this , we can actually go ahead and split up our post and we want to do it by H three tags .
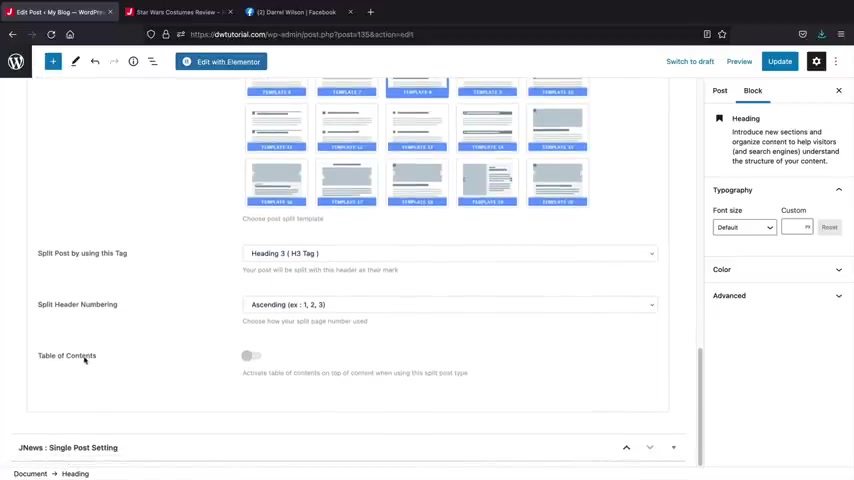
So remember how we set those to H three and there's various templates to choose from .
So I think you guys can kind of go through this on your own time and explore all these templates and just see what they do .
Now .
One really cool option here that I love is the table of contents , make sure to turn that one on and you can have a floating a normal or both .
So normal is just going to introduce the table of contents at the beginning of the article and floating will actually show it throughout the scrolling of the article .
So let's go ahead and update this post .
All right .
So let's take a look at our blog post .
We got this really ugly side of our , we should probably add some stuff to it .
But uh let's go ahead and scroll down .
So now you see how this has been broken up .
It's a really clean sections .
I really do like this also right here .
We can see we have this table of contents .
So I did add some more paragraphs just to give you guys some , you know , just some better examples .
But I really do like this .
It's just a really clean way to read blog post .
So that's an example of how you can split your blog post up .
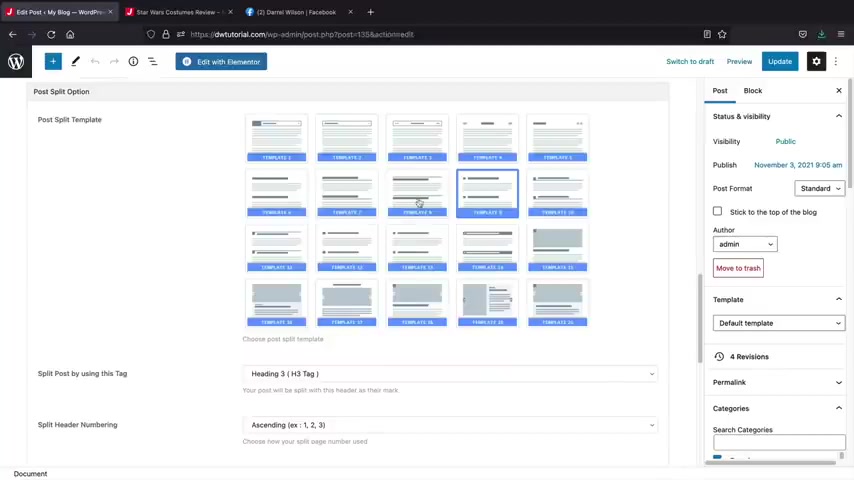
So on your own time , feel free to kind of mess around with these options and just see which template works best for you .
Now , let's go ahead and , and select template five here and now we have some options .
So depending on what template that you pick , you'll see that some options display , but uh I'll select template five and I wanna make sure my heading three is selected and then here we have a sending and you can also have a featured image on that specific uh post , but I'm just gonna leave that unchecked .
And then here we have load mode for split posts and we can do you know , load content with Ajax , load all the content or a normal load .
So let's go ahead and click on update here and just take a look again , guys , I am not a 100% expert on every single option on this steam .
But as you guys can tell you can get a good understanding of it .
So you can see here how we can kind of scroll through every specific H three which just makes it , you know , very convenient and easy to kind of navigate your post if you want to go that route , right ?
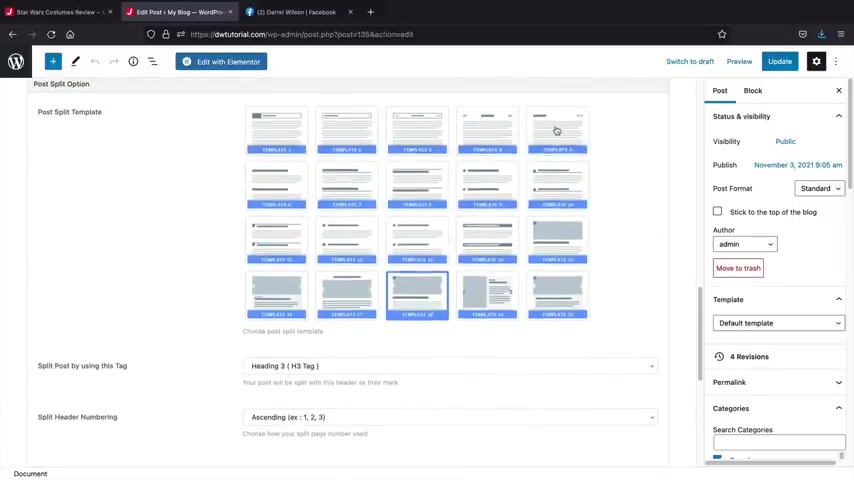
This could be something like men's health where you talk about the best vitamins to take , right , or something like that , you know , I , I don't know something like that , but uh let's go ahead and take a look here at the other option .
So uh we actually have the , what was it this one right here selected ?
We have template five selected .
Uh But now let's do load content with Ajax and let's just take a look here at what that will do with the , the actual blog post .
So I'll refresh the page and now you'll see that we have this little like arrow right here .
So we kind of scroll through like that as well and then we can change it to something like template 20 .
I'll click on update here and then I'll refresh the page and it's more of like this right here .
So it kind of just changes up a little bit .
So you can see how you can split up your blog post .
I really do like that .
Uh So just go through those options and see which one works best for you .
Um Obviously , I'm not gonna go through every template , but uh I think you guys can get a good understanding of the split post feature , a really cool feature .
I really do like that feature .
So uh I'm gonna go ahead and click on update here .
All right .
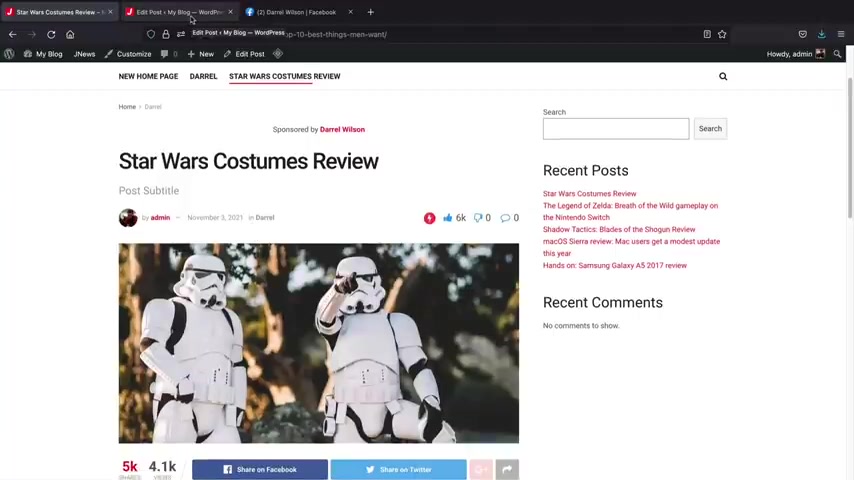
So I showed you guys how to actually customize this specific post , right ?
But you guys can actually make a custom post .
All right .
So I showed you guys pretty much everything about the actual single post settings .
Now , here we have single post settings and then we have override default templates and then we have this option for custom , right ?
Uh We didn't really talk about how to make the page with element or yet .
So let's do that here .
You'll see , create a custom single post from here .
And what this is going to do is that this is going to open the post template section in the back end of your website .
So right here , let's click on new post templates and this can be uh a post for a specific category .
Uh You can take this post and put it anywhere you want , but I'll just do a custom title or custom posts , title , right ?
Something like that , whatever .
And then I'll click on publish here .
After we click on publish , I will then click on edit with mentor .
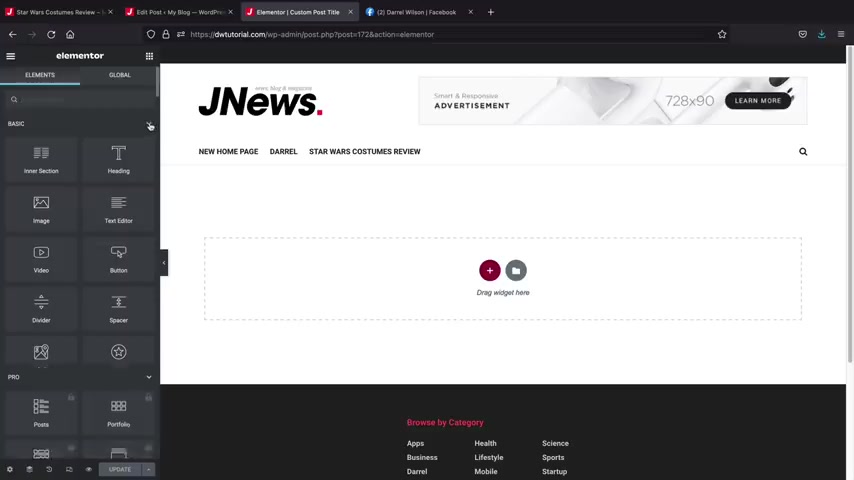
So now we're going to build our post template using the actual page builder .
All right , I'm gonna go ahead and collapse these really quick because I mean , there's so many , there's so many , it's too many , you know .
So let's just close these right here .
Let's get rid of all these and the ones I wanna access are the posts right here .
All right .
So let's say , for example , you want to create your own post using the actual page builder and you can get as creative as you want .
So for example , we have the post title , right , post title .
Let's go back over here and then maybe we have the featured image , right ?
So then we have the featured image for the post side .
Let's make it a little bit smaller .
That's too big .
What , what is that all about or actually , no , let's do like this .
All right , 7 50 by 3 50 .
OK .
So it'll get smaller when the post propagates , but let's just go ahead and keep working here .
So now this is the title of the article , this is the actual featured image and then we can kind of drag in some more elements here like the actual uh contents , right ?
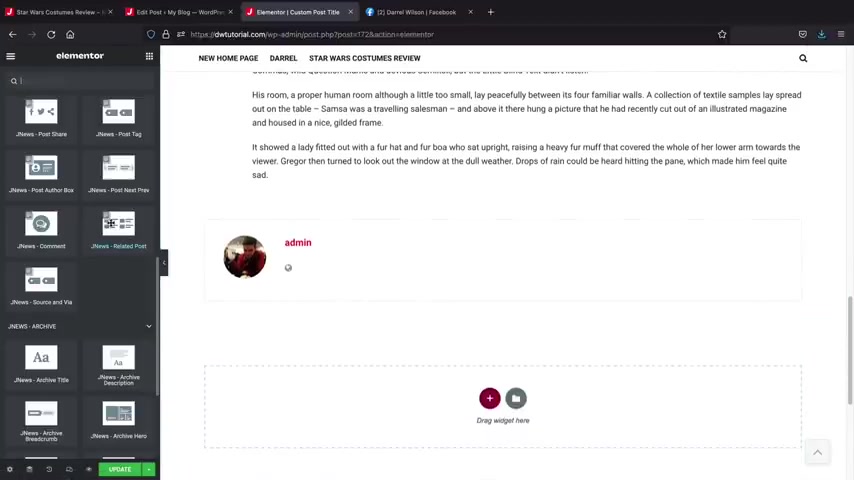
Enable float , share on contents .
Yeah , why not ?
That's cool .
Right now we got the floating floating stuff and then they propagate some demo content for us .
How cool is that ?
But uh let's go ahead and say , all right now that we got this uh we can put the author box here because you know , sometimes when you're making your blog , you don't want specific elements there .
You know , you don't want the , maybe you don't want the admin or you don't want the actual related post .
I don't know , you know , whatever , you know , it's , it's , it's your blog .
You can have all the fun , you want , grab some beers , make some blog posts all day and then we can scroll through previous posts , right ?
And then we'll just drag in one more , you know , we'll just grab in a uh I don't know a comment where they can comment below that .
OK ?
Now these bottom ones right here uh under the post , I'm sorry , the , the J news archive and these are for your archive pages and we will do that in the very next section .
But uh these are generally not for the actual post .
So just stick with the actual post elements .
Now , you guys can also use regular elements or elements on your actual uh blog post .
If you choose to do that , maybe you want to add a Google Maps of your location .
Uh under your , your admin or area .
So you can show them where you're located or , you know , whatever it is that you want to um show , but you can mix and match elements on this page .
So I'm pretty much finished here .
Let's click on update .
All right .
And then we'll go back to our uh blog post right here and I'm just gonna refresh this page really quick .
So we basically made a custom uh post already .
So let's go ahead and uh override this .
Now , we can actually apply this on the entire website .
And we will talk about that in the very next section when we talk about the theme customizer settings .
But now that we selected custom , we can now select the custom post title and then update this bad boy .
Let's , let's , let's see what , let's see how this looks .
I bet it looks terrible .
All right .
You know , this is not bad .
This is not bad at all .
You know , I really do like this .
Now , this is um this is showing like this because we still have that one style of splitting the post .
So we just have to turn that off .
So sorry .
But that's pretty cool .
We can split post even on custom post sites .
Like how awesome is that ?
So for the split post , we got to turn that off .
All right .
My bad , my bad .
Actually , that was on purpose .
Screw it .
You know , that was part of the tutorial and there we go .
So you can see that we have this post , everything's there and then we can leave comments .
So congrats , you have now made a custom post .
Now you can use this post on any part of the website , but that's how you can create a custom post for your specific page .
So that's pretty much it guys for making custom post templates .
I hope this part of the tutorial was helpful .
Let's go ahead and now talk about how to create custom archive pages for your blog slash newspaper website , right ?
Party people in this section .
I want to quickly go ahead and go over how to create a custom category page for your blog .
Now , the theme actually offers a lot of preset styles .
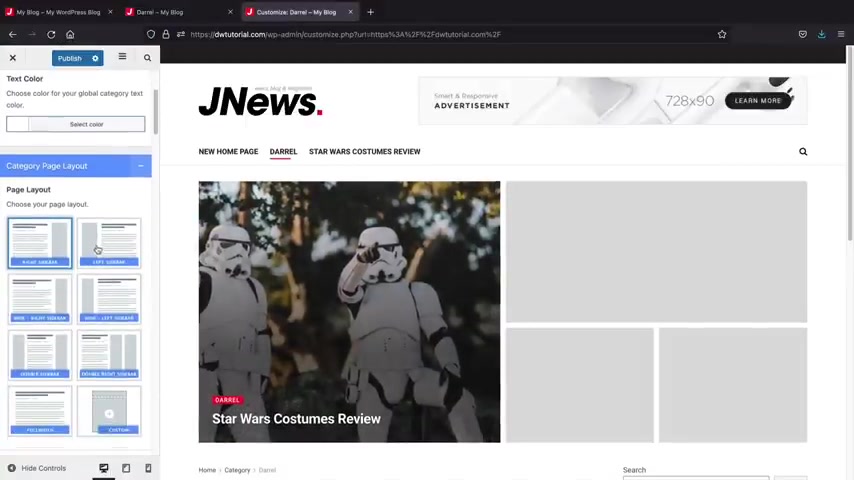
However , if you do want to create a custom uh category page , I want to quickly go ahead and talk about that before we jump into the next section .
So in the next section , we'll be talking about how you can just kind of pick a premade style like a a left , a sidebar right here where the sidebar adjusts and then you can also adjust the header uh of your actual category page .
However , there's an option that you can create a custom um style .
So if you guys do want to create a custom category page for your categories in this section , I'm gonna quickly go ahead and show you guys how to do that .
It's pretty simple .
So we just actually made a custom uh post page , right ?
And making a custom archive page is pretty much the same thing .
So I'll go over here to a dashboard on the left side , you're gonna see archive template , right ?
So archive template is referring to uh categories .
So right here , I'll click on new archive template and then this would just be like your category templates or whatever template that you want to uh you know , whatever template that you want to use or name .
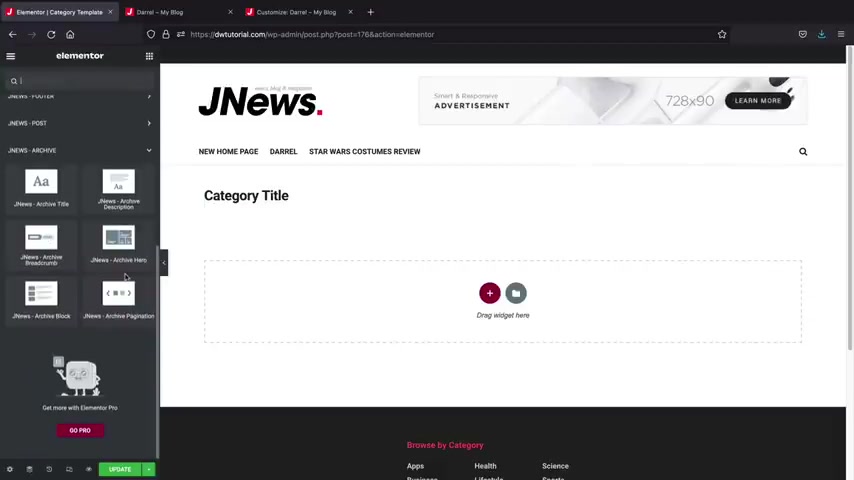
And I'll go ahead and publish this and then I'll click on edit with mentor .
All right .
So on the left side , if we scroll down here , I'll go ahead and scroll down .
You will see the J news archive uh modules and these modules are particularly used to create a custom uh category page .
So for example , you can go ahead and drag and drop the archive title here and then this would be like the name of a category , you know , so like archive pages or category page or something like that .
Um Then I'll go ahead and click back on these elements .
We'll scroll down and this can be like your archive description , you know .
So uh the description would display here dynamically .
So for example , this right here would be Darryl .
And then anything else of a description of Darryl would be displayed right here and then we'll go ahead and scroll down here and we can just go ahead and drag in like a bread crumb , right ?
So we have bread crumbs , which just shows like people like where to navigate and stuff like that .
And then we can just drag in like a hero image .
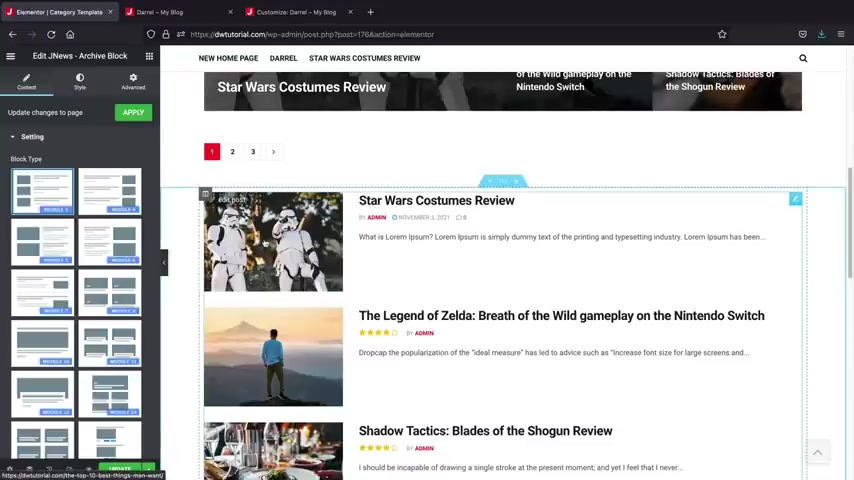
And then here you'll see a list of the specific category posts uh from the specific category .
So that's pretty much it .
So you'll see how we just created a custom archive page and you guys can kind of spend the time to design this .
I know I make it look really simple guys , but trust me , uh making a page is it takes a long time .
You know , web design is not the easiest , but uh I'll go ahead and click on update now .
All right .
So at this point , you guys now know how to create a custom category page .
Now we're gonna jump into the theme customizer in the very next section , but I just want to give you a quick overview about what we just did .
So for example , like this is a list of all your categories .
So we have fashion , science , gaming and stuff like that .
And here you can pick a specific layout .
However , since we made a custom uh category page , I'll click on custom and then you'll see a list of the um the templates right here .
So now we have the category template and now you'll see how the entire uh entertainment category has changed the layout that we created .
So this is how you guys can create a custom category page uh for your categories .
All right .
So pretty simple , right ?
So now that you guys know how to create a custom archive page , let's jump into the next section and talk all about the theme customize .
Welcome back guys .
So in this part of the video , we'll be talking all about the theme customizer .
Now , the theme customizer is very broad , you know , you can control your single post , you can control your archive pages , the home page .
It also does give you more features like adding in a side feed and just some other general options .
So let's go ahead and talk about the theme customizer settings , right ?
Party people .
Welcome to the theme customizer section .
So our website is coming along pretty well .
You know , we know how to create pages , we know how to create posts , we know how to create archive pages and all in all , you know , the website is coming along pretty well .
Now , there's some few things that we can change here .
But uh in this section , we'll talk all about the theme customizer , you guys ready .
So to activate your theme customizer , just go ahead and click on customize here at the top .
All right .
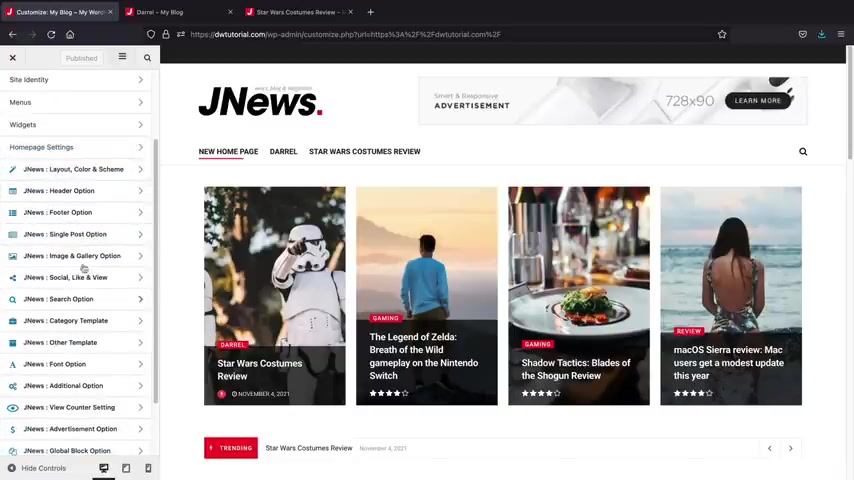
So now you guys will see these options on the left side and these basically kind of control the structure of your actual website , like the archive pages and the post templates and stuff like that .
Now , let's just go ahead and go through these basic options here .
Now these options right here are default for all wordpress themes and these are created for the theme itself .
So for example , site identity , this will display your little logo here at the top in the browser .
So make sure that you change this to your specific logo .
If you don't have one , then the default text will just display your site title and also your tagline .
And then here we have menus .
Now , I personally recommend to create menus in the back end .
I don't really like adding pages and stuff like that from here because it's kind of hard to find all your pages and it just looks really cluttered and messy .
So uh if you guys do decide to make menus , uh I would use the back end .
I wouldn't use the theme customizer to make pages and , and create menus .
It just doesn't look good and it just , it's weird , you know .

So here we have uh next is widgets right now , we'll talk more about widgets , just a bits , but these will be applied to the footer of the websites .
And then also we have home page settings .
So let's say , for example , you guys want to assign a specific page to be your home page , you would just select that , you know , right there .
We already selected this as our home page .
And let's say , for example , you guys wanted to create a default post page .
So let's say , for example , you guys did not have a category page and you did not use the page builder .
Uh You can select a specific page where all of your posts would be propagated by default .
So uh for example , here I just use this post page .
But let's just say , for example , we selected in a new page .
This would be like the default post page where all of your posts are uh are propagated .
So if you want to go that route , you can do that .
But you can also create categories and stuff like that , which I do recommend because it's just easier to navigate for your uh for your visitors .
So uh go ahead and click on publish here and we'll scroll back .
All right .
So we went through the basic options .
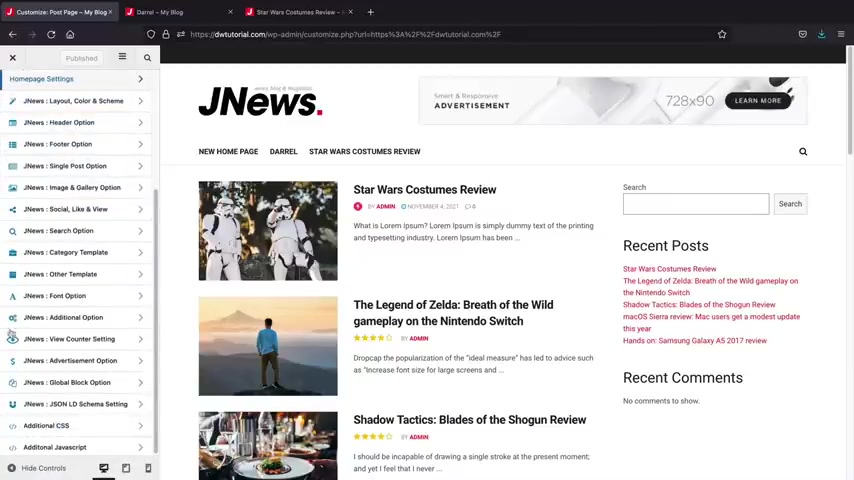
Now we have these J news options and these are basically created by the actual theme .
I'll go through a lot of these options , explain to you what they are .
Some of them are gonna skip because they get a little too technical and uh a lot of you probably wanna use it like Jaque and stuff .
But uh the first thing is you'll click on this J news layout .
So this kind of controls the actual structure of your actual websites .
Some website have like a box layout .
If you guys do want a box layout , you guys can have that checked .
Now , for example , here , I'll click on box layout and then you'll see how this kind of isn't now boxed .
You can't really see it right here because of the padding .
But if this had a background color , then you would see that this is a box layout .
You can also create a box container for like your archive pages and your single posts .
So on the other pages , you can say , you know what I want the other pages boxed as well .
And I also want to have a uh a box shadow , you know , to those posts if he decides to , you know , if you want to have those box .
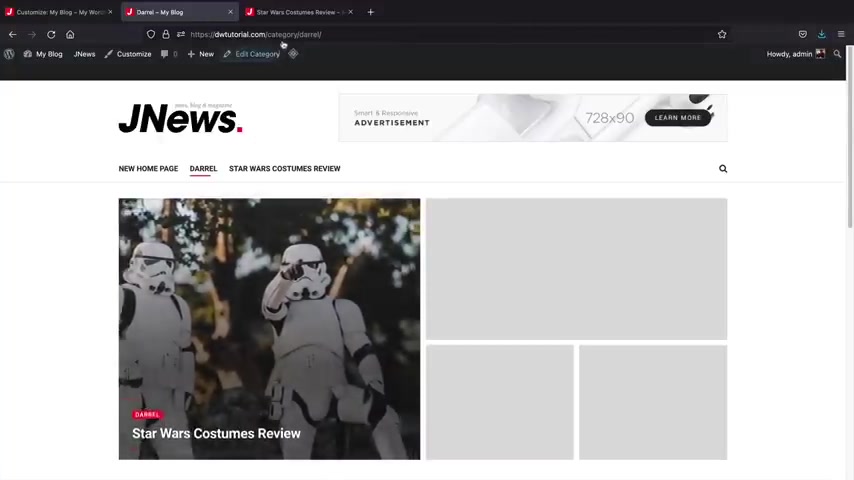
So that would be like these pages like this one and also your post pages , you can create a box layout and also a shadow on these specific posts as well with that setting .
All right , let's go ahead and go back here , side feed setting .
This is actually a really cool option .
So right here , I'll click on side feed setting and we'll turn this on .
So I'll turn this bad boy on here and there we go .
Now , this is perfect for news websites and like large magazine websites because it's really hard for users to navigate news websites .
Right ?
There's so many articles , you know , and it's really easy to get lost .
So with this , you can say , you know what , this is our newest post and then here is our second newest , our third newest .
Now you guys do have some more options here on the left side , you know , you can kind of control the trending button , you can show categories and all these options right here are just referring to the actual side feed .
If you choose to have it here , we have scheme and website color .
Now , this will apply uh for a lot of your text color .
So you can see how we can adjust the text color .
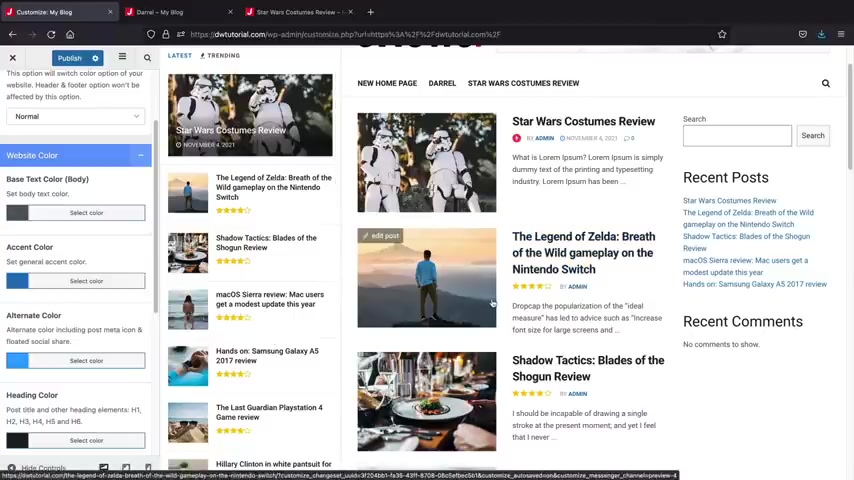
So we have this like red color , but we can always change that to like a green or something or , or teal and this will carry throughout the website .
So this is kind of like the brand of your actual , I guess you wanna say blog , you can kind of adjust all these colors here and then also for entry color , you can adjust the uh content color and also the link color of links on your websites .
And then we'll go back here and then next we have a browse a mobile browser color .
So this would just basically change the background color of your website for mobile users .
So that's pretty , pretty simple , right ?
So that's the layout in a nutshell .
Now , let's talk about the actual um header builder , but I want to go ahead and turn off this side feed as much as I like it , it just , it , it clutters the website when I'm kind of showing you guys how to build this .
So uh let's just go over here to header option .
So this is the header builder and you can actually build your own custom header with this wordpress theme .
Now , on the left side , we'll click on layout right here and they're gonna give you a few templates to choose from .
So you can see here how they've kind of created these preset , preset styles for you guys .
But uh I'll just go ahead and select this one here , style seven and then you'll see how this changed .
Now , let's say for example , you want to drag in elements , right ?
So here we have a search form , you can just drag and drop the elements , we can add a button , right ?
I'll put in a button over here actually , no , I want it over there , right ?
And whatever element you want to customize , you'll just simply click on the elements and then on the left side , you'll see a bunch of styling options .
So if you want to change this to round , we can change that to round for the search icons as well .
We'll click on this and we can change the colors of this and stuff like that .
Also for the logo , if you guys want to upload your logo here , you can go ahead up , upload your logo .
So it's just a very simple to use uh menu builder and you can just drag and drop elements .
And I think at this point you guys can kind of just mess around with this and just understand you know how to use this .
You know , I don't , I don't think I need to spend an hour over here to show you guys how to drag and drop elements .
It's pretty simple , but that is the header builder in a nutshell .
So next we have the mobile builder , so you can actually build a custom menu for mobile users specifically .
So for example , if you want to have like a dark mode , a little changer right there , you can add that , but I'll put it over here .
I kind of want it above the actual logo and then we can add an insert form or even a mobile button .
But uh personally guys try to keep your menu slim .
You know , you don't want it too cluttered and you know , all this stuff up here because then users really can't navigate it well .
So just keep it very brief , very slim .
Also , we have the drawer content as well .
Now this is actually the menu when they open this up right here .
So we have the search form , the mobile menu will appear for users and then you can also drag in more elements here if they actually open up the menu right here .
So you guys can actually drag in more elements if they uh select the actual hamburger menu .
So that's pretty much the header builder in a nutshell .
And I'm gonna go ahead and close this and we'll go ahead and let's get out of here , go back to the mobile header .
Um Also right here , you guys can align this to the left center and the right .
So this little gear icon , you guys can kind of move this around .
Now , you guys might have to actually get it on your phone and actually see what happens because uh sometimes when you're working on this , it's hard for the changes to apply .
So just get on your phone , you know , check out what's going on and and see how it looks .
But overall , you know , this is a pretty simple header builder to use , but uh let's go ahead and go back here .
All right .
So I think at that point guys , you were pretty much done with the actual header builder .
I'm gonna go ahead and close this here .
So overall guys , the header builder is pretty simple to actually use and navigate .
Just go ahead and spend the time to kind of mess around with these elements , see what works best for you .
Also , you guys might notice you have all these elements here on the left side .
These are actually just referring to these specific elements .
You can always design each specific uh element just by clicking on an element here and then designing it .
However , you can always go ahead and scroll over here to logo instead instead of clicking on the element .
So I don't think they really needed to add all this stuff .
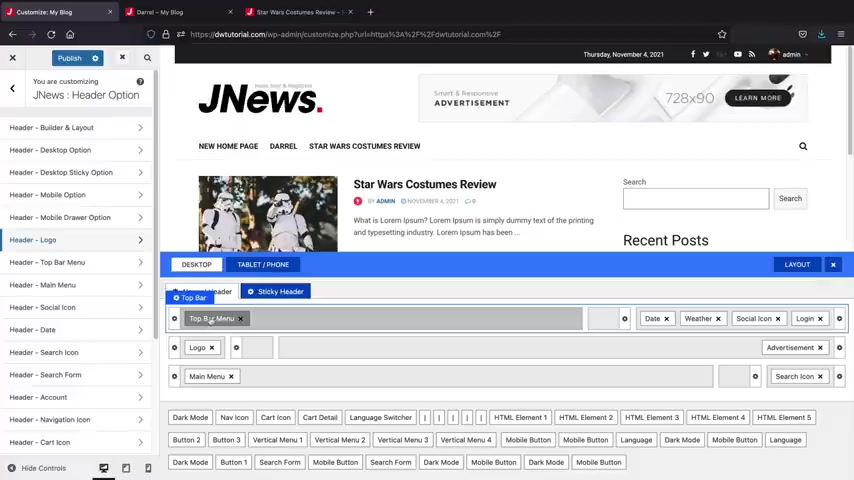
It's really messy and it just looks really complicated , but um you can just click on any element and then design it from the actual header builder .
So , uh that's pretty much the header builder in a nutshell .
Let's go ahead and skip that .
Now , now we'll go to the footer options .
So let's go ahead and click on footer layouts .
And now at the bottom right here , we're gonna see different footer hair areas .
So let's go ahead and scroll down here .
We'll close this and now you'll see that we have a footer layout , right ?
So we have style one .
We have style two where it just kind of breaks everything up .
You can see here how it's broken up .
Then we also have style three , you know , style five .
Now , you can see how these are a little empty right here and these are empty because we need to place widgets in those specific sections .
So I'm gonna go ahead and click on publish here , go back , go back one more time and let's go back to widgets now .
So now we have footer widget one , right ?
So we can add a widget , right ?
And we can just add in some like html text or like an about widget or something like that .
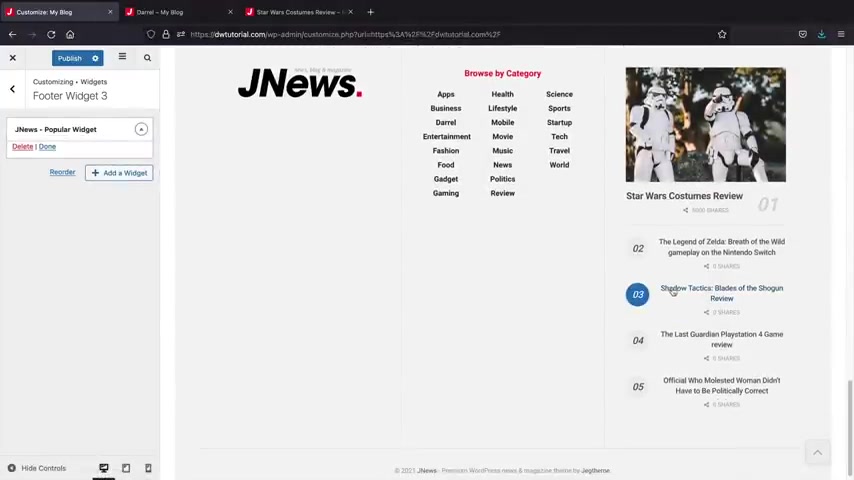
So this would just be like the about widgets where you can go ahead and you know , talk about your , your company , you can always add more widgets here and then here , I'll just grab the popular widget which just displays the post with the actual most page views .
So just go through some of these elements here , see which one works best for you .
But that's how you guys can create a custom footer .
So you can use the actual uh widgets to kind of apply them to the specific numbers .
And then the actual uh options right here , you would select a layout .
So you can see here how you can select different layouts .
Now , you guys can also build a custom footer as well .
So with the custom footer , you guys basically build it with element or just like we did earlier , we did the same exact thing uh or you can do the same exact thing .
However , I don't recommend the footer with this theme because it's very limited and there's only like five modules to choose from .
And I just think that maybe you would be better off just using the actual uh footer elements that the theme gives you .
So I don't recommend using a custom footer in this specific scenario .
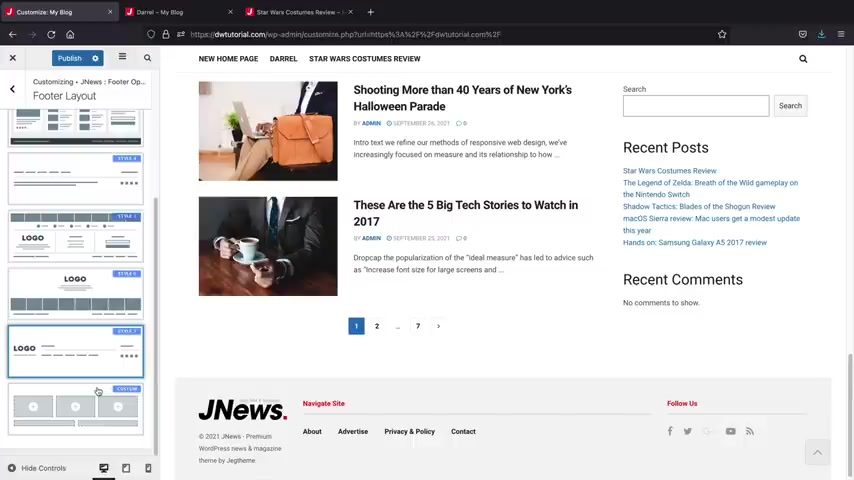
But uh you are more than welcome to create your own custom footer .
It's the same thing as creating a custom post and a page like we did before .
You're just doing it specifically for the footer section , but I'm gonna stick with seven here .
I think seven is really simple and easy .
I do like that .
So I'm gonna stick with a style seven .
And then next we have a footer option and this would just be additional footers below your primary footer if you chose to have like more of , you know , a secondary footer on your site if you want to go that route .
All right .
So that's pretty much the header and the footer in a nutshell .
It's pretty simple , you know , just spend the time to kind of mess around with it , get comfortable and probably after like 30 minutes , you guys will be pros at it .
Now , let's talk about the single post option .
Now , if you guys do decide to use the theme , you guys can actually use the theme and set a global default for all of the posts .
For example , here , we actually have this uh this post right here right now .
I took off the global override .
So when I make changes to the theme customizer , it'll affect all the blog posts on my website .
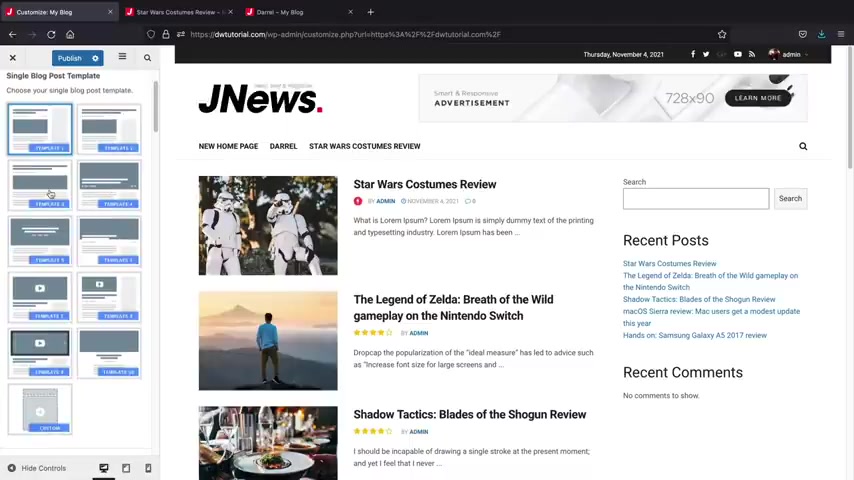
So for example , we have the single post options and uh here we can actually pick a specific template .
So maybe you want to select template like three or two or whatever you'll just click on .
OK ?
They're just gonna redirect us to show us what we're working with .
So for example , we can select template two , template six , you know , whatever works best for you .
Oh , that looks pretty good .
Actually , I do like that , you know , but it's really hard because you have to get images that work really well with it or else it just looks like crap , you know , it's like you have to kind of really like work with it .
But uh I like Temple Three .
I think it looks pretty sharp .
I do like that .
No , no , no .
Was it template four ?
Yeah , template four .
Now this is on a global basis guys .
So just remember that uh this will apply for all of your posts .
However , if you want to actually have a custom post uh over here in a custom , you can assign the custom post like we made earlier to be the global default for all of your post pages .
So that's why we created this single post in the previous section .
So now you guys can kind of understand what we're talking about here .
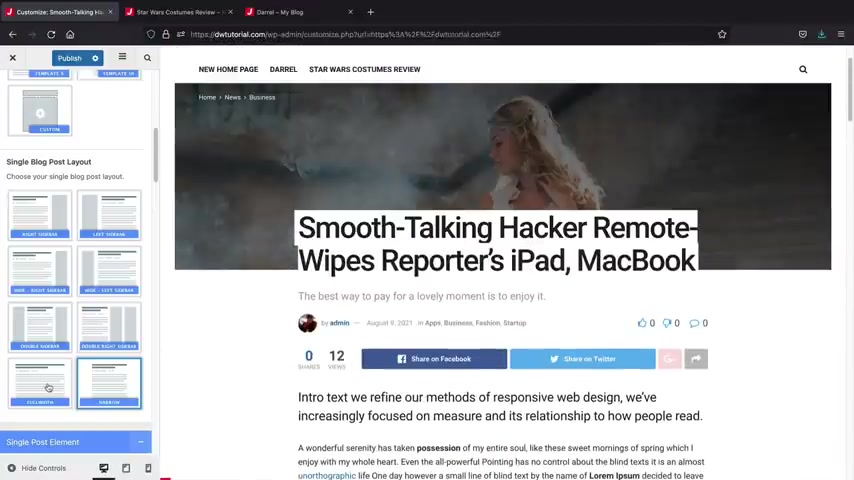
But uh I'm gonna select uh what was it ?
Post six ?
I do like that a lot , right ?
Post six .
And then also we have the single post layout .
So this would be the actual uh layout for your actual post .
So you can have it narrow , right ?
Like this , that looks that looks pretty clean , right , or full width or even with a double sidebar .
So with two side bars on the right and the left side that looks a little cluttered .
But um you guys , you guys get the point here , I'll just leave it as a right cyber by default .
I think that's pretty , you know , pretty basic , pretty self-explanatory .
And then you have a few more options here where you can disable like the featured image , you can disable the video or disable the author .
So this applies to all of the posts on your entire website .
So just go through these options and see which one works best for you .
Uh I'm gonna turn on the reading time .
I do like that .
It's pretty cool .
And then also we have the uh the progress bar .

I like the progress bar a lot that kind of shows the progress bar at the bottom of the page and lets users know uh how quick they are to completing the article .
So I do like that .
I'm gonna go ahead and publish this .
All right .
So that's pretty much the single post options in a nutshell .
Now , these other options here are pretty simple to understand , like for example , bread crumbs , which are these little things up here .
You can disable those and customize them on this page .
Uh related post options .
You can design and customize the related post options or you can just completely disable them .
For example , I'll scroll down to the bottom of the page and now you'll see related posts so you can turn that on or off .
That's up to you .
I do like this little next post thing they got right here .
That's really cool .
I do love that .
You know , it's really cool .
So let's go back over here to the comment settings and then we have comment settings where you can adjust the comments and enable like a login form on your comment section .
And one really cool option is this following video .
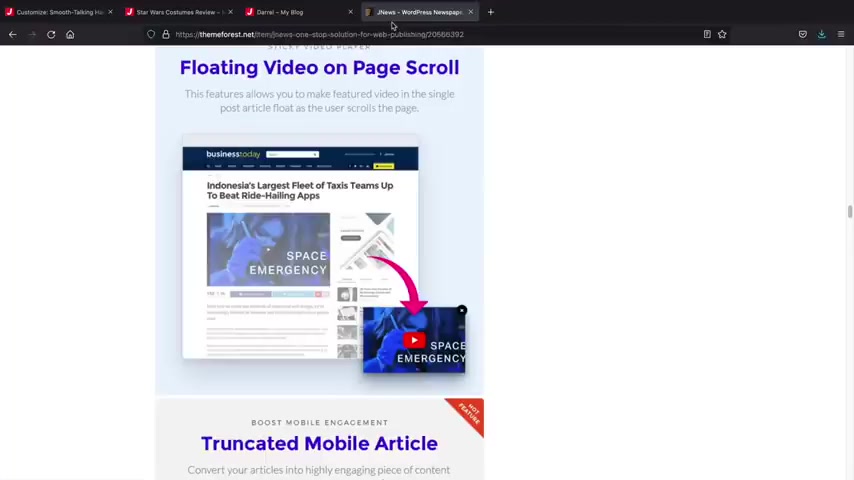
Now , if you do have a video on your blog , uh what you can do is turn this on and the video will actually pop out and it'll follow the user to the bottom right of the screen .
So let me give you guys an example here .
Uh You'll see an example right here on their site .
So you'll see how the video pops down and it'll stay at the bottom , right as the user scrolls .
So if you do have video posts , you can go ahead and uh have the video pop out and kind of stay with the user as they're navigating the actual website , which is a pretty cool option .
Let's go ahead and scroll back here .
So that's pretty much the single post option , guys in a nutshell .
You guys can kind of go through some of these and turn them on , you know , just mess around with them , get comfortable and see which one works best for you .
All right .
So we're doing pretty good , you know , you , we're almost done here , you know , we've , we've gone through half of the options , but these are the most difficult options .
These other ones , they're kind of like miscellaneous options .
They're kind of just like changing small additions here .
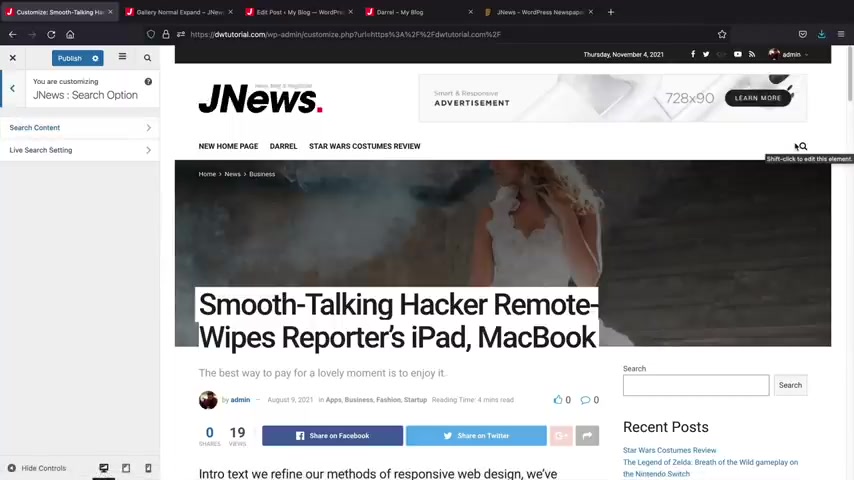
Like for example , we have this social section and this is here , you can change like your social icons or if you want to , you know , insert your social icons here like at the top , this is where you would do it .
Um Also you can adjust like the uh Instagram feed settings and all your social settings here .
Now guys , I'm not gonna really cover this because this is just referring to the actual social login the like button on your post if you have this enabled .
So we did talk about how you can have only likes instead of dislikes earlier .
So that's where you can kind of control these social aspects .
So go ahead and check those out on your own free time .
Uh Next , we have the search option .
Now , this is referring to the actual search here on your website where users can search .
Now , this is if you have the search icon on your menu , if you do not have it on your menu , then these options don't apply to you , right ?
Because you don't have it on your menu .
But if you do have it on your menu , there are some small adjustments you can make .
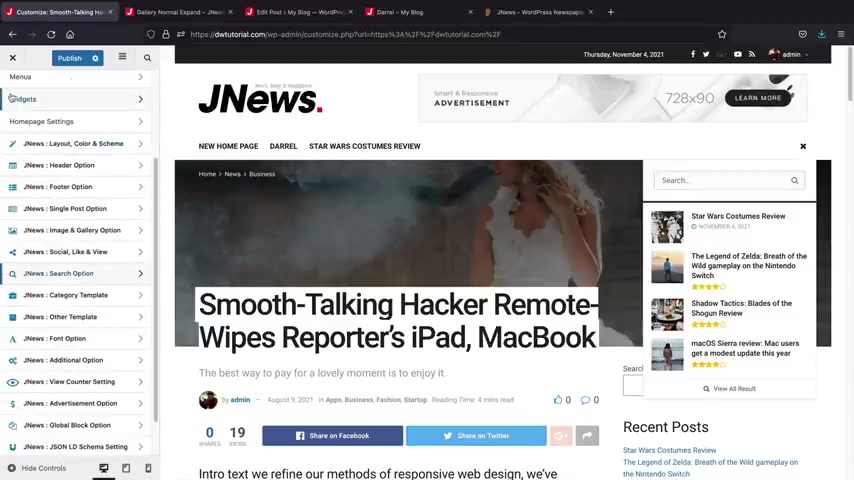
Uh for example , the live search settings uh here , if I actually click on this and we type something in like post , right ?
Or let's see here .
Uh We , we'll type in here .
Uh There we go , you'll see here how these display like that and you can turn these on or off and you can also limit the number of posts that these search displays .
OK .
So you guys got , you guys got that , you guys with me .
All right .
So the next thing we're gonna talk about is the category templates .
And remember earlier how we created a custom category page using element or , well , we can actually just use the theme default if you choose to go that route .
So for example , you know , remember earlier we made this uh archive page here .
Uh I'll just give you guys a quick example here we made this using the element or page builder .
Now you don't have to use element .
If you don't want to , you can actually just use the theme , a customizer to create a archive page .
Now we selected custom previously and this will actually create this actual um I guess you want to say the form that we created .
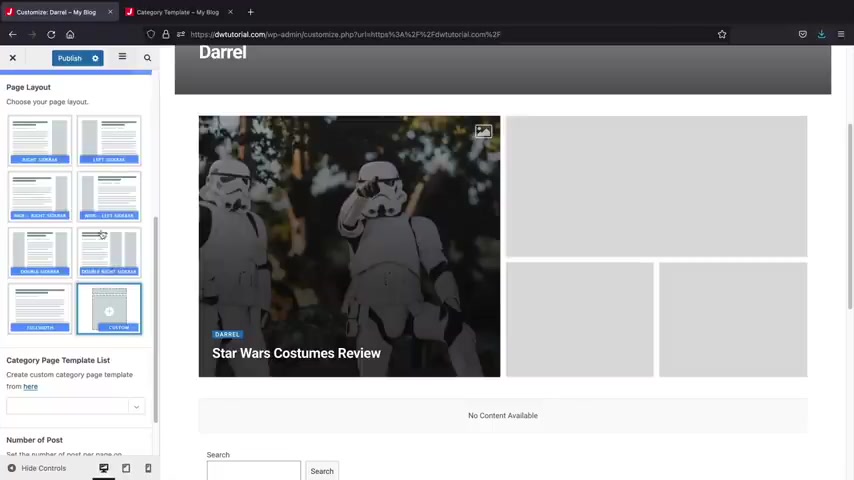
However , if we want to change that to have a global default for the entire website , we can adjust that .
So first let's choose the page layout .
Now , the page layout is this bottom part right here .
So this is referring to a right side bar or a left side bar , right ?
So we can adjust that there .
Now , here we have the category header .
So this is referring to the actual title of everything .
So let's say for instance , uh I want to just change this to style two , this will display the category and then you'll have the bread crumbs and you can always change this to style three and adding color if you want to do that .
So if you have like a color scheme to match , uh you can put it in a specific color , but I'm just gonna leave this as style uh one , let's do , let's do style two .
Style two is good .
So this controls the actual header .
Next , we have the category hero header , which is this section here .
So let's say for instance , I want to display a four column row , we can do that or you know , a five column row .
I like this one right here .
The Hero skew .
This is really cool .
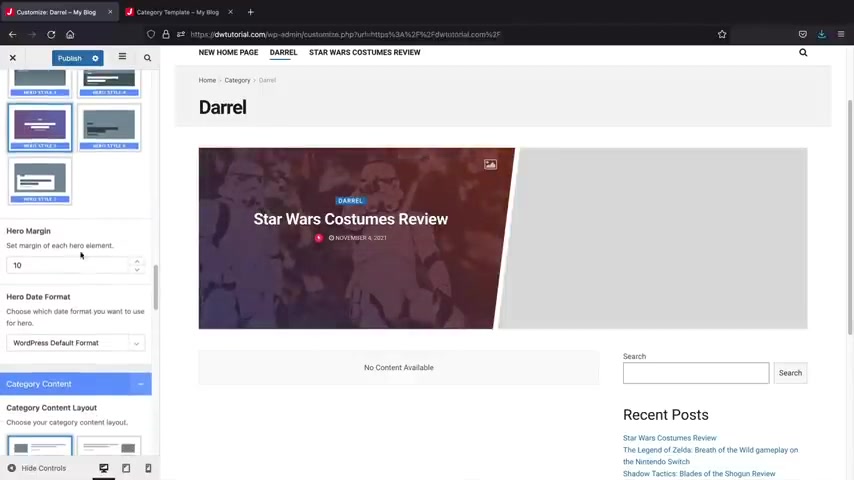
It kind of skews the articles , you know , that's really cool .
I I do love that .
This is such a great theme , you know , like you guys are so lucky .
I found this theme .
Uh But here we have the Hero style .
So this would be just like the actual color it and stuff like that .
And then you can select the actual the margin and you know , stuff like that .
And then also we have the the category content layout .
Now this is for this section right here .
Now , since we only have one article under the Darryl uh category , uh nothing will display here because we only have one article under the Darrel category .
So you'll want to go ahead and you know , create some posts and then let's say you create something here .
Um They will all be displayed right here for you .
So let's say you like uh I don't know this one .
You want that grid layout , right ?
Or a module layouts , you can adjust that .
I think that's pretty cool .
We'll leave it like that .
All right .
And then you do have some other options , like you can enable a shadow like a box shadow and then just some other general options .
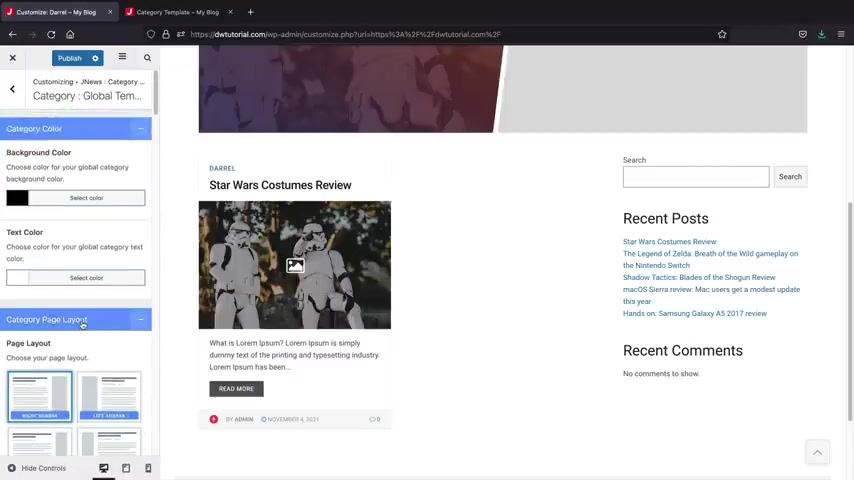
But this is how you can create a global template for your category pages .
So this would be applied to all the category pages on your website .
I do like using the actual theme customizer more personally just because it looks more structured and clean .
And if you do use element to you , kind of have to really make sure that it matches the scheme of your website .
So it's really up to you .
You can either use the theme settings or you can use the element or page builder to create your uh category pages from scratch .
So I'll click on publish .
The choice is up to you .
All right .
The choice is up to you .
If you guys wanna use element or , or the theme , it's all up to you .
And then here we have other templates and this controls the other pages like the author template page , right ?
And also like the search page and the 404 page .
Now these pages are referring to other archive pages .
So for example , let's say someone enters a wrong URL , right ?
They just enter something incorrect .
Uh Here , you'll see that uh this is says not found .
And the archive page , this page here controls the actual structure of this specific page .
Now , let's say , for example , someone clicks on the author page , right ?
Which is the admin here , you can control the actual layout of this page .
So this would be the uh where is it the author template ?
So you can control the author template as well .
If you want like a full width style , right ?
Setting , something like that .
You can control uh this page as well .
You guys can always just go ahead and see what page this is just by adjusting it .
And the theme will actually navigate you to that specific page , making it really easy to find .
So I do like that option that they have with J News .
So yeah , on your own free time , feel free to check out these other pages and you know , go go crazy , you know , if you want to have a left side bar for your author page , be my guest , whatever you wanna do it , your your website .
So uh that's pretty much the other templates .
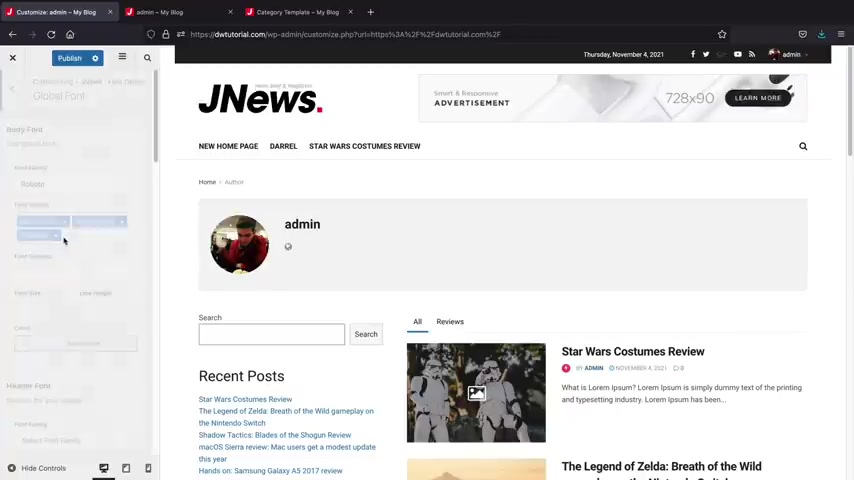
And next we have font options and here you can select a global font for your websites .
Uh Let's say , for example , I like Poppins , right ?
Let's throw on Poppins here , but Poppins is only nice when it's bold .
You know , Poppins is actually a very ugly font .
You see that .
But when you bold .
It , it just looks a lot nicer like here we go .
Poppins bold .
Wait , what were you doing ?
That's good .
Wait , Poppins bold .
There we go .
We got poppin .
So I do like Poppins and we'll change that to like Poppins bold .
So you'll , you'll see a lot of these , um , these titles and posts , we'll change it to bold and that bolds it .
Right .
So I , I like Poppins bold .
It's really up to you and then you can also select the header font as well .
You might want to change this all to the same font to make your website look consistent , right ?
So Poppins uh Poppins , but uh I should probably actually uh make these all bold , right ?
So this is the post titles , right ?
So for your post titles , here we go , post title .
Where , where , where are you Poppins ?
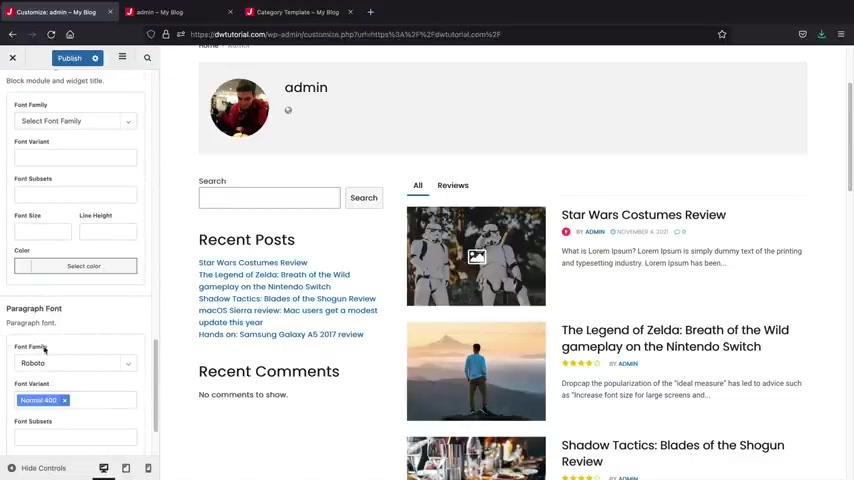
I can't find you Poppins .
There we go pop ins and then bolt .
OK .
The block heading , the paragraph font , which is the font of your paragraphs .
Uh You might want to change that as well to whatever font that you want to choose that to .
So this is a pretty important option right here .
This controls the font of your website .
So just spend the time to kind of go through these uh options here and make sure that you select the right fonts for your newspaper slash block website .
But let's click on publish here .
I wanna save that .
You'll see already how the uh bread crumbs are Poppins .
Uh This right here is Poppins .
These right here are Poppins as well and our admin is Poppins .
Now , some of these options are worth checking out .
The other ones , I'm not really gonna go through .
Uh , one option .
That's really interesting is the weather setting .
You guys can actually pull the Yahoo weather and insert the API key and then they'll get a cool little notification saying uh what weather it is today and stuff like that and that kind of commits users to coming back .
So I do like the fact that they have an integration for the Yahoo API weather .
Also here we have review now earlier , we made review posts and this is where you can actually change the actual currency and the US D I'm not really sure why they put it here .
To be honest guys , I think this is the wrong spot to add in the option for the review because it's kind of hidden , right ?
And if you're in another country using pesos or Tai Bo , you kind of want to have it in the area of the review template , right ?
So I'm not really sure why they do that there , but uh that's where you can access it .
Also loader settings , you can choose to have like a different loader style instead of dots , you can change them to squares or circles or stuff like that .
So you guys can kind of go through these options here and just check them out on your own free time .
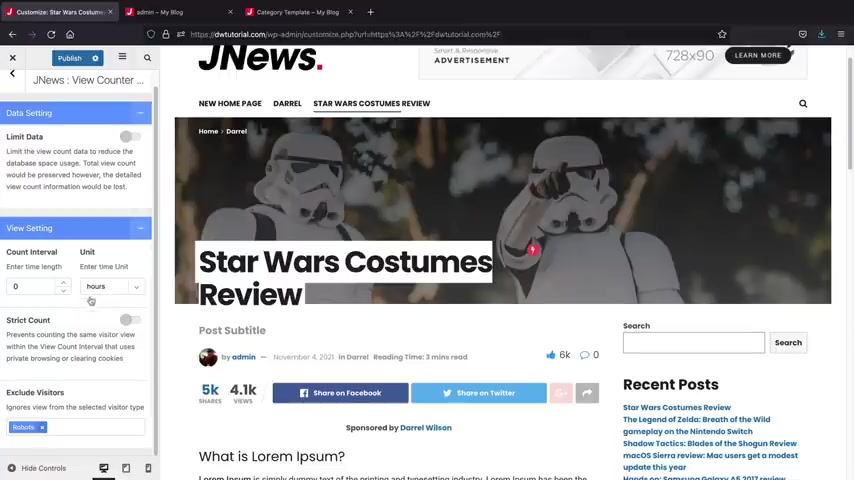
Next , we have the view counter settings and this is essentially the view counter .
So for example , if I click on this and check out the actual view counter , you can adjust this to your liking .
So you can , you know , change this to uh adjust every hour or you know , whatever .
But there's just a little bit more options uh to adjust for view counters on your blog post .
And the last option we're gonna talk about is the advertisement option .
So this will allow you to insert ads on your website .
So for example , we have this header ad right here , I'll click on header ad and here we have an image ad , right ?
So they just inserted this image ad and this is just a banner .
Now , let's say for example , this is an affiliate link , right ?
You'd want to go ahead and insert your affiliate link here .
I type this in the in dot Jay news , right ?
JA News .
So if they were to click on this and purchase the J news theme , I would then receive a commission .
So you can choose to have image ads .
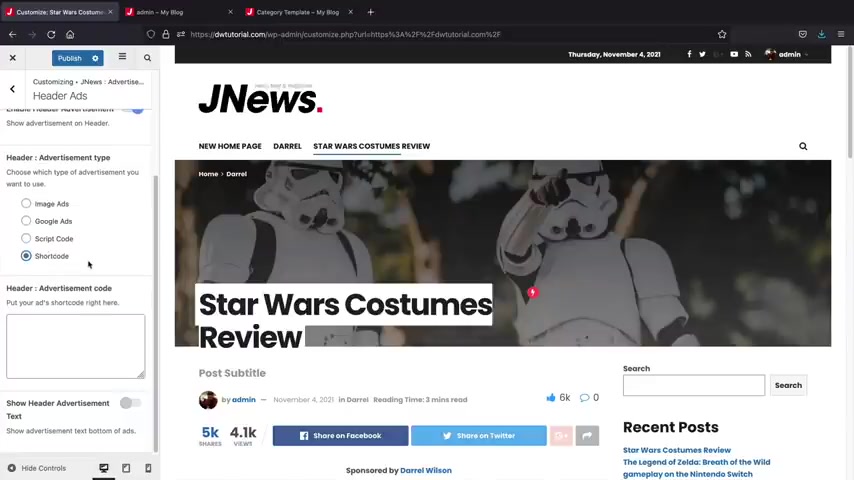
You can also choose to use Google ads or a script code .
A script code is essentially a piece of code that Google ads and other advertiser platforms give you and when you do sign up for Google ad sense , you can go ahead and paste that script code there .
We'll do that at the very end of the video .
But so that's an example of how you can insert script codes .
And also short codes , short codes are kind of like those like uh you know , that's a short code now , depending on your advertiser .
I'm not really sure uh who uses short codes for ads ?
I don't think many do most of them use script codes .
But um that's how you can insert short codes on your uh you know , on your site if you choose to do that .
So just remember image ads , uh these are more for affiliate commissions .
Google ads and script codes are more for scripts and codes that you can insert and then you'll get little ads that propagate on your website .
All right .
So that's pretty much how you guys can insert ads so you can insert them on the articles and they have a few options here .
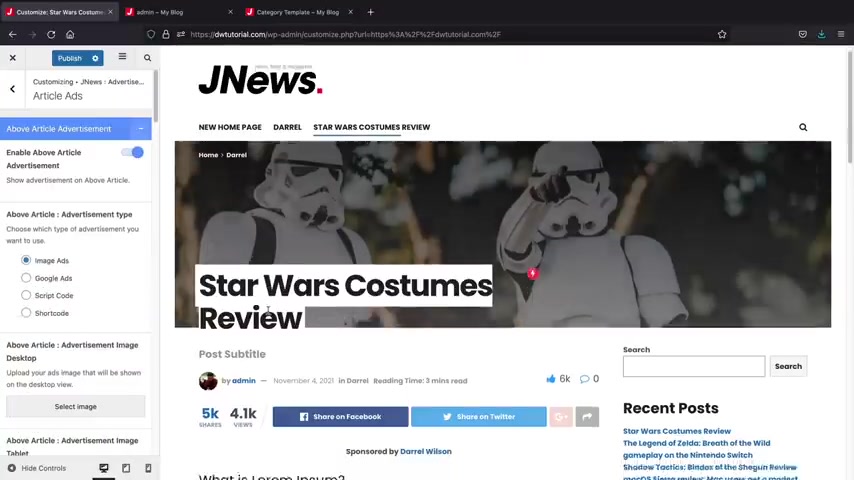
See if this loads there we go , you can insert them above your article .
Uh So you'll see it pop up above the article and then you can insert them , you know , below the article , you can enter them on the category ads .
So these just refer to the placements of the ads and once you turn them on , you'll see that you can insert the image ads , script code and Google ads and so on and so forth .
So that's pretty much what this section means in a nutshell .
You can go ahead and insert ads anywhere on your website once we actually get the script from Google Adsense or , you know , a zoic ads or whatever platform that you want to uh sign up with .
So once you learn how to use the theme customizer , you guys will have a lot more control over your blog slash newspaper website .
So now that we cover the theme customizer , and let's go ahead and move on to the next section .
Now real quick , I'm gonna switch websites right here and talk about how to add a , a menu to your menu .
You'll notice here how if I scroll over the menu , we have a list of posts .
We also have trending tags and then we have these categories where you just can kind of uh navigate the different post categories on your menu .
So let me go ahead and show you guys how to set this up .
Now , this is not available in the theme customizer .
It's actually in the back end options under the menu section and then we'll scroll down here to appearance and click on menus .
All right , and make sure you have your main menu selected and we'll go ahead and scroll down here .
So let's say , for example , you guys want to , you know , you have pages or you have posts or categories .
Uh If we go ahead and click on this little tab right here , we'll then see that we have a few options .
So for example , we have the mega menu category , a menu icon and also a menu badge .
So for example , here we're looking at the news category .
So if I go over here and I scroll over news , you'll see that this is the structure of our current uh mega menu .
Now , if we go back right here , under the mega menu category , we can change that style .
So for example , if you want it with like a four posts or six post , you can see how uh this post right here adopts that format .
And then also right here for the review , you'll see that this has this four post style as well .
So if it goes to the review section and then go to the mega menu uh category , you'll see that this is the same style , right ?
So that's how you can pick and adjust the actual style for your mega menu .
Now , here you have the choose category .
So for example , if you want to display a specific category in your mega menu , you can select that you can also select the number of posts you want displayed .
So for example , here under the news category , so you'll notice here that these are all of the default news articles that are created .
Now , these are sub categories .
So these are categories that are under the news category .
But by default , all of the news categories will be displayed on your mega menu .
And then also we have trending tags .
So the trending tags will be displayed on the right side of the mega menu .
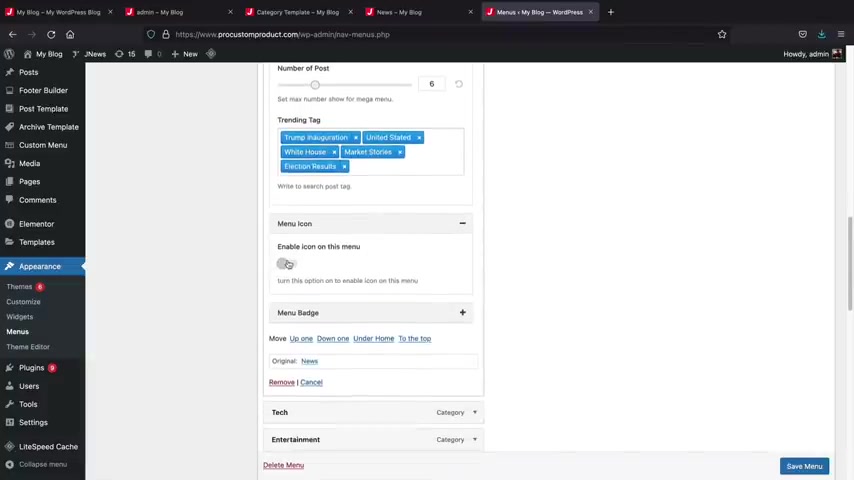
So on the right side , we have trending tags and you can just go ahead and add in the tags uh from your articles .
And then you also have menu icon where you can enable an icon on the menu .
And then uh here , I'll just go ahead and just give you guys a quick example here , I'll just choose this one .
And then also we have menu badge where you can have like a a floating like for example , right here , this is new , right ?
And they'll just click on save menu and then I'll just refresh this page .
So you'll see how this says news and it has that new trending and it also has the icon and then here we have a list of our posts .
So it's really easy to create a mega menu for your uh menu .
Just go to the back end and adjust these options and you'll have a really nice mega menu for your header .
Hey guys .
So in this section , I want to just give you guys a quick overview and talk about everything that we've done because we did cover a lot already .
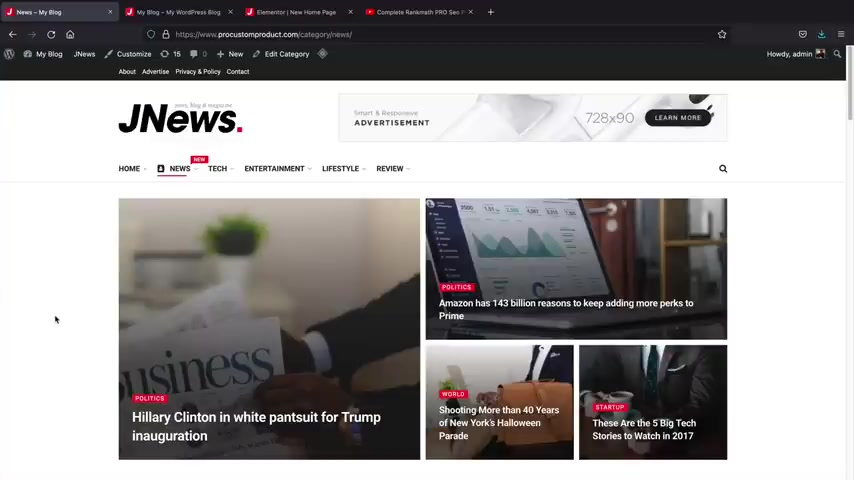
And I just wanna touch base and just kind of go through the website and talk about where the features are to design them and just an overall review about the actual site .
So just remember that your header and your footer , you'll actually design this through the theme customizer .
And for the menu , you would design this through the back end in the menu option .
So it's not part of the actual uh header builder .
And then on the next section , remember , you guys can always build out your page from scratch or you guys can use the actual um the options located in the J news back end and then this is the page loop .
So if you guys do want to just show a bunch of categories , uh you would just turn on the page loop and that would turn on all of the categories on your site .
So you do have a few options , you know , when you're building out your website .
Uh Let's go ahead and take a look at our category page right here .
So I'll just click on uh tech .
So remember that you can also build this page from scratch using Element or , or you can use the actual J news theme personally .
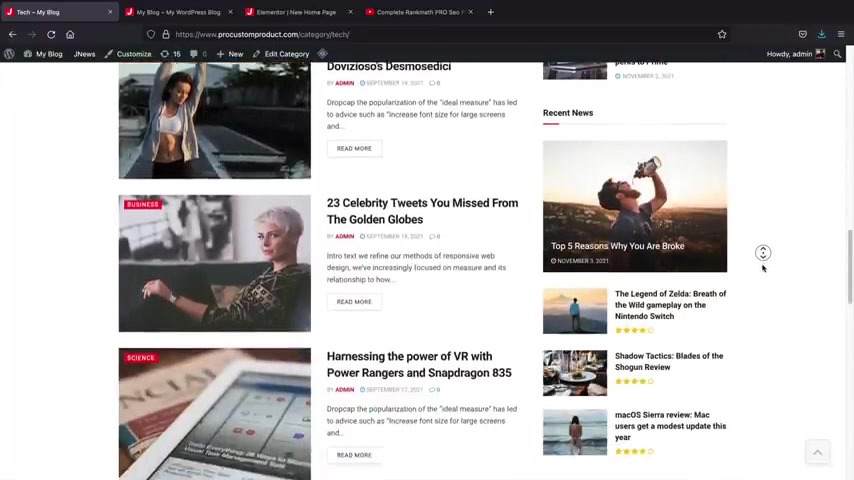
I like using J News for that because I think J News , it just looks a lot more structured and it looks like it's part of the website uh personally with Element to , you can build it with Element and you do have a little bit more control , but sometimes I think simpler is better .
So that's just , you know , that's just an option for you if you want to go that route .
Uh Let's go ahead and click on one of these posts .
Actually , let's go to my other website here and I'm gonna click on one of these posts .
Now , I want to quickly touch base on the post types .
So there's three different post types , right ?
There is the normal post , there's the gallery post and there's also the video post .
And on this post , you'll see that this is a video post and how this kind of pops out and just hangs out .
So remember you can adjust the post style in the edit post section .
So uh I showed you guys the gallery right , we showed you guys the gallery .
So for the post video format type , make sure you select the actual type that you want .

So standard is just a normal blog post video will have a video for the featured image and it also pop out and then gallery , it'll display a list of images where the featured image is and on the right side , you'd want to change that as well .
So you need to tell the theme .
That's all right .
This is a standard or this is a video or this is a gallery .
And also remember that you guys can categorize the post format type with the page builder .
So for example , I'll go to Janu Slider and I'll drag in Janu Slider nine and I'll just drag that there .
Now , on the left side , you'll see this uh content filler where you can actually select content type as the only video .
So if you wanna like display just only the video post , you can do that and that's where you can kind of uh categorize the video posts and the other posts , etcetera .
So yeah , just keep that in mind .
Also remember that for these blog posts , I'm sorry for these um posts right here .
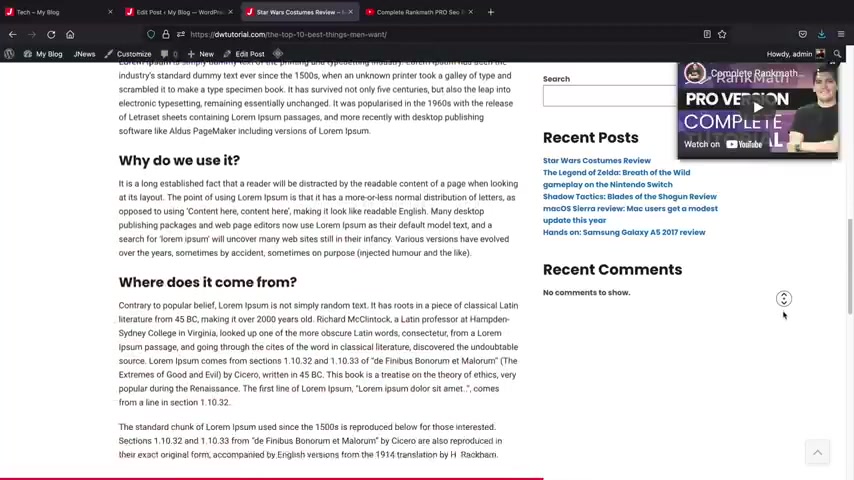
Uh For these ones here , you guys can actually create your own blog post and you can always set the actual blog structure through the theme customizer .
So just remember for every page , whether it's the archive page or the post , you can design it with the theme customizer or you can use the page builder to create your own pages from scratch .
If you're gonna ask me which one would I recommend ?
I would recommend the theme because I just feel like the theme feels more structured .
I feel like it's more intact and the page builder sometimes you can have some responsive issues .
Now , let's say , for example , you guys want to change the demo .
Now you can change the demos and switch from demo to demo with no problem .
Just keep in mind that if you do switch demos , it will delete your previous websites and then the new website will kind of take over .
So for example , if I just want to go ahead and say , you know what I want to switch demos , that one just wasn't working out for me , which you know , it might happen to a lot of people .
Uh I'll just go ahead and say , you know what I want to use .
Uh Let's see here .
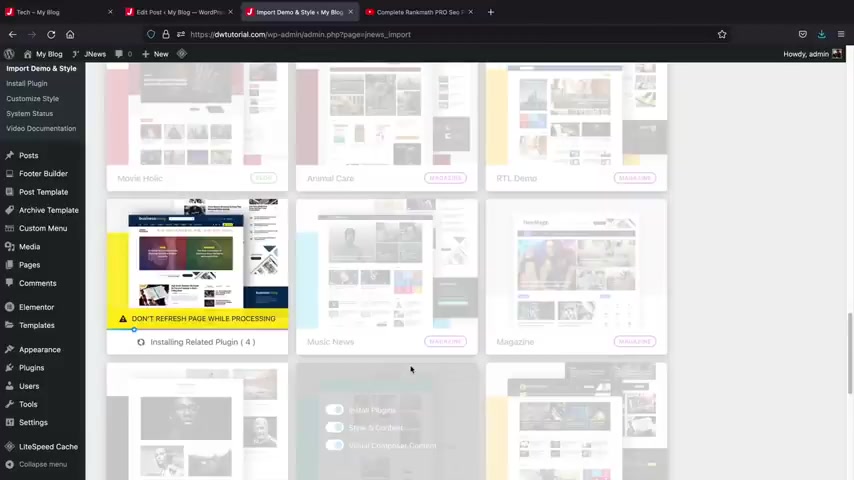
I'll just grab this business news and make sure that I select element and then click on import demo and then click on .
OK .
And what this is going to do is that's going to delete your previous website and then it's going to use this as your new blog or newspaper website .
So just be mindful about that .
All right .
And once we import the demo , I'll click on .
OK , and then check out our new website and then you'll see how everything now is propagated and created .
Now , it will keep your posts .
So you can see here how it did keep our previous posts from our other demo , but just be mindful that um it'll , you know , change the actual structure , the layouts and everything .
So part of people that pretty much sums it up for the website aspect of this tutorial .
I really do hope you guys enjoy this tutorial and I really do hope you guys enjoy this wordpress theme .
It has amazing features and it offers pretty much everything that a blog or a newspaper website needs .
So now that we know how to create a blog , let's talk about ways to optimize it .
So as you guys can tell the theme customizer is very broad , you know , you can adjust your single post , you can adjust your layout , you can also add various features on your blog .
So if you are free on your own time to kind of go through all the options and just see what works best for you and your blog .
So now that we talked about the theme customizer , let's move on to the next step and talk about website optimization .
So this part for the video , we'll be talking about seo how to format your website for the Google search results .
I'll also be showing you how to add Google adsense and Google analytics onto your blog .
So you can start getting revenue and also seeing the traffic on your blog , you guys ready .
Let's get started .
OK ?
So in this part of the video , we'll be talking all about website optimization and everything you need to do after you create your blog .
So we'll first do is we'll go ahead and install an sco plug in and this will allow your website to be indexed by Google .
So after you make your blog , you'll need to submit your site map and you'll need to touch up some Seo settings .
So I'll walk you guys through on how to do that .
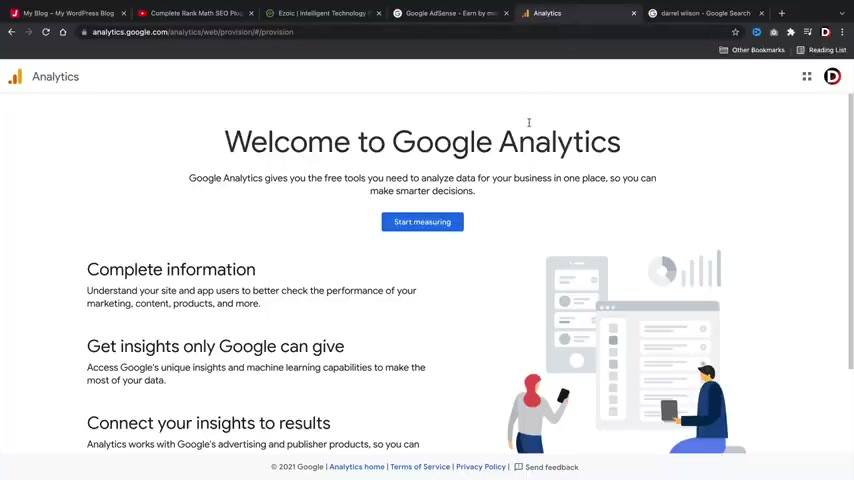
After that , we're going to connect your website with Google Analytics .
This way you guys can see how much traffic you guys are receiving .
And after that , I'll show you how to connect Google adsense where you can go ahead and monetize your blog or your newspaper website .
And I'll also give you guys , alternatives , you know , Google adsense is not the only place to get ad revenue .
You guys can use Zoic ads or Kev or a lot of other uh platforms and these guys will actually pay you a little bit more money .
So let's go ahead and just start with the basics here .
Now , the first thing that you guys should do after you create your blog is to optimize your site with a plug in .
So let's go over here to dashboard .
Now , what we're gonna use uh an seo plug-in called Rank Math .
You guys might have heard of Rank Math .
It's becoming quite popular .
So I go over here to plugins and we're gonna type in Rank Math and this is the plug in that we're gonna use .
It's pretty popular , you know , it's actually trending .
It's really growing uh over the year .
Uh I think in just like two years , I got 1 million active installs .
So we're gonna go ahead and activate that and click on , activate .
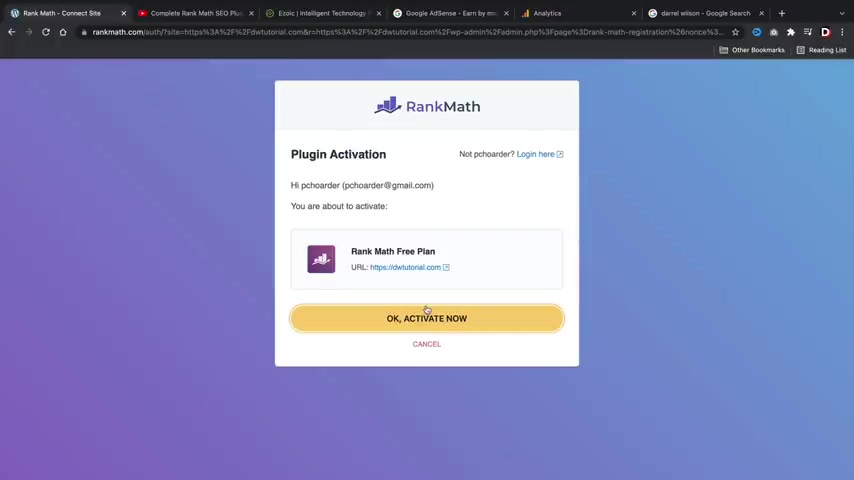
Now , when you turn the plug-in on , it'll start a setup wizard and I recommend following this because this is going to basically create everything and optimize for you automatically .
So let's go ahead and click on and connect to your account .
Now , what you guys are gonna have to do is that you guys will have to make a free account with rank math .
It does not cost you anything at all and neither does the plug in .
So everything is 100% free .
And you guys do need to do this in order to make your site optimal for the Google search .
So once you guys create your account , just click on .
OK .
Activate now .
All right .
And since you guys are new to this , we're just gonna click on easy .
All right , we don't need to go to the advanced options .
Uh We'll talk more about the advanced tab and just the bits but uh just click on easy and let's click on start wizard .
So now they're just gonna ask you some basic questions .
Like for example , is this a blog or is this a news website ?
So you're just going to go ahead and put , which one applies to you , you and then you'll put a logo for Google .
Now , this is important because uh sometimes when you're searching on the actual internet , they sometimes do display uh logos .
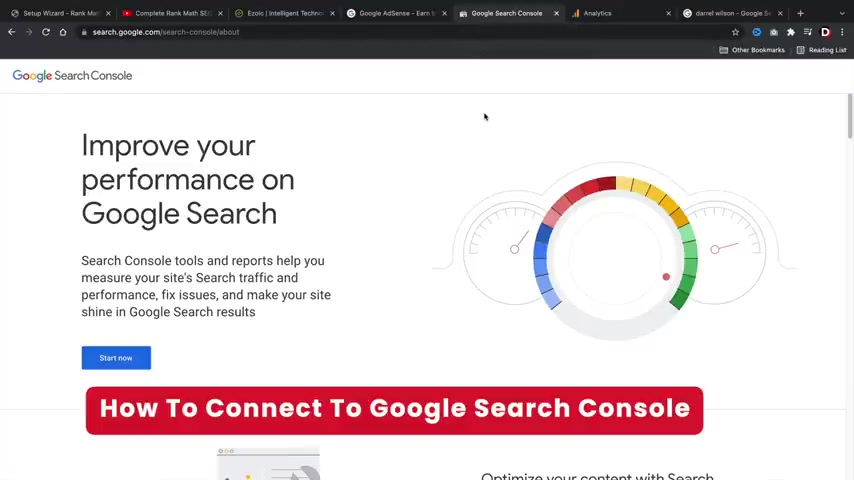
And this is actually very important for mobile because this logo will appear for mobile devices .
So I'll go ahead and upload a logo here .
I'm just going to use the J news one right here .
And also we have the default social share image .
So this is going to be the default image .
If someone shares your websites , once you guys select those images or whatever logos that you have , you'll then click on save and continue .
So next , it'll bring you to the analytics .
Now , before we go on to the next section .
We need to first create a property for the Google Search console .
Essentially , we need to connect our website with Google .
So we're gonna go ahead and go to the Google Search console .
I'll leave this link in the description below this video .
It's really easy to get started .
So don't get intimidated because you know , people here have , oh my gosh , Dev work and stuff , but it's really simple .
They have a really quick set up wizard .
Once you guys are here under the Google search console , go and click on start now .
All right .
So once you guys sign up with the Google Search console , it'll bring you to this page here where it just says that you don't have a property on the left side .
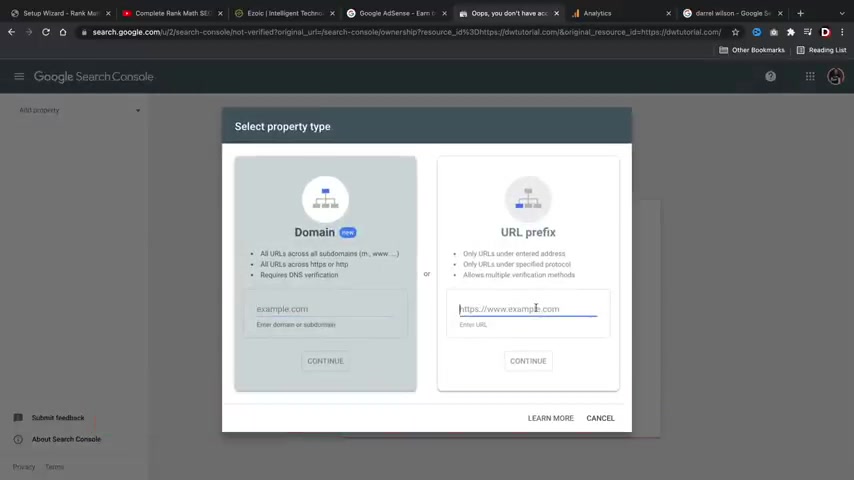
We're gonna click on add a property and we're going to enter in our URL .
So let's just go ahead and type in our address so GW dot com and then I'll click on continue .
So right now , it's basically saying we need to either download a file or we need to upload something uh to our website .
However , we can just go ahead and click on done and we're gonna skip this section and we're gonna have rank math .
Go ahead and pull up the analytics for us .
So let's go ahead and go back to our setup wizard and we're gonna click on connect Google services from here .
We're gonna go ahead and select the email that we used to create the property , which was this one right here .
And I wanna make sure that I give the uh access to the account so they can pull it up for us and I'll click on continue .
All right .
So now we can see that we have connect Google services and then we can go ahead and select the actual domain there .
So it's uh right there .
So the next thing they're asking us for right here is an analytics and we'll come back to this in just a bit .
But uh we can skip this for now .
We'll also skip the ad sense and then scroll down and click on save and continue .
All right , cool .
So let's click on return to dashboard .
So now let's go ahead and go back over here to our accounts and I wanna refresh the page here and now you'll see that this has been verified because a rank math actually verified it for us .
So here it's saying welcome to the new Google Search console , yada yada yada .
But um that's how you guys can verify your website with Google .
All right .
So at this point , we have connected our website with the Google Search Console .
Essentially , the Google search console tells Google that your website is alive .
Uh Here , you'll see performance and you'll also get impressions and just any errors or anything that uh Google thinks that you should work on about your website .
So Google Search Console is pretty important .
So now let's go ahead and connect Google Analytics with our website .
So I'll go ahead and leave this link also in the description of this video .
Just make sure you have the same Gmail account selected , right ?

And then click on start measuring and go ahead and go through the process right here of just , you know , filling this information out .
So I'll go ahead and fill out this information .
All right .
So I've done that .
I'll click on next and then for property name , you'll just go ahead and enter a property that you can recognize .
So this will be main website , right ?
And then below that , we have advanced options .
Now , you need to select the advanced options here and just go ahead and check this box .
Now , this is strictly for rank math and this basically uh connects our website with the Google Analytics .
So for example , right here , we'll type in our website DW tutorial dot com and then just make sure that we uh create both a Google Analytics four and a universal analytics property .
Make sure that's checked and this is checked as well and then click on next .
Now , they're just asking some general information about your business .
So I'll just say this is small and uh we optimize or , you know , I don't know whatever you want to select .
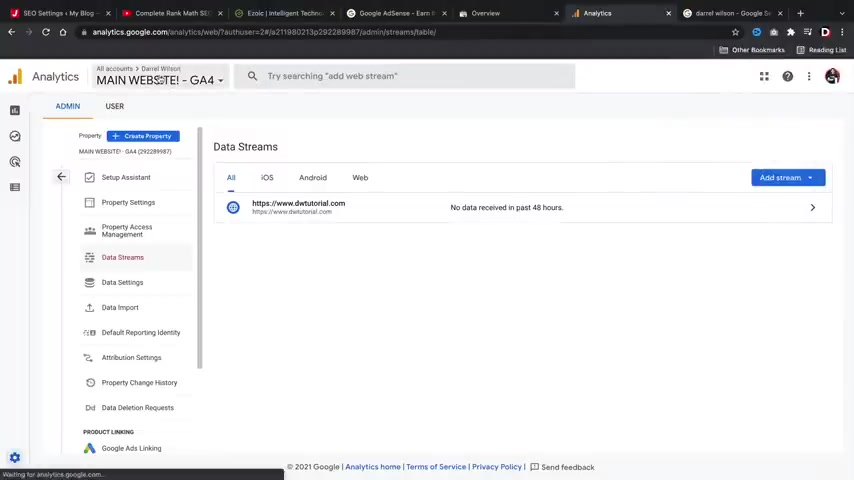
But uh once you guys select those options here , uh we'll go ahead and just click on the next all right .
Cool .
So they gave us some general information about our property , but I'm just gonna go ahead and close this .
All right .
And now we can go back to rank map and we can pull the analytics with the actual plug in .
So I'm going to refresh this page .
All right .
And then we have analytics now .
So we've already connected this with the Google Search console .
Now for the account , we'll go ahead and select the account that we created .
And then also we have main websites , right ?
And then I want all website data and then once we select that , we can go ahead and scroll down and then click on save changes .
All right , cool .
So now you'll see that our website is importing data from Google services .
So we have now connected the Google Search console and also the Google Analytics .
So on the left side , you'll see dashboard go to click on dashboard .
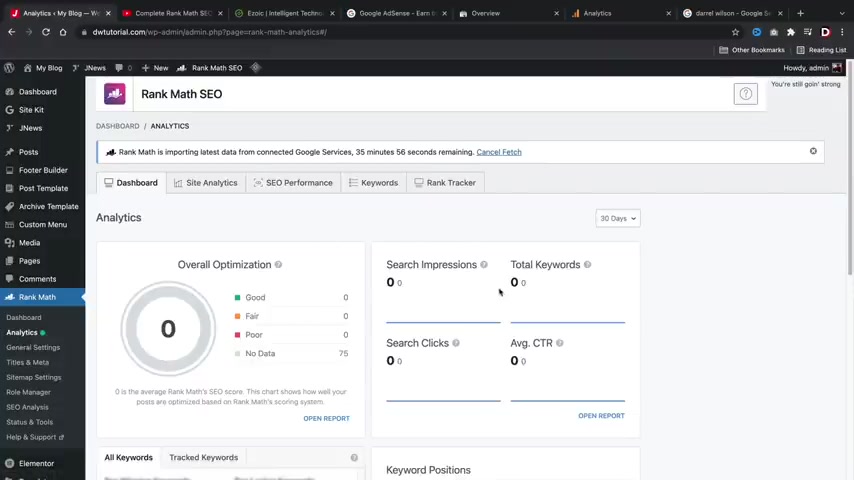
So when you guys connect rank math with the Google Analytics and the search console , on the left side , you'll see analytics and this will display a list of all of your traffic .
So it'll show you how many times people have seen your website , how many clicks you've got in and all the information that you need uh for your website .
Now rank ma also does have a pro version where it'll give you a little bit more information like critical information about what's going on on your website .
But you guys don't need to buy the Rank Ma Pro version just yet .
The site optimizes your website pretty well without it .
So you guys can use the free version .
If you guys are interested in the rank Math Pro version , we do have a video on that and I will leave that in the description below of this video .
So at this point , your website is fully optimized .
We've connected it with Google search console to Google Analytics .
And it also will optimize all of our pages and post for the Google search results .
Now , there's one quick thing I want to talk about really quick .
I'll go ahead here and click on edit page .
Now by default rank math will go ahead and um it'll optimize your site for the Google search .
However , you might want to optimize your home page specifically for the Google search results .
So I'll go ahead and just walk you through how to do that .
It's really quick .
Uh Let's go here on the right side .
So here you can see the preview of our website .
So this is what our website looks like in the search results , right ?
So we need to go ahead and change this up a little bit .
So right here , click on edit snippets and then we can go ahead and type in what we want to appear in the Google search results .
So this will be like DWDW or CEO .
Welcome .
I don't know what kind of news website .
Are we running here ?
Uh , uh , get the latest news , uh , DW , tutorial d that looks really ugly .
DW tutorial dot com .
And then here we have some description .
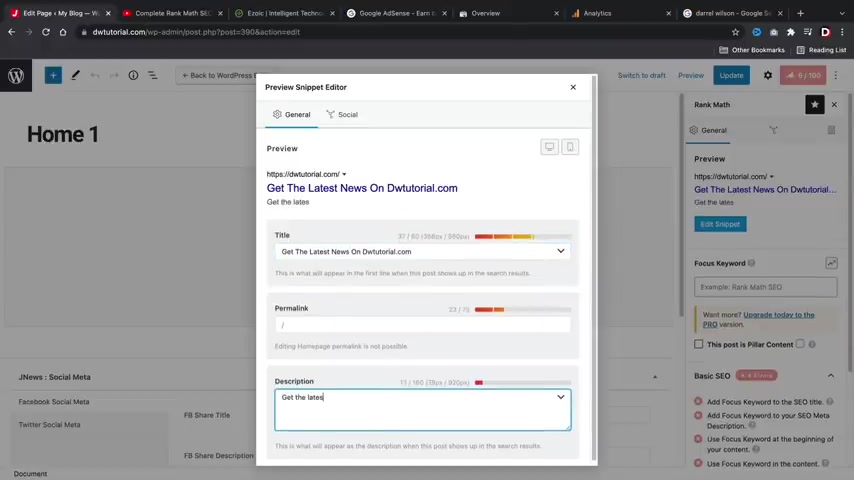
So , uh , get the latest news about what's going on in the world .
Get current news about , I don't know , drones .
I don't know .
What are we , what are , what is our news website even about ?
We don't even have AAA niche , you know .
So we'll just say uh a Star Wars , you know about Star Wars and the latest info about Darth Vader .
I , I have no idea but I I'm just showing you guys that you guys can uh create a list of description , um you know , for the Google search results .
So you guys will need to go ahead and do that .
Once you guys are done with that , you guys can go ahead and click on update .
So I'll go ahead and um close this and then we'll click on update .
Now , as you guys can see in the Google search results .
I did something a little different .
I put my name slash home of the free wordpress tutorials .
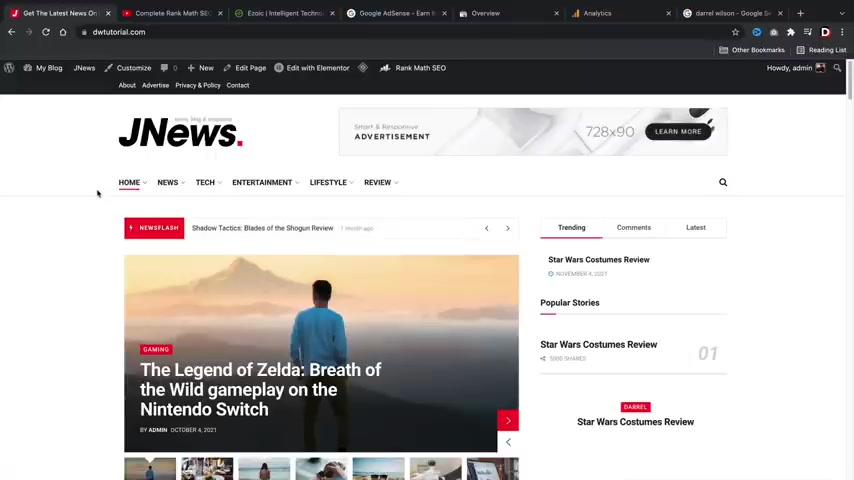
Create your wordpress website , step by step for free , join thousands of people creating websites , no paid courses , just free wordpress tutorials .
So you might need to do some work on , you know , setting that up .
But uh again , I have another video on rank math .
I'm not gonna dive too much into it , but it is something that you might want to take a look at .
All right guys .
Well , congrats at this part of the tutorial , your website is fully optimized .
We have now installed the rank map .
We have now submitted our site map .
We've connected it with Google search console and we've also connected it with the Google Analytics .
So , congrats , you guys are on your way .
Now , the next thing that we need to do is we need to connect this to the Google Adsense .
And also we'll talk about Zoic .
After we talk about ads , we will talk about how to rank your website on the Google search result .
There's a lot of ways to go about that and it's very broad , but I'll do my best to explain it .
So , uh first let's go to Google Adsense .
I'll leave this link in the description of this video and you guys can go ahead and sign up , right ?
So when you guys get here to Google Adsense , you'll click on , get started and then you'll select the account .
So I'm using my , my French email right here .
So I'll just click on this uh my uh accounts and then just go ahead and fill out some information about your website .
So I'll , I'll do a GP .
There we go , right .
And then just go ahead and select your territory .
So I'm in the United States , obviously , right ?
And then we'll scroll down here .
I have read , right .
You guys are gonna read all this .
Yeah , we all read all that and then click on , start using adsense .
Oh Wait , we have to , we have to ask them .
No , I , I don't want performance .
Just suggestions .
No .
Just say no , just say no .
All right .
So once you guys get here , it'll want more information about you .
It'll talk about how to connect your site and so on and so forth .
So right here , just click on , enter information .
All right , and this is where you're going to go ahead and give some general information about you and your blog .
So go through the process and just go ahead and fill this out .
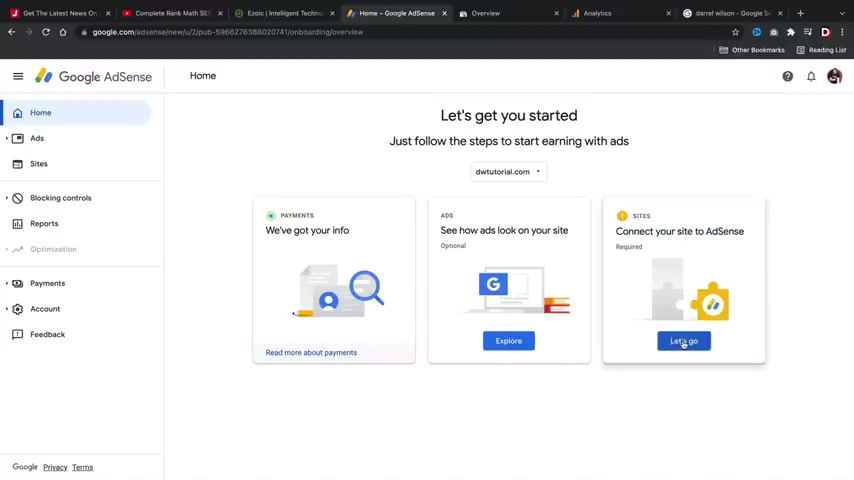
All right , once you guys fill that out , we will then go to connect your site to adsense .
So right here , let's click on , let's go now , right here , we're going to select review request .
Now , Google is going to go ahead and take a look at your website just to make sure that it's not like a not genuine website .
They just want to make sure that advertisers can advertise on your website .
So just go ahead and submit the review .
Now , Google might take a week or two to approve the ads and it's really out of my control .
But uh once they take a look at your website , they should approve it and you should get an email notifying you that you got an approval from Google .
OK ?
So I'm logged into my adsense account .
Because my adsense account is already approved .
Uh You guys can see here my last payments .
I got some , I got paid , I got paid .
But uh let me show you guys what to do on how to add advertisements to your website .
So over here we have ads , right ?
And we have a list of websites .
Uh But what I wanna do right here is click on buy a units .
So once you guys actually get your website approved , you can then go ahead and display ads .
Um We're gonna go ahead and click on display ads right here .
So this right here is a display ad and this will appear on your website and it'll constantly change because advertisers will consistently advertise on your website .
But uh right here , I'll just type in main ad , right or something .
And for the ad size , we can have it as a fixed size , which I actually do recommend because a lot of the times when um Google tries to , I guess , make it responsive on your site , sometimes it can look funny .
However , if you are using it as a sidebar ad , you should have no problem .
But if you're trying to add it on your blog , like in between the posts , gotta be honest guys , Google can do a really shitty job at that .
So uh I would just uh if , if you are using it for um like for the sidebar responsive is fine , but if you are using it for something like this where you want it to display in the article I would then do a fixed ad .
That's my personal experience with it .
But I'll just click responsive and then click on create .
All right .
So now we have the script code and what I'm gonna do here is copy this code .
And then we're gonna go back to our website .
Remember earlier how we talked about script in the theme customizer .
We're gonna go back to that now .
So let's click on customize .
So on the left side , we're gonna scroll down here and we're going to go ahead and click on advertisement option .
And from here , you can go ahead and display a list of ads depending on where you want them displayed .
But uh what I'll do here is just uh go to , I don't know , header ads , right ?
And we can add an ad right here and that might actually work better for the fixed because then you can kind of , you know , fix it .
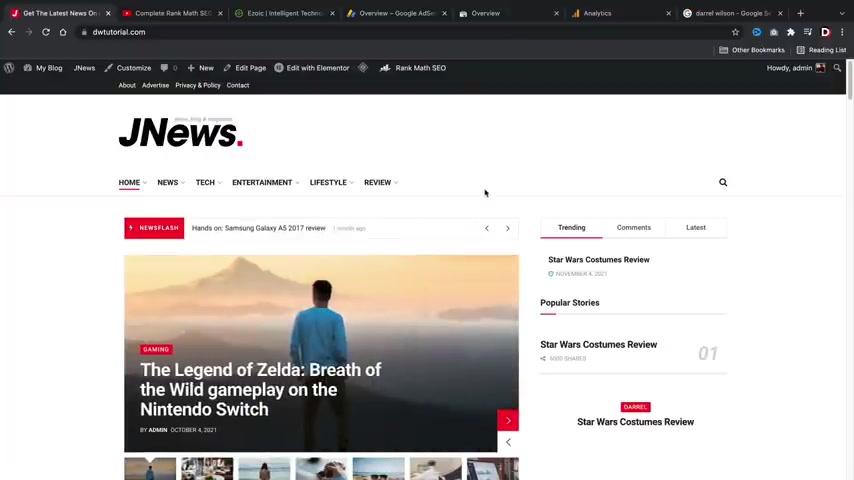
So that's where I was basically saying , you know , it's better to have it fixed sometimes , but just give Google a chance and see what they do .
And for the advertisement type , I want to select script code and all you need to do here is just go ahead and paste that script code in there .
And once Google approves it , they should go ahead and display the ad on your website .
So once you insert the script ad you click on publish .
Now , there is one other way I want to show you how to uh create ads on your website without using the theme customizer .
Uh This is optional , but I do like this because this gives you direct control over where exactly you want the ad placed .
Uh I'll click on edit with elementary here and I'll just give you an alternative on how to create ads on your site .
So uh right here we have our , our uh sidebar , right ?
However , let's say for example , like this right here , I don't want to use this .
So for the image type , let's enter a script code .
And then here I'll just go ahead and paste that code in there and that's it .
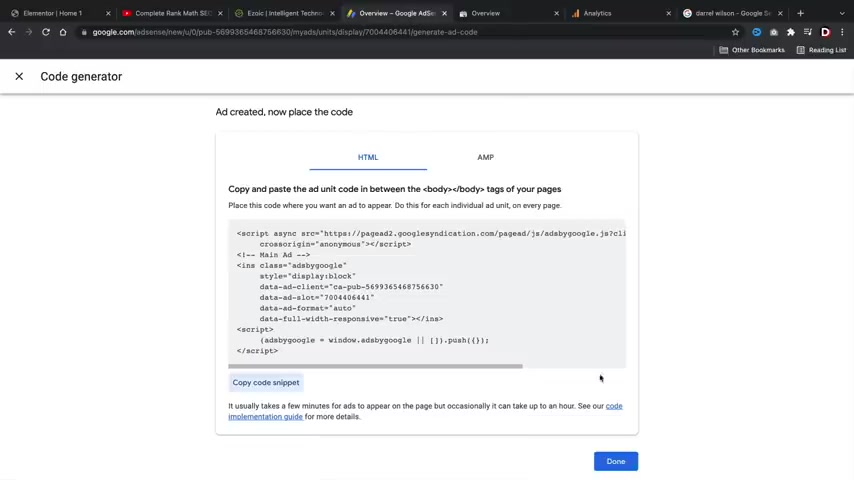
So it'll display right here and that's just a much better way to display it because you can actually see where it's being displayed and it just kind of gives you a little bit more control over where you want it displayed .
So here I'll click on update .
Now , there is one other way on how also to display ads .
Uh I'll click on the elements tab and then here we'll take the text editor and we'll just drop it in there .
Now , for the text , I'm going to go ahead and delete all this , right .
Let's say , for example , you want to add in between this blog post , right ?
Let's go back to our Google ads and you know what I wanna do a uh we'll do the display ads again .
But this time I want to select it as a fixed and then I'll give this , add a name .
So in between A , I , I don't know whatever you know , whatever helps you remember .
So here , click on create and then I'll take this script or copy this code , go back to our site and I wanna paste it here right there .
So when this ad is approved , it will then display right here .
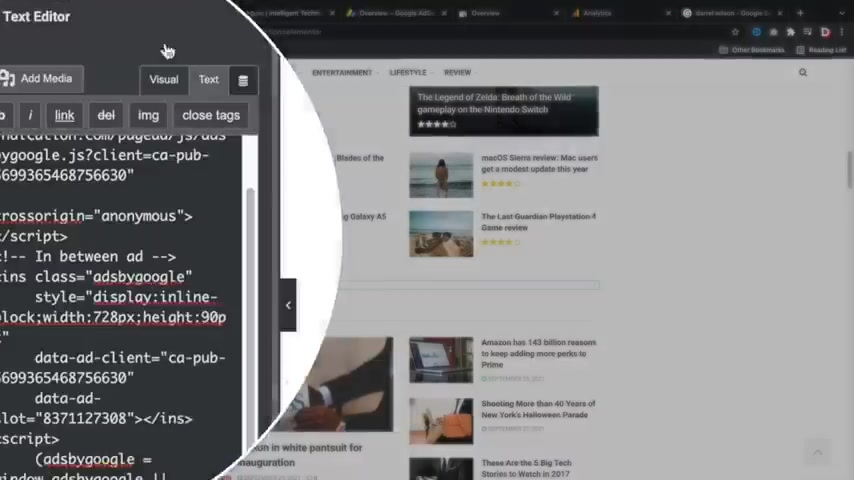
So just remember , you need to click the text under the text editor and that will display the um the ad .
Now one quick note guys is Google ads sense has really cracked down over the last few months .
I mean , to be honest , honest , it takes a little effort now to get approved by the Google Adsense account because advertisers don't want their as displayed on shady websites .
So uh when you do create your website , just make sure you have a lot of content , make sure that you have rank map installed and you've optimized it .
Uh make sure it's a genuine website because a lot of these shady websites , they kind of ruin it for everybody .
So just make sure that you go through the process and you create your websites and make sure it looks really good before you apply for Google Adsense .
And if you've already applied for it , just make sure you fix up your website and I'm sure you'll get approved by Google Adsense .
OK .
So now that we talked about adsense , let's move on and talk about affiliate programs .
Now , affiliate marketing is very lucrative .
There's a lot of ways to make money with affiliate marketing and it just really depends on what you want to promote .
There's websites like share sale dot com and also CJ dot com where they have tons and tons of products to promote .
So what you can do here is sign up to these um these programs .
Uh I already have a CJ accounts and I already have a share sale account .
So I can go ahead and just log in just to give you guys an example , an idea of how all this works .
All right .
So I went ahead and I closed some tabs , but essentially what CJ dot com is and share sale .
They are a portal between merchants and also affiliates .
So people sign up to this website and they want to sell their products and they're looking for affiliates like us to promote them .
So for example , uh I don't know what you're selling or what you want to promote , but uh what we can do over here is click on advertisers .
All right .
So here's some advertisers that you can promote .
Now , these people right here are selling products and they're looking for affiliates to promote their products .
So for example , Dell , uh they sell , you know , products , uh you know Dell in Spain or Dell and whoever .
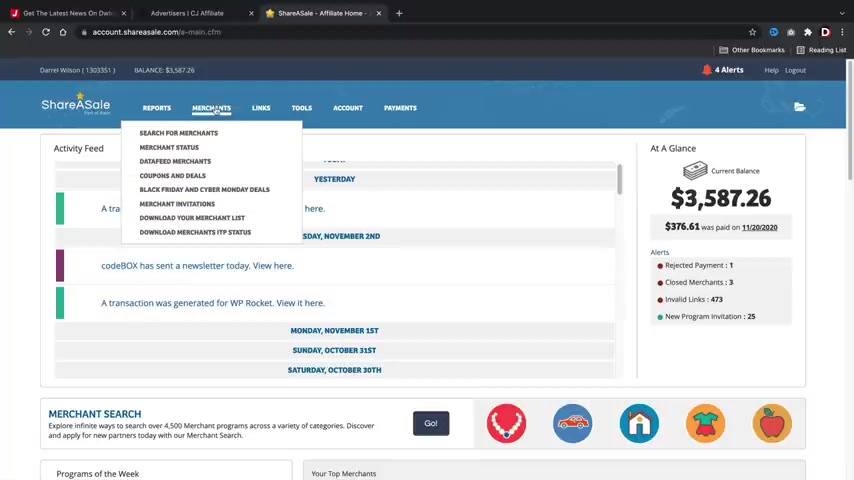
But , uh , you can just go ahead and type what you're , you know , what you want to promote .
So , here I'll type in keyboards .
Right .
And then we have a list of , you know , people who are selling keyboards .
Right .
So , consumer electronics , uh , right here I'll type in maybe computers , right .
I don't know , computers or shoes or whatever .
And you'll always get a list of , of , uh , companies who wants to sell their products .
So you'll see here , this guy gives you a 4 to 7% commission .
So that means if you sell a product for $1000 and you have a 7% commission rate , you'll make $70 right ?
So you'll just go ahead and go through the process of signing up and then get an affiliate link .
Once you guys get that affiliate link , you can then place it on your website .
Also .
You guys can use share sale dot com .
I like share sale dot com a little bit more .
But , uh , right here , I'll just click on search for merchants and I'll give you an example of an affiliate link and you know how you can insert it on your website .
So these are also , uh , affiliates .
I'm sorry , uh , companies that want to sell products .
So , uh , they tell you , you know , oh , we'll pay you $50 per sale .
Uh , you know , they have tons of programs .
You can see on the left side how there's 1300 companies that wants to sell clothing and you can sign up to them and you can sell their products , right ?
But uh once you guys get signed up with the company , you can then go ahead and um insert your affiliate link .
So let's do that here .
I'll click on links and click on get a link in banner .
Now you have to get approved first , ok ?
So they don't just approve anybody .
These are companies that I've already been approved with .
So I'll go ahead and click on get links and then this is my affiliate link .
So I'll just go ahead and copy this link and go back to our website .
And then you can place that link pretty much anywhere you want on your website .
You can also go ahead and say , you know what ?
I don't want to use Google adsense .
I want to use affiliate links .
And to be quite honest , affiliates do pay more money than Google adsense .
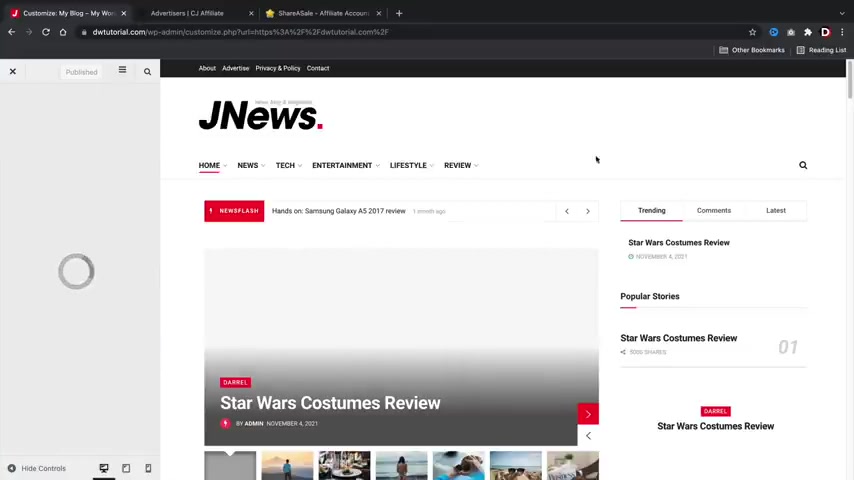
But uh for example , right here , we'll go ahead and go to advertisement options and for the article ad actually , now we'll do the uh we'll do the other one , we'll do the header ad .
So the one that would be displayed there , we can go ahead and say , you know what I want to use a link instead , right ?
So image A and then here you'll put an image of the actual , you know , whatever you want to put and then you'll go ahead and insert your affiliate link right there .
OK ?
And you guys can change this image obviously and CJ dot com , I'm sorry , uh share sale .
They do also give you guys banners .
So if you guys do need images , they have banners here that you guys can use and display on the website .
So you guys can use this instead of using uh something that you custom create .
So they do help you out .
But uh what I'll do is just go back over here and click on publish .
Now , let's close this and I'll go ahead now and click on the ad .
You'll see that it links us to share sale , analytics and then it redirects us to the actual website .
So if someone were to come right now and purchase this service or product , we would then get a commission of the sale .
So that's how affiliate marketing works in a nutshell .
It's really easy to get set up and anyone can do it .
So I hope I covered everything pretty clearly .
At this point .
You guys can now monetize your website with Google adsense zoic ads and also sign up for affiliate programs where you can promote other people's products .
Let's go ahead and move on to the last section of this video .
All right , welcome party people .
I'm glad you guys made it .
A lot of people don't make it to the last step .
You know , there's a , there's a drop off rate , but uh in this part of the video , I'll be showing you guys how to market your blog correctly .
Now , there's a lot of different ways on how to get traffic to your blog .
Uh Personally , I recommend guest posting .
I think guest posting is hands down the best way to get traffic to your blog .
But we'll be talking all about how to write content about marketing and all that stuff in this part of the video .
So let's get started , right ?
Party people .
Welcome to the digital marketing aspect of this video .
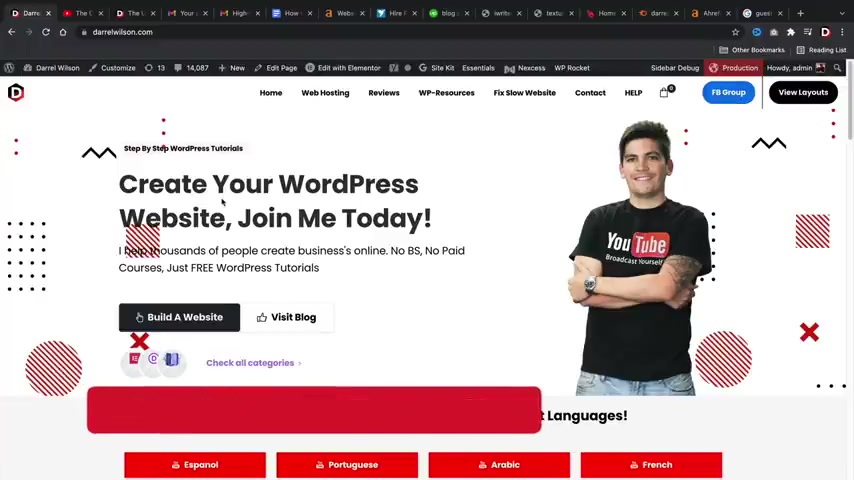
In this part of the video , I'm gonna educate you guys on domain authority page authority .
Do follow back links and no follow back links .
I'm also gonna show you guys real life examples of guest posts and why these are crucial for success for your blog or newspaper website .
But before we go on any further , I first need to educate you guys on what is a domain authority pay drink do follow back links and no follow back links .
So let's talk about the fundamentals of sco .
Next , let's talk about back links .
There are two type of back links .
There is a do follow back link and there is a no follow back link and the difference between both are pretty important .
A do follow back link will help you boost your domain authority and you will get traffic to your website .
Essentially a do follow back link helps improve your overall score of your page authority , domain authority and are considered very favorable .
Now , let's talk about a no follow back link .
A no follow back link is still a back link to your website , but it does not give you all the benefits of a do follow back link .
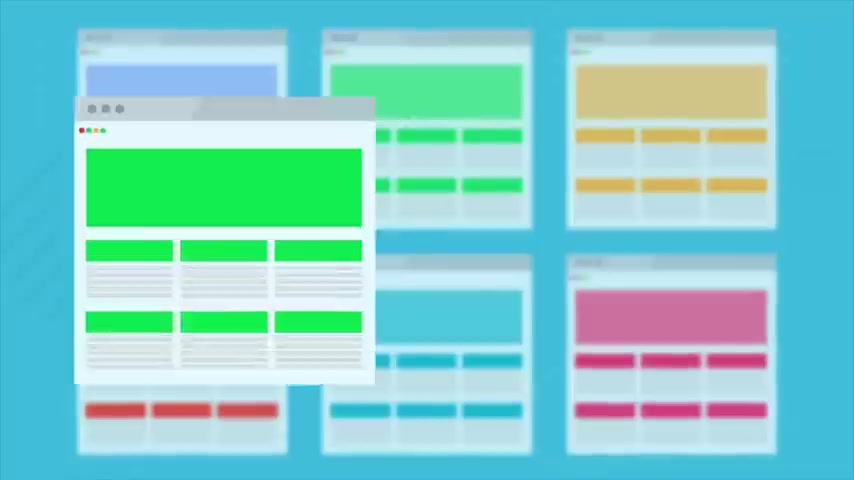
For example , a no follow back link does not affect your page rank or domain authority .
However , it still brings traffic to your website .
Some very large reputable websites create no follow back links to prevent their website from being associated with lower ranking websites in order to protect their own domain authority .
So in short , when you're looking for back links from popular companies or reputable companies , make sure it's a do follow back link .
So you get a boost of page ranking and domain authority for your websites .
And if it's a popular website that still receives traffic back link is still a win because ultimately , you are still receiving traffic from that website .
However , if you have a bunch of low domain authority websites linking back to your website , that doesn't really say much about your website and generally your ranking will not improve .
You can gain back links by simply outreach to high domain authority websites and seeing if you can exchange links .
There's also various companies that will do this for you because it can be very time consuming .
So essentially this is how the back link system works and how to get more traffic to your website .
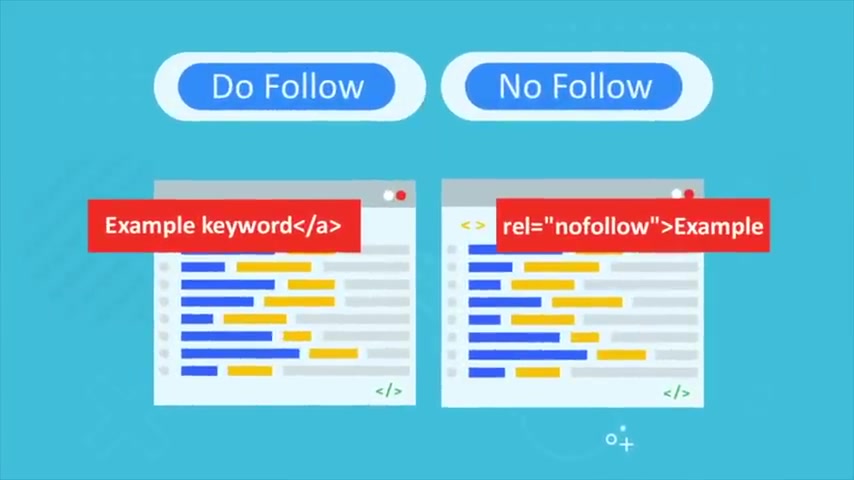
So in a nutshell that is back linked , explained and that is the difference between A do follow back link and a no follow back link .
Now let me explain to you how the Google rankings work for your Amazon affiliate marketing website .
You start by writing reviews and content for specific products on Amazon , you optimize these posts for Google .
Then Google will index them and place them in the Google search results .
Visitors will then find your blog post and this is how traffic is generated to your Amazon affiliate marketing websites .
However , there are some factors to consider that will help users find your blog post more easier .
First , let's talk about page authority .
But what is page authority , page authority is the overall score and ranking on how that specific post or page is ranking in the search results , the higher the page authority , the higher it will appear in the Google search results .
Each time you write a post , it's given a score from 1 to 100 by Google .
And this is determined by various factors in the Google algorithm such as readability structure optimization and the quality of your article .
In short .
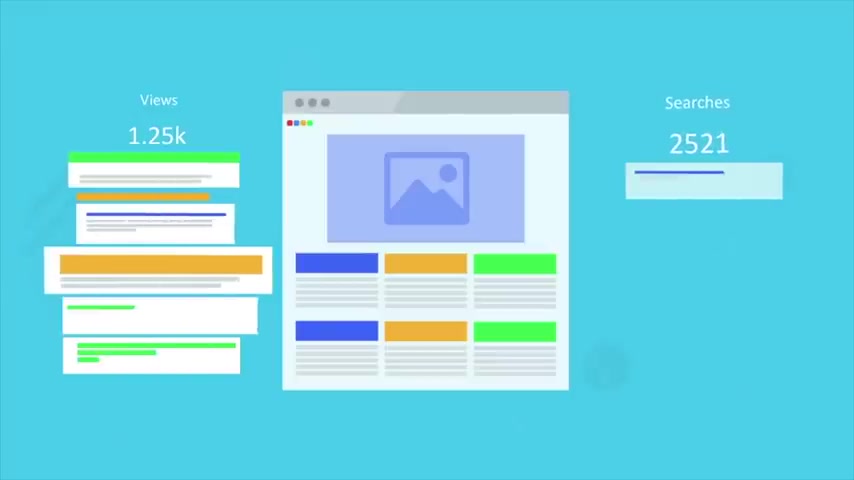
If the blog post is high quality and contains very relevant information for users , then it will be given a higher paid score and be placed higher in the search results , making your website easier to find .
So make sure you write quality content that would actually help someone to get more traffic to your website .
Next , let's talk about domain authority .
So what is Domain Authority , domain authority is also listed from the score from 1 to 100 is the overall score and credibility of your websites .
There are several factors that can help you increase your domain authority of your website such as users interacting on your website , like commenting and sharing reputable websites , linking back to your website with good domain authority and making sure that your posts and pages are fully optimized for Google .
Higher domain authority helps greatly for future posts .
And usually Google will rank your posts a little higher in the search results by default , if you have a higher domain authority , because you have already established a good record .
Think of websites like a popularity contest .
If you have a bunch of large reputable websites , linking back to your website , Google recognizes this and will boost your overall domain authority because credible websites are referring to your websites .
This also helps generate more traffic to your website because people can find your website a lot easier from other various websites .
You can gain back links by simply outreach to high domain authority websites and seeing if you can exchange links .
There's also various companies that will do this for you for a small fee because it can be very time consuming .
You can gain a higher domain authority by obtaining do follow back links from credible and high domain authority websites and remember back links are essential for your website's domain authority score .
So to summarize , that's how Google rankings work and also how you can get more traffic to your Amazon affiliate websites .
All right .
So I hope you guys understand what domain authorities page authority also , what do follow back links are and no follow back links are .
And if you're curious , you can actually use uh Aras website authority checker and you can test the domain authority for your website .

So it looks like my domain authority is around 60 which is pretty , pretty good .
You know , that means I have some authority in my specific niche .
You guys can do the same .
You guys can go to a refs uh website authority checker , you know , put in your domain name and see what you rank for .
You guys will probably be like 10 if you're just getting started out .
But don't worry , there is a long road of head , but it's a good road of head .
You know , it's a , it's , it's a journey , you know .
So first let's talk about how to get high quality back links , but I wanna show you guys something .
All right , cool .
I got my adsense approved .
So once you guys do get your Adsense approved , you guys will get this in your email .
So uh yeah , be sure to be on the lookout for that email .
Now there's a few different ways on how to get back links , right ?
You guys can do guest posting .
But if you guys are brand new , you guys might want to reach out to an EO company where they're gonna go ahead and find back links for your site .
You guys can go to websites like freelance dot com and also uh upwork dot dot com and just do something like SEO company , right ?
Or uh blog outreach , blog outreach is a little bit more efficient , but it's also a lot more time consuming because uh what these guys usually do with these SEO companies is they go ahead and they find low domain authority websites and they just give you back links and it's easy , you know , it's , it's really easy and fast to do , but it's very time consuming .
You know , you have to go to websites , you have to fill out some information , you have to post a back link and the whole process can be very time consuming .
So you guys are better off hiring someone to do this for you and you guys are more than welcome to check out upwork and also freelancer , you know , for this specific um you know , for this field , there's some good seo experts here .
Now , the most important thing to note about these people is they need to find high quality , high D A websites to find back links from you guys saw earlier .
How if a website has a lot of low domain authority websites , it's not gonna do much for your website .
So you really want to make sure that you have some reputable companies linking back to your website .
And it's a process , you know , another alternative you guys can do is blog outreach and guest posting .
Now , blog outreach and guest posting is essentially when I go to a website right here .
And I say , hey , uh can I write a blog post for your websites ?
And they will either say yes , no or they will want money that's perfectly normal .
In this case , this website is a very high domain authority website .
And you guys yourself , you guys can go to startup nation dot com and you guys can go to the contact us section .
My internet is being a little weird , sorry .
And then right here we have like the contact so you guys can actually submit a guest post .
Now , when you guys submit a guest post , what happens is they will actually give you a back link .
So for example , I'll just go to one of these blog posts right here and you guys can see how these are all written by specific different authors .
And the benefit of this is that they gain a high quality back link that leads from this website to your website .
And this website is actually pretty high domain authority .
It's like 91 or something .
And here you'll see that uh you know , the the author has some information .
But more importantly , if they go ahead and they click on this person or I'm sorry , they click on this link right here .
This is a back link to this person's website and this is the whole purpose .
So it's a win , win , right ?
The website itself , uh this website start up Nation and they get a free blog post , you know , because this costs money .
But uh you know , that's good because they get free content writers .
However , it's also good for the writer because they get a do follow a back link .
Now , when you get a do follow a back link , this will boost your rankings up in the search engine .
So people can find your website a lot easier .
Now , you guys can go ahead and go to a reps and you guys can just test out certain websites .
So let's say , for example , you found the website where you can get a , a guest post , you'll just uh go ahead and , you know , copy them right here and go to a and see .
Well , you know , I found this website , they're accepting uh guest posts .
Are they a reputable company ?
And it looks like this company is , you know , they have a high domain authority .
So that would make sense for you guys to want to guest post for them because then you get a high quality back link .
I hope that makes sense , right ?
I hope that's easy .
For instance , uh I told you guys earlier that I get emails all the time .
For guest posts , you know , however they , they , you know , they give me posts and stuff like that and they submit them to me .
But I have to really make sure that it's high quality content .
And right here , this company is writing a guest post for me .
So I win because I get a free blog post .
But this company also wins because they get um you know , they get uh juice , I guess you want to call it from my blog .
And they also get part of the traffic because I do get a lot of traffic on my blog .
So it's a win win for both people .
You know , I get a free blog and they get some free domain authority and they also get some traffic to their websites .
Now , this whole process of guest blogging or I'm sorry , guess outreach can be very , very , very time consuming .
You know , there's a lot of reaching out a lot of going back and forth so you guys can go ahead and actually just go to Google and just type in guest post outreach service .
And a lot of these companies , they'll actually uh reach out to blogs on your behalf and they will say , hey , you know , we work for so and so , and uh we , we want to submit an article to your blog in return for a back link , you know , and they all have pricing , you know , obviously .
So it looks like here , I mean , this guy , these guys are really expensive .
Obviously , I wouldn't , I wouldn't pay these rates but , um , I would pay no more than like $100 for a back link , you know .
And I know that sounds like a lot of money , but when they're receiving hundreds of thousands of visitors , it's definitely worth it to get a back link from those kind of websites .
Uh , I don't recommend the , I've seen them before .
Uh They're really not that good .
Uh A lot of these companies guys , I've tried very few of them .
However , if you feel like you can reach out to blogs on your own and you can communicate with them , then go for it .
You know , you guys can just go to websites and say , hey , you know , are you um you know , are you accepting guest posts and then from there , you guys can exchange links .
So that's pretty important .
Now , let's say , for example , you guys do get in contact with a startup company or a , a company that wants to accept your guest post and you're not the best writer , right ?
Like you kind of suck at writing .
That's OK .
You guys can go to websites like I writer dot com and these websites , they'll actually write content for you .
So you'll see here that they have different skill , uh skill level authors and depending on the length of the article , they will write content for you .
So for example , an elite writer will write 1500 words , which is generally the , I guess you wanna say the normal limits for guest blogging .
Uh But if it's a high quality blog , it might be like 5000 or something .
But uh you guys can use I writer dot com to get people to write for you .
You guys can also use Texan dot com .
Now , this site is a little bit more expensive , but the quality is a lot better .
So uh if you , you know , if you come in contact with a really high domain authority website , you guys can use Texan to kind of write article on your behalf .
So once you guys are writing enough content and you want to kind of track the stats of what you're doing , you guys can use Seru dot com and here you can see like the organic traffic , you can see your domain authority , so the domain authority and like the page authority and also the number of back links and then you can actually see which domains are referring to you .
So that's pretty important .
And then later , let's say , for example , you're trying to rank for a keyword like how to make a website .
Um You can see how you're ranking in the um you know , in the search engine for that specific keyword .
So uh yeah , you guys can use services like Seru , you guys can also use A R dot com .
They do uh they do the same thing .
So they have like analysis and information and , you know , if once you're a competitive blogger , it's worth it because it just gives you a lot of updates , it tells you what you're ranking for and it's just like an overall helper to help you get your website to rank better in the Google search .
All right guys .
Well , this has been a very long tutorial .
This tutorial took me a lot longer than I thought it would make .
It took me about three days of recording and I know it made it look really fast , but uh it was a lot of work .
But I really hope this video brought a lot of value to you guys and I really hope you guys make a successful blog just like mine .
And if you guys do need a back link or something , let me know .
You know , I'll take a look at your websites and uh we'll go from there .
So congrats on your blog and I'll see you guys later .
All right , guys , congratulate patience on making your blog .
You know , I told you guys , this theme was amazing .
Uh You know , from here it's a journey guys , you know , making a blog .
It's not , it's not all peaches and cream .
You know , everyone on the internet says running a blog is so simple , just post some content and make money .
There is a lot of work behind the scenes .
Google has really been cracking down on high quality content .
So you really do have to push , uh you know , you have to push to the rankings .
So it's a journey from here , you know , but it's exciting , you know , but once you guys start making money , it's all worth it in the end .
So if you guys have any questions for me , feel free to let me know in the comments below .
I do my best to get to every comments but uh you know , that's just how it is .
But until then I will see all of you party people in the next video guys take care .
Are you looking for a way to reach a wider audience and get more views on your videos?
Our innovative video to text transcribing service can help you do just that.
We provide accurate transcriptions of your videos along with visual content that will help you attract new viewers and keep them engaged. Plus, our data analytics and ad campaign tools can help you monetize your content and maximize your revenue.
Let's partner up and take your video content to the next level!
Contact us today to learn more.