https://www.youtube.com/watch?v=0ceIauOuMAc
How to Create a Free Website in 2023
Hi guys .
Today we are going to see how you can make a free website using a free hosting provider .
So after watching this video , you will be able to make any kind of website just like this using drag and drop .
Your website can have any design you want and you can add your own pages and your content like this and everything is going to be completely free .
Now , before we start creating a site , first , let's see the two types of websites , we are going to build a static website or a dynamic website .
A static website is where you provide information or content to your visitors and your visitors need not log in to your website or create an account on your site .
Examples of a static website are blogs and company websites which simply have a lot of static pages which provides information to your visitors and users need not interact with the website like logging in purchasing products or creating accounts , etcetera .
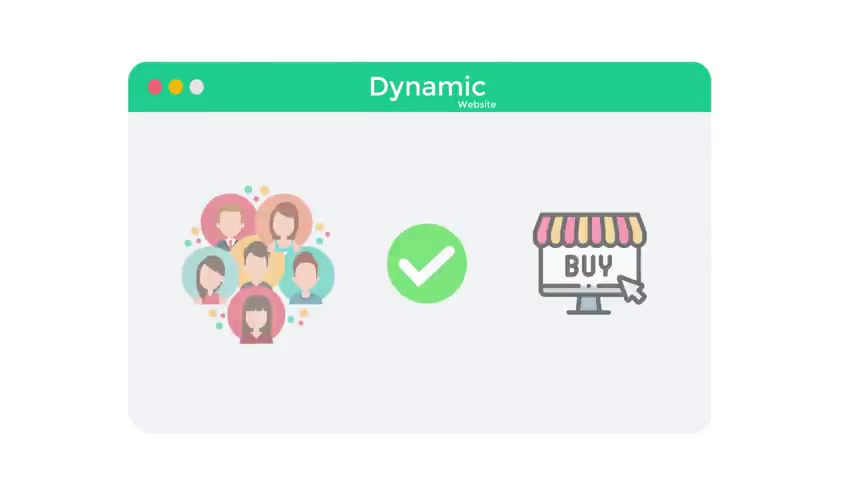
On a dynamic website .
Users can create their accounts log into it and make purchases .
Examples of dynamic websites are e commerce sites , online course websites and membership websites where users can interact more closely with your website .
In this video , we're going to create a static website using a free hosting .
You can build a company website or a blog for free of cost .
If you're looking to create a dynamic website with e-commerce features , you can watch this video .
OK .
So let's get started .
I'm brand from website learners and let's start making our website .
So to make a website , we are going to do three parts .
The first part is to launch a website .
So to launch a website , we are going to do two steps .
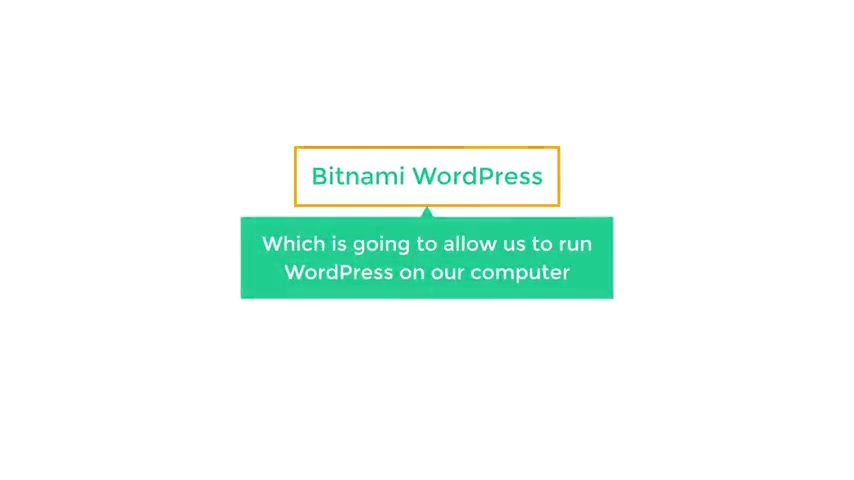
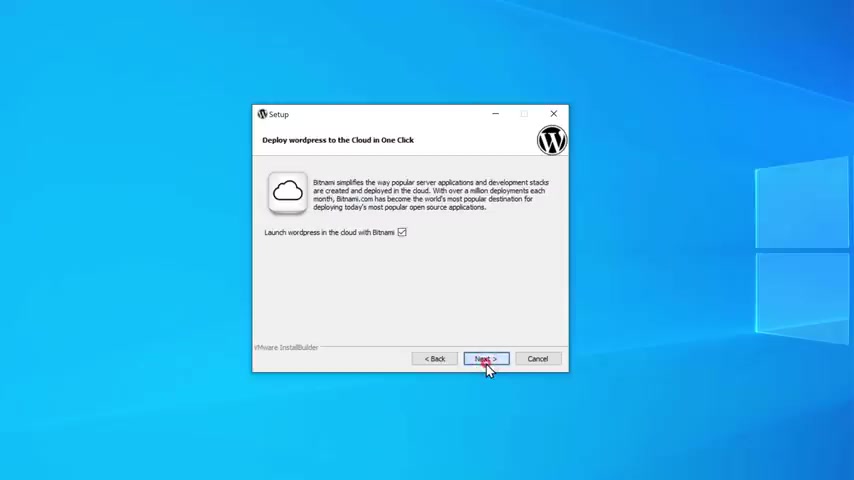
The first step is to download a software called Bit NAMI Wordless .
This is the software which is going to allow us to run words on our computer .
So to download it , let's go to our browser and then search for Benami wordpress .
Now click the first link and it'll take you to this page .
No , and scroll down .
And here you can download Viet NAMI wordpress based on the OS you have , I'm going to select windows .
So let's click , download for windows and you will get this box .
Now , if we queue up , you can see that the software is downloaded to a computer .
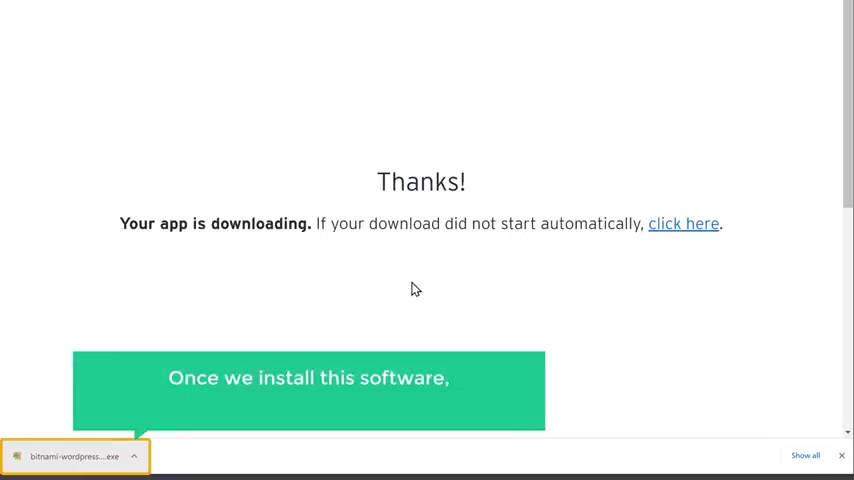
Once you have downloaded Vietnam wordpress , we can now go to step two , which is to install this software .
Once we install the software wordpress will be installed on a computer .
So let's open the file we have downloaded .
Click , ok .
Now click next and again , click next , then I can click next here and you will reach this page .
Ok .
So this is the page where we are going to enter our log in details of our local worker site .
So here enter your name and your email address , then enter the user name and password for wordpress .
No , this will be used to log in to your website once you have entered these details , keep clicking next and workers will be installed .
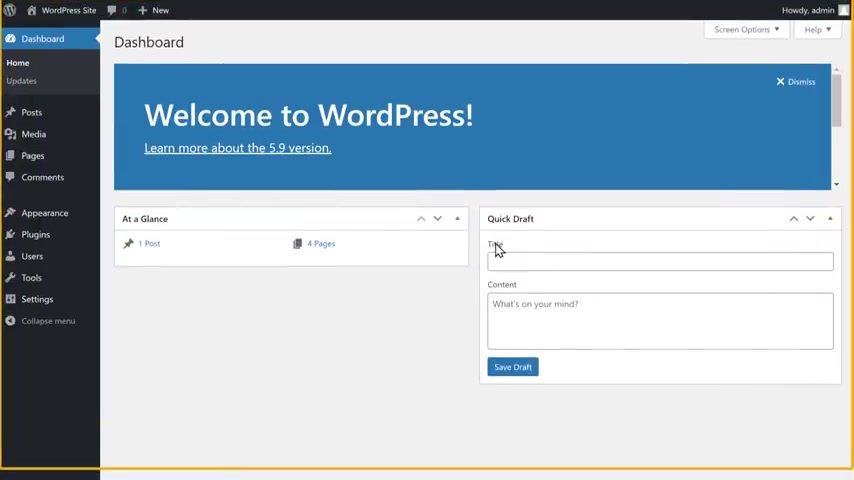
Now let's click finish and it will take you to this page .
So now Wordpress is installed on a computer .
Once you have installed , Wordpress , your website will be launched .
So if we click access , Wordpress , you can see that we have got a new website .
So now we have successfully launched our website and this is how the default site looks like .
Now , if you want to make any changes to your site , you need to log in to your site .
So next , let's see how you can log in to your worker's website to log in to your site .
All you have to do is just type slash log in after your site's address .
And now if you press enter , you can see that we have got the log in page of wordpress .
Now here enter the log in details which you have created for your workers website and click log in .
So now we have successfully logged into our Wordpress site and this is the Wordpress dashboard .
So this is the place where you can control your website .
Now , let's go to our site .
Just go here and like was it said here , you can see that we have launched a site locally on a computer , which means it can be seen only by you and cannot be accessed by anyone .
So now to allow everyone to access your site , you need to make your site live on the internet .
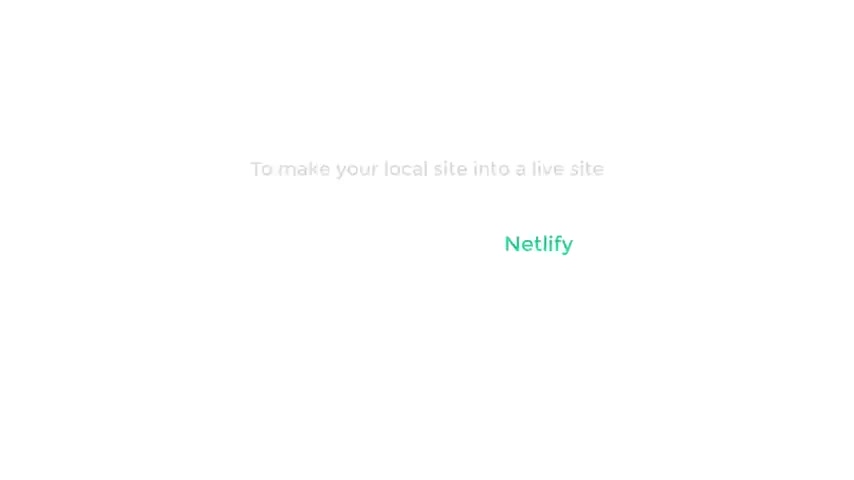
So let's go to part two of this tutorial where we see how you can make your local site into a live site .
Now to make this into a live site , we are going to do two steps .
The first step is to create an account on L five .
So this is the site which is going to help us make our website live on the internet .
So to create the account , just click the link below this video and it will take you to net five , get started and then select email to sign up with notified .
So here enter your email address , then give a password and click sign up .
Now it will ask you to verify your email to create an account .
So let's go to our inbox .
As you can see , we have got an email .
So let's open it , click , verify email and you will get this page .
Now , click here .
Ok .
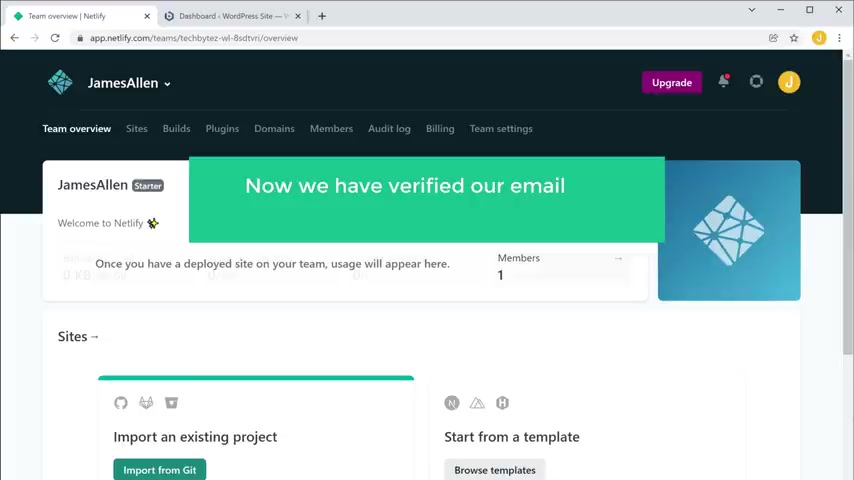
So now we have verified our email and successfully created an account on L five once you have created your account .
So to make your local site into a live site .
We need to export our local site and import it on L So every time when you make the changes on your side , you need to export a file and upload it or notify only then your changes will be displayed on the live website .
So to export the file , we can now go to step two which is to install a plug in called simply static .
Now , this is the plug in which will help us export the file .
So to install the plug in , let's go to our wordpress dashboard .
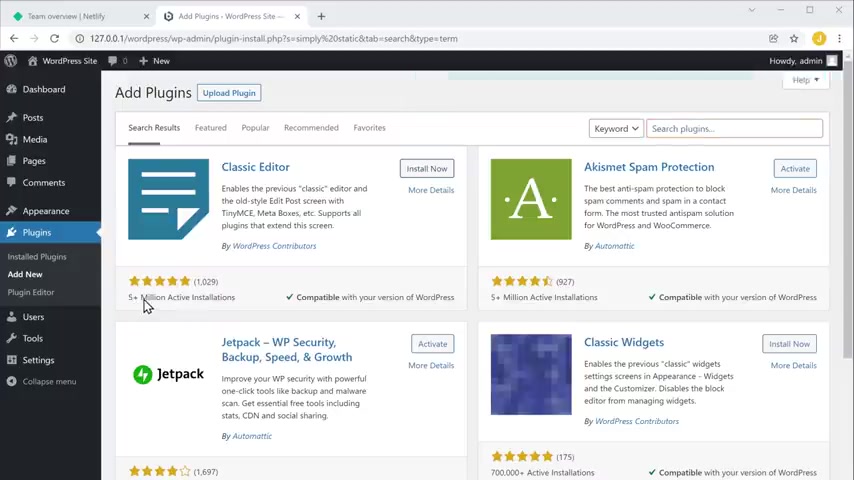
Now go to plugins and click add new .
Now here search for a plug-in called simply static and you will get this plug in now to install the plug in .
Let's click install and then click activate .
So now we have successfully installed the plug in .
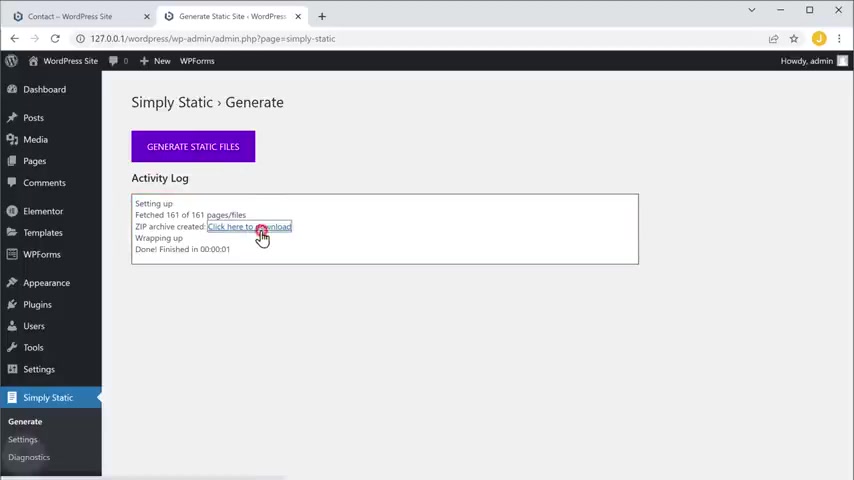
Once you have installed the plug in now to export the file , go to simply static and click generate .
Now click generate static files .
And as you can see the file has been generated .
Once you have exported the file now to make your local site into a live site , you need to download that file and upload it on net file .
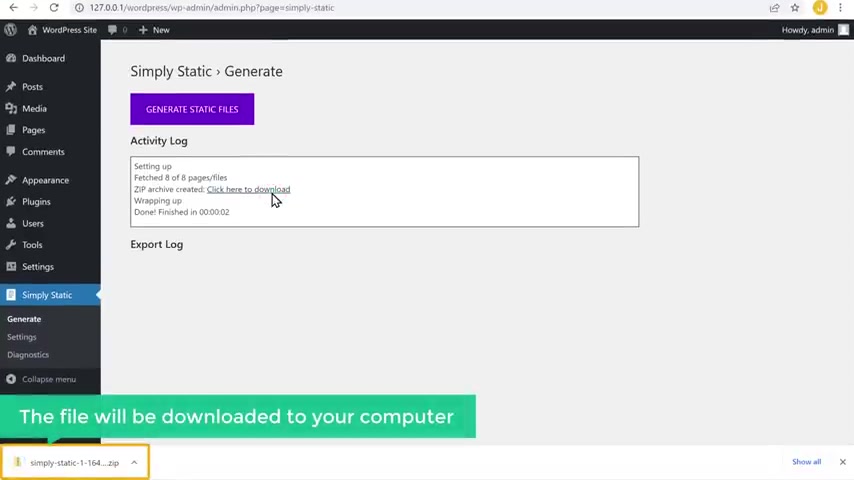
So let's click here and the file will be downloaded to your computer now to upload this file .
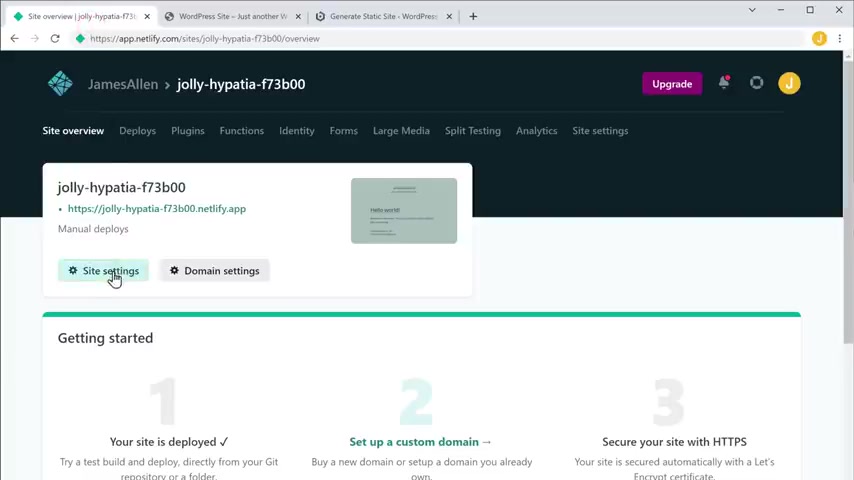
Let's go to net then drag this file and drop it here and the file will be uploaded .
Once you've uploaded the file , your website will be live on the internet and you will get a link like this .
Now , if we click on this link , you can see that it takes us to our website .
Now anyone can access the site by going to this address .
And also you can see that we have got SSL on our site .
Ok .
This is how you can make your site live on the internet .
Now , once your site is live here , you can see that this is the default site address .
Next , let's see how you can change the site name , sort of change it .
Let's go to net click side settings .
Now click chain site name and you will get this box .
Now , here you can enter the site name which you want .
So let's remove this and then enter the site name which you want .
I'm going to enter magical builder .
And as you can see this will be a sites URL .
So let's click save .
Now , if we click this link , you can see that the site name has been changed .
Now , this is just a temporary link to your site .
You can easily change this to your own dot com domain .
We'll see how you can do that later in this video .
Ok .
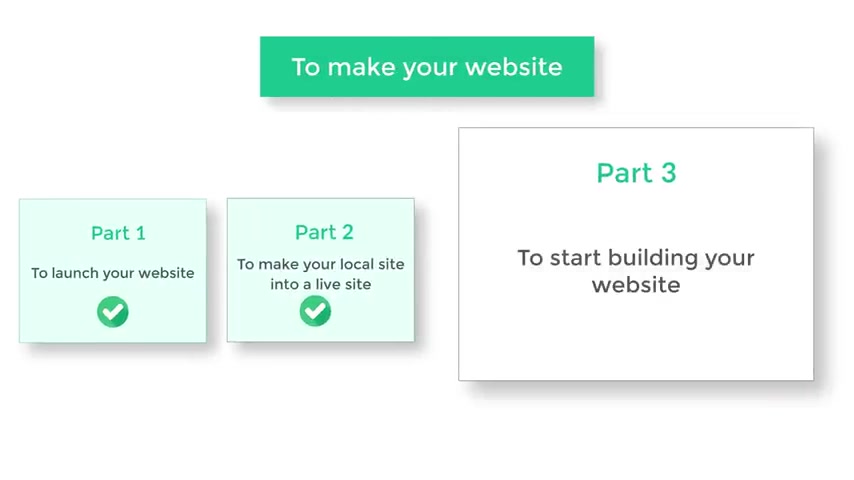
Once you have changed the default site name , next , let's go to part three of this tutorial , which is to start building your website .
So this is how the default site looks like now to build your website we are going to do three steps .
The first step is to install a theme in wordpress .
So we are going to install a theme called Astro .
Now , this is the theme which is going to help us build our site .
So to install the team , let's go to our dashboard , not go to appearance and click themes , then click add new .
Now here , search for a team called Astra and you will get this team now to install the team , let's click install and then click activate .
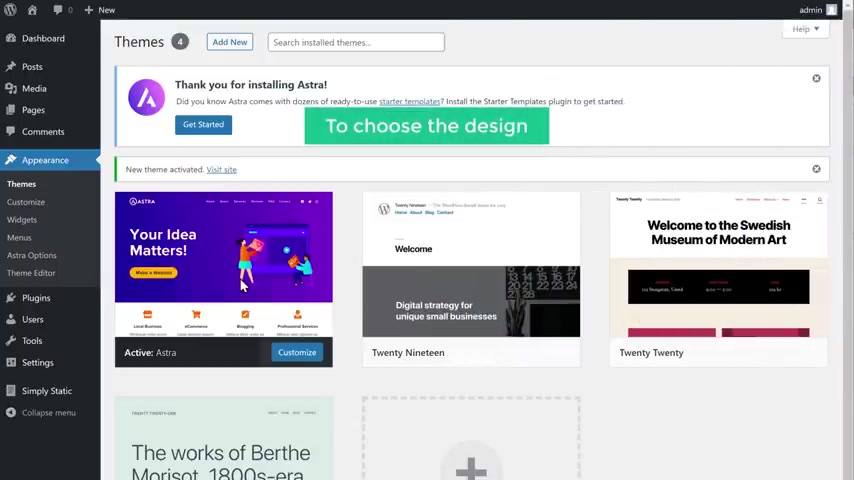
So now we have successfully installed the Astra theme .
Once you have installed the team , next , let's go to step two , which is to choose a design for your website .
So to choose the design , let's get started and it will take you to this page now , scroll down , click build your website now and it will ask you to choose the page builder .
These are the tools which will help you to edit your design .
Now , we recommend you to choose element or which makes it easy to edit your website pages in the future .
So let's select that .
And now you can see all the designs which can be applied to your site .
So have a look at these designs and select the one you like .
I'm going to choose this one .
Now , here you can see a preview of how the design looks like .
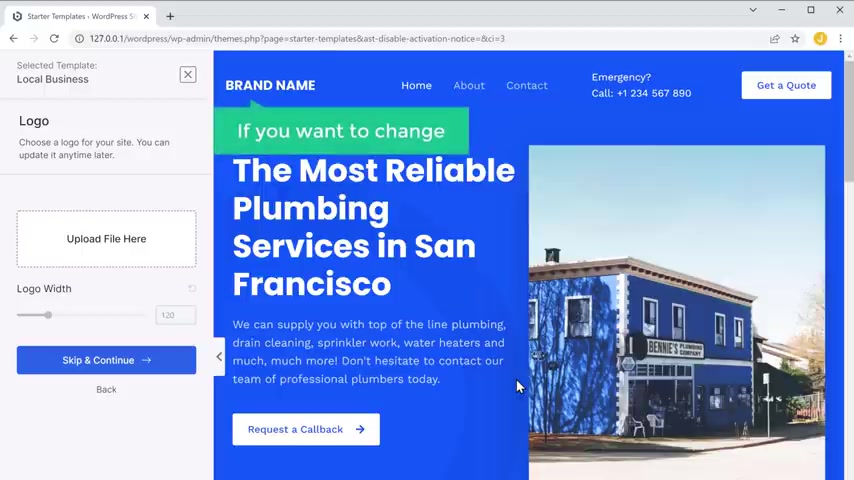
And here you can see that we have an option to change our logo .
Now if you want to change this logo , just click here and then drag your logo and drop it here .
As you can see the logo has been changed .
Now you can adjust the size of this logo just by dragging the slider like this and the logo size will be changed once you have changed the logo , click continue .
Now , here you can see that we have different options to change the color and the font of our side .
You can choose the one you want .
I'm going to keep this default color in font , then click continue and you will get this box .
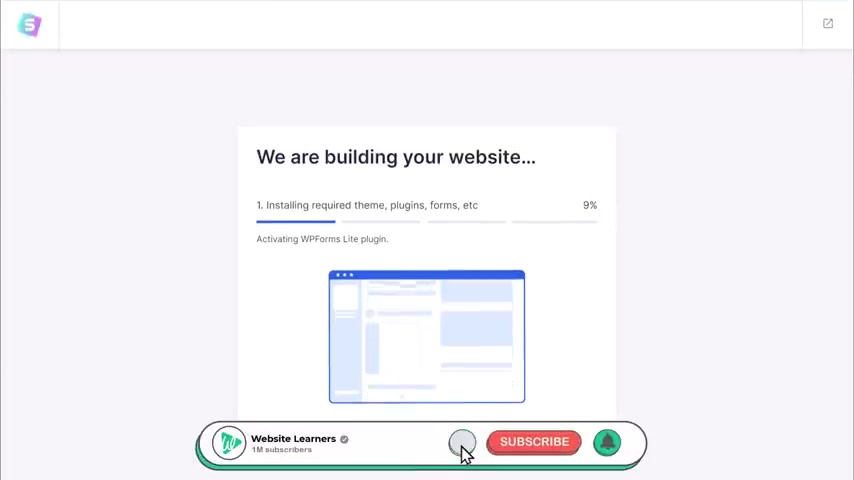
Now , click submit and as is getting ready now and it's done .
So if we go back to a local site , you can see that this is our , our site was before .
And now if we click refresh , you can see that we have got the exact design which we selected and the changes have been applied to our design , which we made .
And you can also see our website pages which has the sample content in it .
OK ?
Once you've got the design into your site , now , how do you change the content of these pages ?
So next , let's go to the final step of building your website which is to edit the content of your website .
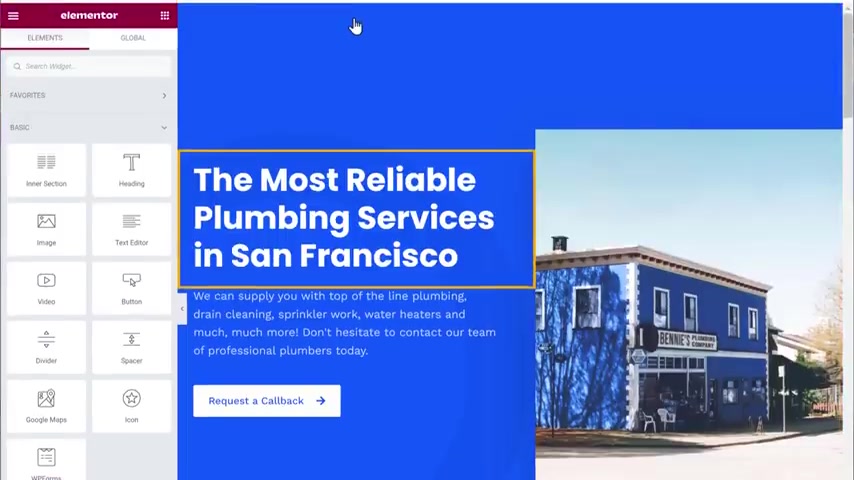
So to edit any page of your site , just go to that page and click edit with the element or so let's say you want to edit the home page , just simply click home , then click , edit with element or and it will take you to this editing section .
Now , let's say you want to change this text .
All you have to do is just select the text and then enter your own text .
I'm going to enter building for a better tomorrow .
Next , if you want to change the text on this button , just select it and then enter your own text .
Now , in the same way you can edit any text you want on this page , just select the text and then start typing .
So this works throughout the site .
Next , let's say you want to change this image .
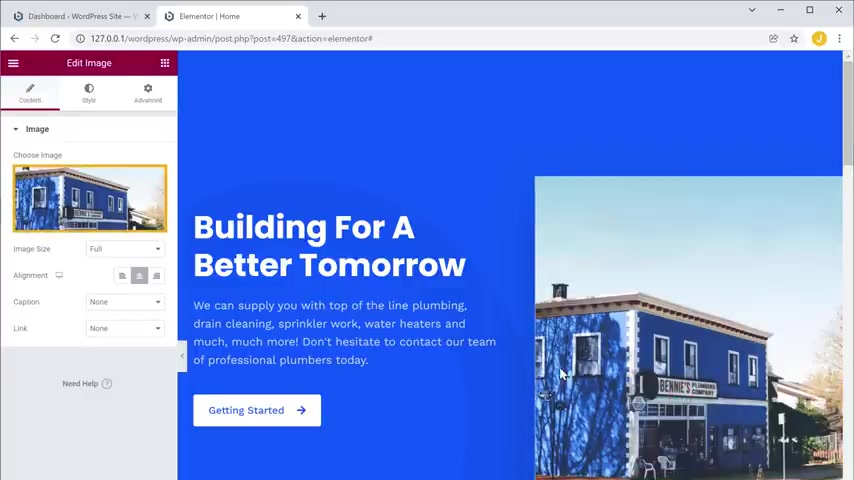
So to change the image , just click on the image , no , then drag and drop your image from your computer .
And as you can see the image has been changed .
Once you're done with all the changes , just click update .
And now if we go to a local site and the first you can see that all the changes have been applied .
So this is how you can edit any page of your website .
So now you know how you can edit any page of your website .
Next , we're going to see how you can change the header area of your website .
Now , by using element to , you will be able to change this part of your site .
But if you want to change this area , which is the header , you can do it by going to the customized option .
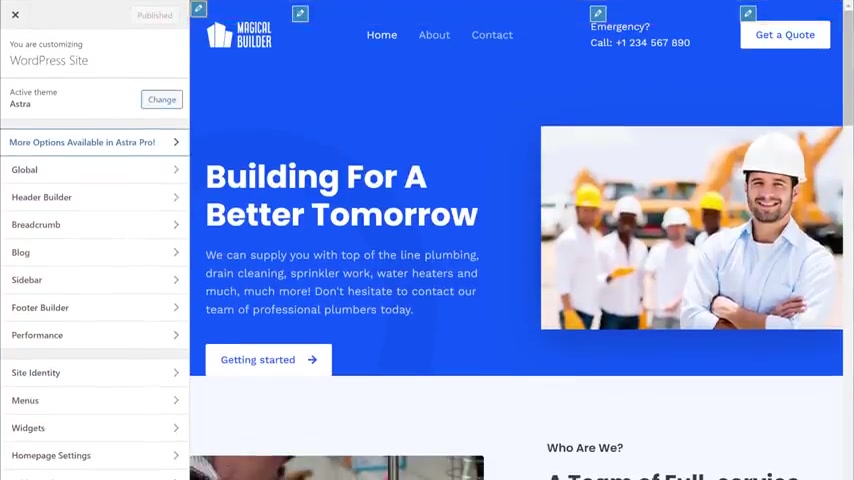
So let's go to customize and here you can see that we have these pencil icons .
Now , if you want to change this logo , just click this pencil icon next to it and you can change the logo here .
Now , in the same way , you can change the menu section by clicking this icon .
Once you're done with all the changes , click publish and the changes will be made to your website .
Now , let's close this .
OK .
So this is how you can change the header area of your website .
Now , if you go to a live site and click refresh , you can see that we still have the default site and the site which we created does not appear on our live site .
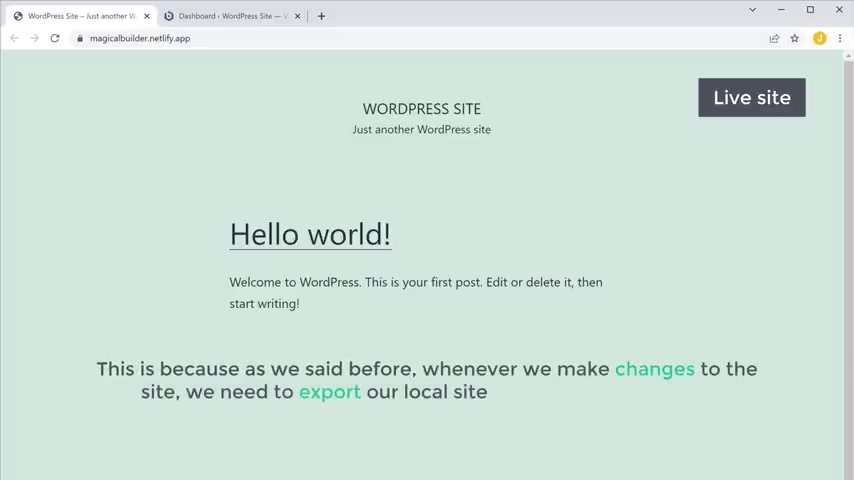
This is because as we said before , whenever we make changes to the site , we need to export our local site and upload it on net FI only then the changes will be applied to our site .
So to export the file , let's go to a dashboard .
Now go simply static and click generate .
Now , if we click , generate static files , as you can see the file has been generated .
Now , click here and download the file , then upload this file on L file .
So let's go with that and click deploys then scroll down and then drag this file and drop it here .
Once the file is uploaded , now the site which we built will appear on our live site .
So reject that .
Let's go to our live site and click the first , you can see that we have got a site which we built before .
Ok .
So now you know how you can create a website and edit the contents .
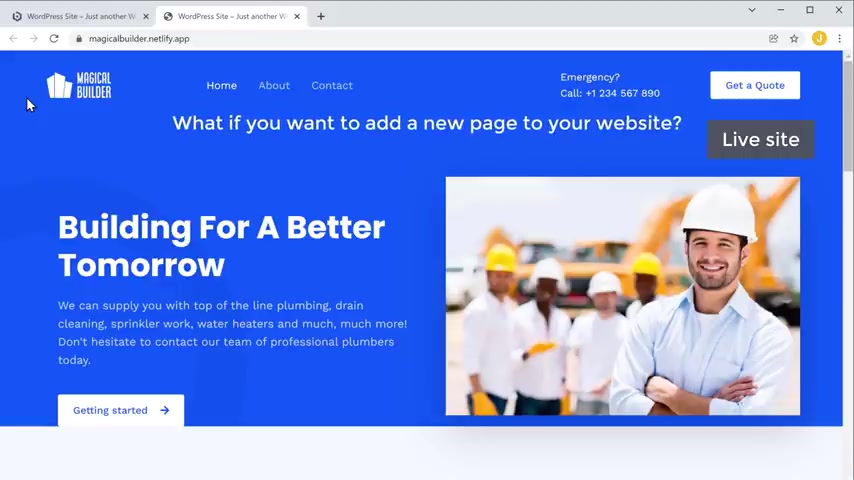
Now , what if you want to add a new page to your website ?
It's very easy .
So next , we're going to see how you can add a new page to your website .
So to add a new page , just go to our local site good and you and click page .
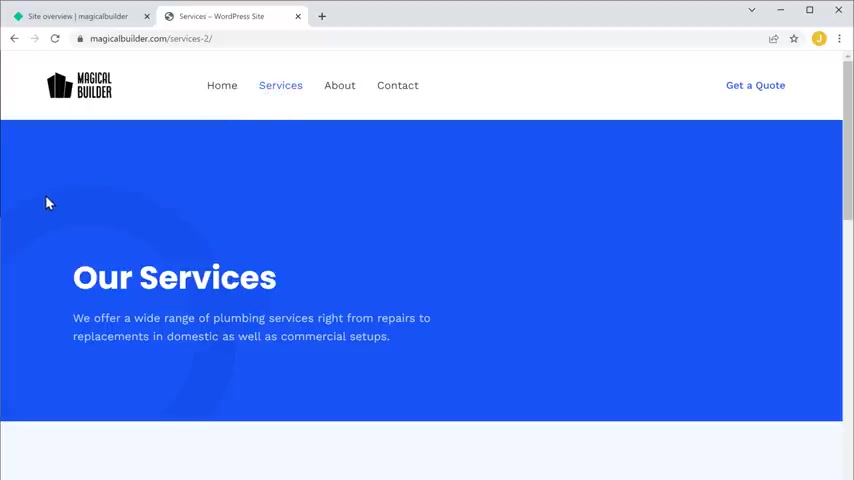
Now , let's say you want to create a service page for your website .
You need to first enter a title and now to start creating a page , just click , edit to the element or and it will take you to this blank section .
Now , you have two options to create your page .
First , you can either use these elements which are all here and then drag and drop them into this area .
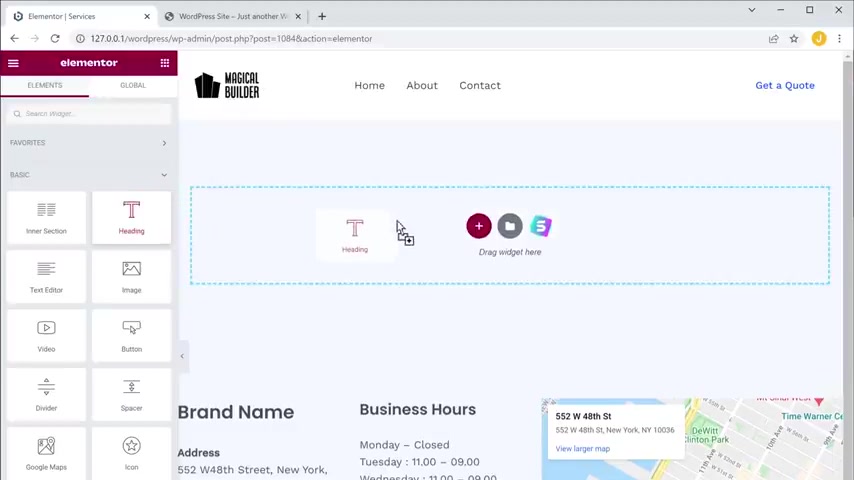
So for example , if you want to add a heading , you can drag and drop this element here and then enter your own text .
Now to add an image , you can drag and drop this element .
So drag and drop here and start creating your page .
Now , the other way to create a page is by using templates .
Now , templates are already made pages which you can import into your site .
So to create a page using templates , let's click here and you will find a lot of designs here .
Now , if you want to use any design , simply click it and see how it looks like if you like it , just click import template .
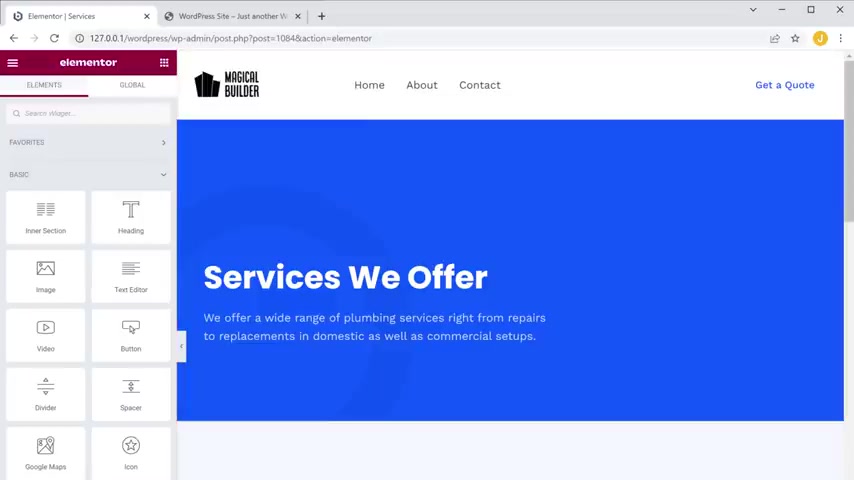
And as you can see , we have got the entire design on our page .
Now again , like we did before , you can change anything on this page just by selecting it and typing anything you want .
So this is how it works .
Once you're done with the changes , click update , and you can view the page by clicking here .
So you can see that we have published a brand new page on our website .
So this is how you can add a new page to your workers website .
Now , here you can see that this page which is called our services is not on our menu yet .
So let's see how you can add this page to your menu .
So to add this page to your menu , let's go back to customize and click menus , then click here and here you can see all the pages which we have here .
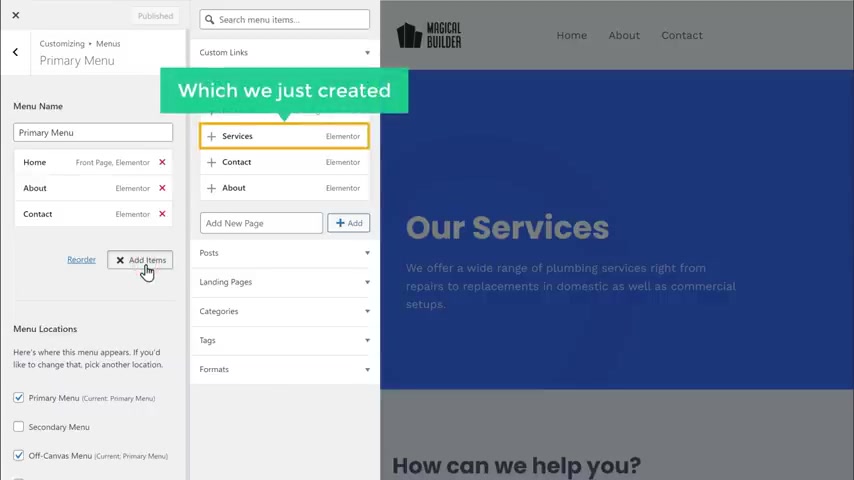
Now to add this page to your menu , just click , add items .
And here you can see the new page which we just created .
Now , if we click on this page , you can see that this page has been added to our menu .
Now to move this menu item here , just drag this item and then drop it where you want .
And as you can see this page now appears here now to save this .
Let's click publish .
And now if we go back to our local site and click the first , you can see that we have got this page in our menu .
And if we click services , we can now see our service page .
OK .
This is how you can add a new page to your menu .
Once you've added a new page to your menu .
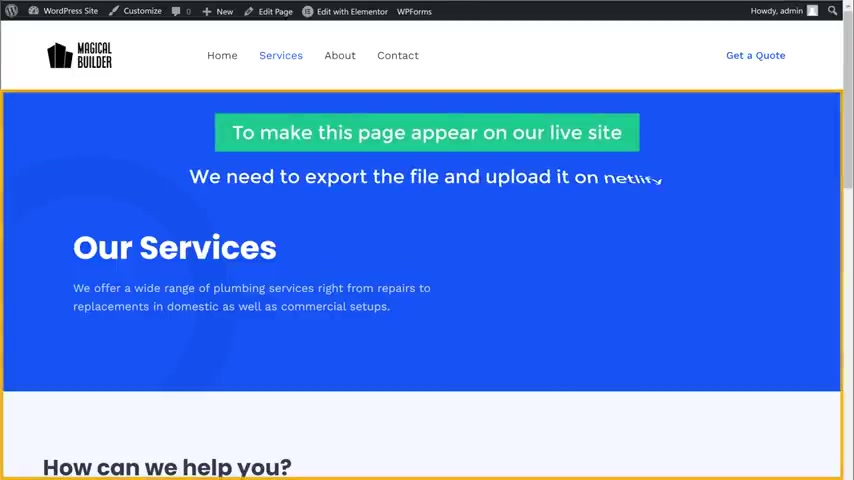
Now , to make this page appear on our live site , we need to export the file and upload it on L file .
So to do that , let's go back to our dashboard .
Click , generate static files and the file will be generated .
Then click here and download the file now to upload the file .
Let's go to NATL FI and click deploys , then drag this file and drop it here .
Now our service page will be applied on a live site .
So to check that let's go to our live site and click the first , you can see that we have got a service page on our live site .
So this is how you can add a new page to your website .
OK .
So now we have successfully created our website for free .
And here you can see that we have a default domain name .
Now , instead of this , what if you want to have a domain name like this ?
So next , let's see how you can get a dot com domain name for your site .
So to get the domain name , let's go to the video you're watching right now , then click the link in the description and this will take you to webspace kit dot com where you can buy your own domain name .
Now , here , enter the name you want for your website .
I'm going to enter magical builder dot com .
Now , if you click search , you can see that this domain name is available .
So once you find a name which is available to get this name for your website , just click add to cart , then click continue here .
It will ask you to choose a hosting plan as we are going to get only a domain name .
Let's click skip and now it will take you to this card page .
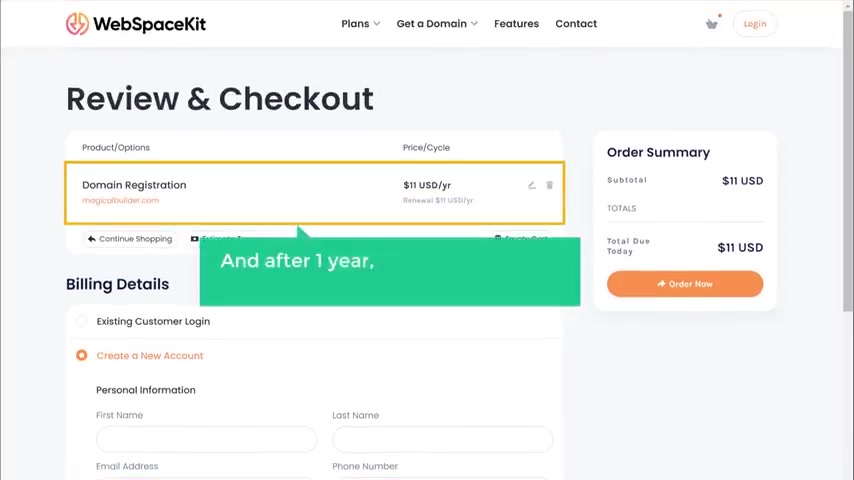
Now , here you can see that we're getting our domain for one year and after one year , you need to renew your domain to keep using it .
So to get this domain , let's fill up these details and then enter our payment details .
Now , if we click order now , you can see that we have successfully made our payment .
Now , if we click here , you can see that we have got a domain .
OK .
So once you've got your domain , now , how do you connect this domain with your website ?
So next , let's see how you can connect this domain with your website .
So to connect this domain , we are going to do two steps .
The first step is to add a domain to L five .
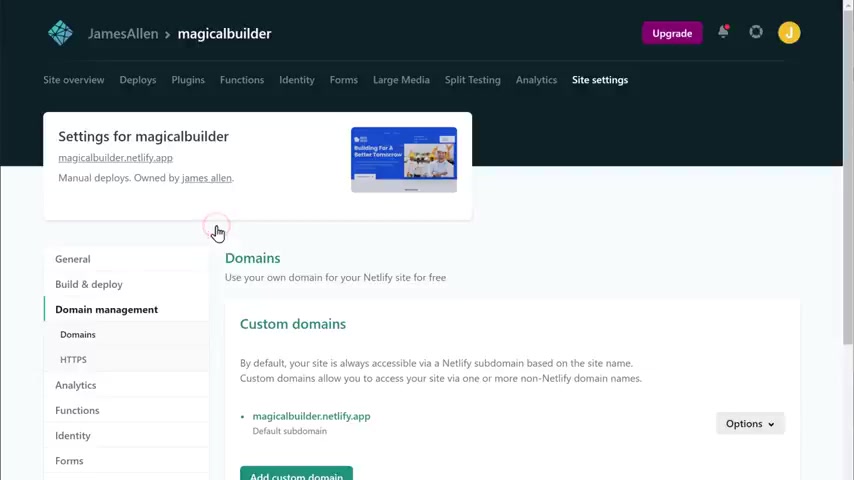
So to add the domain let's go to net click domain settings , then click add custom domain and then you will get this page now here , enter domain name which you have purchased .
So I'm going to enter magical builder dot com .
Once you've entered your domain name , click , verify now click add domin and the domain will be added here .
Once you've added the domain , we can now go to the next step , which is to get the DNS details and then add it to our own domain DNS page .
Once you do this , your website will be connected to your domain name .
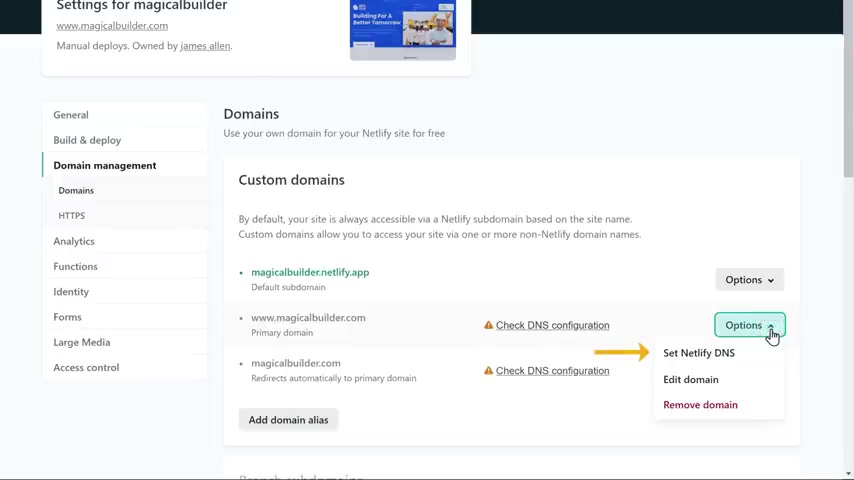
So to get that , just click here and select notify DNS , then it will take you to this page .
Now click verify , then click , add them in and then click continue .
And as you can see , we have got these details .
Once you have got these details , you need to add these details to your domain .
So to add them , let's go to this tab , click on domains locally here , then click manage name service and you will get this page .
Now you need to copy these details and paste them on your domain DNS page .
First , let's remove these old name servers and then add these details one by one .
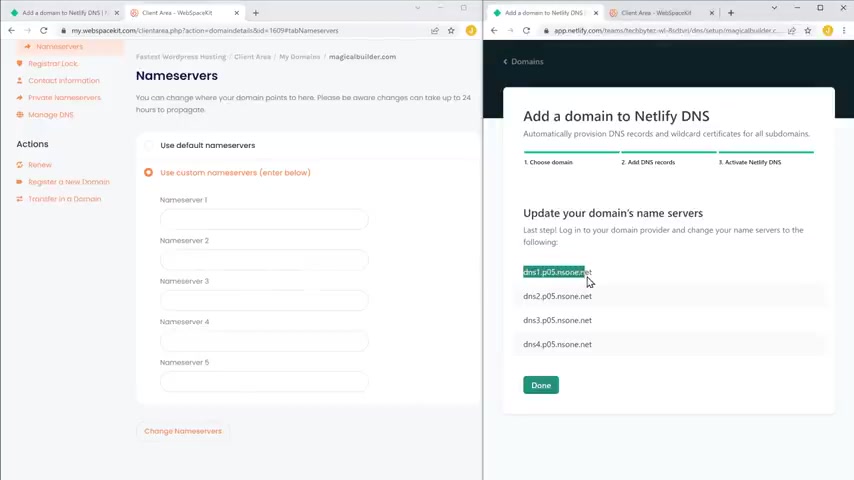
So first let's copy this one and based it here in the same way , let's copy the other details and paste them here .
Once you have added the details , click change name servers .
So now we have successfully added the details to our domain DNS page .
Now , if you go to and click done here , you can see that the DNS has been added , which means we have not successfully connected our domain with our website .
Now , if you open a new tab and enter our domain name , which is magical builder dot com , then press enter .
You can see that we've got a website which we updated .
OK .
Now , if we go to our service page , you can see the page which we have created .
And if you go to our contact page , you can see that we have a default contact form .
Now , let's say a Vita tries to contact you , fills up this form and click , send message .
You can see that we have got an error message which says page not found .
This is because we are creating a static website which cannot collect the data of the visitors from our site .
Now , if you want to collect data from your visitors , you need to add a new contact form to your site .
So next , let's see how you can add a new contact form to your site .
So to add the new contact form , just go to your local site and go to the contact page .
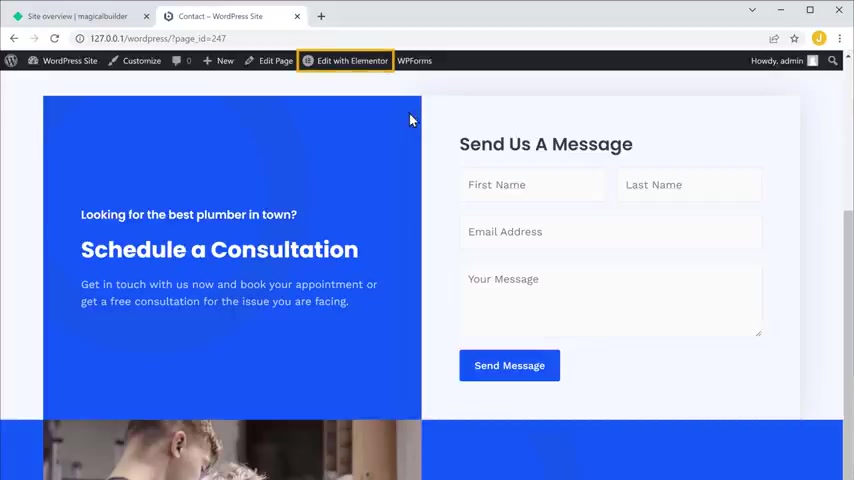
Now to add a new contact form to your site , first , you need to remove this default contact form on your side .
So to remove the form , let's click , edit to the element or now scroll down right , click on the blue pencil and then click delete .
Now , as you can see , the default contact form has been deleted .
Once you have deleted the form , just go here , search for HTML and then drag this element and drop it here .
Now to add a new contact form , we need to enter a code here .
So to get the code , just go to the video you're watching right now and click this link and it will take you to this page here .
You can see that we have given a code .
Now this is the code which will help us to add a new contact form .
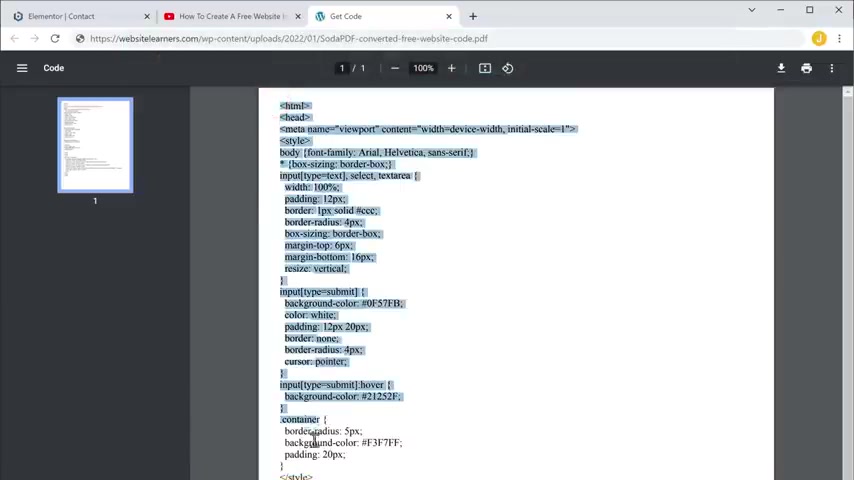
So let's copy this code , then go back to this tab and paste the code here .
As you can see , the new contact form has been added here .
Now , if we click update and click here up , you can see the new contact form which we just added .
OK ?
So now we have successfully added the new contact form to our site .
Now to make our contact form to appear on our live site just like we did before , we need to export the file and upload it on file .
So to do that , let's go to our dashboard .
Then click generate static files and the file will be generated .
Now , click here and download the file , then let's upload the file on net file .
So let's go there and click deploys , then drag this file and drop it here and it will be uploaded .
Ok .
Once you have done that , now , a new contact form will appear on our live site .
So to check that let's go to our live website here .
You can see the default contact form .
Now , if you click refresh , you can see that we have got a new contact form which we just added .
Ok .
Now let's check how it works .
So just like a vista would do , let's fill up this form and click submit .
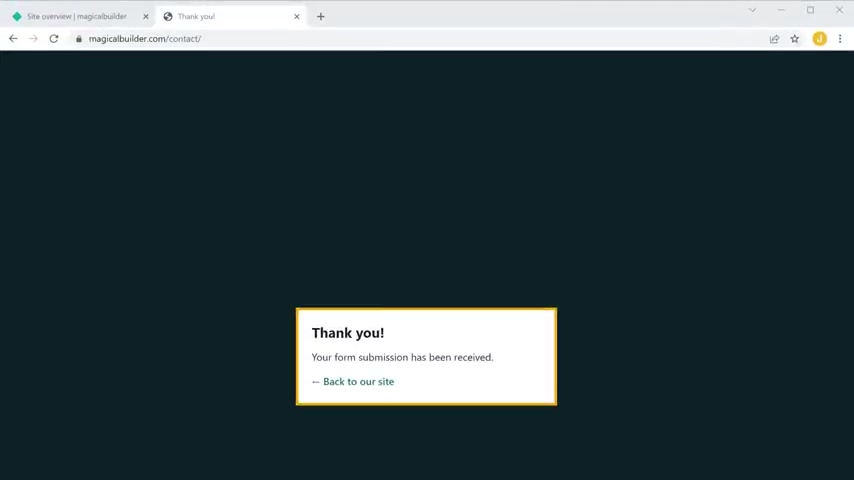
As you can see the form has been submitted once the form is submitted , how can you see the details which have been submitted ?
Now , if you go to net and go to farms and click here here , you can see the details of the visor and their message .
Ok .
So that's it guys .
This is how you can make a website for free .
Now instead of exporting and importing the changes every time .
If you want to see the changes immediately on the live site , you can use a professional workers hosting like webspace kit .
When using webspace kit , you can also build dynamic sites like e-commerce store website where you can receive payments online with shopping cart feature .
So check out our work hosting by clicking here .
Now , if you want to learn more about making websites easily without coding , you can check out our premium courses by clicking the link below this video .
Subscribe for more videos .
Thanks for watching .
I'll see you in the next video .
Take care bye bye .
Are you looking for a way to reach a wider audience and get more views on your videos?
Our innovative video to text transcribing service can help you do just that.
We provide accurate transcriptions of your videos along with visual content that will help you attract new viewers and keep them engaged. Plus, our data analytics and ad campaign tools can help you monetize your content and maximize your revenue.
Let's partner up and take your video content to the next level!
Contact us today to learn more.