https://www.youtube.com/watch?v=IbYXyuOvab0
DRAWING FACES FROM DIFFICULT ANGLES - DRAWING TUTORIAL
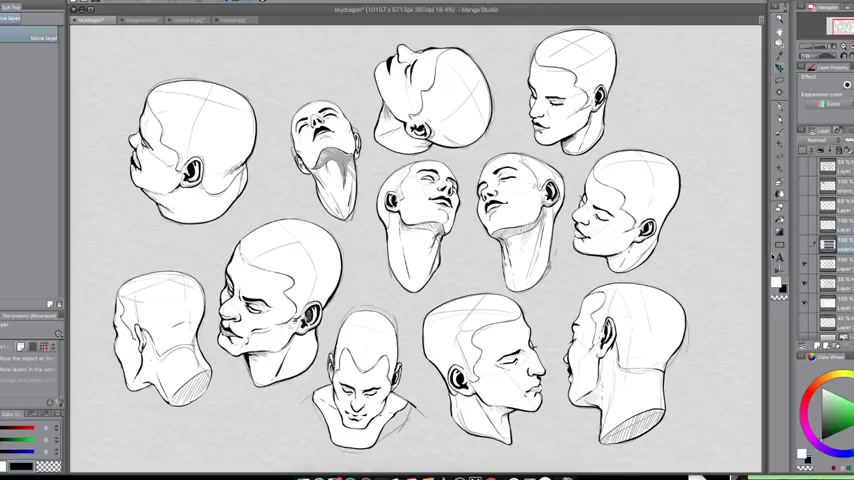
Hey guys , it's on the back of the tutorial thing , and this one is a redo of one that I did a few years ago .
That was who Who kind of bad man .
So we're gonna have a look at some techniques for drawing faces at different angles , because I know people struggle with that kind of thing , and it's just really how I have built my own kind of formula to help me in drawing them at different angles .
OK , so in this video , the first thing we're gonna do is have a look at some common formulas that people have for our own faces and plotting them out .
Then we're going to have a look at some of the issues with them and figure out if we can come up with a different style .
It kind of merges them together and gives us a bit of the best of both of them .
Then , once we've come up with that , I'm going to explain the specific shapes that I use in it and how to use it with measurements .
Then we're going to apply it to chubby people as well , so that we're not just looking at skinny people really defined jawlines .
Then I'm going to go over how I use visual notes for this kind of technique and how I also use that as a stylistic choice occasion .
And then lastly , we're gonna go and draw a whole bunch of examples of these and I'll show you some of my other sketches of characters that you can see .
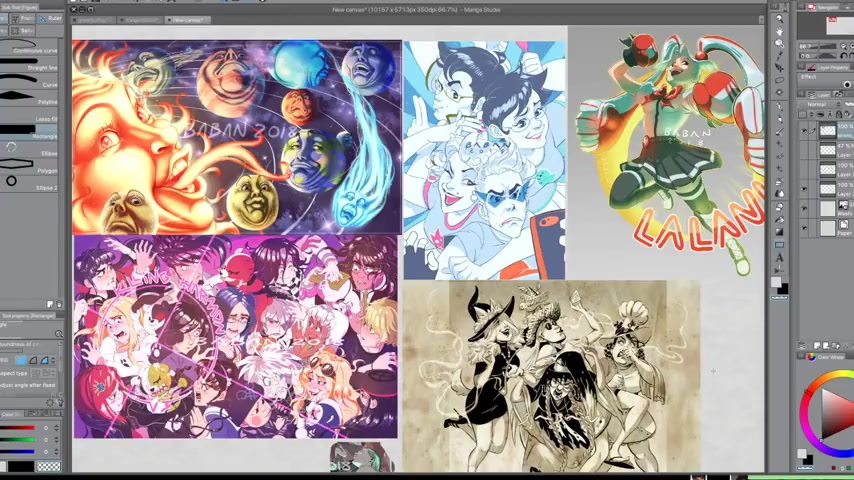
So we've got a couple of different styles on the go .
Uh , so anyway , this is just a a little compilation of stuff that I've done this year that I am gonna come back to once we start drawing and explaining it a little bit so that I can point out some of the other little , I guess , maybe stylistic things that I do to help me with this as well .
So let's get going .
OK , so there's a couple of different techniques that I see most commonly that people use to go and , like , block out a face to draw it at a different angle or something .
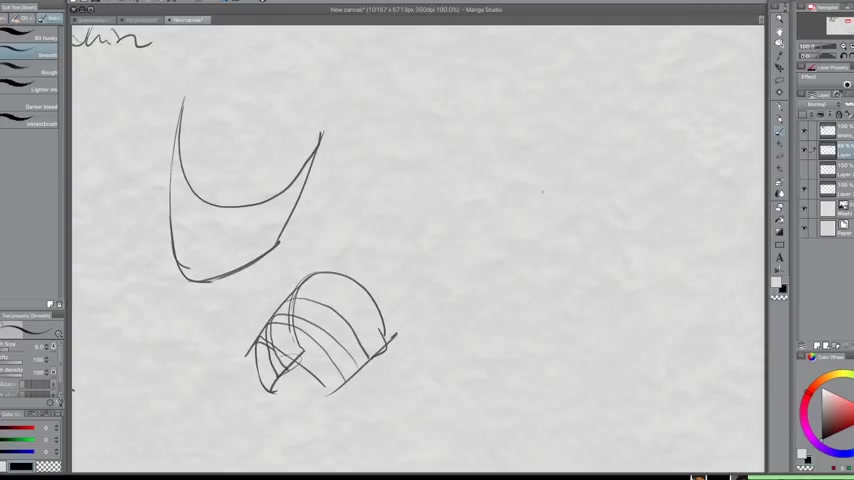
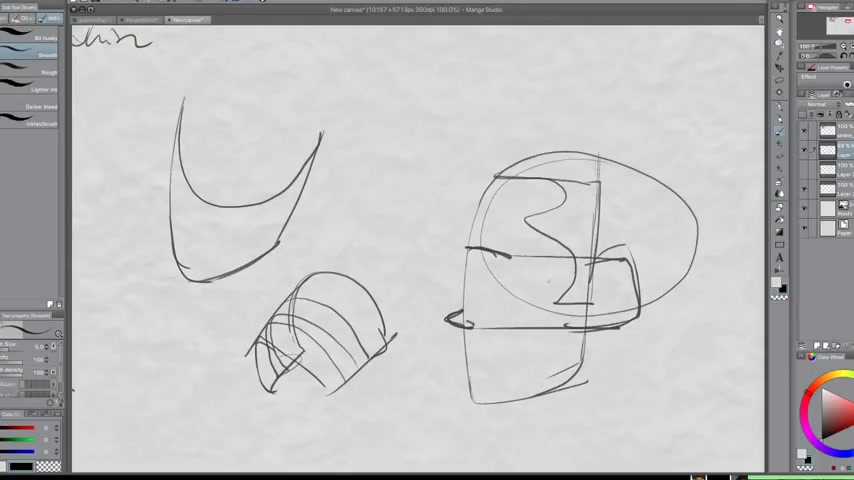
And the first one is to draw a circle , um , to block out where the cranium is , and then you go and put your cross hairs on to mark out , like where the eyes and everything are , and then you can bring it down with , like , a big ellipse for the rest of the face .
Or you can draw a box like this and put your face inside of it .
And with that , you also like go and put your cross hairs on and you know it fits on to where the box is , like you put like nose and mouth .
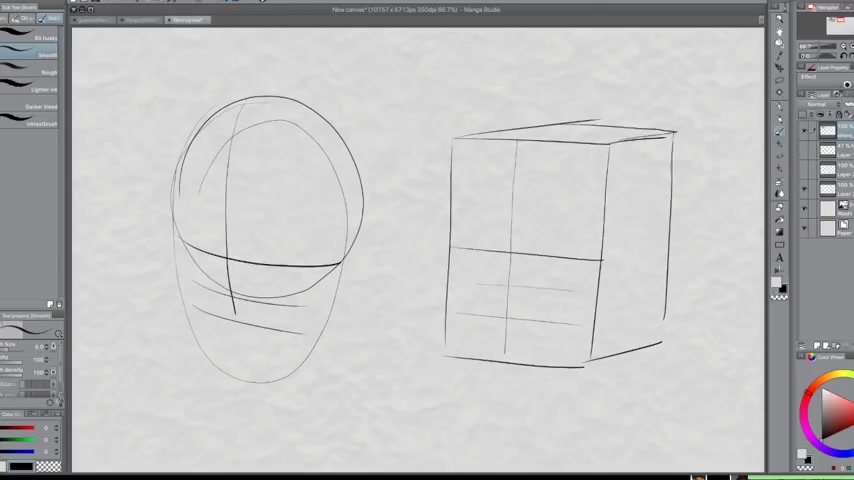
Let's let's do those on these as well , and these are kind of two sides of the same thing .
So you've got the more organic like , curved shapes .
But you've also got this like , more stable block shape .
But if I just go and put like some faces on these to fill them out , So let's put eyes on these and a nose and a mouth , Um , and when I'm drawing stuff like this , I usually , um , if I'm just kind of sketching and trying to figure it out , then I will just go and put circles in for the eyes .
And things are , um , just to block out where they are and stop me from noodling too much .
OK , so let's get a face in that one and block out like where the ears and everything are on that .
And that's that's two fine ways of going and drawing like a head and a face and everything .
But they've both got , like , little drawbacks .
Um , in that this one isn't probably gonna be as accurate unless you're pretty good at , like , going on free hand and stuff .
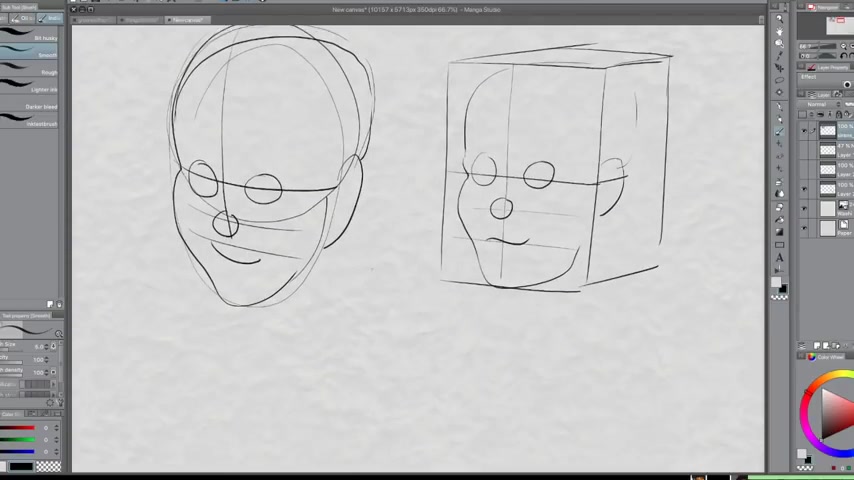
Um , because you're obviously just going and like , drawing everything in free hand with more curvy shapes .
Um , but this one also because it's like in a block , you might end up with it looking a little bit more blocky and kind of stiff .
So we want something that's kind of nice and rounded like the face , But we also want something that's got a lot of structure to it .
But there's something I want to point out first .
Now when I see people drawing I , I guess it's like , especially with this one , where you're drawing a circle and you're bringing the chin down like this as an ellipse , people get far too used to just being able to draw like a face at the three quarter angle like this .
Um , and like they bring the chin down and you've got the side of the draw like this .
That would be like at that kind of angle .
But when people decide , Oh , I want to do a face that's more at , say , this angle looking upwards , and we're gonna be able to see like some underside of the chin because they don't really know how to draw that underside of the chin .
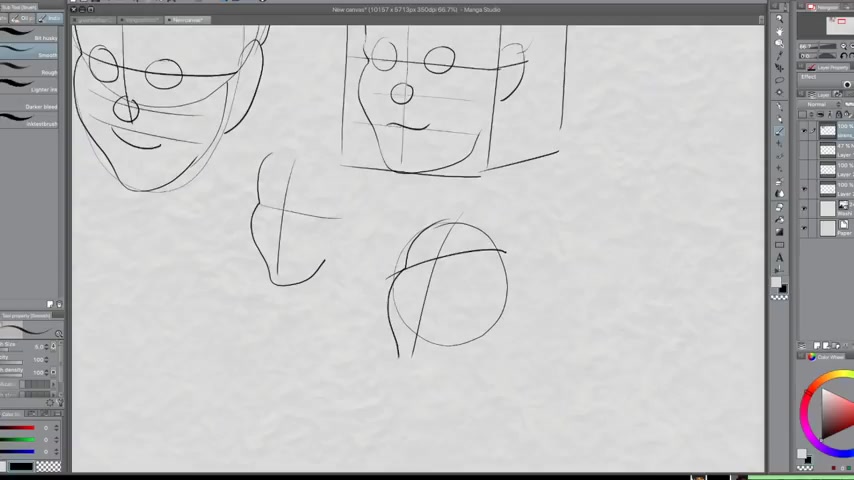
They go and draw the side of the face as though it's at like a three quarter angle , and they end up bringing it all the way down into a big shovel chin .
Um , and then they end up like squashing all of the features up the top here .
And instead of actually putting the perspective improperly , we just end up with a huge shovel chin so that they don't have to go and draw the underside of it like this .
So we just end up , like with a kind of mutated jaw , uh , and and a neck stuck in like this And the the most egregious example of this that I have seen is in Yu-gi-oh , and I've I've I've gone and seen , uh , I've gone and found a little screen cap of this , and if I just go and draw over the top of this dude's face here .
Now you're gonna have to excuse me , because I do not know his name .
I'm sorry .
I know that's Yugi , but I don't know this guy's name .
They're obviously going for this kind of angle because if I draw in the two edge lines of the mouth , then they're going this way .
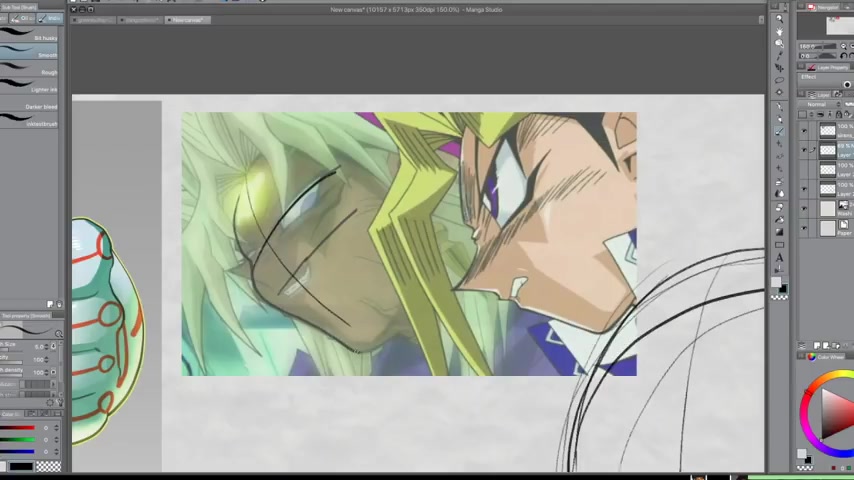
Um and that means that the ice should kind of be going that way , too , even though they're more at this angle .
Um , and because they are going to that angle , um , it should show more of the underside of the chin .
But if I go and trace it and pull this line down , you can see that the chin just kind of goes all the way down into one of those shovel chins like I mentioned .
And there's barely an indication of where the other side of the jaw line here is , and it does not jive at all with this angle that the face is supposed to be at now .
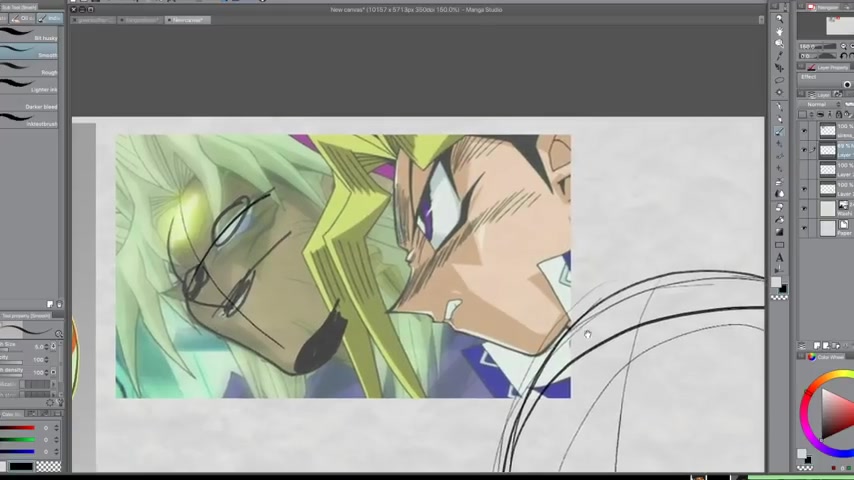
If I go and draw it in where it kind of makes sense for the jawline to be , you can see already that that kind of jives a little bit better with it and makes a little bit more sense for the angles that I've gone and drawn in .
Um , his eyes would also be tweaked because they're kind of like this kind of wonk at the moment .
Um , so we'd have one , like , a bit further up here and one like , further down that way , and his nose would probably still be in the same place and then kind of kind of more like that .
I mean , I'm guessing that he's got a huge chin .
Anyway , um , this is also kind of obvious on Yugi because we can kind of see that we've got , like , a bit of the underside of his nose , Um , and that his face is , like , slightly kind of going this way , even though he's smiling a little bit .
Um , but if I just go and like , give him a chin underneath , you can kind of see that .
That makes more sense already than the big shovel that he had anyway .
So this is something that in this technique that I'm making , I really wanna be able to help you guys with , because it is really something that , um I think stops people from wanting to draw faces at different angles because they really don't understand how to draw the underside of the chin .
OK , so the criteria that we want is something organic and round , but also structure .
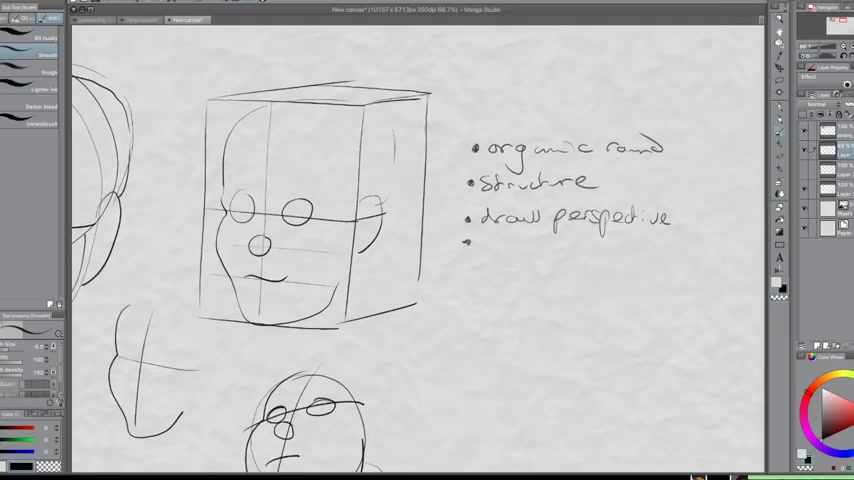
And to be able to draw perspective on it , if we're gonna be drawing it at different angles and along with that , I wanna be able to draw on the side of the chin .
Now I've I've got awful handwriting , you know ?
You know , artists and doctors bad handwriting .
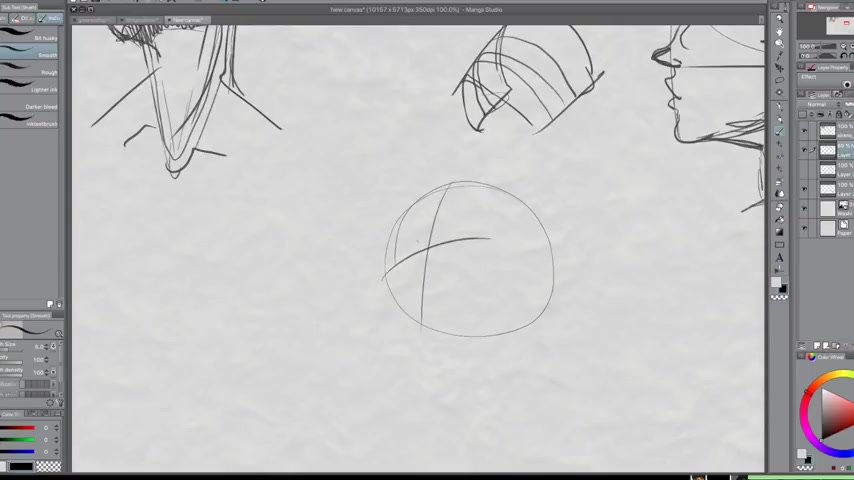
OK , so the way I like to go about this , I will usually start with a circle .
So we've got that nice round shape for the top of the head .
I can also pull it out like a little bit more if I want .
I usually do that later once I figure out what kind of angle I want .
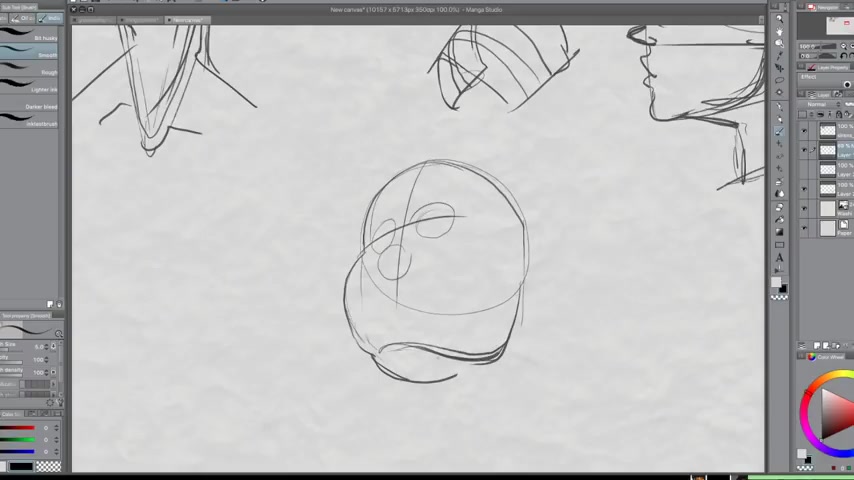
So let's go with one of those awkward angles where they are looking up and we're gonna be able to see the underside of the chin like this kind of angle .
And I'm gonna put my eyeballs in just to kind of placement for them so that it looks like we've got some and it starts to look like a face .
The nose is going to be a bit higher up and starting to , like overlap with where the eyes are .
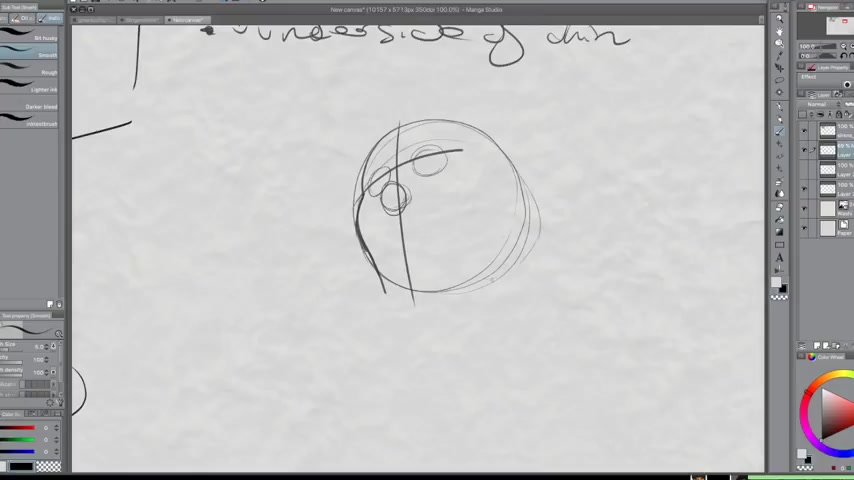
People usually go and draw in the side of the face because now that we've got those features and we can kind of understand where the cheekbones gonna go and how that's gonna come down like this and this is when we get into the danger zone of people wanting to just shovel chin .
But a way we can avoid that is to look at this curve at the top .
If if I can separate this curve into its own thing like this , I can bring it down the side like this .
And if I can , like , separate that curve at the top , then I can also separate one around the chin .
And if we imagine it as like a sheet of paper that's curving around , we can bring it up and around like this and join it up at the side , and you can see that by me pulling it around at the side .
We've also kind of given ourselves a little bit of a box , so we've got all these nice curves that we like .
We've got this to define where the chin is .
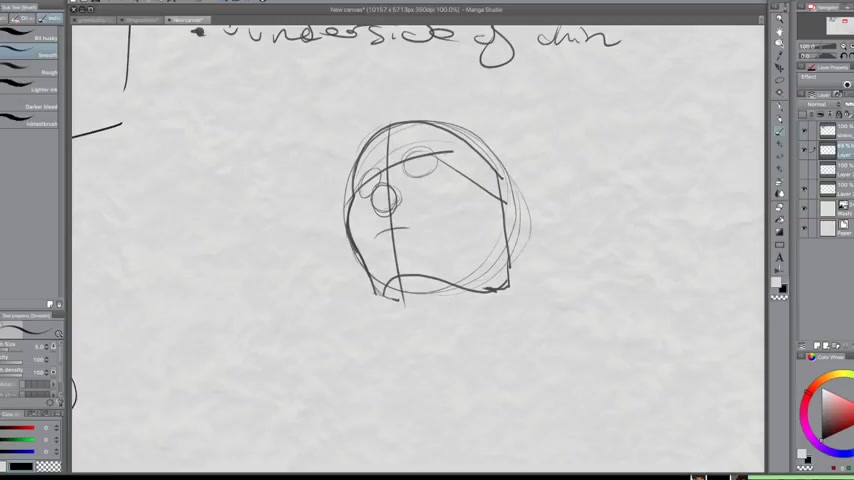
But we've also got this solid structure to put the face on .
And I mean , I can go and , like , line up the chin there and figure out where that is .
By pulling those bits in , uh , we can line up the mouth with those bits .
Um , and I think I've pulled that a little bit far over to the side because I like to line that up with the centre of the head from the side so that I can , when I put eyebrows on , pull it down , pull where the nose is down and we can figure out where our ears go .
And another thing with this is that because it's this curved shape like this , I don't just have to draw that side , and I can understand the other side of it and I , I think that goes a long way in helping people understand how to draw something in 3D .
Because I don't just understand what's going on here .
I can pull this like , all the way round at the top of the head and pull it down to the bottom of the draw there , so we don't just have the one side of it .
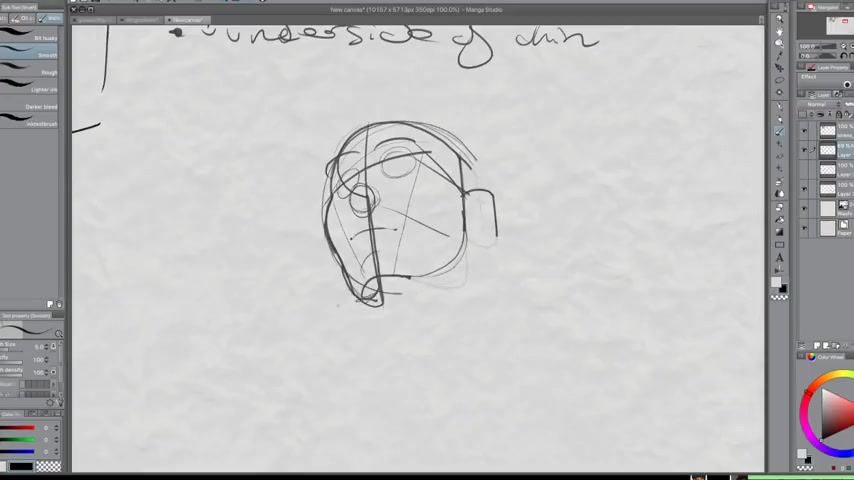
We've got both even what's behind it , and we can draw a line and line those two edges of it up and these two edges here a bit up and again .
That's gonna help us understand the kind of perspective that we've got going on by being able to draw in those angles and like after I've done this , I can go and clean the side of the jar up and make it a little bit rounder because it's kind of big and blocky right now .
They don't tend to go out that far .
I can do it on the other side like this , and then I can go and pull it down like this and give them a neck .
And then we've got a little bit of the neck there and I can shade in this bit on the underside and give enough room for tendons in the neck to come down that way like that .
Oh , and like I mentioned before , let's bring the back of the head further out , something I tend to do once I know what kind of angle I'm doing .
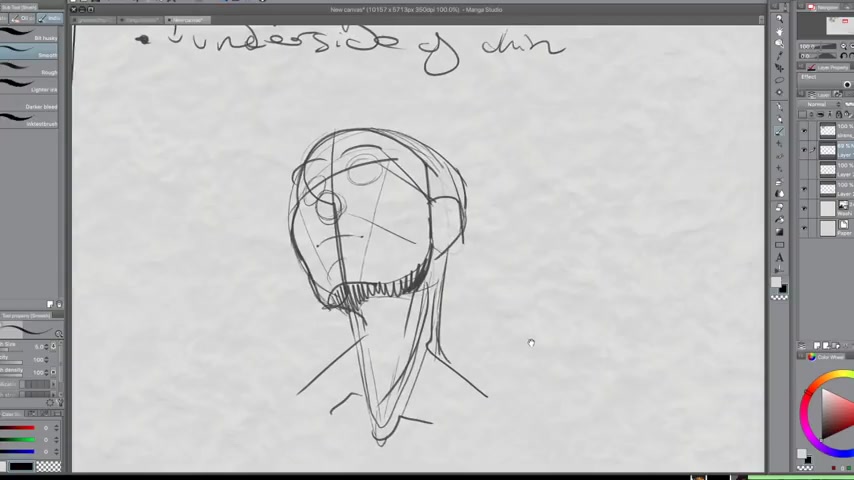
The face up on the circle that I've put in in the first step .
And then I mean , once you've got that , you can go and tidy it up and tweak any of the little angles .
But that just gives me a really , really solid base to use .
Something that I do want to clarify before I go and do more stuff is that the top of this kind of curve is gonna be more rounded like this .
Put the bottom of it .
If I bring it down , it's gonna want to come more into a triangle shape because that's the kind of shape that we get with the Chinn .
They're not the same kind of curve as on the top of the head .
Um , let's do one at this kind of angle , too .
So we're gonna have that bigger curve at the top of the head .
We can bring it down this way , and we can get more of a triangle around the chin like that , and we can join it up outside .
And I mean , you can do that first as well , and then you can go and put your lines on , and you can even , like , pull them around onto the other side like this .
Oh , another thing that I want to mention is the placement for the side of it .
What I try and keep it to is say , that's the cranium for the head .
Um , and we've got the face coming down this way .
I like to try and keep it about halfway into the head , because that also gives us the placement for where the ear is , Um , in terms of , like , front to back , um , and then , like once you go and like , put your eyebrows in and you can put your nose in , like by here , and then that's gonna help you , like , line up the ear .
Um , but it'll give you the placement down the side of the face as to where the ear is .
Um , it also kind of helps if you're drawing it .
Um , from this kind of angle as well that you can pull it back like this and down .
Um , and it can help to be like , Oh , this is where the hairline goes .
Um and then I can pull the hairline down that way and around the cheekbones like that .
So it's It's also a way to measure certain aspects of the face , so that's not just giving me a good base to draw on or some help with the perspective .
It's also giving me measurements for where he is going to go in terms of how far back it goes on the head and where I'm gonna be putting my hairline in .
Now , this technique is a This is actually something I've seen someone else do .
Um , but I , I think I saw it like a long time ago .
And then just for me , like studying on my own , I kind of came up with it .
And then after a while I was like , Hang on .
I think I've seen this before .
So it's kind of a case of just through study , reinventing concepts and ideas and little formulas that already exist .
And this is why studying is good because it gives you a chance to go and come up with all these different little formulas for yourself .
Um , I mean , we can also , um , like , go and draw the the underside of like the chin here because we you get like , a little bit of flab underneath the chin .
Um , I'm also gonna cover as well drawing it on more chubby people because I think that's something else that people tend to ignore .
OK , so if we're just using this basic shape again , I can make myself a circle , and then I can do myself a curve and or a a cross hair , and we can put the features on it .
Then I'm gonna go and draw a more chubby character like this .
Um , and I can bring it down .
Let's give them a hairline like this and bring it down to the side of the face and let's give them a chin right here .
So you're gonna get a slight little indent like there is .
There's a lot of kind of puppy fat around the cheeks and everything you get like jowls on some people , especially older people .
But you're gonna get , like , a little bit of an indent around there , and then you're gonna get all this kind of saggy fat that's underneath .
Um , and if you're not really sure how to define that without a big shape like this to define the jaw , then you can just define where the chin is like this .
Um and that's gonna show like where there's a little bit of fat , kind of hanging over from the chin .
And you also get to define this round bit underneath .
And I mean , with some people , it just kind of gets like Bobby like this , especially if they're wearing tight clothing .
It'll bunch up like that , Um , like , around the top of a shirt or something , and you can , like , go and erase this and you can tell pretty much just from that shape of the chin where the jawline is going , even though it's just kind of obscured .
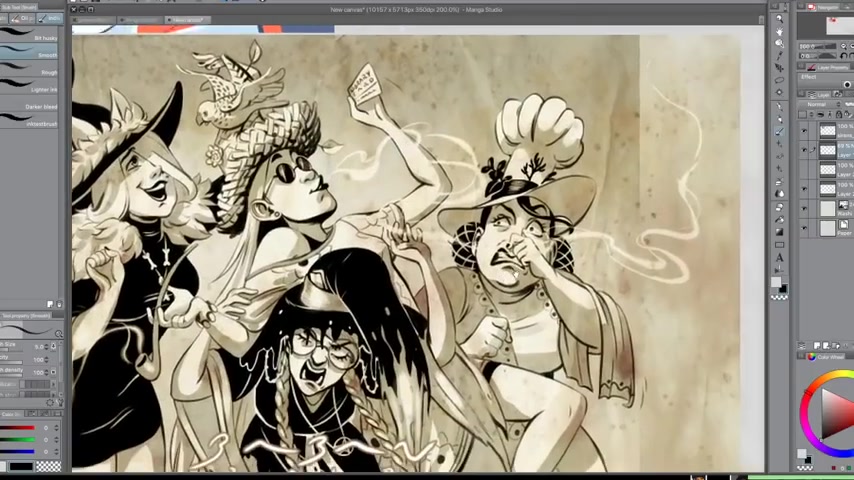
Buy a lot of the fat , and this is why I wanted to bring my little examples up because , for example , I've done it on this character here , like we can tell that a jawbone is going around here .
Tell that it's going around this way , just from the shape of shadow underneath and because I've got this chin here where her chin is , and I've I've just defined that with a little line .
And then she's still got that bit of weight underneath her chin where there's quite a lot of fat around there .
So , um , this can be applied not just to skinny people that have got like really different , or people that do have really defined jawlines like these two , but you can also do it with people that have got a lot more fat .
It's just a case of understanding where to put that fat and where you can indicate where there is a little bit less .
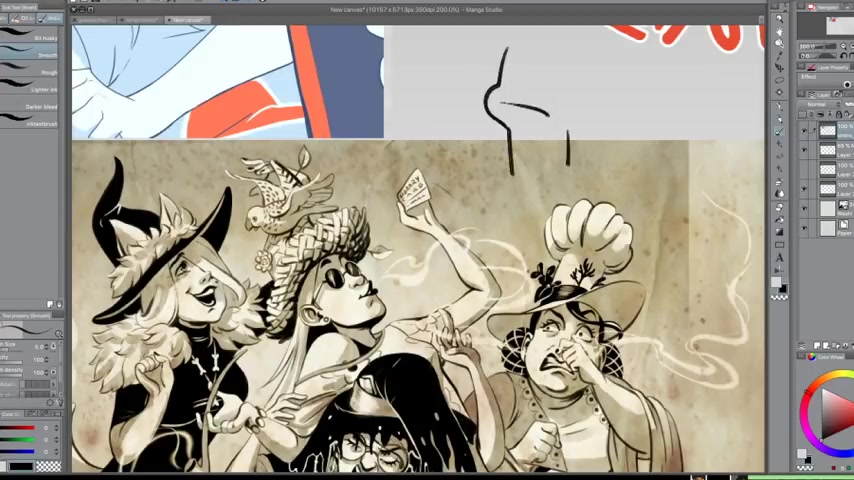
And maybe there's a bit more solid bone kind of showing through , um , another little thing that I wanted to mention that can be quite helpful .
And also , as a stylistic thing is like II I If I draw , if I draw the chin like this and I've got my chin shape and then the neck coming down , what I like to do is just block it in as a big black shape like this .
Especially if I'm sketching , because it's kind of easy to block it in then , because it can get a little bit distracting if you just go and draw like a chin like this .
And then you have a big , big , big jawline like this , Um , and it's something that you can like go and erase later .
But it's a really , really useful visual note , and you can see that I use it on these two where she's got , like , a little bit of , um , a little bit of chin underneath there , a little bit of weight on it , a bit of fat that comes down .
Um , and I've done it on this one underneath to show , like , where ?
Where ?
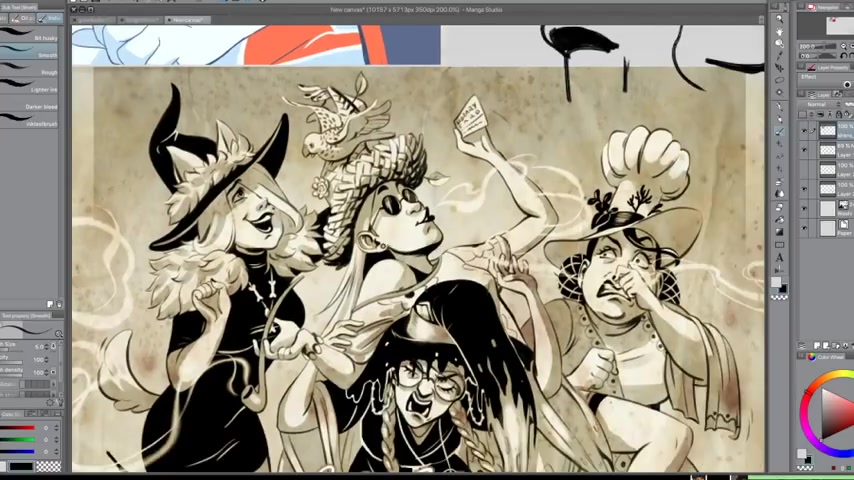
Where the shadow is down there because the skin around her jaw is a lot tighter .
It kind .
It kind of looked like beards when I when I drew that on them .
She she's I guess she's Amish now .
Um , I've got another example up here where I have maybe put that in when I was doing the sketching like I blocked it in like this just to define where that jaw was .
But once I've gone and cleaned it up , I've just indicated it kind of with the lighting that's coming from the bottom , you can still vaguely see that there's a bit of the jaw line there that I've done on the line out layer .
Um , but you can totally see in these things that I've drawn , how I've used those kind of shapes poop poop in putting this stuff together like that .
And of course , angles that are facing upwards are kind of more difficult because you've got the chin .
Um , but you can also do it with these , like , down facing angles .
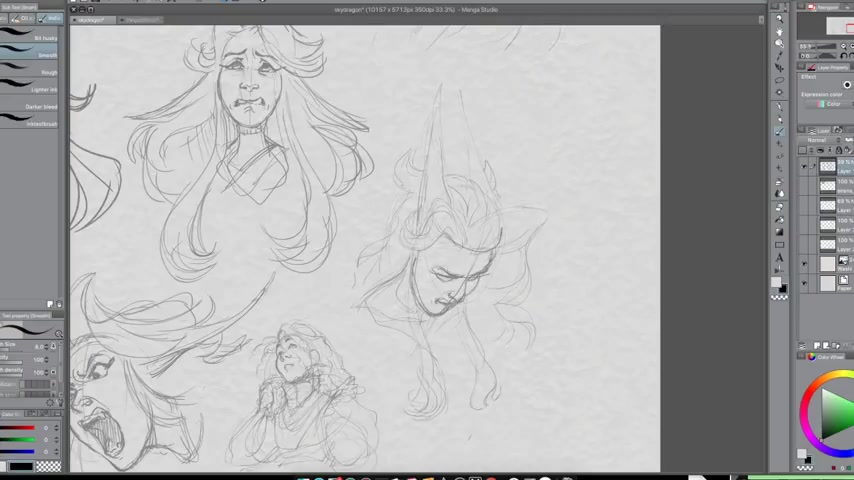
Because , like I said , you can go and put the hairline in like this , Um , and then that gives you the kind of angle going this way down like that to go and draw a face in , like , that kind of angle .
Which is why I've also got that curve not just at the bottom , but at the top as well , because it's gonna help you regardless of what angle you're drawing .
And I mean , then you can , like , go and draw disgusting stuff like this .
OK , so I've got another little sheet of just a few examples of scribbles that I've done anyway .
And , uh , you can kind of see on these that I've got the same kind of structure like underneath when I'm trying to draw them at different angles .
So you can see I've got , like , midline there , and I've got these two curves at the top and the bottom , and then all I've had to do is go and draw the face on .
So let's go and do some that are a little bit more simple and just quick to do at some different angles like these .
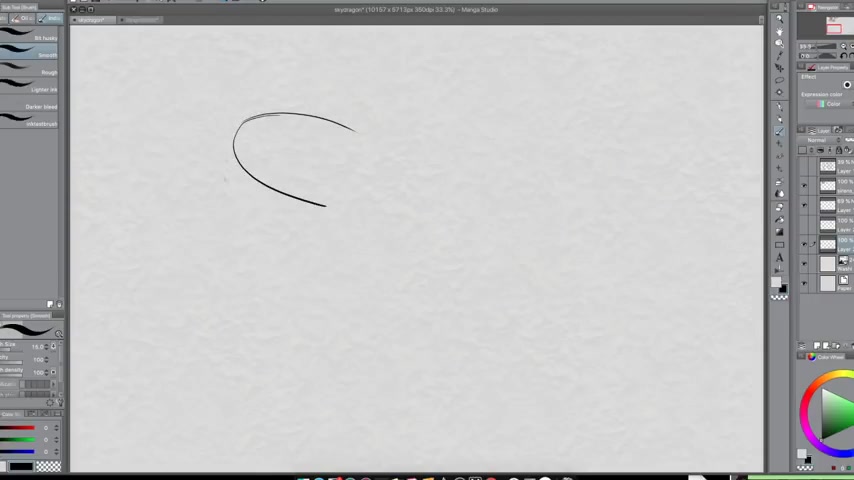
OK , so what I'm gonna do now is go and do some more and we're just gonna go and draw in a bunch of these bases , so I'm gonna give myself , like , one curve and one for the chin .
So I'm just gonna go and draw a sheet of a few of these at different angles , and then I'm gonna go and clean them up .
Now with these , you can also just draw them as a sheet of paper like this .
Uh , as long as you can figure out where to put those curves and then you've just gotta join them up .
Um , you don't always have to draw the circle , but if it does help you , then maybe draw the circle first and then fit the shape around it .
But if you're kind of used to that curve that you get around the top , it's pretty easy to imagine like where the circle is in that and then draw that in .
But we can always go and add the cranium in like this later .
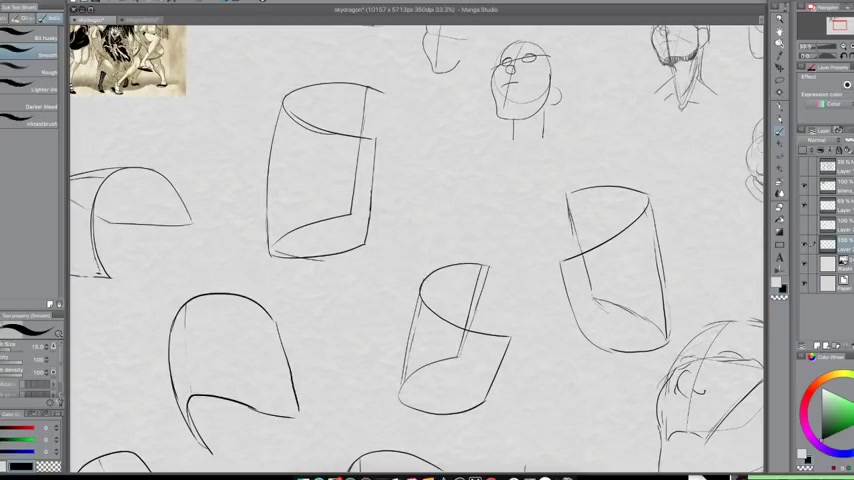
And we want to remember if we're gonna do that to bring it up a little bit because obviously we want this line around here to be defining where the hairline is , and that is gonna be a little bit lower than the top of the head because the hair comes slightly further down from where , where the curve of the top of the head is .
So we've got we've got a little bit of a gap .
So anyway , yeah , we've got a little bit of a sheet of these now , so I'm only gonna go and do these really simply to block out where the features are .
Um And I want to say that you do have to , like , understand a little bit of anatomy and how to draw these features at different angles to be able to do this .
But it's a lot easier when you've got all of this blocked out already to be able to go and put them on .
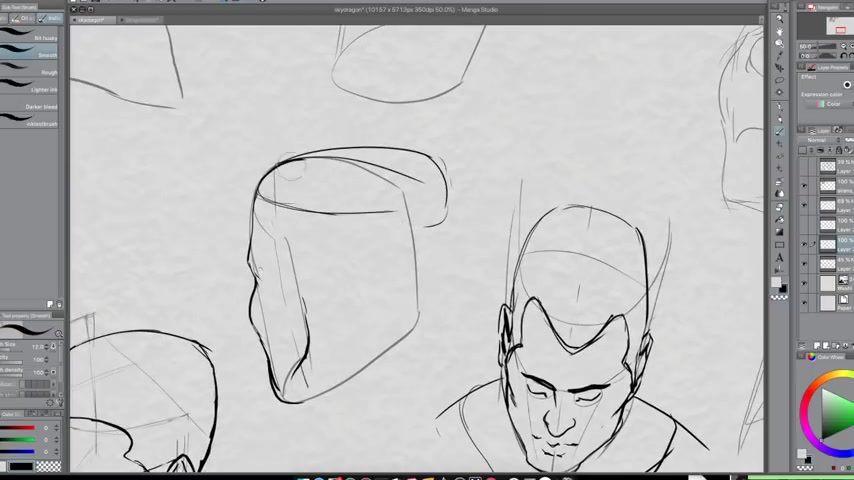
There are also some things like little shortcuts that you can use , like where you can see that I've joined up where the corner of the eye is and brought that down into where the chin is , and there's actually quite a lot of those you can pick up on if you start to , like , go and study faces or , um , I think I've got some other videos where I talk about that kind of thing .
I know I've got ones on drawing male and female faces .
I'll put a link to those at the end , but yeah , you can start to see with these how they are adhering to this form that I've already put down , and it's helped me a lot to go and put things on .
Um , something else that I want to mention is when you're drawing faces at a really extreme angle , then you're going to get quite a lot of foreshortening in terms of just the flat front of the face , and you're going to get things like the nose overlapping with where the eyes are , and you need to be not scared to do that .
Which is another reason why I like to go and put in these circles first , because I'm not committing to drawing anything and then having to go and raise it to put something else in front of it .
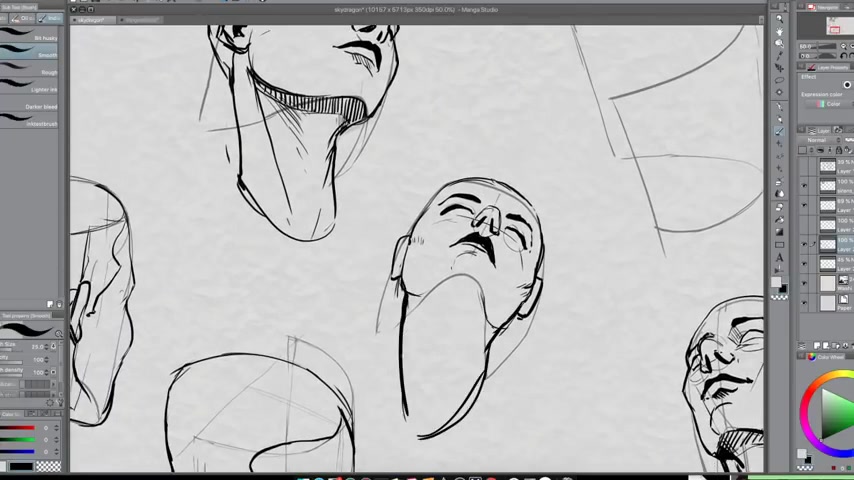
I'm just making sure that I've got the right placement first before I need to go and put any details in .
So I'm not getting too invested in drawing something that's gonna be covered up later with these too .
I'm trying to make sure that I've got a little bit of a range of different face shapes for you guys so that I can show you , um , all different shapes on them .
And like I mentioned before , I'm putting that big bit of shadow on the underside of the chin to block that shape in the face out .
But I'm also doing it partially on the lips just so we can separate them out a little bit easier .
And that's another one of the little visual notes that I like to use occasionally .
And I know that all my previous examples have been quite cartoony , the ones I've showed you , but I wanted to do these a little bit more towards realistic proportions and kind of shapes so that you get to see it in a couple of different styles .
OK , so there we go .
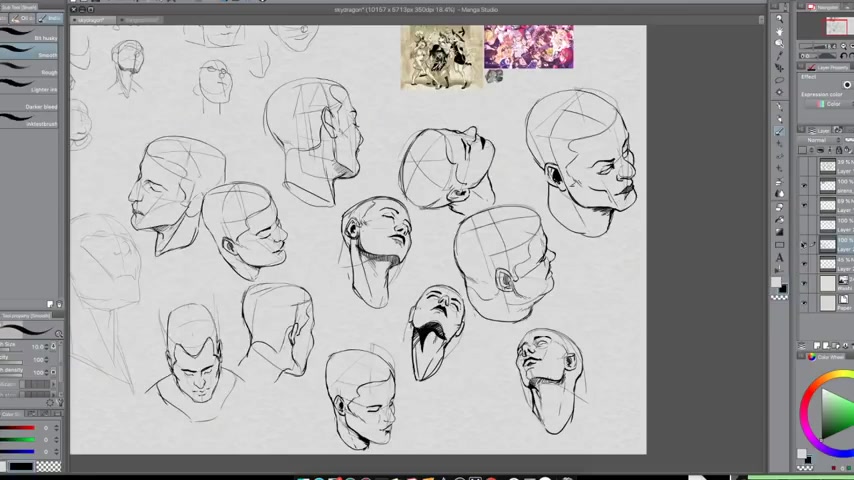
We've gone and clean those up a little bit and put all the features on , and if I flip them off and then back on , you should kind of be able to see how they adhere to these little bases that I've drawn Now , I did have to go and clean them up a little bit because some of the bases were , like , slightly off .
But it gave me a really , really good idea of where the faces were gonna go .
And like I've mentioned it , it you you kind of need to , like , understand a lot of anatomy stuff .
But , um , this is a really , like , really easy way to go and have something to apply those onto instead of trying to go and freehand everything .
Um , and you can see on the top of these I've also been able to go and put this really , um , blocky shape to define cross hairs on the top of the head as well .
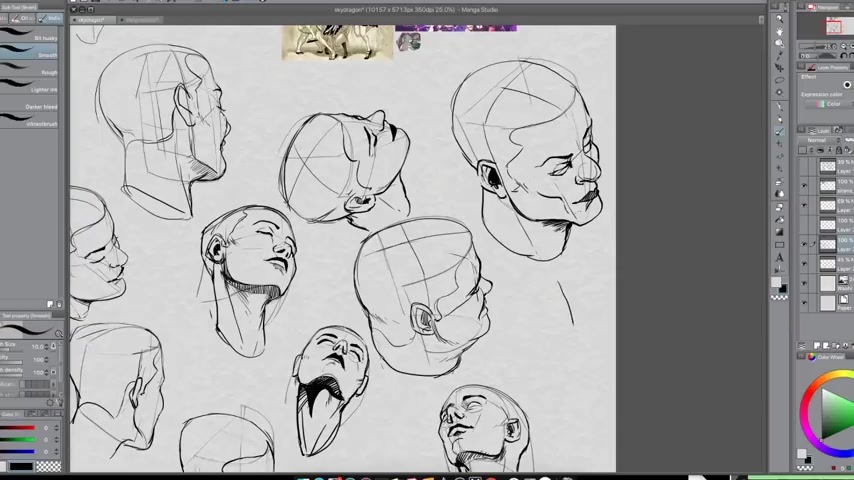
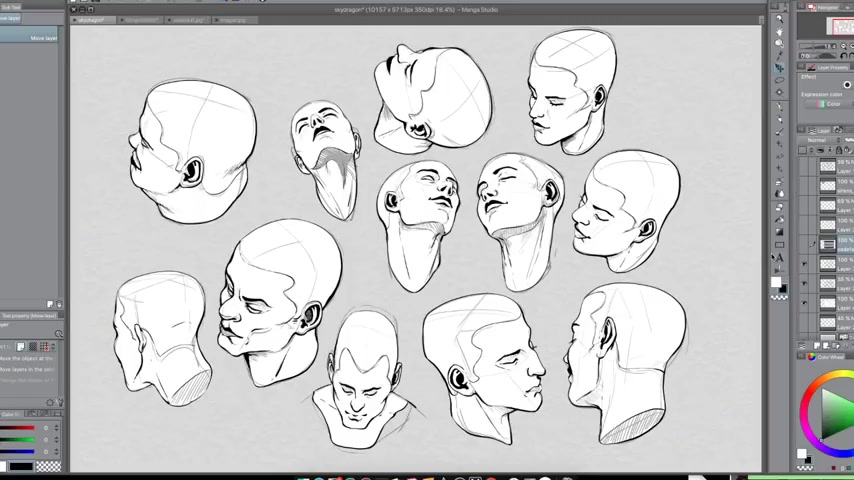
So I think we filled that criteria of being able to have this more organic shape of the curves on the top and the bottom , but also this ability to block it off as though it is a box .
I've tried to differ .
The face shapes on these as well , so it's not just like one kind of face .
So I did someone that was a little bit more jowly around here .
Uh , there's , like , a little bit more on the underside of the chin where we can see that little bit coming out on the neck there .
Um , I've also tried to kind of indicate that on these two as well .
So it's , like a little bit softer around here .
And I did just want to reaffirm again the importance of , like going and studying , because this isn't from me , Just like messing about , um I've got , like , a whole tonne of , like , studies from photographs that I don't really post .
I know , I know you guys know that I've got one of those big 600 page sketchbooks , and I've pretty much filled that thing with just , um , studies from photo references .
So this isn't just a case of me going and pulling all this stuff out of my book .
This is from a lot of study and trying to figure out all the anatomy and shapes for myself and then from that kind of coming up with this little concept that helps to put them all in place and get them at awkward angles .
Uh , yeah .
Thanks for watching , lads .
I hope this helped .
If it did give us a like share if you think it'll help someone else and subscribe for new videos on Fridays And like occasionally Saturdays too .
Because why not ?
There's a link in the description to the Discord Group as well as a link to my commission , information and places that I have prints of things that I've already drawn .
I'll also post a few links to some other videos .
I have a playlist of other drawing tutorials and some speed draws of the other pieces that I had in this video .
Uh , yeah , I .
I hope this helps .
Thanks for watching .
Bye bye .
Yeah .
So , uh , do do you Do you guys think I've improved from from the last one ?
I 00 , I think I think I might have lost .
Are you looking for a way to reach a wider audience and get more views on your videos?
Our innovative video to text transcribing service can help you do just that.
We provide accurate transcriptions of your videos along with visual content that will help you attract new viewers and keep them engaged. Plus, our data analytics and ad campaign tools can help you monetize your content and maximize your revenue.
Let's partner up and take your video content to the next level!
Contact us today to learn more.