https://www.youtube.com/watch?v=FDZ7xhArTr4
How to Start a Blog in 2023 – Easy Guide for Beginners
Hey guys , it's Scott Chow here from the blog starter dot com .
And we're just gonna jump right into this tutorial on how to start a blog .
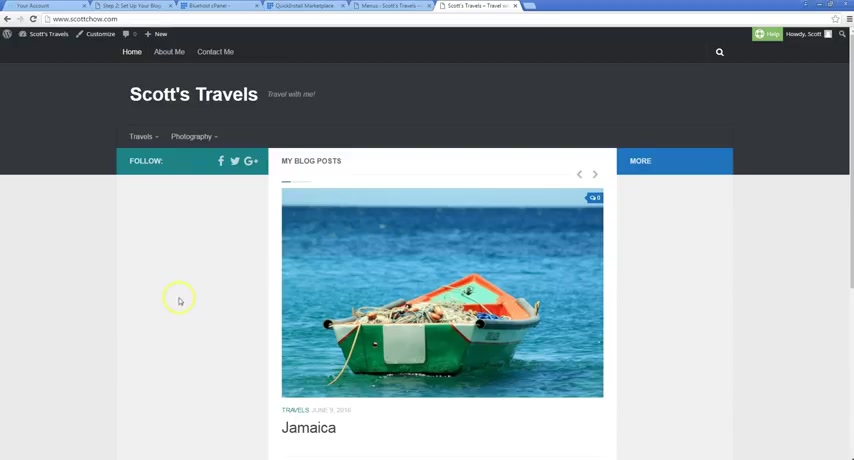
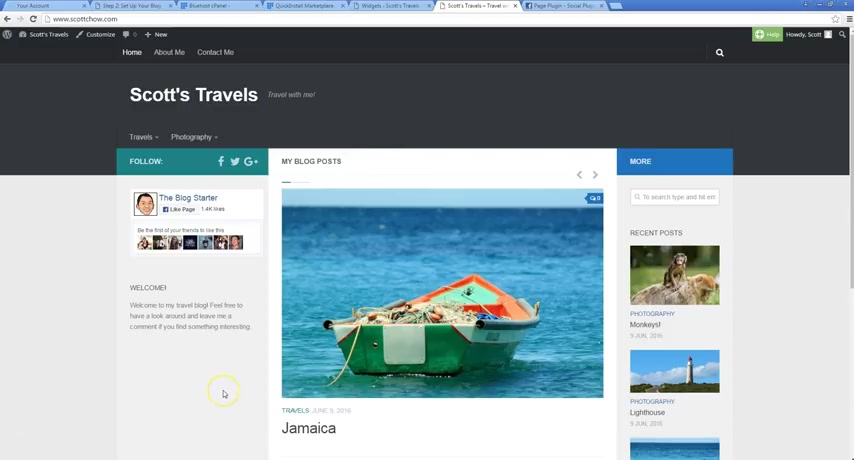
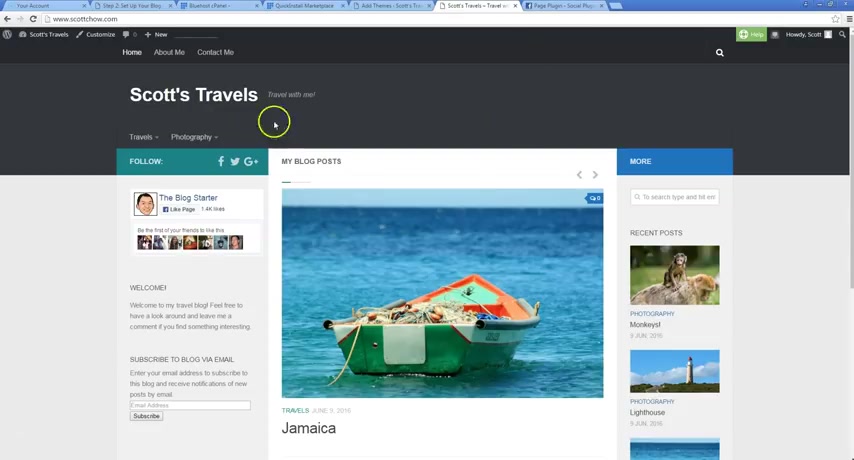
Um I'm gonna show you what the blog looks like first to start with when it's completed .
Um And if you want to see this blog , I'm gonna leave it up here .
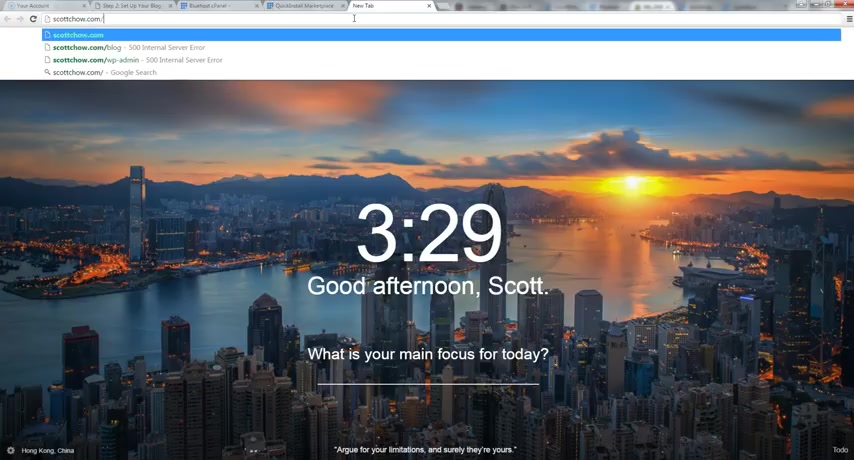
It's at scottow dot com .
You can actually go visit it and see how , you know , it interacts with an actual user on the site instead of just watching the video .
Um But this is what it looks like .
This is just , you know , my kind of sample blog .
Uh And you'll see in the tutor in the tutorial as we go through it , you know , there's a bunch of different customizations we can do .
This is just the way I decided to set it up , you know , you'll see there's ways to change , you know , the colors here , the background colors , the text , you know , the pictures , uh the whole layout , you know , if I don't want to have , you know , this here , I can move it over here .
If I don't want to have this at all , I can delete it .
If I want to add , you know , some other functionality at this site , I can do that .

But just keep in mind , you know , that this is not the way your blog has to look .
This is just how I kind of show you uh a basic blog and how you can set things up uh one way anyway , if you want to set it up this way .
So let's just go over some of the things that are in this blog .
Uh First off , we've got this menu up here which shows uh a link to the home page , link to an About me page , a link to a contact me page .
You'll see on the contact me page .
We've added a form here so people can contact you and send you a message easily .
We go back to the home we'll see here .
We've got another menu .
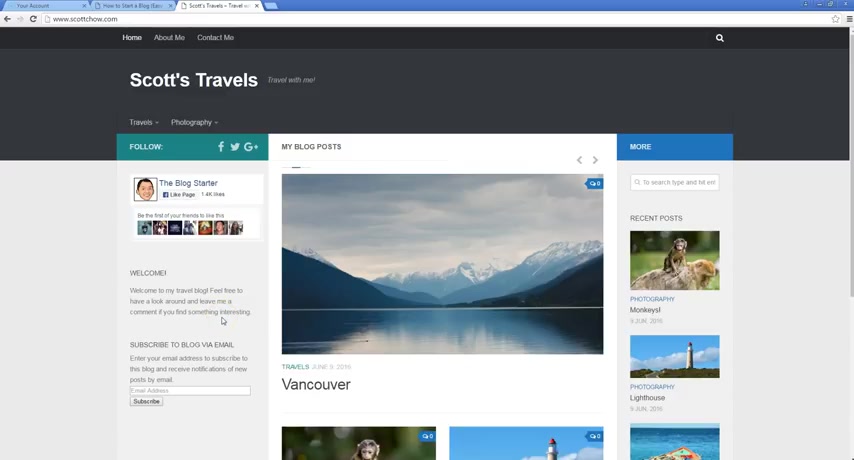
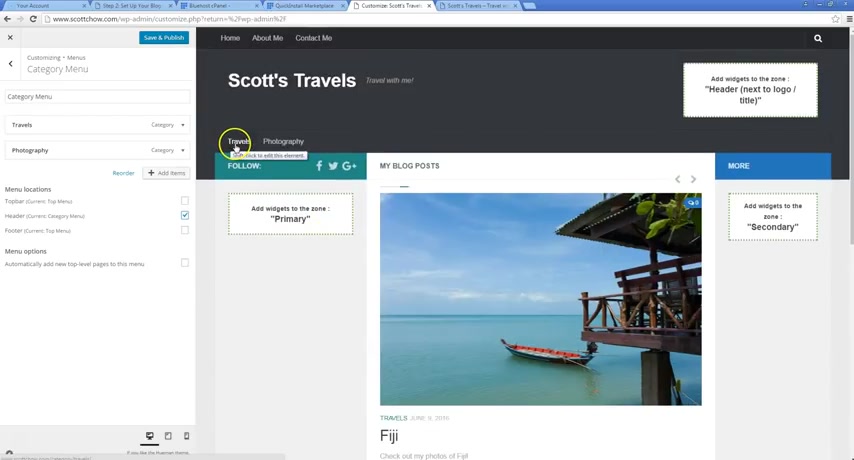
It's a nice drop down menu which shows my blog posts in the different categories that they're in .
So , here's all my blog posts related to my travels .
Here's all my blog posts related to photography .
Um In addition , we've got social links here .
So a link to my Facebook , a link to my Twitter , a link to my Google plus , you can customize those .
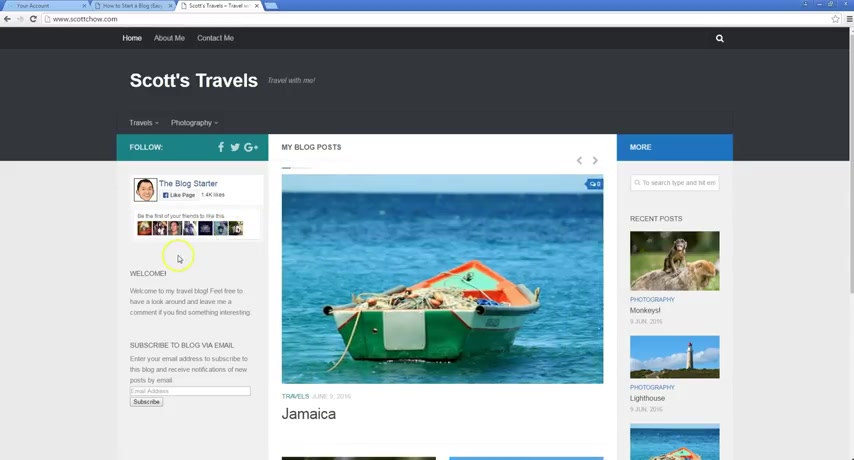
Leave those out if you want , you can add in linkedin your Flicker page or youtube page , you know , whatever it is uh that you want to add in uh or leave out you can do that there .
We've also got a nice little widget here uh that shows my information from my Facebook page .
It lets you like my page .
Uh It shows other people who have like the page .
Uh So it's another way for people to connect with me once they've come to my blog , also got a little welcome message here and really important here .
Uh is a way for people to , to subscribe to your blog .
And what that does is someone puts an email address in , they click subscribe , they're going to get updates every time you do a new post on your blog .
So as I go over in the tutorial , it's really , really important that you have that on there .
Uh Because a lot of people are gonna , even if they like your blog , they may forget to come back to it .
Um And if you can get them to subscribe , then they will always get notified and they'll always be updated on your blog .
So they'll know , you know , when there's something new for them to check out there .
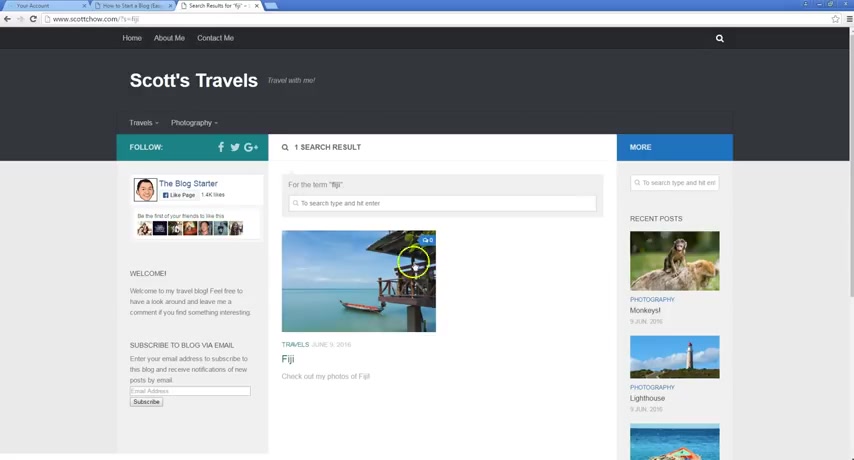
In addition , we've got a search box here that helps us search for any posts .
Uh that might be a little harder to find .
So for example , you know , if I wanted to find um my post on Fiji , you don't see anything on Fiji here .
But if you click , if you click here and you type in Fiji and the search up , there's my post on PG , it comes up in the search box .
So that's really useful to have .
Also recent posts are all here and the bigger posts are here and in the bottom here , we've got another little menu here as well as our social icons .
And again , this is just one way you can set up a blog .
Uh If there's something on here you don't like , you absolutely can leave it out .
And in the tutorial , it will become really apparent and easy to see how you change things and how you , you know , add other things in or change colors or change the whole layout and the whole style of the blog .
Um Your blog can really look like anything that you can possibly dream of .
Um It's pretty much just click and drag and copy and paste type stuff that you need to do .
Um So it's really something that pretty much anyone can do .
So as we go through this video , keep in mind um that this is really designed to be used with the tutorials on the blogs starter dot com .
So you see the blogs starter dot com .
Um check those out .
Um Sometimes there's a little , they're a little bit easier to follow than a video , the video , I , I try to go slow , but it always goes a little bit faster and here we've got screenshots and , and um you know , other stuff like that um That'll make it easier for you to follow along .
So back to the blog here .
Keep in mind you see up here at scott chow dot com .
So that's a custom domain name .
So I chose that domain name .
I want my name to be my blog name .
And so that's what I registered as my domain name .
So that's really the first step to creating a blog is you need to come up with a domain name to use .

So it's kind of a big question , you know , what do I want everyone to know my blog as um if it's going to be a personal blog , like mine is , that's just gonna have content , you know , related to me .
You know , for me specifically , I've got stuff related to traveling or photography and , and um a variety of other things on the site .
Um I just use my name .
I think that's always a great option .
Uh If you don't want to go that option with that option , you can do something else , you know , maybe you're gonna have , you know , a blog about a specific topic .
Let's say you have a blog about cooking , you know , you can call it something else .
You can call it , you know , Scott's cooking blog or you can leave your name out of it entirely and just call it , you know , down home cooking dot com or um you know , whatever , whatever strikes your fancy .
Um But the important thing to keep in mind is that if you're picking a really , you know , simple common name , it might already be registered and um to , to check and see if that's the case .
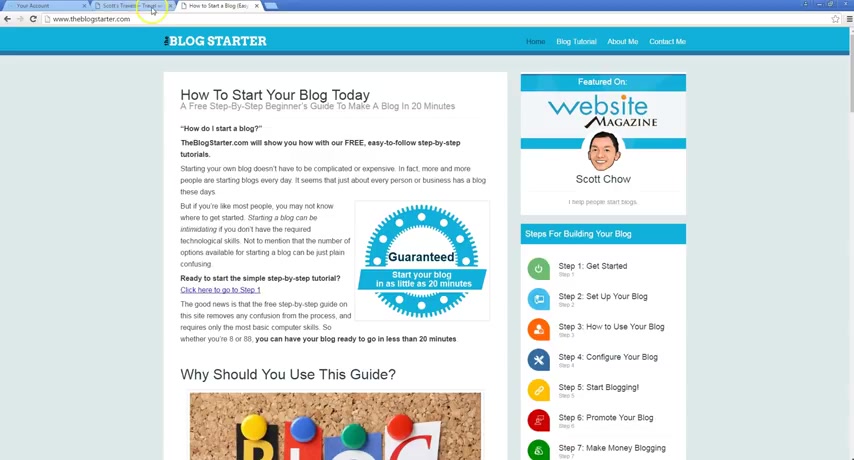
What you're gonna wanna do is on the blog starter dot com .
If you go to step one here , you'll see .
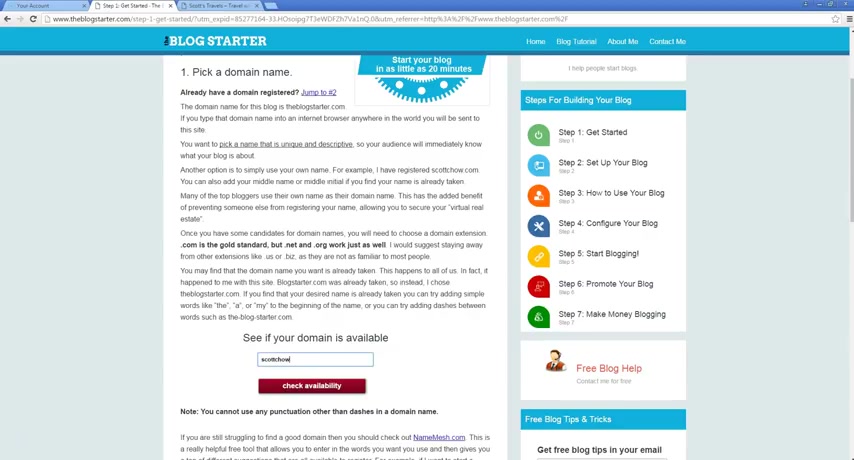
The first step as I'm talking about is to pick a domain name .
And then we're going to need to see if our domain is available .
So for example , if I want to search for , if I want to see if Scott Chow dot com is available , I type that in and click check availability and it's gonna say already taken .
It's because I've already registered it .
But let's say I wanted to do , let's see , Scott's new blog dot com , check availability and domain available .
Good .
So that means it's free for me to register .
No one else has already registered that domain .
OK ?
So now that I know I have a name , you know that I know is available , what I'm gonna want to do is register it .
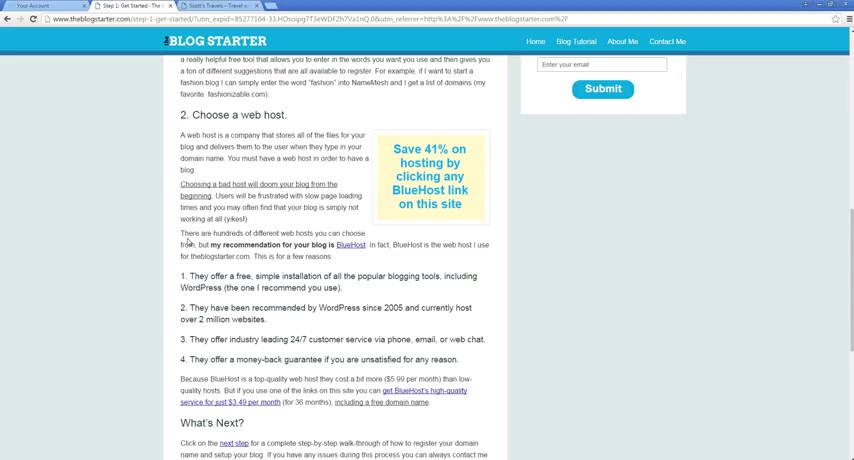
And I'm also going to want to get web hosting for my blog .
So web hosting is the service that actually puts your blog online .

So you cannot have a blog or any other type of website for that matter if you do not have a web host .
Um So it's really important that you choose a good web host because that's what ensures that your blog is online .
If you choose a bad web host , your blog can be down , it may be run really slowly , it may have a bunch of other problems .
So the host that I really recommend that you use is blue Host .
Um And there's definitely , you know , a lot of good things about Blue House , but one of them is that they offer you a free installation of wordpress .
And wordpress is the software that I built this blog with .
Uh It's also the software that I actually use on the blog starter dot com .
It's the most popular blog software on all of the internet .
In fact , it's something like 23% of all sites are using wordpress .
So it's hugely popular .
It's really easy to use , it's really customizable .
Um And it's free .
If you are on blue host , you can install it for free um and use it for free .
So that's really awesome because a lot of the other Softwares out there , they let you , you know , install one page on your blog for free and then they charge you for a bunch more afterwards .
So you definitely , you know , want to avoid that .
I think wordpress is definitely the way to go .
Um And the other recommendation or the other reason I recommend , you know , blue host is that they have also been recommended by wordpress uh since 2005 , which is , you know , a huge deal .
Um You want a web or a web host that's really gonna be trusted and really gonna work well with wordpress .
Um In addition , they've got their customer service , they've got their money back guarantee , et cetera .
It's , you know , the really quality stuff .
And if you use the link on the blog start dot com , you get a discount as well .
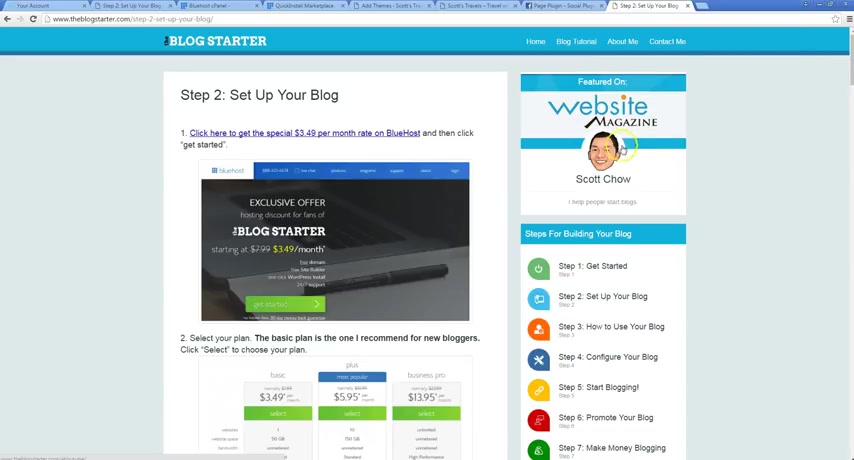
So , um so let's look at actually setting up your page with blue hosts .
So to do that and click one of the links here on the blog starter dot com .
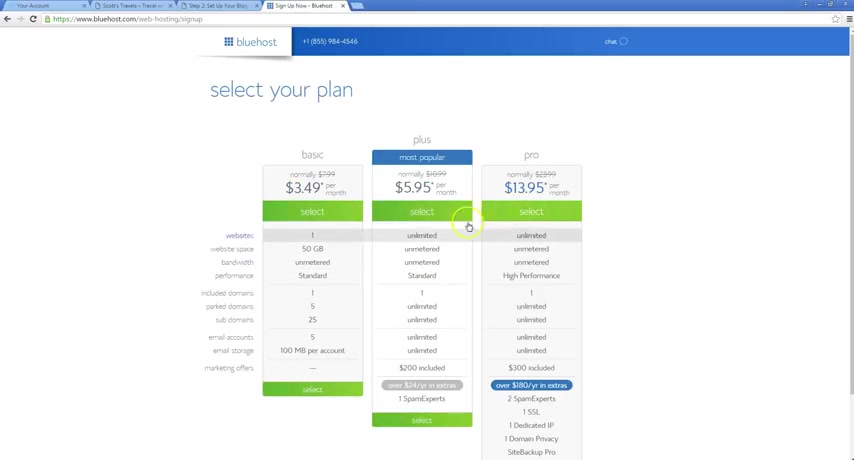
Again , that's gonna get you the discount and it's gonna take you to this page , click , get started and select your package .
So for new bloggers , I really just recommend this basic package .
These other ones are nice if you , you know , really know that you need this stuff , but most people don't and in the event that you find that you do , you can always upgrade later .
So select the basic package and then I'm gonna put in my domain name , click next and that says , congratulations .
The domain is available and we are just gonna fill out our information here and then we're gonna select our package .
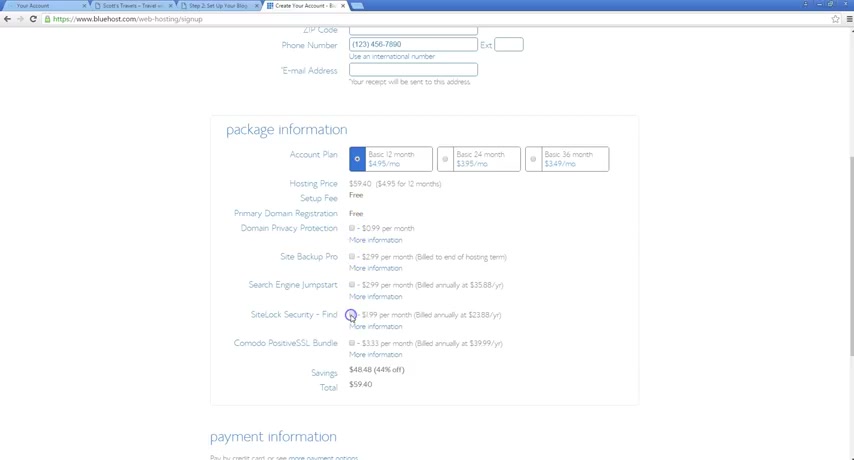
So I like the basic package if you're just getting started .
And I also like to uncheck all these boxes here for these add-on products .
Um Some of these can be useful , you know , if you really feel like you need them .
But again , it's something that I would just recommend that you pick up later if you feel like you need it .
You don't need to get it right away .
You can always add these things on later .
There's no advantage to getting them now .
So like the basic package you put in your payment info and you click submit , ok ?
And then once you're done with that , you're gonna get your confirmation email from blue hosts .
And uh the next step is going to be installing the blog software and customizing it .
Ok ?
Now that we've got the hosting account registered and we've got the domain registered as well , we can start to actually install the blog .
So to do that , we are going to go to blue hosts dot com .
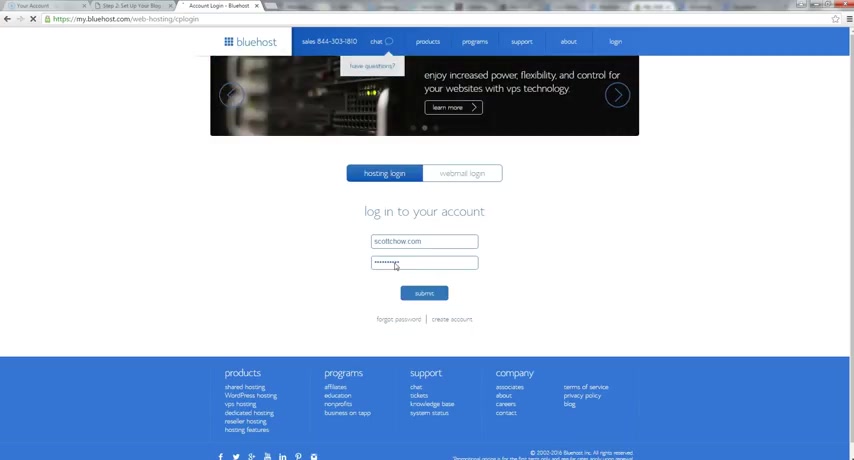
And then on the top right here , we're gonna click log in and then we're gonna put in our domain name here and our password and the password was sent to you in an email from blue hosts .
Um So , oops , I forgot my password , speaking of that .
And so after you register your account with Blue House , you should receive a confirmation email typically within about 10 to 15 minutes .
Um Sometimes it takes a little bit longer just depending on um how things are going uh with the amount of people signing up with them .
Um But once you get , it should have the password in there , then you just go ahead and you'll log in just like I just showed you there .
And once you're in this is called your C panel or your control panel and you'll see there's a bunch of different things you can do here .
Um And on my site , I show you a bunch of different tutorials for things like how to set up a custom email account with your domain name and variety of other things .
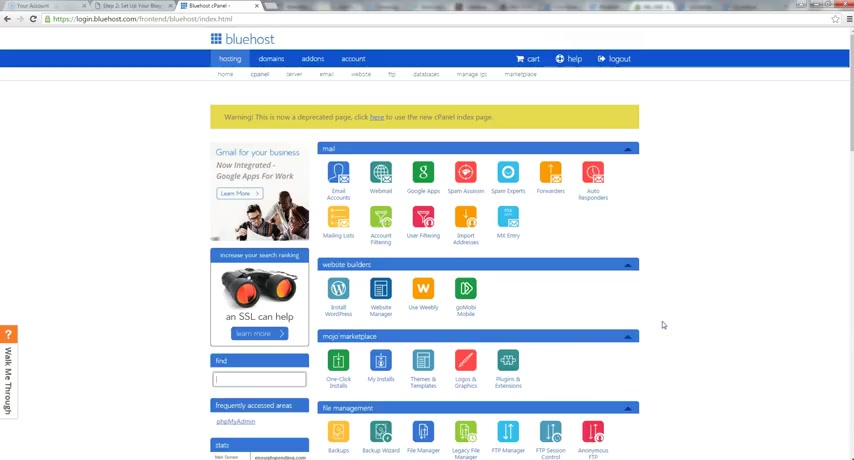
But the thing we're gonna do now is we're gonna install your blog and we're going to install uh wordpress , which is the blog software we're gonna be using .
So we're going to click here on install wordpress and this is gonna take us to the Wordpress installer .
So once we're here , uh we're gonna click on install to actually get the process started .
But I want to point out see below here .
There's several options where you can actually pay someone at blue hosts to do what we're gonna do uh for a fee .
Um But we're gonna do this all for free .
So we're gonna actually save , you know , several $100 here by following this tutorial .
So I just want to point that out and we're gonna click install and that's gonna take us to the installer page or the second step of the installer page .
And then we're going to select a domain from the drop down here .
So you probably will only have one domain in your account .
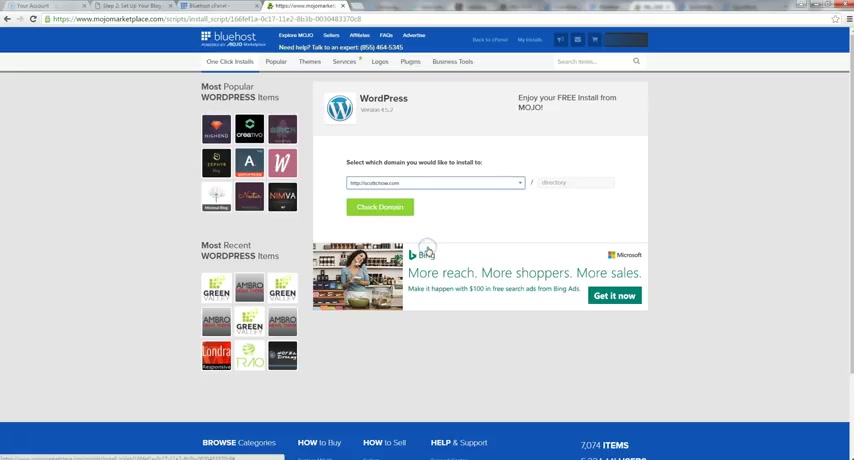
But in case you don't uh just scroll down , find your domain , select it .
Now , this directory here , we're gonna leave blank .
Uh That's if you want to install your blog on a subdirectory of your domain name .
But 99% of people aren't gonna want to do that .
You're gonna want people when they go to your domain name , when they go to Scott chow dot com or your blog dot com , you're gonna want them to see your blog first thing .
So that's how we're gonna set it up .
So let me click check domain and this just takes a like it says , it can take a couple of minutes while they make sure that there's nothing else that's going to prevent us from installing the blog software .
So let's give it just a second .
OK ?
And now that that's done , we are going to click here on show advanced options and then you can put in your site name and title here .
I'm gonna leave it like this because we're gonna actually change that .
And the next step when we customize things , uh you can also put in , you're gonna want to put in your admin user name .
So this is just , this is a new account that you're creating .
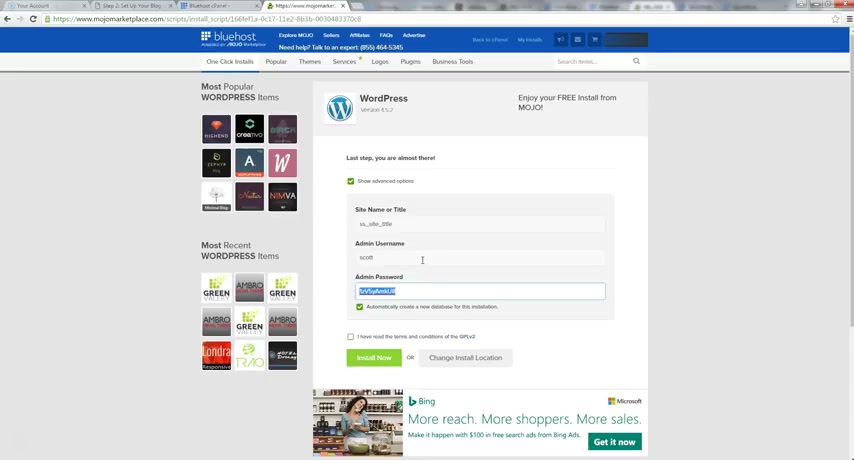
So you decide what you want that user name to be .
Uh I'm just gonna make mine Scott .
And then I will also uh set my password as something that I can easily remember .
Not this crazy one here and keep that box checked .
You're also going to check this box here that you read the terms and conditions and then you're gonna click install .
Now and that's gonna actually install the software for you .
Now , this takes , you know , typically 2 to 3 minutes for it all to install .
Um , and then you'll see a pop up that's gonna show you it's gonna say install complete .
So we'll see that in just a second here .
Ok ?
And once that's done , you'll get a little message here at the top saying your install is complete .
So now it's time to actually log into our blog now that the software is installed .
So to do that , I am going to go to my site slash WP dash admin .
This is your log in URL .
So it's a good idea .
You probably want to bookmark this as well just so you don't forget where it's at .
Although there are other ways to get it , which I'll show you later .
So go there and now that we're at the login screen , just put in either the email that you put in or when you register the site or the user name we just created .
So I'll just do the user name and my password and you can click , remember me if you want um and then click log in .
And so now we're in the back end of your site .
So the first thing to look at is this is not what everyone else is seeing .
This is only what you're seeing because you're logged in .
If you want to see what everyone else is seeing , you're gonna go up here and then you're gonna go to visit site , open it in a new tab here .
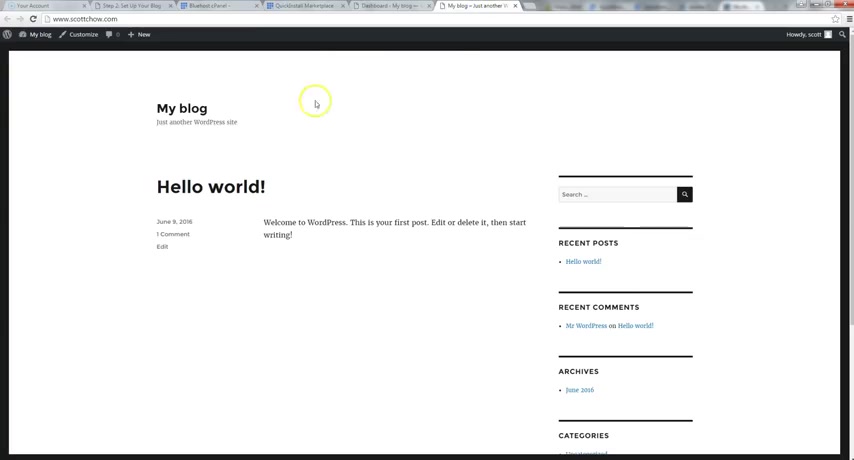
This is what it currently looks like .
It's pretty plain , just very basic .
So we're gonna change that here in just a few minutes as we go through .
But if you ever need to see what the site is actually looking like to other people , you just go up there , the , when you're in the back , back end , you go up there to visit site and you can get a look at what other people are seeing .
Uh It's important to keep in mind too .
This is not exactly what everyone else is seeing because there's a little bar at the top here .
Um That shows a variety of different tools that you have as the administrator .
Not everyone's going to see this , you're only seeing this because you're logged in .
So if you really don't , if you really want to see what it looks like , then you would go here and you could log out and then you'll see it without this black bar , but I won't do that for now .
Um So let's go into the back end uh where we logged in and this is we're gonna make all your changes to your site .
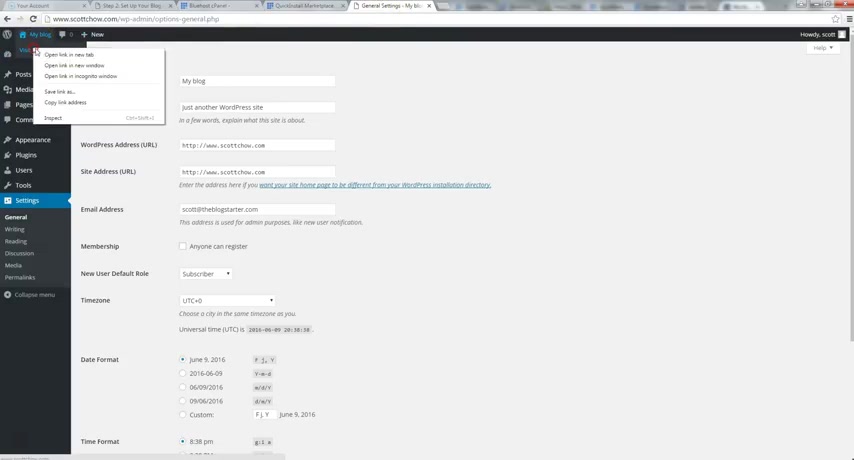
So to start with , we're gonna go to settings and click general and this is where we can change our site title .
So the site title is what you're gonna see at the top in the in some in a tab or it's also what you're gonna see .
Um A lot of times right here .
So currently my blog is listed as the blog title and the subtitle is just another word press site .
So we obviously want to change this .
We want to make it a little more personalized .
We want people to know where they're at .
So , um for the site title , I'm gonna make this a travel blog , So I'm gonna call it Scott's Travels and you can always change this later too .
And for the subtitle , um I mean , I'll put something like travel with me .
Um Now , next , we have the URL S .

So the URL is just the domain name of your site and you can change these a little bit if you want , if you want to remove the www , you can , if you want to leave the www in there , you can .
Um But that's the only change you should make here .
If you mistype anything , you know , if I put another letter in here , that's basically gonna break my blog and not make it work and there are ways to fix it , but it makes it more complicated .
So for , for most cases , I would just leave that alone .
Uh Your email address is the one that we set up when we installed it , you can change that if you need to .
And then once you're done making changes , you can just click save .
OK ?
So the next change we're gonna make is we're gonna go to Perma links here and Perma links basically dictate the format that your sub pages will be in .
So my site is Scott chow dot com .
But when I create a new blog post , it's gonna be on a separate page .
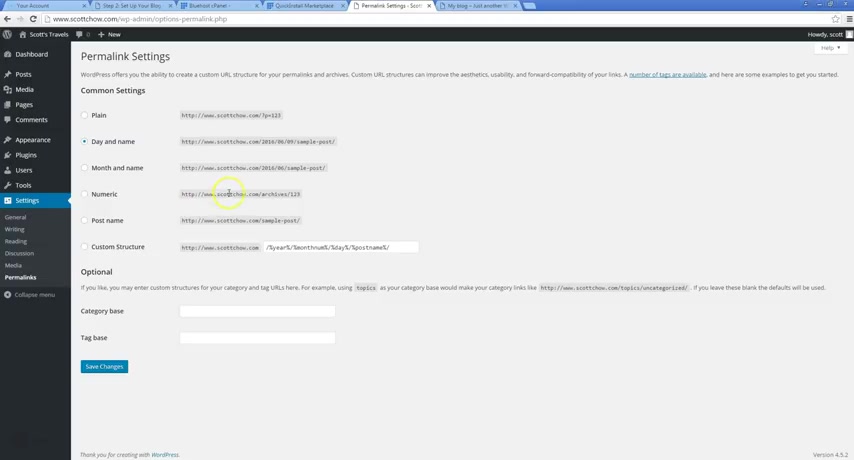
It's gonna be Scott chow dot com slash my blog post or whatever it is .
And this is where you set the format that you want things to be in um for your sub pages .
So the one option here is plain , which basically just assigns a random number to it .
And there's a similar option here called numeric .
I wouldn't suggest either one of those because they're not very descriptive .
I would suggest either picking day and name , month and name or post name because those are going to show the actual name of the post that's a little more descriptive for people and it works a little bit better for sco in terms of your in terms of your search engine rankings .
So I personally like post name .
Um So I'm gonna pick that I'm gonna click save changes .
And the next change we're gonna do is we're just gonna look at users .
So we only have one user here because it's just my blog and we're gonna just click edit and there's a variety of things you can change in here .
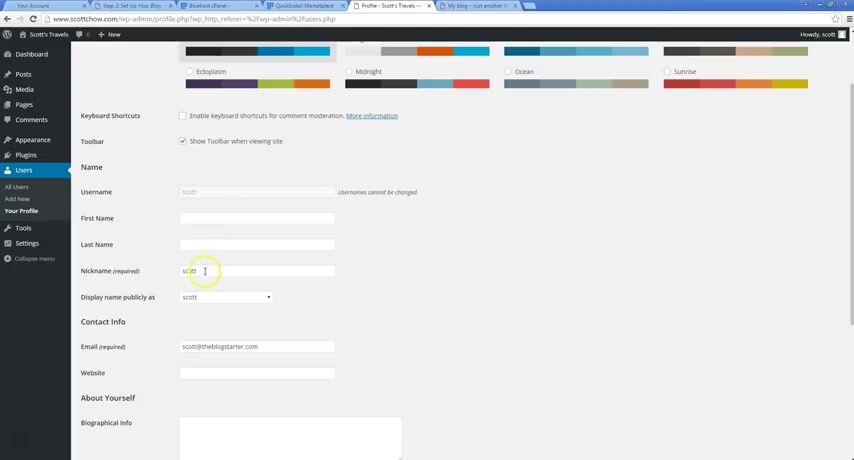
The only thing I'm gonna change for right now is the nickname .
So this nickname is what actually shows up on the site .
So when I write a post , it'll say buy Scott or buy whatever .
So um I'm just going to capitalize this because it's by default , it's set to your user name .
So I didn't capitalize my user name .
So I'm gonna change my uh name there .
So if you want to blog anonymously or whatever , you could just put , you know , by blogger , by administrator or something like that .
So just change that click update profile to make sure those changes go through .
OK ?
So now that we've got those kind of administrative things out of the way we're gonna look at actually creating some content .
So the first thing we're gonna do is create some pages .
So pages are different than blog posts .
Pages are used for things like an about page , which is what we're gonna create first .
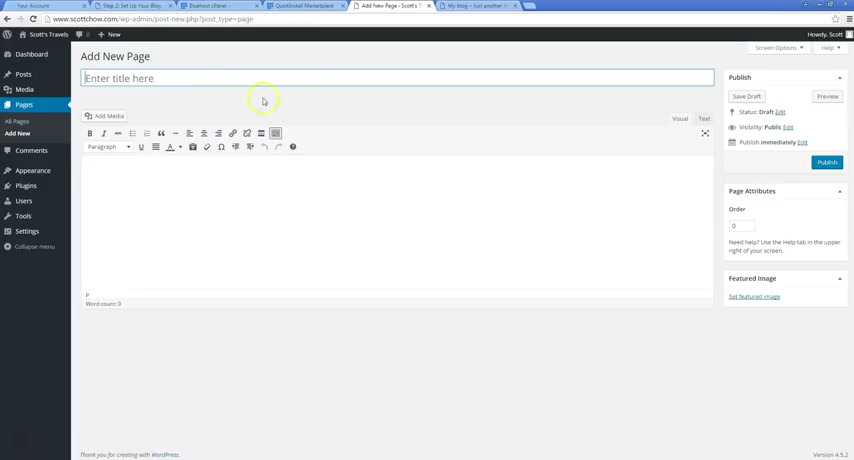
So to do that , let's first get rid of the sample page that's in here by just clicking trash and then we'll click add new to add a new page .
And this is like I said , it's gonna be about me .
So I'll just call it about me and I'll just put in a little bit of text there .
Obviously , you're gonna put in a lot more .
OK ?
So as you can see , we set our Perma links to show the actual um just name of the post or page .
So it just makes about me part of the URL and when we're done , we're just gonna click publish .
So now at this URL , you will find the About Me page .
So about me , my name is Scott .
Again , this is looking really plain and we're about to change that in just a couple of minutes here .
So just bear with me while we put some more content on the site .
So , uh we've got a simple page there .
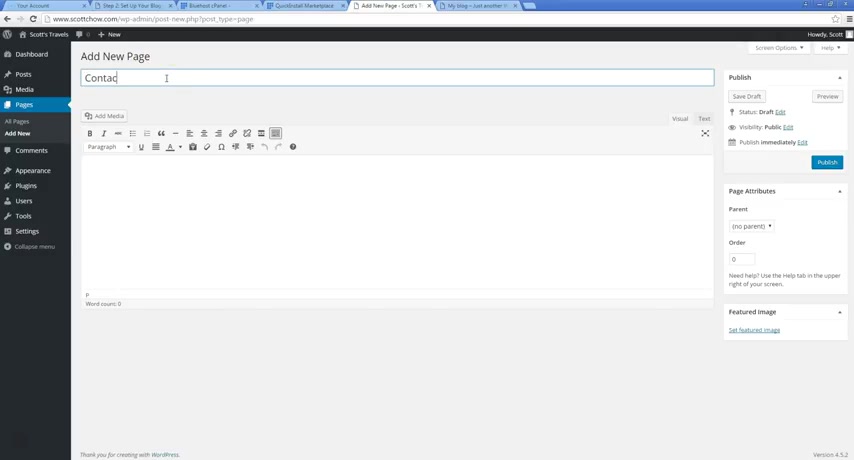
Uh Now let's go and uh look to add another page , uh contact page .
So I'll put contact me and this is a page where people can reach me if they have any questions about my blog or just want to connect with me .
So I'll just put , feel free to contact me with any questions .
OK ?
So that doesn't actually give people a way to contact me again if we look at it now that I published it .
If we look at this , it just says this , there's no actual contact form .
So we want to have a form there , people can fill out their name and their email address and put in a little message and have it sent directly to me .
So to do that , we're gonna do a plug in and a plug in .
Uh Let's you do a variety of different things .

There's thousands of different plugins that you can use with wordpress and they do anything from adding a contact form like we're going to do to adding maps or photos or a variety of other things .
So plugins are really cool and there's a lot of different uses for them .
Pretty much anything you want to do on your blog you can do with a plug-in .
So to add a plug in , I'm gonna go plugins and click , add new .
And the plug-in I'm gonna do is called Contact form seven .
Now , there are a bunch of different contact form plugins that you can use .
You can see there's this one , there's this one , there's this one , but I personally like contact form seven .
It's a very popular plug in and it works really well .
So I'm gonna click install now and then I'm going to click activate plug-in .
So now contact form seven , the plug-in is activated .
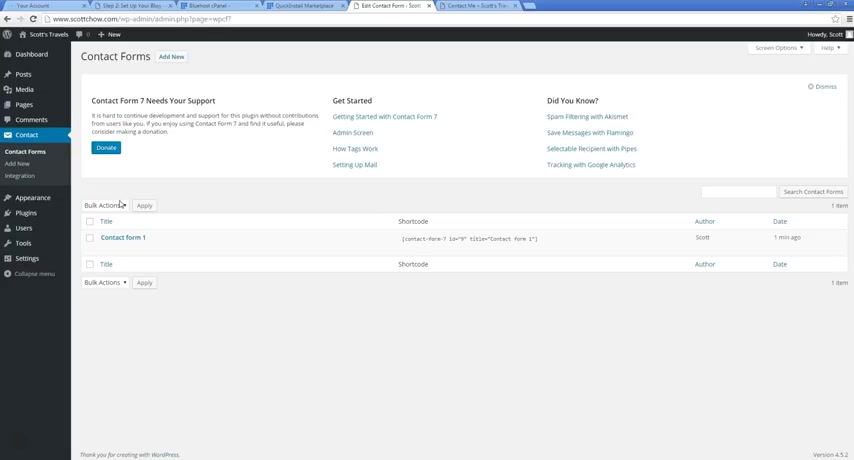
So what I need to do next is I need to actually configure it so that I can use it as a contact form on my site .
So we see here , there's already a contact form created for us a basic one .
So let's add it a little bit .
So right now it's gonna show it shows the different fields that are here .
So there's your name , your email , your subject , your message .
That's pretty good .
I think I'm just gonna leave it like that .
You can always change these fields around or add other fields in .
There's a lot of functionality this plug in .
But basically we just , we just want something pretty simple here and keep it as is .
So I'll go to my contact forms and you can see there's a thing here that says short code , this is the code that we want to copy and then we're going to paste it into our contact page and it's gonna show the contact form for us .

So just select that text and then you can either right , click and click copy or what I like to do is it's a neat little trick .
If you don't know this .
A lot of people don't know this , you just hit control C and that copies the text .
And then I'm going to go back to my page that I created my contact page , just contact me and I'm gonna click edit , see the text I added before and now I'm going to paste in that text .
I'm gonna control V to paste that text .
OK ?
So now that little code is there , I want to click update .
So now when I go to my contact page and I refresh it , we see this actual contact form here so someone can put in their name , their email , subject , their message and then they click send and it'll get sent to your email .
So that's pretty cool .
It gives people a way to contact you in touch with you um outside of the comments box that you'll also have on all your blog posts .
OK ?
So now that we've got a couple of pages set up , let's look at doing some actual posts .
So an actual blog post .
So there's a , a sample blog post in here called Hello World .
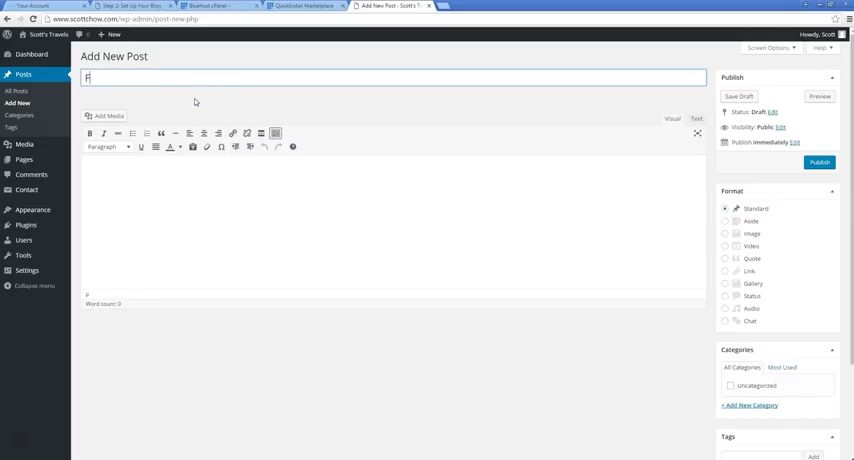
We're gonna delete that and then let's add a new post .
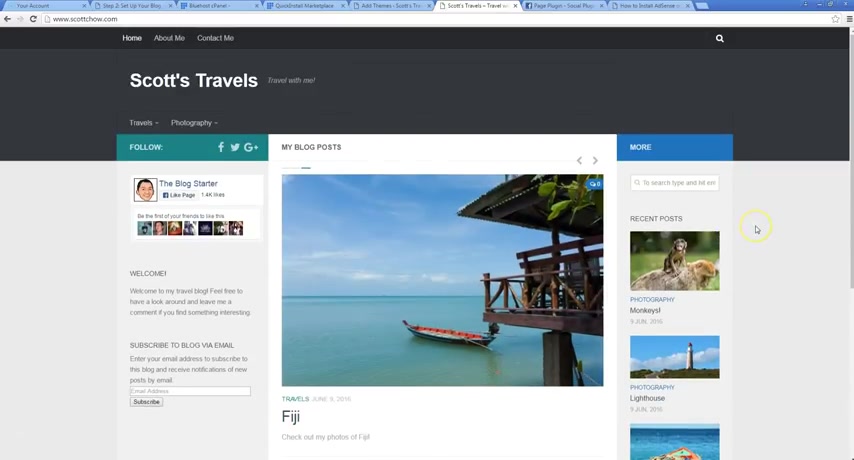
So , like I said , we're gonna make this um a travel blog .
So let's do a couple of posts about traveling .
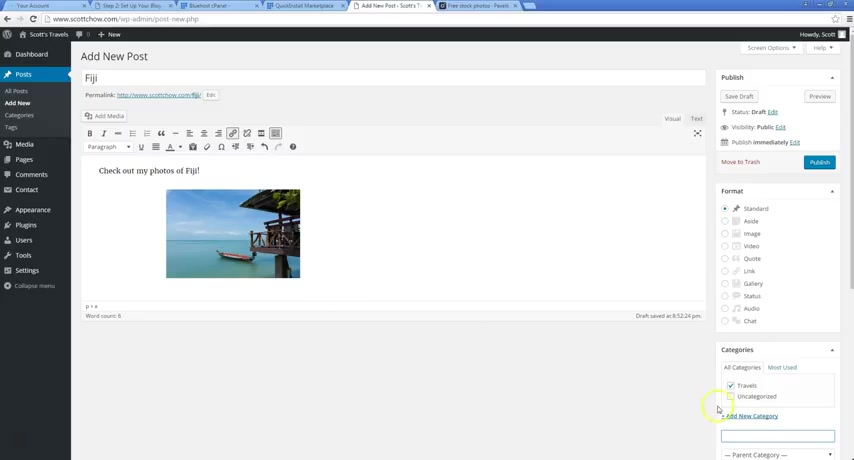
So we'll do one about Fiji and I'll put in , check out my photos of Fiji and then let's actually add a photo here .
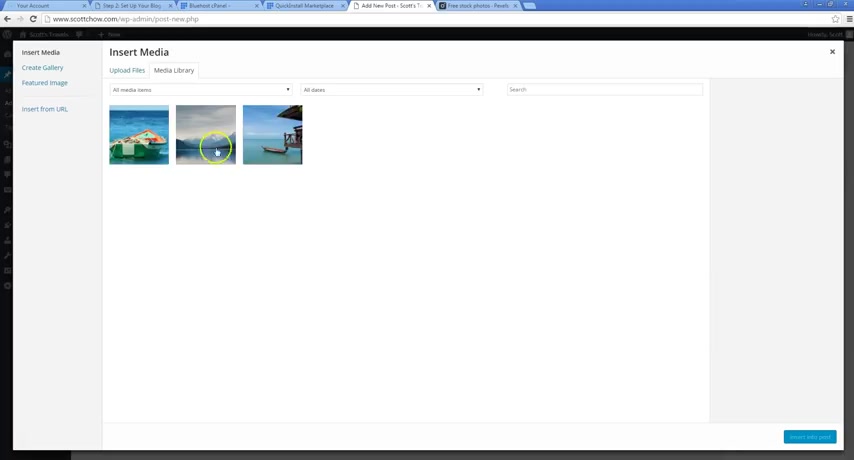
So to do that , we'll click , add media and we're going to upload files .
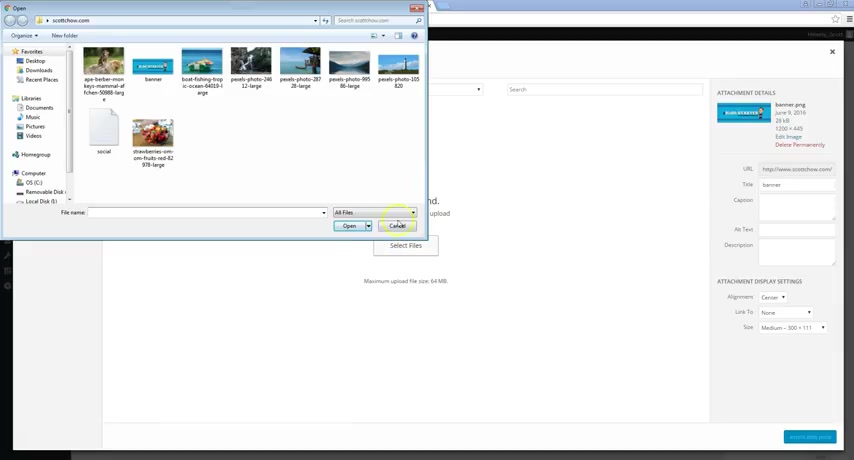
So I'm gonna click select and then we're just gonna pick a file and I've already put some into a folder here .
Um And I'm gonna pick this one looks like to me , these are not my actual photos .
I just did some stock photos .
And by the way , uh before we had this photo , if you were looking for free stock photos , I think , you know , there's a couple of different really good websites .
Um You can just search on Google for free stock photos and this pixels dot com .
I found to be really good .
There's a lot of cool stuff there , a lot of really good high res images .
So you see all of these are totally free to use on your site and a variety of stuff .
They got people , there's food , a lot of nature stuff .
Um So if you're looking for photos that you can use without having to worry about copyright issues or whatever , um This is a great site .
It's also good to , you know , if you have your own photos , you know , feel free to upload those as well .
That that's definitely best .
But if you don't have any photos yet , you know , feel free to look on sites like this and find some photos that might be appropriate for your blog post .
OK .
That's where I got all the photos that we're gonna use uh in this tutorial .
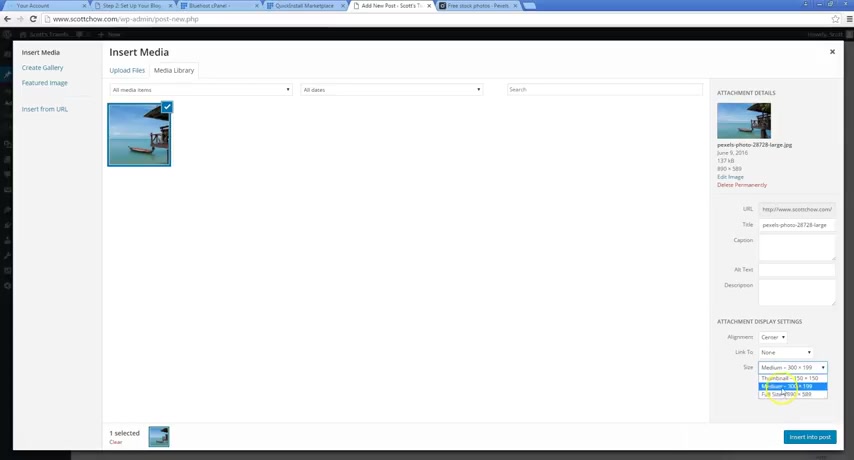
So I selected this photo to add to my post .
Now there's a couple of different settings I can change with it .
I can change the alignment .
I can either have it aligned to the left , the center , to the right of the post .
I'm going to do center .
Um And I can choose the size , I can either do a full size or I can do a really small one or a medium one .
I'm gonna go medium and you can also choose to have it link to something .
So when someone clicks on the photo , it'll take them to somewhere else .
So you can have it set up to , to send them to the specific page , maybe that you want them to go to or you can have them just go to the media file , which basically that means that they're going to be taken to the large version of the photo , which is great .
So then in my post , I can show them the photos in this medium size .
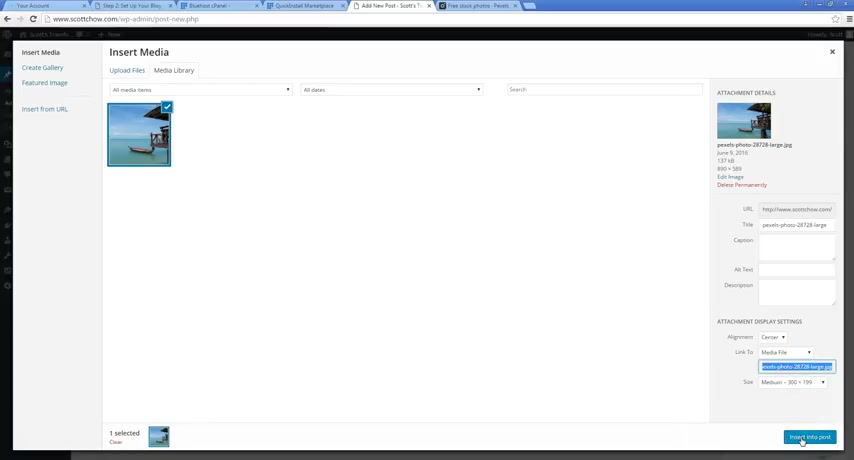
But then if someone wants to see the photo in you know , a higher as you know , a real big picture , they can click on the photo and then they'll be taking the larger photos .
So that's what I'm gonna do for this case .
So once I select my options , I'm gonna click insert into post , it's gonna put it right here .
OK ?
And with that photo as well , I'm also going to set it as the featured image which is down here and I click set featured image , just look that photo that featured image again .
So now when this post shows up in my menus and other things that we're going to do in just a little bit , you'll see this featured image .
So it gives people a little preview of what the post is gonna be like .
And the other thing I'm gonna do now , you should do this for all your posts is you need to add them to a category .
And right now we don't have any categories .
We only see this one here unc categorized .
So what we're gonna do is we're gonna add a new category .
I'm gonna call it travels .
OK ?
Then we just click , add new category .
There you go .
In the check box next to it is checked .
So there we go .
We've got our post , some text , got an image , we've got our category and we set our featured image and once that's done , we're gonna click publish .
OK ?
And I'm actually gonna do a couple more of these just to give you a little overview .
So I click , add new again .
Let's do one on Vancouver and I'll click to upload files again , select files and let's see .
Let's do this photo , same settings as before certain to post .
Let's put it in our travels category .
And let's set the featured image as the same image we just put OK ?
And you can add text , obviously , I won't do that for the purposes of this tutorial .
But you can obviously you can type whatever you want below here and click publish .
And we'll do , let's do one more in the travels uh section or do Jamaica and will upload a file again and insert in the post , choose our category set , our featured image and publish and let's do another one in the photography category .
So I'm gonna set up a different category that's gonna be um you know , just pictures basically from travel .
So if you may , maybe you , your things aren't going to be as related as that , you can have a variety of different categories , maybe you'll have stuff about recipes , maybe you'll have stuff about , you know , parenting , maybe you'll have stuff about just what happened in your day .
So you can set up things in different categories and it makes it really easy to kind of review things for yourself later on , you know , when you're looking for specific posts , but also for your users , you know , maybe someone just coming to your website because they , you know , really want to see your recipes and they don't really want to see your photography , they don't want to see whatever else you're writing about .
So they can just go to the category that they want to go to .
So let's create one .
I wanna do photos of a lighthouse .
So upload files again , same process .
Uh we to upload here and then inserting a post and now we're gonna add a new category .
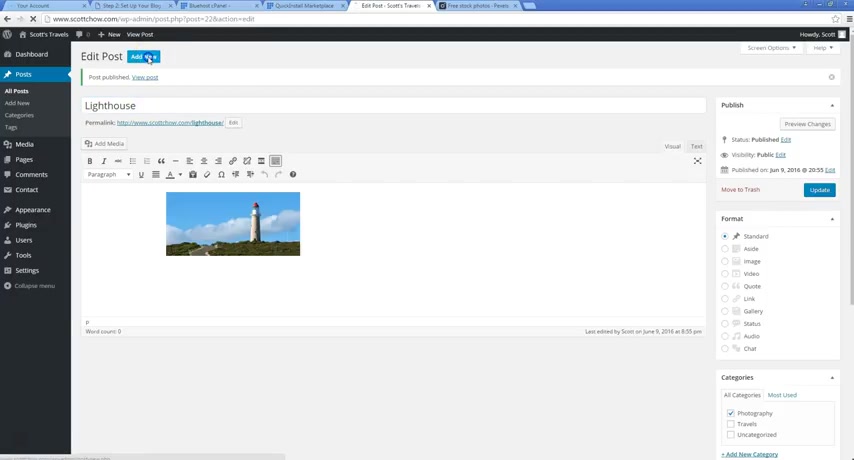
So I'm just gonna call this photography and make sure that's checked .
And again , we're going to set the featured image .
OK .
So we're all set there , click publish .
And now let's do one more photography and then we'll be done with the post .
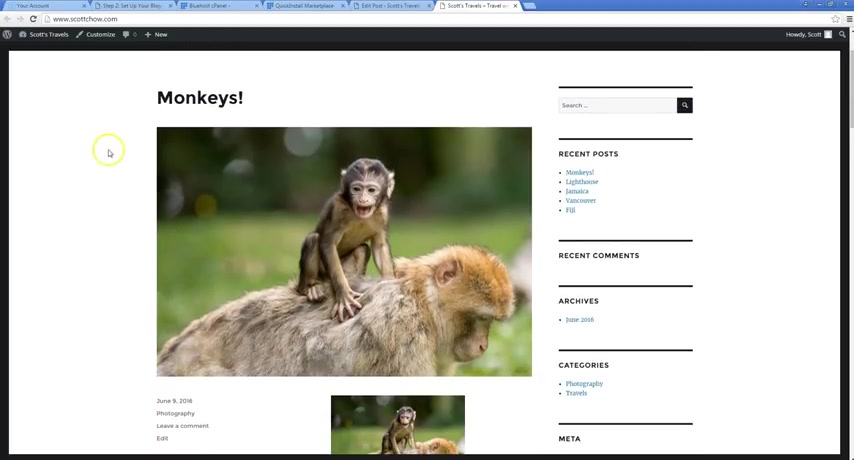
So let's do monkeys .
So I found this photo on that same free stock photo website .
It's kind of a cool photo of a little monkey and the mom there .
And again , it's going to go in the photography section , photography category and we'll set the featured image again to be the same and click publish .
OK .
So now we've added posts , we've added pages .
Let's take a look at how the blog looks right now .
So we can see we've got our posts , we've got our pictures .
Um But what's the layout is still kind of bland and that's what we're gonna look at changing next .
OK .
So you can see there's just a lot of white space .
It's very simple and for a lot of purposes , this kind of log can be good .
Um But let's say you want to do something a little bit fancier .
And so to do that , we're gonna change the whole design of the blog and the easiest way to do that is to go to appearance here and click on themes .
So themes in wordpress are basically just kind of a code word for layouts or designs .
So you can see right now we're using the 2016 theme , which is the kind of default theme that comes with wordpress .
So we , that's how kind of how our blog looked roughly .
Is that what you see in the preview here ?
You see , there's a couple of other ones that are already installed , but we're gonna add a new one .
OK ?
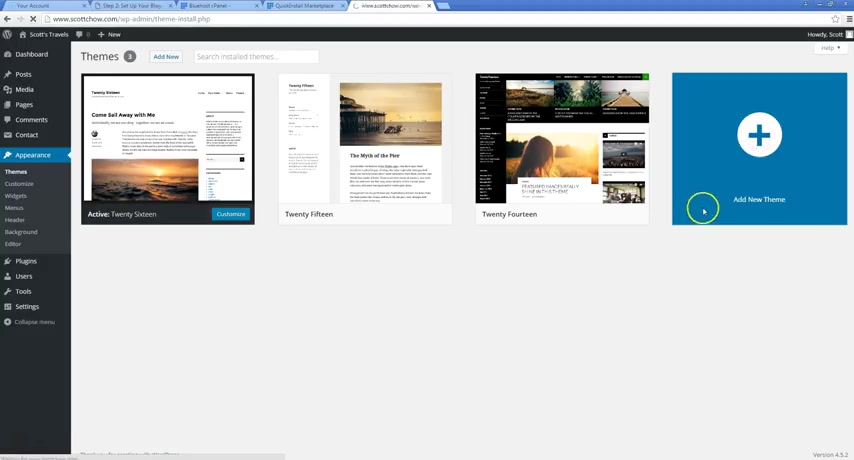
So click here to add a new theme and you'll see there's a bunch of featured themes here .
We can also look at popular ones uh that a lot of other people are using just to get an idea of what other people are doing for their blogs .
Um So there's really thousands of free themes .
There are also paid themes .
Typically , I don't think those are necessary for most people .
I think there's just so many free themes you can choose from , you're bound to find something that really works well for you .
So spend some time browsing through these , find something that really catches your eye .
Um Actually , and we're gonna do this one , I think the human theme .
It's a really cool theme .
So we'll click install and then we can actually do a live preview if we want just to get kind of an idea of what our site would look like before we actually activate it .
So if I do a live preview , this shows me my site and how it will look with the theme .
So all I did was install that theme and now I've got a whole different layout here with everything .
So makes it look really cool .
So I like that .
So I'm gonna click save and activate .
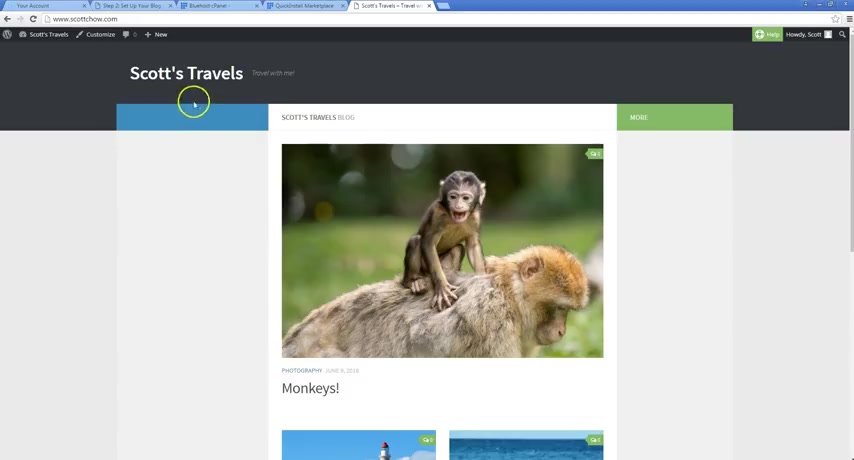
OK ?
So now this is my site .
This is scott dot com .
This is how it looks , OK ?
We still have a lot more customization to do .
But this kind of gives us the basic kind of framework to work with .
Uh when we're building our blogs , we've got our title up here .
You can see our posts here .
OK ?
So now we need to actually customize this .
So changing the theme , gives us a cool framework like I said , but we want to customize it so we can click customize here or also from the dashboard .
From the back end , there's a customized link as well where you go to uh appearance and you click customize .
So this is what we call the theme customizer .
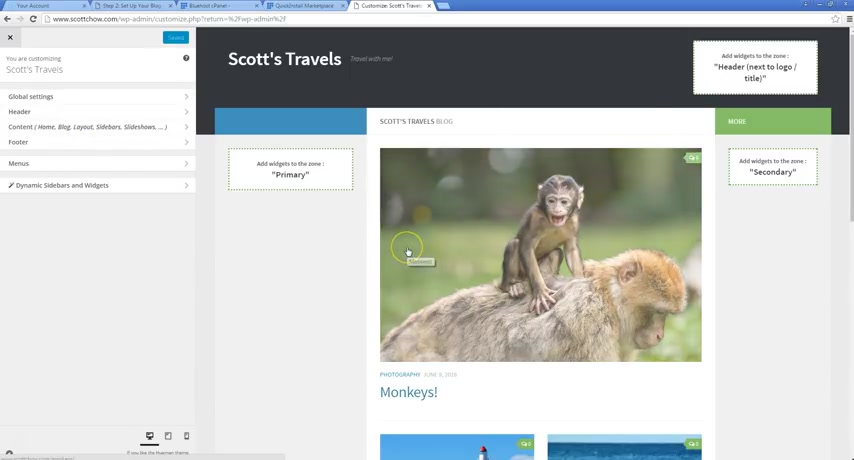
So on the left here , this left bar , we have ways to change the whole layout of this site .
And on the right here , we can kind of see a preview as we make those changes .
So a couple things to note these little green boxes here don't actually appear on our live site .
So if I actually go to scottow dot com , you'll see , there's , you don't see those little green boxes there .
Those are just kind of helpful tools to show you where different areas of your site are when you're in the customizer .
So from the customizer , um let's go first to content and then we're gonna go to layout options for the main content .
And then this global layout section , there's a dropdown box and there's a variety of options we can choose from right now .
What we've got is called three columns , content middle .
Now , what that means is we've got three columns , there's this column , this is one column here on the left .
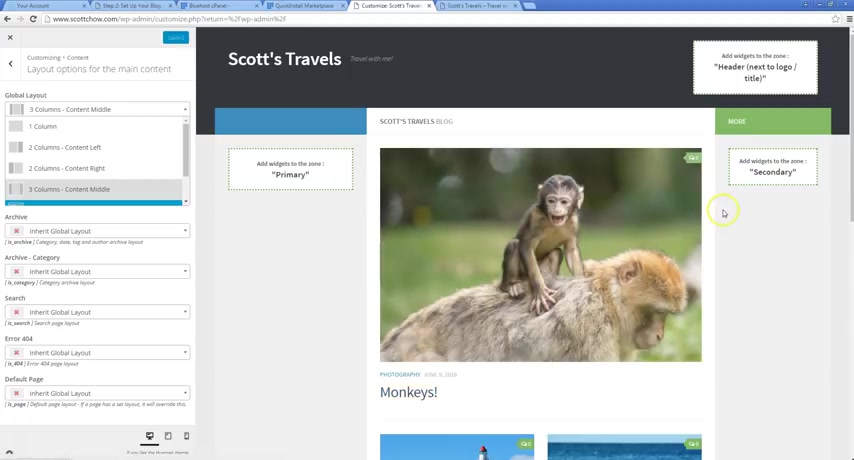
This is one column in the middle .
This is one column on the right .
So three columns and content middle means our content , all our blog posts are shown in the middle .
Now , maybe we don't like this layout , you know , maybe I wanna do just two columns and I want my content on the left .
So this is the two columns , content left .
So you see my blog posts are all here on the left , on the right side , we've got another column which we're going to add things to later .
So you can even do one column where it just shows your content and there's no sidebars .
I personally like the three column , middle , the default one .
So we're gonna keep that .
So I just wanted to show you the different other options that there are there .
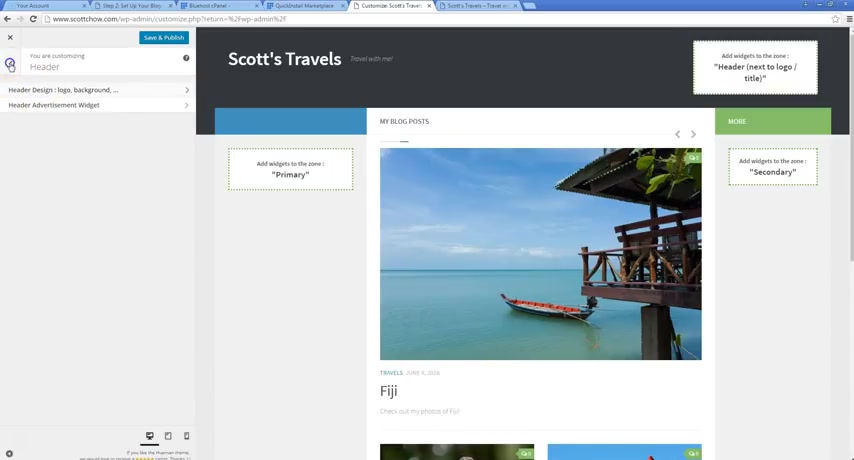
And then we're gonna go back here and now we're gonna go to blog , design and content .
So this is where we can change another place , we can change the heading .
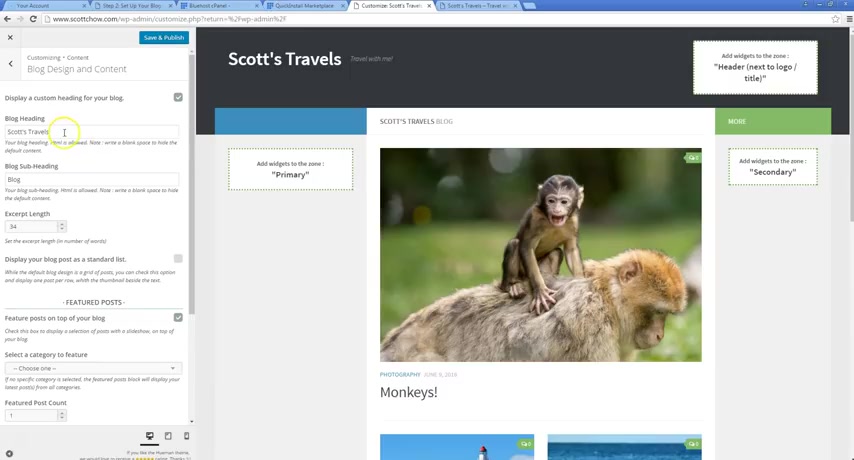
So this heading actually , I think refers to this here where it says Scotchs travels and the subheading is blog .
So I'm gonna change that .
I'm just gonna put my blog posts and then here , I'm just going to put a space because I don't want a sub title there .
So it's gonna say my blog post there .
So it's really cool in this customizer , you get to see these things , you know , change as you do them .
So in addition to changing that uh heading in the same area , we can also do a featured posts at the top of our blog .
So you see this check box for featured posts on top of your blog is already checked .
That's what this is right here .
So you see this post here is really large .
Um And these other ones are smaller .
So this is the featured post .
OK .
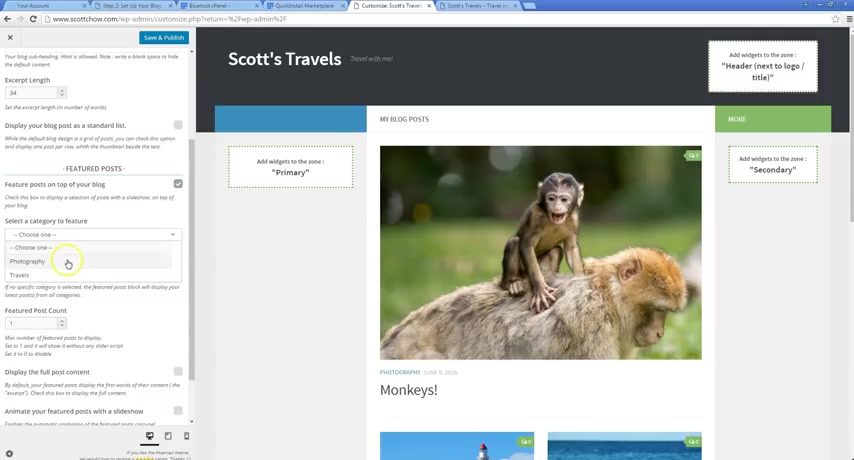
So I want to keep that and if you want , you can choose just one category to , to feature , you can choose just post from your travels , just post from photography .
I think I'm gonna do travels see that change there and then you can choose how many posts you want to feature .
So right now we're just featuring one post .
I'm gonna change it to three posts .
And so then what that does is it has these little arrows here , those little arrows , let you scroll through .
I can see my Vancouver post , my Fiji post and then back through .
And then what I'm actually gonna do is instead of having people have to click here to go through the post , I'm gonna animate it .
So I'm gonna click animate , check that box and now these posts will cycle through on their own .
So you see it's shifted there .
I didn't have to click anything for that .
It just goes from one to the next .
So anyone who's just perusing the site , you know , they kind of see that come through , it's really eye catching and they get to see , you know , a variety of your content there .
Um Instead of just looking at one thing .
So I'm gonna keep that there .
I'll click save and publish just to save those changes .
OK ?
So that's all live on the site .
Now , let's go back here and let's click on header .
So the header design is up here .
So this is what we call the header of a blog .
All right , it's this top area that has the title and you can put other things in there .
So I personally like the way blogs look with a text title and a text uh subtitle .
But if you want , you have the option to add an image here instead .
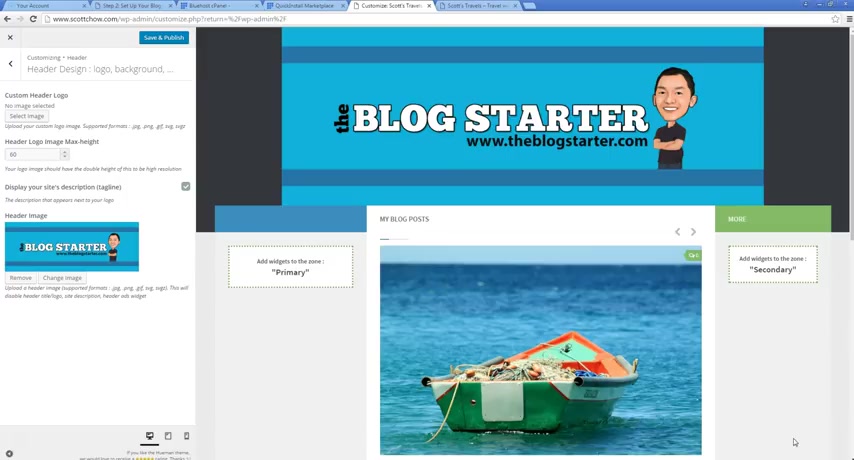
So if I want , I can set a custom header logo or custom header image , so a header logo will just appear right here .
It'll be very small .
So let's do one .
So if I do one from uh my blog center site , we can set it like this , I'll click skip cropping and then that adds a little logo up here .
So again , I don't really like how that looks .
So I'm gonna remove that , but just to show you another option , you can also do it as a large header image across the whole top .
And that's how this would look if we did that , it would just be a large header image .
So if you have something you really want to feature on top of your blog , maybe a really nice landscape photo or just something that's kind of representative of you .
Maybe a picture of yourself , whatever you feel like fits the , the feel of your blog .
It's a good place to put it where everyone's really going to see that because it's gonna be the first thing that everyone sees when they come to your blog again for our purposes .
I think I'm going to remove that .
I like just the text title that's up here .
I think that works better for the , for our purposes here .
So I'm gonna leave it , but I wanted to show you those options there because a lot of people do like to add those in and they can look really good just depending on what image you use .
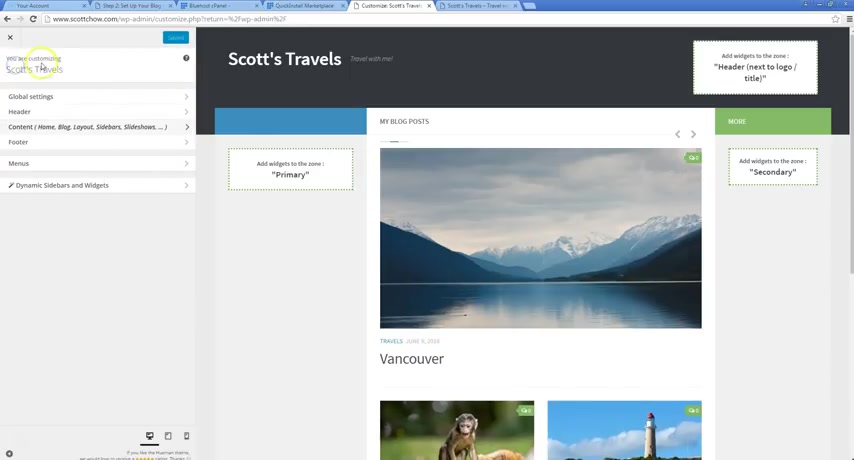
So now we look at that , let's go to the global settings here .
So once we're in global settings , let's go to general design options .
Now , this is a really powerful area as well too where you can change a lot of the major options on your blog .
We can change the font of all the texts .
So there's a variety of different fonts and you can just try them out .
You know , you're not gonna know if you like one or not um till you try it out and it's so easy to just change .
You know , you see how the fonts change every time I click .
Um You know , there's just a variety of fonts um choose from .
So find what you like .
Um something simple and easily readable ideally and then you can also change the colors of your site .
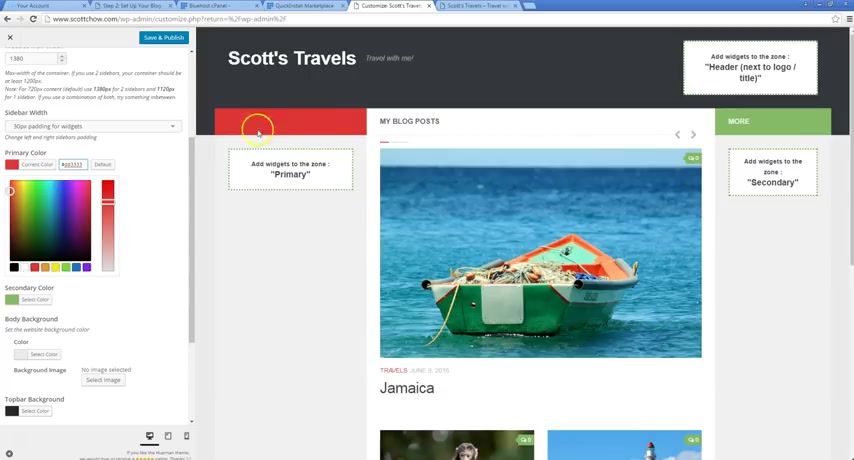
So again , the theme just kind of gives us the basic framework , but we can change all these colors .
You know , if I don't like this blue here , see it's a primary color .
So I click select color and if I want to change it to red , you know , that becomes red , you know , and basically any color in between here , I can do anything , you know , I want there .
So that was kind of nice you know , I'll leave that one in there and then same thing is true with this color , you know , the secondary color I can choose , you know , a blue or I can choose , you know , whatever a variety of different options .
So keep that um , same is true for the background color of the site .
If you want to change the top bar background , which would be , you know , up here , I believe .
And then , or the header background , you can make it lighter or whatever color you want .
So I'm not going to change all those options , but I just want you to see that they're , they're all there and you can play with them .
And the really cool thing about it is , you know , if you don't like it , if you don't like a change you made , you know , just change it back , you know , change it something else .
It's so easy just to click and , you know , kind of see what things are gonna look like and test things out .
So you don't have to worry about messing something up .
OK ?
So we've got the colors and we kind of got the basic layout of our site .
Now , let's get into some functionality .
So one of the main functions that you're gonna want to have on your blog is to connect it to your social media accounts .
If you've got them , you know , your Facebook account .
If you use Twitter , if you use Google plus linkedin , you know , if you do a lot of photography , something like Flickr .
If you're using , you know , your blog to really promote your work , you might want to connect it to your linkedin .
Um You know , there's really just a variety of , you know , hundreds of different social media accounts that you can use .
Obviously , the big ones are gonna be , you know , Facebook and Twitter and Google Plus .
Uh , those are some of the major ones .
So what I'm gonna do is I'm gonna click to select my icon .
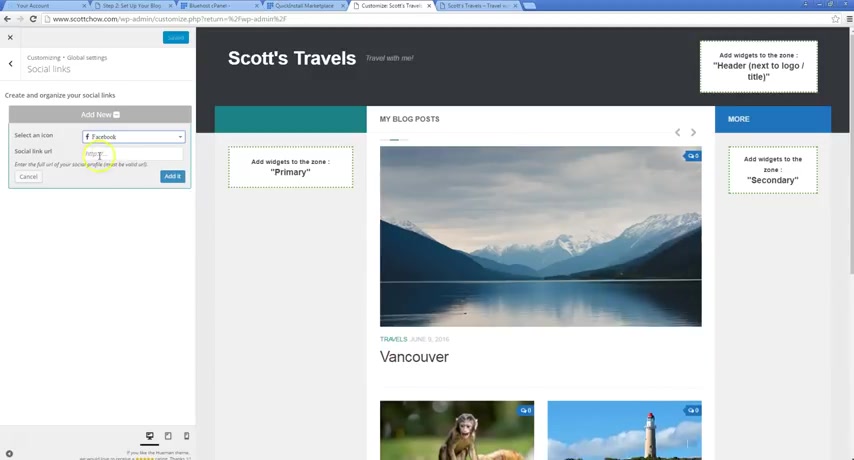
So I'm gonna do Facebook and then I'm gonna put the link to my page on Facebook .
So I've already got a file here with my various pages and I'm just going to copy and paste again , control C to copy and then control V to paste .
Click , add it and you can see that popped up right here .
So now it says follow Facebook .
So if anyone clicks this , it'll take them to my Facebook page and it also shows up down here at the bottom .
OK ?
In addition to Facebook , I'm gonna add uh Twitter and I'm gonna copy and paste that in here .
Click , add it and then let's do one more .
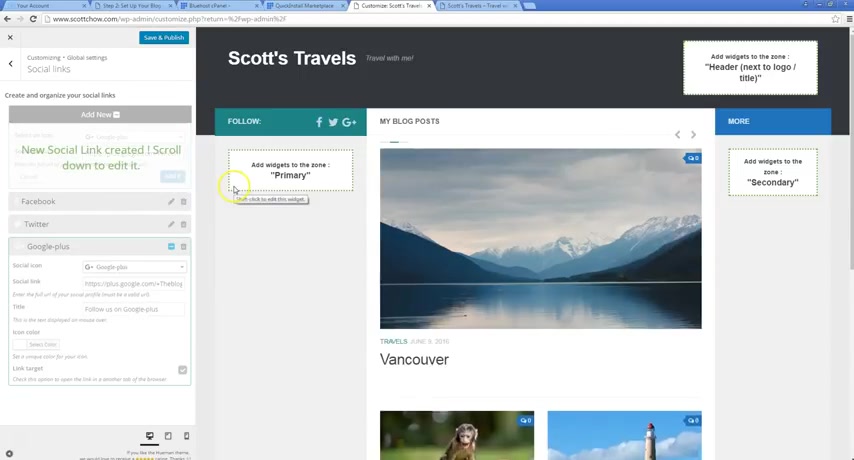
Let's do Google plus and copy the Google plus page and click add .
OK ?
So now we've got all three of those icons there and you can rearrange them and put them in any order .
If I want Google plus first , I can put that first if I want whenever Google plus last , I can put that last however you want to rearrange it .
So they pop up right here , which is really nice .
So anyone who comes to this page , if they want to connect with you on Facebook , Twitter , Google , plus they can click there .
Again , you can add any of the other social accounts you want .
Um Again , those also are gonna appear down here , which is a really cool neat feature of this theme to do .
So now you've got your social links , add it on the site .
So the next thing we're gonna wanna do is we're gonna want to create some menus .
So right now , the only way people can get around to your posts is actually by clicking on this post here or these posts down here .
You know , remember we created those pages , we created the About Me page , we created the Contact Me page .
But right now , you know , there's no way you know , for anyone to get to those .
And so the easiest way to do that is to create a menu for people .
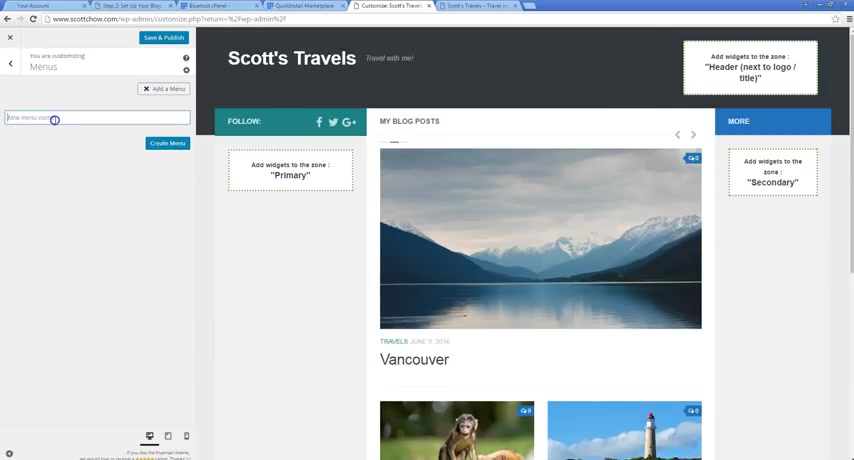
So we're gonna click here on menus .
I wanna click , add a menu and let's call this menu , top menu .
No one's gonna see this title .
So it's up to you , whatever call it , whatever you want , whatever helps you .
And I'm gonna click add items and the pages that I want to add are here .
So I want the contact me page .
I want the about me .
And I'm also going to add the home page just in case someone , you know , ends up on , you know , one of my blog posts and I want to get back to the home page .
I want to give them an easy way to do that .
So I'm gonna click the plus to add the home , contact me about me and you can rearrange these two .
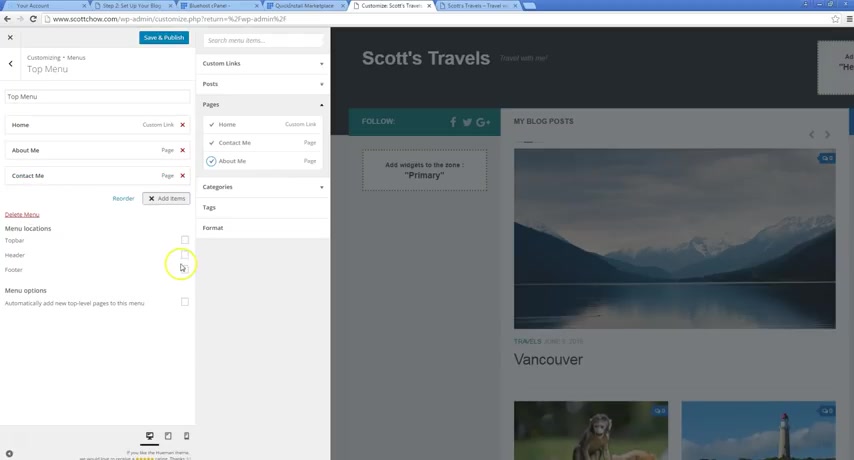
I'm going to put about me second .
So it's going to say home about me contact me .
So that's the menu with those links for people to easily access them .
Now , I need to choose where I want those links to go .
So down here , I see many locations you can put those links or this menu in the top bar in the header in the footer .
It's up to you or you can do all three if you like .
So let's just take a look .
If I do top bar , you see it as this menu up here .
If I do header , it has the menu here and if I do footer , it's gonna add the menu down here on the footer .
Ok ?
So what I'm gonna do is I'm gonna leave it here in the footer and I'm gonna leave it up here .
I'm gonna get rid of this one here .
So there you go .
So now you've got these easy to read links here .

If anyone wants to contact , you learn more about you , they can click here .
And again , those are our pages that we created before .
So if you don't like how it looks , if you , maybe you don't want to say about me , you want to say whatever about Scott or about , you know , whatever you go back to your page and you change the title of it and it'll automatically update here as well as uh down here in the footer .
OK ?
So that's one menu .
Let's also add another menu .
Let's call it category menu , click , create menu and we're gonna add items there and we're gonna add our categories .
So right now , we've just got two categories .
We've got travels and photography and remember we created those posts and we added each one of them to a category .
Those are the two categories we created .
So we'll add those there .
Like it's a nice easy way for people to find the specific category they want .
Again , like I was talking about before , you know , maybe someone's not interested in my photography .
They just want to see the places , you know that I've been to .
Um So this isn't an easy way to get to just the posts that are about travels as opposed to the ones that are about photography .
And again , we need to choose a location for this .
So I'm gonna put that in the header area that adds it right here .
So this gives it an easy navigation , you know , for people as they scrolling through the site , you know , they look and see my post .
Oh , I just want to see the ones about travels .
Click here .
It's gonna take you to the post just about travels .
So you can actually see this is how the travels , this category travels .
It only shows the posts about my travels .
You don't see any of the photography posts in there or any of the other categories .
So it's a really neat feature .
So that's cool .
You know , we've got those basic menus , but if we want to take it up a notch , we can also create dropdown menus .
And to do that , we're actually gonna leave , we're gonna click first , we're gonna click save and publish .
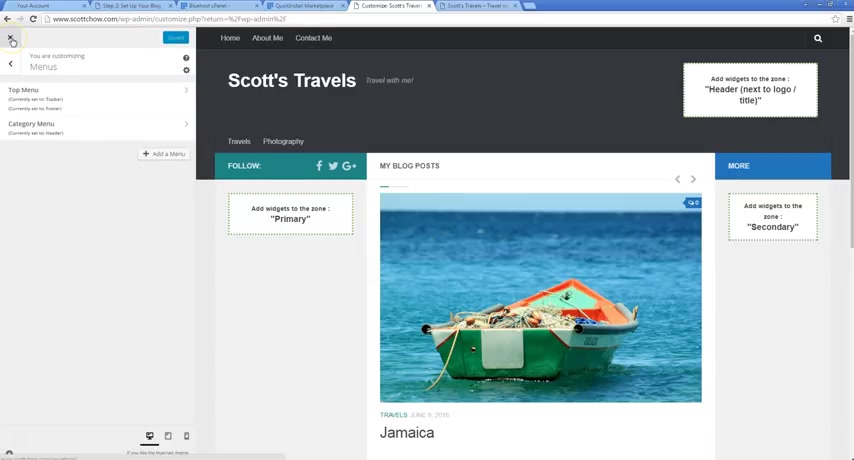
So we don't lose our changes , then we're gonna exit out of this customized view and we're back in the dashboard area of wordpress the back end .
And what I want to do now is I want to customize those menus a little bit more .
And to do that , I'm gonna go to appearance and then menus and I'm going to choose the menu that I want to edit .
It says select the menu to edit .
And the menu I'm going to edit is the category menu it's already selected .
And you see , I've got the two categories I've already added in there .
The Travels and photography .
Now , let's say I want to make it really easy for people to find a specific post .
I don't want them to have to click on the travels category and look through all the different um posts that I've done about my travels .
So to do that , what I'm gonna do is I'm gonna go to posts , I'm gonna select the post that I want to add in the dropdown menu and I'm gonna click , add to menu .
They appear down here .
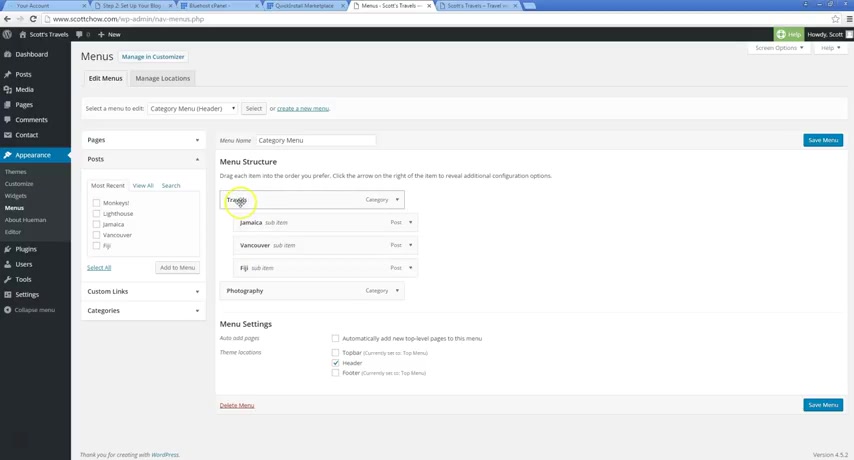
What I'm gonna want to do is I want to move them up and you actually see how these two actually want to put them in , they slit over and it says sub item , that's what we want .
We want these to be sub items .
So I'm going to sorry , is it not working ?
Here we go .
Let's slide this one over just a little bit .
And now those are sub items for the travels menu .
Let's do the same thing for the photography post that I did .
So I'm gonna slide those over and become sub items .
So let's save the menu .
Now , let's look at the site .
So let's refresh this page .
So we've got our menu here .
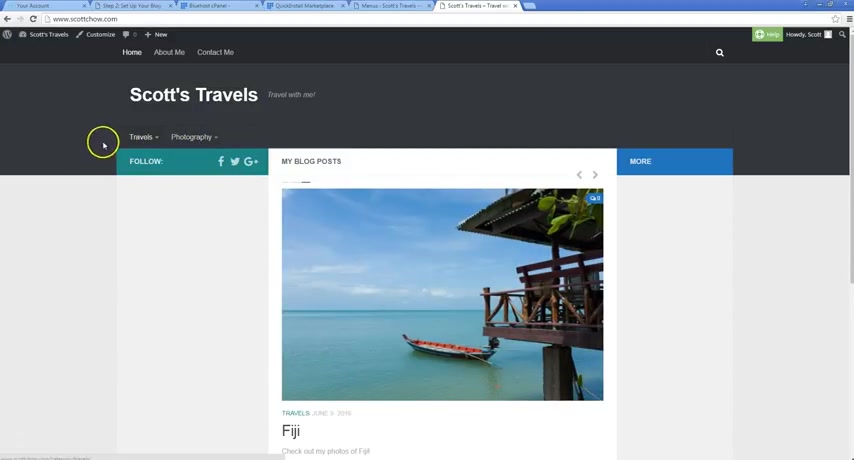
But now you can see when you scroll over it , it's got a drop down box that shows the various posts that go in each category .
So if someone just wants to see , you know , just my photography um post , they can just click right here on the top , they can still do that just like we did before .
But if they want to see a specific post in my photography category they can click here and find specific posts .
Ok .
So that makes it really easy .
You want to have people , you know , you know , you want to have really easy navigation so people can find what they want on your site .
Now , not everyone's going to want to read everything that you write , everything that you post .
They're gonna need to find , you know , specific things that they're interested in .
And so you want to make it as easy as possible for people to do that ?
OK .
So now let's go back to the home .
Take another look at what our blog looks like right now .
So we've got our menus , we've got our title , we've got some blog posts here .
We've got this cool slider thing that um you know , rotates through some different photos and of the post , I've got our menu down here , but right here , I got these two huge blank spaces , you know , and now there's really useful stuff that you can put in here and that's what we're gonna do .
Now , we're gonna look at putting some useful links for navigation as well as just kind of helpful um things for people to see uh when they come to our blog .
So the first thing we're gonna look at is customizing this sidebar .
This is called the right side bar and this is the left side bar .
So the things that go in inside bars are called widgets .
Uh And wis can do a variety of things .
Widgets can be just some text widgets can be , you know , an image , it can be , you know , something else , some other type of kind of plug-in type thing .
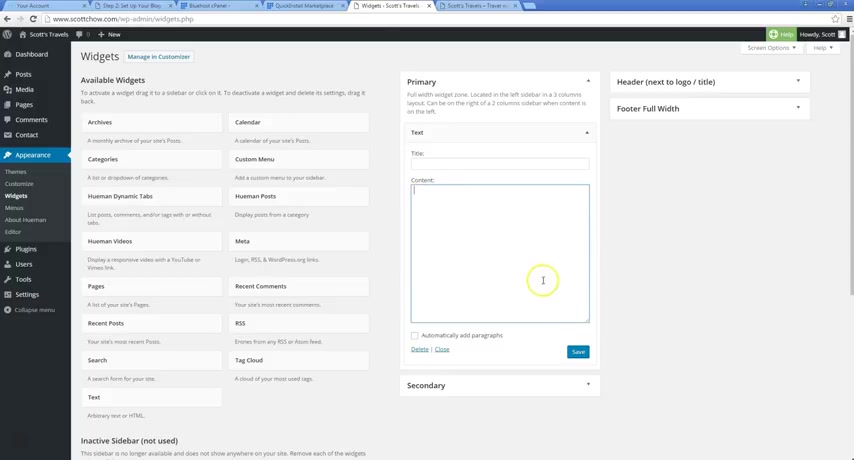
Um So to add those , we're going to go back to the back end of our wordpress site into the dashboard and we are going to go to appearance and widgets .
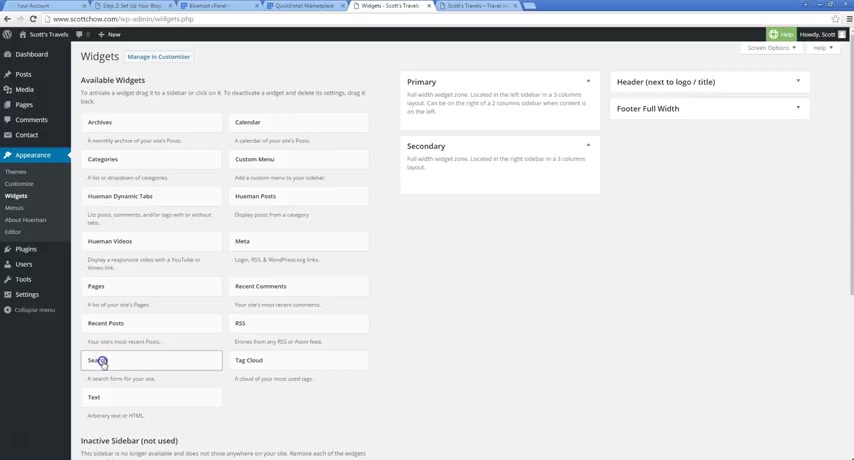
OK .
So you see right here , it says primary , that's the primary side bar .
This , this tells us where it's located located in the left side bar and three column layout , which is what we have .
We have a three column layout .
This is our left side bar and secondary is located in the right side bar in a three column layout .
So that's this one .
So we're gonna start with this one and these are all the different widgets you can add , OK ?
There's a variety of different widgets .
So you got your archives , you can add a calendar , custom menu , et cetera .
So the first one I'm gonna do is I'm gonna add a search widget .
So all you do is you click this , you drag it over and I want to put it in this area again .
So I click save and then when I go back to my site , if I refresh it , you'll see there's a search bar here .
So that's again , really help for people to find content on your site , you know , say I'm looking for .
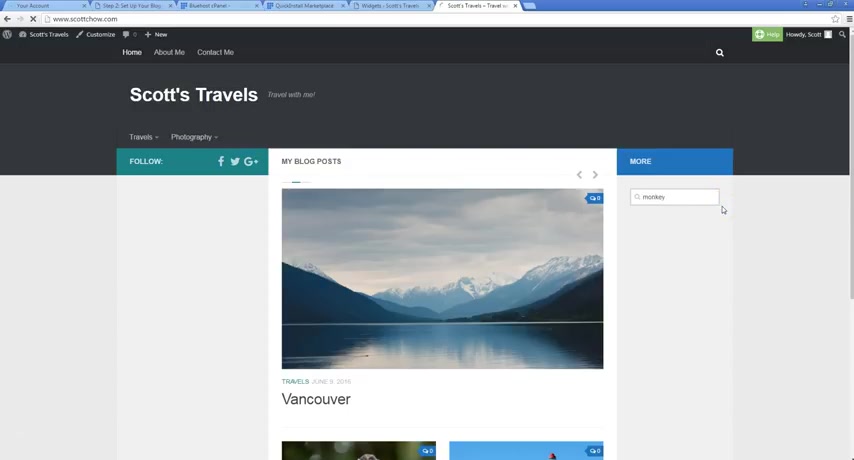
It's like , oh , I heard , you know , Scott had a really cool post about , you know , monkeys on his site , but I can't find it .
Well , and I just put monkey in the search bar .
Oh , there you go .
There is the post that you want it ?
Ok .
That makes it really easy for people to get to .
Ok .
So that's cool .
And that's very easy to add again .
We just click and drag that widget over into the area and then it shows up on the site .
Uh The next one we're gonna want to do is this widget called human posts .
So human is our theme again and it has this really cool widget that we can add , that adds our recent posts uh kind of similar to this other widget down here called the recent posts .
Only also have the option to show thumbnails , which means thumbnail photos , you know , from your posts .
So I'm gonna leave it just like this .
You can call it different things .
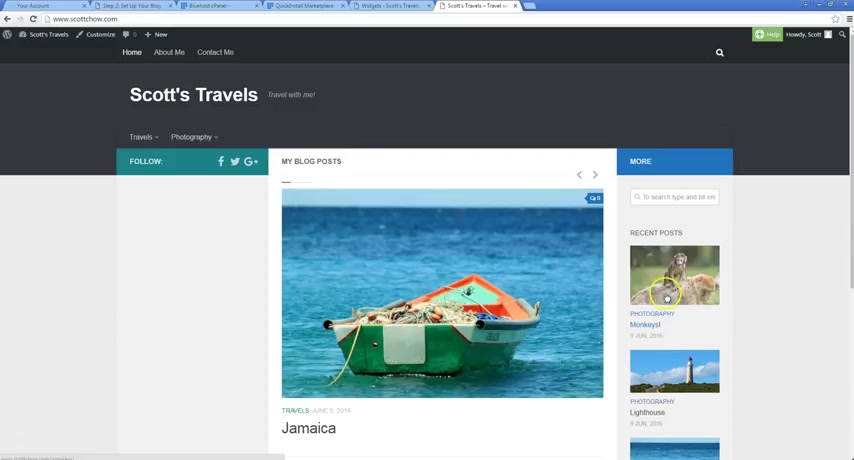
Actually , maybe I'll put a title in , I'll put , I actually call it recent posts and I'll click save and again , let's go and refresh and it's gonna pop up right here and there you go .
Now , I've got my recent posts in a nice easy to find format .
So anyone's looking for what my most recent posts are .
They're right here as well as right here .
It just gives people another easy way to access things and it's also good .
Not everyone's going to end up on the home page .
You know , even if they're , they're reading this post about monkeys .
Well , here's my other recent posts you can easily find right here .
Ok .
So let's go back to the home page .
So we've got this area filled in with some nice helpful things , the search bar , the recent posts .
Now , let's look at adding things to this area .
So that's gonna be the primary wizard area .
Let's collapse this , the primary widget area .
Uh The first thing I'm gonna add is a text widget and a text widget can be anything you want anything you want to type in there .
Um If you know any type of coding , you can put code in there even , you know , it's a whole variety of things .
So what I like to do , I think we go really well in this blog would be to put in a little text area that just kind of welcomes people to the blog .
So I'm just gonna say maybe on the title I'll put welcome .
I'll say welcome to my travel blog .
Feel free to have a look around and leave me uh comment if you find something interesting and click save .
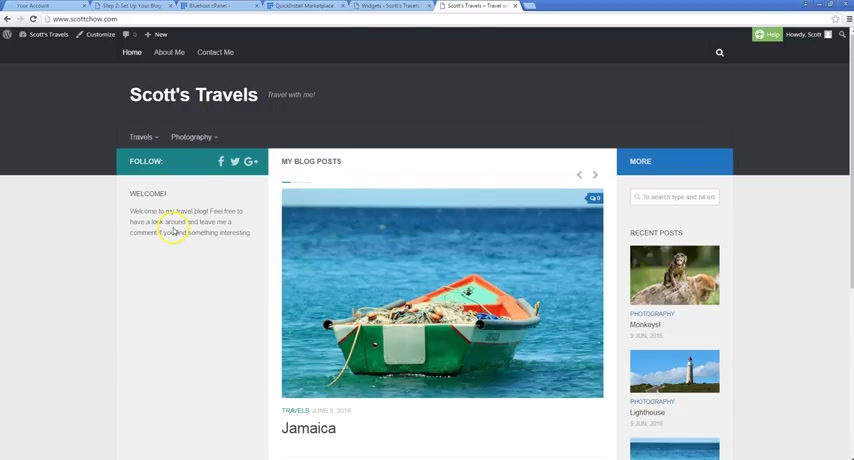
And now in this right area here , I want to click refresh , have this little message here .
So it really personalizes the blog .
You know , if you are doing a blog about something that's a little more , a little more complex issue , maybe you want to explain a little bit about why you're writing about it or who you are .
Um Obviously you're gonna have some of that on your About Me page , but maybe just a kind of short blurb just to kind of give people an introduction to your page and let them know what they're seeing and why you're writing about it .
Who you are , etcetera .
So I've got that there .
Now , the other widget I want to add , there is something from my Facebook page and I want them , I want to show my followers from my Facebook page .
Let people know I have a Facebook page where they can get other updates as well as the blog .
So to do that , Facebook has a cool plug-in called a Facebook page plug-in .
Click here the first one here .
OK .
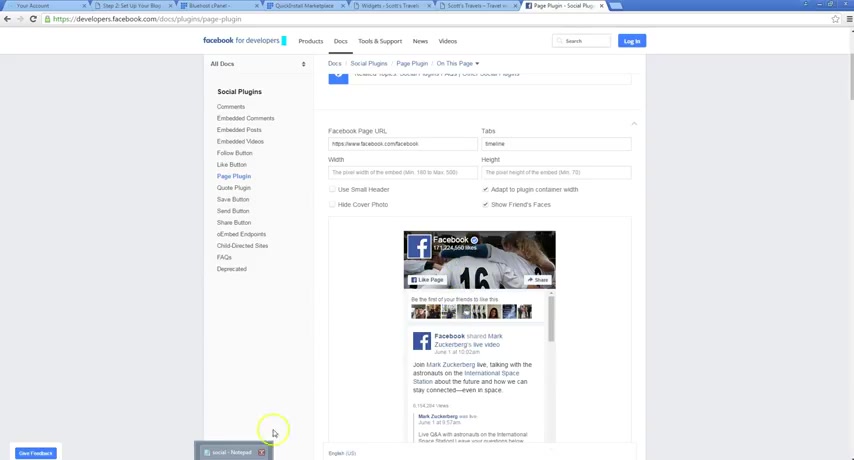
So this is the Facebook page plug in and a lot of the other social media networks have this too .
So if you want to add a Twitter plug-in like this , you want to add a linkedin plug in .
Um Again , if you do photography Flickr is really cool , you have a flicker plug-in that shows your latest photos from that account .
You have a variety of different options .
So we need to customize this thing right now .
It's just showing the plug-in for Facebook itself .
So we wanna do put in our Facebook URL here .
So I'll put mine in .
Again , you just use if you have Facebook , you just put in whatever your URL is I'm gonna put that in .
So you see it pops up my Facebook page information and there's a variety of different customizations you can do you see right now , this is kind of giving us a preview of what it will look like when we put it on our site .
And to me , this is a little too big .
I don't want my whole timeline from Facebook showing up on my site too much going on .
So I'm gonna delete the timeline thing there , see that collapses it .

And so this makes it a lot more user friendly .
Uh I'm also gonna hide the cover photo and it looks like this and I think I will also use a small header .
Ok ?
So it's really condensed .
It , it makes it a very smaller , much smaller widget that you're going to add into your sidebar .
It fits a lot more neatly in there .
So it shows my page , it shows my little avatar here .
It shows , you know , various people who liked the page recently .
Um In addition , I'm also gonna change the width of it .
Um I'm gonna change it to 300 just so it fits in uh really well into the sidebar there .
If it gets too wide , it won't fit in .
And again , you can play with it , you know , if three hundred's too wide um just go back here and change it .
Uh and then when you're ready , just click , get code and then you're going to click the Ira tab here and select this code again , control C to copy .
And then we're gonna take that and we're gonna add , save this one .
We already did .
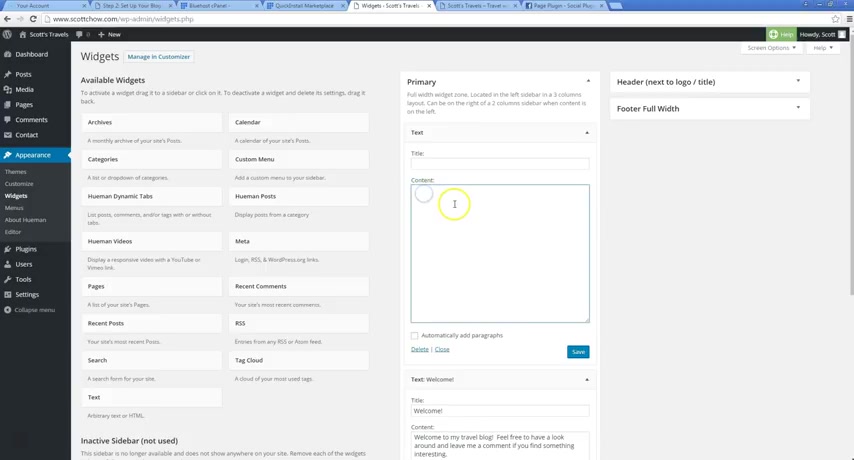
We're going to add in another text widget .
I'm gonna add it in on top here again , you can drag the order of these around however you want it .
And then I'm just going to paste that code .
Control V OK ?
And click save .
So now I'm gonna go back to my blog .
I'm gonna click refresh that little plug in pops up here .
OK ?
So now you know , this is a pretty good looking blog at this point .
You know , we've got our social media network stuff here .
We've got more social media here too .
We've got our menus here for our posts .
We got our pages here .
People can contact a little welcome message , some good recent posts here as well as you know , another menu down here .
My other posts here too , it's a cool little feature .
If you click this , it will take you to the top of the page .
Um The one other thing that you're really gonna want to add um to your blog when you're first starting is an email subscription .
Um widget and that's gonna let people who come to your blog , put their email address in and then they're gonna get updates every time you do a new post .
And that's really cool because you know a lot of people will come to your blog .
They'll say , oh , wow , this is great content and then they forget about it .
You know , they've got 100 things going on in their life .
They're not going to remember to come back and visit your blog all the time .
So if you let them subscribe via email , what they can do is again , they're going to get that notification in their email box .
So they're going to remember that way .
You know , they're gonna , it's gonna pop up and say , oh Scott wrote a new post , you know , it's about this .
And so I'm gonna click on that link and I'm gonna go visit his blog again .
So it's a great way to keep people coming back to your blog and keep them engaged .
So to do that , we're gonna add a plug in .
Um And the plugins gonna add a little box right here for people to add their email address and there's a variety of different plugins you can use for this .
And the plug-in I'm gonna use is called Jet pack .
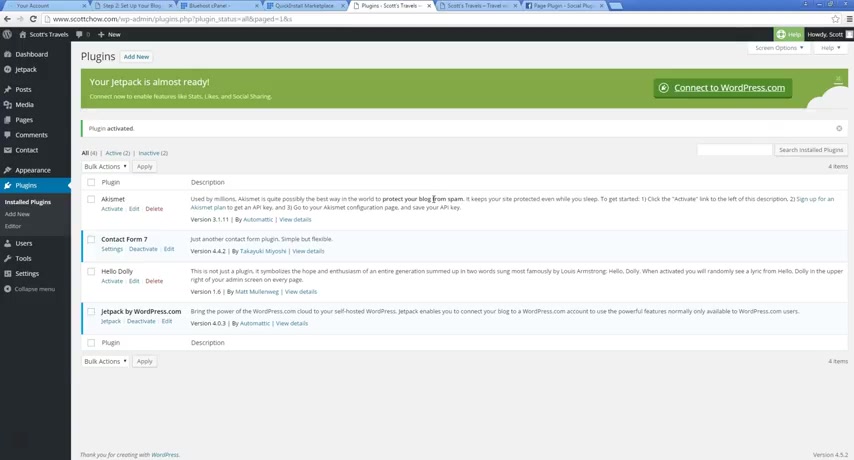
So I wanna go to plugins that new and you see actually it's right here , a jet pack or you can search for it up here .
So just search for Jetpack and click install now and activate plug in .
So , Jetpack is really cool .
Um It doesn't just do the email subscription , it does a whole variety of other things and I get into those on my site a little bit more and at the blogs start dot com and it , it's gonna , that'll show you kind of all the other functionality of jet pack .
But for now , we're just going to really focus on that email subscription widget .
So to use jet pack , we have to connect it .
It's wordpress dot com and wordpress dot com is different than your wordpress blog .
So you're gonna need to have another account .
Um It's , it's a free account .
You just need to create one .
And I'll show you how to do that uh again on my site .
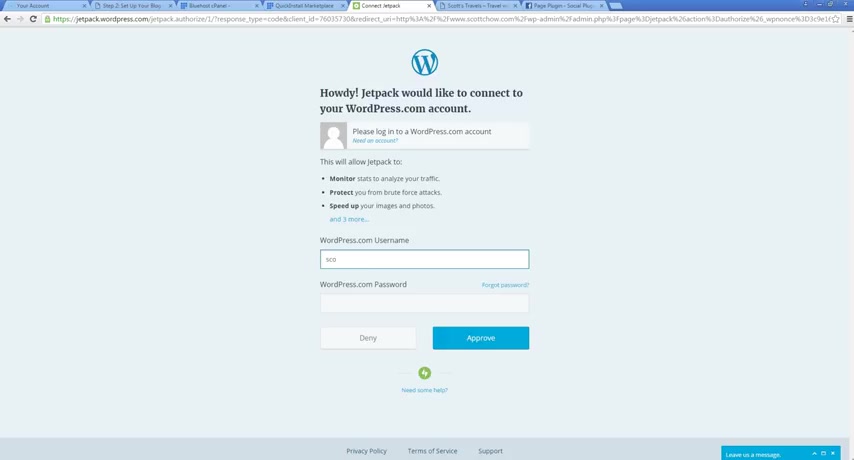
Um But you can just go in here and let's see .
I believe my user name is Scott 14 .
It looks like it's working .
Yep .
There we go .
So I'll click skip on this .
Ok .
So now we've got jet pack installed and to add the email widget .
Now it's really easy .
We just go to appearance widgets and now you can see there's all these other widgets that weren't there before from jet pack .
They all say jetpack , jet pack , bunch of other cool widgets you can add .
Um So let's find the blog subscriptions , which that's what we want .
So I'm gonna take that .
I'm gonna put it right below that welcome text that I add and you can customize this .
You know , you can have it be called something else .
You can have some optional text again , display to your readers .
I'm just gonna leave it as is and click save .
And then when I go to refresh here , we've got this little widget here .
So this way people can put in their email address and click , subscribe and they will get a notification every time that I do a new post .
So that's really it .
You know , again , as you saw , there's a ton of other options .
There's , you know , a bunch of other widgets .
When we go to uh customize , we can customize things in a variety of ways .
We can add more menus , we can change colors , we can change the layout .
You know , we can even go , you know , back to appearance , go themes and we can even , you know , add a whole new theme in that will really change up the whole look of our site .
You know , maybe I want to do , you know , this theme here and have it , have that kind of layout , you know , whatever you can also like again with all these , you can preview them and kind of see this is what , you know , it would kind of the basic layout of how it would look .
So there's a ton of different options .
This is just one set up , you know , one kind of layout for how we could do this blog .
Let me log out too , just so you can see what it looks like when I'm logged out .
So again , that gets rid of that top admin bar .
So this is what everyone's gonna see when they come to my site , you know , they're gonna see , you know , these , this menu up here , they're gonna see , you know , photography and the travel categories .
Again , you got the contact page here with our contact form .
Um They are a little welcome message here .
A way to subscribe easily to the blog so they get updates .
Um It's really all you need , you know , for a basic blog to get started .
You can always add things later on , you can take things out later on .
As I showed you , it's just basically clicking and dragging and , you know , putting a little bit of text .

The entire blogging industry has changed so much and this changing rapidly even right now , what used to work in terms of keyword research or some of you might call it topic research may not work now and maybe not in the future .
It is either you adapt or you get phased out .
And if you are using expensive keyword research tools , maybe you can start considering reducing your expenses .
So in this video , we will share with you the keyword research strategies that are free and they still work .
And we are also going to talk about the newest method to do keyword research that is much faster and more efficient than the existing methods .
Any idea what that method is is chat GP T and Holy Moly , you're gonna love what you see .
And finally , once you've identified those keywords , I will share with you methods to validate them .
So you know , you're starting your blog on the right foot that will lead to massive traffic growth .
Let's go .
You've got to read between the lines and when in do a Google search on similar keywords and see if the top 10 results are almost similar .
Next , we're gonna talk about the different types of keywords .
Now assuming that you are a BBQ retailer , which means you sell BBQ equipment like grills , smokers , et cetera in your blog .
When you find new keywords with the methods , I'll be sharing later , you've got to know which category each of those keywords belong to so that you can craft the right content to serve the right search intent .
First , we have the navigational keywords .
These keywords are when someone is trying to find a specific page on your site .
For example , if your BBQ retail shop is named Smokey and someone wants to know if you have a refund policy , they would type smoky refund policy in the search engines .
So people who are searching for this type of keywords already know what they want from your website you wouldn't need to do keyword research on this type of keywords with some business sense , you should be able to identify what those are .
Um And this is gonna show you how to set up advertising to run on your blog So if you're writing good content and you've got a lot of people coming to your site , you might as well make some money off of it .
You might as well show , you know , some advertisements and make some additional cash off of it .
And so I go over that in step seven as well .
How to make money blogging , uh shows you how to run advertisements on your blog .
Again , adsense from Google is the easiest way to do that .
And this tutorial here will show you how exactly to install Google Adsense .
Um It's one of those things you could , you could show ads , for example , on the blog we set up , you could show an ad right here , you know , you could show an ad up here .
Um Any of those places can show a nice ad um and any time anyone clicks it , you know , you're gonna get paid .
So you might as well do it if you're writing good content and you're working hard to get people to come to your blog .
So I hope you guys enjoyed this video .
The next type of keywords is informational keywords .
People searching for this type of keywords want to get information or learn something related to your business or niche .
For example , if somebody types how to grill ribs , they're expecting a how to guide a step by step guide that will tell them that equipment , they need the ingredients sauces , how long to grill , the tenderness and basically everything .
People searching for these keywords want to learn something and they do not have a buying intent , but you may sleep some recommendations in the content in case they need them .
So if you are starting a blog for your BBQ retail shop , you'll be providing tips and techniques for grilling different types of meat .
And you may use internal links to link informational contents to commercial or transactional contents to maximize your profit .
And these are the next two types of keywords for commercial keywords .
They are something like BBQ gri reviews .
Best guess BBQ grills , BBQ grill , A versus BBQ grill .
Are you looking for a way to reach a wider audience and get more views on your videos?
Our innovative video to text transcribing service can help you do just that.
We provide accurate transcriptions of your videos along with visual content that will help you attract new viewers and keep them engaged. Plus, our data analytics and ad campaign tools can help you monetize your content and maximize your revenue.
Let's partner up and take your video content to the next level!
Contact us today to learn more.