https://www.youtube.com/watch?v=DvbFBxKcORA
WordPress Tutorial - How to Make a WordPress Website for Beginners
Today , we're going to cover how to make your own website step by step in this complete wordpress tutorial for beginners .
Hey there , I'm Christina with WP beginner .
And sometimes we create simple tips and tricks videos for wordpress and other times like this , we do deep dives .
If this video helps you out , please give it a like it really helps out and all the links that I talk about .
They'll be in the description below .
So let's dive in to get started with blue host who want to go to WP beginner forward slash refer forward slash blue host and that is our affiliate link .
We will get a commission if you use that link for us .
So once you get set up , you can see this special page and you see that normally it's about $9 a month , nine or $10 a month with this link , you also get a free domain for the first year .
You'll also get free SSL certificate and that's just says SSL stands for secured socket layer and that just makes sure that your website is secure and encrypted between you and your readers or your visitors .
So super important to have and they already have that automatically .
You also get one click in wordpress installation .
So before it was pretty simple to do , it was like a five minute installation .
Now , it's even simpler and then you get 24 7 support .
So you have any issues with your website , they're there to help .
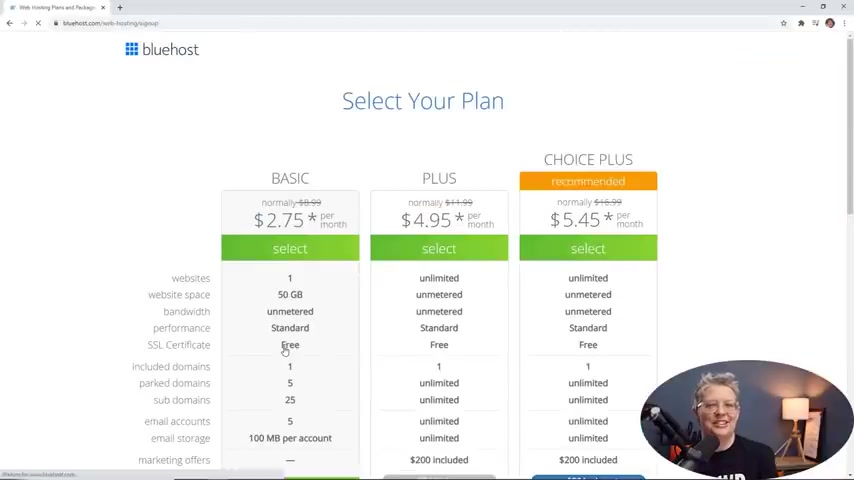
So let's go ahead and click on the get started now button and right out of the gate .
I always like to when I'm sharing this with friends who want to set up a website , they're always like , ok , well , which one do I use ?
The choice ?
Plus is probably a little bit too large for you to have to worry about .
That's for somebody who's really into several websites and things like that .
I would say you want to look at between the plus and the basic and a couple of the major differences between the basic and the plus is the basic .
You only get one website and you have a few other items there to look at .
Whereas with the plus you get unlimited websites .
And so this is the choice you want to make .
When I talk to my friends .
I always say now when you start your first website , it is more than likely that you're going to create more websites or you're going to have friends or family members who say , hey , can you make me a website too ?
So a lot of times for me , it was always worth it to do just the next step up so that I can do unlimited websites for this tutorial .
I'll simply choose the basic here .
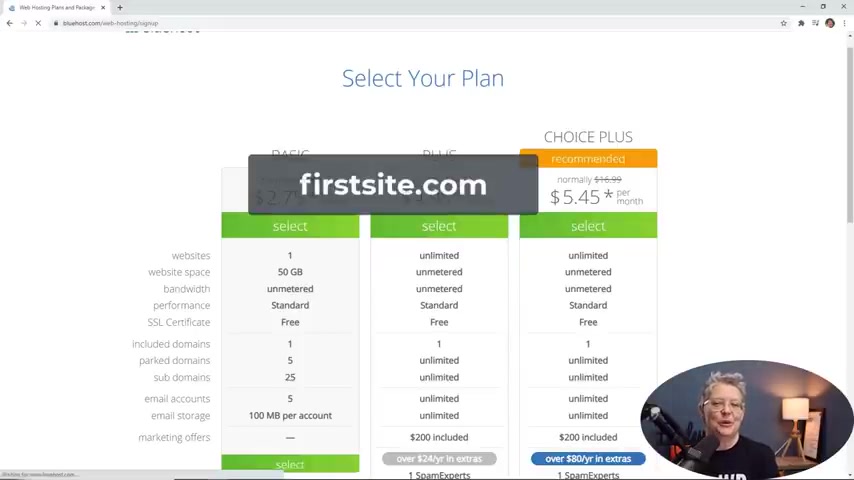
This is where you create your new domain name or the website where you're going to send people to .
So now you can put it in , put in what you want your website name to be .
And when you click next , it will either come back and let you know if it's available .
If it is available , it will give you this big green button where it says or a big green banner that says it's available .
If it's not available , they'll give you some ideas of some other website names to try .
So scrolling down , you'll want to fill out all of this information and then when you scroll down to the package and information , then this is where you need to make a decision on how much savings you want .
And you have your choice between 36 months , 24 or 12 months .
And that gives you the separation between 12 month savings worth of savings and then it resets to the normal amount or you get three years at 2 75 .
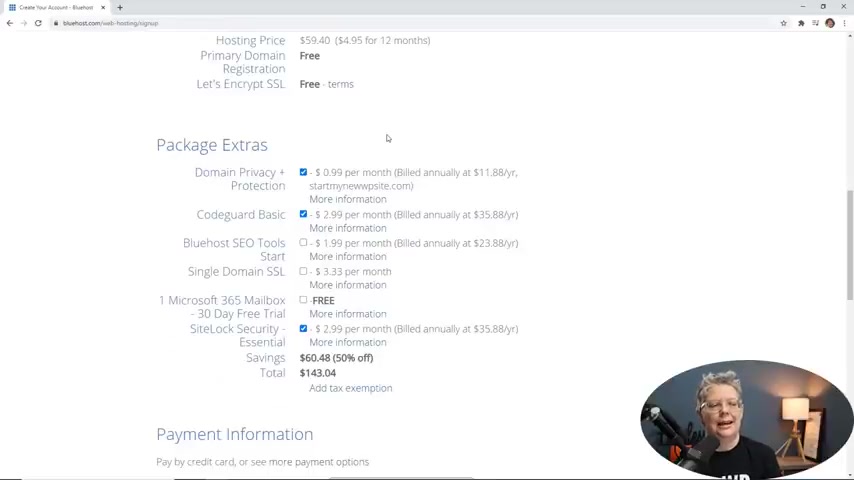
So something you need to look at , but you notice that the domain name registration is free and the lets say encrypt is free as well .
So just for the sake of this tutorial , I'm going to do basic right there and then scrolling down , there's some package extras and you really can uncheck all of these , most of these items you can either choose to do later or there are plugins or the legos that I mentioned that you can add on later on if you want and then scrolling down .
You see the total savings for this is at least 50% off and this is our total amount .
So you just want to go through here and enter your credit card information .
You want to go ahead and read their auto terms .
That's just letting you know when it renews , it will renew at the standard price .
And you'll want to say that you , you want to go ahead and read that and then once you're done reading it , you can submit this .
And then once it goes through , actually create your website , once you get all the information and then blue host will go out and install wordpress for you .
And this is the back end of it .
If we go over here up at the top and we right click and say visit site and this is our website .
We have something that we can already work with and it up how we want .
So let's do that next .
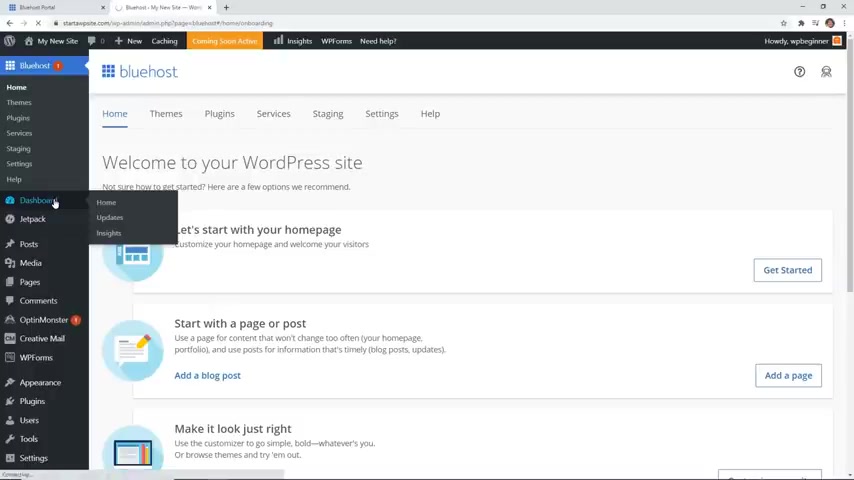
Now , this is the back end of wordpress and this is where you'll go to every time you want to create a blog post or if you want to add a plug in , this is the area that you'll see .
So you'll get an email with your log in information or you should already have it .
Go ahead and keep that somewhere safe so that you don't lose that anywhere .
And we can go to dashboard to kind of get an overall view of how our site looks .
Now , we're going to do a little bit of cleanup because by default , there are a lot of plugins that come pre installed .
It's like when you get a new website or something like that you already have or a new phone , you already have plugins or you already have apps that are installed .
And that's kind of the same thing that's going on here .
So there are some that we do want to keep some of our sister company sites are on here and I'll show you why I think that those are good to keep .
But then there's some that we can go ahead and remove .
So the best way to do that is we can go into plugins , installed plugins and this is where you can see them .
So I'm going to just come up here and select all plugins .
And we want to keep Google Analytics for Wordpress by Master Insights that allows you to connect Google analytics with your website .
So you can see how your site is doing how much traffic you're getting and things like that .
We also have WP Forms Light , which is perfect for setting up a contact form or a survey or things like that .
So we're going to keep those as well .
All these others that we still have checked , those are the ones that we want to get rid of .
So under bulk action , we can deactivate them because you , you need to deactivate them and then you can remove them .
We'll click , apply to deactivate all of those .
And then I'm gonna go under inactive and I wanna delete .
So I'm gonna highlight all of those and elite , all the inactive ones .
OK ?
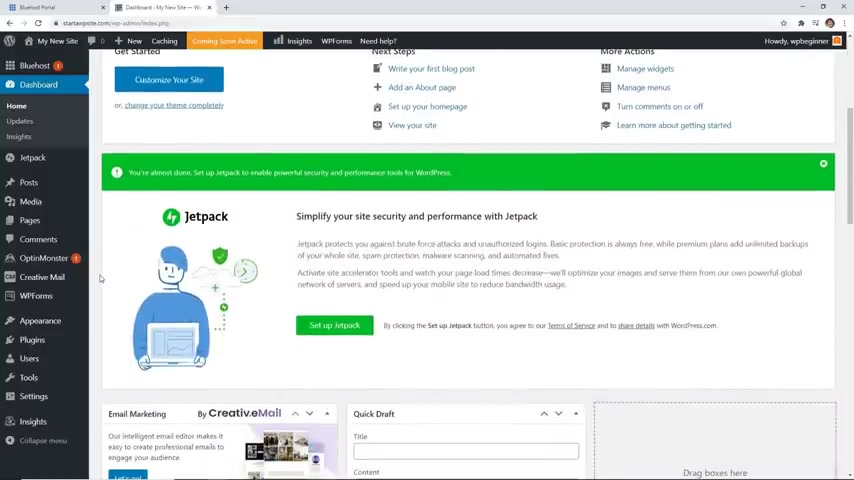
Taking a look at the front of our , of our website .
This is our website and this is our theme .
A theme is the color , the font , the layout of your website .
And you can choose how you want that to look through choosing a theme .
So let's head back over to our Wordpress dashboard .
And the way that you pick your themes is you can go to appearance themes and from here you can see what themes are already installed .
For instance , we have active , it's all installed and active right now , the 2021 theme and that's what we just saw .
You also have 2019 and 2020 .

These come the 2020 series or the usually comes with the default installation and it always changes each year with each new theme for wordpress .
But you can choose whichever one you want .
You can do premium themes or you can choose themes that are free and a lot of them are found in the repository Wordpress Repository is where they verify and make sure that the themes are good to go .
So we're going to go to add new .
And if you had a premium theme that you purchased from a third party , you would upload it here .
But because we're searching for one , you can simply go through all of these and there are thousands and thousands of them .
There are a few ways that you can filter because there's just so many you can either do by featured .
So these are the featured ones that wordpress is featuring right now .
You can click on popular and these are the most popular downloads .
Obviously , the 2020 will be popular because they go with each installation and you can also do a feature filter .
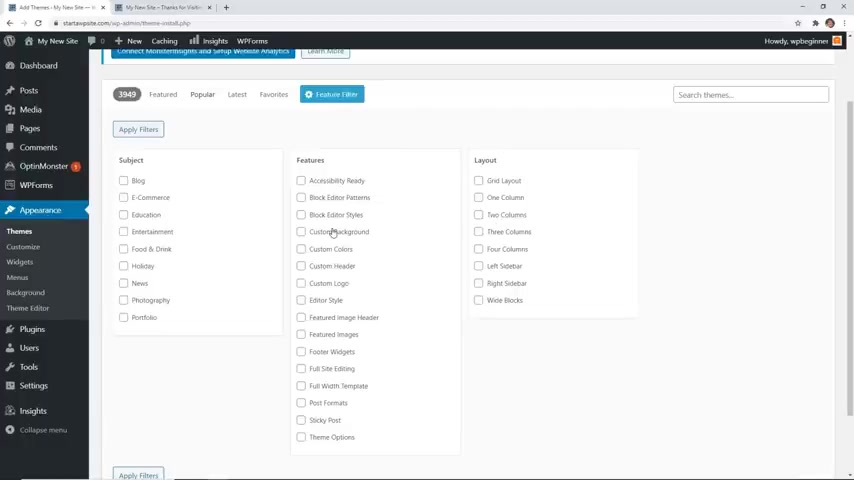
So if you know , you want a certain layout or a certain feature like e-commerce , things like that , you can pick those from here .
So I know which one I want to show you because it's just super easy to install and set up .
So we're looking for the Astra theme .
This is the one we want and or it won't look like this .
This is just the beginning of it .
So let's go ahead and install this .
Now , we have the Astra theme installed .
I can show you what it looks like real quick , going to our site , doing a quick refresh and you say it's real , it's changed , we know that it's changed .
It's still very bare minimum , but that's Ok , we're gonna fix that right now .
Next , we want to download a plug in that will allow us to make our site look exactly like we want from a demo site .
So to do that , let's go to plugins , add new and we're searching for starter template and this is the plug-in that we want to install .
So click install now .

And once you install it , you also want to activate this plug in , we can scroll down and say see library or if you ever need to come back to maybe change your theme and do something different with it and go to appearance starter templates to come back to it from here .
You want to select the page builder .
We're actually going to say Gutenberg and Gutenberg is the default page builder with wordpress .
And now these are all of these starter templates that you can pick for the Astro theme .
And what's perfect is this will bring you up to speed and it takes off hours of development time or customization time because as soon as you pick one and you say import this , it will fill out your site and make it look exactly like what you're seeing .
So many others just don't do that .
So you can scroll through , see which one that you want , right ?
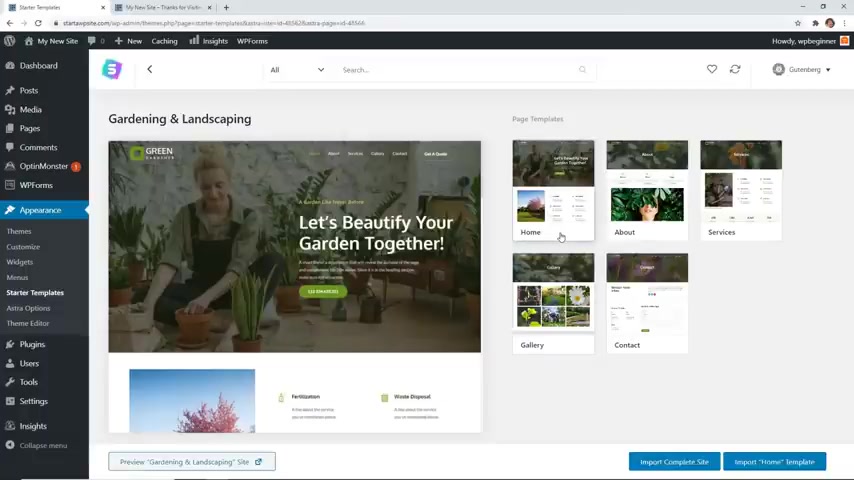
So for this tutorial , I'm going to pick the gardening and landscaping one and you see right here , you can look through this and you can take a look at the about page , the services contact the gallery .
These are all the page templates that will be imported .
And what we want to do is we can actually preview the garden landscape site to see if that's what we want , you know , scroll through and see it .
And yeah , this is the one we'll do .
So then what you can do is you can either just import uh the home or whichever one you're clicked on for this tutorial .
I want to import the complete site .
So I'm gonna import everything .
So it'll go through the process and it'll say , ok , we're going to import all of these items .
Once we import that , we'll let you know when it's done .
If you've done this before and you want to change them , then you want to make sure that you click delete previously imported site .
We haven't done that yet .
So let's just click import .
And if you want to give them your information , you can do that or click skip .
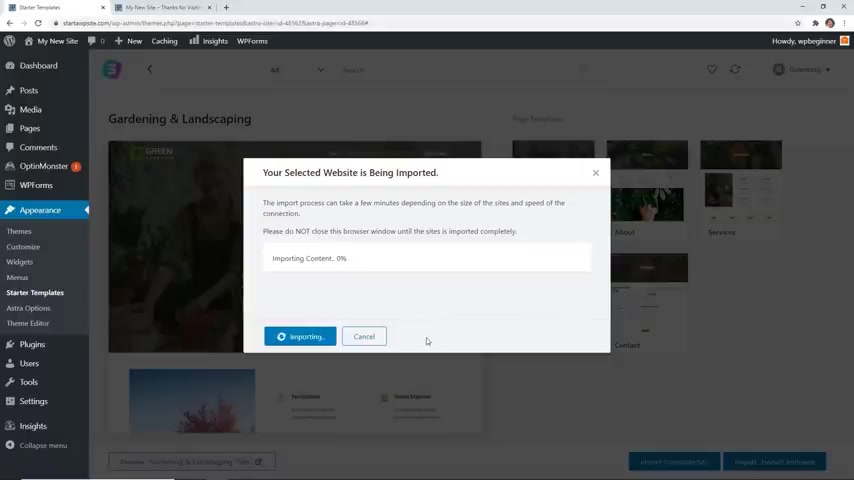
And now what that will do is go out and import the images that you see some of the content , some of the information , it'll create certain pages for you , like the about contact us , things like that .
And then once it's done , we can move on .
Great .
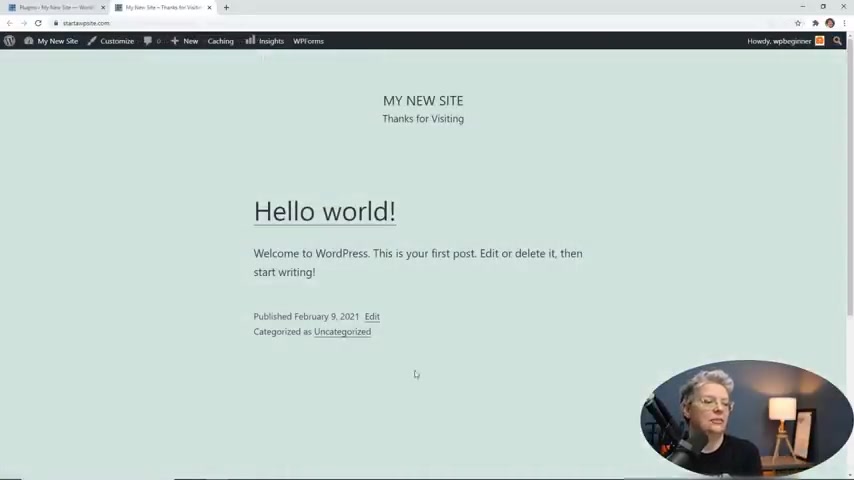
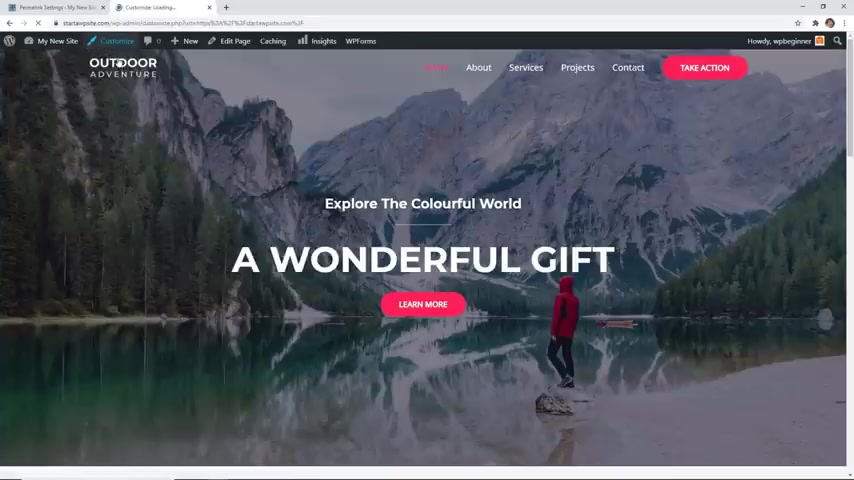
So it took a couple of minutes and now we can view the site and this is our actual site .
We have a logo up here and we can , I'll show you how to create your own logo .
So stick around for that .
We have beautiful background picture , you scroll down , you see all of these great little points of interest for the site , some tabs here and this is our site scrolling up .
We also have these new pages that have been installed that we can also adjust in a gallery if we want to show off some of our images .
If you don't like that one , you installed it and you're like , yeah , I don't really like that one .
Then you , you can go back to the starter template and you can look through and find another one .
For instance , maybe we can do the wonderful gift .
I've used that one several times as well .
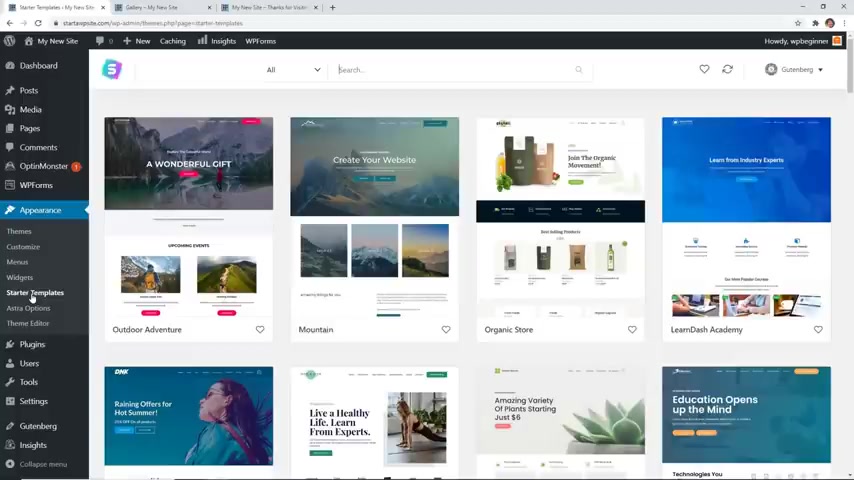
So you can keep doing this until you find the theme .
That's perfect for you to get started with .
Yeah , I think I'm , I'm more on an adventure side .
So we're going to do the same thing and we're going to import this one now because I imported the last one .
I actually do need to delete the imported site and go ahead and import .
Ok .
That one took a little bit longer because it had to delete the old items and import the new .
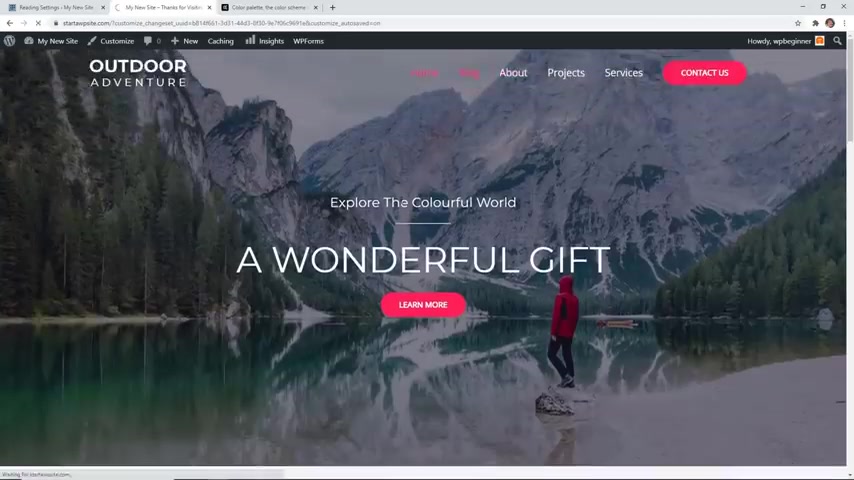
So let's visit the site and see what it now looks like .
Ok , so this is an adventure site , outdoor adventure site and I've used this before and I like it .
So I'm going to keep this one again , we have the about us , we have services and when you see that I'm clicking on these menu items .
So these are the new pages that it's created .
But if you look up into the menu item here , I don't really like this URL structure , this web address structure that would be really hard to tell people to go to , hey , go to my page underscore ID equals 16 45 .
So we need to fix that .
So I'm gonna close these out and we're gonna head back over to our wordpress dashboard .
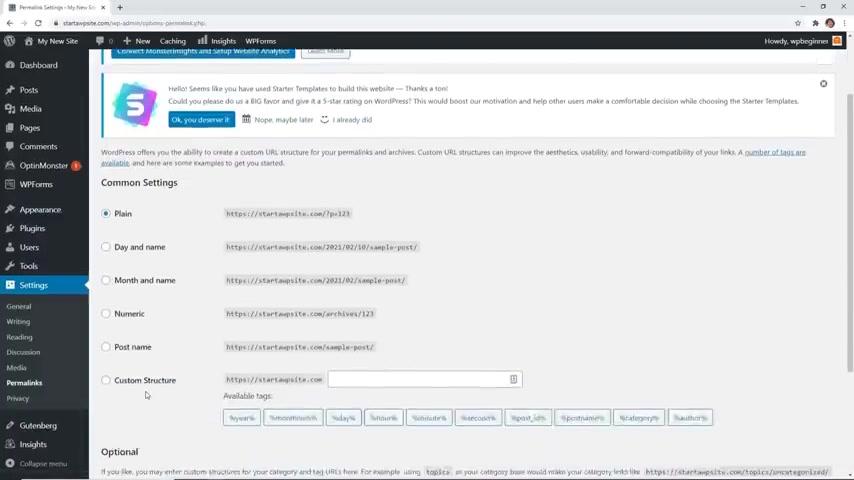
We're going to go down to settings and we're going to go to Perma links and Perma links is simply the way that you structure your website under common settings .
You see that it's structured like this , which is horrible what most people use and what I like is the post name .
So it simply is your web address and the post name like about us , things like that .
I like that much better .
If you want , you can choose the day and name or month and name .
Uh We try and keep away from months and dates and post name is really good .
So we'll save changes and now when we go to the site and if we go to another page , then you see it's , it's much better .
It's pulling in the page name into the much better way to do that .
So make sure you save that or change that on your site if you're seeing that as well .
Ok .
Now that we have it installed , the , we just need to do a couple of more customizations .
For instance , I don't want this to say take action and I want it to actually be the contact page so we can do that under customize .
And we'll just kind of go through the customs area .
So you can see how you can easily customize your website .
So depending on what theme you have , when you click customize , this will be different for you and then you'll scroll through and once you have the customized up , when you scroll through , you'll see a little blue dots .
And this lets you make these changes so I can click on the little pencil icon and choose what I want this to say .
So let's go ahead and change that .
So you see as I'm making the changes here , then that goes in real time over here , which is what you want .
And under the section two , you notice that it says copyright and current year , this is perfect .
If you want the copyright year to automatically update , just keep the current year and then that will update .
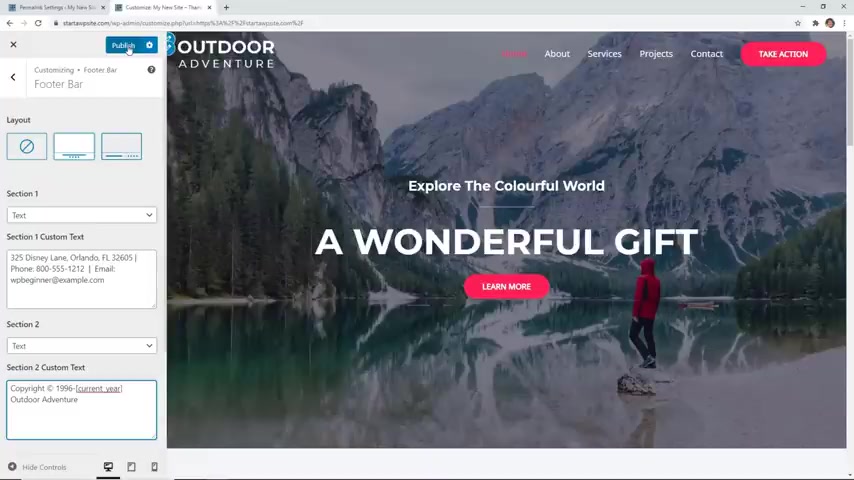
And then if you wanted to say , well , we've been in business since 1996 then you can do copyright 1996 to current date and then it's good to go and then you can change the outdoor adventure if you want none of the changes that I've made so far or edited so far have actually gone public on my site until I hit publish .
And that's what we're going to do .
Now , we're going to publish this and now that's live on the site , going back to the main part of the customization .
If we go to global , this is where you can change your typography .
So all of the fonts that you're seeing , you can make these changes here .
You can also change the size of it .
And it's been recommended to do like 16 or higher nowadays so that people can read it .
So you can make those changes here , you can also change and choose from any of these fonts that you see here .
And once you pick it , it will go throughout the whole site .

So maybe you want open sands , maybe you want Roboto , you can also type in the one if you know it .
So you make those changes as well .
And when we go back , we can also change out the base colors .
So this is the current base color theme and you can change these out to whatever you want here .
For instance , this is the text .
So if you want it a little bit lighter that might be too light .
You also want to consider how people view your website .
And if you don't like what you've chosen , just click the little redo icon and I'll take it back .
You can go through here if you don't already know the color scheme that you want .
Then go to color dot Adobe dot com and you can explore all the different colors out there .
Once you find a color palette that you want , you can copy the color palette and then you can put them in here for this .
I'll keep it like that under header .
We already did the site identity .
That was these items .
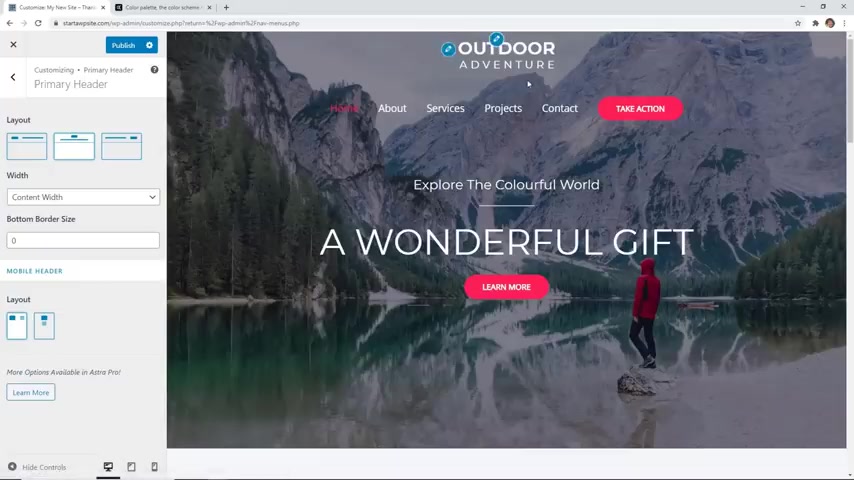
You can also change the primary header So you can change this to basically where the logo will move around and you have the logo , either on the left or the right of the menu or in the middle .
You can also choose how you want it to look on mobile .
So when it is mobile , what will it look like ?
And you can see what that will look like .
Just down here , we have little areas where it'll change .
So that's the different layout on mobile and you can make it different for that as well .
We'll keep this layout , we like that .
And if you need to go back , you can click back on the desktop barrier and then we can take a look at the menu from here .
You can choose , this is the primary menu that's up here .
We can choose here how to handle this .
For instance , this last is a button .
It's a call to action , you have the ability to say none .
And then , so then that call to action won't be there .
I like the button , but I don't want it to say , take action , going to say contact us and then this is the button link .
So where do we want to send them right now ?
It's not going anywhere .
I want to send them to our contact page .
So I'm going to , I already copied it and I'm going to paste it .
So it's going to send them to my contact page .
So say contact us .
I'm going to remove this one in a minute .
So that looks really good .
I like it .
I'm going to keep that and let's go ahead and publish this and we'll definitely need to take out the contact page .
And I also want to add a blog page because I want to have a blog on this site .
So now let's go ahead and create a page and I'll show you how you can do that .
So I'm going to exit out of this .
Now , we need to create a page so we can add it to the menu and work more on the menu .
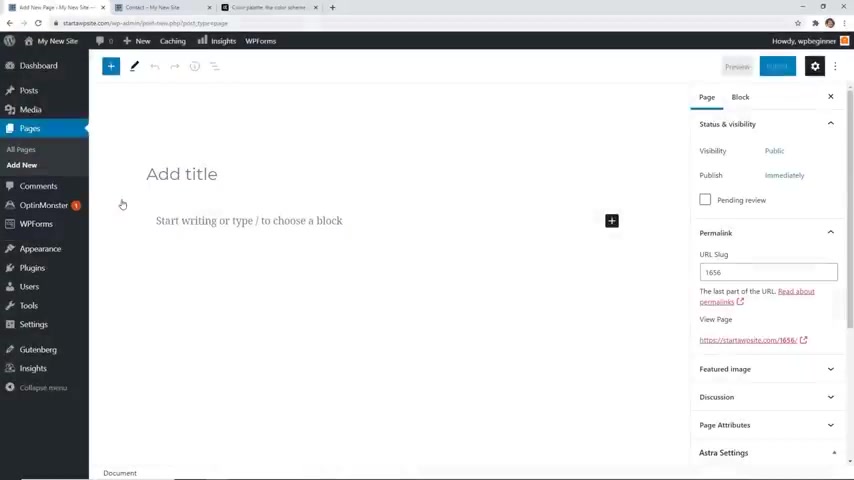
So let's go to pages , add new .
And from here I want to add a blog page and I'm not going to put anything on it because this is where all of the blog posts are going to go .
So I'm just happy with just adding that we're gonna say publish and you'll have to hit publish again .
And now we see that this is our link .
So we're good with that we can add it to our menu .
So let's go to menu this time .
We're gonna go under appearance menus so we can make some changes to the menu here .
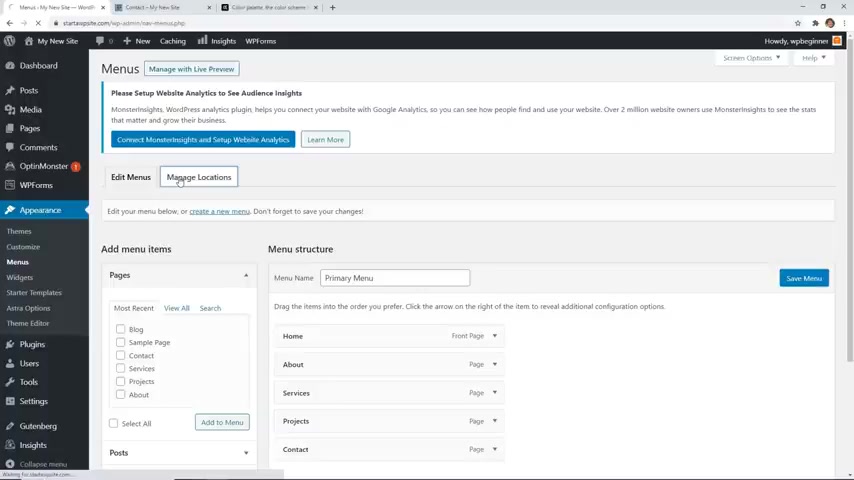
This is the menu area .
You can create new menus , you can manage locations .
You can have multiple menus .
This theme and it's theme specific .
So this theme has a primary menu that we were working on .
It also has the footer menu .
So you could create a little photo menu for at the bottom of your website , I scroll the way down .
It would come somewhere down here .
So I'm gonna go to edit menu and I want to edit this menu because I have the take action or the call to action button of contact us .
I'm going to remove this one here .
But because I also just created that blog page , I want to add that .
So I'm gonna click on the blog and then add the menu and I'm going to left click and drag it because I want to take it next to the home page and you can restructure all of these as well , doing the same thing .
Just left click , dragging them .
You can even make them a sub menu .
So meaning when you hover over projects , you won't see it until you hover over projects , you'll see services .
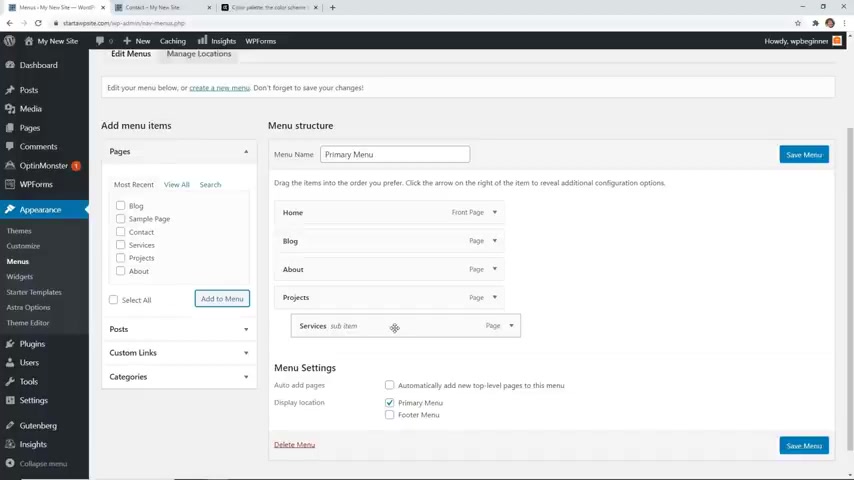
That's a little indentation , but we want everything on the main menu and that looks good for me .
So now let's save it and we can go back to our site , go back to our home page , we'll refresh everything .
So now we have great home blog about projects , services and the call to action contact us .
Perfect , great .
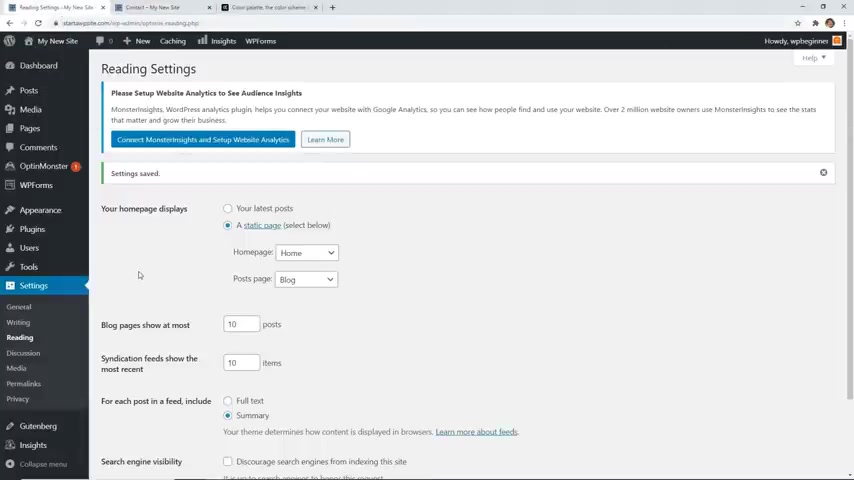
Now that we added the blog page and we put it on our site , we need to set it up so that all of our blog posts will actually go to that and let me show you where you go to do that .
If you go under settings , go to reading , this is where you can see where your latest posts go and how your home page is set up from here .
You can choose how your home page displays .
You can either choose to display all your latest posts .
So if it's a blog that you're creating , that might work for you , this is already set up to , this is a specific static home page .
I am saying certain things on this page and I like that , but when I click on the blog , it's empty and I know that there's at least one blog post here .
So how do I do that ?
So if we go to our reading area , the post page , we need to select that .
And now we want it to be blog .
The other thing you can set up is for each person to feed , we want to do a summary .
Otherwise it would just show the full text of the blog and then they would have to scroll down to see the next one and the next one , this will give it a summary and then if they want to see more of it , they can click on that .
So let's click save changes .
And I'm gonna go back to the blog and refresh .
Now this is set up and this is the only blog page that I have right now or the only blog post that I have .
But now all of my blog posts will be here .
Great .
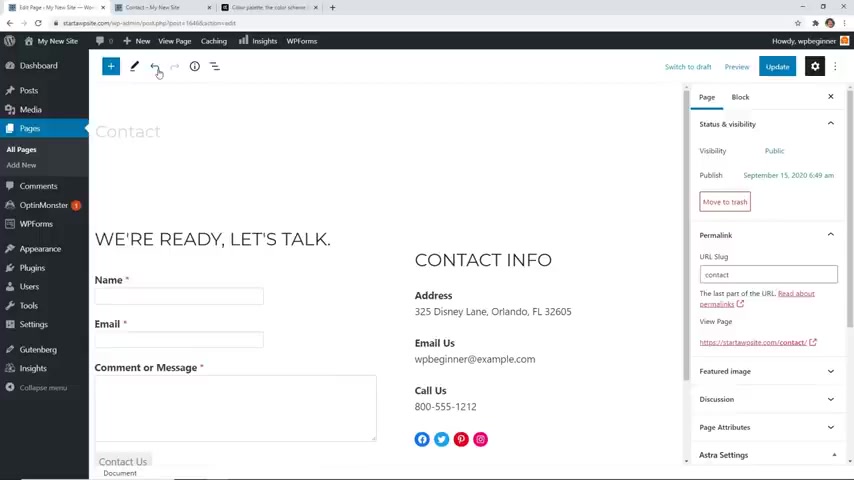
The next thing we want to work on is , you know , we set up this whole contact Us page .
And so let's take a look at it .
This is our contact Us page and we have the contact info , we can change that .
We have some items done here and we have this , but we also want to set up a contact Us form .
So let's go ahead and do that .
We're gonna go back to our dashboard and because it was already installed when we installed wordpress , we have WP forms here , which is perfect .
If you don't see WP forms , then you can go to plugins , add new and you can search for WP forms and then you can install it , we already have it installed .
And so it will show that it's installed and that it's active .
So we need to go to WP forms and we'll click add new from here .
We want to set up a simple contact form , which is actually what it says right here .
There are also a few other templates that you can choose from .
And then if you choose to , if you're running a business and you want to automate your whole back end with getting quotes and surveys and things like that , then you'll want to look at upgrading to their paid version , which does an amazing job for small businesses .
But we're going to do the simple contact us .
I'm gonna go ahead and give it a name and I'm going to pick this template , you know , for a simple contact us .
That's really all I need .
You can move things around if you wanted and just left click and drag things or if you want to make any changes to this .
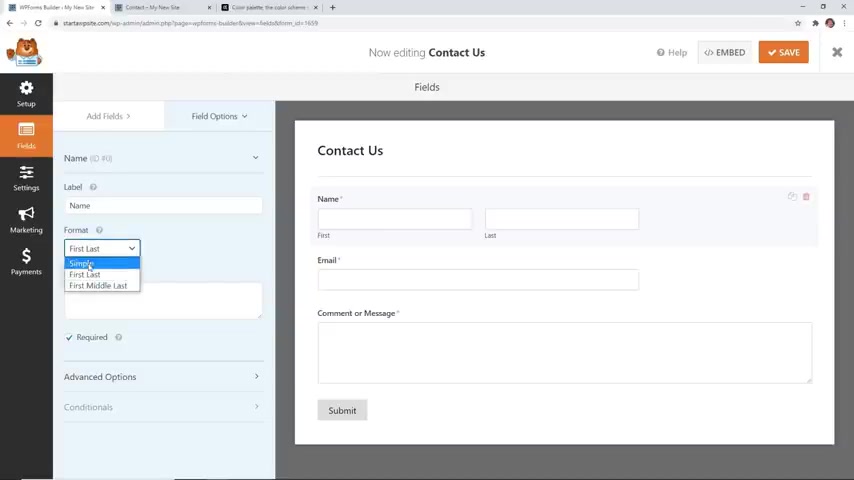
For instance , I always like the simple version .
So I'm gonna click on the field name field and I'm gonna choose simple .
So that's just one text line .
You can also click on the button and if you wanted to change that to something like that , then you can do that .
So really robust way of just making all the changes to this that you want to make it look like you want .
The other thing you wanna do is go over to settings and you just want to make sure that the notifications or that the emails are going to go where they need to by default , the emails go to the admin emails .
And if you want to change that , you can just put the actual email in here .
If you want , you also have these little show smart tags and these are pulling in from the field , which is perfect .
If you want to say change your email subject line , you can say contact us .
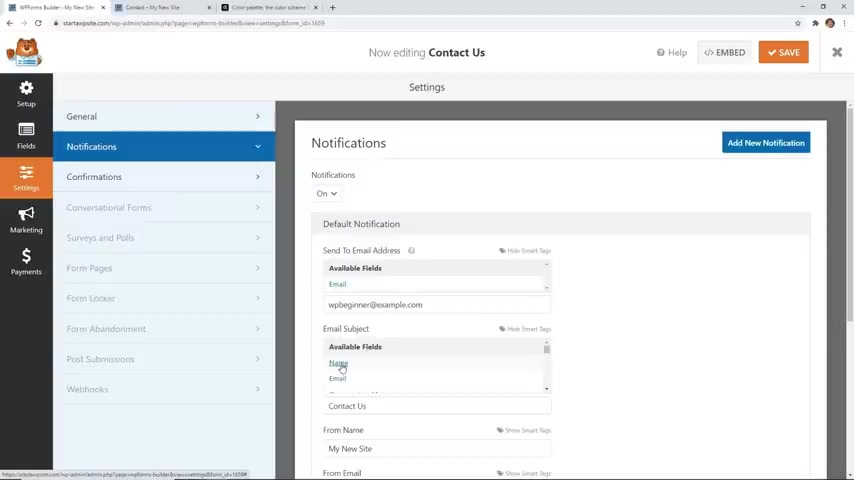
But if you get a lot of emails , then that's all gonna say that in your email .
So you can do show smart tags .
And I would say to make it a little bit more unique is go ahead and bring in the name .
So we'll do contact us and it'll bring in the name field from the form .
So it will look a little bit different each time and then scrolling down .
It'll bring in all the fields and the message , which is perfect .
The next thing we want to make sure we do is set up the confirmation .
The confirmation is what the person who submits the email or the contact form , what they see by default , it just comes up with this confirmation and you can change this to whatever you want .
You can also choose to do show a page so you can show a specific page , maybe thank you , page or something like that .
Or you can also even redirect them to a complete new URL , whether it's your YOU RL or if it's another website , web address that you can do for this , I'm just going to keep the message and we're good to go .
So I'm gonna save this and we're happy with this .
So let's go ahead and we want to embed it .
So let's click embed and saying , OK , where do you want to put this ?
We know we want to put it on the Contact Us page .
So I'm going to click select existing page .
If you didn't have that , then you can hit create new page and it'll take you to create a new page , but we already have the contact page .
So I'm going to choose that and say , let's go .
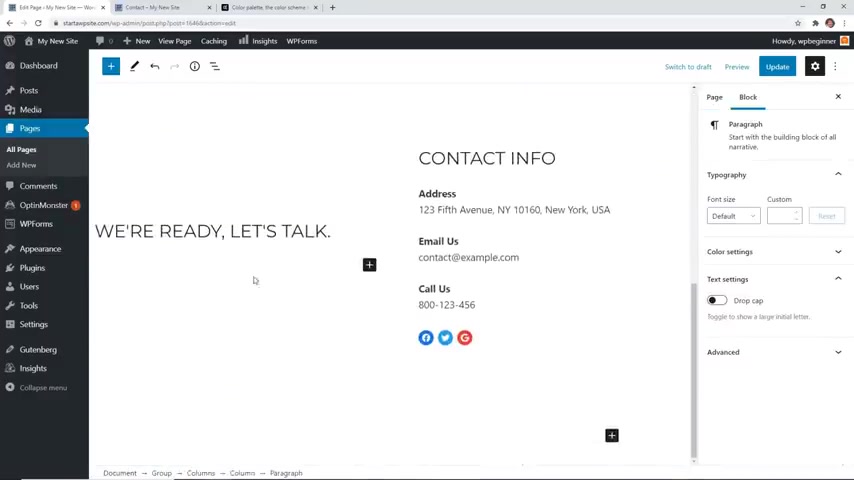
So now it's gonna take me to this page and I can scroll down and choose where I want it to go .
For instance , maybe I just want it right here under let's talk , you can click on the little ad block here or you can come up here and click on the ad block and you can find WP forms , widget brings this in and now we need to pick the one that we just worked on .
And once we do that , it will bring that in and we can see it .
You need to contact us .
I simplified the name that looks really good .
I need to update this address , update my phone number .
And then what's cool is these little social icons ?
These are a block and so you can make more so we click on the button here .
There are all these others that we can choose from .
For instance , if I have a Pinterest account , I can add that , you can just keep doing it until you have all the ones that you want .
But what you want to do is go in here to each of these social icons and you see it's just it's not going anywhere and you want to add the URL address of your profile .
Perfect .
Now I'm happy with that and so my contact us page is , is good to go .
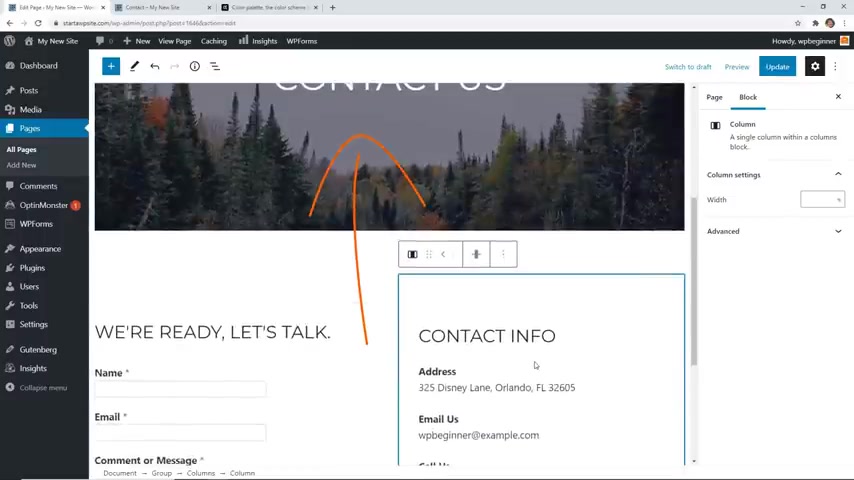
Now up here , you notice that there is a big image you can click on this .
And if you want to keep this , this is called a cover .
And from here , you can do a few things , you can fix it , you can do the fix width , you can do a focal point .
So we can move the focal point to an area of the image .
If we prefer .
If you think that this is too big , we can actually also bring this down .
So it's not so large 300 would be better .
You can either use your down arrow keys or you can type it in if you know the size that you want , that looks a little bit better .
It's not as as large and you could do that to all the others or you could just remove it altogether .
If you don't want this cover , if you don't want the cover , just click on this area .
Come up to the little three dots and remove the block .
If you feel like that was a mistake , we have little undoes up here .
So we can say undo here and that's perfect .
You could also change that image .
So this is coming in from the demo theme that we got and we can come up here and say replace , you can open up media library or you can upload from your desktop if you already have something from your desktop .
If you do open from media the library , then you can click on the media library .
And since these are all of the images that were downloaded from the template , you can choose one of these .
If you already have your own , then you can upload your own file here .
And then you can also choose to pick one from the Pixie base .
So these are royalty free .
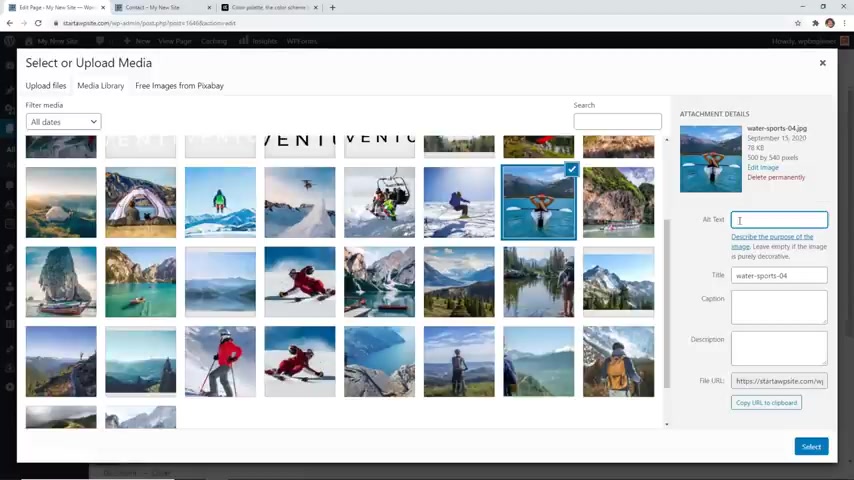
So you can choose any of these here .
Since I have some in the media library , I'm just going to go in there and choose this one .
You also want to whenever you're uploading any images , make sure you add the alt text of this .
This just lets anybody who's coming to the site and they can't see and they're relying on readers , the reader will tell them what this image says since they won't be able to see the actual image and we'll select that one .
So now that will change , you can do the same thing with this focal point .
You can choose where you want to make the focus .
But now we've updated our contact us page and we can click update and then that will be live .
We can see this in action when I go back to the website .
And now I can see that we can make some changes to this if we want to make it a little bit better change the focal point .
But by and large , this looks really , really good .
So you just want to do that with all the other pages that you have , make them design them for you .
OK ?
So let's head back over to our dashboard and you notice that we've been having this , please set up web analytics website , analytics for your audience .
This is a really crucial step .
When you're setting up your website , you want to connect Google Analytics to your wordpress website .
And this lets you track the data and it lets you see just how many people are coming to your website , how many people are , what pages they're looking at , what countries they're from , what type of devices do they use .
So many things that you can look at with Google Analytics Master Insights is is the plug in that you want to use to connect Google analytics easily with your website .
If you haven't yet already set up Google Analytics , then you can watch this video here where there's a step by step process of walking you through the folks at Monster Insights have set that up and that is our sister company as well .
So I'm gonna show you since we have insights here and I already have Google Analytics set up for this site .
I'm going to show you the process of connecting it to monster insights , to set up monster insights .

If you don't already see it , you should the way if you set it up , how I did , if you don't already see it , you can go to plugins , add new like WP forms we did and you'll want to search for monster insights with over 2200 reviews and almost that 4.5 stars in the repository .
So we have this Monster insights area over to the left .
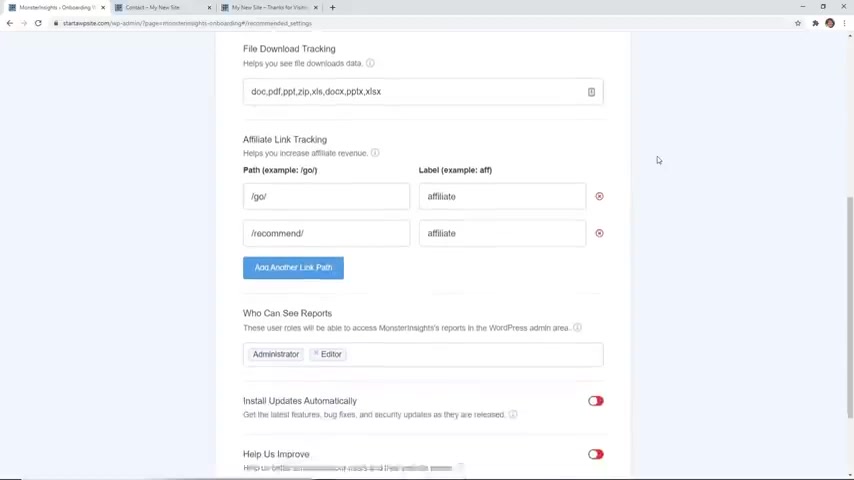
So we'll click on this and we'll go to settings from here .
We want to just click on the onboarding wizard and we'll just let it take us through the process of setting this up .
I ask you just a few questions and it makes it easier to set it up .
So if you're an e-commerce , you want to check that this will be a blog or a publisher site .
So we're going to check that save and continue .
Now , we need to connect monster insights and it will go out and authenticate .
It'll also connect us with Google Analytics from here .
Just choose the account that your Google Analytics is connected to and now you want to pick your site from the drop down .
If you don't have a drop down , if there's only one , then that'll be the one that you'll pick completely the process .
So it will finalize the authentication .
So now they'll give you some recommended settings .
We'll keep all of the default settings here and then let's go ahead and save and continue .
These are a few more add-ons .
So this is perfect if you're doing anything like multiple authors or if you want to do more page insights or Facebook instant articles .
If you're connecting with Facebook , then there's a few more add-ons that you can choose .
We're gonna save and continue and you notice that it's saying , OK , everything is connected .
Just know that if this is a brand new website that you've just set up Google Analytics , it could take as long as 24 hours to start start seeing the data .
So we're going to say finish and exit the wizard .
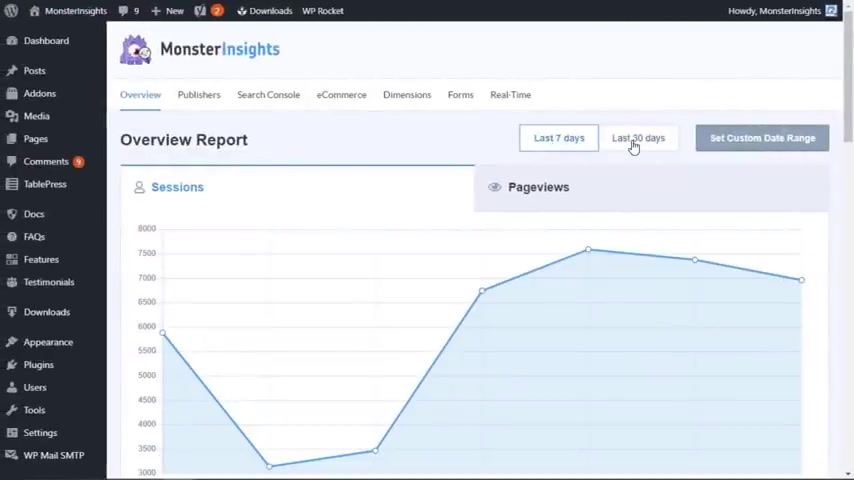
And now because I've already been connected to it , I can go to reports and I can show you what this looks like .
So right out of the box , you can see a lot of data of sessions .
That's how many people have come to your site .
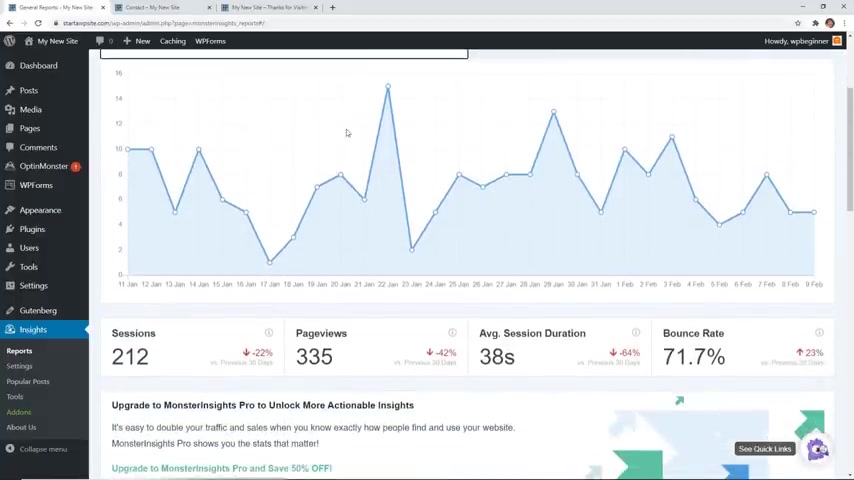
Page views is how many pages each person has clicked on throughout their sessions and you have the average session duration .
So how long have they been on your site ?
You all can see that you can also see the bounce rate .
This means how quickly did somebody bounce that ?
They just , they looked at one page and then they left versus clicking through to others and then you can also see like the the device breakdown .
So you know , with this one , we have the majority of the people on desktop .
So I want to make sure that I'm creating my theme for desktop use , but most people have mobile is pretty large .
And so you'd want to focus on mobile theme for them .
Also returning visitors country , these top refers .
So are people talking about your website and they're sending traffic to you ?
You can also see your most popular pages and most popular posts .
So that's really helpful , handy information of , do you need to write more content about that ?
And then if you upgrade to their paid version , you see other things like their top landing page improvements and so much more .
But knowing what your site is doing , how your site is doing is really key for growing it once the time comes .
So now that we have that set up , we can move on now as we're going through this process and setting up our website , we kind of want to start to gain some attention and we want to share it with people because we've just set this up , but it's not quite ready .
So the best way to handle that is by installing something like a coming soon page and we're going to use a plug-in called cro cro isn't just about coming soon , but it is perfect to get started .
They also do amazing things like a sales page or a lot in page .
You can also do other things like a thank you page .
If you're doing webinars , it is the perfect way to do that .
But we're going to quickly set up a coming soon page .
You can use the free version of cpro .
You just go to plugins , add new insert for seed prod like we've been doing , I'm going to use the paid version to show you all the features that you can do with C prep .
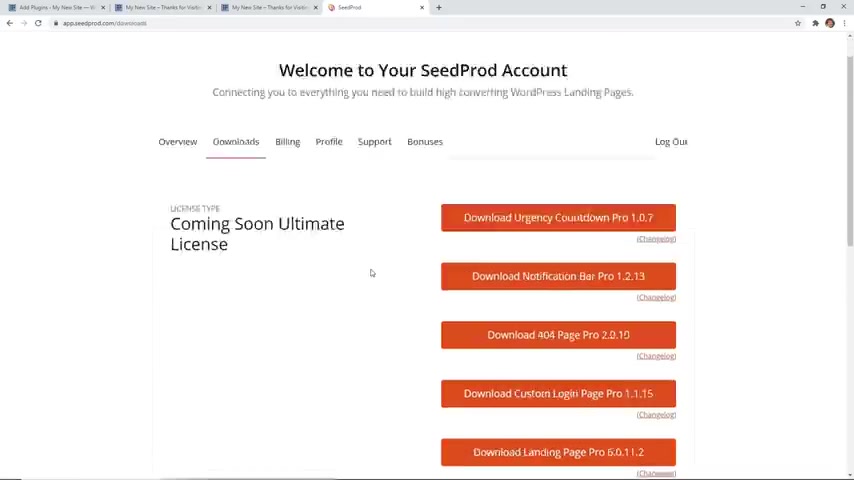
And if it's something that you're interested in , you can go to C prod dot com and you can use promo ow PB VIP and you'll get the best discount on seed product .
So once you create an account , you can go to download and we're going to download the landing page pro while we're here .
I also want to copy my license key and then let's head back over .
And instead of searching , I'm going to upload the plug in and you can either choose file to find it .
If you have it down here , then you can also left click and drag it up and now let's install it and we'll activate the plug in as well .
And I'm going to paste in my license key that I just copied and we can verify it .
And we see we have a valid license key .
Now we can create our first page so we can head back over two pages , but we're going to quickly set up a coming soon page and now I want to filter on coming soon pages .
These are all the pages , all of the templates that you can choose from .
You can also save them and favorite your template so you can come back to them and scrolling down .
I want to use this one .
You can either preview it or I'm just going to go ahead and pick it .
So I'll click on the checkmark and then this is the editor where we can go in and make absolutely any changes we want here .
For instance , we can change this to our logo .
So I'm going to change this out because we need to put our logo in here .
Do our white one .
Perfect .
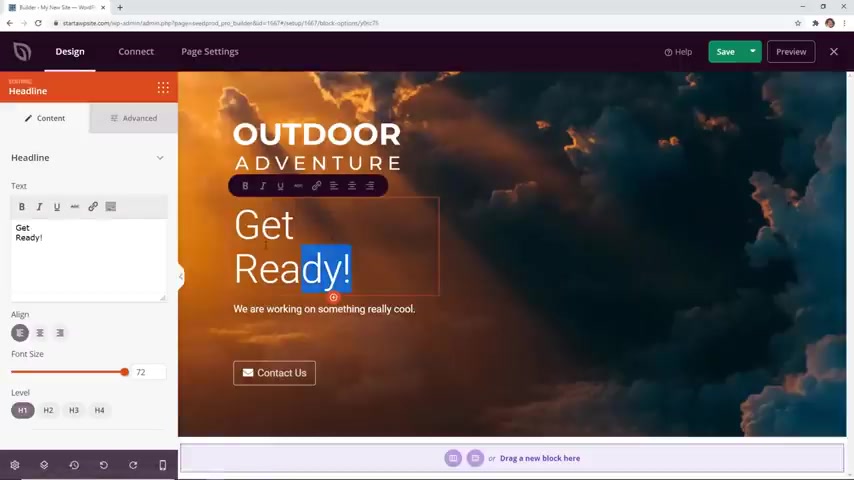
We need to say get ready .
Anything that you want to do here , you can just come over and make any adjustments and you can have a quick button .
Let's actually remove that because we actually want to add a certain block .
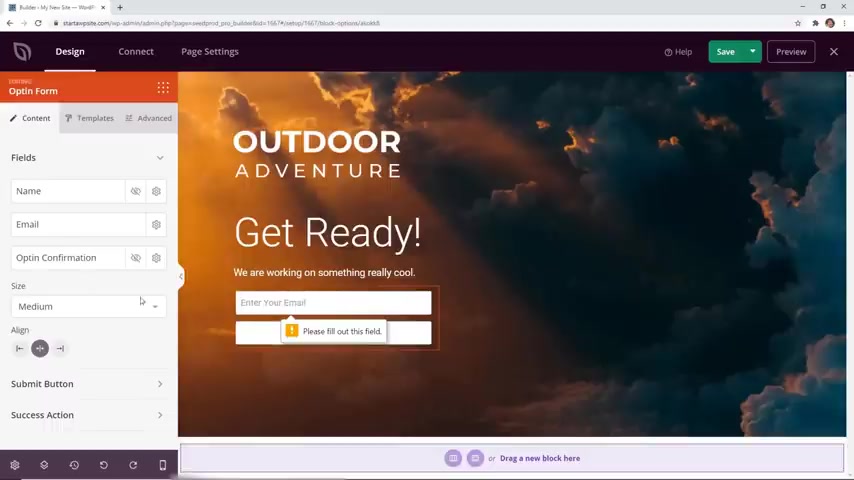
So scrolling down , you have an opt in form .
So maybe we want to start collecting email addresses .
So I'm gonna put that opt in form here and then we can make adjustments .
I want to put the name above the email and now let's just say we don't even want to see the name .
We just want to see the email submit under the submit button .
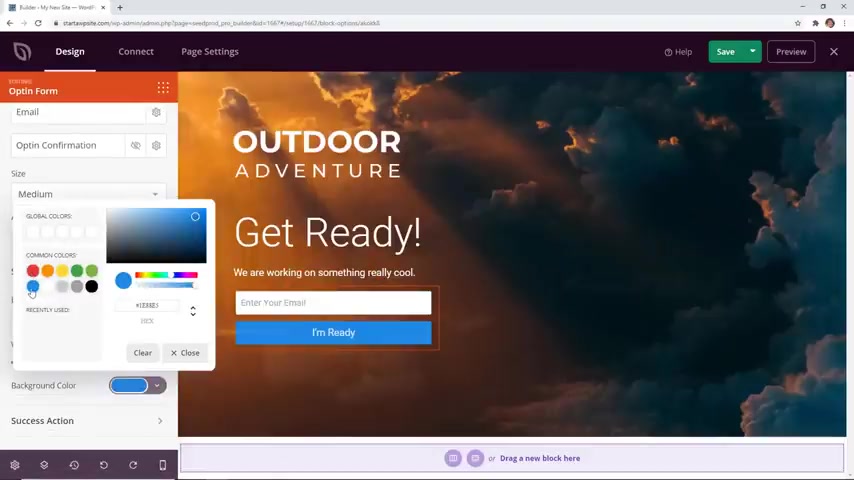
We want to change the submit button .
And what's cool is you can make this smaller or bigger here and then that's cool .
And then you could also change the color of the button if you want pillow seems to stand out if you wanted to .
You can even if you know the hex colors that you want to use , you can choose that here .
If you wanna just use what they have , just click clear and then they'll take on the ones that they already show .
You'd also come up here under templates and it will give you different styles for the field .
So you can do that as well .
So we've added an option .
You can also scroll down , we can add a countdown timer .
So get get ready , click on this and we can say basically when will it come out .
So we're saying it's gonna come soon when you click on that , it gives you how many days and how , what the countdown will be .
So that's a nice and simple layout that we can set up for right now .
You see down here , if you make any mistakes , you can either undo or redo , you also have the mobile preview .
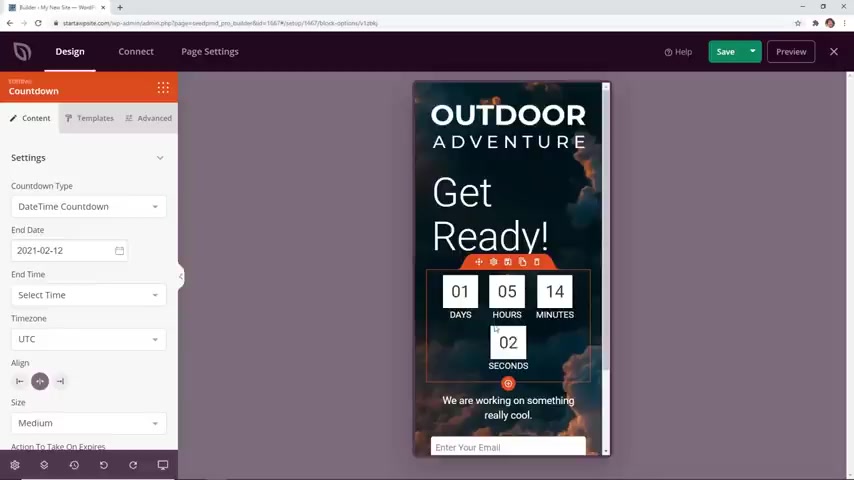
So you can see what this looks like on a mobile phone .
So maybe this is a little bit too big .
We can actually come down here and say let's do it smaller .
So that looks better on mobile going with the little icon here .
You also have some fonts that you can choose from here and the color scheme that you want to do , you also can change the color palette .
And from here , you can under global settings , you can also change the background if you want or just remove it all together .
And then again , if you don't like it just undo here .
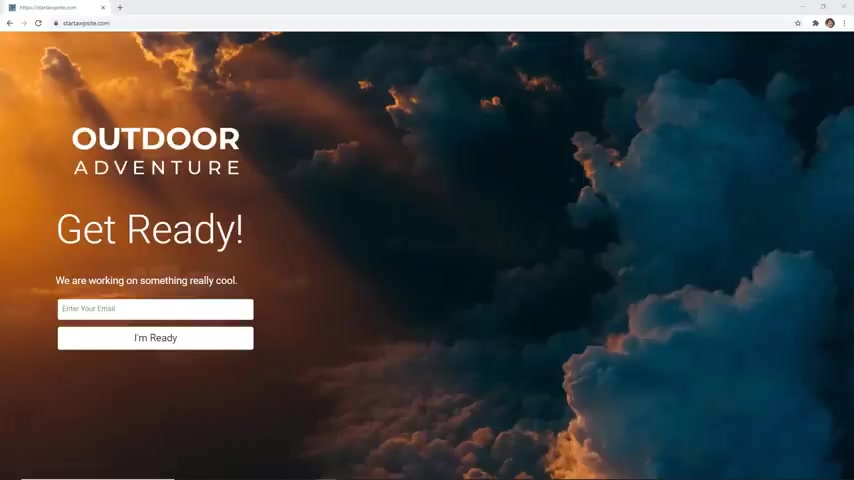
So this is just a great coming soon page that you can set up while you're setting everything else up for your site .
So once we're done with everything , we can click save and we can come under here and say publish , we can close this out and we can exit this out and it's published .
But you also need to make sure you come back to the coming soon mode and toggle this to active .
Once that goes active , then you see a banner up here , it says coming soon is active .
And what that means is anybody who tries to come to your web address who's not logged in , we'll see that coming soon page .
So the perfect way to get everything ready while you're making all the changes to the back end .
The next thing we want to look at is the logo .
This is the logo that they've created for us , but maybe you can create your own .
So let's do that .
Next , we can come up here and click customize and usually they'll tell you the suggested dimensions of your logo .
So when I click on that and I click on the little pencil icon and I click on the outdoor Adventure Notice , it says suggested image dimensions 1 80 by 60 pixels .
So we're going to create that one of the best ways to create a new logo .
One of the easiest is to use something like Camba .
Simply go to Camba dot com and we want to create a design , we want to do a custom size .
So we're gonna click custom and the dimensions were suggested for this theme .
Yours will be different , but we want to do 1 80 by 60 .
And let's create new design right now .
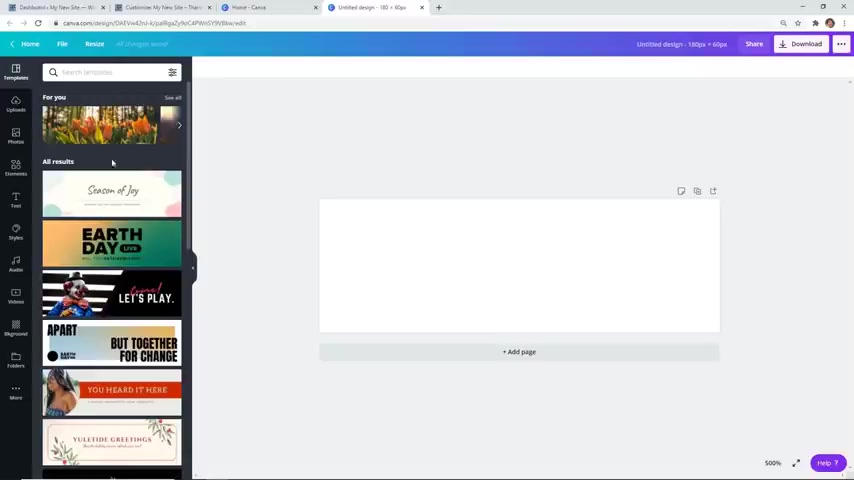
This is the area that we can work with over on the left are elements and these are all the different elements that we can choose from .
So say I want to do a mountain .
These are all the ones I can choose from .
Some of them might be pros .
So you might want to make sure that when you hover over it , it says free , you can also come up here and just say give me just the free ones , apply the filter and you can pick the one .
I want a really simple one , something like this .
And the previous logo had the name across it .
I want this to be simpler and I'm just going to put the mountains .
So I want to make this as big as I can across this space .
So I'm just gonna left click , drag it to make it as large as possible .
You can center it and when it's centered you see the crosshairs like that and that looks pretty good , but the current logo is white .
So I want to click on this and come up here to the color area and change the color .
So now you can't see it but you know , it's there .
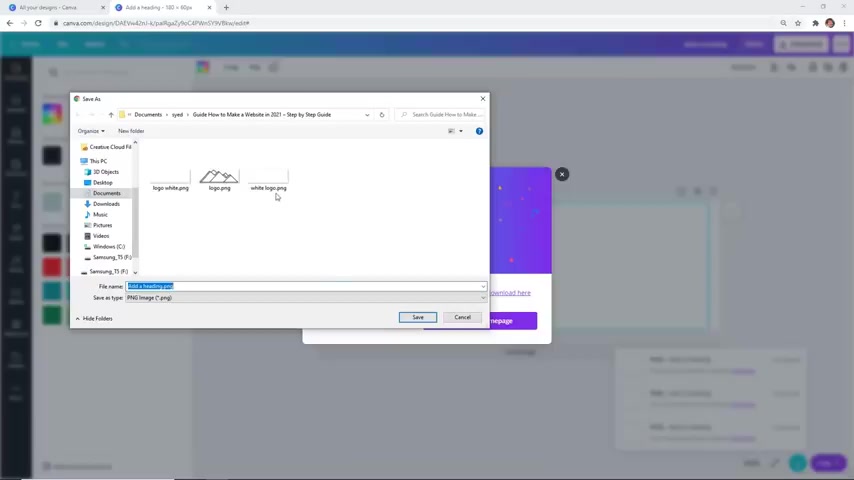
So now we can download this , make sure we do transparent background so that the white border and the white background won't show .
And now we can download it , save it to your desktop and then we can go back to our website , go to customize appearance , customize .
And then we want to click on the little pencil and now let's change image and then we can go to file upload to find it .
Give our alt text , choose the image and now that looks pretty good .
So simplified it .
I like that .
That's how I want it .
Also want to make sure that we click publish to make that go live on our site .
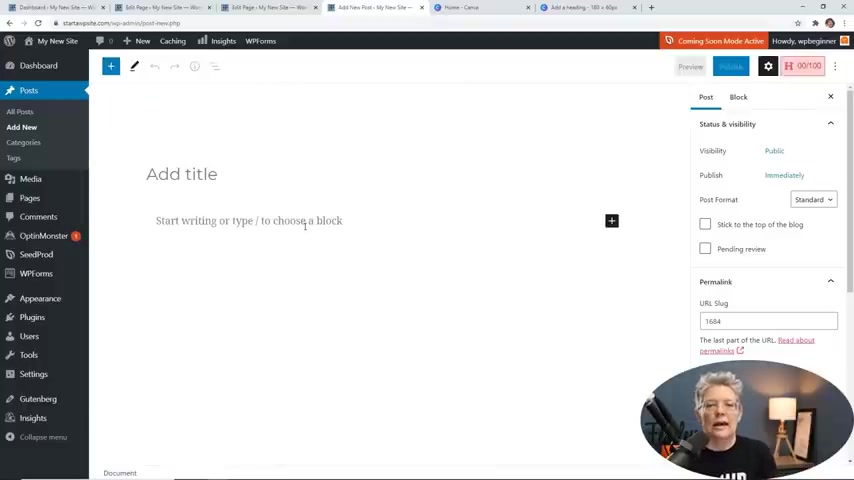
One of the final things I want to show you is where to add your blog posts .
So if you go back to your dashboard , you can go to posts all posts .
This is where your blog posts are created .
This is the default one that is installed .
When you install wordpress , you can come up here and click add new and then you can go in and create your content .
Now you are using a lot of these blocks .
This is called the Gutenberg block editor .
If you want to learn a little bit more about that , then make sure you watch this video next , where I'll walk you through , step by step on how to use the Gutenberg Lock editor to really speed up your content writing process .
And thanks for watching .
Are you looking for a way to reach a wider audience and get more views on your videos?
Our innovative video to text transcribing service can help you do just that.
We provide accurate transcriptions of your videos along with visual content that will help you attract new viewers and keep them engaged. Plus, our data analytics and ad campaign tools can help you monetize your content and maximize your revenue.
Let's partner up and take your video content to the next level!
Contact us today to learn more.