https://www.youtube.com/watch?v=Z6ZPq9Q4A0o
20 FAST Tricks to Transform your Drawing Skills!

Today I have 20 fast and easy tricks that are going to really transform your drawing skills .
Welcome back to my channel .
If you are new here , my name is Michelle , and on this channel you'll find drawing videos like this one loads of stuff on watercolours , even a little bit of mixed media and business and motivation for artists , too .
Please do consider subscribing .
If you click the bell icon , you'll get notified every time I have a new video for you .
I post at least one free video a week here on YouTube , with extra content for patreon subscribers .
Now .
One thing I firmly believe is that anyone can learn to draw .
In fact , I have proof of this because I've been teaching people to draw here in the UK in the real world in real world classes for over 30 years now .
But sometimes it can be really hard to have the confidence and really feel that you personally can learn to draw .
So though I've got lots of drawing videos on this channel today , I'm going to give you 20 really fast tricks that require no skill whatsoever .
But they are going to improve your drawing skills .
We're gonna work through them quite quickly .
I going to introduce each one and then I'm gonna show you how to do it .
Now , don't worry if it moves quite fast because this is going to be a fast moving video .
And don't think you have to write them all down because I've got you covered .
I've got a downloadable PDF guide for you .
So once you've watched the video , if you go into the video description , you can download a PDF for free , and it gives you a full illustration and written description of every tip I have given you today .
If you want to , you can print it out and keep it with you when you are creating your art .
So without further ado , let's get started .
Have you ever thought how much easier it would be to get everything right in the right places on your drawing or the scale or the proportion if you were certain that the proportions I'm not talking about the size , but the proportions of the drawing paper that you were using were exactly the same as the photograph you were working from .
I have a fantastically simple tip for this it's going to make a huge difference to your accuracy .
So let's explain , first of all , that you may see some angles on the sides of paper while I'm working today .
It's just the angle of the camera .
It's not possible for me to film for many technical reasons .
Facing straight down I know you would all like me to , but it would be impossible .
I'd lean in front of where I'm working .
So just to point out that all piece of paper I'm working on today are square .
So what have we got here ?
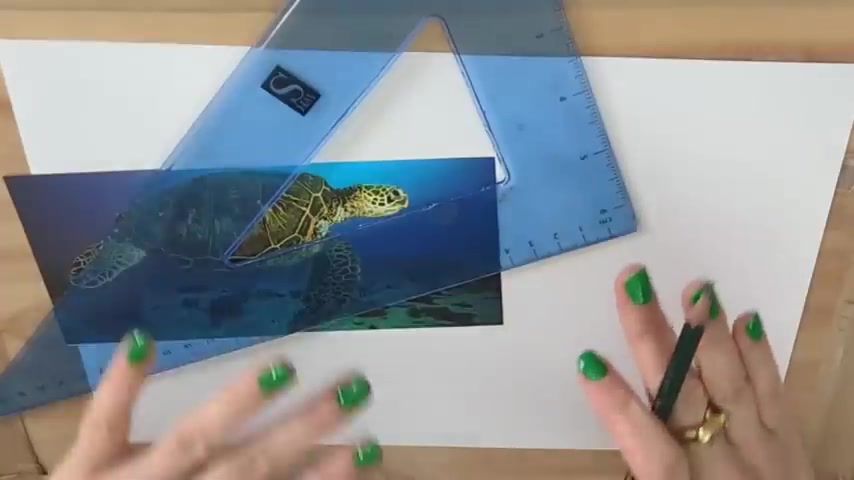
We have a turtle picture here .
It's quite long and thin .
Thin , isn't it ?
Now , how do I know that this piece of paper here , you know , I could measure where you know , the turtle's head is three quarters of the way across .
But if this paper here is different proportions , that's not really gonna work out for me .
So I need to make sure that the photograph I'm working from here is the exact same size as this piece of paper .
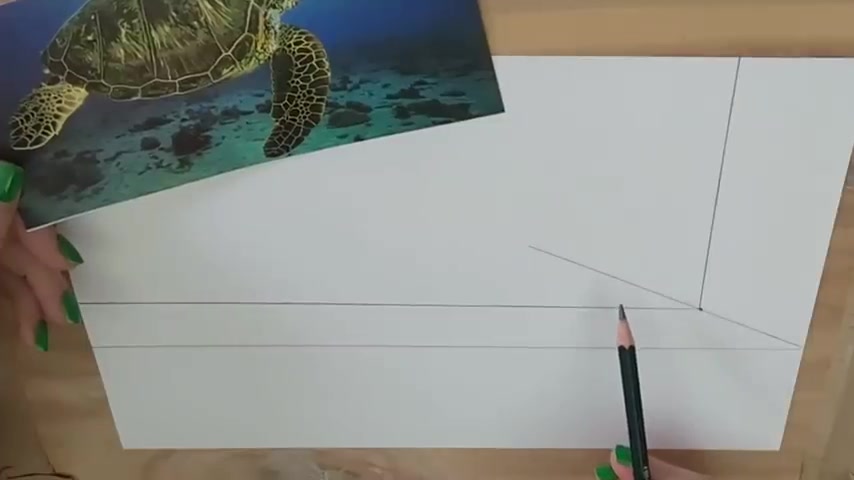
So here is my trick .
What you're gonna do is place your picture in the top left corner .
Now , of course , if you're left handed can reverse this .
It doesn't make any difference if you do it the other way around , and we're going to line it up there .
If you need to put a little bit of tape on to keep it still .
Now what I need to do now , and you don't need to set square a ruler or any straight edge will do .
A piece of printer paper even is .
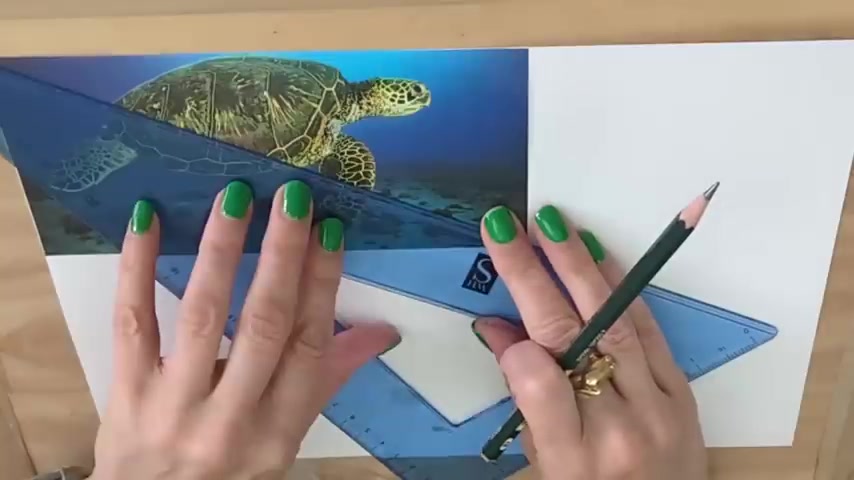
I'm going to take the straight edge out of the top corner and out of the bottom corner of the photograph .
Now , if you've got a white border on your photograph , remember that your only measuring the printed area here .
So either ignore the white border or cut the white border off , as I have done here .
And we're going to take that straight line from one corner of the photo to the other corner whilst keeping it in the corner of our paper , and we're going to just take that line out here .
There's no need to draw directly on the photograph at all .
We're just drawing on the paper so I can move that now , and I'm going to continue this line until it hits an edge .
Now it will either hit the side edge or the base edge .
What you're gonna do then , is you're going to take a right angle from this point to the opposite side .
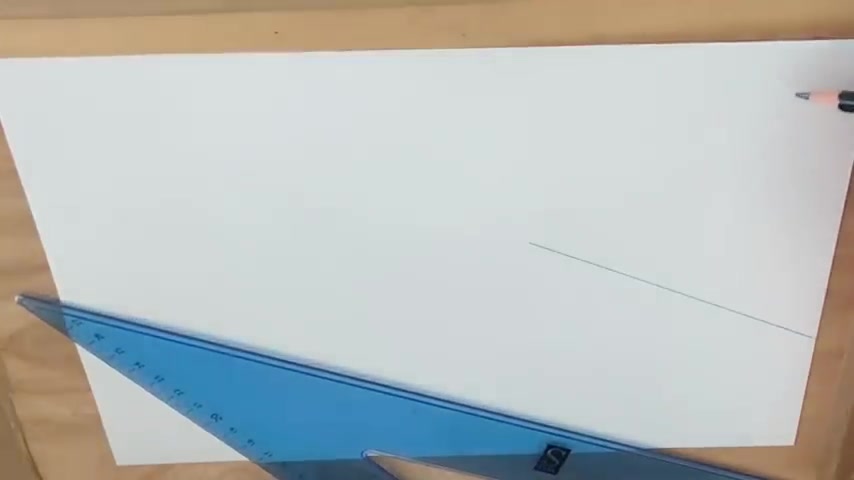
So if it comes out down here , you're going to take a line up like this .
If it comes out of the side , you're going to take a line across .
So now I've got my set square .
So I need to make sure this is a right angle .
As a said , if you don't have a set square , just use a piece of printer paper or you can measure the same distance down one side to the other .
We're gonna take a line across from that point and out the other side .
Now what I'm left with is this area here .
This area here is the exact same proportions as my photograph .
So I can now either cut the bottom section off or what I actually like to do .
If it's just a small area to get rid of , I like to just put a piece of masking tape across , gives you a visual stop .
That's much easier to acknowledge than just having a pencil line .
But we can use this for something else as well .
Because not only have we made our paper to the biggest size that we can , that's the same proportions as the photograph .
We can actually choose a point anywhere along this line .
So let's just randomly put my pencil mark here .
What I can do from here is go up and across , and now again , we've got another area somewhat smaller .
That is the exact same proportions as our starting photograph .
All we need to do then is just erase this pencil line here , and I will be pressing a little bit harder today than you ever need to , just so that you can see on camera .
You'll erase this pencil line here before you start your drawing .
Now , when it comes to scaling up , you may have heard of the grid method where you draw a load of squares on your photograph , and then you put larger squares on your drawing paper and transfer everything across .
It's very accurate .
It works very well .
I've got another video all about it here on this channel if you want to learn to do it .
But if you're looking for something much faster , that still gives you a good amount of guidelines .
I have a really quick trick for you , so I want to transfer what I see on my photograph onto my paper .
But I don't want to go to the tiresome trouble of putting a load of grid lines across maybe 30 or 40 squares .
It will take ages to draw all of that out and to scale it up properly .
But I do need a few reference points to help me .
So what I'm going to do is I'm going to go first of all corner to corner .
So I'm going to draw on my photograph .
But you don't need to .
If you want to do this without damaging your photograph , all you need to do is get a piece of trace paper , tape it on one edge , and then you can put the lines on the tracing paper and we're going to go corner to corner like this .
And then what we're going to do is again with a set square or corner of a piece of printer paper .
You're going to take a line down here .
This point that we've made in the middle here is the centre point of the photograph , so that's going to give us a good reference point to start with and another right angle across .
And we've now very quickly divided our photograph .
So we've got our bigger piece of paper .
We do the same again , corner to corner , which finds the centre points and then right angles through the centre point in both directions , horizontal and vertical .
So what I've got now are the same guidelines on both the photograph and the paper .
I can look for something like , for instance , this centre point here , and I see here the turtle's body starts just above this .
So as I start to sketch , I've got a really great reference point there of how to get started .
So do you have trouble drawing straight lines ?
Are you tempted sometimes to grab a ruler and use it in your sketching ?
Now , I don't advise this simply because if you put a perfect line in your drawing and a straight line is a perfect line , then the person viewing it is going to have almost an expectation of everything else being perfect .
And none of us want that , do we ?
So I've got a way of drawing a straight line .
We are going to use a ruler , but it's going to look like you never went near it .
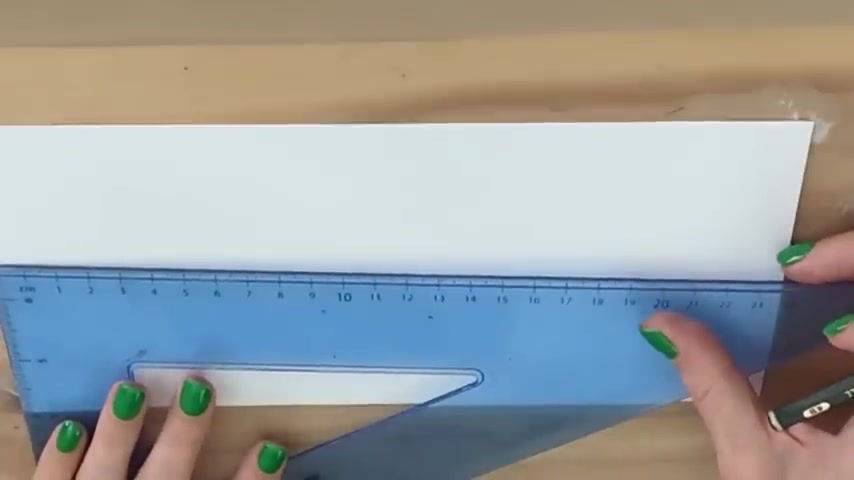
So this one is so easy now imagine I want to put a horizon line on this piece of paper and I want to get it straight , and I want to use a ruler , but I know it's going to look really unnatural .
All I'm going to do is put some tiny marks along where the ruler is .
So just some little dots .
What I'll do next is just join these up by hand so we still get a line that looks really natural and hand drawn .
But we know that we're keeping it straight now .
We often need a sharp point on our pencil .
I've got a really lovely pencil sharpener , which I'll show you in a moment .
However , if you keep sharpening your pencil , you get through those expensive pencils very , very fast .
Let me show you what professional artists do to bring the point back without ending up with half your pencil missing to pencil shavings .
So here's my favourite pencil sharpener .
It's an old fashioned helix desk sharpener where you insert the pencil .
You pull this out it grips and then you turn the handle .
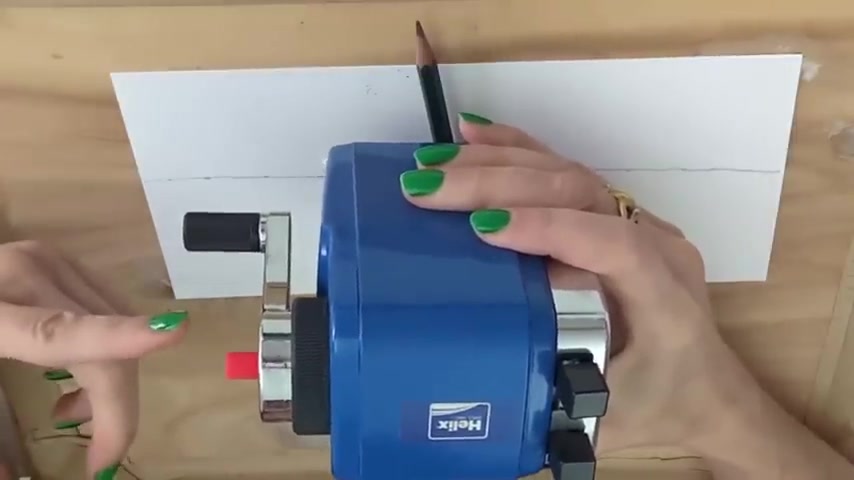
I'm not sure if I like this because it's so reliable or just because I have nostalgia from using them at school .
But of course they do .
Remove a lot of wood and a lot of pencil , and you can get through your pencils really a bit too quickly .
If you just need to get a little bit of a point back on your pencil , all you want to do is get a piece of fine sand paper , and you can shake it on there .
This one's a little bit rough .
If you buy the stuff they call glass paper , you'll find that you get a lovely , smooth , sharp point and you won't have lost any of the wood .
Now , whatever you're drawing is really handy to be able to measure angles , Um , particularly for buildings .
But it also goes for all sorts of other things .
You might , for instance , be drawing a portrait , wants to check an angle , you know , between an eye and the lips .
Something like that .
I've got a fast and easy method for checking angles , doesn't require any kind of rulers or measuring equipment , So let's imagine I'm about to draw this lovely picture here .
And look at this wall here how it comes down at a real steep angle .
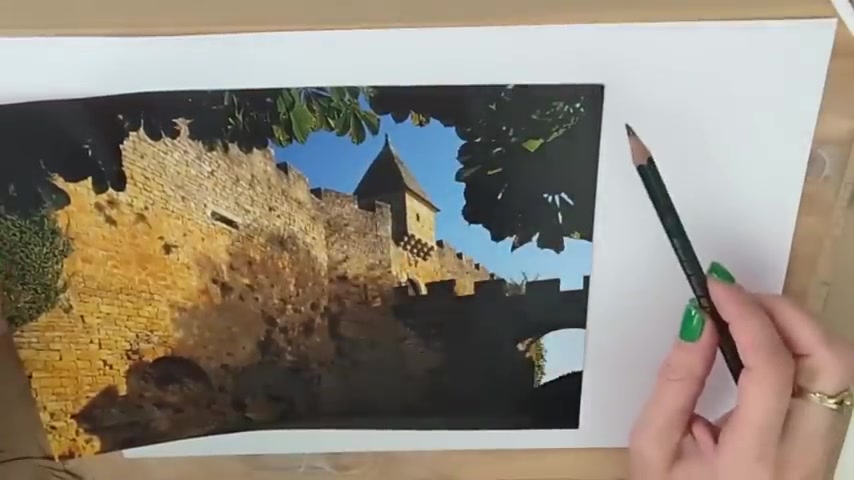
Getting that angle right is to be quite important for getting the drawing to look right .
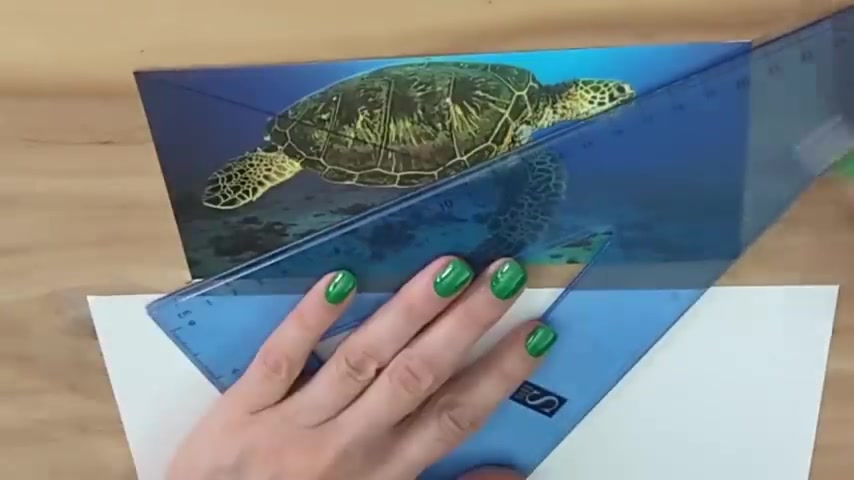
So what I want to do is measure this angle now .
An easy way to do this is just to place a long object like my pencil along it there , and I can see the angle quite clearly .
But what I've done wrong here is I haven't anchored the picture .
So in other words , if the picture is anywhere , then the angle is anywhere .
So what you need to do before doing this is you need to place the edge of the picture against the edge of your paper , and it doesn't matter which edge it is .
You can place it on the right , the left , the top , the bottom .
You can have it halfway along like this , so it's sticking out the edge .
You just want to place it wherever it is nearest to the angle that you're drawing without covering it up .
So I'm going to place it along the top here , and then what I can do is , I can place my pencil along like this .
Now this is not mathematical .
It's not exact , but all we're going to do is keep it really still .
Move it across like this , and then we've got a really good idea of the angle .
If I need to draw the whole thing , I can get another pencil and just put that pencil line in .
I can then go on to check all sorts of other things , and you do always want to check angles .
Look at this one Here , for instance .
It looks almost like it's dead straight , doesn't it ?
And yet when I place my pencil along it , we see it's sloping down very slightly of checking angles and moving them across angles don't change , so it's a fantastic way of getting your proportions correct .
This next tip is all about things that grow , So whether you're drawing hair or fur or grass or plants , this next tip is going to make them all look much more realistic .
Let's talk about drawing things in the direction they grow .
Now when you place pencil on the paper and you draw up like this , or out or down when you finish the stroke .
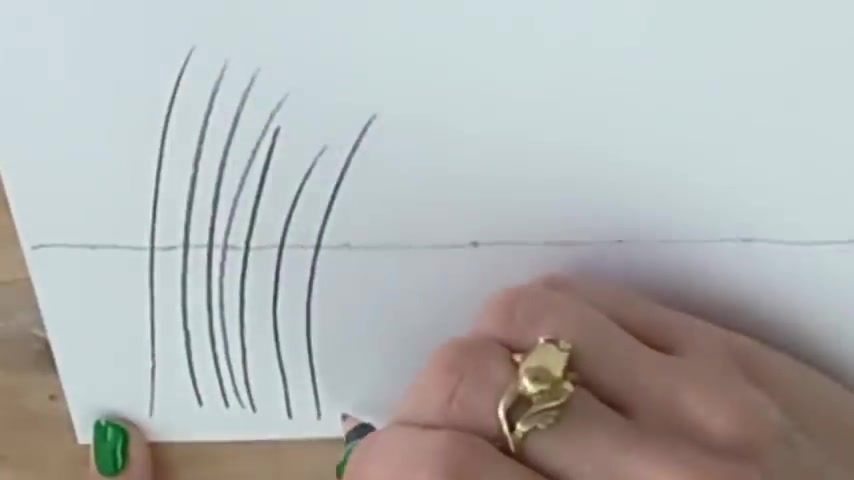
You get a tapered point like this because as the pencil reduces pressure as it comes up , the pencil line will taper .
Therefore , if you're doing something that grows , whether it's grasses or hair or fur , it's really important to take those strokes in the direction that your grass or your fur or your hair or your plant is growing .
This way you get a nice , natural tapered edge on the outside here , and hairs also taper as well as plants that grow .
Now look what happens if I try to draw it backwards .
Now , if I go outside in like this , do you see that stubby line I get ?
And that's because where I start the stroke is always quite blunt , whereas where I finish the stroke always tapers .
Have you ever drawn a river or a pathway going into the distance in your landscape and found that it looks like it's kind of tipping up towards you ?
It doesn't look like it's laying flat in the landscape .
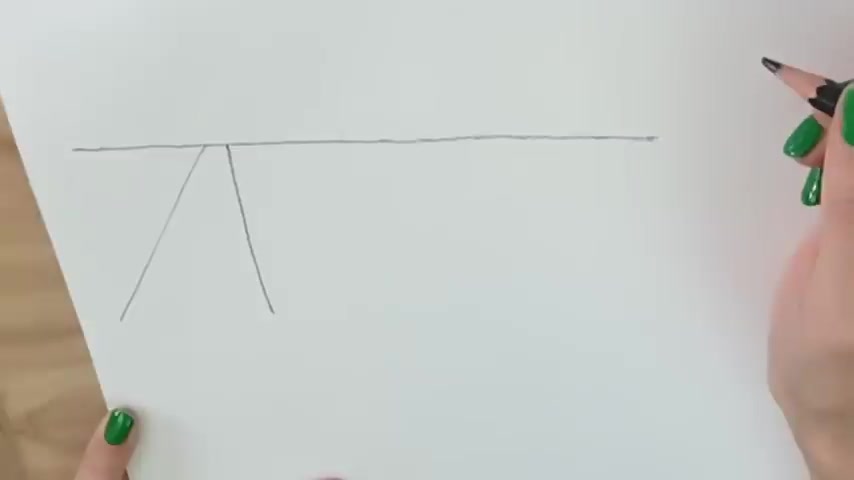
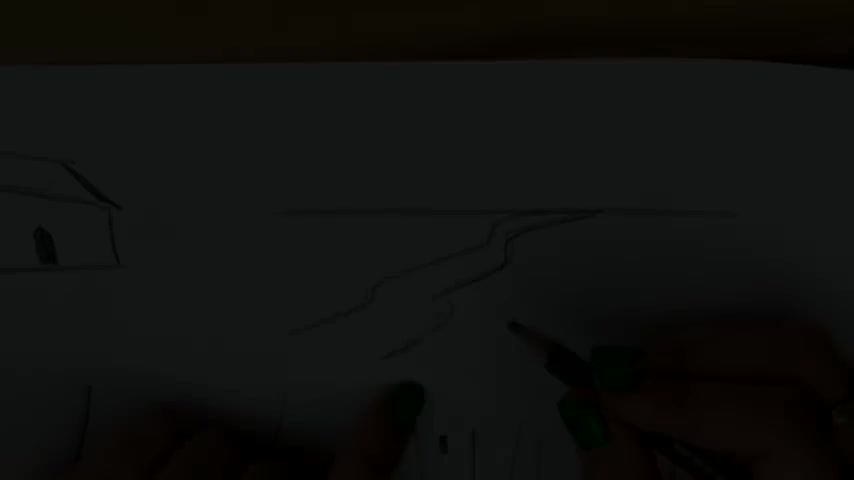
Let me show you a simple trick for fixing that problem , so I've drawn a little horizon line here .
Let's imagine that we're drawing a river or a pathway that goes off into the distance and we can do this and you can see it doesn't really lay very flat .
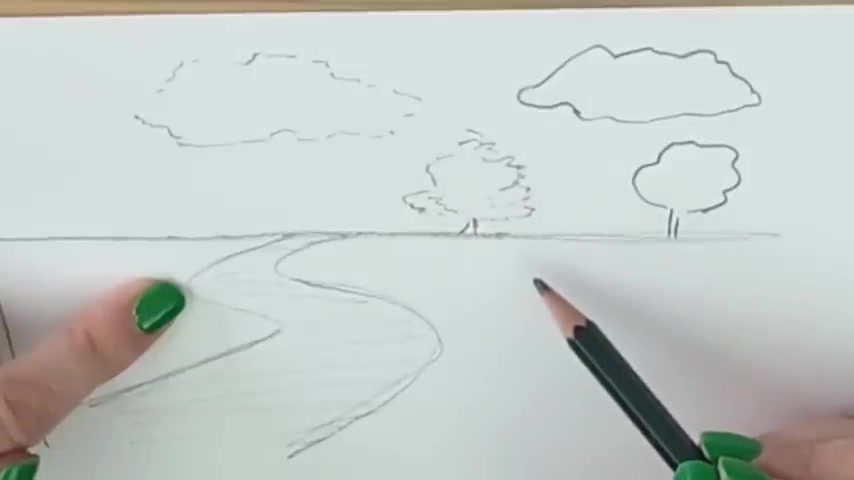
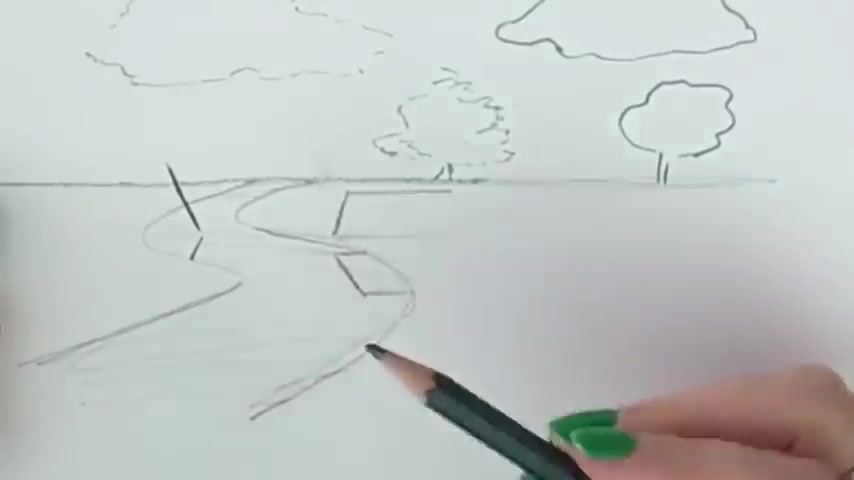
So what we need to do is we need to emphasise the horizontal by coming across a little bit like so we're going to taper that line where it meets the horizon .
You'll see that at these points where the river curves , it's a little bit wider .
We're just reducing the angle , making it shorter this way .
And what we've done here is we've really emphasised the horizontal part of this .
I sketch this one the other way .
You'll see the difference between drawing up too steep an angle with lines that are too straight , as opposed to flattening your path or river and emphasising the horizontal .
Can you see how this one appears to lay flat ?

This one looks like it's just a ladder going up into the distance .
My next trick is gonna show you the best way of sketching things that don't have a solid outline .
I'm talking about fur on animals .
I'm talking about clouds , reflections or perhaps shadows .
So I've got my river here going into the distance and let's imagine there are some trees and perhaps some clouds in the sky .
Now , obviously , when you first start the drawing , you're gonna do a rough outline for them .
And it's a mistake , for example , to draw your tree with a really hard edge or your cloud with a really hard edge .
It'll be difficult to erase when you go back to it later on , and it's going to look very cartoonish .
So if ever you are depicting something the soft edged or in the distance , I want you to use a broken line .
This will be easy to erase and easy to adjust when you start to put more detail in later on .
Now , if you draw a water reflection with a hard edge and make it look as as hard edged as the thing that it's reflecting , you're going to find that the reflection itself looks like an object , which then stops it looking like water .
So the rule is if there's anything with soft or ragged edges , draw it initially with a dotted line when vertical objects such as houses and posts are reflected in water .
We need to make sure that we are doing the reflection at the right angle .
It's a simple thing , but people sometimes get it wrong .
Let me show you the trick for getting this one right .
So we've got our little river here .
Let's think about water reflections .
Let's imagine there is a post in this water and it's sticking up like this .
What people sometimes do with the reflection is they can on the angle , whereas in fact it should go in the opposite direction like this .
The same with any hard edge .
We have a wall like this .
Then the reflection is going to go the other way like this .
So you always need to be mirroring your reflections in the water .
Whatever the angle is of the thing that's on top , take it in the other direction .
In the water .
Have you ever done a drawing where there are little white lines , perhaps whiskers on an animal and you think to yourself , How on earth do I get these white lines ?
I'm not using any white pencil .
I'm just using my sketching pencil .
I'm going to show you a tool that will do this with no trouble at all .
It's actually something that's much more widely used by professional coloured pencil artist , but it works for graphite pencil two .
I'm gonna be using a special tool , but I'm also going to give you options that you have just got lying around your house so you don't need to buy anything at all .
Now , what I have here is an embossing tool .
It's basically a hard point with a little ball on the end so that it can't tear the paper .
What we're going to do is we're going to emboss lines .
So this is great for any fine lines that you may have .
What it's doing is denting the paper .
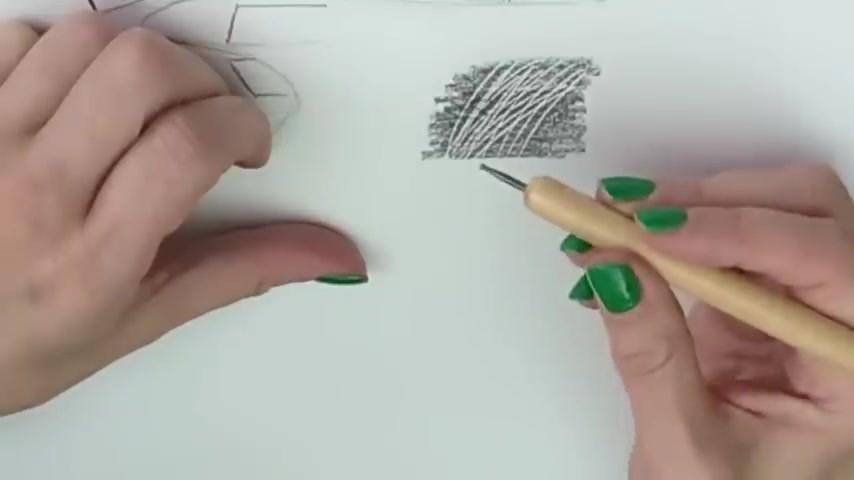
Now , if I sketch over the top , can you see those fine white lines appearing ?
You would never , ever be able to reserve those and sketch around them .
So a tool like this is fantastic .
Each end has a different size on , and you can get lots of different sizes .
Now , if you're saying to yourself , Well , I don't have one of these .
There are lots of household things that you can use instead , you can use a ball point pen with no ink left in it .
That works really well .
Another thing you can do is to use a hard pencil .
You want something like an HB and then just put tracing paper over the top so that you're not actually drawing on the paper .
And then you'll be able to use your pencil to make any lines that you want .
Remove the tracing paper and you can sketch over the top .
At this point , we're halfway through our 20 fast drawing tricks , and I'd like to ask you to do me a quick favour .
First of all , could you please click that like , button that thumbs up ?
It really helps with the YouTube algorithm .
And if you find this video useful when you finish watching it , I'd like to ask you to share it with someone , whether you share it in messenger or perhaps in a Facebook group where you know it's gonna help other people .
It really helps me to reach more people , and you'll be helping someone else out as well .
So let's get back to the video with our next drawing trick .
My next trick for you is gonna show you how to draw an object that's behind another object and yet keep it looking perfectly well formed and natural .
So I've drawn a leaf here and there's a stem that goes behind it .
So I want to put the stem behind it .
Now , the mistake that a lot of people make is they draw the stem like this and then they kind of try to imagine where it comes out the other side .
And it doesn't always end up looking 100% natural .
So what I want you to do instead is with very light hand is you're going to just come up and go right the way through like this .
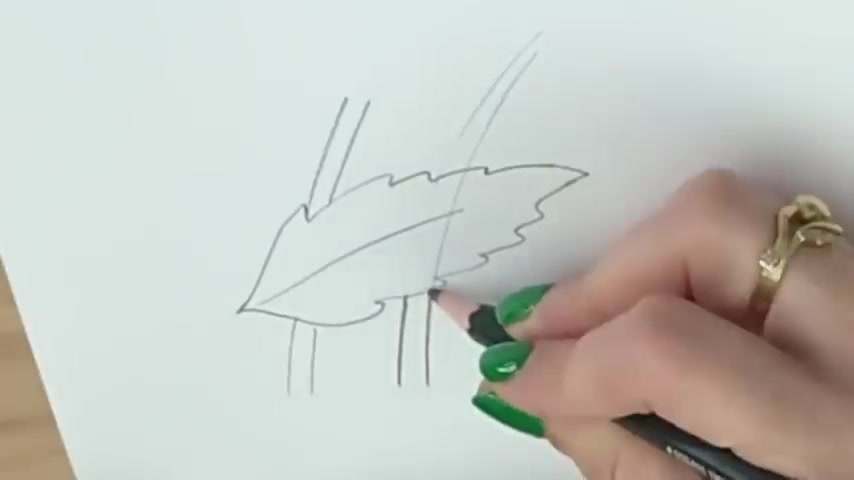
Then , of course , you can just make your lines a little heavier and erase the bit that goes over the top .
By doing this , you can layer things up .
Maybe we've got a large leaf coming here that's going behind both of these objects again .
I draw through and then I just get rid of the bit that I don't need .
If you accidentally erase anything , just pop it back in .
You should still be able to see the lines .
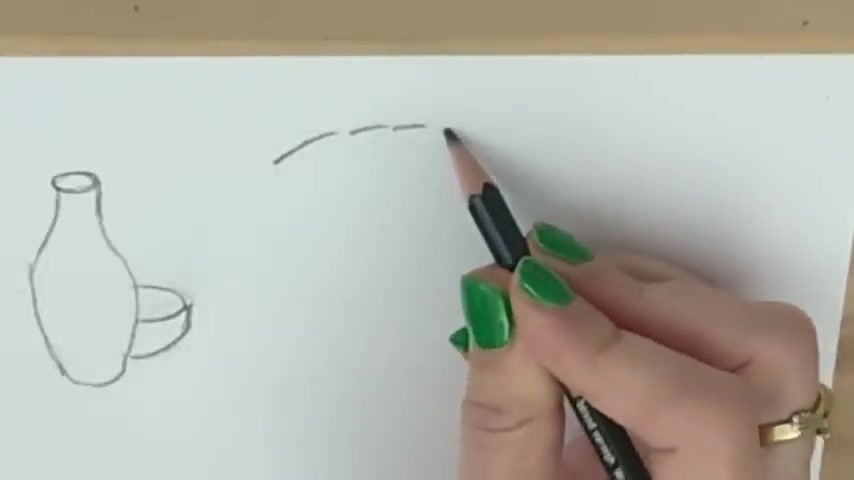
We can build up complex shapes in this way .
I've drawn a little bottle here .
Maybe there's a bowl behind it .
If I try and just imagine what half a bowl looks like , I will no doubt go wrong .
So what I'll do instead is I'll draw the whole bowl like this .
And then I just get rid of the bit that I don't need and then strengthen the lines that are left behind .
In this way .
We get a fully natural shape now , while I'm filming YouTube videos always have a glass of water on hand , and this top circle here , seen on the side , is called an ellipse .
Let me put that down before I spill it .
Now , if you've ever had trouble drawing an ellipse and getting it looking perfectly smooth and perfectly circular , I have a really easy trick for you now because it's tricky to draw an ellipse .
Most people try and draw them quite slowly , often using a dotted line like this .
They think that perhaps it'll help them to be a little bit more accurate .
But generally it doesn't work , and you often end up with these corners here .
Now , if you look at a circle from the side , it's still a circle .
It can't possibly have a corner .
So what you want to do is to draw the whole thing from the shoulder .
Now you can only see my hand .
But as I draw this , I'm actually going to be moving pretty much only from the shoulder or at least the elbow .
You see that my hand and my wrist are not moving at all .
I'm moving from much higher up the arm , and that's going to give us a lovely , smooth line .
But it looks about right .
We can then take the bit of it that we like the best and just make that more defined .
In this way you'll get a lovely , smooth circle , no matter what angle you're viewing it at .
Do you struggle when drawing flowers in order to get them facing in different directions ?
Because they're not just all facing forward .
Some of them are facing upwards and sideways .
I have a simple two part trick that is going to allow you to draw any flower facing in any direction .
It's amazing how well this one works .
It's gonna make such a difference to your flower drawings now , to draw a flower facing any direction , you need to do two things you need to find the outside shape and the centre point .
Now daisies like this have a specific centre point .
You may be drawing something like a marigold , a chrysanthemum , something that has tonnes of tiny petals .
If you look closely , you'll find that you could still see a centre point .
The petals often get smaller and closer together .
You can still see where that centre point is .
So if we look at some of these little flowers , what we need to do is draw the outside shape .
So imagine you're putting your flower in a box .
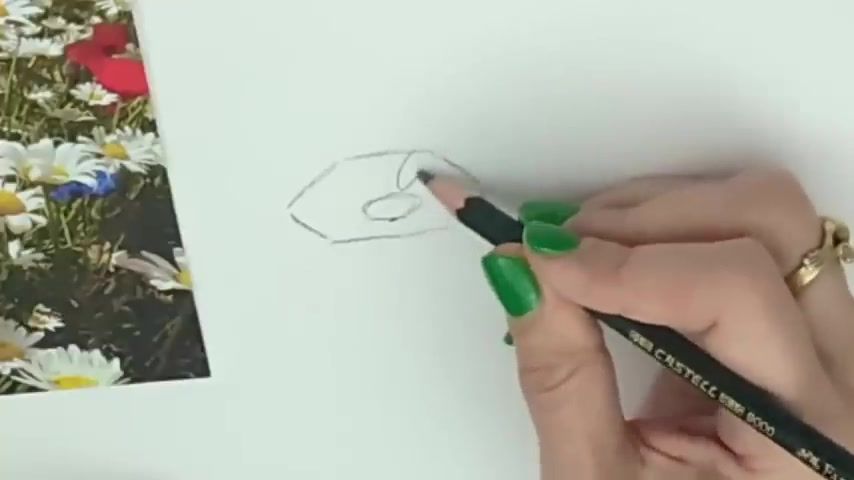
It won't necessarily have four sides .
It might have six sides or eight sides , but you're actually just trying to see what shape a box would be .
If it fit around that flower , then you're gonna find the centre point with my flower .
It's right down low , and then once you've got the centre point , you can just take your petals out from there and fit them into that shape .
And then , of course , pop your stem in .
Let's do another one .
I can see a tiny one higher up .
You may not be able to see it on camera , but let's try another one .
I've got here and the centre is about here .
Let's draw that centre in and then we start to put the petals in using those outside edges .
As a guideline , It's a rough guideline .
They may go slightly outside in places , but again , you can see that it's easy , then to draw a flower that faces in any direction , and you can get rid of your guidelines later on .
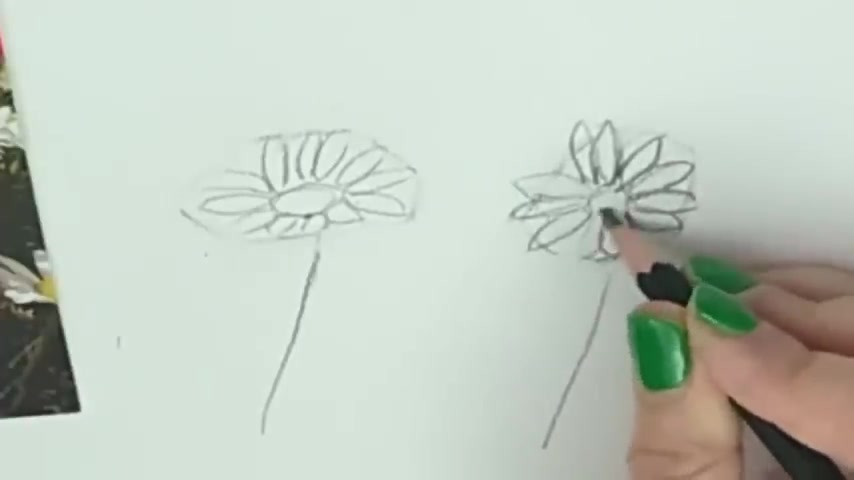
As I said , I'm drawing much darker here so that you can see on camera .
You would use a very light hand to do this , and in this way you can make flowers that face in literally , any direction at all and look much more realistic .
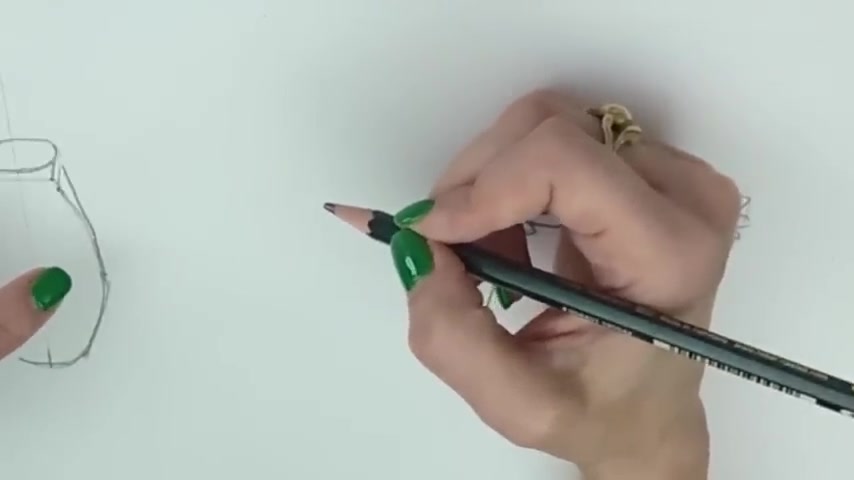
Do you struggle to keep tall objects like doorways , vases and columns looking completely symmetrical ?
This next trick will enable you to get it right every time .
So I've started to draw a vase here , but it's really not looking very symmetrical at all .
So what I need to do is find the centre line .
I'm just gonna do that by eye , just , you know , pick a point which you think is probably most central , and then we're just gonna take a line up like this .
Now we've divided it into two halves .
You can see that it really does look quite wrong .
So pick the side that you like the best .
I think this side looks nicest .
What I can do then is I can go out from each side and I can measure .
So I've got one centimetre here .
So that tells me that I need to go one centimetre here .
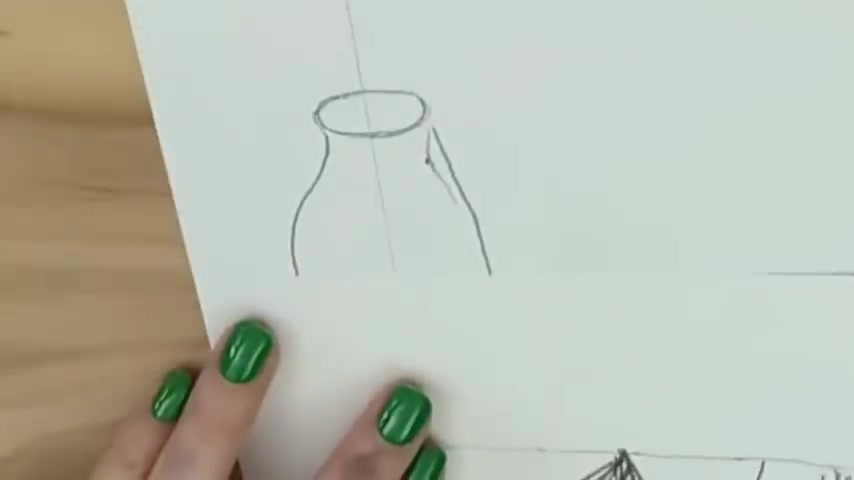
So this line here has come far too far out .
Now , you don't actually need a ruler to do this .
You can just use a piece of paper like this .
So I'll use my piece of paper here and I'll mark the side and the centre point .
I can come this way .
Well , that one's pretty close .
What about up here ?
Side centre point again .
We're OK .
So I think really , it's this top point , isn't it ?
That's furthest out .
I can do this and I start to get the shape looking much more correct .
Next , I'm going to show you a really simple trick to make tall buildings actually look like they're towering above you and are indeed very tall .
If at this point in the video , you can hear some pattering in the background , it's bucketing down with rain outside .
We have storms forecast today here in the UK so , um , any strange noises you'll know what that is .
Now people talk about one and two point perspective .
You may not have heard of three point perspective .
It basically , in layman's terms , means that when you look at a tall building , it will appear to get narrower as it goes up .
Now you don't have to worry about it .
When you're drawing an ordinary , say , two story house , you can pretty much keep the uprights upright and just adjust your horizontal lines for perspective .
But if you're drawing something tall like a church or a tower , it's a really good idea to slope those sides in .
So if we're drawing a tower , for instance , let's draw one without perspective .
First of all , so we're coming down like this , and we're keeping the sides dead straight .
Doesn't look too bad .
But now look what happens if we slope those sides out a little as they come down .
And , of course , bearing in mind that any sort of windows get smaller as they go up by sloping your sides in , and this goes for circular towers as well and things like lighthouses again , you would just slope them in like this by sloping the sides in , you'll make a building look much taller .
If I asked you to draw a wall , say with a doorway , dead bang in the middle , you'd quite easily be able to find the centre point of that wall .
But if that wall was angled away from you and whether it's a door or a window or any centre point you're looking for when you've got a bit of perspective going on , I've got a simple trick for finding the centre of your angled wall .
Let me show you how it's done .
So I've started started drawing a little building here .
Now this corner here is closest to us , and then the perspective is taking it away at an angle here .
Now imagine I have a doorway that's exactly halfway down the side of this house .
It won't work for me just to measure from here to here and find the halfway point because for shortening means that the doorway , although physically it may be halfway down that wall , it's not going to look like it's halfway down that wall .
So how do we find out where to place it ?
So all you need to do is go corner to corner again .
So we're going to put a guideline here , keeping this quite faint and a guideline here .
Now , where these lines cross over is where your central doorway or window or whatever feature it is will be placed for this next trick .
We're going to use something I call repeating motifs in order to show distance in your drawings .
It's something that doesn't require any perspective knowledge at all , but it's really , really effective .
So what are repeating motifs ?
Were there any object that repeats ?
That's the same .
In other words , perhaps you had a row of fence posts that are all the same size or a row of trees that are all the same size or just things like grasses .
And what you're gonna do is make them smaller as they go into the distance .
So imagine some fence posts .
In fact , let's give them a line to sit along .
They're going to go along here and we're gonna start drawing them .
So what we need to do is make them smaller as they get into the distance .
Now , you probably know to do this already , but did you know that as well as smaller they'll also get closer together and fainter .
So not only will they get smaller , they will get closer together from here to here , and they will get fainter .
You can use this with whatever it is that repeats .
Maybe you've just got some shrubs that repeat so smaller , closer together , softer and fainter .
You can do the same as well with grasses .
Have them large in the foreground and then getting smaller as they go further back .
Using repeating motifs will always give a sense of distance in your picture .
I've got a couple of tricks now for drawing more realistic features on faces , and we're gonna look at lips first .
This simple trick will enable you to draw much more accurate natural looking lips .
So when you're drawing someone's lips instead of going around the outside of the lips and trying to get the shape right like that , you might have tried this and find it doesn't work very well .
Instead , you want to look at the centre line and just very closely observe .
I'm doing this from memory , but you can have a look at the photograph or the source material or the person you're working from and you want to get that centre line right ?
Once you have got the centre line of the lips right , it's going to be really , really easy to fit the rest of the lips around .
If the lips are opened , it still applies .
You still draw the centre part of the mouth first and then just shape the lips around the outside .
Have you ever tried to draw someone's eyes ?
And they've looked like they're really , really staring at you or they're surprised or scared .
My next trick is gonna solve this problem , so it's easy to make an eye look like it's staring .
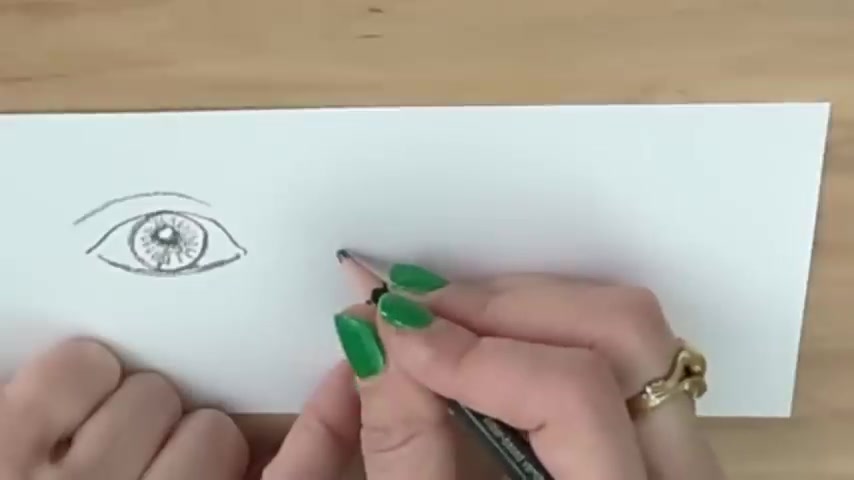
And the mistake we've made here is to draw the whole of the iris as a circle .
Though it is a circle , it's usually covered partly by the top lid .
So if I draw this one again , the way it usually looks is like this .
So the pupil will appear higher up because we're only seeing mostly the bottom part of the iris because the eyelid here is cutting off the top .
In this way , you'll get eyes that look more realistic and less like they're staring now in the real world , we all know that things have different surfaces .
Some are hard , some are soft .
You may have a smooth texture , like satin or a rough texture like Hessian or a wall .
My next trick is gonna show you how to apply the pencil in order to mimic rough or smooth surfaces .
Now people often don't give much thought to texture .
But the truth is , the way that you shade your picture is going to help you to show the surface .
So therefore , if you are drawing something that's very rough textured , so say we're drawing fabric and we've got some rough sort of netting .
Then we're going to need to make rough sort of marks .
Maybe we've got Hessian or fishing nets .
Something like that .
You're going to need to make those marks rough .
But what about if you're drawing something like silk or satin ?
And I've just quickly sharpened my pencil here to get a longer li ?
What we need to do then is we need to get a much smoother effect , and that's when we need to start using blending techniques .
There are lots of tools you can buy for blending , but let me show you one that you already have in your house , and it's a cosmetic tissue like this one .

What you're gonna do then , is just place it around your finger and you can use it to blend so you can see that this surface looks rough .
This one looks smooth and dreamy , so always consider the surface that you're trying to portray , whether it's something rough , like a basket holding some fruit or something beautifully smooth , like a piece of glass and shade accordingly .
So do let me know in the comments .
Which one of these tricks you found most useful do feel free to share your own drawing tricks there , too , because lots of people read the comments , and it gives us a chance to share our knowledge with each other .
So I hope that having watched this video , you understand that you can learn some really , really simple skills that are going to level up your drawing really , really fast .
Don't forget to pop into that video description .
Not only can you download a free PDF with all of the tips I've told you about today , there are also some other free PDF S .
You can even grab a free watercolour painting course , and you can find out as well about my complete drawing course for beginners at the time of making this video .
That's September of 2022 .
We're having a big sale on it .
But even if you're watching this video sometime after that sale has ended , it's still a fantastic course .
You can click that link and read all of the positive reviews from other students that I have helped to learn to draw .
If you enjoyed this video , I'm gonna link to another drawing video that I think you're gonna find really , really useful .
You can watch that video right now .
Are you looking for a way to reach a wider audience and get more views on your videos?
Our innovative video to text transcribing service can help you do just that.
We provide accurate transcriptions of your videos along with visual content that will help you attract new viewers and keep them engaged. Plus, our data analytics and ad campaign tools can help you monetize your content and maximize your revenue.
Let's partner up and take your video content to the next level!
Contact us today to learn more.