https://www.youtube.com/watch?v=hCxIyl3vkLU
How to Start a Blog in 2023 (Step by Step)
Are you finally ready to start the blog you've been thinking about for years ?
Well , great in this video , I'll walk you through how to start the blog and how to get up and running quickly .
I'll take you through the step by step process of getting your blog up and running so you can get started .
So if you're ready , let's get going .
And if you want to learn more tips to improve your wordpress website , make sure you hit the subscribe button and ring the little bell to be notified .
Whenever we upload new content .
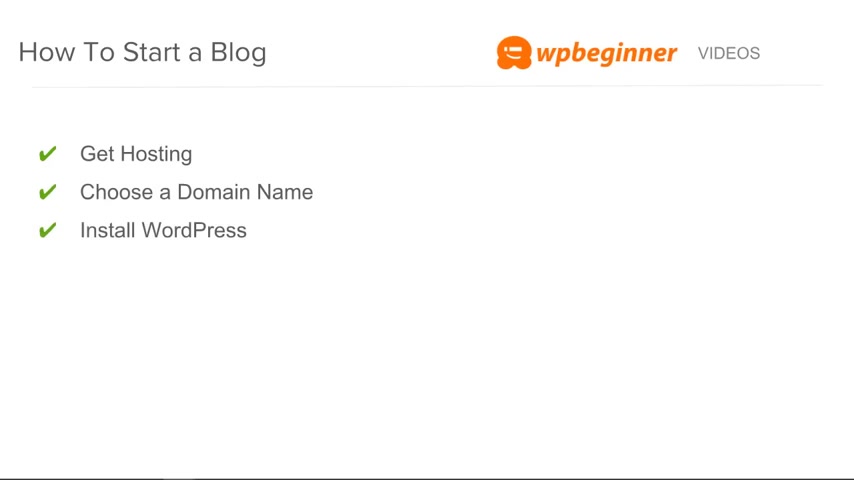
First , we'll talk about getting hosting , then we'll talk about the domain name and what you want to call your blog .
Next , we'll install wordpress and then we'll choose a theme for your blog .
We'll set up the different pages that your blog needs and then we'll add plugins to extend the functionality of your website .
Make it do the things that you want it to do .
Finally , we'll write our first blog post and then you're ready to go .
So first , let's talk a little bit about hosting when you're building site .

It's very similar to what's happening when you build a house , you have the land that you need to use to put the house on .
That's the same as the hosting provider .
The hosting provider has servers that all of your files and folders will go on .
Next , you have an address and that's so people know where to find you .
And the address is your domain name or your web address .
You want to start building your website and your website is your home .
That's what houses all of your files , all of your images , the color structure , the way that looks the functionality of it via the plugins .
Finally , you have your mailbox , which is your email address and that's how people can contact you and all of these come together to make up your whole website on the web .
Now , at WP beginner , we recommend using blue hosts as your hosting provider .
They have great customer support .
They are one of the oldest most established hosting companies out there .
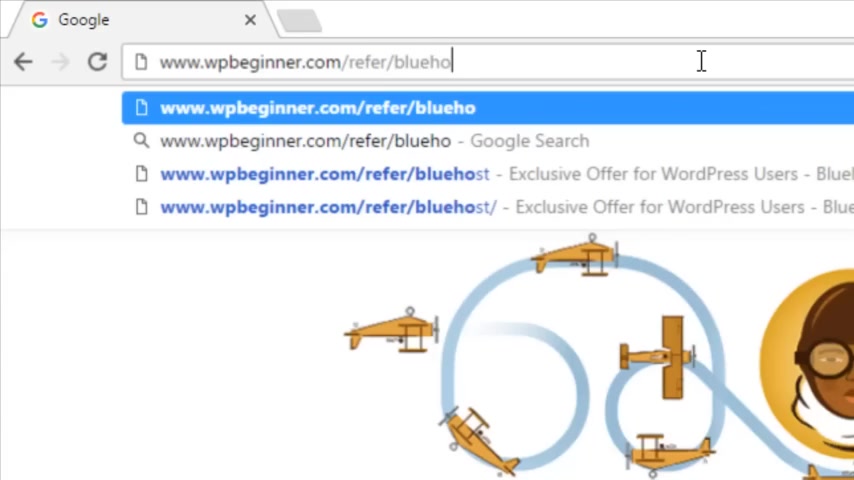
They're officially recommended by the wordpress dot org organization and WP beginner users can get 60% off and a free domain by using our discount code to get that discount .
Just go to wwwwp beginner dot com , forward slash refer forward slash blue host hit enter and it'll take you to that page .
We also have a link below that you can use as well from here .
Just click on the big green get started button and it'll take you to the select your plan page .
You can choose your plan here .
The biggest difference between these two is with this one , it's very basic and you're only allowed one website .
Whereas with this one , if you have web addresses or multiple websites that you want to set up , then this might be the best one for you .
After you've chosen , which setup you want , go ahead and sign up with a new domain name that you want .
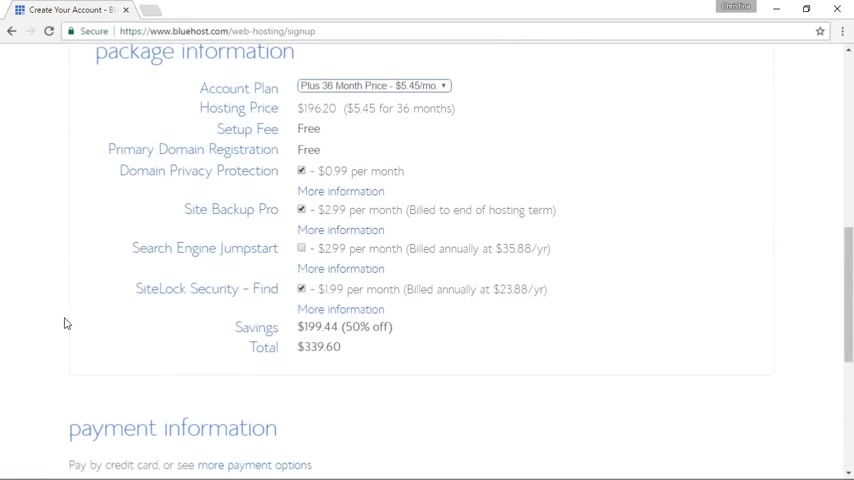
Since it comes free and click next from here , you want to go ahead and create your account by filling in all of this information .
And then down here you want to verify the package information .
I would say that your domain privacy you don't need .
We normally just turn that off things like backup site and site locker .
There are a lot of great plugins and features available with in wordpress .
So you don't need that either .
Once you fill out all the information , you see the amount that's being discounted .
Now , just fill in your payment information and you'll have your hosting account set up now that we've signed up .
We'll get a congratulations screen and we'll just need to click on the next screen where we can create our password .
This password will be used to manage our hosting account .
Once you create the password , they will start setting up the account for you .
One of the great things about blue host is now they've made installing wordpress even easier from here .
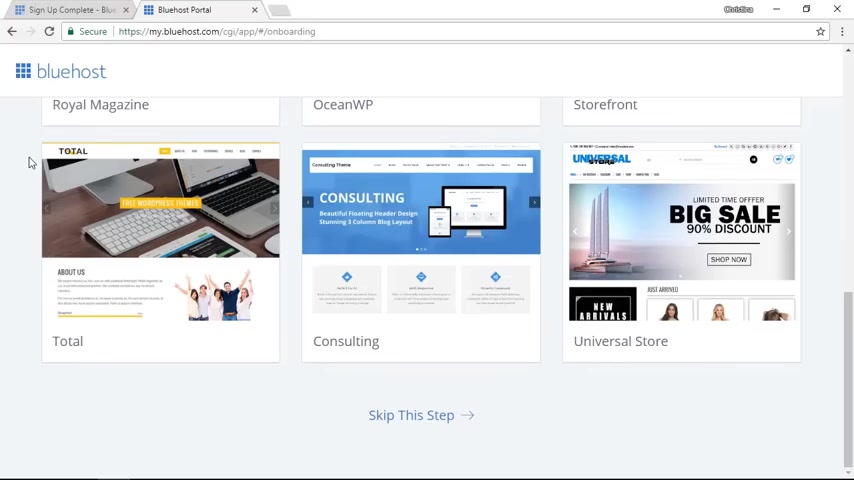
You can select a theme that you might like to go with your site since I'll be walking you through the whole process .
Let's go ahead and skip this step and now they automatically set up wordpress for you .
You no longer have to go into your blue host account and install Wordpress and go through that process .
Once we get everything set up , you can click start building and we'll be taken to the back end of our wordpress dashboard where we can start customizing it .
Great .
Now that Wordpress is installed , this is the back end of our website where you can go and make changes to it .
Yours might look just a little bit different , but this is the overall feel of it .
This is our dashboard area where you'll see things at a glance .
Most of the things that we'll work on are from these tabs on the left and you see already we have some notifications here that if you need to , you can address those .
They're simply for updating .
Well , let's take a look at some of the main areas of our website , the posts area , that's where you'll be using a lot of your time .
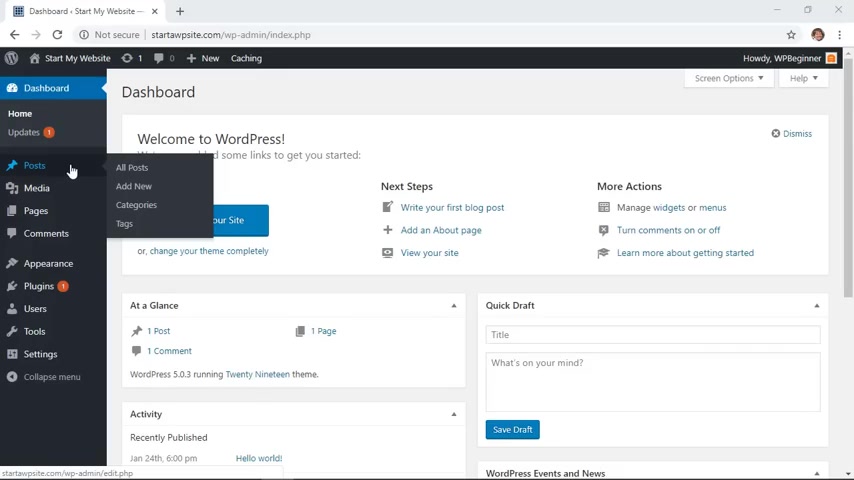
You'll be spending a lot of your time writing your blog posts for your site and this is where you'll go to do that .
The media area is where you upload your images and your photos that will be housed on your site .
Pages are very similar to posts , pages are the things that don't need a date , time stamp on them .
And it's for things like your about page , maybe a contact us page comments .
If you start to get a lot of comments , this is where you can go to approve or edit those .
And the bulk of what we're going to do next will be under appearance and plugins .
The appearance is where we can go to set our theme for our site or what the site looks like .
And then the plugins are where we go to add the different bits of functionality that we want our site to do .
For instance , if you wanted to add a e-commerce shop on here , we would go into the plugins area and add a plug in that would allow us to sell on our site .
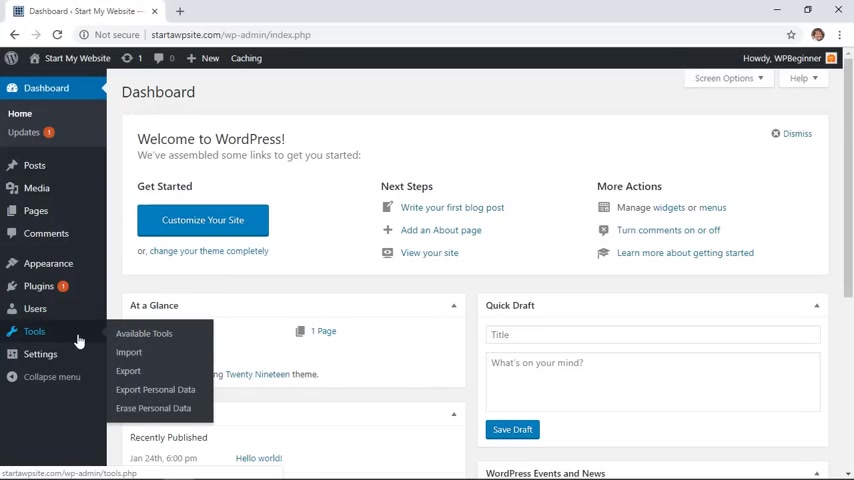
And then if you wanted more users , you could go in here to set up new users .
Tools are for importing and exporting things .
And as you add more plugins , you may see this expand a little bit more depending on the plug in .
And then finally , we have some settings and just real quick , we're going to go into a couple of settings right now .
This is where just all of the general back end stuff is .
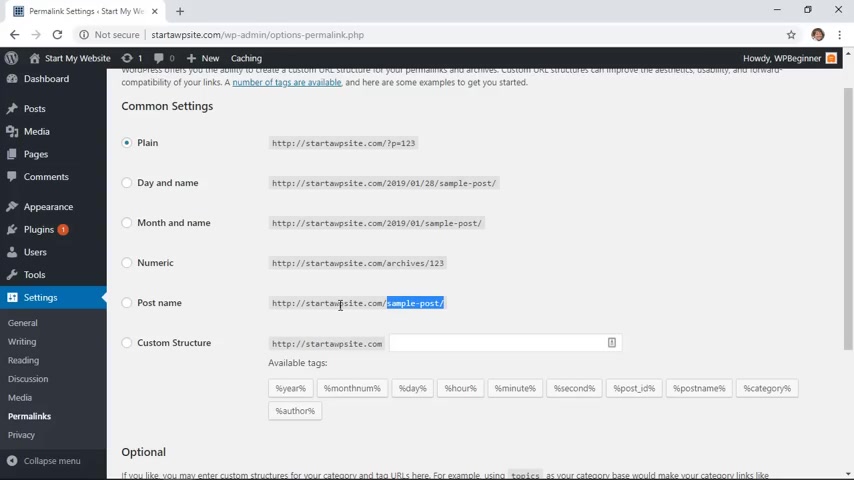
But the one thing we wanna do is we want to change our Perma links .
The Perma links are describing your URL for your website .
Some blogs prefer to have their whole date structure up here where it's like by the year , by the month , by the day and under Perlis is where this is changed or updated .
You'll want to set this in the beginning and you'll want to stick with this throughout .
And that's simply because once you set this up , you don't want to keep changing the permanent structure .
So you really want to get that from the get go .
But here are some other examples of what you could use .
And if you are doing like a true blog where it's very important to you to showcase the time and and date , then you can keep that .
I will say that even for any blog post that I do , my favorite will always be just doing the title of the post as my URL structure behind my domain name .
It's simple .
It's easy for readers to possibly remember because it's shorter and it's also better for search engines .
So for me , I prefer that , but once you figure out which one you want , go ahead and set it now and then really try not to ever change it again .
So once we're done there , let's click save changes and now that permanent structure will be on all of our posts .
Let's go ahead and change the look and feel of our site by picking a theme .
I'm gonna show you real quick what it currently looks like .
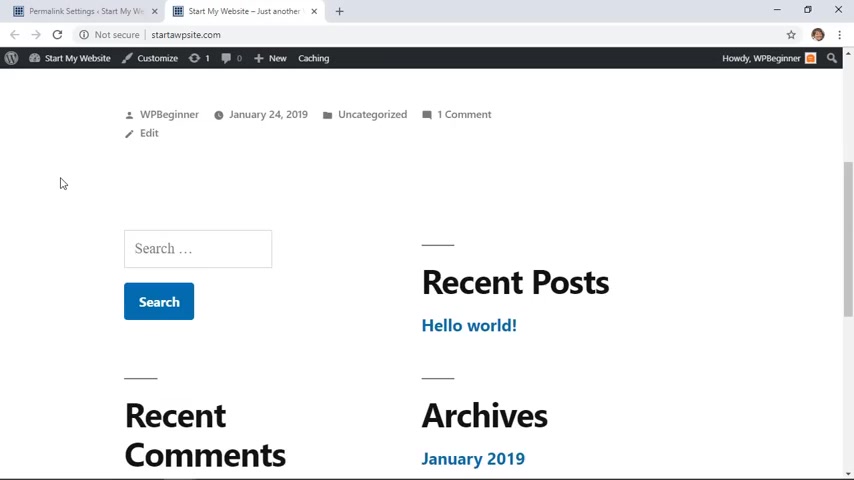
Yours might look a little differently .
But by default wordpress installs with the latest theme that they have .
And this is the 2019 theme for the site .
You see , it's very nice and big and bold typography .
A lot of white space and it really drives the user to read the blog posts , but maybe it might be a little plain for some people .
So let's go in and look at some changes that we can do to do that .
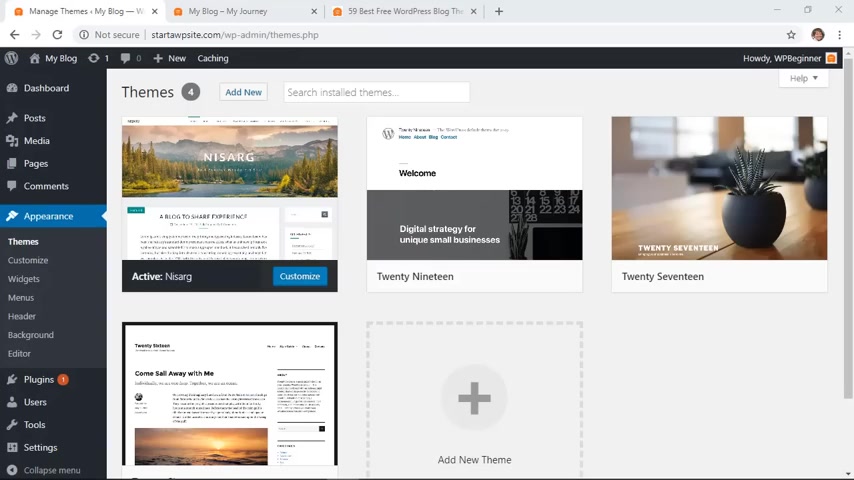
We'll go to our appearance and we'll go to themes now right now for my site , these are all of the themes that are currently installed on my Wordpress website and this one is the only active one .
You can only have one theme active at any time , but you can have multiples installed .
You can click on the add new and this will pull in all the available themes from the Wordpress Repository where they house all the themes .
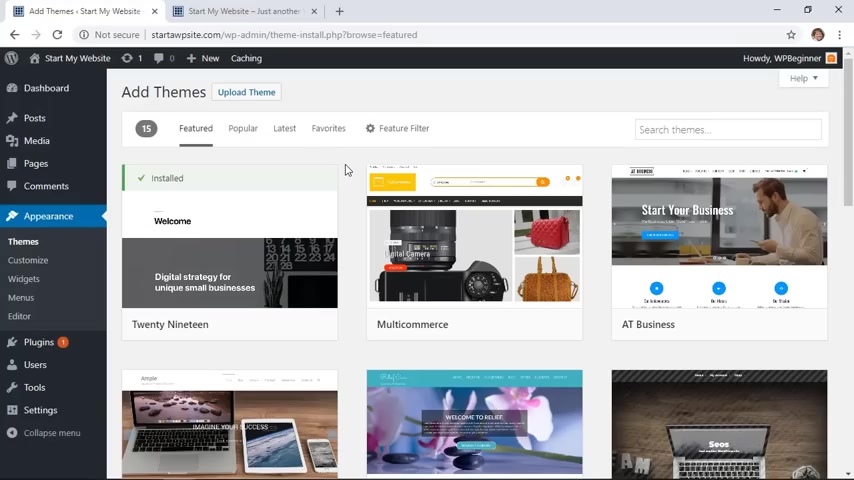
If you want a premium theme , you'll simply go to the premium themes website and you would have to download the theme from there and then upload it separately for this .
We're simply going to use the repository and we'll look for a theme that we want now because this can take quite a while .
What I would probably recommend you do is go ahead and go to WP beginner and do a search , we link for this in the description , but we've coordinated several of the best free blog themes for the latest year .
And so do that for yourself .
And that just kind of pairs it down a little bit more because there are just thousands upon thousands of them .
And so you can go through and see which ones you like .
Once you see one that you like , you can go back to the add a theme area and you can search for it .
For example , I know that for this tutorial , I want to install the Nazar .
It's just a very clean theme and I like the way that it looks .
So I'm going to install this .
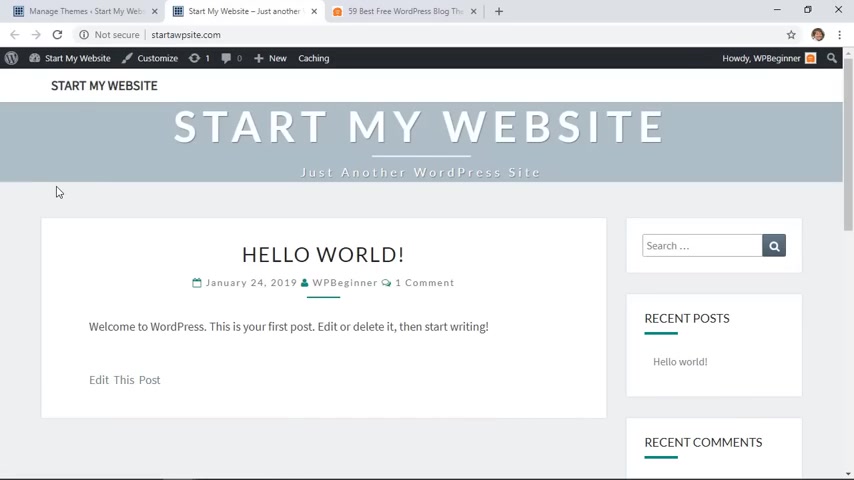
And once it's installed , you'll also want to make sure that you go ahead and activate it and then once we activate it , it will become our default theme .
Great .
Now , I can go to my site on the front end , let me refresh so that you see , this is what it looks like and this already looks like what I am envisioning my blog to look like .
So let's just go in and we'll make some changes to do that .
We'll go back to the dashboard , let's go under customize .
And from here , we can customize the look and feel of the theme for our site .
Now , yours might look a little bit different because all of these customizations are driven by the theme file .
So yours might look a little bit different .
So don't worry if you don't see what I see .
Let's quickly go through a couple of these .
This is where the startup website is and just another blog is right here .
So we'll be changing that whatever you want that to be and you can decide if you want that even displayed or not .
Now , the site icon that is this little guy up here .
And so we'll want to select an image for that .
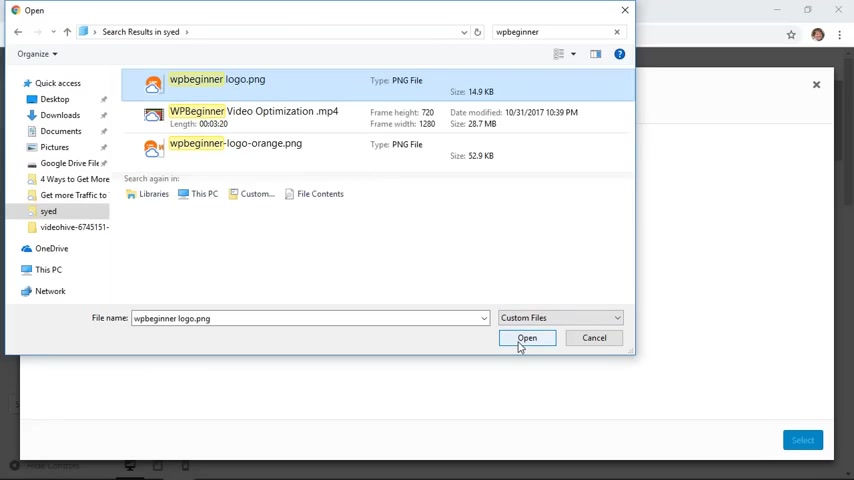
You wanna upload that from your desktop and bring it up into your media library for your site icon .
You want to make sure that it is a square five at least 5 12 by 5 12 for this to work the best .
And you see mine is a little bit larger .
So it'll ask me to crop , but it gives you a preview of what it will look like we like that .
So let's go ahead and crop and use that and it immediately gets updated here and you can do the same for yours again .
It's under site icon .
OK ?
The next thing we want to do is change what color we might want .
You see whatever that's doing that changes here .
If you don't like any of them , you can also just go back to default .
You can also add a header image for that .
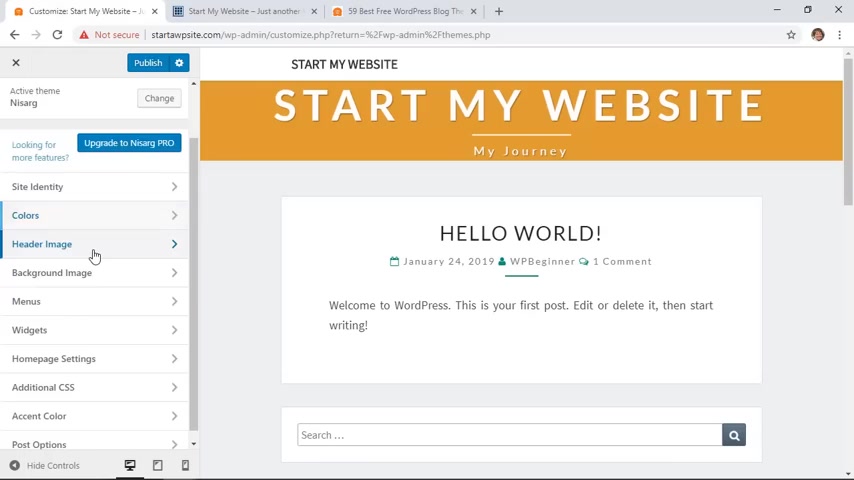
We can do that .
If I use an image , I'm actually going to go back up to my site identity and I don't want to use my site title .
So go through that and you'll want to play with the look and feel of your site and just go through each of these items .
I'm not gonna go through all of them simply because your theme might be a little bit different .
And I also like to set up widgets and menus under a different area .
So I'll show you how you , how you can do that as well .
Now , the beauty about the customization is everything that we're doing .
We're seeing a preview over here , but nothing has officially changed until we hit publish .
So if I go back over to my area and click refresh , none of those changes that I've done are actually on my site yet .
So do remember to hit publish for all the changes that you make .
And then once you do hit publish , now everything will be updated .
And so now our site looks like this great .
Now that we have our theme set up , let's go ahead and set up a few pages when we set up a few pages , then we'll be able to create a menu structure and that will make it easy for people to find things on our site .
So I'm gonna go to pages all pages so I can create some by default .
You'll have a couple of pages here and we'll go to add new and here we want to give it a title .
This one we can do about most websites have an about page , maybe a blog page and a contact page .
So we'll do a couple of those .
You'll wanna write out your about page here , give them some introductory about you .
And now let's come over here and click publish .
I want to do that a couple of more times for a few other pages .
I'm gonna go over here and click , add new again .
This time , I want to set up a blog page .
So I'll put that as the title .
Make sure that we click publish on that .
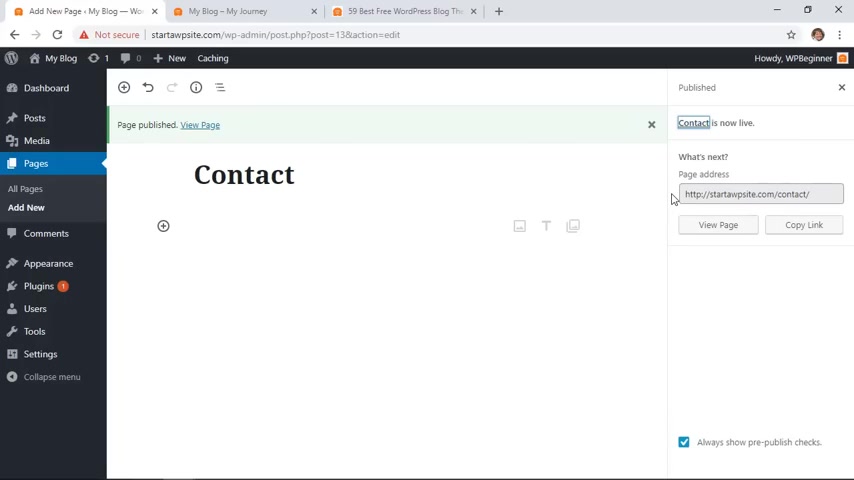
And then I want to do one more and that will be our contact page .
So let me click add new one last time , call it contact and we'll set this up in a bit .
So we'll click publish on that .
So we created three new pages and now we can go and create a menu structure for our site to do that .
Let's go over to appearance .
We'll go down to menus and let's create a new menu .
We want this to be our main menu .
So I'm gonna click main .
So let's create menu and now that we hit create menu , we have these available .
So these are all the pages that are available to us .
I'm gonna select the ones that I want and I'm gonna click add to menu and then you'll see they're over here .
And what I can do here is I can rearrange these for the order .
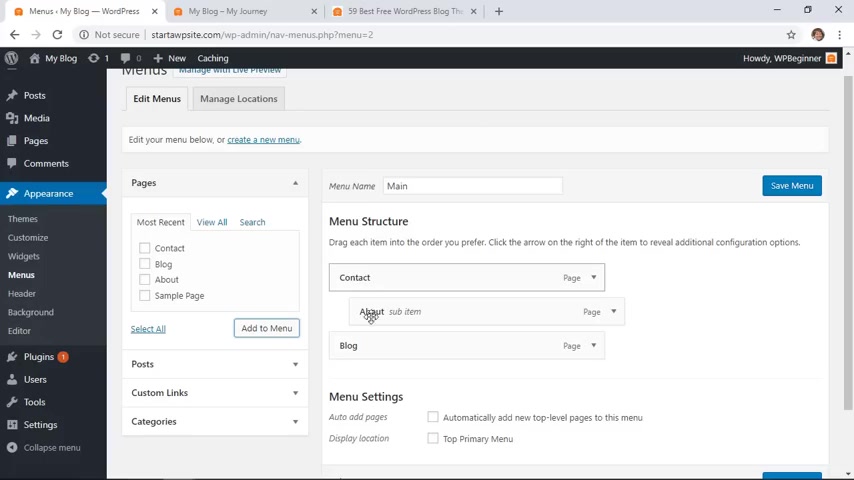
I can even make this a sub menu of that so that it will become a dropdown .
I don't want that .
So I'm gonna put it back over .
So I have three parts of our menu .
You could even do custom links here .
That just means if you wanted to add , say your your social media profiles , you could do that .
If there was a particular post that you really wanted to bring over to your menu , you could do that as well .
We're happy with these three for our menu and I want to click save menu .
Once you save that , that will create the main menu and now we can choose where to put it .
This is theme related .
So the managed locations for you might be different than what you're seeing here .
My top primary menu will likely be up at the top , but you could have several different ones , maybe a footer or something like that .
So this is where I want to use mine , just click save changes .
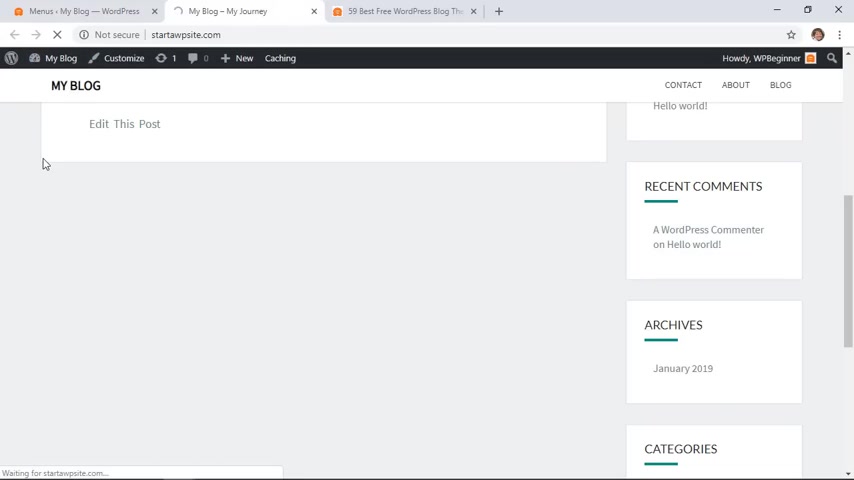
And now I just want to show you what that looks like .
I'll go back to my site , let me refresh great .
And now you see my menu up here .
So that's the menu .
Now , you also see yours might not have this , but most , most blogs usually have a sidebar area .
That's what this area is called .
You have your main content and then you have information over on the side and each of these are their own widgets , little pieces of code that you don't have to write , but they're just little widget areas that we can put over here .
Let me show you how to do that and yours probably has a sidebar or a footer area .
Some themes will have footer area widgets .
So let's go back and fix that under appearance widgets is where you can find these widgets and this is my sidebar .
You see all of those items are right here .
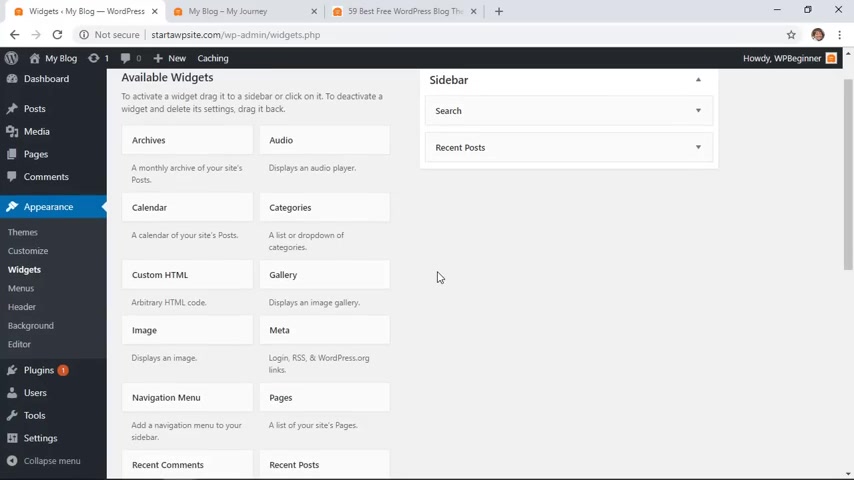
If I go back , there's my meta , there's the meta and then these are all the other widget areas .
So you can adjust this however you want , I'm gonna take quite a bit of these off because I like to have reset posts and I like a search .
You could also add new widget areas here depending on what you want to showcase .
Maybe if you have a lot of photos that you want to showcase , you could put a gallery there .
So that's a real quick and easy way to use widgets on your sidebar area .
OK ?
Now that we have most of the look and feel of our site , then let's start looking at plugins and we'll do a brief overview of that .
So plugins are basically the like these little apps that you can add to your website that will make your site do whatever you want it to do .
For instance , you could do a contact form , you can integrate pop-ups , you can create a forum , you can do e-commerce .
There's almost nothing you can't do with a plug-in that's probably already on the market , either free or a premium version .
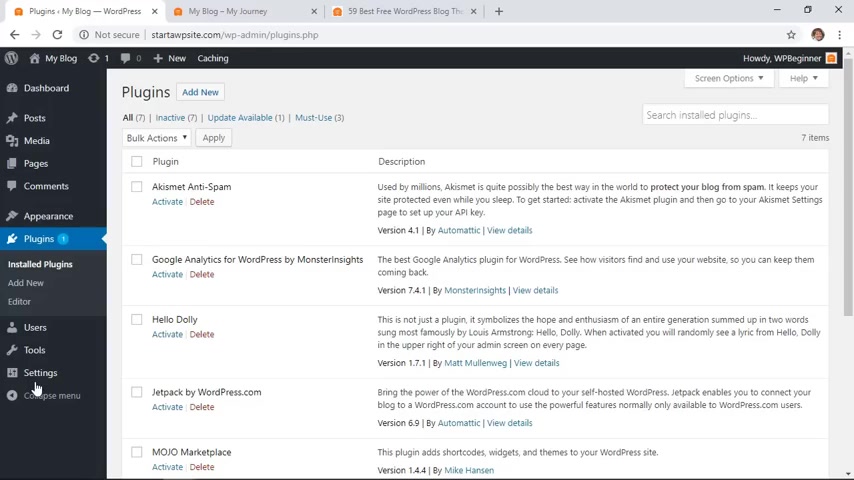
So , and this is where all of the plugins are stored .
You see by default , there are a few that are automatically in installed .
These are not activated but they are installed and you can choose whether or not you want to use them to add a new one .
You simply click , add new and it's very similar to the themes section where you'll be taken to the plugins repository .
That's where Wordpress verifies to make sure that these plugins do what they say they do and that there's nothing malicious added to them .
And then these are all the plug ins that you can do .
Your best bet is to know what you want your site to do and know what type of plug-in you're looking for in order to install that .
So I'm gonna just show you the process of installing one and searching for it for SEO purposes .
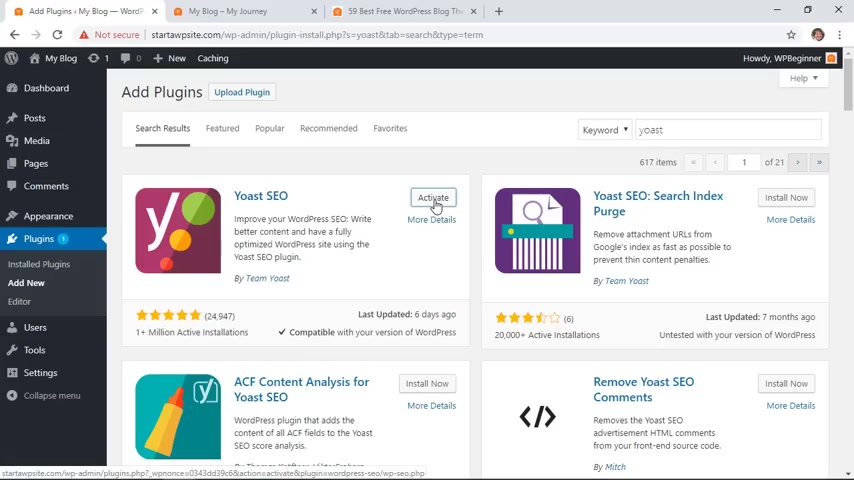
We always recommend Yost Seo plug in and that's this one right here .
It simply helps you keep Seo under control .
That's a search engine optimization that you want to do for your site to make sure that search engines like Google or Bing or Yahoo can find your site just like with the theme .
Once you install it , you'll want to make sure that you activate it as well .
And with each plug in that you activate , they may show a different area as you see this one .
Now , we have an area up here and we also have a tab over here to configure .
Now that was just to show you how to install one .
Let me show you how to work with one because we want to create a contact form .
The WP forms Light was automatically installed with your wordpress site and that was by blue hosts .
So we're gonna go ahead and activate this and once it's activated , then I'll show you how easy it is to add a form on your site .
Great .
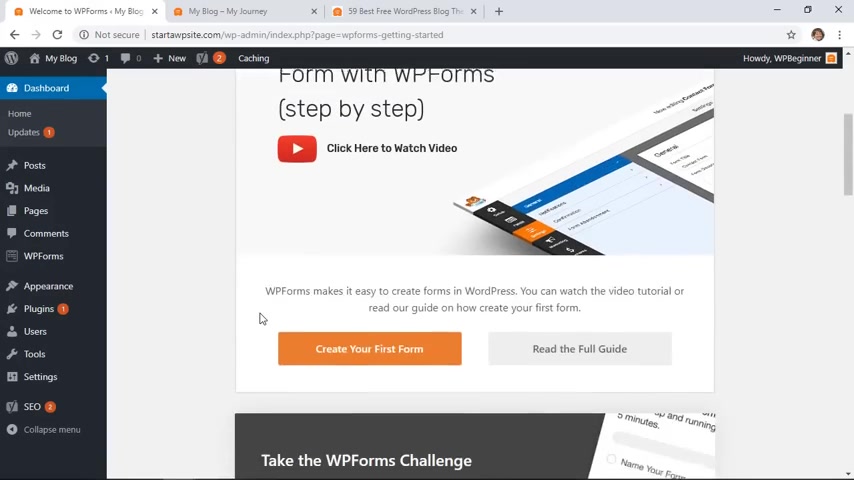
Now that we have it , we can create our first form and we'll do that here .
And this is WP Forms Light .
If you ever get your site to a point where you're wanting to make even more money or you're wanting to charge things or you want to do a survey , things like that .
Then the WP Forms pro version would work really well for that .
Since we're just starting out , let's go ahead and create a simple contact form .
So I'm gonna click on this and what it does is it will just automatically create a very simple form for us and we don't have to do very much .
So this is great .
We can click and drag and drop if we want any of these forms to move around .
I'm going to click on the title of this form and just say contact us and I'm gonna head back over and then under notifications .
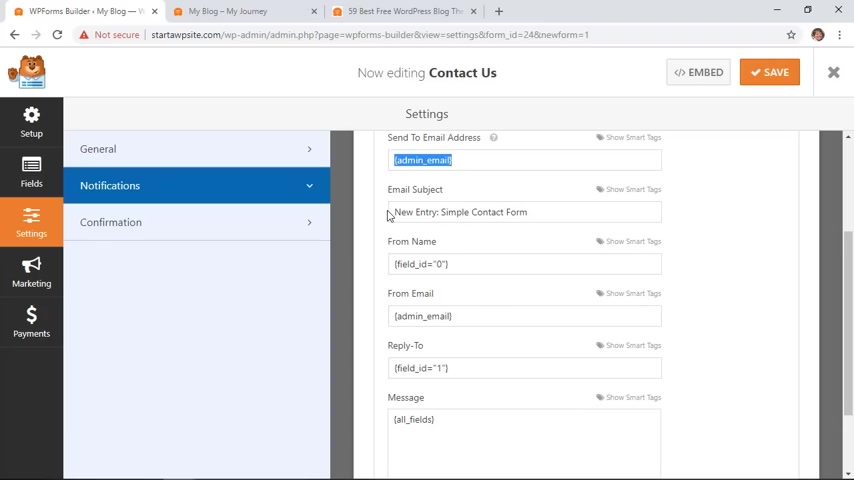
I wanna make sure that it's being sent to the right email address you can put in an email address right here or this is pulling in from my wordpress admin email , which is mine and I'm ok with that , but you could change that here if you wanted .
And you can also change when you get the email , when you get the emails .
This is what the subject line will say and what all will come over .
So we're pretty happy with all of that same thing with under confirmation .
When somebody fills out a form , they will get a quick little message right here and that all looks good .
So then we're gonna go back to fields .
And the only other thing I like to do is I'm gonna click on the name .
I like to make this simple .
But you can keep first and last or you can even do first , middle and last .
So I'm gonna click save here and now I'm done with the WP form .
So I'm gonna exit out there and now that we have this form , we need to add it to our contact page .
So let's go back to our pages and remember we did set up a contact page .
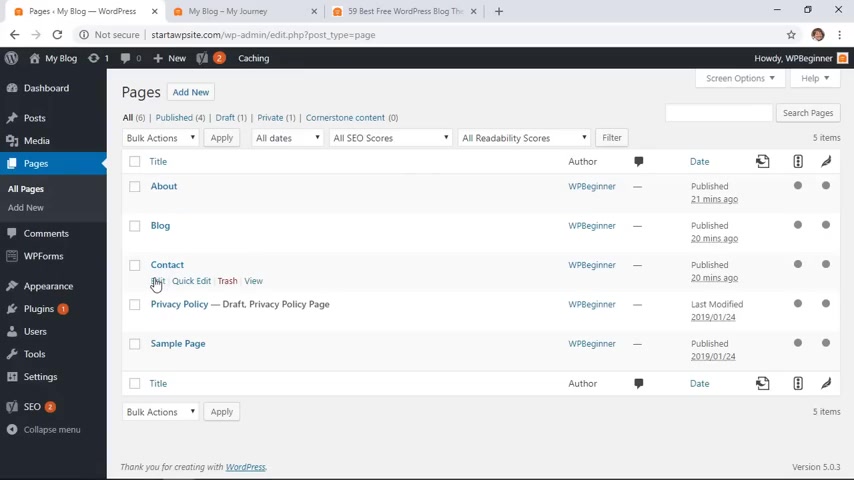
So I'm gonna go down over here once I hover over this , I can click edit and we haven't really written anything here .
But what we can do is once I hover you see this little plus sign , I'm gonna click on that and there's WP forms here that I can use .
If you don't see it , you can also start typing it in and it will pop up .
So we want to add the WP forms , contact us form here .
And now we see a bit of a preview of what that will look like .
And so I'm happy with that .
So let's update that .
So now we have a contact form , we use the plug in and our contact page is ready to go and that's also a real quick update on how to use plugins .
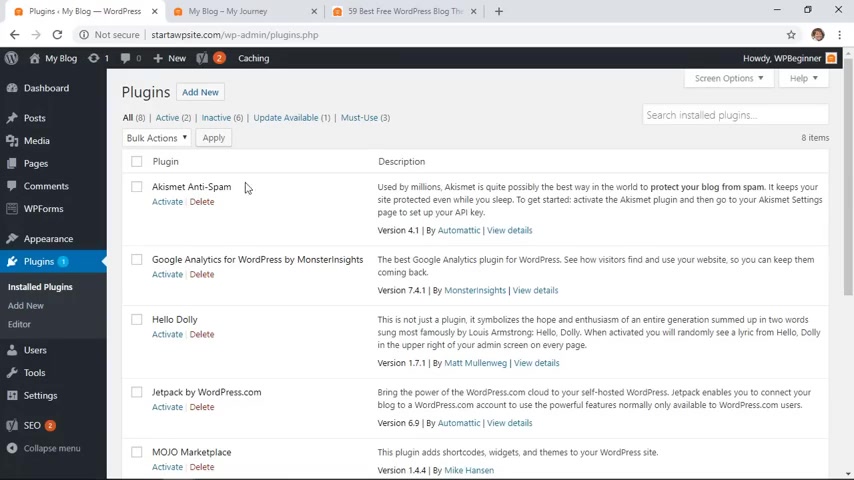
Now , you see that this notification here , we have a red notification .
You can click on all plugins and you have a quick update on what each of them are .
Say there's an update available , meaning part of the maintenance process , we need to make sure that our site is updated .
So I'm going to update the opti monster plug in , even though I'm not using it right now .
I still want to update that and then whenever I am ready to use it , then I can activate it and connect it .
So there's a lot that you can do with plugins again .
It really just depends on what you're wanting your site to do .
But whatever it is that you think you want your site to do , there is probably a plug-in , either free or paid that you can use to make your site do whatever it is that you want .
And that's the power of the plugins with wordpress .
Ok .
Now that we've got our theme set up , we've added some plugins to make our site do what we want .
We've changed our widget area a little bit over here .
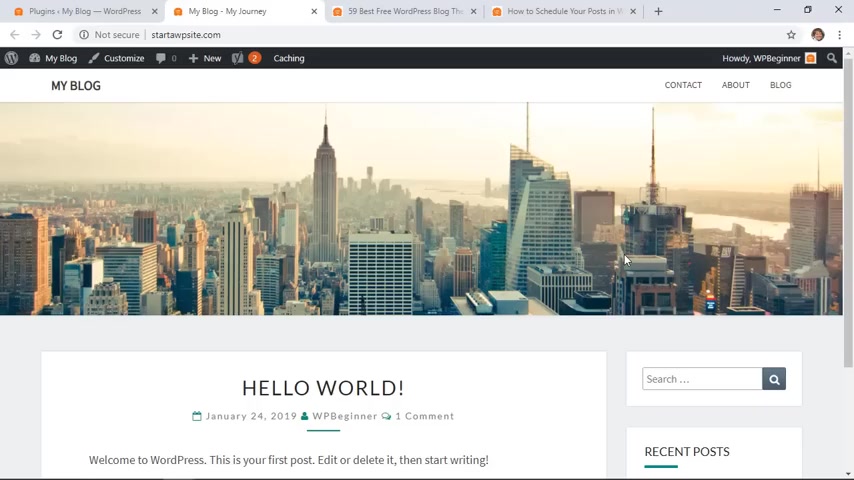
Now , you really want to concentrate on the bulk of what you're probably going to do with your blog and that's create posts .
So let's go in and , and kind of take an overview look of how to handle that .
I'm going to go back over to my dashboard area and let's go to our posts .
Let's go to all posts .
I'll show you everything about it by default .
You'll get a Hello World Post and that is the first one that you can do .
But this is the power of what you're doing for your site .
You're setting up a blog , so you want to set up the posts and start writing .
So let's go in and we'll just set up a quick blog post and I'll show you what you'll be doing .
The title is the URL structure that we talked about .
So you want to make sure that whatever title you do is a very descriptive thing for search engines as well as for users .
And I'm just going to show you what I mean .
Then you can just start typing .
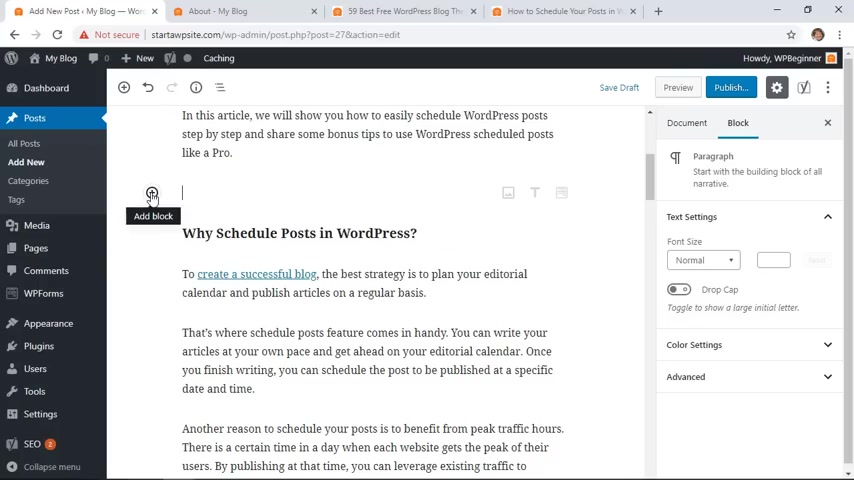
Now , you can also click on these little blocks .
And this is if you want to add certain things like a list , bullet points or numbers , if you want to add images , these blocks are here to help you with all of that .
So you can start typing stuff in .
I'm just going to insert some information here .
So right here , I want to add an image to break up some of this content .
So I'm gonna click add block and I want to add an image .
You can either bring it in from a URL .
So if you already know an image location , you can do that here .
But we need to upload because we don't have any images yet .
So I'm gonna click upload and I want to add this one .
So I'm gonna upload that and that's getting uploaded to my website and it will be in under media .
And then here I can decide how I want the image to display .
You can do alt left or right .
Let's do none or align center .
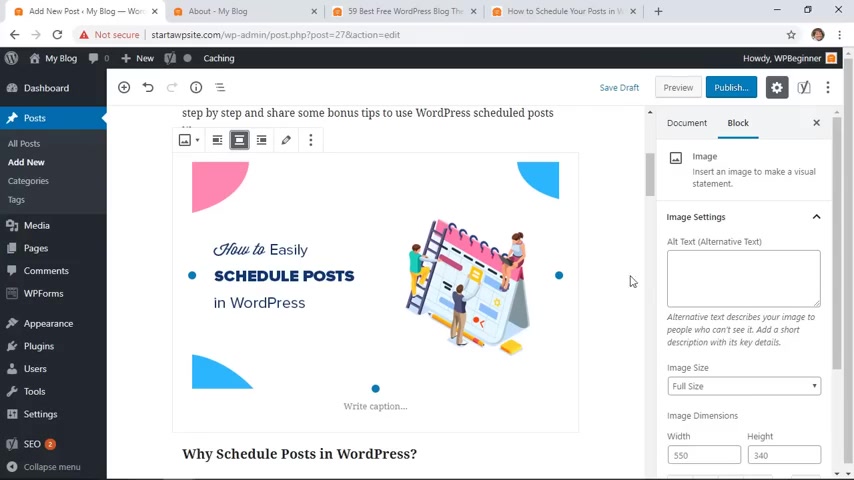
When you're working with images , you also want to make sure that you add alternative text for the image .
This lets search engines know what the image is about .
But more importantly , it's for accessibility unless people who are using a browser reader , tell them what the site is about .
So you definitely want to make sure that you always add alternative text and that helps both people , people who can't see who are on your site .
And it also helps search engines know as well .
So we've just added an image you see here is a hyperlink .
I'll show you how you can do that as well .
So I'm going to highlight this area and once you highlight something you see a little toolbar come up , we want to add a link to that .
You'll want to know what the link is and then I'm going to just paste that here .
Once I click , apply that will add in the link for me .
So it's a great way to do that .
You can also add video .
So we'll do a new line again .
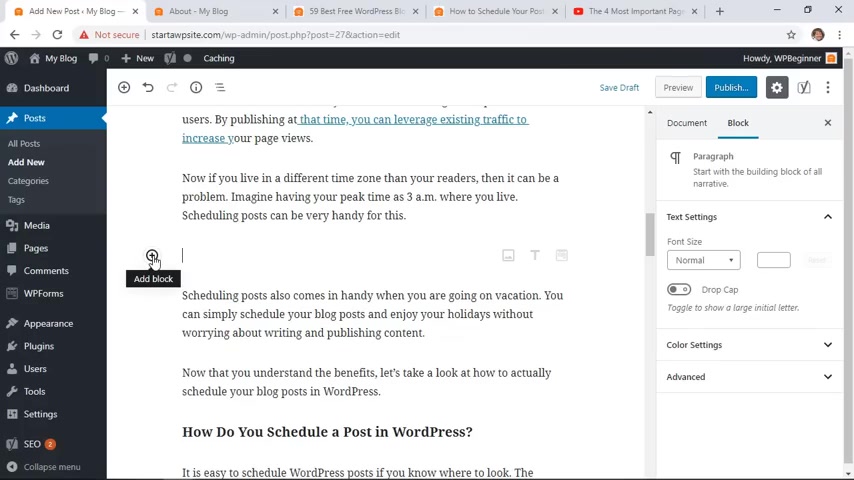
I'm gonna hit enter and I'll get a new line and we can find add and I'll type in video and you see this here .
So you can either upload .
I highly recommend any time you add video to go ahead and add it to something like youtube , something like that and then insert a link here , click apply and then it will embed that video like that .
So it makes it look really , really good .
So once we're done with that post , we can click publish .
So let's really quickly go through all the things that you've done today .
First , we get hosting , we set up a domain name , then we installed wordpress .
We got a theme for our site .
We set up the different pages including the contact form for our contact page .
We added plugins and we wrote our first blog post .
So now all you have to do is keep going , keep at it .
And congratulations .
And thanks for tuning in .
Did you learn today's video ?

If so subscribe to our youtube channel and we'll send more helpful tips to help you manage your wordpress website and thanks for watching .
Are you looking for a way to reach a wider audience and get more views on your videos?
Our innovative video to text transcribing service can help you do just that.
We provide accurate transcriptions of your videos along with visual content that will help you attract new viewers and keep them engaged. Plus, our data analytics and ad campaign tools can help you monetize your content and maximize your revenue.
Let's partner up and take your video content to the next level!
Contact us today to learn more.