https://www.youtube.com/watch?v=mA77noU56_8
Drawing Animals for Beginners - Part 1 - Structure & Form
All right .
So let's draw some animals .
But before we do , I want to talk about just a couple of very basic things .
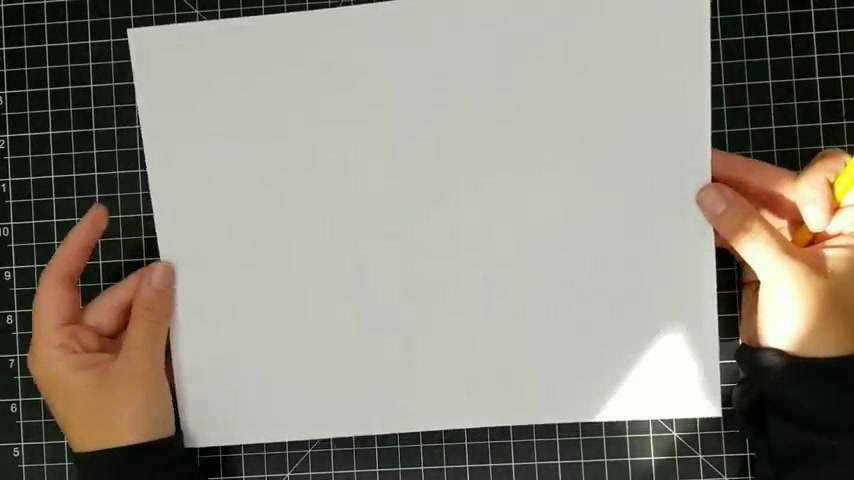
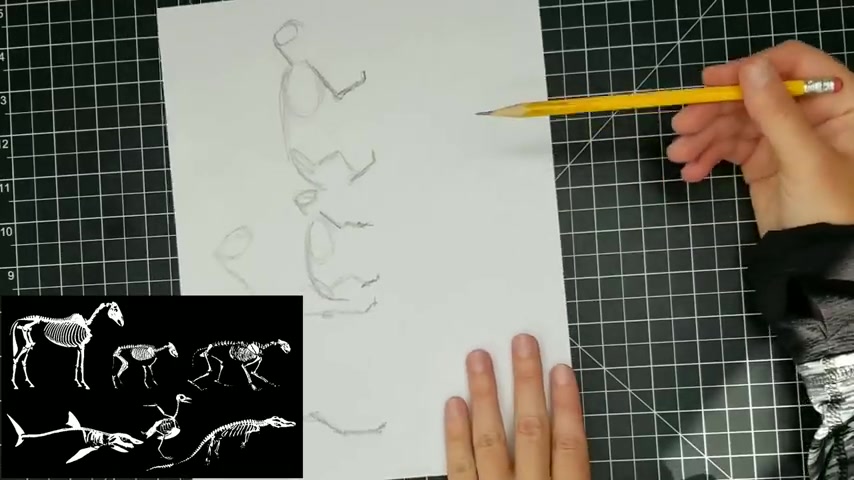
So I am going to be doing all of my drawings with just some paper that I grabbed from my printer .
So this is very inexpensive paper .
It's not special drawing paper .
It's just what you would put in a printer .
And then this is just a number two pencil just like you can buy anywhere .
So you really don't need anything special to become very good at drawing .
Now , the first thing that I want to mention is that even though we typically are used to holding our pencil like this , especially when we write and we do sometimes hold our pencil this when we're drawing , especially when we're drawing small details .
But for the most part , I really want you to get used to holding your pencil with an overhand grip .
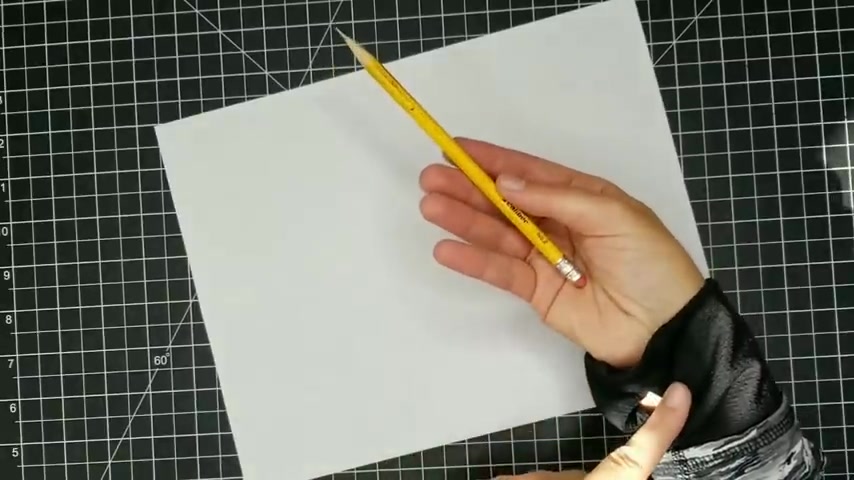
So I want you to see that the pencil is resting in my palm here and I have a loose grip on it .
And when I make a mark , you're going to see that I'm not using my wrist like when we use this this is called a tripod grip , by the way , because we have a grip on our pencil from three fingers .
So it's a tripod grip .
And when we're writing , we are doing a lot of wrist motions and we have this kind of very rigid grip on the pencil .
And you may have noticed that after a while , your hand and your wrist really starts to hurt and become very tired from doing this .
And this is actually not the best way to start a drawing .
You really want to start out with this overhand grip .
It is a much looser grip on the pencil .
And so you're not going to get as tired as fast .
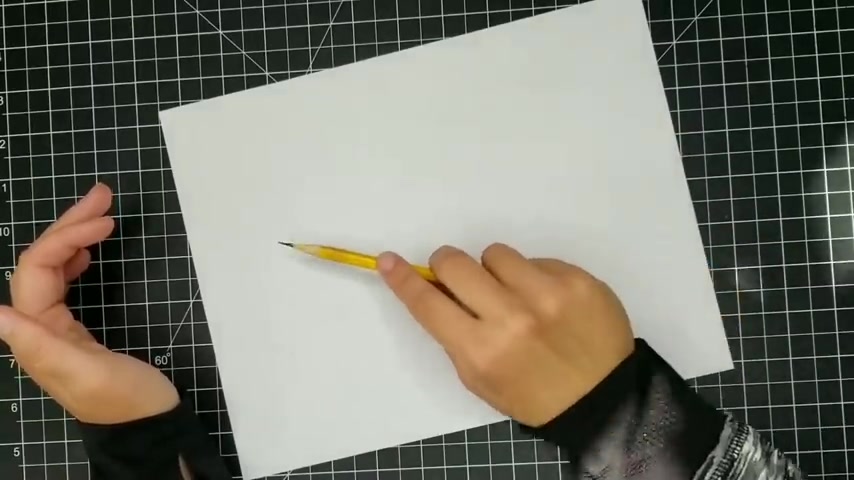
And also when we're doing this , you can see that when I move my pencil , my wrist isn't moving at all .
It stays in the same position .
And so we're not going to get any wrist pain when we hold our pencil like this .
And when I make a movement , I know it's hard for you to see because you can't see my whole body here .
But this movement is coming from my shoulder and my elbow rather than my wrist .
And so this is just a much more proficient way to draw .
And it may feel a little bit strange at first and that's normal because we're so used to holding our pencil like this .
Or if you're like me from an early age , I developed a very bad habit of holding my pencil kind of like this , which is even worse .
So don't be like me start getting used to holding your pencil the appropriate way for drawing with the overhand grip and an open palm .
And you will not have the issues that a lot of people have when it comes to drawing and using a pencil or a pen over a long period of time .
So it's going to feel strange at first , but the more you do it , the more natural it is going to feel .
All right .
So the most important thing that we need to understand about drawing animals is that all animals , or at least when we're talking about mammals , we're talking about having a very similar structure .
And so if you can start to understand and this basic structure of drawing mammals , it's going to take you a long ways because you don't need to know how to specifically draw a horse or an elephant or a deer .
Because if you understand the structure , you're going to be able to apply it and modify it according to the animal that you want to draw .
All right .
So to just to demonstrate that let's go ahead and start drawing some basic structural forms of animals .
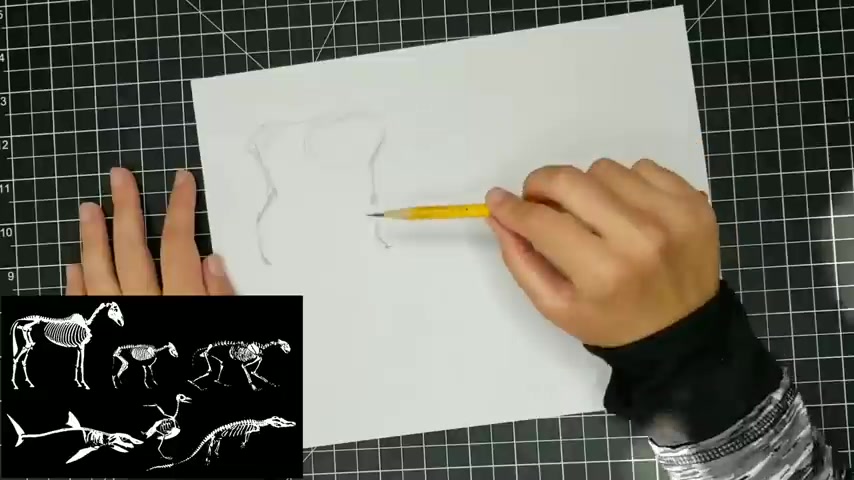
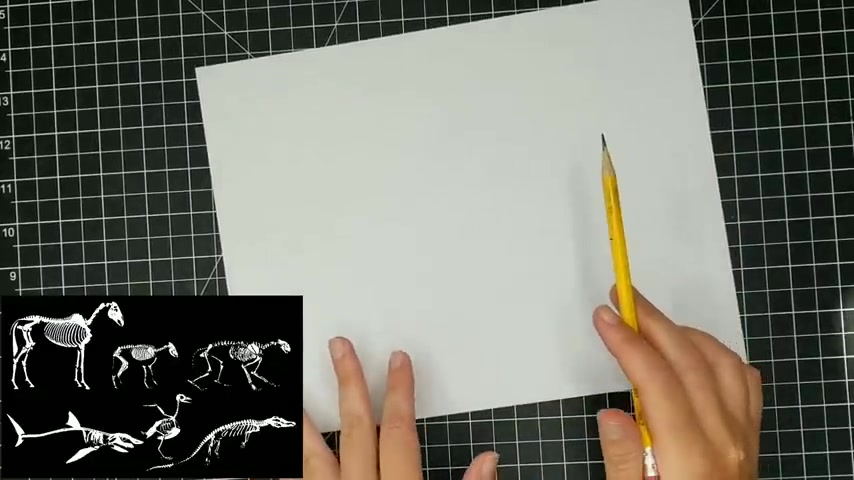
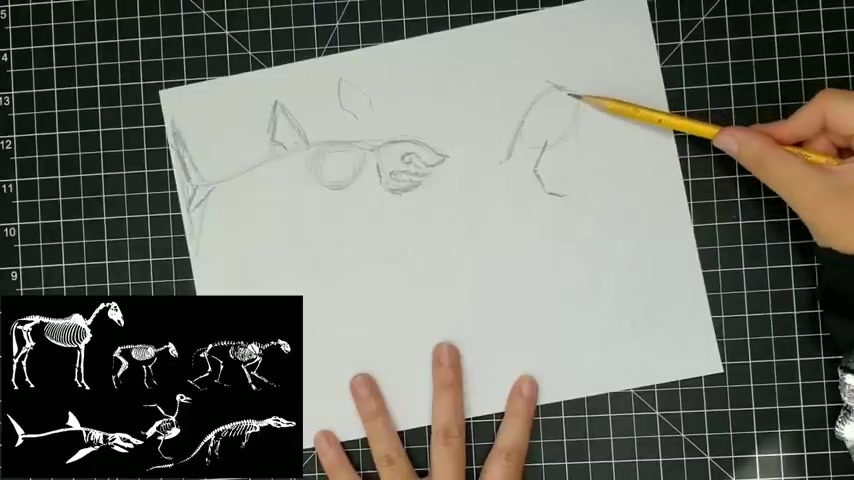
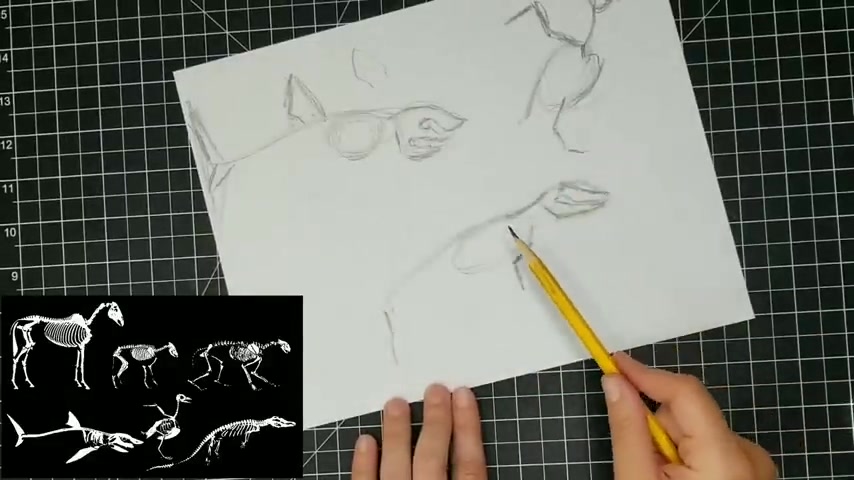
Now , the skeletons that I'm showing you here on the screen right now , you can see that the animals across the top of this image are all very similar .
Now , that doesn't mean you have to go in and learn how to draw the specific detailed skeleton that you see here .
I'm basically going to show you a way to simplify the skeleton .
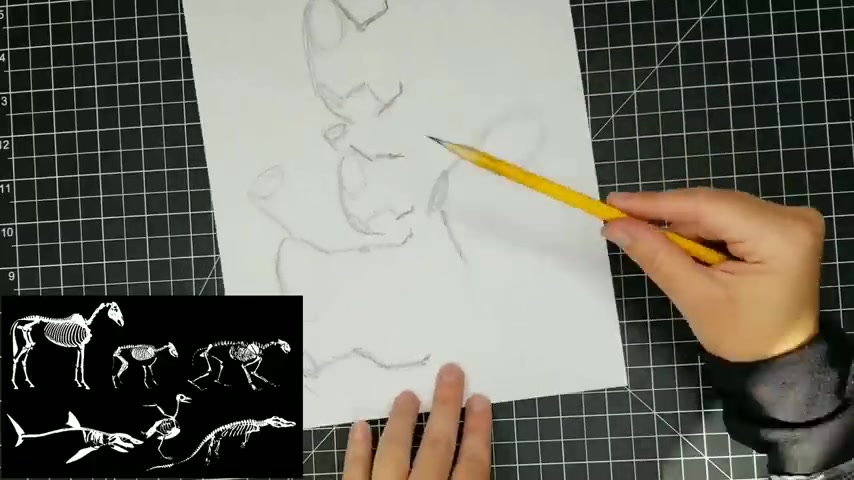
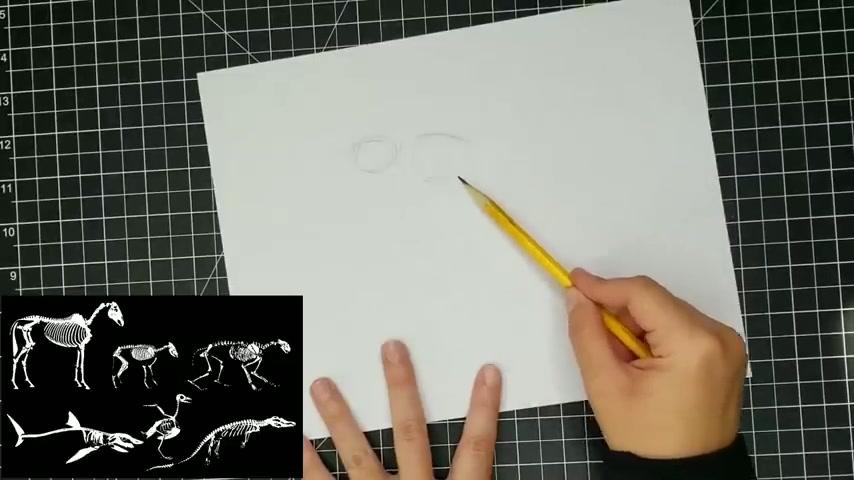
So , what I like to do is I like to start out with the largest form .
So that's almost always gonna be the rib cage and it doesn't need to be perfect .
It can be very sketchy .
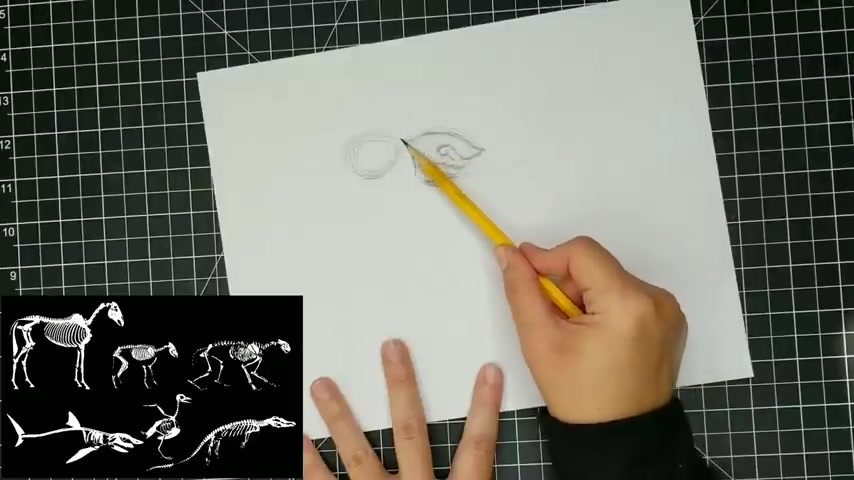
And then we have the spine here and then we have the pelvis , which is kind of like that .
And then we have the bones of the leg .
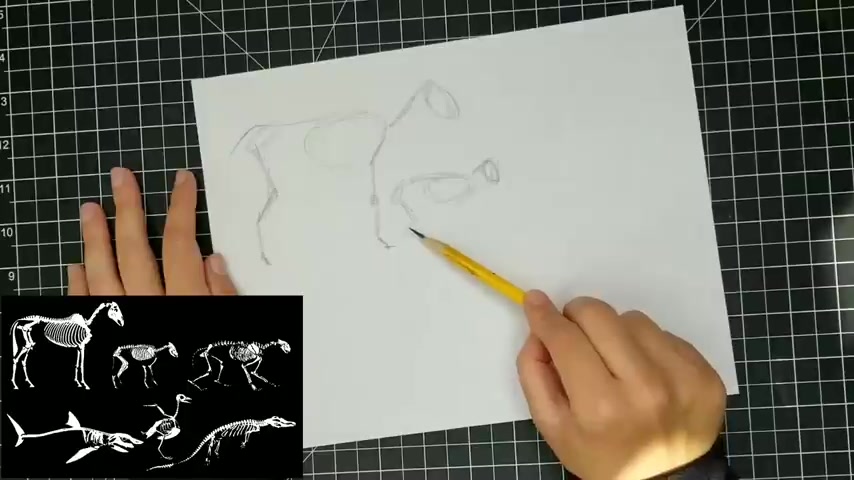
So I'm doing the horse first and you can see this is very sketchy .
It doesn't need to be perfect .
And then we have the front leg and on the horse , it's pretty simple , just kind of goes straight up and down .
We have a joint right here .
And then if we really want to get into the details of the feet , we can just add .
So this is basically just angles .
OK ?
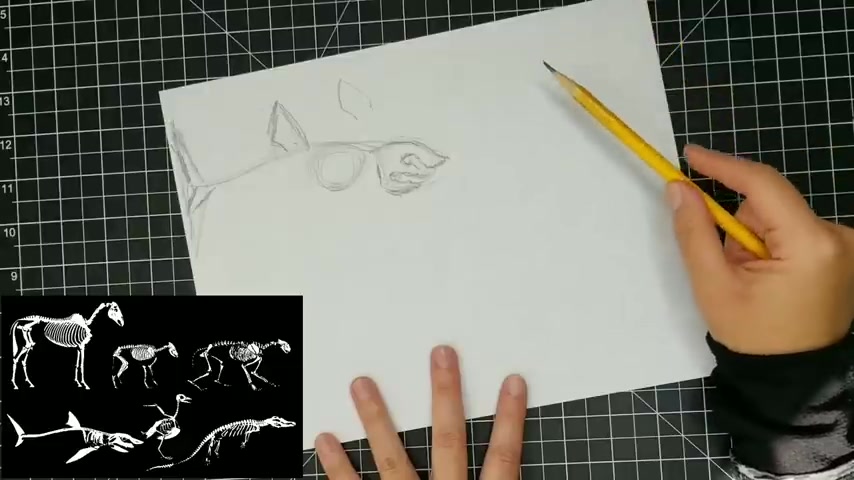
And then for the head , just put in the neck right here and then for the skull , we'll just keep this very simple as well .
All right .
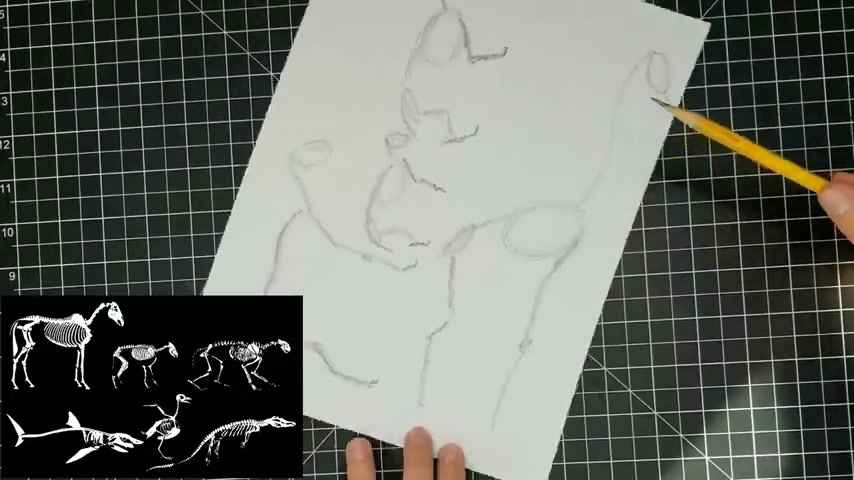
So basically , we're going to , and then of course , a tailbone right here , we're going to keep this very similar .
We're basically just going to make it much smaller and we're going to do the same thing to get the structure of a wolf or a dog or something like that .
And a wolf , if you can draw a wolf , you can draw a dog and you can draw lots of other things too .
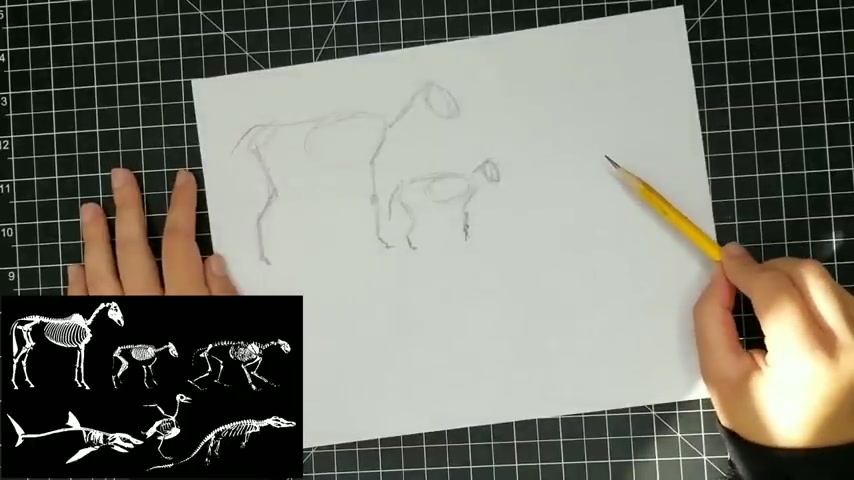
Oops , I accidentally started out with the head now that I would say is something that you wanna work on .
I know that for me , I have a lot of bad habits because I taught myself how to draw at a young age and so you just kind of end up doing it the way that comes most naturally to you .
And so I used to always start out with the head .
I'm trying to get into the habit of starting out with the rib cage because that's the largest form and it helps us to really simplify .
All right .
So now we can see that maybe a difference between this uh structure for the dog or the wolf is a little bit different here back in the lake because this part of the leg is gonna be much shorter than it is for the horse .
OK .
So this is the kind of modification that I'm talking about that you'll observe when you're looking at the different animals that you want to draw .
But then the front leg is pretty similar .
All right .
And then the tailbone here and you can see this is very sketchy , it's very loose .
There's no need to feel like you need to be perfect when drawing because all of these movements that you're doing with the pencil , the more you do them , the more naturally they're going to come .
OK .
So I don't want you to get caught up with trying to draw a perfect rib cage .
It's basically just kind of an oblong oval here .
Sometimes the shape of the spine is going to vary .
Ok .
So we can see that with a horse , the spine is gonna kind of curve a little bit .
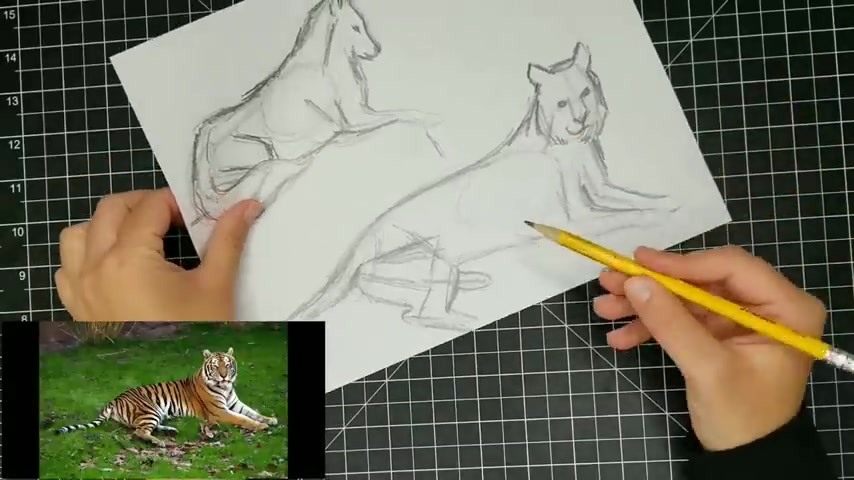
But with the wolf or the dog , it's a little bit more of an upward arch and same with a large cat like a tiger like we have here .

And so we can see though that with animals who are on all four legs , their pelvis tilts a little bit forward and downward , that's gonna be pretty common among any animal that walks on four legs .
And then we can see that the back leg of the large cat or tiger is also a little bit different .
It has a very large heel right here that even there is actually a little bit of a heel here on a wolf or a dog , but it's not as pronounced as on a large cat or even a small cat .
And then for the cat , we also have much longer bones in the front legs than we do for the wolf or the dog .
And that's because cats are climbing animals .
And so they need a lot more flexibility than a wolf or a dog because they don't climb .
And then again , just kind of loosely put in the neck here and the skull is just kind of another oval that we don't need to be perfectionistic about and then the tail bone right here .
OK .
So for mammals , this is very , very common .
OK ?
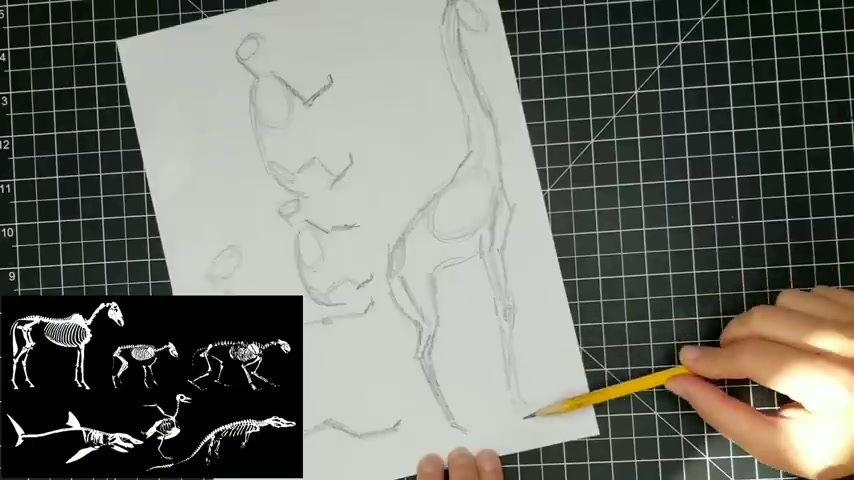
And we can apply this to , you know , I don't even have a picture of a giraffe here um that I'm looking at , but we can very easily apply this structure to something like a giraffe without even really having to look at a giraffe .
OK .
So we're going to start out with a rib cage .
And if we think about a giraffe , they're gonna have a little bit shorter of a spine than a lot of animals do , especially in proportion to their limbs and their neck .
And we're gonna give them this tilted pelvis here .
And then we know that giraffes have very , very long legs , but it's still going to have the same basic structure that we see in other animals that walk on four legs , ok .
And then the front leg is gonna start kind of up here just like with these other animals .
And it's also gonna have to be very , very long , of course , a little joint right here .
And then we know that a giraffe has a very long neck .
Ok .
So I hope that you can see very clearly at this point how just understanding the very basic structure of especially mammals , you know , it's a little bit different from other kind of animals .
Um But with mammals , it's very easy just to kind of work out their basic shape just by understanding this basic form .
And then you kind of think about that animal or you look at that animal and this really helps you to simplify their structure and makes it much , much easier to draw .
OK .
And then just as an example , let's just go ahead and kind of give this giraffe a little bit of form , you know , just to show you how even just understanding a little bit of the basic structure will get you a long ways in actually drawing out this animal .
So I'm just gonna put a little meat on the bones here for this draft .
And you can see that even without actually having to go in and look at a draft , I can get pretty close to drawing a convincing draff .
And you can see that I'm allowing my lines to be very sketchy .
I'm keeping this overhand grip while I draw and this just helps me to be much looser and get a little bit more of a gestural kind of line right here when we're just kind of sketching things out , just kind of thinking about things .
And then we know that giraffes have kind of a unique head shape .
All right .
But I think that you can see that even without looking at the animal , if you can see it in your mind and understand the basic way that mammals are constructed , you can really get quite far .
All right .
So let's talk about some other animals who don't quite fit this mold .
And I think it's just a really great idea any time that you want to draw an animal just to go and look at some photos of that animal and try , you know , rather than going in and trying to draw every detail of that animal , just try to figure out what the underlying structure is .
So one animal that I am including in the lesson today is a shark and a shark has a very interesting um skeleton form .
And if you know anything about sharks , you know that they actually don't have any bones , every bit of their skeleton or their structure is made out of cartilage , which is kind of a soft tissue , softer than bone .
So they're very flexible and they also don't really have much of a rib cage .
Um But we'll go ahead just for the sake of good practice , we'll start out with a rib cage , but actually , their head is almost just a little bit larger than the rib cage .
And instead of drawing out the exact shape of the head , which is very unique , I'm just gonna start out here with an oval and then we can kind of modify this a little bit to be more like the shape of the shark's skull .
So their skull is very , very interesting looking , in my opinion .
And then we have , you know , some teeth here , their mouth goes all the way back because they have a huge mouth .
You can see that just by starting out with that basic oval , then I can go in and start to chisel out the actual form of this kind of complex shape instead of going in and trying to just draw this outline , doing this oval underneath , it helps to guide that process .
All right .
All right .
And maybe we'll make the rib cage just a little bit bigger because it's just a little bit smaller than the skull .
And then the spine here might run out of room .
So this will be kind of a short shark maybe .
And then we have this dorsal fin that begins kind of right where the rib cage ends .
And again , you know , I can start out with just a basic triangle here , but then I can go in and refine this a little bit more to get that shape .
And that's something I really want you guys to practice as well , start out with a very simple shape and then refine it from there .
It's gonna make your drawing process much easier than if you tried to go in and , you know , draw the dorsal fin .
Exactly right .
You know , without doing any kind of basic structure to it .
And same here with the fin on the tail .
Let's just kind of start out with a large triangle and then we can just refine it from there and that's going to make our lives much , much easier .
All Right .
So , another structure I want to look at is going to be birds because they're , um , they're a little bit different because they do not walk on two legs and they do have wings , but the wing is not gonna be as complicated as we might think .
Birds have a large rib cage in proportion with most of their body and they don't have much of a spine .
It's just kind of like this and then we have the tail .
All right .
So then let's look at the leg .
So the leg tends to be very similar to other animals who walk on four legs .
So this is similar to their back legs of like a mammal .
But then they have longer talons .
You know , most mammals don't have long , you know , toes and then the wing is going to be very similar to a human's arms because it's not coming down , it's actually coming out of the top .
So this would be kind of like the upper portion of our arms .
This would be kind of the , um , our forearms and then they're gonna again have very long talons here at the end .
So this would be kind of like our hands or our fingers out here at the end .
And then there's gonna be a lot of variety with birds in terms of their neck .
But we'll just kind of keep this very basic and then they have more of a rounded skull .
But then , of course , they're gonna have a beak coming out and the shape of the beak is something that will change as well between different birds .
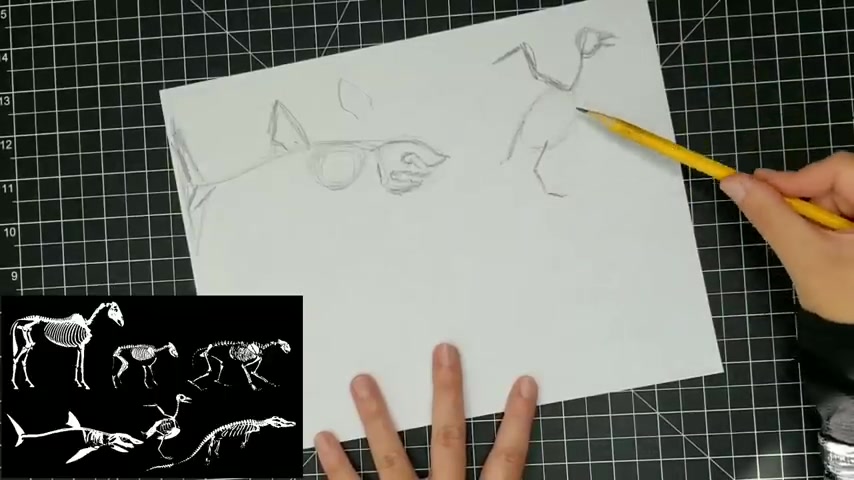
So again , if you understand kind of this basic structure and they have a very large breast plate , which most animals do not have .
Most of , most animals have a very small breast plate or sternum .
Um So birds have a very large breastplate , that's not something you really need to know .
But I thought it was kind of interesting .
Um So with birds , we're gonna look at , you know , the size of the wing in proportion with the rest of the body , the length of the legs in proportion with most of the body and the shape of the beak .
And that's going to take you a long ways in terms of understanding how to draw birds .
All right .
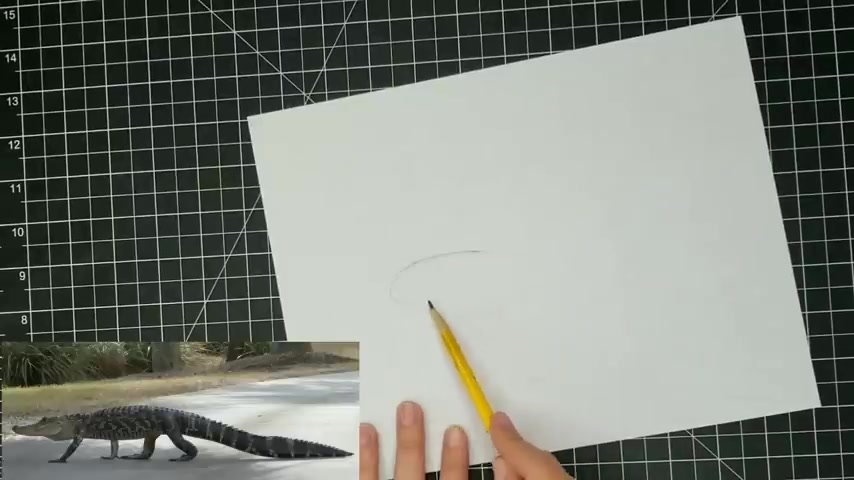
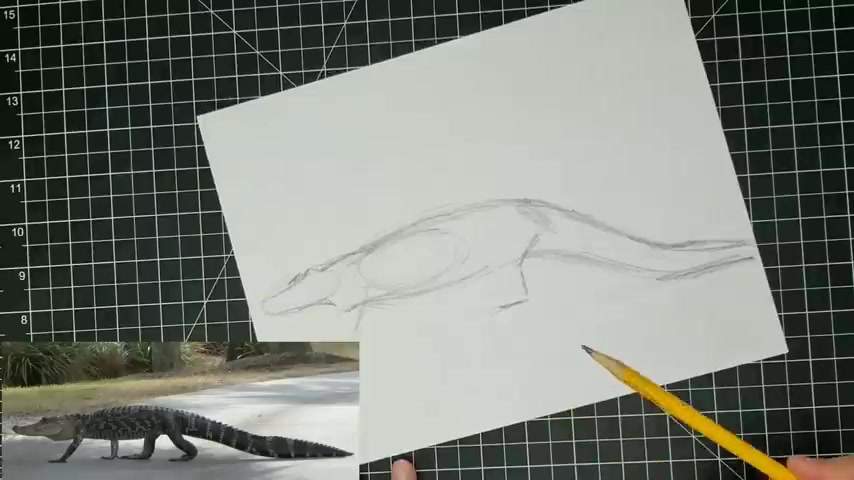
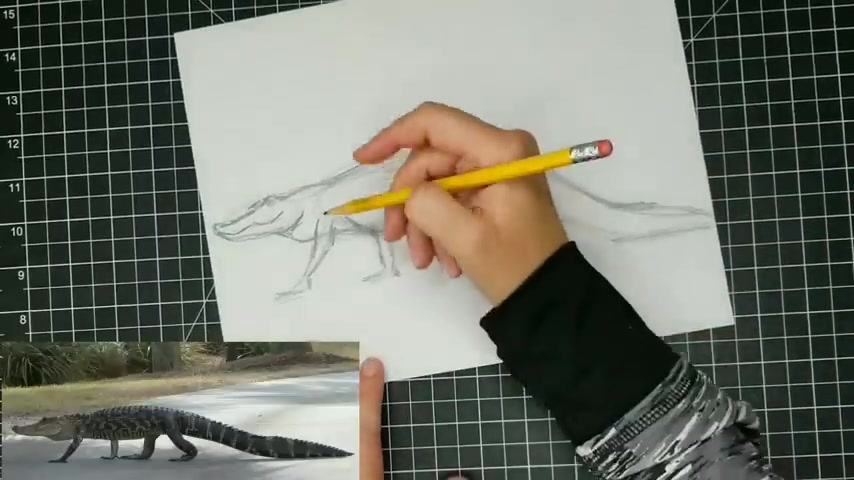
So let's look at one other animal that's gonna be ac or an alligator here .
I almost said crocodile , but this is an alligator or yeah , an alligator .
Sorry .
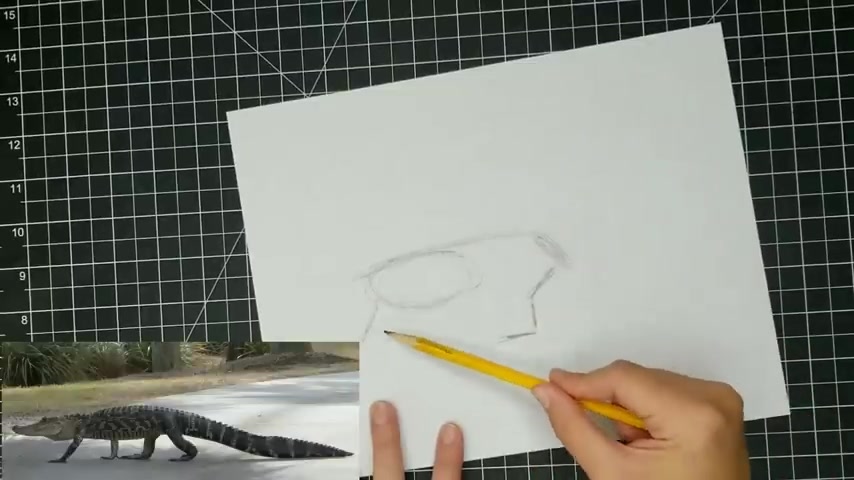
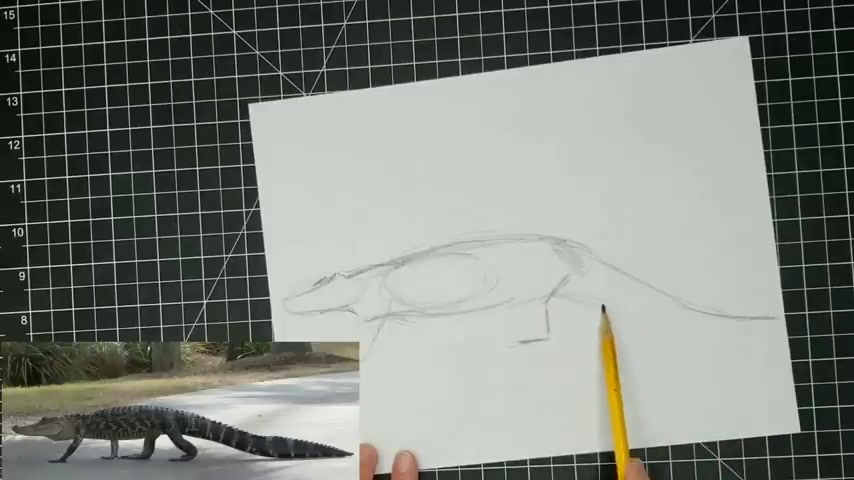
So I thought one thing that's interesting about the alligator is that the rib cage is very elongated .
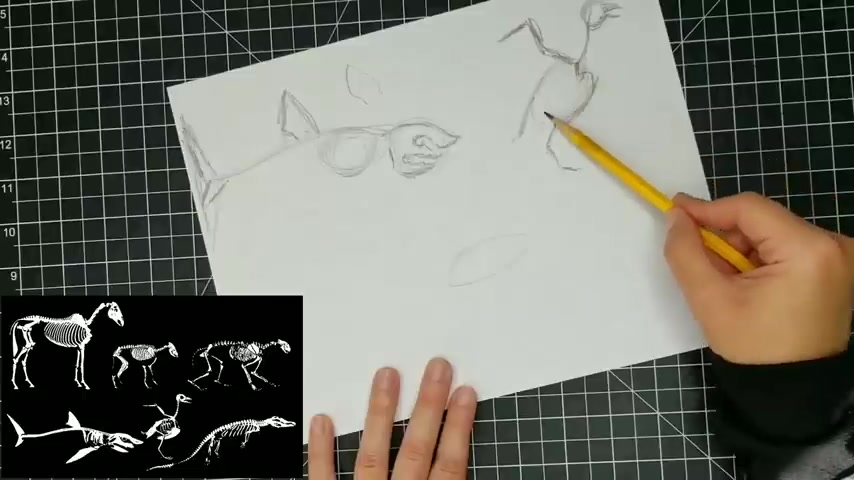
So , whereas a lot of animals have more of a round rib cage , it's very elongated in the crocodile .
And then of course , they're going to have a very long spine that extends all the way into their tail .
But I'm gonna , I'm not gonna draw in the tail quite yet .
I'm gonna do the back legs first and this picture I have doesn't really show the structure of the back legs too well .
But , uh we , we know that it's gonna be a little bit similar to a lot of other animals who walk on all four legs .
Uh , but their legs are much , much shorter , especially in proportion with the rest of their body .
And then their front legs are going to also be very similar , just a little bit shorter .
And then let's go ahead and put in the head before we do the tail .
So they have a very elongated skull , all right .
And just like with the shark , let's start out with just a basic oval and then we can go in if we want and we can add a little bit more of the realistic shape here .
So I want you to kind of think about drawing as you know , sculpting .
We're gonna start out with kind of a big block , a big chunk of a shape and then we're gonna chisel it away to get the more specific shape out of it .
And then its eyes are kind of at the top of its head .
So it can peek over the water and then let's go ahead and draw the tail .
And the reason I like to wait to draw the tail is because without knowing quite where you're going to place the legs , it can be easy to feel like the spine just goes on forever and you don't know where it's going to end , it's a little easier to judge the proportion when you have other things in place to help you judge .
So , and I might run out of space here on my paper .
So we'll just , we'll curl his tail up a little bit .
All right .
So these are the basic structures .
I want you guys to practice , I want you to practice holding your pencil with an overhand grip .
I want you to practice starting out with a very basic shape like an oval .
And then you can add more of the nuanced details to that structure after you have the basic structure underneath .
OK .
That's gonna take you a long ways and alleviate a lot of your frustration with drawing .
So once you understand the basic structure of the animal that you want to draw , then you can start going in and really refining the animal .
All right .
So what I'm going to show you here is I'm going to really break down the way to draw a horse and then I'm going to show you some more examples of other animals , but I'm going to go through them much more quickly .
I'll probably speed up the video just so that um you have time to watch them .
And also , I really just want you to take away the fact that you can start out with very basic shapes , very basic structure and really you can create a very convincing animal and really any animal .
OK .
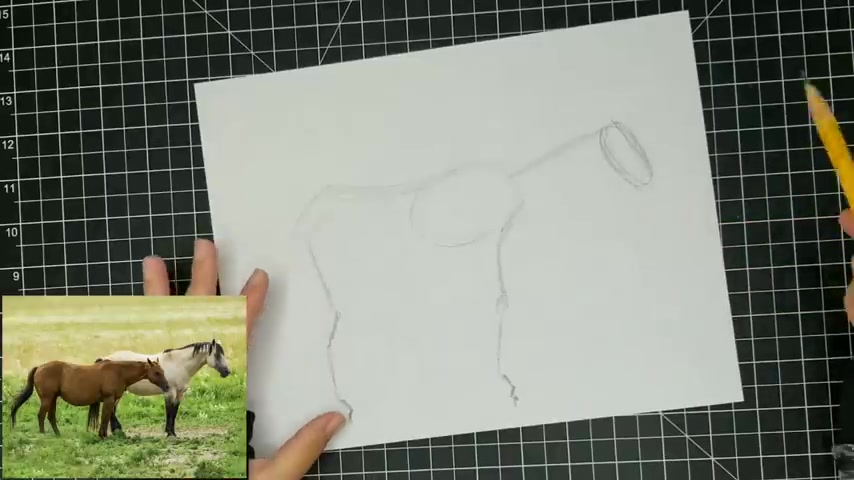
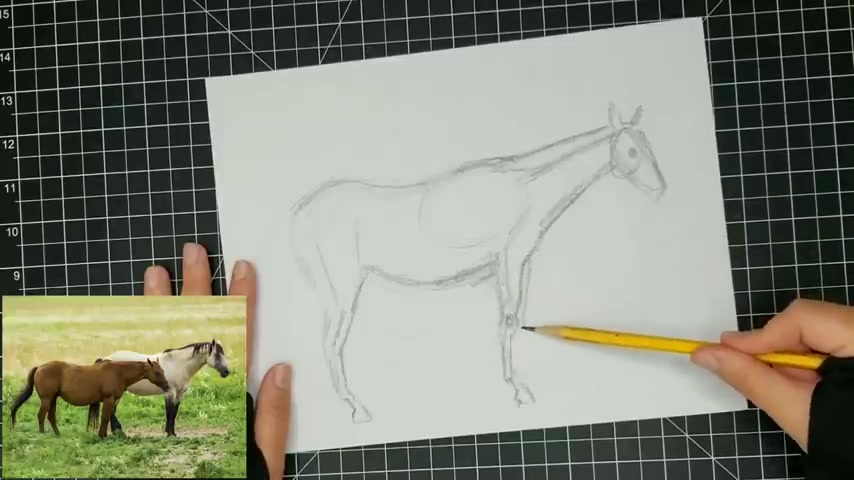
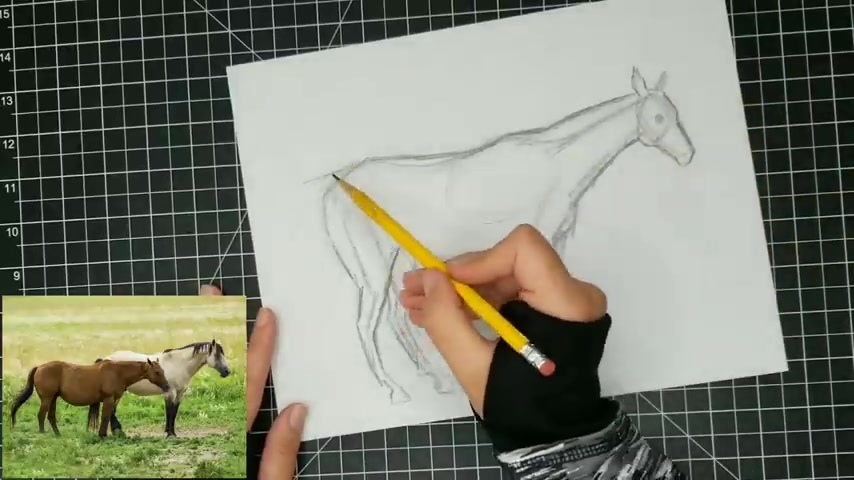
So we're gonna start out with a horse .
I'm gonna start out here with a rib cage and then I'm gonna notice the angle of the spine here and how long it is in relation to the rib cage .
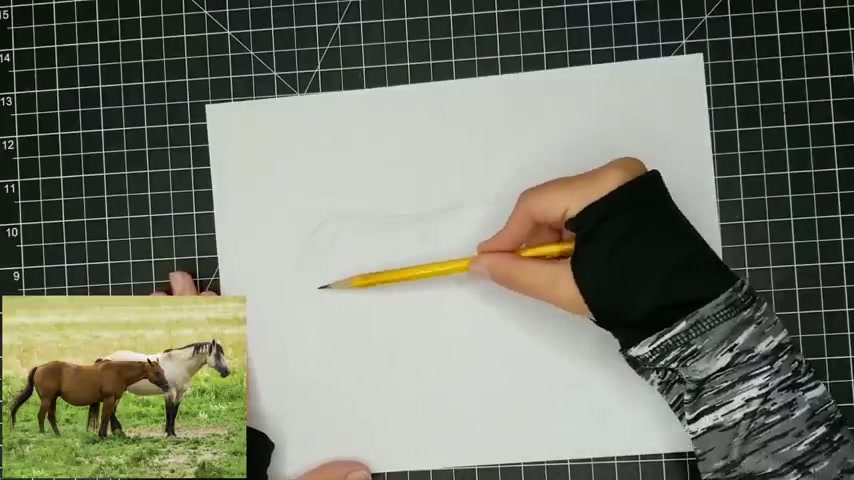
Then the pelvis back here and then I'm going to mark in the legs and I'm just looking at the angles here .
So this is the leg that is closest to us .
We'll do the leg that's behind a little bit later .
OK ?
So let's just keep it very simple for now .
And then let's look at the front leg here and this horse is standing still .
I am gonna show you how to give your animals some action and make that very easy for you .
And I know that we really can't see the hooves on this horse in the photo .
But I , since I understand the structure of a horse , it's very easy for me to just go ahead and add that in .
OK .
So once you understand the structure , it also helps you to fill in information that you may not even have in your photo reference .
And that can be very useful because sometimes you have an idea for a drawing , but you can't find an exact photo reference for what you want to do .
And so you need to be able to understand the basic structure of these animals .
So then you can better modify in a way that gets you where you want to go .
So let's just go do a little bit of a oh That's very narrow .
It doesn't need to be that narrow .
So again , just modify .
And I know I didn't mention this before .
But what I also want you to keep in mind is that there's no need to erase .
OK .
Um Erasing is actually not something that you should do very much when you are learning how to draw because you're going to spend more time erasing than drawing it , waste your time .
And if you think about it , you could spend a whole hour drawing and still end up with a blank sheet of paper because you've erased everything and you don't need to be that perfectionistic about drawing .
OK ?
Because it's really , again , it's kind of like sculpting , it's about chiseling away at it and starting with some very basic forms and then refining from there .
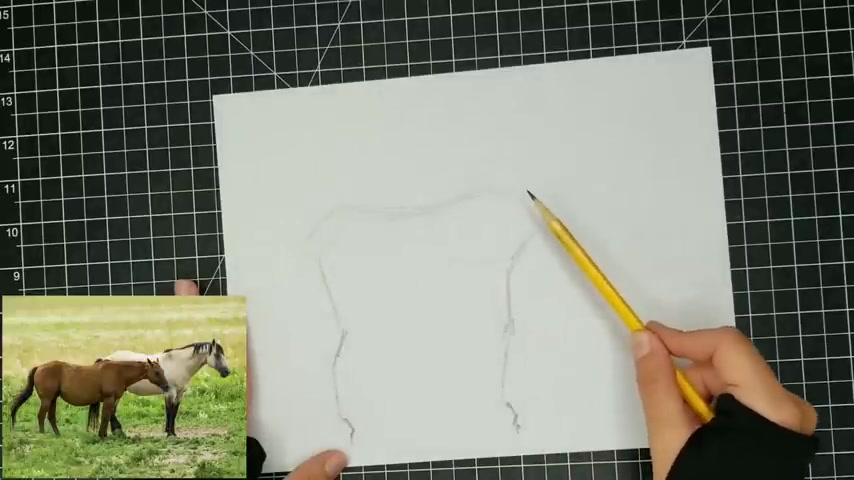
All right .
So now we have this basic structure of the horse , I've left off the legs that are kind of behind these legs .
We'll add those in a little bit later .
So , what I want to do now is to start looking at the contour of the horse and figuring out how the , the muscles fit on top of the structure .
And again , you might make mistakes and that's totally OK .
Just keep drawing .
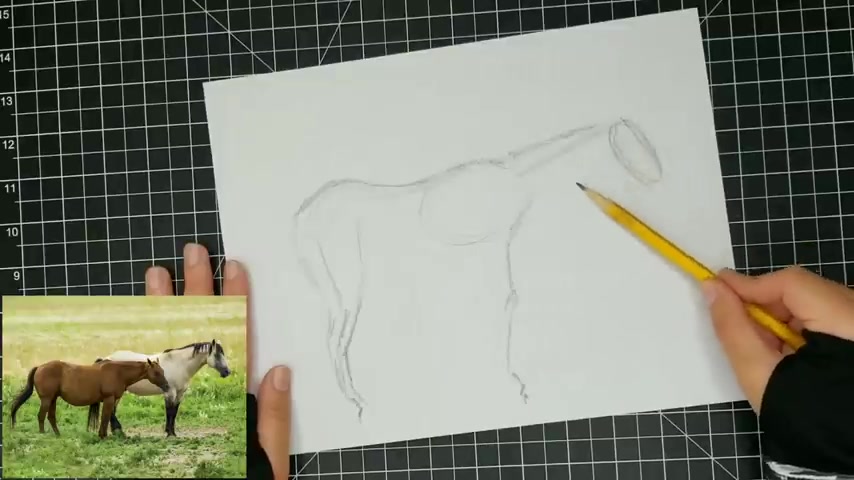
But you'll notice too that I'm not doing any details right now .
So I'm keeping this overhand grip and being very , very loose one thing you'll , you'll notice about necks , especially on mammals is that there's a lot of meat on the neck .
So we have the , the spine here that curves around , but there's a lot of muscle underneath that we have to account for .
And then maybe this joint I put too high .
So I'll just kind of redraw it down here and then same here with the torso .
There's gonna be a lot of muscle and organs that kind of fills in the space .
And that's something that you'll notice about mammals is that the way that their torso is formed is gonna vary from animal to animal .
Some animals are gonna have more of a , a rounded belly , uh , like maybe a cow horses kind of , it does taper a little bit toward the back end a little bit and same with dogs and cats .
You get that tapered look here .
So that's something that you'll want to notice , it's gonna vary between different animals .
So then once you kind of have the basic forms here , then we can start looking at putting in a little bit more detail and being a little bit more specific about the shape that we see and we're not gonna put in the tail yet or anything like that .
We're really going to keep it very simple .
We're gonna kind of mark where the eye is going to be , maybe refine the head just a little bit , but you can already see how this is coming along very , very quickly , just by starting out with that basic structure underneath and then refining as we go , let's go ahead and just mark in where the ear is going to be as well .
And then , so now that we have this kind of all very roughly drawn in , I'm gonna go ahead and look at where the legs on the other side are .
And this leg pretty much mirrors the leg , the two front legs kind of in the same position as one another .
But then there's a little bit of a variation with this back leg .
Now , one thing that can be very tricky is to , you know , after we've done all this structural work , then we go in and just try to like guess where this leg is going to be .
But I really advise to you to go ahead and just draw the structure of the leg behind so that it really can look accurate .
So there's a little bit more of an angle here .
All right .
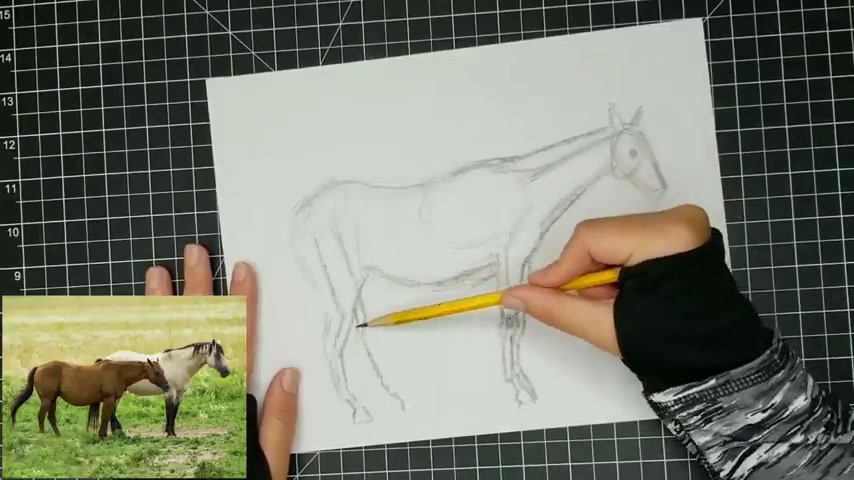
So now we've got that in place so we can go ahead and add the form around that structure and it's gonna be much easier on us than just trying to go in and , and try to guess where things are supposed to be .
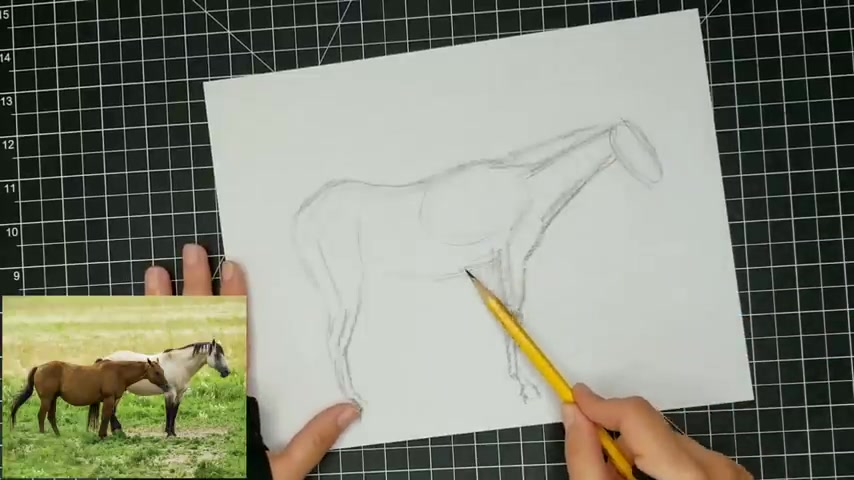
All right .
So now we have a pretty good looking horse , we kind of know what's going on here , so we can go ahead and we can add some more details if we want .
So I just kind of quickly .
Now , I have my tripod grip because I'm going to be using more of a controlled stroke with my pencil .
And I'm basically right now , I'm gonna start out with the contour .
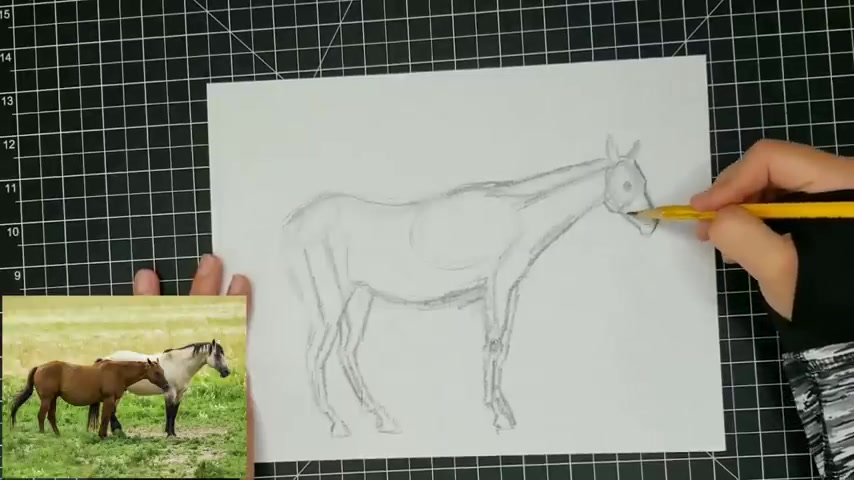
So the outside line of the horse and I'm kind of just looking at the angles and I'm building the angles that really define the shape of the horse , building these around that basic structure and we can make modifications as needed .
Maybe there's too much of an arch actually .
So I'm gonna straighten this out .
So again , there's no need to go in and , and erase everything because you can see too that as I make more refinements , I can use a heavier pencil stroke and then you almost don't even notice some of the errors that were made early on in the process .
And the more you draw , the fewer errors you're going to make or the errors that you make are , you know , they're still going to be pretty close , kind of make these hunches just a little bit more pronounced .
There's a lot of muscle there .
All right , let's go ahead and add in the tail .
Remember that there's a tail bone here .
So with a horse and with most animals , it's not gonna be that the tail is just kind of draping down behind the horse , it's actually gonna stick out just a little whiz .
Yes .
And then also when you're drawing hair like this , like in a Maine , don't go in trying to draw every single strand we're gonna kind of keep this as one big solid shape as well .
Alright .
And then let's just go ahead , let's add in the nostril here just trying to pay attention to kind of the general shape of it .
And then we already know where the eye is going to be .
So we can just kind of refine the shape here to be a little bit more accurate .
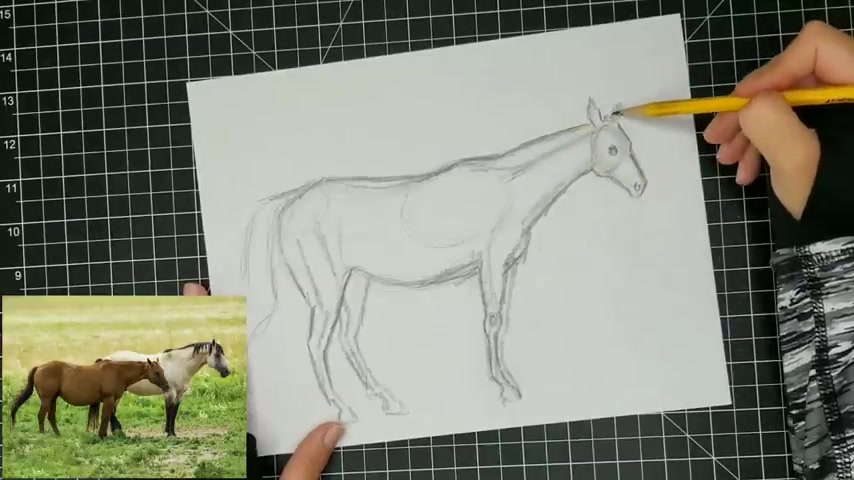
Add a little bit of this man here , refine the shape of these ears a little bit .
All right .
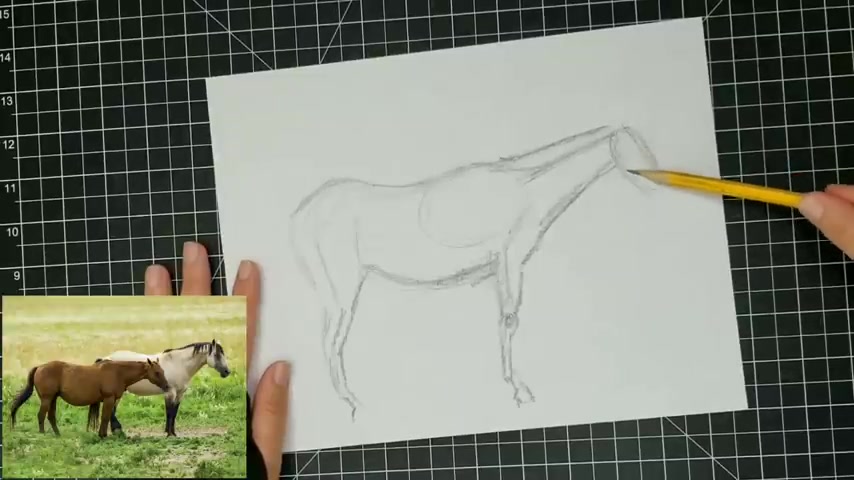
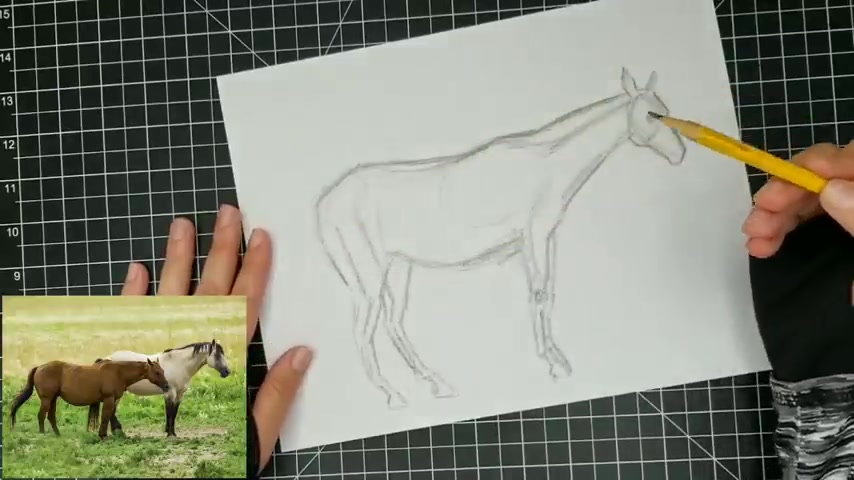
So there's our horse .
So the next thing I'm gonna do is kind of just show you how I can take the basic structure of some of these other animals and build up a very convincing looking animal .
What's up in this drawing ?
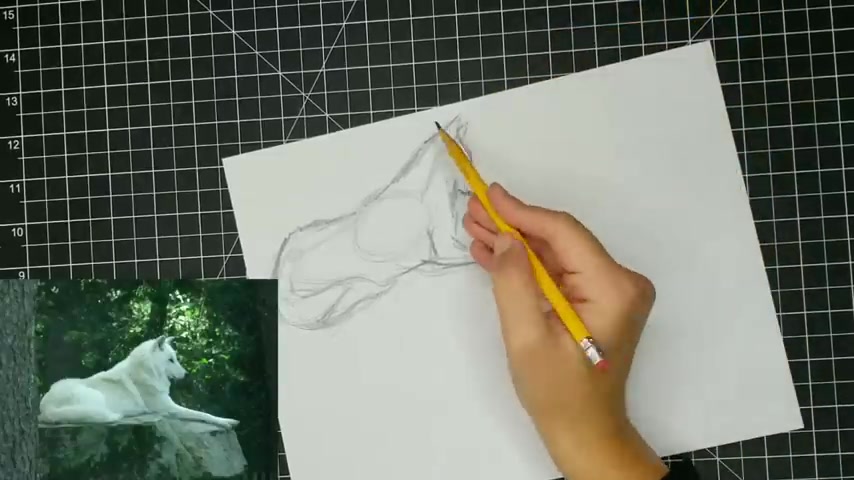
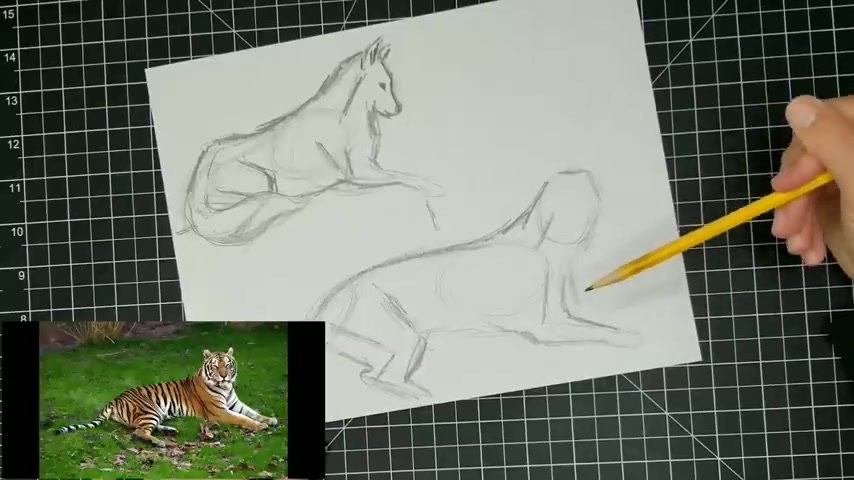
I'm going to do a wolf and I'm going to do a wolf that is laying down instead of standing up .
And so I'm gonna show you how we can apply the basic structure to change the position of the animal from what we might typically see the structure as in our minds .
I'm going to do this next one pretty fast .
I'll probably speed up the video just for time's sake .
But what I want you to notice here is that I'm going to be using the basic structure of a wolf that we went over earlier and I'm going to apply that to a wolf that's in a different position than how we drew the structure earlier .
OK .
But I just want you to basically see that it's very important to understand the structure and use that in order to help you draw animals in different positions .
So I'm gonna start out with the rib cage and we'll just go from there .
So nothing has changed so far .
I got the rib cage .
It might be a little bit big here .
Let's kinda elongate it just a little bit .
And then I've got the pelvis here .
Now , what's gonna change is the position of the legs .
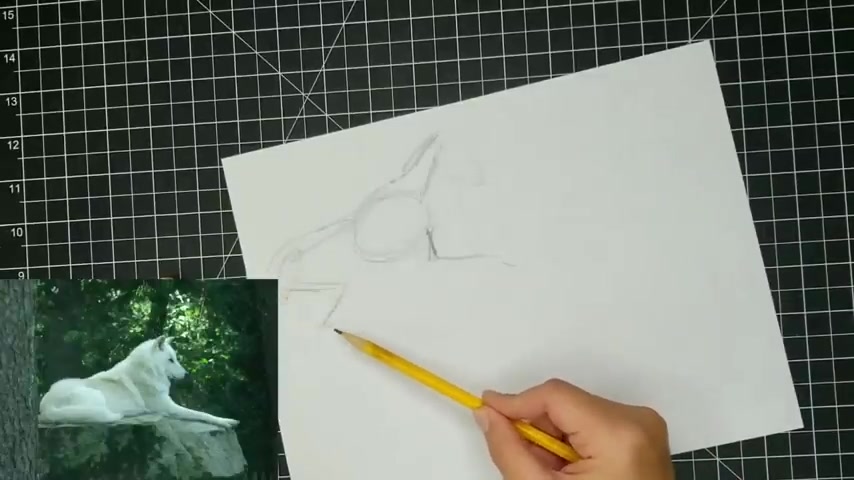
So now I've got the structure and I'm gonna go ahead and start building up the form that I see around this structure and that's gonna give me a much more accurate contour than if I just went in and tried to do the contour without that structure .
But you can see we've got a wolf that is laying down or sitting and even though in the photograph , you really can't see what this leg is doing because the tail is in front of it .
I wanted to just go ahead and just kind of estimate what I think is going on there because that's a very useful way to kind of understand .
So that when even when you put it all together with everything in there with the tail covering it up still is going to read as true .
Yeah .
All right .
So there's our wolf maybe just add a few more details .
In here , you can see that the form of the wolf around the structure has a lot to do with the fur .
So of course , we have a lot of muscle mass in this area that adds a lot of form around this neck structure , just like within the horse .
But then we also have a lot of fur that we have to account for .
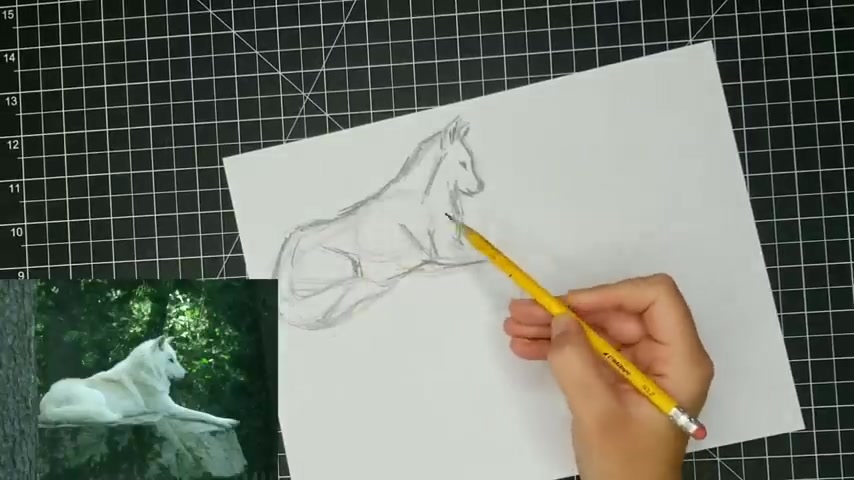
But by understanding this structure , I could very easily build all this form around that structure in a way that really reads as accurate and realistic .
All right .
And then this here is just that back leg .
And even though it's mostly hidden , I used this form here and I know there's a lot of muscle around this bone here to make up just this little indication of this back leg .
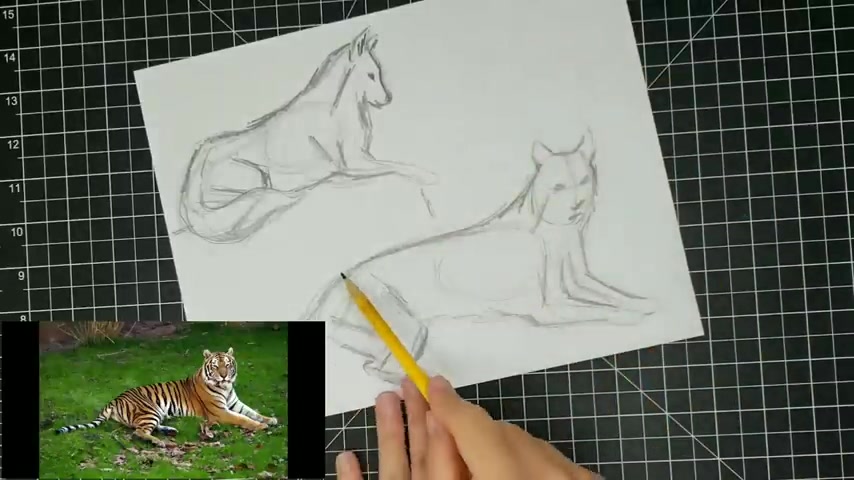
So there is a wolf laying down , let's do the same with a tiger that is laying down .
So again , I'll start out here with the rib cage , really big strong rib cage here for our tiger .
And then let's kind of look at the shape of the spine here and you don't need to go in and you know , do a super accurate , very curvaceous shape for the spine .
In fact , what I would recommend is starting out with a very simple spine and then we can refine it .

So if the shape of the spine is a little bit confusing or seems to have just a lot of curves in it , I would say start out very simple with basically a nice arch and then we'll kind of build up from there .
And then again , nothing really has changed from the standing position to the sitting position so far .
You know , we have the pelvis back here .
What's gonna change is the angle of these leg bones and we have a little bit of foreshortening in here , which we'll talk about a little bit more later .
Let's not worry about it too much for now .
But this bone right here , this is kind of a little bit foreshortened just because of the angle at which we're looking at the tiger .
And you can see there's a foot coming out over here .
We're not gonna worry about that for now .
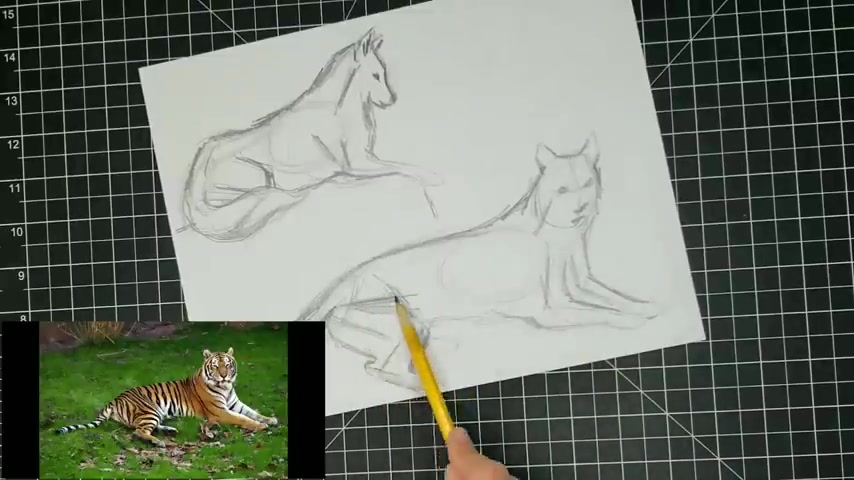
Let's go ahead and go up to the neck .
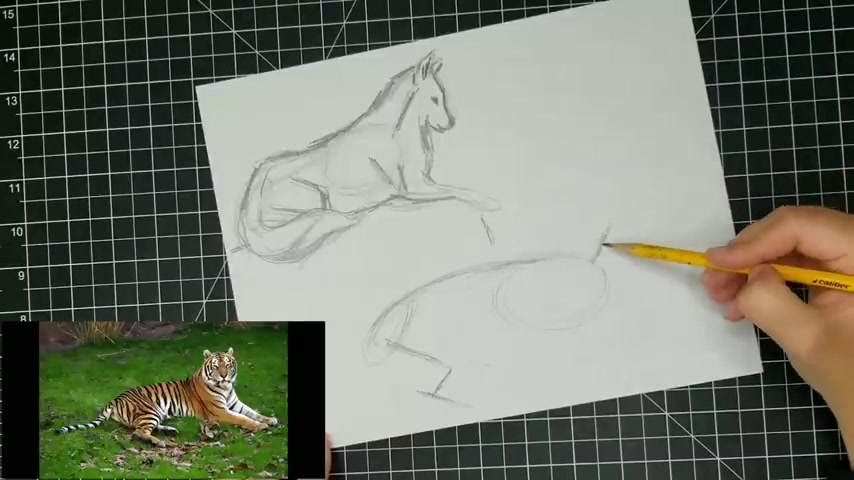
It's gonna be a pretty short neck and we have some foreshortening in the face .
So instead of a side view of this tiger's face , it's really going to be quite round .
And actually we don't see much of the neck here because this tiger is looking right at us .
All right now , same thing with the front legs .
We have a very simple structure .
All right .
So let's go ahead and add some form and I'm gonna leave out the ears for now , leaving out the back of the legs that are kind of behind him .
Also did not draw in the tail yet .

I can go ahead and do that now that I have everything else in place , be a little more easy to judge the length of the tail .
Now and now I can kind of refine if I think that the shape of the spine was a little bit inaccurate before you can go ahead and refine that a little bit .
And again , we have a little bit of foreshortening going on here .
And now we can really see how this heel that sticks out more than it did within our wolf or our horse really comes into play .
This is another thing that just helps these animals to climb and jump , be very agile .
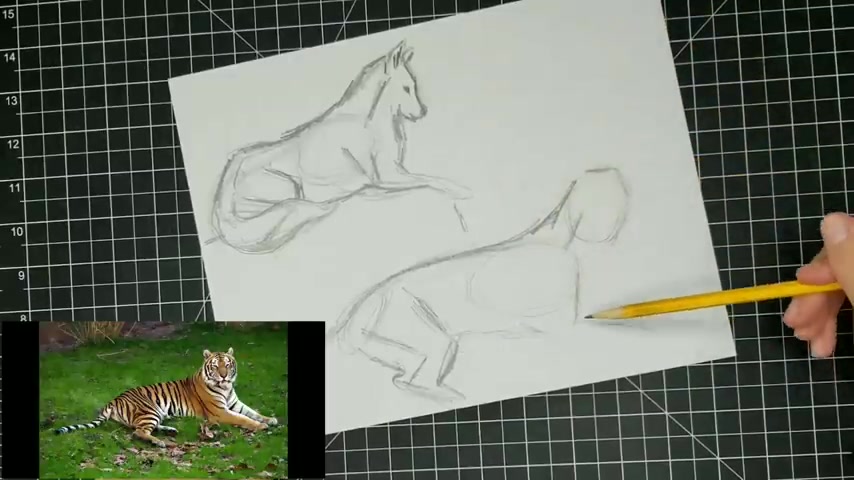
And then I think I need to refine this just to be a little bit longer .
Another difference that you're gonna notice between different kinds of animals is how much mass or , you know , muscle mass that they have in their legs .
Some animals like a horse or a deer have very lean legs and then more powerful animals like a big cat , they're going to have a lot more mass around the bones of their legs .
Ok .
So now we've kind of got this basic structure in and you can see that there's , I don't really want to connect this to the head because there's just , you can see a little bit of the chest here .
Ok .
So instead of connecting those , what I'm gonna do is I'm gonna go ahead and start building in this other leg .
So let's kind of figure out the structure of that leg .
It pretty much mirrors this leg right here , right ?
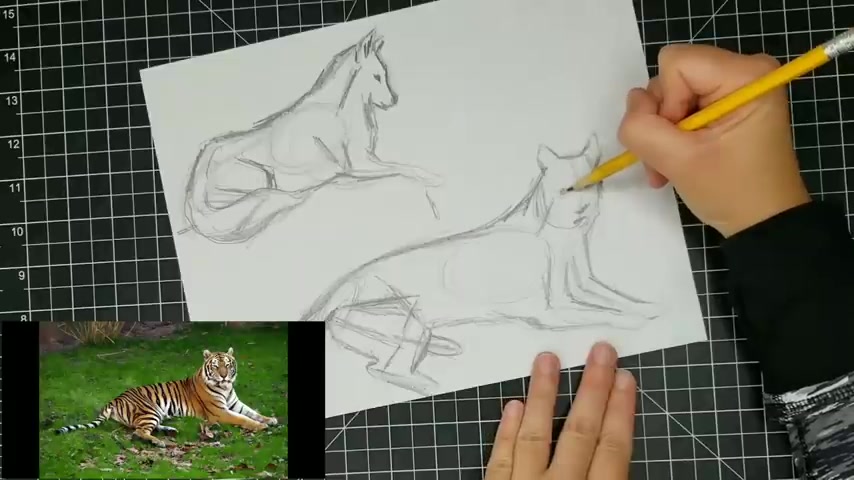
So let's go ahead and add some ears .
These ears are a little bit rounded at the top rather than being pointy like a house cat .
All right .
And then for the head , if we're going to be drawing a head that is kind of um facing us , it's a little bit different than drawing it from the side .
It's a little bit trickier .

But what I want you to see first is that there is a structure to the head and hopefully we can go into this .
Um If not , I'll put it in and extra video for you guys , but this is going to be very similar for humans as well .
So what we're gonna do , we're gonna find this area where the eyes are and we're just so that we don't end up with an eye up here and an eye down here , we're gonna kind of loosely add in a line where the eyes are and then the center line of the head kind of curves down right down the middle like this .
OK .
So this is where our eyes are going to be .
So instead of going in and drawing really detailed eyes , I like to just kind of scribble them in so that they're in roughly the right position before I add any details .
And then same with the nose , we're just gonna kind of scribble that in and where the mouth is gonna be .
All right .
So now that we've got those basic structures , now we can go in and add some details and we can also add in this foot over here .
If you want to , you might want to make the decision to leave some details out of your drawing .
If you feel like it's gonna just be kind of distracting , which I might normally do that with the tail , but just for the er with that other foot , I'm going to add it in just so that you guys can have an example of that .
But that might be actually a place where I just leave something out , even though I can see it in the photo reference , I might just make that choice to leave it out .
Let's go ahead and do the tail , which is a little bit foreshortened here as well , actually comes up to here and we can actually see a little bit of the back end of this tiger here .
All right .
So let's try to think about what this leg back here is doing because we know and we could just , you know , draw in this foot here , but let's actually try to think about what's going on back here .
So this tiger is kind of laying on its side so it's tilted toward the ground .
So this leg over here is on the ground a little bit more and is being very much foreshortened .
So let's go ahead and just try to imagine what is going on back there .
So I think that this leg it's in a , has a little bit of a different angle .
So I think it's gonna be a little bit more like that rather than like this with this front leg , which is kind of outstretched .
A little bit more .
This one is a little bit more compact and then we of course have that long heel that we can imagine and then we have the foot .
So this makes sense with where this goes .
So this is a very useful thing to do even though it may not be necessary because you could just easily draw this little shape right here .
Uh very useful just in case you ever want to make a modification or to draw something from your imagination .
Good to start thinking about these structures that you can't see as easily because they're a little bit concealed by the position of the animal and a little bit later too , we'll talk more about adding markings .
So I'm not gonna add any markings to this tiger .
Let's just go ahead and do a little bit more detail in the face just so he is recognizable as a big powerful cat looks a little bit ambiguous right now .
But you can see how doing all these very loose sketchy marks just to kind of mark where things are , that really helps to guide me as I add more detail .
Ok .
So we're gonna call this good for now .
So let's go ahead and move on to some of the animals that are not so typical .
Like mammals are , mammals are pretty easy .
Once you understand that basic structure underneath them , it's pretty easy to come up with different animals to position them a little bit differently and to have a really good , strong understanding of that with other kinds of animals like , uh , fish and , um you know , reptiles and birds and things like that and insects even , um it's gonna be a little bit of a different process .
However , just understanding and starting to be able to envision these basic structures is gonna help you to simplify every type of animal .
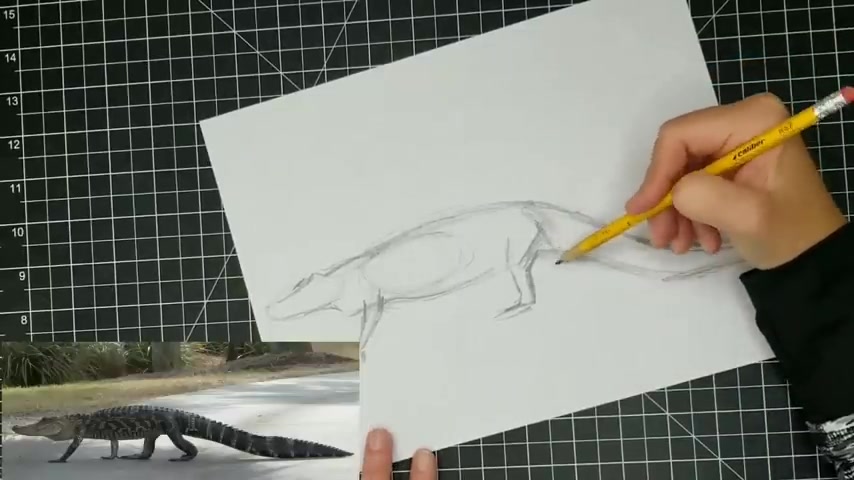
So with the alligator , remember it has a very long oblong rib cage , it's not quite as circular as most other animals .
And then it's gonna have a very long spine and I probably didn't get myself enough room for the whole tail on here .
But let's just see what we can do .
So I'm basically just going to try to guess how much distance I need between the rib cage and the back leg before I even worry about the tail .
Ok .
So I would say about right here is where we're gonna have our pelvis and then remember much shorter legs .
Now this alligator is walking .
So I'm going to think about the leg that's closest to us and what it's doing .
So it's gonna be kind of out in front .
And then this leg also , oh Let's go ahead and add the skull that's gonna take us pretty close to the edge of the paper .
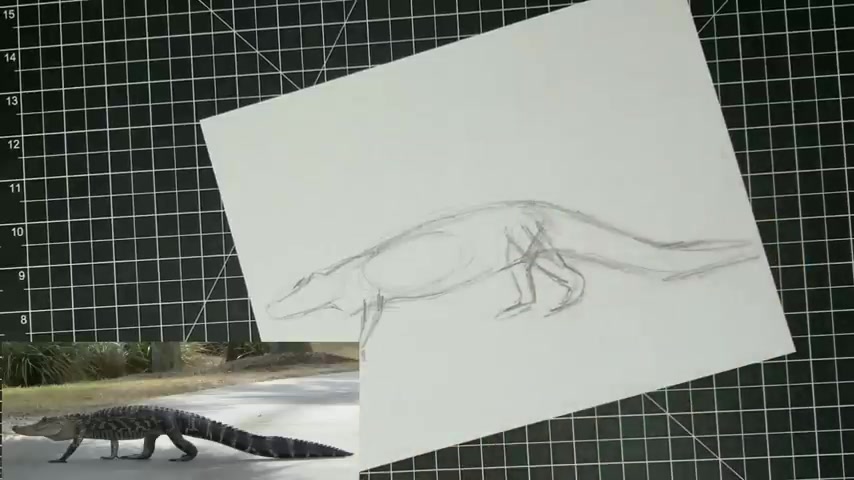
OK .
So now we've got these basic structures , the rib cage , the pelvis , the legs , the skull .
Let's go ahead and try to estimate what this tail is going to be doing .
All right .
So there's our basic structure .
Uh Let's go ahead and add some form before we add in the other legs that we can actually see here .
So instead of going in and drawing the line , I'm actually gonna just continue this line all the way through and actually all the way through the tail because this all needs to kind of line up together .
So sometimes you may feel a need to do this usually on like longer animals .
I like to do this just so I can keep this line very consistent throughout the entire animal .
And then we'll add the lakes back on top of that six .
And then something I notice about the tail is that it kinda , it almost gets thicker here at the end .
And that's probably to help them be very fast swimmers , very powerful in the water .
It's almost like a paddle at the end of his tail and it's dragging on the ground .
So it's gonna be a little bit flat on the bottom side .
OK .
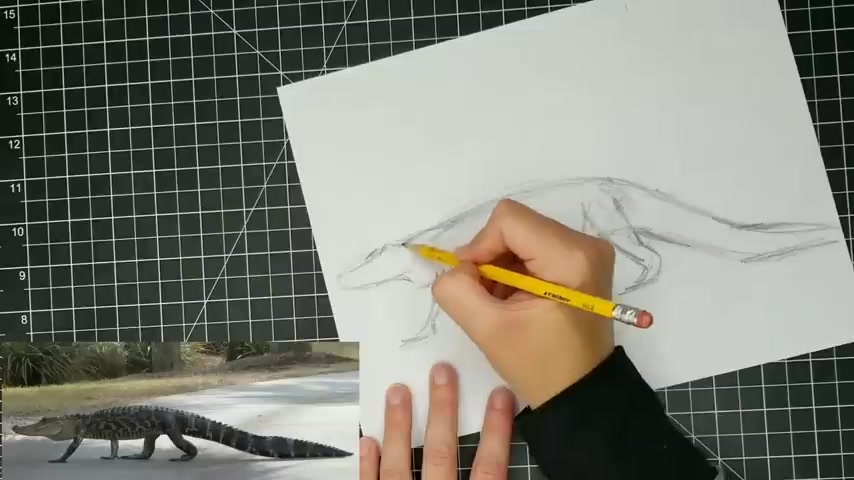
So now let's go ahead and add in the legs .
So the legs form pretty simple , not a lot of really defined joints because we have the elbow kind of up here .
And then it's pretty short .
We're not going into details on like the clause or anything like that .
We're just getting the basic form here , but just like with anything else , if you want to add a very realistic looking , you know , claw or whatever , it's good to have this basic shape and then to build all those details around that basic shape .
Yes .
OK .
So we have this leg attaching to the pelvis up here and then we have this other leg back behind .
So let's kind of imagine where that's going .
We have to do things a little bit differently here .
Oh You know what ?
Actually this is the lake that's in front and this is the lake that's behind .
My photo is so dark .
I couldn't really see that .
So there we go .
So now we're putting in this leg here in the front .
So , all right .
And since I made these lines so dark , I'm actually gonna cheat you guys .
I'm gonna use my eraser just to lighten this up just a little bit .
So it's more clear that this is the leg that's in front .
If you have a pencil like this , don't even bother with these pink erasers .
They are no good .
All right .
So let's look at this leg back behind here .
So what we have going on , there's quite a bit of distance .
So the , the elbow joint , here's the shoulder up here , the elbow joint is pretty close to the body .
So we don't really even see much of that .
So it actually just looks like it's kind of sticking straight down .
You can see a little bit of a claw back there .
All right , let's give a little bit more detail to the head before we wrap up the gator .
So I think the snout needs to be a little bit longer .
Eyes are clear up at the top of the hood and then has kind of a interesting mouth shape .
But what we're gonna do , we're gonna draw a straight line for the mouth and then that's gonna kind of guide us to draw all these interesting curves here and then this jaw kind of is very defined back here .
All right .
So there is our gator .
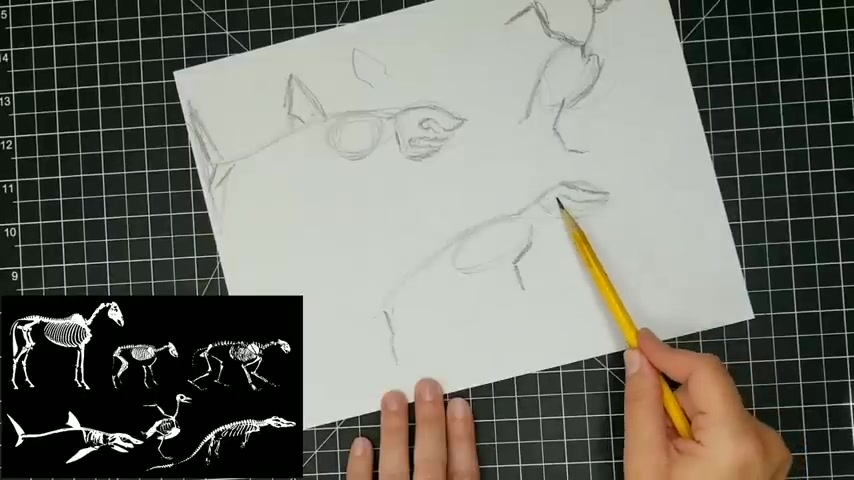
So let's quickly sketch a little eagle and we're gonna go based on what we know about birds .
So pretty large rib cage and it's more upright instead of being more horizontal like other animals , because birds when they land , they tend to be on just their back legs , obviously because their front legs are , their wings .
Eagle has a pretty short neck , rounded skull .
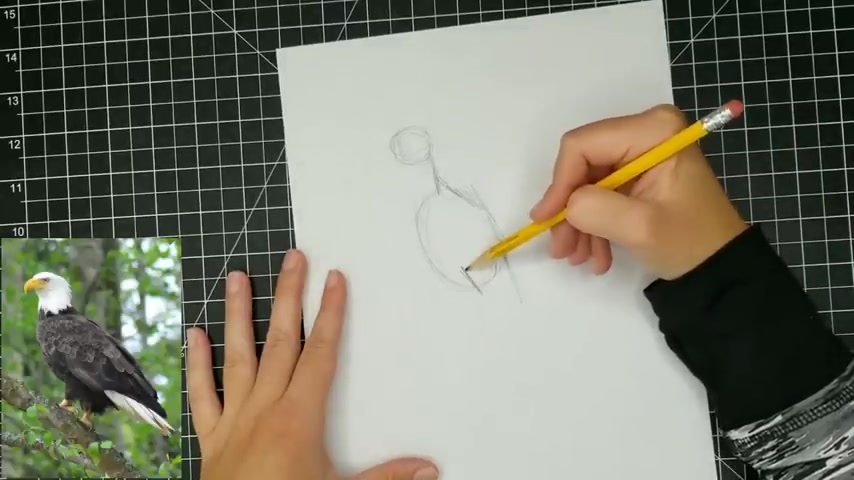
We're not gonna worry about the beak quite yet rounded skull , spine very short and then the legs kind of start up in here .
Well , here's the pelvis .
All right .
So let's go ahead and add some form and then the tail feathers are gonna come out beyond where this stopped .
And again , we're not gonna do the beak quite yet .
We're just gonna worry about the most basic forms around the structure first .
And then let's go ahead and draw this all the way through to the tail feathers .
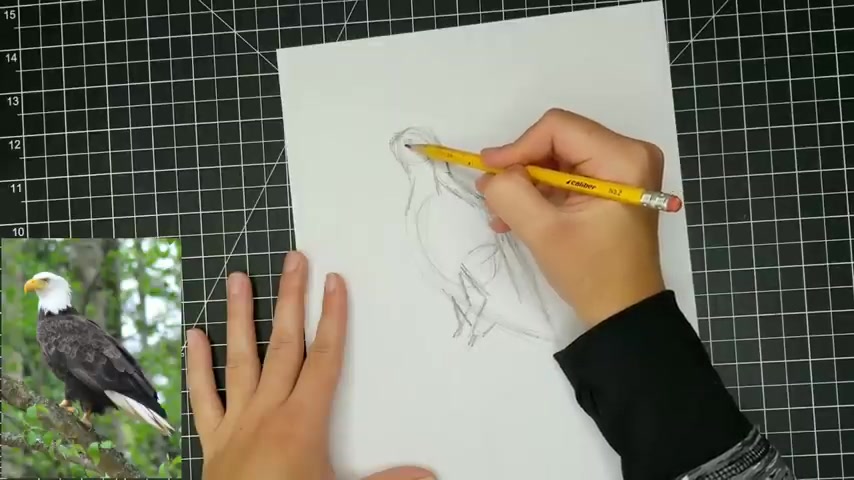
And then we just see a little bit of this leg sticking out here and then we can go ahead and think about the other leg .
It's just a little bit behind .
So kind of sketch that in just so we have a good placement .
All right .
So let's refine a little bit .
We'll go ahead and let's look at where the eye is .
It's going to be close to the top of the head right here .
And now let's go ahead , let's um very roughly estimate the shape of the beak .
So I'm going to start out with just straight line out like that .
And before I put in the little hook at the end of the beak , I'm just gonna go ahead .
I want to make sure that the biggest , most solid form of the beak is very clear first .
So we're gonna kind of imagine it like this .
All right .
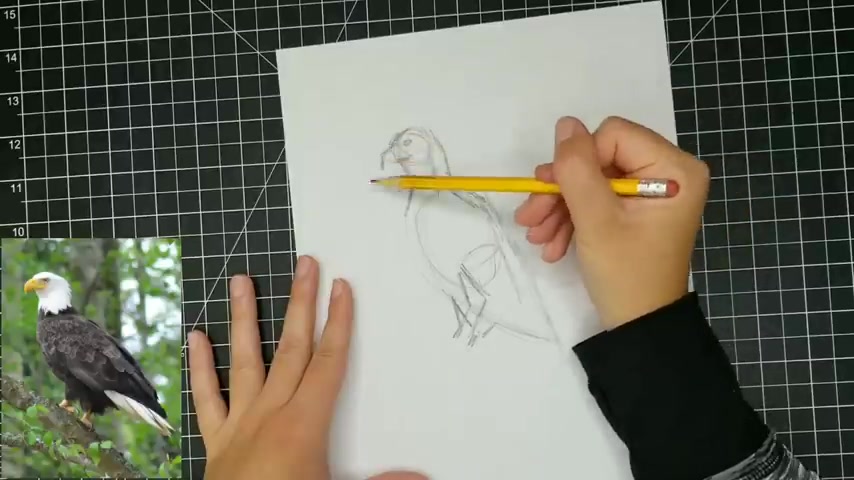
And then once we have that all in place , then let's go in with this curve here so that we don't make the beak too long or look wonky or anything like that and notice how the beat comes back into the head quite away as it's really just like right under the eye .
We'll just kind of rough in very , very loosely where these tail feathers are going to be , but we're not going to go into detail right now on anything like that .
I really like how the skull of the eagle kind of slopes over the eyes makes it look real tough .
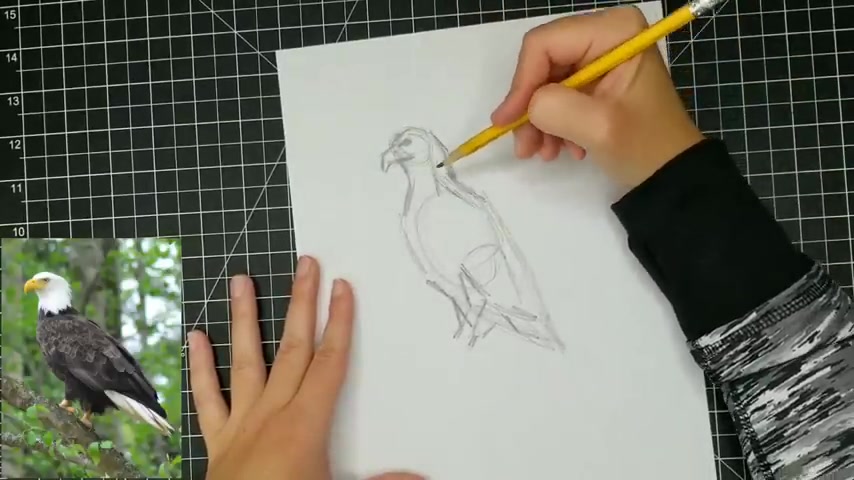
I put in the nostril here and maybe we'll kind of indicate some feathers very loosely here and you really can't see a lot of definition in the wing here .
Not until you get back here where there's , you know , the darker feathers and then the lighter feathers down here .
So we're not gonna worry about trying to figure out where the wing is .
I think that this is actually enough to very clearly tell you that this is an eagle , a very majestic eagle .
Are you looking for a way to reach a wider audience and get more views on your videos?
Our innovative video to text transcribing service can help you do just that.
We provide accurate transcriptions of your videos along with visual content that will help you attract new viewers and keep them engaged. Plus, our data analytics and ad campaign tools can help you monetize your content and maximize your revenue.
Let's partner up and take your video content to the next level!
Contact us today to learn more.