https://www.youtube.com/watch?v=tysvdXwoiB8
GoDaddy Website Builder Tutorial 2023 (Create a Website FAST & EASY)
So I've been using many different website builders before and I got to say that using the Go Daddy website builder , I've definitely had the easiest time creating a beautiful looking website .
It's perfect for beginners because honestly , it's very hard to screw anything up whenever you change something on the site , go Daddy makes sure that it still looks good rate on your page .
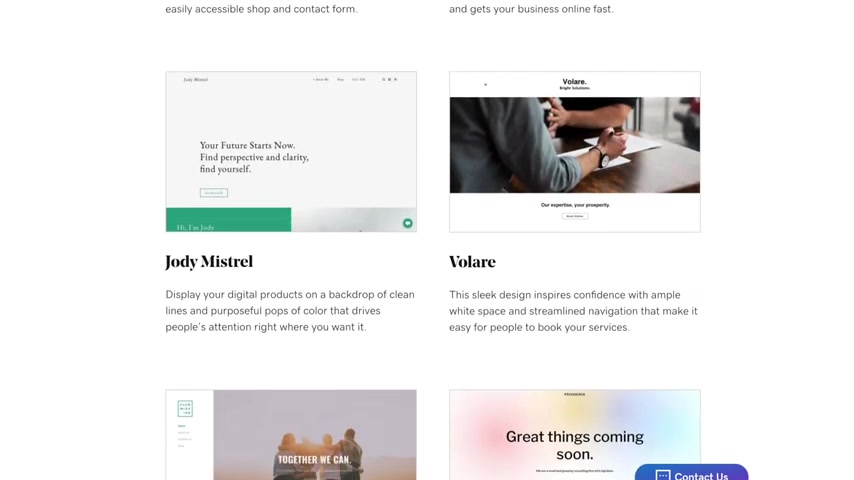
They also have tons of beautiful templates for all kinds of different websites .
And you can also run your website entirely for free if you don't need any of the paid features .
So in this video , I'll give you a complete walkthrough of the Go Daddy website builder showing you everything you need to know to build your own website .
So even if you don't know anything about building websites , you have never built a website before .
After watching this video , you'll pretty much be able to build any website that you want .
Be it a blog , a personal website , a website for your business or maybe a website where you want to sell products .
I'm going to show you how to do all that in this video .
You'll find all the time stamps down below in the video description .
So let's get started .
All right .
So the first step is to go to Mex media dot com forward slash godaddy or simply click on the first link down below in the video description .
This will take you to the correct sign up page where we're gonna start the video .
All right .
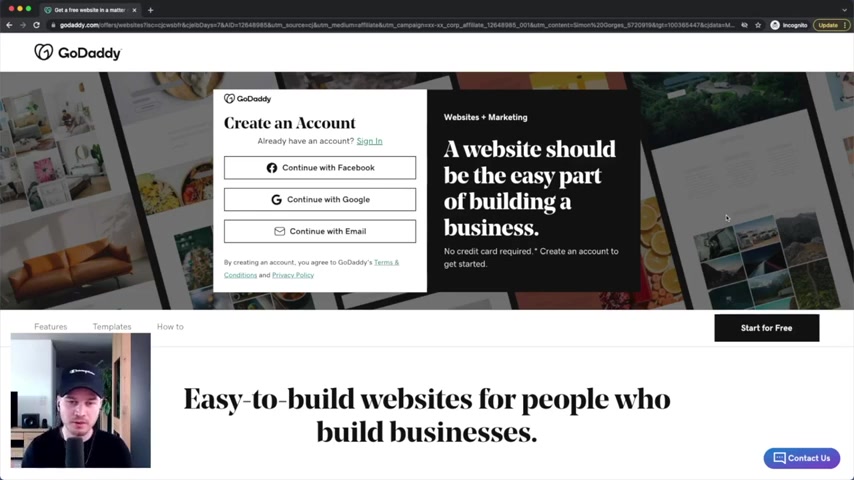
So the link in the description will take you to this page right here where we'll start by creating a new Go Daddy account .
You can either sign up with your Facebook account , your Google account , or you can simply type in your email address to get signed up .
So click whatever option you want to choose , type in all your information right here and then click on create account .
And then here on the next step , we have to decide on what kind of website we want to build .
So they already give you a couple of suggestions here on the top like gaming real estate agent .
However , you can simply type in whatever you're looking for right here in the search bar .

So if you want to build a blog , you can just type in blog right here and then you get some more suggestions or you can type in , let's say a photography website .
So you can type in photography and so on .
And then based on what you type in here and decide on what kind of category you want to go for .
They will basically give you the perfect template for this specific website .
For an example for this video , I'm gonna create a website for a clothing store .
So I'm gonna just type in clothing and look for clothing store .
So we , we have one example right here .
So I'm simply gonna click on clothing store and then I'm gonna click on next .
Then we have to set a name for our site .
So I'm gonna name this site , Medics Apparel .
However , if you don't know what you're gonna name your site yet , don't worry , you can always change your name later on and then we can see all the different website plans that we can go for and we will take a look at them later on in the video .
However , now we're gonna simply click on continue for free and then start building out our site .
And then at the end , you can decide on if you are actually in need of a paid plan or if you want to continue using the free version of Go Daddy .
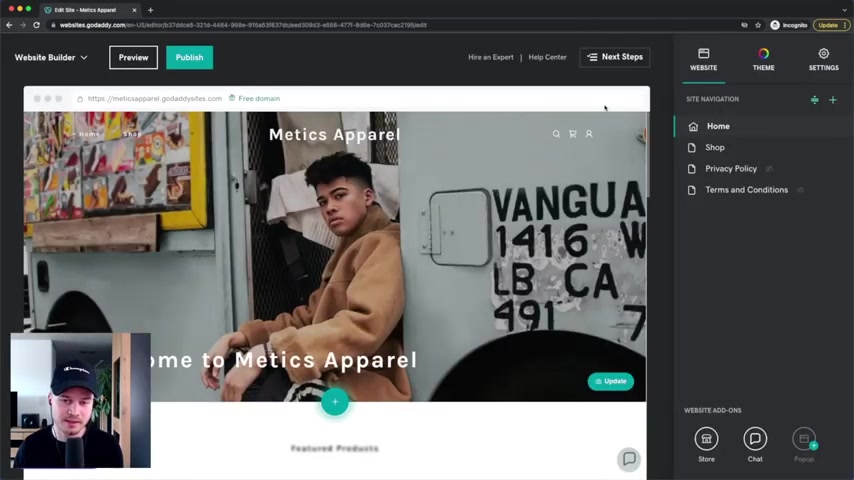
And that takes us inside of the Go Daddy website builder where as you can see , we already kind of have a finished looking website right here and we're gonna get into how to change all the content to change all the pictures , the text and so on in a moment .
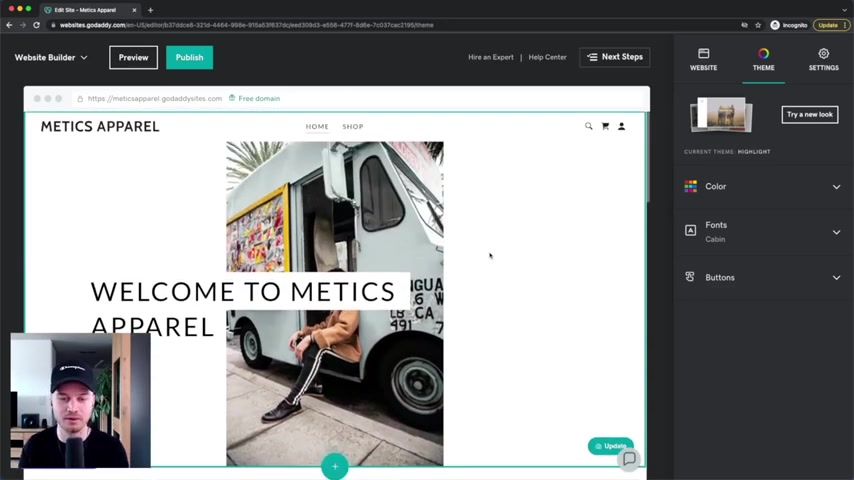
But the first thing that we want to do is choose our theme .
So when we go to the top here , click on theme , then we can click on , try a new look and then you will see different themes for your type of website .
So I'm gonna see themes here for a clothing store website .
Because before I have chosen to build a clothing store website , if you have chosen something else , this is gonna look different for you .
So what you want to do here is just check out these themes for yourself , maybe click on them , check out different pages how they look like and then decide on a theme uh that looks the best to you and don't worry about that decision too much because later on , if you decide that you should have chosen another theme , we can always change the theme later on down the road once we have finished building our website .
So for this video , I'm gonna simply choose um the highlight theme , which is right here .
So I'm gonna click on select and then it changes all the content to this specific theme right here .
And if it doesn't look perfect , don't worry because we can , can still change a lot of the things inside of the theme right now .
Now , before we change any of the details here on our website , we want to go again to the right side where it says theme and then we want to check out each of the tabs that we can see right here .
So first let's go into color .
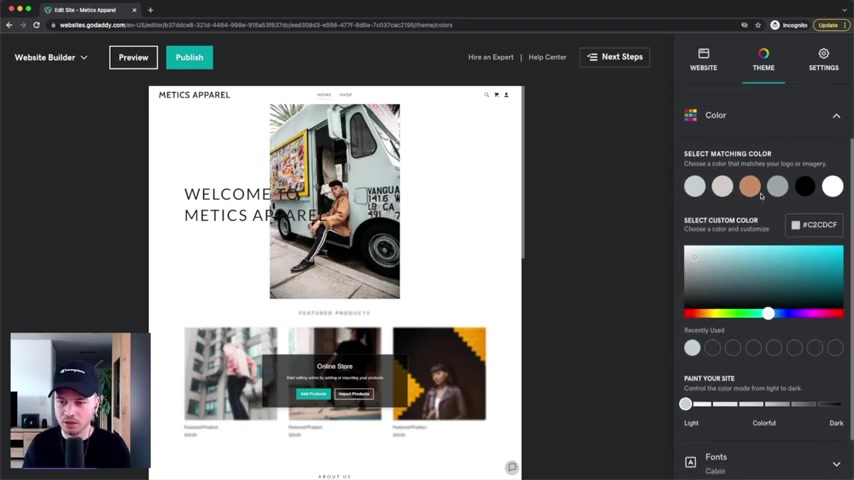
So under color , we can basically change the color theme of our website .
So they can just play around here , we can just move this color and then we can see exactly what changes .
So currently , for example , the button changes the button colors .
You can also make this maybe an orange like this and you can just play around with it a bit .
What you can also do here is um kind of change the tone of your website .
So right now , we are uh we have everything in the bright section .
So the light version , we can also make it a bit darker by just going to the right side right here .
And that will just make everything a bit darker and I kind of have a darker theme .
So whatever you think looks the best for your website and for your brand , just choose accordingly .
I'm gonna gonna just stick with the , the light version right here because I think it looks better for what I want to build .
So this for the colors .
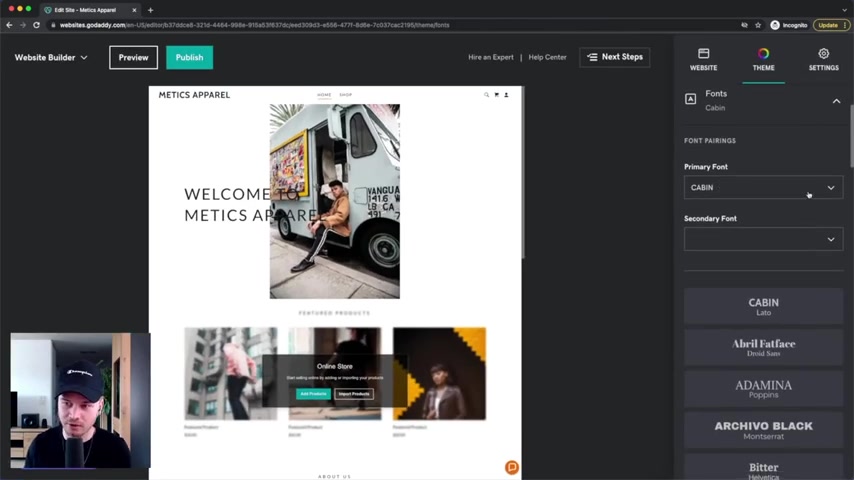
Um you can just play around with it basically and then we're gonna move on and click on fonts right here and here , we can basically decide on what kind of fonts we want to use for our headings .
So our primary font and then also our secondary font right here .
I can either choose this manually by just going in here choosing the font or I can use already made options that go that it gives you that they think looks very good together .
So for example , uh our black and looks very good together or maybe low one and Source Sense pro look very good together .
So just choose , um , just play around with it and choose whatever you think looks the best for your site .
Then let's also go into buttons right here .
So buttons the same way we just can't decide between different styles .
So what I would do is just scroll to a part of your website where you have some buttons so you can see how it looks like on your website and then you want to go um you have primary buttons right here and also secondary buttons .
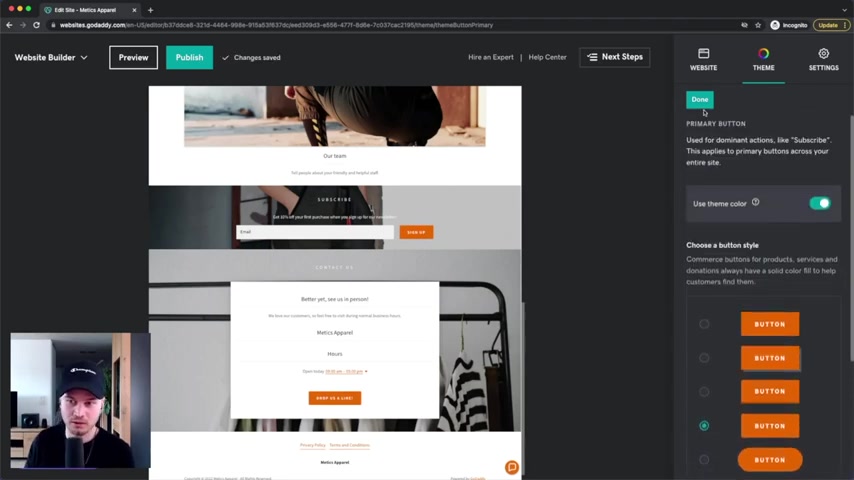
So let's go into the primary buttons and here's all the , the options that we have , we can use a minimal looking button that looks kind of like this or what I like to do is I kind of like to highlight my buttons a little bit because I want people to click on them .
So I'm gonna make them kind of colorful uh like this .
So again , just choose what you think looks the best for you and then we can move on .
So now we have set the basic style of our website , which like I said before , we can always change down the road .
So let's look at how we can add content to our new website .
So here under the website tab , we can see what kind of pages we already have on our website .
So we have a home page .
Every website has to have a home page .
Then we have a shop page , a private policy page and a terms and conditions page .
Now , here's how we can add new pages .
All we gotta do is click on the last sign right here where it says add page and then we can click on new page right here .
Then we can decide on to start with a blank template and then just add content from there .
Or we can use an already existing template from Go Daddy for an about page , a contact page , a gallery page and so on .
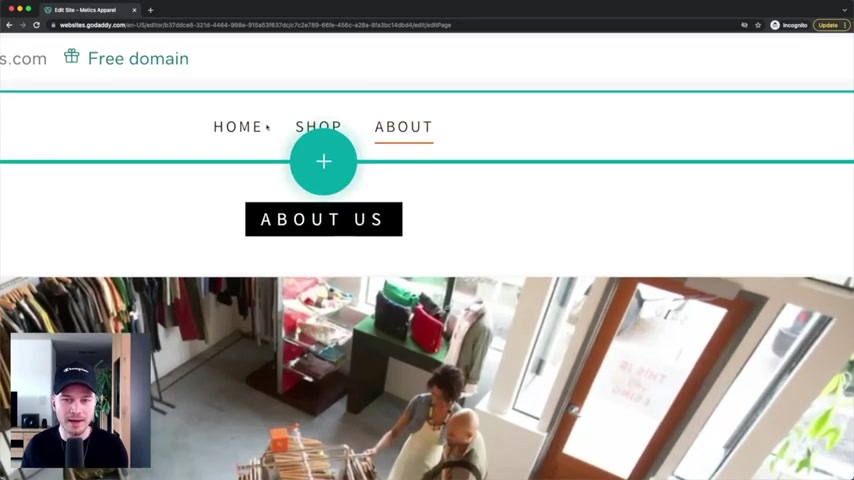
Let's go for an about page .
For example , click on about page and then click on create page right here and then Go Daddy will create a new page on your website .
And as you can see this new page is also in the menu here on the top where people can navigate through your website and it already creates an about page that looks exactly like the template that you went for basically , and you can always change that later on .
So now when we go to website again here , we can see one more page , the about page .
And we can also change the order of those pages by clicking on this icon right here .
And then we can move it up , move it down wherever we want to have our page .
So let's click on done .
And now we can also go into the settings .
So when we click on the settings icon right here , we can click on page settings .

And then if you don't want to have that page in the navigation bar here on top , we can simply unti show in navigation and then it will just disappear right here .
We can also just have it in the footer .
So then we can just take this or we can make it a private page .
So nobody really has access to this specific page .
And then once everything is fine here , we can click on done and we have now added a new page .
So let's now look at how we can change the content on each of the pages .
Let's go back to our home page by clicking on the website and then clicking on home right here .
So now we are back on our home page , which is what we started with .
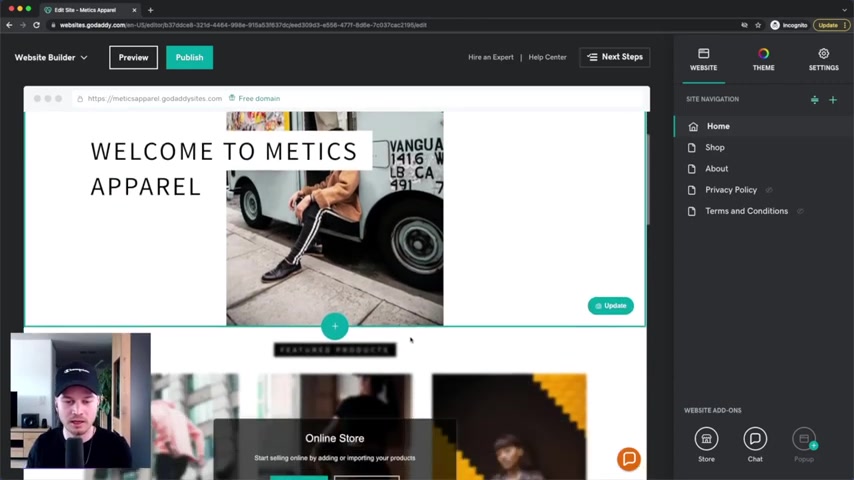
So each page is set up in different sections .
So here on the home page , you have this header section right here where you have a big image , a big headline and also the navigation bar here on the top .
Then when you scroll down , you have the next section which is for this website , an online store section which doesn't have any product sets .
Obviously , then we have an about a section and so on .
We have an email marketing section and you can just build this site out indefinitely with new sections .
So when you click on the plus sign right here , add section , then you can just add content , you can create a specific section based on a template .
So maybe you want to add some uh an image gallery right here .
So we click an image gallery , let's say uh photo gallery .
And then you always have nice templates here on the right side that fit very well to the website style that you already have .
So let's say we use this one photo gallery right here , click on add and then it will simply add this new section on our home page and you can also delete section .
So if you don't want to have , let's say this about a section , we simply go to the three dots right here , click on delete section , delete and we can also move sections around by simply hovering over the specific section that we want to move .
And then you can see those arrows right here .
So if you want to move it down , we simply click on move section down and then it will just flip these two sections .
You also have the option to preview your site at any time by clicking on preview here on the top left .
And that way you can see how your site looks like on a normal desktop screen and also on a mobile phone .
So the cool thing here with Go Daddy is that the templates are already optimized for mobile So there's basically nothing you have to do to optimize it for mobile as well .
And you should have a site that is optimized for mobile because a lot of the traffic nowadays comes from mobile phones .
So uh once you're done checking out the preview , you can click on edit side and then you'll get back to the editor .
And then when you want to change the content of a specific section , there's basically two ways to do that .
The first one is to simply change it directly on the site .
So we can simply click on the section , then go to any element you want to change .
And then let's say I want to change this text here to let's say just medics apparel .
So I can just do that right here .

And then I can also change the style maybe from style one to style five or something , whatever you think looks the best .
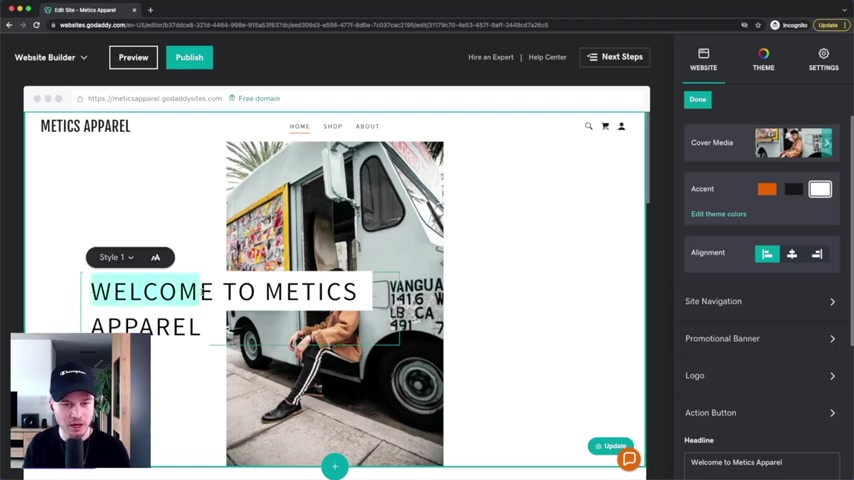
And then also when you click on the section , then on the right side , a menu will open up where it can change everything right there .
So let's start out with changing the image right here on the top .
We can click on cover media and then we can click on change image right here .
And then you can either upload your own image , which is probably what you want to do because it's your website and your content .
Basically , I'm gonna simply use a stock image here that go Daddy offers .
So I'm gonna just type in fashion and then I'm going to just choose one of the images that I find right here .
So let's say I'm just gonna go with this one right here .
Click on insert and that will now change the picture here on the top of the website .
We also have different image styles here on the top .
We can click on fill , we can go to fit to blur or just insert .
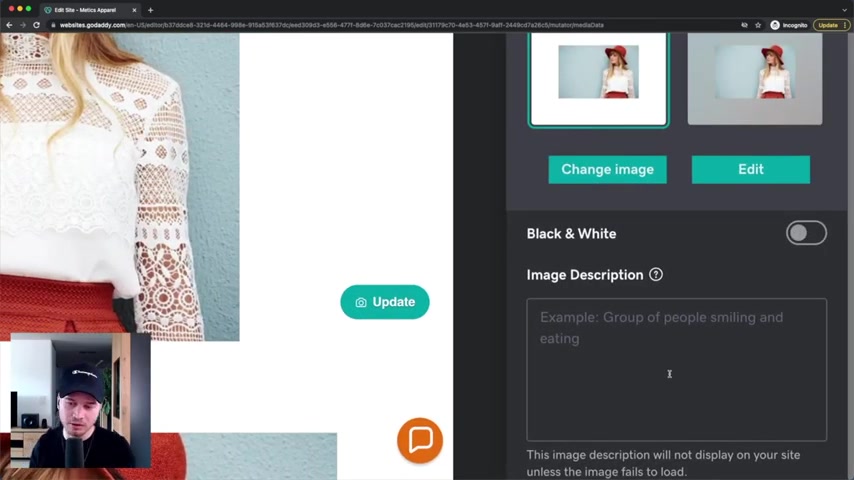
So whatever you think looks the best , then you can also add an image description here on the bottom that will just help out with your rankings a little bit because then Google knows exactly what uh what image that is .
And maybe people will stumble across your website using Google search .
However , that's not really necessary .
You can also make it black and white right here .
So then once the image is fine , click on done and then what I do is I simply go from top to bottom .
So I start with cover media , then I go to and right here , see what looks best .
You just play around with it and then you just find what looks the best .
Then the alignment here of the text .
I think it looks good here on the left side , then site navigation , we already went through this .
This is basically here on the top uh the menu bar off your website .
So we can skip that .
Then let's move on promotional banner .
Here is where you can just show a promotion on the top .
If you have a discount going on , you can just add some discount codes here on the top .
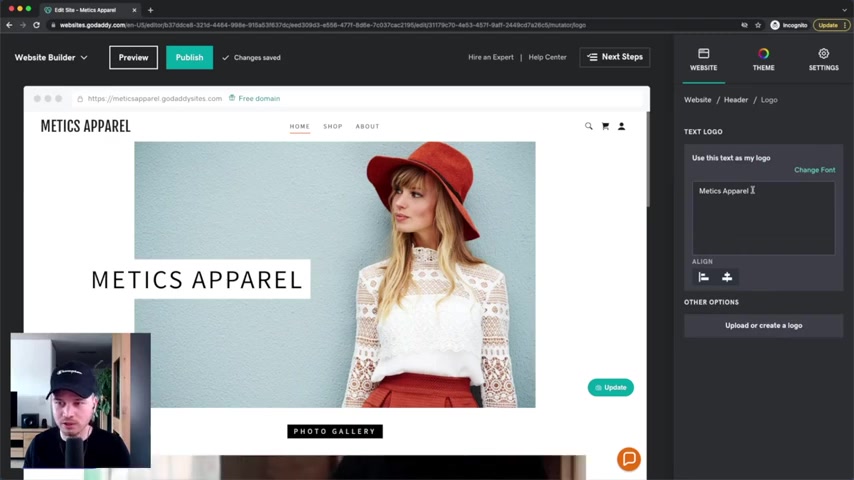
We can also add our logo right here so we can upload the logo or simply change the text right here .
Here is where you can upload your own logo .
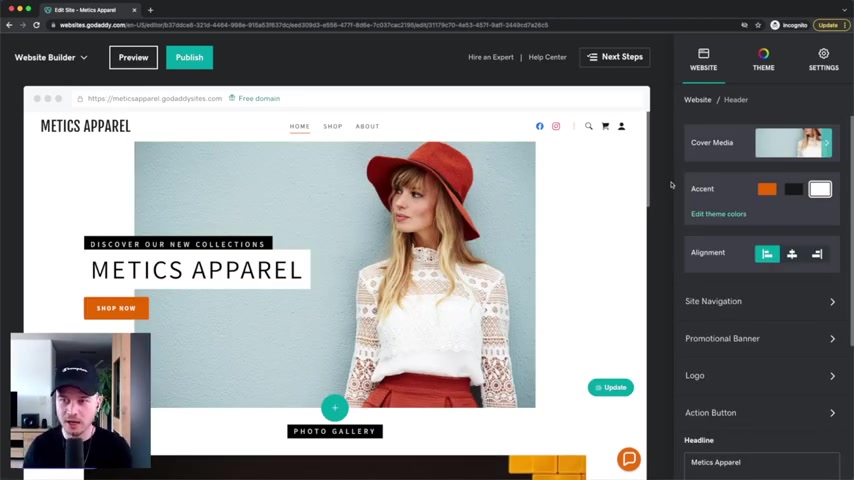
Then let's move on action button .
So this is something I would recommend to add a button to the top of your website because then people already see a button without having to scroll .
So uh I'm just gonna click on , get in touch show action button and then I'm gonna have it say shop now and then I will link this specific button to the shop page .
So here I can just link to page , that's fine and the page should be the shop page so people can click on the button and then they will get , get directly to the shop .
Now , if you have a , a website for your business where you want to book appointments , you probably wanna send them to the booking section of your website , whatever makes the visitors convert to a customer for your specific site , then let's click on done .
That's fine .
Uh Let's go back to header and um then we also have the headline here .
We already changed it here on the site itself .
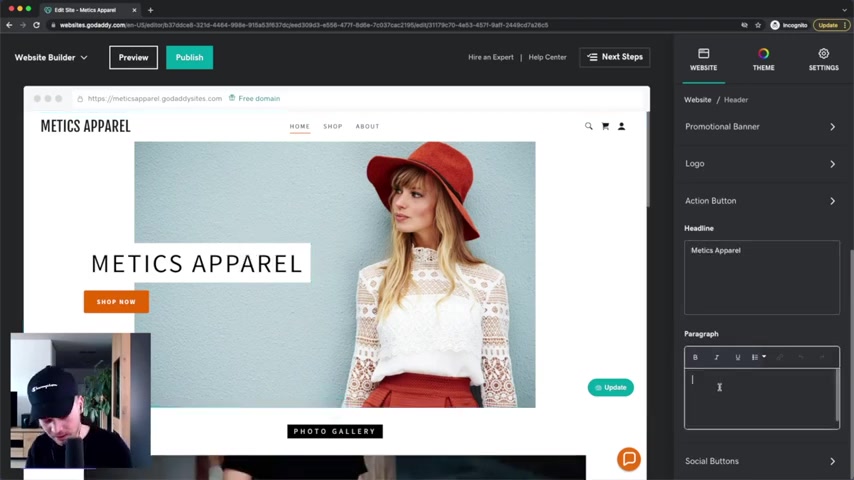
You can also add a paragraph , let's say discover our new collections .
And then as you can see it will add it here and it looks awesome in my opinion .
So you don't really have to worry about designing really much because the design part is already done by cho choosing the template and then you just add your content and it looks already amazing .
Let's click on social buttons here on the bottom and then we can just enable it right here on the top .
And then maybe you want to type in your social media icons , Facebook , Twitter , Instagram , and so on .
And then the social media icons will show up here on the top of your website .
And that's basically what you do with every single section of your site .
So now we have created the the top section here .
Let's go to the photo gallery .
We click on it and then we just go from top to bottom here and just check out every option until it looks perfect for us the same thing with the contact us section .
And then once we're done with the home page , we simply go to the About us page or the shop page .
And then we do the same thing right here .
We go through all the styles , the image options and so on .
So just using this method , you can just build out your entire website .
And now I also want to show you a couple of add-ons that you can use on your website .
So when we click on website right here and then on the bottom , we can see website add-ons that we can use on our website .
So if you have a store and you wanna sell products on your website , you're gonna need to add the store add on which is already added here on this website .
And we're going to get into how to add products , how to add shipping and all that kind of stuff later on .
Then we also have a chat add on which is this icon here on the bottom .
So people can click on that and then they can start chatting with you or your employees .
And they can also set up like automated messages like a greeting message right here .
You can have a confirmation message , set up some chat bots as well .

So just go through these options and then you can set up your communication channel here on your website .
Then we also have a pop up add on .
So we click on that .
We can just enable it right here and then you can maybe give them some discount code or whatever you want to communicate to them right here .
And how you change everything here is basically the same way , how you change the sections , just go through all the options here on the right side and then uh just customize everything to the way you want it to look like .
Now we're gonna move on and go through some of the main settings of our website .
So when we click on the top , right , click on the settings .
Then we again want to go from top to bottom .
So we're gonna click on basic information here .
We can basically change the site name , uh this business category and our email .
Then under social media links , we can change all of our social media links .
Uh Then it will just automatically change all across your website .
If you want to add a fab icon , what a facon is , is basically what you can see right here on the top .
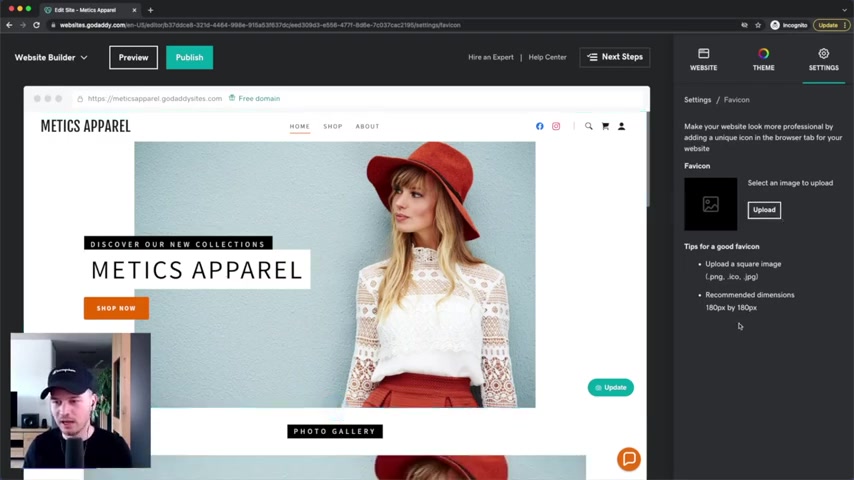
That's just a little icon that you can see on your browser when you visit a specific website .
So it's usually a 180 by 180 pixel image that you can simply upload right here and then it look , it'll look more professional on your website .
So you don't have to go at the icon here on your website and then get found on Google .
You can add a description for your website , a headline for different pages as well .
So this will just make it easier for Google to rank your website under the correct keywords .
And then we have also site history .
So this is basically when you just mess up and then you want to recover a previous version of your site .
And then you also have some analytics and tracking options , which is uh a bit more advanced .
So we're not going to go into it uh with a lot of detail .
However , under cookie banner , you can ask people to accept the cookie policies that's required in some countries .
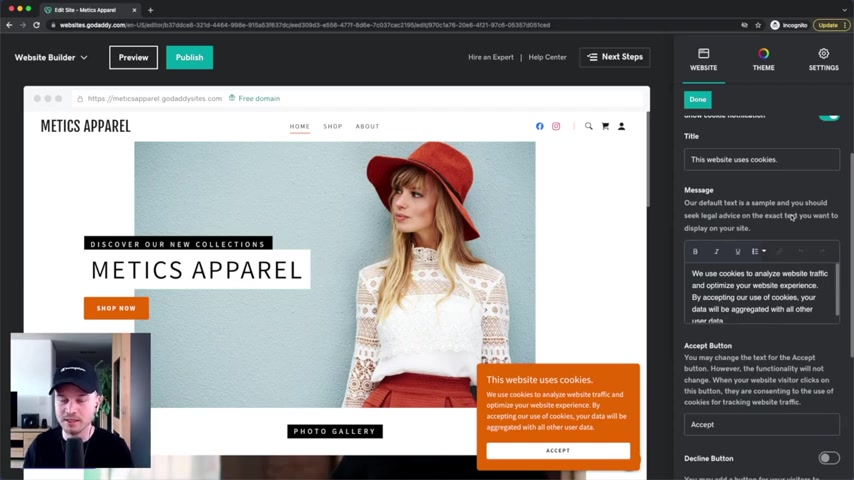
So make sure you inform yourself if that's required for you , then you can simply click on uh show cookie notification right here and then it'll ask people if it's OK to , to , to add cookies to the browser , which makes it easier um for , for Go Daddy to load your site faster and uh to basically make the experience better for your visitors .
Then we can uh basically move on here to Google analytics , which is very useful if you uh want to analyze the data of your website , if you want to track what people are doing on your website , and you can add the tracking id of your Google analytics and then you can see a lot more data here uh on your website .
Then we also have Facebook pixel .
If you want to retarget people who are using Facebook ads , you wanna add your Facebook pixel , Facebook , meta tag , printer , meta tag and then Google adsense .
Google adsense is if you wanna run ads on your website using Google adsense and want to make some money , then you can also do that right here .
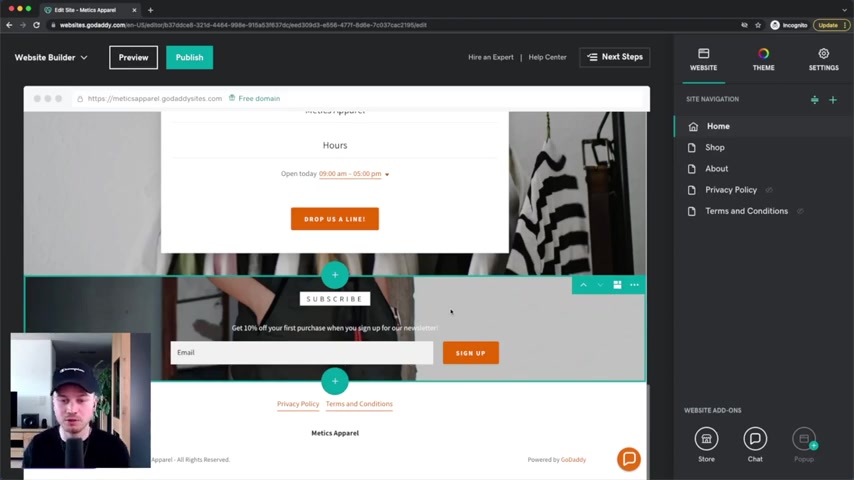
So let's go over how to use email market using the Go Daddy website builder .
Um I already have an email marketing section here on the home page .
By default .
If you don't have it , you can edit manually by just adding a new section and then choosing the email marketing section .
And what that basically is is it enables people to subscribe to your email list and then you can send them promotions or informations about your business .
So they all they have to do here is type in their email address and then the email will be taken into your bank office where you can start sending them emails .
And what many people do , especially if you have a store , they just give out a discount code .
So when we click on this section right here , you can again change the image , change the accent headline and so on and then you can type in a discount uh percentage right here .
So let's say we want to get a 10% off for everybody who just gives us their email .
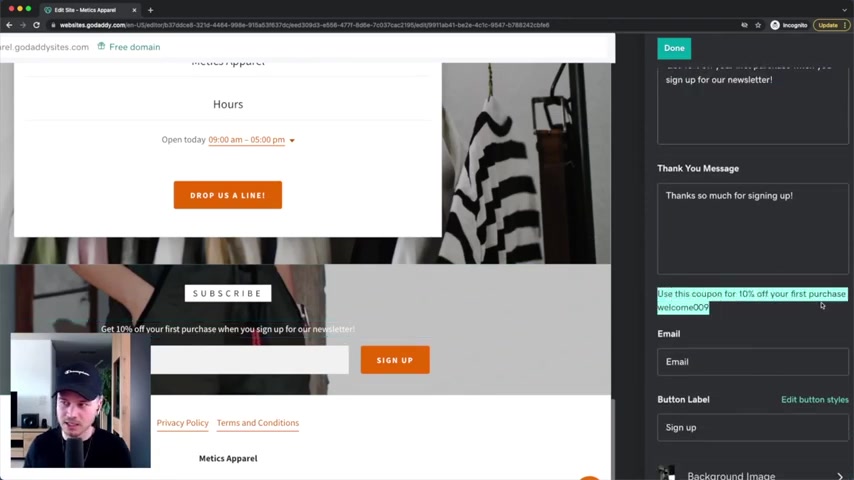
So then this will be the text here on the top and then whenever people type in their email , then this text will show up where they're going to get a a coupon code .
Welcome 009 where they can now use this code to get a discount .
You don't need to do the discount .
You can just also ask for the email .
Whoever giving something in exchange for the email always leads to more conversions to more sign ups .
Then once that section is done , what you can do is create email newsletters .
So when we click on , create an email here on the bottom , it will take us to our the back office of our go daddy site .
Now we are in the back office and here on the marketing , email marketing .
This is where we are right now in the back office .
And here's basically where you have an overview of all the campaigns that you have set up .
If you want to create a new email and send it out to your email subscribers , all you gotta do is click on create new email right here and then you'll get to the email builder kind of .
And um you can use different templates that , that Gold Eddy already has .
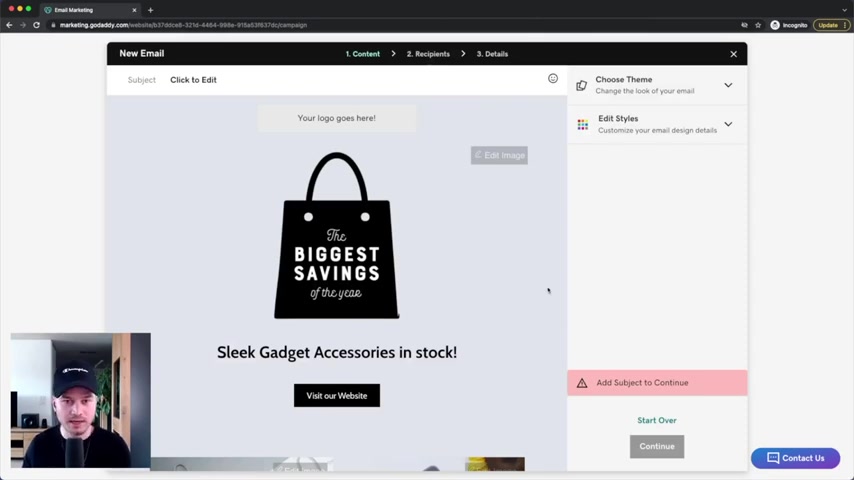
They have some very nice looking templates or you can just build it on your own .
Let's maybe choose this template for an illustration .
Let skip the tour and then it's the same way as you build your website , you just click on different elements , you can change them right here .
You can also change the style here on the right side , change the background , the text and so on .
What you definitely need to do is add a subject here on the top .
You also need to add a , a postal address because of email marketing laws , you have to add a physical address .
So here you just want to add your business address basically .
And then you also have to uh to change here , the link where that specific button should go to .
And then once that's done , you can click on save and continue .
Uh once your email is finished and then you can decide on who you want to send this email to click on next and then you're basically ready to send it .
So you click on send now , schedule for later and so on .
So let's click on send now .
I don't even have an email subscriber .
So nobody will receive this .
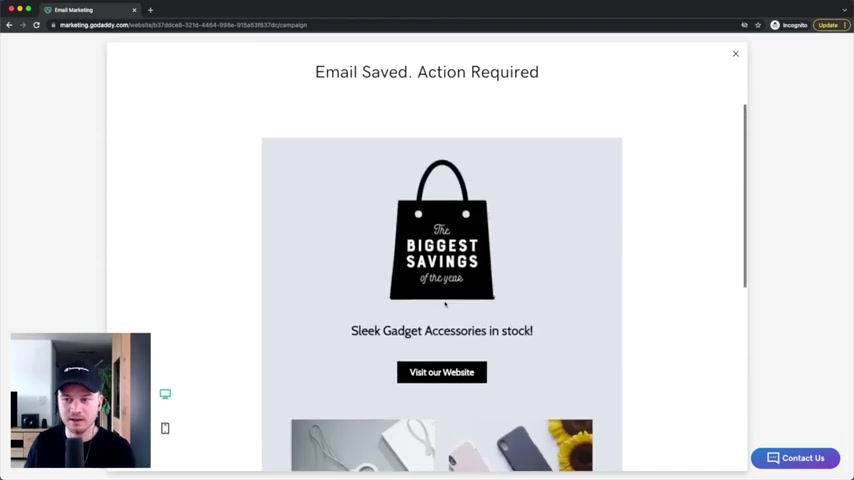
And then everybody who signed up using on your website will receive this specific email .
So again , it can be a promotional email or just information that you want to send uh your email subscribers .
So let's go back to our website by clicking on website right here .
And now if you want to add a blog to your website , this is also super easy here using Go Daddy .
So all you gotta do is add a new page .
So we're gonna go to website , click on the plus sign right here , click on new page and now we're gonna choose the blank template right here , click on create page and then we're gonna name that page .
So I'm gonna name it blog and then it already shows up here in the header and then we're gonna click on done .
And now all we gotta do is add a section for our blog posts .
So we're gonna click on add section right here and now we're gonna go to blog and newsletter blog and now we can see different sections that we can use for our blog .
So maybe uh I like uh this one right here , I'm gonna click on add and then it will add our blog section now because I don't have any blog posts yet .
There's nothing here .
So what I gotta do is click on start writing and then it will again take me back into the back office under marketing and then log right here .
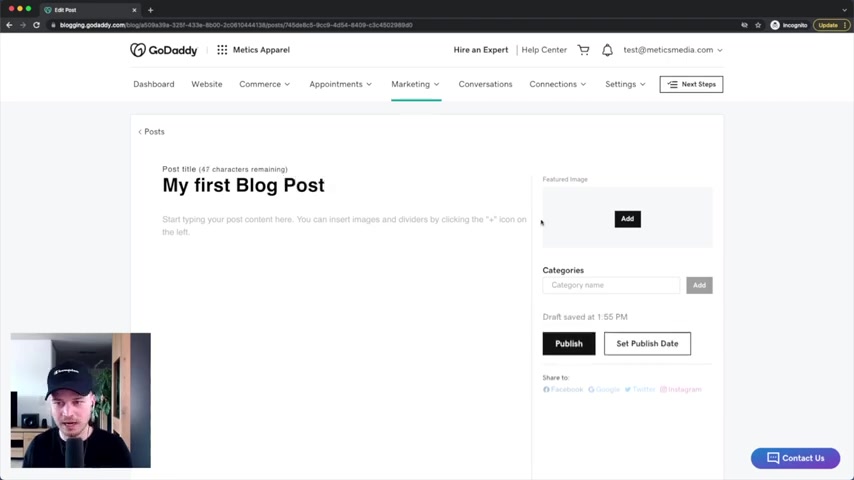
So what I can do here is simply click on create post and then here I can start writing my blog post .
So let's say my uh first blog post , then I can also add an image right here .
So let's just add something for demonstration purposes .
Let's add this one right here , insert and then I can also write something here on the bottom .
And then once the blog post is finished , I'm gonna click on publish and um go to editor and now I'm gonna go to my blog page right here .
And now , as you can see here is our first blog post .
So as you can see very easy to create a blog as well here on Go Daddy .
Now let's go over how to set up your online store if you actually want to sell products on your website .
So I already have a shop page right here , which you can also add if you don't already have it um by just clicking on the website , add-ons store here on the bottom and then just add it that way .
Then uh when you're on the shop , you're gonna see that you don't have any products yet .
So what we're gonna do here is click on add products and then it will take us again into the back office of our go daddy site where we can add our first product .
So you can decide on if you are selling physical products or digital products right here .
Then also upload an image .
Obviously , it makes sense to upload images of your products .
Um I don't know , let's just type in t-shirt and then see what comes up .
Let's just use this one right here .
Then click on insert and then the product name type in the product name type in the price .
You also have the possibility to type in a sale price .
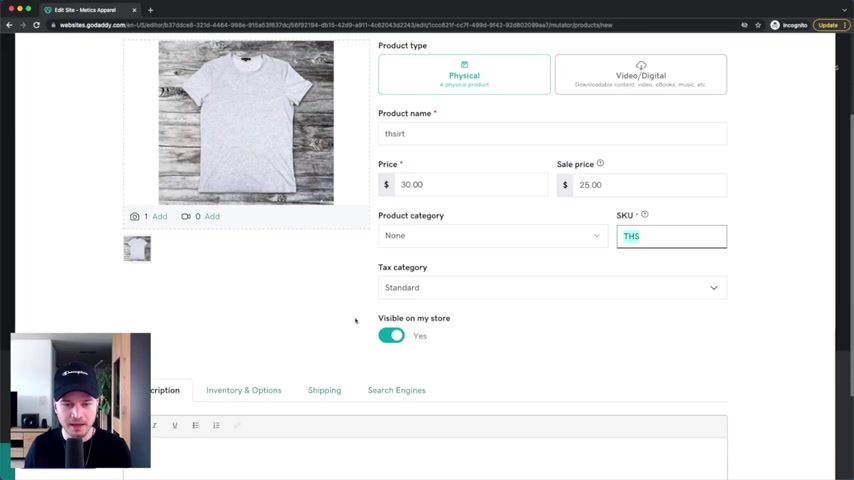
So um if the if you wanted to say it's discount , you get like 20% off , you can just type in the price right here .
Then it's out on the product category and the stock keeping unit and tax category as well and then make it visible on your store .
If you want people to see it , you can also add a description here on the bottom .
Then once that's done , click on save right here and that has added our first product on our store .
And now , as you can see here , this is what it will look like on our store .
So when people just browse our products , this is basically what they see .
So t-shirt , which is the name and then it's down from $30 .
Now it's $25 and then they can click on it and go through the entire just checkout process .
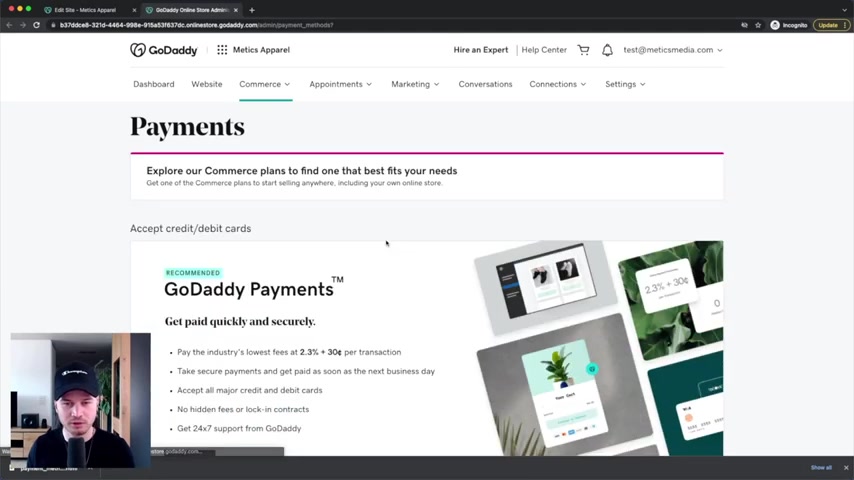
However , in order for everything to work , we also have to set up our shipping information and also our payment providers , which is the method how you will collect the money from your customers .
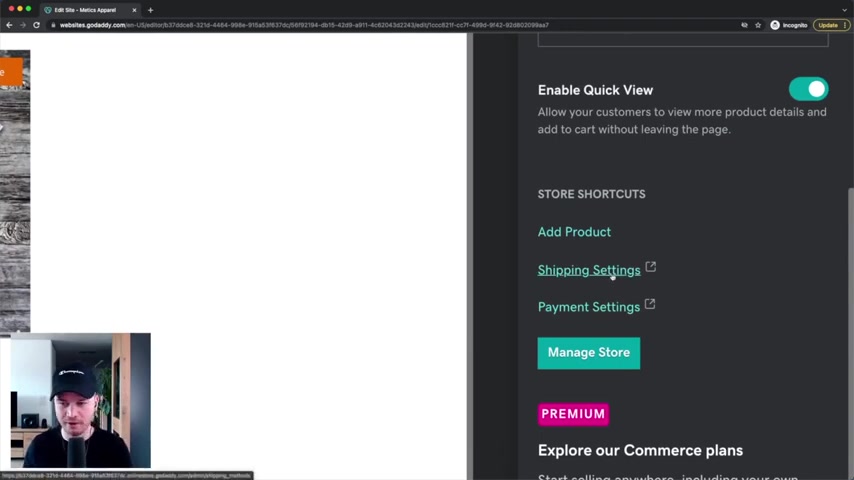
So when we are here on the shop page and click on the shop section , then on the right side , all the way down , there are some shortcuts that will take us to the correct pages of our dashboard where we can set up our shipping and also our payment providers .
So let's start with shipping by clicking on shipping settings right here .
Then it will take us to our dashboard and by default , there's already free shipping set up .
Um , we can also delete that and then just start with a new shipping method .
So we're gonna click on add shipping right here and let's go for , um , you can click on flat rate per order .
So just have a fixed shipping price , maybe a price based on weight or we can also use free shipping .
Let's do free shipping for a certain amount of car value .
So let's click on add and then we just do free shipping and let's say they have to order at least $50 worth of goods and then it's free .
Otherwise it will be just , let's say $7 that's fine .
Then click on save .
So now I've just added a simple shipping method .
So people know exactly what they have to pay for shipping .
And then we also have to set up our payment providers .
So again , here on the shop page , on the right side , we can click on this shortcut payment settings that will take us again to the dashboard to the correct page .
And then there's something called Go Daddy Payments , which is a very easy way how you can set up your payment providers .
So people can just type in their credit card information and then uh Go Daddy will basically process your payments .
Then you also have a paypal which is there by default .
If you don't want it to have it active , you have to click on disconnect right here or you can just also use offline payments so you can just send people invoices or they pay you cash somehow .
Um So a lot of options here uh for the payment providers as well .
Now , what we haven't looked at yet are the legal pages .
So something like private policy terms of service refund policy and so on , these are basically just pages that we usually have uh linked on the footer of our website .
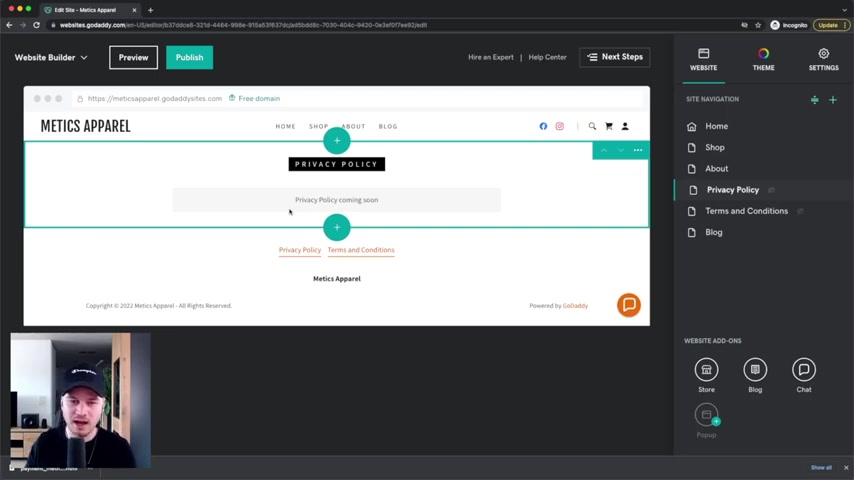
And currently we already have them by default here on this footer .
And you could just go to website and then click on each of these pages and here's where we can add all of the , the content that we have to add to our private policy .
Obviously , that differs between what kind of website you building , what kind of business you have .
If you don't know how to write this , just Google how to a private policy or just , and the most expensive way is to hire a lawyer to do it for you .
But there are a lot of templates out there uh that you can use from similar businesses and then you can just replace the words .
So you have your own private policy in terms of conditions and so on .
Just make sure you add them to your website .
So you're fine .
And then once we are finished building out our entire website , I would recommend that before you go ahead and publish it and make it available to visitors , you actually test it out yourself .
So what we can do is click on the preview button here on the top and then we can go ahead and click on buttons , we can go to the shop , we can go to the checkout process , book appointment and all that kind of stuff to make sure everything works perfectly before we make it go live .
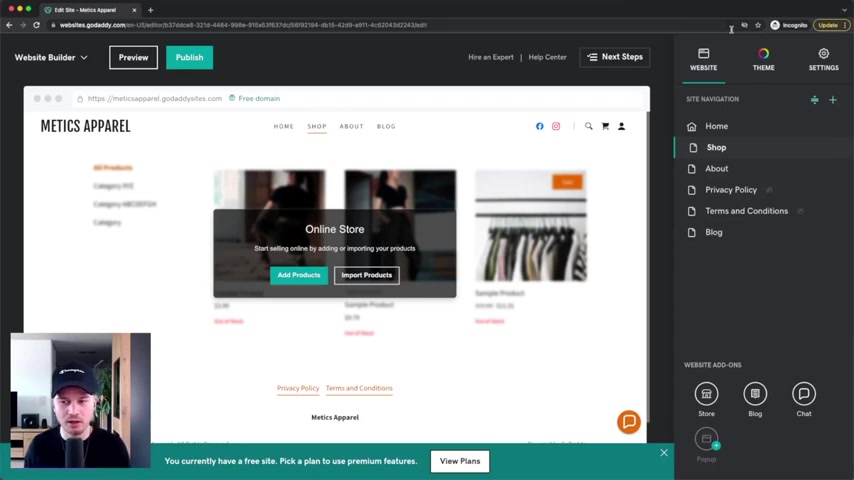
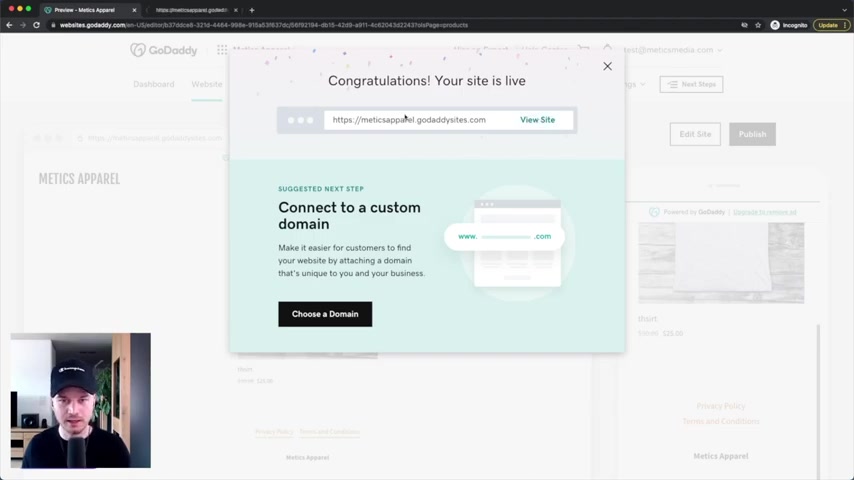
So once that's done , what you can do is click on publish right here and then Go Daddy will publish your website on a Go Daddy Domain .
So as you can see now the website is live and we can actually click on this link here and just check out how our website currently looks like in a normal browser .
So the thing here is that on the free plan , you have your website here on this Go Daddy Sides Domain .
So if you don't worry about that , that's fine .
You can just use the free version of Go Daddy .
However , if you want to create a custom domain , for example , something like medi media dot com , then you want to go for a custom domain , buy that domain and you're gonna have to go for a paid plan .
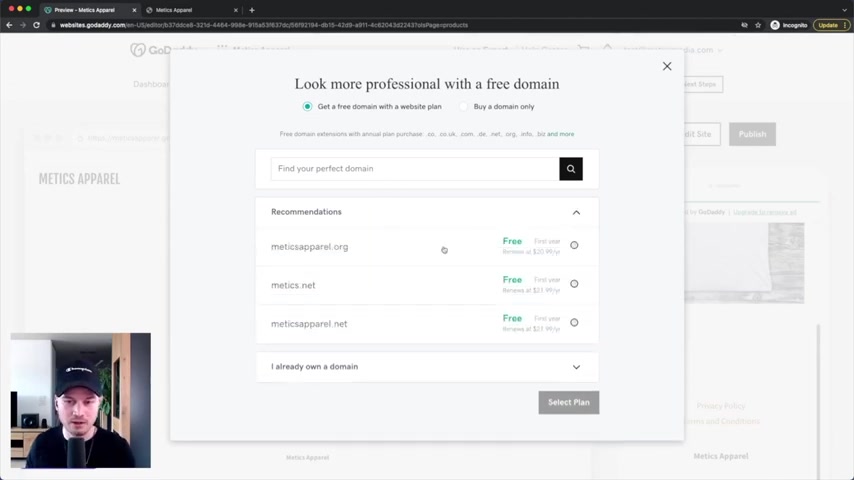
So if you want to do that , you can click on choose domain and then you're gonna have some suggestions right here .
You also can look for domains uh try to go with a dot com domain if you are international .
If you are maybe only Canada go for A dot C A .
Um Just make sure it looks kind of professional .
If you already have a domain , you can click on , I already own a domain right here and then you just import it here to go daddy .
However , let's say we don't already have one .
So let's go with , I know there's only dot net .
So let's go with medics apparel dot net .
Click on select plan because you're going to have to select a plan if you want to connect it to your own domain .
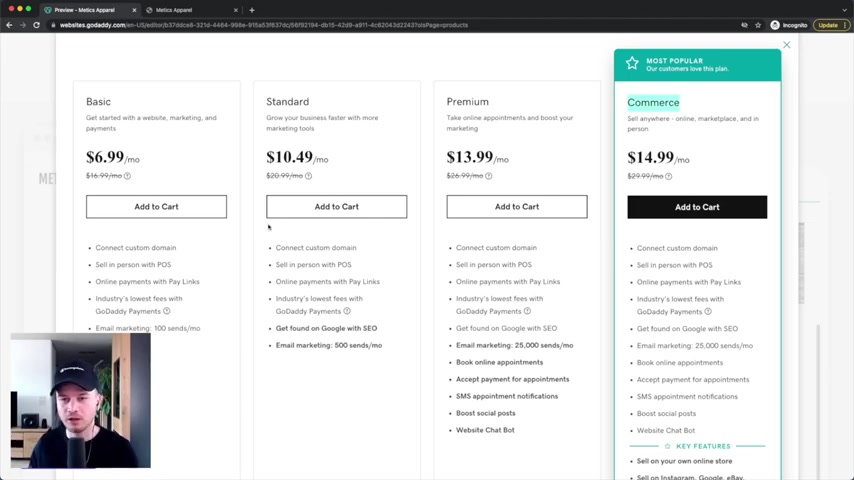
And then there's a couple of different plans .
If you only have a basic website where you're not selling anything , I would simply go with the basic plan .
However , if you are a , a website that sells products , you're gonna need to go with a plan where you can sell products .
So here you're gonna need to go with the commerce plan in order to take payments on your website .
And by the way , you can always upgrade your plan later on .
So if you now go for the basic plan and then you realize that you need to send more emails per month using Go daddy .
You can simply upgrade to the standard plan and then to the premium plan and so on .
Yeah .
Are you looking for a way to reach a wider audience and get more views on your videos?
Our innovative video to text transcribing service can help you do just that.
We provide accurate transcriptions of your videos along with visual content that will help you attract new viewers and keep them engaged. Plus, our data analytics and ad campaign tools can help you monetize your content and maximize your revenue.
Let's partner up and take your video content to the next level!
Contact us today to learn more.