https://www.youtube.com/watch?v=CnBnVHn7dzE
How To Draw Face Proportions- Easy anatomy
Hey everybody .
How's it going ?
Welcome back soon of the video .
Um Yeah .
So today I'm gonna be showing you guys how I like go about drawing my face proportions .
It's like , it's like in between like an anime style and a realistic style .
It's all , you know , you know , it's all , it's all , you know , it's like a mixture of both , but I think it's more realistic than anime in my opinion .
But you never know it , it is what it is .
Everyone has a , has a way of drawing their faces , but I'm gonna show you my way .
Let's get started .
I mean , um All right .
So the first thing I do when I'm doing a face for any for , for mostly for males or females , I'm gonna do both in this video .
We'll do the female first .
We'll show with the girl , ladies first .
All right .
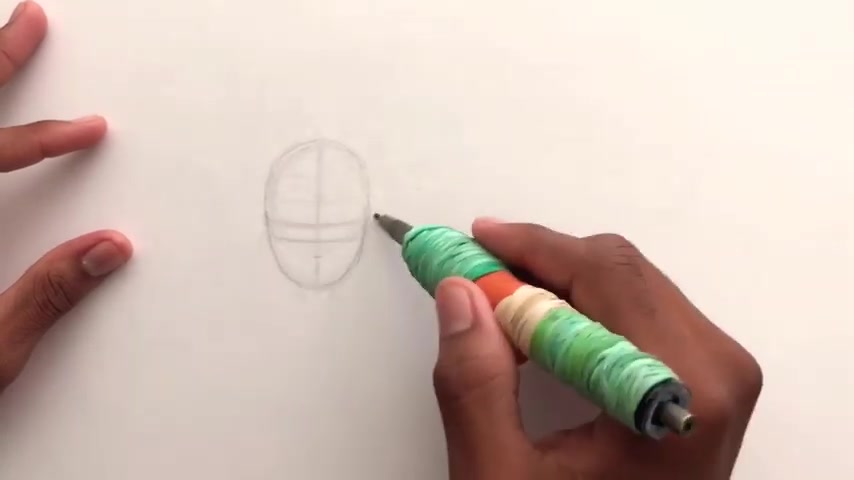
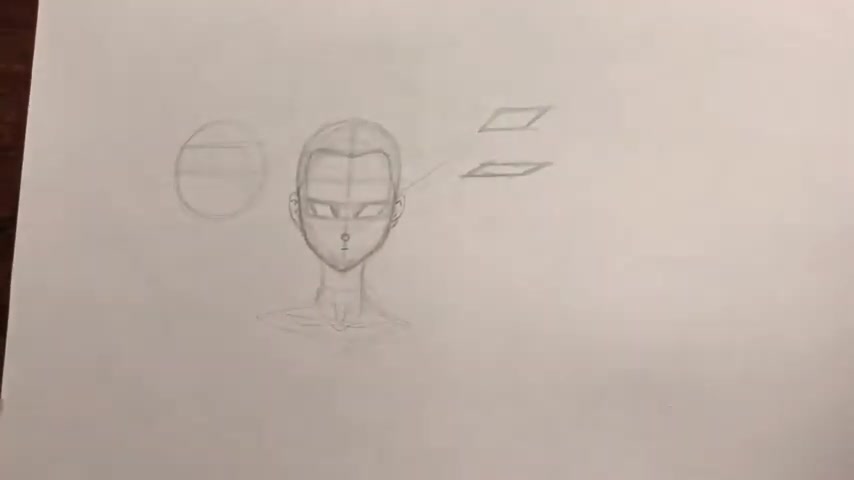
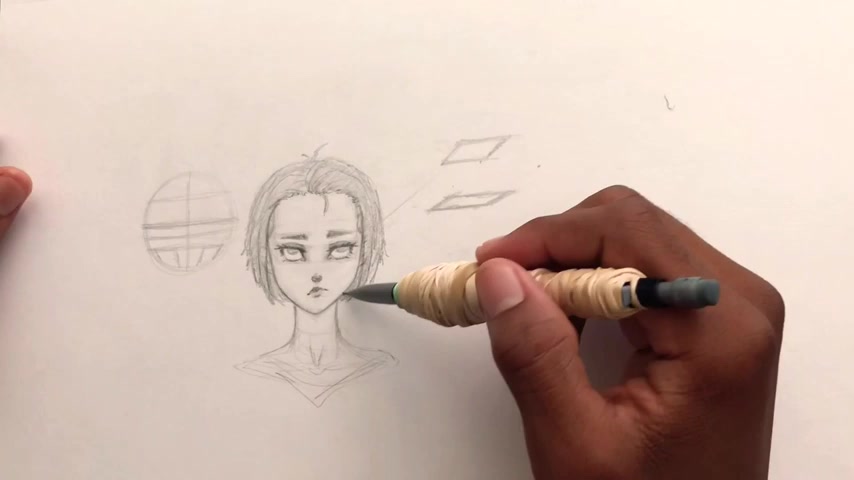
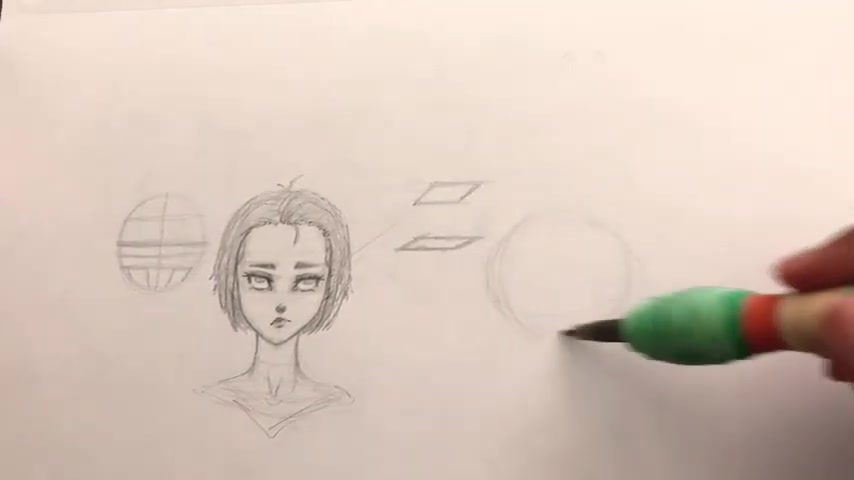
The first thing I always start off with is an oval shape .
Now , I used to now I sometimes do circle , but I usually do an oval shape .
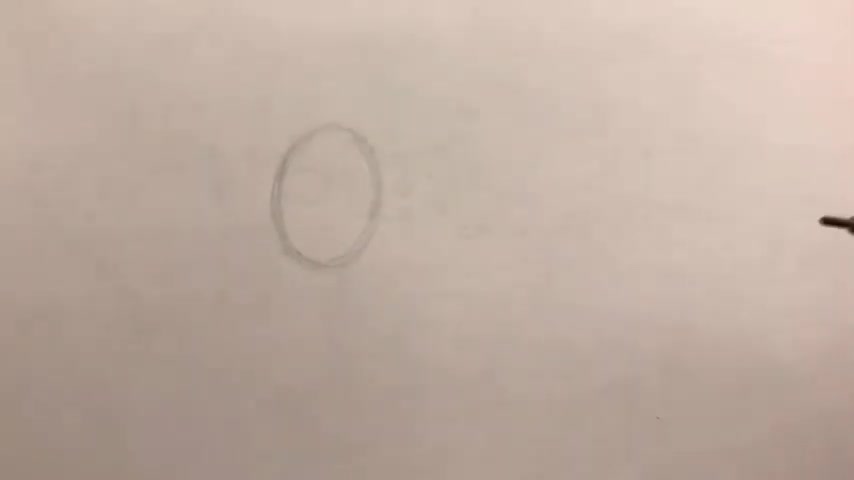
But the reason why I did an oval shape is one reason one is because it helps me get , that helps me get that , that draw line and later on .
And it also like , it also helps me out with like the angle of the face .
Why it's a circle ?
It's like really hard to map it out .
But for the front , from a front facing view , it is good to use a uh a oval .
But from other angles , a circle would do .
So I'll be showing um you guys that in just a second .
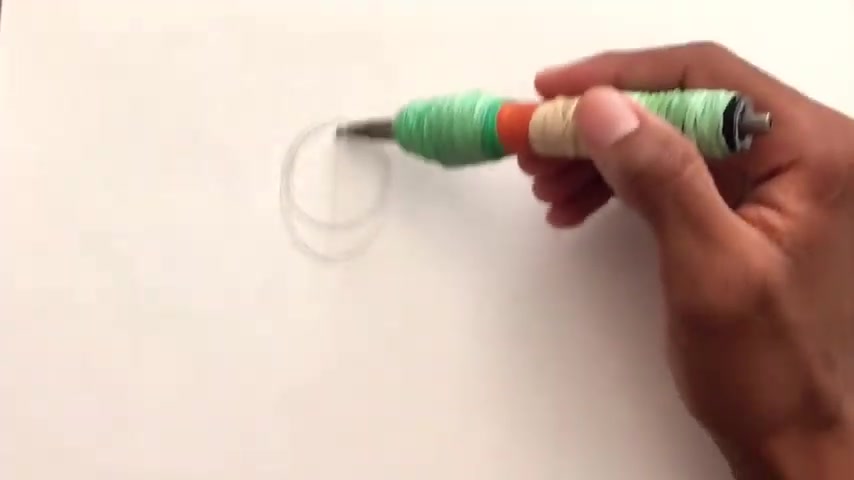
But also the thing is I also , I kind of do an oval and I do a circle inside the oval .
All right .
So I still do the circle method .
I just draw a circle inside the oval .
You can do it vice versa .
You can draw the circle in the oval or you can do the oval in the circle .
It really doesn't matter how you do it , it just , it just a circle then oval .
OK .
Circle part is the cranium of the head .
This is where the brain lies all that stuff .
And uh the oval represents the jaw line .
And that's the reason why some people use oval and circle .
I use both obviously because I just , I can't decide which one I like the best .
So I decided to use both .
So I do the circle inside the oval or the oval inside the circle .
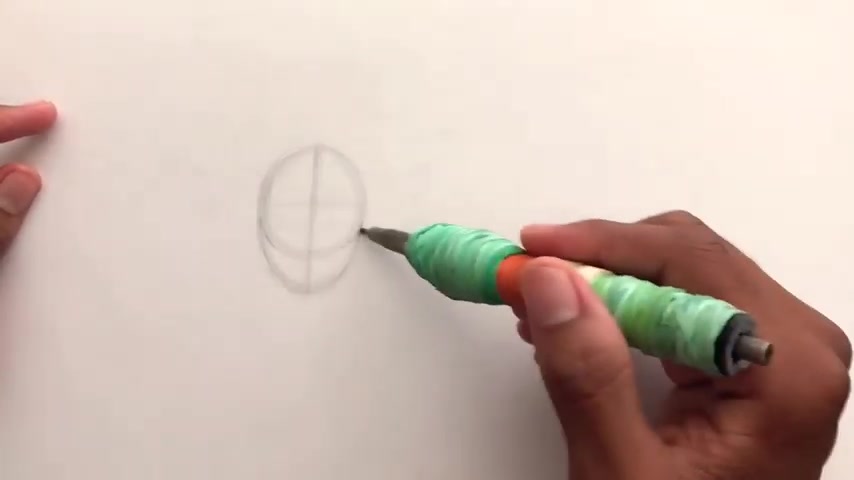
Then I start making a uh a symmetry line in between , I mean right , right down the center of the uh face .
All right .
So when you do that .
The reason why I do the reason why you want this important , right ?
I'm gonna show you in a minute is because right here , I don't know if you guys like , I don't know if you can see it , right ?
But like right here , like where the circle is started , OK ?
Where the circle starts ?
OK ?
Like like the end of the circle and like with the oval begins like right here that's going to , that's gonna be giving you the eye line .
All right .
So like right where the oval touches the circle , it's not gonna be splitting .
You don't split the circle in half .
All right , you can .
But like for this one , we're not going to , but you don't put the circle in half , we're gonna find the eye line first .
So that's going to be right up like a down .
Like if you actually , if you split the circle in half and then you split this in half again , this is where the eyes are gonna lie .
All right .
And it's gonna be a slight curve .
You don't have to curve it .
Straight lines will work too , but I usually curve it because I don't know , it's just me half that in half and then half that half , it's all about half it up .
All right .
So just half it up .
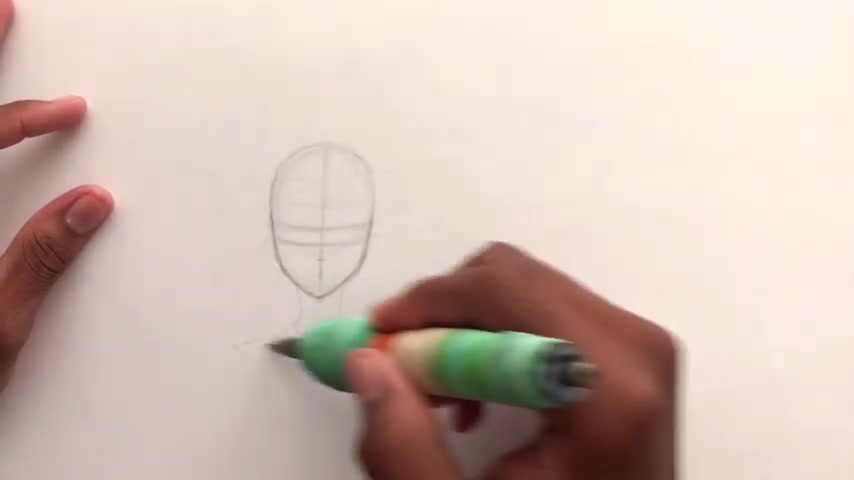
Then at the bottom of this circle is where the nose is gonna be .
And then the mouth .
Now , since I have a unique since I have an anime type style , the mouth is gonna be way lower than like in a real , a real proportionate face , like a real face .
The mouth is gonna be this low .
But like I said , this is stylized sort of , I'm not teaching you guys how to draw realistic faces .
I might do that eventually in the future , but right now cartoons , right .
So I'm just gonna refine it .
Too many lines .
I just like to refine my stuff , you know , make it look a little bit neater .
So you could show up .
Is it showing up on the camera ?
Do you guys even see that ?
All right , making sure everything's cool .
Everything's dandy .
All right .
All right .

So once you get that in , all right , you can either like the reason why I do this is because I like to adjust the jawline to like my liking .
So if I want the person to have a long jawline , right ?
I can just always go down if I want the , the the person to have a like a fat face , I can always just do that .
Like I leave the jawline customizable .
All right .
But the cranium and eye line stay the same , but the jawline can be customized to your liking .
All right , but since we're doing a simple face right now , we're not gonna do all that maybe like in later videos .
So what I also do because I draw two lines .
So I can get the bottom and top of the eye because my eyes are quite , not quite big , but like they're larger than normal eyes because like I said , style eyes , I'm gonna go a little bit lower down because I want the jawline to be a little bit lower , longer , just a slightly bit , slight bit like this is the part where you start refining the face up so you can just like go like that , make it a little bit pointier .
Go like that , make a little point here .
I don't know if you guys know this but the like the pointier the chin is the cut of the character .
I don't know if that's like a thing , but like we have pointy chin , you look , you look adorable , at least that's what the anime industry implies .
All right .
So here's the uh the chi chi chi chi chi .
I usually round off my chin because I don't really like the pointy chin .
But if you , like I said , like I said , this is my style and uh you guys can always customize the chin to whatever you like it to be , the chin can be customized a lot .
So can the forehead and everything else .
But like I said , keep it simple .
All right .
So we got the face structure .
I always add the neck in whenever you're doing head studies , it's good to add the neck even though you're not doing neck studies .
I still add it in , even , even if it's like a quick couple of lines , you don't got to really worry about it , but just leaving a floating head , it makes it look really weird in my opinion .
So just always add like a , like a couple of lines to indicate the neck , right .
You don't got to really refine it .
You don't even gotta catch it out that much .
But just when you're doing studies just , just do the neck .
All right , it helps you out .
All right , helps you out .
Anyway , boom , we got that .
Now , what I'm gonna do is I'm gonna place the ears .
All right .
So to our mechanical skinny pencil is I go right ?
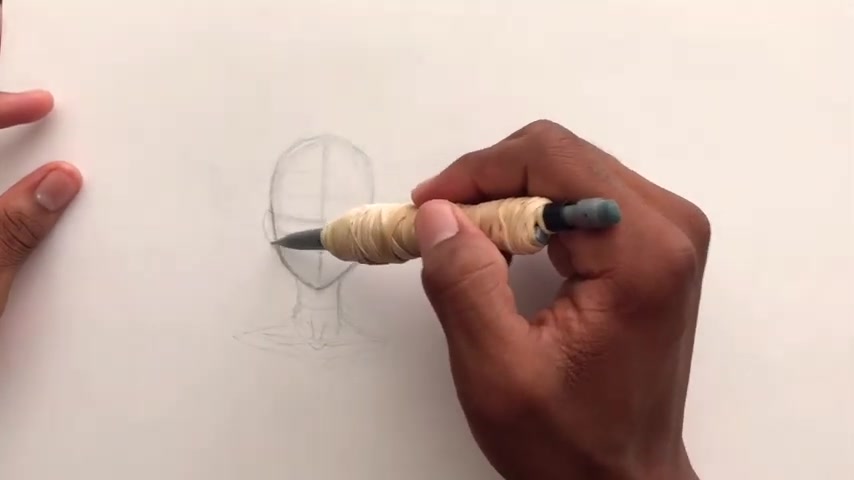
Remember the first line we made for the eye line .
I go right there , right ?
I go up slightly .
All right .
Then I come right back down , right back down and I go past the uh this uh the first line we made .
All right , start off , go off less likely , then go past the first line we made almost , it can like you almost to the nose line .
It can go down to the nose line pretty much like what the nose line is .
You can go down that far , right ?
Depending on the character .
Like I said , I don't know who you're drawing .
You could be drawing like an Elf and the of course , the years are gonna be different on the elf because the E A pointy and shit .
So we got the ears .
Boom .
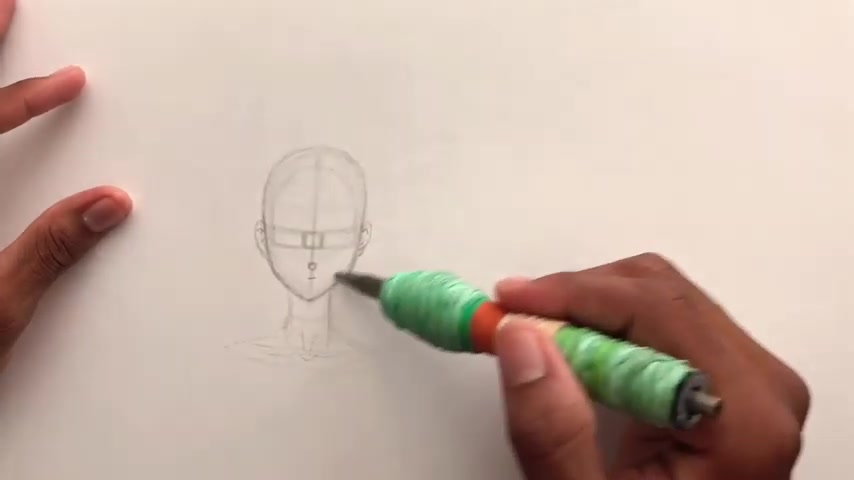
Now , here's where we're gonna add the facial details .
All right .
Now where this line starts , I usually add a circle at the bottom , a small little circle since we're doing a girl , I usually give with small noses because I don't know because this is what I do .
A line for the mouth is fine and you can already see kind of like the face coming together .
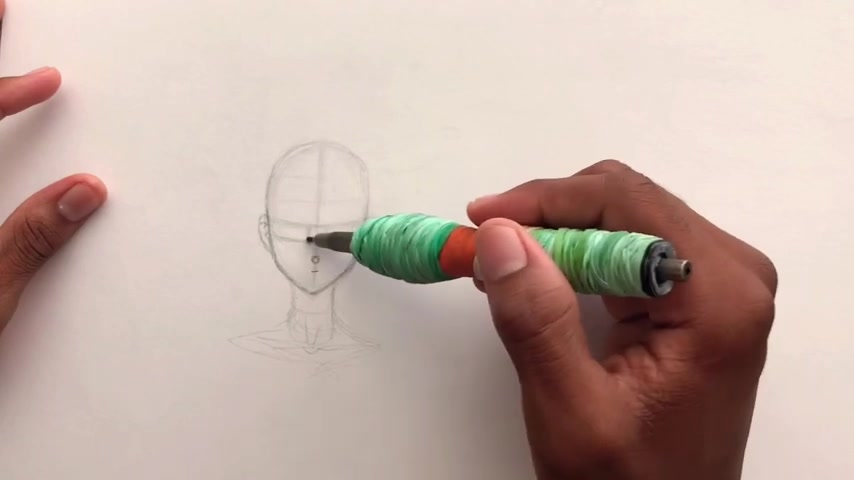
All right , but we're not done yet .
We're not done yet .
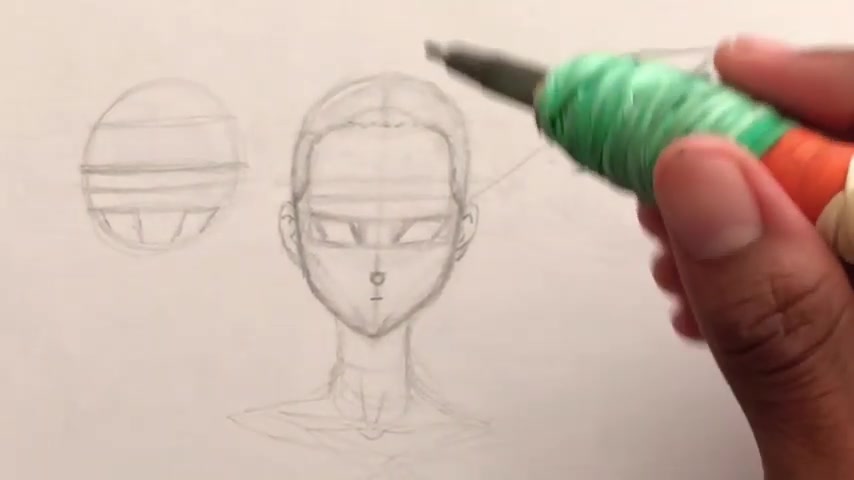
What I wanna do is we're gonna go back to the eye line because we're gonna place the eyes down .
So we're gonna make a box , make sure it's as even as possible a box right in the middle of , of the uh of the , of the of , of the face , this is gonna give you the the separation between the eyes , make sure the box is as square as possible .
Make sure the line the center line is , is , is in between it .
Like I said , it's all about eyeballing .
You want to uh you want to uh just make sure that square is there .
All right , obviously , I'm doing it way darker .
So that shows up on the camera , but usually it wouldn't be this uh per night proposals that are pronounced phenomenal .
It wouldn't be this refined and this dark .
Anyway , how do we do that ?
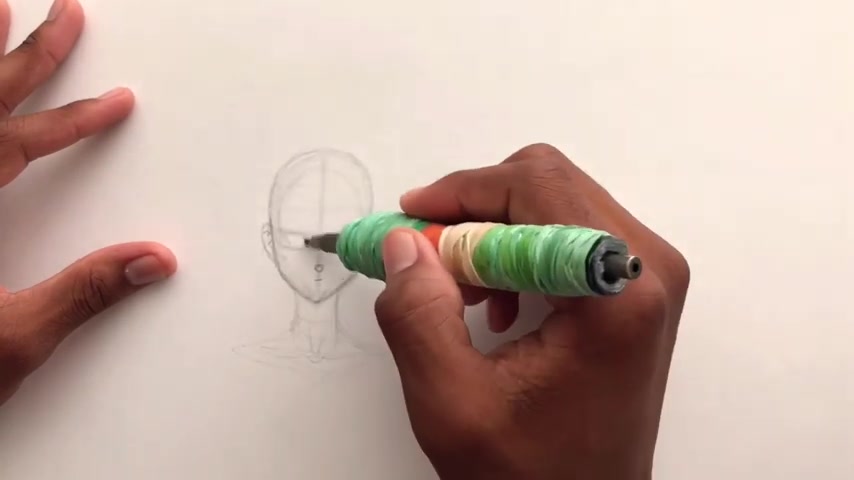
I like to go halfway , not ha actually , not even halfway but like a little bit in inward right .
I make these two curves and then I go up and make the forehead plane .
Now I like to break the head up into planes because it gives you the because one , it helps you add lighting later on when you start coloring it , two helps you add the hair and everything and three , it just looks better in my opinion at adding that place .
You can also add the face which is like the face , the face planes , which are these like cylinders on the ellipses on the side that go down to the point and curve upward .
You don't gotta do that .
This is optional .
But if you really wanna show like all the planes , these are , these are the main planes you're gonna wanna have .
All right , the main planes , a forehead and the size of the face , we're gonna raise these side planes first so we can have some room to work with .
Now , I'm gonna lighten this box a little bit .
So you guys , so it doesn't distract you guys .
Now , what we do is we go to that box , we just made right ?
And we add up , we go up at a , at an angle on both ends or we can do one at a time , go across and then come right down at that same angle .
All right .
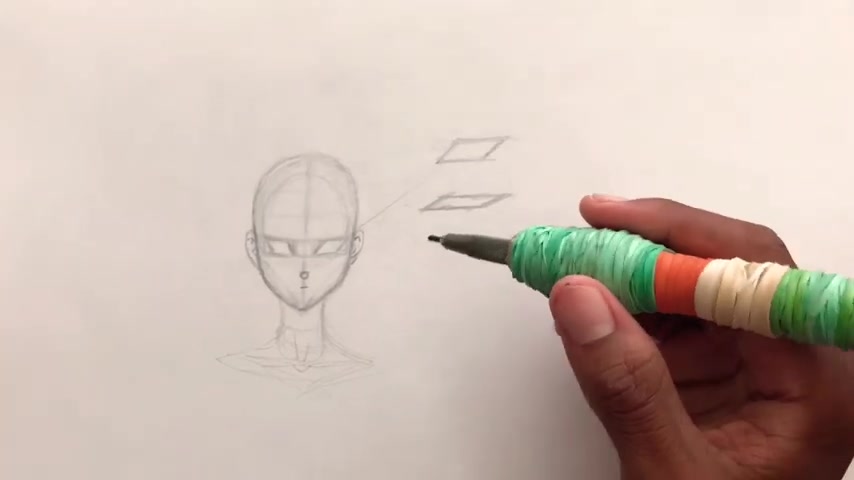
This is , this is usually how big I make my eyes right ?
This is this is the limit like they can either be bigger or smaller than this .
All right , this is , this is like the base I make for all my eyes , right ?
And the base I'm making is basically , I'm gonna just gonna just give you guys a little , little uh up closer zoom in version .
It is just a box , imagine a box , right ?
Mash my box and you just push this side that way and these two ends lean .
All right .
This is a very important form , ok ?
Because this is literally the framing of the eye .
All right , the framing of the eye , I'll do an eye tutorial later on .
But just let , just let you know that's the frame .
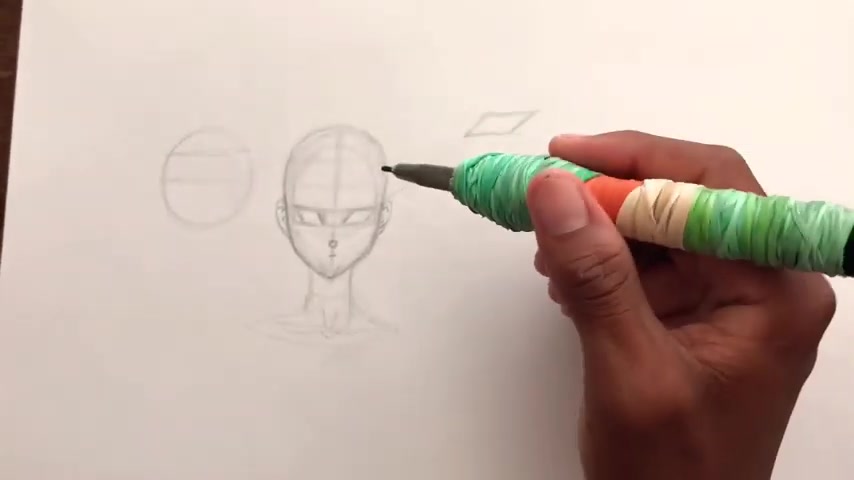
Now , this can also vary , ok ?
It can be more boxy but still slant it , it can be very , very , very , very slanted , right ?
This this can change .
So if you're making thin eyed characters , just push the box a little bit more down and it will always come together .
So this can vary in size .
It can also be a straight up box .
I usually don't do this ever .
Unless I'm making really rounded eyes , I'm making really round eyes like a like for Children or like really big round eyes .
I go for this or this one .
If I'm making more of a serious character who got thin eyes , this or this one .
All right .
So I'll leave these two here so you can see them anyway .
So we got this , we got the uh the eye the eye placement and the reason why we have that box because this is gonna give you guys the distance .
We make a box in between a boxer circle .
I usually use a box but a boxer circle in between the eyes because sometimes the eyes can get way too close or way too far apart .
But the box lets you gauge um , the distance and it makes it look much more , much better in my opinion .
All right .
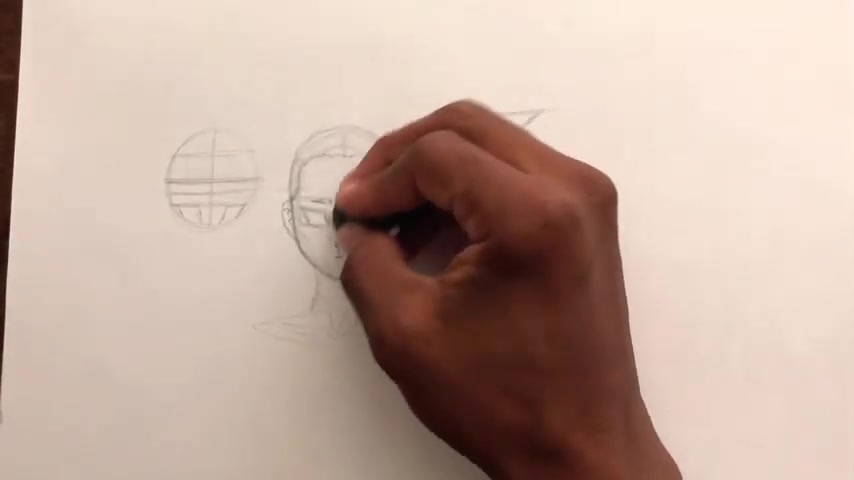
So now that we got the base and stuff , everything worked out , we can start adding the hairline .
Now the hairline is going to be .
I remember where the circle is .
I'm gonna make a zoom in version .
We made that circle the first time .
Imagine that split in half and then split this top half in half .
And that's what the hair that's gonna be .
You got like some people when they , when they're drawing , they make the forehead very , very small , but actually we got a lot of forehead .
All right there .
OK ?
The reason like we , we should , you should be able to fit four fingers and that's why it's called a forehead man .
You know what I'm saying ?
Some people got a five head , some people got a six head , seven head .
I saw a guy with a freaking nine head once it was crazy anyway , but if you want the normal proportions to split this in half , split that box , the the circle in half , all right .
So this is , you know , it's always about half and measuring .
All right , then we go from the middle of the center line .
This is why I love symmetry lines because they always help you get it per , per , per , per , per perfect .
Every time you go up , you go at a slight angle right past the forehead plane and you can just come down and then curb it up .
All right .
Now , hairlines vary as you guys know , like me , my hairline is like way up .
You know , I got a big head but it always , it all depends on the uh on the character you're drawing and the style you're going for .
But I usually make the hairline like this .
All right , I go down and then I just curve it up and I make the hairline in this like this weird heart shape .
It can be straight on it can the hairline can be whatever it wants , it can be all jagged and curved , it can follow , it can actually also follow the curve of the forehead and make it like that .
That's usually what I do .
I actually gonna make her uh her forehead a little bit larger .
All right .
So then we got the hairline all placed up .
Now , we can go to the eyebrows right now .
Remember we half this , half of the half , half , remember OK .
Anyway , remember the split between the the sphere ?
OK .
Remember that split right now , we're gonna split that split like that , right ?
But that's where the eye line is .
Remember the eyes are right here , the eyes right here .
So what we're gonna do , we're gonna go back to this split and split that split into some thinner , splits , split .
Anyway , this is the height of where the eyebrow should be .
All right at a neutral face .
Now , of course , the eyebrows vary , they show the eyebrows are very , a very uh important part of expression in the character .
So of course , the angrier they are the lower they'll be to the eyes and of course , the more surprised they are , the higher they'll be up .
So depending on the facial expression you're making at the time , that can vary .
But we usually just go right here for the eyebrows and that's the not the neutral height , neutral , like normal , regular face , they can be lower or higher .
It's all depending on what you want that character to be doing .
All right .
So now they've got the eyebrows and stuff all done .
We pretty much have finished the face .
All right .
These are the proportions of the face and now you can now you can add the detail and stuff .
All right , because right now it's not detailed .
Oh , sorry , you can always , you can add the detail and stuff , the eyes , all that and all that good stuff in a minute .
Maybe we should do the mouth , the mouth .
Like I said , it is gonna be at that line .
Um This is , this is make her like in a , in a , in a , in a very hm , like , I don't know , expression .
Let's just make the mouth like that .
The lips , everyone has their own way of drawing lips .
So I'll be doing , I'll be doing a tutorial on pretty much every body part eventually .
But um , right now it's the face .
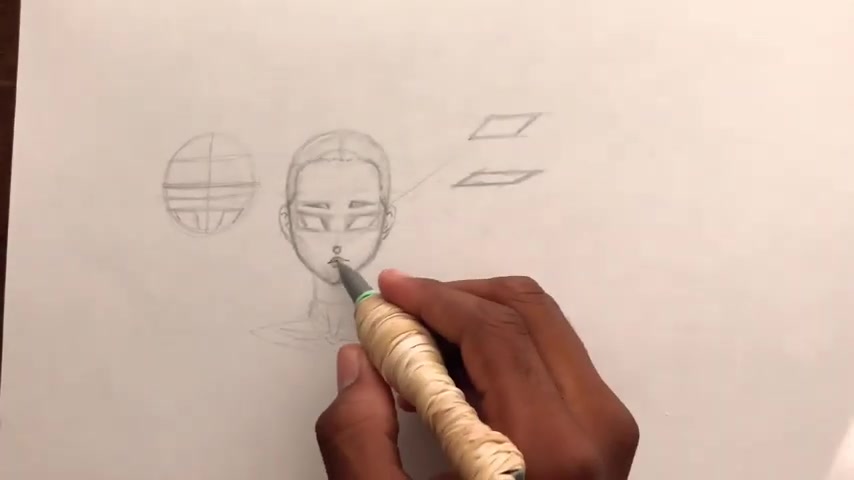
Also when you're drawing lips , little tricks to make them look nice is if you make the top lip darker than the bottom lip , um , that also helps because uh there's actually shadowing underneath the uh the but like I said , it's not Lior anyway .
So we got the face in proportions and now what I'm gonna do is I'm going to speed it up , add hair , add all that stuff and refine the face and then you just see everything come together in one big old sp loop .
All right .
So let me just get some time lapse .
All right .
So I just did a quick little refinement like I wasn't really trying it hard .
She ended up looking like that little girl from Game of Thrones .
What's her name ?
Sherry .
I don't know the little , the little little girl .
So she's my favorite character from Game of Thrones .
She ended up looking a little bit like her in my opinion , which was kind of funny .
So , yeah , I mean , that's , I just gave her like a quick bob cut .
It took me like , I don't know , like five minutes to finish this all off anyway .
Yeah , like that's like that was just the basic like format of like drawing the facial portions from the front on view .
And now I'm gonna show you guys from the side view , which is going to be a little bit different from the side view , getting the proportions , right ?
I think I've already done videos on how to draw from side view .
But um you know , it was just like profile .
I'm gonna actually tell you how to get the actual landmark this time .
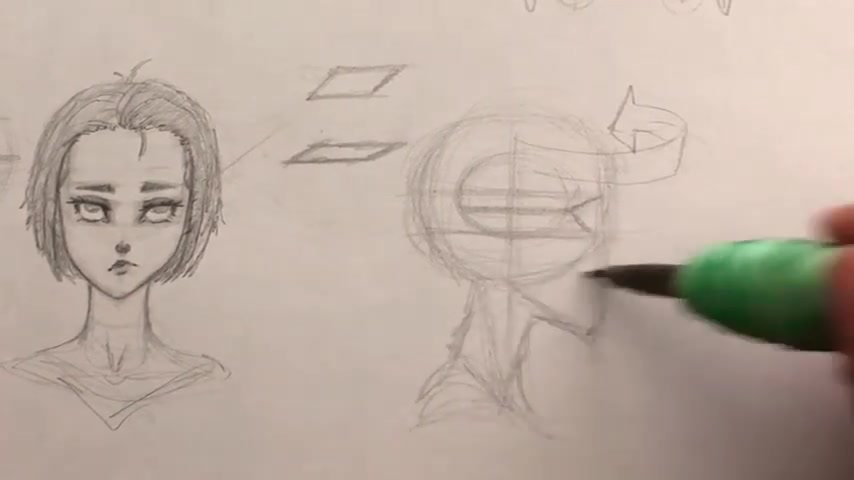
So we start with the circle or the oval , whichever way you want .
Now , actually , the funny thing is , is that from a side view , you can draw a circle , but I usually sometimes is that I actually make the head a circle because as you guys know , at least I think you guys , I don't know , but like from a side view , the head is actually longer , all right than it is in the front view .
All right , the head from a top view is actually an oval too , all right from and from a foot on view .
It , the oval too , from this , from , this is like top , top view and this is like a , a front on view .
So it's all straight up from the front and then from the from , from the , from the top view , it's to the same too .
So you start with the or circle , whichever , whichever one you wanna go with , then you wanna come straight down , right ?
And then make right with that end you come down to , alright .
Erase the lines that don't matter .
We always have those don't matter lines .
All right , have the neck .
Now when you find when you're drawing the neck , we wanna make sure that it's always going at an angle , right ?
Because the that comes po po pokes outward , right ?
All right .
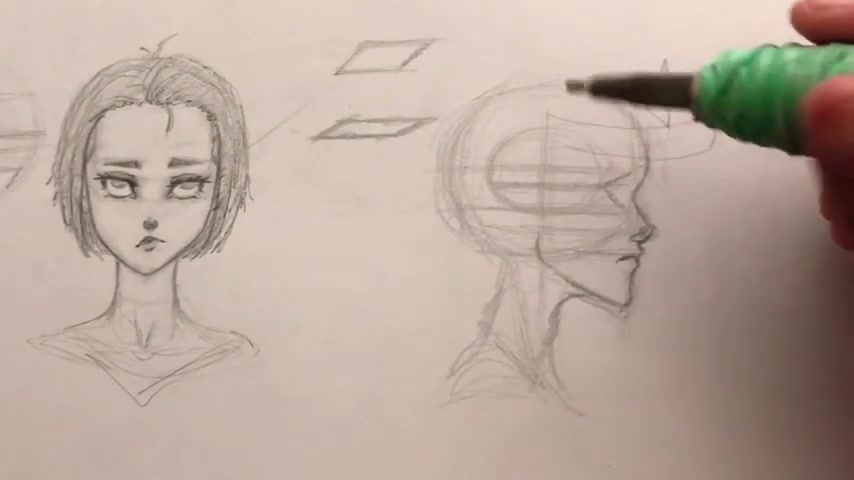
So now that we got our base , our basics , our basis for the uh first side view .
All right , let's just add a cheeky , little , quick , little uh you know , anatomy .
But um all right .
Now , when you're looking for the proportion on the side you face .
All right .
It's very simple , right ?
Where we make this circle inside of the circle , the circle inside the circle , the smaller circle pretty much you wanna make a straight line going outward .
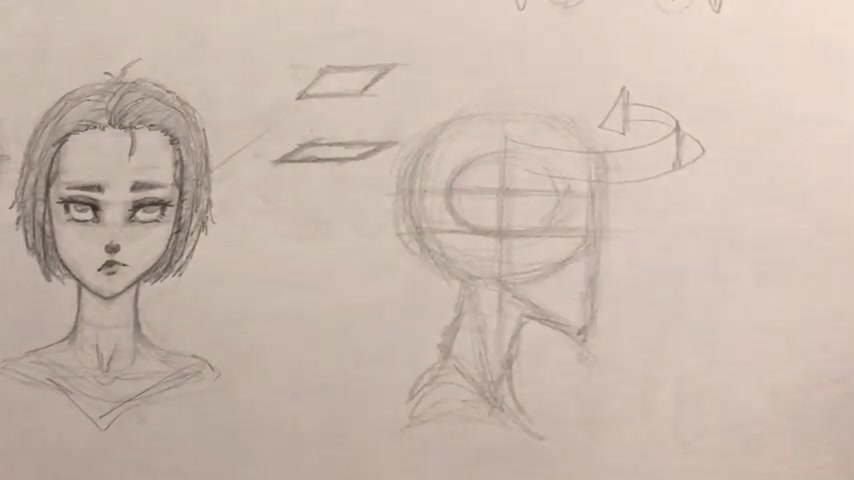
Now , these two lines represent the eye line we made for , remember these two lines that we made for this for , for the her face .
These are gonna represent those they wrap , remember they wrap around , they go , they go around the head .
All right , they go around the head and uh that was a pretty terrible error .
I try again , they go around the head .
All right , they wrap the , all the , all these lines that wrap around the head .
All right .
So we make those two lines , then you wanna go and you would put this line in half again .
All right .
But you wanna stop at the little circle .
Always put the , remember the little circle , make a little line in that little circle , but don't go all the way out .
Now , at this little circle where we have this in half , you wanna go at an angle straight out .
I'm just going to represent the eye socket from a side view when you're drawing the ice .
All right .
Now , we can um go down to the bottom circle , half is in half .
All right .
And we can find the nose .
It's gonna be right in the middle of these two lines .
All right , right in the middle or can be lower or higher depending on the character , but right in the middle .
So it might this grow on the outside , then the mouth is going to be right at the bottom of this line .
So those are the proportions .
Now we are in the details on the face .
So just kind of follow the contour .
So they go in , come down to the nose , go down again , come out again , learning to draw from a side view is actually pretty difficult .
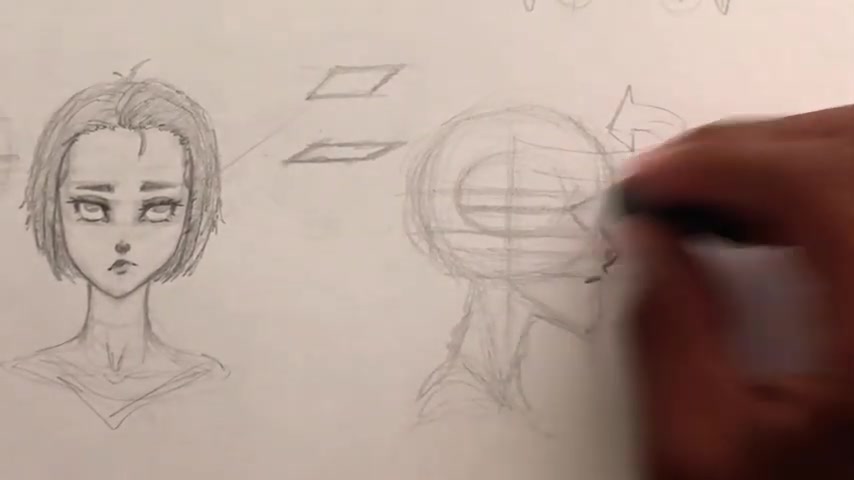
I understand why some people can't do it properly , but just make sure that when you're drawing the face is that you don't wanna leave the face too flat .
All right , you don't wanna leave it too flat , you wanna go in , you wanna make a dent all right .
Make the nose , make the lips .
All right .
Don't be afraid to , to , to , to exaggerate the facial portions .
All right .
Make a little line of the other at the other lip and then come down and you got the chin right that you can stoop back up and you can just connect it like that to the face and then boom , we got the chin .
All right , that simple .
All right .
Now make sure like here's the like the general thing .
All right .
So we have for the face on the side , we kinda try to remember this silhouette .
All right .
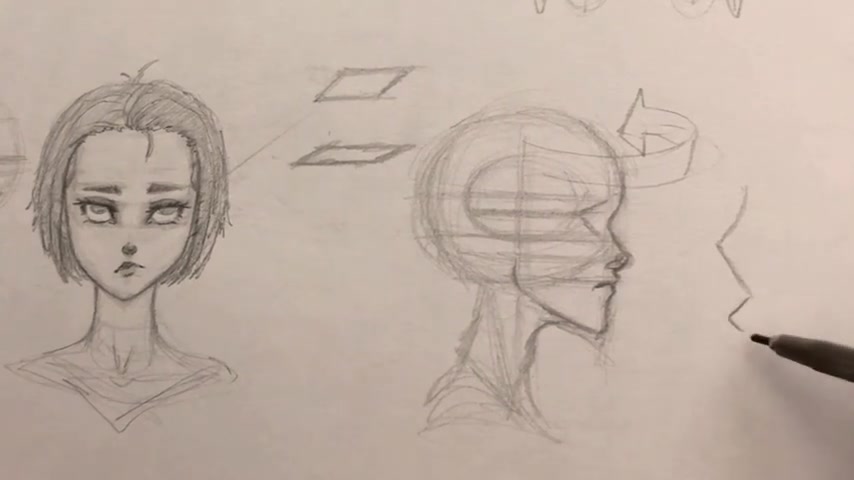
So it's like in straight down oh oh N oh in down up .
All right .
That's the basic silhouette you wanna remember for the face ?
All right .
And then I also add like a little line to show like shadowing but you don't gotta do that anyway .
That's the way you wanna , you wanna , you wanna have , you wanna keep in mind like curve or pointed , curve out , out , out , out , out , out and then down .
All right , kind of like if you , if it kind of like it , it , I didn't even think of this but like I turned the sideways , right ?
If I turn the sideways , it kind of looks like a key .
You see , you feel me ?
Imagine the key .
No , that was stupid .
All right .
I , I thought , I thought , I thought it was smart .
I thought it was , I thought it was clever .
Anyway , just remember , just remember that silhouette when you drunk beside you and then you , then you'll be a master at no time .
Now we're , we're trying to place the ear .
All right , which is gonna be the last part .
Um We go right in right here , right where this line meets the eye socket , we go up , you can go a little bit above the line if you want to or stop right at it and you wanna swoop right down to the jaw line .
You wanna go from this line swoop and then come right back to the line pretty much .
So you want the ear to stay on this line .
So you go up , swoop down and keep the ear on the same um line plane and the ear can , you know , you can go back and forth , you can adjust it to whatever you like another neck head and boom .
And I mean , that's pretty much it .
This is gonna be a very simple tutorial .
I didn't want to be way too long .
I try to keep my tutorials like 20 ish minutes .
Sometimes it goes a little bit above .

Sometimes it goes a little bit uh uh low but 20 ish minutes is the maximum I wanna go .
Um And yeah , I mean , hopefully this video helps you out .
You know , I'm just trying to share my knowledge , share my wisdom , share what I know a little bit , you know , I feel like you know , learning how to draw , you know , some to some courses , you know , you should pay for .
But I feel like there's some basic things that can like be free and that's what I'm here for .
I'm here to give you guys some free tips on how to get better and how to improve your art .
You know , like , you know , we're all improving together , man , we're all improving together and uh I might , I might as well show what I know already .
And then when I , then I come back and teach y'all what I what with some new stuff that I know .
So , um yeah , I hope you guys enjoy the video .
If you did leave a like , comment , subscribe and I'll see you guys next time .
Peace .
Oh man , I'm actually tired out .
Are you looking for a way to reach a wider audience and get more views on your videos?
Our innovative video to text transcribing service can help you do just that.
We provide accurate transcriptions of your videos along with visual content that will help you attract new viewers and keep them engaged. Plus, our data analytics and ad campaign tools can help you monetize your content and maximize your revenue.
Let's partner up and take your video content to the next level!
Contact us today to learn more.