https://www.youtube.com/watch?v=Eg-16MooOuk
How To Draw Faces- 3_4 View - CARTOONING 101 #2
Hey there , I'm BJ Dell .
And you just stumbled across episode two of cartooning 101 , a new youtube tutorial series that I'm doing showing you the basics and fundamentals of cartooning .
If you missed episode one , we talked about drawing the head from a front facing position .
And in this episode , we're gonna take the head tilt it ever so slightly and do a three quarters perspective .
I'm gonna walk you through some guides and tips and tricks that you can use to make sure everything is lined up correctly so that you can become a better cartoonist .
So if you want to learn all about that and more , keep watching .
Hey guys , welcome to episode two of cartooning 101 .
In today's video , we're gonna be talking about drawing the head from a three quarters perspective , kind of angle perspective .
Uh If you have not watched the first episode in the series , I highly recommend hopping over there and watching that one first .
Uh just because a lot of the base and fundamentals we introduced in that first episode are going to be transferred and used over here on this one .
That episode was about drawing the head from a straight on perspective .
So watch that one first and come back .
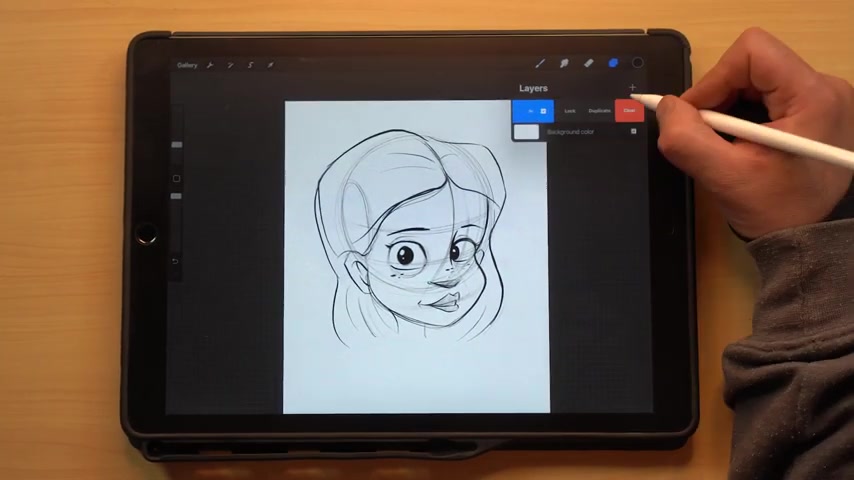
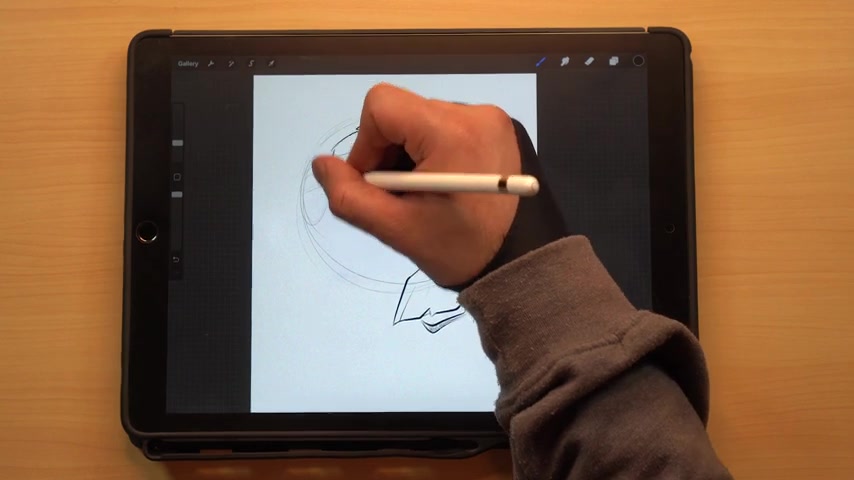
Uh As far as today's video , I'm using an ipad Pro 12.9 inch first gen model with the apple pencil .
But that being said , this entire video series does not have to do anything with digital .
I'm just using the ipad because it kind of speeds up this process and you'll see I can do some undoes and it makes the , the whole process easier and it's gonna make these videos shorter .
Uh So if you don't have an ipad , if you don't have a tablet or a computer to draw on at home , just grab a piece of paper and a pencil , you will be able to do everything that's gonna be shown in these videos .
So let's go ahead and jump into it .
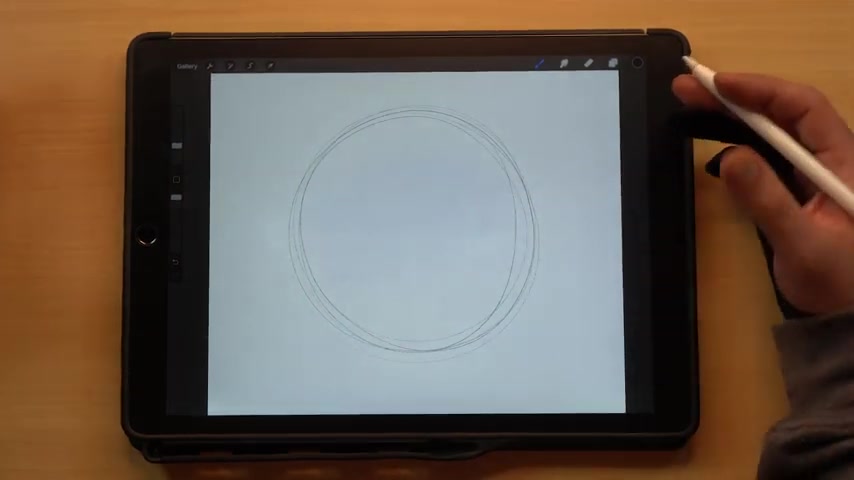
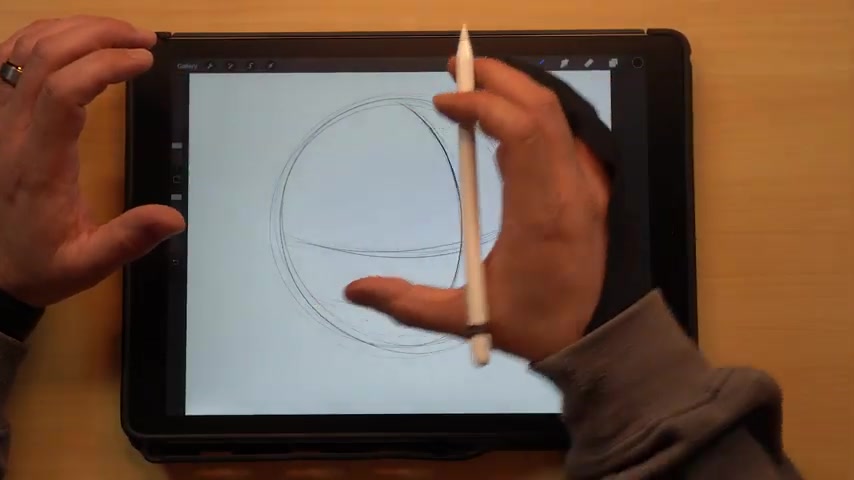
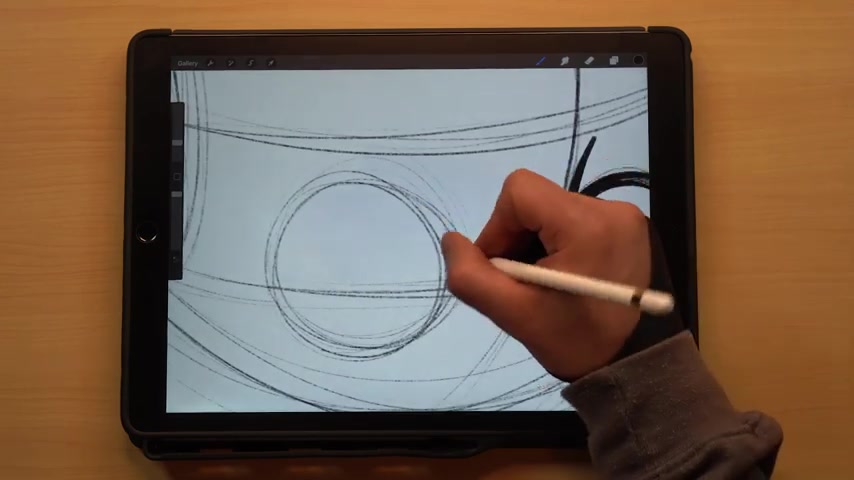
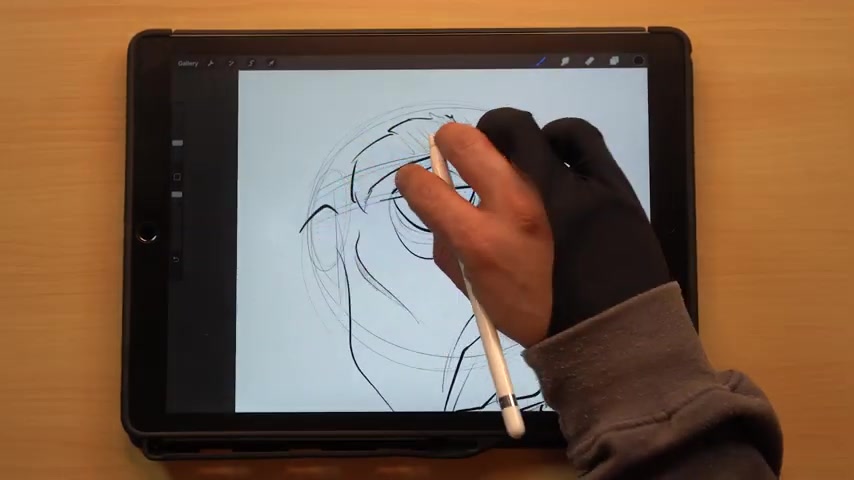
Uh So , like I said , in the first video , starting out any character that we draw , it doesn't matter if it's a human or a animal or anything like that , it's gonna start out with your basic circle shape .
So let's start out by drawing a circle .
And the first video we drew a vertical and then a horizontal line to break this into four sections .
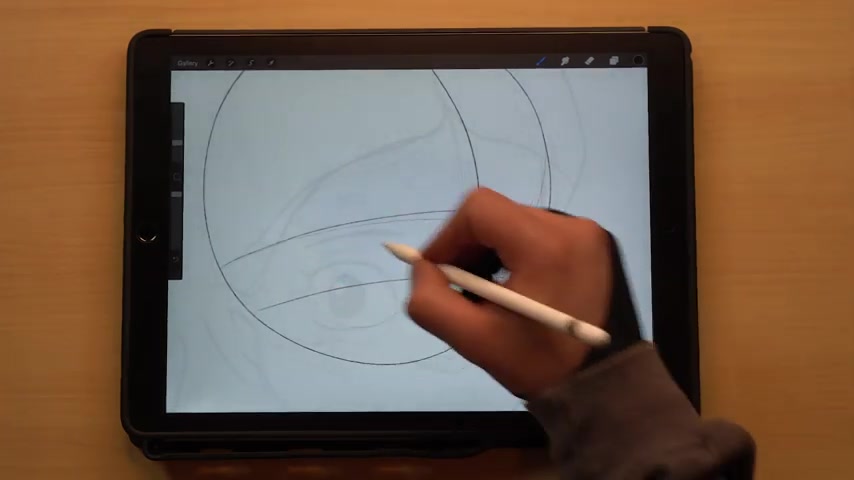
Uh This one , we're going to do that as well , but we're going to make a curved line here for the vertical line .
Now , basically what we're gonna do here is think of the shape and the circle as a three dimensional sphere .
So it has volume and mass to it and you can spin it around .
And that's why we want this circle to have the center line that's curved following the natural shape of the circle .
And then likewise , we're gonna draw the center line here and you'll see this follows the curve as well and gives it that nice three dimensional shape .
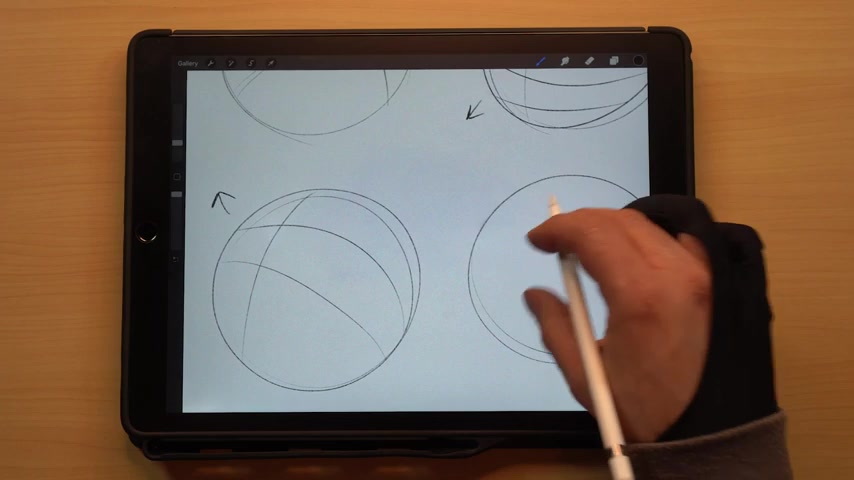
So we did this in the first video doing the vertical and horizontal line broke the circle up into four equal sections , four equal quadrants .
Uh You'll see in this one , we do have the four sections again .
However , since this is a three quarters perspective , you'll see everything over here .
These quadrants are larger than what are over here .
So that also is going to come in handy later to give us the right perspective because anything that falls on this left hand side of the center line is going to be larger than anything that falls on this side , this is going to be uh smaller due to the perspective .
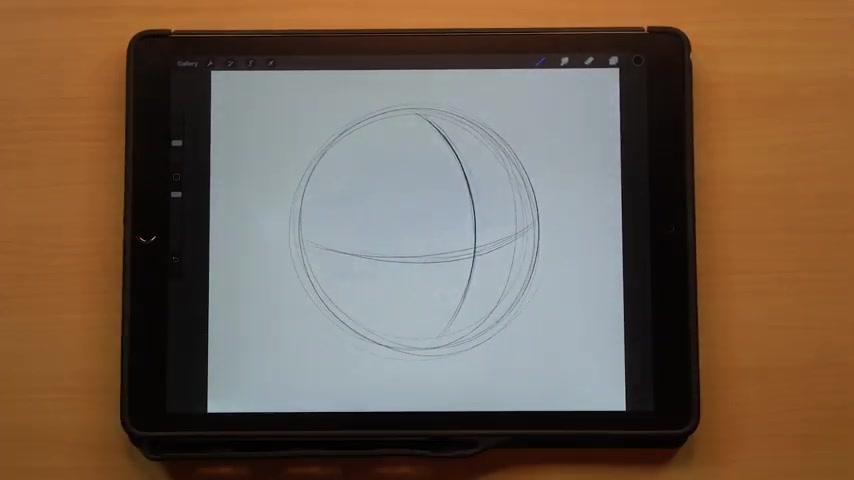
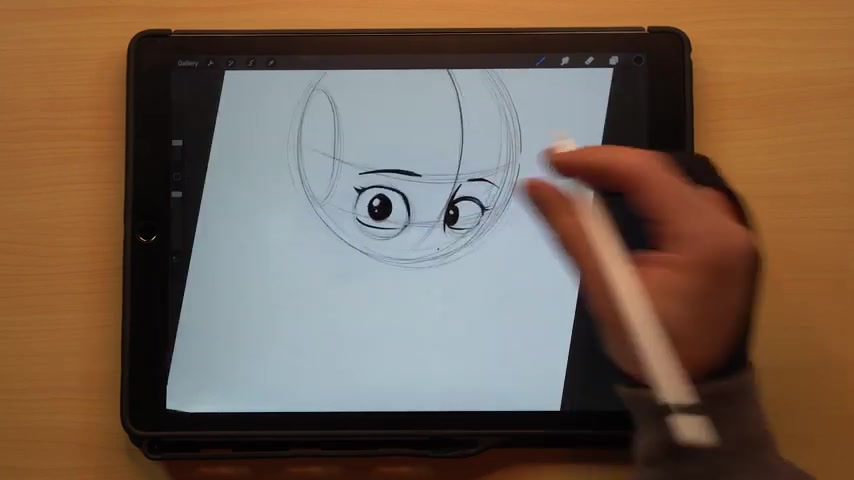
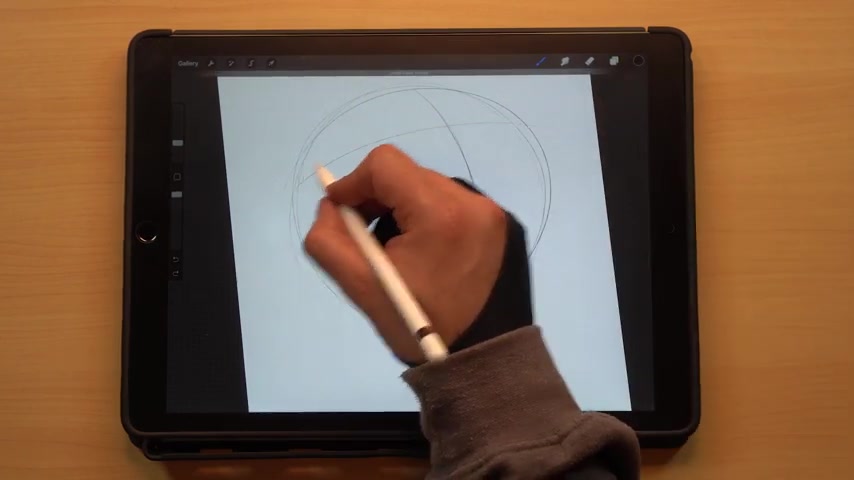
So now that we've got the center line here drawn , if you remember this is going to be our brow line , so we need to go ahead and draw a second line here for our eye line and this was covered in that first video .
So we've got the , the two different lines here kind of set in uh the next step since this is that three quarters perspective , if you think about this shape .
This is basically what's representing the , the skull , the cranium part of the skull .
So your , your head has that roundness factor to the skull .
But on the sides of your head , it is flat .
So if we draw in just a kind of oblong ellipse shape here , this is going to represent that flat side of your head where your ear is .
It's gonna make things a lot easier to , to understand once we start adding the extra parts in here .
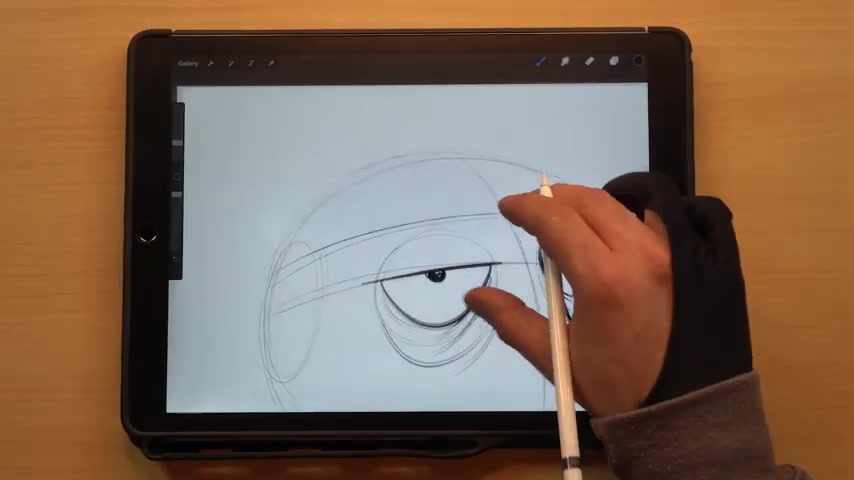
So now that we've got that , let's go ahead and draw our eyes in here .
And then this comes in handy too because it allows us to kind of center this eye in between this line of this ellipse and the center line .
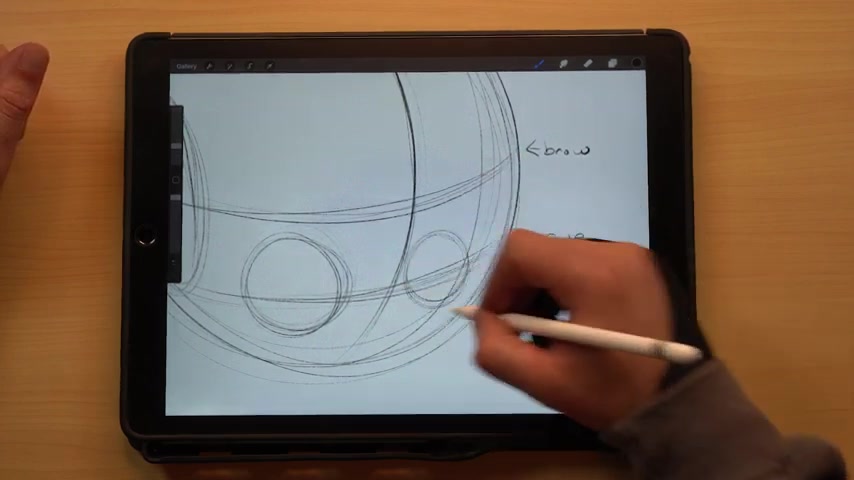
And then we also want it centered in our uh line here with the horizontal eyeline and likewise over here , let's draw another circle and those are gonna serve as our eyes .
Now , you might be looking at this if you didn't watch that first video or if you skipped ahead in it and might think to yourself , those eyes guys look really kind of far set down .
Uh they're really close to this bottom .
Is that really too close to the bottom of the head ?
Well , this is not actually going to be the bottom of the head , I'll start to kind of block in a little bit here to better illustrate what we've got going on .
So if you kind of picture this , this is where that flat part comes down and around into the cheekbone and then the start of the jaw section .
And I'm just kind of blocking in the underlying skeletal features on this .
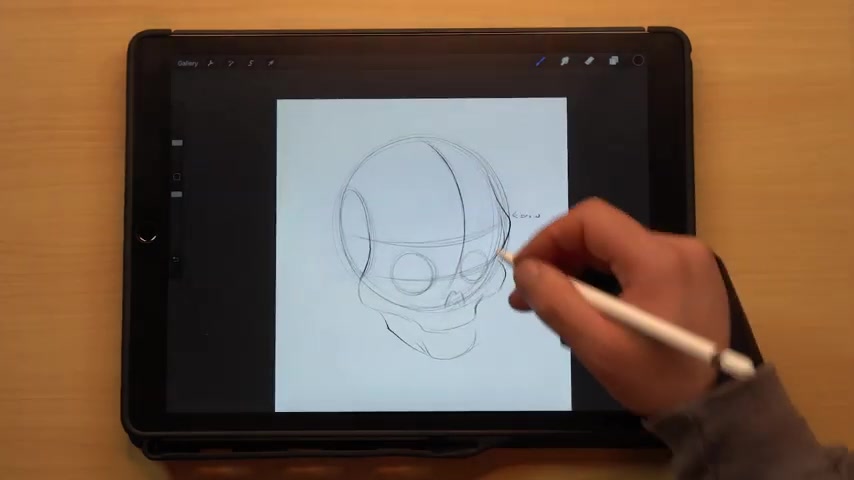
So you can kind of see a little bit better what we've got going on here and you'll see the jaw comes around here and then into the front of the chin .
So this is the underlying skeletal features .
We've got the skull .
So you can kind of see why these are set so far down because that's not the bottom of the head .
It's going to come down further down into this section .
Uh So you'll see here too , uh being able to undo this and going backwards .
That's why I'm using the ipad because I can illustrate stuff like that and not have to redraw all this .
We're just going to kind of erase those and erase this and get started with the , the actual design .
So , uh with this design , I think we're gonna go ahead and do a female character with this one .
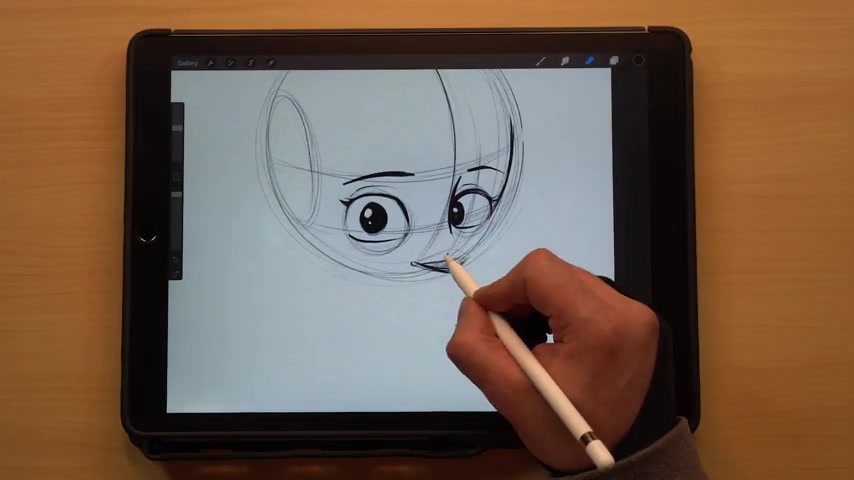
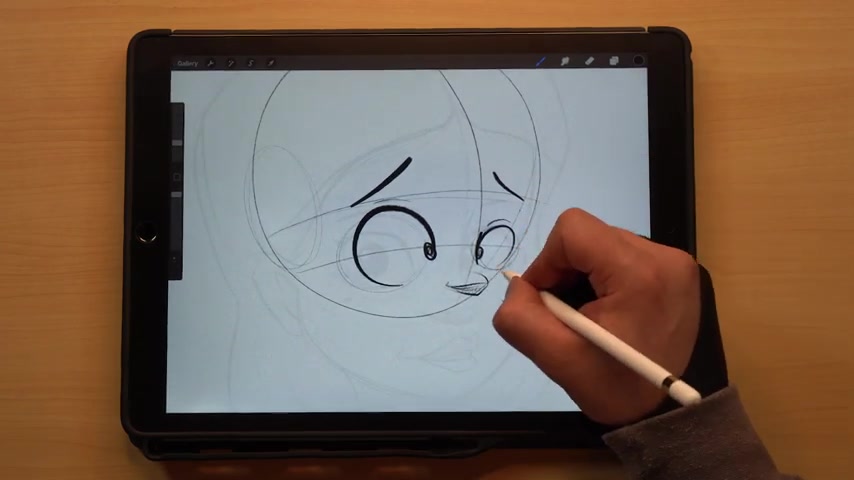
So let's go ahead and kind of start blocking in the eyes , usually start over here .
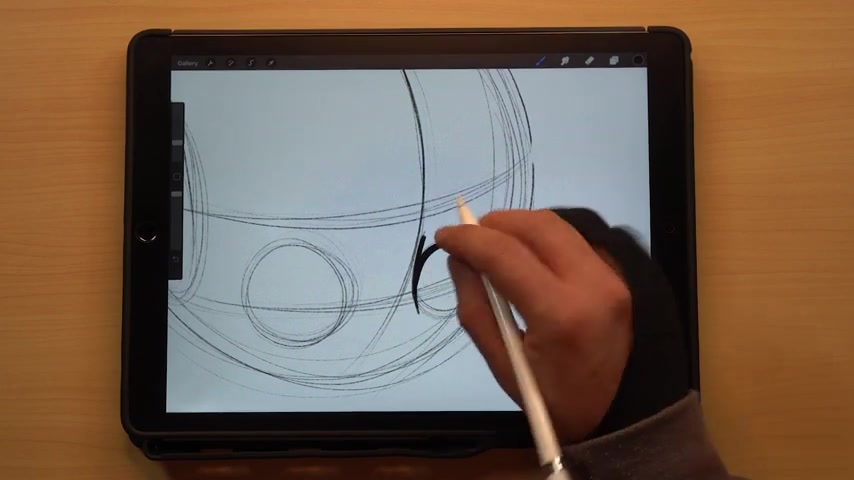
And one thing to remember when in these three quarters perspectives is this eye here on the uh shorten side , it's going to actually be obscured by the nose a little bit .
So you'll see here as I do this , this nose in the bridge is going to hide part of this eye , it's gonna kind of be tucked back underneath and it's gonna give that realistic three quarters perspective .
And if you're worried too about drawing eyes and stuff like that , um not going over those in these videos , uh the head videos , at least I'm going to do all separate videos for how to draw eyes , how to draw uh noses , mouths , ears , and then how to draw the body , how to draw dynamic poses with the body .
So I don't get too worried if you're not up to par on , you know , drawing the , the individual parts , we'll get to that in the videos .
So just make sure you stick with the video series and we will go over all those parts .
So one thing to remember too is you're drawing the eyes and I'll talk about this as I'm doing it is the , the round shape is once again , like we drew the skeleton , this is what's laying underneath that eyelid that we're drawing .
So you don't necessarily have to follow that circle perfectly when you're outlining the eyes .
That is basically just to give you the , the underlying structure of where you want everything else to go .
And once you have that , it kind of sets in where the lines need to be .
So like here , I didn't actually connect everything and do you know a perfect line that touches everything ?
And that's because we , we kind of know where it's supposed to be and we don't really need to do that and we can kind of clean some of that up later .
Uh If we go in and color it and you can make things a little bit more obvious where the , the eyes are .
So just get the , the pupils in here a little shine on the pupils .
Oops .
Ok .
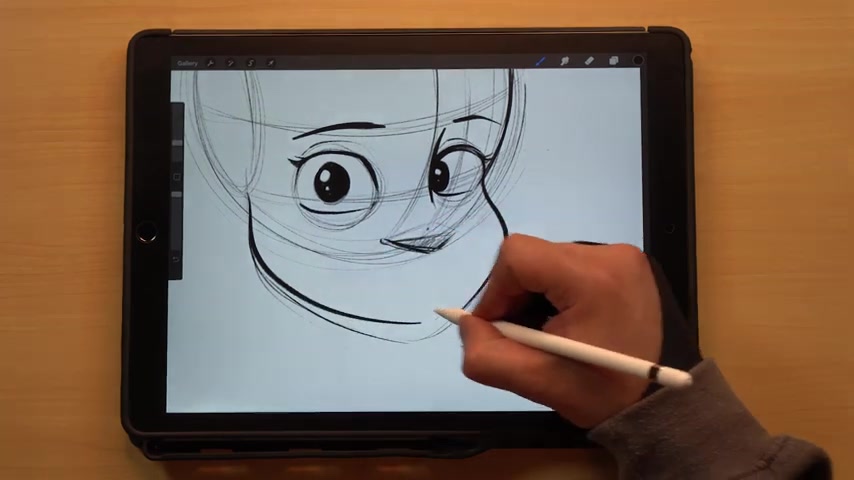
So next up , we've got the brow line up here , we can go ahead and add those in there .
Once again , with this being a female character , the brows are going to be kind of thin , not super thick and then we'll go ahead and add this crease to the top of the lid here .
Put that in .
Ok .
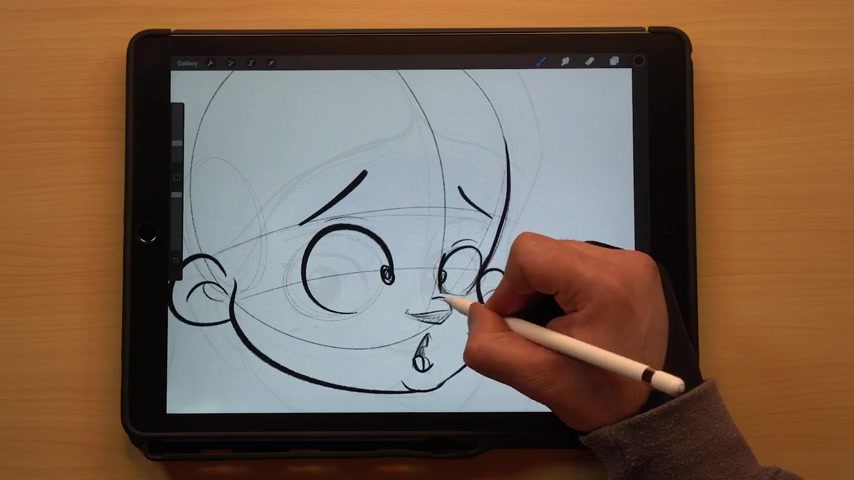
So our next step then is to start working on the nose .
Now , in the first video I talked about , you know , putting the nose directly in the center of the uh vertical line that comes down .
But with this , obviously , the center line comes and curves back around .
So we're not gonna do that with this one .
But what we can do is let's draw a another line here and it's basically gonna break this i in half and come down and follow that same curvature that this line and then the outer circle line has .
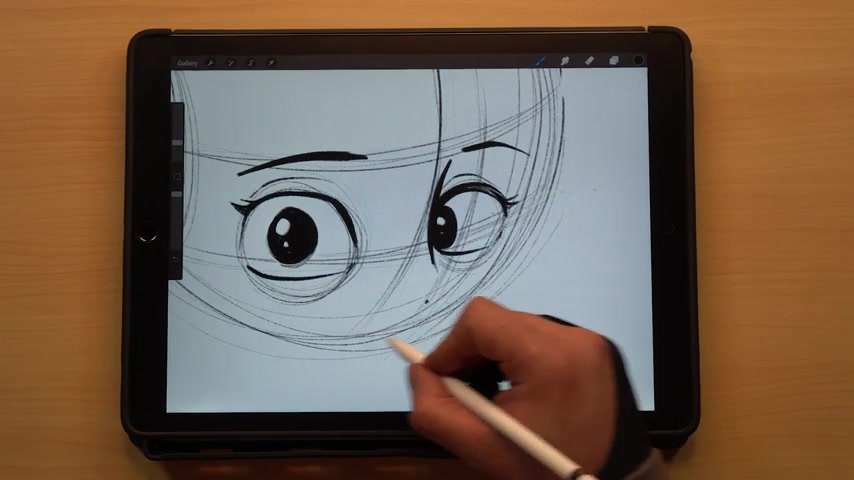
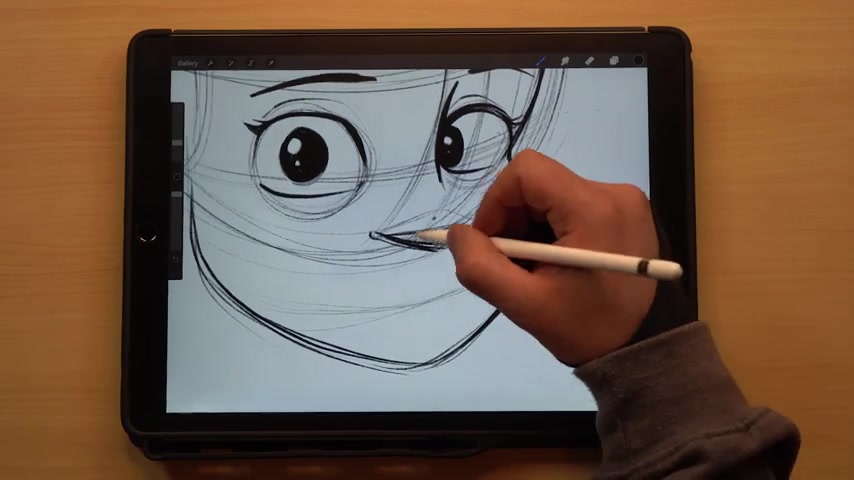
So with the nose , we're gonna put it down here at the bottom of the circle like we did in the previous video .
However , we're gonna start it over further .
So using the center line , if you remember , we we did the nose like a kind of pyramid triangle shape last time .
So we're gonna do that here .
But once again , that perspective is gonna be skewed because this is the three quarter shot .
So we're gonna start over here at that center line , that's gonna be the back of our triangle .
And once again , this line is gonna be longer because it is actually closer to the viewer .
And this one's gonna be going off in the distance because of that perspective .
So we've got our nose kind of blocked in there and we can pull this back around .
And of course , with the female characters , usually you want the noses a little bit smaller , a little bit uh pug like that kind of does that cute little uh pin up girl or if you're doing like young characters that gives that cute factor to them .
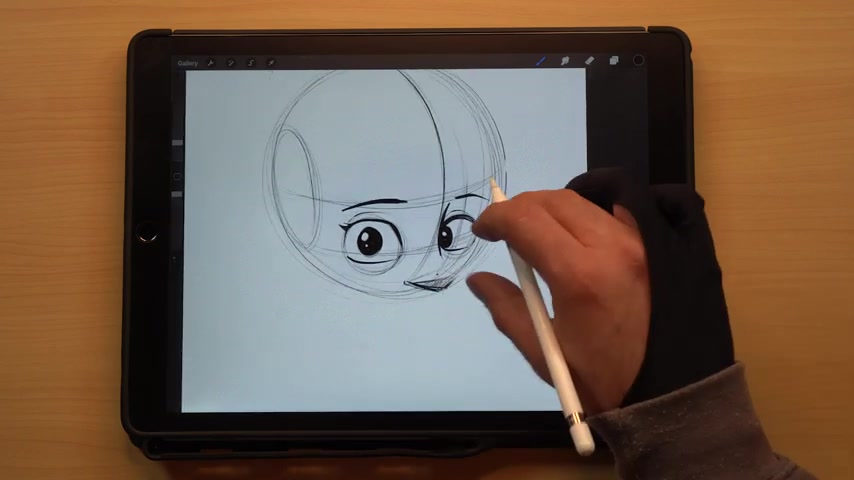
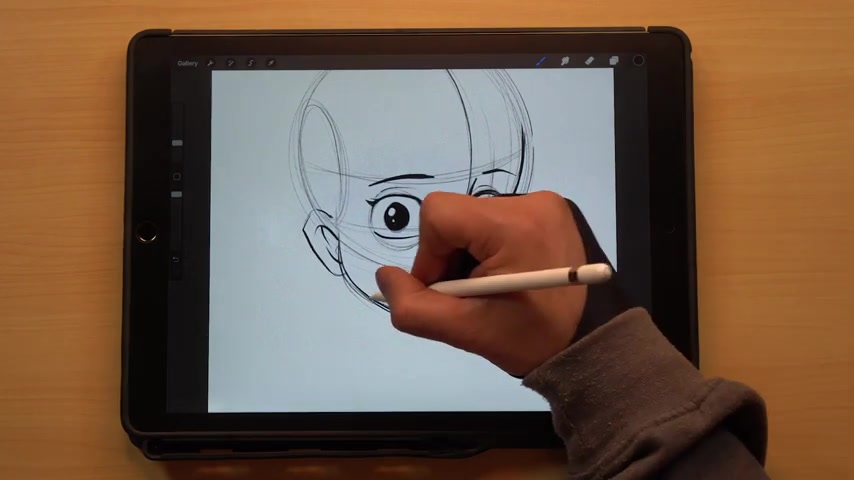
So we've got that in there next up is the jawline and the cheeks here .
So usually what I will do is start over here and what we want to do is follow this circle around and depending on the character , I usually bring this and touch this eye right here .
If it is a younger character or a female character , it just kind of makes the , the overall design look a little bit cuter .
Now , if you're dealing with a , a larger set character , a man , um anything with a little bit of girth , you might pull this out further .
So it doesn't touch and it leaves a little bit more room off to the side .
Um Likewise , the , the jaw itself is really gonna depend on the character that you're making .
It's gonna define that character .
So , like we talked about before babies have that smaller uh shorter squash set jaw to give the , the overall young factor , older characters , you're gonna bring the jaw down further .
Uh If you've got , of course , a heavy set character like that bouncer that we did in the last video , you know , the jaw might be pulled out to here and it just really depends on the character you're doing .
So kind of play around with the jaw placement to get that right look , but we'll go ahead and pull this in .
Now , the next step , this is super important to get that cartoony and cute look is to pull the cheek out .
So this is gonna come out in a kind of a , a flowing dynamic line here .
You'll see this pulls out and down and around , I'll do that a couple of times just so you can see the motion that it takes and this is gonna pull that eye out into the cheek and then bring it down to where the jaw is gonna start to meet the chin down here .
So just kind of play around with how far out you want it and how , you know , the , the character's style and personality is gonna determine that .
So now that , we've got that come back over here where we've got this ellipse and just start bringing this down and this is going to be that backside of that chin and we can pull this down into this bottom section here .
So we'll do that kind of make the line a little bit thicker here and then we just want them to meet in the chin .
Now , it really depends with the chin to uh what kind of character you're doing .
Uh You know , females are gonna have a little bit more uh natural , like feminine quality to them .
Sometimes you might go for a little bit more angle , look on a female .
Uh Sometimes it'll be , you know , a nice soft line .
It just really depends once again on that character .
So now that we've got that in , let's go ahead and do the mouth , the mouth is gonna fall in this midsection here .
So if you want to do another line kind of following the curve of the face and then we talked about in the previous video too , if you start here in the middle and kind of go down in a triangle and hit the sides of the nose here .
This is gonna be pretty much the the area that the mouth goes in a normal expression .
Uh So like I said before , with cartoons , you can get some crazy facial expressions out of them .
It it's fun to really go crazy and hog wild with these where if you , you know , had like a super comical thing like this , you can make some really fun mouths .
But uh for this sake of this video , we'll just do a , a fairly normal size mouth here and just make it look like I said , pretty , pretty normal .

So once again , taking into consideration the angle that we're at this back part here is going to be larger than the front part because we have that three quarters perspective that we're dealing in .
So make sure that as stuff trails away back here , it does get smaller and it covers less surface area .
That way you make sure that you are using the correct perspective .
So we've got the mouth in there .
Now , let's go ahead and do the ears , ears like we start uh said previously in the last video , start from about that center line here and come down to about the bottom of the nose here .
Once again , the ears are really gonna be dependent on the character as well , the size and shape of those and we will talk more about ears in one of those later videos too .
So don't get too caught up in worrying if your ears are perfect right now and I'll just do the the neck down here and then for hair , we'll just throw in some hair real quick here .
Once again , there will be a separate video on hair .
So that will be uh one of the the future ones .
So don't worry too much about the hair right now if you need tips or tricks on hair starting out , definitely just get on a Google image search of , you know , hairstyles for women or hairstyles for men or boys .
And you can just kind of take those real world examples and , and see how you can adjust those to what kind of style you want for your character .
There's always a ton of uh hair pictures out there for , you know , hairstylists and stuff like that .
So they're uh a definitely a , a good resource to , to give you ideas .
So there is our female character .
Let's go and throw a couple of just freckles in here to make it cute .
There we go .
So there's our female character .
Now , let's go ahead and I'm gonna duplicate this layer and then I'm gonna turn down the opacity once again , this is one of those ways that I can make these videos really quick and we're gonna use that same shape that we had to begin with and we're going to draw the , the baby using this same base layer .
Let me turn this down a little bit further .
There we go .
And you're gonna see how adjusting this jaw is going to kind of affect everything else here .
So get these lines in here a little difficult to see .
There we go .
So we'll go ahead and draw our eyes , get our circle back here .
Now let's just kind of block these in , make this part fairly quick .
Oops , raise this part , the eyebrows appear eyelids there .
All right .
So once again , hiding that behind here , we'll pull that bridge down .
Now , the nose on the female character was down here with the babies .
Like I said , everything needs to be a little bit closer .
So we're gonna actually start our nose up quite a bit further here .
So it's gonna be a lot closer to the eyes .
And this is also gonna work too once we pull the jaw and the , the cheeks around .
So let's go ahead and do that .
Now , we'll pull in this close here .
I'm gonna pull this out a little bit further and then you'll see the difference in the area there .
This is gonna be up a lot closer and then the mouth of course , is gonna be closer to .
So you can see how far uh difference that makes as far as the size that is in between the sections and then the ears .
We just kind of knock those in real quick here .
So if you can see underneath here , the , the difference between the two that jaw comes down quite a bit further , the mouth is set down here .
Uh We even kind of move the eyes in a little bit closer too just because with the babies , you want all those features kind of closer together and it reads a little bit more younger and cute and same thing with the , the neck , we can go really small with that .
So that's the , the baby .
So taking the uh steps that we learned so far , we can also adjust the way that the character is looking .
So straw these circles in here again .
So we start out with just , you know , basic angles here .
But if we start to adjust where these lines here that are horizontally go , we're gonna have a character that's looking up this way we pull these down .
This is gonna be a character that's looking down this way .
If we go the opposite direction here , you're gonna have a character that's looking up into the left and the same thing here pulling it down , you're gonna have a character that's looking down into the right .
So this is a good way to work with perspective on top of the uh the three quarters .
So you can get some dynamic poses out of your characters and change , you know , which direction they're looking .
And this is one of those good tools if you're doing comics or cartoons to kind of add to the , the viewer interest , uh makes it just not seem so stagnant and stale and cookie cutter by changing the , you know , the direction that the characters are looking .
So , uh next up , let's go ahead like we did last video .
Let's take what we learned so far and kind of throw everything on its head and make some really kind of funky designs just by using these basics .
So we'll start out with the same shape here .
Let's move everything up though .
Instead of having the character looking up though , I'm actually going to still have it looking towards the viewer , but it's just going to kind of skew this whole shape of the face .
So we get these in here .
I think I kind of want this character to , to be an older character .
Let's make a kind of crazy bridged nose here .
It's gonna come down longer and be a little bit more prominent .
This is one of my , my favorite things about cartooning is just being able to do fun designs like this and create some , some really cool characters .
Let's kind of do some droopy eyes here , some bags underneath there .
It's kind of cool .
All right .
And we'll get the , the pupils in there and then for the eyelids up here , these are gonna kind of be wrinkly add some age to him .
There we go .
And then for the eyebrows , let's go ahead and make those kind of busy and big here , kind of exaggerate the the overall size of those .
And once again , remember this eyebrow here is on the right hand side , the fore shorten side of that center line .
So this eyebrow needs to be smaller in surface area than this one over here .
It gives that correct perspective , fill those in just ever so slightly .
Ok .
So now we can go ahead and start pulling out the , the shape of the face .
So let's do the , the eye here into the cheekbone .
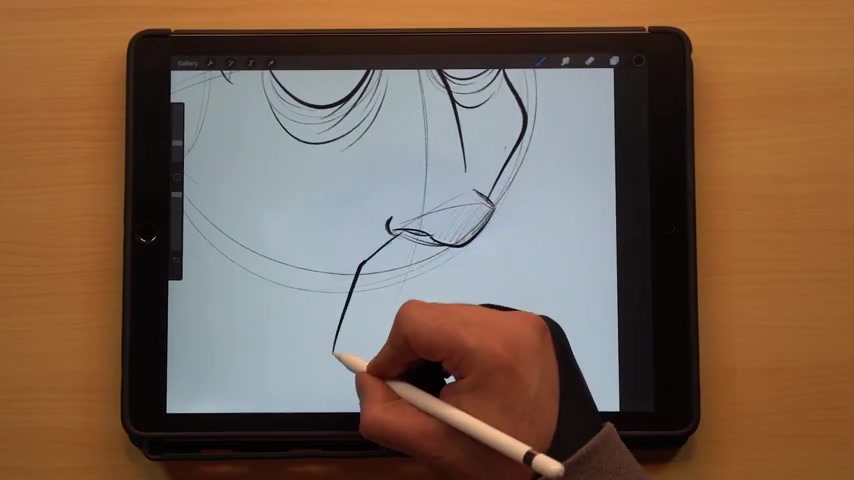
I think I'm gonna have the nose sticking out a little bit past here and you know what , let's do a mustache on here .
I think that might look cool too .
So let's do a cool mustache .
Once again , mustache wise , this is gonna follow the perspective that we've already set in there and this backside is going to be shorter , then that front side and then let's go ahead and put in his bottom lip here .
Top one is gonna be covered by the mustache .
So we kind of just want to give the impression of the bottom lip .
I'm not gonna draw it in 100% just gonna have that kind of shadow effect to it .
So there's that and let's go ahead and start to pull down this jawline here .
We're gonna make this kind of exaggerated and elongated .
So it's gonna come down quite a bit here into the chin and let's go ahead and make this chin kind of crazy too .
Here we go .
Have this lip kind of overreach outside of that jawline gives it a pretty cool effect there .
And then I'm also gonna do just a a cheek line here to give that extra gaunt look to him .
And with this , you can kind of shade in lighter there , bring down some age lines around the nose in the mouth there .
Let's go ahead and add the ears in .
We're gonna go ahead and make these kind of bigger two .
So they're kind of stretched out and exaggerated .
There we go looking good .
So now for the top of the head instead of , because I've kind of got this up further , you could pull up the head if you wanted to .
But I kind of like how this breaks off here .
So I'm gonna go ahead and just do this like squared off .
Look on the forehead .
There's not gonna be a lot of forehead and it , I think it looks really kind of funny like this , of course , this goes against , you know , everything realistic .
But I think for this character , it adds an interesting element to him and then let's go ahead and add some hair here .

We'll have him bald on top and then his hair is just coming down here and maybe a little bit longer and shaggy on the sides , maybe a couple here .
He's still hanging on to on the top .
There we go .
All right .
So that gives you kind of a another example of how you can take what we learned to begin with and just kind of go crazy with it .
Go just nuts with those , those lines , stretch everything and really make something unique and one of a kind .
So that's it for today's video .
All right guys .
That's it for today's video as always .
Thank you .
For watching .
I appreciate it if you like today's video too .
Make sure you give it a thumbs up .
Subscribe to the channel if you haven't already and hit the bell for notifications , you can get alerted when I post new videos .
And speaking of new videos , the next up in the series is the last one about heads and we're gonna be taking the head , turning it on its side and doing the profile .
Uh So that's gonna be the last one about heads before we move on to the features , uh focusing on nose , mouth , ears , so on and so forth before you move on to hands feet , how to connect everything , how to put your characters and dynamic poses .
There's a lot to this series and gonna be about 20 videos give or take by the end of it .
So a lot more information left and don't want you to miss out .
So hit that bell so you can get alerts and if you like these videos , if you like my youtube channel , the , the content that I'm producing and putting out there for you .
I am finally on Patreon so you can back and support the channel on there .
I'll put the link in the description below .
Uh But I had a lot of people ask when I'm gonna join and I finally started one .
So it is live right now and I'm gonna be doing a ton of exclusive Patreon stuff .
There's gonna be exclusive Patreon tutorials that you will not get on youtube .
Uh There's gonna be behind the scenes Q and A's live streams , polls , you name it , it's gonna be on there and I want you guys to be a part of that and I appreciate the support .
Plus I've got a ton of cool tiers .
So if you want to get exclusive stickers delivered straight to your mailbox every month , there's a tier for that uh original hand drawn sketches delivered straight to your mailbox .
There's a tier for that uh video reviews , personalized video reviews , you send me your artwork , I will send you back a personalized video review of it or even if you are on Merch by Amazon or the other print on demand platforms , I'll draw you a one of a kind original .
No one else has it .
Digital illustration that you have full ownership rights to that you can put on any product that you want .
Uh It , it's yours , you own it , commercial rights all belong to you .
So those extremely li a bunch of those tiers I did have to limit .
So there's only a certain number of slots available and they're filling up fast because I've had a bunch of people join already .
So if you are one of the ones that have joined a number one , I love you guys so much and thanks for the support you guys rock and uh it it really warms my heart to , to think that you guys enjoy the channel that much that you want to support .
So thank you , as for me , I can be found online BJ dell dot com as well as on Instagram and Twitter at BJ Dell .
So until next time , keep creating it .
Are you looking for a way to reach a wider audience and get more views on your videos?
Our innovative video to text transcribing service can help you do just that.
We provide accurate transcriptions of your videos along with visual content that will help you attract new viewers and keep them engaged. Plus, our data analytics and ad campaign tools can help you monetize your content and maximize your revenue.
Let's partner up and take your video content to the next level!
Contact us today to learn more.