https://www.youtube.com/watch?v=1BBXepO33ag
Make an AMAZON AFFILIATE MARKETING WEBSITE Blog with ADSENSE using WORDPRESS and Elementor 2019
in this video , I'm going to show you how to create your very own affiliate marketing website with some AdSense ads using WordPress and the Amazing Element or page builder plug in the site .
We're going to be making looks just like this .
The website uses a free theme that offers a lovely , clean and clear layout perfect for showing off your articles and your content .
As I mentioned , we're going to be using the elemental page builder .
It makes it really easy to add content just by dragging and dropping things around .
And to make it even easier , I'm gonna be providing you with all of the layouts and templates that I create within this video so that you can use them on your site and get you up and running really quickly .
All you've got to do is adjust them to suit your needs and your niche .

Speaking of niches or niche is , if you're in America , I'm gonna be sharing with you some ideas on how you can find a niche , how you can choose a niche , how you can determine whether it's going to be a good niche .
I'm also going to be sharing with you some niches that are best avoided as well as choosing a niche .
I'm gonna be sharing with you some thoughts on how to come up with inspiration for content , how to do some research and find some good keywords and basically give you everything you need to get the site up and running and enable you to work on it going forward .
So you hopefully get to a point where you are getting lots of good traffic and earning some good money from it going forward .
I'm gonna be posting loads more videos around the site that we create in this video .
I'll be sharing with you my traffic , my income and all of the stuff that I do on the site to get it working .
So if you're up for creating your very own affiliate marketing website and you want to earn a bit of extra income , then this is the video for you .
Let's go .
Hello ?
It's Alex here from WP Eagle .
Thanks for watching .
If you're new here , why not subscribe ?
You can do so by clicking on the button below .
And as I mentioned , I'm gonna be uploading loads more content around the website that we create in this video and you're not gonna want to miss it , because I'm gonna be sharing my earnings how much traffic I'm getting and all of the work that I do on the website .
So you can basically just follow along and do what I do , and hopefully we'll all get some success and and some money Now , before we get on the computer and start building our website , I just want to share with you a couple of things .
First is how much money we're gonna need to spend today .
I'm afraid there is a few costs involved with setting up a website , but I've done my best to keep them as low as possible .
First thing we're I need is a domain name .
If you've got one registered already , that's great .
I'm gonna show you how you can use that domain name a little bit later on in the video .
If you've not got a domain name , a domain name is basically the dot com or dot co dot UK or the dot net .
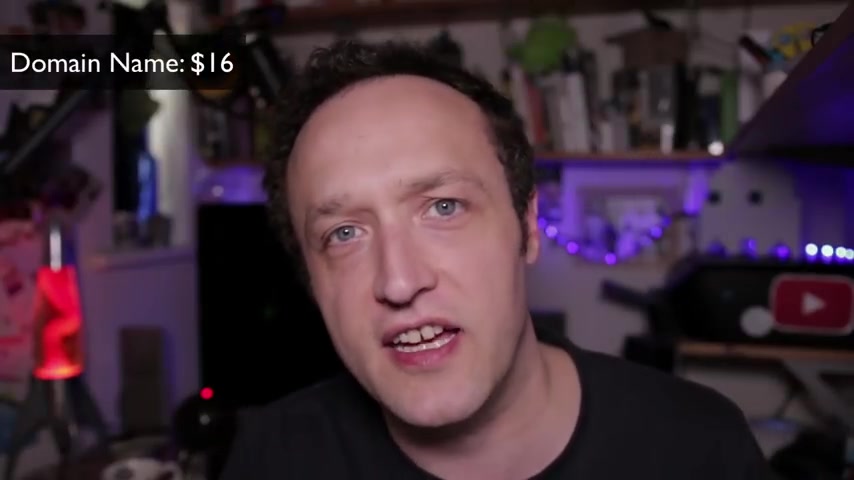
It's the thing that people type into their browser to access your website .
In this video , I'm gonna show you how to register a domain name , and the cost for that is around 15 to $16 a year .
Similar amount in pounds .
If you're in the UK , so not a huge expense .
Second thing you're gonna need is your website hosting , and this is basically where your website lives .
On the Internet .
You hire a little bit of a server from a hosting company , and they make sure that your website is online and and look after you and all that kind of thing .
I recently did an in depth review into WordPress hosting .
I tested out loads of different hosting companies , and the one that came out best in terms of performance support and features was a company called Site Ground .
And that's who we're going to be using today .
And I've managed to secure a fantastic discount off your first year's hosting , so be sure to follow my link to make sure that you get that discount cost for the hosting with the discount comes in around $70 .
So not a huge investment to give you a four years worth of hosting .
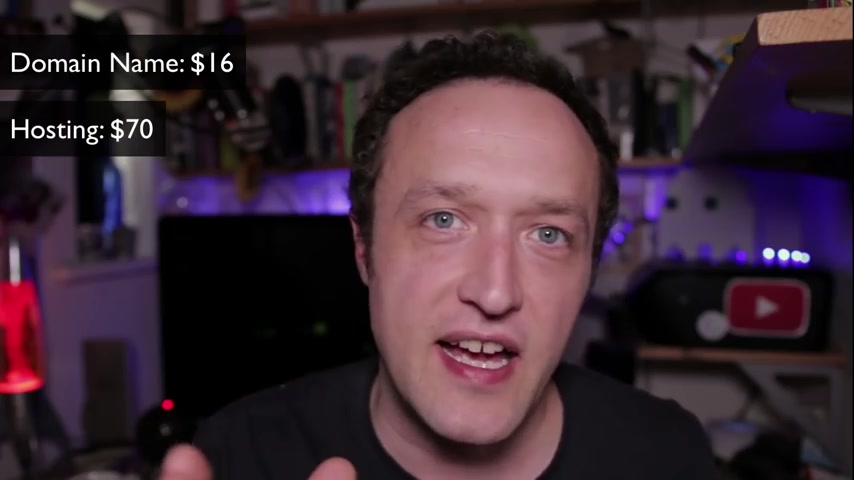
It's around £70 in UK money as well .
I don't know why there's not much difference But I guess you know that's just the way it works .
So for you , Americans paying in dollars , it is slightly cheaper .
Final thing you're gonna need .
And this actually is optional is an add on for the elemental page builder that I like to use , basically enables you to create tables really easily as well as a whole load of other cool stuff .
But it's the tables that I really like , because when I'm creating my content , I like to show off products in table form just to make it really easy for my visitors to be able to choose the best product for them .
I will be using it in this video , but if you don't want to use it , then it's entirely up to you and maybe you'll find another table .
Plug it in for free somewhere .
But it's my favourite , and I think it's worth the $49 cost in order to get hold of it .
And as I say , it comes with a whole load of other features , not just tables .
So the cost should be up there somewhere .
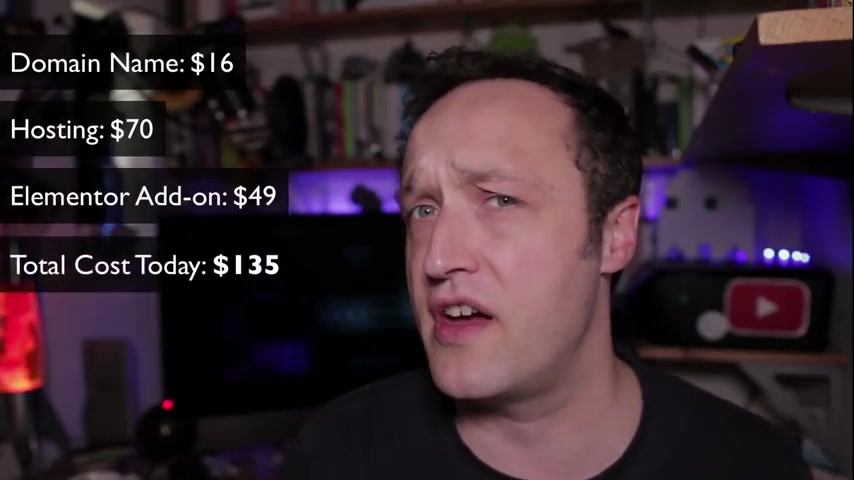
And if I do some maths off the top of my head , I think it comes in around 100 and 30 or so dollars for the first year , which is only a really small investment to get your online affiliate marketing business up and running .
One thing I will say is this video is probably best watched over on WP eagle dot com .
You may be watching it on YouTube right now .
If you go down into the description , you'll find a link over to this video on WP eagle dot com .
And within that post , you will find links to all of the templates and links to all of the things that I talk about in this video , including the hosting and , um , the extra plugins and any other tools that may be mentioned .
Also below this video , you'll find a whole load of timings .
So if you want to jump forward or backwards within the video , you can do that .
Just have a look click on the time , and you can , you know , skip forward to the particular part that you're interested in .
And this video is quite long , so you might need to go forward and backwards a few times over certain bits .
But if you do get stuck for whatever reason do Leave me a comment below , do my best to read and reply to as many as I possibly can .
So , yeah , if you've got a question or you're stuck , just leave something below .
And I'll , I'll do my best to get you moving again .
Now , before we get on the computer , you are gonna need to have thought of a niche .
It's pretty helpful to know what your website is gonna be about .
So when it comes to choosing a niche , what I'd recommend is you think of something that you're at least a little bit interested in .
It kind of helps .
The site I'm building today is going to be all around roof cargo boxes .
It's something that you know I'm not particularly passionate about , but I did need a roof cargo box just recently for a new car .
So I was doing a bit of research , and I kind of found that there wasn't a lot of information out there around these roof boxes and especially when I was searching for specific uh , roof boxes for a specific make and model of car , there was hardly anything .
So it got me thinking that maybe I could fill that gap and , you know , add some content that would get ranked quite well because there's not much out there at the moment .
So , yeah , think of something that you're at least slightly interested in , and then start doing some research on Google and on Amazon , you're gonna want to go over to Amazon and drill down into the categories .
You want to go as deep as you possibly can , because the more specific the products are , the easier it is to get some rankings on the search engines and the easier it is to create content .
So for me , rather than just doing stuff around cars , I've gone really deep and just focused on the roof racks and the roof boxes .
Once you've got a niche in mind and you've got some ideas around products , start doing some searches on Google .
This will give you some ideas for content , and it will also give you an idea of the amount of competition around that particular search .
So for this particular website , I started doing some searches .
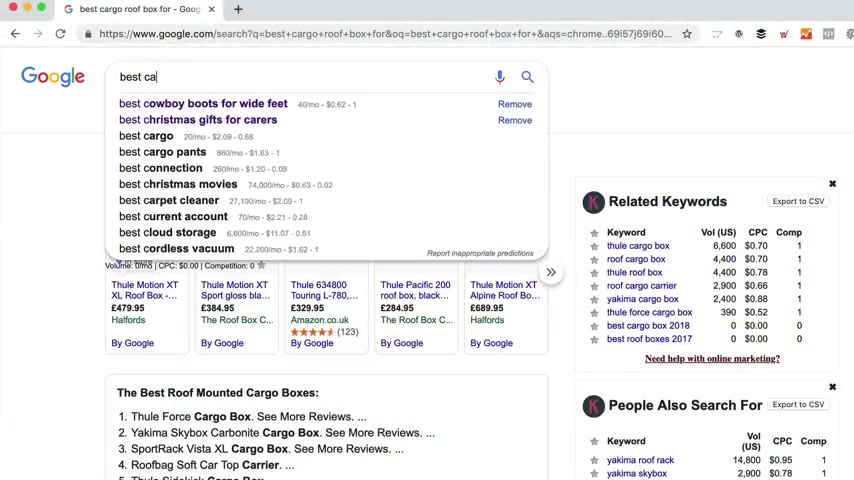
I entered things like best cargo roof Box four , and I just pressed the space bar and waited to see what Google would suggest , and it was suggesting things like best cargo roof , Box four , Audi Q five and best cargo roof box for Ford Escape .
So it got me thinking that I could create some content around each one of these , uh , vehicle types each make and model of car .
And then I was aware that I could create loads of content because there are tonnes of makes and models of cars out there .
Obviously .
So best roof box four was gonna be a great , um , article idea and then started thinking about how people use these roof boxes .
So Google was suggesting things like best roof box for skiing or best cargo roof box for fishing rods .
Again , these are all great article ideas .
So I started running these search terms through Google , and I noticed that there wasn't many articles that answered these questions directly .
Me .
So I started adding all these keywords to a list , and that's basically the foundation of my content plan .
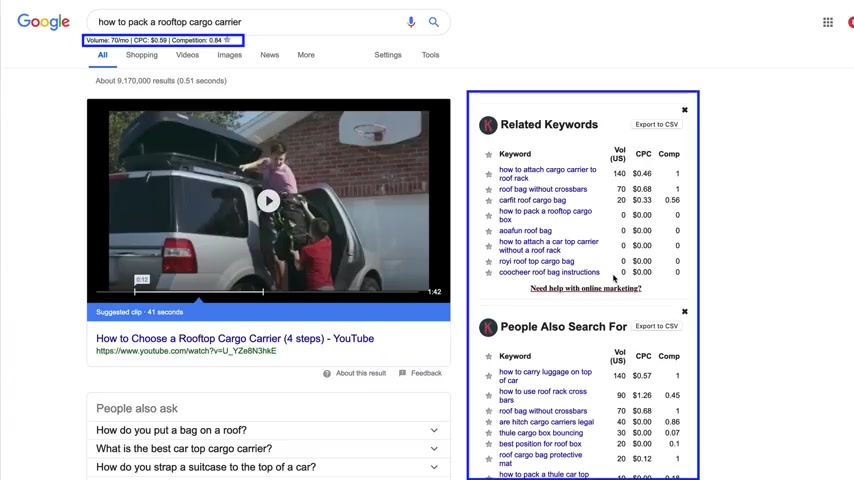
I also have a tool called keywords everywhere installed in my browser .
It gives me an idea of how many searches a month there are around a particular keyword , and I was looking for searches of around 100 a month could be less .
Could be slightly more .
But I certainly didn't want searches that were getting thousands a month , which you might expect that would be a good thing .
But it's not because if a keyword is getting a lot of searches a month , generally there is a lot of competition when it comes to articles .
You really want to go for those long tail searches .
When I say long tail , that's basically searches , which have got four or more words so very specific searches because A they're easier to rank for because there's less competition and B .
When someone starts typing in those specific searches , they're almost ready to buy a product .
Someone types in cargo roof box .
They're just sort of thinking about getting a roof box .
Someone types in cargo roof box for Audi Q five .
They're almost ready to buy because they're being very specific .
They know what they want .
They just need a little bit of help to make that purchase .
And speaking of giving a little bit of help , that's what we're here for as affiliate marketeers .
We're here to help someone make that purchase .
So by offering good content and answering their questions , providing good information around a product .
We can help that person make that purchase .
They use our links and we earn our commission .
So hopefully that's given you a few ideas on how to choose a niche and outcome with some content ideas .
I'm gonna be going into this in a bit more detail later on in the video when we start adding content to the site .
So , uh , yeah , we'll go into a bit more detail , but , uh , hopefully you've got enough information now to choose a niche and get started with your website .
Good luck .
I know you can do this .
I'm here to help you .
As I said , if you get stuck at any point , just leave a comment below , and I'll do my best to help you out .
Also , I do a live stream pretty much every single week on a Wednesday within these streams , I'm there to answer your questions live in real time .
So , yeah , if you get stuck or you need any help or you got some questions or you just wanna hang out , do join us to get a notification .
When I do go live again , make sure you click .
Subscribe and click the bell or head over to W PE dot com and sign up to my newsletter and generally send out a reminder email just before I go live .
So on that , Let's get on the computer and let's get this website set up .
Let's go .
So the first thing we're gonna do is set up our Web hosting .
Web hosting is basically where our website is gonna live .
On the Internet , we hire a bit of a server and that give us everything we need to get up and running .
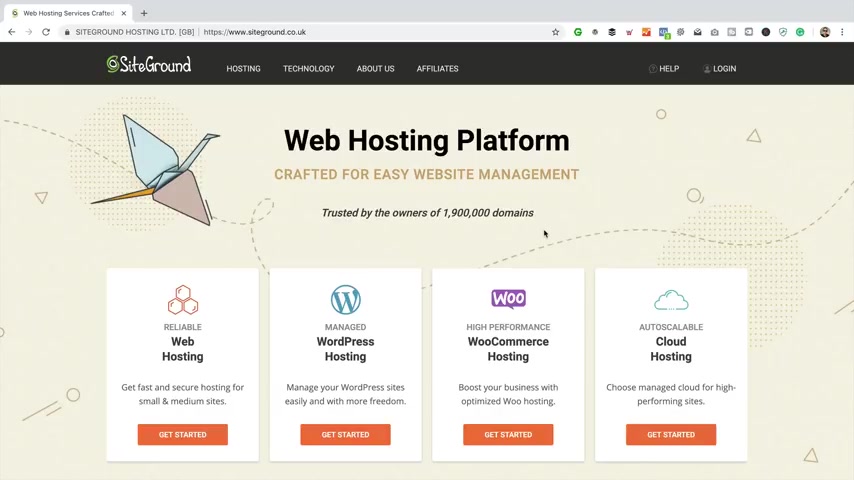
The company I'm gonna be recommending to you today is site ground .
They offer some excellent Web hosting at great prices .
The reason why I recommend site Ground is that recently I did a full test on hosting .
I tested loads of different hosting companies .
I tested them in terms of speed and in terms of features and value for money .
And when all those things were considered , site ground came out on top .
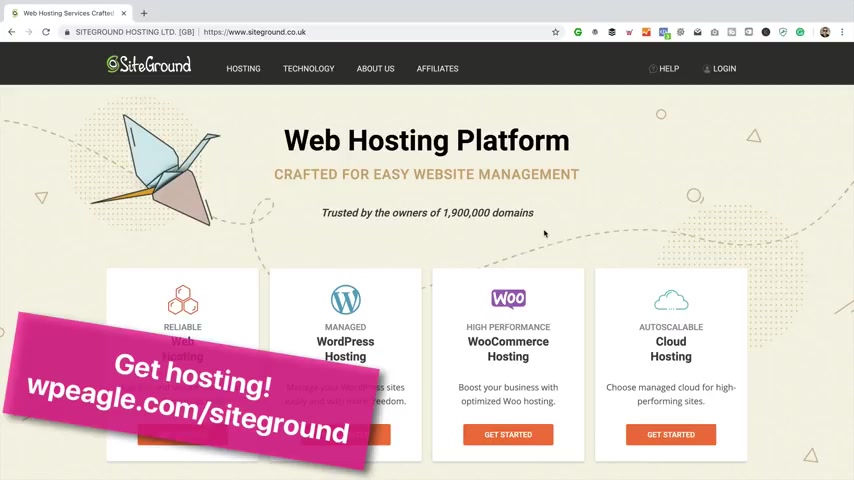
So that's the reason I'm recommending them to you today on the screen .
Now you'll see a card .
If you click that card , it'll take you straight through to site ground is an affiliate link , so if you use it , thank you very much .
I will earn a small commission , and you'll also get a discount of 70% as well .
If you missed the card , you'll also find the link in the description of this video .
I'm really grateful to everyone that uses my links .
It really does help me out and allows me to carry on creating YouTube videos .
Once you land on site ground , you'll see a page very similar to this , and they offer basically four different types of hosting package .
We're gonna go for the standard Web hosting .
That's absolutely fine for what you want to do .
You'll notice there is WordPress and woocommerce hosting , too .
Um , but we don't really need them right now .
So let's just go for the , um , standard Web hosting , which , by the way , we can install WordPress on no problem .
So once you come through to this page , you'll see there's three different packages available .
There's the startup Grow big and the go geek .
Generally , I'd recommend the grow big package .
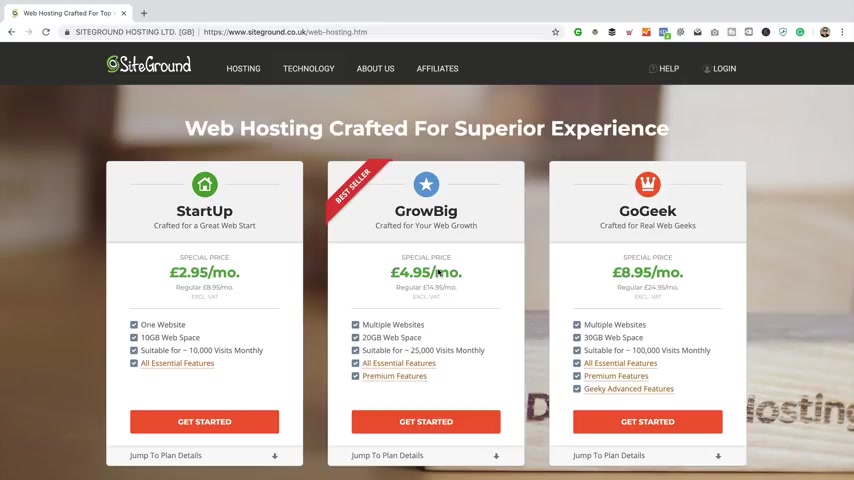
It's perfect as it allows you to kind of scale up .
You can have multiple websites on .
It offers a good amount of space and allows for plenty of visits .
If you don't think you're gonna be doing more than one website , you're just gonna start really small .
Then , of course , go for the startup .
But today I'm gonna choose the grow big plan .
And yeah , I recommend that you do the same .
See , we've got the special price of 4 95 a month .
If you're in the US , it will obviously be in dollars and site ground are fully compatible with US .
Um , UK whatever you like , you can in fact , choose the server location when you set up your hosting so that it's nearer to the visitors that you're gonna be targeting .
Let's click get started .
First box is asking us about our domain name .
So if you've already got a domain name registered with another company , that's fine .
I'm gonna show you how you can use that domain name with your site ground hosting .
If you've not got a domain name , you are gonna need to register one right now .
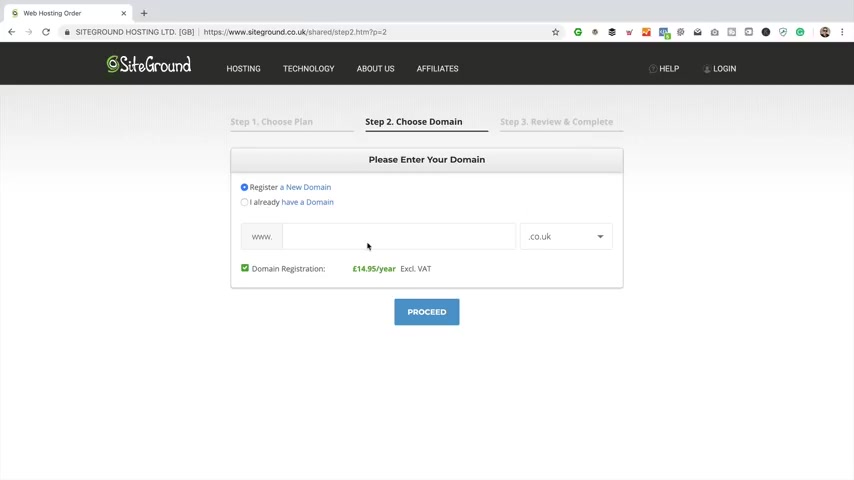
Domain name is basically the dot com or the dot co dot UK or the dot net or dot whatever you like .
There's lots of extensions , as you can see .
So you are gonna need a domain name in order to set up a website .
Because , of course , it's the thing that people will type into their browser .
To access your site , you can register one with site ground .
That might be easier for you .
Keep it all in one place and see they offer it for 14 95 a year , which is a pretty good price .
So to register a new domain name , you just simply type in what you'd like , Maybe something like my new domain name .
Then you come over here and you choose the extension you want .
Maybe you want a dot com , uh , and then you click Proceed , and it will sort that all out for you .
Obviously , you can only register a domain that is available .
You can't register a domain that's already been registered , so you may have to enter a few different things in to try and find one that you can order today .
Now I'm gonna choose I already have a domain because I've already got the domain name that I'm gonna be using today registered over at GoDaddy .
So I'm gonna enter that domain name into here .
And the debate I've got registered is best roof box dot com Just going to enter that in and click .
Proceed now , we've just got this final form to fill in .
It's all our account information .
So into your email and password .
I'm not gonna enter all this stuff right now .
That'd be a little bit boring .
Uh , enter your billing information to your name company if you've got one VA T if you've got one .
And all that stuff here is the payment information .
So enter your card details down here .
We've got the personal information .
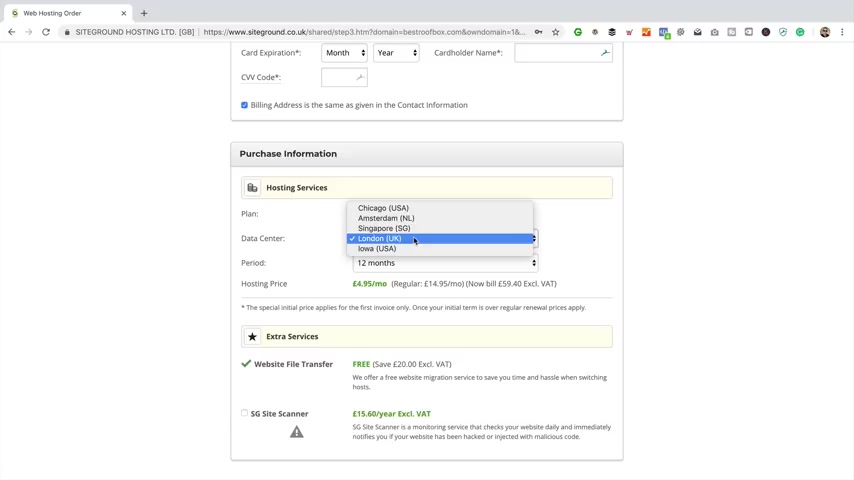
So this is the plan we've chosen .
Here's the data centre .
So you can adjust this if you like .
I'm actually gonna go for a US server because the site that I'm setting up is going to be targeting mainly US traffic .
So let's go for Chicago .
The next box is the period .
I would keep it on 12 months , but you can go longer if you like .
Let's keep with 12 months .
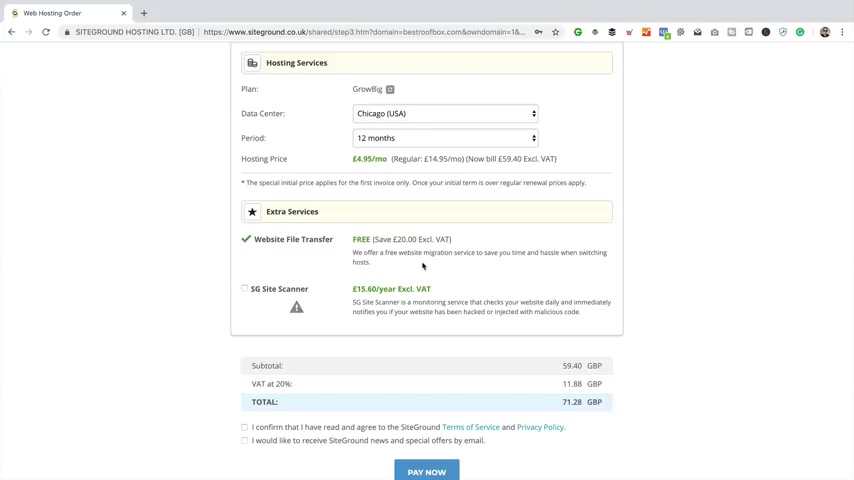
I wouldn't go for the one month that's got a set up fee and that kind of thing , So just stick with the 12 months down here .
We've got extra services .
There is a website file transfer thing , um , which we're not gonna need , obviously , because we're setting up a new site .
And then there is this site scanner thing , which again we're not gonna need because you can do site scanning stuff with some free WordPress plugins .
The final thing is , you just need to tick this box here to confirm the terms and conditions , and you can tick that one as well .
If you'd like to receive news and special offers by email and click pay now and you're all done .
So I'm just gonna go away and quickly set up my site ground account .
Uh , and then we'll move on to the next step , which will be to re point our existing domain names if we've already got one .
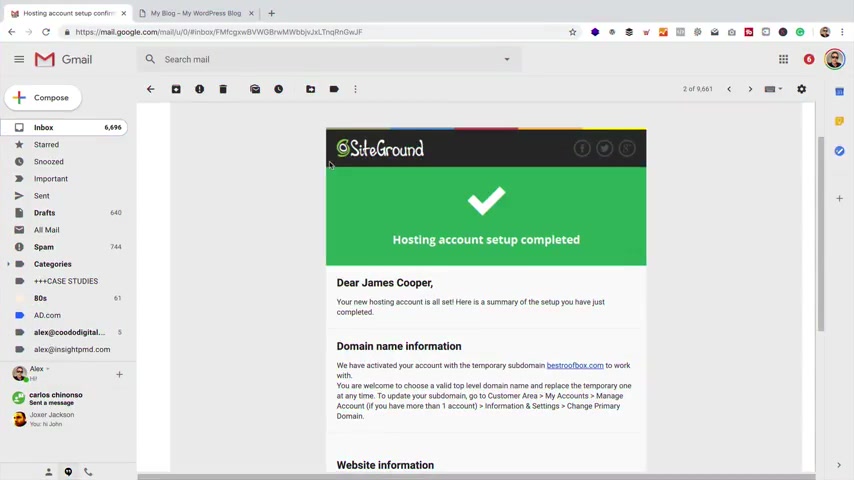
OK , so I filled in all the form and got signed up and purchased my new hosting .
And I've just received this email from Site Ground .
Now , this is quite an important email .
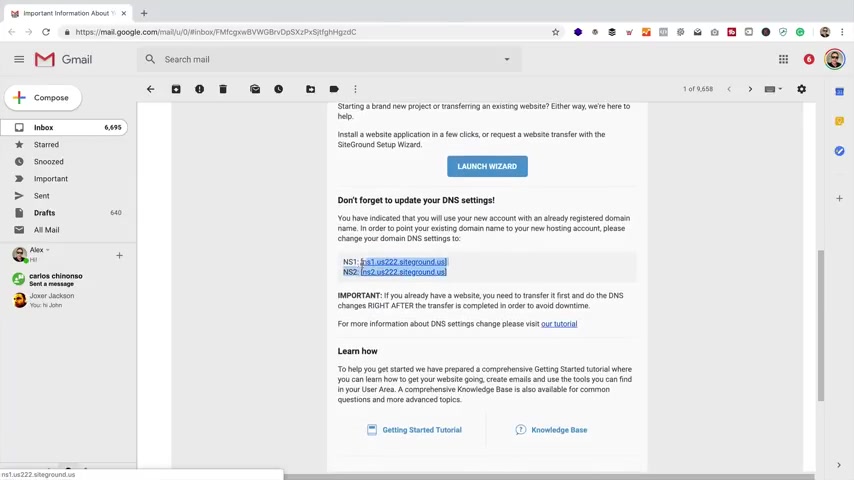
Hopefully you've received something very similar once you've signed up and this email basically contains everything we need to know when it comes to setting up our website , so The first thing I want to look at is these two name servers .
Now , this part of the video is specifically for people that have got a domain name registered with a different company .
So , for example , go daddy or name cheap or names star or one of those guys that registers domains for you .
If you've just registered a new domain name with site ground , then you can skip this step .
Um , but do keep in mind that new domain names take a little while to register .
So if it's not working , if you go to your domain name and you can't see anything , just give it a little bit more time .
As I say , it takes a little while for these domain names to register and for the settings to be sent all around the world and updated on all the different servers and all that kind of thing .
So if you are one of those people that did just register a new domain name with site ground , then you can skip forward a little bit in the video .
I'll put a time up on the screen .
Now skip forward to that time , and , uh , we'll carry on setting out WordPress for the rest of you that have got a domain name registered elsewhere like myself .
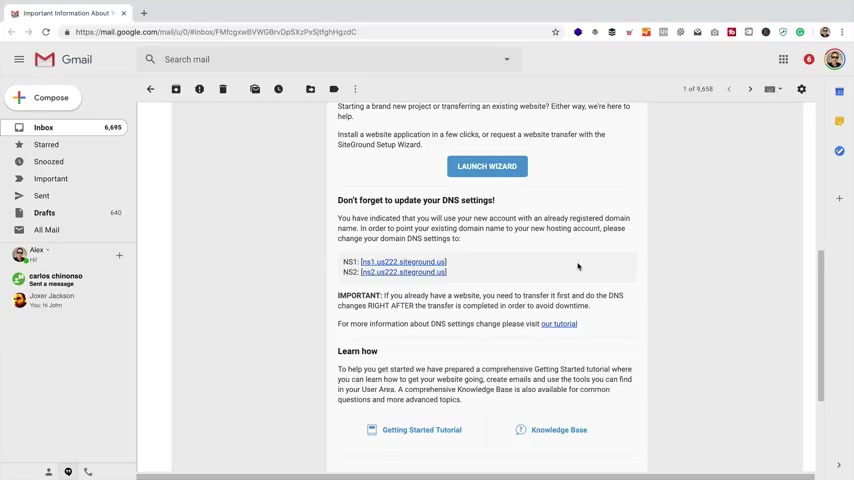
All we need to do is update the name servers on the domain with these ones .
So I'm gonna do it with Go , Daddy .
But the process is pretty much the same for all companies that register domains .
So I'm gonna head over to go .
Daddy , we're doing another tab now .
I'm already signed in , so I'm just gonna go over to manage domains .
I'm gonna find the domain that I want to just type it in here .
Best roof box dot com .
There it is .
Now , I'm gonna click on these three little dots here , and I'm gonna go to manage DNS .
So if you're not with go Daddy , just look for a similar kind of setting within your control panel .
That would be to do with DNS or name servers .
And then you should be able to go in there and change the name servers to the site ground ones .
So scroll down and go , Daddy .
And here we are .
Here's our name servers currently set to the default Go Daddy ones gonna click , change , gonna select custom .
Then we've got these two boxes here Back to the email .
Gonna copy NS one .
First , put that into my clipboard , paste it in and the next one NS two .
Copy that to the clipboard .
Paste it in .
So that's all done .
So I'm gonna wait a few minutes for this to all update and the settings to , you know , be spread around the world and update all the name servers in all the different countries .
And then when that's all done when I visit my domain name , I should be able to see a site ground holding page .
Once I see that I know that my domain name is pointing to my new site ground hosting .
And I can then carry on installing WordPress and setting up my website , which is what we're gonna be doing next .
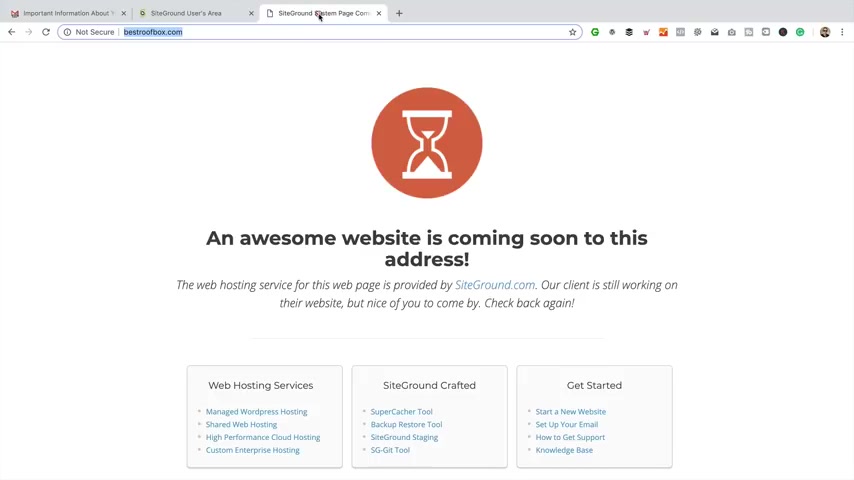
OK , so my domain is now pointing at my new site , ground hosting .
I know that because when I go to best roof box dot com , I enter it into my browser .
I see this page , which is the site ground holding page .
So we're good to go .
We're now ready to set up WordPress .
So let's do that right now .
I'm gonna pop back to the email that I got from Site ground .
Here it is .
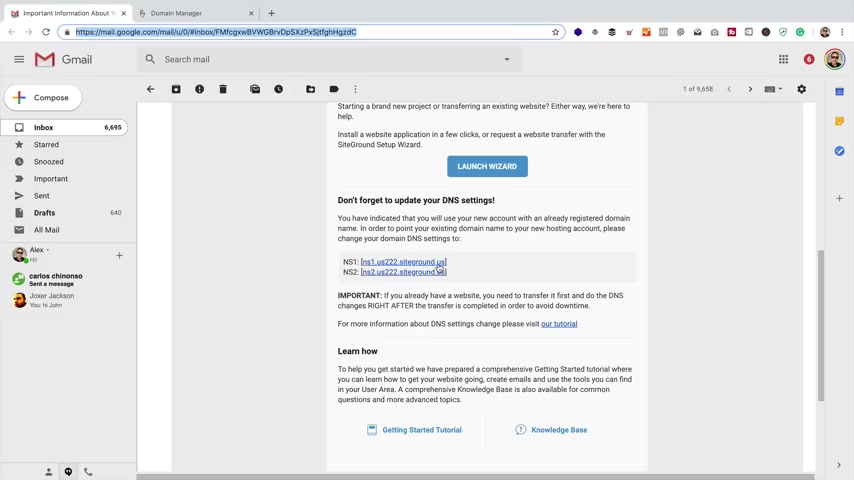
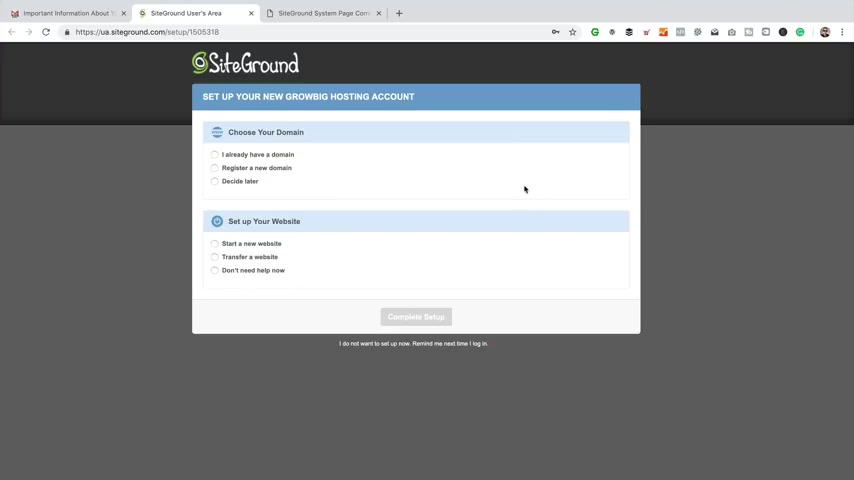
What I'm gonna do is I'm gonna click this big launch wizard button .
First question is , choose your domain .
Uh , I'm just gonna go for the side later on that or when it's auto chosen , the right one that I selected or entered when I registered .
So that's fine .
Hopefully , yours does the same .
And then the next question is set up your website .
I'm gonna select start a new website .
It asks the software that I want to install .
I wanna install WordPress .
Then down here , we need to enter some login details .
So enter your email address , so my eagle at WP eagle dot com .
Next , we need to enter a user name and this is the user name we're gonna use to log into a press .
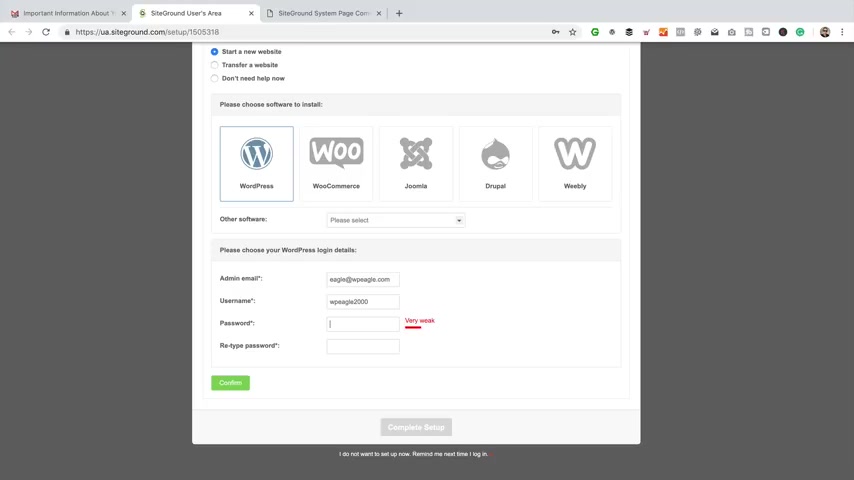
I think it needs to be eight characters or so long .
So let's go for something like WP Eagle 2000 .
Perfect .
There .
We need to enter a password .
So let me enter something in here , then retype it .
Uh , and then that's that .
Let's click Confirm , and we've got a tick there .
So that's perfect .
Tick , this box to confirm the terms of service and the privacy policy and click complete set up .
Gonna take a few moments .
There we go .
It says We're all done .
So let's proceed to the customer area .
And if we go to my accounts , this is where you'll be able to find your new hosting .
Here's mine .
I've got another one on the go as well with site ground bete dot co UK .
That's part of my hosting testing that I did , as I mentioned anyway .
So if we click manage account in here , this is where we can do everything to do with our hosting .
So here's our WordPress installation .
Here's all our information and settings , so there's your name , servers , your IP address , if you need it , FTP details and all that kind of good stuff .
Now , if you want to set up email addresses , that kind of thing , you'll find that in the C panel so you can click on that red button and all that stuff will be in there .
But anyway , let's go over to the website .
I've got it here .
So if I just refresh this , this is wordpress .
I mean , it looks a little bit broken at the moment because there's nothing on it .
But this is wordpress .
It's installed , and it seems to be up and running .
Fine site ground have also installed our SSL certificate because we've got a little padlock here that says the connection is secure .
So , you know , that's a good thing .
So the next thing we need to do is install our WordPress theme .
So what we're gonna do in this part of the video is install our WordPress theme .
WordPress theme basically gives the website its look and feel gives you all the functionality you need to lay stuff out and set colours and and all that kind of stuff .
The theme we're gonna be using today is a free theme , which is good news , of course .
Um , but there's a premium version available if you want a few extra features , Uh , maybe some support , that kind of thing , but you don't have to spend any money on it today .
Now , I've just had this email coming in from site ground , and it basically just confirms that everything is set up and complete .
And then if we scroll down , we got the , uh website information and this is where we go to log into WordPress so I can just click this link and takes me to this login screen .
So you just need to remember this , that you need to go to this page to log in and do stuff to your WordPress website WP hyphen login dot PHP Or indeed , you can just go to WP admin like that and you end up in the same place .
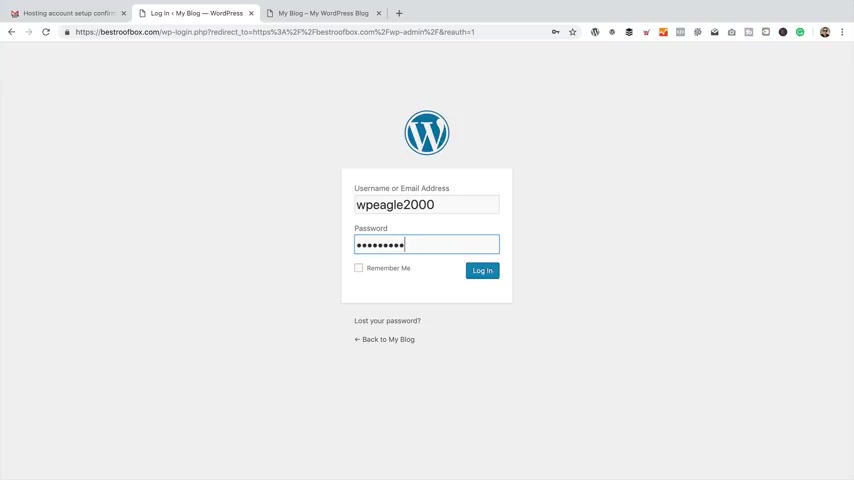
Now , the user name was the one that I said earlier , which , if you remember , was WP Eagle 2000 .
And then the password was the one that I entered .
So hopefully you've remembered what that was .
If you haven't , you can reset your password with this link here , Tick .
Remember me so that it doesn't keep asking me to log in all the time .
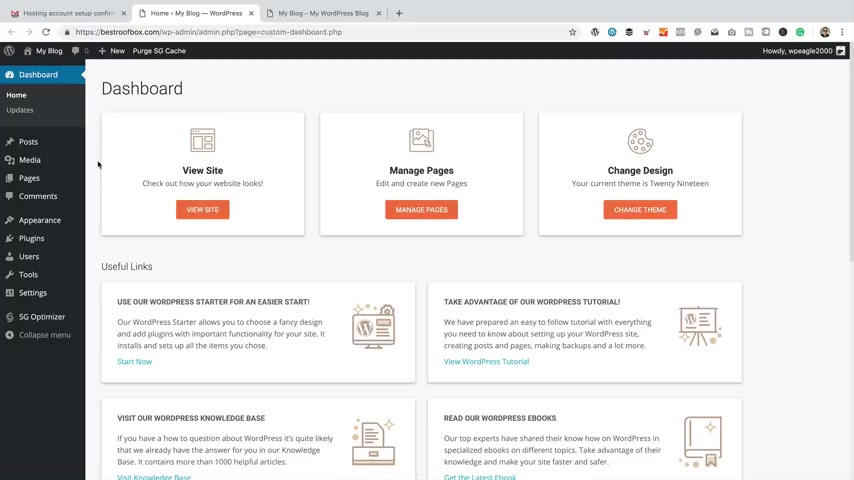
OK , so we're in .
This is our wordpress dashboard .
Hopefully , yours looks similar to this .
You may get this message pop up , or it may even look actually bigger than this and take over the whole screen .
It's the site ground WordPress starter wizard .
We're not gonna be using that today .
So if you do get this screen or indeed as , say , a screen that covers the whole thing .
Talking about WordPress starter .
Just click .
Don't show this again and you'll be fine and you'll be at this dashboard here .
So within the WordPress dashboard is where we do basically everything to do with WordPress so we can manage our posts and pages and comments and and all that kind of stuff .
And we'll be going into these sections in more detail as we start to add things to our website .
So let's get that theme installed .
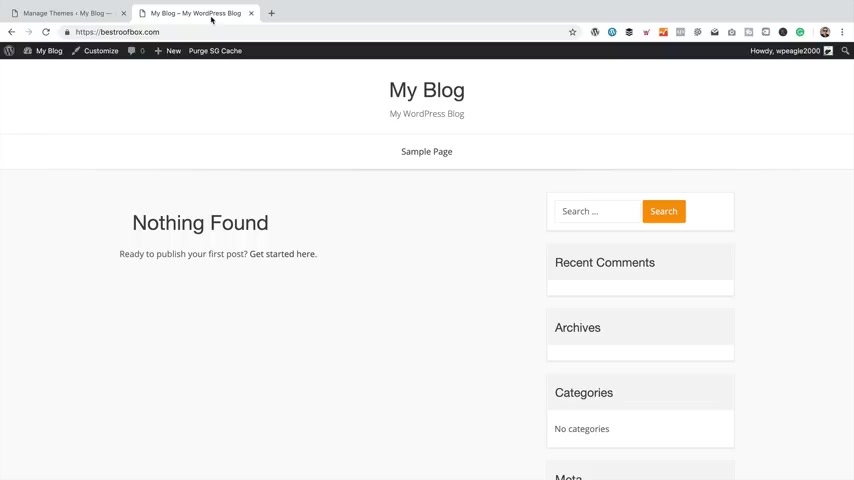
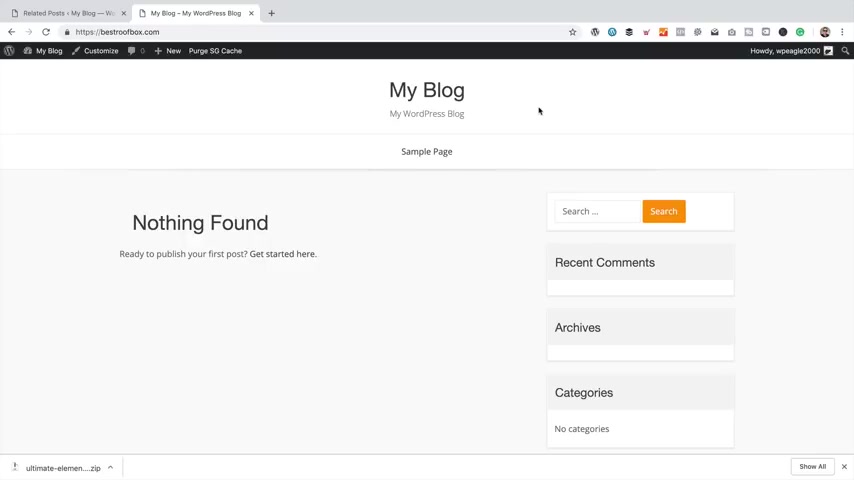
If you remember , the site looks like this at the moment .
A bit of a mess .
It's the default theme that comes with WordPress .
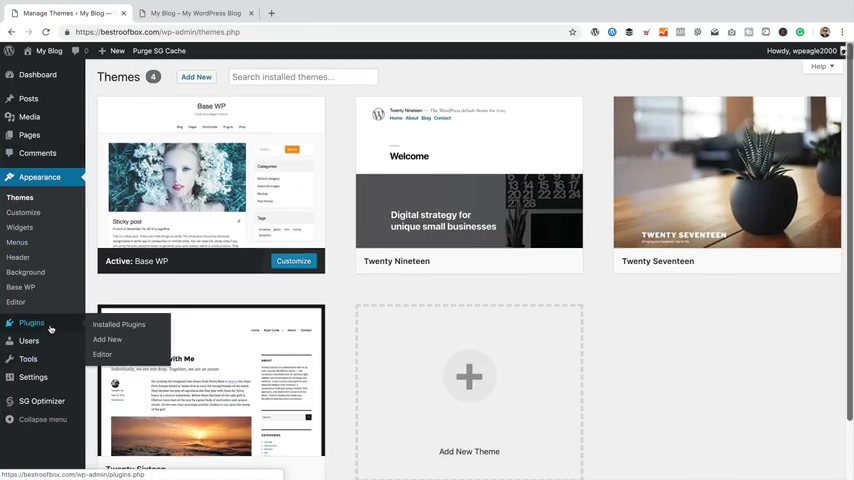
So let's install the theme we're gonna be using , went back into the dashboard , gone to appearance and then themes .
Then within here , I'm going to go add new , then in the search box over here .
I'm gonna type in base WP .
And it's the first one that comes up this one here and I'm gonna click install .
It's gonna take a few moments just gonna download it and install it .
It's done it already , and then I'm gonna click .
Activate to switch it on .
There we go .
That's all done .
So it's popped up a couple of little boxes .
We don't need those .
Click on the crosses .
Let's go back to the front of the website just here .
Let's refresh and see what it looks like .
There we go .
That looks a bit better , doesn't it ?
Obviously still quite a bit of work to do , but it's starting to come together .
So the next thing we need to do is install some plugins .
So let's do that now .
So let's install those plugins .
The first one I'm gonna install is elemental , which is the page builder we're gonna be using to put together our posts and our pages .
As I mentioned at the beginning of the video , I've got some element or templates that we're gonna be using to kind of get the pages and post up and running really quickly .
And then all you need to do is , uh , you know , edit them and make them your own .
You'll find a link to the page on my website where you can download all of the elemental templates in the description of this video .
So let's get elementary installed to get back into the dashboard .
I'm then going to go to Plugins and add new , then in the search box .
I'm gonna type in element to that .
It's the first one that comes up .
Just click install , then activate .
So there we go .
We got elemental installed and ready to go .
Now there is a pro version of element uh , that you might be interested in .
You'll find a link , Um , to that in the description of this video pro gives you a few extra features like you can have global layouts .
You can use templates .
It gives you a few extra modules that you can use on your pages .
It's not gonna be required for this tutorial , but so you might want to invest in it going forward just to give you that extra functionality .
I use it quite a bit , and , uh , I think the pro is well worth it .

Now , the next plug in we're gonna install is called Ultimate add-ons for element to , and this gives us a few cool things that we're gonna be using within some of the posts that I'm gonna be adding .
So you may or may not want this , I would recommend it .
The main thing that I like about this particular plug in is that it gives you tables that you can use within your posts .
And tables are really good for displaying product information , doing comparisons and just really making your posts come alive and add that extra bit of value .
So if you want to follow exactly what I'm doing in this tutorial with regards to adding tables to posts , then I recommend that you get this .
Add on now .
The cost for the plug-in is just $49 for the one site .
I think that gives you a year's worth of updates .
So it's not a huge amount to invest as , say , you'll find a link in the description , and in fact , I'll put one up in a card as well .
The link is an affiliate link , So yeah , thank you very much if you use it .
But I only do recommend stuff that I use myself and that I think is worth spending money on .

So yeah , go take a look .
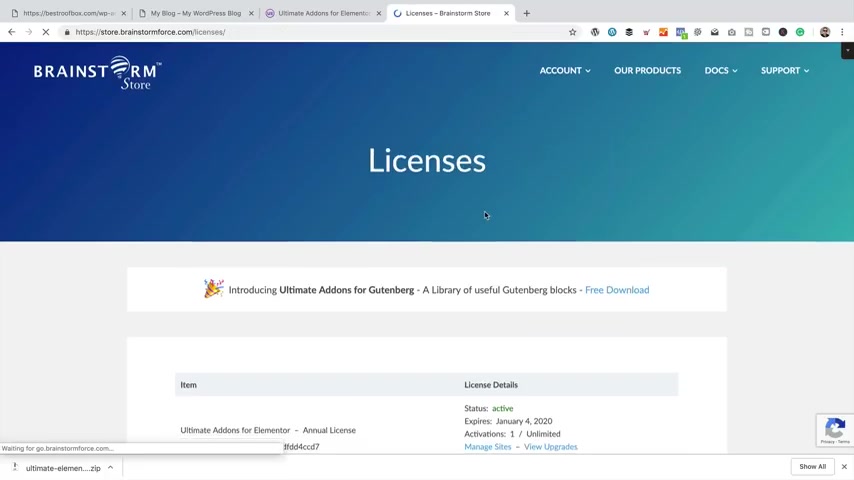
So let's go and get this plug in that I'm talking about opening a tab .
I'm gonna go over via my link , which is W PE dot com UAE .
And here it is now .
I've already got a copy of this , funnily enough , so I'm not gonna buy it again , But , yeah , you'll need to buy it by clicking on by now .
And as I said , I think it's just $49 .
Yeah , which it is , So I'd go for that one .
Once you have purchased it , you'll be able to access the download area .
Here we go .
I'm just gonna click here to download it .
Gonna download it into my downloads folder .
That'll be fine .
There we go .
That's downloaded .
Then I'm gonna pop back to the website , gonna go to plug ins and then add new .
But then I'm gonna click , upload plug in , choose file .
Then I'm gonna select that file that I just downloaded .
Here it is .
Click open , then install .
Now , then I'm gonna click .
Activate .
There we go .
So we need to activate that plug in now .
So I'm gonna click on this link here so we can find this licence key .
If we go back to the store , then go to account and licences .
Uh , there we go .
There's my key .
I'm just gonna copy that into the clipboard , back to site past it in , and then activate and that's done .
So there's just one more plug in that I'm gonna add now .
And this plug in gives us our related posts , which is basically some lovely links that you get at the bottom of the posts linking to other posts on your site that are related .
Funny enough , and it does what it says on the tin .
So to add this plug in , I'm gonna go to add new and in the search box , you can type in related posts for WordPress .
There's this one here , the first one that comes up and click Install now and then activate .
Yeah , well , that's weird .
It's throwing up an error .
Hm .
I'm sure there's nothing to worry about .
Let's just go back to the dashboard , which is gonna take off this bit that comes after W PE hyphen admin .
It's gonna go back to the dashboard and go back into Plugins .
Sometimes you get these weird little error messages in WordPress with Plugins .
But as we can see , it's here and it's active , so nothing to worry about .
Just double check the settings .
All looks fine .
Might come back in here later if we need to make some changes So we've got our theme installed .
We got our plugins installed .
I think the next thing to do is start adding some content and making the site our own .
Give it a name and a home page and that kind of thing .
So , uh , yeah , let's do that next .
So in this section of the video , what we're gonna do is give the site a name and a strap line , and we're gonna add a home page .
So let's start with this name at the top .
It's pretty easy to change .
We go up here and go back into the dashboard , we go to settings .
And , General , we can enter our site title in here .
I'm gonna enter best roof box , and that's what the domain is .
Then here we can enter the tagline .
Something like Find , um , I Let's do capitals find the best roof box for no capital on that one .
You Well , maybe we should have a capital on that one .
I'll do my English is great , isn't it ?
Ok , let's go down and save that .
Let's go back and take a look .
OK , so that's changed .
So let's do the home page .
As I said , I've got a template for this .
So get you kind of up and running really quickly .
And then all you need to do is make some tweaks here or there if you want to .
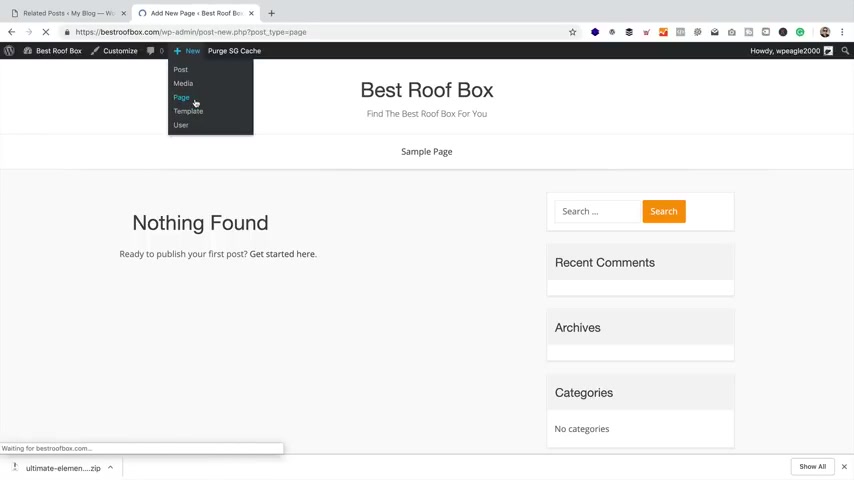
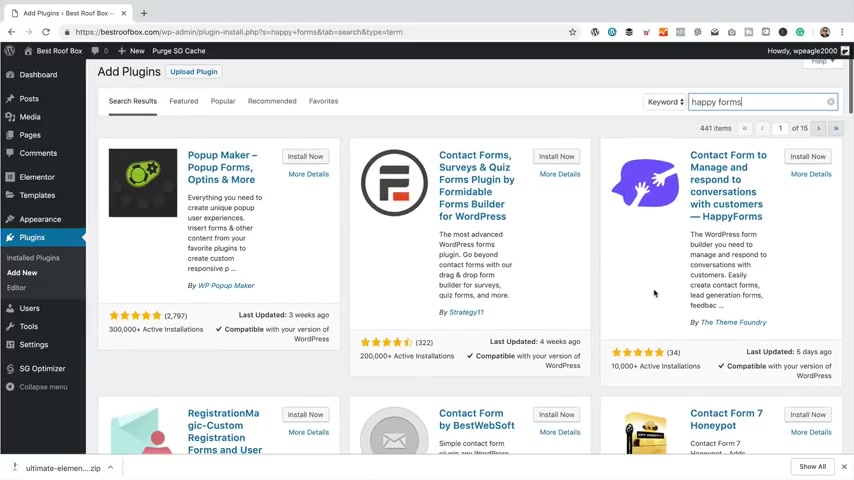
So let's create a new page .
I'm gonna come up here to New and then Page , Let's close this other tab down .
We don't need that anymore .
It is confusing .
Here's our new page and get rid of the tips .
Don't need them .
The title is gonna be home page .
That's a good good name for a home page .
Then I'm gonna click , publish and then publish again .
Now , this is the Gutenberg editor that we're looking at here , which is the default WordPress editor .
We're not gonna be using that for this site .
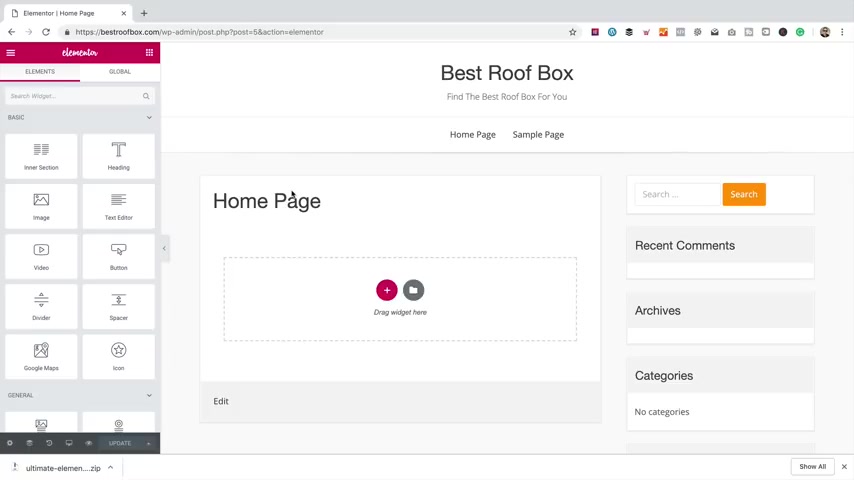
So let's click up here and switch to Elemental .
The button says edit with elementary is all you need , and this is much better cos it's nice and drag and drop and easy to use .
So let's add that template , and so you'll need these templates saved on your computer .
So if you haven't got them , um , yet then head over to WP eagle dot com .
You'll find a link in the description to the blog post that you need on W PE dot com , and then within that post are the links to the downloads .
Download all the files to your computer and then you'll be ready to go .
So once you have those files and come in here and click on this Grey folder thing , then up here on the right hand side there's this little arrow , which says Import template .
Let's click that and then you need to find the files on your computer .
You can do that by clicking the green button .
So here's a couple of templates .
I've got the home page one here , so yeah , you select the home page one that you downloaded from my website .
Select it , click open .
And there it is .
Let's click Insert just warning you that it's gonna overwrite whatever is already there .
Press .
Yes , here we go .
So it's looking a little bit squashed , so we need to make a few little changes .
When we come down to the bottom left , you'll find this settings , uh , section a little cog .
Give that a click .
First thing we need to do is , uh , change the page layout .
We're gonna change it to element or full width like that .
It's looking better .
And that should lose the title , that we can just switch this head high title to Yes , and , uh , it's definitely gone .
Then for sure , let's click Update .
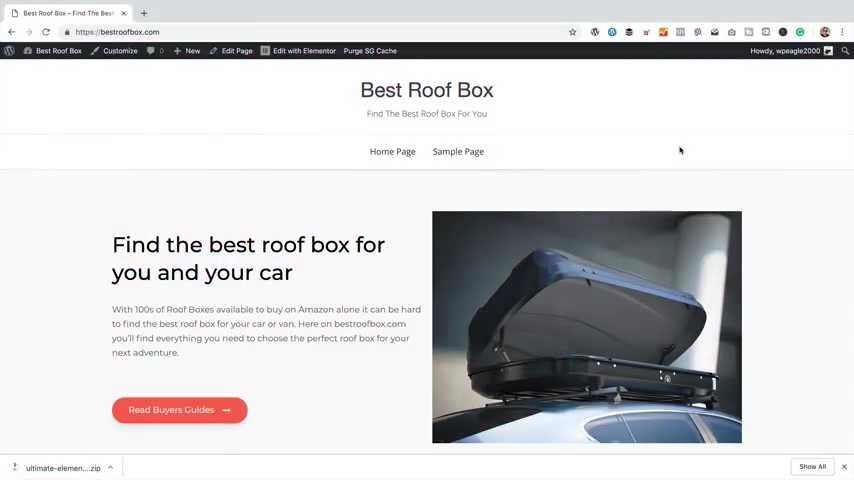
Then if we come up here to this little burger menu , the free lines we can then click here to view the page .
There we go .

That's our home page .
Now there's obviously no guides or articles showing just yet because we need to add some , which is what we'll be doing very shortly .
Of course , you're gonna need to edit this page so that it fits your niche .
So , um , I'm gonna show you how to do that right now , But before we do that , let's just set this as the home page because at the moment it's just like a normal page .
Um , it's not gonna be the default page that comes up when people come to the site and show you that by clicking on the title here and going back to the actual home page and we can see that it's not here .
So let's just set it as the home page to do that .
I'm gonna come back into the dashboard , then in settings and reading .
And then we've got this option at the top here that says your home page displays tick that to be a static page , and then I'm gonna select home page , which was the page obviously we just created .
If you call it something else , you'll need to select that one .
So that's saved .
Now let's go back to the site .
And here it is .
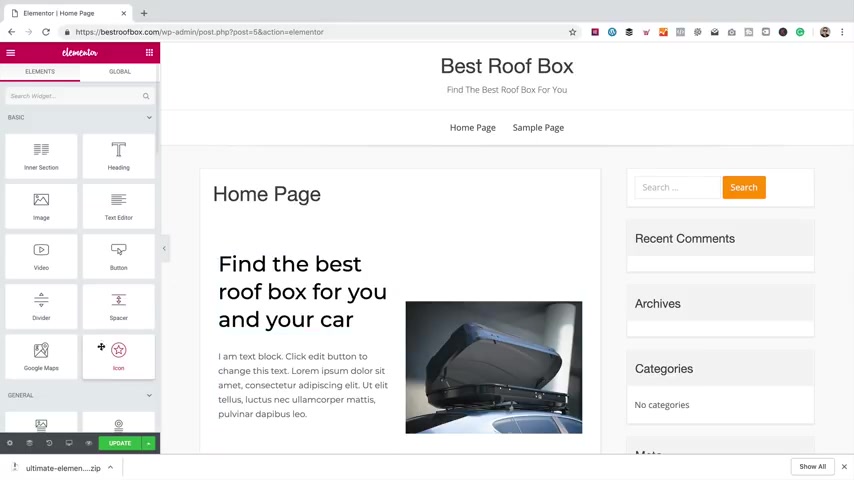
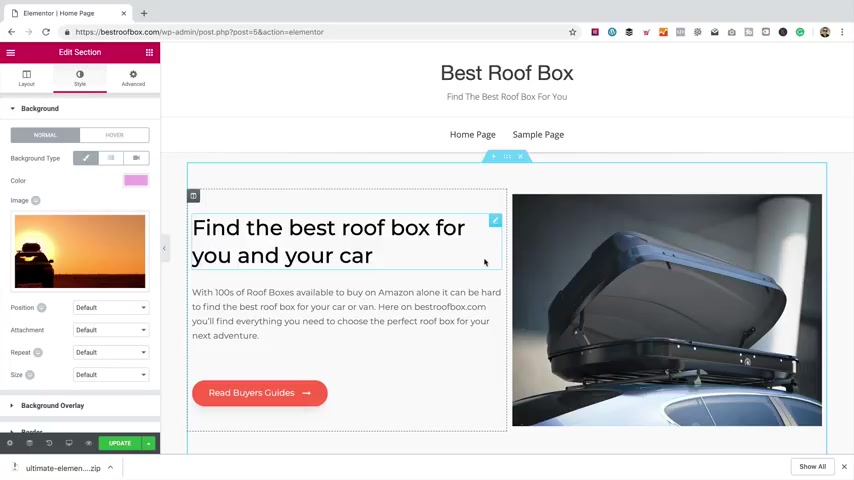
So let me just show you how , um , you would change this because I can actually see that there's a little bit of text there that I need to change because it's all gibberish .
So we're gonna do it all with element or element , or depending on how you say it .
So come on to the top and click edit with elemental .
And here we go .
We're now ready to make some edits , so it's very simple .
You just click on what you want to change and , you know , just start typing away .
It's just like any other word processor .
You can highlight text .
You can make it bold .
Underline italic .
Whatever you need .
Really .
Let's put that back .
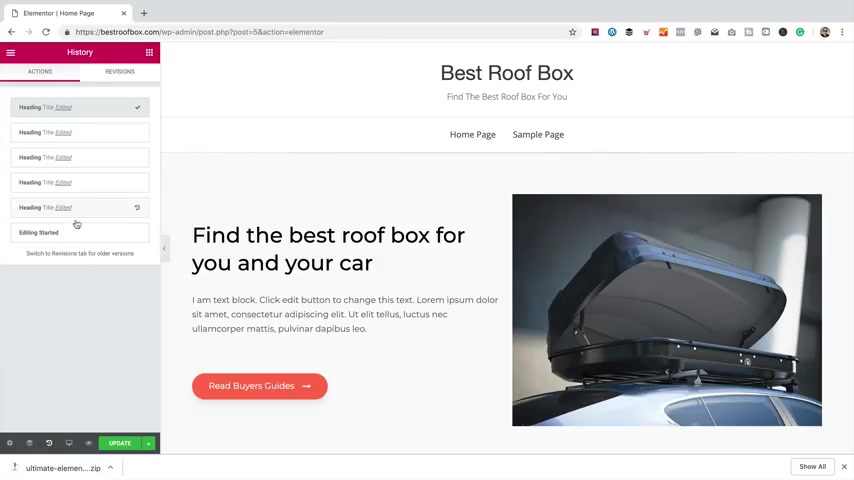
There is actually an undo down here .
You've got a history where you can see what you've done , and you can then go back in time if you need to .
Let's have a look at this text box .
So again , this works very much the same .
You could just type away with hundreds of roof boxes .
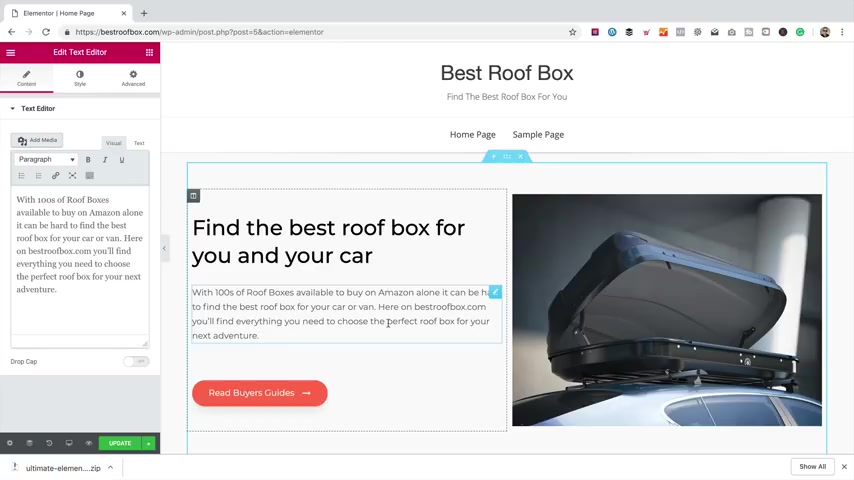
I just basically need a little bit of blurb .
See what ?
Let me just paste it from my clipboard .
That's better .
I just copied it on my computer and then pasted it into this one .
So yeah , you just you just type away .
It's just like any kind of word processor .
There are some options up here for your styling , so , uh , you can change the text colour .
You can adjust the typography , so the sizes , the weight , you know , maybe you want it bold or , you know , rarely thin entirely up to you .
I'm just gonna leave it as default and just the front family line height , letter spacing , basically everything to do with the text all in here really easy to play around with .
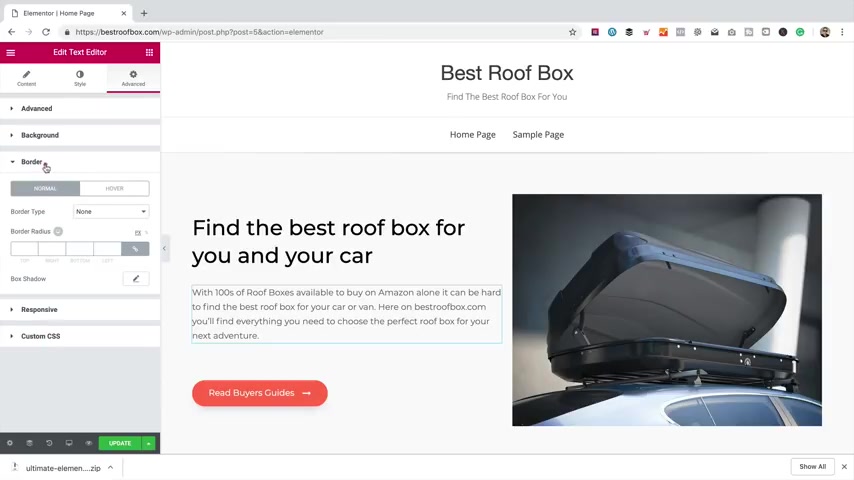
You've got an advanced option where if you need to adjust the spacing or the padding that's all in here , too , you can add a background Maybe you wanna have , like , a gradient background like that .
You know , just add two colours and it does it for you .
Or you can just have a a solid colour .
Or indeed , you can have an image whenever you like .
You can have borders .
I mean , with elemental .
It really is powerful and flexible and easy to use .
So , um , if you've used a word processor or something like that before you , you should be able to find your way around here pretty easily .
The other thing I love about Elemental is you can just right click on an element to change it .
So just right .
Click on the heading , select , Edit Heading and you can do it all over here , your alignments and and all that kind of stuff and again style .
And , uh , the advanced features are all in there now .
A page is made up of of sections which is then broken down into columns if you want .
So this blue box is kind of covering this top section here .
Come down .
This is another section here with the blue line around it .
And this is the third one here .
If you wanted to move them around .
You just get hold of it by these dots , and then you can just drag it around really easy to change your LA Wanna bring it back down here ?
Let's do that .
There we go .
I wanna change any of the options for a particular section again .
It's just a right click .
You can edit the column .
Just the width , the positions .
Uh , obviously the style .
So set backgrounds and borders .
And , yeah , whatever you like .
Really .
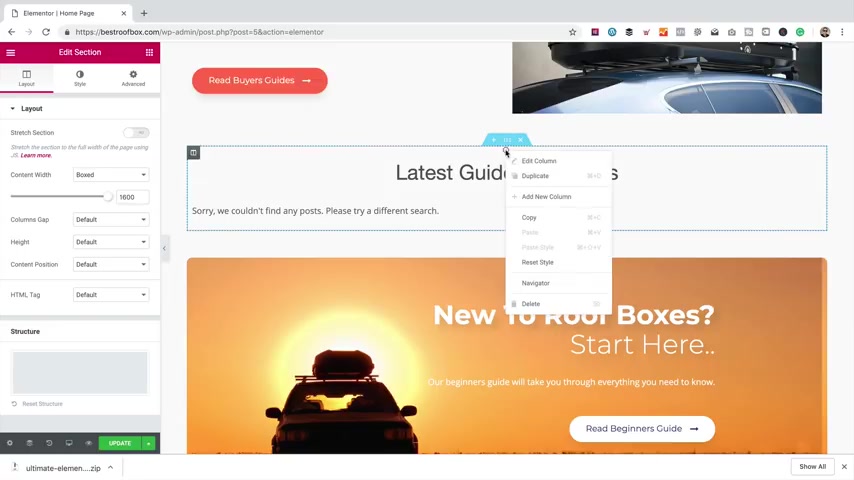
This top section is made up of two columns .
See that if we go right click and edit section .
See there , it's got the two columns .
Now what I've done with this particular section is in the advanced area that under responsive I've reversed the columns round .
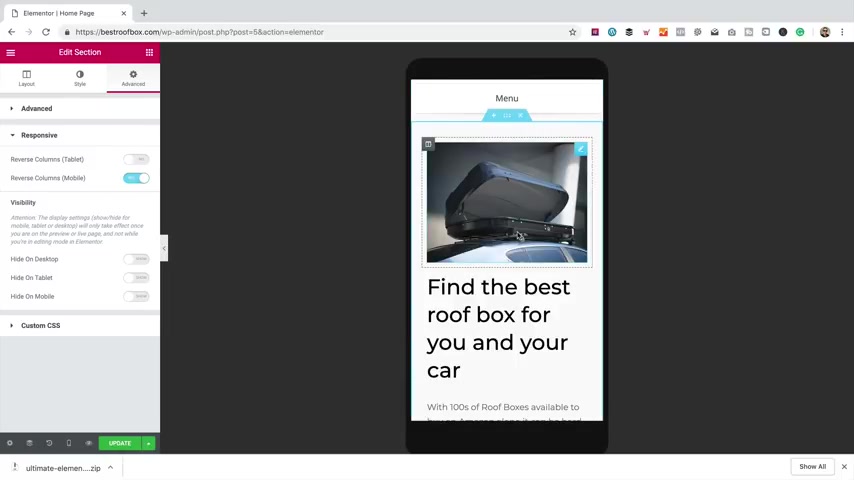
If that makes sense , so when viewing from a mobile , what it's gonna do is it's gonna squish this down , and I can show you that by coming down here and clicking on responsive mode , a select mobile , we can actually see what it looks like on a mobile , and you can see that it's put the , uh , the image first .
So basically , swap those columns around , turn it off .
You'll see the difference puts the image at the bottom .
It's entirely up to you , but I just prefer the image at the top on mobiles .
So let's just go back to the desktop view .
This button here is very much the same as the titles and the text .
Just click on it and you can make some changes .
So in here you can change the text on the button .
You can add the link , uh , which is something I'll do .
Once I've added , uh , some of the buyers' guides .
I'll come back here and link through to the buyers guide category .
Change the icon .
You can change the icon position and all the other stuff really to do with the button in here .
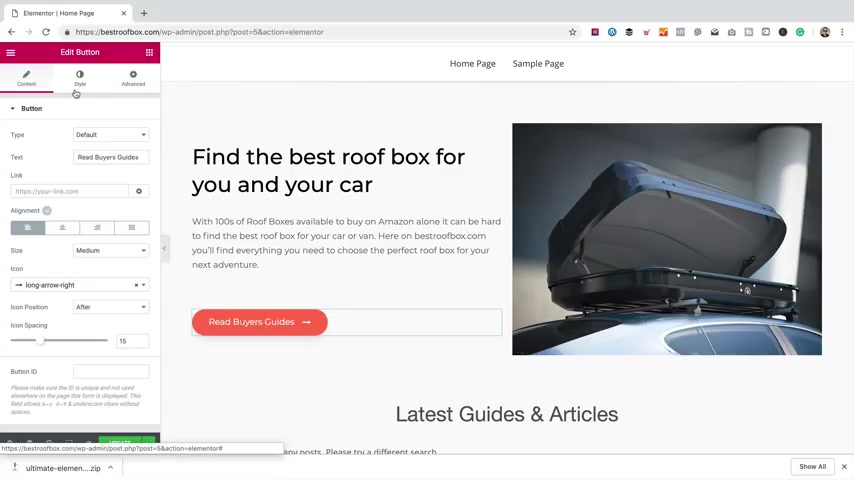
You got the colours and in here again , you've got the margin padding backgrounds and other interesting stuff that I'm not going to go into all of these settings on every single element but will be far too long .
And I really want to keep this video to a manageable length .
So these images that I've added I got them from I stop photo , which is one of my favourite places to get photos from at the moment .
Now you do have to pay .
I've got a subscription where I can download a certain number of images every single month .
I'll put a link to I , doc in a card or in the description now so you can go check it out .
It is an affiliate link , Of course .
So I really appreciate it if you use it , but yeah , I find it a really great place to get images .
Obviously , if you don't want to spend any money on images , there are some free stock , um , photo resources .
Again , you'll find links to those in the description .
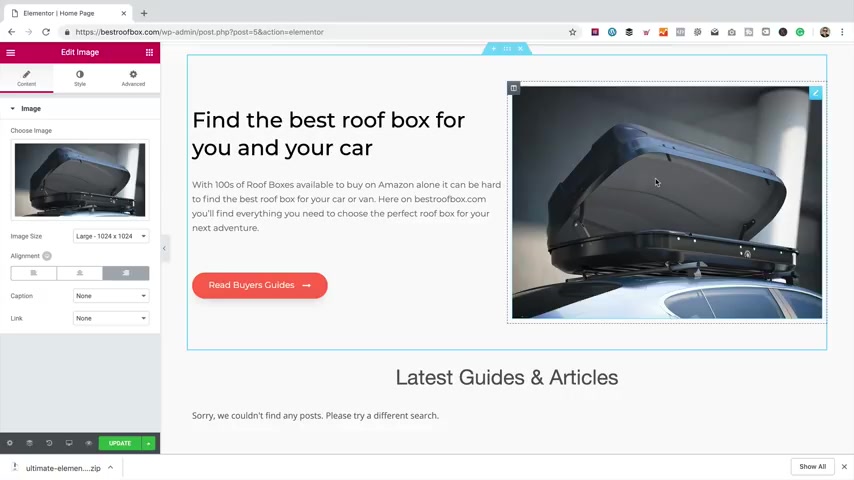
If you do change the image , I've set this image to a size of 1000 24 by 1000 and 24 .
So let's keep that in mind that that's going to be the kind of size of image that you want to add here .
If you want to change this image , which I guess you do , because you probably don't want a picture of a roof box on your site , just right .
Click .
Go to edit image .
It's got this panel over here .
It was already loaded .
Actually , you don't need to right click .
You can just click on it um And then you can just click , delete , and then you can upload a file from your computer .
I'm gonna go back into the media library and choose that one and put it back .
There we go .
Same applies down here .
So here I've just basically set an image as a background , a right click edit section , and then go into style and see it there .
Now , this image let me just double check The size is 1190 by 453 .
So , again , if you want to change it to something of a similar size , that is the , um the size of the image you're gonna want to upload .
It works pretty much the same .
You click on here , then you can upload a new file .
So that's the home page .
That's pretty easy , wasn't it ?
And always remember , when you make any changes , tournament , you're gonna want to save it by coming down here and clicking update .
What I'm gonna do now in the next part of the video is I'm gonna add the categories and sort this menu out , and then I'm gonna start adding some content to those categories .
I'm gonna show you how to put together some content .
I've actually purchased a load of content from some of my writers .
Got it all ready to go .
I'm just gonna show you how that content , uh , is added to the site .
I'm gonna add some images , some tables and , of course , some links through to Amazon .
And , of course , those links are gonna be affiliate links .
If you got this far in the video , you're doing really well making good progress .
Let's get on with it .
So I think the site's really looking pretty good .
But let's get this menu sorted .
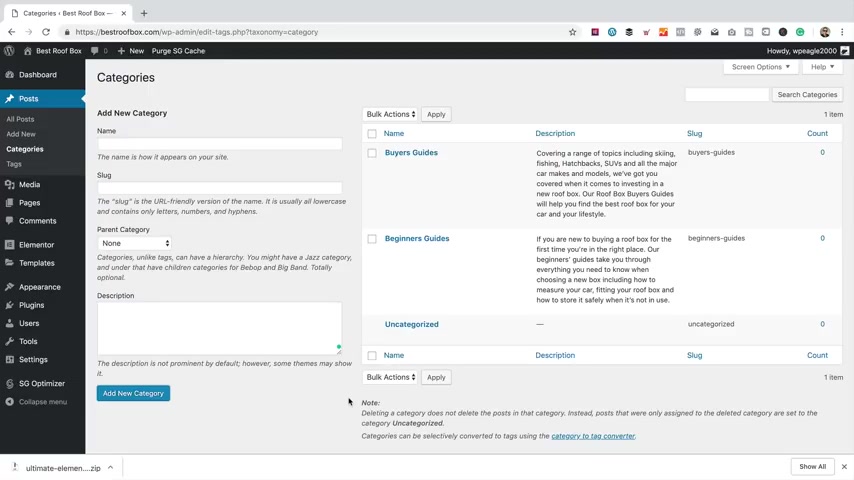
Let's add our categories that we're gonna be adding our content to So a category is just basically a way of grouping posts together .
So on this particular site , I'm only gonna have a couple of categories .
I'm gonna have a beginner's guides category , and I'm also gonna have a buyers' guides category .
So let's add them .
Now we go into the dashboard and I'm gonna go down to posts and categories .
At the moment , we've just got the one it's called UNC Categorised .
And that's just basically where WordPress puts posts that don't have a category that's fair enough .
So let's add our first one .
So I'm gonna have a beginner's guide .
We begin as guides .
Even that makes more sense .
Is it gonna be more than one ?
I don't need to enter anything for the slug .
It will do that automatically for me .
Then in here we can put a little bit of a description .
Now .
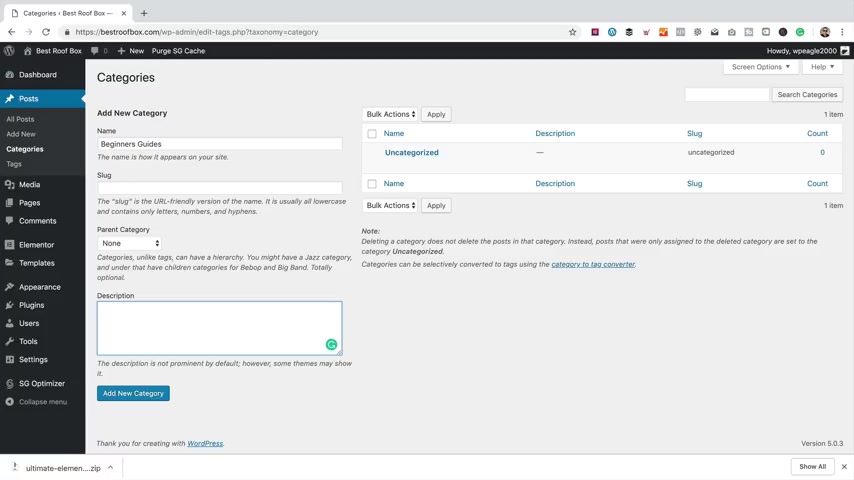
I think it's a good idea to put something in here because it's displayed at the top of the category and you know it's useful for visitors .
And it's also useful , Uh , from an SEO point of view , you know , to get some , uh , keywords onto the page , that kind of thing .
So I'm only gonna put a couple of lines .
I've actually got something that I've already written .
I've got it in my clipboard , ready to paste in .
So there we go , pasted that in .
You can see it's just some simple blurb .
Try to include a few keywords like roof box and beginner and that kind of thing .
But yeah , you probably don't want to make it too long .
So let's add this category by clicking .
Add new category .
Let's have my second category .
This one is buyers .
Guides can have parent categories , by the way .
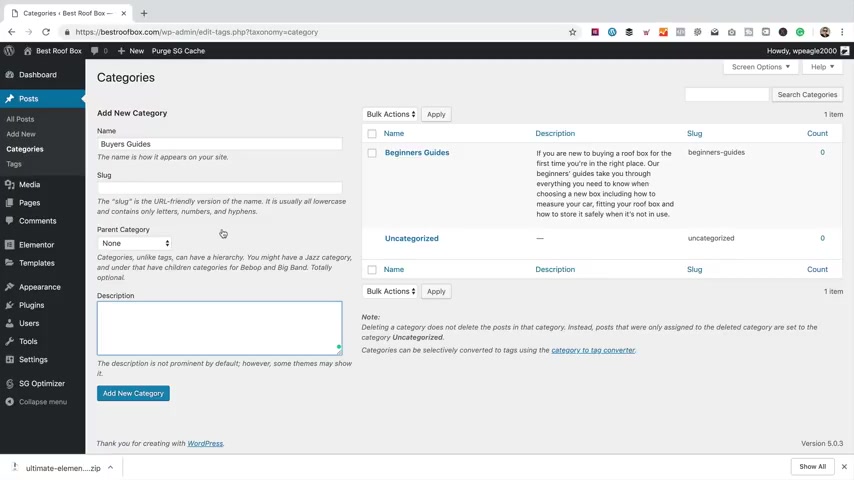
So if you want to kind of have a logical structure to categories , if you've got a lot of them , you can have , uh , yeah , this kind of layered approach by using parents .
But I'm not going to be doing that today .
I've only got two categories , so let me just paste some text into this box .
There we go .
Now , of course , you're gonna add the categories that are relevant to your niche .
I do recommend keeping it simple , though .
Don't have too many for me .
I'm just gonna have the two because I want a really simple site on it , easy to navigate .
And it just makes sense to have these two .
So the beginner's guide is gonna be for the first time buyers or a roof box .
You know how to measure a roof box , how to choose a roof box , that kind of thing .
Uh and then the buyers guides are gonna be for specific purposes around a roof box , like , you know , best roof box for fishing or skiing .
Um , best roof box for a hatchback , that kind of thing .
So I think that's all done .
Let's click .
Add new category There we go .
So what I'm gonna do now is I'm gonna add them to the top menu .
To do that , I'm gonna go into appearance and then menus .
I'm gonna create a menu and call it main menu by typing into that box and then clicking , create menu over here .
Then I'm gonna set the display location as primary .
Then I'm gonna choose the categories which are in here where it should be .
Just click View that out and click .
Add to menu and let's click Save , Let's visit the site .
There we go .
They're there , Ready to go .
Ready for me to add some articles to .
But before we do that , what I'm gonna do is add a few more links to this menu .
I'm gonna add a link to the home page .
I'm also gonna add an about US page and a contact us page .
I think they're two useful pages to have .
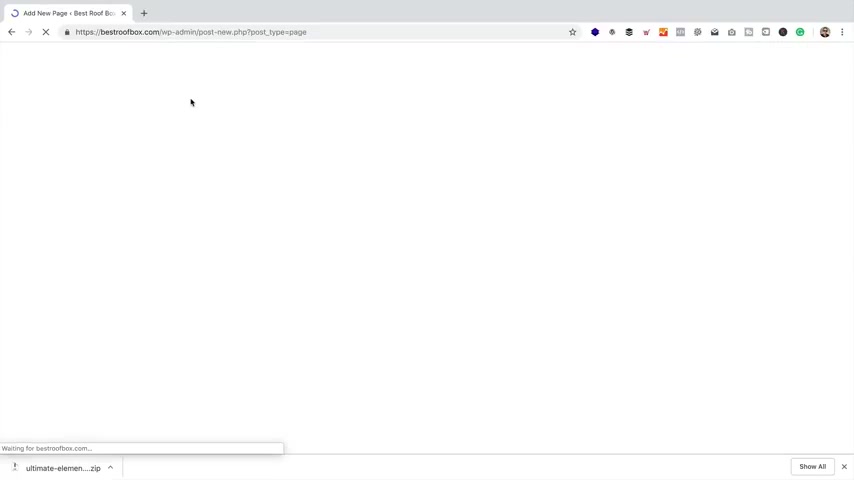
So first I'm gonna add the about us page .
Gonna go new page now .
I've actually got a template ready to go on this again .
You can download this from WP eagle dot com .
Find the link in the video description .
Let's call it about us .
Let's click , publish and then publish again .
That's published .
Let's click Edit with Element to I don't know why I say it like that element element element to sounds better , doesn't it ?
Anyway , I'm gonna click on the Grey folder and then I'm gonna click on the little arrow to upload the template .
But of course , I've already downloaded from W PE dot com Select file .
There it is about us .
Do Jason .
Now , you might not want to do this .
It's only a very simple page in the day .
You don't need to have too much on it .
Maybe just a picture and a bit of text , which is exactly what I've got .
As you'll see , let's click insert .
And yes , there we go .
I'm just gonna leave it like that .
I'm gonna leave this sidebar because we'll be adding some stuff to that , Uh , a bit later , we'll be adding , you know , recent posts and , um , some ad sense or something like that .
So yeah , this layout is fine .
That's the about us page Done .
Let's click update .
There we go .
Now , the next page I'm gonna add is the contact US page and the contact us Page is just simply going to have a form that people can put some information into and send me a message .
Simple as that .
Now , to do the form I'm gonna need to add another plug in probably should have done it at the beginning .
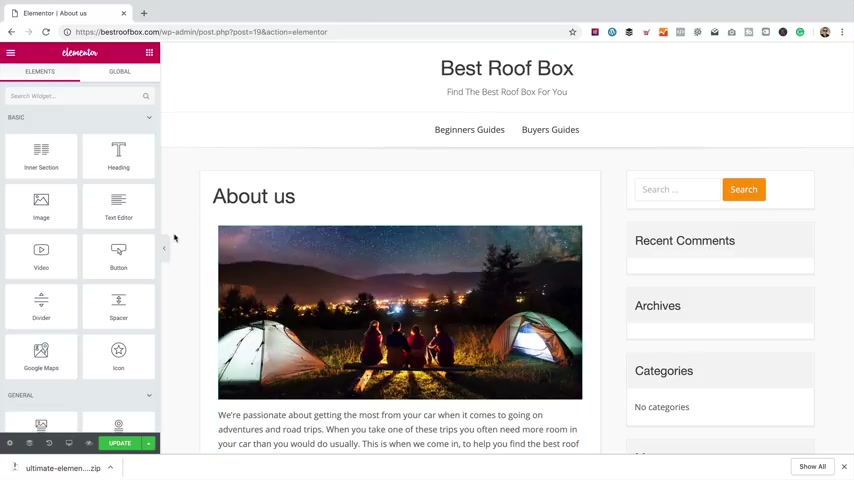
But hey , we'll do it now .
So the plug-in is called Happy forms .
Let's go and add it .
I'm gonna go to the dashboard .
It's really great Plug in , um , for doing forms .
It's free as well .
So nothing to spend .
It's free as well , which is obviously good news .
So I'm just gonna go into plugins and add new .
And then I'm gonna type in happy forms in this search box .
Um , for some reason , it's not the first one that's come up .
It's actually this one over here or this kind of purply hand icon thing .
Whatever that is that's installed .
Let's click Activate so asking for my email address you don't need to enter that you can just click Continue now we're ready to go , so it's already created a form that we can use to play around with .
Let's let's go for that .
Give it a click .
I'm gonna call it contact as we've got a name .
Field .
Um , we've got this .

What's your reason for contacting us ?
I don't want that .
Mhm .
Go right down and click .
Delete over here .
Um , with this age thing , we don't need that .
I'm just clicking on the pencil .
Then it opens them up over here so you can play around with them , scroll down to the bottom .
Oh , wow .
There's a lot of options on this one right down .
Here we go .
Delete .
I think all we need to add is the email .
So let's , uh , let's just click that and then that appears Over here , we can drag it up a little bit .
I don't actually want it there .
I want it there .
That's it .
That's fine .
This is required .
That's perfect .
And I suppose you could add a phone number as well .
They I doubt I'll be ringing anyone , but who knows ?
Let's just drag that to there .
That can be optional .
I don't need people to give me their phone number .
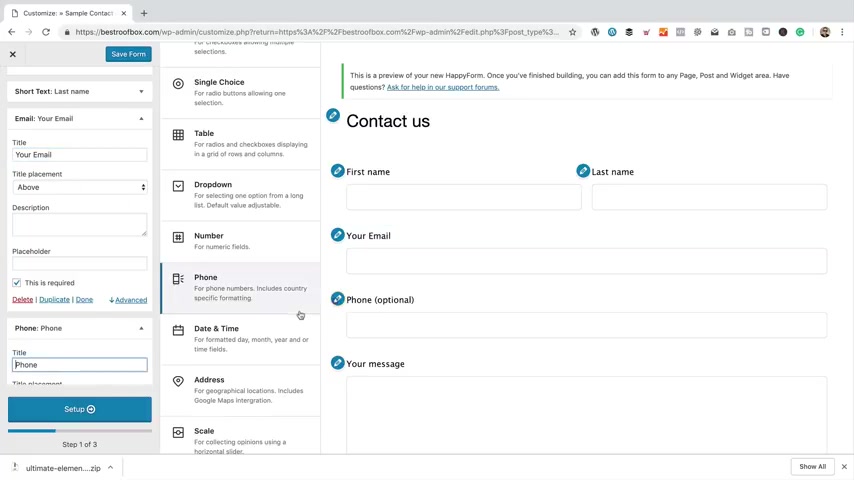
I want to change , um , the titles on these .
Just edit them and just type in where it says Title .
Very easy .
Very easy .
Your phone .
There we go .
That's about right .
For a contact form , let's click .
Set up .
This is the message .
Um , that's gonna appear when someone sends a message .
That's fine .
It's gonna send it through to me .
And this is my email address , and this is what the email subject is gonna be .
I mean , obviously you can play around with this if you like .
To me , it's fine .
It change the button to say , send message and a Google recapture .
If you get a load of spam , I'll leave it for now .
That's fine .
And the next is a whole load of style options .
So whips and padding and and all that kind of stuff .
I'm not gonna play with any of that right now because I think it will just be fine as it is .
So save and close .
There we go .
We've got a contact form .
So all we need now is a contact page .
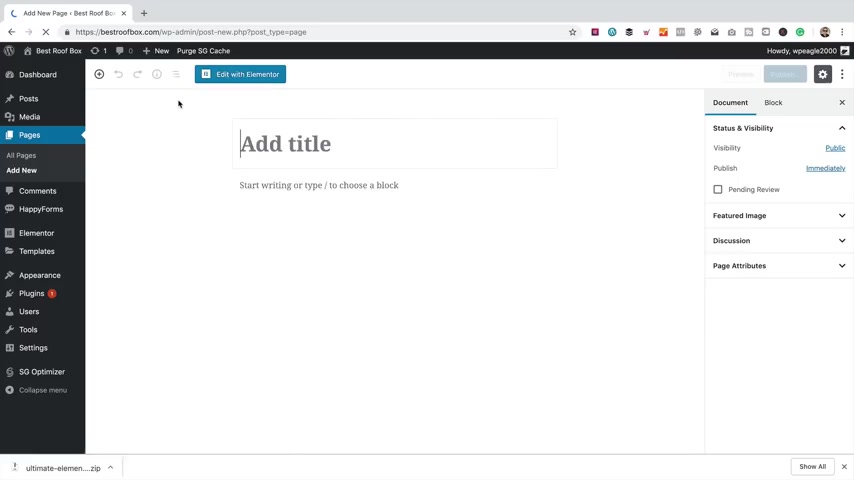
We're gonna go to new page , call it contact as just like that , I think gonna publish that , Press it twice .
I'm gonna click edit with Element or and here we go .
And then I'm gonna come down here , click on the plus , gonna add just a simple single column structure .
Click on the plus here to add an element .
I can search for the widget I want it's happy form , so I'm just gonna type happy oop .
There it is .
Drag that over .
We can add a title here , so let's type in and get in touch .
No , it's actually added the form title , too .
So I think we need to adjust that .
We'll do that in a second .
Let's click update .
Do I need to click that ?
Apply as well and we can do that .
There we go .
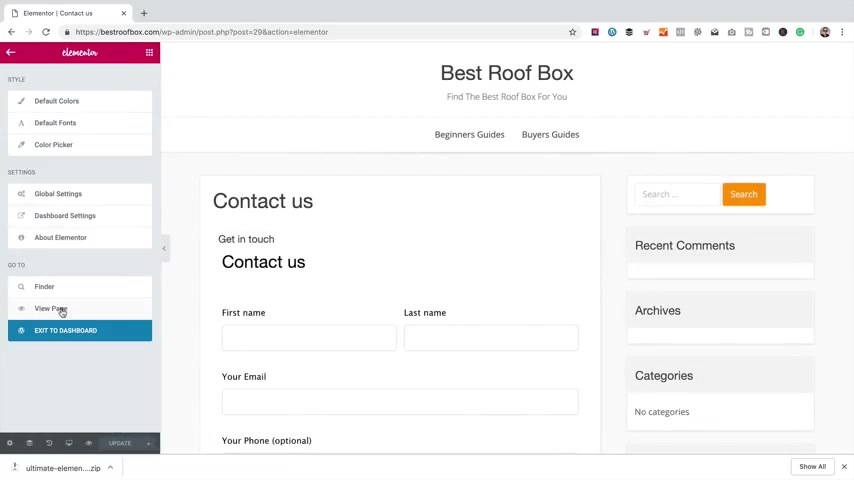
Let's just have a quick look at this page .
Yeah , it's got too many titles going on .
That's the page title .
That's the form title .
Let's turn off the form title .
Do that quickly .
Go back into the dashboard into happy forms into all forms .
Let's click on style .
I think that's where it's gonna be .
Get a form title and go for hide .
There we go .
Save and close .
Let's go and have a look at the page .
Go to all pages and view .
Contact us .
There's our form .
There's a contact us page , so to finish off this bit , we just need to add those new pages and the home page as well .
I think to this menu to do that up here .
Uh , we hover over the site name .
We're going to menus .
Then we can add Contact us about us and the home page .
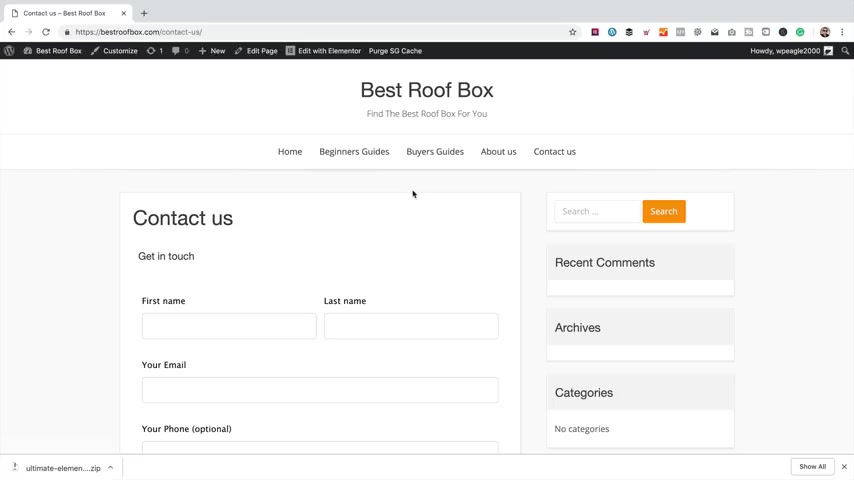
There we go .
So this is our menu that goes across the top .
We can now drag these into the order that we like .
So on the home page first , then contact us .
Page last .
If you want to change how these display , just click on the little arrow and change the labels so I don't want that to say Home page .
I just want it to say home .
There we go change that .
Think the rest is fine .
Let's click .
Save menu .
Let's take a look at the site .
There we go .
Looking nice .
Let's click through .
Check the pages .
There's the about us .
There's a contact that so that's all done .
What we need to do now is get some of the content on some of the good stuff .
Some of the articles that are gonna generate traffic to the site and that are gonna generate us our commissions .
So let's get on with that And before we go too much further , you're gonna wanna sign up as an Amazon associate .
If you haven't done so already , you obviously need to be an Amazon associate in order to earn some commission .
Once you are signed up as an Amazon associate , you get access to this , uh , bar across the top .
It's called the Amazon Associates site , and it allows you to generate links .
Uh , really easily .
When you're looking at a product like this one , you can come here and click text to get a text link that you can use within your content .
I prefer to go for the full link if I'm honest , but you know whatever .
And you can use these links wherever you like .
Someone clicks on one of these links and then comes through to Amazon and purchases .
You'll earn your commission .
You've also got this image , uh , option here where you can add images to your content .
You just copy and paste this code .
Good thing about doing it this way is the images should update automatically if Amazon changed them .
And in fact , this is the only way to add images to your content without breaking the Amazon associates terms of service .
And finally you got this text and image thing , which I never use , so we're not gonna look at that .
So to sign up as an associate , you want to come over to Amazon and you want to go to the Amazon that you're gonna be promoting for the site that I'm working on in this video , I'm gonna be targeting the US , so I'm signed up at amazon dot com .
If you're doing a UK based site , then you want to sign up at amazon dot co dot UK Working out of Germany , You probably want to go to amazon dot DE .
I think you get the idea .
You do have to be signed up on each of the international sites that you want to promote .
So to do that , you just scroll down to the bottom of Amazon right down to the footer .
And then here you'll see a link that says , become an affiliate .
You give that a click and you click this big button up here that says , join now for free , and then you'll need to sign in with your Amazon account , which I'm sure you've already got .
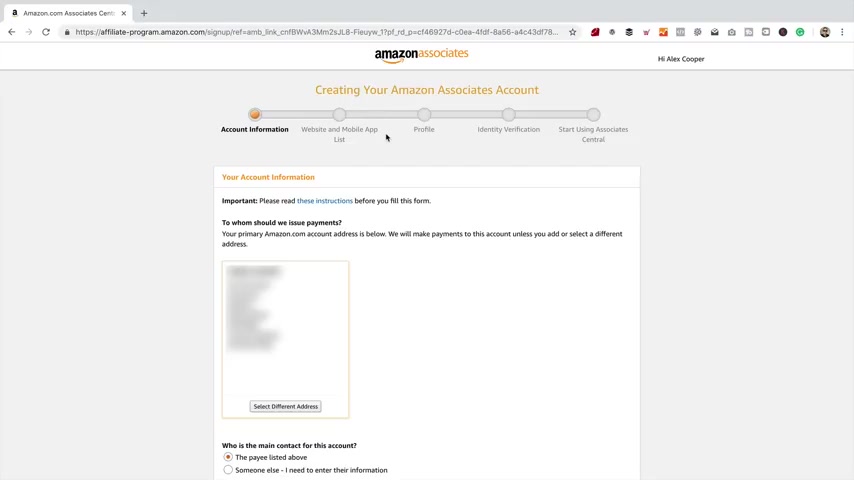
And then you're gonna need to work through this form , which is a reasonably long It's gonna ask you a few questions about your website .
So you want to say that you're a blog ?
Uh , it's gonna ask for the URL of your website .
Now , don't worry if your site isn't built , which it probably isn't because you're watching this video right now and building it , aren't you ?
So don't worry about that .
You will get access to your site and and the whole Amazon associate area before you built your site .
That's fine .
So you better add links and and all that kind of stuff .
It's only when you start sending traffic over to Amazon .
It's at that point that they'll come and take a look at your site and see that it's what it's all about and whether it's all good and all that kind of stuff .
Um , and providing you follow my video and you've added some content .
You should be fine .
So , yeah , go to Amazon , sign up , uh , complete this form , get access to the Amazon associates dashboard on your site stripe .
Uh , and then you can carry on watching the video where we're gonna be adding some content and adding links in and using that site stripe to add images .
So good luck with that .
I'll see you in a few minutes .
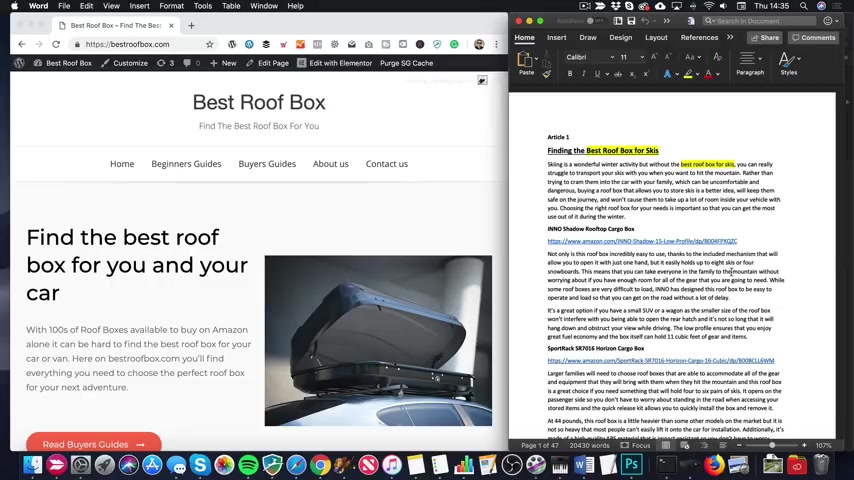
So let's get some content added .
Got some articles here .
They're in a word document Now .
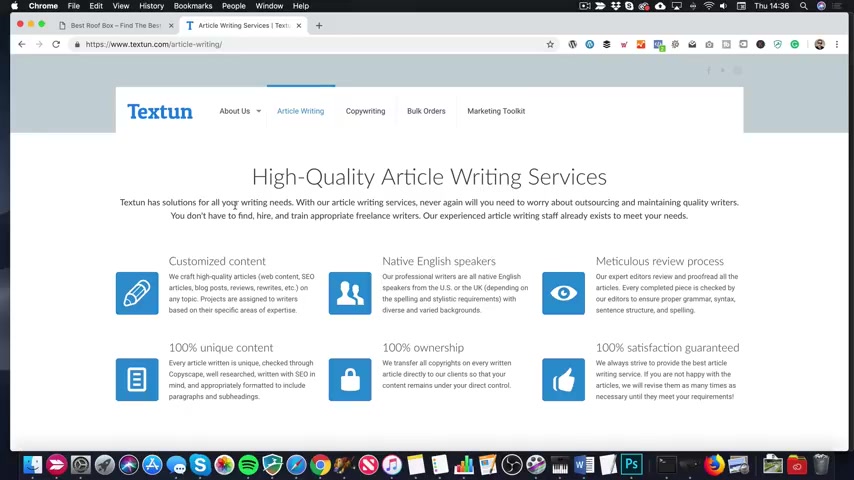
I ordered these articles from a company called Text and dot com for a link to them in the description .
And yeah , I found them pretty good .
Uh , the pricing is pretty reasonable .
In fact , let me just fire it up here and you can .
I'll show you .
It's text UN dot com Text in and let's have a look .
The price , the price , the price .
Where's the price ?
Here we go .
Article writing .
You can select your word count .
And yeah , it's for 1000 words .
It's $22 so it's 2.2 cents per word unless you want their premium quality , which is written by the top writers , and it's 2.7 cents per word .
So if you're not going to be writing your own content , then this could be an option .
Now , when it comes to choosing the content that you want to write about , I suggest that you do some keyword research now I did a playlist , uh , made up of 10 videos .
I did the playlist with a friend of mine , Doug Cunnington , who's also got a YouTube channel .
And he's , um , very much into creating Amazon niche sites .
And he has a formula that he uses to decide .
Um , which articles to write ?
It's called the keyword Golden Ratio .
And so within this playlist you'll find videos all around that what you need to do , how to find keywords and , uh , how to get ideas for your articles .
I'll put a link up now to that playlist so you can go check that out when you get a moment .
Of course , another way to do research and find out what people are actually looking for on the Internet .
Because , keep in mind , the best way to rank and get some traffic is to write content answering people's search queries where there isn't already a lot of existing content .
If that makes sense , so you're kind of filling gaps on the Internet where there's people looking for information , but there isn't actually much information out there .
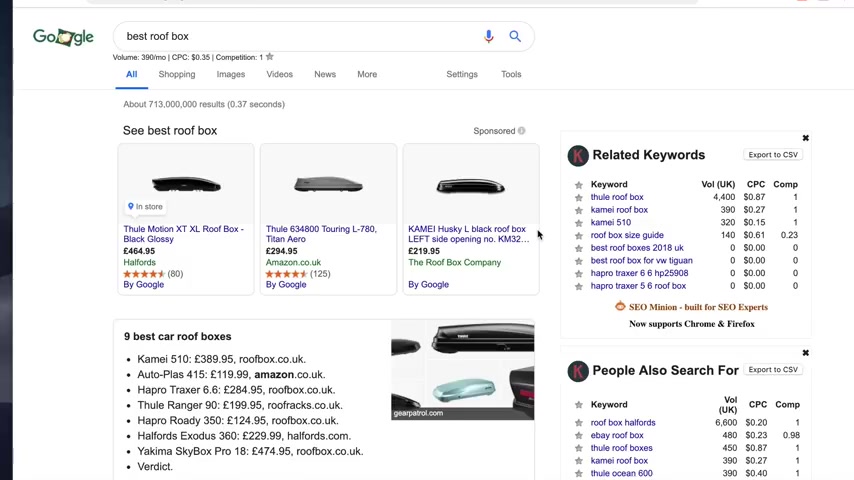
Good way to do this is to go over to Google and start typing stuff in around your niche so I might start typing in Best roof box , See what comes up .
Now , this is probably gonna be too broad .
You really want to create content around keywords that are 3456 , maybe even seven keywords long .
That's what we call the long tail keywords .
They're very specific searches , and often there isn't much content around them , so you've got a good chance of ranking .
And when people type in 456 or seven words , those long searches generally means they are towards the end of their buying process or their buying cycle .
There's a good chance they are actually going to convert and buy something , so it's good on both fronts .
You're gonna get traffic and that traffic has got a good chance of actually going over to Amazon or wherever you're promoting and actually buying something .
So let's expand this a bit more .
Let's go for best roof box and I'm going to put a space .
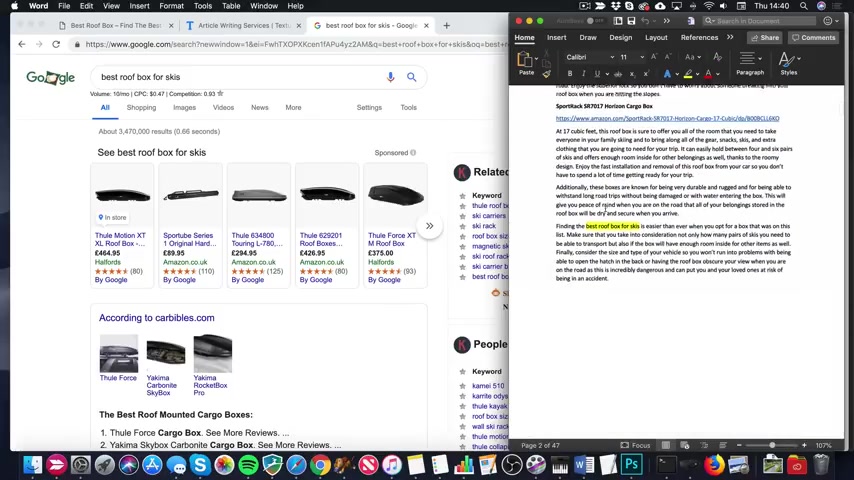
Here we go .
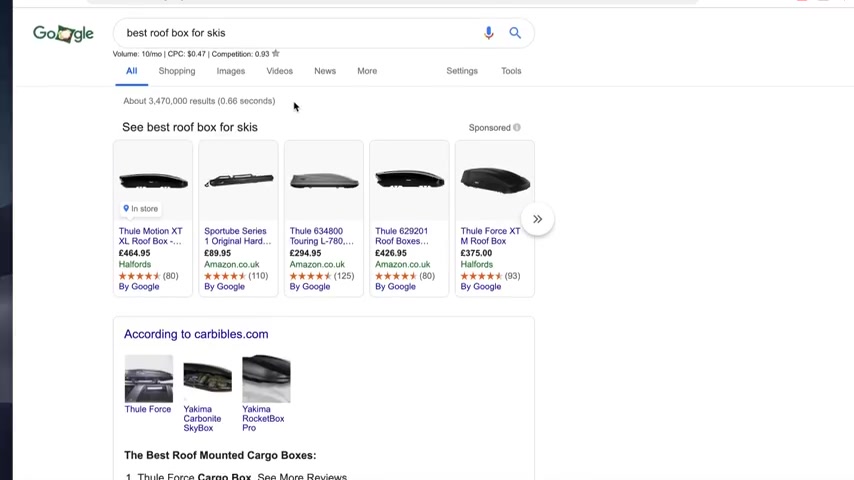
Look , it's given me all these ideas for content .
So best roof box for skis .
Best uh , roof box for Volvo XC 90 best roof box for suitcases .
It goes on you know .
So you know , these are all ideas for articles .
We do a search for best roof box for skis .
You then gonna want to kind of assess what the competition looks like .
So we've got this article here from car bibles dot com .
If you look , it's not actually about skis .
It obviously talks about skis , But it's not about skis .
Um , this one is actually roof racks , not roof boxes , ski carriers , roof box or ski rack .
Um , best roof mounted .
Uh , that's the one we've already looked at at the top .
So basically , yeah , there isn't an article that actually is called Best roof box for skis , so that's really a good one .
So , yeah , do a load of research , do some searches on Google .
I've got this tool here that I've installed .
It is called keywords everywhere .
I'll put a link in the description .
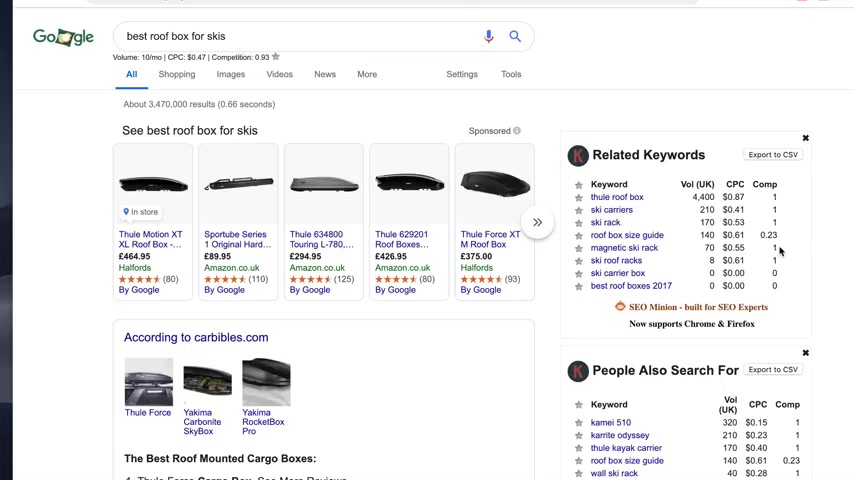
In fact , you'll find links to everything that I mentioned in the description of this video , and it's a free extension for Google Chrome , and it basically just gives you some ideas in terms of the volume .
I take these numbers with a pinch of salt in a date .
Uh , Google's data .
These guys don't have access to it .
Only Google really know how many people search for whatever every month .
But it gives you an idea , and I think it's quite useful .
And it also gives you some keyword ideas down here , so that's pretty cool .
Um , so you can check those out .
And , of course , Google also gives you some keyword ideas towards the bottom .
Anyway , I think an article around best roof box for skis might be a good one to go for .
So , luckily enough , I've got one right here .
Look , that's handy , isn't it ?
Yeah , I did do a little bit of planning , actually before recording this video , which is unusual for me .
I know .
Um , so I did a load of research , and I've ordered a load of articles , and they're here , So here we go .
Let's add this article .
So before we start actually adding stuff to the website , what you're gonna want to do if you've ordered some articles from a writer or from a article writing service like texting , you're gonna want to just go through the article and just double check that it's , you know , reasonable .
It makes sense .
And the products are good and all that kind of stuff .
So I've already done that I've been through .
I've looked at these products on Amazon .
They all look nice .
They are available , Uh , and all that kind of stuff .
Now , these are on amazon dot com .
So , yeah , this site is going to be focused on the US market , so that's fine .
I may throw in a couple of , um , UK links as well .
Um , we'll see how it goes .
So I went through the article and I looked at all the products , and I mean , this article is a little bit dry .
It's it's just lots of words .
In fact , there's more than one article here .
That's Article two .
We'll get to that later .
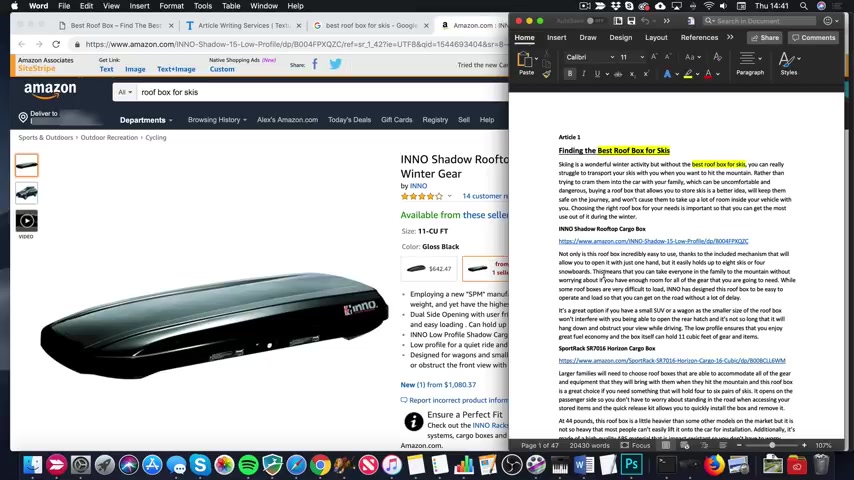
There is a lot of words and yeah , I need to obviously need some images , and it needs something else .
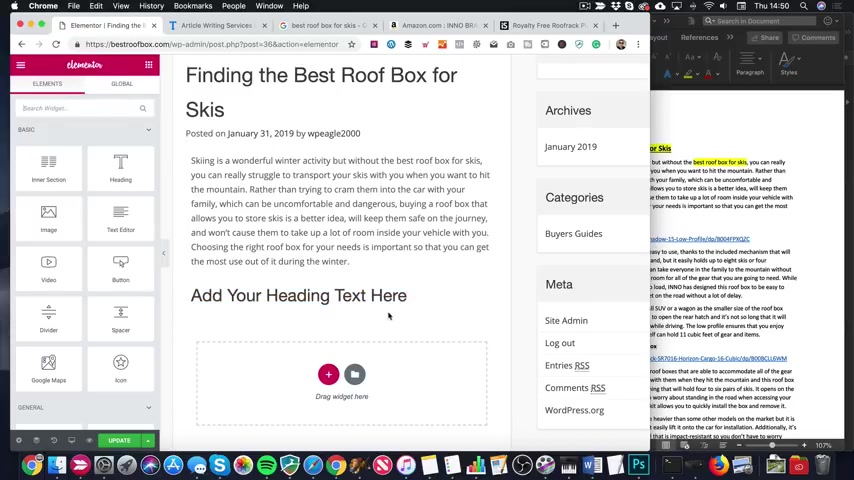
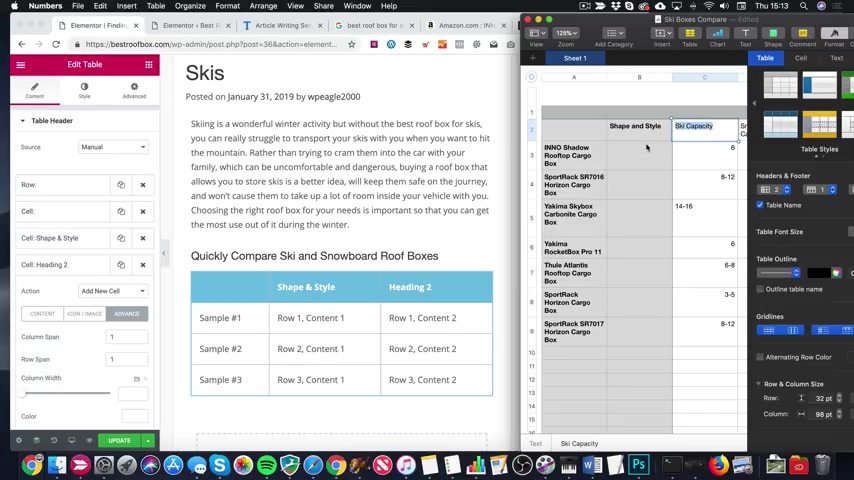
And I think that's something else is gonna be a table .
In fact , it is gonna be a table , because that's what I want to show you guys .
I think a table is a great way to show off products and allow people to quickly compare and make a decision .
So what I did is I looked through all of these products , and I put together a table which I've got to hand Here it is .
And obviously I focused it on , um , skiing because the articles about skiing .
So I wanted to include the ski capacity , the snow capacity , the weight and the side that it opens , and the just the capacity overall .
Here's my table .
Now , obviously , you could ask your writer to do this for you if you're very clear on on what you want .
I did it myself , so I came through and I basically looked .
And you can find the information pretty quickly on Amazon .
So there we go .
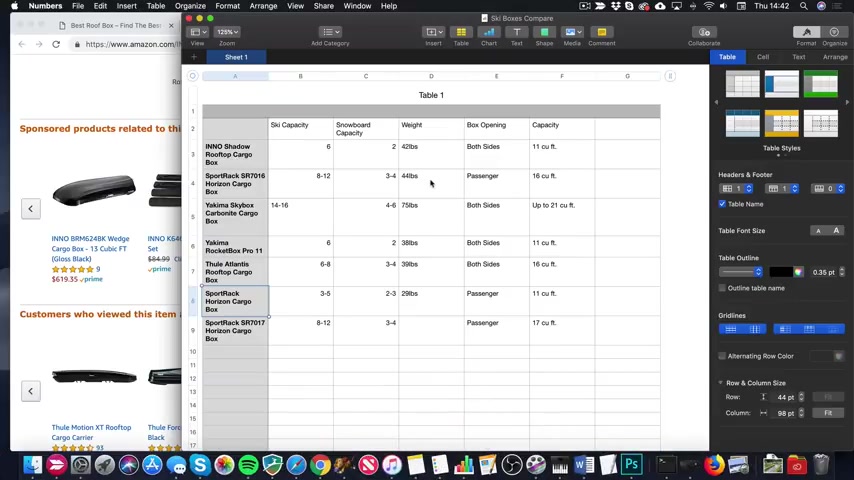
Look , can hold up to four snowboards , excuses or two surfboards .
So you can pretty much find all the information and you can quickly populate a table .
And I'm gonna show you how to create a table using the extension that we purchased earlier .
The ultimate elemental add-ons .
Now , in terms of imagery , I've already mentioned it once .
I use Istock .
Um , so I've been over to Istock and I've purchased some images using my subscription .
So , you know , you do a search for roof box and there's loads of nice images that's not relevant .
None of these are , but they're awesome .
That are .
So you know , you can drill down roof rack and you know that looks familiar , doesn't it ?
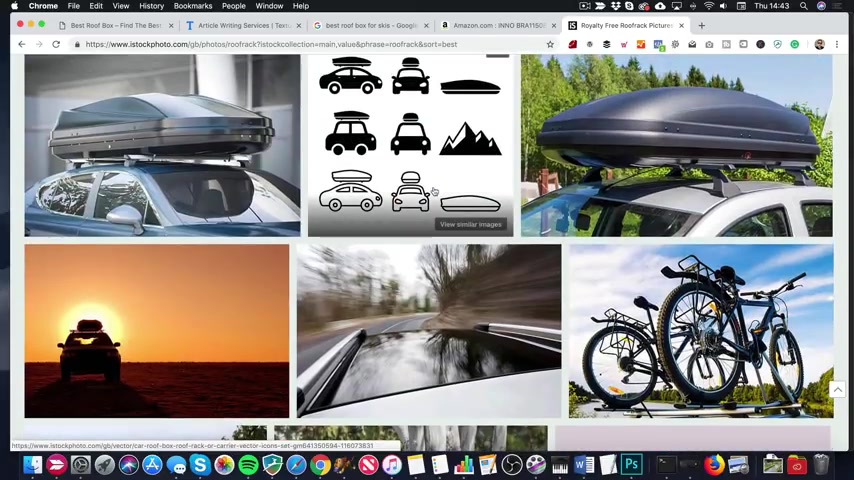
That image , there's loads of images on here to do with roof boxes and roof racks and and that kind of stuff .
So I've got a load of images that I'm gonna use within the articles .
And of course , I'm gonna add images from Amazon as well of the actual products .
I think that's enough talking about it .
Let's get on with it .
Let me show you exactly what I'm gonna do and how we're gonna add this content .
So let's create a post I'm gonna go up to New and Post just to clarify posts are for articles and for basically the majority of your dynamic content , the stuff you're gonna be adding on a regular basis and pages , uh , for your more static stuff .
So that's things like the about us the contact us and the home page .
There are pages , but generally articles .
That kind of stuff is going to be a post post can be put into categories .
These are our two categories that we created earlier and yeah , that's basically it .
Obviously , if you want to find out more about posts and pages , have a look on the channel .
I'm sure we've got a video about it .
Here we go .
So let's add the title .
What I'm gonna do is I'm gonna just make this a little bit smaller and get word over here on the table so I can kind of just copy and paste nice and easy .
It does help when you've got a massive screen like I have anyway , So I'm gonna copy this paste that in .
There we go .
That's the title .
I'm also gonna set my featured image , which I've already got ready from Istock er roof box skis .
Now , when you order images from Istock , they're generally pretty big .
So you're gonna wanna edit them down , make them a bit smaller .
Generally , the smaller the image in terms of file size , the better because it will load quickly and not slow down your website .
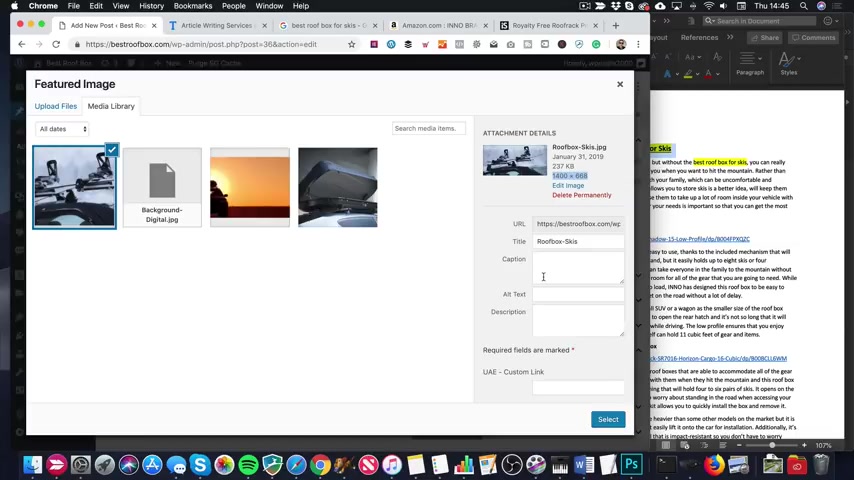
And Google will like it because it's , you know , fast the size that I'm using for my featured images is this 1 1400 wide by 668 high .
I found that it works pretty Well , I mean , you can use whatever size you like , but I suggest you put them all the same size for each post .
So you get a nice , consistent look across the site .
But I found this size works well because it's not too high that it kind of takes up the whole screen .
When someone looks at the post because you wanna , you know , not be all image .
You want them to get the text as well ?
Pretty quickly .
So , yeah , I'd recommend using this size 1400 by 668 .
So let's select that .
And the featured image is what generally appears at the top of the post and will appear around the site when you know when you're showing off your posts .
In fact , I can show you that right now .
Let's publish , and that's for you to post .
There's obviously not gonna be much there just yet .
There we go .
See , there's that image at the top .
And then if we go back to the home page , we've got this , um , thing here which is pulling in the latest posts .
And there's the image again .
So let's go back here .
I'm gonna click edit Post at the top here .
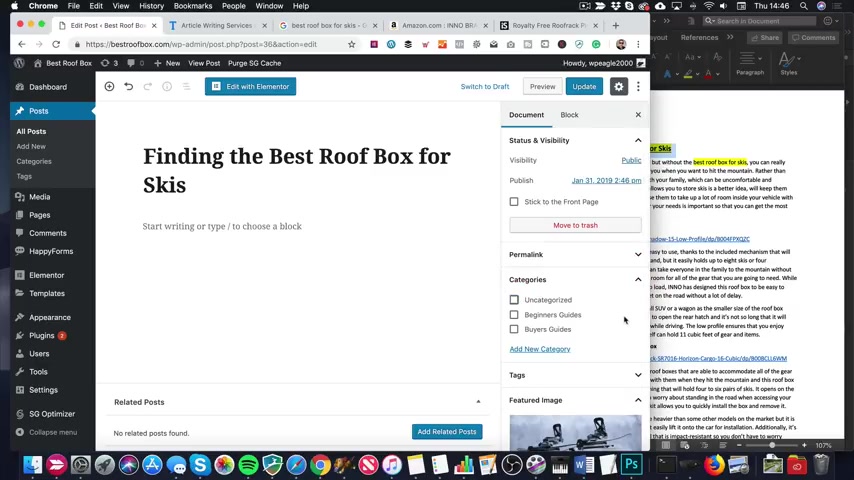
One other thing I need to do is add it to the correct category .
So that's down here on the right hand side category .
I'm gonna take it out of UNC Categorised , and I'm gonna add it to buyers guides , Click Update .
Now we're gonna switch to Elemental so that we can do some funkier stuff because Gutenberg is OK , but , you know , tables and that kind of stuff , elemental is the way to go .
So let's start by adding this first paragraph that we got here , we just highlight it , and I'm gonna copy that into my clipboard .
I'm gonna come back to the site .
I'm gonna drag over the text editor .
Drop that in there .
I'm gonna highlight this text .
Then I'm gonna cut up to the top go edit and paste and match style .
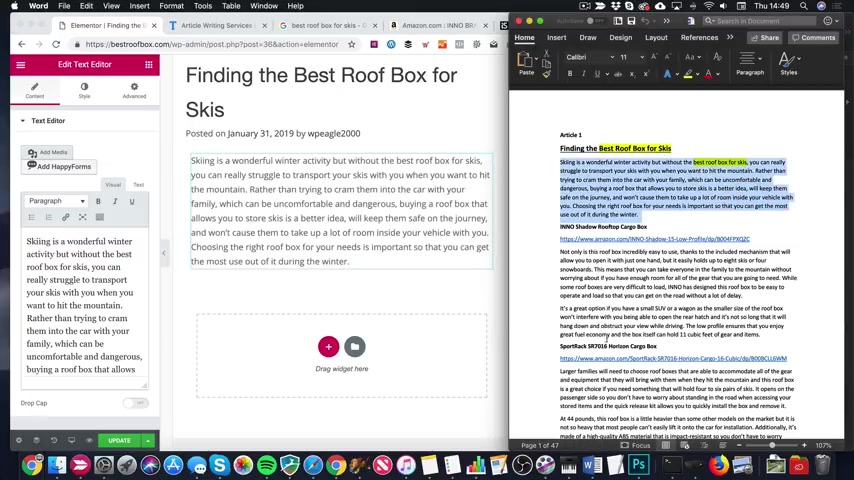
The reason I went for paste and match style is I don't want any formatting information coming over from word that might mess up the layout of our website .
Here's our first paragraph .
Looks done .
Then it goes into the , um , the product .
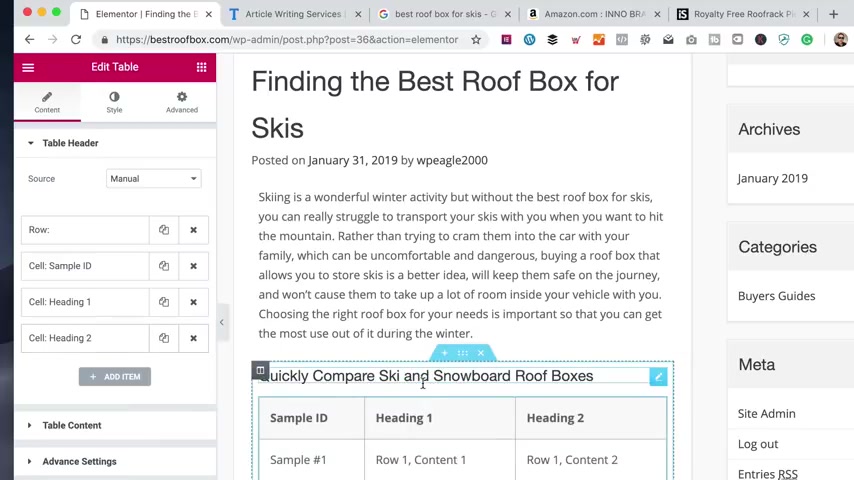
So what I'm gonna do is I'm actually gonna add a table now towards the top So before I add the table , I'm just gonna add a heading for the table .
So let's go back and choose another widget .
Do that .
You can click on the little squares up here and you can see all the widgets .
What I want is a heading .
Now , you can either add this heading as part of this section at the top and kind of have it all in one section or if you drop it here , it will create a new section .
I think I'm gonna create a new section so I'll just drop that there .
Then I'm gonna put some text in here so I quickly compare ski and lower case and that's ski and snowboard roof boxes like that .
I'm gonna make it a little bit smaller .
So let's drop the HTML tag over here to like a H four .
So these are basically the different levels of heading .
If you can imagine you've got a newspaper or something like that .
The big headings are H one , and then they get smaller and smaller and less important when it comes to search engines as you go down through the tags .
So now let's go back and let's go and find the table .
It's gonna be under the ultimate add-on section .
So this is the add-ons that we got from the premium plug-in that we installed earlier .
Got a favour ?
Here's table .
I'm gonna keep that within this section .
This is gonna be the table section rather than going here and creating a new one .
Here we go .
Let me get my spreadsheet to hand .
It's just here .
I close this side thing .
I don't want that .
Guess not .
Let's just make the window a bit bigger .
Think we can sort of see what we're doing ?
Should have got a bigger screen .
I'm actually running a little bit of a lower resolution just for the recording .
So that's why everything is a little bit squashed .
But I think it'll be fine so we can adjust our table over here on the left hand side .
I know it looks a little bit complicated , but it's not actually too bad .
So this is our head out .
This is the content .
So it says we've got a row , which is this row across here , and then within that row we got to sell , sell and sell .
And if we wanted to add another row , for example .
In the heading , we could just , uh , duplicate this .
Drag that down , then say copy this one .
Drag that down .
You see , it's added another row , but we don't wanna do that .
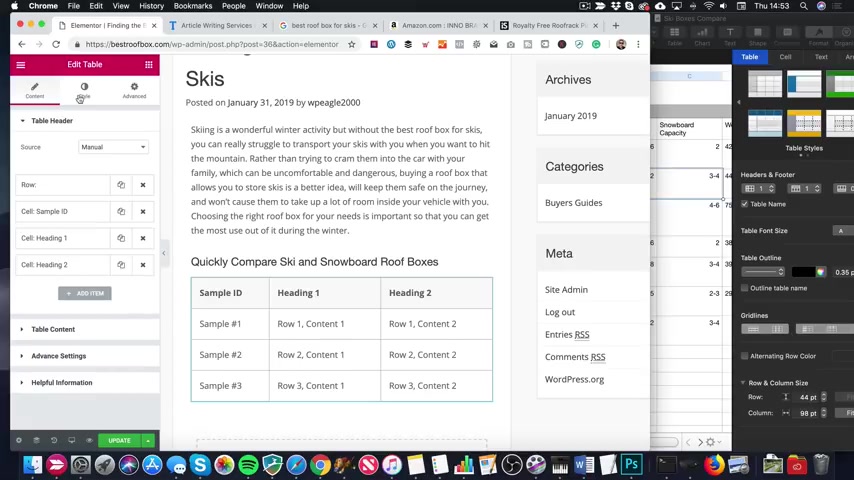
Let's just remove these , but also just colours and things like that .
If you come into style , you can change the background colour .
You know , maybe a nice blue looks good .
There we go .
That looks quite nice .
I wanna make the text white .
I can do that by coming back into the content section , clicking on the text cell and then going to advance .
Set the colour out .
There we go .
I think that looks better with White .
So let's change the other ones , too , to white .
There we go .
I'm just gonna need to add a few more as well because I've got a few more columns in my table .
Let's do that .
Now .
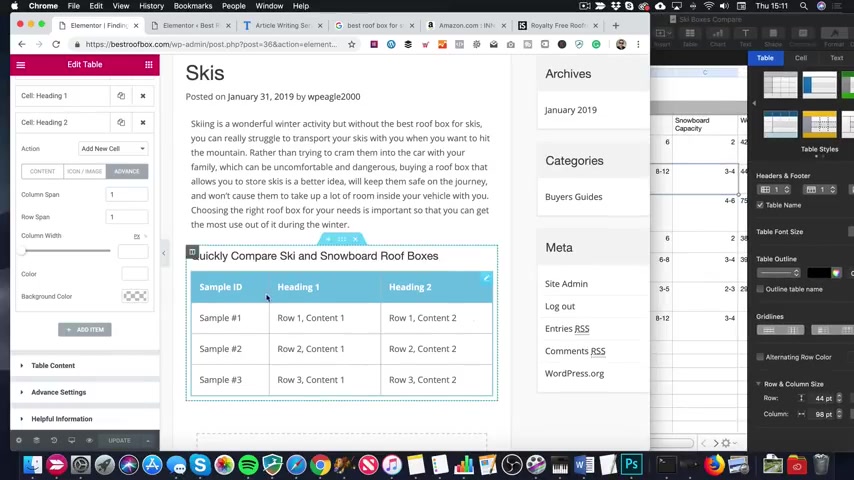
Let's add some extra columns and and let's label up these columns properly as well .
So first one where it says sample ID , I don't actually want anything in there at all .
You look at my table .
I don't have anything in there .
The next one is ski capacity .
But in fact I'm actually gonna add an extra column .
Let's do that on the spreadsheet so that we don't get confused .
Uh , head of column after perfect .
Well , it doesn't really matter if it's Grey .
We'll get away with it in here .
I'm gonna put some images .
So let's go for , um I know shape and style .
Something like that .
You get the idea .
So , uh , let's come back to the website and adjust this one , which it says heading one .
There we go .
Adding two is ski capacity .
I can just copy this .
I think into the clipboard .
Switch to content , paste it in .
Perfect .
Next one is snowball capacity .
So I'm just going to duplicate this one on the end , clicking the little button here .
There we go .
Perfect .
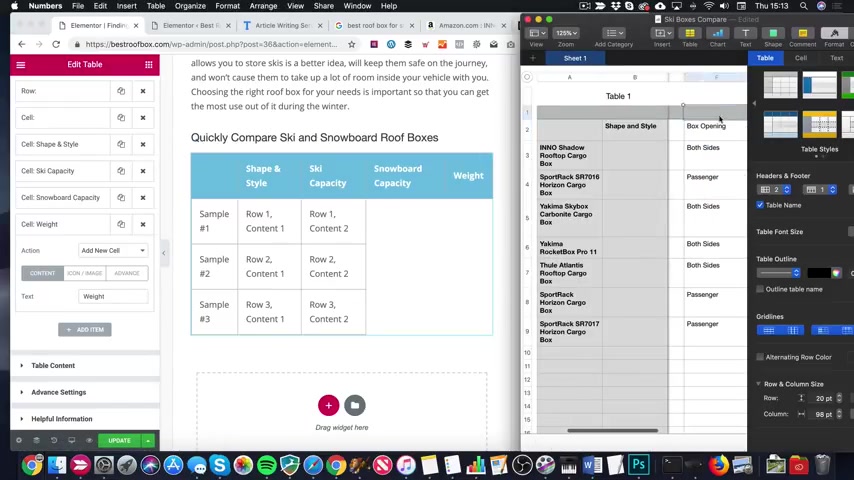
And then we've got we then box opening finally capacity not include any price or anything like that , because you want to be really careful .
When you do that with Amazon , you can't have any hard coded pricing .
So it's pretty best just generally to leave the pricing off because pricing changes so much on Amazon , which is why they don't like you to have it on your site .
There we go .
Let's update .
I think we should have a quick look at this page to see how it's coming together .
There we go .
There is our table .
Obviously needs a bit more content and stuff like that , but , um , he's looking all right .
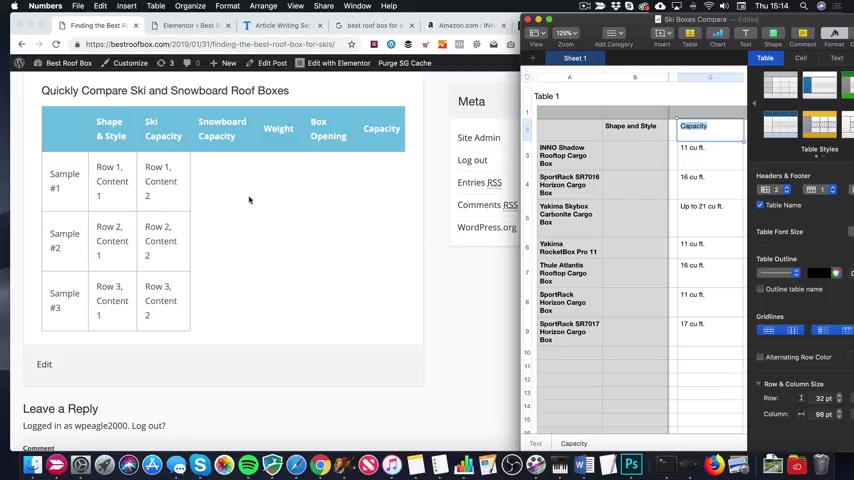
Sure about that blue .
We can always adjust that later , but hey , here we go .
So we now need to add all of this content , uh , from this table to this table and we need to add the images .
Now , the images will include a link through to Amazon indeed , an affiliate link through to Amazon , so that'll be fine .
And then , of course , we'll add some more links within the content as we go forward .
So let's add these rows across here , starting with this one .
The Eno shadow rooftop cargo box Just gonna copy .
Oh , let's edit the page and it with element talk .
OK , so we've done the header so we can close this .
Let's open up the table content .
Here is our first row .
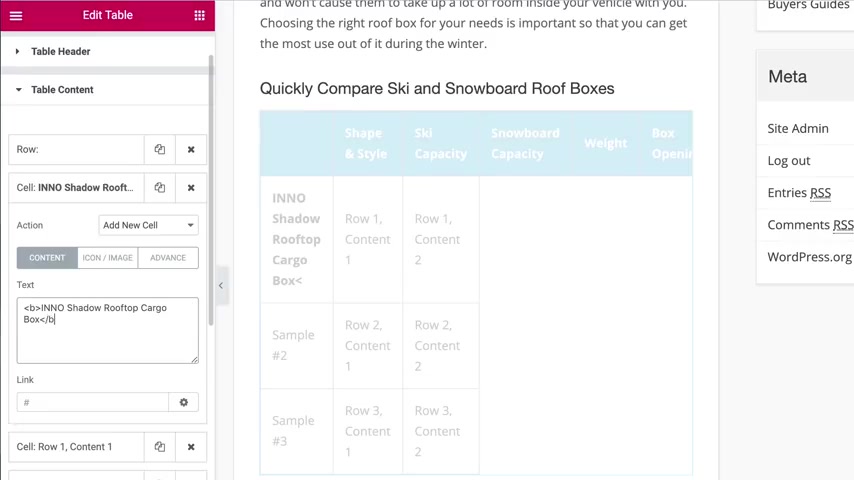
Here's our first cell , So let's just paste into here like that .
I think I want it bold now .
There isn't actually any kind of text controls in it , so we're gonna have to do it the manual way .
So I'm just gonna do a little be like that and a little B with a slash at the end and make it bold .
OK , the next one is the image .
So let's do that .
So let me find the article .
It's got the links that I need .
Here we go .
Here's the lovely shadow roof top cargo box .
So we're gonna come up to the top and select image and go for large .
And I'm just gonna copy this code here .
Go back to the table , go to next cell , which is this one ?
Row one content one .
I'm just gonna paste it straight in .
There we go .
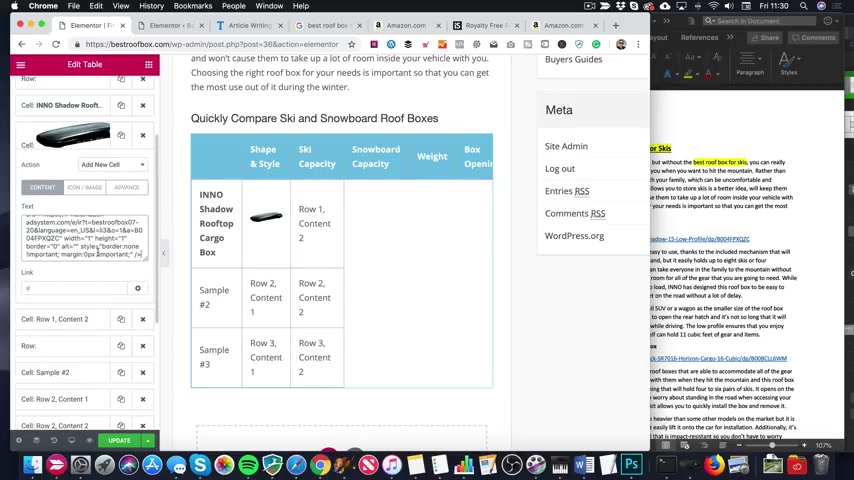
There's our lovely roof box .
OK , let's do the next column , which is ski capacity .
And it's just , uh , six .
So that's fine .
So let's go to an Excel .
Let's go type six .
There we go .
Perfect .
Now we need some more cells .
So the easiest way to do that is to just duplicate the one we've just worked on .
Just gonna click that There we go .
We'll do it a couple more times .
There we go .
So the next one is snowball capacity , which is two .
Did that sound like that ?
And we've got a weight of £42 in the next one .
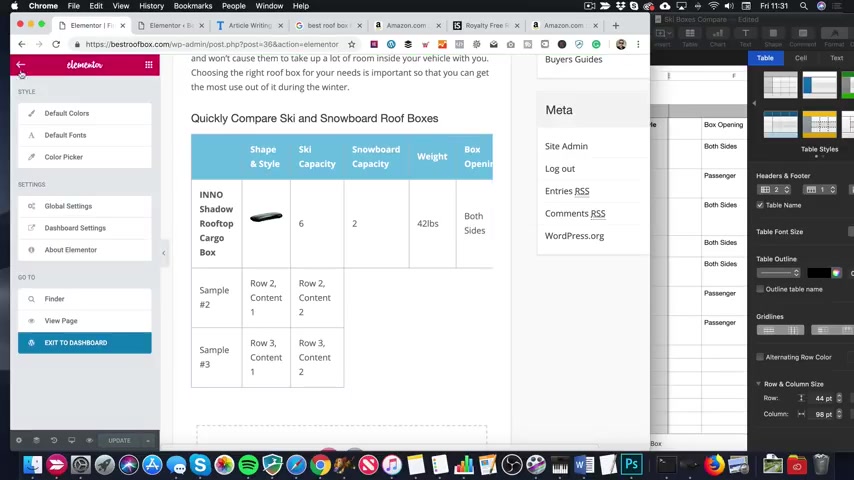
Then finally , the box opening , which is both sides .
Let's press update and take a look view page .
Ah , we didn't do capacity .
And also , the table is slightly too wide for the page .
It's got a little bit of a scrolling thing going on there , so let's make a few more adjustments .
You just gonna have to play around these tables until you get them looking nice .
Once you have created a nice table , you can kind of save it as a template if you like .
So you may need a mentor pro to do that .
OK , so let's , um , add one more , uh , cell along here in the content .
So it's this one here .
I want to duplicate the bit that both sides can get a little bit confusing .
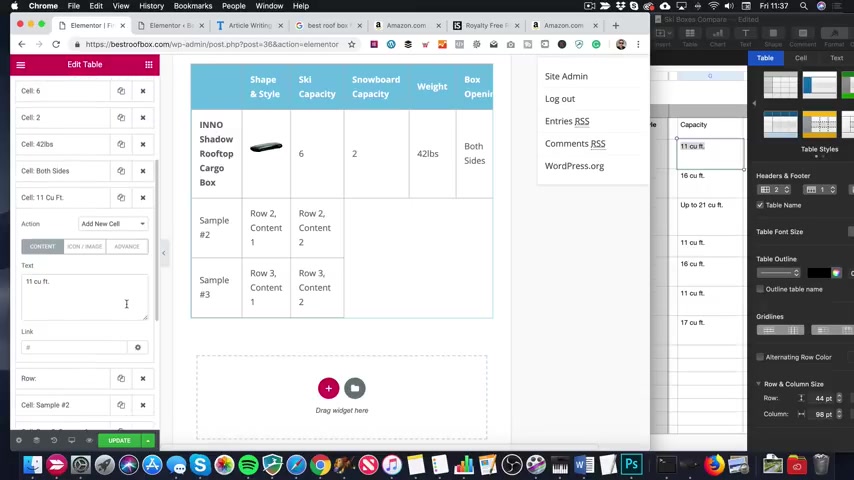
I will say doing tables , but once you get your head around it , you'll be fine .
Duplicate that , and the capacity is 11 cubic foot or feet .
Let's copy that .
There we go .
So let's just make the table a little bit narrow so that we haven't got any of this kind of sideways scrolling .
I mean , you will get that on a mobile , but we don't want it on the desktop .
So what we're gonna do is just reduce a bit of the padding on the table .
So I'm gonna go into style here , and we've got this padding .
Let's just take this down a little bit .
I don't know .
Maybe five .
See what that's like .
I gonna view the page again .
There we go .
That fits a bit better .
So let's add some more boxes to this table .
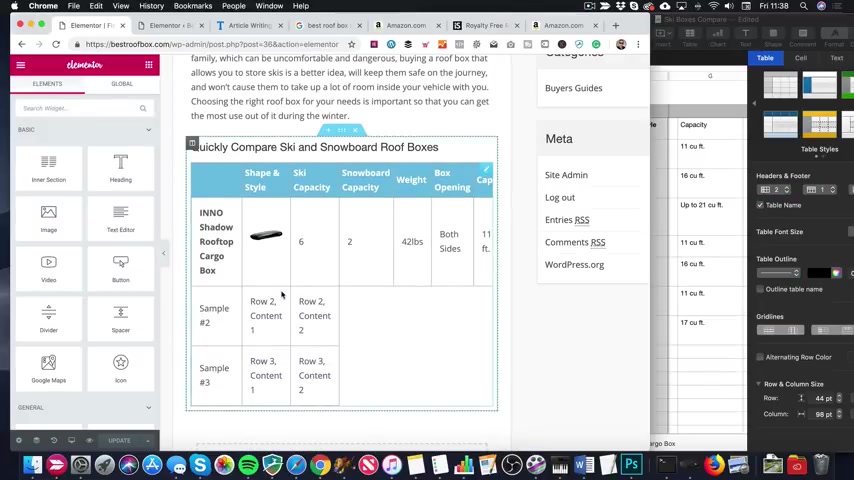
The next one is the sport rack .
Copy that to go down to the table .
Table content .
Here's the next row we can see because there's a row thing here .
So let's open up this sample too .
Paste it in .
Let's make it bold .
And , um , let me find the link .
There it is .
OK , the image on the site stripe up the top here , Copy that into the clipboard .
Move to an excel paste .
Don't need to add a link here , by the way , because it's included within this bit of code .
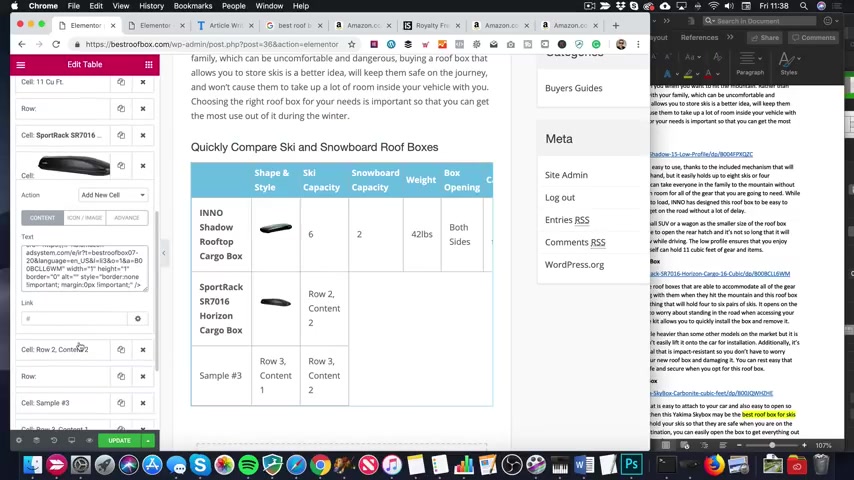
There we go to the next one the ski capacity , which is 8 to 12 .
0 , change it into a date .
That's not right .
Let's type that in 8 to 12 , we need to add some more cells .
So I'm just gonna duplicate this one .
There's 123 , four .
That's enough .
Next is snowboard capacity , which is 3 to 4 .
The weight is £44 .
The box opening is the passenger side .

And finally , the capacity is 16 cubic feet NCUFT dot Right there we go .
So I'm not gonna make you watch me at all of these .
But before I do a quick get it and add them all in the background so you'd have to watch , I'm just gonna show you how to add some extra rows .
So I You know , for example , if I do this last row by just duplicating these extra cells like that , I am gonna need to add some more roads because , you know , I've got another four or five products to add , So to do that , we'd go add item and the action is not a new cell .
Let's start a new road like that , and then we can add another item here , which will be a new cell And there we go .
You can see it's already started the new row .
And then again , just duplicate this .
Got that , then I've got a new row .
Let me one more .
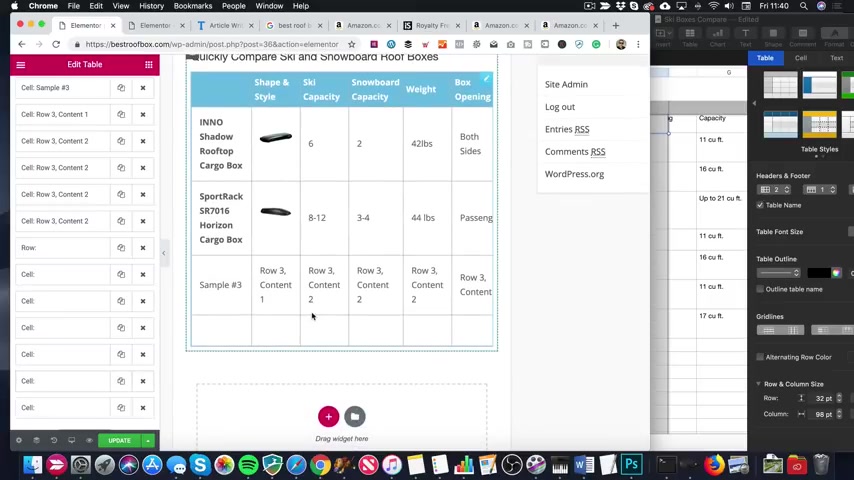
There we go .
We've got a new row to add all my product information .
So yeah , I'll , uh I'll add these products .
Now , do a quick edit and and then we'll carry on adding the rest of the , um , paragraphs and content and whatever we've got for this article , get it all nicely laid out and finished .
And of course , we'll be adding some Amazon affiliate links .
So we've got the table all done there it is looking good .
So what I need to do now is just add the rest of this content that I've got over here in , uh , my word document .
So let's go in and edit with Element to Oh , by the way , I've added links , um , to the product names .
As you can see , the way I did that was simply coming in .
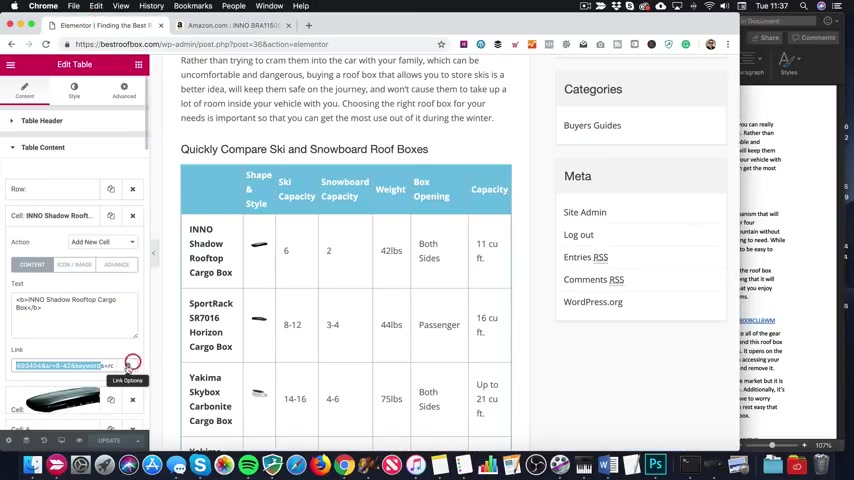
Finding the right , um , cell should be in table content here , and then you'll see there's a link box there just pasting in the Amazon affi link , which you can get When you're looking at a product page , come up to your site stripe .
Select text link .
Always go for the full link because it's easier to change in the future if you need to .
And you just copy that into your clipboard .
Paste it into this box here .
And if you click on the little cog , there's a couple of options I like to set my affiliate links to open in a new window .
In fact , I like to set any link to an external site , um , to open in a new window .
But that's just me .
Yeah , and that's it .
I've just added , uh , the links , respectively , to each one of these .
OK , so we've got some blurb to add .
I'm gonna do each one of these in its own elemental section .
So let's do that now and then click on the plus click on the structure .
I just want a single column .
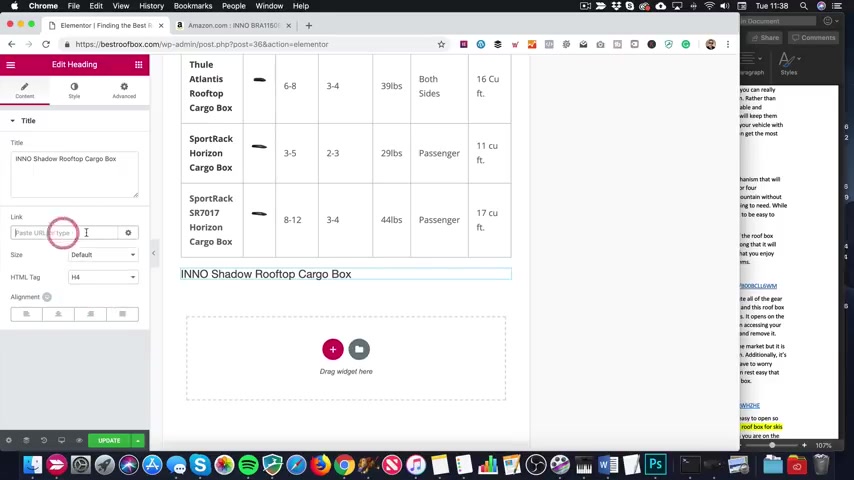
They're gonna drop in a heading .
I'm gonna copy the product name into that heading box like that .
I'm gonna make you a H four just like that kind of size .
If you wanted to , you could , um , make it a link .
Although I'm gonna add a button .
I wanna add too many affiliate links , and Google might not like that .
I'm then gonna copy this text into the clipboard .
Come up here to the little What is that ?
Called that little menu ?
Whatever it is , this squares with in the shape of a square .
And I'm gonna grab the text editor .
Drop that into the section two .
Come over here .
I like this and then paste in the text on my clipboard .
There it is .
Looking good .
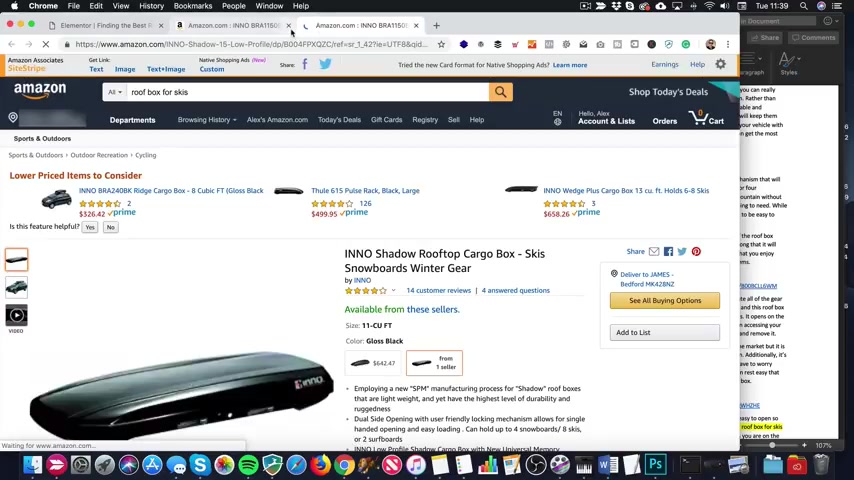
And then up to the square again , I'm gonna grab a button .
Drop that in send to the button , make it big if you want .
That's too big and we go for small .
Um , I'm gonna add the link , so let's , um , just go through to the product .
Oh , I think I already had it open , didn't I ?
There we go .
I don't need to get the text link and say I prefer to use the full link .
Copy that to the clipboard .
Come back , paste it in .
I'm gonna open that in a new window like that .
I change the text to say , check the latest price on the I'm not shadow roof top cargo box .
Something like that .
We're gonna add an icon , too .
We've got a lovely selection of icons here .
And there is , actually if I can type an Amazon one , which is perfect .
I'm not too sure about the colour scheme on the buttons , on the button , even or buttons .
I guess I have more buttons .
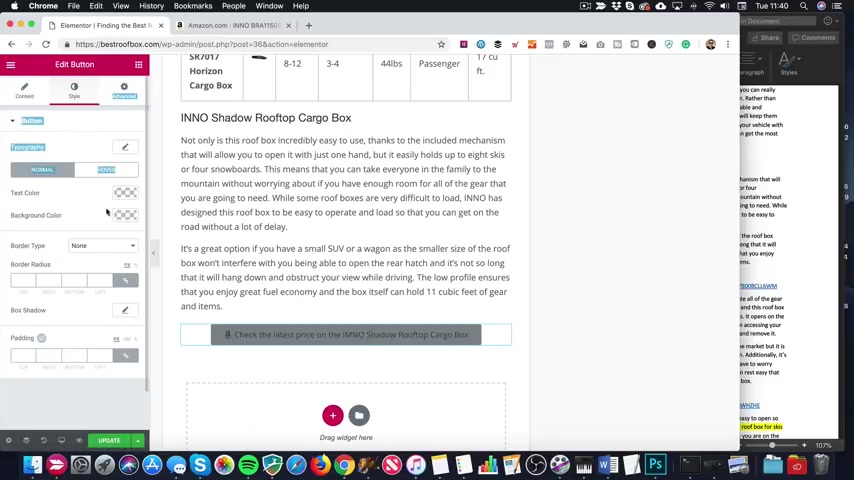
It'll all be the same .
But I can adjust this button by coming into style .
Here , make the text white , make the background .
I don't know .
One of these blues , maybe .
Or green .
I mean , it's quite nice you change the text colour on hover as well in here so you can make it go blue , which is not very nice .
Um , orange , maybe , Like like amazon .
Mm .
Don't like any of that .
Let's clear them .
Maybe let's change the background colour on a hover to the blue Yeah , yeah , yeah , yeah , yeah , yeah , yeah I like that .
Let's press up update Let's take a look .

I like to check the page as I'm as I'm going along I table that is looking good .
There's a button .
Oh , look at that Hover .
Click through .
There you go .
We're on to Amazon by the affiliate Link So I need to add some more products .
Let me do one more .
What I can do is I can just duplicate this section now and , uh , just change the text even quicker , so yeah , I can just , like , right click .
Oh , there we go .
I wanted to get on that section bit .
So see where it says section to duplicate .
And here we go .
Now , there's not actually as much space there as I would like .
So we've got a couple of options .
We can either , um , go into the section and we can add live style or sorry via the advanced .
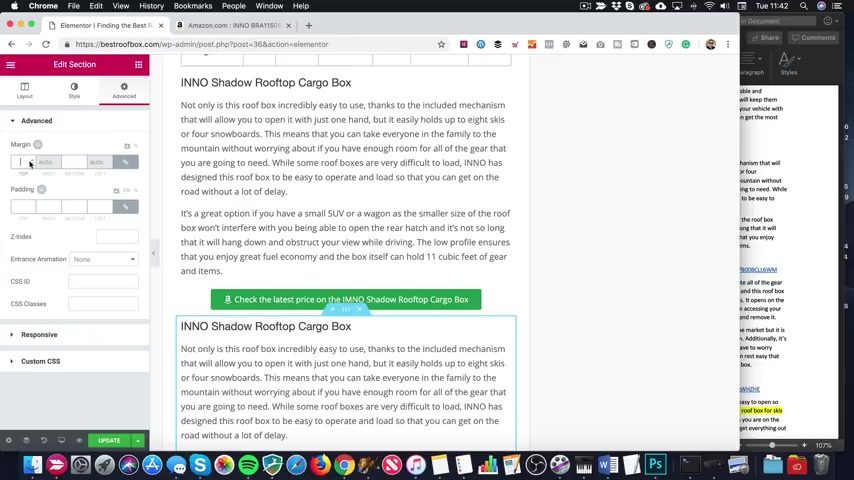
We could add a bit of margin at the top if we wanted to .
That's one way of doing it .
Well , the other way of doing it is to come in here and grab a spacer .
Drop that in .
Hm .
I think I'm going to do it the margin way .
So I've got rid of that .
Let me just , uh , change it on this one before we duplicate it .
So let's add a little bit of margin at the top and bottom .
The left and right margin is auto .
That's fine .
I'm thinking 20 might be OK .
now let's duplicate .
I'm just right clicking , select and duplicate .
That's OK .
I think that's enough space .
So back into word .
Grab this on to the title .
Paste it in here .
Perfect .
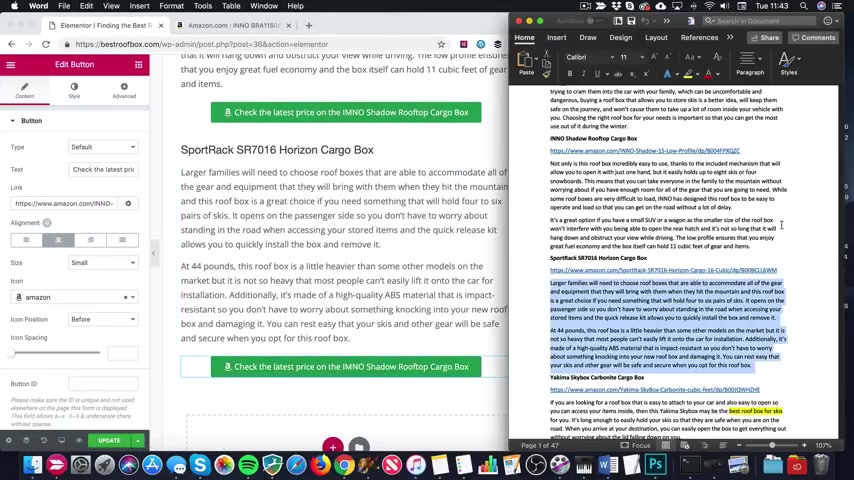
Grab this text coming to here .
Highlight and paste .
There we go .
Let's update this button with the right link .
The sport rack SR .
7016 .
What a fantastic roof box .
Copy the link .
Drop that in .
It should remember the opening new window .
It does , which is why I love duplicating stuff .
It's just saving you .
Those seconds here and there .
Just streamline your work flow and they should change the text on the button .
I can even do some copy .
Inhale it .
I copy it like that .
Beautiful .
It's , uh , should we have a look or should we just carry on ?
Let's just carry on .
What I'll do is I'll do a quick edit now .

You don't need to watch me do this .
I think you get the idea .
So let's edit .
OK , we're all done .
Here we go .
Let's take a look at this piece of content .
There's the table .
Here's the blurb around all the different cargo boxes and roof boxes .
Whatever you wanna call them looking good .
Then at the end , we got the summary , which was this bit here .
Oh , like this bit here .
I just made it bold .
Make it look kind of nice .
Of course , you could add more images .
Um , if you want to add an image , you can do it the same way as I added it to the table .
You just copy and paste that code .
Drop it in , and then off you go .
But I'm happy with this .
I think it's it's fine .
I think it looks nice .
So what I'm gonna do is I'm just gonna save this as a global , uh , template , whatever you call it into the template library .
Just so that if I want to knock up a post like this again with a table , um , I could do it quite quickly .

So to do that , let's go back into element element .
If you wanna say it and then I'm gonna come down , click on this little folder thingy , go to my templates , click on the disc up here , which I just think in 2019 .
It's a very weird icon to use for saving me .
I know what it is .
I know what that is .
It's a floppy disc .
I used to use them when I was younger on my , um , on my acorn computer .
In fact , we had floppy discs like that .
But anyone who's , like , younger than 30 maybe even younger than 32 they're not gonna know what that is .
I'm digressing again .
Sorry .
So you click that floppy disc and give it a name .
Let's call it post for table .
Might be a good name for it .
Then it's ready to use .
Now .
I'm gonna make all of these templates available to you .
As I've already said , Uh , they're over on WP eagle dot com .
You'll find a link in the description .
If you haven't downloaded them yet , you probably need to .
I'm sure you have downloaded them because you use them for the home page .
Um , but yeah , you'll find all these , um , templates on W PE dot com and you can download them and you can just , um , use them on your site .
You click on this little upload thing and you can er use them so you could knock up posts and pages in no time at all .
OK , so Let's add another post .
I think that'd be a good thing to do .
Let's come out of here .
Let's come out of here .
We go back to the WordPress dashboard , one up your new post and the one I wanna add .
Now , let me just see if I can find it .
Yeah , we got loads here .
We'll be adding all of these .
Of course not gonna make you watch that , though .
Oh , come on .
Where is it ?
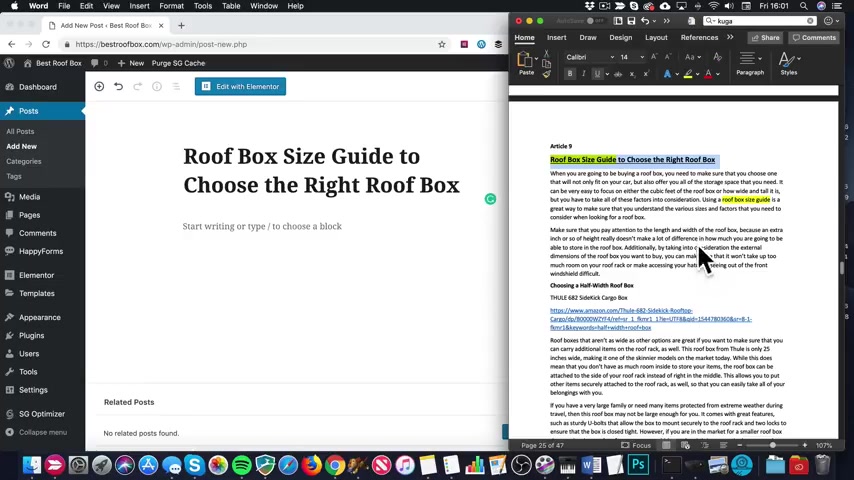
I wanna add a beginner's guide .
Basically , that was a buyer's guide .
This is gonna be a beginner's guide .
So here's the one I want .
It's the roof box size guide to choose the right roof box .
So this article is gonna be slightly different to the last one .
It's not gonna have a table in it .
It's just gonna have some , uh , some products and it's gonna have some anchor links , which I'm gonna show you how to set them up so that people can quickly jump , um , to the size of box that they want .
So I've added the title .
Um , I'm actually just gonna cut that down to that .
That looks better .
I think Let's , um , add it to the beginners guides .
And then let's add the featured image .
But I think I've got one to hand that do .
There we go .
Let's publish that .
And then I'm gonna switch to Element to there we go .
Let's start adding this content .
So let's add a section at the top first , I might add some margin in a minute .
We'll see how we get on .
Then within here , we're gonna add text editor and let's pop these in these two paragraphs .
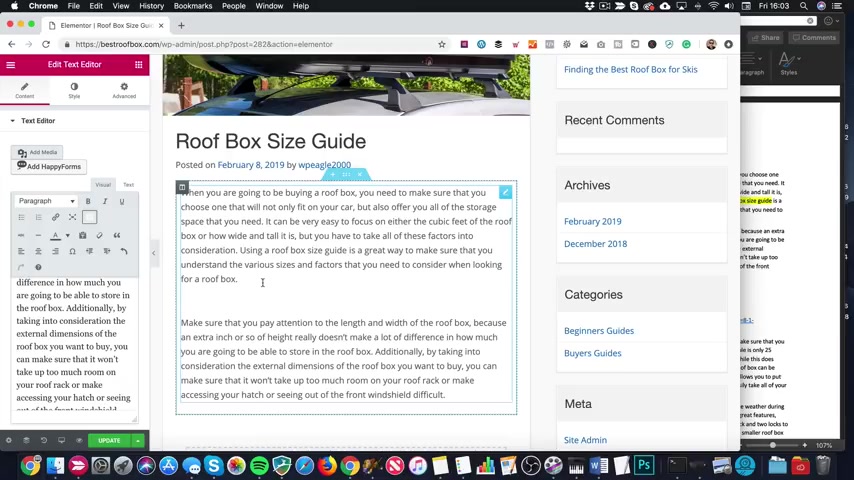
There we go .
Now what I'm gonna do is I'm actually gonna add another paragraph between these two just to kind of clarify what the article is about and to get the keyword in again .
The keyword for this article is roof box size guide .
Funny enough , So I've actually got the other paragraph in my clipboard .
I just copied it from my other computer , so I'm gonna paste that in .
I like to build up the second paragraph for SEO reasons .
And just because it makes the , um , the article look good .
So that's those added .
Let's add some more .
So we I'm gonna add another section here .
I thought , Let's right , click it properly .
I think I'm gonna add a bit of margin to these sections , similar to the other post of 2020 just to space it out a bit more .
Then we're gonna add the heading , which is choosing a half width box .
Make this a H three , I think .
Yeah .
Now I'm also going to add some anchor links .
I think I'll do that now .
Why not ?
And I think I'll add them in their own section too .
So let me just duplicate this section .
Let's get rid of this .
Well , in fact , I can get rid of the whole thing .
I don't need the heading in here .
Just gonna add a text editor .
We're gonna add quickly .
Jump to the size you need .
Highlight that .
If I If it's gonna let me .
Come on , let me highlight it .
There we go .
Oh , I hasn't bolted up me queue .
Let's do it over here .
Sometimes it gets caught on this little icon .
I don't know why that's a little bit of a glitch , OK , And then we're just gonna at the headings again .
So the first one is the half .
That's like got a hyphen , isn't it half width with books ?
I guess we should capitalise that too .
Let's unfold it .
But I'm gonna make it , um , some bullets like that .
Then what I'm gonna do is I'm gonna link this to this , and then as we go down , I'm going to link it to all the other headings so that people can quickly jump to the content that they want .
So in order to do that , we need to come back into the heading , and then we need to go to advanced , and we need to give it a CS S ID .
I'm gonna call it half width like that .
That be a good name for it , then come back up here , highlight this , and then we're gonna add a link , and the link is simply a hash sign .

And then the idea that I just set just like that , it'll all become clear in a second if you're not quite sure what I'm doing .
But anyway , let's add some more content .
So the first product is this one , the full sidekick .
So let me add some text in here .
There we go .
Right .
Let's go and copy this in the product name .
There we are .
I'm gonna add a little bit of extra text .
I'm gonna just put our choice .
There we go .
And I actually want this a little bit bigger , so I'm gonna go to style typography .
Not as big as the heading above it , but reasonably big .
Let's go for 2020 18 , 18 , maybe 18 .
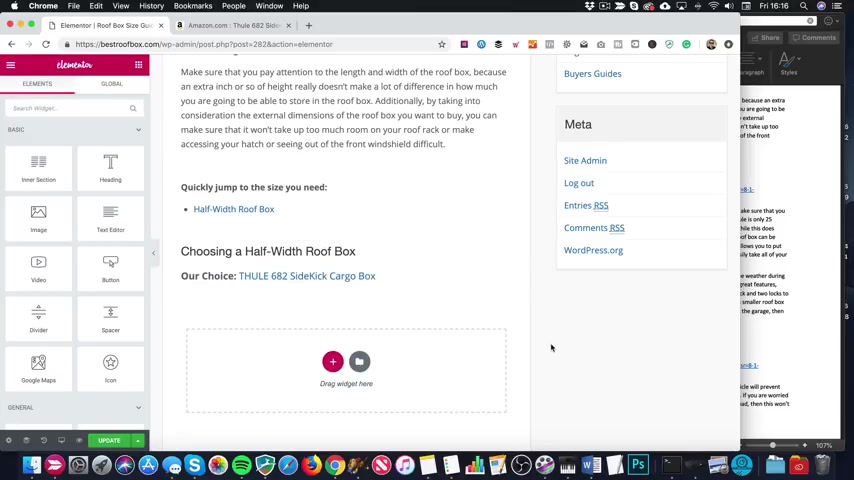
Eighteen's right , But we can make it bold .
Yeah , that's nice .
OK , let's fire up the product page on Amazon .
Let's get the affiliate link .
Let's just standard text link .
I'm gonna go for the full link , as usual .
Copy that into a clipboard .
Gonna highlight this bit of text .
There we go .
I don't know why the link isn't bold , but hey , I think that actually looks looks pretty good .
So let's get this copy .
I think I'm gonna add another text block for that .
Keep this bit separate because I'm probably gonna to duplicate it for the rest of the product .
So what we're doing , let me grab the text editor .
Put that in there , drop in the text , and then we'll add a picture too .
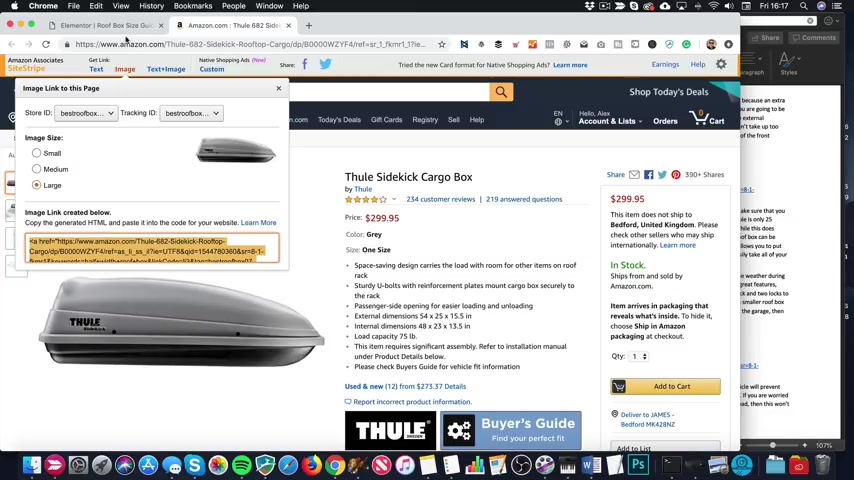
So go to image , go large , copy the code , come back into text , and so I'm gonna switch to text because pasting code into the visual editor sometimes messes things up , paste it in , switch back to the visual editor , highlight the picture and then align .
Right ?
I think there should be an extra paragraph here , so I'm just gonna enter , and this also looks like it needs a paragraph .
Hm .
There we go .
That's good .
And then we'll add our button .
Think we can have a button ?
It's just the style again .
We like the background colour to be green .
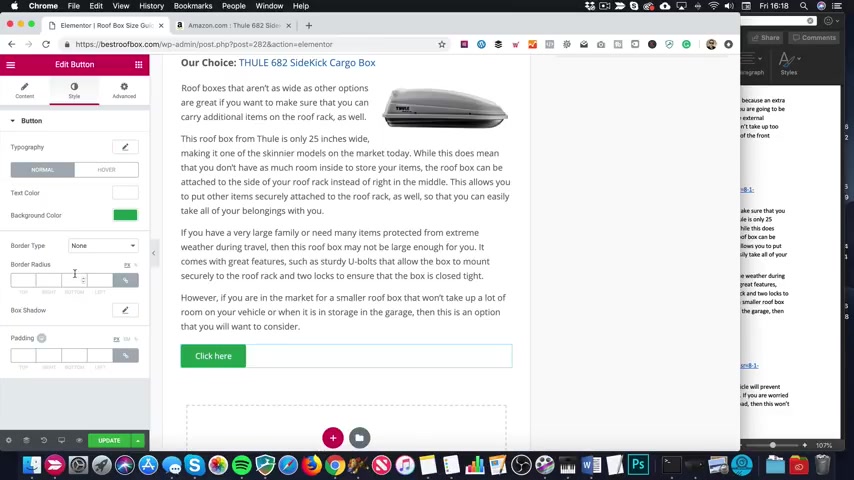
The text to be white like that on the hover .
I have the background colour and the blue .
There we go .
There's a line at centre .
Change the text .
Check the latest price on the Let's copy the name of it again .
Check the latest price on the 46 .
A two sidekick cargo box .
Let's get our affinity link again it in .
So that's our first product .
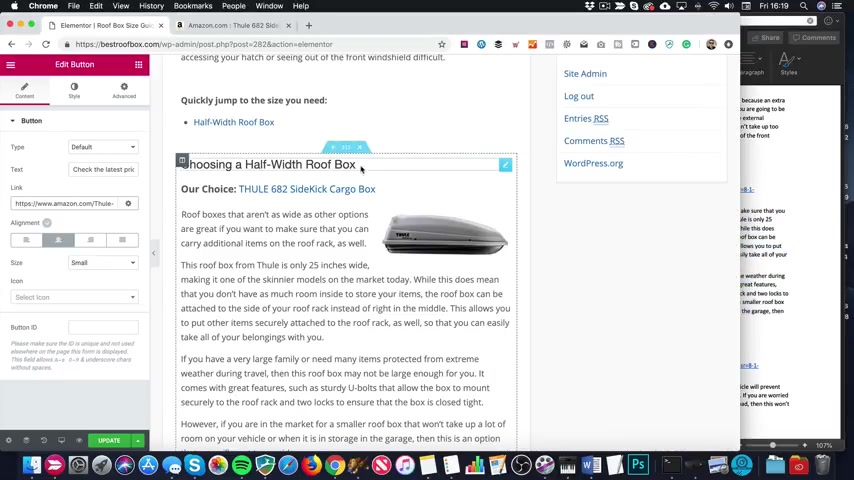
Added , it's obviously gonna be a lot easier adding the rest because I'm just going to duplicate this and go from there .
So what we got next wide box So right click duplicate .
I'm just gonna change .
I'm not actually gonna go pick a wide box .
I'm gonna just try and keep it consistent .
So choosing a wide roof box .
Let's come up here wide roof box like that .
Let's come back down here and change the ID .
Ah , that's interesting .
Actually .
Stripped out the idea cos I've duplicated it , Which makes sense .
Then I'm gonna put wide White .
I think that's fine .
Come up here .
Highlight .
Add the link hash wide .
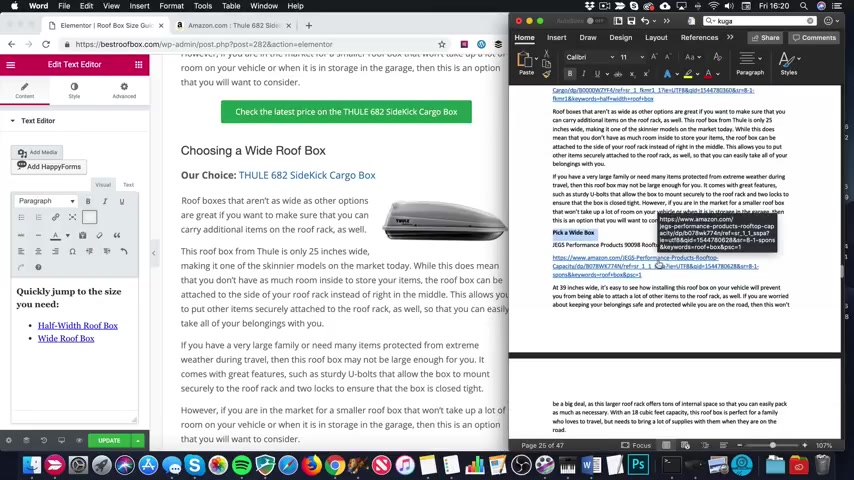
There we go .
So I'll just finish this off and then and I won't make you watch all the rest of the products .
I'll fly through it and get it all done .
Um , but yeah , all I need to do is add the product name in here .
Oh , it's gone a bit big .
I don't really want it going on to two .
We'll see what happens once .
Oh , it might be just because of that's better .
Yeah , I did the return .
It's only me .
All right , let's fight the product .
Let's get the affiliate link .
Well , I'm I'm doing it over this side .
You can do it .
That side , this side , it really doesn't matter You actually , you get a few more options on the linking over here .
Just place it in .
Click on the options open in a new tab .
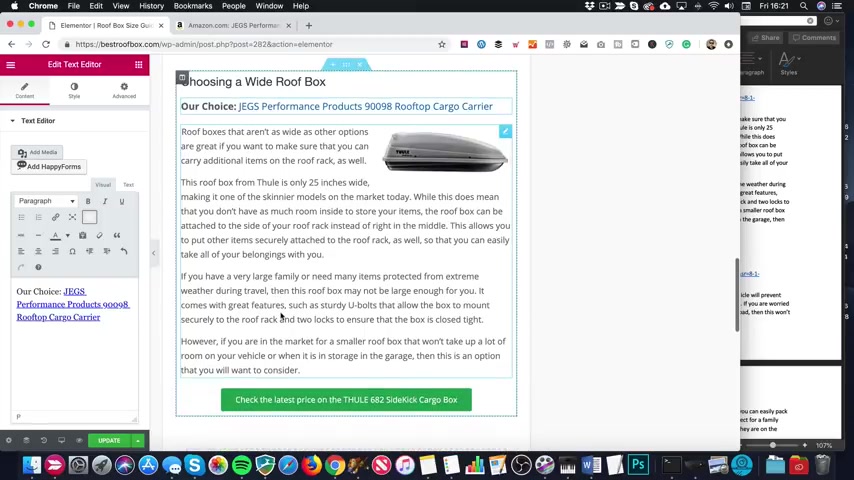
Update there We go as well .
Do the button as well .
While we're here , Update the link .
Open a new window ?
No .
Did I do that on the on the last one ?
No .
I think it's good to tick those two things .
Let's add the name to the button .
Oh , I know the other thing we haven't done .
We added our little icon on the buttons .
Amazon icon .
There we go .
Now , this button has spilled onto two lines , so I'm gonna reduce it down a little bit , so it's got a weird here .
We don't need that .
Uh , let's get rid of performance products .
There we go .
Perfect .
Let's clean out this copy .
Just select it all there and deleted .
Let's copy all this .
Copy .
I'm gonna add a few , uh , more returns .
I think that's fine .
Let's grab the image large .
Let's copy the code .
Come back into the text editor , paste it in back to the visual editor .
Select it and a line .
Right .
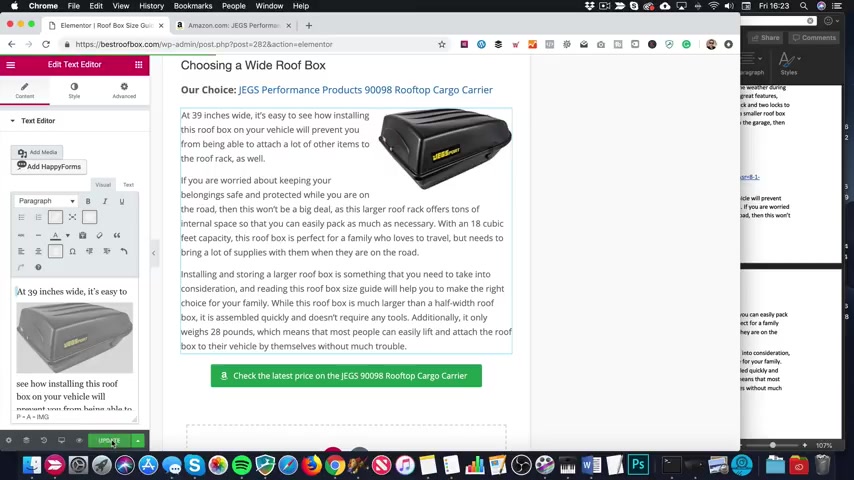
There we go .
So let me do a quick edit in the video and I will quickly add the rest of these products .
Then I'll show you how those anchor links are gonna work or how they do work , in fact , and then we'll just add a quick plug in to make the anchor links work .
Even better .
See you in a sec .
OK , finished adding all of the content .
So let's take a look .
There we go .
There's all our lovely roof boxes .
See , let me show you these links .
So if I wanted to jump down to long , I can just click long .
There we go .
It takes me straight down there .
Let's go back up .
Let's try it one more time .
Launch .
There we go .
Now it looks like it scrolling a little bit too far , but it's only because I'm logged in and this bar is covering up the actual heading .
But it will take you straight down there now .
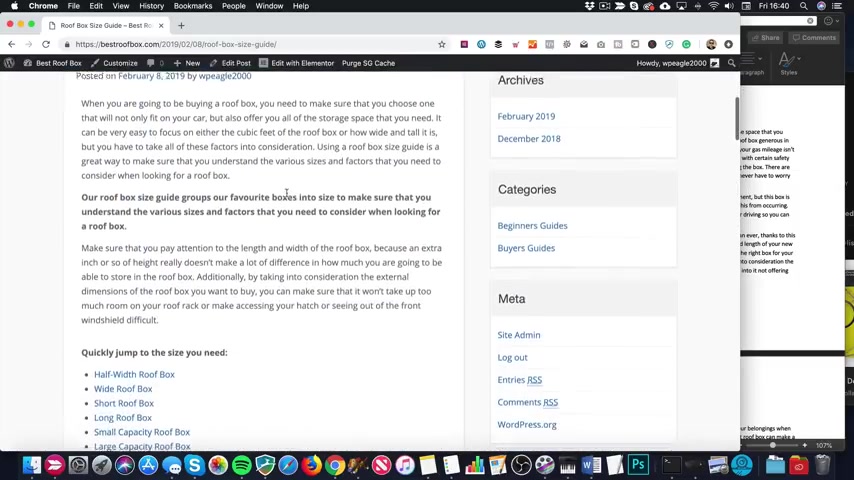
Sometimes it jumps really kind of abruptly .
For some reason , mine is actually smooth scrolling .
And that's probably because I was testing out a plug in earlier .
And even though I've removed the plug in for whatever reason , it seems to have left Ryan , If yours is jumping like in a kind of jarring kind of way , this is the plug in that I recommend you install .
Go to plugins and add new to get a nice smooth scroll effect .
Just type in here page scroll to ID .
It's this one .
So you might not want to do this .
It's it's it's entirely up to you .
I think it gives them a better experience with the , uh , the old anchor links .
There we go .
That's done .
I don't think you actually see much difference on my site cos it seems to be doing it .
Anyway , Let's have a look .
There we go .
So , yeah , if you want that nice scrolling effect like I've got , that's the plug in you need .

So we've got the two posts on .
Now .
We got this one here with our lovely links , and then we've got the , uh , the ski one with the lovely table .
So I'm gonna go through , and I'm gonna add the rest of my content , Um , which will mostly probably be the one with the table thinking about the kind of content I've got .
So I'm obviously not gonna make you watch all that .
Let me do an edit , and then when we come back , my site will be full of content .
Well , I'll have about 14 or 15 posts on it and which is good enough in terms of being ready to launch , I think .
And then what we'll do is just finish off by , um , you know , adding things like Google ads sent to Google Analytics submitting the site to Google Webmaster console and a few little bits of Bob just to do before launch .
Well done .
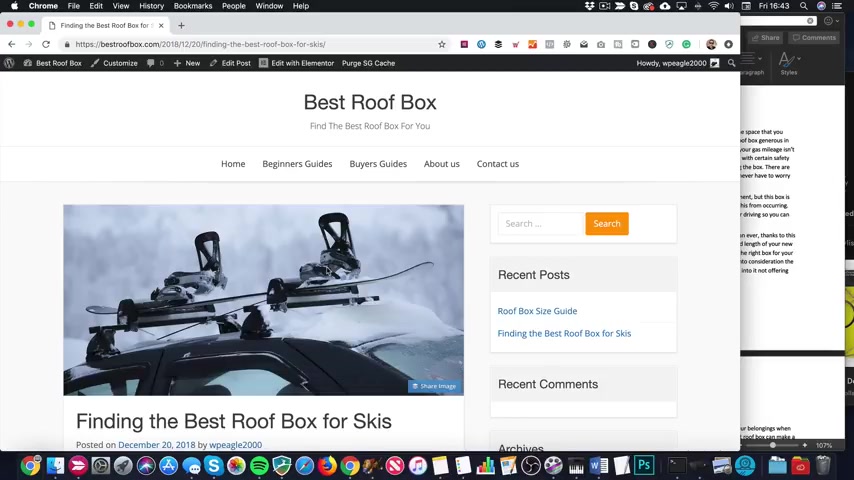
If you've got this far doing really well and , um , I hope you're making good progress like I am , But anyway , let me do this edit and get this content added , And I'll see you in a moment , right ?
So we've now got some content on the site .
Here we go .
I've added 14 , maybe 15 or articles , selection of beginners , guides and buyers' guides .
So the buyers' guides are basically just around the different cars .
And then the beginners guides are are more around more general stuff like size guides and storing your roof box , that kind of thing .
We dip into the categories .
They're looking good , too .
Nice images .
And yeah , the the posts are pretty much , uh , of a similar format .
They've got the buttons and the images .
Some of them have got tables .
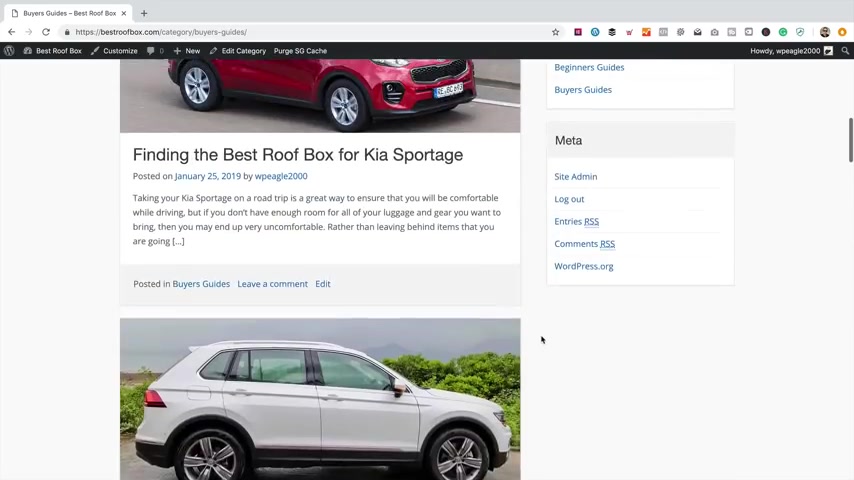
Of course , you've got to find templates um , for these posts that I've created on W PE dot com .
But anyway , let's crack on .
Let's get this site finished .
We're nearly there .
What we're gonna do now is we're gonna add a footer , add some links and things down here , finish that bit off .
Then we're gonna look at this side bar as well .
Um , add some nice widgets and add some ad sense too .
Get a bit of extra revenue in .
So let's start with the footer .
The foot is made up of columns , and then within those columns , we can add some widgets .
We're gonna come up here and go to widgets , and here we are .
This is how the widgets work .
So this is our sidebar .
We'll come to that in a second .
There is a header widget area , too .
I'm not gonna be using that today .
And then we got our footer here .
Can have up to four columns .
I'm just gonna be using three columns for now .
I'll save one for for later .
You never know .
I might need it .
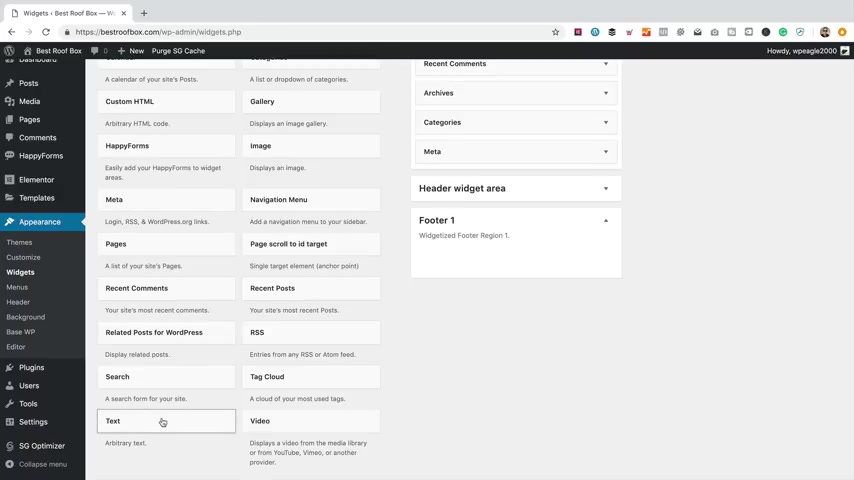
First one , I'm gonna add a bit of text .
So we got We just have here and anything you want .
You just grab hold of it and drag it to where you want it .
So that's foot to number one .
And in here , I'm gonna put the Amazon affiliate disclaimer disclosure thing .
Whatever it is , it's a kind of requirement of Amazon that you state very clearly that you are an Amazon affiliate and all the rest of it now feel free to copy the wording that I'm using here .
I've actually got it out on my clipboard and I'm just gonna paste it in now .
It actually says Roof box guide , which was the name I was gonna go for .
But I changed my mind .
We're now obviously best roof box .
There we go .
That should be fine .
Save that .
So let's have a look at what that looks like .
Just head back to the site .
There it is , that stretch to fill the whole footer because we only added the one .
And as we add the others , it will .
It will shrink down to to fit nicely .
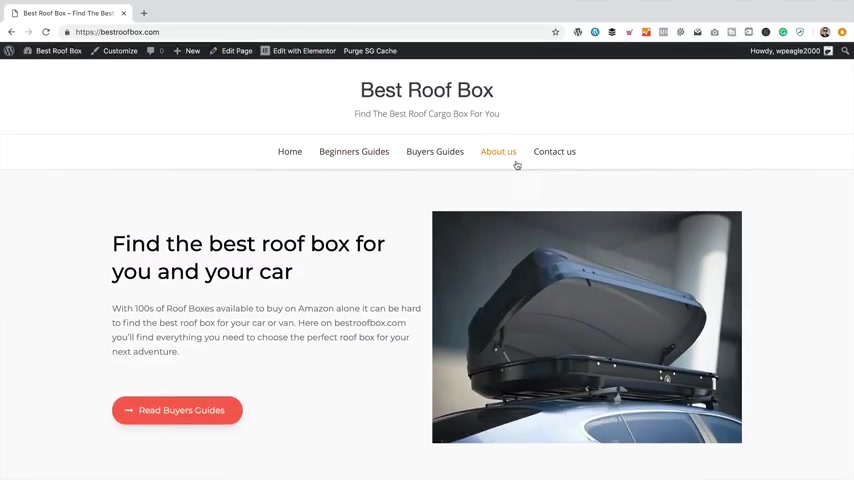
Next thing I'm gonna add is a menu just linking through pretty much to this stuff .
In fact , I'm gonna add the very same menu at the bottom .
Um , for now , in the future , I might start adding , like privacy , policy pages and things , and and they'll be added to the menu down here , too .
But for now , we just add the main menu .
So to do that , let's go back into widgets .
I'm gonna grab the , um , navigation menu one .
Put that in foot or two .
Call it something , like learn more , then select main menu .
Now , of course , you can create another menu within the menu section , which you find over here under appearance .
Then you could select it and and show that instead , finally Footer number three .
I'm gonna just show the recent posts .
So I'm just gonna grab this recent posts widget .
I'm gonna call it recent posts or let's call it recent guides .
That sounds better .
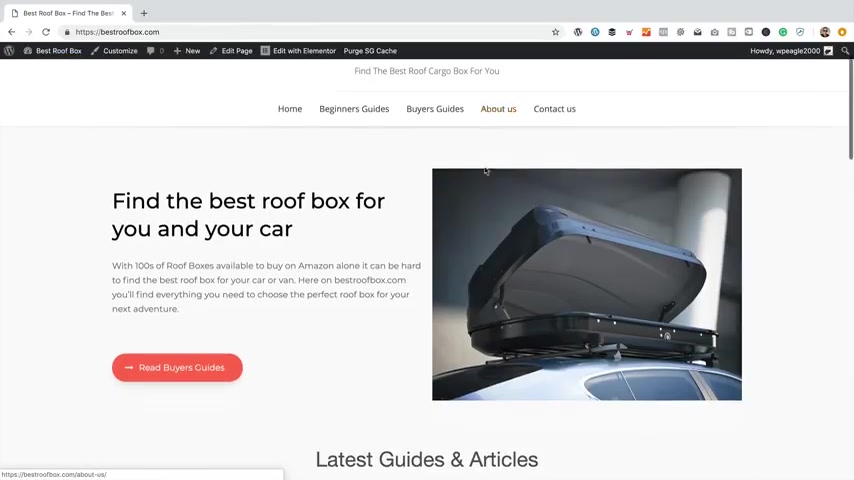
And I think I'm just gonna show four click save .
There we go .
All saved .
Oh , let's have a look at the site .
There we go .
What a lovely footer we got there .
That's absolutely perfect for now .
So what ?
We're working on with it .
Let's take a look at the side bar .
So that's down here .
I think what I'm gonna do is I'm gonna keep the search box .
I'm gonna keep the recent posts .
I'm gonna drop recent comments for now , until we start getting some comments , then I might add it .
But at the moment , there's nothing there , so it's a bit pointless .
Drop the archives , drop the categories and drop the meta Uh , and then I'm gonna add a a Google AdSense uh , ad .
So first off , let's remove the ones we don't need so back into widgets .
So recent comments don't need that .
Let's click .
Delete .
Archives don't need that .
Categories has gone and meta is gone .
There we go .
So let's go and set up our AdSense .
So to do that , I'm gonna head over to AdSense .
So for those of you who don't know , AdSense is Google's advertising programme for publishers , it allows you to earn some money by showing ads on your site .
Gonna need a Google account to be able to sign into here .
I've already got an AdSense account , so I should be able to go straight in .
If you haven't , you're gonna have to go through some sort of sign up process .
Here we are .
We're in AdSense .
There's my earnings pound this month .
You're never gonna maybe earn a fortune off AdSense , but it's a lovely way to supplement your income from your affiliate site .
But anyway , let's create a new ad .
I'm gonna do a manual ad .
There are auto ads and things like that .
Um , which kind of lets Google put ads wherever it wants to .
I prefer a little bit more control .
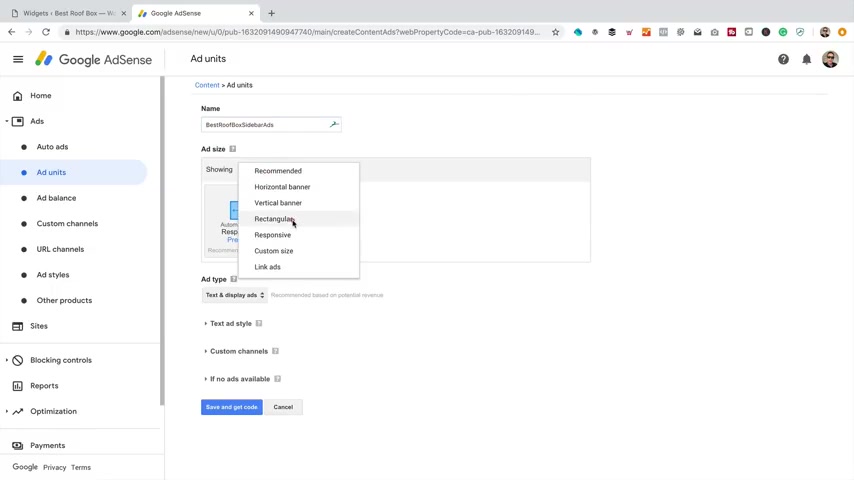
So I'm gonna go into a units , so I'm gonna click new add unit , choose text and display ads .
You gonna give it a name ?
Let's call it best roof box sidebar ads .
A nice , short , snappy name .
I'm gonna go for a rectangular size .
I'm gonna go for 300 by 2 .
50 .
I think that looks the best on this particular site .
They go for just display ads because I prefer them over the text ads .
Then click , save and get code .
So we've got a bit of code here .
I'm just gonna copy that into my clipboard .
Go close .
Come back to the website , then I'm gonna grab a HTML , uh , widget or a custom HTML widget .
I should say I'm just going to paste that code in like that .
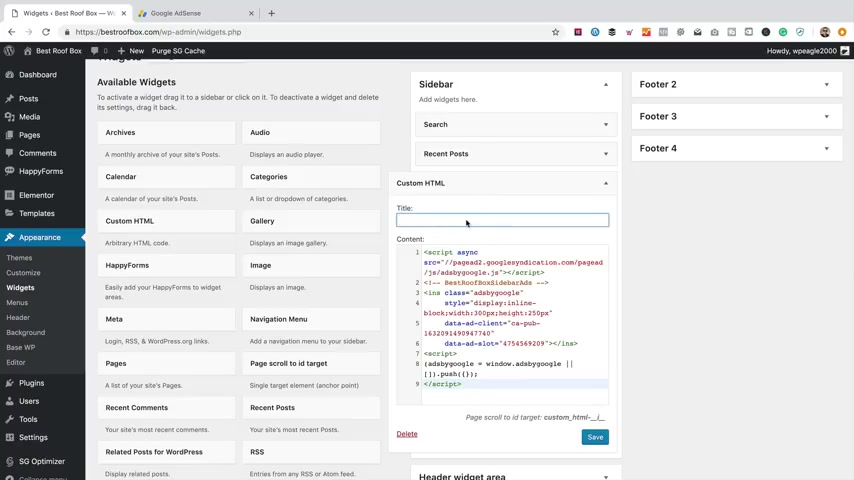
Give it a title .
Yeah , I'm gonna call it something like that .
sponsor message .
There we go .
Now I'm gonna just pop back to a sense because I think I need to add , um , this site as a site within AdSense .
So back to add , I'm gonna go to sites .
I'm gonna go add site .
Enter the URL .
Which is best roof box dot com .
Then there's a bit more code to copy .
Let's copy that to the clipboard Press .
Done .
Now we need to add that code to the header on our WordPress site .
I know that sounds a little bit complicated , but it's gonna be fine .
We're gonna use a plug in to do it .
So let's go back to the site .
Click Uh , add new on plugins and in the search box .
I'm gonna type in insert Header .
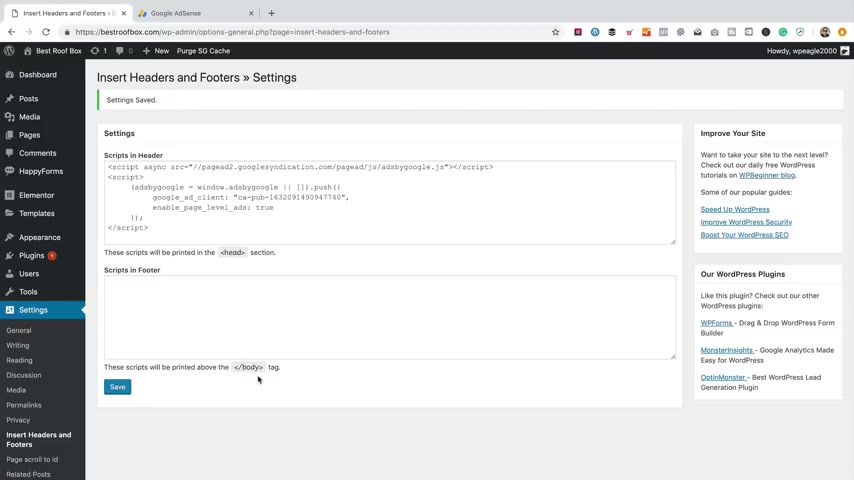
And this is the plug I'm gonna use Insert headers and putter .
I'm gonna click .
Install now can activate .
That's all done , Then .
If we go into settings , we'll see that we've got insert headers and fitters .
I'm just gonna paste that code in from a sense like that And that's all done And take a look .
It might take a little while for the ad to show they don't always show instantly .
In fact , they very rarely show instantly .
So at the moment , we've got this kind of square , so it will appear there shortly .
I'm I'm I'm confident in that .
So that's had since done .
So the next thing I'm gonna do is install Google Analytics .
Google Analytics is a free , uh , bit of software that you can install to your website , and it enables you to track all the visitors that come to your site where they're coming from .
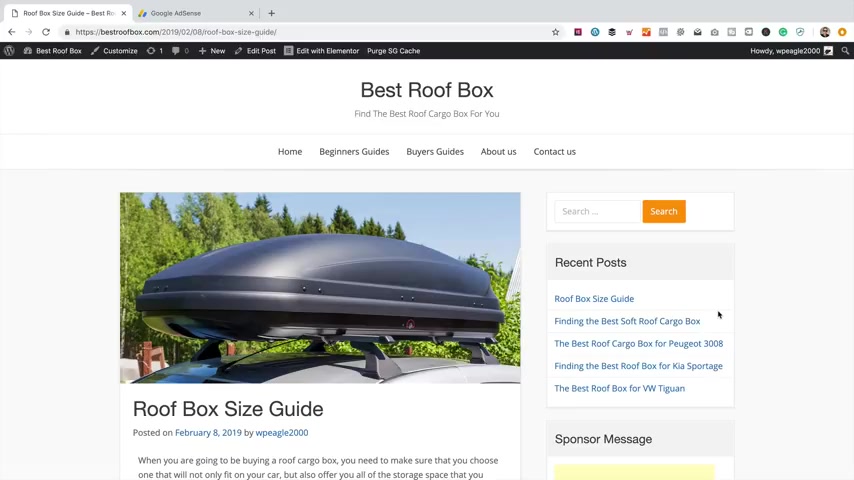
Uh , what articles they're looking at , how long they spend on the site , A whole load of information that's really useful when it comes to making decisions around marketing or or content .
All that kind of stuff really easy to set up .
I'm gonna do is I'm gonna head over to analytics .
I'm just gonna type analytics in to Google and it's taken me straight there , isn't it ?
Here we are .
So what I need to do is create a new , um , property .
Now , if you're new to analytics , when you sign up , you'll be greeted with the set up with us straight away .
I need to come into the admin , and I'll do it under this account .
I've already got an account this digital account .
So I'm gonna click , create property , given a name and to the URL .
It's a HTTP S Best roof bucks dot com Select a category if you want .
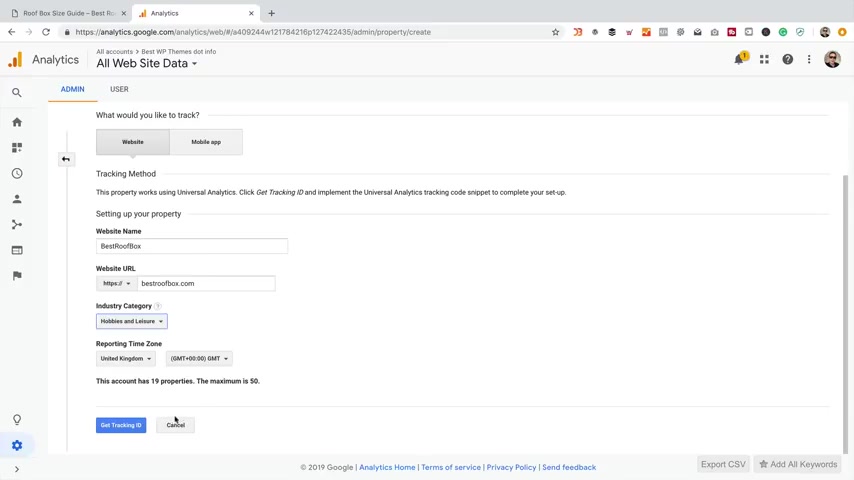
I guess it's , um , what is it ?
Could put references .
Not really shopping , hobbies and leisure .
Yeah , that's fine .
Set your time zone .
Click .
Get a tracking ID .
You look another bit of code , but actually we don't need to copy this code .
We can use a plug in to connect , so let's go back to the website , Go to dashboard Plugins and then add new .
My favourite Google Analytics plug in is called Monster Monster Insights .
It's this one over here with a little monster Click Install Now .
Then I'm gonna click .
Activate got a few questions to answer .
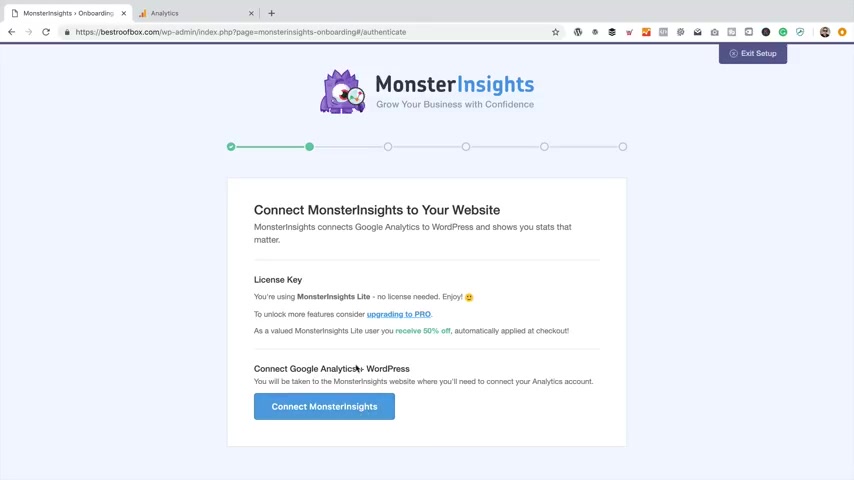
I'm a blog , I think blah , blah , blah .
You can get a pro licence if you want .
We don't need that .
Let's click Connect Monster Insights .
It's gonna want you to sign in to your Google account , so just click on the Google Account Click allow that you need to , uh , connect to the right profile .
If you've got multiple analytics profiles , select it in the drop down .
It's already chosen the right one for me , so I'm gonna click complete connection .
We leave all these settings as they are .
Click , save and continue .
Just trying to make me upgrade to pro .
Not gonna say continue again .
It says .
Install some form .
Plug in .
We don't need to do that .
Skip this step .
We're all set .
So let's finish set up an exit , wizard .
There we go .
Should be all done .
We go to reports .
We can just see if there's anything there which they won't be because I just set it up .
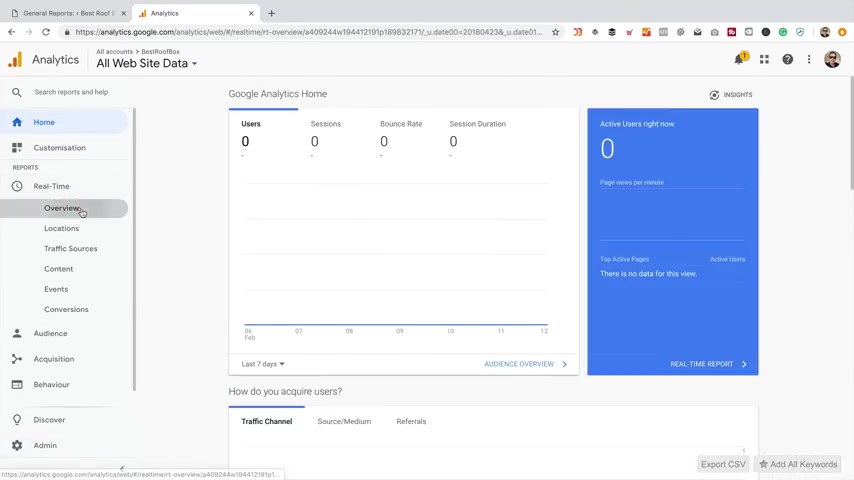
But there we go .
At least it's connected and working .
We can double check .
It's work .
And if we go into analytics and let's just go back to the home and go to real time , this tells us who's on the site right now .
So it says there's zero .
If I fire up a incognito window because it won't track logged in users and go to the site , have a little browse around like that .
Let's close it now .
Oh , look , there's one active user that will be me there .
I am in Luton .
I'm not in Luton .
How dare it say such a thing .
If you know anything about Luton .
You know why I've said that anyway , So that's analytics done .
The final thing I'm gonna do now is install an SEO .
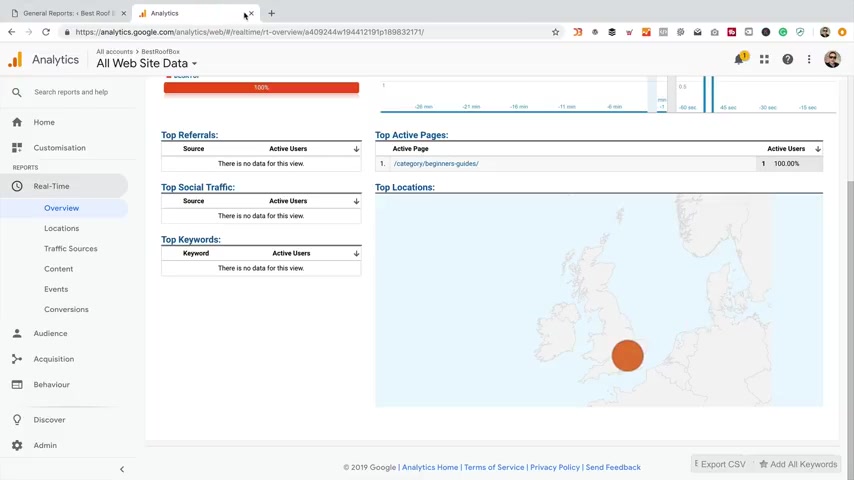
Plug in and I'm gonna submit a site map to Google Webmaster Console or Google Search console .
I think it's called now something like that .
Just to let Google know all about my posts and pages and categories and and the structure of my site .
So we don't need analytics anymore .
Close that back into plugins and then add new search for Yost SEO first one that comes up , click install now and then activate .
That's done .
So Yost allows you to optimise your posts and pages .
I'm just gonna show you how that works , and then we'll do the site map .
I'm not gonna do too much optimisation because the posts are pretty much optimised when I publish them .

I know that because , um , I instructed the authors to focus on certain keywords , and that's what they've done .
And also , it's it's actually quite difficult to optimise with element , or I'll show you why I'll just click edit on this one .
Uh , and this is with the Gutenberg type , um , screen down here .
You'll see there's this panel .
So this gives us an idea of what's gonna show on Google .
Um , should , uh , should it get indexed and ranked , which hopefully it will do .
So you may want to set a meta description that is probably a useful thing to do in terms of the page title .
This is fine because I want to rank for roof box size guide .
And in fact , what you need to do is add a focus keyword down here .
So I say on this one , it's roof box size guide , and it's got a green face .
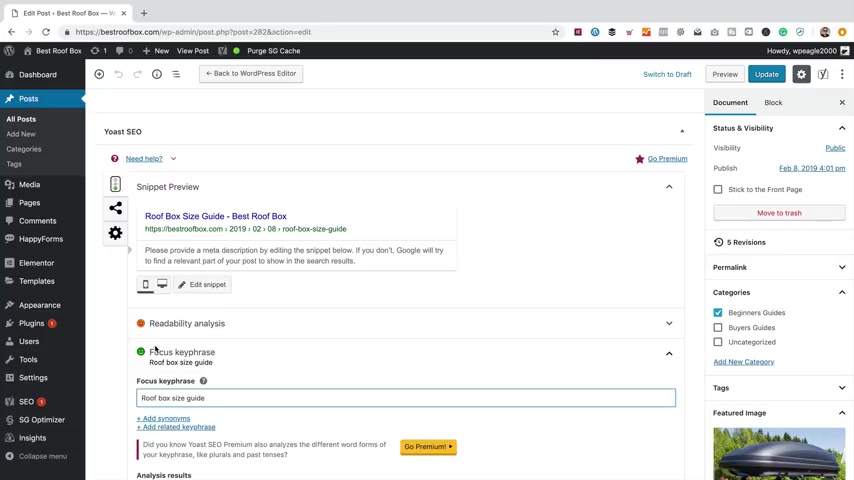
So that means that the content is pretty well optimised for that key phrase .
But let's say I think adding my description is pretty good thing to do .
Otherwise , Google will just try and make one up , which may or may not be be good .
So I like , find the perfect fit for your car .
With that , then I'm gonna include the keyword roof box size guide .
It's bolted it .
It's not easy to follow , but bear in mind that you wanna write something that's gonna attract a click , because click through rate is very important when it comes to the SEO .
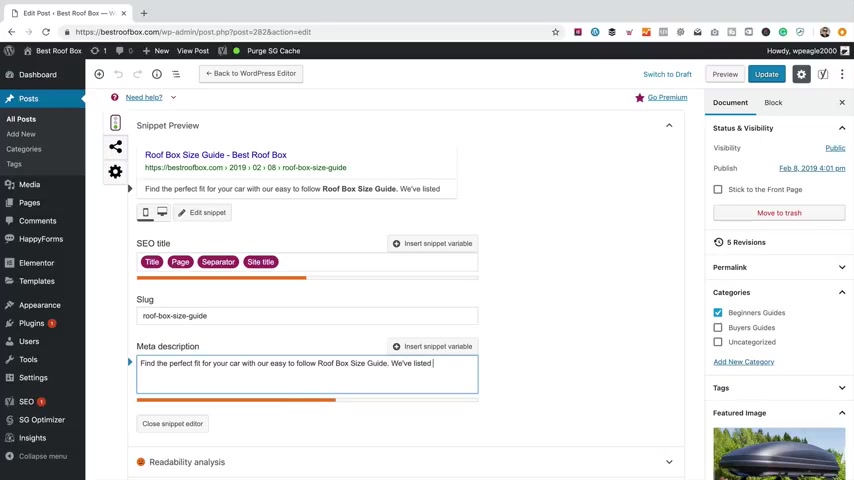
We've listed a FA for it roof boxes by size , so you can quickly find the one for you .
That's fine .
It's got a little bit over in terms of length , but that's fine .
So yeah , that's , um now , of course , it's also gonna give you recommendations .
Uh , if you look down here .
So it's saying that the key phrase is , uh , is too low .
Key phrase was found four times , so I should maybe add it a few more times , says My mat description is a little bit too long , as I just said , but I'm not worried about that .
Says there's no internal links .
Well , that's not actually true , because the related posts plug in is adding internal links .
So not too worried about that .
But , yeah , when you're using elementary , it's difficult to obviously work on the copy .
While looking at this , you just click update .
If we go into elemental , I mean , I could add the phrase a couple more times .
I think the reason why the um , the phrase is not showing as many times as it says it should do is because I've got a variation on the phrase which uses the word cargo as well .
But it's mentioned there looking at it here .
Here's our roof box size guide .
There we go .
I added it one more time .
To be fair , if you're getting the green smiley face , then you're probably just gonna be fine .
OK , so let's go back to the dashboard .
We're gonna do the site map now , but there's one more thing to do before we do that .
And that is , uh I'm gonna change the URL structure of the site .
I don't like this kind of category .
Well , not even category .
This date thing that's going on , I prefer a category I should say .
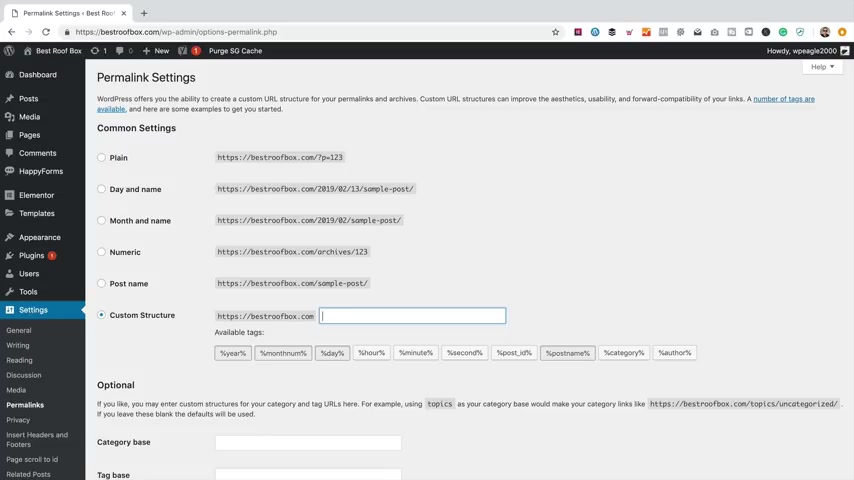
So to change that , we're gonna go into settings and permanents Can you go custom structure , take out all this stuff , Then I'm gonna add category and then post name .
That's my favourite URL structure .
You can put what you like , but I'd recommend something like this good for SCO .
So now when we look at a , um , article , rather than having like date , it's gonna have the category beginners guide and then the RL of the post , which should , of course , include your keywords .
No sign of the ad yet .
OK , so let's do the site map .
So back into the dashboard , go to SEO , the general that into features .
Here we go .
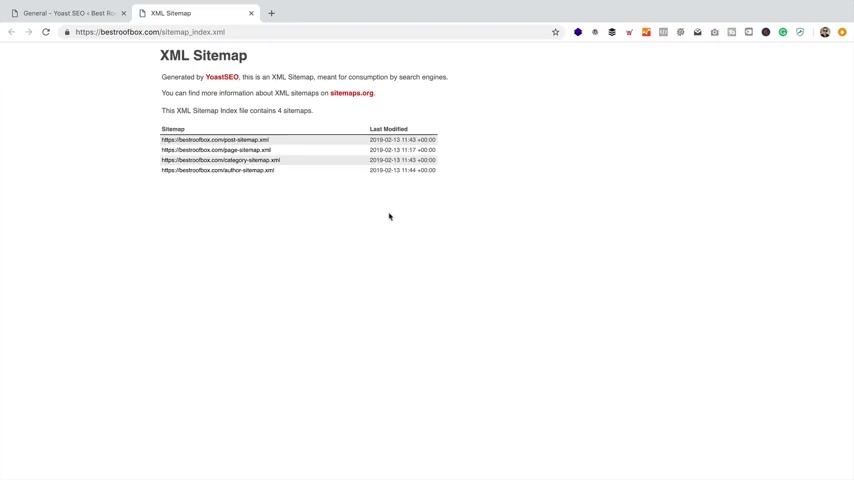
Here's the XML site maps , so I'm gonna click on the little question mark .
They're already switched on .
That's fine .
If we click here , we can have a look at it .
So it's made up of four site maps within the main site map .
One for the post , one for the pages , one for the categories and one for the authors .
If we click through , there's all the posts , lets them know about the images , which again is not strictly true because there's some Amazon images in there .
But it's it's obviously not reading them .
Not worried about that .
The one thing I do wanna remove is the oh , let's just go back is the alpha ones .
I don't think that's gonna be needed .
So to get rid of that , I'm gonna go into search appearance down here .
You go to archives where it says author archives .
I'm gonna just put disabled and save changes .
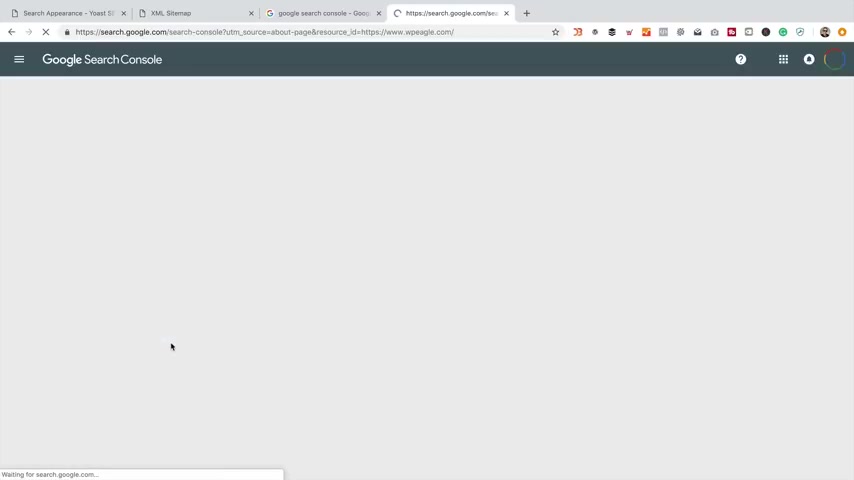
Think date archives are off and they're not Don't really want that either .
To say all that .
There we go Let's just refresh this .
There we go .
Authors have gone , so that's perfect .
So let's submit this to Google .
Let's pop over another tab .
I'm gonna go to Google Search console .
There it is .
Start now .
Now , this is the new version , and I'm a little bit confused in terms of how you add a new site on this new interface .
Maybe they're just not added facility to do that yet .
I don't know .
I only go to the old version down here and I'm gonna go to like the overview page .
We'll do that by clicking on the Google Ogle .
Then I'm gonna click .
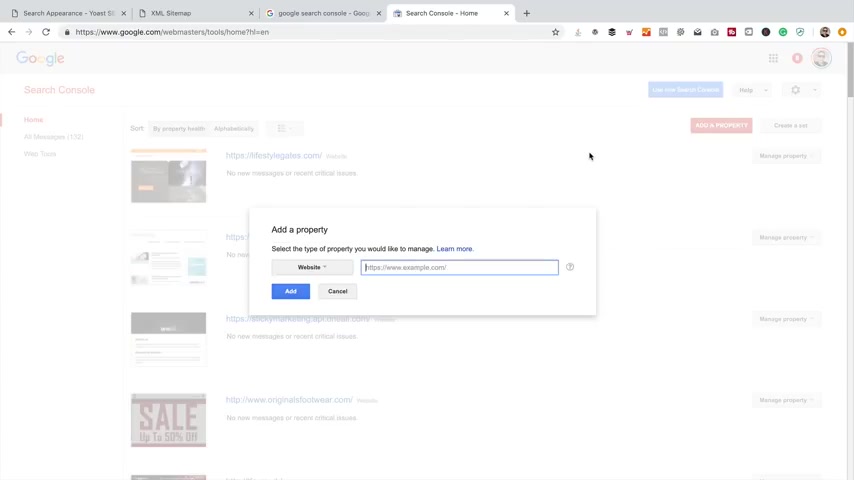
Add a property type in URL and click add .
Now it's gonna wanna verify that you actually own the website .
Now , if you've just done the previous step and installed Google Analytics , you should be good to go .
So let's click .
Verify .
There we go .
I think that's the easiest way to do it .
Let's click Continue .
And then down here under crawl , I'm gonna go to site maps add , and here I'm gonna type in site map .
Underscore index dot XML press submit .
It says it's been submitted .
Let's refresh the page there we go , it's pending .
That should be fine .
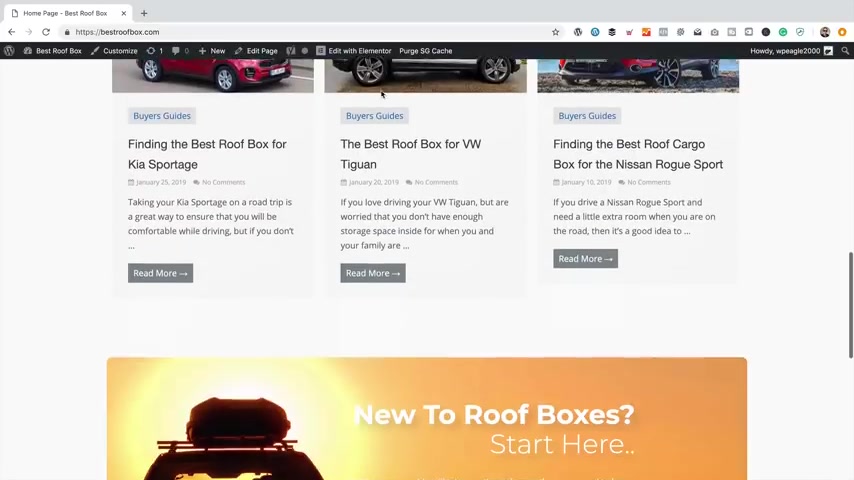
So I think we're pretty much done , actually , And let's just close all these things down .
Let's take a look at the site .
There we go .
Now , going forward , I'm gonna be adding loads more content to the site .
I'm gonna be creating more videos around me , adding content .
I'll be keeping you guys updated in terms of how much traffic the site's getting , how much money it's earning all those kind of things .
So if you're not already subscribed , be sure to do that now And , uh , well done for making it this far .
And I hope you've got a great website .
But that's it for now .
Let's go back to my face .
Well done .
You've made it to the end of the video .
Congratulations .
Not many people make it this far .
You're one of the few that has got to the end of this mammoth video .
Hopefully , you've got a great website , and hopefully it's all up and running and you're happy with it .
As I've said a few times in this video , I'm here to help you .
So if you've got any questions or comments about your site , do leave them below .
I'd love to see what you've created .
You might want to email me your website address .
You can do so by emailing Eagle at WP eagle dot com .
I wouldn't recommend leaving your website in the comments because people have been known to steal people's niche or niche ideas .
So , yeah , you probably don't want that .
People are always stealing my ideas because I put them up on YouTube .
But , hey , I'm fine with that , but you might not want to .
But , um , if you do , then obviously leave a link in the comments .
That's fine , too .
But generally you might want to email me .
So yeah , it's Eagle at W PE dot com , and I'll take a look at your site and I'll give you my thoughts and feedback .
So , yeah , we're at the end .
If you fancy watching something else , then there's a few more videos up on screen now .
They've been chosen especially for you .
Hope you enjoy them .
Uh , if you click on the Eagle , you can subscribe .
But I'm sure you've already done that by now .
If you wanna watch my vlog click on my face up there until next time .
Bye for now
Are you looking for a way to reach a wider audience and get more views on your videos?
Our innovative video to text transcribing service can help you do just that.
We provide accurate transcriptions of your videos along with visual content that will help you attract new viewers and keep them engaged. Plus, our data analytics and ad campaign tools can help you monetize your content and maximize your revenue.
Let's partner up and take your video content to the next level!
Contact us today to learn more.