https://www.youtube.com/watch?v=cbV6TEc_Fjc
How to Draw a Face for Beginners (7 EASY Hacks!)
how to draw a face for beginners In today's video , I've got seven simple hacks for you and a bonus tip , too .
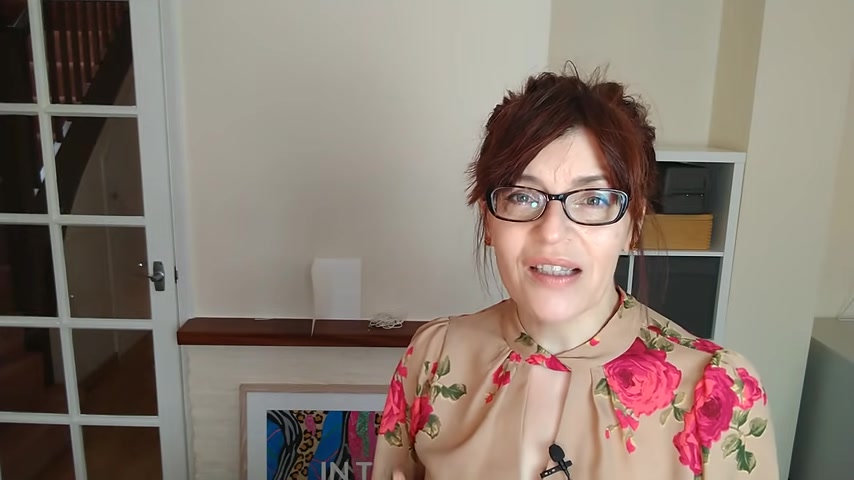
Welcome back to my channel If you are new here .
My name is Michelle , and on my channel you'll find mostly videos on watercolour painting as well as a little bit of mixed media drawing videos like this one , even some motivation and business videos , too .
So please do consider subscribing .
If you click the bell icon , you can get notified every time I have a video for you .
I make at least one free video a week here on YouTube on a Thursday , with extra content on Saturdays for patreon subscribers .
So usually on this channel , I am teaching how to paint more often than not in watercolours .
But the truth is that I have been teaching drawing for just as many years .
So I've been teaching painting , and that's almost 20 years .
So coming up on this channel this year , I'm gonna do a lot more drawing tuition and also be going into some other medias , too , just so that we mix things up a little bit on this channel , and if you're not specifically into water colour painting 100% .
You'll find something else of value here , too .
Now , today I'm going to concentrate on drawing faces .
So this is useful for portrait drawing , but also , when you're not looking to get , you know , maybe a specific lightness .
But you just want a realistic looking face .
There are some things that beginners do wrong many , many times , and I am going to show you some simple hacks so that you can get a realistic face every single time .
Now I must apologise light levels in this video .
Everything looks really washed out only because white it's a sheet .
The weather outside is what could be described best as fog .
Yes , fog .
We have fog here in the UK today , and despite having loads of filming lights on me , I just can't get very good lighting in here .
But you'll still be able to see what's going on .
So don't worry about that now .
In this video , I'm gonna be drawing in pen , actually , and I'm at filming this video again .
I filmed it yesterday , and I got halfway through the edit .
I just wasn't happy with it .
You couldn't see properly , and that's because pencil doesn't show up that well on the camera screen .
So what I'm gonna do today is I'm actually gonna draw it in pen so you'll get to see everything mistakes and or I'm not suggesting that you do your under drawings in four point pen , as I am going to do today .
I'm just doing it so that you can see what's going on now .
My first hack for you is to find the angle of the head .
And it's the only time in this video that we're going to be using a straight guideline .
I'll explain more about that as we go through video .
But have you ever noticed how you can recognise one of your friends from a great distance away ?
When you can't see any of their features or even clearly what they're wearing , it's usually to do with the way they hold their body and they hold their head and the way they walk because the way we hold ourselves is unique to every single person .
It's partly to do with our physiology , any problems that we might have with our skeleton or just the way we're built .
It's also to do with the way that we choose to hold ourselves and also how we hold ourselves unconsciously because heads are heavy , so almost no one holds their head upright all of the time .
Unless they're , you know , a soldier in a parade .
We all hold our heads slightly on one side , and it's really important to get that right from the beginning of your drawing because your brain will want to default to everybody , having their head upright and facing forwards .
That's why the Egyptians used to draw everybody on flap act .
But we're going to learn some hacks today to stop you from doing that and to make it easy for you .
And here's the first one .
I'm gonna show you how to easily find the angle at which someone is holding their head .
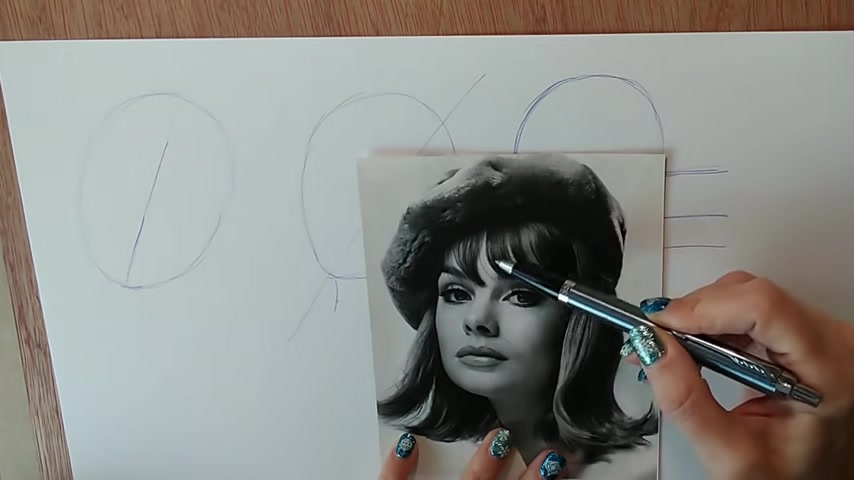
So in my studio I have a filing cabinet , which is literally full of thousands of photographs that I've used for years when teaching art classes .
Now this one's got famous faces in some of whom I recognise and some of whom I do not , because I never watch TV .
Let's look at these two faces here , and let's look at the angles of which they're holding their head Now I'm going to use a paint brush because it's long you can use a ruler .
You can use anything you want to judge the angle of someone's head .
Now , sometimes the angle of the head will coincide with the features , and sometimes it won't .
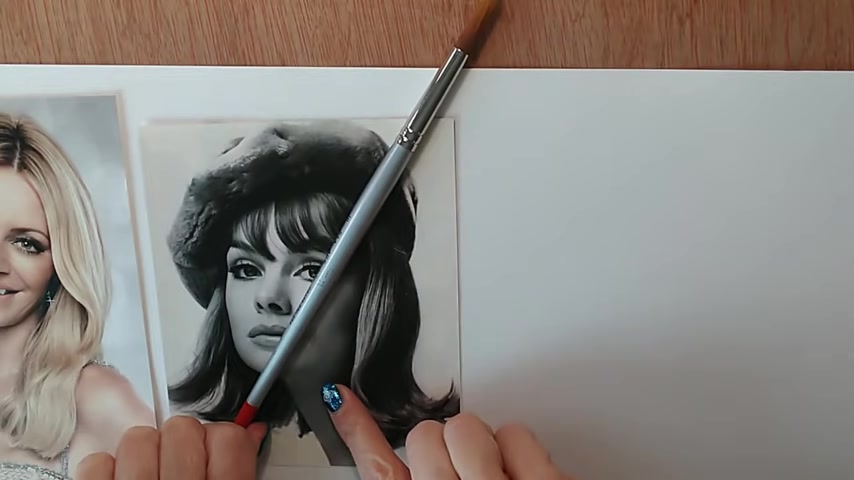
So let's look at this one , first of all , and you can see if we place a line from her chin through to the crown of her head , or at least where we think it might be .
We have got something that lines up entirely with the features , however .
Let's look at this one here and you'll see if we take a line from the chin to the crown of the head .
We've got something a little bit different going on , so this is not about the features .
This is about the angle of the head Now , in order to translate that onto your paper , if you're working from photographs , you need to anchor your photograph , by which I mean it's no point trying to judge the angle .
If the photograph could be anywhere , so you need to line it up close to where you're working and to one side you can anchor it to the top edge .
You can anchor it to the side edge , or better yet , in the corner .
Wherever you place , it need to know that it's on the same plane .
In other words , it's on right angles to your paper , and then once you've placed your line , you can just bring it across like this .
Of course , it's not an exact science , but it will give you a good idea of where the line sits .
From .
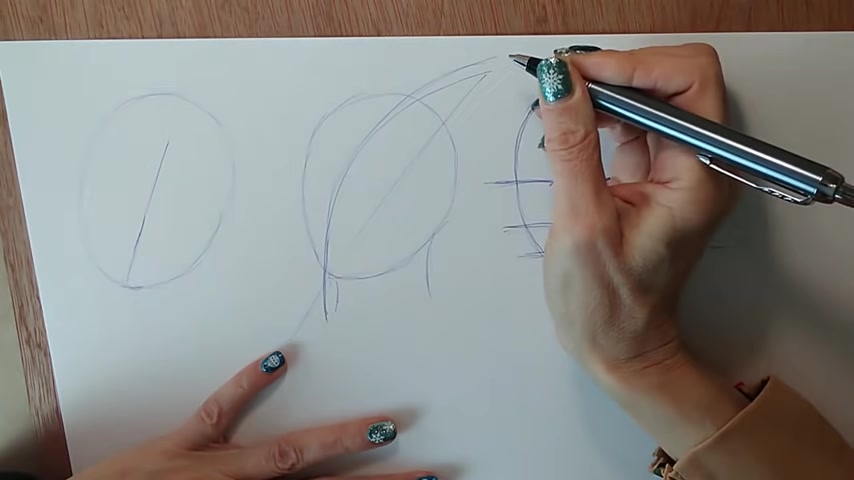
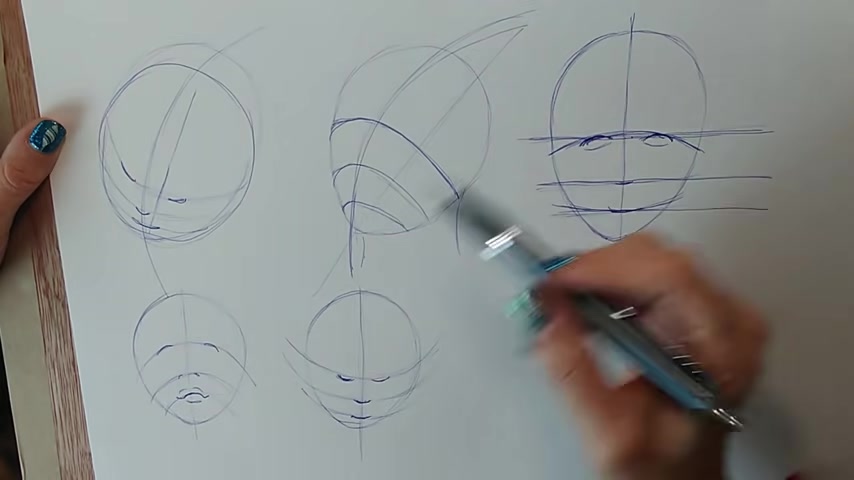
There , you can start by making an egg shape .
So let me show you how that looks .
If the angle of the face is like this , so just slightly to one side .
And remember , I'm only drawing with a pen so that you can see well on camera .
So if the angle of the face is like this and the person is facing fairly forwards , then you are safe to do sort of , initially an egg shape that's going to be a little bit smaller at the base , just like an egg is .
So this is your person here Now .
If somebody is looking very much at the side , then the shape of that egg will change a bit , and the side that's facing away from you will be fairly flat , and then you will get to see more on the other , the side .
It will be more curved because what you're getting is someone that's on the side like this .
And so the side of the face that's turned away , let's put the angle in of the head .
The side of the face that's turned away will be a little bit flatter , and you're seeing a bit more of the back of the head there , so that side will be a bit more curved .
So this straight line is just to see the angle at which someone is holding their head .
And that's the first thing you should be checking when drawing a face .
Now , one mistake that everybody makes when they first start drawing faces is to put the eyes too high up in the head .
So you may have heard people say that the eyes are halfway down the head and it seems really strange , because when we look at people , the eyes are the first thing we notice .
In fact , they're often the only thing that we look at when we're communicating with other human beings .
They're so important for human interaction , so we tend to give them greater priority than actually exists when it comes to the proportions of the face and we tend to put them far too high up on the face .
I'm going to tell you now about the rule of halves and how this will give you a basic layer of where to place eyes , nose and lips in your faces .
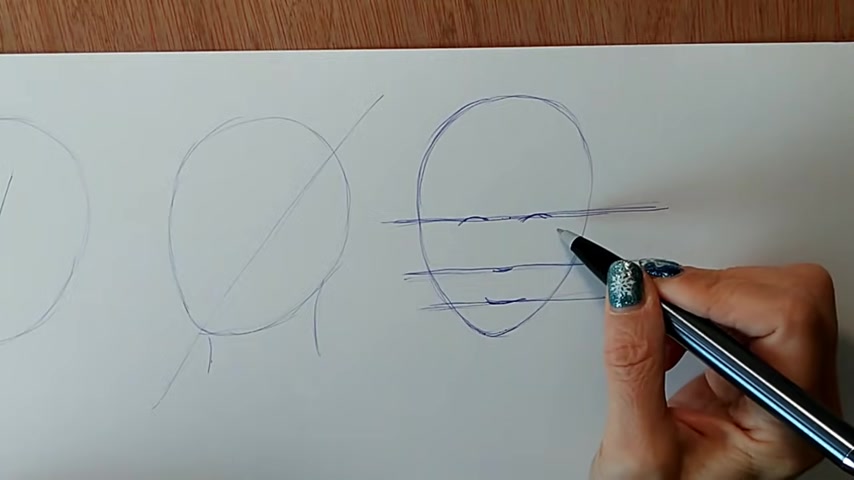
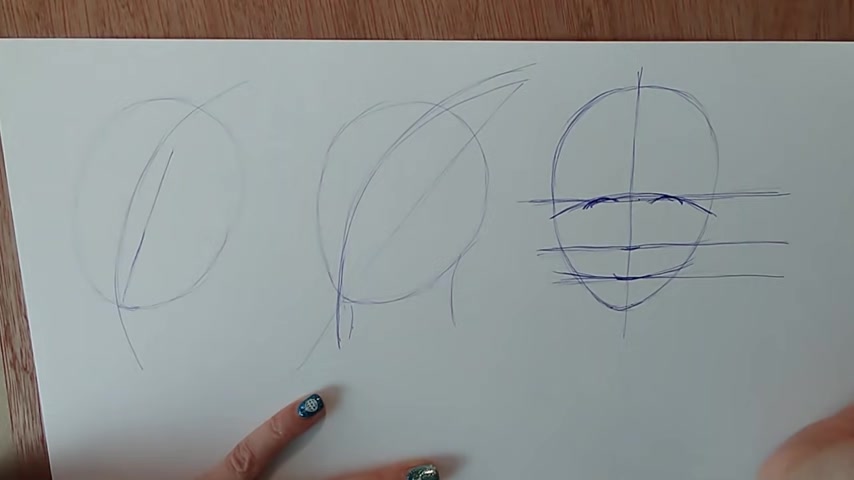
So the next thing we're looking at is the rule of halves .
Now you'll have to forgive me .
I did just draw this on camera , but for some reason it didn't record , so I'll just go over it again .
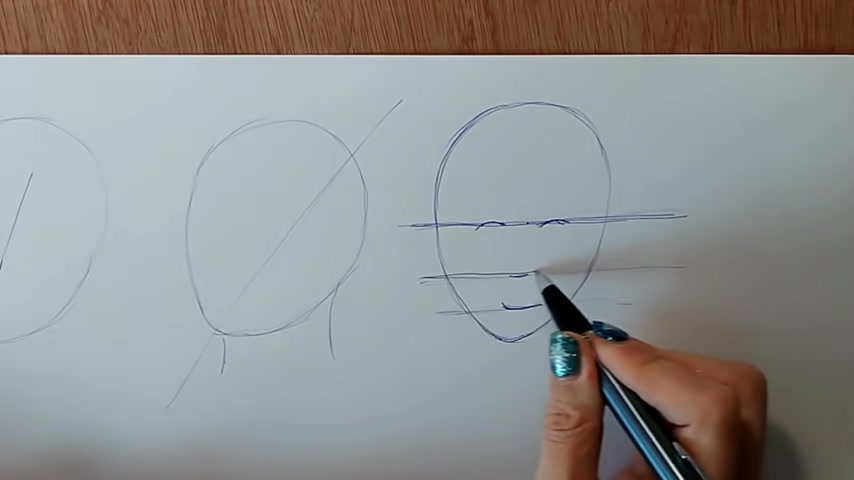
So we've got outline of the face here .
We've got the egg shape .
This is someone looking straight at us .
We then divide in half , and this is roughly where the eyes sit in the skull .
We can then take this line , go from here to the chin and divide in half again .
This is roughly where the tip of the nose sits , and then we take this line and the chin and we divide in half again , and we have an area roughly where the mouth sits Now , to be clear , the eyes do not sit along a straight line .
This is only about proportions .
These are not guidelines .
This is just about me telling you roughly how the features sit within the face .
Now people often say to me if you have a point halfway down the face where the eyes sit , is Is this the top of the eyes ?
Is this the eyebrows ?
Is this the lower part of the eye ?
The truth is that will vary from person to person .
But if you can start with that mid point on the skull where the eyes sit , then you're on to a winner .
Do be aware , however , that this will change if somebody's tipping their head up or down , and we'll talk about that more later in the video for my next hack , I'm gonna show you how to find the centre line in someone's face .
Now , this is entirely different from the last thing we learned , which was just how to find the angle at which someone is holding their head .
The centre line is different , and it's absolutely vital that all of the features line up along the centre line .
So , in other words , the point directly between the eyes the nose , the lips .
All of these things should line up along the centre line .
If you don't get this right , you're gonna end up with features that are completely out of alignment .
So I'm going to show you now how to easily find the centre line in someone's face , whether they're facing forwards or to the side .
So let's talk now about finding the centre line of someone's face , and this is one of the most important things you can do when you're drawing .
And it's something that many , many people , whether they're beginners or experienced artists , they still miss this out .
And it's so so important because when you have the centre line of the face , you have a way of positioning the lips and the nose and even the eyes in a way that everything lines up .
Now , if someone's looking directly at you , then it's easy .
The centre line is simply right down the middle like this .
Now , if we go back to our heads where people are facing away from us , the centre line will move across .
So again , if we look here , we have got a lot more of the face showing this side and a lot less of the face showing this side .
This means the features on this side are foreshortened , just like you look at things in a landscape and they become foreshortened .
The same happens with the features .
What this means practically , is that not only do you see more of the features on this side , they will be larger and take up more room in your drawing .
In other words , there is more of the lips to this side than there is to this side .
So let me show you how it works .
If we go back to our person with the head on the side because they're looking over to one side , what has happened is the centre line has moved across , and you'll notice that , unlike the angle of the head , the centre line is curved because it's following the curve of the skull .
The same with this one here , which was only slightly looking over to one side .
The centre line is still going to have moved .
When you're working in pencil , I suggest that once you've got the angle of the head correct , you rub out that construction line or construction lines would be rubbed out in the end , but I would take that one out because it can be a little bit distracting .
So once you've found the angle of the head , you want to be looking then at finding the centre line .
And remember that unless the person is looking straight at you and the perspective has flattened , that centre line will follow the curve of the skull .
At this point , as always , Can I ask you , please , if you're enjoying this video and getting value from it , can you please press that like button that thumbs up YouTube rewards channels with audience interaction .
So if you , like , share , subscribe or leave me a comment , YouTube will push this video out to more people .
And I'm super grateful to all of you who watch me on YouTube for my next hack .
We're going to add to that curved centre line , and we're gonna start using curved guidelines to lay the features horizontally on the face .
Now I have seen tutors with much bigger followings than mine teach this wrongly , and I'm sorry to say that I've seen lots of people teaching how to place features on the face , using straight guidelines in other words , a straight line through the eyes , whether that's facing forwards or to the side .
This is wrong because the skull is curved .
There is no way that you can place your eyes on a straight line , and this is something that beginners often do , because obviously they see that a face has symmetry , that the eyes sit either side .
And so what they try and do is line the eyes up on a straight line , and it ends up looking very strange indeed .
So I'm going to show you now how to use curved guidelines and how they interact with the curved centre line that we made previously .
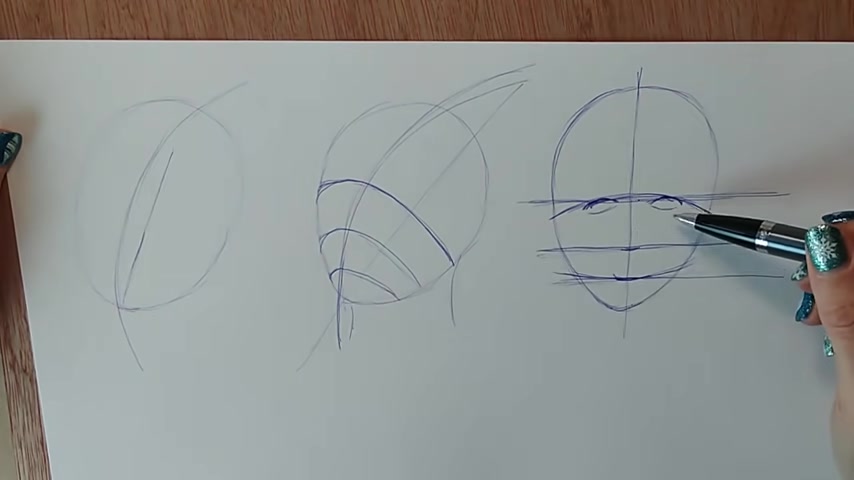
So let's now are using curved guidelines to place the features .
Now with this person here who was facing straight towards us , we use these lines across to show us vaguely where to put the features .
But in reality , the actual guidelines where the features sat would be slightly curved .
So if we were looking at this person straight on and they were the same height as us , in other words , we're looking at them pretty much sort of nose to nose .
You'd have something more like this going on and so the eyes would sit slightly along those curves rather than in a complete straight line .
Now , by doing this , you get a much more realistic look to your face .
So what happens if the person is looking to one side ?
The guidelines still exist .
They become much more curved .
So let's look at this person here , and what we'll get is something like this .
Now the head is not spherical .
It curves and flattens towards the back .
So when you're drawing your curved guidelines with someone looking away from you , what you're going to find is that they are most curved where they interact with the centre line .
So you get something like this happening .
Obviously , if the person's looking the other way , then you just get the same thing happening to the other side now , going back to our person who's looking straight on what happens if they're looking down or they're looking up .
So let's draw them again , looking down and looking up .
Now , the first thing that happens to the shape of the head is that it becomes more rounded when someone's looking down or looking up .
But because you're seeing more of the top of the head , and that's the case , whether they're looking down or whether they're looking up because you're still seeing that top of the head before you see the point of the chin .
So if someone is looking up or down , you can slightly squash and round the shape of their head .
Let's put our centre line in because their face onto us .
So here's the centre line .
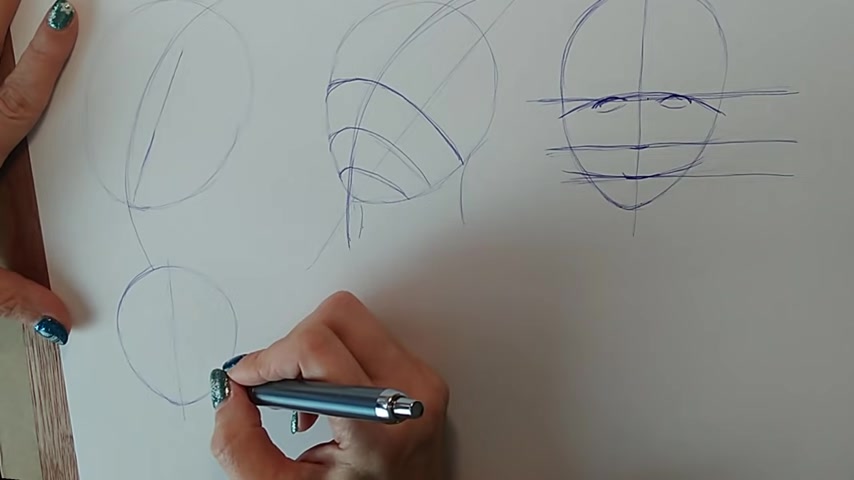
The next thing is easy to remember .
If they're looking up , the guidelines go up , and if they're looking down , the guidelines go down .
So when someone's looking up , their eyes will come above halfway up the skull and we can do the same with those other lines , too .
So what you get then is something more like this .
You'll see more of the nostrils because they're looking up and here's the mouth .
Now I want to be clear at this point .
This is the guideline for where the mouth sits in the skull .
It's not necessarily the shape of the mouth , so , in other words , the guideline can still go up like this .
But that doesn't mean that the mouth is necessarily facing down .
It's gonna follow that downward curve , but it could actually be smiling .
So these are guidelines for where your features fit in your skull , not the shape that they are .
So it's possible for a mouth to be following an upward guideline but still be turning down at the corners , for example .
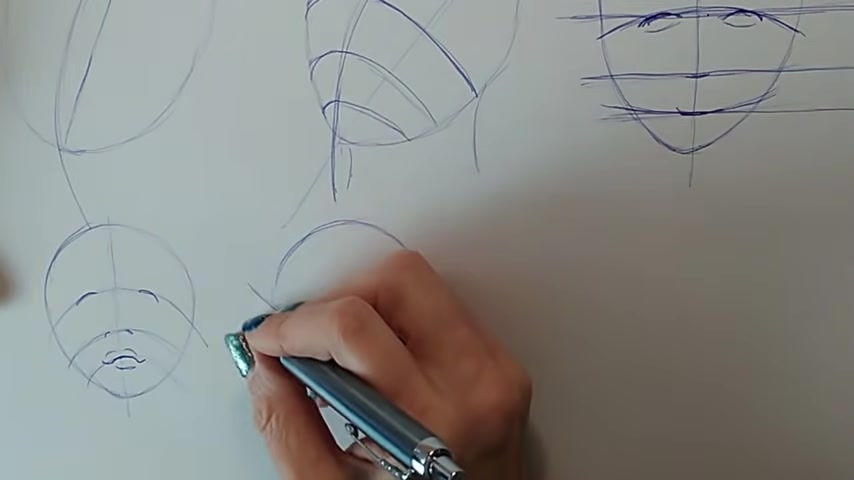
So let's draw now a person looking down again , we're gonna slightly more round the head , and then we're going to take the guidelines down lower .
Not only are they lower , but they are a little bit closer together because of foreshortening .
So here we are .
And again , let's put the centre line in again .
You've got the eyes and we'll draw them looking down slightly because people tend to have their eyelids showing , even if their eyes are open .
When they're looking down , we'll see more of the tip of the nose rather than the nostrils .
And again , here is the mouth .
So can you see how , with these curved guidelines , we can make people look up or down ?
Now what about if they're looking up or down at the same time as looking sideways ?
So let's go back to this example here .
Let's make the head a little bit rounder .
Let's get them looking down .
So again the line is gonna come down .
It's still going to interact with that centre line .
The curved part is still going to be most on the centre line .
And again , let's do this .
And then we can put the eyes in and the nose and the mouth .
So by using these curved guidelines , you can get the proportions of the face right , and you can accurately get somebody looking up or down .
Everything lines up .
I cannot tell you how important it is that you get these curved guidelines , the ones for the eyes most often when beginners go onto Facebook groups and forums and art forums , and they say that there's something wrong with their face and they don't know what it is .
It's usually that the eyes are either out of alignment or the features are out of alignment , or they've drawn their eyes too far up the head .
You won't need to make that mistake anymore .
Have you ever drawn a face and it's ended up looking very cartoonish ?
One of the mistakes that people make is to outline things that really should be kept very soft , and there's a couple of items that are gonna look very , very strange if you outline them .

So my next hack is to avoid outlining noses and teeth .
You're actually gonna find this one quite funny .
Cos when I show you how it looks when it's wrong , it really is very amusing indeed .
So let's look at these problem areas of noses and teeth and why it's so important not to overly outline them .
So let's look at this mouth here .
I'm gonna do a rough sketch of it , and I'm gonna keep it super light because I'm already drawing in pen , which tends to make things look much more cartoony .
I'm gonna talk to you about how to draw mouths in a minute , so don't worry too much about that .
And I'm not trying because I'm being really quick here .
I'm not trying to get , you know , a massively accurate version of this mouth , but just an idea of a mouth that's open and showing some teeth so you can see here .
I'm starting to get an impression of a mouth with teeth .
Doesn't look too bad , does it ?

Now look what happens if I outline all of those teeth really strongly .
It starts to look frankly , like they're wearing fake false teeth .
So this is why it's really , really important not to outline people's teeth and to keep them super super light and just hint at the gaps and the shapes insofar as possible , do not overdo it with outlining the teeth .
There is very little contrast between teeth and the gaps between .
You're far better to go in and shade things like that .
Gums and the dark area beneath the teeth rather than you are to actually outline the teeth .
So let's look now at the idea of someone's nose , and this nose is on the side , so we'll do a little bit of drawing there .
Now , when someone's nose is on the side , you can often outline the side that's facing away from you and then just get an impression of things like nostrils .
And if there was another eye , it would be up here somewhere again .
It's already going to look a little bit cartoony because I'm using a ballpoint pen to draw .
But you would , of course , be shading and things like that .
Now what happens if we outline this nose on both sides now ?
What happens is you get this absolutely God awful elephant trunk and all you need to go with that is a pair of comedy glasses .
So be very careful not to outline the nose , depending on how the person is holding their Selves and also on how old they are , because younger people tend to have much softer definition around the nose area .
This one here , for instance , I wouldn't be doing any hard edge on this one here .
We've just got some shading on either side .
I try to find different pictures here because it's just a selection of white women at the moment , isn't it ?
We don't want that .
Here we go .
Look at this chap here again .
No definition around the sides of the nose .
This would all be done with shading .
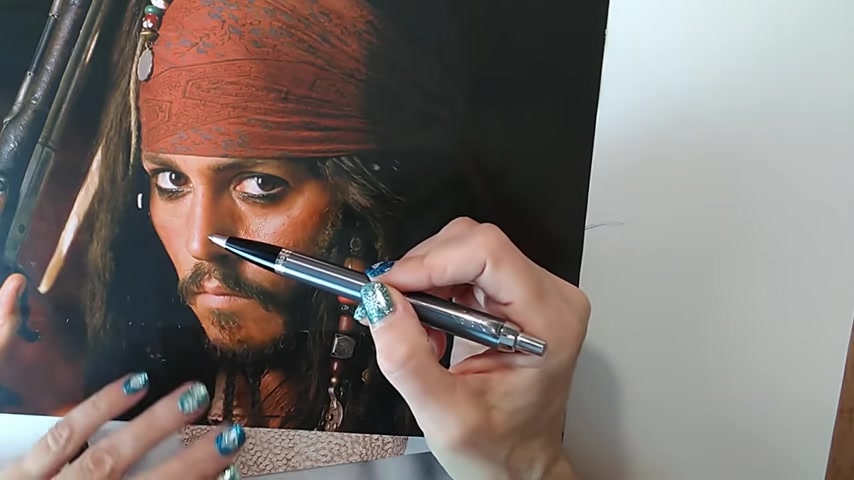
However , here we've got Johnny Depp and I think we could get away with a little bit of a hard edge along one side of the nose .
So it really depends if the person is young , are old on the lighting , and also on whether they're turned to the side .
Often when they're turned to the side , you can get a hard edge on that further edge of the nose or at least part of it .
But you never want to outline both sides of the nose or all of the teeth for the reasons that we've explained .
It's the quickest way to make somebody look like a caricature and a crazy cartoon character .
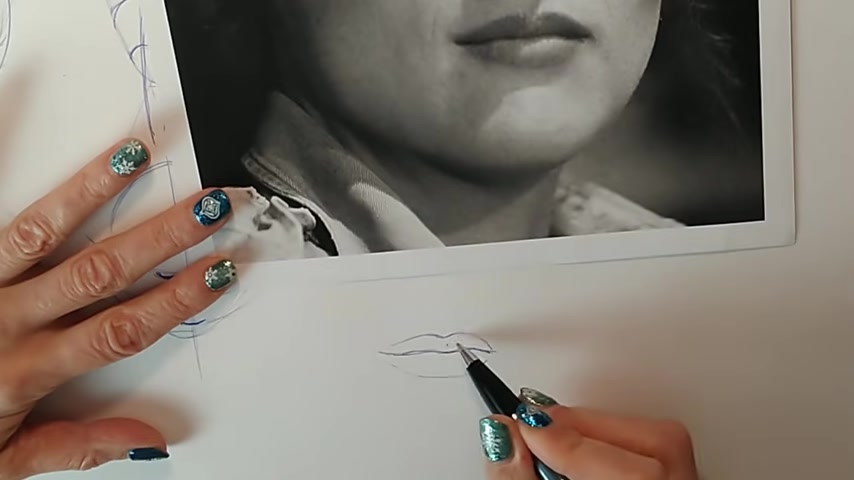
My next tip is to help you when you draw lips and mouths , and that's to start from the centre line .
So so often what people do is they start either from the top line or they just try generally to outline the lips .
Now we've already learned how to place them on the face .
What I'm gonna teach you now is to start drawing them from the centre line , and this works whether the mouth is closed or whether the mouth is open .
Mouths that are open are always a little bit more tricky , but they still can be used .
And if you start drawing your mouth from the centre line , the centre shape you're going to find , you get a much , much better result .
So we've looked at the wrong way of drawing mouths .
Let's look now at the right way .
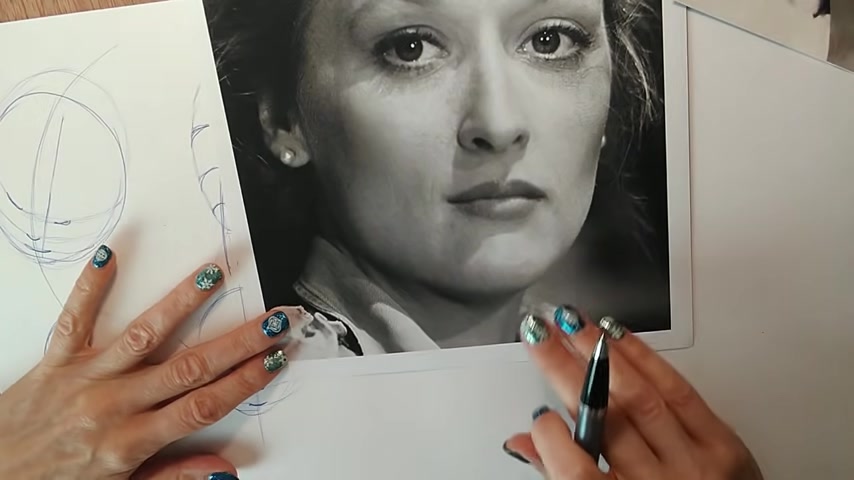
Now the simplest way to draw a mouth is to go from the centre line .
So let's look here at Meryl Streep .
She's got a slight up turn to one side of her mouth .
I'm just drawing here .
I'm drawing the centre line because this is the part that everything sits around .
Just like if you're drawing a leaf , it's easier to draw the centre line and put the leaf shape around the outside .
It's the same with lips .
It's much , much easier .
You'll get a much more accurate shape if you start by drawing the centre line rather than trying to go around the side , because chances are if you start drawing that way , not only will you go offline , but you won't have even really got the structure of the lips or even noticed what the centre looks like .
So look how easy that is there and how much of a realistic idea of the lips you get just by drawing that centre line First .
If you can get that first in the right shape and in the right place , everything else is just going to work very , very easily now .
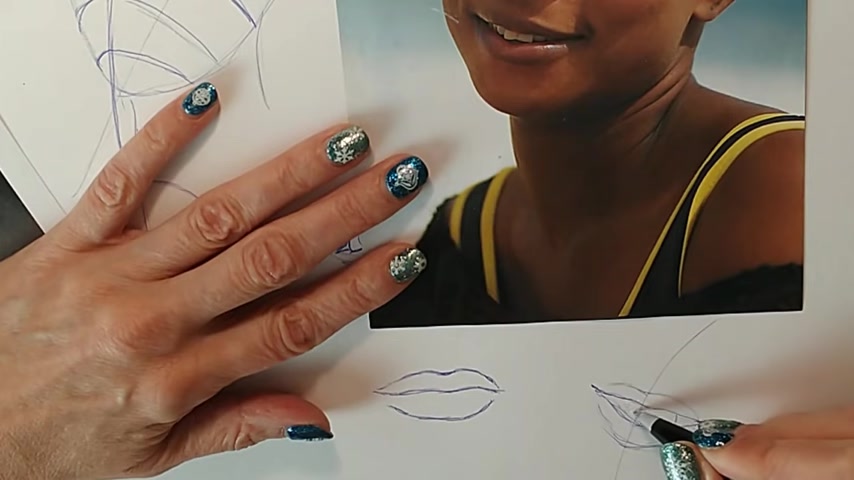
Mouths that are open are a little bit trickier to do , even with this method , but again , it's the correct way of doing it .
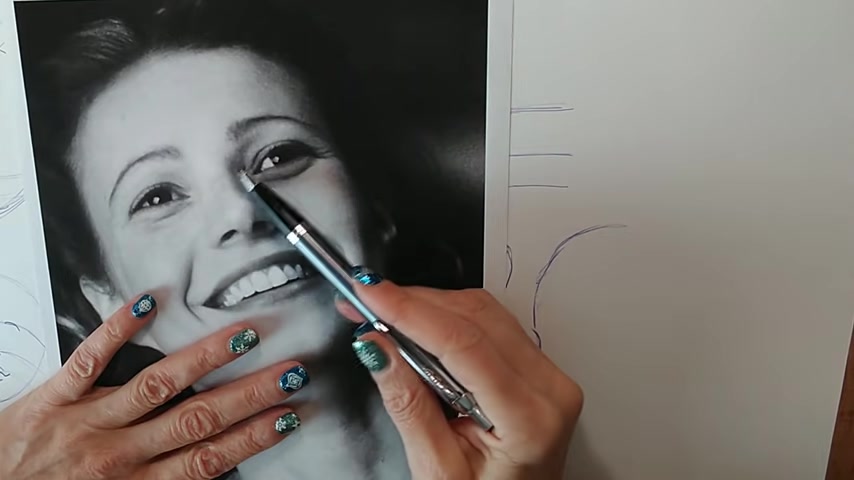
So let's look at this lady here .
Her mouth is slightly open and , uh , she's on the side slightly .
So again , I'm going for that centre line .
I'm going for that negative shape .
So you can almost in your mind's eye , fill in the centre opening of the mouth , ignoring all the teeth .
And you know anything else that's in the tongue and just think to yourself what shape would that middle bit be ?
What shape would that middle bit be if it weren't for the lips and again from there ?
You know , we're looking at angles as well .
This is a really tricky mouth .
Draw this one , isn't it ?
She's on the side , so the centre is going to be slightly over to one side .
Of course , I'd be working within guidelines if I were putting this in a real drawing , so that would be easier as well .
I would have my centre guideline , you know , going through here .
And I would know then that I've got more showing on this side because her head is facing away .
And then , of course , from there , I could start to get , you know , an impression .
Just an impression of teeth .
So again , by starting with that centre line , you can much more accurately draw your mouth .
Now this next hack is to stop something else that can look rather crazy when you get it wrong .
And that is the fact that people tend to draw the whole of the iris when they're drawing an eye .
So that's the coloured part .
If you draw the whole thing as a big round circle , it's going to look like the person is either incredibly surprised .
And I mean hammer horror levels of surprise , or it's gonna look like they're on drugs .
And I mean literally , you know , half your body weight in cocaine type drugs .
So to avoid that crazy , bright eyed drug taking surprise , we're going to learn how to draw the iris in a way that's much more realistic .
So let's look now at the right and the wrong way to draw an eye .
Although I've got Meryl Streep sitting next to me , I'm only partially using her as an example , because she's slightly on the side .
I'm really just using her face to cover up all the scribbled marks I've got on this piece of paper so that it's not distracting to you .
So here we go .
We have an eye shape and let's put a bit of an eyelid on it .
I'm going to draw it twice , show you the right and the wrong way of drawing the iris again .
Eye shapes vary a lot , and people who are younger tend to have more of a rounded eye shape like this .
As we get older , everything sags and our eyelids cut down slightly more and droop .
So here are two eyes .
Let's look at the wrong way of drawing the iris .
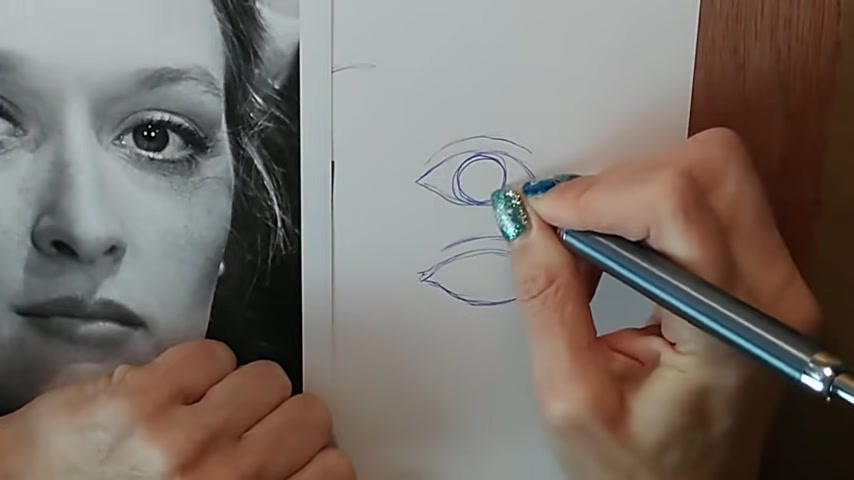
So this is what I see Beginners do is putting a circle in the middle like this , and you're gonna end up with a very surprised look .
If you add to that the straight eyelashes that sometimes beginners do before they've learned to draw them accurately again .
Looks like Clockwork orange , doesn't it ?
What happens actually with the iris , even in younger people , is that the top lid cuts across the eye like this , and the eyelashes themselves also dip across that area like that sometimes as well .
A little off the bottom is cut off , and so you only see a partial amount of the circle .
Now , of course , the circle still exists if the person's eye was opened wide , but it's just that not as much of it is on show .
So can you see the difference between this surprised cocaine hammer horror eye and a more natural looking one ?
Yeah .
So at the start of this video , I promised you a bonus tip , and this bonus tip is going to help you to practise getting those guidelines right on faces .
Now , when I was a kid , one of my favourite things to do was mess around with old newspapers and magazines and a pen .
What I like to do is put glasses on people , beards , moustaches , you know , all the sort of things that you do as a kid .
Now , luckily , I've grown out of that .
I mean , mostly , but , um , this is something that you can still do in order to practise your curved guidelines .
So let me show you how it's done .
It's really fun , but it does have a practical use of getting you much more used to dealing with the structure of someone's face .
So what have we got here ?
We've got my local community magazine , and , um , here we have Mr James Cartledge , Who is the , uh , the conservative ?
If you are American , that would be the equivalent of Republican politician .
I can think of no better person to , uh , to use to figure out the shape of the skull .
Right .
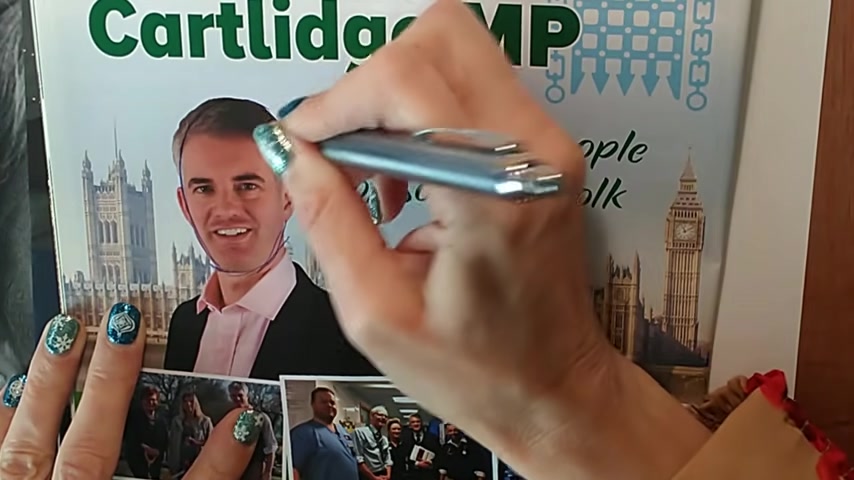
So what we do here is we're just gonna We're just gonna follow the shape of James's head round .
Here we go .
And this is not a political commentary .
I always , as you know , from my Facebook group , keep politics out of art .
However , here he is in his pink shirt and he's just asking to be used as a drawing aid .
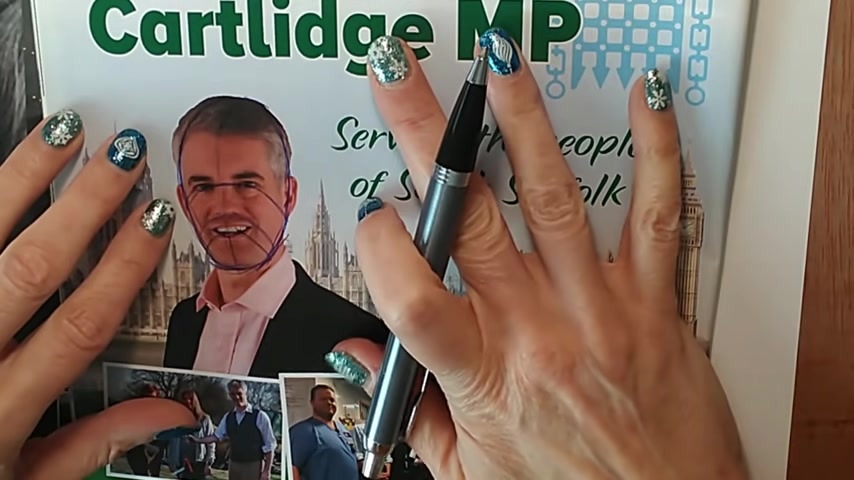
What we can do then , is we can find the centre line of the face .
So do you see how James is looking over to one side ?
His eyes are about halfway down , but they're a little bit up because he has his chin up slightly in the air .
There you go .
Like a good politician .
He is holding his head up high again .
We can then use his face to find the guidelines .
So you remember what I said about the guidelines could be going down , but the mouth could be facing up so before you throw your magazines away , have a look at some faces that you could scribble on .
You'll find all sorts of people looking in all sorts of different directions .
The only slight problem with particularly with local newspapers and magazines , is that people tend to look straight at the camera .
But if you have a look through , particularly newspapers as well are great for this .
You find people's heads facing in all different directions .
Sportss photographs are great because footballers and people always flying through the air got themselves tipped at odd angles .
And just by taking a pen across the people in your local newspapers and magazines , they won't mind .
They'll never see it anyway .
You can get an idea of the structure of the face if you play around and do it all like this enough times .
Believe me , it has an impact , and you'll start to see faces much more in terms of skull shape and bone structure .
So do let me know in the comments which of these tips you found most useful and if there are any other types of drawing videos that you would like me to make for you if you've enjoyed this beginners video .
I think you're really going to like the video that I made to get you started in using water colour pencils .
You can watch that video right now .
Are you looking for a way to reach a wider audience and get more views on your videos?
Our innovative video to text transcribing service can help you do just that.
We provide accurate transcriptions of your videos along with visual content that will help you attract new viewers and keep them engaged. Plus, our data analytics and ad campaign tools can help you monetize your content and maximize your revenue.
Let's partner up and take your video content to the next level!
Contact us today to learn more.