https://www.youtube.com/watch?v=fu2awnEXSxs
Loomis Method Monday Ep 2 _ Drawing Faces Looking Up
I like to do the , I like to do do .
Hey guys , welcome to the second episode of Luma method Monday .
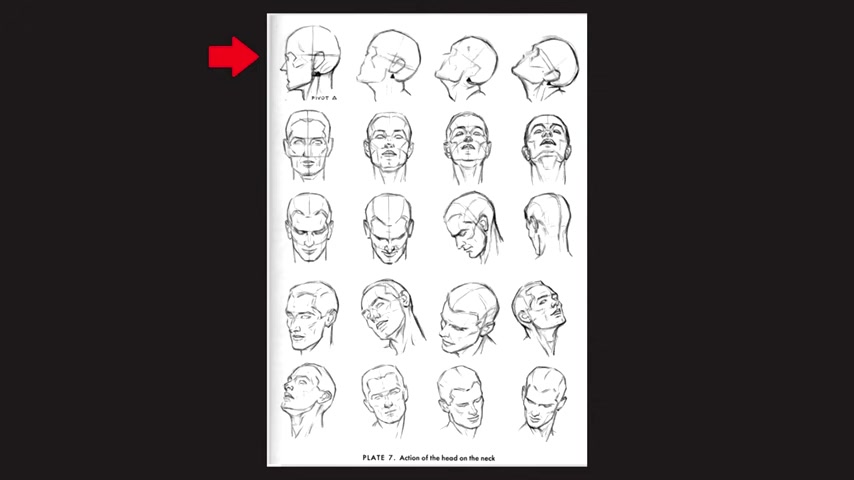
Today we're doing that second line on plate seven .
I think it's on page 29 .
It depends on if you're looking at the PDF file , which is , I think on the PDF file is 25 .
But in the book , it's page 29 at least the old version version of the book .
So you see here we did the first line last week , uh the heads and uh profile basically .
And there are different tilts and today we're doing the second line which is looking at the person straight on and they're starting to tilt their head back .
This is a great exercise and it kind of stretches you out a bit .
At least it did for me , especially that last head .
That angle is , is so extreme and it's like it's really difficult to do and it's so it makes for a great , great exercise .
So I like to do these throughout the day and you might try it as well .
I draw them on little uh scrap pieces of paper or post it notes it's a great way to build up that memory recall and build up that knowledge .
So , um hope you enjoy it and draw along with me guys .
Thank you .
Bye .
OK .
So let's go ahead and I'm gonna do four circles across the page just all at once .
So I can get the heads placed on the page and a decent uh manner .
Let's see if I can get my hand to work here or my shoulder .
It's uh you probably can't even see these circles yet .
It's so light , just very , very late .
Ok .
That's good enough .
So the first one , he's gonna , he's uh looking straight at us .
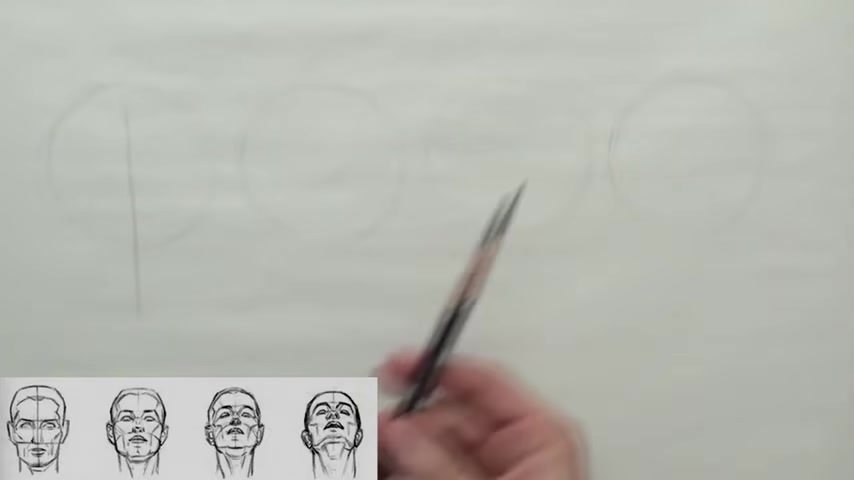
So I'm gonna start off with the center line and then I'm gonna come in and place the hair , the hair line is about right here and then this will be the brow line which gives us that cross of the face and then about equal distance from the hair line to the brow .
We're gonna go from the brow to bottom of the nose and then same distance uh bottom of the chin .
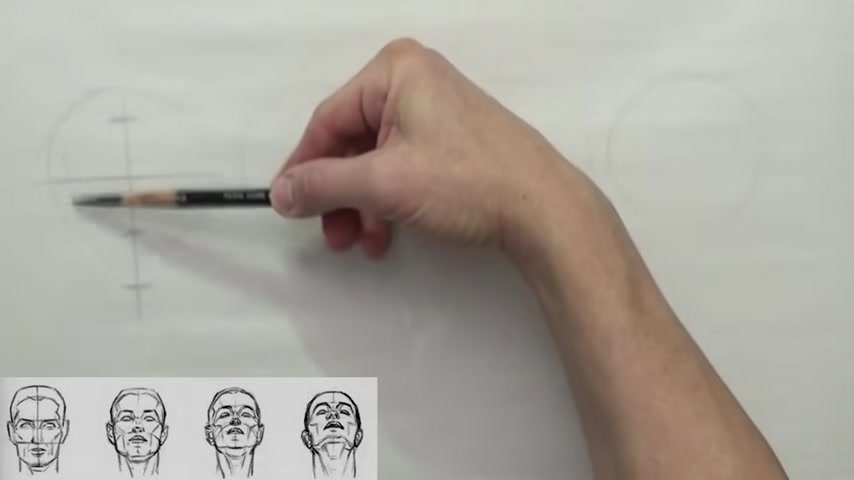
Then now I'm gonna cut the sides of that circle off , equal on both sides , roughly , hopefully , let's see , maybe a little bit more here and then it looks like the jaw probably comes down to about right here , then turns that corner , then place the neck .
I'm gonna , I'm gonna give him a little V shaped neck instead of just leaving it open ended .
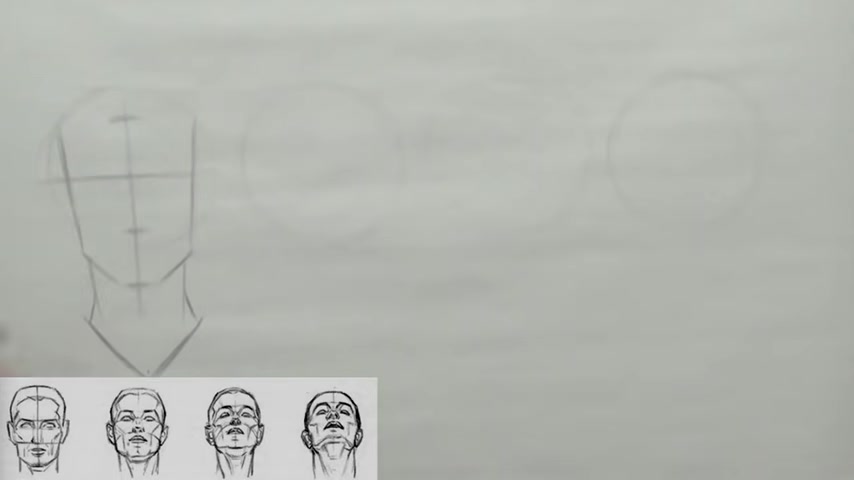
And so we got three equal parts and the third of the face is pretty straight across .
So what's gonna happen is when we proceed here and the head starts to tilt uh backwards .
This line is gonna start to curve around the form , but here it's pretty much straightforward .
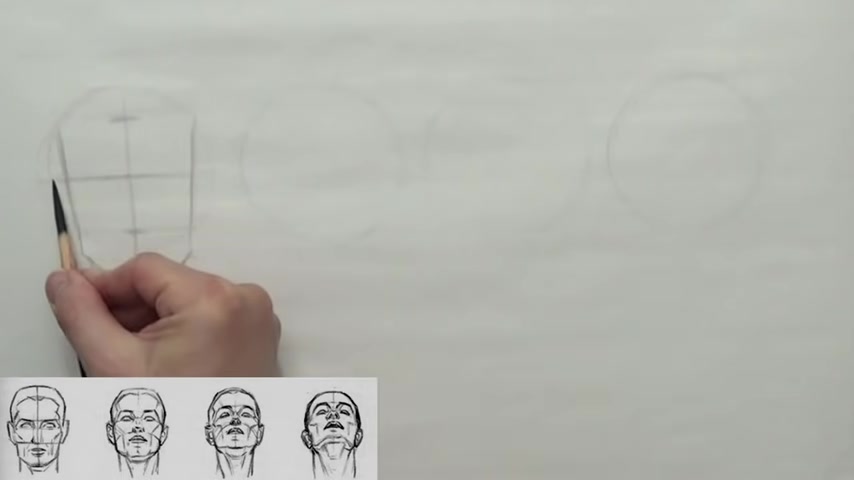
So , um , the brow line right here will give us the top of the ear , the bottom of the nose gives us the bottom of the ear And then let's go ahead and put in the hair shape .
So you don't have to , I just want to say something about uh I've been asked about how I hold a pencil .
Um Most people draw like this and that's fine .
You can do , you can do these studies that way .
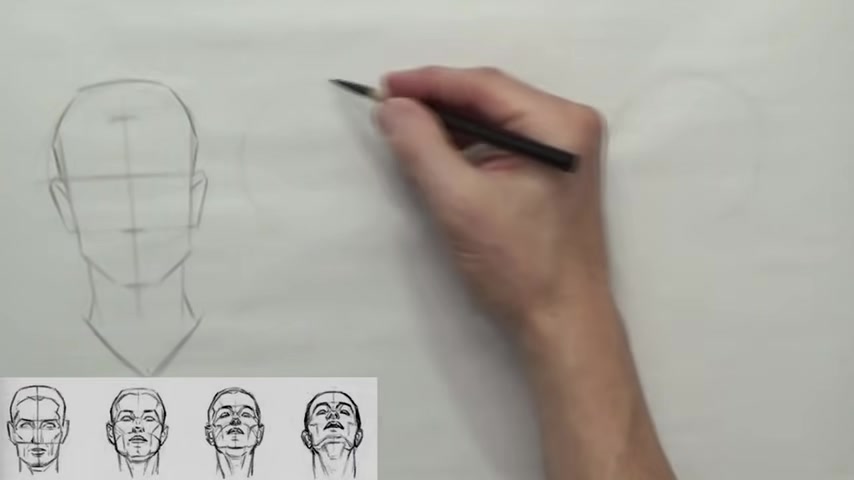
Also , um the way I'm set up here , I draw with this position and you'll see me go .
Um Sometimes I'll go into this position , the traditional , but mostly I like this position .
It's almost like painting and I , I feel like I get more control and I can do bigger portraits this way .
And also I can use my shoulder instead of my wrist .
So here , if I drew a circle , I'll be using my wrist and I have to move my hand around a little bit at the same time .
But with this , with this way , my wrist is not moving at all .
It's all in my shoulder in , in my elbow .
But here it's the wrist , elbow and shoulder .
So here you got kind of like three joints working together and here you only have two , you got the elbow and shoulder .
So it's more control .
So it's just a preference .
It doesn't matter , you can do it either way .
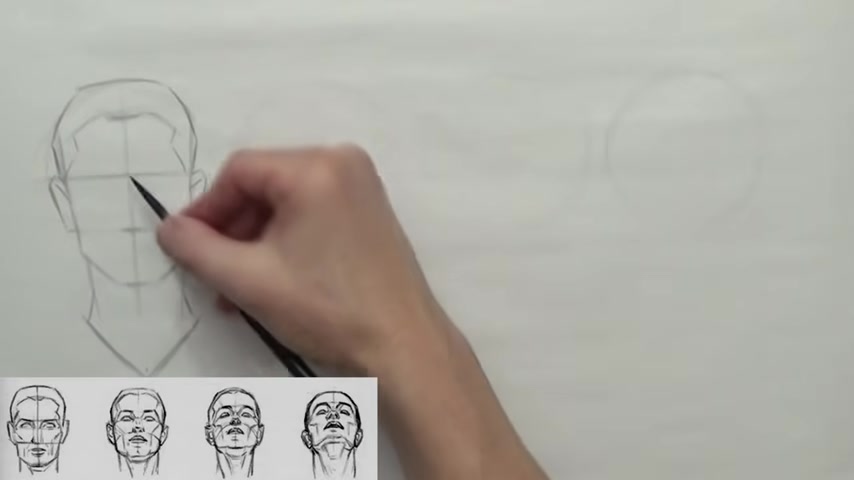
So let's go up here to the hair shape and just kind of get that sketched in real quick here and then we'll go on to the , the globe shape , the little wedge between the eyes and then there's the big block shape for the nose .
So in this position , we're not seeing underneath the nose .
Um not very much anyway , but as we move forward to the other ones , we definitely will .
And then we have the filter .
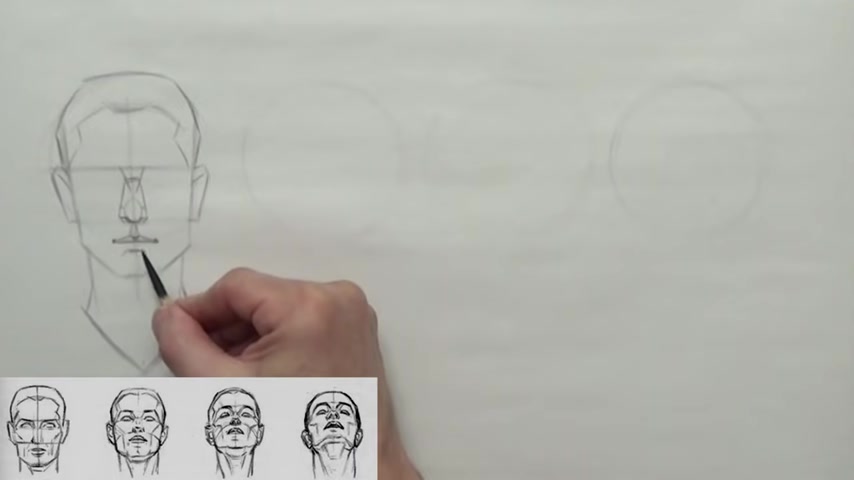
Yeah , it's a little wedge underneath that bottom lip and then we have the rhythm of the chin , just very , very generic , but it is a such a good I'm good um practice a good study .
It's kind of like when you're doing scales on the piano or guitar or something like that , it's really good practice .
Think it's a good way to learn dexterity to learn just the basics of the head construction .
So here I'm doing like a sunglass shape for the , the eye sockets .
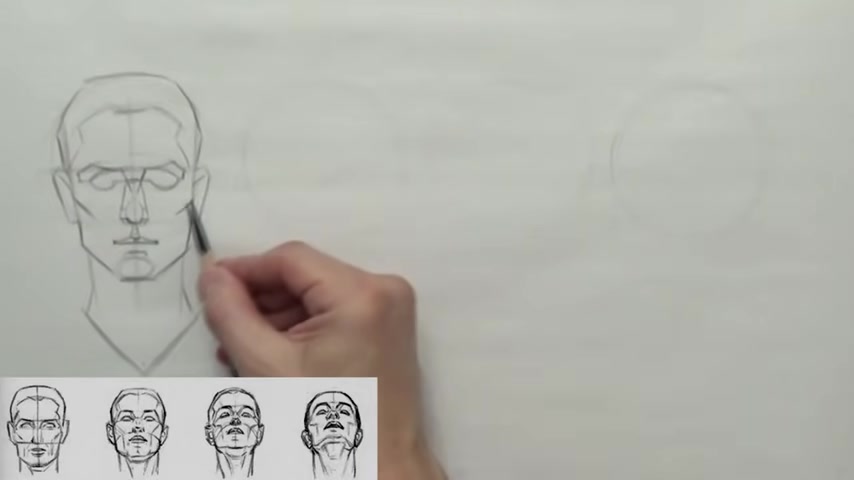
It's kind of kind of comes from the Riley method and just when I was tight over at then his cheekbones and those come down very much to the front .
So that's kind of like the mid cheek furrow of the uh the method and here is the uh nasal AOL or the muzzle line .
And you can also see this rhythm here for the forehead .
So the Luis doesn't really put those same rhythm in same rhythms in his drawings .
Um But they , they , they do work pretty well with the Riley method like his , the way he does his um head structure .
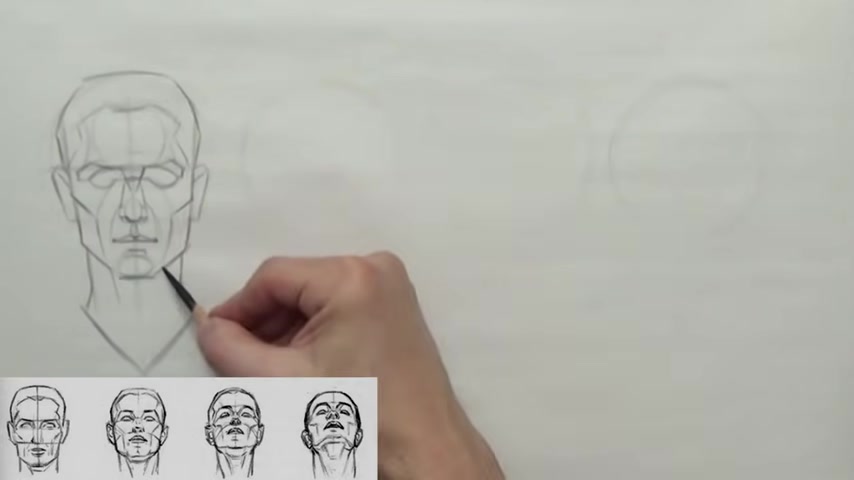
So I think that's why um schools like waa two va teaches those two together because they work so well together .
Ok .
So basic head straight on .
Not much to it just uh close to , I think it made his forehead a little bit big on this one .
I can kind of change it if I wanted to .
Hm , I'll just leave it .
It's ok .
So the I actually let me bring his hair down a little bit .
Let's see .
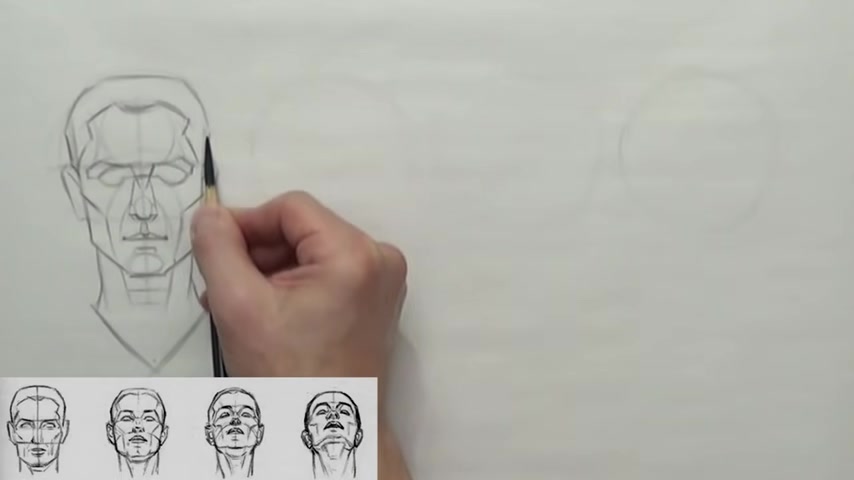
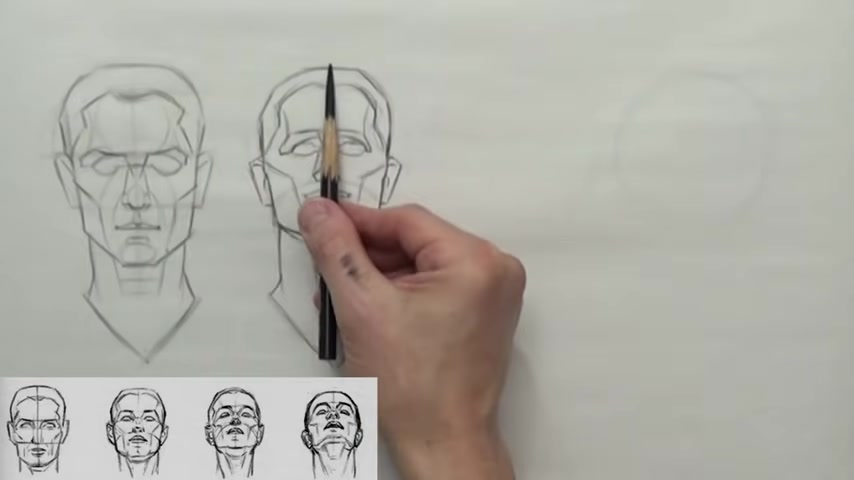
So the idea about this little study , this , this one line of four heads is to show you a couple of things that happen when the head tilts back .
So one thing that happens is um the thirds start to change in length .
So the forehead will get shorter , the nose will get shorter , but the chin will be , will be longer than the nose , nose longer than the forehead in general .
And we'll start to see underneath the jaw and the ears will start dropping down uh the jaw line and you'll start to see up and under , under the nose and under the brow .
So as it tilts you'll start to see up and under things and the neck might flare out a little bit too .
Ok , let's move on to the next one .
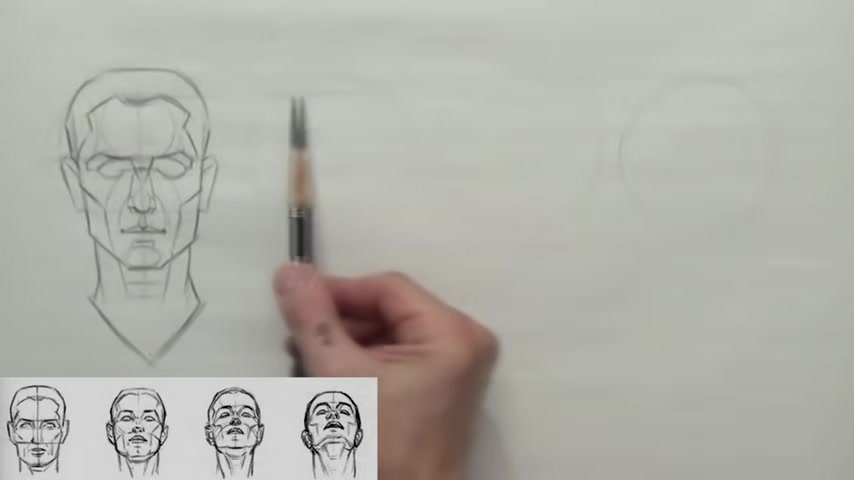
So I'm gonna take those uh those lines and pull them over to here so we can see the change that's gonna occur .
So if you got bottom of the nose that comes across , then the chin , let's see the hair , the top of the hair .
So here's our circle and we're gonna cut that guy in half the center line of the face because that's not gonna change .
We're looking straight at them .
So I'm gonna use my pencil and finger and try to find the width of the head and then make sure I get the same wit width .
Uh Let's see , that looks pretty good .
Let me just double check it .
So I wanna make sure the heads are the same size .
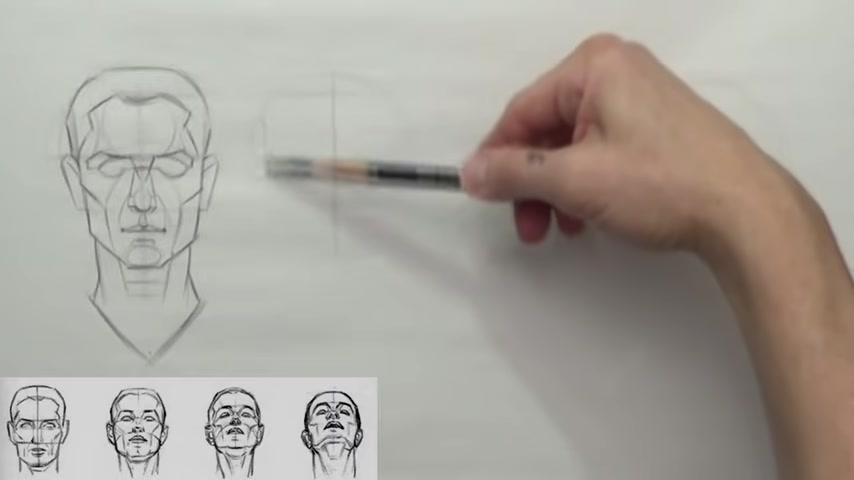
So now let's come on the side and slice the sides of the , of the circle off .
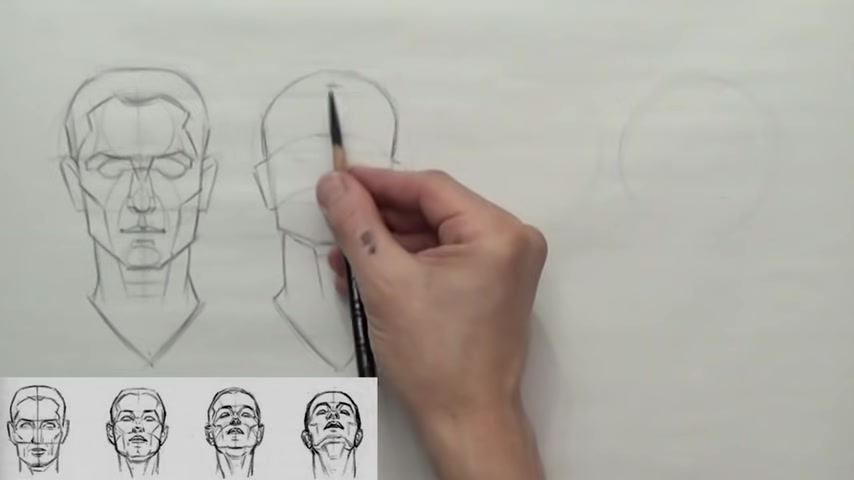
And then now on this one , his head's gonna be curved or um the um the thirds of the face , the , the lines are going to be uh curving around the form .
So we're gonna bring the hair line up to about right here , bring the brow up , maybe it's about right here , bottom of the nose and then the chin .
So everything kind of moves up and it's gonna start to wrap around .
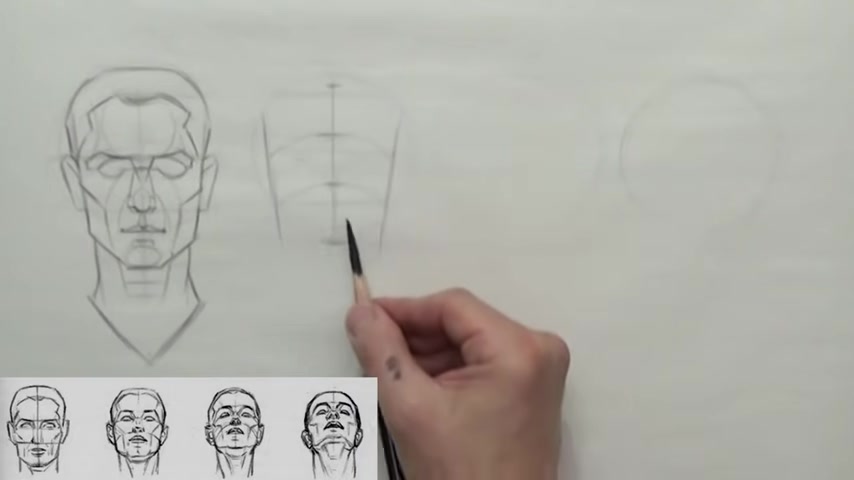
Not so much this part though , the chin will pretty much stay there .
So let's see on the chin .
So our jaw line is right here , that's gonna sit a little bit higher .
So you see the , the angle of his jaw is not as , as um long or wide or whatever , it's starting to get a little shallow and we'll be able to see underneath it right here .
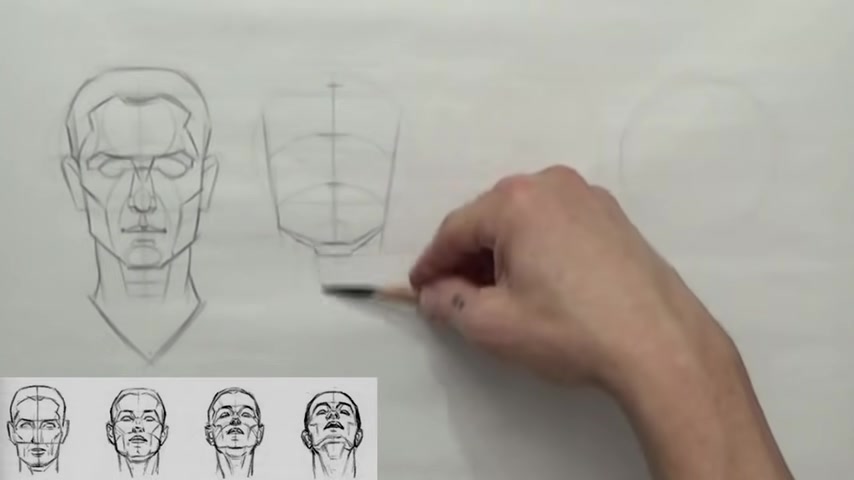
So if you can draw that little wedge shape that's underneath the chin in the throat , let's put the neck , the sternal cloud of Mastoid , which is gonna start to flare just a little bit and see the point right here is about right there and because it's curving around the bottom of the nose that , that um see right here it comes across to the bottom of the ear , but it's straight and here it's curved .
So it's dropping the ear down a little bit .
So now our ear is sitting a little bit lower .
Ok .
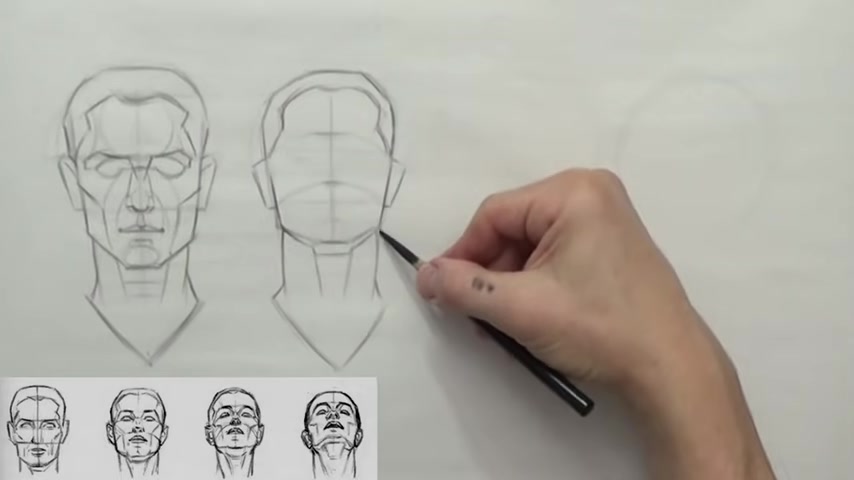
So here hair line , right .
Mm Let's actually bring the head down just a little bit more because the forehead looked too , too long .
So let me do the hair again .
OK .
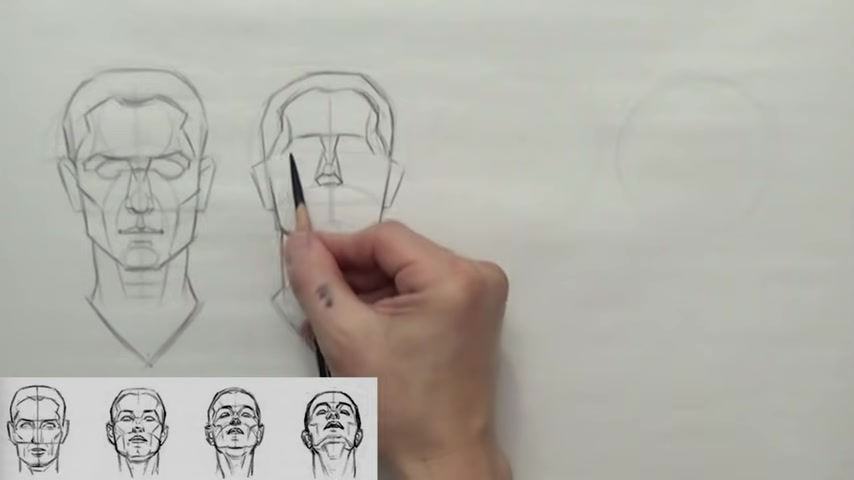
So for the Gabe shape again between the eyes and then , so now on the nose , we're gonna see up underneath the nose a little bit .
So actually let me do the sides , the side plane of the nose and then the underplaying .
Ok .
994.299 --> 1054.329
All right .
Let's see .
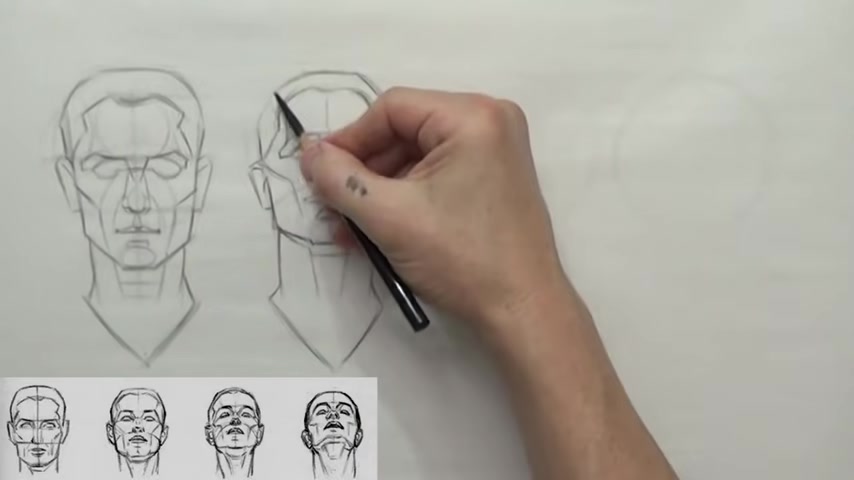
Let me just try to make this a little bit more like the other side .
So basically , what is happening is we're starting to see more underneath the nose , the ears are dropping and things are starting to curve more around the head .
I still feel like a little too heavy on the forehead , which is always the thing I struggle with .
I always make the foreheads too big one K .
So next one , let's do the same thing like we brought the lines over top of the head , his brow , bottom of the nose , bottom of the chin .
And let's take measurement for the width .
Let's try maybe right there .
It's right there .
And then like before we're gonna cut the sides off , uh find the center line , the one thing that doesn't change .
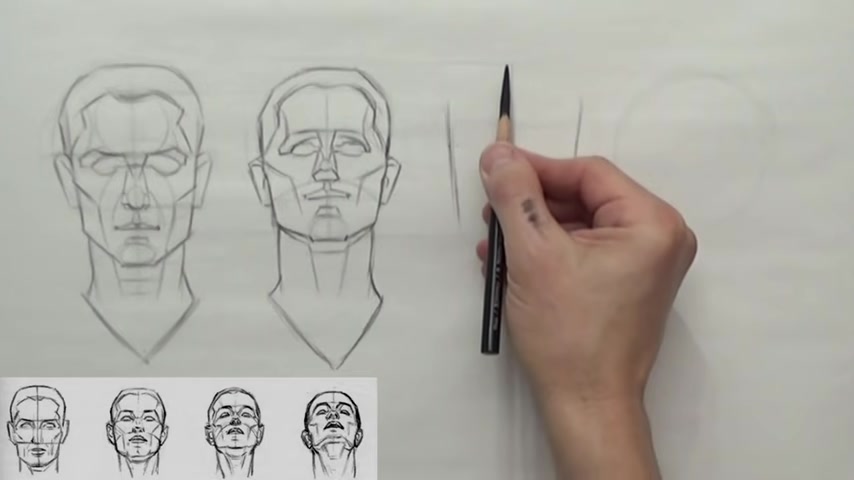
And so now the hair , the hairline is really close to the top of the head .
So it's a very little bit of hair showing and we're gonna bring the brow up here , bottom of the nose here and his jaw is going to be straight across pretty much it's gonna change .
It's gonna be a little bit of an angle but not much .
So let's actually bring the bottom of the nose maybe right there .
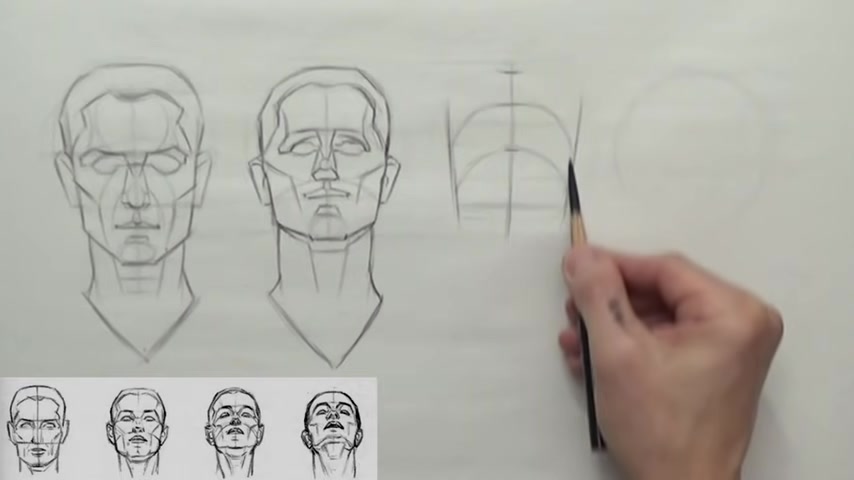
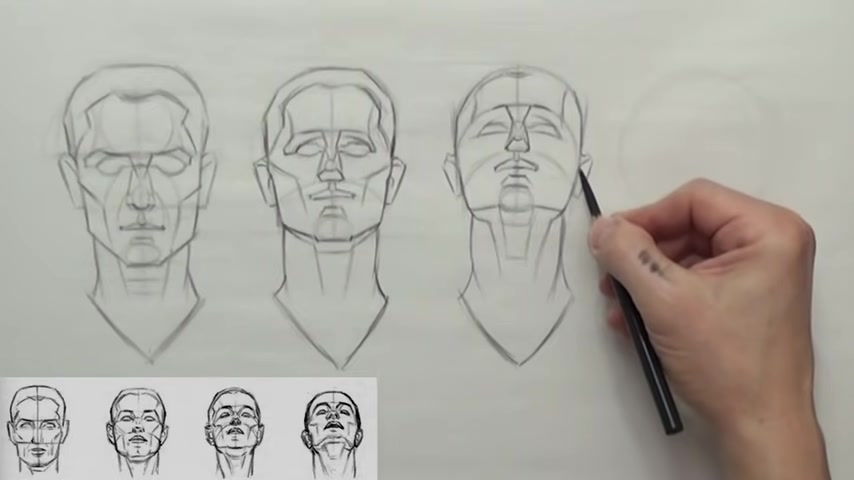
So now things are really starting to curve around that form and the ear is gonna drop even further down the jaw .
So now we're coming down pretty low .
They were still following uh the idea that top of the ear is where the brow is and the bottom of the nose is where the bottom of the ear is .
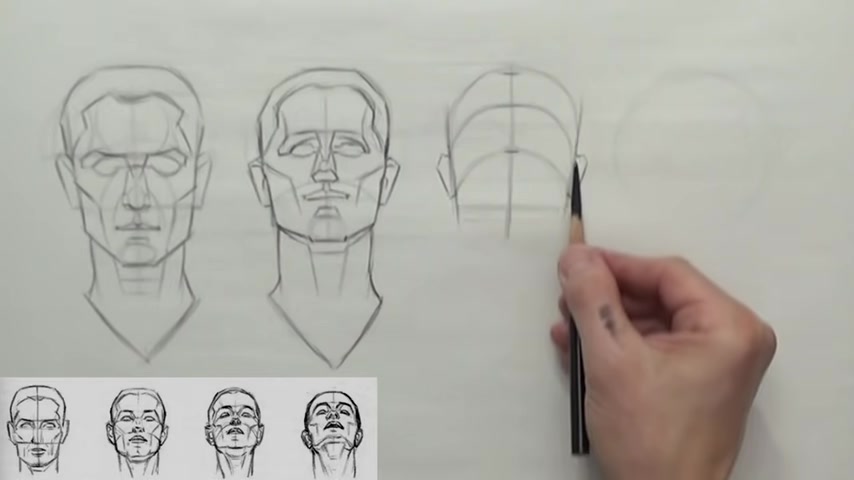
But that line , that reference line is wrapping around because of that perspective because of that for shortening .
So our chin is about right here .
It's still kind of round and then there's a little bit of an angle down that jar and I feel like I wanna clean that up because that , that's kind of messy .
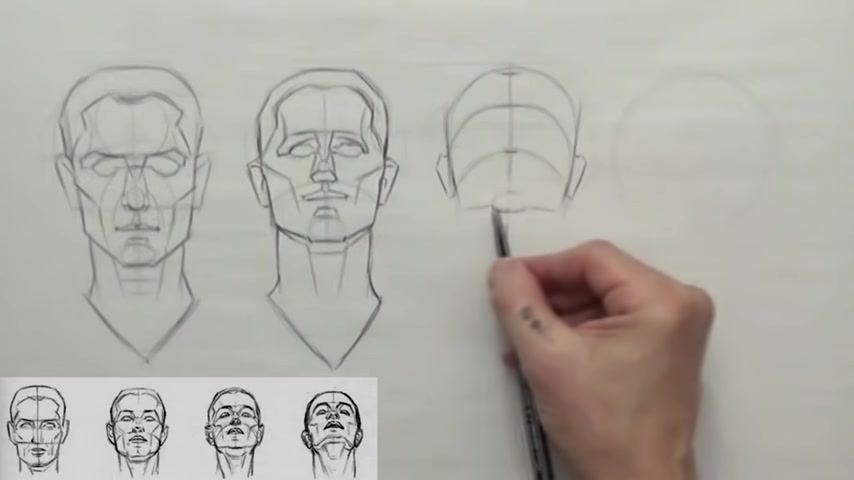
So the rhythm for the chin , the jaw comes down , turns kind of comes up just a little bit , then wraps around to the other side and then we have this nice , we shape underneath the jaw and then it comes down into the throat and then maybe a little bit .
It's kind of like this box shape for the , the throat right here .
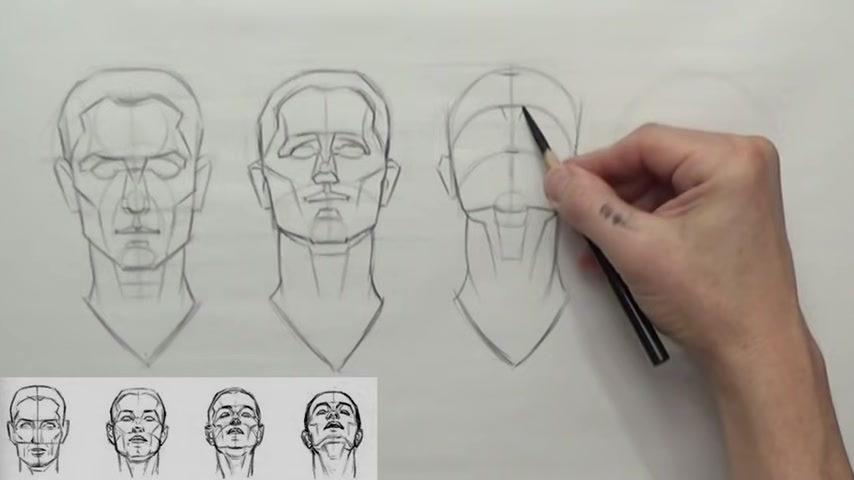
Now , his sternal Claro Mastoid is really gonna be flexed .
OK .
So let's go and do that center .
We shape the Bella and now the tip of the nose is gonna be higher .
That might be a little too .
It's OK .
So it's kind of , I was thinking maybe it was a little too extreme .
But looking at the drawing , I think it's looking at drawing , I think it's OK .
The next one over here you're gonna see a lot more .
Actually , I'm gonna bring it just the touch , just the touch less .
Yeah , that's better .
OK .
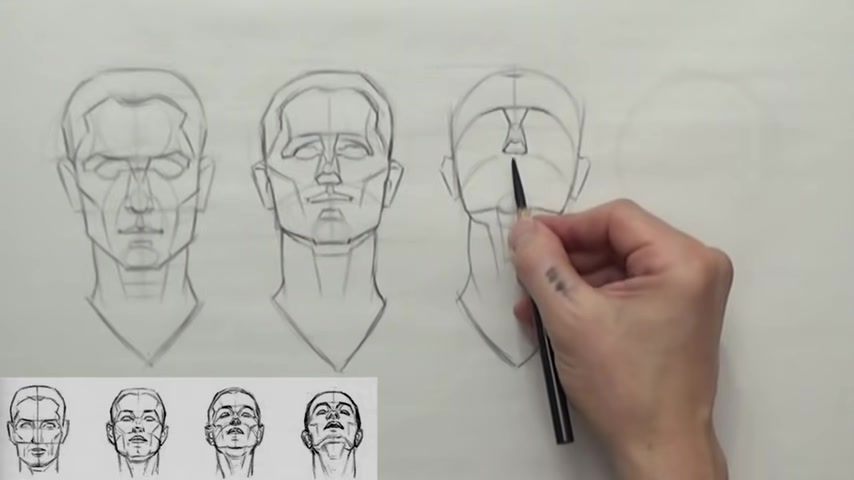
Then the lips , the fil trim and the bottom lip is gonna curve a little bit .
Now we're gonna see that wedge underneath the bottom lip even more .
OK ?
And see how the eyeglass shape on this side is still has that curve here .
It's gone .
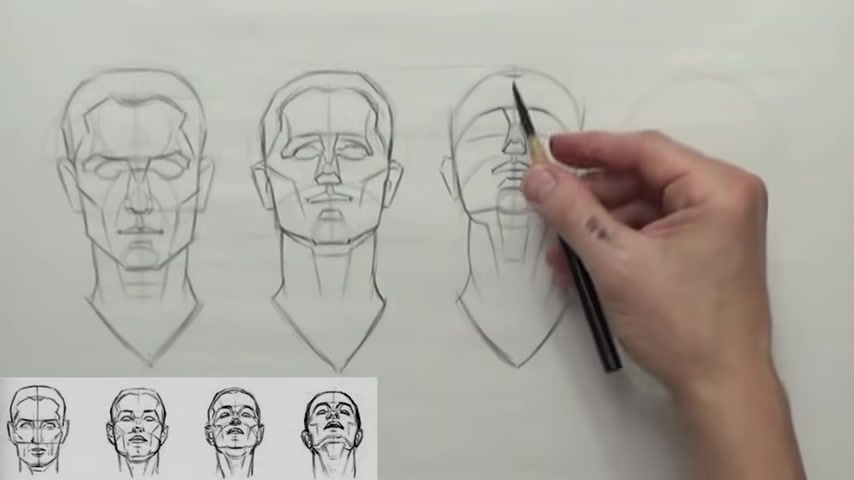
Now it's gonna be pretty much straight through and he still has hair showing up here through the side plane of the temple , kind of goofed that up a little bit .
Let's clean it up .
I keep telling myself to be patient because I wanna blow through this really fast and uh because it just , it , to be honest , it feels tedious but , but I think that's because it's , uh it's kind of , I don't know , it really is like doing skills on um on the guitar .
It's like , or when I was a kid it was a saxophone later , it was a guitar .
But when I was really young it was a saxophone and I was like , I'm so sick of the scales , but that's how I got good .
So it , it's um it's needed .
It's uh it's , you gotta walk through the steps and do the , the basics to get better .
So I just got to remind myself that and to be patient .
OK .
Alright .
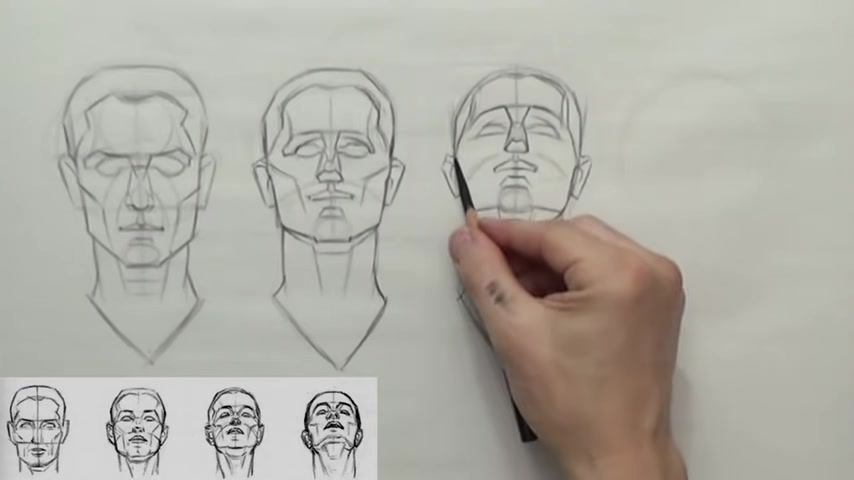
Indicate the cheek a little bit more so the cheek maybe be about right here .
Just put the hair in .
All right .
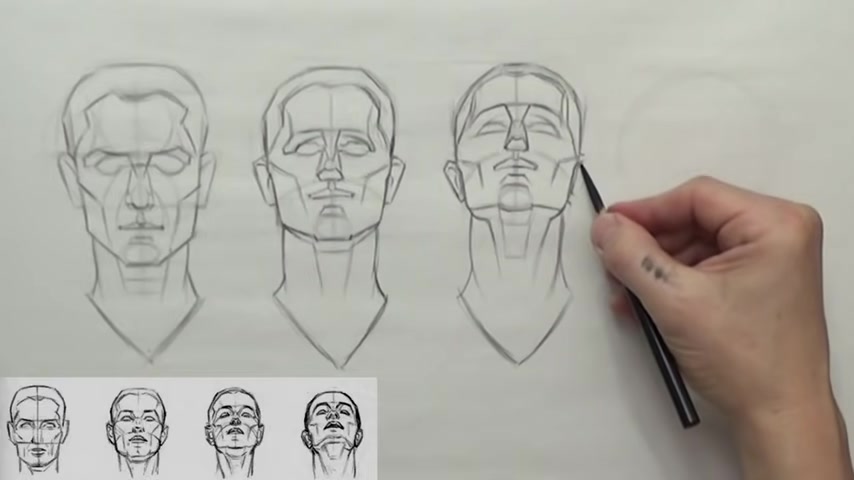
So my pencil is getting a little doll so I probably have to grab another one for the next head here so you can see how it's starting to change uh perspective as he's looking up , ears are dropping downwards .
Actually yours are not low enough on this guy should be about right here .
Mhm .
Oh That's better .
Yeah .
Yeah .
Your placement can change the look of the head tilt a lot and it's also a good way to cheat your way if you uh kind of goofed up and you did like a figure and you , and you got all this work done and two hours into it and you realize he didn't put the head tilt um extreme enough and you can always try to like drop one of the ears or drop the ears down a little bit further down the head and sometimes it'll help make it uh give that illusion .
But yeah , moving their ears down definitely makes it look like the head's tilted back more so you can see how the ear is dropping down .
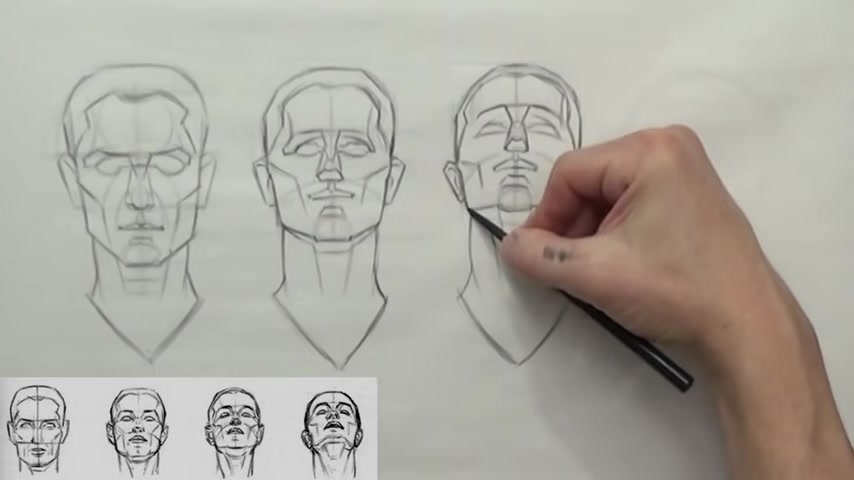
And then on this one , the final one , it's gonna be really close to the edge of that , that angle of the jaw .
So let me grab another pencil real quick .
OK , I'm back .
Switch out these pencils .
Ok .
Make sure it's all cleaned up .
All right .
So looking good so far , let's see , try to clean up some of these lines .
I know it's just a study , but I'll do that later .
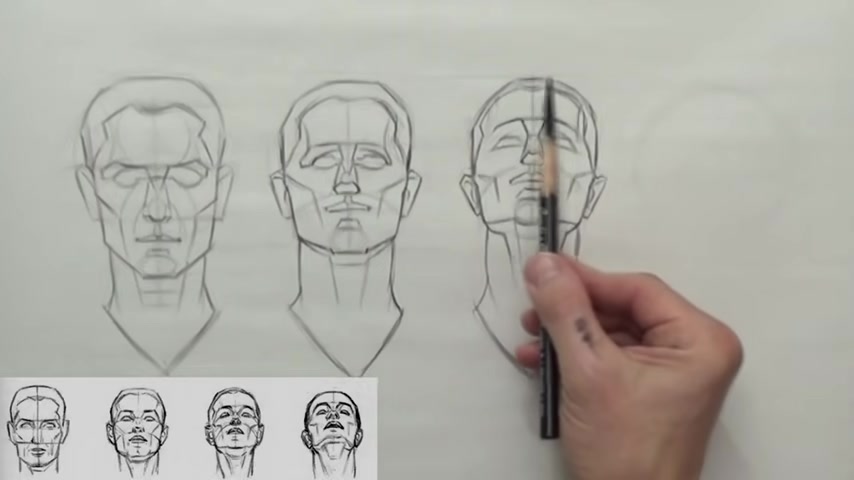
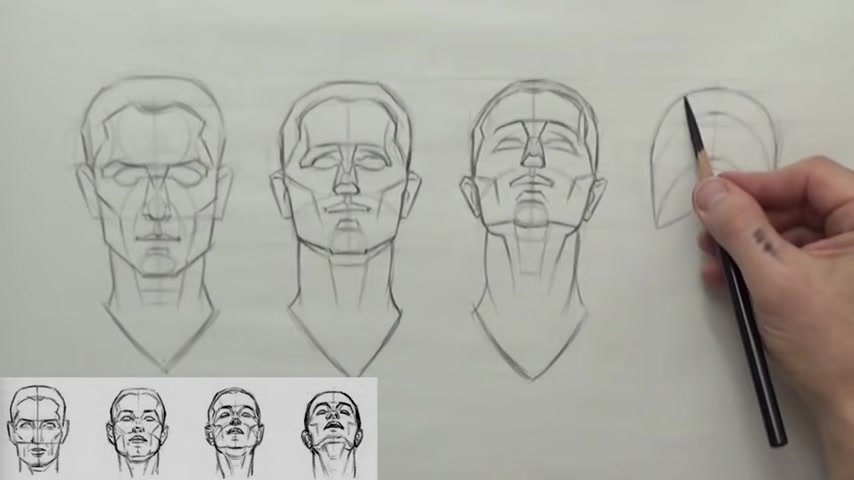
Let's , let's just continue to the next one , the top of the head , the top of the hair and then the hairline was right here and I like to do this , bringing it over just to show how we are changing the perspective from this one to the next one .
So the , the brow about right here is draw that line straight across , then bottom of the nose , the bottom of the chin , you see how much difference it has changed from the original guy .
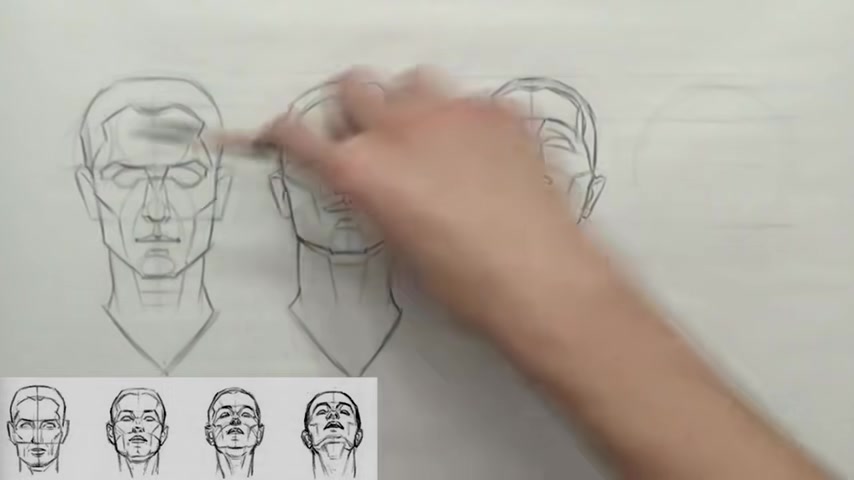
So now let's get the width of the original guy to make sure our heads are pretty close to all be in the same size , which I don't think they are , but we'll try to cut the sides off of that circle .
Then let's do our center line .
The one thing that doesn't change on this one .
Now , the difference is when we come over to this one , it's almost inverted from the original guy where the jaw drops down to the chin .
And now it's gonna be the jaw goes up to the chin .
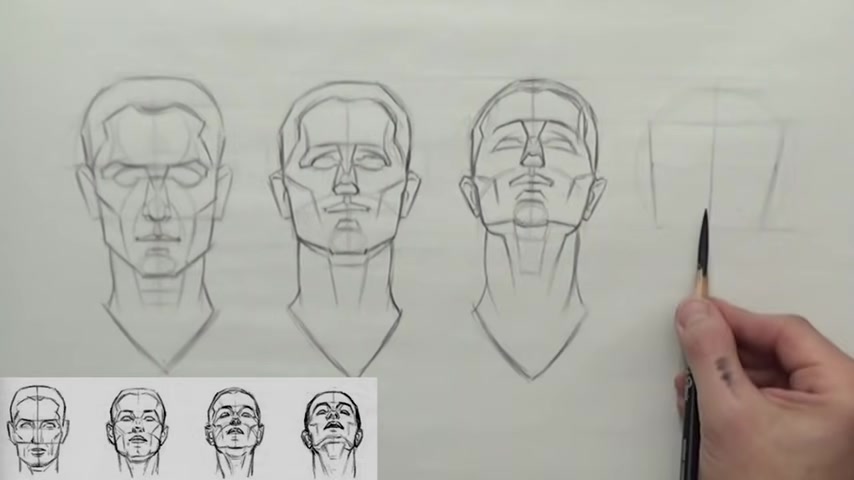
So his jawline , it sits pretty close to here , but the chin , it's gonna be pretty high .
Chin will be about right there and the jawline is gonna drop down to it So it's inverted probably more from him to this one .
And that curve is really , really occurring .
Now , he didn't draw it on this one , but I would drop like , so I'm just really wrapping around .
Oh , wait , we gotta move the nose , right .
Excuse me .
So we have the chin , we moved it up from here .
The nose is gonna come up all right there in the brow to here and that's the end of the head .
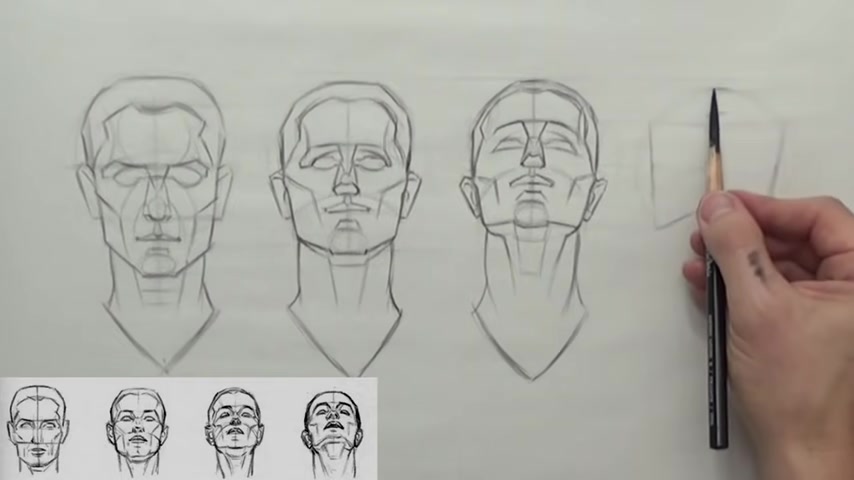
No hair is showing here .
So now let's wrap this around .
Whoops .
I'm still having dexterity issues today .
Some days are better than others .
It , it really depends a lot of it's mental too .
Like if you got problems in your life , it could really affect your drawing , really affect your um dexterity .
I think it's more like um concentration , but everything's going good right now .
So I don't know what it is .
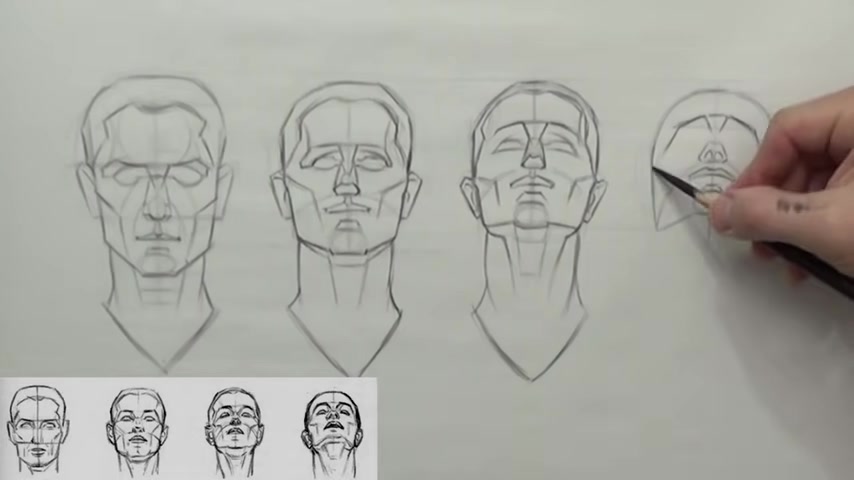
Uh the nose , we are really looking up into his nose now and right up into the nostrils and the globe shape and his eyebrows are gonna be angled down and then his mouth pretty flat and that bottom lip is gonna curve .
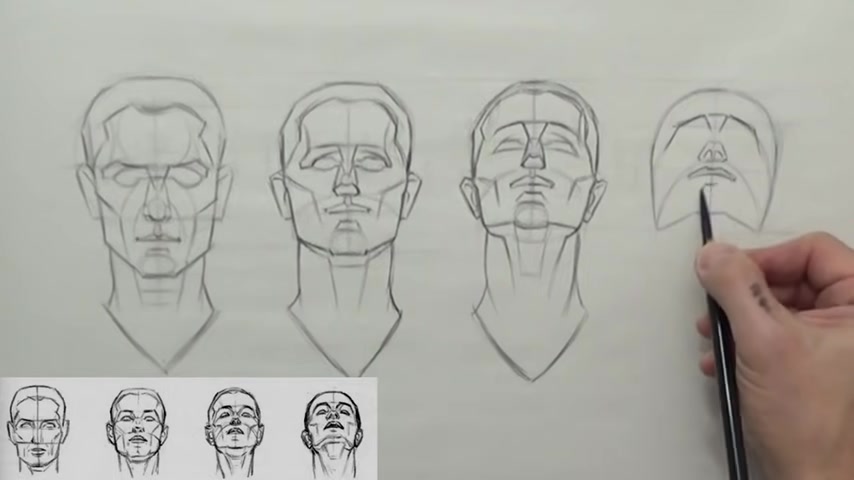
Then again with that wedge shape chan rhythm .
2082.62 --> 2153.659
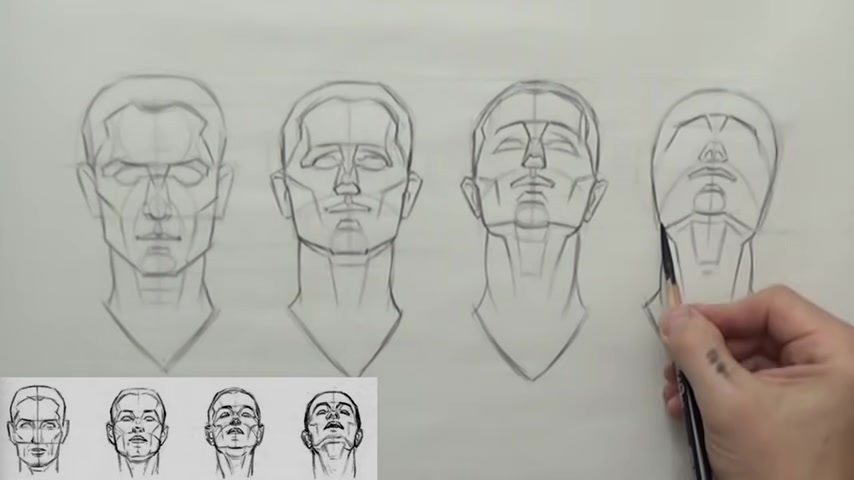
So his ear is gonna be down here .
Let's put that hair shape can almost see it , but it's hiding behind the forehead up here .
This one is the hardest one to draw and it's the pose that we , none of us really like in an art class .
It was when the model took that pose or you got that position in the classroom and that's what you saw .
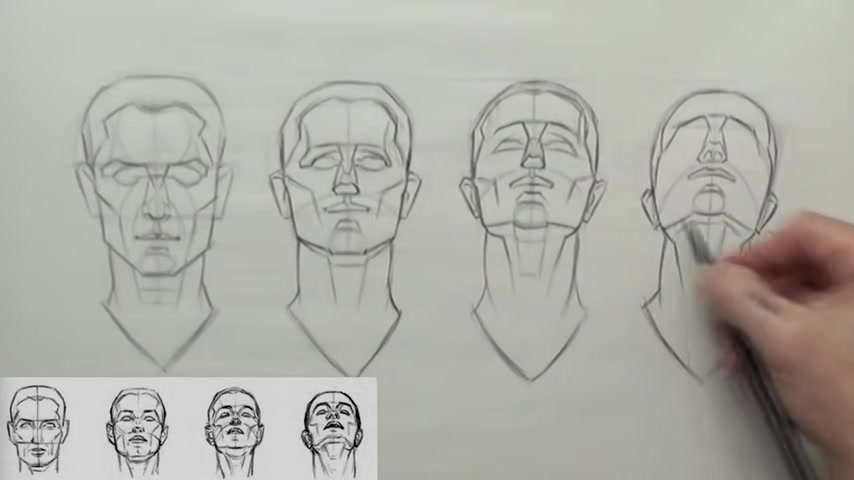
It was like , everybody would make the same disturbing sound like just like a groan like , oh my God , I gotta draw this .
Are you kidding me ?
I got five minutes to draw this or whatever it is .
Uh It's , it's not a good , too challenging sometimes .
It's just , it's like , oh man , how often do I draw this ?
Not very often .
I should probably do more extreme angles because it is challenging .
So now he's really looking up and we can see under the nose really well and the cheekbone was pretty straight .
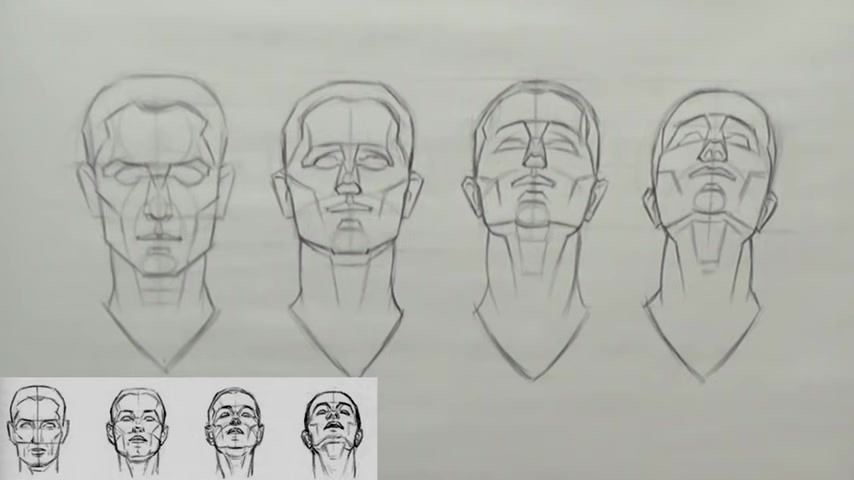
Um That's pretty much this line on plate seven , the second line , man , that was really hard to that stretched my brain pretty good .
Take a deep breath .
I'm gonna take a break after this , that's for sure .
So a couple of things that happened um just to go over it again , uh looking straight on everything's pretty straightforward .
And as we start to tilt backwards , things start to curve around , we can see under the nose , more under the the jaw , under the chin , the ears start to drop down and so on and so on .
So I'm not crazy about this one .
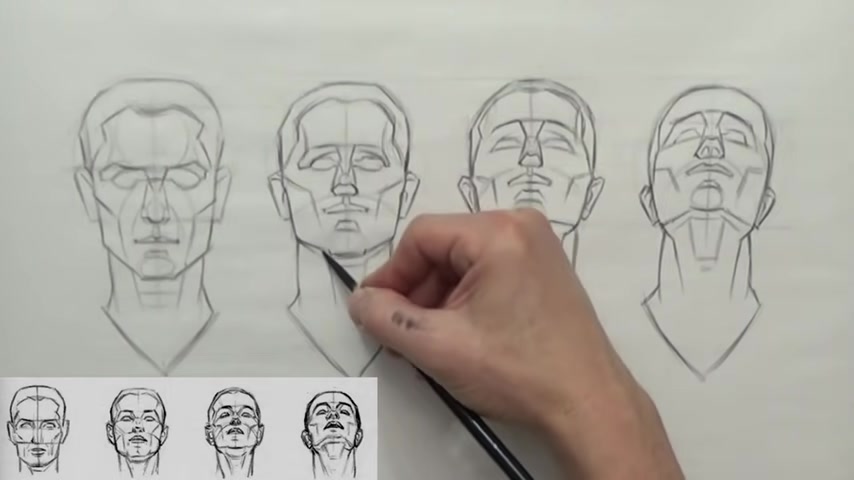
This one was kind of , I kinda goof this one , it's ok .
I shouldn't be hard on myself .
This is a tough one .
I can really get , I can really be mean to myself more than any youtube comment could ever be .
They have those , those negative people when they come around every once in a while , they have no idea .
They can't compete with my , my own mind against myself .
It's pretty funny .
So , anyway , OK , let's go back over to this jaw .
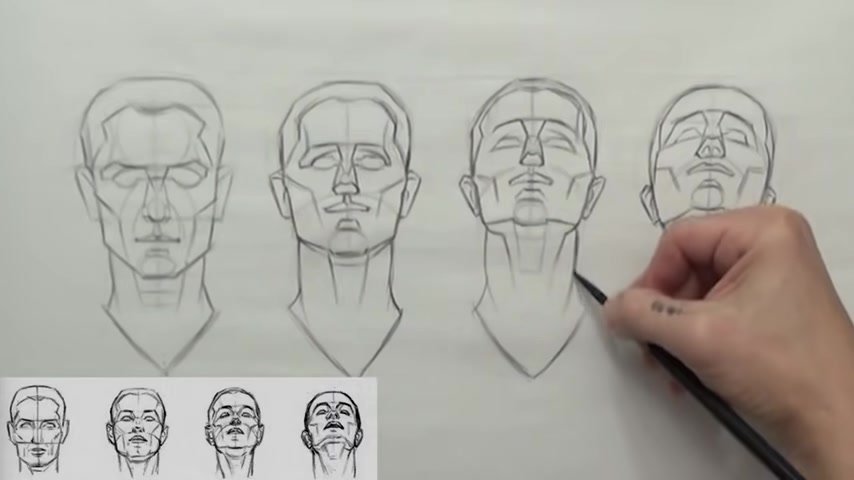
Just wanna clean these lines up a little bit and looks like the next line is gonna be two heads looking down at uh different angles or different um extreme uh positions and then another profile maybe kind of looking down and then the back of the head .
So , um I think this line is probably going to be the hardest of them all .
So , all right , this one is done and I'm gonna take a break and stretch and get ready for the next one .
Are you looking for a way to reach a wider audience and get more views on your videos?
Our innovative video to text transcribing service can help you do just that.
We provide accurate transcriptions of your videos along with visual content that will help you attract new viewers and keep them engaged. Plus, our data analytics and ad campaign tools can help you monetize your content and maximize your revenue.
Let's partner up and take your video content to the next level!
Contact us today to learn more.