https://www.youtube.com/watch?v=MyPVKG04uI8
How To Make A WordPress Website _ Divi Theme Tutorial

Hello , people .
My name is Freddy .
And in this video , I will show you how you can create a professional website using the Diy thing .
The website we will create is a website I could sell for between 3 $5000 to a client .
And that's not all besides showing you how you can make this website .
I will also give you all the pages for free , the headers , the footers , the pages , you can import them into your website and in a few minutes , you can have a complete website up and running for free .
Let me show you what we will cover in this tutorial .
This is the website we will make and when I scroll down , see the header will change and the logo will change .
We're gonna create this from scratch .
And the great thing about the diy theme is that you can apply different headers on different pages .
So right now it looks like this when I scroll down .
But when I go to the contact page and I scroll down , it looks like that a little bit different .
So you can assign different headers and different footers to any page in your website .
Let's go to the home page .
We have a hero over here .
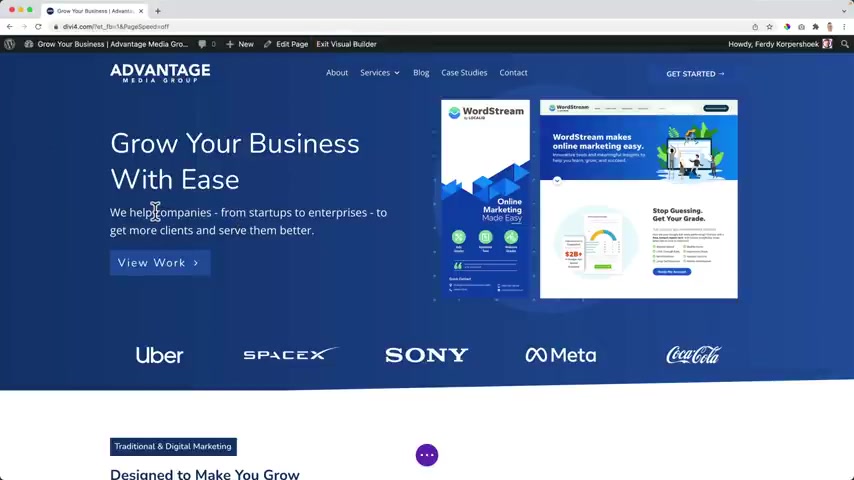
And if I want to adjust something , I just open the visual builder and I can just start typing over here .
I can even make things bolt or on the lines .
I can even give them a different color or a double click and then I can change the text over here , change the button , get started , can change the image over here , do something else .
And that's how easy it is .
If I don't like it , command Z or control Z and I'm back .
If I want to adjust the background over here , I can do this over here in this area where I can edit everything .
I can drag it around .
I can make it bigger .
I can stick it to the left .
And if I want to , I can adjust those colors over here and the second one and then I can copy the backgrounds and I can face it over here .
That's how easy it is .
If I don't like it come ZZ also over here , I have a background , I can click over here .
I can adjust a few things so I can change the , the degrees .
I can change the starting position , the ending position .
So I can make it a line like that turn of the round , make it a radio , change the colors .
And if I like the background , I can copy it , base it somewhere else over here , I have a divider .
If I want to change it , go to design dividers at the bottom and I can change it too .
Something like that can increase the height or like like that play around with the settings repeat itself .
If I want to give it some space , I can drag it just like that .
That's how easy it is .
Also over here play around with the the height size of areas spacings .
So it's what you see is what you get editor .
You can adjust everything from within the page builder .
I'll show you how to create a portfolio so you can showcase your work to visitors .
And if we exit the visual builder , I scroll down , you see that it animates when we scroll , I can enable the visual builder .
Again , I can click over here to the left and go to design , scroll down , go to animation and I can make it slide in and I can decide from which angle how long it should take before it arrives and the delay and then that's where you can have really nice animations .
What else over here ?
I have this module with the heart and if I click on the heart , I can change the color .
Maybe I want to have a red heart like that .
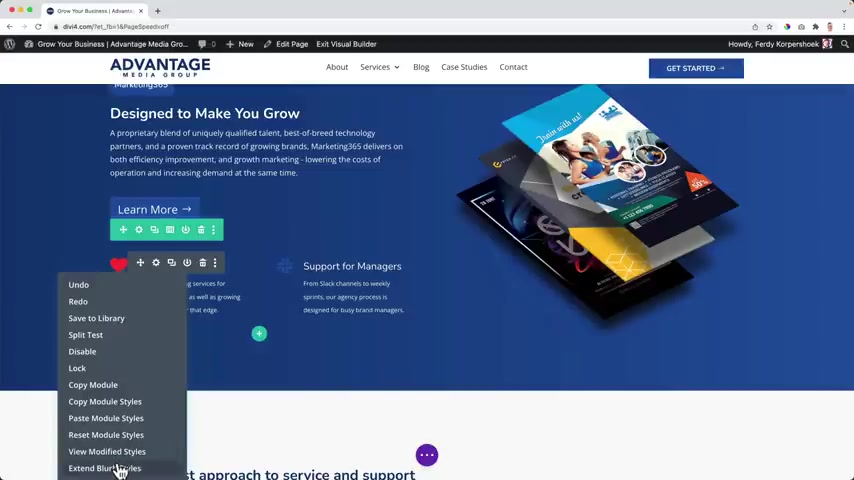
What I can do , I can copy the muzzle sts and I can face them over here like that or right mouse click extend the blurb cells throughout the whole website or this section .
So if I would have five more of those and I extend it all those will get a red Eigen with the DV theme .
It's really easy to speed up your workflow and make websites really efficiently .
We're gonna talk about branding and styling .
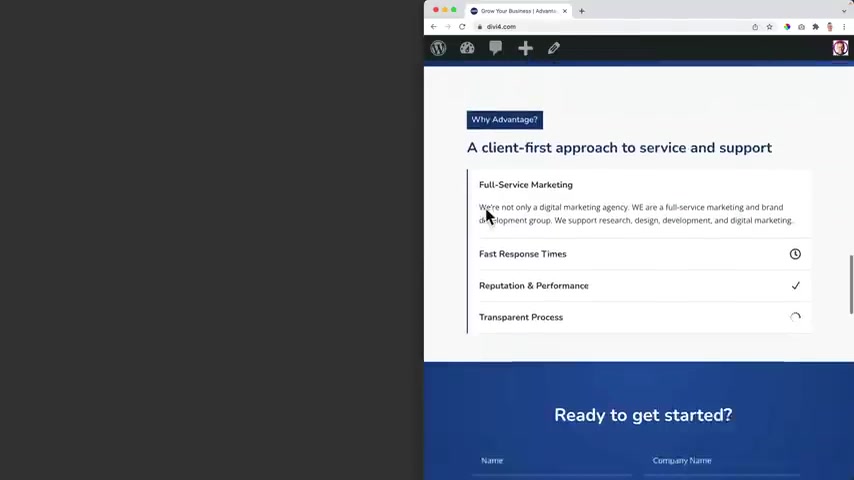
If you see this area over here , this is a form .
But if I would import a new form that is not designed yet , it would look like this .
So I will show you how to go from something like this to this because styling and branding is really important in a website .
We're gonna talk about a blog post and about food .
Now I can click over here and now I can adjust the footer and this whole page will be designed from scratch .
And I will show you how we can optimize everything for all devices .
Because more than 50% of the visitors on your website visit through a smartphone or through a tablet .
So if your website is not optimized , it will scare people away .
You see it looks great and also on the phone , I'll show you how to optimize everything .
So it looks all beautiful .
When we have created this page from scratch , you will have the knowledge to create outstanding pages using the visual builder .
So I will show you how to create something like this .
And as I said before , we're gonna create a block post and with block post , we can create the whole look a few ourselves .
So this is a template I've created and we'll dive deeper .
Well , I'll show you more widgets over here .
So now we can go to our latest block post and we can adjust everything to our wishes .
We can decide how this will look .
And what you see over here is a transparent header .
And if I go to the block page to certain block post , there's a white header .
So again , for every page on the website , we can assign different headers .
The same goes for case studies showcase your work .
Now , I will show you how to create something like that .
And then we have the contact page and also all those pages are optimized for all devices .
When you follow all the steps in this tutorial and you apply them , you will have the knowledge and the know how and how to create professional websites using the DV theme .
And the great thing is when you have the DV theme , you can use it on unlimited websites .
So even after watching this video , you can become a web design agency and have there are tons of stories of people that did that .
Thanks to the tutorials , I provide when I go to fast for you , you can go to the settings of the youtube video and change the playback speed to a slower one .
Or you can click on the left arrow on your keyboard and go back five seconds in the video in the description of the video , I have time stamps .
So if you want to go to a certain part of the video , you can click on one of the time stamps and you go directly to that part of the video .
Do you like what you see so far ?
Then please like this video .
And now let's get started with the four steps we will take in order to create a beautiful and professional website .
So there are four things we need to do .
If you don't have it yet , I will show you how you can get your own domain name and web hosting and I can give you 70% discount .
After that , we will install wordpress , then we get the the then we will create our amazing website .
If you already have a domain name , a web hosting and you have already installed wordpress , I will show you on the screen right now where I need to go in order to continue with this tutorial .
Now it's really time to get started .
If you already have a domain name , a web hosting , you can skip this part if you don't have it .
Let's go to web hosting 11 dot com hit enter .
You will be redirected to name hero .
In my opinion , the best web hosting provider when it comes to quality and affordable prices .
And when I take a look at web hosting , of course , I take a look at speed .
I take a look at the support and I take a look at ease of use and name Hero came out on top and I have an exclusive discount for you of 70% if you go for the first plan .
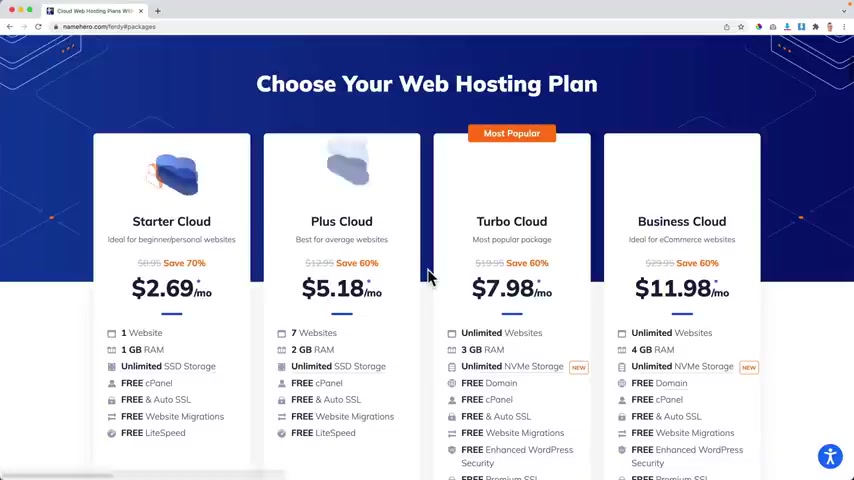
So let's take a look at the plans by clicking here or if you feel like it , you can scroll down and here you see the four plans if you just want to start and you're sure you want to go with one website .
This is a great package for you .
It's called a starter cloud .
You pay $2.69 per month and you can have one website .
You have one gigabyte of ram , which is more than enough unlimited SSD storage .
You have the C panel which helps you to install wordpress and free and automated SSL and this one I really like , it saves you some time because automatically your website will be secure with other web posting providers .
You need to do them manually .
Here , it is automatic .
If you already have a website , you can migrate it for free to name Hero and you have free live speeds which makes your website even faster .
I can tell you the website at name Hero are fast .
That's for me the most important thing , fast websites .
I don't want to have slow websites .
So if you get the startup cloud , you have one website and it can be as short .
It is blazing fast .
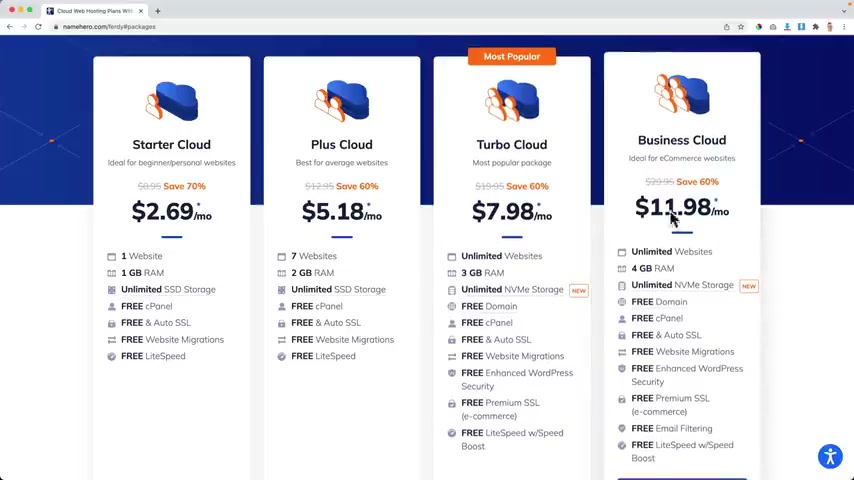
If you think in the first year or the first three years , you want to create multiple websites , then I would go with the Plus cloud .
You get 60% of discount .
You can have up to seven websites and two gigabytes of ram , which is more than enough to have seven websites .
Again , unlimited SSD storage , all the other benefits which you also see over here .
If you want to start a web design agency , I would go with the Turbo cloud .
You can have unlimited websites .
That means that you only have to buy the domain , but you can host it under your turbo cloud package less than $8 per month .
But this is not with SSD storage , but with NVME storage , which is a new technology that makes your website even faster .
This is already super fast , but this makes it even faster and that can be handy .
So if you're planning to create a lot of websites , then this is the plan for you .
And if you want to go all in the best of the best , then you can go for the business cloud .
So if you're starting out , I would suggest you start with the starter cloud or with the plus cloud , you can always upgrade later .
So if you're sure you want to go with one website , this package is great for you .
If you know , you want to create multiple website in the first year or in the first three years , then I would go for the plus cloud , but again , you can always upgrade later .
So I will start with the plus cloud .
I scroll down and I click on order now .
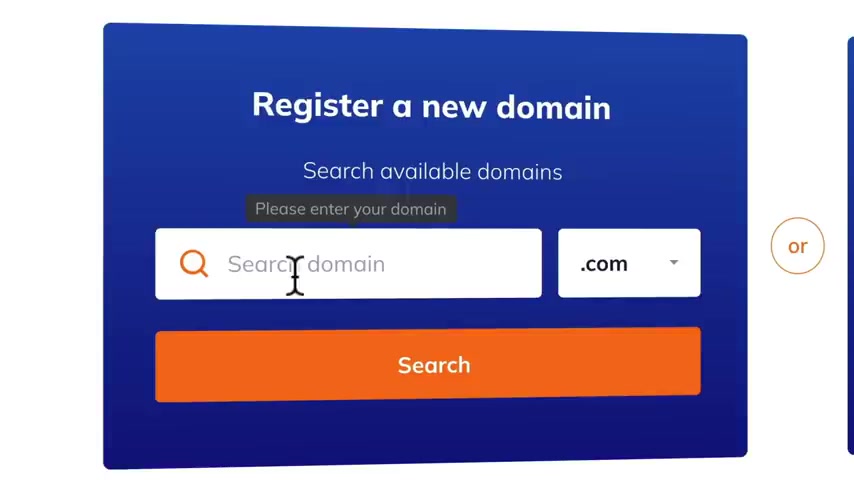
Now we need to get a domain name .
You can have a dot com domain name or a different extension .
You can also search for it .
Do they have a , a Dutch extension for instance ?
Yes , they have that .
And if you buy a dot com domain , your website will be live immediately .
That's what I really like about name .
Er , you don't have to wait .
Your website is live immediately .
We don't have to take a break .
So you need to search for a domain name that is available yet .
Of course .
So you need to come up with a , with a brand name or with your own name .
For instance , my brand name is Ferdi Corps .
That's my name .
So I can also choose Ferdinand David dot com .
See if it's still available .
I click on search and if it's not , you'll see that over here , but it is available .
So I will go for Ferdinand David and I click on continue .
So over here we can choose our billing cycle .
Do you want to go for one year ?

Then you pay $5.98 per month for two years , $5.58 or $5.18 .
So depending on the billing cycle , you get more discounts .
Maybe you ought to check things out .
I suggest you go with one year .
And then after the first year , you can also extend your billing cycle for another three years .
And then again , you get a discount .
So I would start with one year and then you don't need all this stuff .
This can all be done using wordpress plugins .
So I click over here and continue and then it's really important to take ID protection .
So you can check that over here .
Why ?
Otherwise your data , your phone number , your email address will all be visible to everybody in the world and people will spam you their automatic bots that they will send you emails about let me create a logo or do sco for you .
You don't want that .
So for just $6 per year , you can get ID protection and nobody can see your personal details .
Then I click on continue and that's it .
So we have the web hosting plus cloud which normally costs $179 per year .
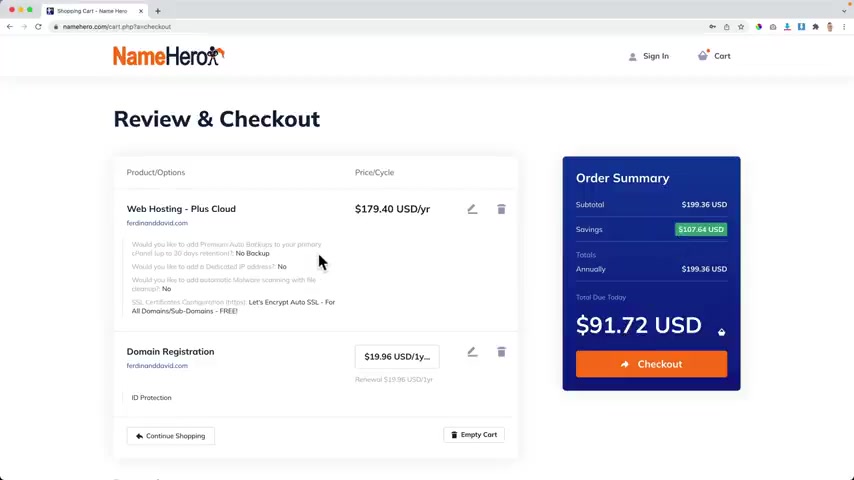
But you get a lot of discounts and we pay less than $100 and then we can have up to seven websites in this package , which is amazing .
This over here is a glitch .
This is not uh $20 .
So select that and see the price stays the same and I see the right price .
So I don't know what it is .
Maybe it's a mandatory .
You found out that the , I don't know .
But um I want to have the domain I want to have this web posting package and we can get started right away .
So you see , we got a lot of discounts .
So I'm a new user .
So I will fill in my details over here .
First name , last name , my email address , my phone number , my company name , the street address , my city where I live , I live in South Holland in the Netherlands .
How did you find us ?
Well , probably through youtube because you're watching this tutorial and you can have a support pin and that can be asked from you if you go to the support .
But if you have phone or live chat and then choose four numbers , I have those over here and then I want to create a buzzword and I confirm that password .
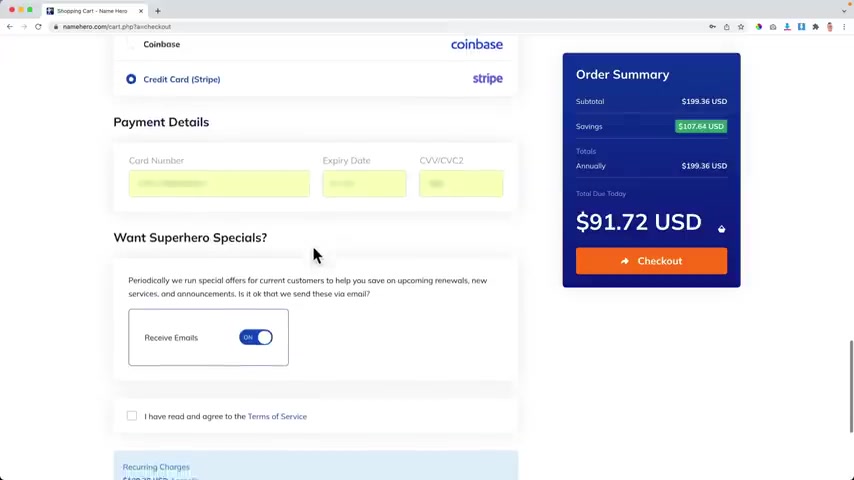
I want to pay with credit card stripe .
So I fill in my details over here .
One superhero specials .
Well , I definitely would turn it on because with Black Friday , for instance , you get an amazing discount .
So I would turn it on and they do not spam you , they send only emails when it really benefits you .
They need to agree to the terms and then we need to go to the checkout by clicking here .
And when you got this through my link , you don't pay more , you get a discount and I get credit for it .
So it's a win , win situation .
So I click over here on , check out .
This sometimes can take a moment and I'll check a few things and there we are , the order is placed .
Congratulations with your domain of web hosting .
Now , let's install wordpress now , we can continue to the client area .
So I click over here and there we are .
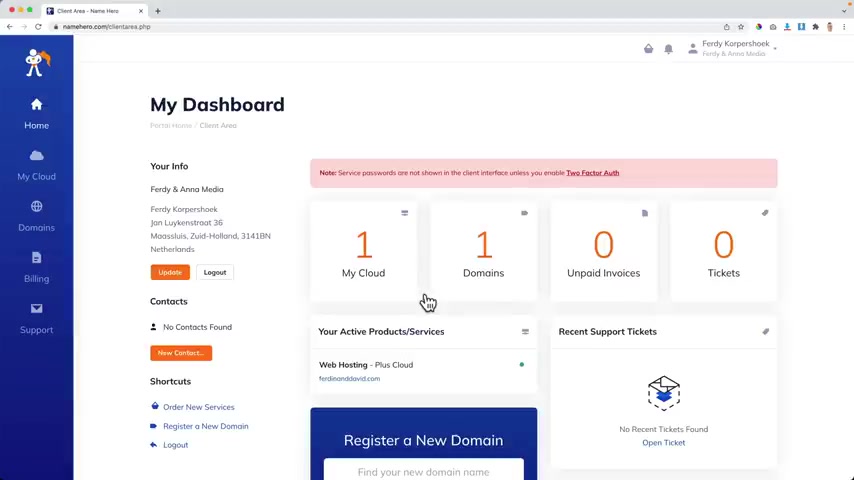
So what we can do over here , we can maintain our domains , our websites , our support tickets are billing .
So if you have any question , you can click over here on support , you can open a ticket or go to your tickets and they usually reply really fast .
So that's really nice here .
You can see an overview of all your domains , your cloud , we going right there .
So what I will do , I will click on my cloud over here because we're going to install wordpress .
And then I click over here on the web hosting plus cloud .
Awesome .
I log into the C panel before we install workers .
I want to configure a few things I search for select and then I click on select PHP version .
I click on it and then I can choose a PHP version and I want to choose 7.4 .
I click on set as current .
OK .
Then I go to the options .
I scroll down a bit and I want to change the execution time , let's say 150 .
And then over here the memory limit 1 28 the post max size , let's say 64 and the upload max fell size .
This is really low two megabytes , change it to 512 megabytes .
OK ?
I click over here .
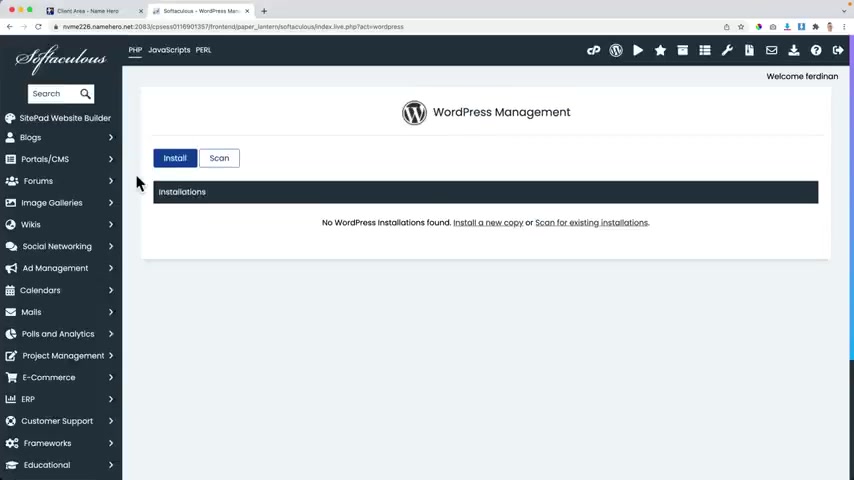
So I go back to the overview with applications and now I want to search for wordpress and then I click on wordpress manager by soft Dela .
And now we can install a worker website on our domain .
So I click on the blue button , install in the air .
We can choose our domain .
Awesome .
And then over here I can choose a tps and maybe it will say , let's see , it will say nothing .
It can say , hey , you don't have htps .
Still choose HPS because it will be there really soon that will be automatically be created .
And with HPS , as you see over here , your website becomes secure .
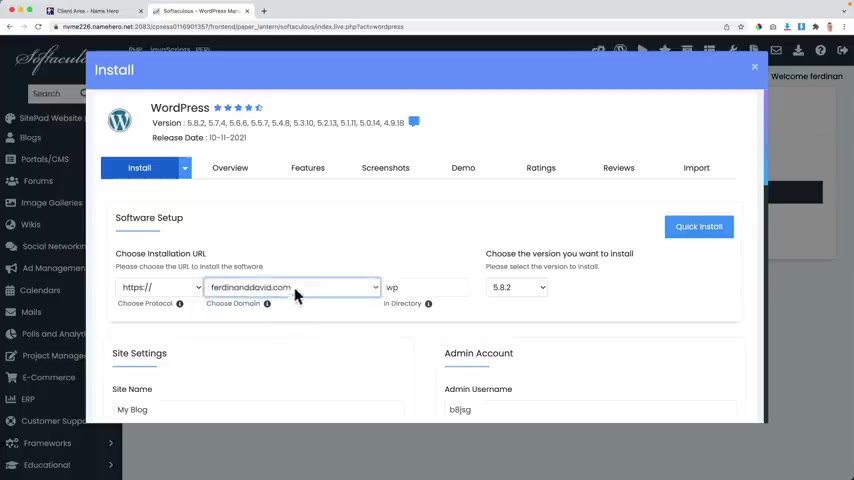
That's really important for the search results , really important for your website .
So with they take care of it , then you can choose your domain name .
If you have multiple domain names , you can choose one over here .
And by the way , if you want to learn more about everything that name Rs offer , you can go to youtube and search for name Hero tutorial .
And I think I will be the number one .
Yes .
10 months ago , I will create a new one that I recorded four K .
But over here a 1.5 hours of everything you need to know for uh name Hero web hosting .
And then over here we can install wordpress on your domain name forward slash and then new or WP or test .
And if you make this empty , which I suggest you do , then workers will be installed on the director on , on , in my case Ferdinand david dot com .
They always use the latest version .
And then over here we can choose the name of our website .
We'll do this later .
Right now .
I want to create a user name Corp and I want to hide my password and create one and I need to create it admin email f at 30 corp dot com .
And then I scroll down all the way I don't need all that stuff and I click on install .
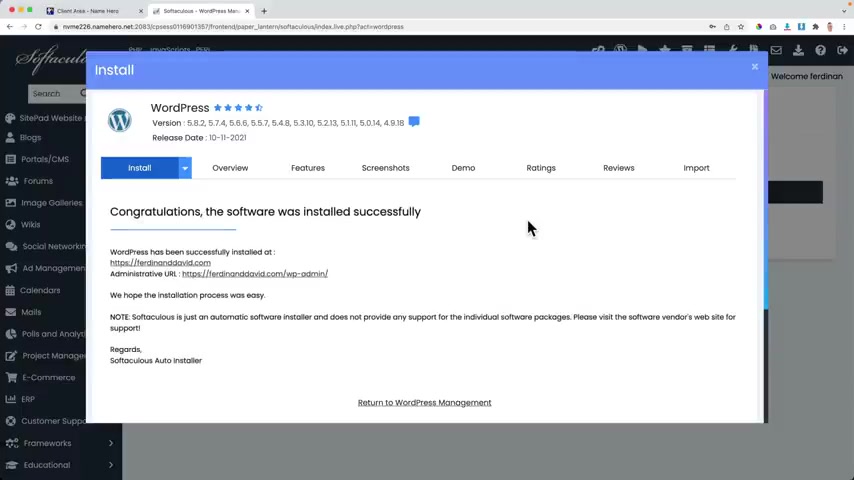
And now ladies and gentlemen , Wordpress is installed on our brand new domain name with web hosting .
So there it is , we can go to the back end and to the front end of our website .
If I click over here , I go to the back end , that is where we can configure our complete website .
It may look overwhelming .
I will explain to you how everything works .
Then I go back and I click over here and now I go to the front end of the website .
So what I can do , I can close these two steps .
This is what people will see when they go to your website .
It's called the front end .
And then this over here is the back end is what you only can see when you're locked in and no matter where you are in the back end or in the front end when you are logged in , you see this bar over here , this stub bar , this bar is only visible when you're locked in .
So your visitors will not see this .
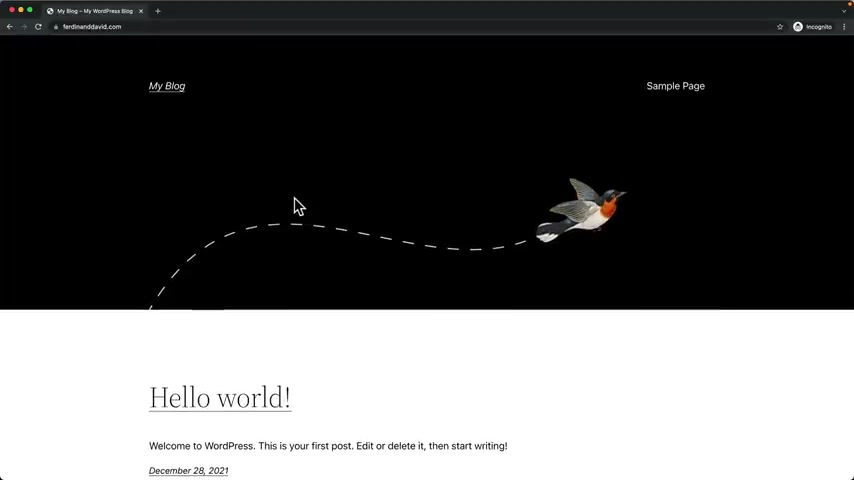
But if I would go to this website , let's say , in an incognito window looking over here when people go to Ferdinand David at this moment , they will see this website .
So we are live immediately and that's what I really like .
Let's face it , it looks ugly .
It looks , it looks ugly .
Why do they do that ?
I don't know .
But what I know we can make it look better .
But before we do that , let me show you how you can clean up your website and um just a few important settings so we can get started the right way .
So let me talk you through the front end and the back end starting with the back end .
This is the place where we adjust our website .
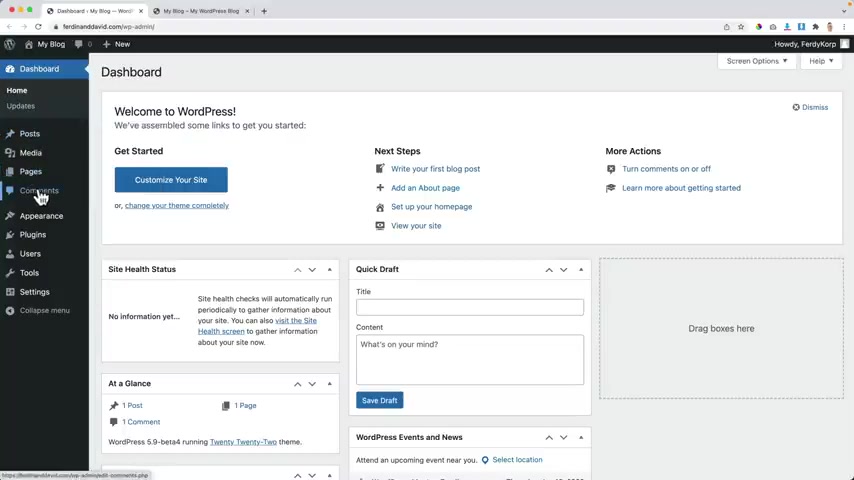
We can change the theme , we can create blog posts , we can add pages , we can monitor all the comments , we can add plugins , create new users , go through the settings of the website and step by step .
I will show you how everything works .
And then when we change things over here at the back end , you will see the changes here at the front end .
So first things first , I always like to make my website a little bit cleaner because this is a little bit overwhelming .
So the first thing I do , I dismiss this message and all this stuff over here .
I want to make it look cleaner .
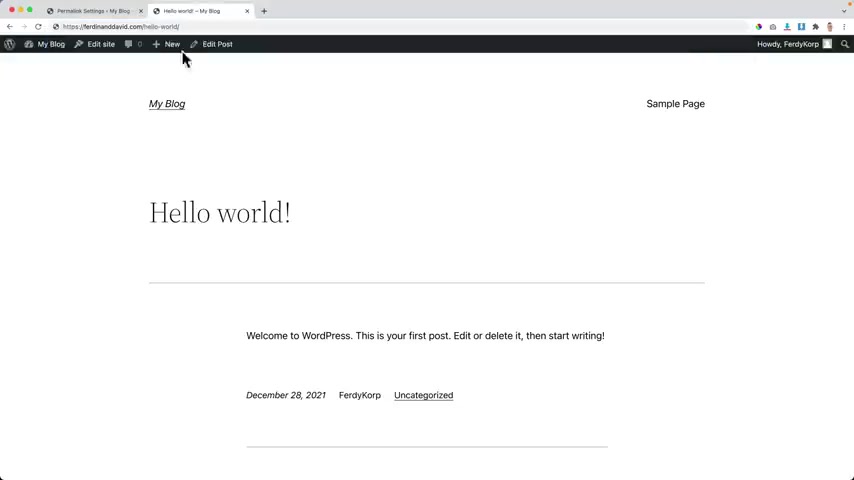
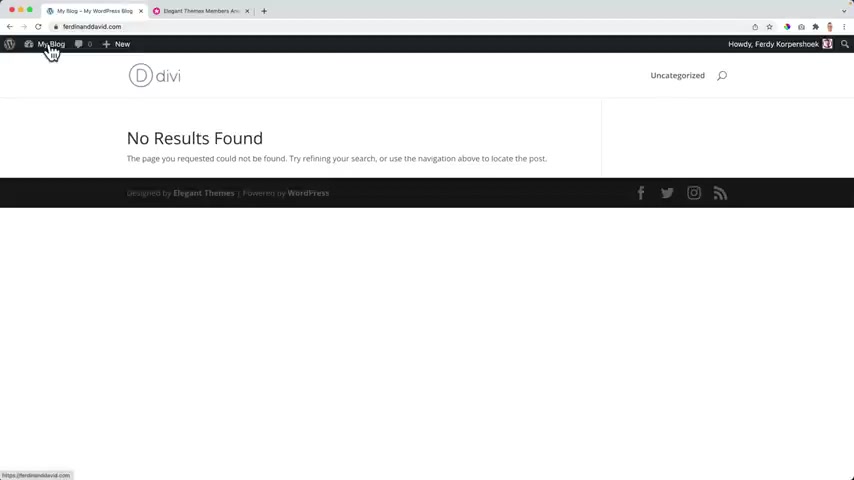
So first I go to my blog post over here and I want to remove it right now .
On my website , I see one blog post , which is this one .
If I click on it , you go to the blog post and there's a comment and it looks really ugly .
In my opinion , we're gonna make it look so much better .
But first I want to get rid of this blog post .
I don't need it .
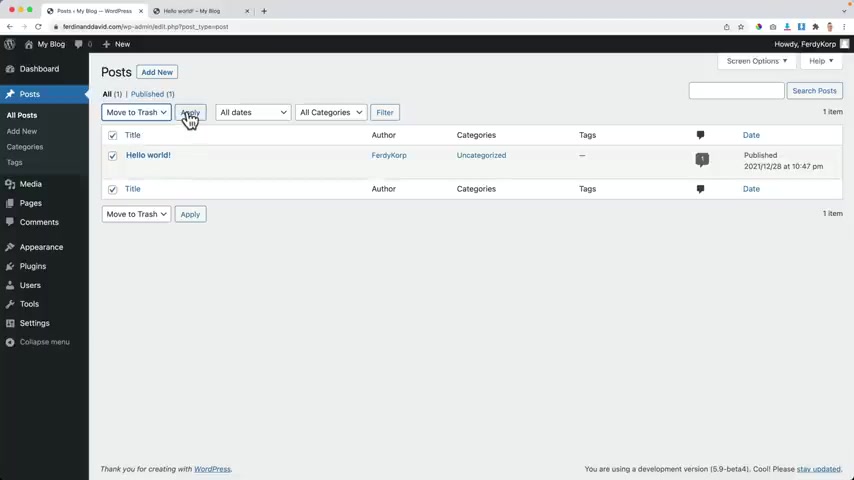
So over here at the posts , I select all the block posts , there's only one build actions move through the trash and I click on apply .
Then I go through the trash and I emptied the trash .
The same goes with pages .
There are a few pages .
I don't need those .
I select them all by clicking here .
I can also select them individually build actions , move to the trash , apply .
Then I go to the trash over here and again , I can remove them permanently one by one or enter the trash .
I go to the dashboards , I see all those steps over here um to collapse them or even better get rid of them .
So I go to the screen options and I uncheck them all .
So I don't see unnecessary stuff over here later , we're gonna add a few things over here .
But right now it's not necessary .
Then I go to the plugins .
OK ?
Two plugins .
They are not um active .
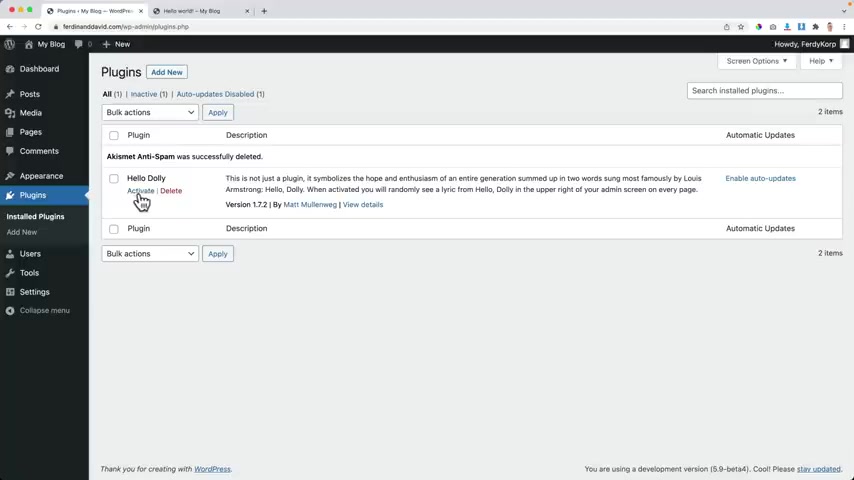
So I can click on delete .
If you want to delete a plug-in , you need to deactivate it first .
So if I would activate it , I cannot delete it right now , I first need to deactivate it and then I can delete them .
OK ?
Then I want to go to settings Perma links right now .
When we have a blog post over here , you see this my domain name and then the date , I don't want that .
That's ugly .
I just don't want that .
I want to have my domain and then the title of the blog post , which is in this case .
Hello world .
How can I do that here at settings bema links .
I select post name .
That's the best option in order to be found in Google and other search engines .
So I save the changes .
I do it twice just because I feel like so sometimes it's good to follow your feeling , you know , yesterday , I felt really sad and I woke up and I forgot um my favorite color , I forgot what it was .
So I asked my wife , I'm just kidding .
And now if I would refresh this , uh this blockhouse doesn't exist anymore , but it would look like this and it looks much better if I go to my website , the Corp dot com and I go to tutorials how to make a workers' website , it will say free Corp dot com , how to make a workers' website for free .
So that's what I like to use and not this or this or this .
Uh I don't want that .
Ok .
So far so good .
Now , I want to go over here to my profile and then we can change the look , a few of our back end .
I always use the default one .
I'm just used to it .
So um I keep it with that .
What I can do right now , you see how Ferdi Corp and then when I write a blog post , it will say the author is Ferdi Corp .
I don't want to show my user name .
I want to show my real name .
So my first name is Ferdi .
My last name is Corpus Hook .
And then over here at display named Felicity , I can choose the combination Ferdi Corpus and what you will see over here Howie Fed Corpu .
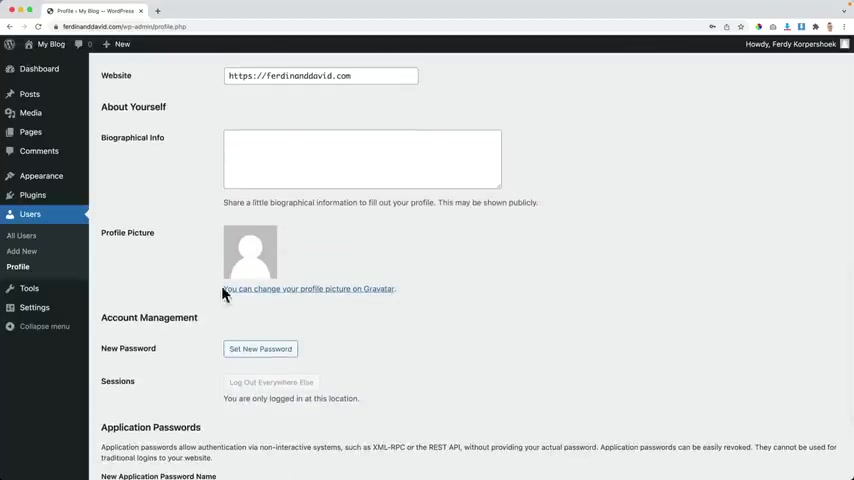
If you want to have an image over here , you can scroll down , it can create a profile picture on gravity .
So if I open this in a new tab , you can sign in .
And if you sign in with the same email address you use over here it contact info , then you can upload an image in this account .
And then when you use the same email address over here as over here in your gravity account , there will appear an image over here a lot of over here is in one sentence .
So I normally use this email address on my websites and this email address is also active here at Gravatt and when I have that .
So when I save this and I confirm it , my profile picture that I have on grave will appear .

I scroll down all the way I can create a new password if I want to , I click on update profile and now I need to confirm my email and I have done that .
And now you see this image over here , which is from .
So when I place a blog post and people can see my my profile picture , this one will appear .
And if they see my profile picture , I can also say something about myself over here over here .
So uh I love to teach people about word press , affiliate marketing and commerce .
My style is being honest straight to the point and optimistic .
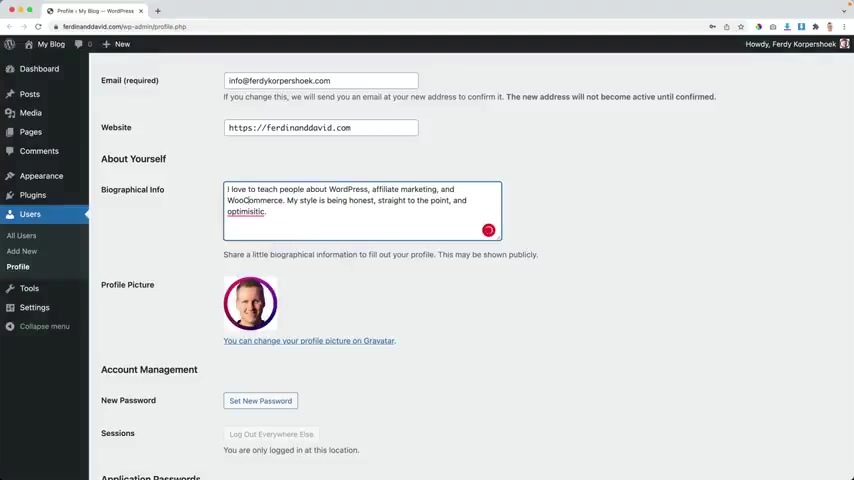
I don't know , I'm not the best text writer , but then we have something over here and then I use grammar to fix all my errors because there are a lot .
I'm from the Netherlands .
My first language is Dutch .
So grandma Lee is helping me .
Thank you , grandma Le .
You're welcome .
Uh Did he talk back ?
No .
OK .
Whatever .
So this is how it looks right now , really ugly .
But as I said , we're going to make it look so much better .
So one more thing go to the site settings .
In general .
And here we can give our website a site title really important for the search results and a tag line .
We're gonna talk about this later , really important that you have HPS over here that your website is secure .
Also over here , your administration , email address and what we can do over here , we can change the language of our website to a different language if you want to and we can change the time zone .
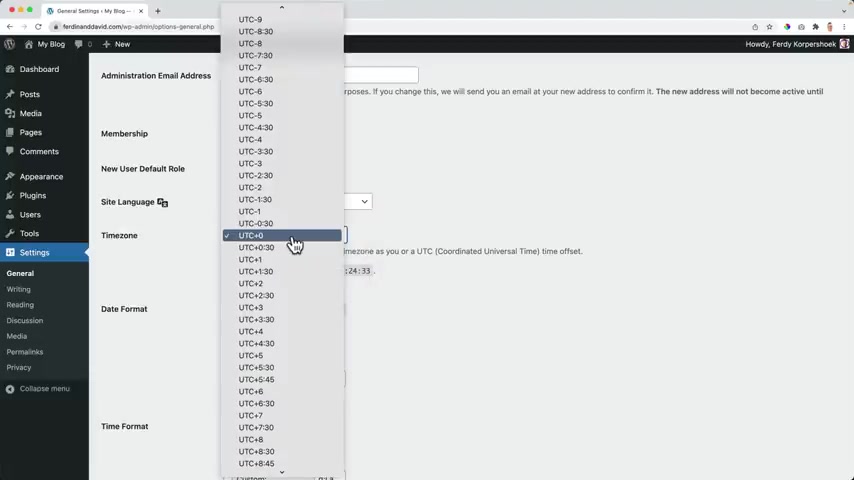
So if I'm from the Netherlands and I want to schedule a few blog posts , it's important that my time zone is correct .
So I can use one of those and Google , which one is , which one or I can screw up .
And over here , I can select the place where I live or close by .
So I can choose Amsterdam and then I can change the date format uh depending on where you live .
It's , it's different .
You can choose one , you can create your own and you'll see how it will look over here .
I like this one and then the time format I use this 1 a.m. and PM using capitals over here .
And also here , you can have your custom time format .
My week starts on Monday and I save the changes .
So if we take a look at our website , it looks ugly .
Now , ladies and gentlemen , it is time to install the DV theme , the most popular warp theme in the world .
And when you get the DV theme , you get so much more .
Let me show you .
So in order to make this beautiful , we're gonna use an amazing theme called the DV theme .
In order to get it , let's go to 30 warp dot com forward slash DV .
Hit .
Enter what you see over here , 188 people purchased the elegant , the subscription in the last 24 hours and for 24 hours you get 10% off discount .
And after 24 hours unless you know how to remove cookies , it is gone .
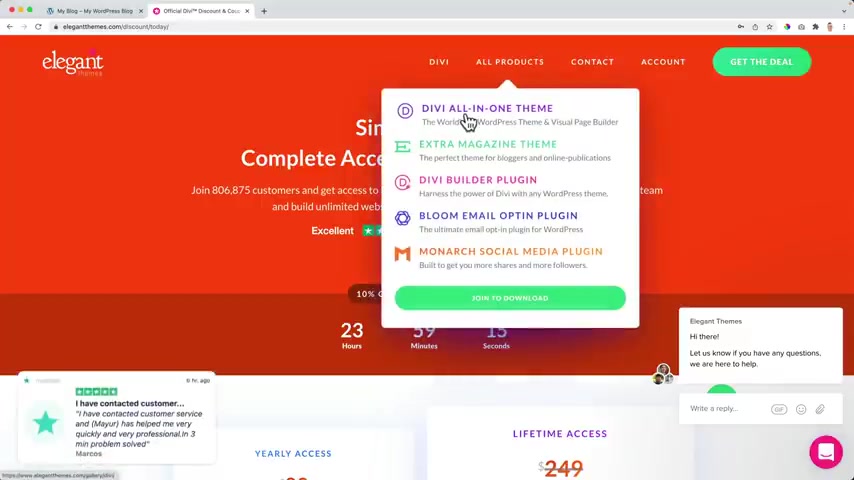
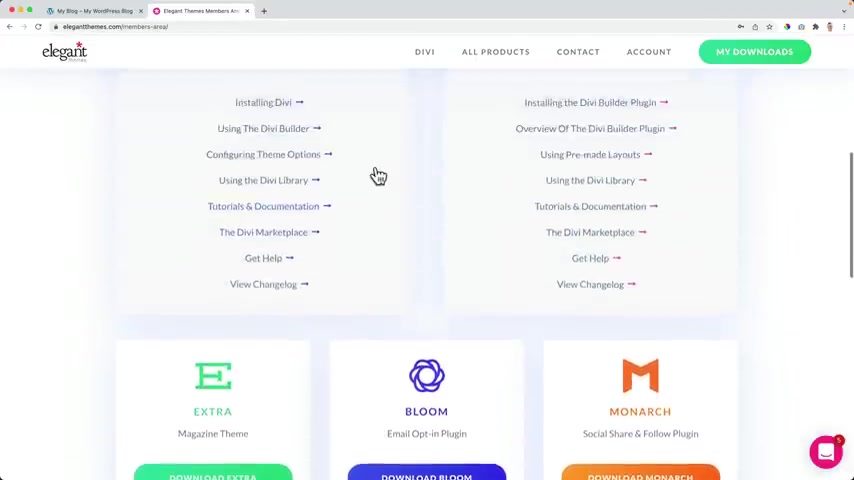
So when we get the DV theme , what do we actually get ?
Well , of course , we do get the DV theme , which is the most popular wordpress theme and website builder for wordpress in the world .
And it will enable you to create an amazing website .
And of course , in this tutorial , I will show you step by step how you can do that .
Besides that , you get the extra magazine theme , a theme that can enable you to create an amazing news website .
I have thought about it .
You can go to youtube search for extra theme tutorial and it's not number one yet over here .
It is three weeks ago .
What else do you get the Divi Builder ?
So you can even use a different theme and still use the Divi Builder , which also is included in the DV theme .
Then there's the bloom email update plug-in that will enable you to get more updates to your email list and there's the monarch social media plug-in that will enable you to show real time how many followers you have on different social media platforms .
And it enables you to let the visitors on your website share the content of your website .
So let's take a look at the pricing .
We scroll down , let me close this .
We get 10% of discount in the next 24 hours .
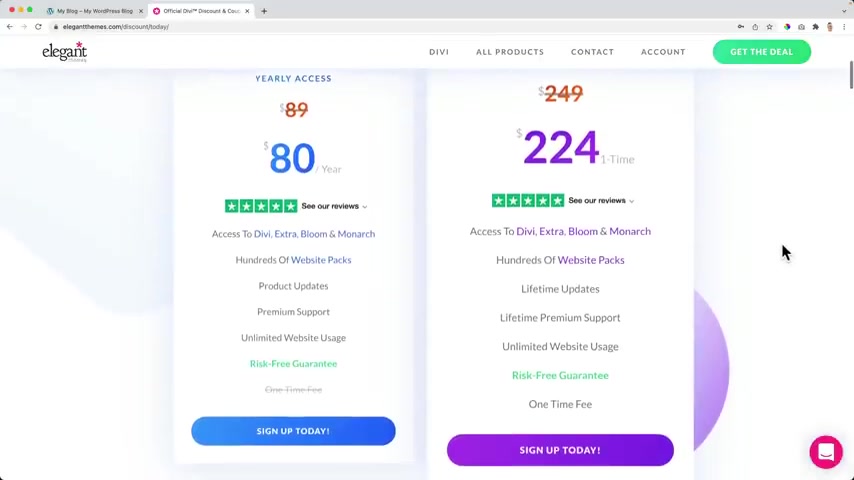
And there are two plans .
You have the yearly access .
So for $80 per year , you can get access to all those tools and you can use it on unlimited websites and you can have updates for a year , you can have premium support for a year .
And if you somehow don't like it within 30 days , you can have your money back or what you can do , you can go for lifetime access , a one time fee of $224 .
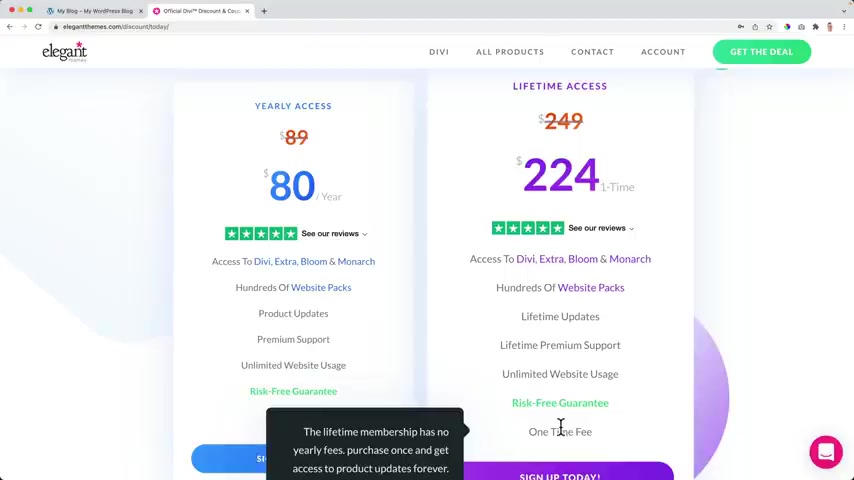
And then you get all the tools , all the products , you can use it on unlimited websites and you get lifetime updates , lifetime premium support and lifetime unlimited website usage .
And again , if you don't like it , you can get your money back within 30 days .
You only pay once I paid it six years ago and I still can use all the tools .
And when there are new tools or new updates , I have access to them at once .
Even though I paid $224.06 years ago .
This is crazy .
So , really simple .
If you want to use the Diy theme or the extra theme or one of the tools or all the tools for longer than three years , I would go with lifetime access , take the 10% of the discount and then you can use all those tools on unlimited websites of yourself , but also on websites of your clients .
And then through the tutorial , you can see how it works .
If you really , really , really don't like it somehow you can get your money back .
I tried it already and they gave me my money back .
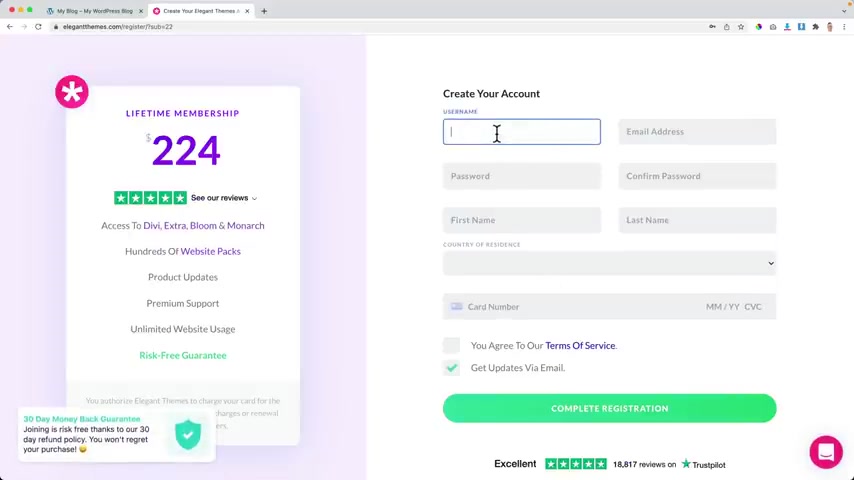
So I click on sign up today and I need to create a user name and I love creating user names .
You know , you can choose whatever you want .
I can choose this one .
The baby is already taken .
Now I can choose , I , I choose um FF Corp .
I don't know why just because I like it .
My email address is FF at F Corp dot com .
I need to create a password .
So my first name , my last name , I'm from the Netherlands and that's why I see uh a vet included Texas .
But uh since I have a vet number , I can fill it in over here and then it will be subtracted again .
Nothing you need to pay with credit cards .
And I agree to the terms of a service and I don't want to get updates via email .
So I click on complete registration and it says welcome to elegant themes and we can log in over here .
Remember me ?
I always like to be remembered .
Ok , let's continue log in and now we can download all the stuff we have over here .
It all looks really slick , really nice .
The extra theme , the Bloom plug in the mono plug in .
I have to talk about all of those tools .
But what I want to download over here is the DV theme .
So I click here and download the DV theme .
There it goes .
And now I go to my website to the back end to appearance themes and I click on add new upload theme and then I drag it over here and then I click on install now .
Awesome .
Now I can activate it .
I can close this .
I want to remove all the themes I do not use by clicking on the theme details when I hover over it .
The lead .
OK ?
Thing , details , delete .
OK ?
And there we have it .
Great .
So now when I go to the website , it looks like this , it looks a bit better , but we're gonna make it look so much better .
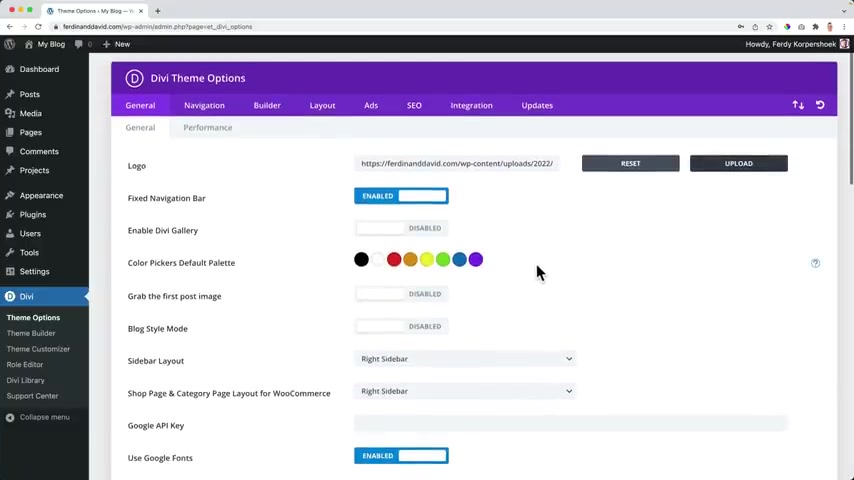
So let me do a few things and now we're really gonna create our first page using the DIVI thing .
But before I go to the back end , I can close this .
Now I go to over here theme options and if you want to , you can upload your logo I have tutorials on how to create a logo .
You can go to youtube and search for logo tutorial 30 or create a logo 30 or you hit uh type 30 .
After that , you see a few different tutorials on how to do it with Photoshop with another free tool and with a free tool using a free transparent background , which can be really handy .
So you can watch that .
I have my logo made in two minutes uh using Photoshop .
So I click on upload select files and then I want to upload the colored logo , the white logo and the fave icon .
By the way , if you want to download these files , using the tutorial , you can go to 30 corp dot com , then go to tutorials Diy , scroll down and here download the images I use in the tutorial and you can get along .
So I want to use this image right now to call it one as a logo .
Great .
And the next thing I want to do , I want to make use of a few colors .
You don't have to do this yet .
But if you have a few colors , you're using your website that has everything to do with your branding , you can change them over here and then in the whole website , they are at your fingertips .
So I go to my notes and also those colors can be found in the document with all the images that you can download from my website .
So I use this dark blue color .
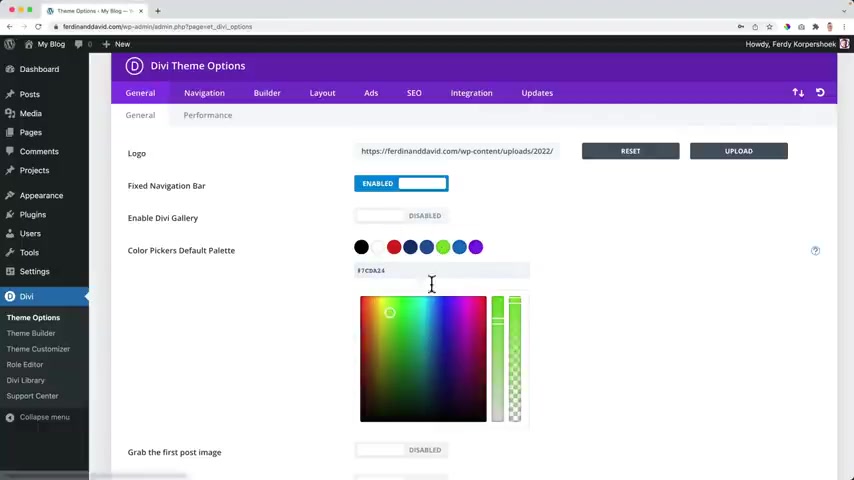
I want to paste it here and I want to use the light blue color and then this one all white copy base because I don't use other other colors because you don't want to use too much colors in your website .
And then I want to change the red one by six times three .
That will be the color of the text in my website .
OK , perfect .
I click on save the changes .
And now when I go to my website , it looks like this .
We have a big logo and a home page , which is this page over here .
And that's what we will configure .
We're gonna create a few pages we want to have in our website .
So I hover over my blog and I want to go to the theme , customize it by clicking here .
And then we go over here to menus and I can create my first menu by clicking here on this button .
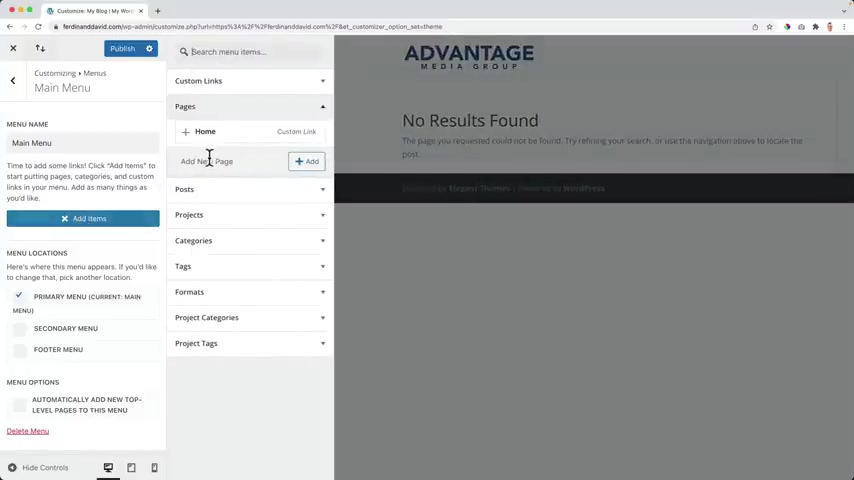
And I call this one the main , no , the main menu .
And I want it to be the primary menu .
So to appear over here .
And then I click on next .
And now I can add pages by clicking on this blue button , add items .
So I click over here .
I can create a new page and the first one is the home page .
I click on .
What else do I want to have on my website ?
Well , it depends , of course , on what kind of website you want to create ?
I want to create a website where I help people to elevate their business to the next level using their online presentation by creating new branding and marketing strategy and better web design .
But first , I want to say something about myself .
I always like to say about instead of about me or about us just about and I added it and it will be added over here .
And if I would say come on minus you see it will appear over here at the right , which is nice .
The next one is services .
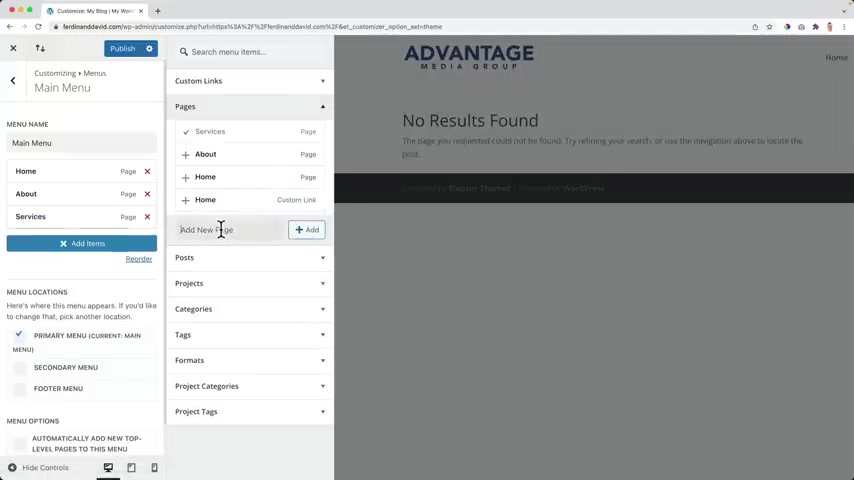
I want to offer multiple services or a three in one service and then I want to highlight all those services .
So I create three pages for them .
The first one is branding .
The second one is marketing and the third one is web design .
Then if you want to , you can create a blog on your website .
You can have a portfolio and you can have a contact page and what I do , I don't like to copy others .
But what you can do if you want to create a marketing company , you can search for marketing company , Amsterdam and you can go to the ads or skip them .
Click over here , we grow brands , OK ?
Services expertise and our work tips about us context .
So you can get inspiration from it if you want to , you don't have to copy it , but that's what you can do .
And if you click over here , for instance , I want to change this back to case studies .
I think that looks sounds better .
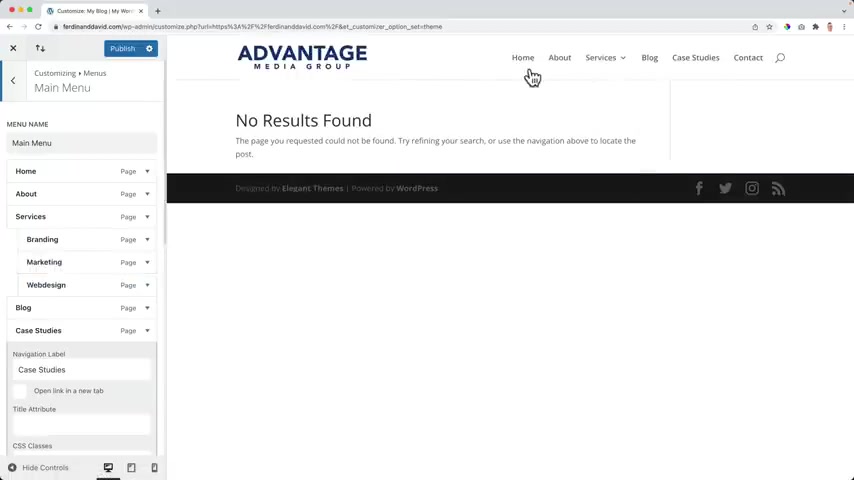
And if I'm finished , I click on publish and there is , but I want to do a few things .
I want to go to services and then below serve .
I want to bring this a little bit to the right .
So I click and I drag it over here and then it becomes a sub item like that .
So now I have three sub items over here .
That's better .
And I don't want to have the home page over here because that will be our our home page .
So when you uh want to go to the home page , you always click on the logo .
That's common knowledge .
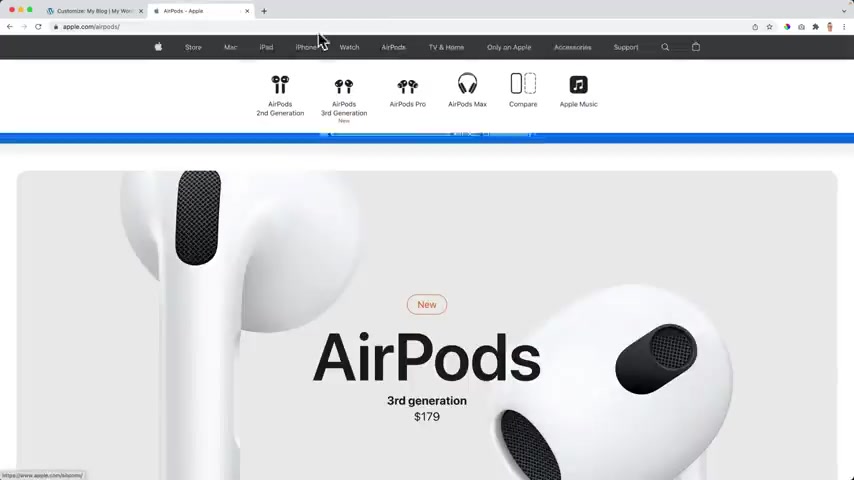
If you go to any website or let's say apple dot com , and I go to a certain page , I want to go back to the home page .
How do I get there ?
I just click on the logo .
So uh instead of uh spending thousands of dollars on marketing , I just can learn from the best by not using a home page over here .
Then I go back from the main menu and back over here to the homepage settings and then I can change this from our latest post .
So right now our home page shows the latest post to a static page and now we can select the homepage .
And if you want to go for a post page .
I can select the blog page .
OK , almost there .
I would like to go to the general settings site identity .
And right now we see if I can over here .
And again , if I go to apple dot com or let's say uber dot com or Uber , you see this icon over here .
It's called A , I can also here at the apple and the apple logo .
That's what I also want to do .
So side icon , I want to place it here as a site identity and I use this one select , I don't want to drop it and that it's shown over here , am GV Media group .
Then over here is the site title .
Well , way you create a site title is really important for the search result because if you go to Google dot com and you search for web design or Rotterdam , you skip the s but you see web design in the title .
This is the title which we can create over here .
Web design wrote to them .
So I searched for web design , wrote to them .
And what you see is web design , wrote to them .
So it's really important to web design , wrote to them , web design , wrote to them , web design , wrote to them , what design wrote to them , et cetera .
So it's really important that the term you want to be found on is at the beginning of your side title .
So I want to be found on grow your business and then a pipe , it's called pipe and then I say it vantage Media Group .
So first your your keyword , grow your business or marketing , Rotterdam or Amsterdam , depending on where you live .
And then there's a decline which can show a little bit more about your website .
We help companies small and big two get more business and serve more people .
Interesting .
Publish .
So now when I close this , this is life , this is how it looks .
I can uh adjust a few things over here .
And then we're gonna take a look at the home page later .
We're gonna create an advanced header right now .
This is a simple one .
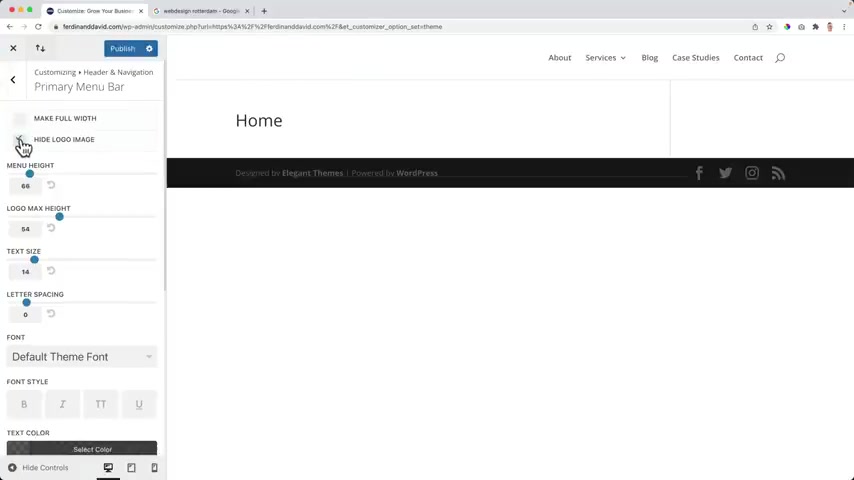
So one more time I go to the theme customizer .
So I go to the Heather and navigation .
I go to the primary menu bar and I can make this fool with if I want to , I can hide the logo somehow .
I have no idea why you would do that .
But hey , it's a possibility .
How cool is that ?
We can change the logo height so I can make it a little bit smaller .
And also here I can use the arrows to make it smaller and the tech sites make it bigger , smaller letter spacing .
But what I want to do , I want to um use capitals and I want to use a different color for the text which will be this one and then I bring this up because then it is not transparent .
If I bring it down , it will be completely transparent and then it's gone .
But I wanted to be visible .
OK ?
I need to click out outside of this area .
Then the background color is fine .
The dropdown menu background color , it looks like this that looks fine .
And I want to change the active link color to this light blue one or the normal blue one and also this line color to this blue one and I'm happy with this close it .
So right now , we , we created a simple logo and for now that's perfectly fine .
And what I want to do if I want to edit this page , using the Divi Builder , I can enable the visual builder .
If you don't see that , just click on , edit the page and then over here , click on use the DV builder .
It is time to get to know the D builder .
And the biggest portion of the tutorial is about the D BUILDER because that is the tool we use to create amazing pages .
And not only that when you learn how to create a page we're going to make and we're really gonna take a long time to create this space because I want to show you everything there is to know about the DV page .
When you learn that you will also learn how to create pages yourself .
So I'm excited what I will do .
I will first show you the basics on how things work with sections and modules and columns and rows and then we start to build our page .
Are you ready ?
I hope you are because we're gonna get started and then I can edit the page using the DV builder .
I close this , we can get a tour but I don't need it .
So I click on start building and then we see three options over here .
We can build from scratch , we can choose a premade layout and we can clone an existing page .
Well , since we're getting started , I want to build a site from scratch and show you how to work with the DFI builder .
So I click on start building and now we see this area over here .
I want to close it and I want to start from scratch .
So , are you ready to learn how to work with the DV editor , the visual builder ?
Well , if you are uh then continue .
If you are not , then do whatever you need to do in order to become prepared already .
Yes .
So I give a few minutes to reflect on yourself .
Take a look in the mirror .
Ask yourself the question out loud .
Am I ready for this ?
Because this will change your life ?
Are you ready for your life to be changed ?
Those are some serious um questions .
It's only one question .
OK .
Let's uh start , let's get started .
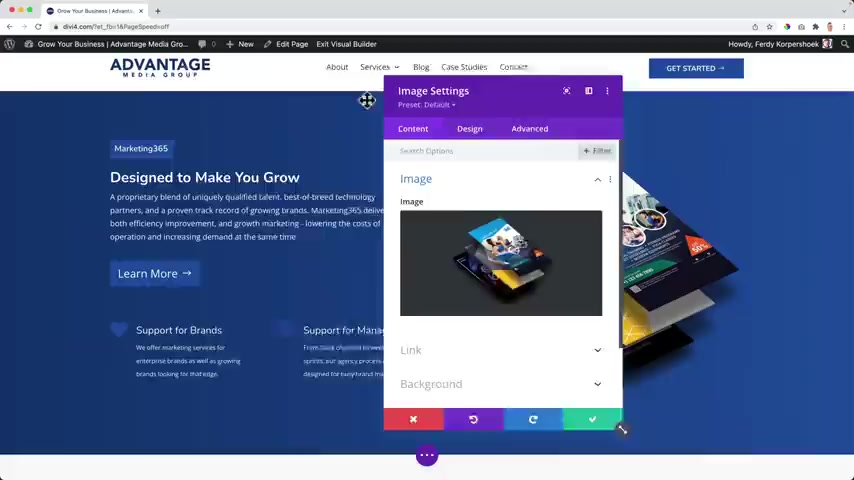
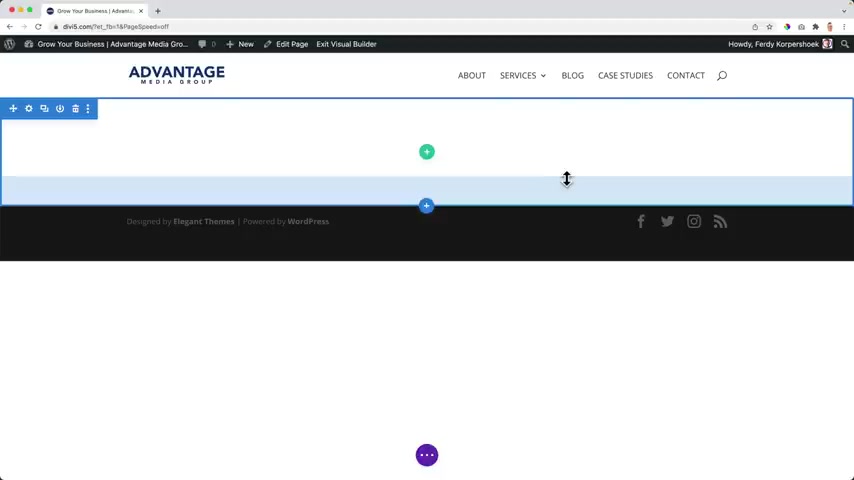
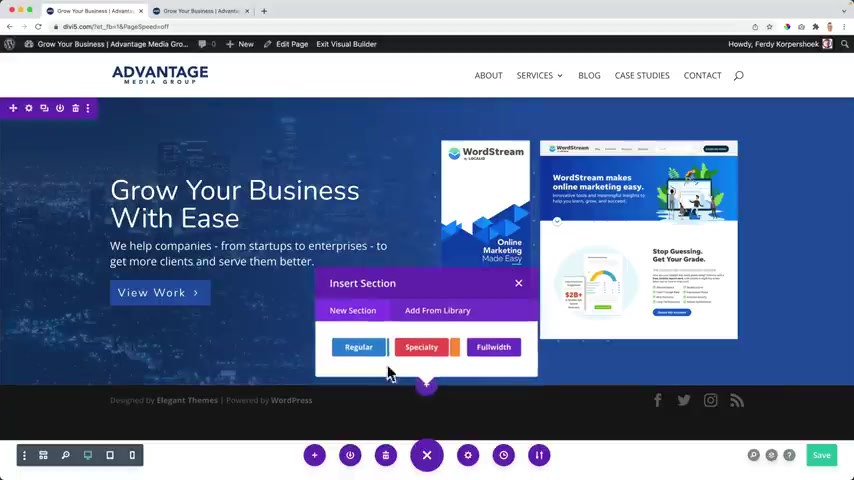
I click on the plus over here and what I see , I can insert a new section , a regular one , a specialty one and a full with one .
If I choose a regular , I can choose a few columns .
It's called a row , but it has columns .
So I prefer to call them columns .
This one has one column , two columns , three columns , five columns , uh unequally divided like a small column at the left and a big one at the right .
Three , four .
No , just kidding .

It's also three five , no , 40 , come on .
I will leave it .
Why not ?
I , I normally use um those three , but I can also click on the X and then I can remove it and I can remove it and I can choose it again if I want to .
But maybe I want to insert a specialty row so I can close this again .
Click on the blue plus and then there's a specialty with even more complex set up .
So if I would choose one of those , what I can do now , I can insert modules in all those areas .
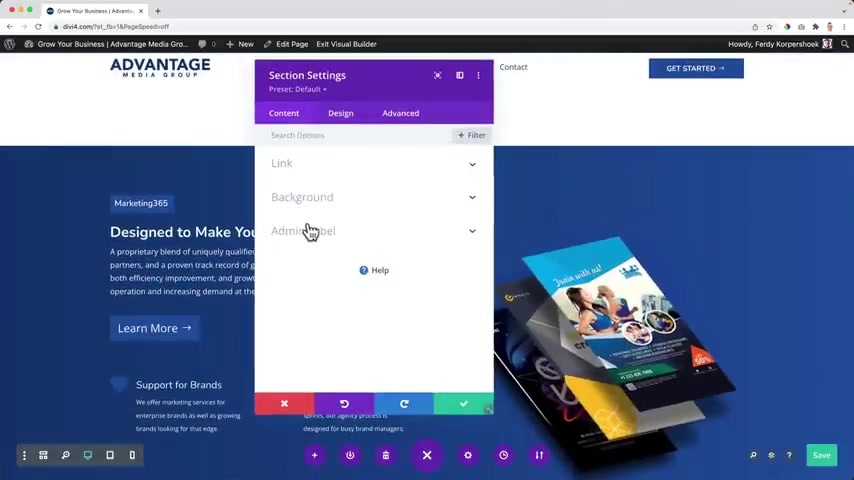
So here are two columns and then here is one and I can add something in it and then we can adjust the content .
We can adjust the design , how it will look the colors , the fonts , the sizes .
And then we have advanced and we can add custom CS s add conditions , create transitions , change positions at scroll effects .
We'll talk about all of this and every module has our own content settings .
So here you see what I can link in background .
If I click on the plus and I add an image , I can search for it .
Image you see image link background admin label .
So depending on the module , there are different settings here at the content .
If I hover over it , I can remove them again , remove them .
So that's how it works .
You have a section which is a specialty section or a normal section .
In that section , you can have different columns and in those columns , you can have modules .
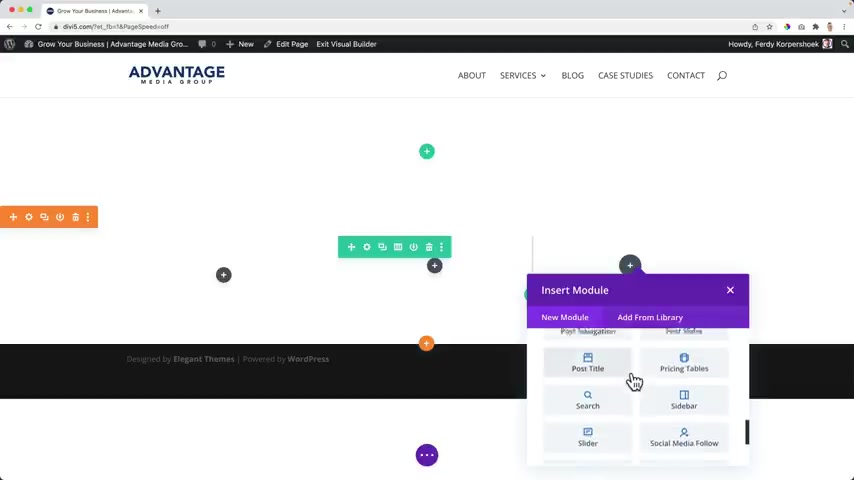
You should take a look over your accordion , audio bar , counter block , blurbs , login map a lot of different modules and using those three elements , the sections , the columns and the modules , we can create beautiful websites , make them optimize for all devices and create amazing websites so I can close this .
Let me show you a few other options .
I click on the plus , I can have a full with area uh with code or a header , a map , an image , a menu portfolio .
So you can add a lot of things .
We'll talk about it .
I close this for now .
I want to show you a little bit more .
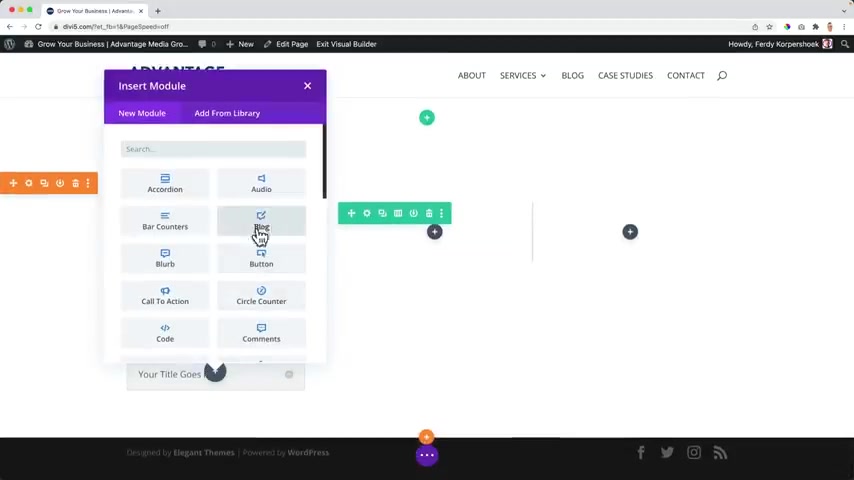
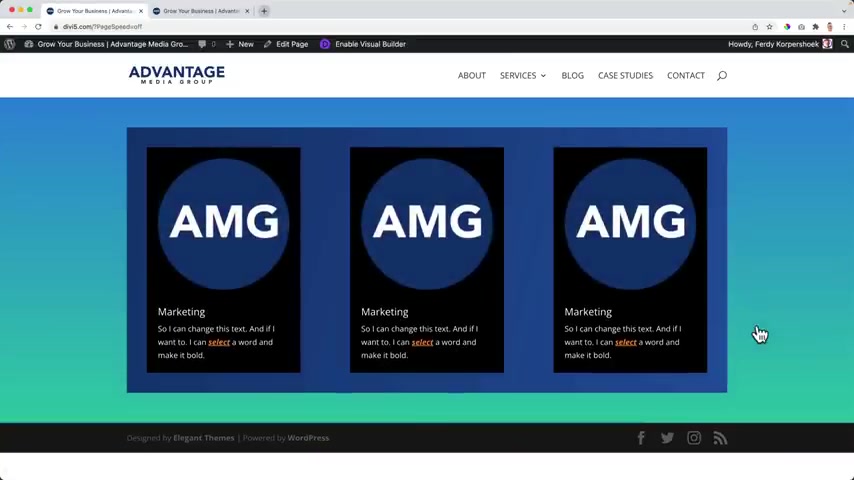
So I click on the plus regular and then three columns .
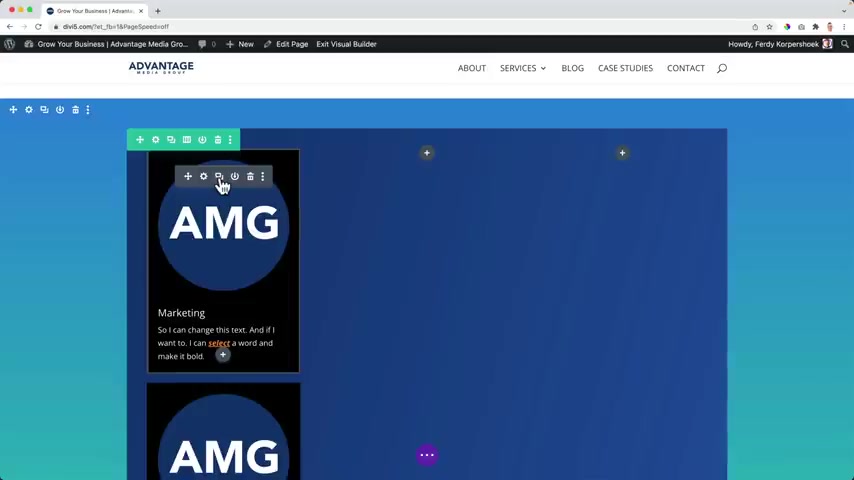
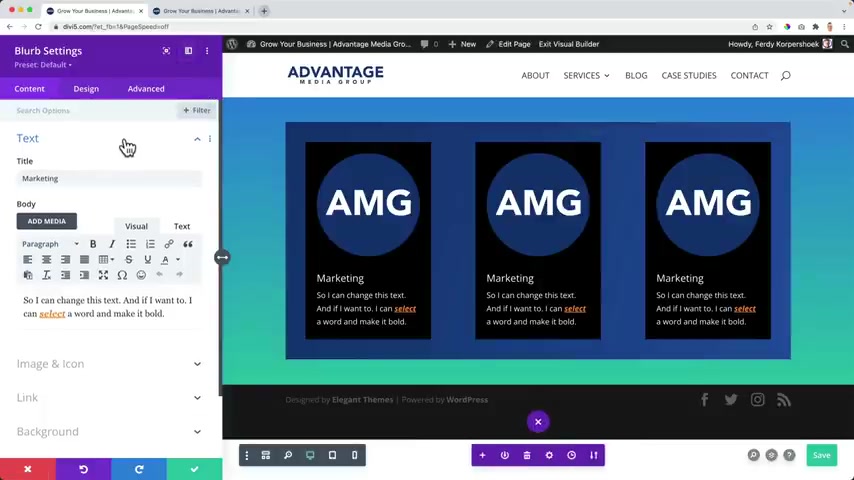
And I want to go for a blurb .
Should I edit over here ?
So I see over here , I can change the text so I can say marketing and it will be changed over here .
I can also change it here to text .
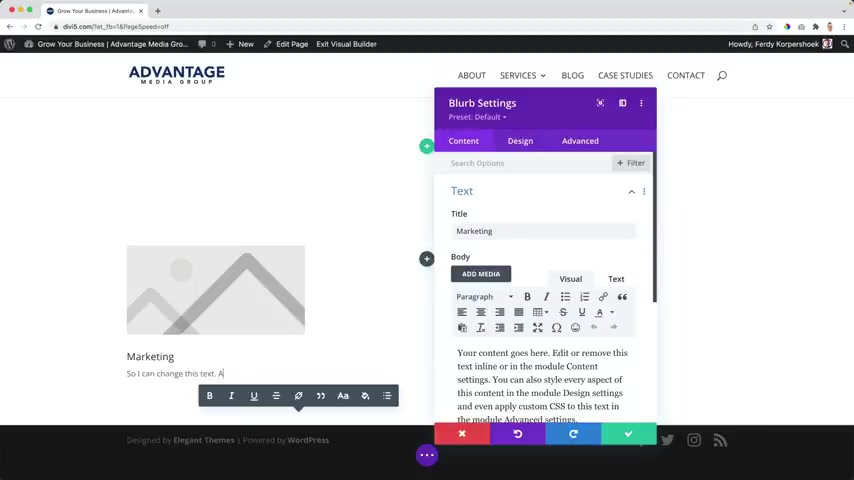
So I just select it .
That's the great thing about the Diy Builder , the Visual Builder .
It is a front end editor so I can see all the everything that I'm changing .
So I can uh so I can change this text .
And if I want to , I can select a word and make it bold so I can select this word , make it bolt or on the light or give it a different font or color .
So let me see .
Let me select it again .
No bold .
So that's what I can do .
And then over here in this area helps you to adjust the content of the website .
So um right now I selected this module .
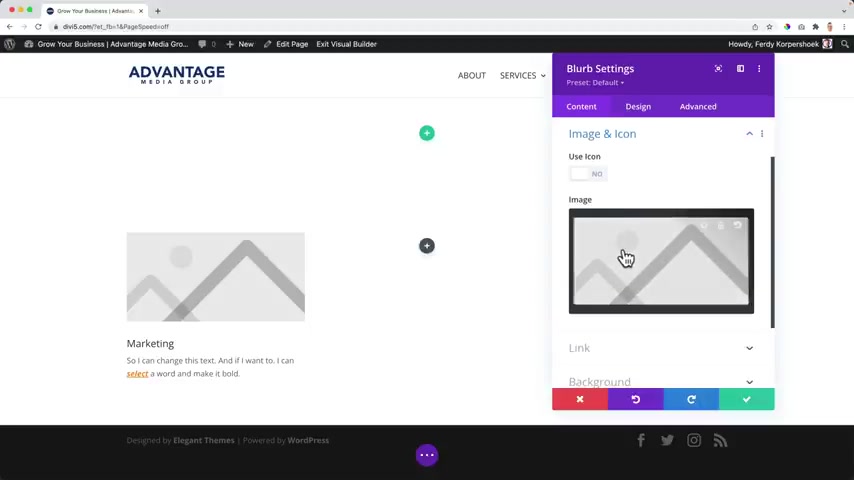
So over here , I can change the title , the text , I can change the image or use an icon so I can use this over here .
But that's it all .
I can also change the background .
So maybe I also have a black background , but then I need to make the text white so I can click over here , scroll down a bit , maybe I'm overwhelming you .
That's OK .
That's also what I had in the beginning .
Step by step .
I'll show you how everything works .
I can go to the text area and make the text a light .
And I think there's not much spacing so I can go to the spacing area and I can increase the margin margin is the spacing outside of an element and embedding is the spacing within an element .
So right now we increase the outside area .
And if I go over here and I connect the top and the bottom and I increase it , you see , I get more space over here .
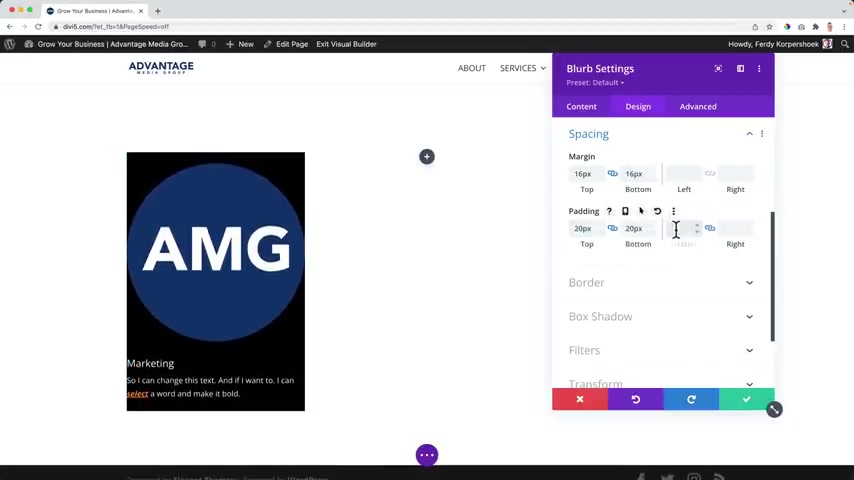
The same goes over here if I say 20 .
So that looks nice .
Now , if I say Jack and I can go to the row settings over here and over here , I can also give this area and background .
So let's say a gradient .
It's color one in color two and I can change it .
I want to show you so much things already .
But step by step , you will learn how everything works .
But now this black background is , is on the edge over here .
I want to have some space so I can do two things .
Or I go over here to the module , I go to design and spacing and then over here at the left and the right , I say 16 .
So there's spacing or I go to this row area , design spacing and then at the betting , I can say 20 2020 20 .
So there's also more space again , maybe I'm overwhelming you .
No problem .
I will show you how it works .
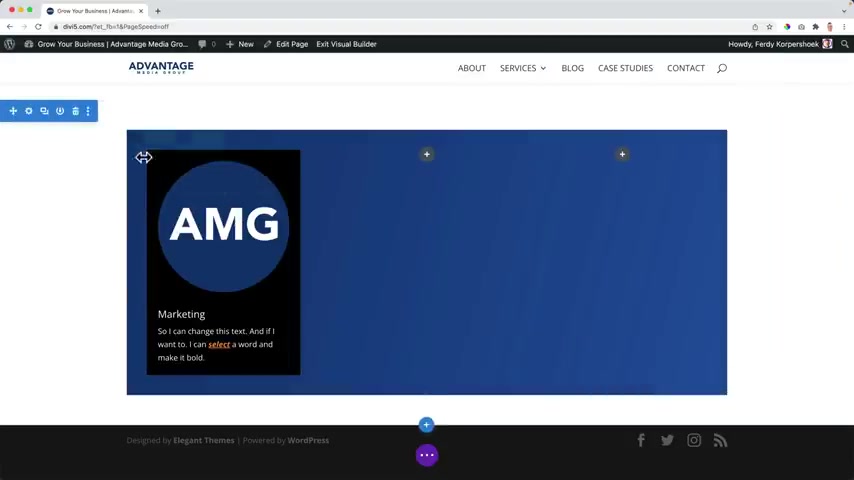
And uh this was the row area and now we have another area .
It's a section .
So we have sections in those sections .
We have different columns , those columns are uh in a container called a row and then we have the modules .
So over here , I can also change the background and I can use an image .
Why not ?
It will be really ugly .
But hey , it's possible also gradient here .
So a lot of layers , the section , the row , the different columns and the modules and every module has their own style .
So this looks ugly .
I know , but I just want to introduce you to what is possible using the Visual Builder within the DV theme .
And they're really easy .
I can duplicate things .
I can drag them around .
And since I'm talking about these kind of things , um let me show you a little bit more .
I can click over here and I can save it .
Then if I want to , I can exit the visual builder and what you'll see it will look the same as when we have the visual builder enabled .
So that's the great thing about the visual builder .
You'll see exactly what you're creating .
Since we have this area , I can remove this one .
I just hover over here .
I can duplicate it .
I can change the settings , I can move it around so I can drag it here below .
If I remove it , I can say command or control s and then I save it .
What I also can do what I prefer .
Hold command , click on exit Visual Builder .
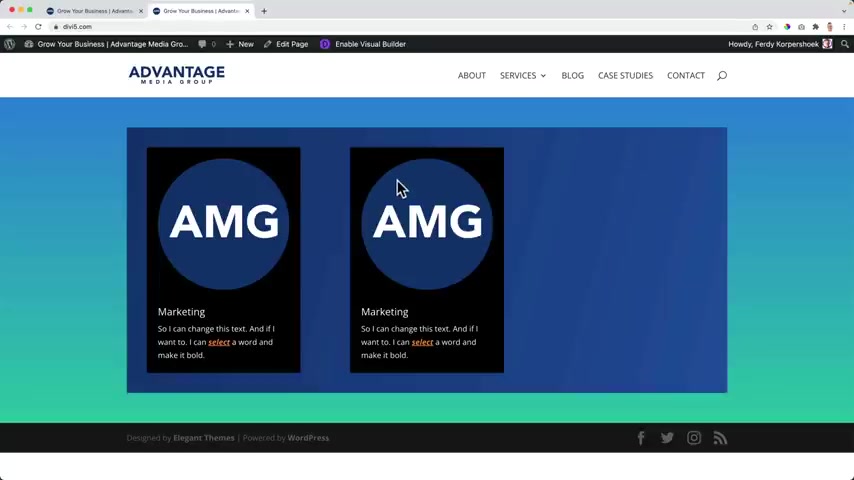
And then I see the real life result over here and the editing area over here and they look exactly the same , but here you can see the final result of what people will see when they enter your page .
Ok .
What else ?
Since we opened this area , we see a lot of options as well .
Maybe you like it over here below .
I like it .
But if you don't like it , just direct it over here .
If you open it .
Wow , that looks even better in my opinion .
Or here or here or here , whatever you want , you will get used to it .
Uh I prefer this one .
I always use it and it's , yeah , it's beautiful .
But if you prefer , you can bring it here .
And that's also really nice .
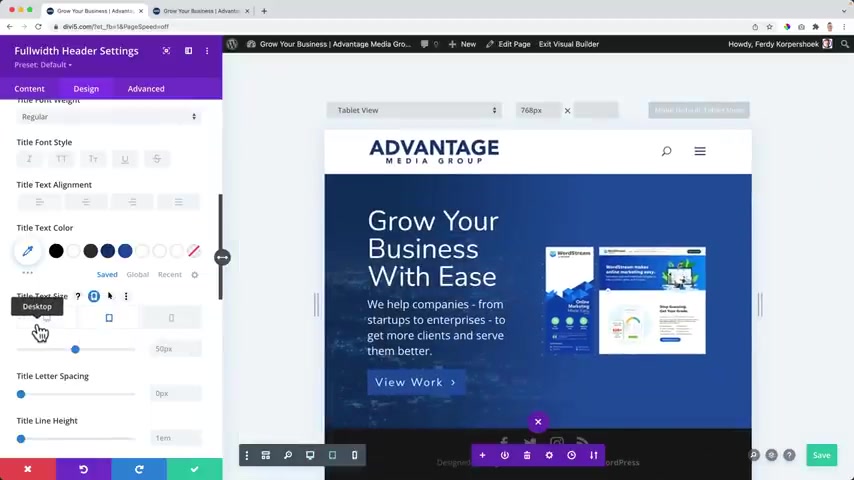
If I open this a few shortcuts over here , I'm in the desktop field .
That's what I see .
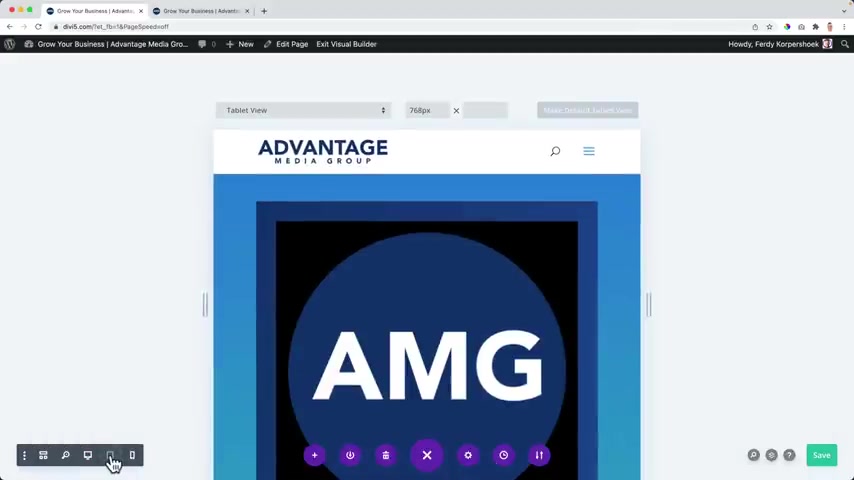
If I want to edit things for the tablet , I can click over here or over here for the mobile , I can click on the plus and I see a bigger overview .
I zoom out a little bit actually and I can see the wire frame .
So now I see I have a section with a row with three columns and I have a blurp over here and I have a blurp over here .
So sometimes I don't know why it can be hard to drag something over here .
Well , it's working now .
But if it's not , I can go to the wire frame and then it's easier .
And if I want to go to go between those .
I don't know if that's the right word .
But if I want to switch between those , I can say control or command plus plus minus , minus minus minus .
And when you get to know how to work with these two men , it becomes so intuitive and easy .

That's what I really like about the , the thing so I can toggle between all those options and normally I like to stick with this one .
The desktop few over here are a few more things we can do .
I can click on the plus , I can import a premade layout so I can click over here .
If there's something I like , I can click on it and I can use that layout .
I'll talk about it later .
I can save this layout to the library , can give this uh practice and I can create a category .
And if I have a gate away , I can select it over here by filling in a few words and then I can save it to the library .
I can export it , use it on different websites .
I can start all over from scratch by clicking here .
Of course , they will ask you if you're sure .
Well , I'm not over here .
We have the settings of this page , the title , the Excerpt .
That's something people will see when they Google your website and it will appear in the search results .

We can have a featured image for every page and we can do split testing , we'll talk about it later and then over here , if I made a mistake , I can go back .
So maybe I'm like , I want to start over again or go somewhere else and if I saved it already , then I'm screwed .
I don't know if I'm offending people by saying it word .
But , um , I hope I'm not , I don't mean it but um , no , you're not .
If you save it and you exit the visual builder and you enable it again and you're like , hey , but I like the old uh thing better .
Uh what you need to do , you need to go and edit the page , they need to go to revisions .
So I can go back to something uh 32 minutes ago .
And if I restore this revision , I can edit it again and then like this because this is what I've made before .

And then I can um adjust things and stuff and I can also remove it , then I can save it .
Command s and then I can edit the page again .
Go back to something that happened 24 seconds ago .
I restore it updated and I edit the page with the Diy Builder and there it is it back .
So this is what you can do .
And also here you can export this page at once or you can import a page at once and you can let it replace the existing content or uh download the backup of this area before you import it .
And here I can select the file on my computer .
OK ?
A few more things .
Really nice .
You can search over here for uh anything .
So maybe you want to insert something or go to a certain page .
I can export things .
I can view things and I can search for that over here .
So maybe I want to import audio so I can say insert accordion , accordion module .
Um Where do I want to do that over here ?
There it goes .
Uh I personally do not use it , but hey , it's an option .
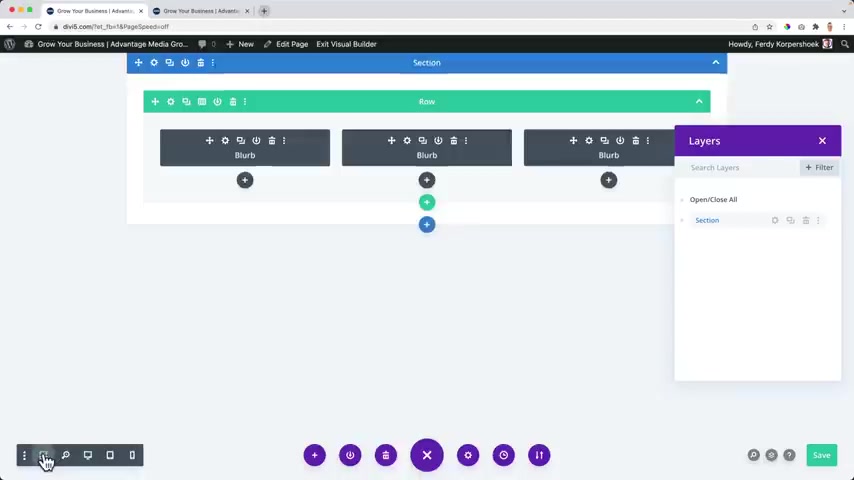
This is what I do use because uh as I said before , we can see this wire frame .
But if you want to speed up your workflow , you can also open the layers and then I see this section in that section , I have a row with three columns and in those columns , I have a blurp .
So if I want to select something really easy , I just click over here and there it goes , I can drag this around since we're talking about this area , I can make it float like it does .
Now , I can make it um smaller .
I can make it bigger and depending on the screen , um uh You can see what option is best for you .
You can also make it really big , make it smaller again and then put it to , to the left and then what will happen , it will push the website to the right .
And now I can edit everything over here from the left and if you check things , it will be gone .
So then you see the whole result again , then you can go to the layers and select things or just select them over here and then to appear at the left again and you can increase the width .
So if you have a big screen , you can make it float , you can make it stick to the left or you can do both .
So sometimes you like to work over here on the full width screen and sometimes you prefer to stick it to the left , it's all up to you .
And what I like is that there are so many options with that .
So having said that , I think that's pretty much it .
Of course , you can get help with videos and all that stuff .
You see the shortcuts on redo save the page , uh exit the official builder .
So it's all about speed .
So I can say command s and I save it if I say command E I exit the visual builder and then I can enable the visual builder again .
So if you want to know more shortcuts , click over here and go to shortcuts or you can take a look at those videos .
So knowing that I think you're ready to get started creating the first area of your website .
And of course , we all create different websites but the principles I will show you will help you to create your own website with different texts , different layouts , different images .
I hope this video will benefit you a lot if that's the case , right , please like this video that would help me out a lot .
And if you want to subscribe for more upcoming tutorials about wordpress , about about Element or about affiliate marketing , ecommerce and probably more so feel free to do that .
Or maybe you just want to support me .
I'm after subscribers .
That's what makes me excited .
So that's why I do my best to create a lot of tutorials .
Yes .
OK .
I can click over here .

Remove all the content and then start from scratch .
I close this , I click on the plus and what I want to create is a full area with a text , go to action and an image so I can scroll down and see what I want to have .
I can have a fool with Heather that will do .
That's great for me , Heather .
No slider .
If you want to have a slider with different backgrounds , different text things , you can use a slider .
I'm happy with this one fool with Heather .
So I click on it .
And by default , there is I like to keep things organized .
So I'm happy with this right now .
And first I want to remove this area , then I say come on s over here , come on R and this is our website .
Amazing .
So let's configure it .
What I see over here is this blue color ?
Oh I don't like that .
Why is there a blue color ?
Why is not pink or purple or orange ?
Why is this blue color ?
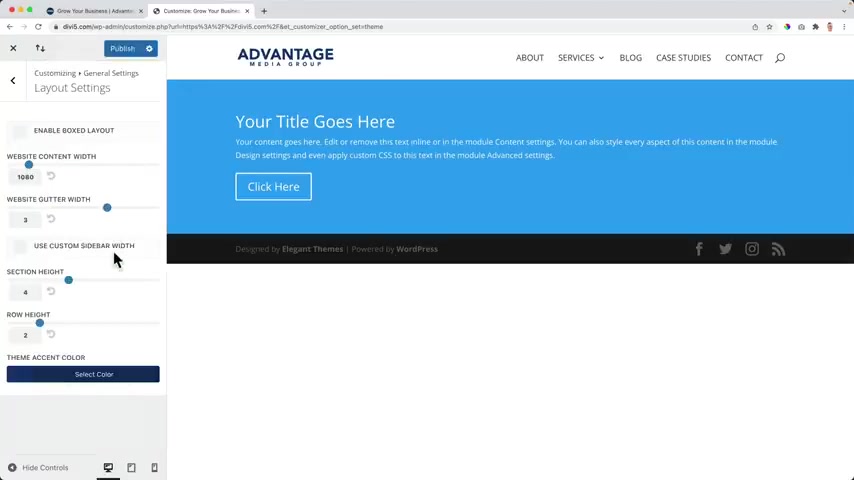
What we need to go over here , the theme customizer .
Then we can go to the general settings and the layout settings .
And then over here we see this thin accent accent color .
I choose this one because that is my theme .
Excellent car .
And since we are here , let me uh say command e because now I know that he will exit the visual editor .
This is the width of our website , but my website is zoomed in .
So if I say command minus minus , this is the width of my website , I think it should be wider because there's a lot of space over here and I want to use it .
How can we do that over here ?
It's also smaller .
Now we can increase the width of our website .
You see it will be applied over there .
So how about 11 40 ?
That's the width I want to use .
It's easy to read like that on the screen .
I would just like that amount of pixels in the width .
So I click on publish close this .
OK ?
And before I want to edit this page , I click on command plus plus until it's 1 25 again .
And then I want to enable the visual builder close this .
So now it's uh that background , the different background which is install , install the branding of our website .
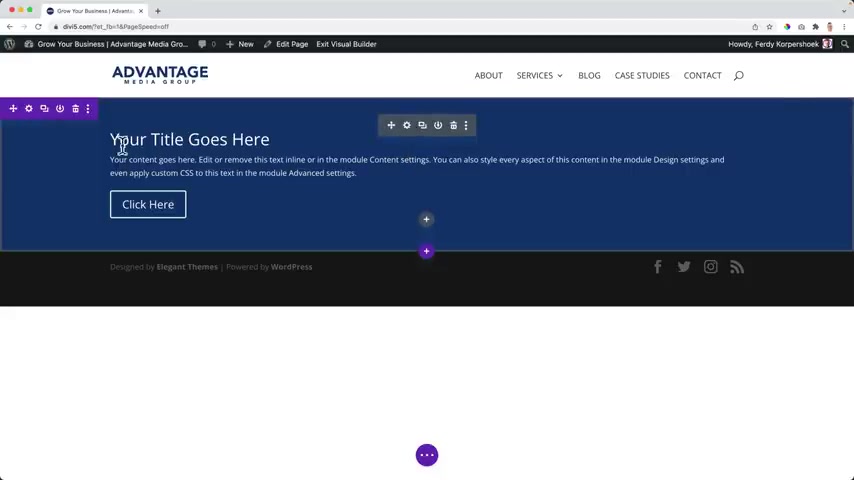
So it's a module so I can adjust this area and there it goes again .
So my title goes here .
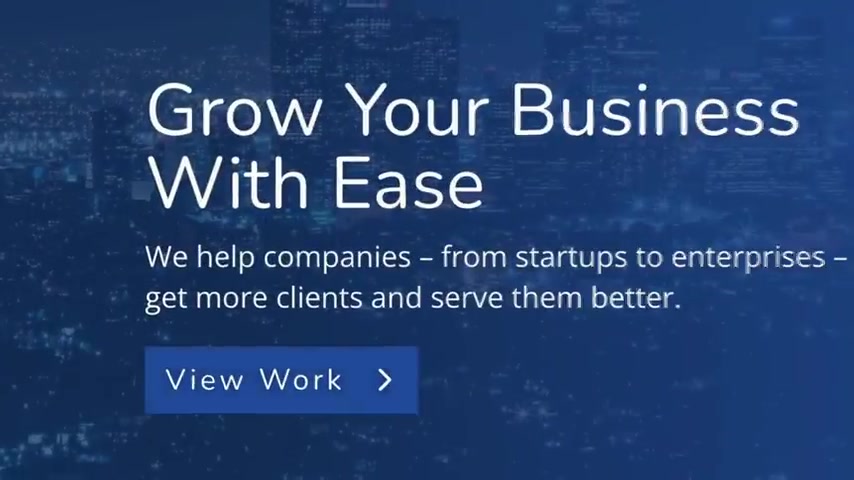
I need to create a title and I want to say , grow your business with ease .
I want to create a website where my company can help people to increase their company by helping them to get more business , more clients .
I can have a subtitle , I can have a button over here and I want to say few work or case studies .

Well , I like few work and here below .
I can type a text and it will be displayed over here .
So I start typing .
That's my goal .
I want to help companies , big companies , small companies to get more clients and serve them better .
Because if you serve your clients in a great way , you'll get more clients .
So it's uh it's uh so it's helping each other more clients helping them better , which will give you even more clients .
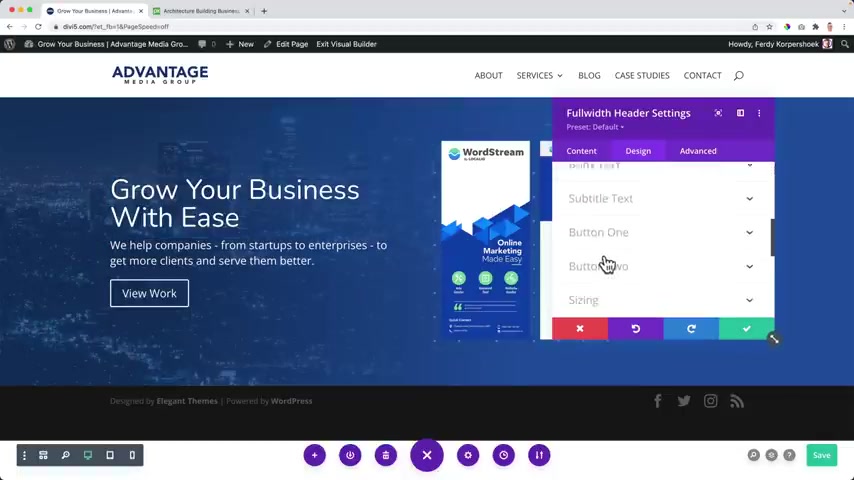
But over here , since we are talking about a fool with header , I can adjust all the content over here .
So we made the title the button , text , body , text and we can add an image .
So I want to add a header image over here .
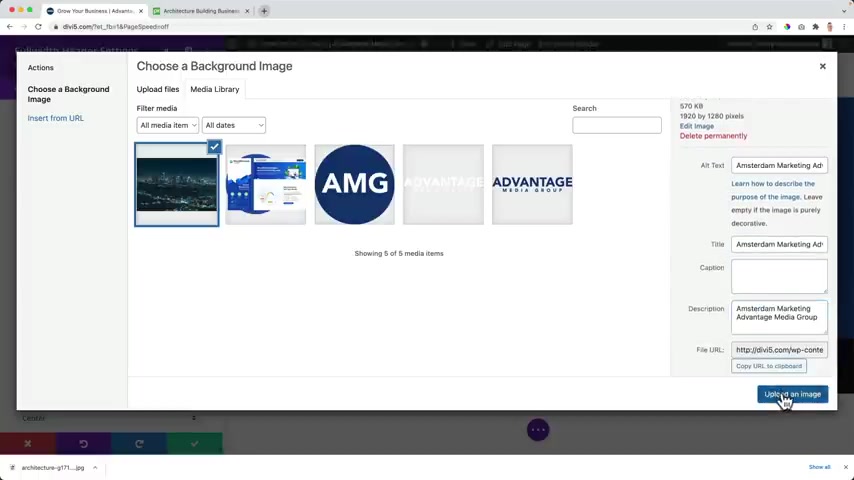
I click on upload files .
You can see this file in the folder , you download it .
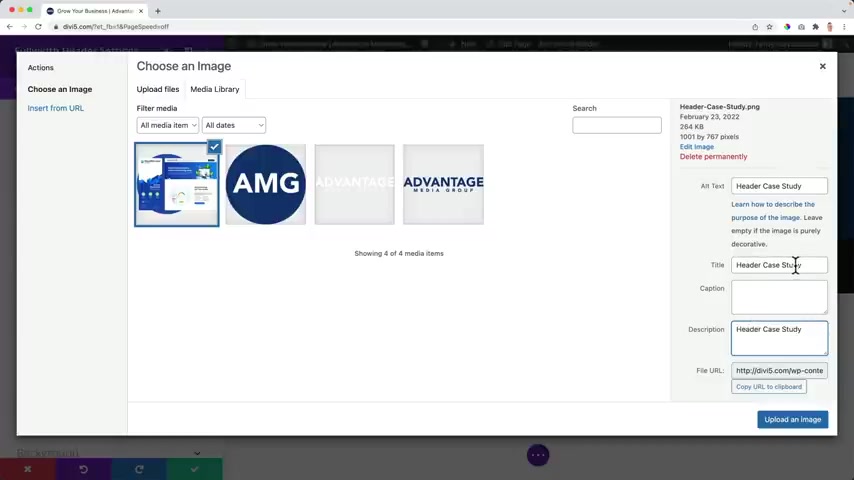
If you want to play along with the same images , I use I created this image and then what I want to do , I want to remove all the dishes , copy the title based in the all text and based in description .
And maybe you see something else over here .
If you have a different image , well , I always would rename your images .
It would be even better if I would say um Advantage Case study or Advantage Amsterdam if my company was in Amsterdam , because if people search for Ferdi or and they somehow want to go to images , you see those images over here .
If I click on this one , I click on this one and I click on the image address and I base it , I see the 30 is in the name .
Well , this is not good and this is not good but still I'm found .
Uh If people search for something , they also can go to images .
So what you see people that do not read name things , you made an image on your phone or whatever , it's gonna look like this because those people did not rename their images .
You see a so um link address basic image .
Oh No , sorry , this is wrong .
But uh the title of this image is IMG 0001 and you want to be found on Google .
So never use that , always rename it and then use irrelevant words .
So it could be even more relevant .
I would actually like to say to this image .
You are media agency Amsterdam case study .
Then I upload the image and there it is OK .
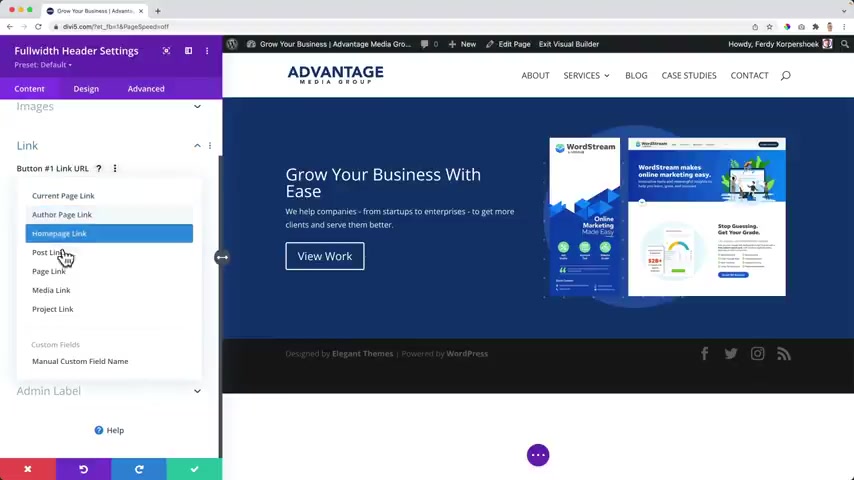
So far so good , we can link this all the button of the first link is case studies or I click on the plus .
I want to search for a certain page and then I scroll down and I Schleck the portfolio .
It's a portfolio page .
So we will link to the portfolio page .
This is a button over here in the same window .
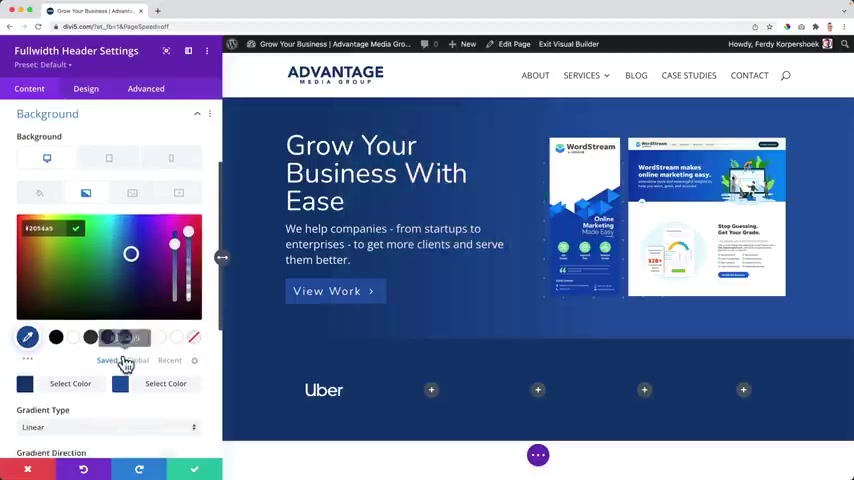
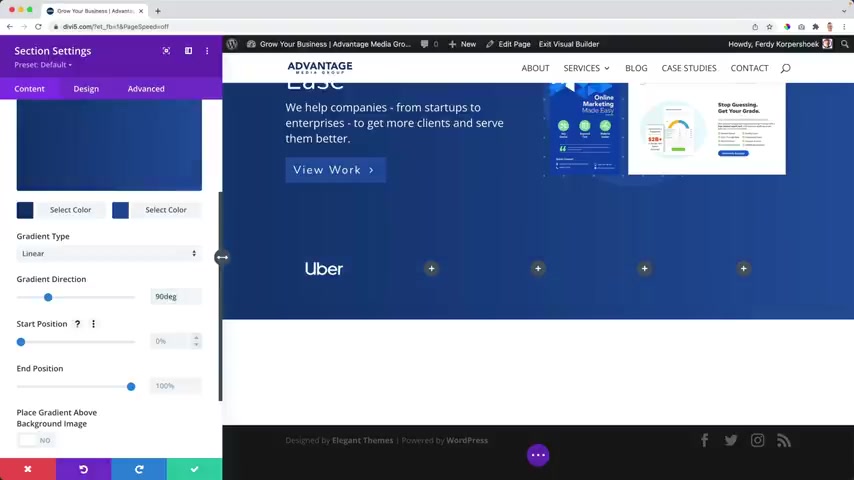
Then I can have a background which is this one , I can also change it to a gradient .
So the first color , yes , this one and the second color is this one nice gradient .
We can change the gradient type to radio , we can change the starting position in the ending position .
So you can create something like that again .
Uh we we can change the direction so you can change something like uh create something like this .

Oh Actually it's pretty nice change the starting position , change the ending position , create something like this .
So you can be really creative .
I would like to have a linear one .
And also here you can make it one line then change the direction I like to make the direction 90 and then starting position here and the ending position there , I can place uh uh a gradient over an image over here , I can upload an image .
So let me upload a file .
OK .
If I want to find an image for free I go to Pixar bay dot com that serves for city or Skyline .
I can download this one for free in this resolution .
I'm not a robot .
Where are the bicycles ?
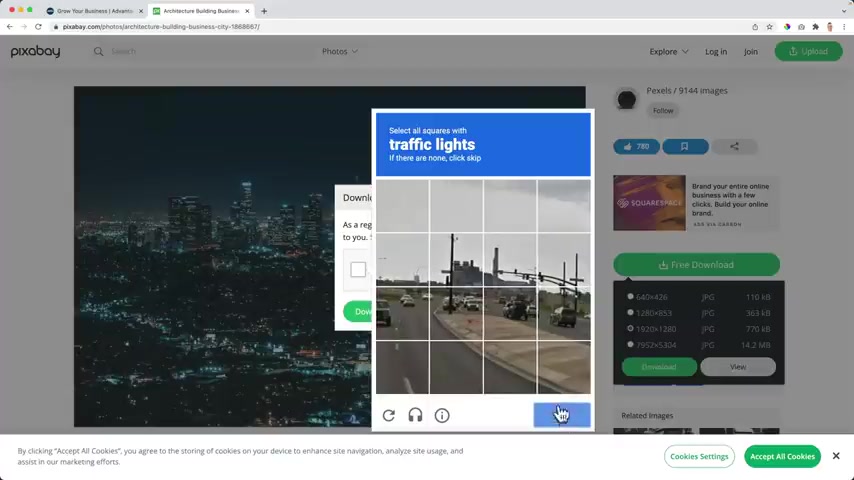
Uh skip traffic lights .
Ok .
And then what should I do ?
Of course , I should rename it .
So I say Amsterdam Media or marketing and then pitch media group .
Ok .
What I can do , I can make the file smaller but it's ok .
You know , let's try it .
Let's go all in tiny PNG .
I drag it over here .
I just want to show you as much as possible .
At the same time , I don't want to make the tutorial too long .
So , but I , I don't want III I just want to help you .
OK ?
This is such a small increase .
It's a , it's I don't want it , but sometimes you can decrease it from two megabytes to 400 megabytes .
And that's a big decrease .
So I can select the file .
I go to downloads there .
It is open and again , guppy based and based upload the image .
Now you see it over there and then if I turn his arm , it can be mixed , but I still don't see the background .
That's because I need to click on the color , then I need to decrease the opacity .
Oh Wow .
Not too much .
If I check this , I see the real live result , I can say command or control s to save it .
And then I want to take a look at the style because this is not appealing to me .
So I click over here again and now I want to make it float because I want to see how as well look so I can make it smaller over here .
How does this area look ?

OK , I go to the design tab and then I need to go to text , but I also can click here and I go immediately to H one .
Grow your business with ease .
And then I want to search for a font and if you want to know how to find the right font , you can go to fonts dot google dot com .
And what you can do , you can uh type in , grow your business with ease .
You can filter things and then you can just scroll over here if you see something you like , you can use it .
But I like , I don't know .
So I searched for , there's one there , it is OK .
I can make it capitals .
I can make it online somewhere else can change the text color .
I can make it bigger .
That's what I want .
I want it to be on two lines .
Grow your business .
What is , let's make it 50 .
OK .
Then this text is a little bit weird below that .
So I also want to make that a little bit bigger .
So I click over here body text again .
I can do the same things and I can change the body text .
Let's make it 20 .
And then I want to have a , a little bit more line height , not too much arrow down .
Yes .
And then the button I can click over there .
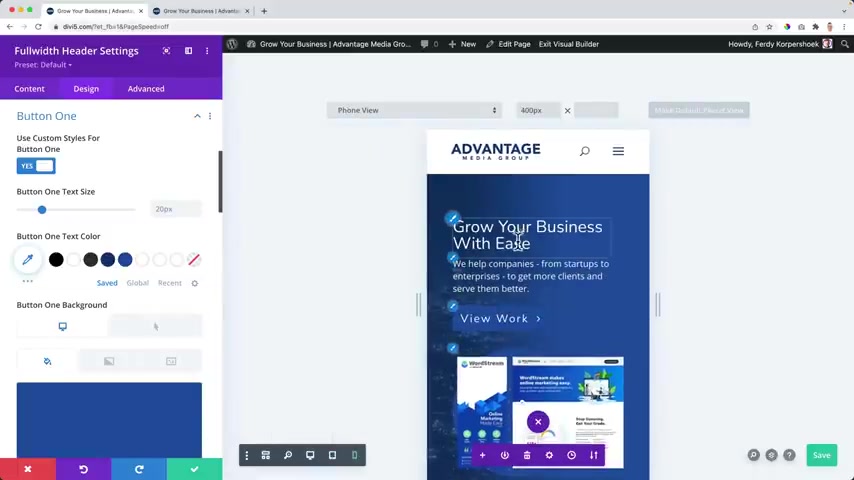
I go to the button area and if I collapse this , what I see all those errors over here , I can adjust everything , the image , the overlay , the text , the title text , the spacing , the filters , the transformation , the animation can all be done over here .
So let me make it a little bit bigger .
Again , I want to go to to button one .
I want to give you the custom styling .
So I click over here .
Button tech size it OK ?
The color is also OK .
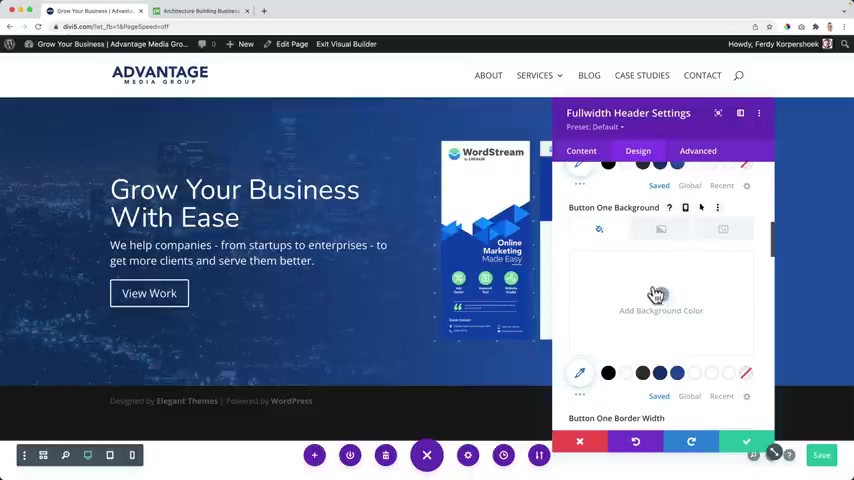
I can have a different background but I want that .
So I click over here and I select this blue background over here .
OK ?
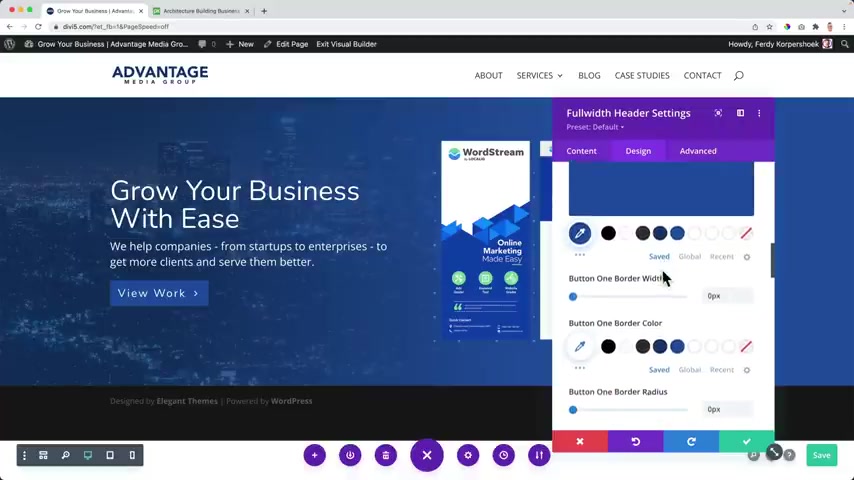
Then the border with I don't want to have a border .
So I decrease it to zero .
If I had the border , I could give it a different color .
I could change the radius .
I can still change the radius but now I don't see it that well .
So what I also can do , I can go to this area and make it the lighter .
But because this is the same background color as this darker one and I want to see the background now I see it better .
So um let me decrease that .
I wanted it to be zero , just flat square letter spacing .
Yeah , let's increase it 2.5 and the front also .

No , and then the front of the text .
Let me go back .
I wanted to be open .
Sounds .
It's already the case .
When I hover over it , I see a nice animation is what I like .
And uh I'm happy with the results .
I can give it a different icon .
When I hover over it , I can make the , the icon appear always So not there permanently , but I want to see a hover .
So when I hover over it , it becomes a different color .
How can I do that ?
I need to screw up .
It's a little bit hidden , but I need to go to the background color over here and then I need to click on this mouse .
So normally it will look like this and when you hover over it , it can change .
So now if I change the color , the darker one , OK ?
And I go back to the normal one , you see it becomes dark .
So um I can play around with that , I can also go to the border with look over here .
And when I hover over it , there is one pixel and this color should be white .
Let me save it .
Exit the visual builder in a new tap .
Now that happens , I personally do not like it .
But for me , the the background is enough .
So I go back , I can also click here and then I go to the background over here .
It's ok .
But for the , this is what I want when I hover over it , turn it off safe refresh .
Let me close this perfect , grow your business with is we help companies from startups to enterprises to get more clients and serve them better .
I think it looks great what we have made so far .
But it's really important to optimize your website for all devices , for tablets , for smartphones .
Why ?
Because more than 50% of the visitors on the internet go to the internet through their tablets or through their mobile phone .
So if your website is not responsive , it's not mobile or tablet ready , you'll scare people away .
So let me show you how to optimize your website for all devices .
Well , that's what we can check over here .
So remember I can say come on plus and then I see how it looks and I think this text is really big and the image is a little bit small over here .
So again , I can click over here , maybe bring it to the side .
And um if I go to design and I hover over here , what I see , I see it will inherit inherit the the size of the desktop screen .
So over here again , I can go hover over here and then I click and then I see here it is 50 here it's inheriting 50 from the desktop because I did not give this a different value So if I make this , this 30 over here and go back to the desktop style here .
It is 50 here , it is 30 over here it's also 30 because it's inheriting the most recent uh step .
So 50 30 if I change nothing , it will say 30 .
OK , so far , so good .
Let's go back to the status .
Um This is great .
This can be a bit smaller , in my opinion .
So I go to the body text size again 20 then over here 16 and the same with the button , I can make it smaller , but actually I like it the way it is .
So um that's ok .
Then I can go to the smartphone , grow your business with ease .
Looks great with the image .
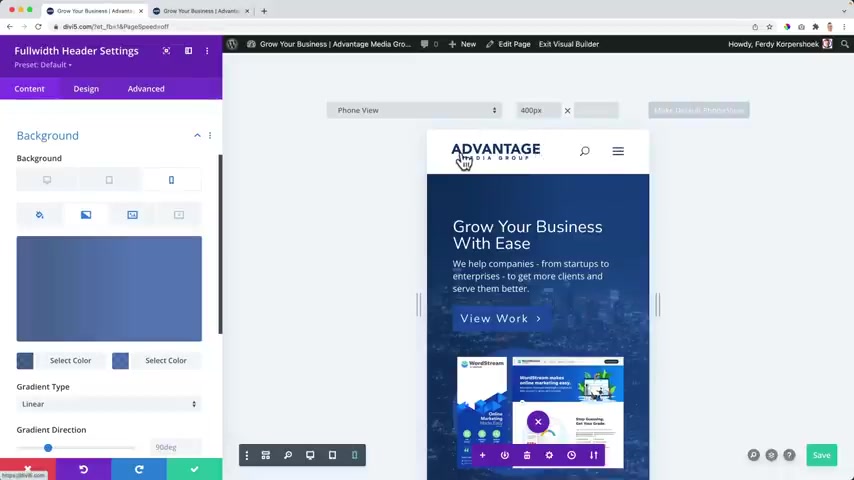
But what I don't like is that you see a city over here and you don't see it .
It's , it's a lot of blue so I can uh go to the settings of the background , content backgrounds and over here with a smartphone , I can change it .
Let me go over here see I'm on the smartphone and there , I can also like that's a bit more visible .
So if I go to the big screen , I see it's uh uh a little bit transparent over here and not over here , it's opaque .
Is that the right word ?
Then I go to the tablet , same thing and then I go to the smartphone and it's visible completely .
So so far .
So good .
This looks great .
We're gonna make this look better in the future of the store , but right now we have something to work with .
And uh I think so far , we are doing a great job using the DV , the grow your business with ease .
We help companies from startups to enterprises to get more clients and serve them better .
And if you take a look , this is within the visual editor , it's outside of , if you see two differences , this dash is a little bit longer on the real website over here , it's a little bit shorter and this area it's bigger and there's a lot of larger space .
So how can we fix that take over here and then here scroll down all the way but in the bottom one area and then we see margin and betting and it's a betting , right ?
I want to increase it .
So let's see how that will look .
I would say 15 man refresh .
Yeah .
You know , this is a little bit shorter than this .
So one more thing and that's , that's the whole part of the , the uh part of the whole process , let's say 44 .
OK .
But there's more we can do .
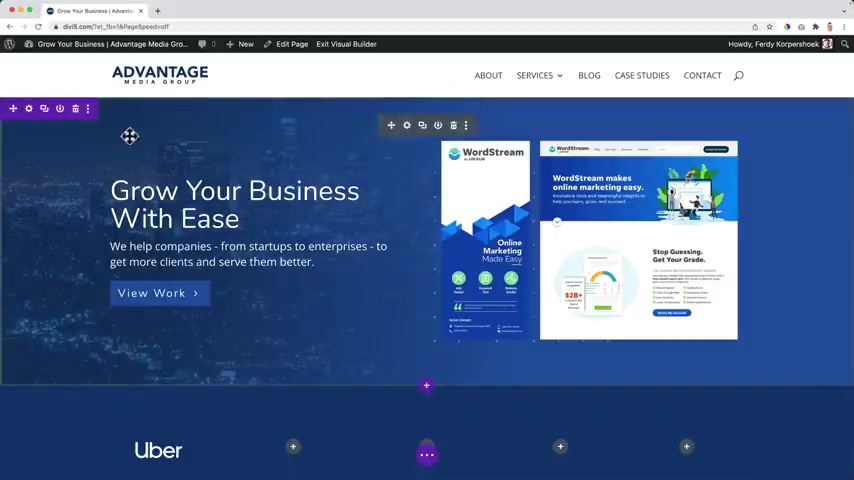
There's a plus over here and that means we can add another full width area .
And what I prefer to do is a portfolio with a lot of items , but there's a problem we don't have portfolio yet .
So what we can do instead let me remove this , I can create a new area by clicking on the plus .
And right now it's purple .
It doesn't matter that it's purple .
It has everything to do with the kind of full area we have over here that is purple if I were to create a new area , which is regular .
So let's do this one with a button .
OK ?
And now I would create a new error and it will be blue .
So it doesn't matter right now it's purple because of this area .
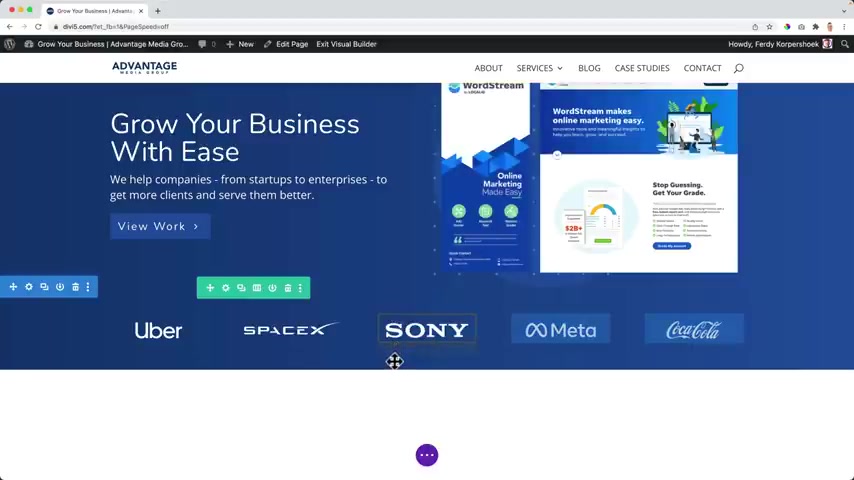
So I click on the plus I go to regular and I want to add an area with five columns .
Why I want to display a few logos of companies I work for .
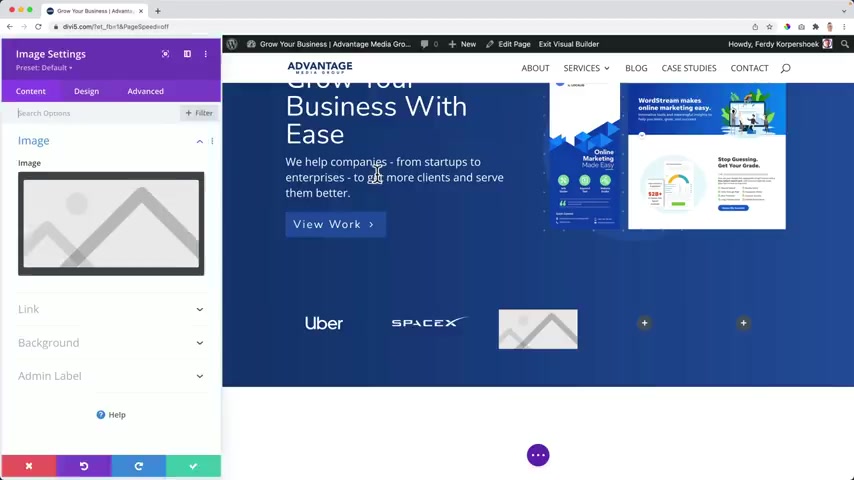
There's only one thing if I go to image and I click on the image and I go to upload files and you take a look at the folder which you can download , you see logos .
These are these , those are white .
So if I upload a white logo , Uber , I upload the image , you don't see it .
So what I can do , I can click over here on the section settings .
I go to the backgrounds and I can give this a certain backgrounds .
But now I think it doesn't look really nice in combination with the top area .
So what I can do over here to make them one area .
I go to the module , I go to the backgrounds and I remove the backgrounds and over here , I removed this area so I have the city .
So I click over here and then remove this area .
I go back to one of those .
So if I want to have one color , I choose this one and now it aligns , it looks like it's one area .
But maybe , yes , maybe , maybe I prefer the gradient .
But there's one thing over here , the gradient is not fully opaque .
It's a little bit transparent so I can bring it back , choose color one , this one , the dark one and then the lighter one , I scroll down 90 degrees .
That's what I like from the left to the right .
I bring this to zero and I bring the second one , 100 I don't need ingredients .
Then I need to make sure if everything is still correct what the other devices .
No .
Also here I choose this color .
Perfect .
So now if I go over here to the section below and I go to the backgrounds , I can remove this one , I can go to the gradients , select color one , select color two , bring this to 90 degrees and now it looks perfectly the same .
There's a lot of space over here and then we'll take a look at it later .
First , I want to click on the plus , search for an image selected and I select the second image which is space X .
So what I can do , I can download all those images , but I don't want to use the color at once so I can hold command or control .
And I already uploaded the where one open them .
If I don't need this , I click on delete permanently .
I thought maybe I can .
Ok , let me , let me keep it , but I just wanted to show you how we can delete it .
So now , you know , uh the second one was space X and no , I do not really work for those companies .
It's just for the purpose of the tutorial .
The third one , Sony , the fourth one made a verse this one , Coca Cola , Coca Cola is the reason that when you see this video , the first few seconds , I look like I look because I drink it a little bit too much .
OK ?
What we can do over here when you hover , you see this blue area , I can decrease it .
It's just uh a shortcut of removing betting and margin because if I go over here to the design and the spacing , sorry spacing , I brought it to zero .
So if I would say 100 it appears over there 100 so I can bring him back .
I'm also here , bring it a bit closer and then over here I can increase it .
So that's a nice way .
Just dragging and dropping .
Why not ?
It's a front page editor .
So it's really easy to just check a few things until I'm satisfied .
And if you really want to make it pixel perfect you can click over here design , go to spacing .
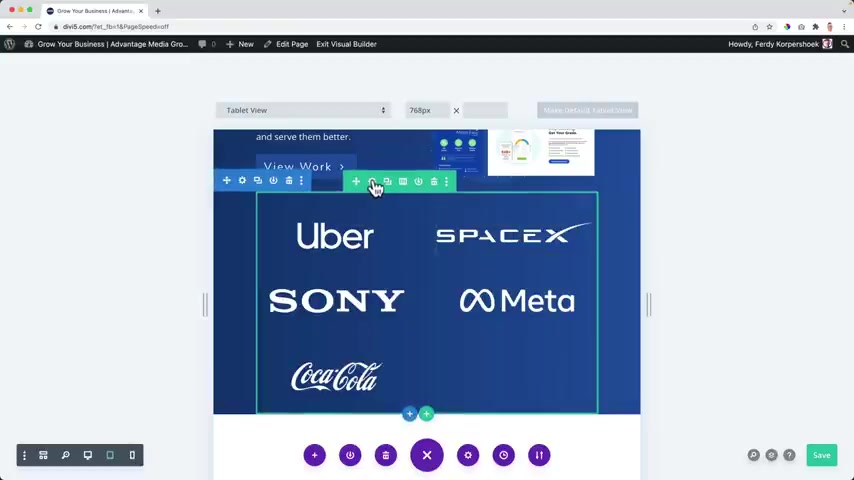
Yeah , I can , I just think command or control s but what happens when we check this on the phone or a tablet that looks like that and that's what I do not want .
So we're gonna make use of a little bit of CS S um I really like the page and sometimes you need to use CS S and sometimes I think , hey , couldn't this not be placed within the editor ?
So you don't have to use C as until this point .
No .
So what I will do , I have this area open and that means that everything I add also to CS S will be only added to the tablet view and the mobile view .
So I click over here on this green area .
And again , if you cannot find it the layers and then the second section .
So over here , I can uh make this a hero .
Let me see , sorry , hello , double click , make sure it's selected .
I somehow don't see that .
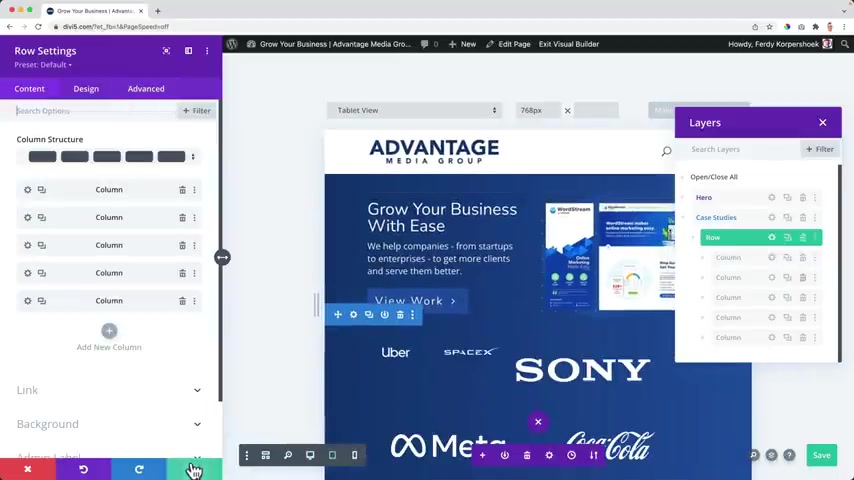
Yes , logos or case studies .
Then I open this and I want to go to the row settings .
So I click over here and then I see five columns .
I want to go to the structure of the column .
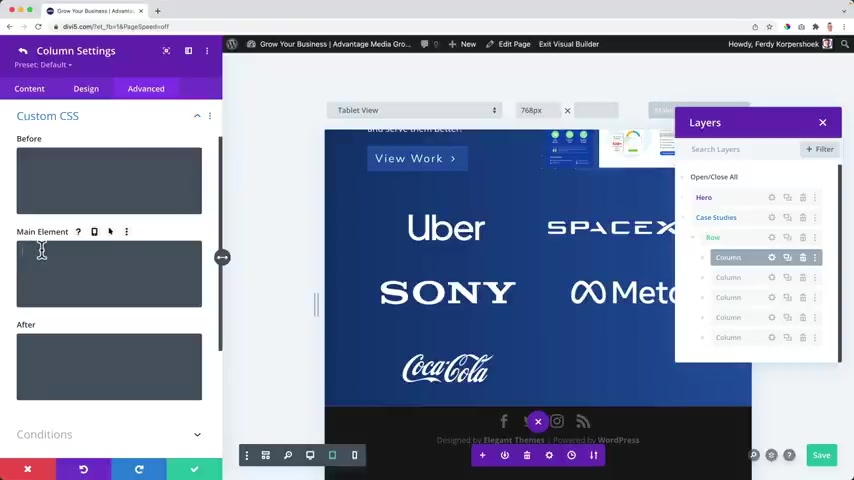
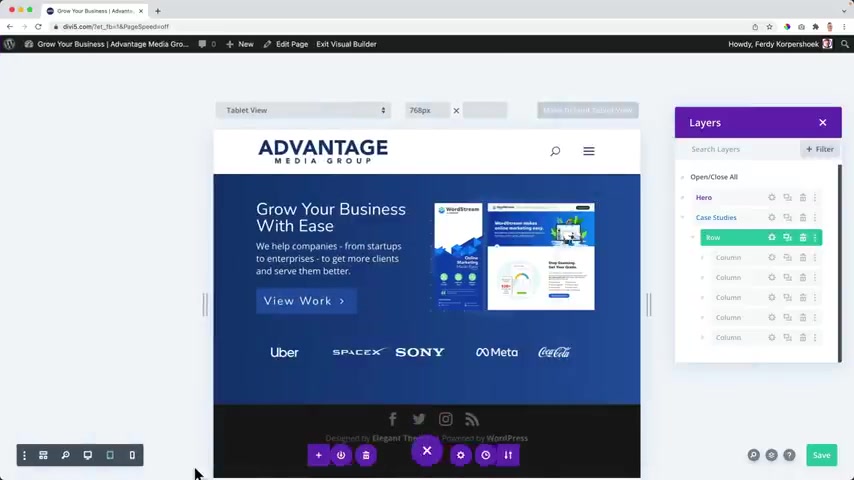
So I click over here , then I go to advanced custom CS S and then in the main element , I want to say the width of these elements is 17% .
Then place an exclamation mark and say important and then close it with this , the semi column .
Oh You see it becomes smaller over here .
So no more two rows with a lot of big logos .
No , so I copy this .
Then I click on the checkmark .
I go to the second one , advanced custom CS S and over here I base it .
But keep in mind when you go back to the big screen , it looks normal because you need to make sure you're editing this in the tablet .
Not , not this one .
So right now it's also over here .
Got it over here based over here , check this and then go back to the first one .
Advanced custom ess .
I said look at the desktop .
You , yes , it's over there .
I don't need it .
I only want it to be placed in the tablet mode .
So it's a little bit of a weird workaround .
But hey , it works .
I go to the third column , advanced custom CS s make sure we're in the double .
So if I base it over here , it should not be here .
Perfect .
I go back to the fourth one , advanced base it and the fifth one got some Cesars tablet .
I said before when you adjust something over here , it will automatically be adjusted on the phone .
So let's have a look right now .
All those logos are next to each other .
I decrease this area a bit , save it .
Ok .
And on the phone , they're still next to each other .
There's a lot of uh space left over here .
Why ?
Because over here at the column settings advanced , I said 17% .
So if I copy this , I can bring this to 90% make it a little bit bigger .
There's a small glitch .
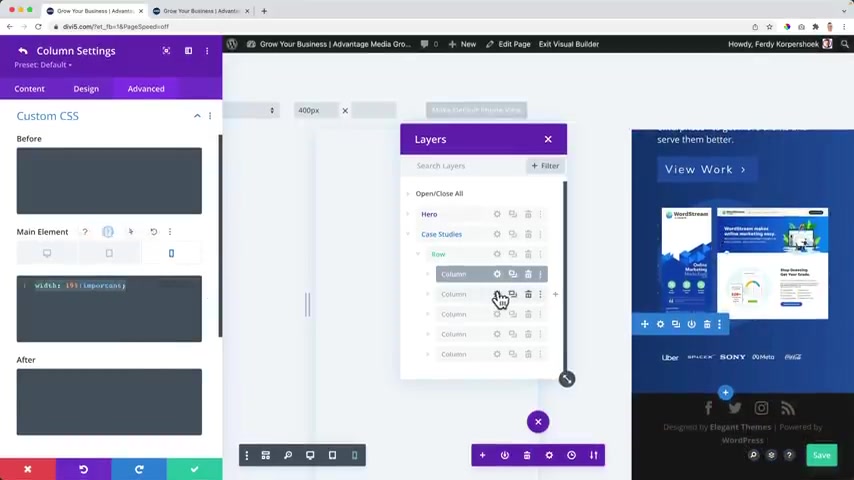
So I go to the I copy this , go to the second area , advanced custom CS base it and make it 19 , the third one , advanced customs , us 19 .
And you see them become uh a little bit bigger .
So uh let's take a look here , advanced and take a look over here when we base it , it become a bit bigger columns , it bounced perfect .
So refresh when you make it smaller , it looks like that .
I'm happy with the results .
Let's go back to the desktop few .
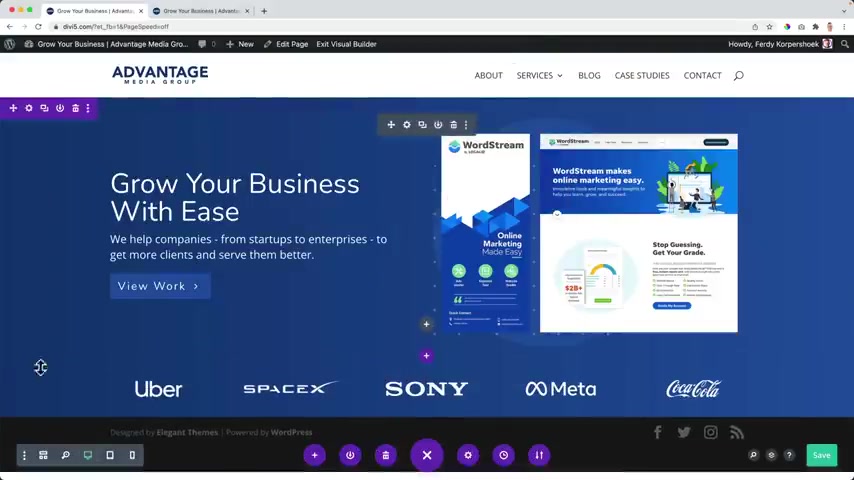
So as a complete thing , I think it looks a nice uh maybe just a few more things over here .
I want to make it uh the line it was higher .
Now I want to make it to float so I can see how it looks .
OK ?
Then I go to the text .
OK ?
Then I can take a look at the spacing everywhere .
Maybe a little bit more space over here .
Perfect .
So if you've created this , I'm proud of you .
You did a great job and this is how it looks .
I'm really happy what I want to do to finish it off .
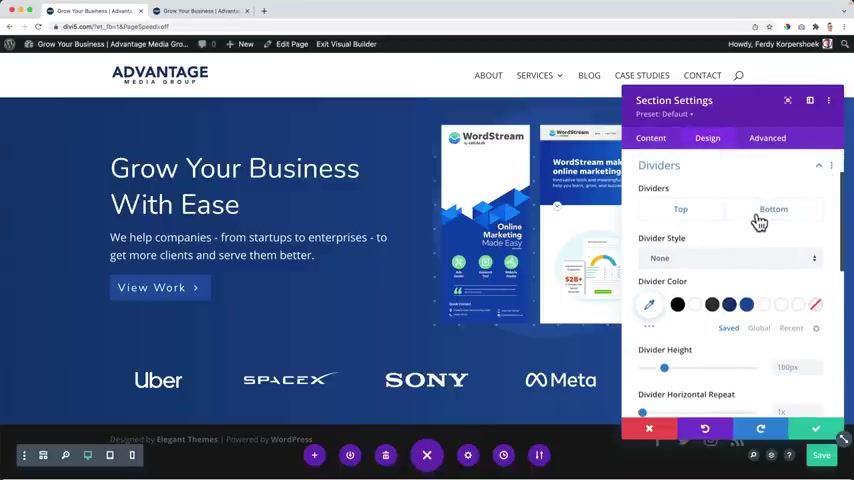
I go to the settings over here of this section and I want to go to design and I search for a divider and at the bottom of this section , I will have a divider and I can choose a lot of different styles .
So if I choose this one , look at that , you see a nice divider , but it , it doesn't look right yet .
We can choose another one .
Create something like this are this and I want to keep it simple , just align like that the other way around .
So uh I can change the height over here on to flip it .
And if I want to repeat it , I can create something like that .
But one is perfect for me and I want to be on top of the content .
What does it mean ?
It will be on top of this logo .
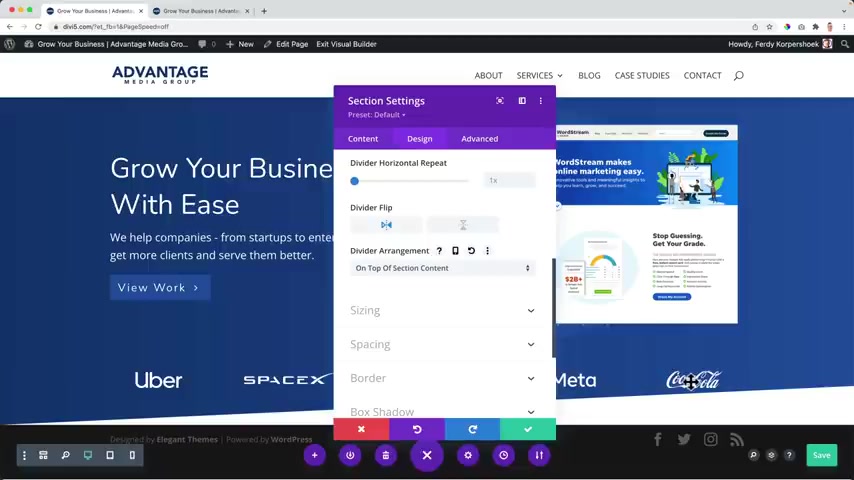
So if so if this logo will be in color and and this area will be a little bit higher , it will be on top of the logo and now they will be underneath .
So , you know , let's do underneath in order to make it look better , I direct it to the left .
I want to go to the spacing area and then at the bottom betting , I want to increase it .
And then again , let's take a look at the tablets .
Ok .
Yeah , I definitely want to decrease it and then on the phone it's also decrease .
But what I want to do , I want to go to the um OK , let's go back to the tablet few because I think it's a really strong line can be a little bit less .
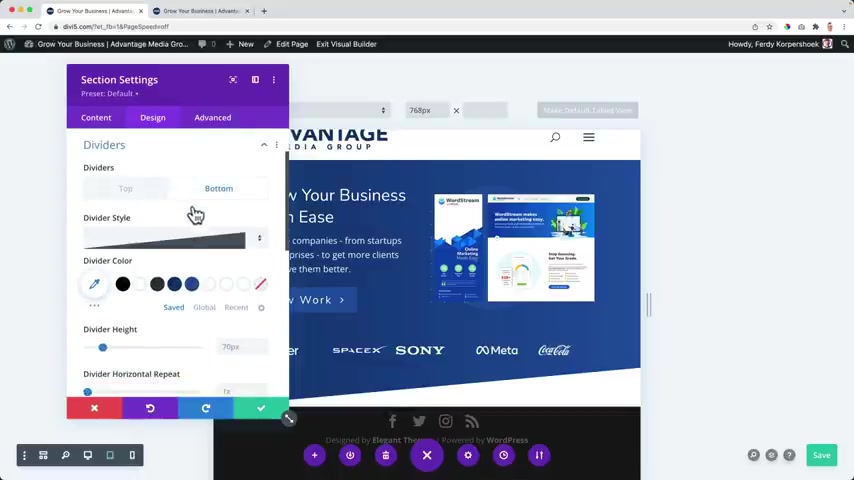
Sorry , I need to go to the dividers bottom .
There it is .
And the height .
Ok .
I don't know if you're here and then the smartphone .
Ok , with that .
No , I'm not .
Yes , I am .
No , I'm not .
No , go to design again dividers button and there it can be even dec increased even further 30 .
And then I want to go to the sizing , sorry , sorry , sorry , spacing .
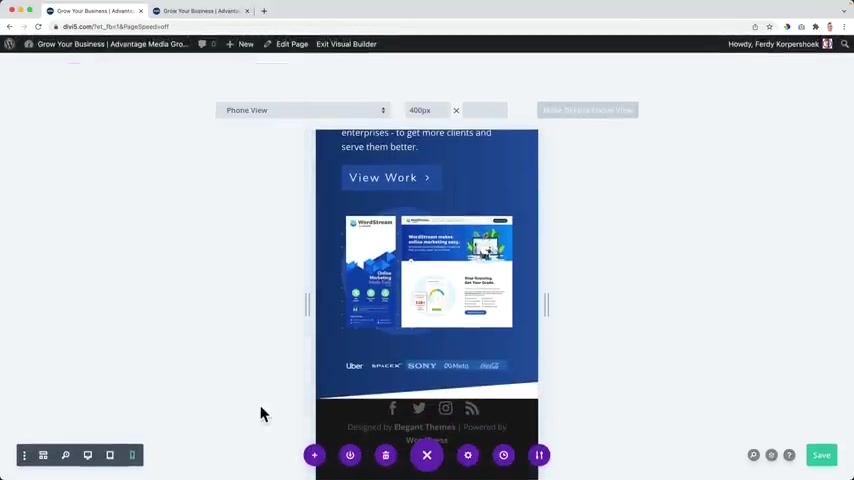
And then over here like that safe refresh .
Great .
I wanna make it smaller .
It looks like that's , it's time to create our second area .
So I go back to the desktop fi or command or control minus minus .
I click on the plus .
I go for regular and I want to have one column with the text area and she likes it and I can tell my text can be uh a paragraph , it can be a heather and I want to create a heather .
So I tied my text over here traditional and digital marketing and let me show you how you can sell it in a certain way because branding is important .

So what I want to do , I want to make the backgrounds dark blue and I'm so excited .
This is it perfect .
No , I don't like it .
So I go to design to the text .
I want to make the text of light .
So I scroll down a bit , I can change the text color here or I can scroll down a bit further and change the text color to light .
Then I want to create a little bit of spacing before I do that .
Ok , let me go back to the text .
Click over here and change this to a heading to so it becomes a bit bigger .
Then I go to design to the heading text or I click over here two , I can make it capitals if I want to , I can bring it to the right to the center .
I give it to the left but I want to change a heading and it says default .
But if I change it to no look at , look at this area , it changes .

So by default , NITO is not the heading text .
So I save everything .
Then I want to go to the website and over here I hover and then go to the theme customize .
Then I go to the general settings , typography and then the header font .
It says the default theme font .
I want to change that too .
You need to only thing is what I don't like .
You need to scroll all the way .
So normally when I do this , I have a different screen and I watch a lot of drinks , all three of them .
And then when I'm at the end of the film , then I'm finally at the end for my font unit .
So I fast forward it took me nine hours to get here .
I'm still up there .
Yes .
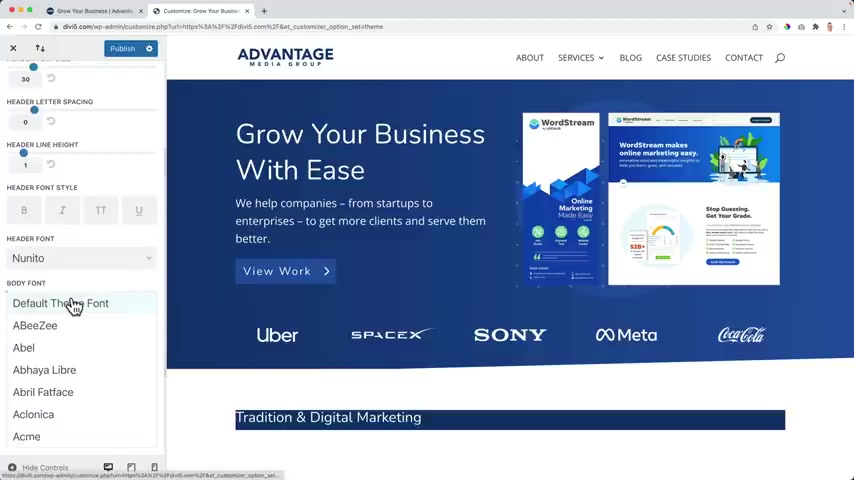
Whoa I'm gonna take a break and now we need to find the font for the body .
I want that to be open so fast forward .
And this time I watched the trilogy of the hobbit there I am open open , but now it will save me time in the future .
Ok ?
By the text color , by default , I want it to be this color .
The heathers also , sorry , sorry .
This one OK .
Close its maybe I should exit the visual builder and enable it again so it can load all the new settings .
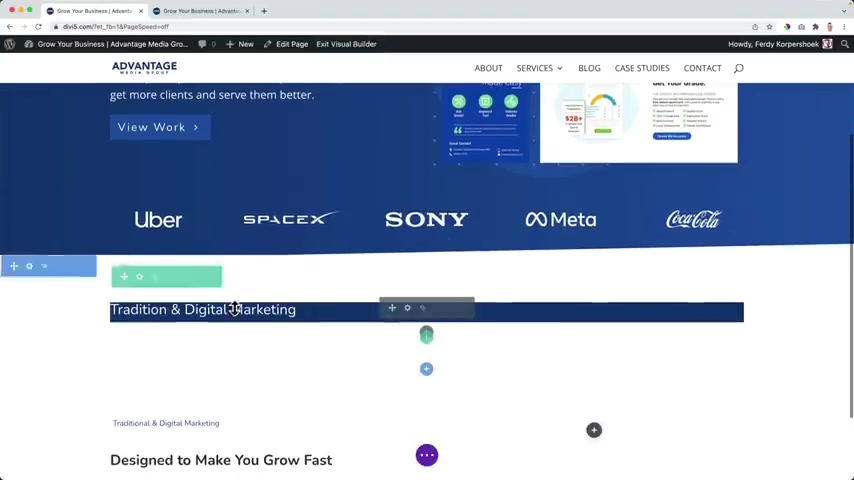
So now by default , this should be so I click over here and I can work on it further .
OK ?
No capitals .
But I do want to decrease the tax size .
I want to make it quite small and then I want to screw up and make the font semi bot .
Yes , then I go to spacing and then from within this area .
So betting I want to decrease it or increase it and then at the left the top until I think yes , this is it .
If I would say zero here , nothing will change .
Perfect .
Now , I want to decrease this blue background .
How can I do that ?
That's not at spacing but it's at sizing .
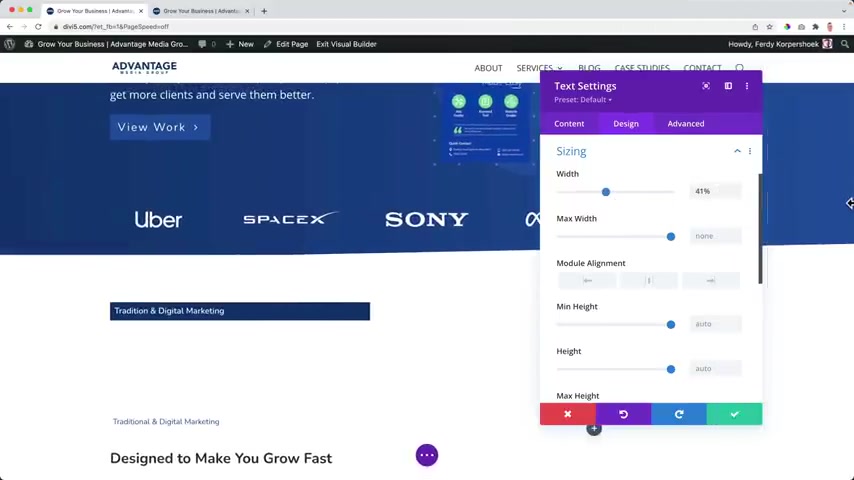
When I decrease this , it will be decreased in percentage .
So depending on the width of my screen , it will become bigger and smaller .
That's not what I want .
So I want to do it in pixels , 300 pixels and then I see I can make it smaller .
I think 200 is OK .
OK .
I need to increase it .
OK ?
And then pixel Perfect .
I won't have the same width over here as I have over here .
And that's why I have this nice area over here .
The text is wrong so traditional and now I need to increase it again .
So depending on the text , you need to change the sizing and then you can create a heller like that without using any code .
Then the one I have a new area .
So over here I click on the plus and I go for a new fixed area .

This time , I want to have Heather .
So I say designed to make you grow fast .
That's what his company is all about .
OK ?
I click over here , make it a having two and I go to design having text H two .
And this time when I changed it to look at this area over here .
Yes , nothing changes .
That means that it's by default that you need to heading and it will saving time in creating the website .
And if I want to change the font somehow , sometime the main font for headers , it will be changing the whole website .
So that will save me a lot of time .
I want to make it bold and I want to give it a color this blue , dark blue color .
If I want to bring this closer to each other , I can do it with spacing this same margin and with margin , I can also have a negative value so I can make it pixel perfect .
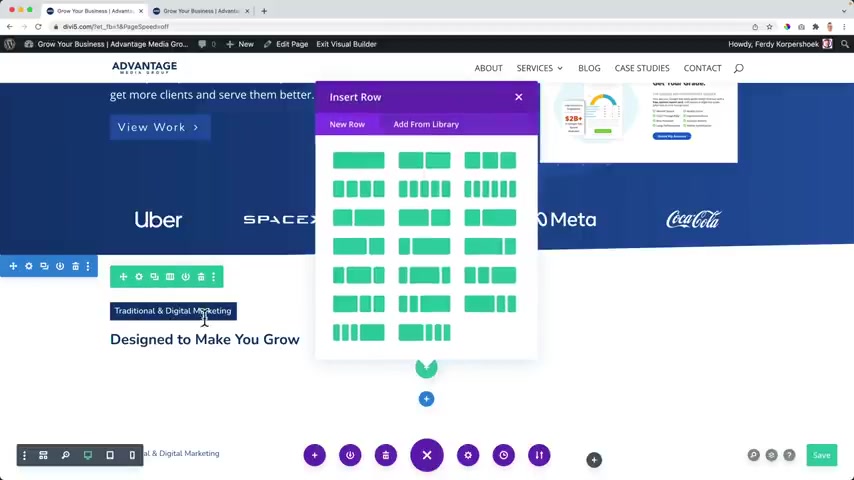
I think it's OK .
MS control s now , I want to click on the new plus because I want to have a new row and this time with two columns , we're still in the same section .
So I can have multiple rows in the same section .
And that's what I really like .
So this time two areas and again a text module .
So I start typing .
OK ?
So I'm saying I want everything to be in one company .
So they don't have to go to different companies to let our company grow better and I'm happy with the the size of everything or not .
OK ?
Then I want to go to the design to the text where I click over here and I can make it , let's say third thing , OK ?
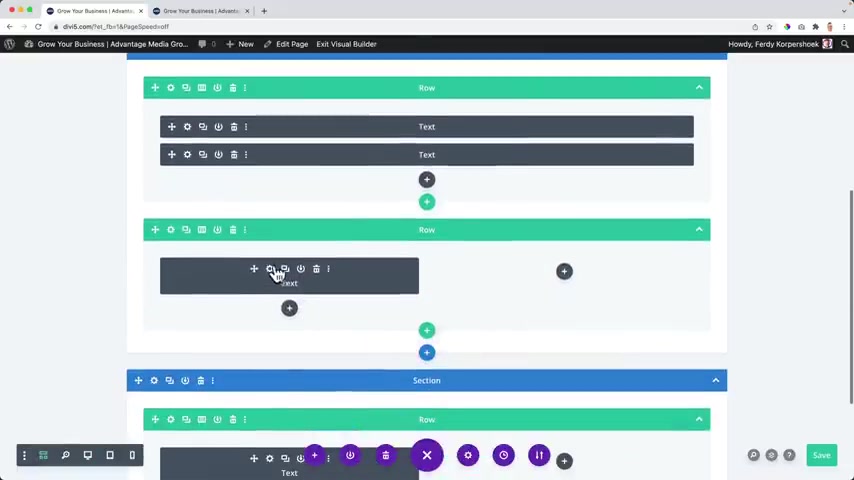
I can go to this skeleton view , I can duplicate this area , bring it to the right .
And now if I say command plus plus it is added .
So over here , I can continue with the text and new text .
OK ?
So far so good on to decrease this area 20 also here .
And I can even go over here to the design spacing at the margin , decrease it .
So it comes a little bit closer .
What I want to do now , I want to give this a small background a a slide effect in the background .
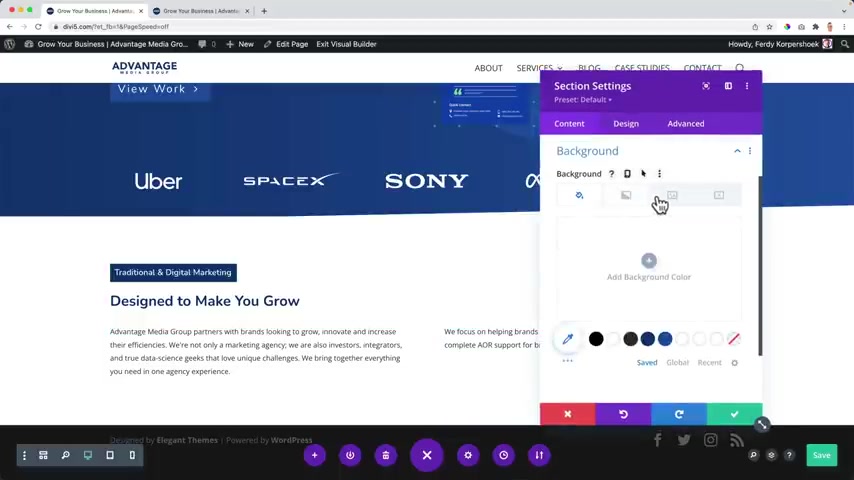
So I click over here , go to the background , go to an image , click on a plus , upload files , select files and then I search for background stroke and looks like that .
I open it , you move to dash copy , make it and have it to do this every time upload the image and there it appears I'm not happy yet .
We can do a few things .
We can make it parallax effect .
So when I scroll it moves , but right now , we don't see that we need to create an area below that before we see it .
So again and then through or or CS S that means it's uh it's sticky .
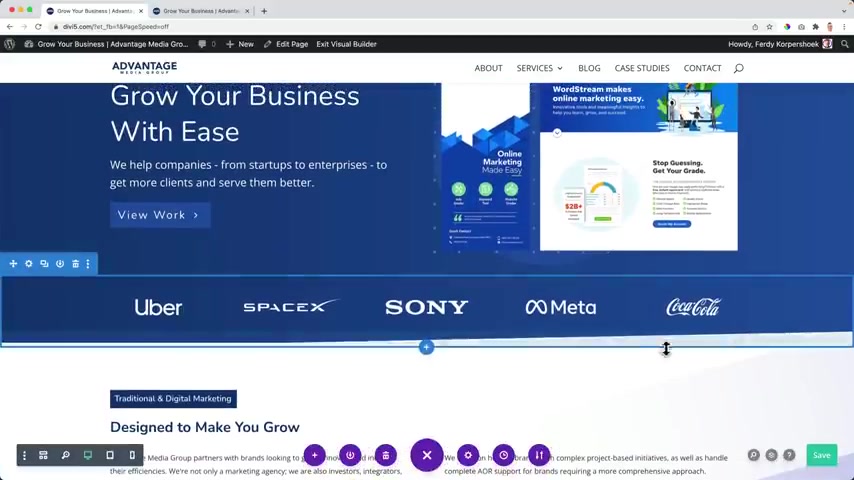
So when I scroll , it looks like that , but then it looks weird with this background over here or with this uh diviner .
So I don't want that .
So what else can I do ?
I go to the image , turn it off right now it's covered .
I can make it fit , it looks like that .
I can bring it to the center , right ?
And that's what I like and then I can play around with cover and you see to the weird area and the exo size actual size .
Well , in this case , the best thing would be to make it fit and um no repeat .
OK ?
Or you can go to Photoshop and make this a bigger and in that way , it will become a bit bigger .
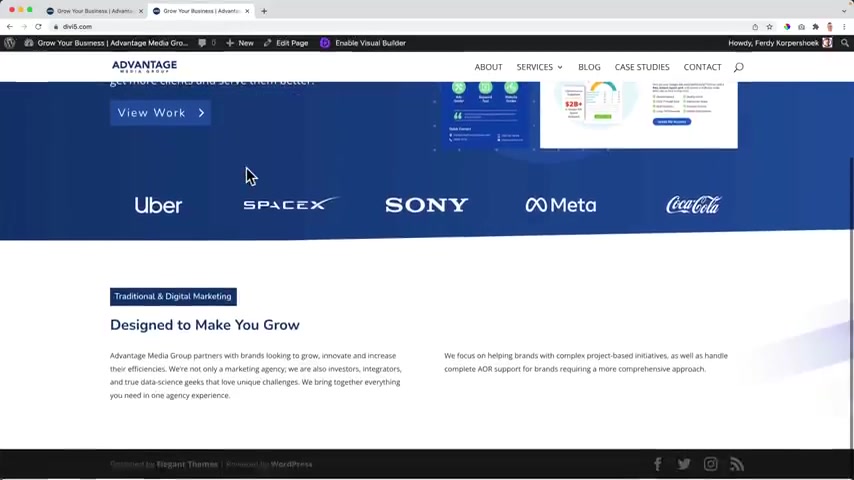
So save it , refresh the page and I would look like this .
What I want to do now , I want to show a portfolio .
I want to show my work or also over here I show for who , for who , who am I am working .
By the way , I see there are no links .
I want it , I can do that over here to a certain page and then becomes a link .
But over here , I want to show a portfolio .
Uh I have a different tutorial about it .
How to make a portfolio using the DV theme if you want to find it , uh You can go to youtube and search for divi the tutorial or divi theme portfolio to do .
If it is two years old , I will make a new one or you go to 30 Corp dot com .
The do and then we all find the most , most up to date one over here .
Yes .
So I will uh implement the tutorial in my website and then it will look like this beautiful .
So if you want to learn how to create something like that , what's the story about creating a portfolio using the divi theme ?
And now we can increase areas , decrease them .
See if everything looks right this way .
Well , this looks great .
Let's take a look at the tablet .
OK .
So over here , I can click , I can go to design to the sizing and make sure I have the tablets , I can make it smaller .
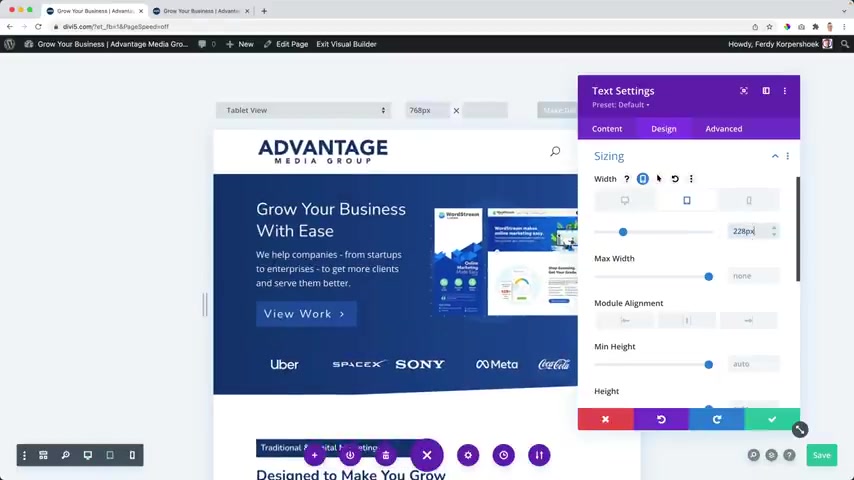
But again , I think um the same amount of pixels will be perfect or the tablets and that is the case .
And then with the phone smartphone , one pixel smaller or one pixel bigger , that's a glitch and glitches do exist also within the DV theme .
Even within the OK .
Looks nice .
Show all cases on the phone and what I can do if I want to , I don't want to scroll too much on the phone .
I can click on this module or um go over here to a later section .
I can give this a name section .
Digital marketing .
I can open it .
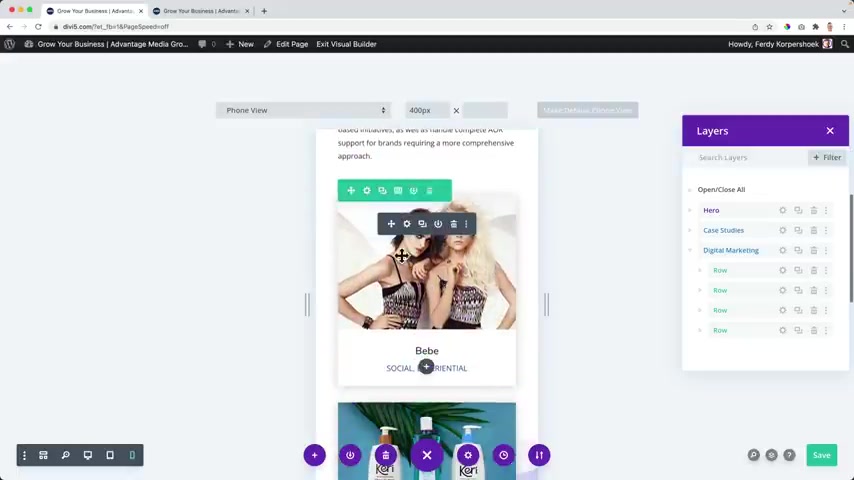
There's um the first row , the second row , here's the third one .
So I need to open the third one and then I want to remove or hide the latest two columns because I don't want to scroll too much on the phone or let my visitors scroll too much .
I don't want his or her thumb to be hurt .
So I go to and with hurt , I mean , don't mean that people hear the hurt but they the pain , you know .
Ok .
Advanced conditions .
No , OK .
Come on visibility .
The disable on the phone .
The same with the latest one lates column .
Advanced visibility disabled .
Ok .
So let's check it out .
So brother stick it out now .
Ok .
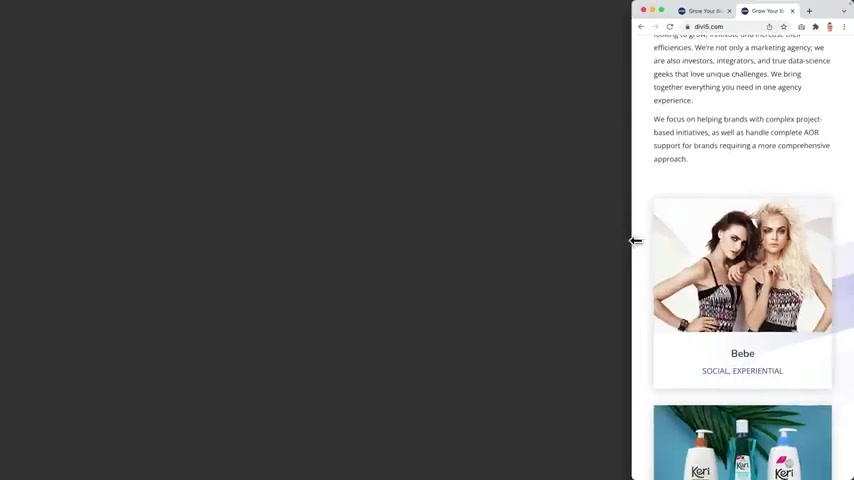
Great personal information also .
Great .
And then on the smartphone , it should be gone .
Those two , it works or not even on the smartphone .
I am happy .
So all cases , it all looks beautiful on any device unless you're not using nokia and nokia .
Ok .
I have an idea .
Let's continue with the tutorial .
So I click on the plus , but this time we go for a specialty area .
What I want to have is a right big area and then a left area actually like this one .
So I click on it and now I can decide how many columns I want to have at the left .
I want to start with one and then I want to have a text module .
OK ?

And then below that , I can click over here and then I can have an area with two columns but still , and I want to add a blurp but still have the right area .
So in that way , you can use the specialty area .
I really like it .
So I save it .
I close this .
I want to go to the section settings .
Then I want to go to the background , choose a color which is dark blue and I want to do the same thing as over here , it's not a mandatory , but over here I can go for a background image upload files .
I go to my desktop and I go for the background circle .
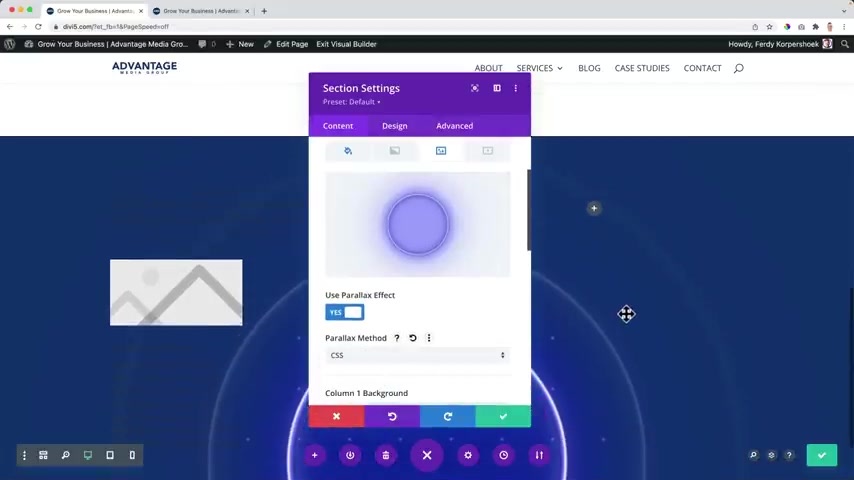
It's a square upload the image and it will appear like that .
But it can also make it a parallax effect .
Or CS S so it stays in the background like that , but I don't want that .
So I turn it off , then I can make it cover or fit .
I can bring it to the center , right .
So it will be over here or what I can do .
I can remove it over here .
I scroll down , I go to the column two backgrounds and there .
I want to have that image .
I don't see anything yet .
Maybe because it's because we don't have any content yet .
So over here , I want to insert an image .
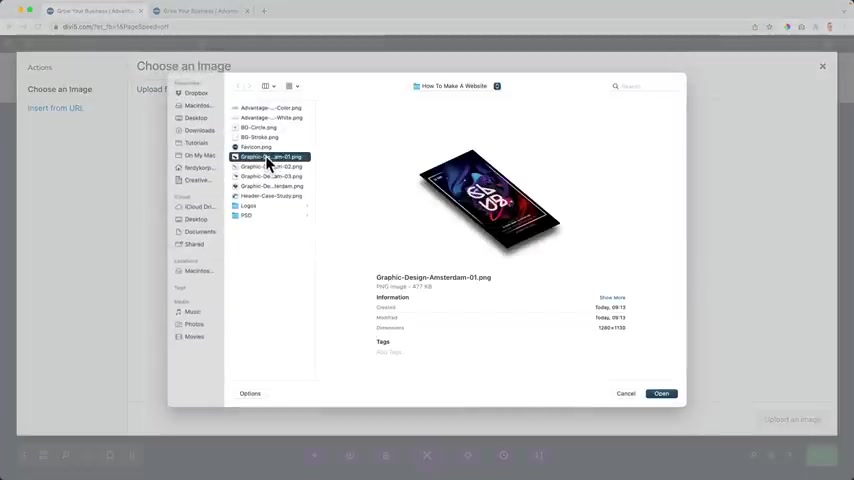
I click over here , upload files , select files .
I have three separate images and I can show you how you can uh use those together , uh create animations which can give you a really nice effect or just show you how to upload an image like this .
So it'll save you a lot of time for right now .
I will just upload the normal one .
If you want to learn how to work with the three separate layers I have to do about it , you can find it at 30 corp dot com .
Otherwise really this story will be seven hours .
I'm not accelerating .
I don't know how to pronounce it .
Really .
There's so much to talk about .
I don't want to scare people by showing them a seven hour tutorial .
So over here below straw effects and uh animation effects .
Let me turn off my mail accounts .
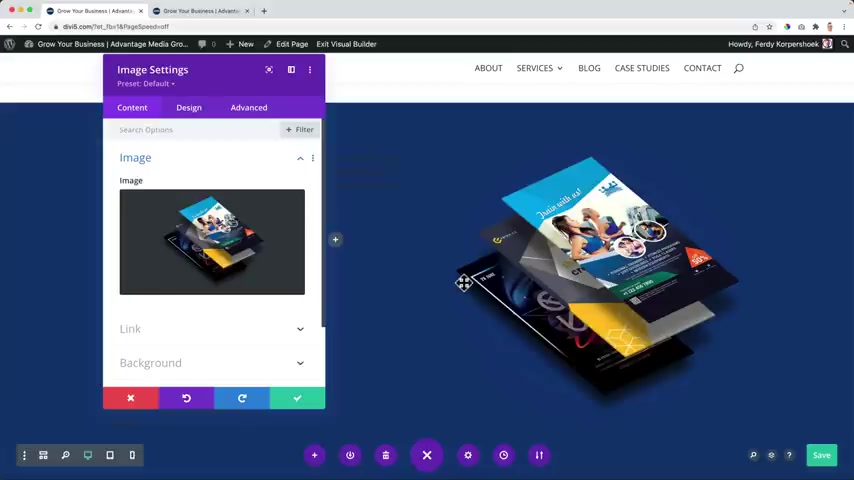
So I uploaded the image there it is .
So what I can do over here , I click on the image .
Then I go to design animation and I wanted to slide in from right or from the left to the right to the left .
I can change the duration and I can make it appear after one second .
So you'll see that nice background .
OK ?
Over here , I have to make everything white .
So I click over here .
I can make it right at the design and I hope by now things will start to make sense for you , you know , by yourself already , what you need to do , but I want to create an area that looks like this .
So how can I do that ?
I duplicate it or I go over here , let me see .
I go for this text area .
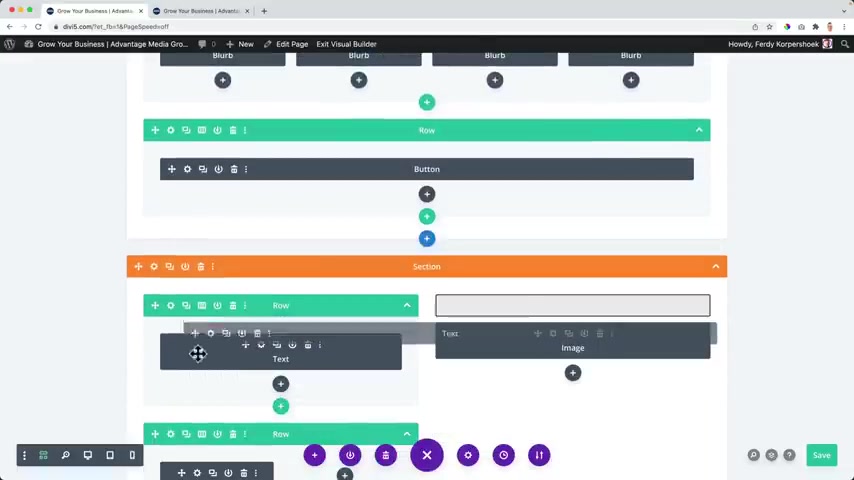
I drag it over here .
There it is .
And the second one , the title drag it over here and then I can make the text light light but it's still dark .
Let's take a look over here and or get rid of it .
Yes .
OK .
And then I want to go to the first area you don't see the background now so I can change that and design or sorry at the the background , the the lighter one like that .
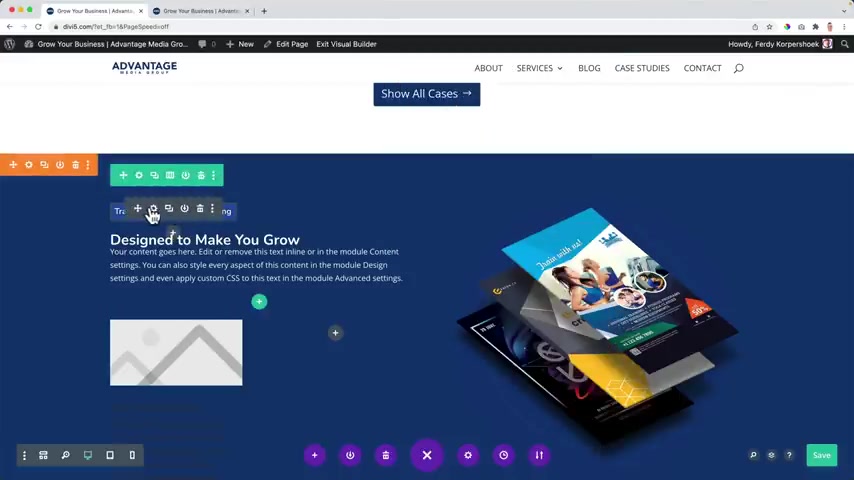
And I have a special thing in my company .
It's called Marketing 3 65 .
And with that , with that system , I can help people to grow their company like crazy .
So I go to design spacing , sorry sizing .
And I can decrease it and make it to 1 60 1 20 .
Like that's take a look at the tablet 1 15 , 1 15 and the smartphone 1 50 .
And you see uh web design , big part of it .
Oh yeah .
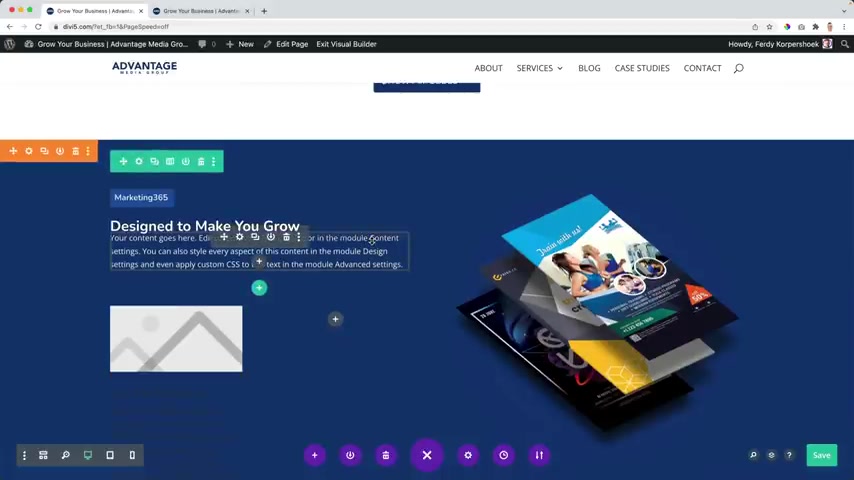
Once , let's say 1 60 or 14 is , is uh doing the mobile design because websites are being found more or uh viewed more on a smartphone than on a computer .
So it's really important to optimize all your websites for all devices .
So I click over here .
See what's going on with the spacing , bring that back to zero and then I get oh can go over here and type my text .
OK ?
The is already the same as over here .
So I keep it like that so I can save a little bit of time .
I also have a button .
So I let me see .
Do I have a button over here ?
Duplicate it dragon hair below and then I drag this on top of it .

OK , I adjust it , change the text , learn more , change the link .
Of course , I can go forward slash forward slash mark , think 365 .
But I need to have a page for that .
I go to design alignment , bring it to the left or nothing at all to stay at the left automatically .
Then I go to the button to the background .
I want to make it light .
And then when I hover over it .
I can make it dark or keep it like that as what a half over it to also elevate it a little bit .
So I refresh the page .
That's good enough for me .
OK .
Then over here we have the blurp .
I don't want to use an image .
I want to use an icon , first title .
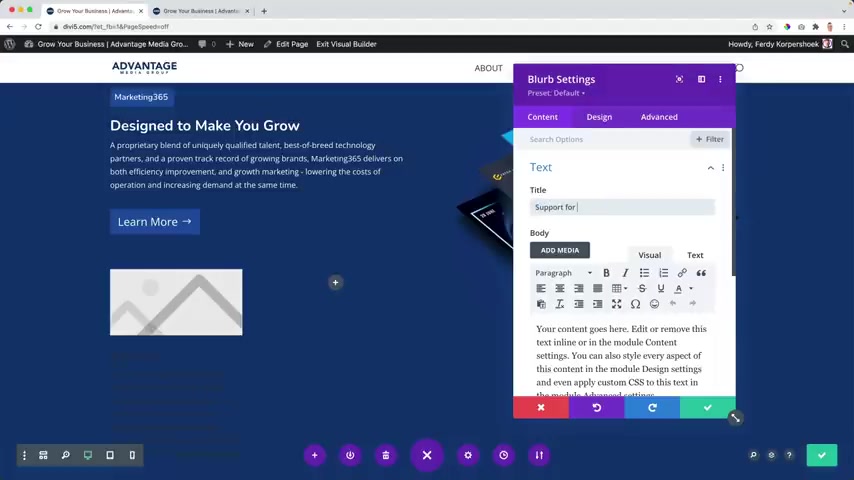
I want to say supports or brands rent .
Now , I want to type my text over here .
OK .
Well , it looked like this .
Let's go to the I can use an icon .
I want to search for a heart , not the fat heart , the normal heart broken heart design image and I can , I can color white can have a background .
No .
Thank you .
The placement .
I wanted to be at the left and I close this .
I want to go to the text and make it light so I can see a little bit of what is going on .
Yes .
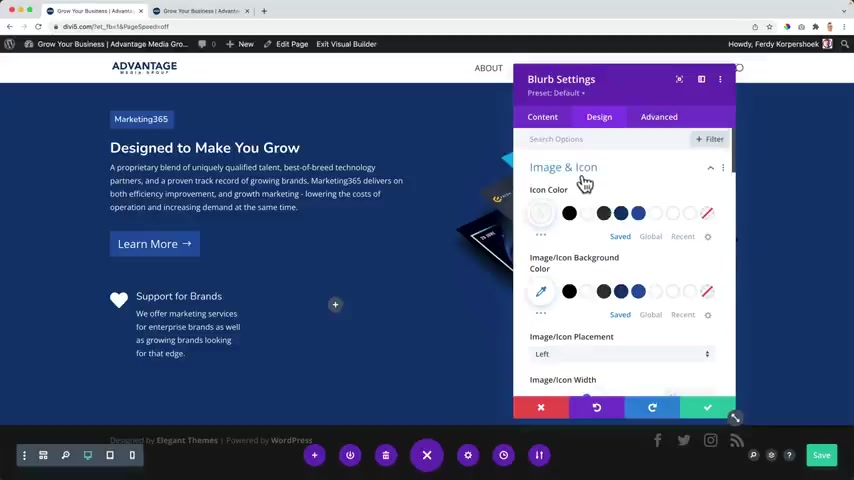
And it was the color of the I that would be light blue or hey transparent or we click over here and we go for red , but it's not the branding but it's so hard .
So it's up to you what you want to do .
And then I want to go to the text design text .
You don't have to follow along everything .
Exactly like I do it click over here , but I just want to show you how it is done 11 pixels .
Then I want to duplicate this area .
Drag it to the right and then I want to change the title too .
Support for managers .
Ok .
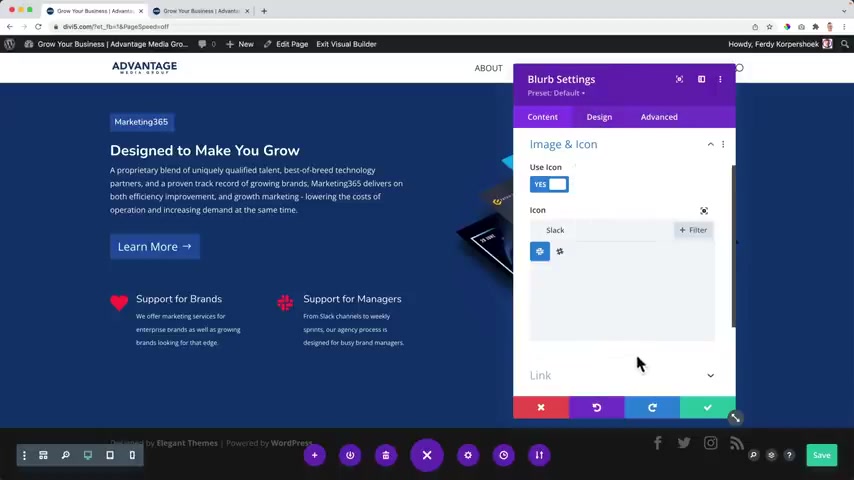
I can , I can change it so I search for Slack Slack .
OK .
It's , it's nice .
The the horror , but it's the brand .
It , if I'm promoting brands , at least I should have a good brand myself .
So I have to change the color back to the lighter one .
It is what it is , by the way , if this one is still uh a different color .
So let's say uh purple , what I can do , right ?
Mouse , click on this module , copy the module styles and then over a different module , right ?
Mouse , click based bunch of steps and it's you can change everything the the the the font size , the font colors .
So save it , refresh .
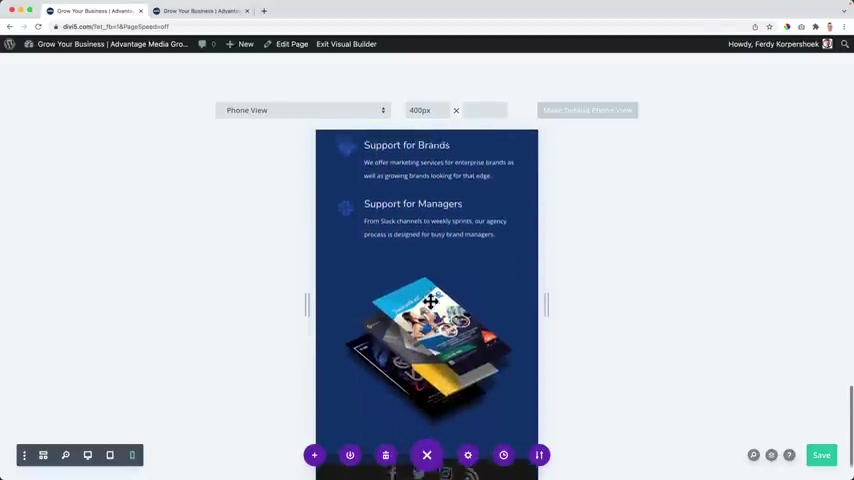
Great .
But how does it look on a different device on the smartphone if he's doing a great job itself ?
Perfect .
OK .
Now I want to take it to the next level .
I want to copy this whole module .
So I duplicate it .
I have two of them and I want to go through the framework .
So you see um digital marketing .
Why ?
So I can grab this one by clicking on this icon , scroll down or leave it over there , then go back to the view .
OK ?
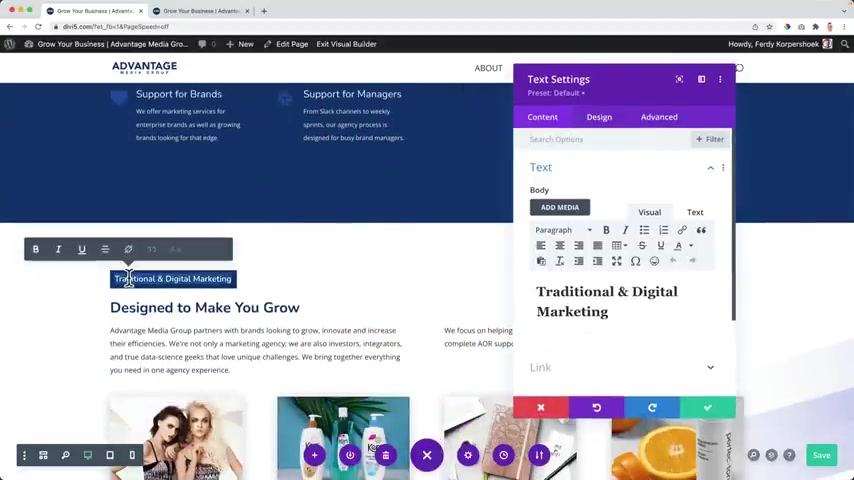
So double click over here and I see why at advantage now I can go to design to the sizing .
I can bring it down , copy this over here , the tablet few base it smartphone view base it on one pixel lower .
Otherwise there's the glitch .
Then over here the title double click or triple click .
OK ?
And everything below that .
Bye bye .
I don't need you .

And then over here I want to have a plus with two columns and even better and it closes or , or , or , or let me go back .
Come on Z I click over here and then I can change it .
That's also nice .
So this area is bigger .
I want to go for an accordion and I want to have my first text by clicking here and I type my text .
OK .
The second one .
So let me fast forward and uh fill in all the information and this is how the content looks .
So I click on it and it looks like this , those colors change when I hover over it or when I click on it and I want to adjust the styling .
So the first thing I want to do , click on the plus .
I want to add an image and I want to show you how we can get images for free pix up be dot com .
I searched for Amsterdam .
I search for a nice image .
For instance , this one .
Click on free downloads .
I'm not a robot .
I rename this Amsterdam Media Group Marketing .
Then I go to the website .
Click over here , drag the image , copy the text base it base it and I upload the image .
What I see is not a square .
I want it to be a square .
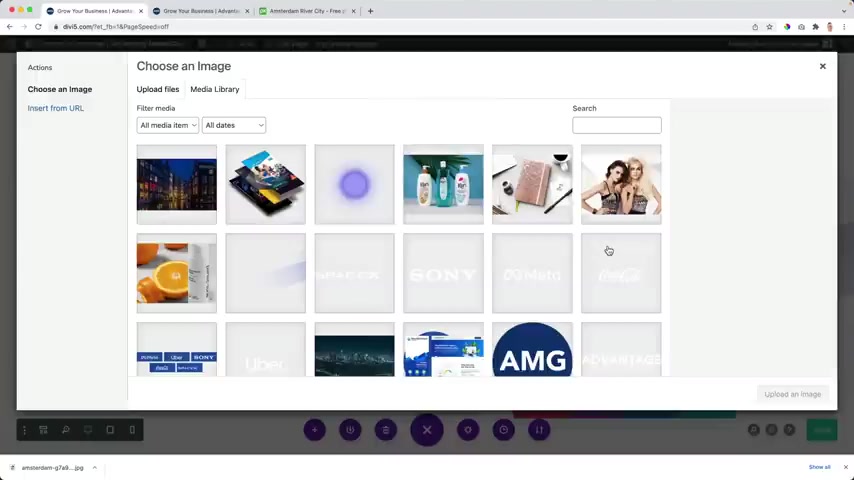
So I click again , click on the image , click on the image over here , edit the image .
Now I want to change the aspect ratio so I can crop this right now .
You see those crop lines over here .
I wanted to be one by one .
So I make it as big as possible and I select an area this one , then I click on the crop button and I save it and I update it .
So it's a square image right now as you see over here and I can close this .
And now let me see , maybe I should save it and refresh the page .
I scroll down .
Look over here , remove this one , add an image and right now it's the square one and that's what I wanted .
Then I go to the settings of the row , this green area by clicking on this icon .
And at the design , I want to open the sizing depth .
I want to use a custom gutter width of zero .
Look what will happen .
Everything will stick to each other .
That's what I want .
Equal column heights .
Yes .
Then I want to go over here to the row settings , go to the background and give it a background that is white .
And when I make it blue , I see there's space left over here .
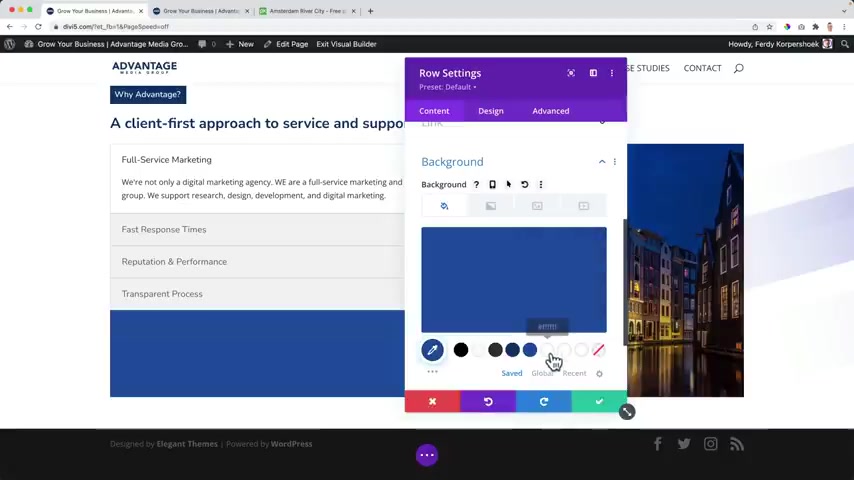
So I go to design spacing and at the betting I say is zero , turn it on , then I go back to content background , make it white .
Now I want to go to the background of this whole section .
There is this image over here .
I don't need that anymore .
But what I want is at this , at this , but a really light gray .
So you see a small distinction over here and now I go to this area to design .
Let's take a look , the icon , we'll change it .
Uh But the color can be blue or let's say 333 .
So this is the item right now .
I want to use the font size and make it a bit bigger .
20 .
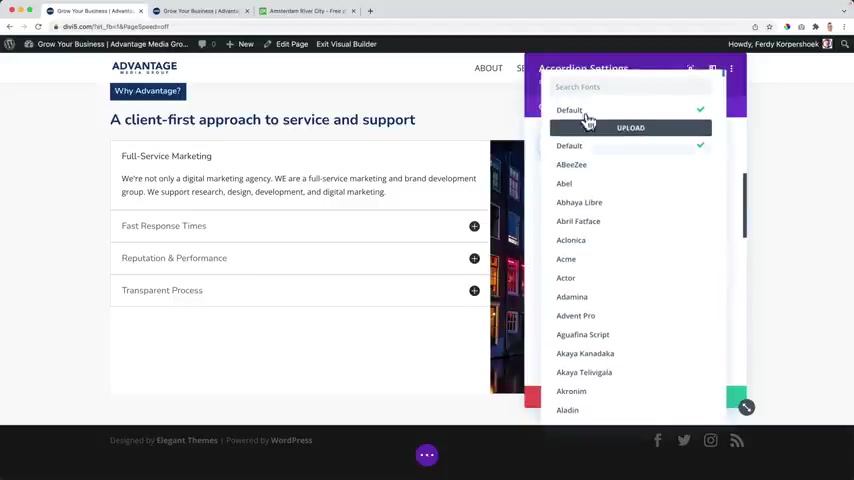
How about the toggle the background color ?
I wanted it to be white and after the closed one .
So right now it's gray .
I want it to be white .
Then I want to go to the text .
It's OK .
The title text make it for just for the sake to be sure I increase the text or no , it's fine .
16 .
I want to make it a little bit thicker .
I found weight .
So I make it bold .
So I scroll down a bit further to see the close title text .
I also want it to be 333 , a little bit darker , everything else .
It's fine .
Then I want to go to the border right now .
You see a border all around it .
I can decrease it , I can increase it , decrease it , I can make it zero .
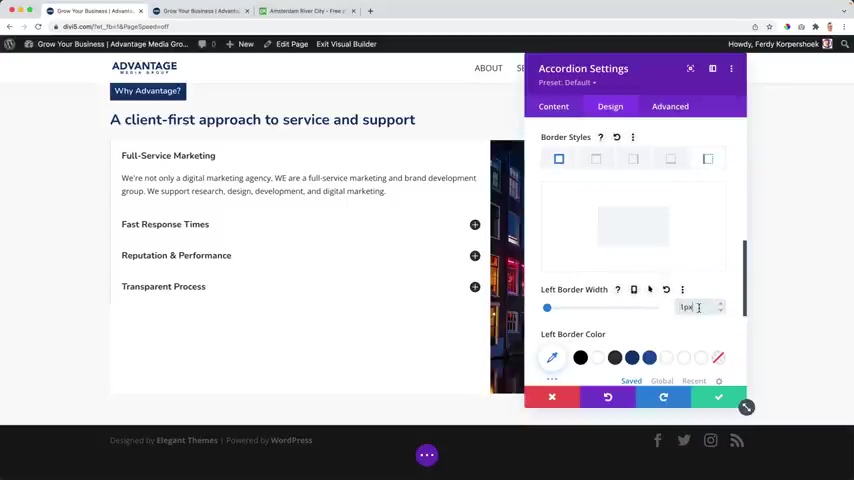
I want to have a border at the left that is two pixels that has the this color .
I know what at the top right now , at the bottom , I also want to have one pixel that is fine with me like that .
OK .
What we also can do when we go to the module , we can go to those individual accordion items .
So I go to the first one , I go to design and here I can change the icon .
So let's search for , right ?
I can add this one .
So when I go to a different one , there it is .
Then the second one , fast response time , I can time something like that or eight clock .
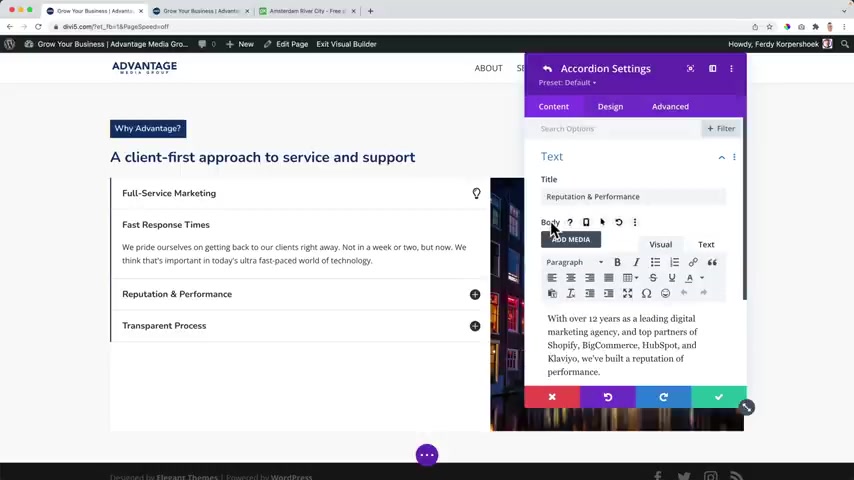
OK .
The third one reputation .
So how about a checkmark ?
And then the fourth one , you have something about process or just search through everything the whole process like that .
OK , month , refresh the page .
It looks like that .
I think that is beautiful .
So what else can we do ?
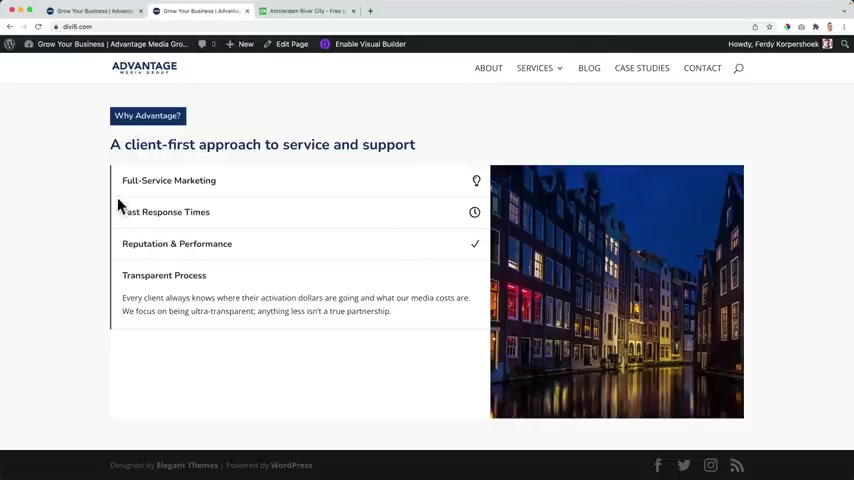
We can add a blog post but we do not have blog posts yet .
I have tutor about that because not everybody wants to have a blog post in their website or blog post .
I suggest you have that because it's a great way to get organic visitors to your website .
If you write about the things you love or you offer as a service , like for instance , uh marketing techniques , seo techniques , how to create your web shop , create posts about it .
People can find you and then they think , hey , that is a nice post .
They will probably know what they're talking about and then you can get new clients .
So uh I skip the part , but I want what I want to end with for the home page is a form .
So I create a new regular section , one column and I want to go for the form , contact form and I close it for now over here , I go to the background and I choose the dark color and then I want to have , you know what ?
I don't want to have a dark color .
I want to have a gradient with this color and with this color and I wants to be a linear sorry radio .
The starting position is at over here so I can see it really well where it is and I want to be on top .
OK ?
And actually the other way around .
So over here should be the lighter color over here should be the darker color .
OK ?
And I want to want to have a title so I duplicate this one .
I drag it , change the text design to a light .
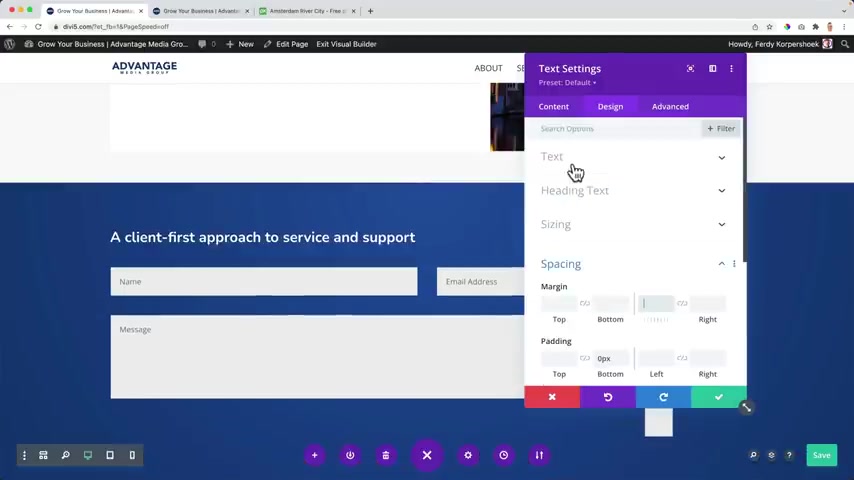
If it's not working , I should overwrite it over here somewhere .
OK ?
Let me click over here and then I get white .
Yes , then I go to the sizing , sorry spacing .
I left that is all go .
I want to bring it to the center .
So if I go to the text and you see , bring it to the center , um , make it a bit bigger .
Yeah , I need to select this .
Ok .
And that content I want to say ready to get started .
Ok .
And then I'll have my form click over here .
I can have my name , I can adjust things over here .
So the few options and it's all ok .
Again , if you want to have an in-depth tour about the DVD V form tutorial , let's see which one comes 1st .
99 months old .
Whoa , I didn't know that it was such an , such an in depth uh tutorial out of this uh with all the options .
Yeah , you can do so much things over here so you can find out exactly how to make a form .
I want to make it like this .
So here it is .
Uh I forgot or I forgot getting the right word , but uh we have not optimized this yet .
So let's take a look for the tablet .
OK ?
I can't say , hey , you know what , forget about it on the tablet .
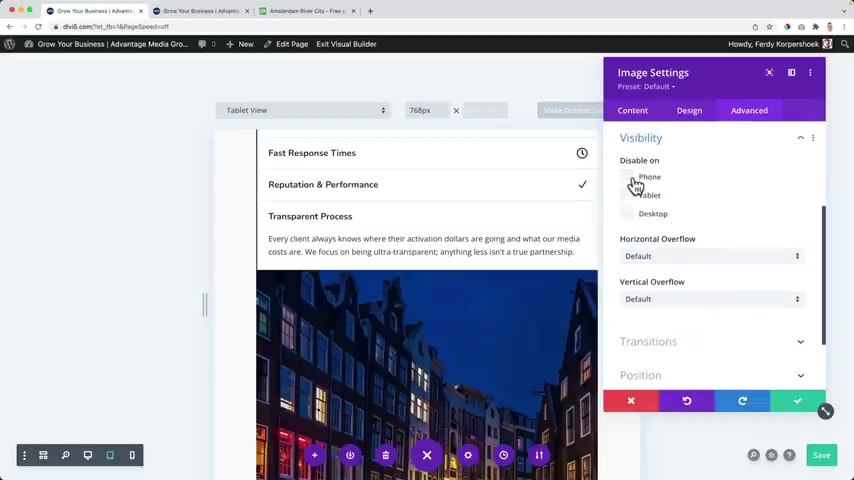
Advanced visibility , hide it on the phone and on a tablet .
So it all look like that .
OK .
This definitely needs some changing .
So I click over here alignment with a smartphone that'd be at the left , but I did not select it the right way .
So it's two on a smartphone like that .
But then I would like to have some spacing from the left 15 , save it .
And sometimes I get across things like this .
It doesn't work as I want and then I need to be flexible .
See what I can do .
Ok .
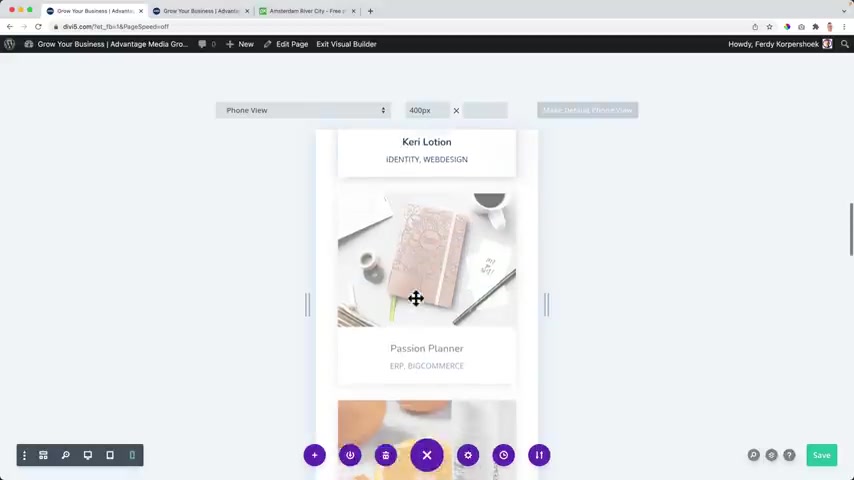
So this whole page he's doing a great job on a mobile phone .
Ok .
I'll show you one more thing before I go to a different page over here , I click on it to scroll effects and we can enable vertical motion .
There's a lot .
So let's say it's option one , one .
Here it goes up and then it goes down .
It goes with us .
Try drag this all the way it only goes up and you can do that also with different things horizontal motion or rotating .
So I enable it .
OK .
There's a lot .
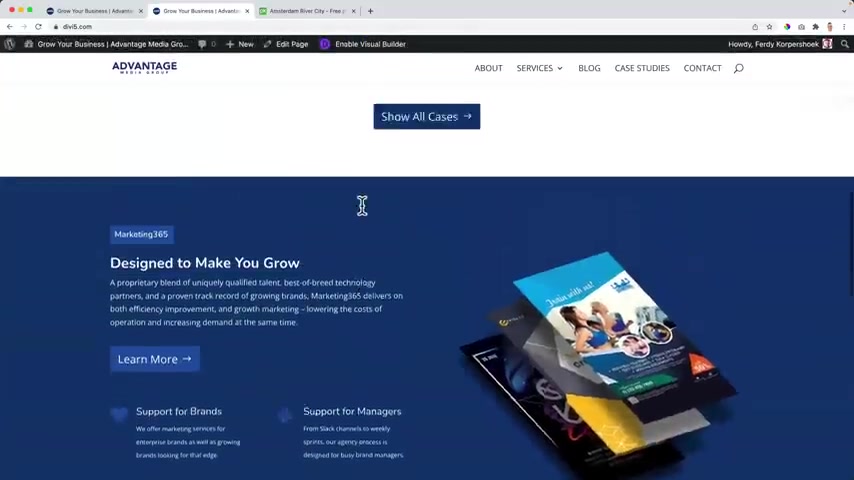
So how about 20 if I do that , I want to go to design animation and I want to remove that one .
So do I not slide in ?
So I refreshed page .
Let me see if it is saved .
Really important .
Refresh girls like that .
And that's what you can do with pretty much anything within the website .
I think we made a great website or a great page and we it is optimized for all devices .
I hope you'll learn a ton of stuff .
And now let's take a look at what else we can do by default .
The Diy page builder comes with a nice header .
You can adjust it a little bit in the theme customizer and you're good to go .
It looks great out of the box .
But if you want to get everything out of it , you can create a header using the Diy Builder and I created a separate tutorial for that .
Why ?
Because it's quite a big subject and I don't want this tutorial to be seven hours long .
So you can do three things .
First , you can follow the tutorial and learn how to create a beautiful header yourself .
Second , you can uh import it .
I will show you how to import this header .
We are going to make a separate tutorial in this tutorial .
So you can just import it and adjust to your wishes .
Save yourself a lot of time or three , you can get angry with me and quit this video because you hope that everything was bundled in one big tutorial that is seven hours long .
So it is story time , 1223 .
It's up to you what you're gonna do .
I hope it's one or two .
We have created this nice simple menu and when we scroll down , it becomes a bit smaller and this is um built into the diy theme .
So just out of the box , it's quite ok .
And if you want to keep it like this for every page , you can do that , hey , it's your website .
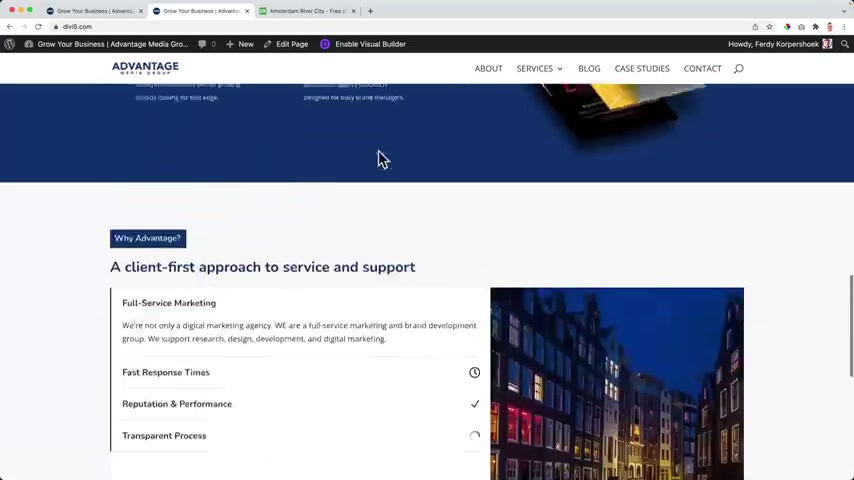
But if you want to take this to the next level , I want to show you how you can do that also for the footer , we can create a custom footer .
So in order to create a custom header that is transparent , so it shows the this blue background and you scroll , it becomes a different logo in a different color and things change over here .
If you want that , then go to 30 GOP .
Let's come to tutorials devi and search for the Diy Heather tutorial over here .
It's not yet to create it .
I'm gonna create it right now .
And if you want to import this end result , you see over here , let me show you how that is done .
So I close this , I close this and I go to DV 0.30 Corp dot com .
Hit enter , I will be redirected to this page .
I leave my name 30 my email address and I can get the templates .
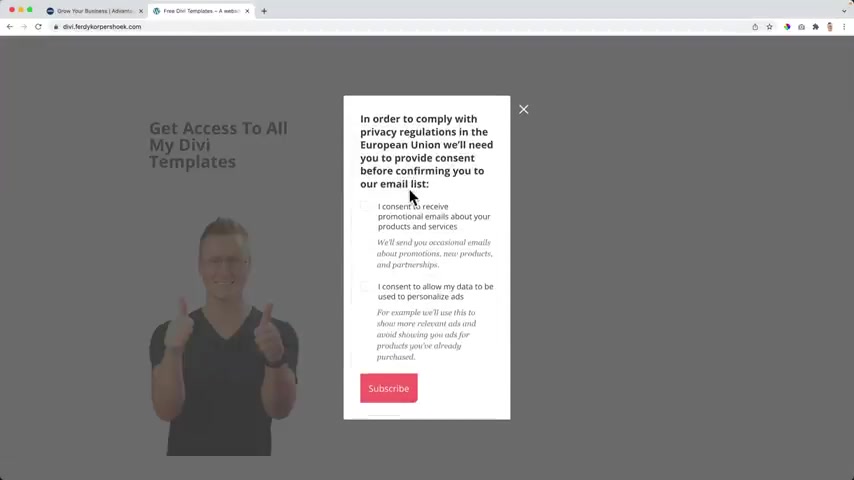
You can unsubscribe any time soon or later .
I'm from Europe .
So I need to consent with a few things .
And if you want to learn , I can do something like this .
I have thought about that .
Search for convert get tutorial .
I expect to be number one and I'm not .
So you can also search for 30 after that .
And there it is four months ago , 2.5 hours .
I show you everything you need to know , you know , to grow an email list and uh provide value of what I'm doing right now .
But um that's what I wanted to say , check your email .
So I need to go to my gmail account .
I download my templates and there it is .
So this is the header .
When I scroll , this is the header with a different logo and on the mobile it looks like this .
I can download the header over here .
It will be a zip file and I can unzip it and look at this .
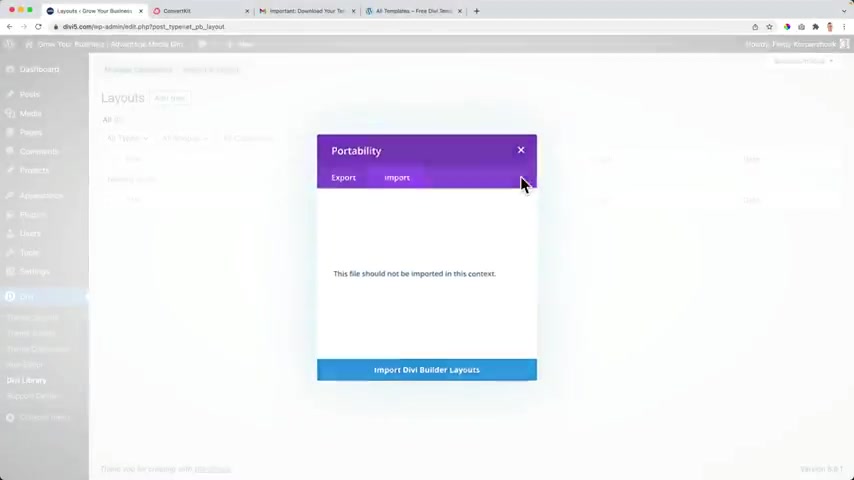
There's adjacent Fell and I was also listening to music of Jason Upton with an A in between the J and S let's go to the back end , go to Diy Diffie Library and there are two ways to do this .
You can click here on import and export .
You can import , select the foul and then go to downloads and go for the Jason Fell and import it .
And if this doesn't work , which can be the case , then you can go to the female .
There don't restore .
And I want to add a header for the home page .
So I click on the plus over here for the homepage , create a template .
I save the changes .
Then I click on custom header .
I want to build from one from scratch .
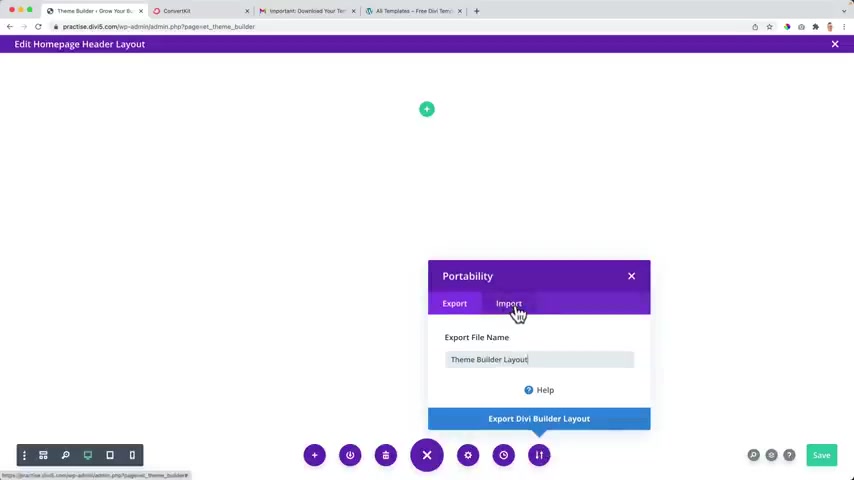
OK ?
Now I click on those three dots over here .
I click here on this icon with the arrows .
I search for the tap import and I select the file .
Jason Fell open it , I can replace the existing content and make a backup of this , but I don't need that and I click on insert DV builder layout this time it works .
OK ?
No , you can go to that Lear area , go for the desktop header row , the first column change the white image with your image with your logo , the colored image with your logo .
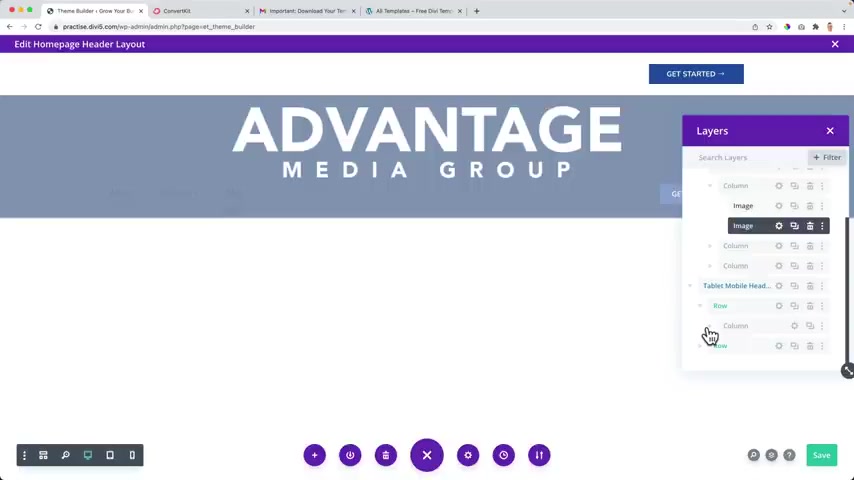
And then for the tablets in the mobile view , James image over here , then when you save it , you need to close this .
So this head that we just created is assigned to the home page .
I click on save the changes .
And now when we go to the website , we import it this page .
And if you have created something something beautiful , you want to share it with the world for free or you want to sell it or you want to get someone's email address , you can enable the visual builder .
Click on the three dots , click on this icon the most right one and you can export this as the At Advantage home page , it will be exported and downloaded over here .
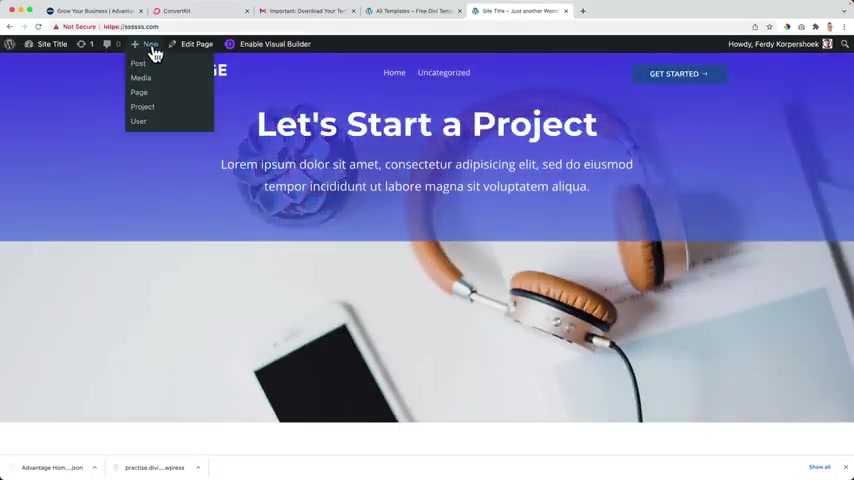
If I would go to a different website made ad V for instance , this one and I create a new page .
I call this one at Vantage , publish , publish .
Um Use that Diy Builder .
Keep in mind that this is a simple , Jason Fell 4.2 megabytes , but it takes me hours to make it .
So I have to build from scratch over here .
Uh What I want to say is that you can sell this , you can sell this to people .
You work really hard on this , you export it like this and then you can sell , you can turn your your diy knowledge into a monetization machine over here .
Same icon .
This time I import it .
I tried this one over here .
I import this complete page .
OK .
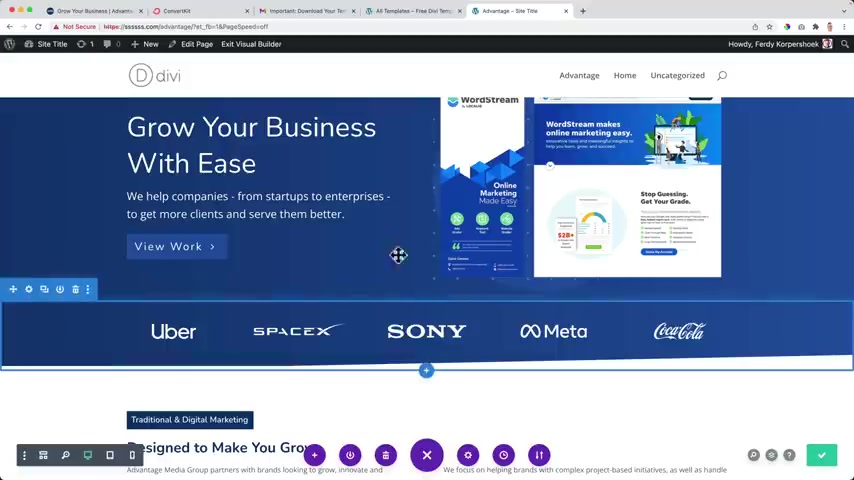
There it is .
Wow .
Exactly the same .
So I save it .
Command S I go to the back end to media and there are all the images .
This is amazing .
This , this can save you so much time .
So what was the beach and the advantage ?
Great .
And to combine everything and let's go to the back end and go to Diffie the builder .
Let me check .
Disgusting header .
Yes .
OK .
I go back and I click over here , manage template assignments and I go to a specific page and that's the advantage page .
Save it .
Say that it's really important that you save it over here .
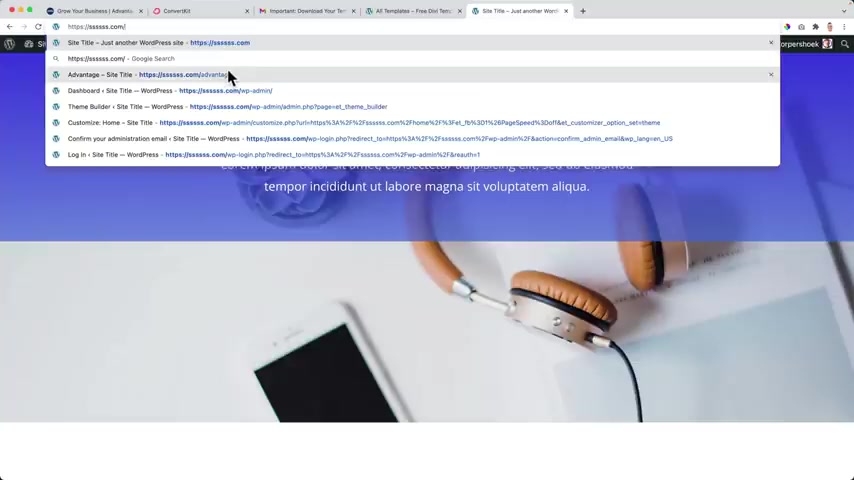
Go to the website forward slash advantage .
And in a few minutes we imported this heather in this page .
Isn't that amazing ?
I think it is .
OK .
So this is our home page .
We copied it , we imported it and um I'm happy except for one thing and that's that the weather in the Netherlands could be better .
Now , that's another thing .
Um This background has a nice gradient .
This one hasn't .
So when I zoom out , I go over here nice .
It looks a little bit different than everything else .
Also here as a gradient , I miss I'm missing that over here .
How can I do that ?
Well , of course , I can do that manually .
I can create a creative .
But what I also can do , I can go to the layers to the hero .
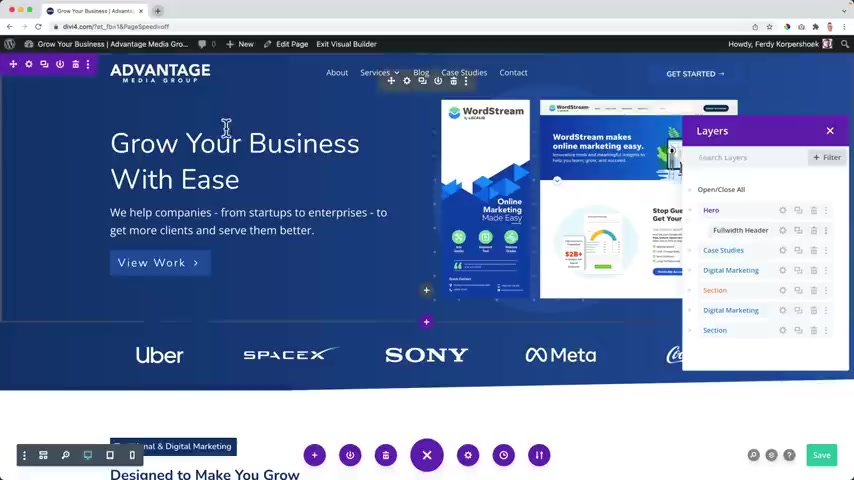
I open the hero and in the hero , I have a fool with Heather .
I click on the icon over here , the settings icon and then I collapse text and at the background , I can say right mouse click and now I can extend the background cell so that every section on this page has the same background with the gradient .
But that's not what I want .
I want to copy these backgrounds .
OK .
Then I want to scroll down to this one .
I hover over here , right mouse click based the background .
And voila .
Ladies and gentlemen , now we have the same gradient in the background over here .
What I see now over here is that this also has a background , the icon has a background .
I don't want that .
So I go to the design area image and I can , I can color and the backgrounds um gone .
Now I can do a few things , right ?
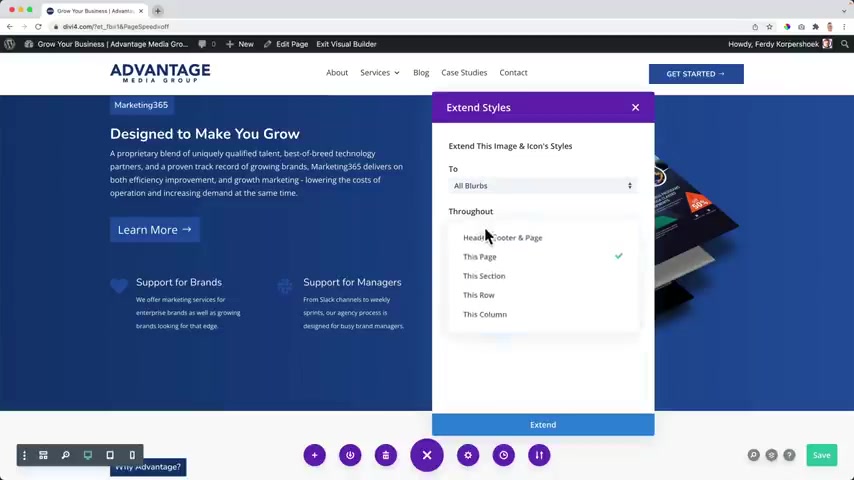
Mouse click , extend an image uh image in Eigen cells to all blurbs throughout the heather and the footer and the page .
Oh I only want to do it on this page or on this section .
So look at this , there's a background over here .
Maybe I can make it a bit bigger .
No it doesn't work like that .
Ok .
Sorry .
Here is a small background .
If I extend this , the background is gone , we're gonna talk about it a little bit more , uh , for the next page because there's so much more I can show you because I have so much to cover so much to do with the DV theme .
And every time I make a tutorial , I fall in love with the DV theme even more because also in every tutorial , I want to make the website better and do more fun stuff .
And if you can appreciate it , I can appreciate if you would like this video .

And if you want to subscribe for more upcoming tutorials about DV , about Element or about wordpress , about e-commerce , about affiliate marketing , about how to sell your website , how to become a web design agency .
So um for me , it's all about sharing available knowledge .
Hoping in return I get a lot of um subscribers for me .
That's uh important .
That number , I don't know why I wanna reach 500,000 subscribers in 2022 .
And I'm willing to share all my knowledge in order to reach that point .
So having said that what I can do , look at this , I can cop uh copy this whole area .
So what I can do , I can go to the layers hero , right ?
Mouse click , I just say copy this section .
I save it , then I exit the visual builder .
Now I go to the page , I enable the visual builder like that .
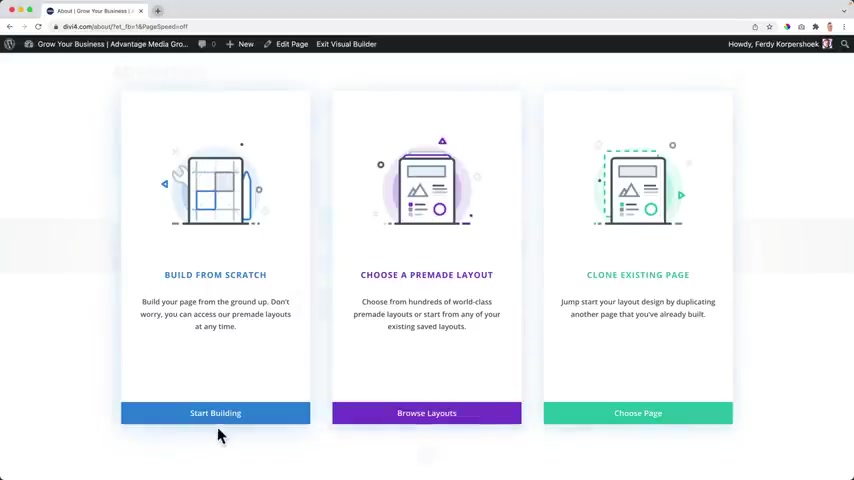
Now I can do a few things I can build from scratch .
Again , I can choose a primate layout and I can clone an existing page .
But I want to go through all of these options .
So I click on start building over here .
I close this and now I can say right mouse click based this section .
Look at that .
There it is .
I remove this one and now I have the same exact section as before on the home page , copy it and paste it just like that .
So I save it .
And now there's a small problem because this is a different heather .
And while I can do now I can go to the background , no back end to the area , the theme builder and I have this home page header and I can click over here and manage template assignments .
And this time I also want to adjust our assignment to the about page .
So I save the changes .
Now when I go to your home page , I see our header .
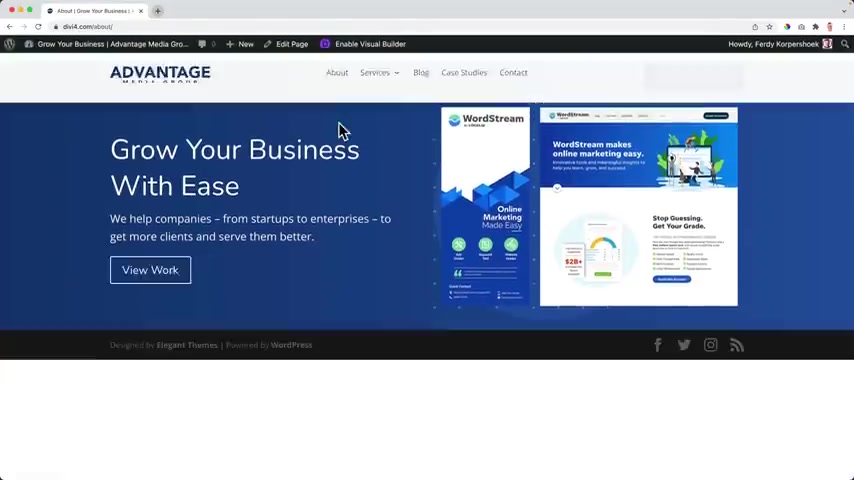
But now when I go to your page , I also see of heather , I go to the home page again , I try to open two tabs at the same time and then open a visual builder and copy and paste it that did not work .
So I go to this page , I enable a visual builder , right ?
Mouse click copy the section I exit visual builder .
I go to the about page I enable the visual Builder and then let me see normal area , right ?
Mouse click based the section .
It's a little bit weird how to do that but I it works and it's all already optimized for all devices .
I can change the text .
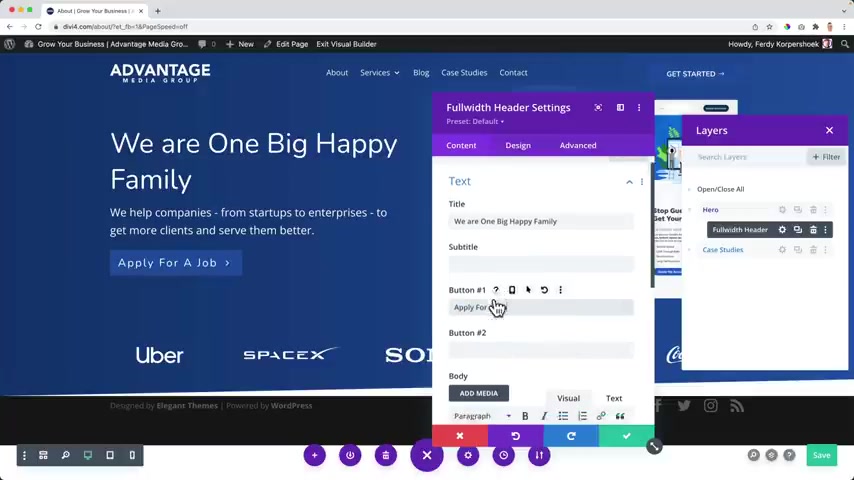
Now we are one big happy family and then um go to the layer who with Heather over here say apply for a job and change the the link of course to certain beach , save it .
Exit Visual Builder .
So now with the about page with copy and pasted areas , there's another way on how to do things .
If I go to the services page branding , I click on enable the visual Builder we built already from scratch , but we can also clone an existing page .
So if I click on choose page , maybe I want to use a lot of information from the home page again and change the information , change the content .
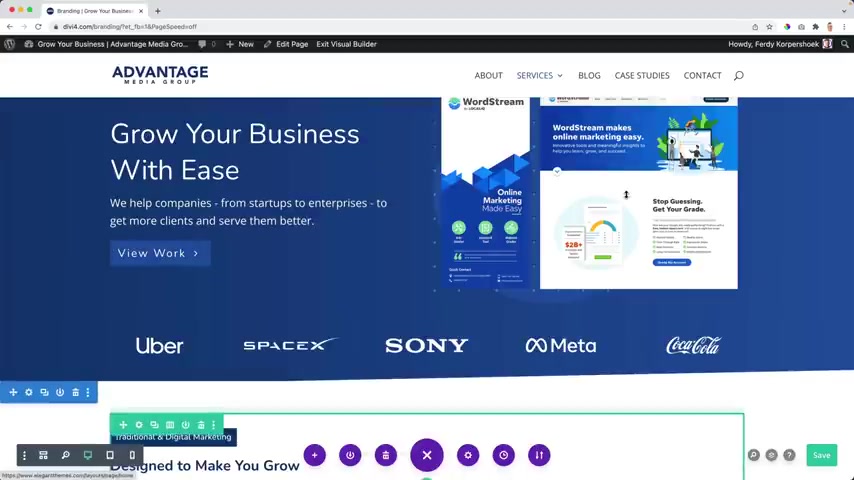
I click on the homepage and now it's copying the home page to this new page like that and I can change things over here .
Tough way .
Come on uncle shit .
Now you see branding , grow your business , the hard and tough way over here .
It's the other way .
That's a way now I can adjust everything over here .
So maybe you want to use this area , you want to change the content or there are multiple sections you want to reuse and then change the content .
And this is a great way .
Then we go to marketing and then there's the third way enable the visual builder .
We can choose a premade layout .
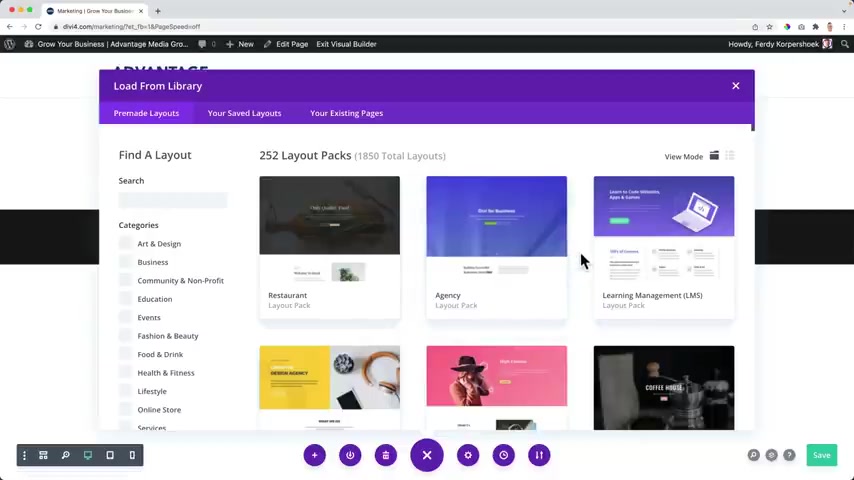
And if you somehow forget to click here and click here , then how can you import a premade layout ?
Click on the three dots and then on the purple plus .
And then there are the premade layouts .
And every week there's a new layout pack .
A layout PAG means that it's not only one page , it's a whole set of pages , the home page , the block page about page landing page .
So this will save you a lot of time .
If you make a for a client and you see something that looks similar to what you have or your client have , has a mind , then you can import it and adjust it to her wishes .
So if I go to this one , I can import this page , but I can also import the about page on the about page , on the contact page , on the contact page , adjust the colors , change the content and you'll save yourself a lot of time .
So I can use this layout .
It will be imported .
And in order to do that , you need to leave your user name and your API key , which can be found in your elegant themes account , which I have shown you before and there it is .
So what I want to do now , I want to have some fun by showing you how you can adjust the styles and the colors and the text really simple .
Using the DV page builder .
In this part of the tutorial , I will show you how you can speed up things and you can make things easier for yourself by doing a few shortcuts and by doing a few things and it will make your life easier .
So I think it's important to have this part of the tutorial in the tutorial .
And if you like what you're seeing so far , I would like to ask you to like this video that will help me out a lot .
I do a lot of put a lot of effort in making this video .
So I hope they will rank well .
So they will be found .
I get more viewers , more subscribers and that's what I'm after .
So if you like it , please like the video and feel free to subscribe for more upcoming workers related e-commerce related and affiliate marketing related tutorials .
I'm here to help you to boost your business .
It can be an agency that you start for yourself .
It can be that you want to start make money online .
It can be that you want to sell things online .
Well , that's the same thing because then you start to make money online .
If you want to learn more about that , you can subscribe and like this video and create a second account and then also like this video and dislike videos of my competitors .
I can name a few that you can dislike .
No , you know , that dislikes also help you to get ranked .
It's crazy .
It's a crazy world we live in .
So let's continue with the tutorial .
I want to introduce you to global colors and this is amazing .
Right now , you see everything has a purplish look and now I need to change everything step by step .
But there are multiple ways on how to save yourself some time .
And one of the things is global colors .
So when I go to the background over here and I go to the background , I see my safe colors and I have used them all the time .
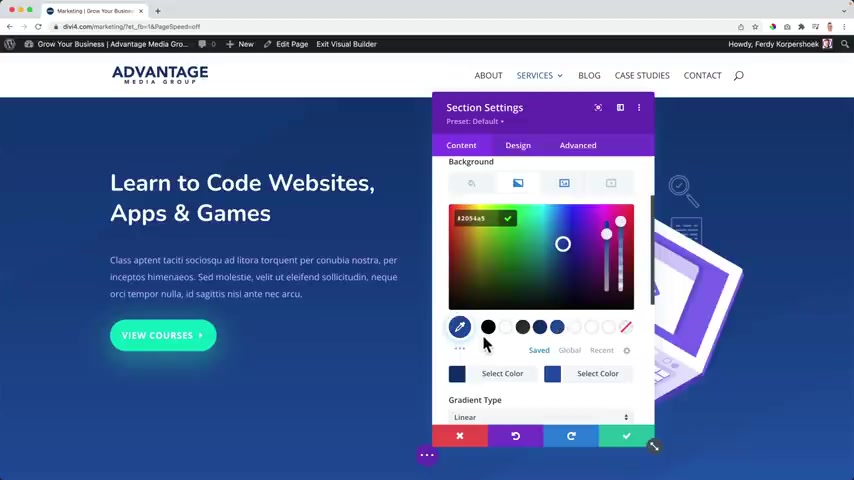
So um if I would go to the gradient , I can change those colors with my save colors .
But there's a better way over here .
I have the the global , I can click on the plus .
Now I can choose the color is one and go back and click on the check and save it .
Now I click on this button .
I go to design button , I go to the global color .
I click on the plus and I can create a new one for instance , the dark one uh somehow it seems to be , yeah , I need to click outside of the area and now I can add my third one , this color and the fourth one , the black one , the fifth one , the wise one and then the latest one .
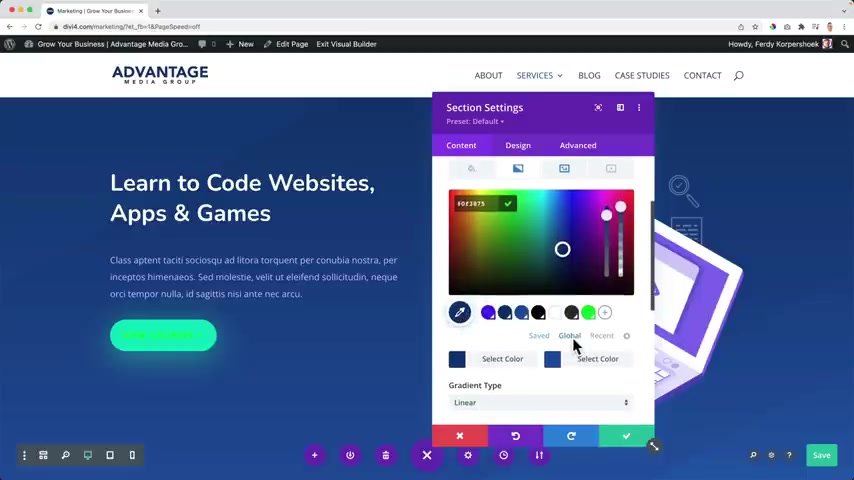
This one the next OK , I have all those global colors .
Let me , let me add one that's really different than all the others .
I check this .
I save it .
So now I have a lot of global colors .
If I click over here , I go to the backgrounds , I go to the gradient and in the first color , I want to use a global color and I choose this one .
Then I go to the second color and I use this , this global color .
I scroll down a bit .
I go to this button design button , I search for the backgrounds and I go to a global color and I change it to the green one .
OK ?
There's also a border .
I also want to change it to a green border .
What I can do now look at this , I have green , blue and green over here .
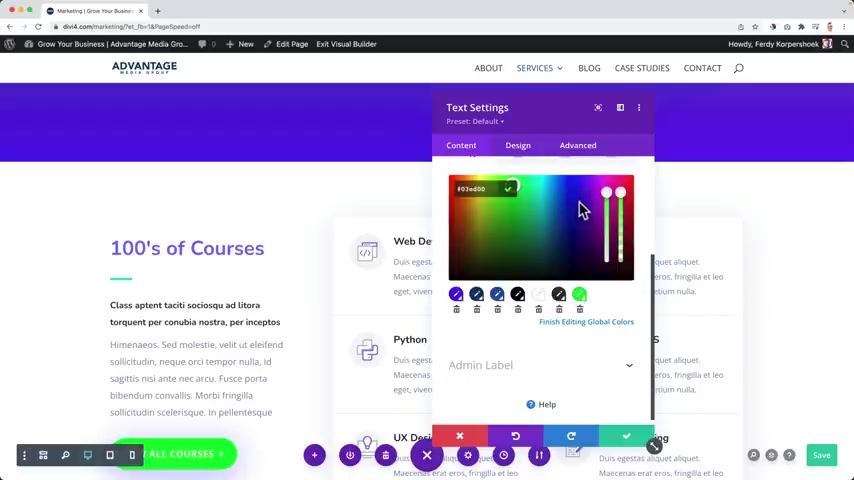
If I go to the global colors , I click on this icon , look at this .
Now I can grab this icon with this color .
If I would change it to purple , I finish it .
What you see now is that this color has been changed , but also this color over here .
So now if I go to this button which uses the global color and I go to the design button over here , the the background color , it is this global color .
As you see on this , I can .
If I click over here and I change it , look at that , you see it's also changing over there .
So if I make this red and I check everything and I save it .
If I scroll up , it's also red over here .
Some , somehow it does not appear yet .
It seems to be a glitch .
I exit the visual builder and now it's red .
So there's a glitch .
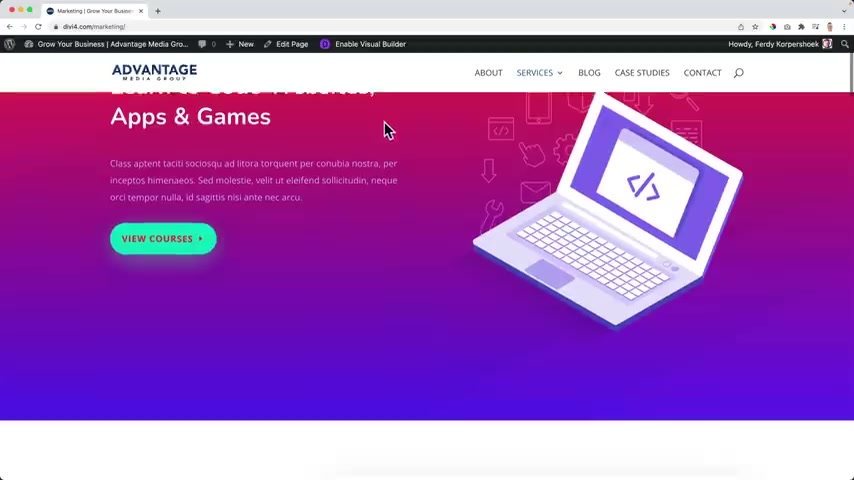
But what I want to tell you , it would be great if there was no glitch , then it means that when you save this , change this red color and you applied it to multiple places on the website , you can save yourself so much time , you can change the whole look a few with just a few but just a few clicks .
So let me show you other ways on how we can speed up this process of adjusting the style of the website .
So let me enable a visible builder start over again by removing the website .
And the more you play around to this , the , the easier it becomes to get used to how everything works .
So right now , I know really easily I can use this layout like that .
The more I play around with it , the better it becomes to navigate through the website and adjust the website to your wishes .
I want to change this page into the colors and style of our website .
So I click over here and this is an image .
So maybe you think OK , I should say this to Photoshop and then change it .
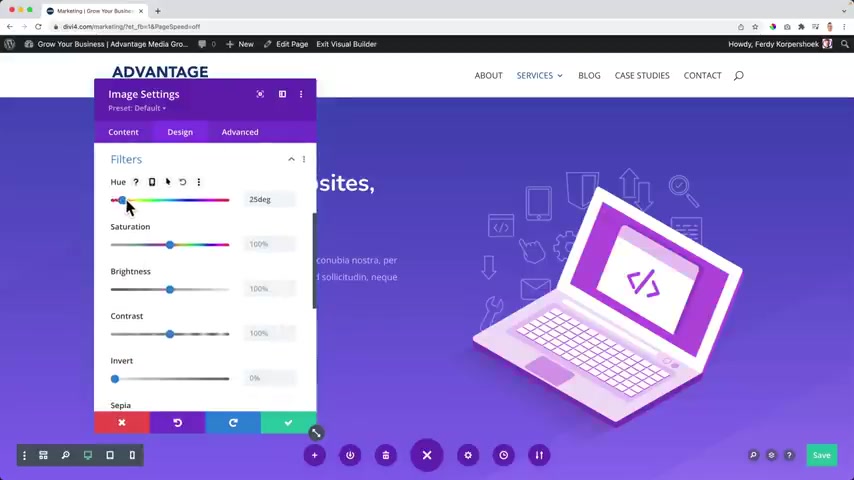
But Hey , if you go to design and you go to filters , look at this with you , you can change the colors .
So maybe I want to make it dark blue right now .
It's purple .
I want to make it blue .
OK ?
You can increase the saturation and decrease it , make it brighter , make it darker , even increase the contrast or bring it back .
If you don't like it , give inverted and then play around with a U .
There's quite a lot you can do .
So let's let's use a different color for now .
I just want to illustrate what is possible .
So I use this color purple .
OK ?
I like it .
So what I can say right now , I just click , copy the module steals and then I scroll down .

And here I also see an image , right mouse click based in the module cells and there it is in new colors based the module cells .
Bye based module cells based the module cells .
Perfect .
What else can we do ?
You see a button over here ?
I want to change the colors design or is there also a button over here ?
Yes , let's grab this one design .
And then I go to the button .
I changed the button text color to it's it's uh OK .
I go to this global backgrounds and I use this one the same I do with global the the border .
OK .
Right mouse click .
Oh There's also uh you see a shadow .
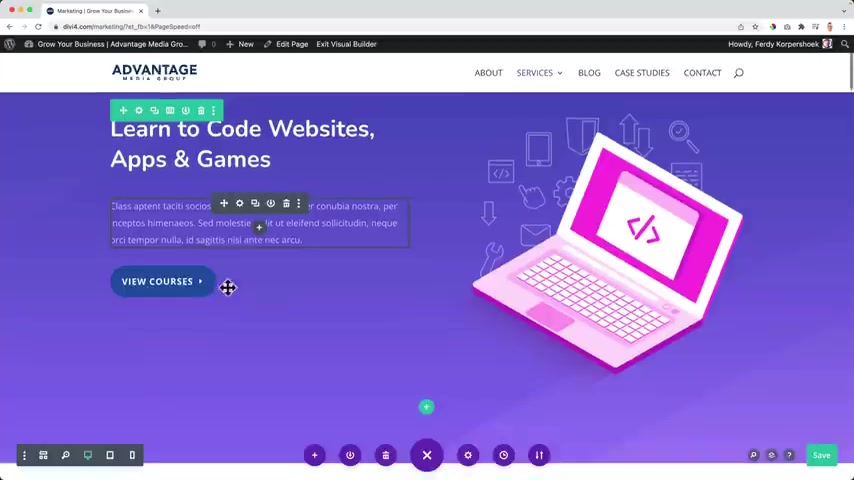
So I go to design box shadow .
No .
So right mouse click copy of module cells , I mouse click based module cells .
There it goes but there are more buttons here and here and here .
What I can do now I showed you before but let's do it again .
Right mouse click extend the button styles throughout this page throughout the section , this row , this column or I want to do it in the whole page .
So all the styles is blue background and stuff , no shadow that will be extended .
So let's go to a different button .
This one if I extend it , look at this .
Wow , look at that .
I like it .
And also here everything has changed .
I save it .
I like it over here .
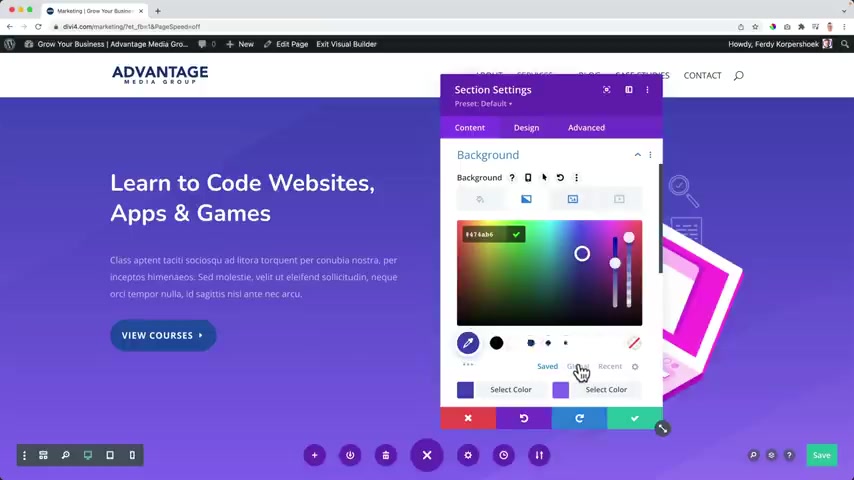
Backgrounds , gradients first color , the global color .
It's one , the second one is global color .
Then I want to change the ingredients to 90 .
OK ?
And then over here , right ?
Mouse click , copy the section styles or if I want to narrow it down backgrounds , copy the backgrounds .
So I only uh copy the backgrounds and then over here , right ?
Mouse click based the backgrounds .
Oh man .
Oh man .
Right past click base the background over here .
If I want to .
Hey , why not ?
It's my website over here .
I can make this sorry .
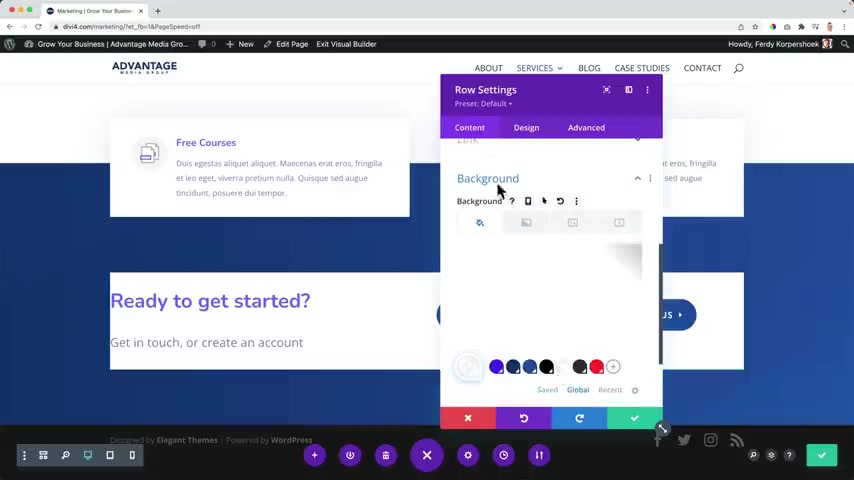
Um Like this white or a global I can go to design spacing .
Betting 20 20 .
That's the way the cookie crumbles .
We can do the same thing with titles change .
The color design heading text or I can click over here and I can change this to the global color , right , right .
Mouse , click extent text styles throughout this page , right , right .
Red , red , of course .
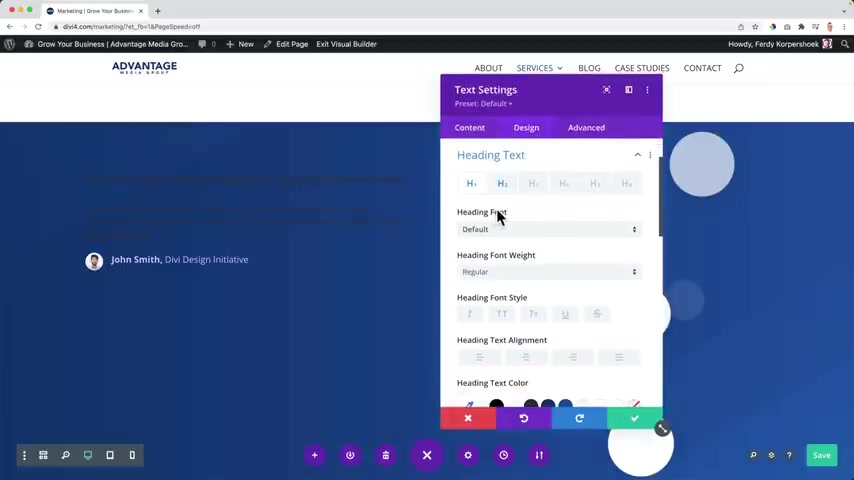
Oh Here and now and then I need to change a few things , modules , design text , make it light here .
It's what I can also do .
I can hold shift .
So I click here , shift , shift , shift , shift , shift , shift .
And then I click over here .
I go to the design settings to the I can and I want to change the I can call and it will be is everywhere .
Also , I want to go to the text since I feel like it and I totally do not care about styling anymore and bring it to the center .
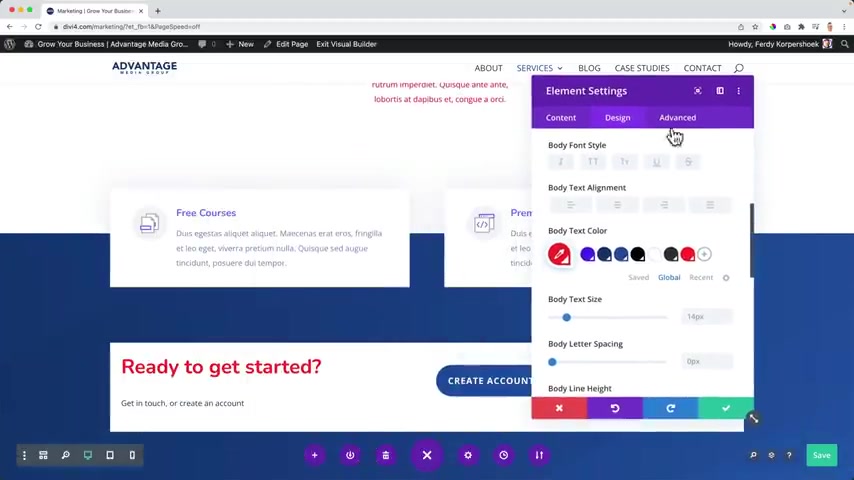
I go to the body text and since I don't care , I just make it red because it feels good .
I don't want to have any new clients .
So I'll definitely put this into my portfolio .
Same over here , shift , shift , click here designed , change it too red .
So we changed quite a few things to red .
Let me save it .
So we changed the look a few quite rapidly and then here and then when you do a just some colors and it will save you a lot of time .
It's my .
So those are a few tricks in order to adjust the style of your website quite easily and fast .
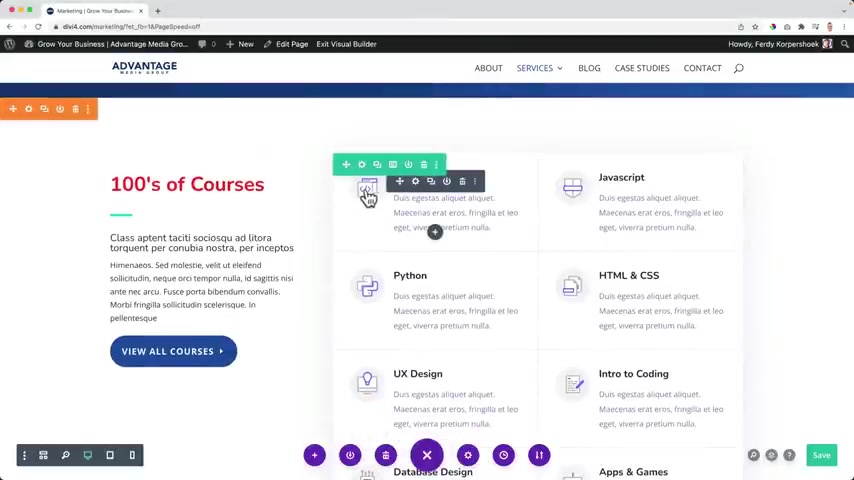
Another thing we can do over here .
I see this text in this color .
I click over here .
I go to the design area or I click over here .
So I see uh this area .
I see that the color of this text , it's uh this color , what I can do , right ?
Mouse click , find and replace .
So I want to find all those colors in the entire page or in the section or in all modules , let's say uh just wait in a section .
I want to change it to make a clear color .
So um no , definitely that they changed as there is one .
And if I click on replace everything over here should become green .
All those text areas .
Wow .
OK .
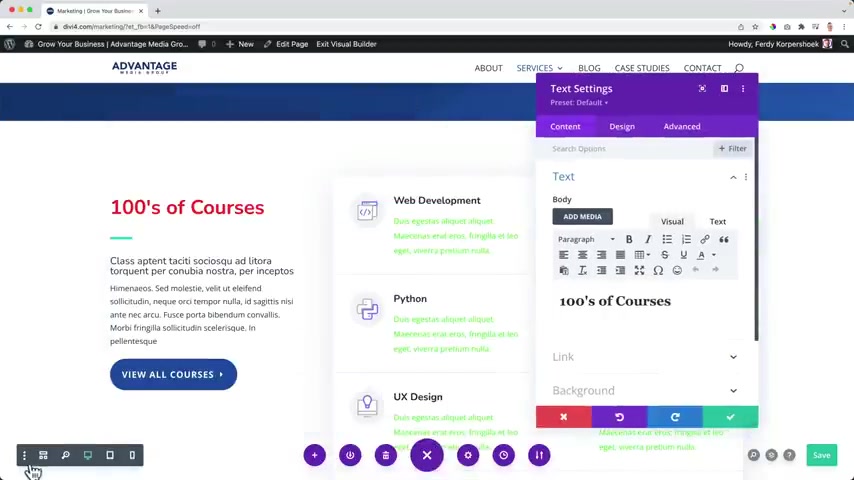
What else over here is red color , which we have a lot in the website and you see red , red , I can click over here , this color , right ?
Mouse , click find every place with this color replace .
And I was changed over here over here over here and there you go .
So some nice ways to adjust your website .
One more thing over here , I can go to the backgrounds and I can have a gradient .
I can have an image but I can also have a video in the background .
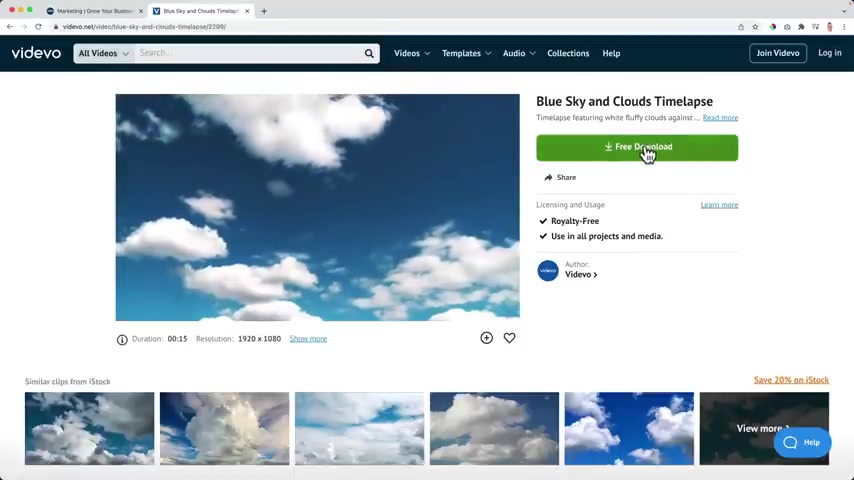
So if I go to vdfo dot com , I can go for this over here or this artist .
So let's do that free downloads .
I do not use videos in the background that I just want to show you , it is possible .
Click on the plus , drag it over here , upload it and there it goes but it overrides all the other ways of having a background .
So what I should do over here in my opinion , uh go to the background , make it black and click over here , make it a bit gradient uh transparent .
And I go to design spacing , check this , check this and say 50 50 .
Otherwise you don't see the text that well .
Um I don't like it , but if you be creative with this , you can make something nice out of it , man man mani mani safe closes .
So let's go back to the home page .
It is time to create a Fooder and again , it is joy time .
You can create a Fooder yourself in a separate tutorial because this will take 30 minutes or you can uh import it .
I will show you how to do how to do that or um yeah , there's only two options you have .
Yes or you can follow along with a separate store .
You can find it in the description or you can import it and adjust to your wishes and save yourself a lot of time or there's even a third option .
It's not creating the video .
It is to import a premade layout from the DV library and then um use that one and adjust that one to your wishes .
OK ?
It's up to you .
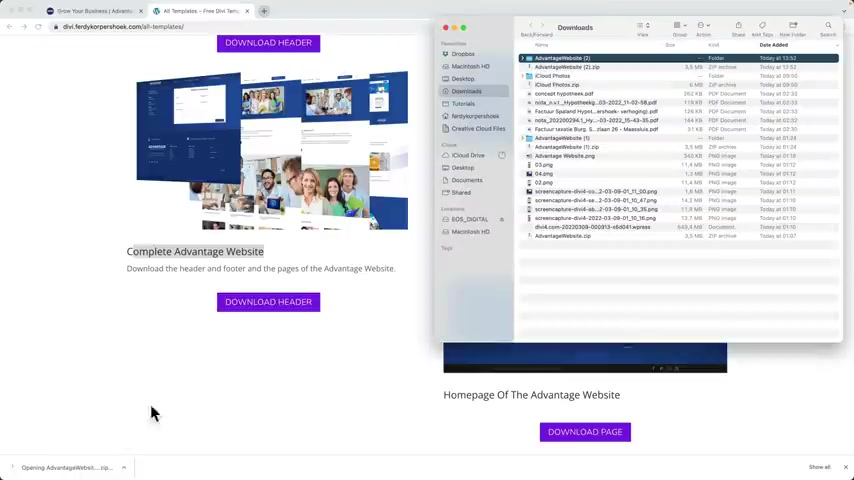
Let's continue if you want to import the heather that I have created for you or the footer or one of the pages or all the pages , then you can go to 0.30 or dot com .
Hit , enter , you leave your first name and your email address , then you go to your email account and there I see the confirmation link and then you can download the header , you can download the home page or you can download the complete website .
So I suggest you get this one , you download it , you unzip it .
And then with those Json files , you can import everything .
And if you want to learn how you can see that in the end of this video , I'll show you how to import every single step of this tutorial .
You can find it in the time stamps .
OK ?
And , and throughout the website , I can , I can adjust a lot of things .
Of course .
So if I scroll down , I think , hey , I want to head out to be a bit smaller so I can enable the visual builder .
I wonder if I can add the other .
Yes , by clicking here .
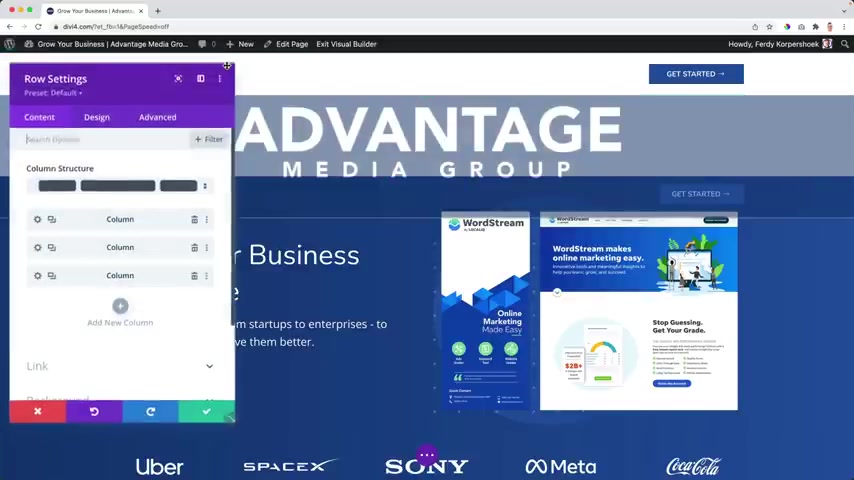
Great .
This looks weird .
No problem .
I want to go to this area and then a design spacing .
When I go to the sticky state , I want to say 10 pixels .
So here's 20 here .
It's 10 .
Awesome .
Save it .
Exit the visual builder .
And now when I scroll down , it becomes a bit smaller .
And then that way we can keep on changing everything .
Great .
So as I said , I will import this page and import this one .
I will show you at the end of the tutorial how to do that .
Let's go to the blog page .
Not everybody wants to create a block in their website .
And that is why again , I created a separate tutorial .
And I , I really hope uh sincerely that you don't this like this because um if I would put everything into one tutorial , it will be a tutorial that will be between six and seven hours and not everybody wants to have a blog post .
So people can be scared when they see a seven hour tutorial .
And I was , I like , I think around three hours .
So that's more appealing .
And that way you can still watch all the information , not be scared away and decide what you want to add to your website .
So if you want to have a blog through your website , you can follow the tutorial that is linked in the description .
Why would you want to have a blog post or blog on your website ?
It will help you to be found uh in organic results .
So if you write about the things you promote , so you promote making a website , you write blog posts about how to make websites , how to speed up your website , you can be found .
And when those people find you , they can think , hey , the quality is great .
I want to do business with the person because I don't want to do it myself .
I want him to help me .
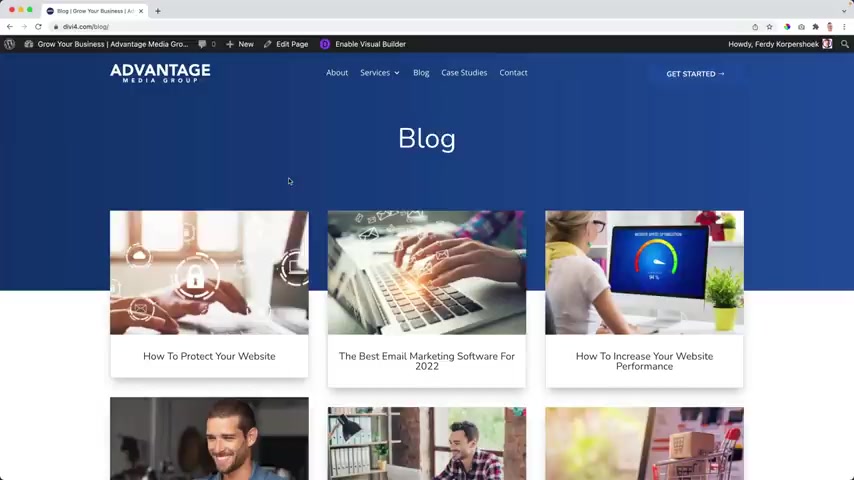
So it's a great way to go to get organic visitors and it's a great way to get more business .
So I highly suggest you do it .
And if you don't want to do that , you can follow along and if you want to do it , you can follow the tutorial in the description having said that let's continue .
If you want to see the end result , I will show you right now .
This is how they look , I scroll down logo changes .
And if I go to a particular or certain block post , it will look like this .
I will show you how to create this using a template .
It's quite basic .
But in the tutorial , I will dive deeper , show you more widgets here at the site and they are sticking with you .
I will show you how to create a block post .
You can follow the tutorial by going to F Corp dot com tutorials Diy .
When you scroll down , you'll find a tutorial about that .
This one that probably with a new design because I will make a new better tutorial about it .
The same goes for the portfolio , not everybody wants to have a portfolio .

I think having a portfolio is a great thing because then you can showcase to your clients or to your visitors what you have created so far and you can show it to the visitors .
That's what I already said .
And then they can see it and based on that they probably want to do business with you .
As I said , I have a separate tutorial about it .
You can find it in the description of the video .
If you want to find that I should have left the page open Freddie go dot com .
Tutorials Diy , scroll down , create a portfolio .
It's the old version or the , the recent one and then I'll create a new one .
And if you follow the tutorial , you'll get something like this .
Look like the block page , same style .
And when I would go to one of those portfolio items or case study items or however you want to call them , you go to their individual page and again , you can place things over here , go to the last project or a new project or this lays one .
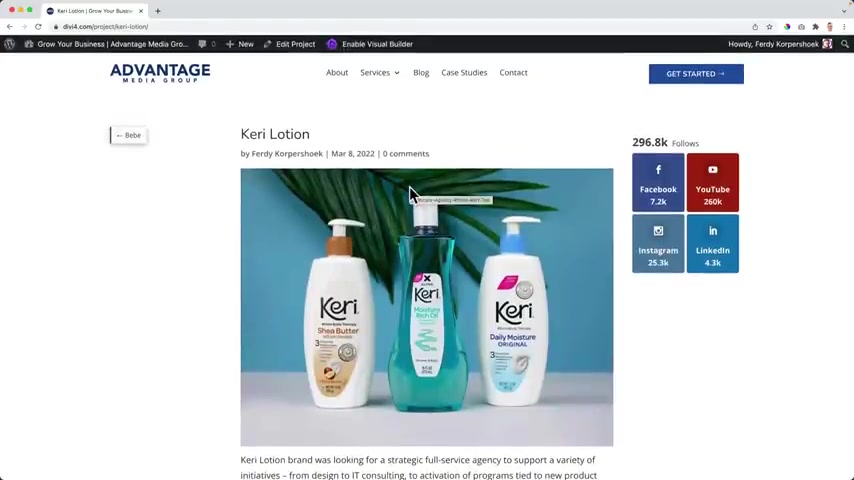
So you don't see it over here and it sticks with us .
There's some text , some images and then that way I can showcase what I have created for one of my clients .
So what else do I want to show you ?
Let's go to the home page .
What I want to show you now is how you can make use of global items .
I use global items all the time .
They are a great way to , to speed up your editing process .
And um I love , I love global items and you will love it to when you watch the next part of this tutorial .
So let's continue .
Yes , let's continue .
Ok , let's talk about two things at the same time about creating the emo opt in and creating a global item .
A global item is an item or a module or a section you can use on multiple places within the website .
And when you change that particular module or section , it will be changed on all the places where you use it in your website .
So I enable a visual builder .
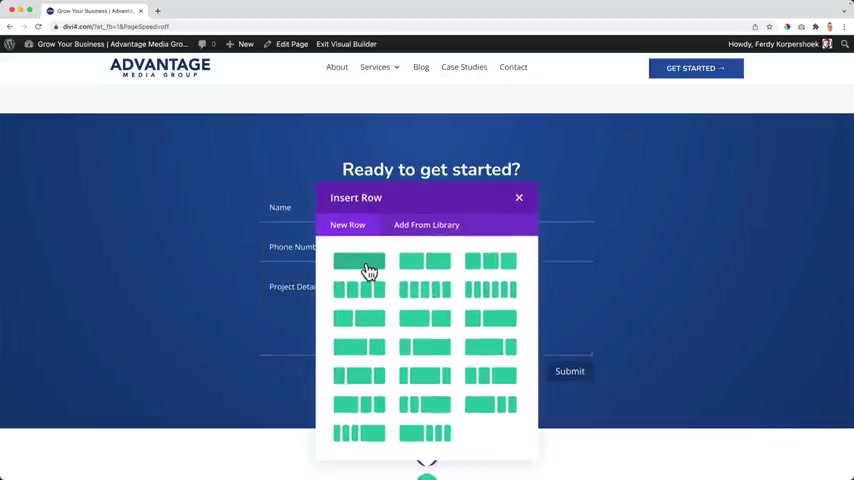
I scroll down all the way over here .
I click on the blue plus , I have a regular area with one column and I search for email in there .
It is by default .
OK ?
I check it .
I save it and it looks nice .
Let me configure it really quick to the email account and I use converse kit .
It's already linked .
That's nice .
And I selected the bind form and then I go to fields and I use the name and email .
That's perfect .
So if I would save it , everything seems to be fine .
And if I want to use this on a different page , I can copy and paste it .
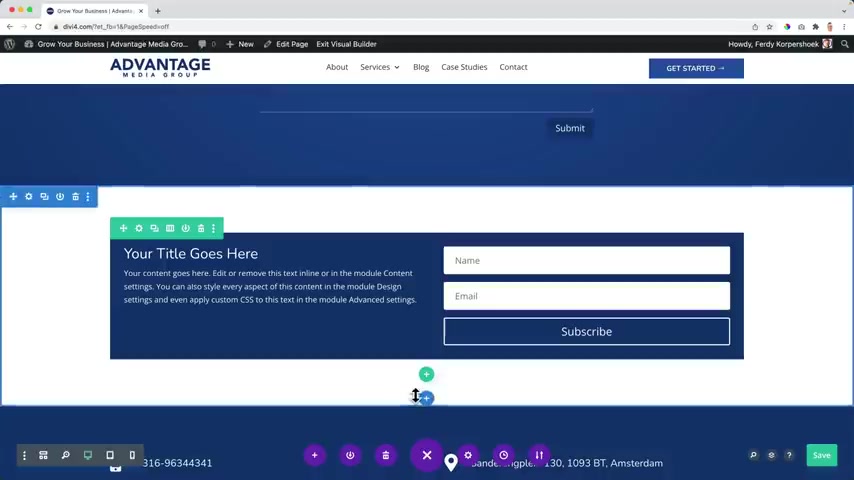
But what I also can do over here when I hover over it , I can click on this icon and now I can save this module and I save it as an email often for the news leather and I make this a global item .
It's really important that you do this and I call this one email updates so you can have multiple categories but our global items .
So I save it to the library , then I save the page .
And now if I would exit the visual builder and I go to the contact page with a different header which I really like I can enable the visual builder .
Let me do something crazy .
Let me place the global item over here below .
I click on the plus .
I click on add from a library and there it is the email of the newsletter and it's green because it's a global item .
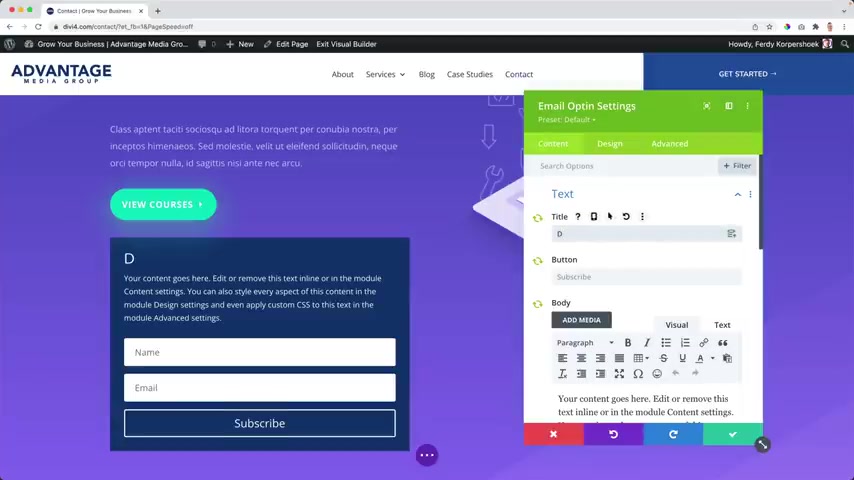
And here it is now if I change this , I click over here and I say so , subscribe to our newsletter .
I can change the decks over here , get updates when we post new content about digital marketing and growing your business .
OK ?
Hey , you know what else go to design to the button ?
And I use a different style .
Let me make this background a little bit lighter .
OK ?
Look at this .
This is how it looks now .
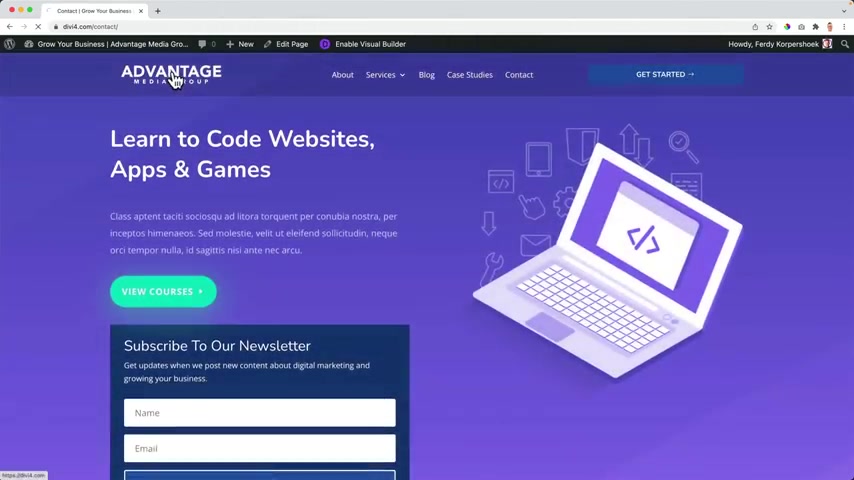
But if I go and exit the visual builder , save an exit and I go to the home page , I scroll down , subscribe to our newsletter , get updates and the new button .
So one more time I enable the visual builder , I click over here .
It's green because it's a global item .
I go to the backgrounds .
I changed it to a gradient with this color and this time , no , let's do something weird .
So we definitely will see that it is changing .
I save it .
I exit the Visual Builder .
Go to the contact page now .
You see those same colors over here .
This is amazing .
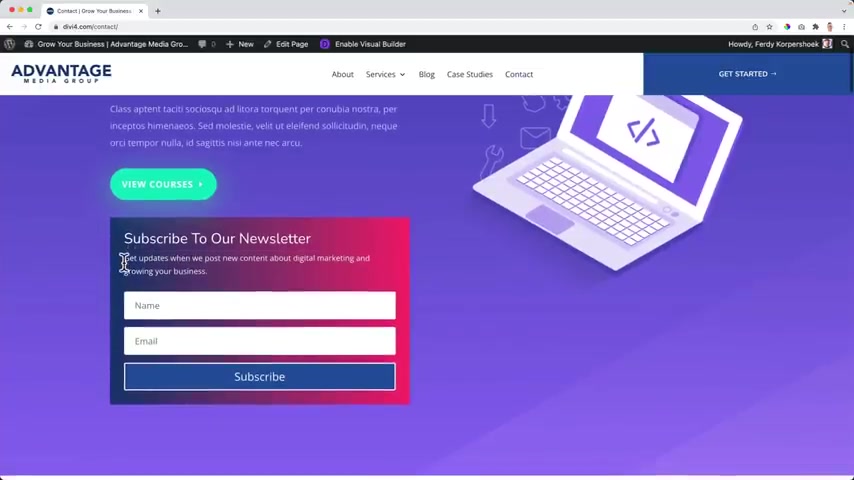
This is what I love about the you can use this for websites of clients and when they say , hey , I decided to change the text over here , can do it on all place in the website .
You have a global item , you change it on one place and it will be changed everywhere , don't you like it ?
Well , I do now what I want to do , I want to give you a complete website .
We spend a lot of time on the home page .
And since you have created a home page , if you followed that part of the tutorial , you should be able now to create things using the Divi Builder .
If you have not learned enough yet , let me know , then I will create a more in depth tutorial about the Divi Builder .
And um maybe I can make a tutorial about all the different modules and what you can do with it if you want it .
Let me know in the comments .
I think that would be a nice video to make , just go through all the modules and show you what is possible .

Um Yeah , I want to show you , give you all the uh things for free and I will show you how you can get those .
We talked about this before .
But let me show you the power of templates within the DV theme .
This website has a header .
I created this with ad V theme .
This page is created with ad V theme .
The footer is created with ad V theme .
The above page is created with ad V theme and all those areas can be saved as a template .
So I enable the visual builder .
I click over here and now I can export this .
So what I've done , I've showed you before .
But now I will , I created this website .
It's completely empty .
Uh That's only pages but it has no templates .
It only has his logo .
How can I make this website look like this one in a short amount of time ?
Well , go to Divi 0.30 or that's come , you can leave your first name and your email address and then you get the templates .
If you uh confirm the link , get in your email , you sign up over here , then go to this page , then scroll down and over here .
You see the complete Advantage website .
I just created something really quick and after effects , uh you can download the header , you download a zip bell .
I click on it and there are the Jason Fells .
So now I go to my empty website , I go to the back end , I go to divi the the builder .
Now I want to click over here I go to the import area .
I want to choose a file is the Heather and footer which is a template , import the TV builder template that goes to will be applied to all the pages .
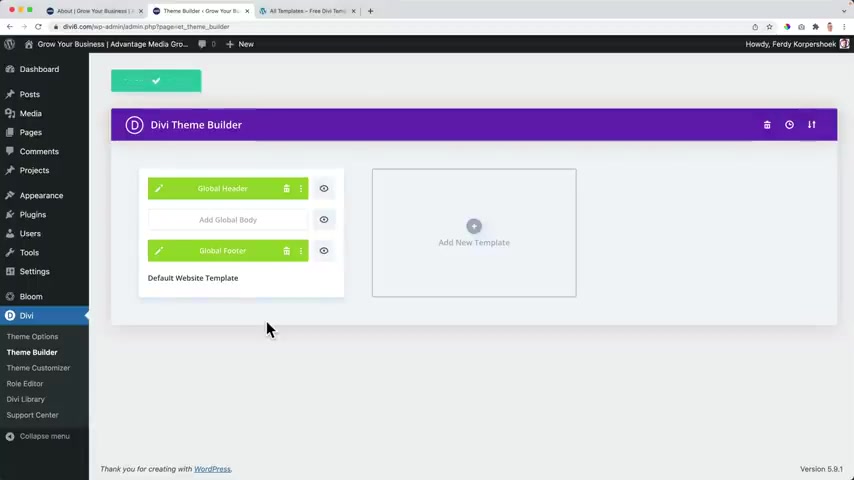
I say command s and do not only say it , I also type it on my keyboard .
I save all the changes over here just because we can then I go to the home page enable the visual builder .
So it's working but I don't see the page .
So we have the Heather and the footer on every page .
So we also have at the contact page footer to heather .
Let me go back to the home page .
Enable a viso builder .
I want to build it from scratch .
Close this click over here , click on this logo or this icon .
I click on imports .
I select the fell .
I use the advantage home which I just downloaded optimize for all devices .
I click on import the DV builder layout .
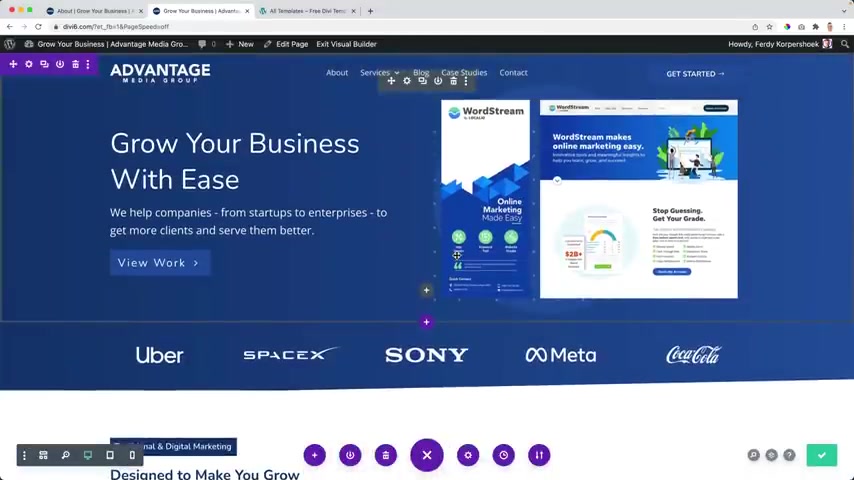
You got this from me uh by uh by giving me your email address , but you can also sell this so you can create something great .
You can become better in creating websites .
Look at this .
It's all there except for the images for the latest posts .
Let me save it .
Come on S I exit the visual builder .
I go to the page enable the visual builder built from scratch .
The same thing this time the about page exit the visual builder .
Next page .
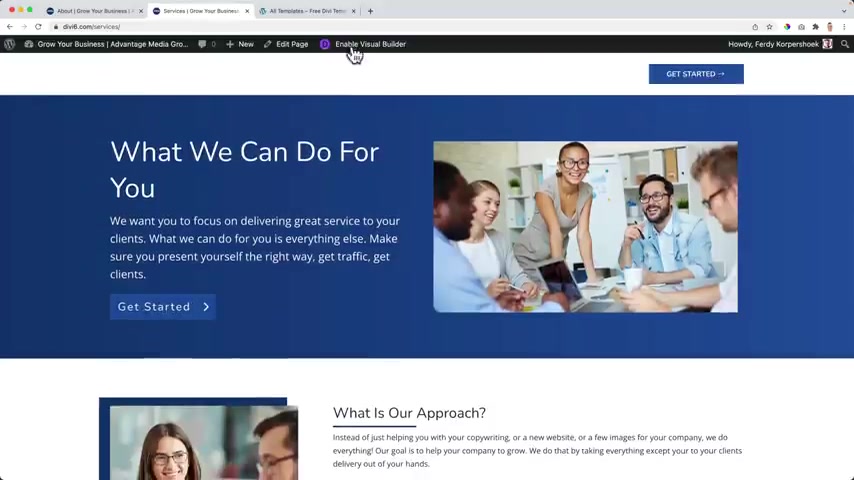
Services enable the visual builder do the same thing .
Import the services page , save it .
We can go to the contact page .
Sorry .
First , we need to exit the visual builder .
Scroll down , contact enable a visual builder star building and then their contact page .
And that's the way the cookie crumbles .
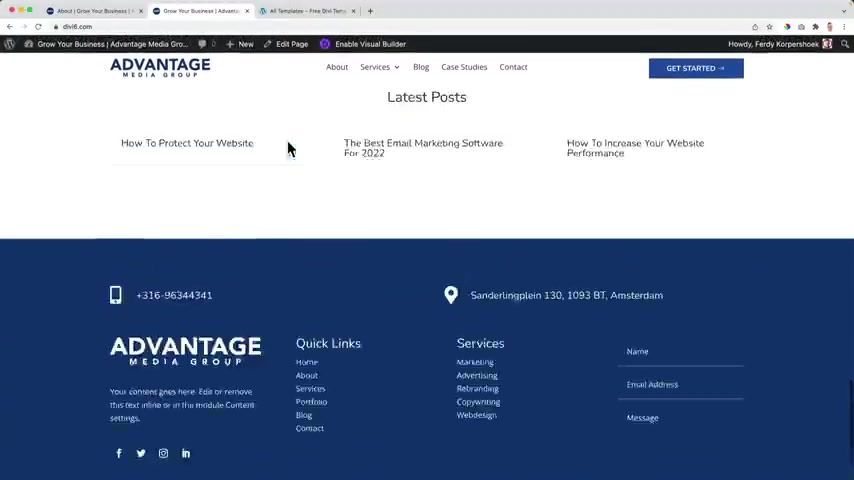
I accept the visual builder .
I go to the home page and in a few minutes , we imported this complete website .
Keep in mind I cannot give you all the images because they are copyright protected protected , but you can replace those with your own images .
Uh I like to use I stack photo .
It's really worth it .
You get really high quality images and that's really important for people to see on your website because if you go to apple dot com , I have a simple question for you .
Does it look great or does it look a little bit low quality ?
It looks great .
This image , everything looks great .
You , you do you see how many images are used in this website ?
They better are high quality .
Otherwise your website stinks .
Sorry to say it like that .
Really good important image , good , good images are really important .
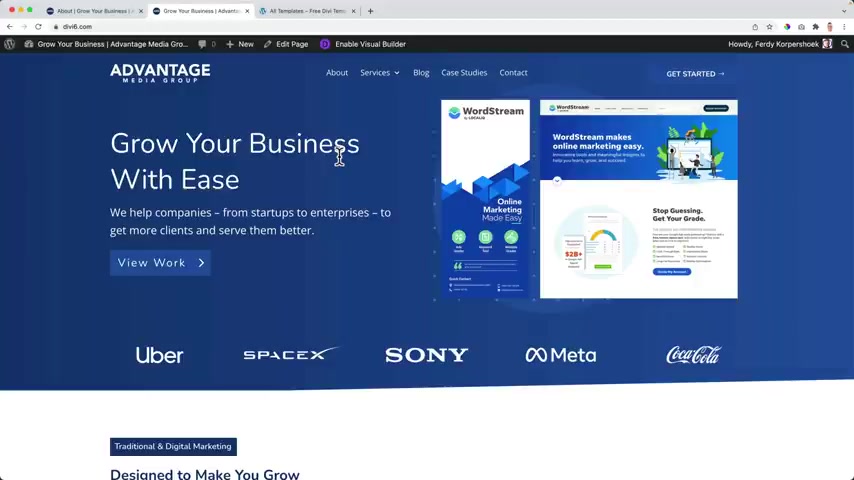
So that is how we can import a complete website in a few minutes .
OK .
People , we're getting to the end of the tutorial .
I hope I don't have to feel bad for all the the external tutorials .
I'm just figuring out what's the best way to put everything together .
What I've created for you is a list um with the tutorials , I suggest you watch in order to make your up be found , get more traffic .
So let me show you right now .
So let's start with the package we have um over here .
If you go to elegant themes , you see diff you , you bought it so you can use it , but you can have so much more .
If you take a look at all the products , when you get the diy theme , you also get the extra magazine theme .
It's for a separate website .
If you want to create a news website , it's a great way to go .
If you search for extra the tutorial 2022 you'll find me mine over here a month old and a three hour long tutorial on how to create a beautiful news website .
And that's one of the best themes that comes with the elegant theme package .
Then there's the bloom email and plug in a great way to collect email addresses from people on your website and then you can send them emails .
Uh It's not uh an email marketing tool .
It will link .
It's the bridge between your website between an email marketing tool .
So there's , there are two tutorials .
I suggest the first one is my bloom tutorial 30 .
Otherwise you cannot find it properly .
I will make a new one .
It's 40 minutes and I will show you I can get updates unlock content and that's also a great way .
So you can have uh if I go to my website 30 .
No , no , no , no , no V four .
That's one of the great ways I like things I like about uh the bloom plug in .
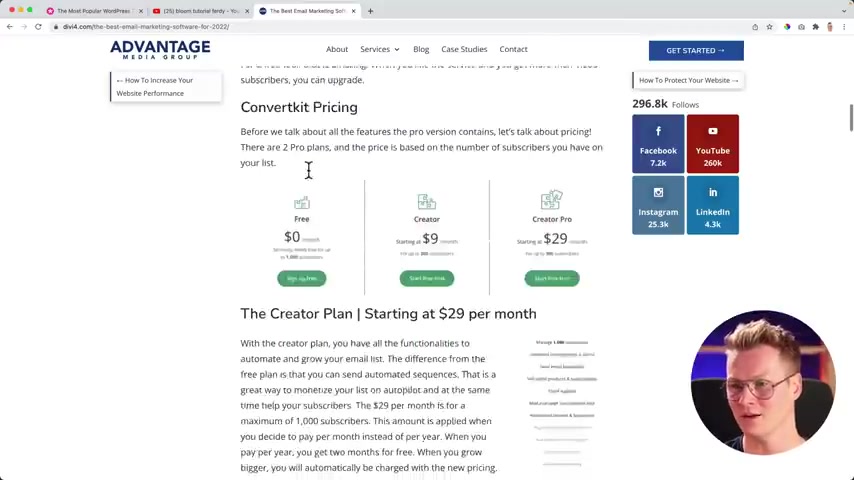
Uh Let me go to the email marketing tool .
What I can do , I can place a link over here that says if you want to follow this content , if you want to read the rest of this , then you need to sign up .
And when people do that , then the rest of the content will appear a great way to get people on your email list .
And then when you create something new , a new blog post or something , you can send an email and this block post is about converse kits .
I use converse kits uh to , to uh to grow my email list .
I have a tutor about that so you can search for convert it tutorial .
It's probably not in the newest or the number one yet .
It's number two right now , converted tutorial 2022 2.5 hours where I show you step by step how you can build your email list .
And for me , that was a way to make a lot of money .
And at the same time , help a lot of people on automatic pilot .
Right now , I can send an email to 50,000 people all at once and I can and name them by the first name .
And it's a great way to grow your business .
Whatever you do , you can grow your email list .

And they say the money is in the list and I always say serving people is in the list .
You know , it's not about making money , it's about helping people .
Wow , maybe it's a bit of a bit of both .
So the bloom , there we go to Monarch .
Uh It helps you to , to , it helps you to let people share things on your website .
So share blog post uh follow you .
But also uh let people show how many followers you have on automatic pilot .
So 7.2 Facebook followers , 260,000 subscribers , Instagram linkedin or on automatic pilot .
And I have to do about that monarch again .
And as far as I know , I'm the only one that goes into the part of um uh showing you how to link everything with API keys .
It's a little bit complicated , but I went all the way with it over here two years old already .
And then um you can learn how to work with that .
What else ?
I have a list over here on my phone , split testing .
You can do split testing within the , within the team .
It's a great way to optimize your conversions if you have two separate uh headers in your video in your website .
So uh let's say heroes , I mean heroes and you change them , they look a few , the colors you can see what is converting the best and it's all about conversion conversion .
You can find that uh if you search for um the V split testing tutorial 30 then there's the theme builder I will make , I have to make it a , a theme tutorial specifically about the theme builder about creating custom headers .
For instance , over here we see this header .
But if I go to the get started page , I have a different header .
If I scroll down , this goes to the left , this goes to the right .
So I can assign specific headers and footers to specific pages .
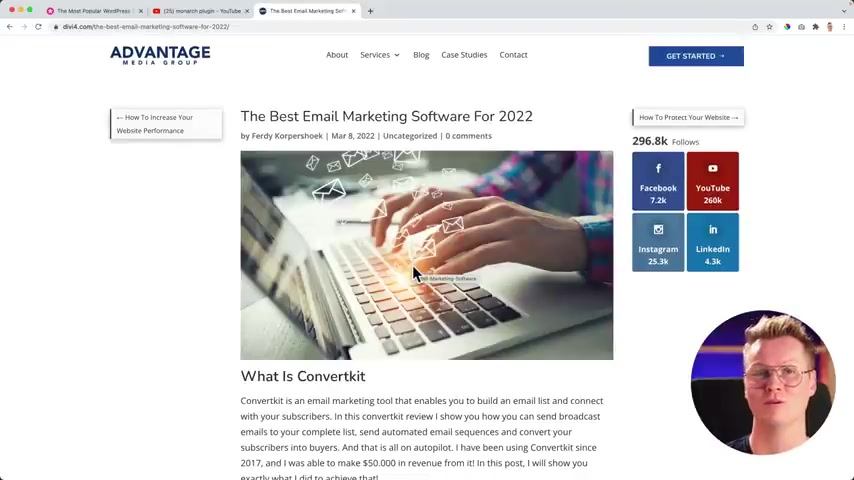
And if I go to the block page , I go to a block post post , I can create a specific template for all the block post , but I can decide to create other templates for other categories .
So in order to find out how everything of that works , um Let me , let , let me log in really quick .
We use the theme builder .
So here at Theme Builder , this can look overwhelming , but I will make a tutor about that and you will have more freedom to create a website you have and then everything can be created using the Diy Builder .
So that's what I really like about the the builder .
So I will create a tutor about that .
What else Google ads do you want to make money using your website ?
Well , then you can uh search for Google its tutorial How about , I , I mean , Google at Sense tutorial .
And then 30 because there will be a lot of tutorials .
56 minutes .
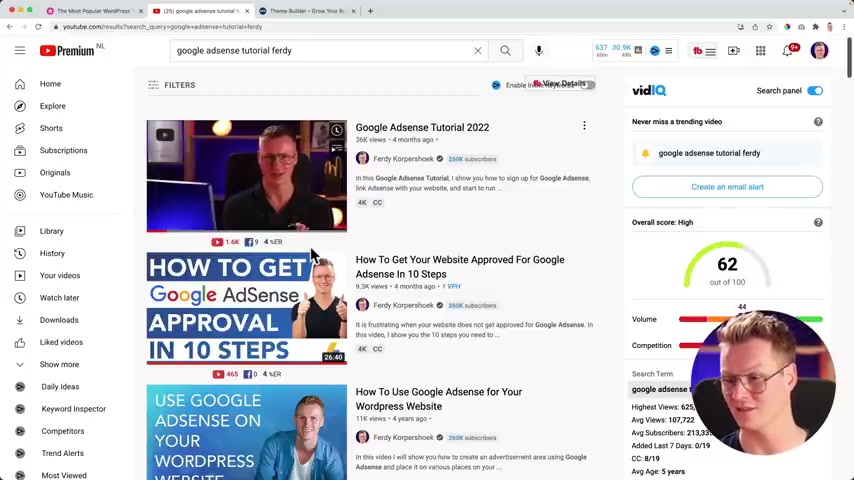
Oh , nice haircut on how to , uh , get your website approved how to make money .
And I started a new website a few months ago from scratch and , um , I made a few $100 already with it without spending a lot of time to make it .
So , that's great .
I think less than 10 hours at four on the hour .
So that's um $40 per hour .
But still I'm making money with it .
And then , yeah , why not ?
I have an , a field marketing tutorial affiliate marketing .
30 I have 26 hour tutorials .
They are separate .
They , they are a little bit the same but mostly separate .
This is complete course on how to start with affiliate marketing with video or website or whatever .
And this is specifically on uh creating a website for a , a , an affiliate marketing website .
Ok .
What else I talked about grammar if you write blog post and you're not from the , from the United States or English is not that good .
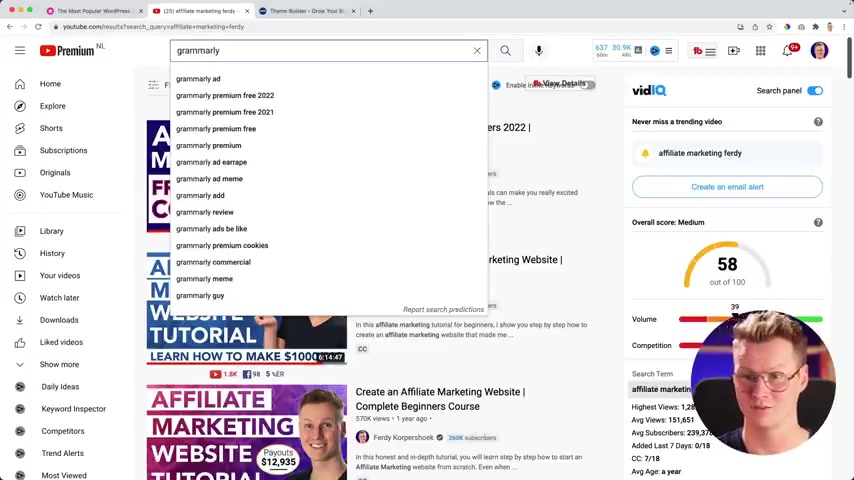
I should talk about grammar that will help you to make her text better .
Grandly tutorial .
30 year old .
No , 30 minutes .
It's doable and rank math .
Really important if you want to rank your website , even though you don't have blog post , rank math tutorial .
Personally , I think it's better than a Yost .
Also a recent tutorial two hours .
So if you want to , you can go and follow all those tutorials .
Spend a lot of time learning how to make your website better .
And if you , if you're missing a video , you're like , hey , I want to learn something else and feel free to let me know .
And one more thing , I also have a tutorial about how to start a youtube channel , uh , and make money with it through affiliate marketing .
I have a course about it at this moment .
It's $997 and I can tell you it's , it's the real deal and by now I hope you trust me here , go to courses .
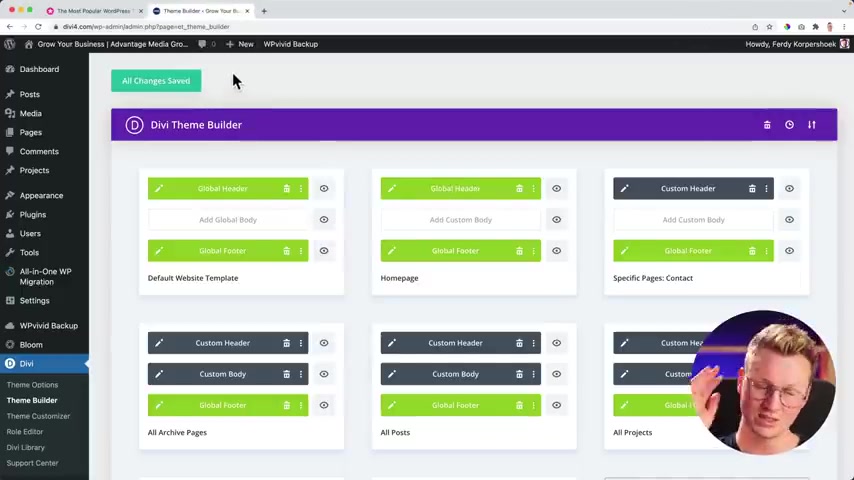
Best of income with 30 or best of income with youtube .
And , um , uh , some people bought the course and they have made $0 with it as one guy that bought the course and he made , uh , more than $1000 in one day .
It's crazy .
Uh , doesn't depend on the course .
Well , the course is good .
The course will help you , but it's up to you if you persevere with it , that's why it's , yeah , it's , it's $1000 a little bit less .
I think it's really cheap , but I just don't know how to sell it .
I'm just throwing it at you .
Uh , the last time somebody bought it was a few months ago .
So I just don't know how to promote it .
So I keep on continuing to make free videos because that's what I like more .
But I just want to tell you that .
So that brings me to the end of this tutorial .
Thank you for watching this story .
If you have any feedback for me on how to , how I did this , please let me know I want to become better at making videos with , with my studio with the lighting .
I know my teeth are a little bit yellow .
So I'm gonna find a way how to make them whiter using a certain light .
I want to improve .
I want to make the best tutorials possible .
And um if you have any feedback about how I present things or uh external tutorials , maybe I should leave them within .
Let me know if you want to please like this video and subscribe for more upcoming tutorials .
And then I hope you will create amazing websites using the DV theme .
And remember when you bought the DV theme , you can use it on unlimited websites as long as you have a subscription .
So if you have a lifetime subscription , you can use it for the rest of your life on unlimited websites with high quality support .
I wish you a great day .
Good luck with everything you do and bye-bye .
Are you looking for a way to reach a wider audience and get more views on your videos?
Our innovative video to text transcribing service can help you do just that.
We provide accurate transcriptions of your videos along with visual content that will help you attract new viewers and keep them engaged. Plus, our data analytics and ad campaign tools can help you monetize your content and maximize your revenue.
Let's partner up and take your video content to the next level!
Contact us today to learn more.