https://www.youtube.com/watch?v=RvehqgXKvmM
How To Make a WordPress Website 2021 _ Divi Theme Tutorial 🔥🔥
Welcome party .
People .
Come on in and take a seat .
My name is Darrell Wilson .
And today I'll be showing you how to make a Wordpress website step by step with the divvy theme .
So we spent weeks making this video .
So complete nudes like yourself can learn how to make professional wordpress websites that look great that are responsive and you don't need to have any experience whatsoever .
Plus you'll learn how to use the theme and all these features , which is currently right now , the most popular wordpress theme in the world .
So today , after watching this video , you'll be able to create your own websites and you'll become a Wordpress Pro .
Trust me , this stuff is so easy and we do not make ugly websites here on the Darrell Wilson channel .
So after watching this video , you'll have a modern professional looking word press website and you'll be so good .
You can even start your own web agency tomorrow .
So go get some snacks , go get a drink , pull up a chair and let's get started today with this word Press tutorial .
So today I'll be showing you step by step on how to build and customize a modern and beautiful word press website .
And the great part about this video is that you don't need to know any sort of coding or any html because we are using a drag and drop builder that makes it super easy to build your new word press website .
And as you can tell this website looks very professional yet simple .
So I'll be showing you how to build and customize every part of the website .
So you can walk away today with a beautiful website that your visitors will love .
Now , you can build any type of website you want with this tutorial , you can build a business website , a blogger website , a portfolio website , a tech website .
You can build any type of website you want in this wordpress tutorial .
I will also be showing you how to make vibrant and beautiful designs with free templates that will stun your visitors and make you and your website look very professional and just to make sure you make great looking websites , I'll be giving you some professional design tips and quizzes to help you with your web design skills .
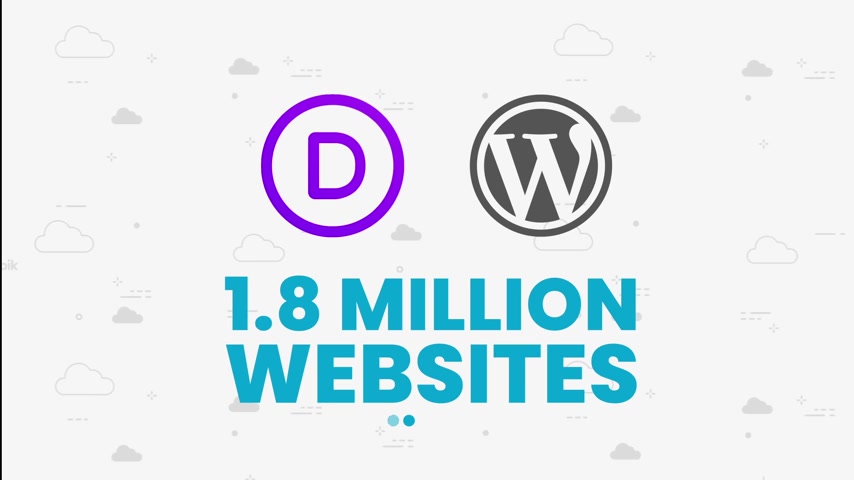
So today in this video , I'll be showing you how to build your new website with wordpress and the Diy theme , Wordpress Powers more than half a billion websites and is by far the most popular platform for making websites .
The Diy theme started back in 2013 as a one man operation and after years of development and hard work .
The diy theme quickly became the most popular wordpress theme in the world employing more than 100 people worldwide .
So as of today DV is the most active wordpress theme that powers more than 1.8 million websites .
It is also used by popular websites like the Kingdom of Thailand , all of the Power Station casinos in Las Vegas , Polytechnic Institute , Penn State University and the State of Georgia .
So you'll be using the most modern and up to date software to build your new word press website .
Now , I gotta be honest , I think the best part about divi is the templates .
You have access to over 1400 templates that include all the images perfectly sized .
And they also include the pages such as the home page , the about us , page , the services pages and also several other pages .
So you will have full access to all these templates for your new website .
OK , party people .
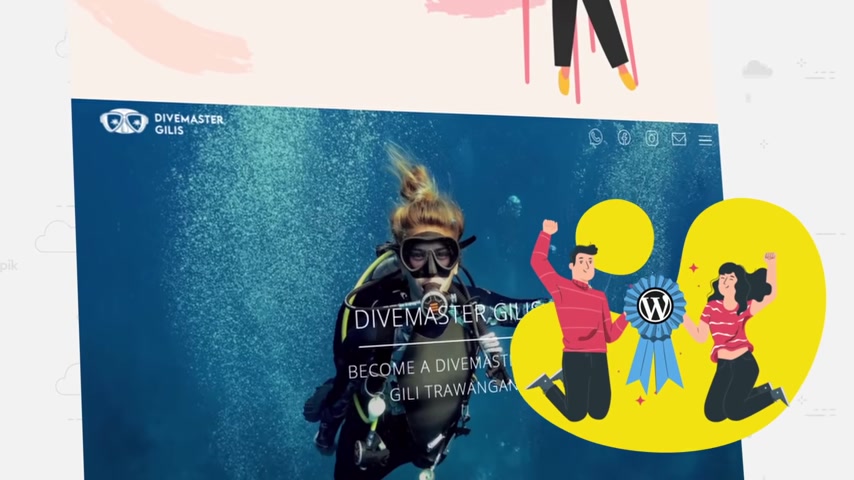
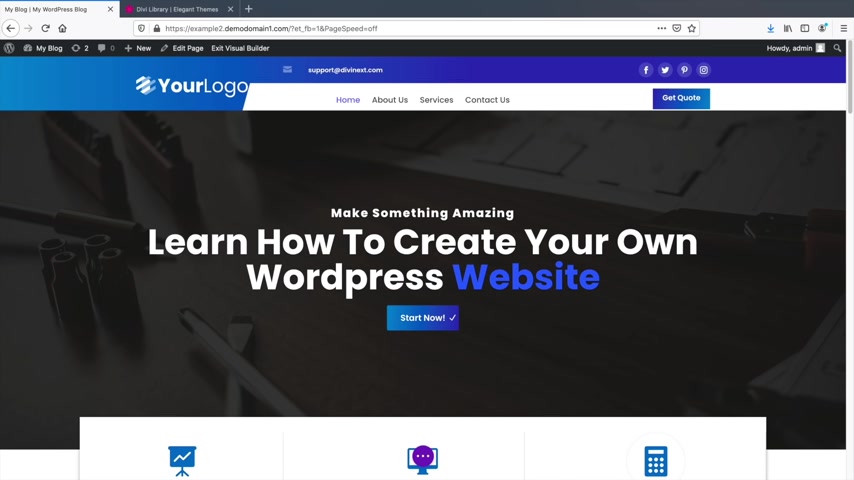
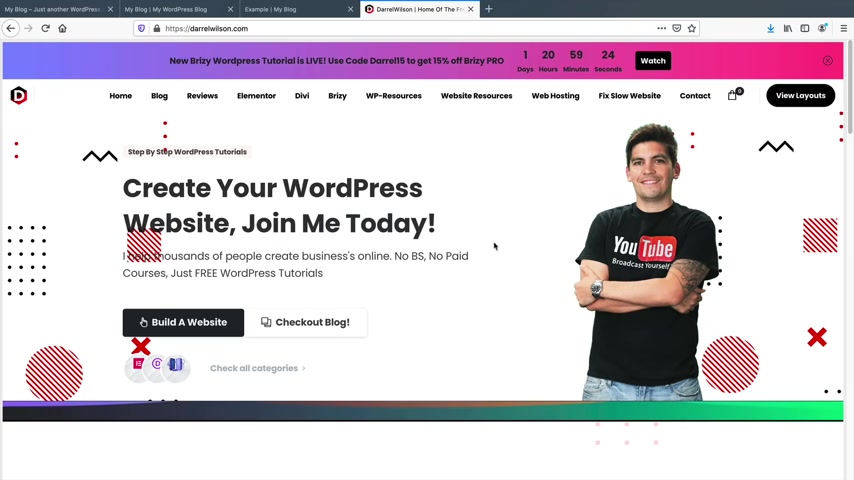
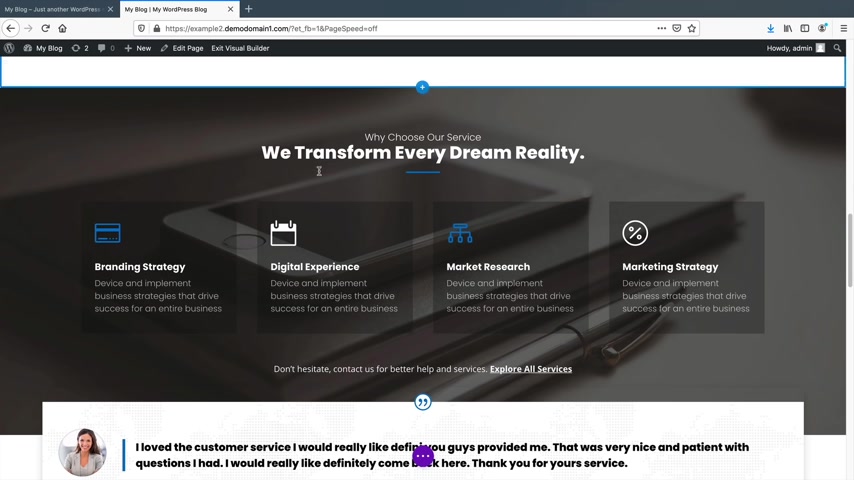
So this is the website that I'll be showing you all how to make today .
Also in this video , I will be giving you all the demo images and the starter templates to help you follow along in this wordpress tutorial .
So let's first take a look at the header .
So on the header , we have these social icons .
So I'll be showing you how to add these and then we have this beautiful grating button that says get quote and course you can change this to any fonts and any color that you want on your new Wordpress websites .
We have this menu right here with all of the pages and you can create as many pages as you want .
We have our logo so you can add your own logo .
Now , if you don't have a logo , don't worry about that because I'll be giving you a really good resource on where you can get a professional logo for your new Wordpress websites .
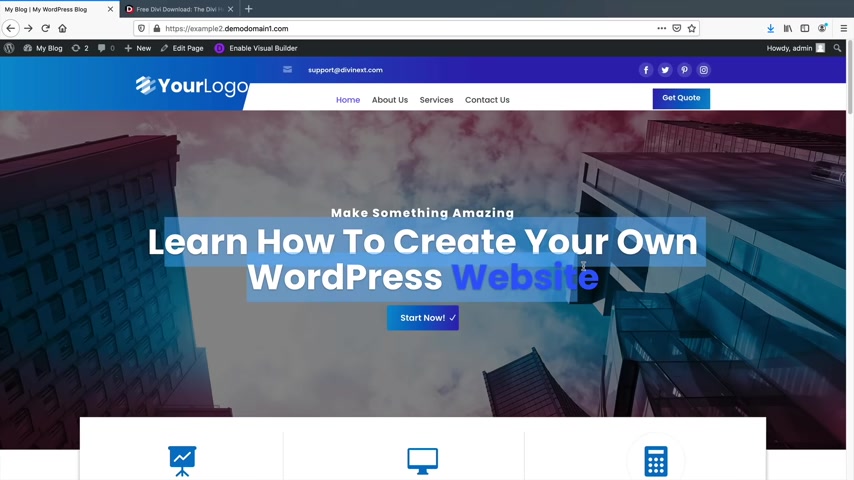
And then we have this landing page and of course , you can change this text to anything that you want .
You can put my amazing business website or you know , my dog grooming business or whatever you want , and you can change the colors and the style of it .
And then we have this beautiful grating button where if someone were to click on it , we can navigate them to other parts of the website .
So let's go ahead and scroll down next .
We have these blurb icons .
So we have just some up sales , you know , just telling people about our website like our uh maybe your services , like your marketing uh website and dog grooming .
That's an awkward combination .
But you get the idea .
So you can just add general services uh that you offer on your website and then scrolling down here .
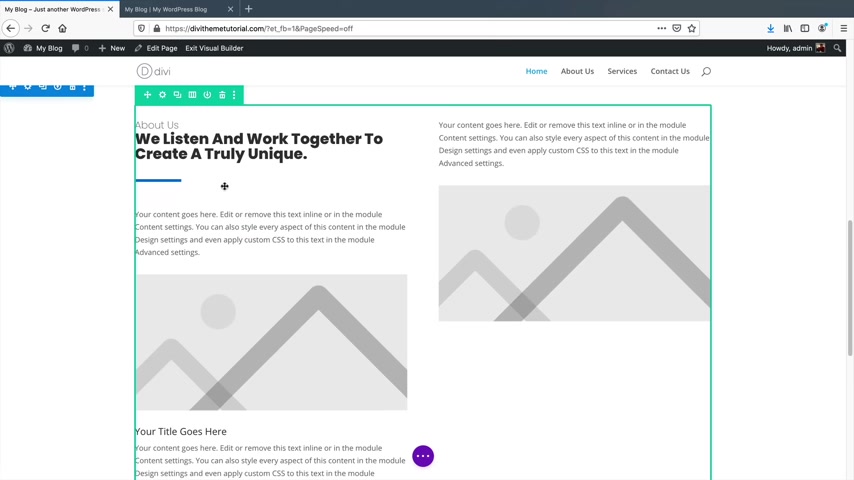
We have just some text and we have some other icons on the left side .
We have this image that just kind of helps add some images and style on the website .
And then we have this beautiful gradient text which will show you all how to incorporate gradient text on your website to make it look really vibrant and really amazing .
Let's go ahead and keep scrolling down here .
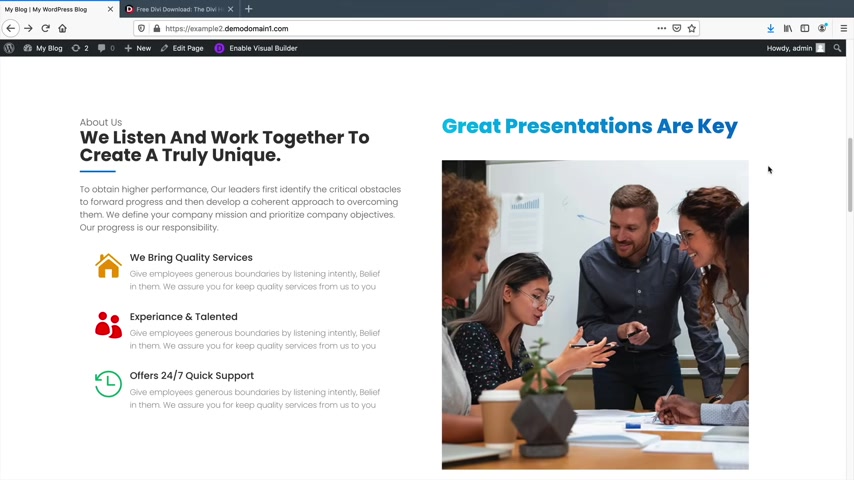
And then we have this other section .
So this is like a a stylist transparent section where we have this text and then we offer our services and what we do and we just gave it some style decor to take away from all of that white .
So I always showing you all how to kind of add design and dec core to your website to make it look really attractive .
And then scrolling down here .
I'll be showing you how to incorporate testimonials .
If you have a bunch of people that think your website is amazing or your service is amazing .
We can add those testimonials to your new word press website .
I'll be showing you how to add really nice testimonials to your websites and then scrolling down here .
We just have some other things that you might want to offer .

Like , you know , go here , check out that or maybe awards or prizes and of course , you can change this to anything and this can be awards , this can be something else .
And then we have this gradient button and we can link them to any part of the websites and then scrolling down here .
We have another call to action and this just looks really nice , you know , we have this mountain background to kind of take away from that business corporate look .
And then we have this button which again , we can link them to another website or your , you know , your linkedin page or whatever you want .
And then we have the number and then you can also add your email and then we have some companies that we work with .
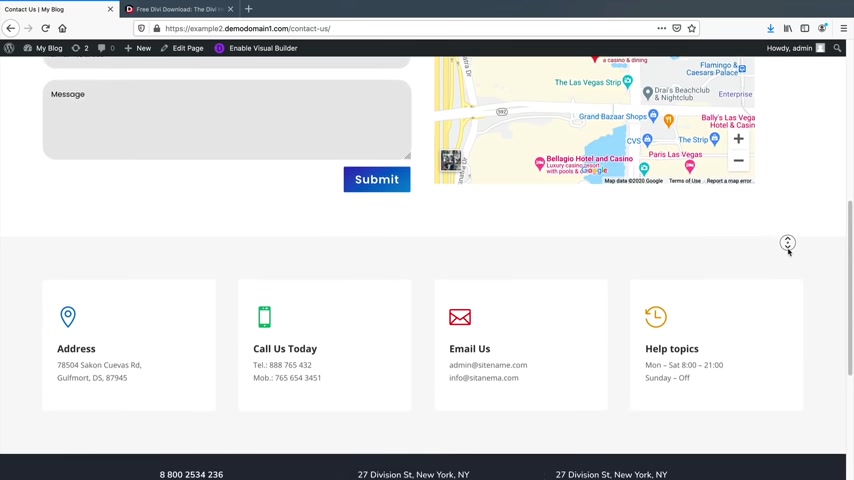
And then at the bottom , we have this really nice footer where we can talk about where you're located at , we can talk about your , your hours of operation .
So I have Monday through Friday 8 a.m. to 5 p.m. and then weekends and then just some other services and sections that we can add for your new wordpress website .
So it's a beautiful website .
I think your visitors are really gonna like this website .
So it doesn't really matter what kind of niche you're in , it'll basically work for everybody once you change the images .
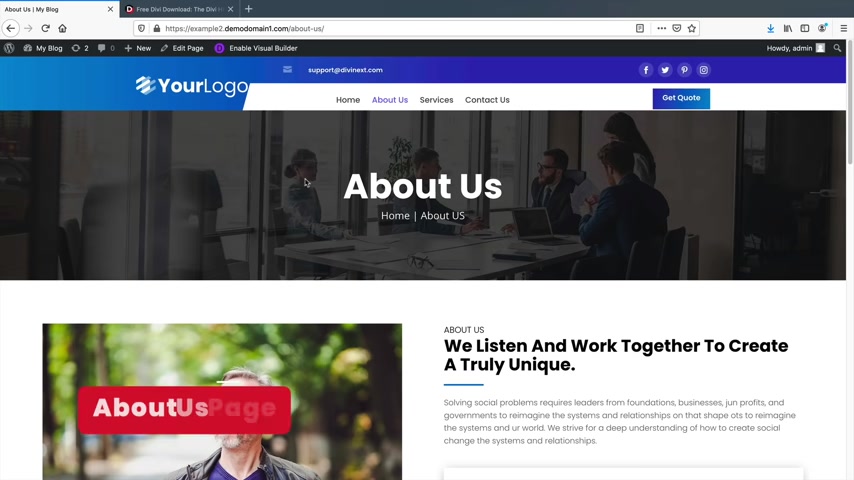
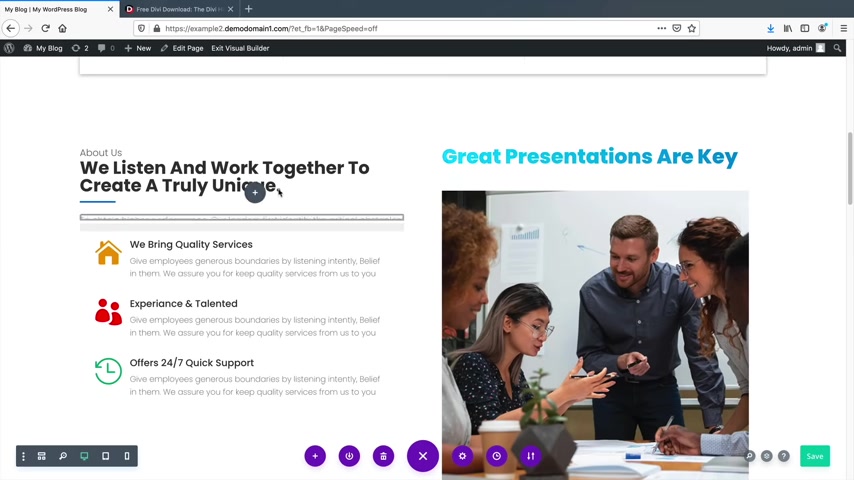
So next we have the About Us page and you'll notice we have this banner at the background that represents a business slash corporate style .
And of course , you can change this background to anything that you want .
Everything is fully customizable on this website and then scrolling down , maybe you can introduce like the owner of the company or just someone that you know , that works with the company or something like that .
Scrolling down here .
We have just some additional Upsell saying this is what we're good at .
This is what we offer and maybe just encourage people to actively explore your websites .
And then we can list achievements like uh we have this many happy customers .
This is how much staff members that we have , you know , just something to make your website look , you know , engaging and make people want to navigate it and look great .
And then we have maybe your staff so we can add your staff to your website .

So we have Jessica Rabbits , we have Robert Brown and Elaine and we can also list their positions of the company .
Uh I'll be showing you how you can add that to your current wordpress website .
And then again , we have companies that we work with and then again , we finish it off with our footer again at the bottom and let's visit our services page .
All right , cool .
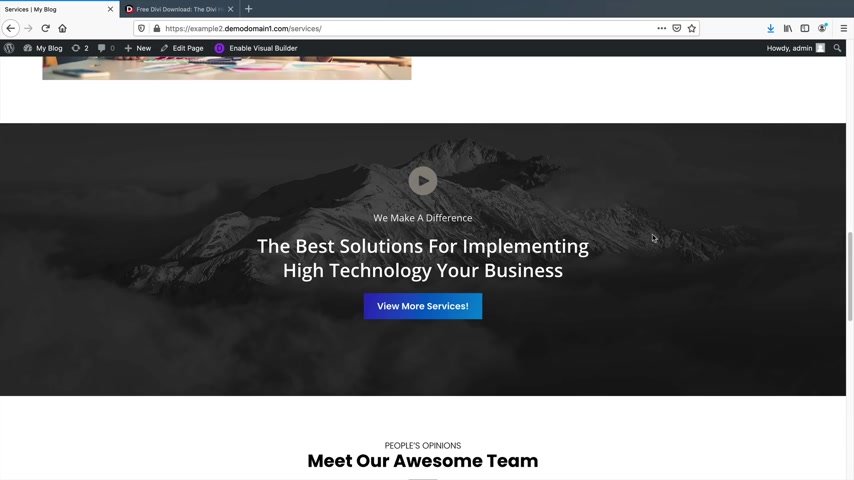
So this is our services page and again , we have this banner in the background and I kind of changed it up .
I added like a different style to it because I didn't want it to be too similar .
And then here you can list your services .
So I'm just acting as if I'm some marketing company where we do business planning , branding , strategy and just things to improve current businesses .
And then scrolling down here , we just have some other services that we offer and we can go ahead in detail and explain what we do for our business So maybe here you can talk about web development , web design marketing or something else like sco packages and just talk about your company and just give some more information about your current services .
Scrolling down here .
Again , we have this beautiful section and again , I like this mountain section because it just takes away from all of that corporate business .
It kind of , it's refreshing .
You know , I think when I see this image , it's just , you know , it's just refreshing .
I wanna go out and , you know , I wanna see it , you know , so I'll be showing you how to add this really nice call to action section as well for your website .
And then we have your team as well .
So if you want to add your teammates again with this really cool animation , so when I hover over it , you'll see how page kind of lifts on the corners .
I'll be showing you how to add that to your website .
And then again , we just have some current up sells , you know , just reminding people that we work with a lot of reputable companies and that we're a large and reputable company .
And then again , we finish it off with the footer at the bottom of the websites .
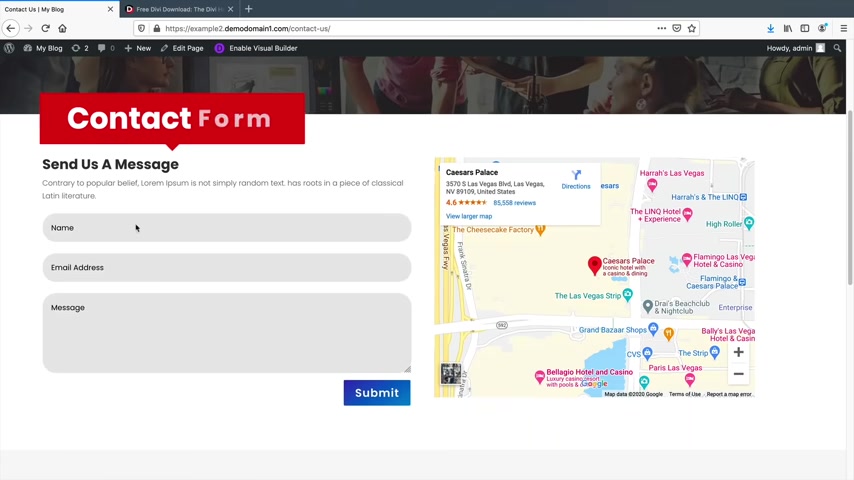
Now , let's talk about the Contact Us page .
All right , and this is the Contact Us page and as the background you can see there's a bunch of people talking and engaging and it just looks friendly .
You know , it's inviting , you know , I'd want to with these people and then scrolling down here .
We have the contact us form .
So I'll be showing you how to add a contact us form to your website .
And if someone fills this out and clicks on submits , it will then go to your email inbox .
On the right side .
We have this location of our company so you can add a location of your company telling people where you are .
And I just put Caesars Palace here .
I mean , I , I don't know what to put .
So I just put in a casino and yeah , that was the end of it .
I just added something on Google's Maps .
So I'll be showing you how to add your company uh on Google's Maps on your website .
And then we have just some other information like the address , you have your phone numbers , your email and then also your hours of operation just to notify people a little bit more about your website and your services .
And that is the entire website .
So this page builder is super easy to use .
It's 100% visual and drag and drop .
You can edit the website from the front end .
So for example , puts , learn how to make an amazing website step by oop , step by step and then I can scroll down and maybe I want to change this text to computer pros , right ?
Computer computer .
Oh my .
Oh my goodness .
Computer pros , there we go .
And you know , we can change the fonts , we can change the color , the size .
And then to this section , if I want to drag elements around , I can say , you know what I want this text , I want to put it above the gradient on the right side .
So I'll just drag and drop it and then this image I want to put it where that text was .
So I'll just grab the image and I'll drop it right there .
So now let's say , you know , I made a mistake on my website .
This doesn't look that good .
I can just go in my history and redo everything .
So I'll just say , you know what , let's just go back to the way it was before and then there you go , everything is back to the way it was and then I can change this to .
This is the best word press tutorial or the Dibby theme and then I can save it on the bottom , right ?
And there we go .
So it keeps growing down .
Let's just see what else we can change here .
So maybe we want to mix and match these elements .
So for example , let's say I want the marketing strategy over here on this side .
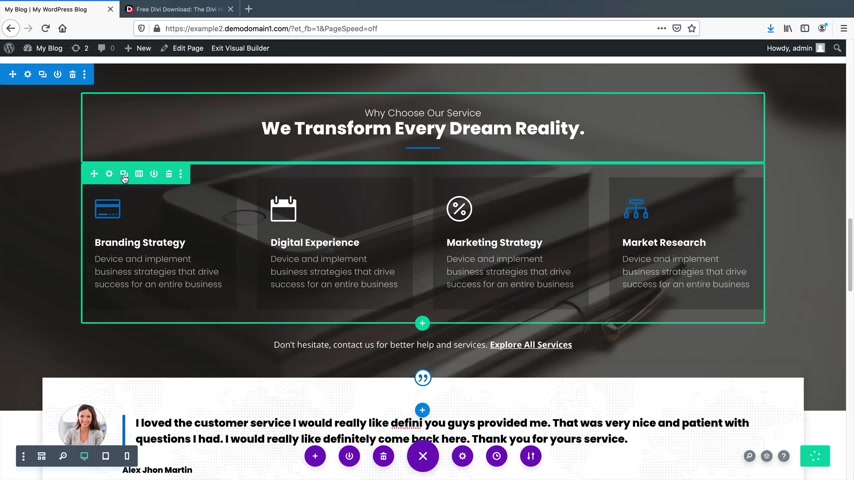
So I'll just take this and I'll drag it and then take this and then I'll drag it and we can duplicate rows .
So for example , this is say , I want to have this whole row duplicated .
So I'll just click on this duplicate button and there you go .
Now we have that whole section duplicated and then we can drag and drop and edit all these elements at any time .
So party people , I have a lot of goodies for all of you .
I have a lot of free stuff in this video to help you out .
Let's go ahead and get started with this wordpress tutorial .
Are you guys excited ?
Are you ready ?
Good , good .
Because we're gonna build your new website in five simple steps .
Step one , we will get your domain and hosting .
So for example , my amazing website dot com , I'll also show you how to download the Divi theme and also adjust some general settings for your wordpress website .
Step two , I'll show you how to make pages and start designing your website and make it look really professional using the Divi theme .
Step three .

I'll show you how to use the theme customizer , some Wordpress plugins and just some additional settings for your wordpress website .
Step four , I'll be teaching you how to make your website mobile responsive .
So it doesn't matter what kind of device your visitors are using , such as an iphone or an Android , your website will look good and be responsive on all mobile devices .
And step five , I'll be teaching you how to use the DV theme builder and all the advanced features that Divi has to offer DIVI offers some really cool features that will really speed up the workflow of your website .
So I'll be covering all of this in the advanced features section of the video and make sure to stick around to the end of the video because I'll be introducing you all to the DV marketplace where you can check out divi plugins , divi child themes and also tons of divi templates for your websites .
Now , there is a link below in the description of this video .
It will take you to a page to purchase discounted and fast web hosting and this is name hero dot com .
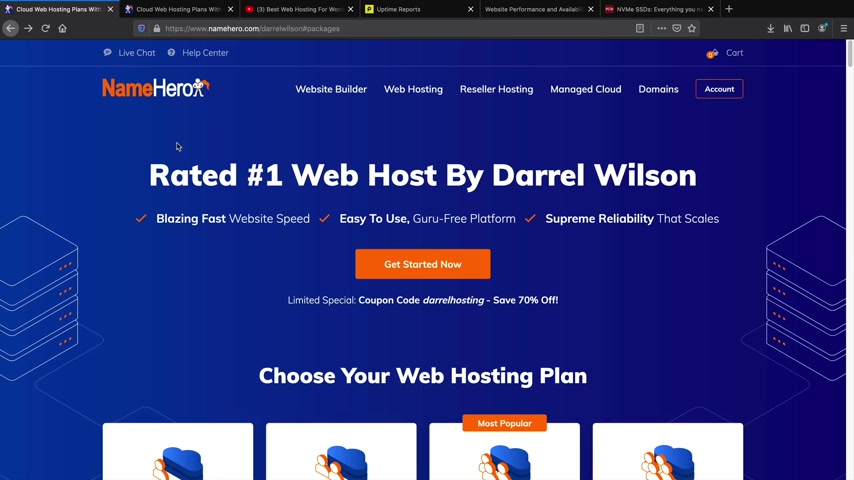
Now name hero dot com performed as the most fastest and one of the most reliable web posting companies out there .
Now , how do I know that ?
How do you know ?
I'm not just lying to you .
Right .
Well , I actually tested Name Hero against 20 other web hosting companies for 90 days and Name Hero performed as one of the fastest and the most reliable web hosting companies on my list .
In fact , name Hero had zero down time this whole week .
So you'll have a reliable and a fast wordpress websites .
Now , I contacted the owner of this company to give me a special discount .
So through my link exclusively , you all will save 70% off your web hosting .
If you go to the website , normally you'll only save 50% off your hosting packages .
And the owner gave me this discount just for my viewers on youtube .
So when you get to this page , you will click on , get started .
Now name your offers four different type of web hosting plans .
They offer the starter cloud , the plus cloud , the turbo cloud and the business cloud .
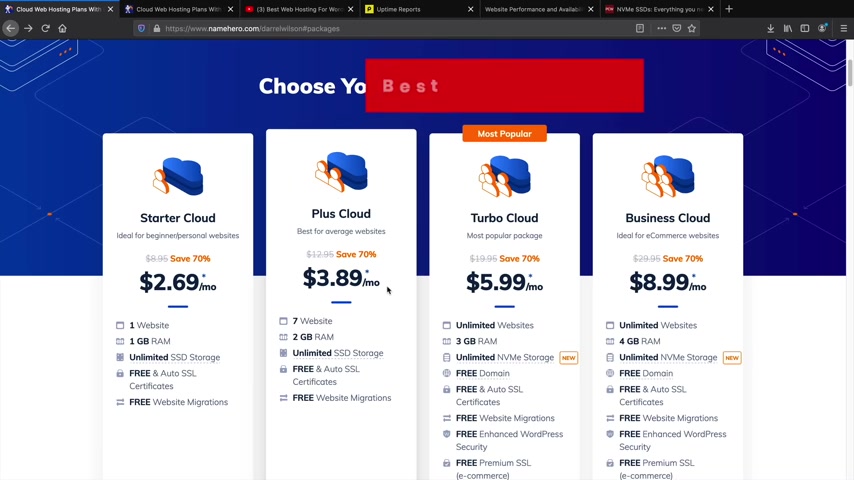
For those of you who are just getting started out for the very first time , I recommend the plus cloud , I think that's suitable .
It gives you a lot of SSD storage .
It's a very affordable plan and your website will be very fast .
However , for those of you who have been using wordpress for a while and you want to upgrade , I highly recommend the Turbo cloud .
Now , the reason why I recommend the Turbo cloud is because this plan offers the NVME storage technology , which is a new type of store technology for web hosting servers , for example .
So this graph is from PC world dot com and you'll see that the NVME storage can transfer data a lot faster than typical SSD and say hard drives .
Also , you'll see that the NVE storage can access information a lot faster than typical SSD and say the hard drive .
So for those of you who want a blazing fast website , I think the actual Turbo cloud is a pretty good option , but I know everyone out there is on a different budget .
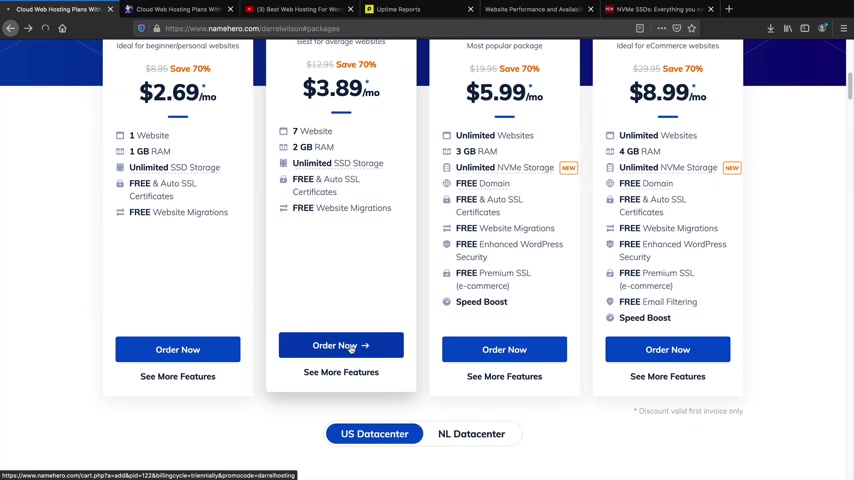
So just select the package that works for you and once you select the package , we'll scroll down to the bottom and then you'll click on order .
Now All right , cool .
So this is where you're going to enter in your new website .
So for example , my new amazing website dot com or my dog is amazing dot com or whatever you wanna put , I'll just put demo tutorial 123 dot com and click on search and look at that .
We get a free domain on top of that .
So once you select your domain , you'll click on continue .
Lastly , we have the review and checkout and look at that .
You just saved 100 and $25 .
You have a year of web hosting and ID protection for under $70 .
So you have a very good value with name hero dot com .
Once you're on this page , you will scroll down next .
We have the billing details .
So you've seen the screen before you'll put in your first name , your last name , your social security number , your bank account .
I'm just kidding guys .
They don't want that information .

It's a joke you'll put in your billing address and any other information you see here for the support pin , make sure you write this down .
So if there's an issue or you want to know something about your account , they will want to know about your pin just to verify that it's you calling and they want to make sure it's not just some random person over the internet trying to get your info , you'll create a password which you probably use the same password for all your other websites .
Rights .
I'm just joking .
I , I do that sometimes , but I should really stop that .
We have the payment methods you can pay with credit card , paypal coin base or credit card stripe .
Look at that .
People are using crypto .
In fact , crypto , I think Bitcoin is almost at $20,000 right now .
It's crazy , man .
This is going up and then you can go ahead and fill all this information out .
Once you fill everything out on this page , you will then click on the checkout button .
Now I will purchase an account and I will meet you on the very next page and congratulations on registering your domain .
So this is your current client area here .
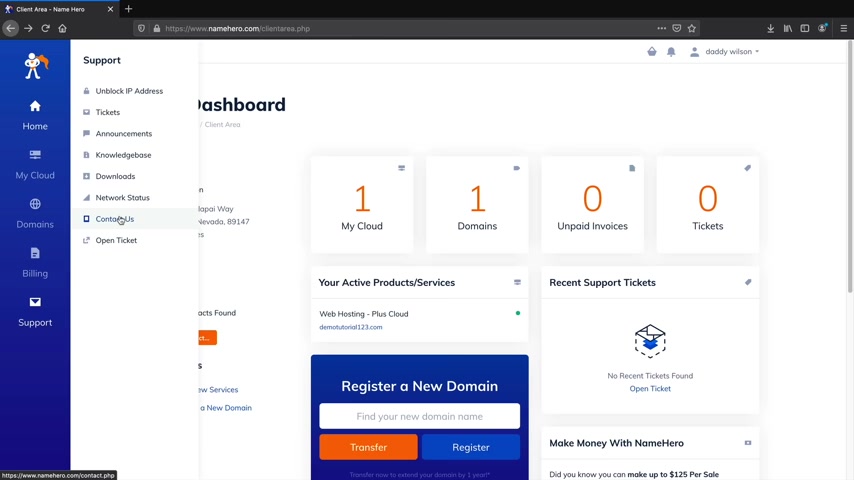
You can access your support , you can access billing , you can purchase more domains or you can upgrade or purchase other web hosting packages if you want to do that and has very good supports .
So at any time , you have a problem with your website under the support , you can open a ticket or you can contact them any time if you have issues with the websites .
So next , let's install wordpress onto your new domain under the my cloud .
You'll go ahead and click on my cloud .
I like this new interface name Hero introduced .
They recently remade their whole websites for those of you who have been with name Hero for a while .
You can tell they did a really good job .
At making their site look really nice .
So I will click on the plus cloud .
The next thing that we will do is we will access the C panel .
So on the left side , under actions , you'll see log into C panel .
Go ahead and click on , log in to C panel .
All right , cool .
So next , let's install wordpress .
Let's scroll down .
Just keep scrolling , just keep scrolling .
We're going to find a wordpress installer and we're going to install wordpress onto our domain .
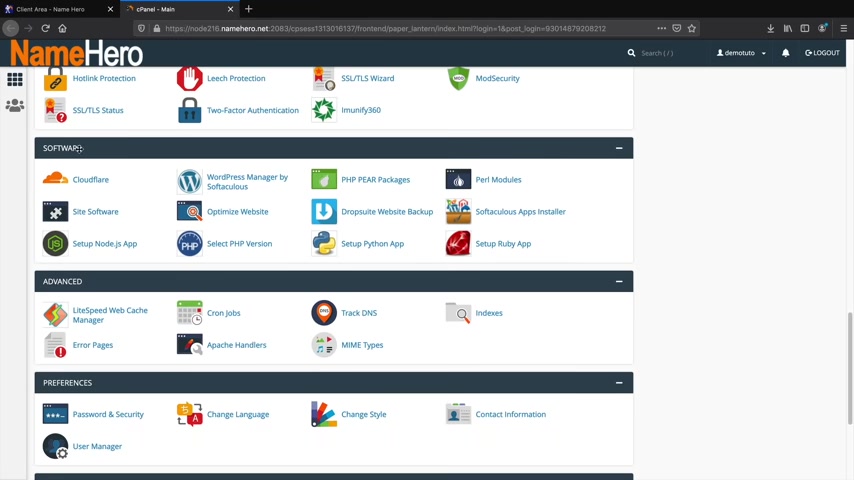
So under software you'll see Wordpress manager by Soft Taus and go ahead and click on that .
Next , it's going to say , install a new copy .
So let's click on install .
All right .
So this is the software set up .
So let's just change some quick settings while we install wordpress onto our domain for the protocol .
Make sure you have http S that just make sure that your website has a valid SSL and that just lets people know that your website is secure for the Indi directory .
Make sure nothing is there that just means your website dot com .
You know , that's it .
We don't want it to be whatever that is .
So just leave it like that for the site name .
You can give your website a name and you can also give it a description .
So this can be web agency .
You guys can see II I do this quite often and I just put a cool website , agency or something like that , you can change all this later .
So don't worry about it for the admin user name .
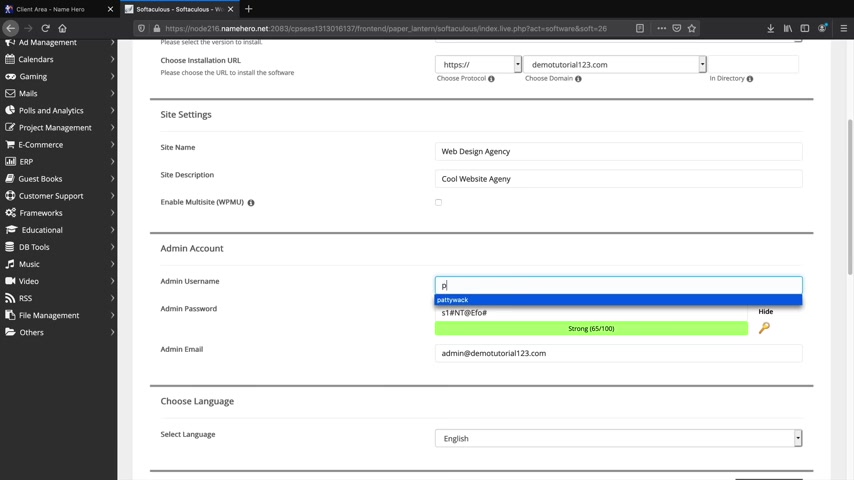
Uh Make sure you put something that you know , because you will need this information to log into your website and change it .
So I'll put Patty and then for my admin password , I'll put uh Paddy Whack 99 for the admin email .
Make sure you have access to this specific email because let's say , for example , you forget your password .
You will need to have access to this email to retrieve your password .
And I'll scroll down .
You can also select your language .
So if you speak uh Chinese , you know , there's a big a big debate on my channel .
So isn't it Mandarin ?
Right ?
Not Chinese because there's no Mandarin on this list .
But I think uh Chinese is the new standard of , of what American calls Mandarin .
I don't know , let me know your opinion about that in the comments below , but I just speak English .
So I'll leave this as English .
But you can select all of these languages like Spanish , Turkish , Arabic and , and all those languages and scroll down .
And then we will click on the install button at the bottom of the screen .
So now it's installing wordpress onto our domain .
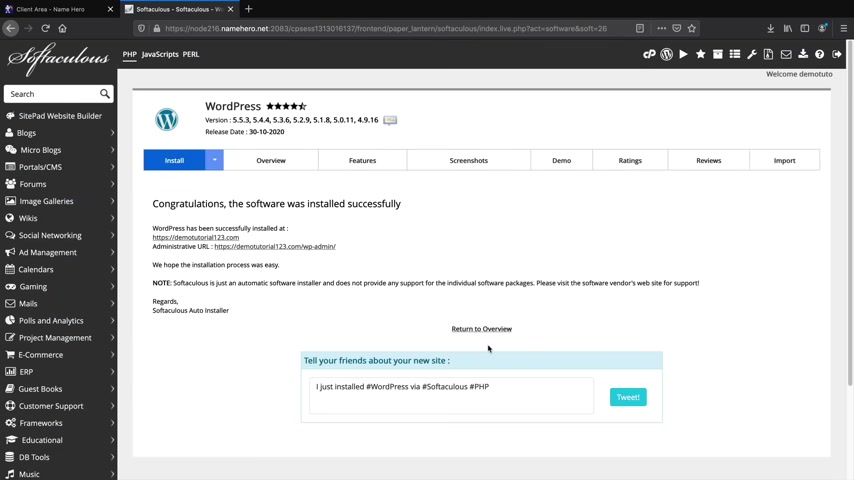
All right , wordpress has successfully been installed on the administrative URL link .
You can click on this link right here and congratulations , you have now successfully installed wordpress and your website is now live on the internet .
If you want to see what your website looks like right now under the top left , you can click on visit sites and this is your new wordpress website .
So you have a live website on the internet .
Pretty cool .
Right .
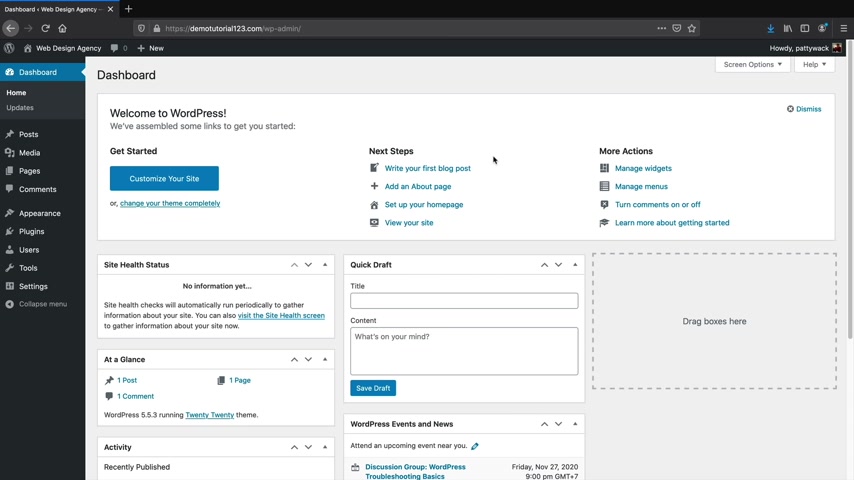
Let's go back to our dashboard .
So , while we make changes to your website , let me show you how to log in and to log out of your wordpress website on the top , right ?
You'll see your admin user name .
You can click on , log out in order to log out of your Wordpress websites , then I'll just go to the domain .
Now , when you want to log in to your Wordpress website to build it and make changes , you will go to your website and type in dash WP dash admin and press .
Enter here .
You will go ahead and enter in the login credentials that you created during the Wordpress installation .
So I'll put in my email address and my password .
I will click on , remember me and then click on log in and that's it .
So every time you want to log in and log out of your website , you can just go to your domain type in dash WP dash admin and you can access your website .
Ok .
So your website is live on the internet and it's all ready to go .
So the next thing that we're gonna do is we're going to download and purchase the DVD .
So let's go on the left side , you'll see users go ahead and click on profile .
Now , here you can change the color scheme of the back ends and just make it look a little bit , you know , nicer or just thought , oh , that is ugly .
That is ugly .
So I like modern , I think modern is a good one , you know , or midnight .
That's also a really nice one .
So go ahead and pick your color scheme and then scrolling down here .
We have email .
So make sure you have access to this email .
Let's say you forget your password , which a lot of people tend to do .
Your password will go to this specific email address .
So make sure you have access to that email and you can always change it whenever you want .
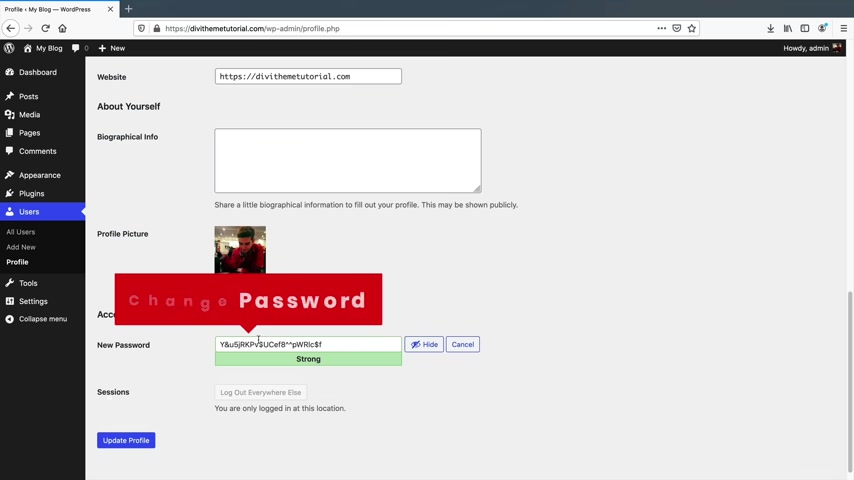
And also for those of you who want to change your password on the bottom , you can click on and generate password and here you can enter in a new password for your wordpress website .
But uh , I'm gonna leave mine standard and then once you're done with all those settings , you'll click on update profile .
Ok .
Next , what we're gonna do is we're going to change the links of our website .
So we're gonna make it look a little bit more cleaner and we're also going to make it more seo friendly on the left side .
You will see , um , I'm sorry , you'll see .
Uh , where is it again ?
You'll see settings , sorry , settings and then you'll see Perma links , go ahead and click on Perma links .
So you have these common settings , but you want to change this to post name .
And the reason why we do this is because you want it to display your websites like , you know , Darryl wilson dot com slash about us , not , you know , 2021 , you know , this doesn't look good and this is a lot cleaner and looks a lot better for seo purposes .
So make sure you select post name , scroll down and then click on save changes , right ?
So the next thing that we're gonna do is that we're gonna make some pages for our website .
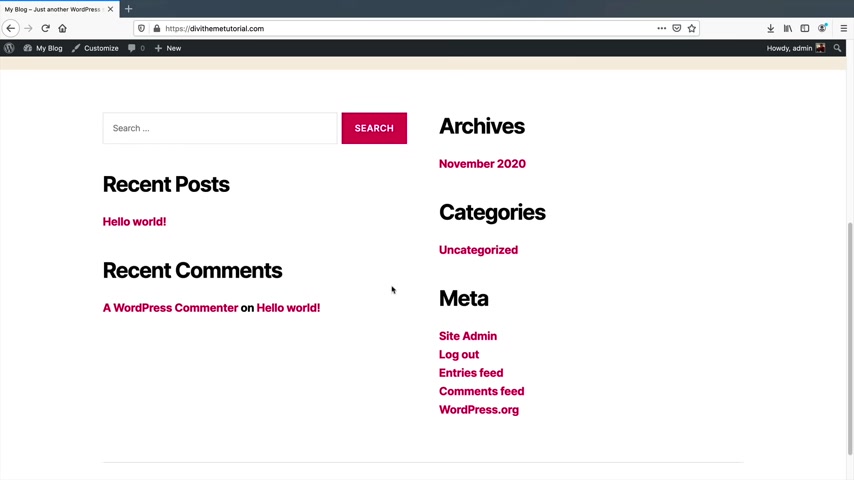
So if you go to your website right now and click on visit sites , you'll notice that there's no pages , there's no menu and there's , there's , it's just like it , it looks terrible .
We're gonna make it look a lot nicer .
Uh Go ahead and click on dashboard and under pages , click on all pages .
Now , these pages are created by default when you install wordpress and you do not need these pages .
So to delete a page , you can click on trash and click on trash .
Ok ?
So let's go ahead and create a page on the top .
You'll see .

Add new , click on , add new , ok ?
And we're here , we have add a title .
So this will be our home page , right ?
So home and I will click on publish at the top , right .
And click on publish .
All right .
Now we need to make the About Us page .
Let's click on the wordpress icon and click on add new .
Next , we'll make our About Us page .
So about us or about , you know , either one you know about or about us .
Same thing , right ?
You know , click on a publish and a publish and let's do that two more times for the services and the contact us .
Now , you can make as many pages as you want .
You are not restricted in any way .
So go crazy .
You know , go crazy .
Here we go , services , publish and publish .
All right .
So we made the pages now .
We need to create a menu for our pages .
Let's go ahead and do that on the appearance section .
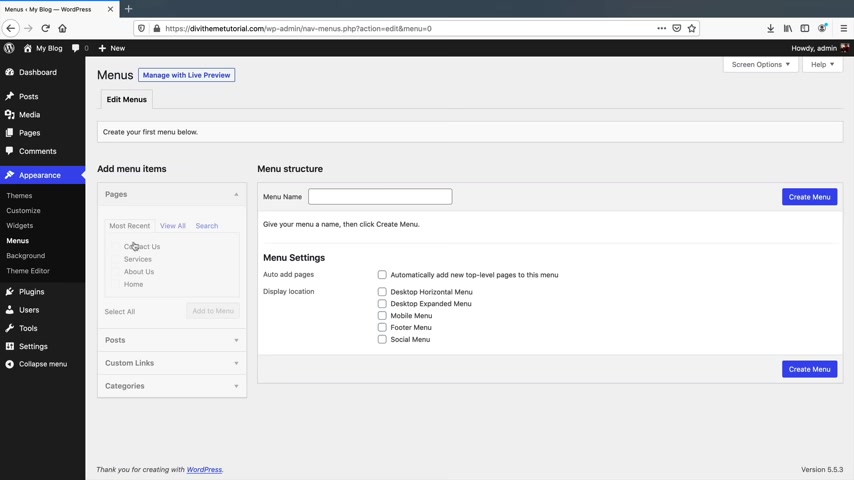
You'll see menus , go ahead and click on the menus .
So we don't have a menu right now .
So this will be main menu for website .
Look at that .
I was already messing around with this earlier as you can tell .
I mean , I had to remake the website uh here uh on the right side , you'll see , create a menu .
I'll click on create menu and then under the pages on the left side , you'll see view all , let's click on all of the pages here and then I'll click on add to menu .
So you'll notice we have the pages .
However , for this home page , we have this custom link .
Now , we don't need custom links uh a custom link is basically a link to anywhere on the website .
So for example , you can put this to like uh a gofundme account or something and then you can link the gofundme link there and then that will display on the menu .
So uh the custom links are just links to pretty much anywhere .
It doesn't even have to be your website , but I'm going to remove this custom link , so I'll remove that and then I'll rearrange this menu .
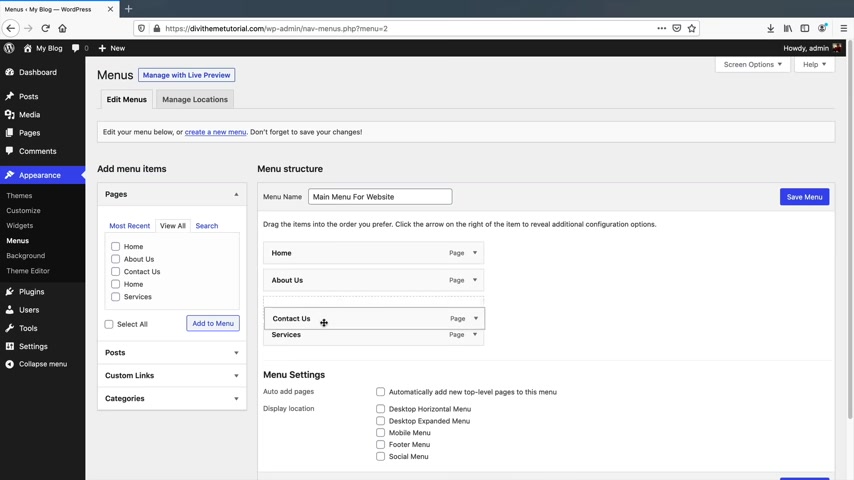
So I'll put the home at the top and the contact us .
So that looks good , right ?
The home , the About us services and the contact now on the bottom where it says display location , I want to click on the desktop horizontal menu and then click on save menu .
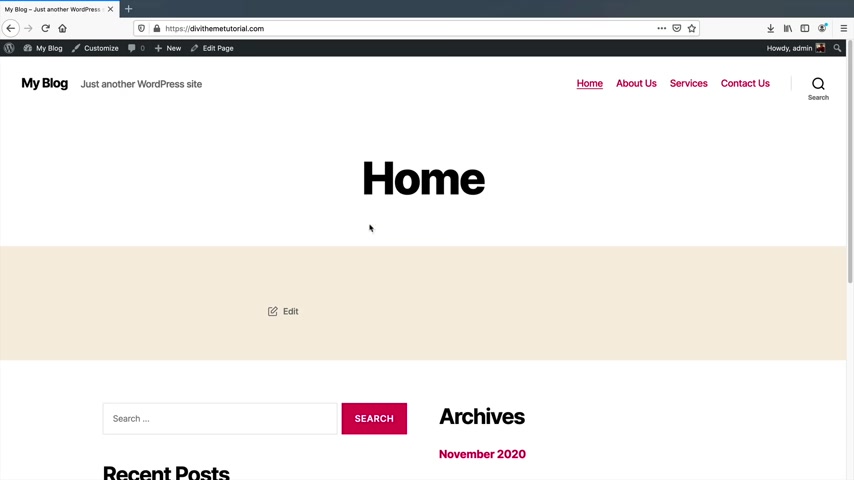
So now let's take a look at our website and see what that has done .
So on the top left , I'll click on the visit sites and there we go .
We got the home page , we have the About Us page , the services page and the contact page pretty nice .
Uh This theme is really ugly .
You know , I don't even know why they made this theme .
Hopefully 2021 will be looking a lot nicer .
I'm not really sure why they , why they made such an ugly looking theme .
So now that we've created our pages , we want people to go to our home page when they visit our website , right ?
So let's assign the home page as the home page on the top left , you'll see this customized button .
Go ahead and click on customize .
Now , we will come back to the theme customizer and the divi options a little bit later in the video .
But uh all you need to do right now , don't panic .
First off , go to the bottom of the home page settings and then under a static page , you want to select the home page as home du it's pretty simple , right ?
So that's it .
So home page is home and then on the top you'll click on to publish and that's it .
Your changes are saved .
So let's click on this icon and this is the first page that users will visit when they visit your website .
So you'll see how this has divi the tutorial and if they go to it , it'll bring them to our home page .
That is pretty cool .
The next thing that we're gonna do is we are going to purchase and install the DIVI theme .
Now , I do have a 20% discount code for all of you watching this video .
You're welcome .
So you open up a new browser or you can go to my website .
Darr Wilson dot com .
I think the links in there somewhere , but I'll leave the link to purchase devi in the description below of this video .
If you want to receive the 20% off discount , you'll type in Darrell Wilson .
Oh , ok .
Cancel my name guys .
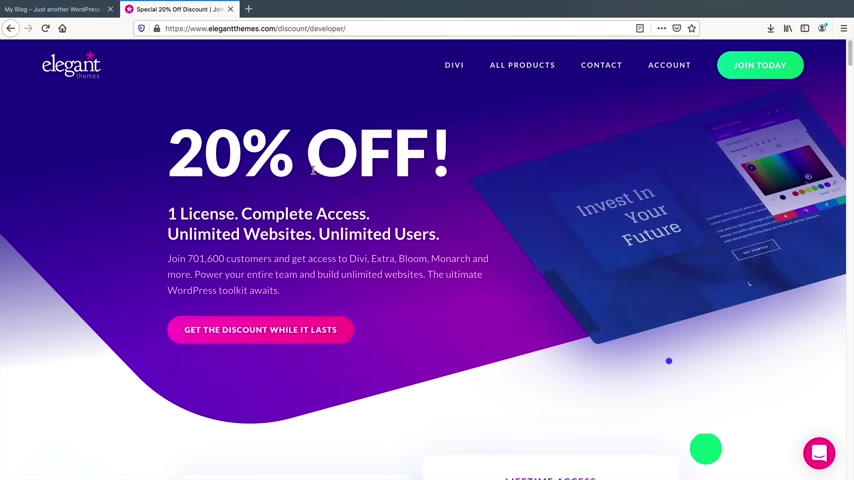
So Darry Wilson dot com slash divi 20 and there you go , you have 20% off .
So this will give you 20% off the Diy theme .
Uh Let's go ahead and purchase divi get the discount while the supplies last .
So we have two options and we have the yearly access and the lifetime access .
Now , I want to go ahead and say two things before we go any further is that um no other company offers lifetime access .
And in fact , Diy is probably one of the only companies out there that offer lifetime access and I have lifetime access .
So I would go ahead and purchase the lifetime access .
Now , second off is that I already have the lifetime access and there is a 30 day money back guarantee for any reason if you just say , hey , da this video sucks .
This theme sucks .
You can go ahead and get your money back .
So that's a , it's a win , win for both of us because I do get a small commission .
If you guys do decide to purchase , this helps you make these tutorials for you for free .
We have two options again .
You'll go ahead and select either one , you have the yearly plan or the lifetime access .
Usually what happens guys is people purchase the yearly and then they upgrade to the lifetime .
That's usually what happens .
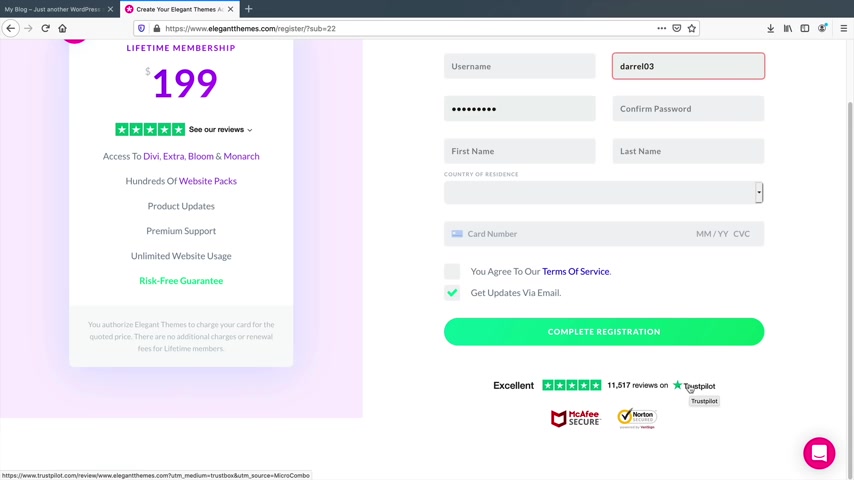
So once you go ahead and purchase it , you'll click on sign up today and then you'll go through the process , you know , of creating an account and putting your credit card and all that good stuff and you'll see at the bottom , they have a lot of positive reviews on trust .
Pilot , elegant themes is a very reputable company .
They're not some fly by night company .
These guys have been around for a long time , very , very long time .
So go ahead and purchase the uh the theme and then I will meet you in the account page .
All right .
Awesome .
Welcome to the Davy family .
So this is the members area where you can access all the products .
Now , when you purchase , did you get access to a lot of other products ?
You get access to the Divi theme , which was what we're gonna use .
You also get access to the Divi Builder plug-in .
Now , what the Divi Builder plug in is , is essentially you can use any other theme that you want and also use the Divi Builder .
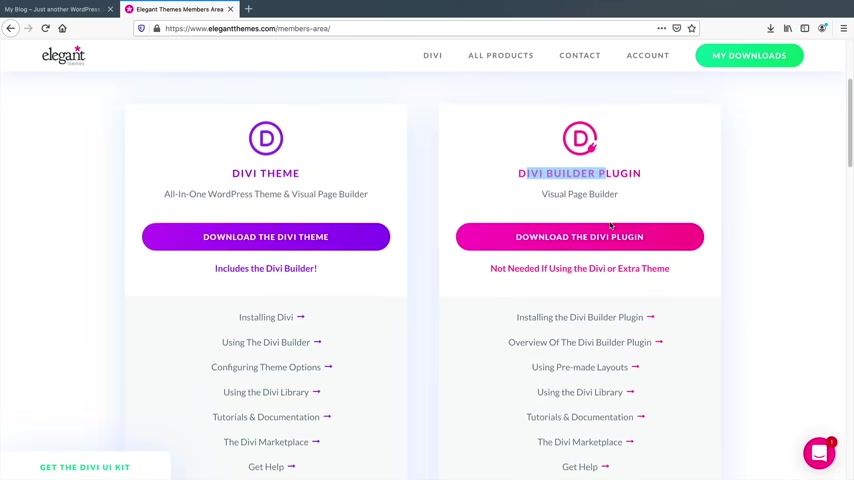
So you can use a different theme and use Divi to build your pages if you want to go that route .
And then also you have access to Bloom , which is one of the best email , often plugins .
You have access to Monarch , which is another plug-in which allows you to display social sharing in a very professional manner .
And then we also have Debby's younger brother , which um you know , it's , it's , it's fading away , you know , but it's still there , there's still lights .
We still love extra .
It's just a theme for uh blogs and , you know , it's , it's still there , you know , it's still there .
It , it's still trucking so good for you .
Good for you on the section where it says Divi theme and it says download the Divi theme , go ahead and click on , download the Divi theme and save this file .
Now , what it's going to do is that it's going to save a zip file to your desktop or your computer or wherever you're working on .
Now , let's go back to our website and go to our dashboard .
So now we need to upload divi onto our website .
We'll go down to appearance and click on themes and now we're going to upload the DIVI theme to our website on the top where it says add new , I'll click on , add new and here is a list of some free themes .
A lot of these free themes , they're just like empty , like kind of templates and although they look nice , they're very limited on what you can do with them and that's hence why they are free .
So on the top , you'll click on upload theme and you'll click on browse and now you'll want to go ahead and upload the zip file that you downloaded from elegant themes .
I'll click on open next , I will click on install now .
Ok .
Awesome .
So we uploaded Divi now in the middle , you'll see activating , go ahead and click on activate and congratulations .
Welcome to the Dibby family .
You now have divi installed on your Wordpress website .
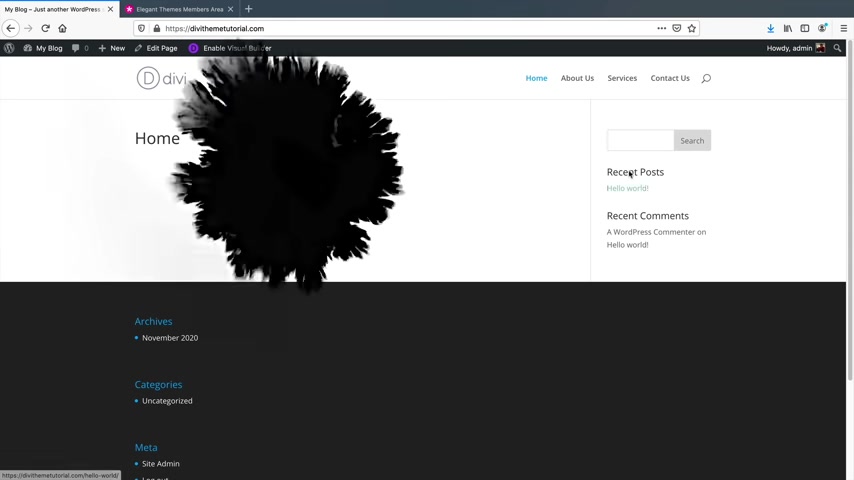
So , if you want to see how your website looks now , it might have changed a little bit on the top where it says my blog click on visit sites and you'll notice right away how everything looks a little different .
We have the home , the about the services , the contact looks a little different .
We have this footer which looks like crap .
Don't worry , we'll change all that a little bit later .
We have this default logo and we also have this sidebar on the right side .
Ok ?
So let's just take a look here .
So we have our website , we have the pages , we have our menu , everything set up .
So this next section , I'm gonna show you how to design your website using the Divi themes .
Go ahead and get your thinking caps on .
Let's make your website look amazing .
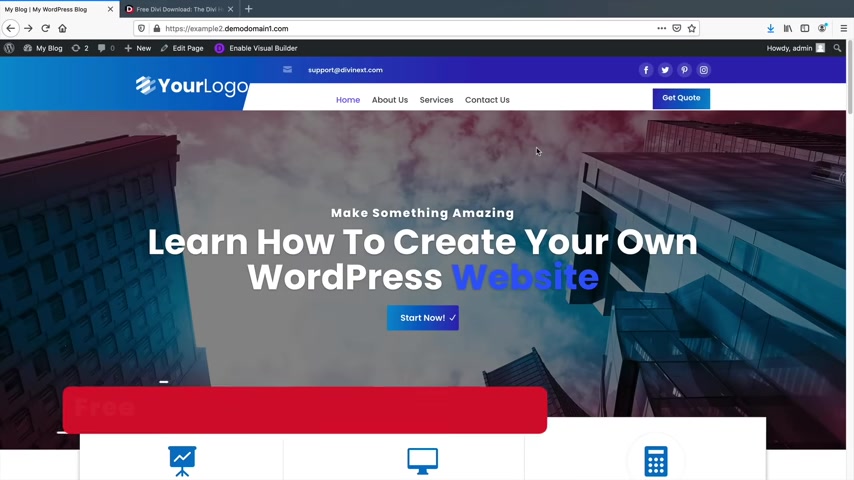
Let's go back to the video ready to now start designing the website using the Divi builder .
So there's two ways to access the visual builder on the top .
You'll see enable visual builder and this will allow you to build your website on the front end .
Also , if you click on edit page , there is also another button to use the Divi Builder on every single page .
See how on the top it says use the Divi Builder .
Go ahead and click on , use the Divi builder or if you're on the front end , click on , enable the visual builder .
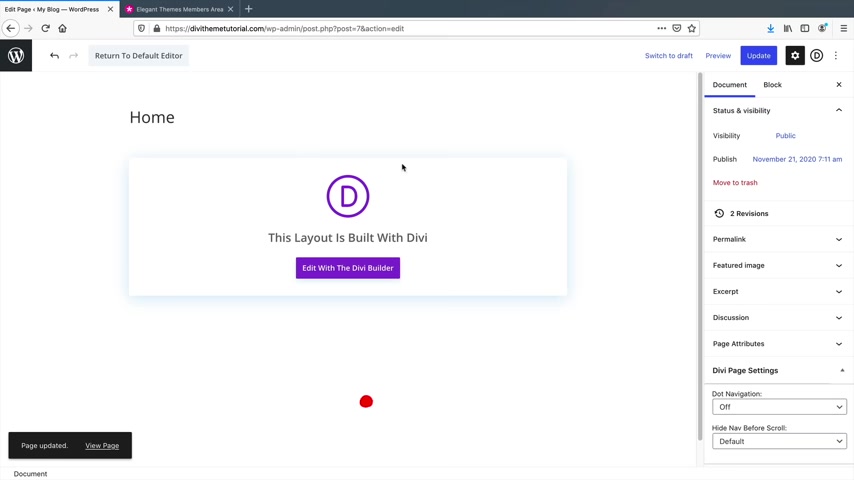
So next , let's click on edit with the Divi builder .
All right .
So they're just welcoming us to the DV builder .
We have Nick Roach , who is the owner saying , hey , I'll help you out , blah , blah , blah , blah , blah .
But uh let's just click on start building .
And here we have three options .
We can build from scratch , choose a premade layout and clone an existing page .
So on the left side , click on start building .
What I'm gonna do to help you all out is I'm gonna open up my demo website and I want to compare and contrast and teach you how to look at websites and know how to build them with Diy .
So here is the website that I showed you all in the beginning of the video , I'm going to show you this website and then I'm gonna help you understand how to look at any websites and kind of build it using the Divi builder .
First , we have this header , 1/4 header module and then we have this three column row with three blurbs .
And then under that , we have , you know , a two column row , we have text , text , text , we have a text module .
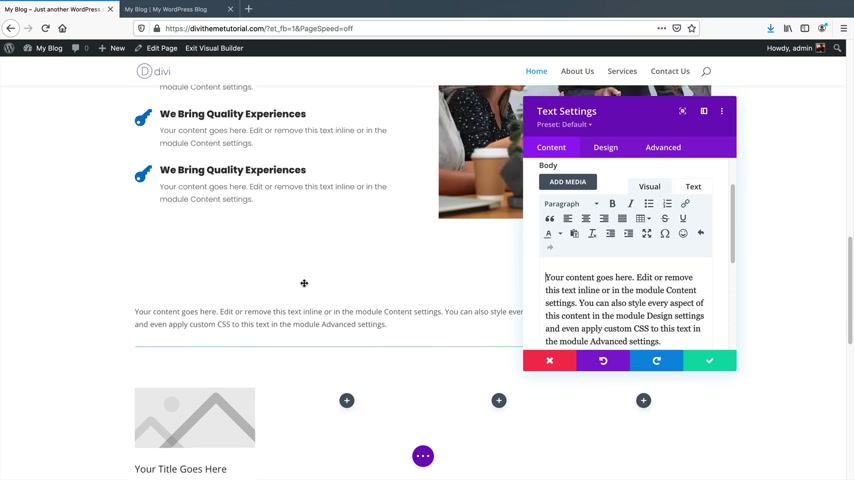
Now , this is a special plug in and we will talk about uh DV extensions near the end of the video that I make your website look really , really nice .
But first off the just go back to our website and just go stick to the basics .
So here we have some rows where you can add specific rows to your website .
So here you can add in a blurb for your first row and then for the second row , maybe you can add in , you know , a call to action for a button .
And then if you want to move these elements , you can go ahead and drag them with this icon and just drag it below it and there you go or I can do that over here as well .
Just to kind of , you know , mess around with stuff .
I can also duplicate elements at any time with this duplicate button in and then I can drag it to the other section like that .
So that's just a quick way and how to kind of utilize the drag and drop aspect of this builder .
But let's just create a full with section first .
So in order to delete a section , you can go ahead and just click on this trash can to delete that module or if you want to delete everything inside of this row , I can click on this trash can or I can go ahead and click on this trash can and that will delete the entire section .
So first if you want to add a new section , you'll see this plus icon and you'll see regular specialty and full width .
I want to select the full section And for this specific section , I want to select the fourth slider settings or the fourth slider module .
So we have the full slider and I'll click on check now , this top section we don't need this .
So let's delete this .
So here we go , we have this both section .
Now , whenever you want to access a module or design it , you'll see this gear icon .
Let's click on that gear icon and we have two specific slides .
However , I only want to use one .
So I'll go ahead and click on trash and only have one specific slide .
Let's click on the gear icon to customize this slide .
You can put anything you want .
I'll just put uh make something amazing .
And then for the button I'll do start now , right ?
Or you can put it whatever you want , you know , start now or begin or something like that .
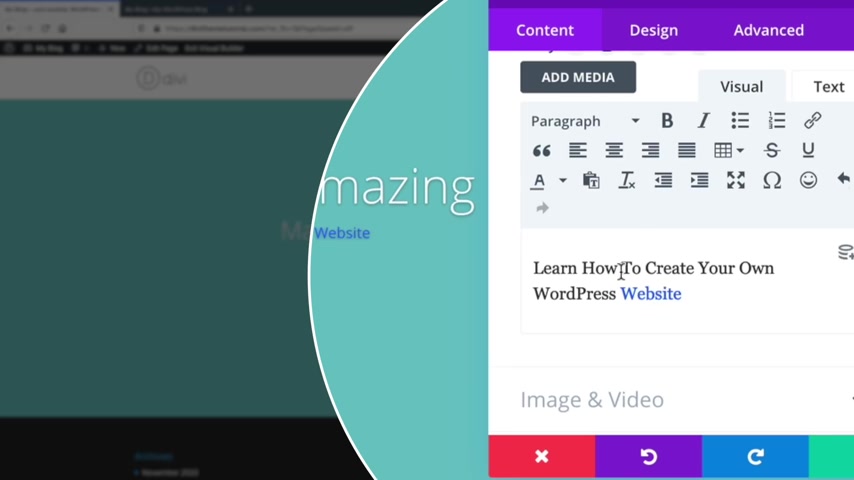
Now , I'm gonna go to my demo website here and just kind of copy the text just to speed this up because I don't want to , you know , take too long typing everything from scratch because I've already , I've already made everything , you know , paste that in there here .
I have learned how to create your own websites and you notice how website is colored .
Now , there's a few ways on how to do that .
However , what I just did was I just double clicked on the word and under the text color , I just changed it to blue .
That's all I did .
So you can have multi color texts .
I mean , right here , I can change this one to red or something like that , you know , like something like that .
You know , if you want to add some design into core , learn how to create your wordpress websites and then I'll go ahead and go to the design section and we have these other options right here .
So if you want to go ahead and design this specific slide , you can use these to design everything .
Now , once you understand how to design one module , you will understand how to design all of the modules .
Also , you'll notice that we have these little blue pencils .
Now , this is going to display for every module whenever you click on this little pencil divi will automatically bring you to that section so you can start editing your website as you want .
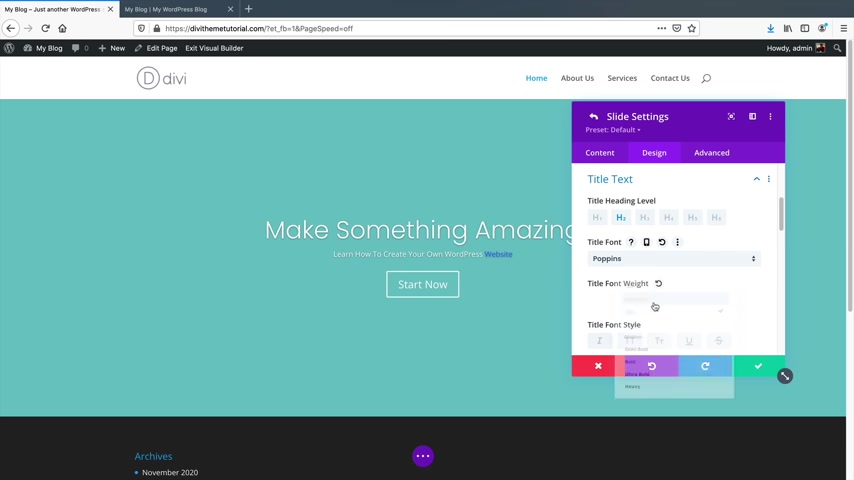
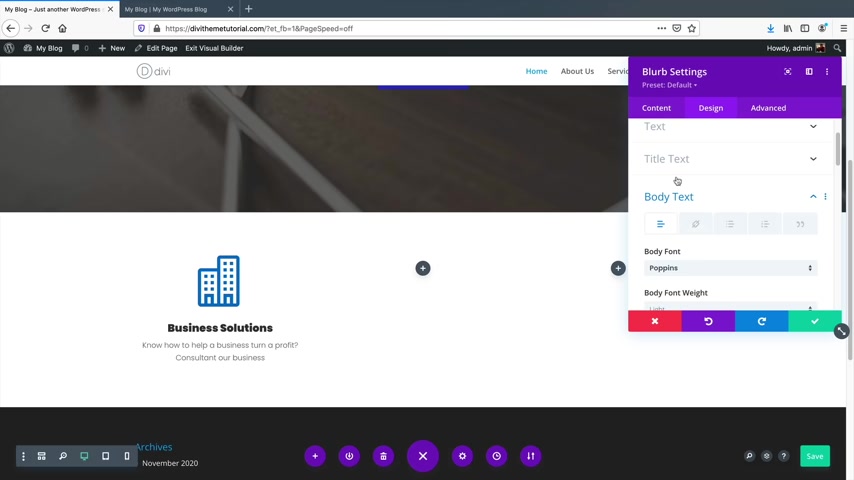
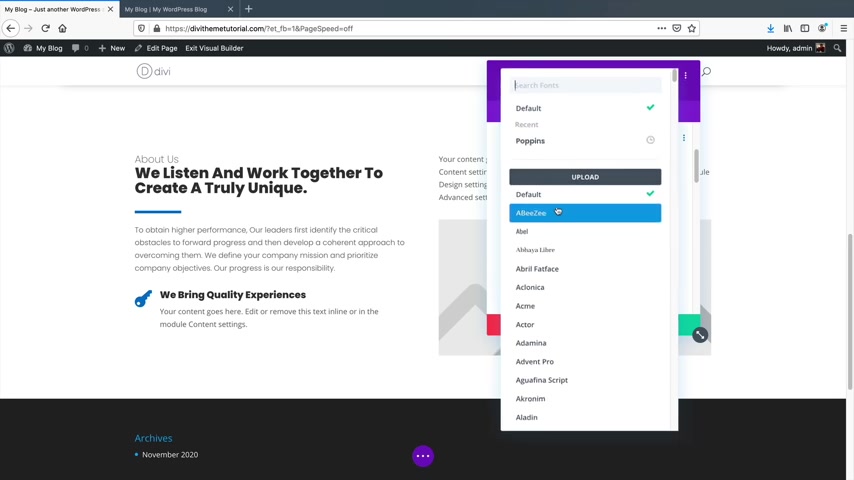
So for the title fonts , I like Poppins , I think Poppins is a very good font .
So I just like Poppins and then I'll do something like uh you know , I'll do ultra light or I don't know light , you can change the weight of the font , see how it's very skinny like that or you can make it , you know , ultra light or you know , however you want and you can align this text to different parts like that if you want to do that and then for the text size , I'll change this to something a little bit smaller actually because I want the the middle part to be bigger .
So I'll leave it like that .
I think that's good .
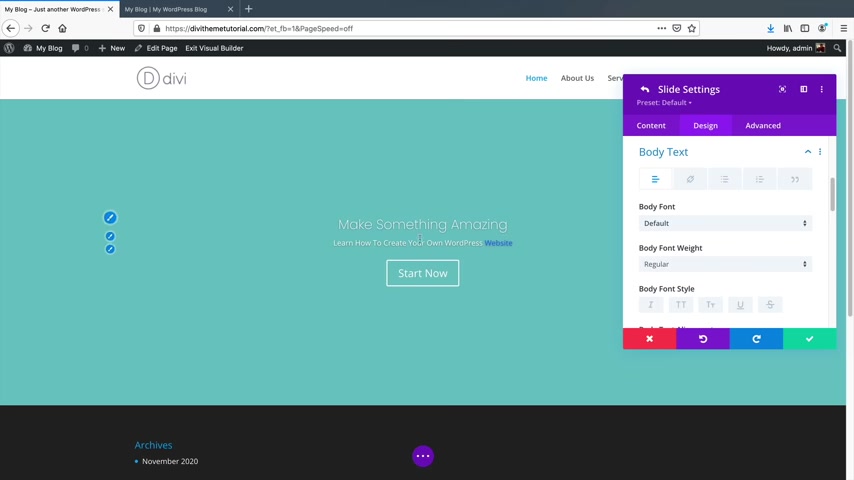
And let's design the middle section now .
So for the middle section , I'll click on the little pencil icon .
I'll change this also to pop ins .
However , I want this to be bold .
I want this to be ultra bold and we can change the font style .
These are just decorations or designing the specific element .
So we can have this Atala size .
We can have this upper case , you can change the elements , the I'm sorry , the alignment of the actual uh of the of the the module and then we have the text size .
So here you'll see , I can make this really big like that .
In fact , you can even make this bigger than Diy wants you to make it .
So I can put like 100 I can type in 100 and 50 pixels and that will make it even bigger .
Now , the reason why it looks clustered like this is because it's trying to work within the specific box .
So it's really like clustered .
It doesn't look good .
We can always change that .
But uh let's just , let's just keep it simple here .
I'll just change it to something like um you know , we'll just do 65 something like that .

And for the letter spacing , we can make the letter spacing wider .
Now , let's say , look uh I don't know what I'm doing here .
I messed up .
How do I change this back to what I was doing before uh under every module , you'll see these little icons .
So this little uh I guess it's a refresh , this will change it back to where it was before .
So I'm just going to leave it there .
Next , we have a line height .
So what line height does is that it adds some , it adds some height in between the specific line .
So um it just basically adds a little bit of space in between everything .
So you'll see here how we have 1.11 0.2 .
And I want to add maybe just like one , you know , one pixel of line height .
So now it looks a little bit more cleaner and nicer , right ?
And then we can add in a tech shadow .
So if you want to add in the shadow , see all behind we have the shadow like that , you can kind of control the shadow like that and then you can control the actual blur of the shadow with all these options like that .
And I mean , there's so much cool stuff you can do with Diy .
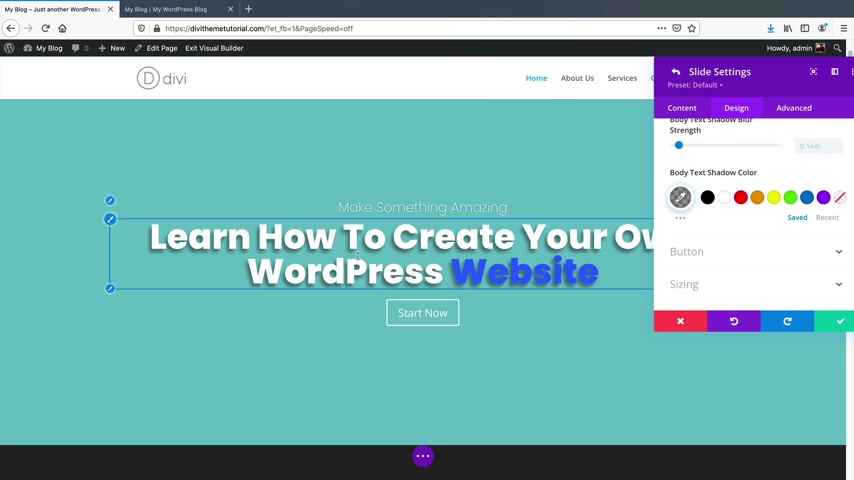
I mean the the the possibilities go on and on and on , you can even change the color of the shadow .
So by default , we use a gray .
But if you want to use like a uh a red or another color , you can go ahead and do that .
That's just a quick little rundown of the actual styling , we'll come back to it a little bit more when we do the actual modules .
But let's go ahead and design this button .
So I can click on button right here or I can click on this pencil icon and that will bring me to the pencil or to the button customization automatically .
So on the right side , you'll see use custom styles for button .
I want to turn that on because I want to design this specific button .
So here you'll be able to change the actual button , text size of the actual buttons .
By default , it's 20 pixels , but we can make it like 25 pixels .
You can also go ahead and change the text color of the button as well just by clicking on the specific colors .
Now , if you want a custom color , you can click on this little icon and this can like , you know , you can get very technical with the colors that you want for your specific button .
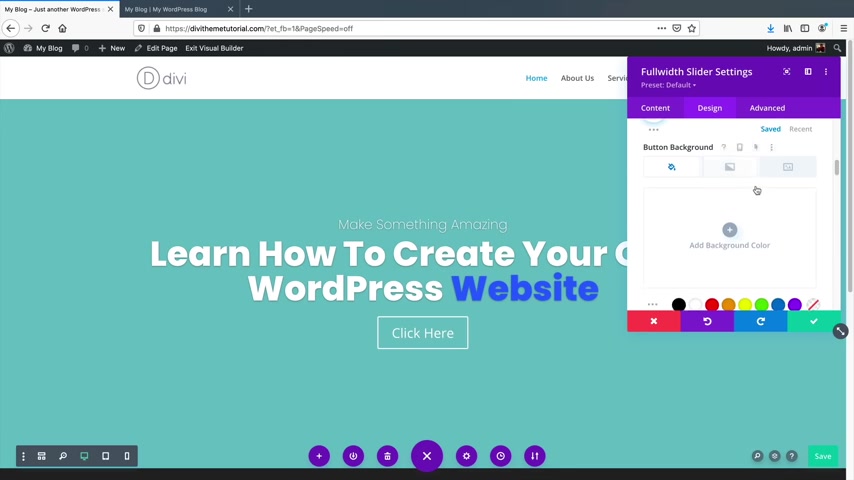
Um scrolling down .
We have the button background by default , it's uh transparent .
But if you want to add a background color , you can add an a specific background color to your button .
I'll get rid of that .
And if you want to add ingredients to your background , you can go ahead and add an ingredients .
So you'll notice how on my demo website right here , I added a specific gradients to my button .
Now if you want to get a good color palette for gradients , you guys can go to U I gradients dot com .
This website will really help you out with gradients .
So gradients by default guys , I know every amateur loves them , but they're very hard to carry throughout your website .
So let's just say , for instance , uh we'll just , you know , we'll just pick a gradient here .
I'll just click on a blue one and I'll just select the Azure Lane or something like that .
Actually , you know , that's , that's too many .
What we're gonna do .
There we go .
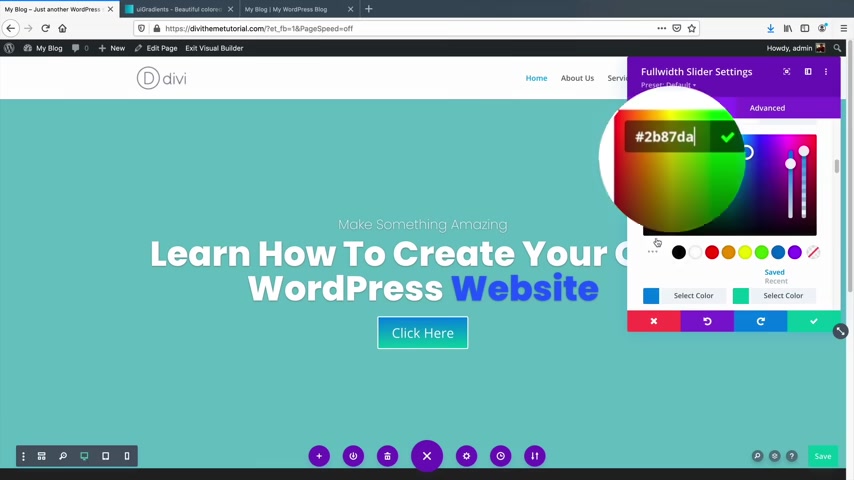
So what you'll do is you'll copy this color code , go back to your websites and under the actual first color , I'll click on that .
I'll paste that in there , go back to this website and I'll paste this second color code and click on that color and then I'll paste that in there like that .
So now you'll see how we have that same color palettes from the actual U I gradients website .
You can use that website if you want help with gradients because I know people like gradients and it's uh you know , it's , they're , they're fun , you know , they're nice to have .
But uh again , it's hard to carry them throughout the website .
So here we have gradient directions , you can change the direction of the actual gradients .
Also , we have the gradient type .
Now there's linear and there's radial .
So radial just means the gradient starts from within the circle .
So you'll see here how it starts from within and linear is just basically like a linear style .

It's like a , it's like a directional angle and you can kind of change the start position and also the end position of the gradients , you can even make a split color uh button like that .
If you want to get crazy and creative , you can go ahead and do that .
Um But you know , there's so many possibilities on what you can do with Dibby .
It's just uh it really depends on what you're going for .
The color pale that I use for my specific website .
Let's go and take a look here .
I'll just put that in there and paste that and then for the second color I have this one , I'll copy that and then I will go back and just paste it in there like that .
So there you go .
We have this other option .
So we have a button border with .
So we have this white border .
If you want to get rid of it , just go ahead and just take it off to say , you know what I don't want a border .
But if you do want a border , you can add a border to pretty much anything .
So you'll see how we have this border .
In fact , I can't even make the border the same color as the actual button to make it blend in , but I'll just get rid of it for now .
Now also here we have the border radius and this just gives it a circular kind of style .
You'll see here how the the button gets this like circular style .
Now , since we don't have a border , it's actually kind of like missing there .
So if you want to have like a like a , a total circle like that , you'll need to match the colors and then just add a border radius or something like that , you know , something like that , you get it .
So you just have to match the color with the actual button border because technically they're two different things .
But uh I'll just get rid of that for now and just leave that basic .
Don't worry , you'll get this whole layout later .
Don't worry about it .
And then for the button font , you can change this as well to like pop ins and you can change it there like that and so on and so forth .
So again , once you understand the options for one module , you kind of get it for all the modules .
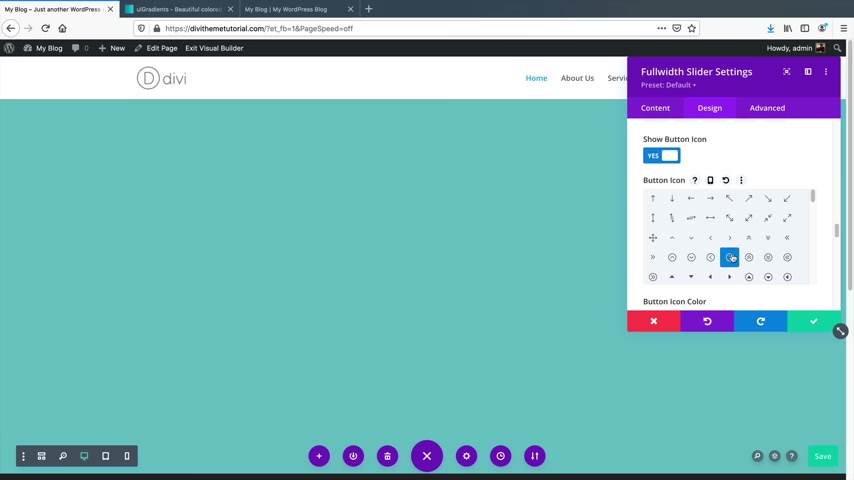
Now , if you want to add a little icon to your button , you can go ahead and do that as well .
So you'll see here how that little button pops up .
You can change the color of that button .
You can also change the placement of the button .
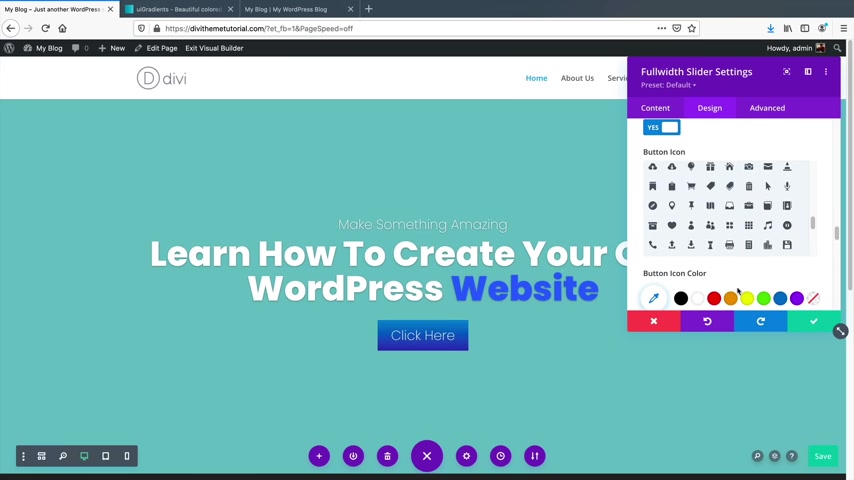
So the left side or the right side and you can also have the button show , you know , forever or only when they hover over it .
This just means the button will be displayed at all times and you might want to add a border if you do that because then it'll look like it's cut off and then we can change the alignment of the button .
So that's pretty much it for this specific module .
Now , we'll go through all these options a little bit more um when we talk about other modules because this is kind of a bad example to use it for the fullest slider module .
But let's just go back to the actual content and then go to background .
So let's say you want to change the background color of your website , you'll click on these little icons and this is the actual color .
So we can add a background color and you know , you can add in like an orange or red or black or something like that to match the criteria of your website .
Also , if you want a gradient , you'll click on the gradients and then you can click on add ingredients and then you can select a specific gradient for your website just like we did before .
So you can have a gradient background .
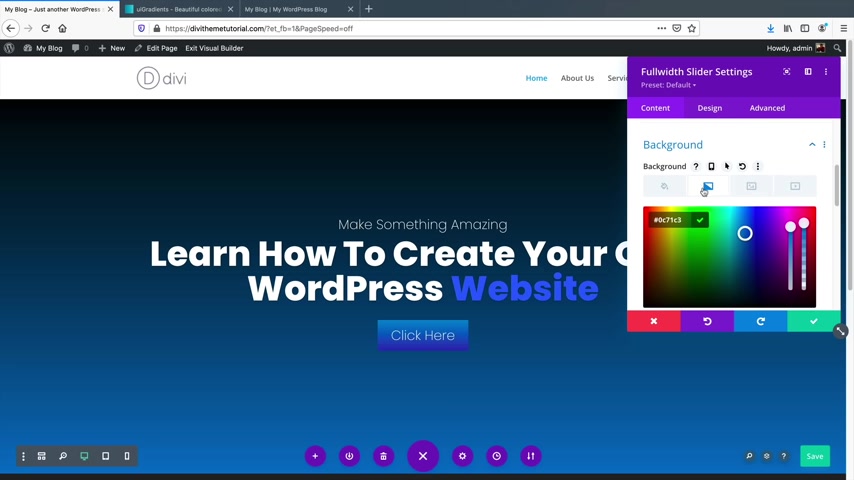
Uh Also if you want to add in a specific image , which I think is the most standard , uh you can go ahead and do that as well by clicking on the image icon .
So let's go ahead and add an image to our background .
So I'll click on the plus image .
Now there are demo images for all of you in the description below this video that you guys can download for free to follow .
Along in this tutorial , you'll click on the select files and then you'll see the divi images .
So you'll need to go ahead and unzip that folder and then once you unzip that folder , you can go ahead and upload all those images to the website .
OK ?
So the images have finally been uploaded .
Now , there's a few images I gave you guys all just for free .
Like for example , this one uh I think this is a really good one .
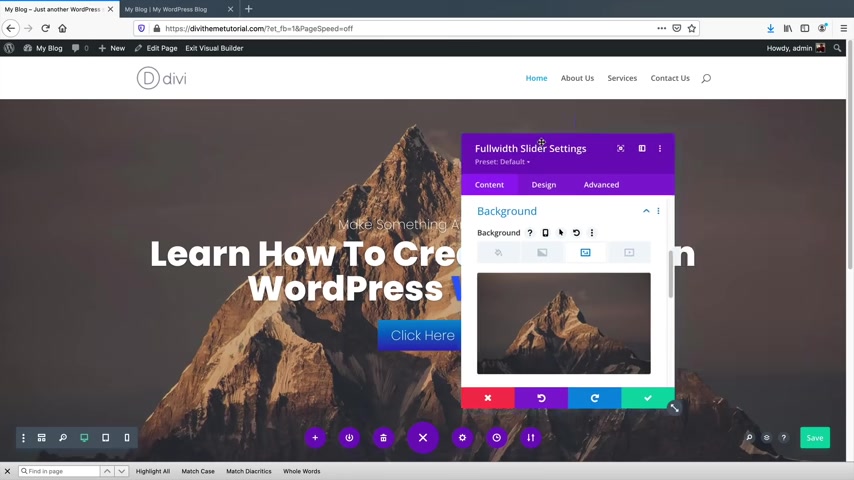
You know , it just looks nice , it looks very clean and it , it , it's like multipurpose , you know , it kind of works for anything , you know , give or take or you can do something like this mountain , look where , you know , you just want to have that like uh you know , oh we're uh we're up here in the mountains and uh you know , we , we eat goats or whatever , you know , you can have that or you can have something like this is which is like the default one that I had .
Now you might come across images online that you love .
The problem is that sometimes it's too white and it makes your text blend in and it looks really bad and you can't see it .
So what we can do is we can add in an overlay So go ahead and click on the uh and under the design tab under overlay , we can click on , use a background overlay .
So now what we'll do is we'll just dim the overlay , but you'll see how I have this black and here we go color .
There we go .
And I just want to reduce the transparency on the right side .
We have this transparency .
We can just reduce the transparencies .
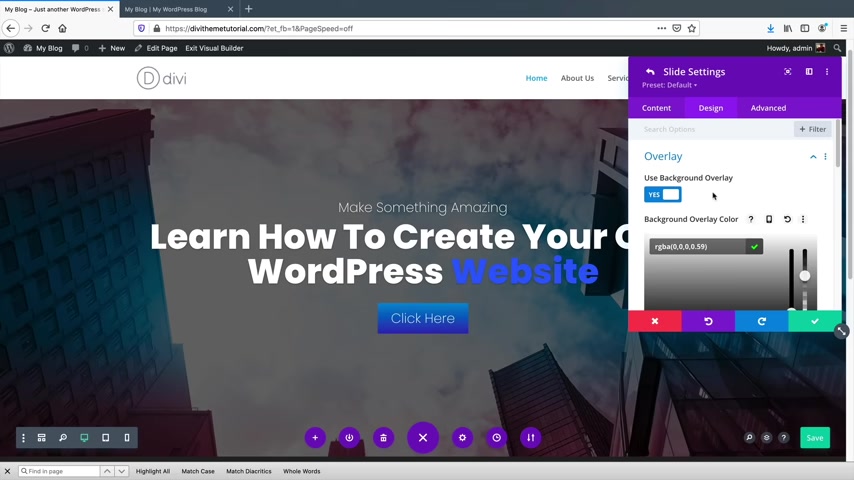
We can let people know what we're , you know , we can let them know about the image , but we just want to add in a very little like hints .
So people can kind of see the image yet also see the text at the same time .
So that's just a way on how to add in a background overlay to pretty much any image that you might come across on the internet .
All right , break time .
So let's talk about my design tip number one for all of you building websites .
Now when you're building websites , you can use specific colors , right ?
However , for your landing page for your home page , whatever colors you introduce on your home page , that is basically your color scheme , that's your color pal , that's your brand and you need to make sure that it's understandable right away .
So for example , Diddy for Business OK ?
Business website , and we have the colors .
Now , if I scroll down on this page , you'll notice , wait a minute , wait a minute , wait a minute , the colors are all different .
Now , these colors don't make sense because on my home page , you know , why don't I introduce this red ?
That doesn't make a lot of sense .
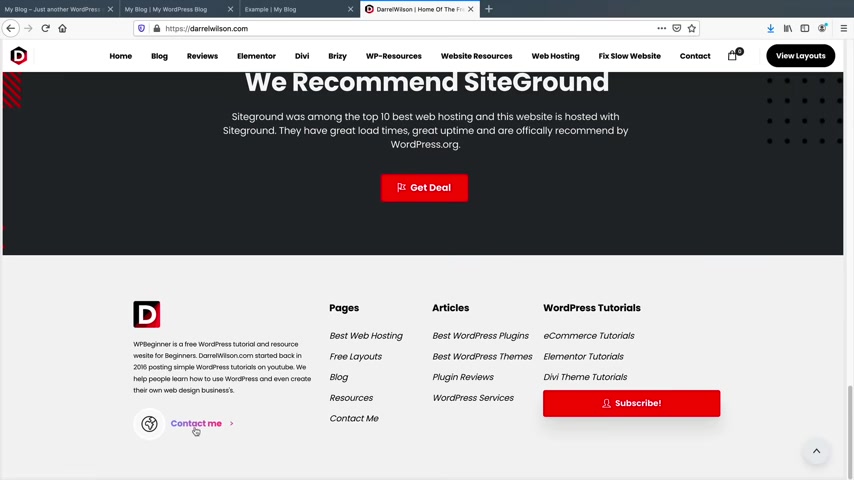
Let's take a look at my website .
So on my website wilson dot com , we have this black color scheme and we have this black , white and red color scheme with this specific font and style .
Right now .
If I scroll down on the website , you'll see how we keep that scheme consistent .
So we have this black text .
We have this little abstract red gray black design and I carry that throughout the website .
I add in this banner here and I have this red button .
I'm keeping everything consistent .
You know , I'm not adding any yellow , I'm not adding any blue .
I'm just keeping all the colors here consistent on my website .
When you are building your website , you need to make sure that you keep the colors consistent .
So you should have a color palette .
No more of maybe 3 to 4 colors .
No more than three colors , anything more than three colors , it just looks tacky .
So for example , here I have this purple , I have a red , I have a yellow and now I've introduced this other color and then we have this other gradient .
It just doesn't make sense .
It looks tacky .
And you know , if I'm someone who's building or if I'm someone who's visiting your website , I'm not gonna know what you're trying to do .
I'm I'm not , I don't know what you're trying to achieve here .
So make sure it doesn't look ugly guys .
Remember just keep it consistent and when you are building your website , just make sure that you're not adding in too many colors .
You know , my my obvious tip is don't add more than 33 other schemes or three color palettes .
So , on my website , you might see that I added just a white , black and red color palette .
I did throw on the gradient as a wild card .
So this gradient at the top you'll see is another color palette that I used .
I use this more of a wild card .
I do introduce it throughout my website .
You saw it on the top a bar , you saw it over there and I think I also add it here on the bottoms .
I do have maybe a four color palette or four color uh palettes that works for my website .
Uh Just keep that in mind and remember whatever colors you introduce on your home page , that is your color scheme and you must carry that throughout the website .
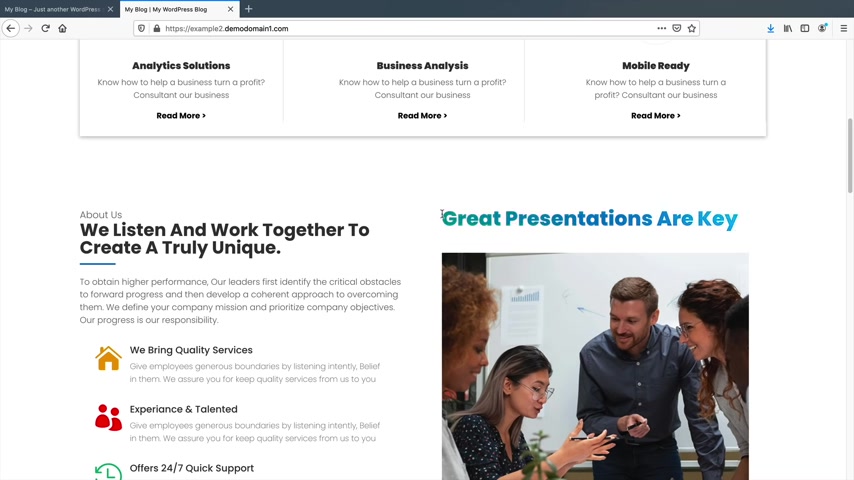
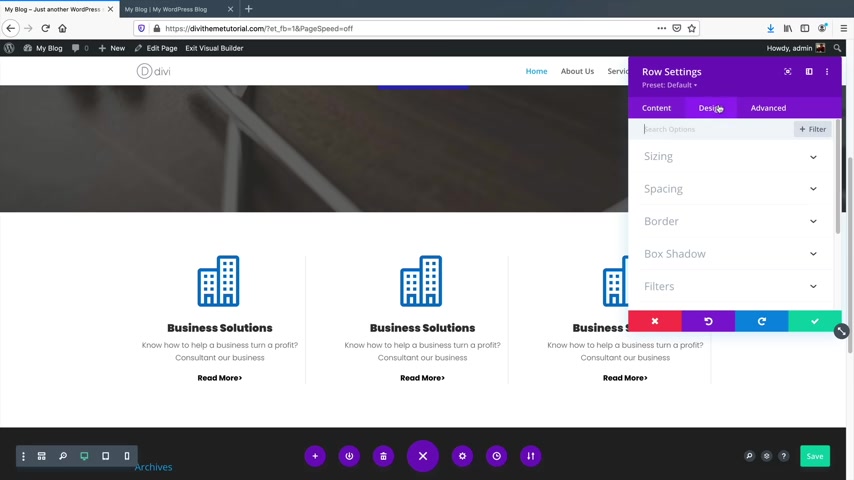
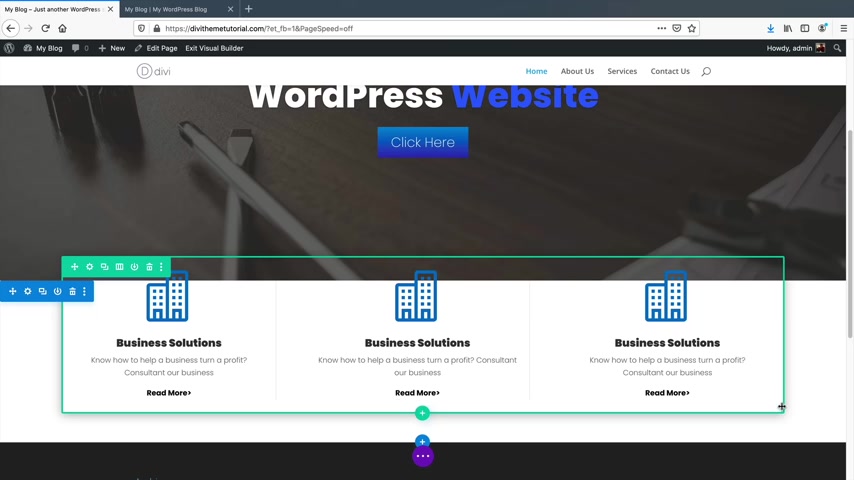
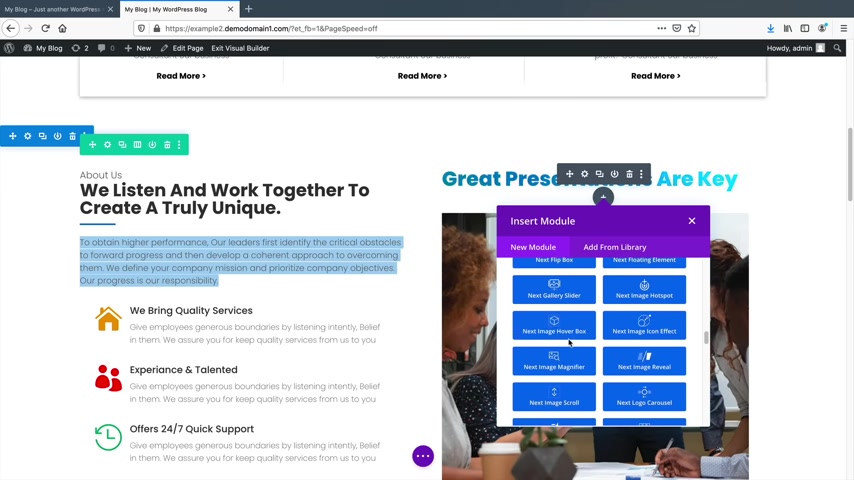
This is a three column row , right ?
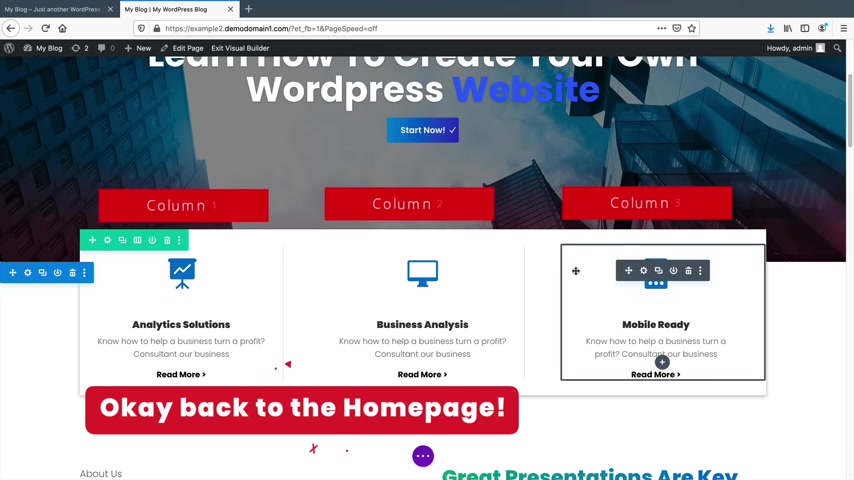
123 and it's three blurbs as we do this , I want to just kind of help you understand , like for example , this next section , this is a two column row , right ?
And this is a text , text blurb and a text and an image .
That's it .
So let's go ahead and create this section next .
Make a new section , click on the plus icon and click on regular and I'll click on to the three column row .
Now , the great part about this is that we only need to make one icon and then we can duplicate it .
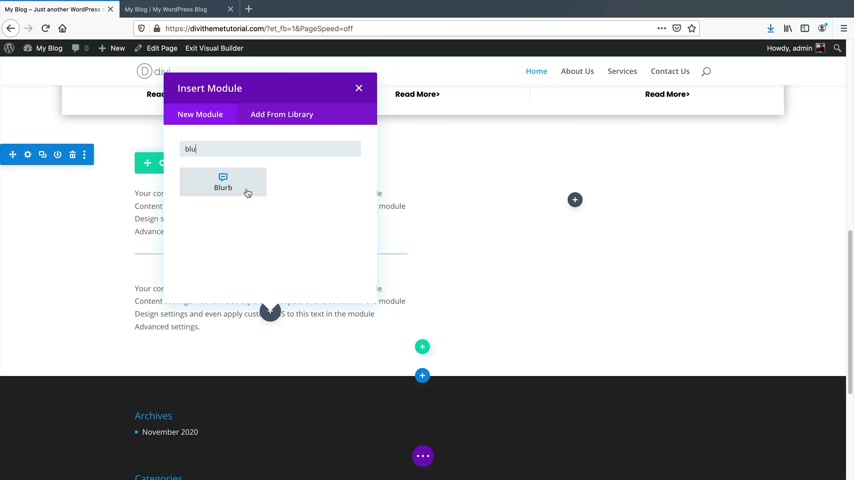
Saving us a lot of the hard work is also select the blurb icon .
So this is the blurb blurb is just kind of like , I don't know , I like the blurb icon .
You might want to use something else , but I think the blurb is just easy to work with .
So what I'll do is just put in something here like , you know , business solutions .
And then over here , I'll just , you know , I'll just actually just do this , I'll just copy this paste right here .
Here we go .
And then I will paste that in there like that .
Now , we can put in an image here .
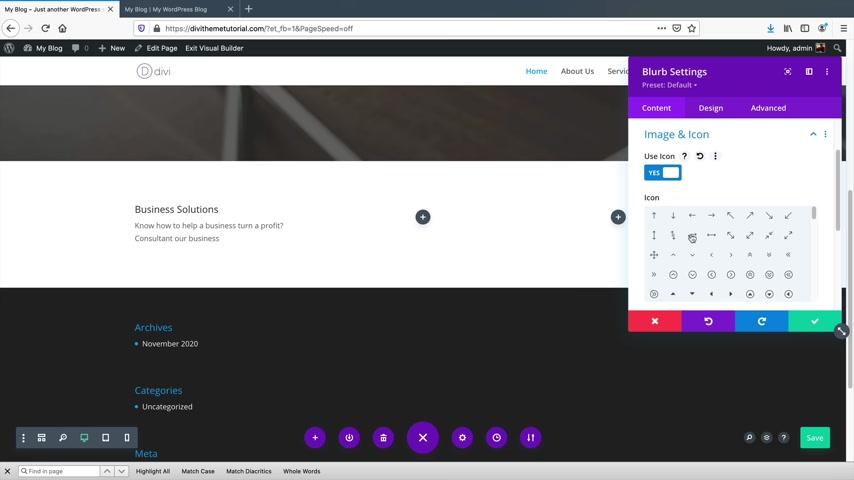
However , we can also use the icons that Diy comes with .
Instead of actually using a custom image , I , I like using the icons more because I feel like these just , they're very responsive .
They work well with Diy .
And ultimately , it just makes things a lot easier .
Uh go ahead and just select an image and we can go ahead and change the color of that image .
So maybe for this one , I'll put in , put in this building right here , you know , we'll put in the building , there we go we got the building .
So and then we'll go ahead and go to the design tab .
So now that we actually have the everything done , we need to just design it .
Now , I know it looks terrible , but we just need to just give it some color , give it some fonds and we're all good to go .
I'll click on this pencil icon and I'll do the pop ins and I like the , the bold here .
We have like the ultra bold .
I think it looks really good .
We can even do heavy as well .
I mean heavy also works and I want to align this to the center and maybe I'll change this a little bit bigger 20 right ?
And then yeah , I think that's pretty much it .
So next we have the body text so the body text as well changes it to pop ins and I will put this as a light , right ?
Or we can do like a like a light and we can also center that as well and keep it like that .
And then we can change the text of that as well and so on and so forth .
So that's pretty much it .
You know , we just made our module .
Now , what I did here to be a little bit more creative and I want to kind of help you guys think outside the box here is under the text tab .
I kind of made a fake button .
So I just typed in and read more and I bolded this .
So under here , I'll bold only this one and then I added this arrow .
Now , let's say , for example , you want to link this somewhere within this box , you'll click on this insert , edit link and you can insert a URL .
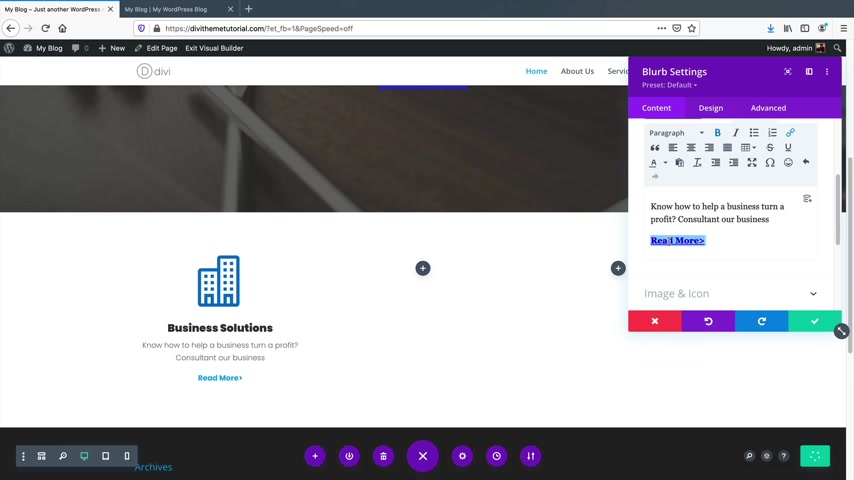
So I'll put Darryl wilson dot com .
I can open this in a new window when someone clicks on this specific link under this , read more .
It'll actually take them to my website .
Essentially .
What I did here is I just kind of created a button using text .
There's no right or wrong way to use a module guys .
However , you can use a module .
That's what , you know , whatever , whatever you're trying to achieve with whatever you want , that's what works , you know , there's no , there's no handbook to Dibby .
It's just whatever you can think of that will work and I want to change this to black , you know , I want to keep this black like that .
So you'll see how this is now a link that we can use to pretty much anywhere we want .
Also , you'll notice on my demo website how we have these great little bars .
Now , what this does is that it just gives it some separation and it's too much white .
So the gray bars kind of helps it take away all of that white .
So to add a border to anything under the design tab , you'll see this border option .

Now we can add a border to the top , we can add a bottom to the right , the bottom or , you know , the entire box .
But I just want to only add a gray border to the right side so we can add in a small border like that and that's a little bit too dark .
So I want to just kind of reduce the transparency there .
So over here , I can just reduce it , just kind of give it like a faint look , right ?
Not too much , just a little bit like that .
And there you go , what we can do next instead of having to do everything all over again , you know , I'm a lazy guy , you know , I'm very lazy .
So I'll just duplicate this module twice and I will drag this over there .
There it goes , OK , let's see if we can do that again here .
Let's , let's , let's see here .
Uh There , there it goes .
So if that ever happens guys , you know , I'm not gonna edit that out .
That really does happen with me sometimes .
So it's just , you know , you just gotta work around with it .
So next , let's go ahead and say , all right .
Well , you added this little , this little section here and you pushed it up .
How did you do that ?
Well , let me just show you how I did that .
What I did under this section is I added a , a drop shadow .
So under the teal section under the design , we have a box shadow and I added a box shadow to it like that .
And for the actual sizing of this , I made this a little bigger .
So I want to reduce this .
Uh I wanna increase this with here .
I just want it a little bigger , you know , something like that max with .
There we go , something like that .
Now , one thing also is that sometimes these are too close to the ends so you can go ahead and just so , you know , it's , I want this a little bit , you know , in the center there , you might need to adjust things as needed while you're building this .
So now that I've done that , we have these three icons , um what I can do is I want to push it up here .
Now , this is a little advanced , but this is where margin comes in .
So there's margin and padding .
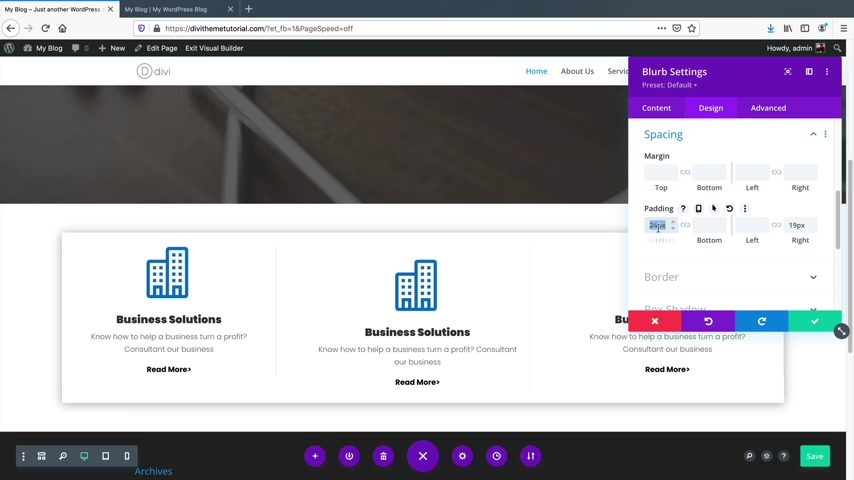
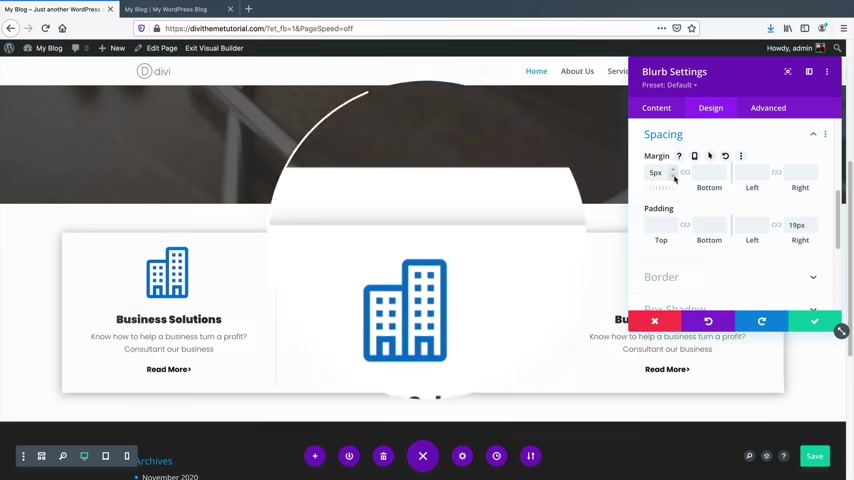
So let me click on this gear icon just to explain it to you really briefly about margin and padding .
So under the design , you'll see , I think it's under a spacing .
Essentially .
What margin in padding is padding is creating space .
You see how right here we have the space and how it's making more space .
So padding is creating space above this particular icon .
If I do padding on the bottom , it'll create space below the icon .
So now it's making more space below it .
If I add space to the left , it'll create more space to the left and more space to the right .
Essentially , what it's doing is that it's kind of pushing everything away because it's too clustered and you want space .
Like let's say , for example , I just want more space on the top here .
So I can just click on the gear icon under the design .
We go to the spacing and just say I want space on the top like that and you can do that for pretty much every single module , 100 pixels gives it a lot of space .
Now , what margin is , margin is saying ?
I just want it to start from a particular area .
So that's what margin is in a nutshell .
And you can even have negative margin with negative margin .
You can say , well , I want this module to start way up here .
So I'm giving it negative 40 margin .
I'm just essentially saying I want this module to start minus 40 pick from where I originally put it .
So that's what margin and padding is .
So we can use margin for this entire row here .
We did it for one module , we can do it for rows .
So I want to go ahead and click on this gear icon and I want to add margin to this entire row .
So design spacing now we have margin , right ?
So we have margin on the top .
But what I can do is I can add margin to the actual whole entire row and we can push it above it like that .
Now , you might notice also how we have this space and it's also kind of transparent as well from this top one .
But we need to add a background color to this .
First .
I'll go ahead and access this whole row .
See I'll go ahead and double click on this row and under the background , I want to change this background color to whites like that .
So now we have this white background , you know , we just want to make sure that uh you know , it doesn't interfere with this top one .
Next , let's say , OK , we made this section .
Congratulations .
Now , how do we make this section pretty simple , right ?
We have a two column row , text , text and blurbs , text and an image under this little plus icon regular , right ?
And we have a two column row .
And what would you say ?
We said text , right ?
So we have text here , I'm lazy .
Here , there we go .
There we go .
And then also we have this divider .
So we have text divider and text , right ?
We have text and I'll click on the plus icon and we have a divider and then I'll duplicate this text and then I'll drag this text below that one right there like that .
And also we have three blurbs .
So I'll just put in a blurb like that .
OK ?
And under under this section , we have text and then we have an image below that text .
See I want you guys to just kind of look at the website and say , OK , I know where everything goes .
We just have to design it .
So I know this looks nothing like this , but literally all we do is we just change some fonts , we change the colors and that's it .
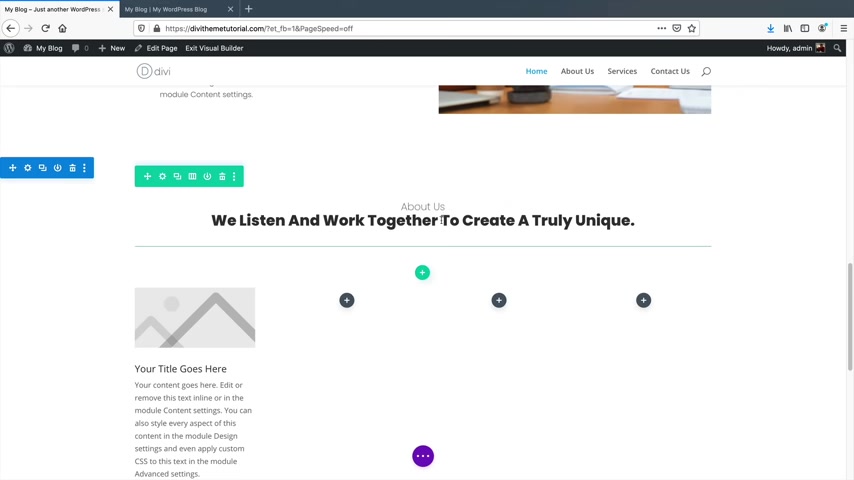
So for example , we have this section about us and then we listen and work carefully .
Now for this section , I'm going to introduce you all to h one tags about us and then I'll go ahead and just copy and paste this this text and paste it in there .
So with this text , you'll see how we have heading one heading , two , heading three , heading four , heading five .
So I want to change this to heading two .
OK .
There we go , heading two and I want to leave it like that .
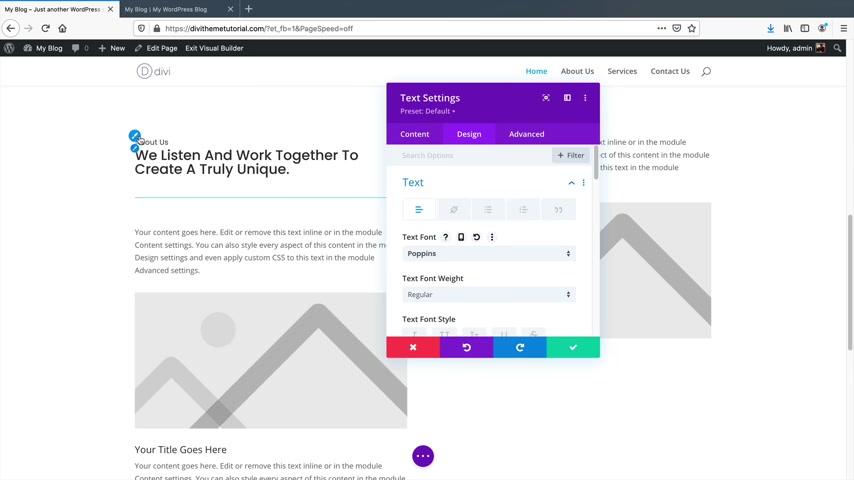
Now when I go to the , the design tab , you're going to see text , right ?
I want to design this text .
However , uh we can have different texts for each of these ones .
So usually , you know , since we have it in one box , it would change everything .
But since we have the heading to tag , we can now design this text independently from this text .
So for the text here , I'll just change this to ultra light .
Now you'll notice here how only the top is changing and that's because the text is default to the paragraph fonts .
So now let's say , OK , Darryl , well , you know , we , we , you know , we change that .
How do I change this one ?
Well , let's go ahead and close that .
Go to heading text and we selected the H two tag , right ?
Remember how we selected H two .
I'll go ahead and change this font now .
Do something like ultra bold and yeah , I mean , that looks pretty good , right ?
I mean , I can , you know , maybe increase the size of it .

So heading text H two and uh let's make that a little bigger like that .
So that's what that means under the text section where you see the H one H two H three and all that different fonts and a different size for every H tag , which is pretty cool .
All right .
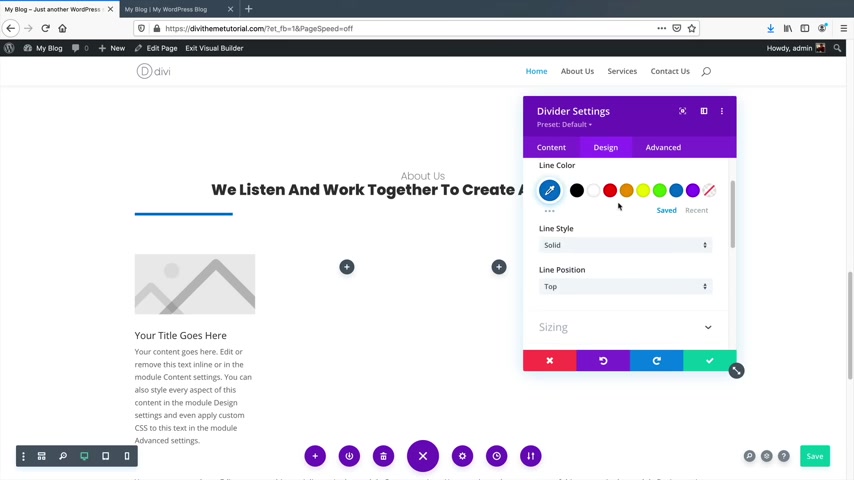
So now that that's done , we'll click on this and this is the divider guys , a divider essentially adds space in between certain modules .
I'll just go to the design and just under the line .
Uh We can change this to blue because I want to carry that blue and under the sizing , I wanna make this little fat , you know , a little fatty here .
We got a , we got a fatty , right ?
That offends a lot of people today .
I shouldn't use that word anymore .
It's like people on the internet take everything offensive and it's like , well , it's a fat line , you know , I want to reduce this with , you'll see here how I just kind of reducing the whiff like that and that's pretty much it .
And here we have the max the , I'm sorry , the minimum heights .
And then we also have the height as well .
So essentially what the height does guys is , we're just adding height above it and below it , that's essentially what a divider module is supposed to do .
However , I'm just using it to add the core to the website because I just don't want all of that white everywhere .
And I want to create this divider to kind of , you know , help people understand , you know what I'm trying to do there .
So uh that's basically how we add a divider .
And again , I can always adjust this like that and also the same way as well .
So it's kind of hard to kind of get to all these modules because a lot of them get in the way of each other .
But you guys get the point .
Now , let's just say , for instance , I want this , um you know , I , I want to make sure that uh I want to reduce the space here and maybe this module is like the max space , you can add , you can always add negative margin .
So remember design spacing and I want to add negative margin to the top and negative margin to the bottom like that just to give it a little bit more space , something like that .
You get what I'm saying .

So that's where margin can come into play kind of forces everything to work together .
Now , let's go back to here and I'll just grab him some demo text , right .
Copy this and you know , paste this , paste there and I like that and then I can just change this text to pop ins and I think ultra .
There we go .
That's good .
All right .
That's good .
I just light .
That's good .
So now we have this section .
Now , what I've done on this website is you see how I have this orange , red and green , I kind of use that as a color palette .
So with colors on your website guys , you probably only want two , maybe match three color palettes .
However , I'm using this as a specific color palette .
So I'm just getting a little bit more creative .
So let's just say if I introduce this color on my website , I have to introduce it again somewhere and I did .
So I introduced it right here as well .
And I also introduced it on the other pages .
That's where you want to keep the colors as consistent as possible .
Here we go .
So I have this little module and what we'll do is just go over here and um you know , I'll just put in , what did I put there ?
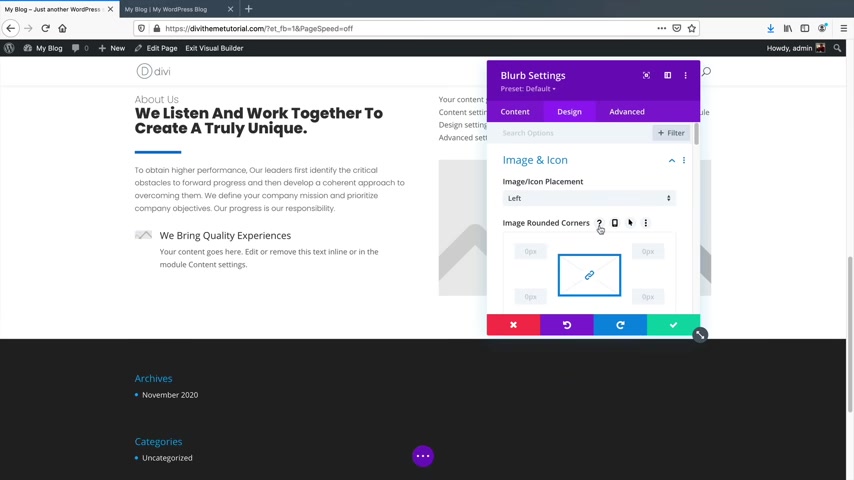
We bring quality experiences and then , you know , I can just , you know , you guys get the point and then for the design , I'll just add an icon , but I want to place the icon to the left here so to the left like that , you know , now you'll see how we can change the blurb to , you know , a different style because up here , this is more for like introduction of a service .
This is more for something where we're just trying to add , you know , decors and features .
So I have the icon on the left side .
However , under the content section , uh I'll click on the image and icon and I want to use an icon here .
And again , we can just use any icon .
There we go like that .
And then for the design tab , we can design the color of this .
So I can have it blue also for the um there we go to text , we can change this to pop ins , right ?
So I think the blue little uh pencils really help you find everything because it is kind of hard to go through all these settings and find each particular one .
So just clicking on that blue little pencil really speeds up the process of building the website .
I'll change this to something like ultra bold .
And then over here , I will also change this to pop ins and make this light .
So something like that .
And again , we will come back to the image filtering a little bit later .
The image filtering is really cool .
So we'll come back to this a little bit later and I just want to duplicate this and then we can just change the actual color of the icon and so on and so forth .
Now , this particular module right here , um this is created by another plug-in called Divi Next and I will have an exclusive discount for all of you watching this .
But essentially what this module does that it allows you to like have some really cool stuff on this site .
You'll notice how if I click on the plus icon , I have more modules and this is where we have the third party um The divi third party extensions come in which I'll talk more about little or like at the end of the video .
But the the extensions just , they add a lot of stuff to your website and it just makes your website look really cool .
Next , we have this placeholder image and I want to click on this gear icon and I just want to change this image .
I'll just grab in an image from um one of these here .
So I'll just grab in this one and upload an image .
So I did talk about the image saturation .
I did talk about the filters of the image .
So let's go ahead and apply those now to this image .
Now that we have a good image to work with .
I'll go to the design tab and then we'll find the filters .
So with the filters , essentially what this is is like you have a built in Photoshop , you can just kind of change the saturation , the brightness of everything , which is really cool , you can change the contrast so you can go ahead and mess around with all these settings .
Hi guys .
Today , we are going to see how you can create a mega menu on your wordpress website .
Let's say you have a website and you have a lot of pages and different categories on your site .
So instead of using a default menu with only a few pages like this , let's say you want to create a mega menu where you can add all the pages and categories on your site .
So your visitors can easily find any page they want right from your menu .
You can do that by watching this video .
So after watching this video , you'll be able to create a mega menu like this and you can also add images like this .
Now , if you visit us , click any page , it will take them to that page .
Now , having a mega menu will help you keep your website organized and let your visitors easily navigate through your website .
So make sure you watch this video till the end to learn how to create a mega menu .
So let's get started , I'm Huser from website learners and let's start creating our mega menu .
Now to create a mega menu , we are going to do three steps .
The first step is to install a plug-in .
Now , if you like this layout , click insert , as you can see the layout has been inserted .
Once you have selected the layout here , you can see that we don't have the menu to add the menu .
Click here and select the menu you want to display on your header section as I want to display the main menu .
Let's select main menu now to add your logo here , just click the pencil icon and click here .
Now drag and drop your logo here .
As you can see our logo has been added .
OK ?
Once you've created your header , just click update and the header section will be added to your website to check that if you go back to our site , you can see that this is our default header .
And now if you click refresh , you can see that our header has been changed .
So we have now successfully created the header section once you have created the header section .
Now if you go here , you can see that the mega menu is not displayed on our site .
Next , let's go to step three , which is to enable the mega menu .
So to enable it , let's go back to wordpress dashboard , then go to appearance and click menus and then enable this option once you have enabled the mega menu .
Next , you need to select for which page you want to add the mega menu .
Let's say you want to add the mega menu to this page .
So just go here and click here and enable mega menu .
Now the mega menu will be enabled for that page .
Once you have enabled it .
Next , you need to select the design for your mega menu to select it .
Let's click , edit mega menu content and click here and then click sections .
Now go to category and click mega menu .
Now here you will get different designs for your mega menu .
Select the one you want .
I'm going to select this and click insert .
As you can see that we have got the design which we selected once you've selected the design for your mega menu .
Now , here you can see that we have these default pages instead of this .
What if you want to add your category pages here so that when someone clicks on it , it will directly take them to that page .
So to add the category page here , you need to enter the category name .
So just click here .
I'm going to enter t-shirts now to add your category image , just go here and click the pencil icon and then click choose image .
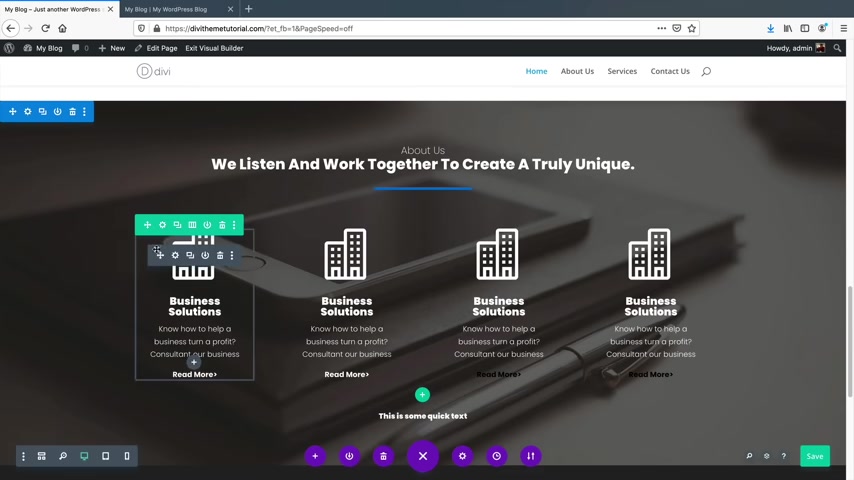
Now drag and drop the image you want as you can see the image has been added .
Now let's add the pages under these categories .
Click here and then click here .
Enter the page name .
I'm going to enter Polo t-shirts .
Now , here you need to enter the link of the page .
So to get the link , let's go back to our site , then go to all products and click Polo t-shirts .
And here you can see that we have got the link .
Now , let's copy it , then go back to this tab and paste it here .
OK .
Now , in the same way you can add all the other pages .
So this is how you can add the category pages to the mega menu .
Now , if you want to delete any section , all you have to do is just click here and the section will be deleted .
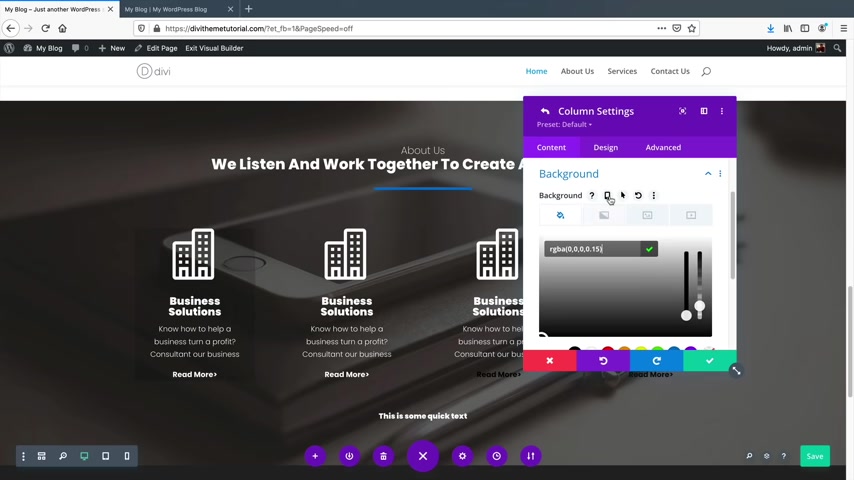
Once you have done with all the changes , just click update and close this and then click save and again , click save .
Now the mega menu will be added to our site to check that .
Let's go back to our site and click refresh .
Now , if you go here , you can see that we have got the mega menu .
And if you click on any category page , you can see that it directly takes us to that page .
OK ?
So we have now successfully created the mega menu .
Now , let's say you want to display the mega menu in a full bit like this to do that .
Let's go back to our wordpress dashboard , then go to appearance and click menus .
Now click on the page where you edit the mega menu before then click settings .
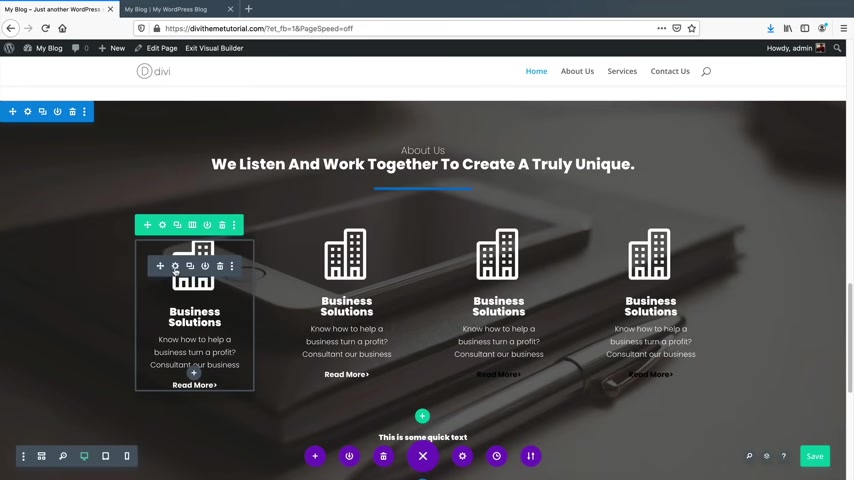
Now here select full width and default and then click save .
Now if we go back to our site and click refresh , you can see that we have got the mega menu in full size .
This is how you can create a mega menu and add it to your Wordpress website .
Now , if you want to add different and unique menu templates to your website like this , you need to get the pro version of the skip plug in .
So to get it , just click the link below this video and you can purchase the pro version of the plug in from here .
So that's it guys .
Now , you know how to create a mega men .
And if you want to know more about wordpress , you can check out our wordpress course here .
OK .
Also make sure you click the subscribe button to see more videos from us .
So thanks for watching .
I'll see you in the next video .
Till then .
Take care .
Bye bye .
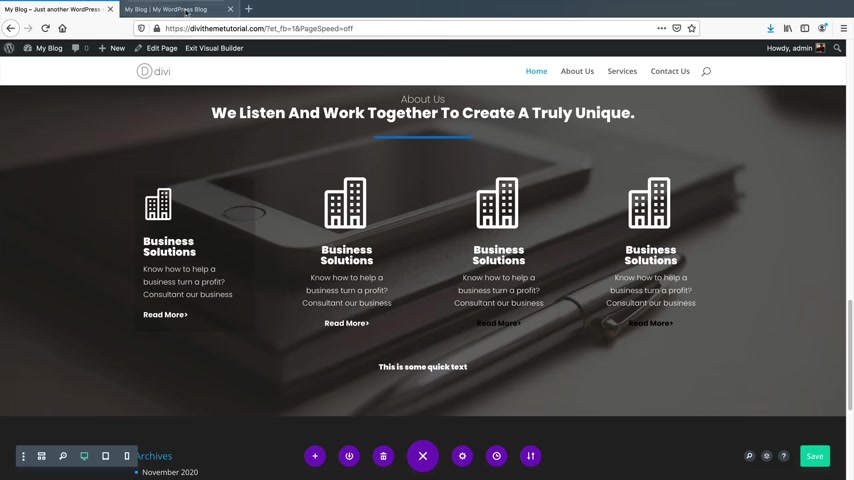
But overall , that's how I achieved this specific section .
So let's talk about this section right here .
Now , this is pretty simple and you guys probably know how I did this already because we already introduced it to you earlier .
And this is a testimonial icon .
I'll click on add a new section , regular one row and we have a testimonial .
So testimonial , I'll just put in like the author names like Jenny MC and then she's the CEO of uh I don't know , ladies Jim , ladies Jim or something like that .
And then for the body paragraph , we could put some text here and then for the design , we can go ahead and design all of this .
Now , remember you can just hover over something and just click on it and then you can adjust whatever you want there .
Uh That's just a quick one how you can , you know , design everything and just , you know , make your design for a little faster .
Now for the image , I'll just go ahead and get rid of that image and put in this woman like that .
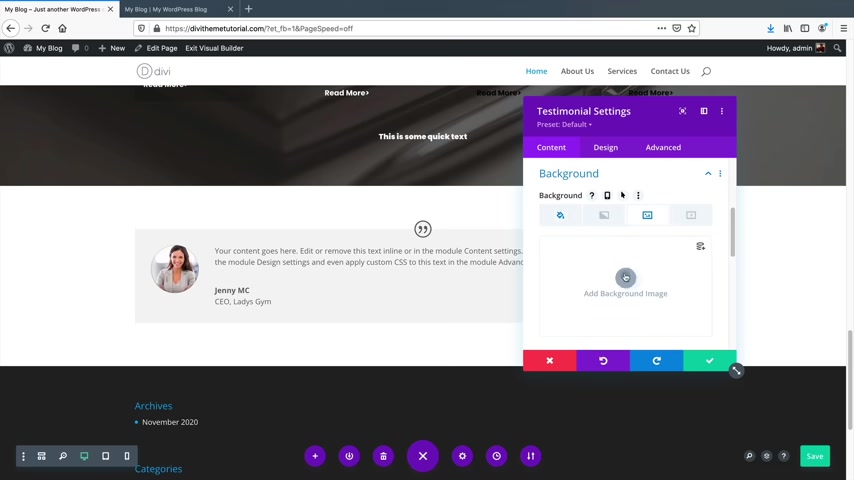
Now again , you can design this and maybe you even want to add in a specific background image like I did for the actual background under this section .
I'll put in a background image and I believe I added something like this here .
There we go like that .
I'll go ahead and delete that actually .
No , I think that actually looks better .
There we go or something like that actually .
Yeah , I think that actually works out and then I also added a drop shadow around this whole specific row .
So under the gear icon for the design , a box shadow like that .
So now let's say , all right , well , you made this section Darryl .
Let's just go ahead and move it up again .
I'll just move it up .
So gear icon here , I'll go ahead and click on that to get rid of that there .
We go like that .
And then for the design uh under the spacing section , I'll do the same thing again .
So I'll just give it some uh negative 100 pixels .
There we go .
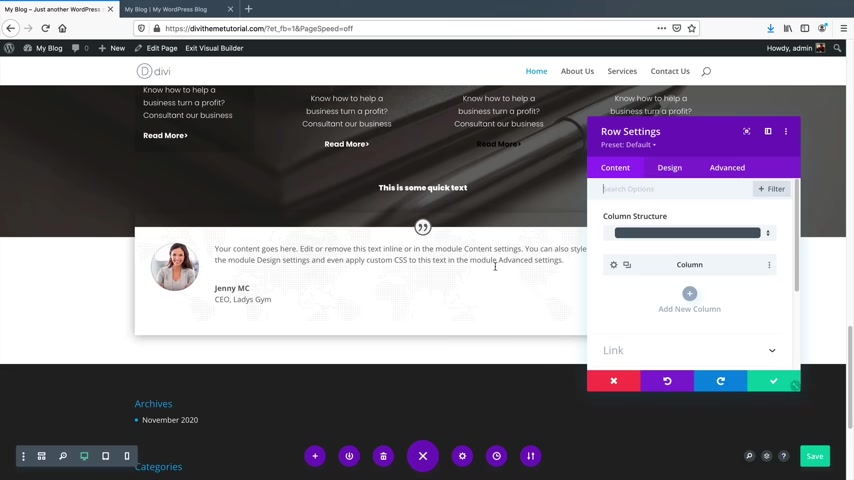
And then I need to make sure that this background is white that makes it .
So people can actually see the actual , you know , the white background color like that .
So next , we've done that section , we have this specific section .
Uh We have this section which you've already created , we have text and we also have a button and then we have these modules which these are just blurbs and they're just designed differently than we normally did .
So let's go ahead and make that next section .
First , let's go ahead and just say , you know what , I've already done that hard work .
Let's duplicate this section .
But first , I need to introduce a regular row .
And over here , what I've done is we have one column , two columns and three columns .
Now , if you ever want to see how many columns that you have , you can click on this column row and it'll show you the columns and the formats , you can actually change that as well .
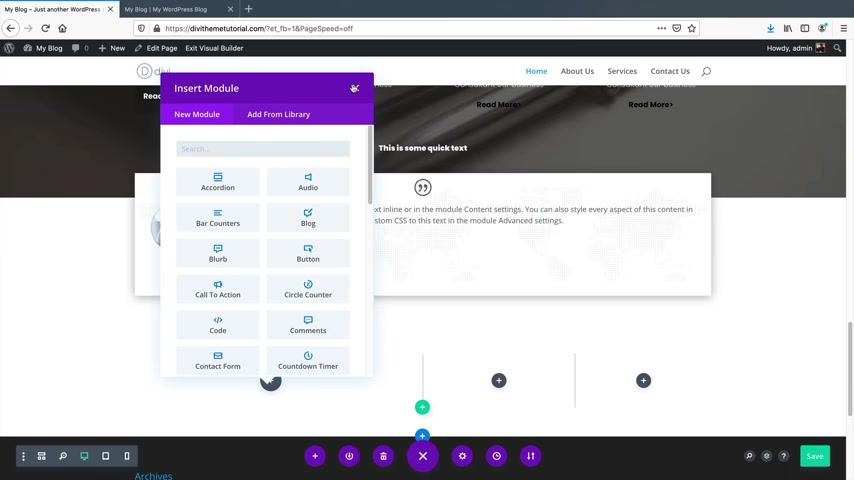
So for example , if you want to change it , you can click on it and it'll change everything inside of those specific uh modules to adjust to whatever you want to put .
However , I wanted to go back to that like that for this section , I'll click on that little uh rogue or column , whatever you wanna call it .
And then I will drag this , put this in there , right ?
And then we also have a text like that , but maybe that's too much text , right ?
Something like that .
Now , for this text , we can't see it because it's white .
So if you want to change the design , we can change it to black , right ?
Black and then also we can change this .
Here we go there to black as well , just so we can see it .
So now that we've actually copied this , what we can do to speed up the workflow is we can actually save certain modules to the library .
So let's say for example , I need this divider module , right ?
But I don't want to copy it and I , I don't want to bring it somewhere .
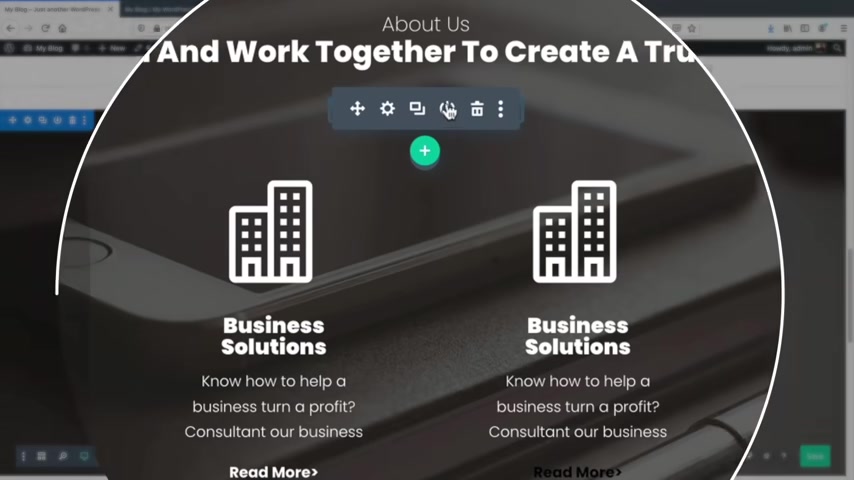
I just want to kind of save it and just use it to other parts of the website .
So we have this little save button and we can add this to the library .
So this will be our divider module and I will save this to the library .
So now what I can do is I can go ahead and click on the plus icon and I can add that from the library instead of having to duplicate it and bring it everywhere .
You know , all around the website .
Essentially you can make certain modules , add them to the library and then you can just kind of use them throughout the website .
I want to go ahead and maybe push this to the left side .
So all this to the left side , you know , I think that's , uh , you know , it looks better like that .
This one as well .
I want to push this to the left side .
It's kind of hard for me to remember where everything is all the time guys .
So , you know , my bad , if I make mistakes , it's just hard to do this because I'm not on a script .
Now that we've actually made that specific section , we need to make the button .
So we want to make something like this .
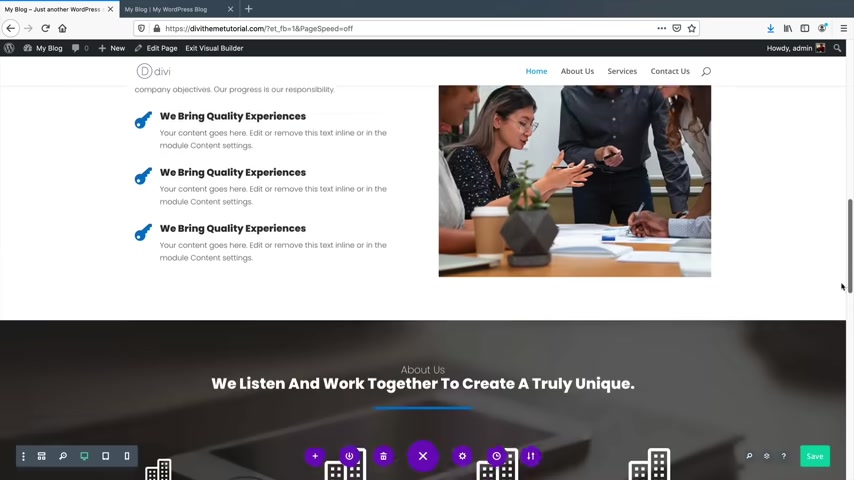
However , for the button , we will have to make one from scratch because that module is part of another module and we can't use that specific button .
What I'll do is click on the plus icon and select a button like that and then I'll just select it right there and there's our button .
Now , let's just say , for example , you have other modules later on and you don't want to go through every single one and you don't want to change them .
What I'll do is I'll go to this plus icon and click on button .
Now , there's a few ways on how you can kind of achieve this little trick .
I'm gonna show you how to do uh I'll teach you this later , but I just wanted to kind of give you a crash course about some of the advanced features .
So again , what we can do is I can just go ahead and copy this module style and then I can paste it onto this module style and therefore it'll change it to , you know , however , I want that to look also , we can use the extend styles .
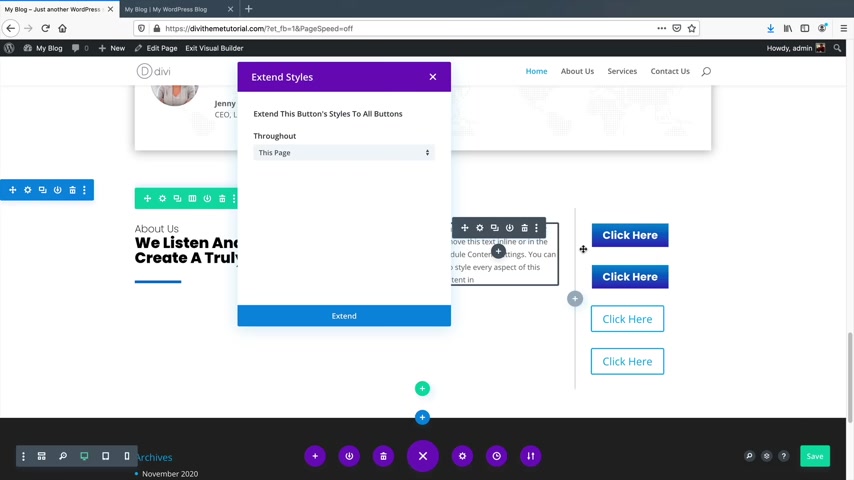
So I'll go ahead and right , click on this and go to extend button styles .
So what this is going to do is that it's going to take this same design of the button and apply it to all the buttons on this page , this section , this row or this column .
So I'll just say this page and I'll send the styles .
So now it's going to find any button on this page and change it to that specific style .
It doesn't change it to this button because this is part of the full with slider module .
It's not a specific button module .
So that's just some , you know , just a crash course on some of the advanced features that come with devi it's really , really cool .
We'll talk more about all those features a little bit later in the video .
So now I have this section here and this section is just a blurb .
So I just added a image and some text .
And what I can do is I can actually just go ahead and copy this module or even add this to the library .
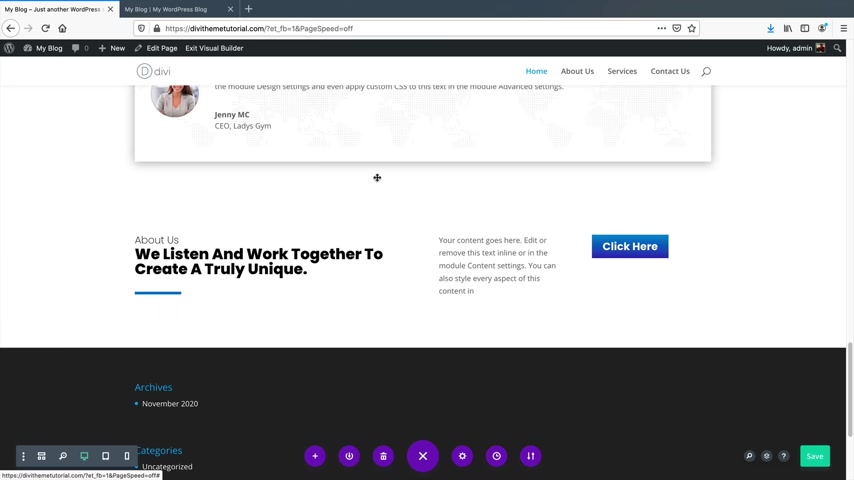
So this will be the new blurb , the blurb icon , blurb icon and save this to the library and then uh we can go ahead and just , you know , I'll put in a four column row here and add this from the library .
And now we have the blurb icon .
Now , essentially what I did is I just added an image instead of the actual um icon .
Now , one thing to note is I might want to go ahead and change this to black .
Let's go ahead and experiment here .
I'll go ahead and copy this module styles and let's see if I can paste those module styles here .
So here we go .
Does that work ?
Hm No , it doesn't work .
It has to be the same module guys .
So I was , I was hoping it would because it would save a lot of a lot of our time .
But what I'll do is just change this to black .
And then also here I'll change this uh you know , the text to black as well and then there you go .
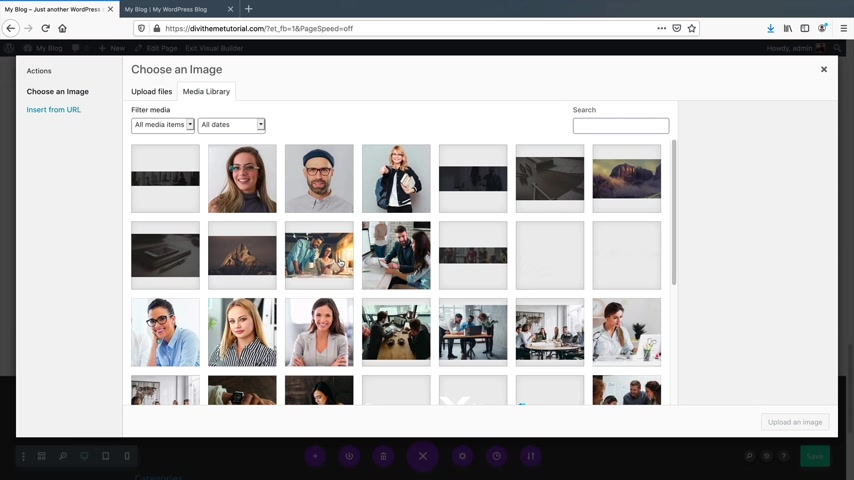
And then also we have that little read more , but whatever , that's fine .
All I did here is instead of using the blurb , I just used an image .
So for the image and icon , I'll use an image and then I put a picture of like the women here , right ?
So we have a picture of the woman .
And then what I did here is I added a box shadow around this specific column for the green row under the gear icon for the first column under the design , I will add in a box shadow to it , something like that .
And also now that you guys know about what padding is , I want to add some padding to the top , right ?
Because you see how everything's scrunched together .
I wanna add padding .
So let's add some padding to the top right there like that .
And there you go .
And I can just duplicate this module and so on and so forth .
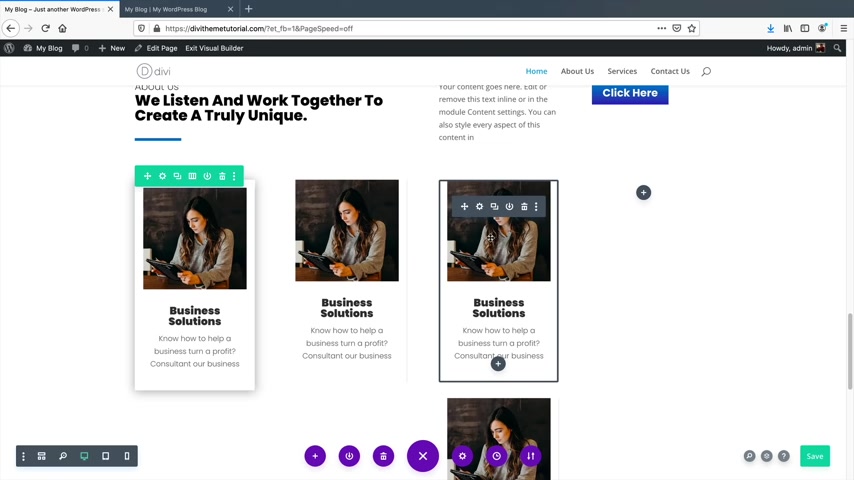
So duplicate it , put it there , uh duplicate it and then put it there like that's but , but here , here we go .
Sometimes guys it gets glitchy .
You just kinda , you just have to drop it and it's like a game , you know , just gotta , you just gotta drop it and hope it works out like that .
So there we go .
Now , uh Also I have to add in the drop shadow to all four columns just to make sure that it all looks good for column one for the design under the um here we go for the box shadow , right ?
And then for design column two , we have .
Yeah .
So what I can do actually is I can just copy this row style , copy it styles and then I'll just paste item styles here like that .
There we go , paste item styles .
Now you'll see how they all look the same .
OK ?
So next , let's add a call to action on your website .
Call to actions are very helpful .
You've probably seen these on various other websites .
It just adds a lot of navigation to your website .
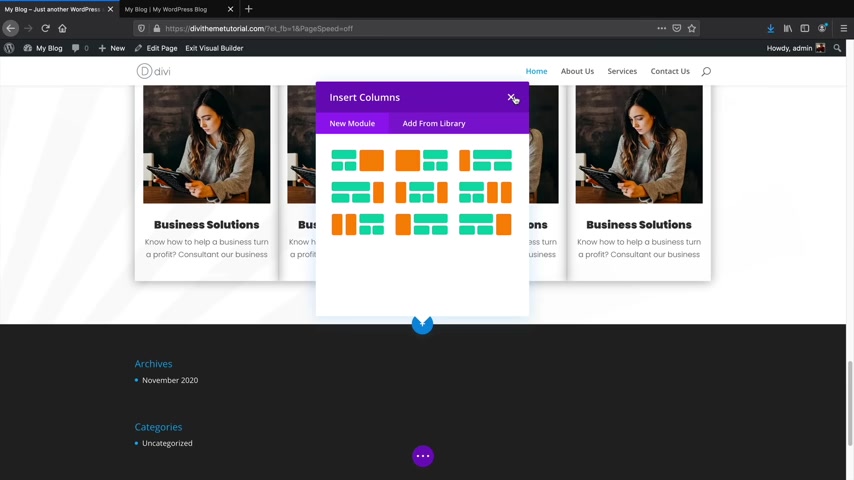
It tells users where to go and you can link them to pretty much anywhere you want your contact form .
Let's go back to our website and let's now create a call to action section .
So first I'll hit on the plus icon and click on regular .
Now , you probably already seen specialty .
It's just a different style and way you can add different sections .
Now , that's what specialty is .
I don't really use it too much .
Um I don't really find a big reason to use specialty , but uh I'm sure there's a reason for everything .
If you wanna add specialty sections , you can go ahead and do that .
But I'm just going to add a regular section and just put in a single column row and I'll type in text .
Ok ?
Now , I don't really have to edit everything all over again .
In fact , what I can do here is just take this and duplicate this , right ?
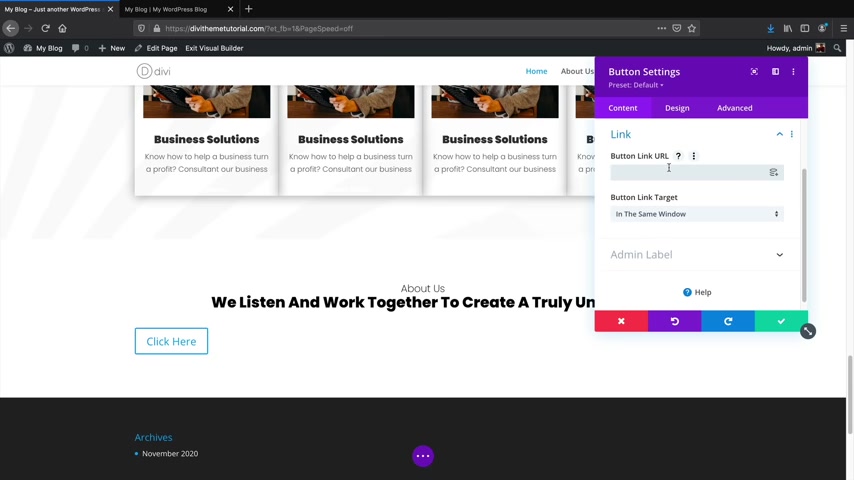
And then maybe even just drag this down and just use this section , you know , just add it there and then center align this and I'll hit the plus icon and here I'll type in a button like that and then you can put in the link so this can go to like Darrell Wilson dot com or something like that , right ?
So Darryl Wilson dot com , and what I'm gonna do here is remember , we need to be smarter here .
We don't want to work too hard .
So there's a few things I can do here .
I can copy this element , drag it or I can copy the module styles and then I can paste it here instead of having to do everything all over again , something like that , right ?
And then I can center align this as well by going on the design tab and on the alignments , I will center align this .
Now , we need to add an image on the background .
I think that's the only thing that we need to add here .
What I'll do is under the gear icon for the section settings under backgrounds .
I will oh no , not color .
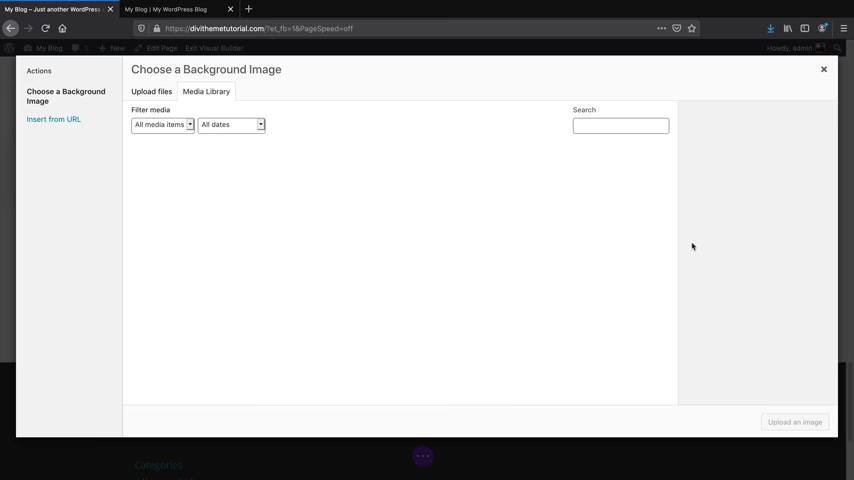
We'll go to an image and we'll add a background image .
Now , I did give you the image uh for this specific background as well .
It's at the bottom here .
It's this little mountain and I'll upload this image and there you go .
Now , the only thing that we need to do is probably change this text to whites and I think that's pretty much it .
All right .
Cool .
So I uploaded that image now , I might want to add a specific overlay to this background image because it's kind of hard to read this text since we have this white mountain .
So what I can do is if I scroll down , I will then see the background image blend .
So I'll click on that and there's various ways you can blend it in , but I'll just click on soft light .
Now , once I click on soft light , you'll notice how everything disappears .
But all I need to do is click on the background color and I need to add a specific color for that color blend .
I'll click on the plus and I'll select black .
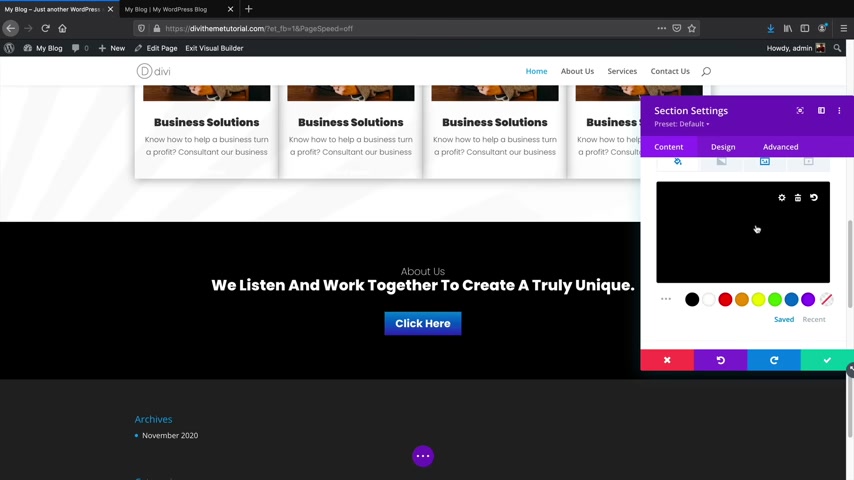
So now I have this black background , but what I wanna do is click on this color and I want to reduce the transparency now .
So now you'll see how it kind of blends in really well and it just looks great .
So something like that and then we click on check and then there you go .
Now , if you want to adjust this section , I can adjust it like that and also like that as well and you can make this text bigger or smaller just depending on how big you want your call to action to be .
Don't make it too big , but something like that is pretty cool .
So next , let's go ahead and create this section here , which is a very unique section you'll notice here how we have this uh text and it's also overlapping .
However , it's this kind of circular style , which is really unique .
So let's quickly go ahead and create that and we are pretty much done with our home page .
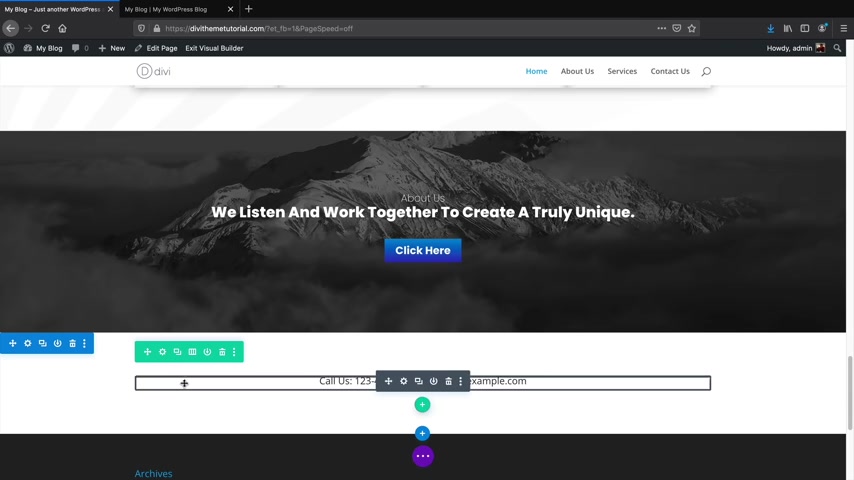
So add a new section , regular , right , normal text and I'll just paste in some demo content and I'll make sure that center align , which is good , right .
So I'll close that .
Now , I might want to actually reduce the size of this whole column .
It's , it's a little big , you know .
So what I can do is I can reduce the size of this whole column of this teal column .
So what I'll do is I'll click on this gear icon and for the design tab under the sizing , what I'll do is for the width , I'll change this to something like 65 .
And then for the max width , I'll make this 614 pixels .
So a little bit smaller , just a little smaller .
So if I hover over it , I'll click on check , you will then see how the whole column gets smaller .
And that's what I want because I want , I don't want the overlay to be too big when I push it up .
So let's go ahead and continue under the gear icon .
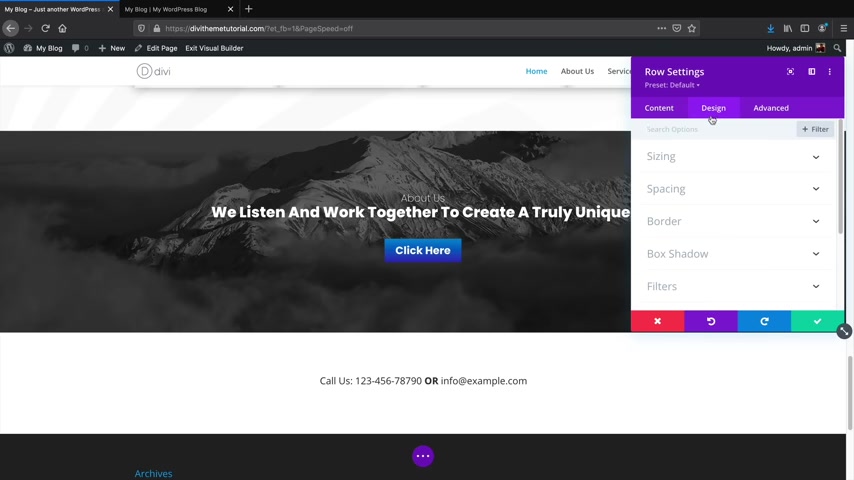
I'll click on that .
And for the design , I want to add a border radius .
So remember a border radius you can use for everything .
It just gives things that circular style .
So for the border , I'll add , let's see 26 pixels around the whole uh module and you'll see how we have the borders .
Now you can kind of visibly see what it looks like .
And then for the content background , I need to actually give this a background color of white .
So I just wanna make sure that uh when it goes up that it doesn't like fall in there and , and you know , it shows the background .
So I add it in the background .
Now , let's push it up .
That's all we got to do .
So for design , we have the spacing .
I want to go ahead and give this negative margin of maybe minus minus 60 .
Would that work ?
Minus 60 pixels ?
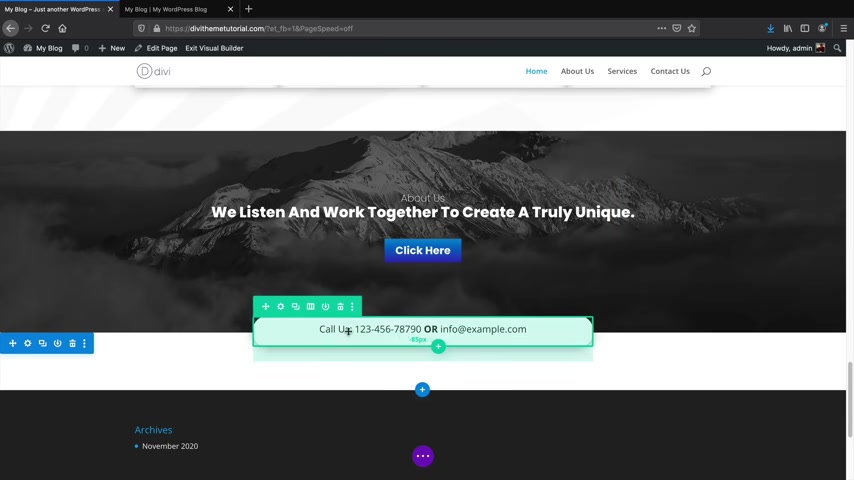
Nope , a little bit more and perfect .
We'll just do it at like maybe 85 .
Now , there's one thing that we're missing and we're missing a box shadow , the box shadow just kind of adds emphasis around this whole section .
So I click on box shadow and I'll just add a box shadow and we can add different styles .
So that's how I achieved that specific section .
I did post that in my Facebook group .
And a lot of people were asking me like , how did you do that , Darryl ?
And I was like , well , you just gotta think outside the box there , but let's go ahead and make this last section which is pretty simple .
I add a new row five columns and I just added in an image .
I mean , that's it .
That's all I did .
And then for the image I just added in one of these uh demo images and that's it .
You're done and I can just duplicate this right ?
12345 .
And congratulations guys .
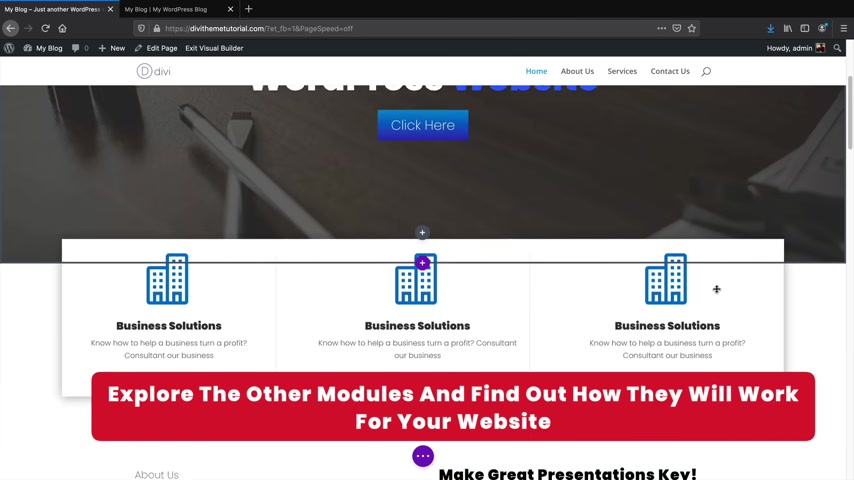
You are now done with your home page .
You made it this far .
Go get yourself a beer .
My favorite beer is Melo .
So at this point , I think you're very familiar now with the builder and it's really up to you , you to kind of , you know , make the step and just explore other modules , seeing how you can improve your web design process , right ?
Party people .
Welcome to design tip number two .
Now , I want you to tell me what's wrong with this picture or website .
So I'm just gonna scroll down and I want you to visually look at it and say , OK , what's wrong with this website ?
We have our landing page .
OK .
The next section we have , welcome to Royal and we have this picture of fruits or vegetables .
OK ?
And then we have fresh ingredients , tasty meals .
What's wrong with what I just showed you all ?
Well , you might notice that I used a different font for pretty much every section .
So I have one font here and that font obviously , it's , it's unique and it works right .
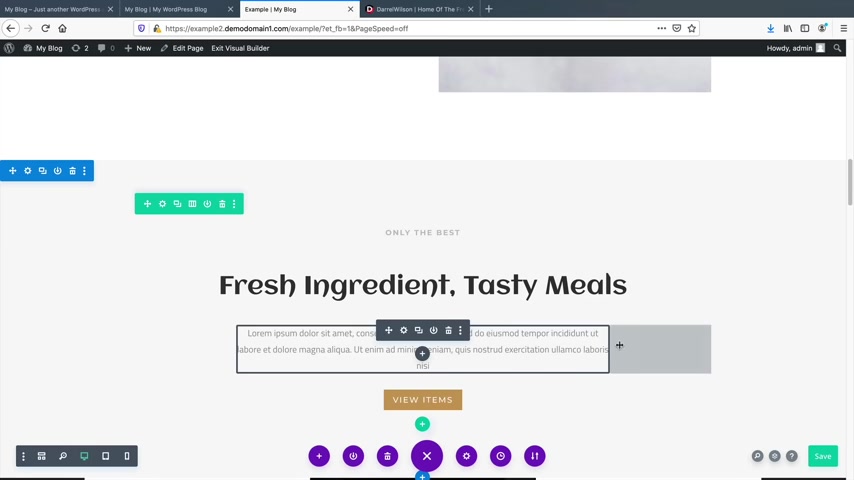
But now we have this other problem is we added another font and another font .
And if I scroll down here , we added another font and we have this different font .
When you're building your website , you need to keep the fonts consistent .
Now , a general rule of thumb is to have two fonts .
Most don't go more than two fonts .
So you can have a font that introduce your heading tag and you can have an additional font that introduces the smaller text .
For example , I use Roboto and a lot of my follower font , smaller fonts .
And then for my larger fonts , I use Poppins bold .
So you can get away with two fonts .
However , you want to make sure that you don't use a large amount of font because in your website just looks tacky .
I mean , we have only quality food and then we have this welcome to Royal and then we have this other one .
It's just confusing and it just looks tacky and ugly .
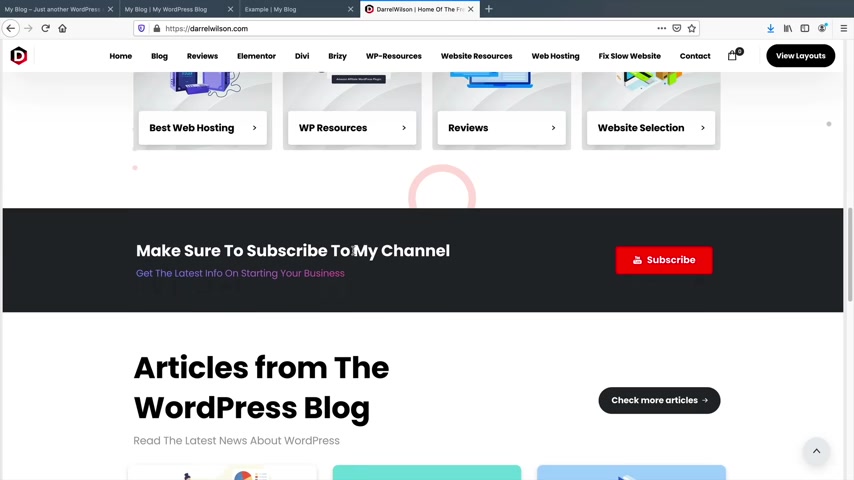
So when you are building your websites , make sure to stick to around 1 to 2 fonts and keep it consistent on my website , you'll see that we have this , uh poppin bold as my H one tags or H two tags and I'm just consistent .
I mean , you can click on this blog post here and I use the same font as well and I use a different font for these smaller text .
Ok .
So that is a general rule of thumb .
A lot of amateurs .
They like to add multiple fonts , but just be mindful that it will turn your website into a complete disaster .
If you added multiple fonts guys though , you don't want an ugly website .
Keep your fonts under two fonts .
Well , now that you're all professionals , let me quickly show you how to import the other pages along with making sure your contact form is working on your wordpress website .
In the folder that I gave you all that you downloaded .
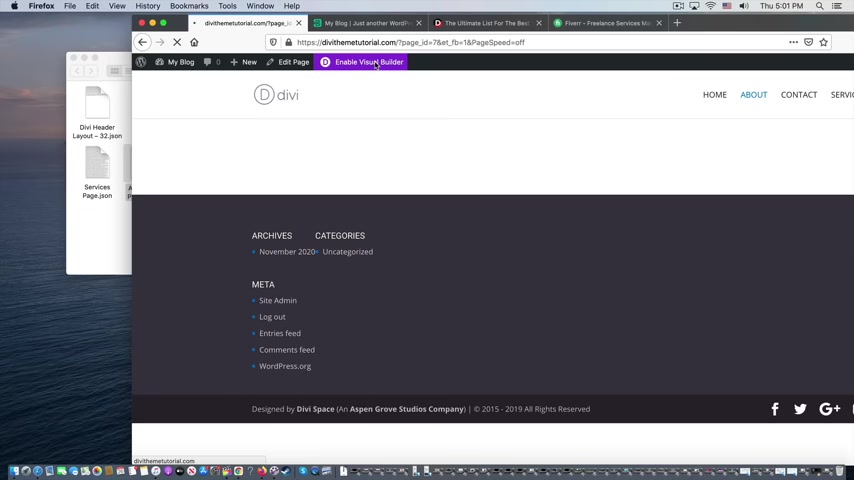
If you open it , there is the about us , there is the the Davy header , the services and all these other pages , you can go to your pages and open it and then you can enable the visual builder and you can basically drag and drop this on every page to make sure you get your layout and everything is working the way it's supposed to .
I enable the visual Builder on the About Us page and then I'll just drag and drop the About Us section , replace the existing content and import the divi builder layout .
You can do this for every page .
All right .
And there we go , we have the About Us page and everything looks great .
So go ahead and go through the other pages and you can import them all on your website and there you go .
There is your free layout .
You're welcome .
Now , let me go ahead and show you all how to make sure that your contact form is working on your website .
First .
Let's go to the contact page .
Next , I will enable the visual builder .
All right , we have these three options .
So I will build from scratch .

Click on X , I will find the contact us page and drag and drop it .
Then I will click on import devi builder layout and there we are .
So now you have this beautiful Contact Us form .
You are welcome .
Now this is the contact form module .
You can get to this module by clicking on the plus icon and typing in contact form .
And this is the module that you need to insert in order to have a contact form .
However , this layout already includes it .
So you don't have to do that .
This is the actual contact form module .
The contact form settings includes any field .
So you can have one for name , email , message , phone number , fax machine and whatever else you want to have on your contact form .
The contact form for elegant themes is amazing .
There's so much you can do with it .
You can have conditional logic and there is a lot of things that you can have on your contact form .
I do have a video on the contact form .

It is a little old , so I will be updating it , but I'm not gonna go into detail on this contact form because there is a lot to talk about with the contact form .
However , I just want to show you right now how to accept emails from your contact form in case you want to use it on your website , which I think most of you will once you open the actual module , you'll see these options , click on the email and then for the email address , just put in your email , that's it .
So I'll put in my email address now we can also set a redirect .
So for instance , let's say someone fills out your contact form .
After they hit the submit button , we can redirect them to another URL .
Like a thank you page or a terms and conditions page or any page that you want to have .
Uh users go to after they fill out the contact form .
But I'll be saving a tutorial on the contact form for another video because again , I want to be very thorough .
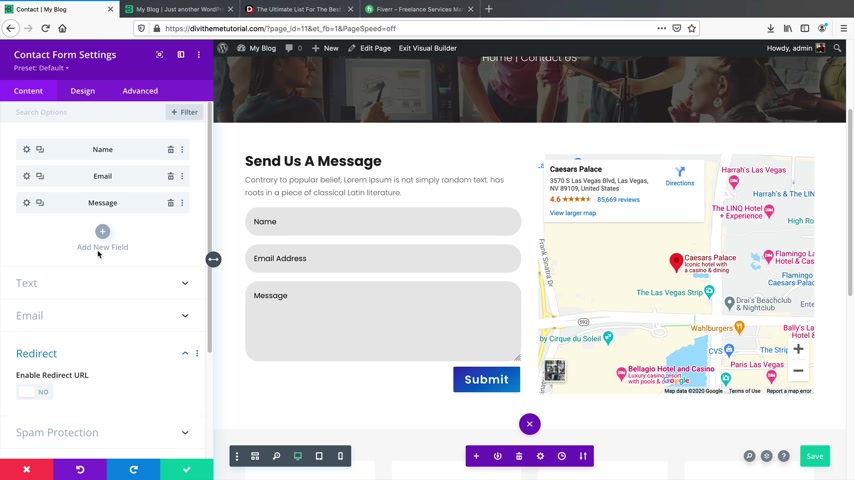
I just didn't want to make this video too long because I can easily talk about the contact form for another 30 minutes and then you'll click on the green check and click on save and that is it .
You are done .
So now when someone goes to your contact form and fills it out , it should go directly to your email inbox .
On the right side , we have this Google Maps .
This Google Maps is essentially an embedded form from Google Maps .
You'll see that this is just code from Google Maps .
And I'll also show you how you can quickly add Google forms or Google Maps on your website .
OK .
The first thing you'll do is go to Google Maps and you will enter Google Maps on the top left where it says search Google Maps , you'll just put in your business address or whatever you want people to see on your contact US page .
I will type in the Red Rock Mountains near Nevada and I'll click on the Red Rock Canyon National Con Conservation Area .
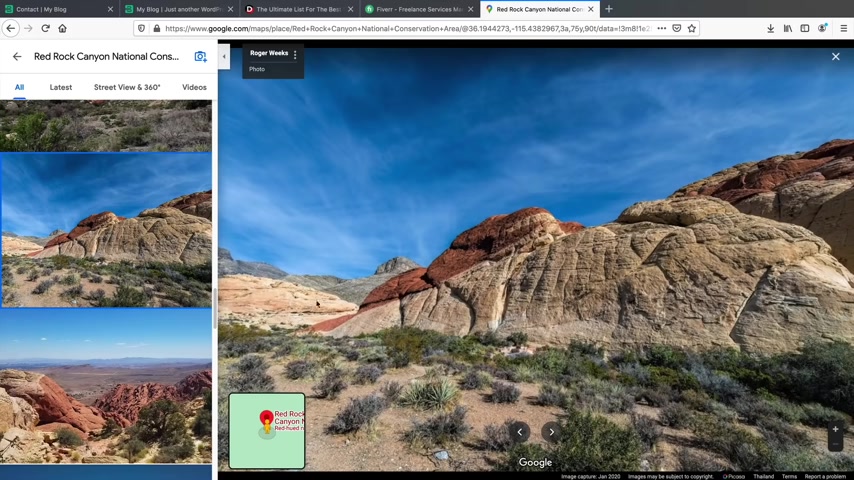
I actually used to live right here and these mountains are just beautiful .
I mean , the Red Rock mountains , I mean , I hate to go off topic here .
But , uh , for those of you living in the United States , you definitely have to check out the Red Rock mountains .
They are beautiful and there is tons of hiking .
I mean , look at the multicolor here .
It's , it's pretty , it's pretty wild .
So , uh , now that you actually have the address of whatever you want to have .
So your business or anything else where it says share , you'll click on the share icon and you'll click on embed a map .
You will then click on the copy html and then go back to your website and for the text under the actual text um element , you'll click on text , not visual and you'll paste that in there right there and then click on check and there it is .
So now you'll see the Red Rock Canyon National Conservative area and then you'll see the uh no con conservation area .
Whoops .
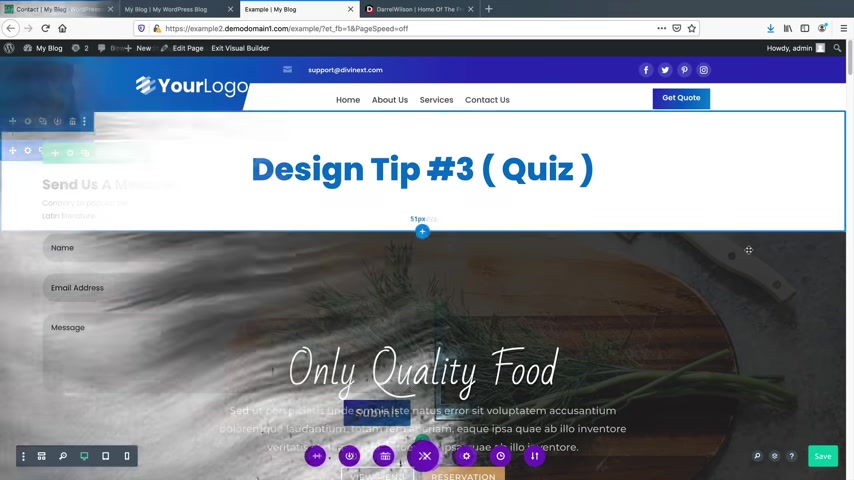
So you'll see the , the location and then you can click on save and that's how you can show people uh where you are at or where your business is located on your website , right ?
Party people .
Welcome to another quiz .
So this is gonna be design tip number three .
And I get this common mistake with a lot of amateurs building websites .
So I want to visibly show you what I'm talking about and show you how to fix this problem just in case you add this to your website , which a lot of amateurs tend to do .
I get a lot of people in my Facebook group asking me , hey , I just made this website , what do you think about it ?
And I get this problem quite a bit with a lot of amateurs .
So let's just take a quick look at this website and then try to understand what we did wrong here .
So let's take a look .
We have the landing page looks good and we have the secondary section .
Welcome to World with a picture of some vegetables .
And then we have the third section which is just some text and another image .
What is wrong with this website ?

Well , if you guess that we have too many background images , you're absolutely right .
So the common mistake that I see with people is they don't know how to introduce new sections .
So we have this image in the background , which is good .
However , when you introduce a new section , it's very safe to have a color and image .
So just remember this color palette image , color , maybe another color and an image .
So maybe do like two colors and an image .
So this background should be a solid color .
There's no reason why it has another image with another image on top .
And then on top of that , we have a third image .
So at this point I don't know where the website is going .
I don't know what it's doing , it's all over the place .
So let's just take a look at a layout is created and follow their design criteria .
So they introduced their landing page with an image , right ?
That makes a lot of sense .
And then they added the secondary section with just a standard color in the background that again makes a lot of sense .

And we have this third section which they've also introduced another color .
And the reason why I like this is because they've made it this faded color .
So as someone who's navigating the website , we know that it's a new section , right ?
Because if this were white as well , I would be confused .
I'm saying , well , is this part of this page or is this part of this section or is it part of this section ?
So since elegant themes added this very faint color , it basically distinguishes and tells people this is a new section to the visitors .
And if I scroll down now you'll see how they started to add in different images .
So they could have even added a background image .
But since they've already added images to this section , they probably felt like let's not add in more whites , let's add in a black color palette .
But let's just introduce some images here to take away from all of these whites because there's too much white at this point .
Because if they were to involve a third section with all white .
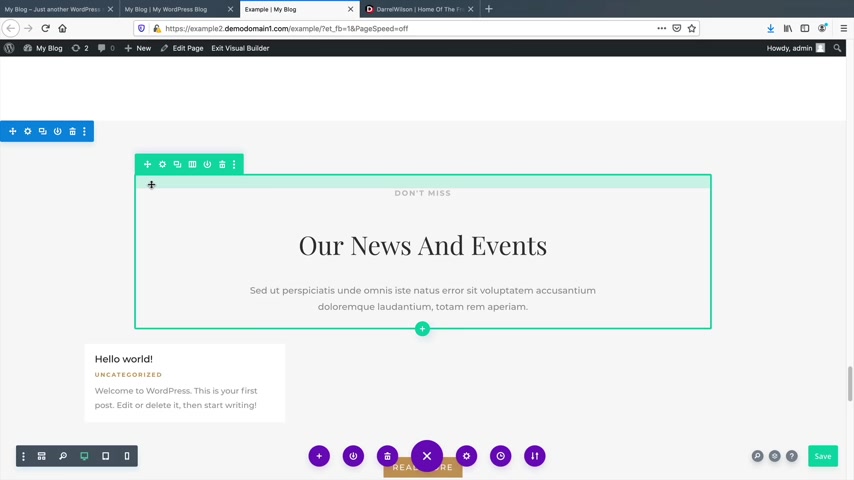
The website would look bland and boring , right .
So , let's keep scrolling down here .
All right , we keep scrolling down and now they've also said , OK , let's just go back to the basic color , right ?
Let's just go back no more images .
Let's just , you know , stick to a basic plain color and scrolling down here and again , they , they stuck to another color .
You'll see how this is a white color on the top .
And then this is another like uh I wanna say it's like a , a darker white .
But the overall purpose is they're just telling the users that this is a newer section and they haven't changed the color palette .
They've just kind of tinted it just a little bit to let people know that this is a new section .
So I'll scroll down and then they decided , OK , let's added some images because now we've added in too much whites .
So let's just take away from all that white by adding in some images on the background .
And then that would be the end of the website with the footer .
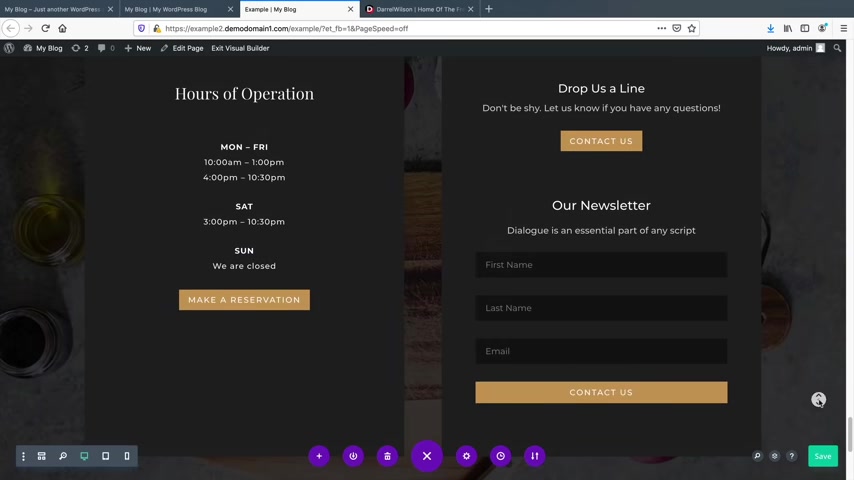
So just remember that when you are building your website , you want to introduce specific sections with specific colors and styles to tell your visitors that this is a new section and that this is something they should look forward to .
So if I had this all as a white background , it would look bland and boring However , if there's too many images , the people would be confused saying OK , image , image , what is going on here ?
This is too much .
So , even on my website , we have this image , we have this color palettes .
Now , you've noticed also right here , we have this second section .
Now I added a very small tint of whites .
But you've also noticed how I've reduced the , the , the strength of this color because I didn't want to introduce the same strength of the colors twice because the , the website would look um it would look um repetitive at that point .
So I have this section and then I'm saying , OK , Darryl look , I have too much whites .
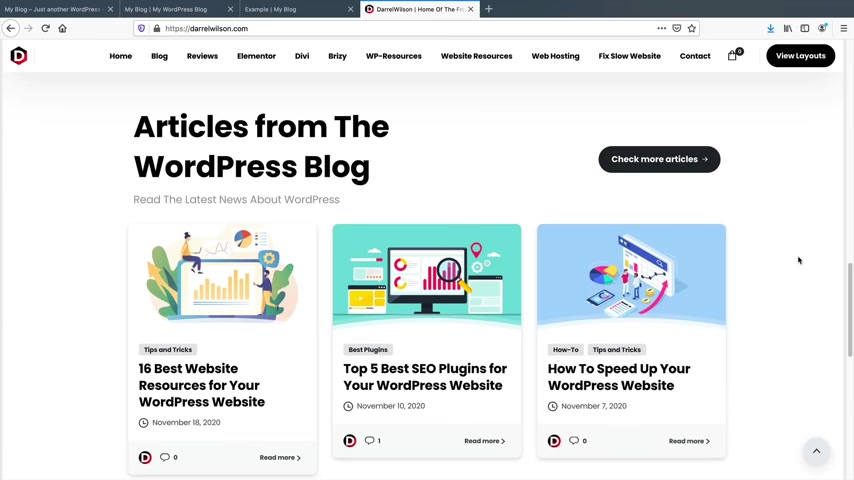
Let's introduce some black , you know , to kind of take away from all that whites and now let's introduce a new section .
So we have this new section here .
However , I took away from the abstract designs .
So I don't have those little red things here anymore because it was too much .
And I just want to take away from that design .
So I want to have every single design distinct .
And then here I added in the black .
However , I added in these little designs again to kind of remind users that this is my brand and this is my style just so they remember .
Oh OK , I remember the designs and then we finish it off with a footer at the end .
So just remember to incorporate different designs and different styles for every section , do not add too many images and also do not add too much color .
And if you do add color , make sure you just introduce a tint of something to just take away from all of the white or to , you know , not make it look so bland and boring .
That is a very common mistake .
I see with a lot of amateurs .
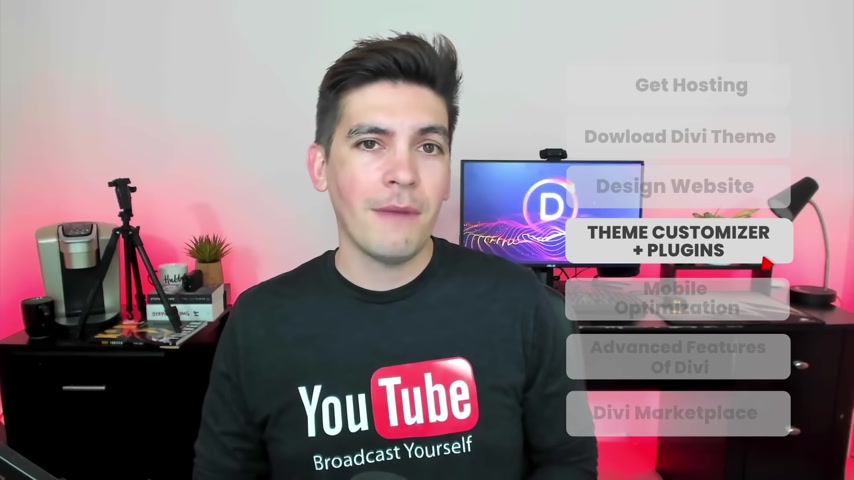
But , uh , now that I've told you how to fix that , uh go ahead and make sure you don't add that to your website .
That was my design tip number three .
And if you guess , right .
Congratulations .
So , congratulations .
Your website is coming along pretty well .
Now guys feel free to pause the video and mess around with the , you know , the builder , check out some other stuff .
I know people like to kind of mess around with other stuff .
So , you know , go ahead and do your thing .
But in this next section , I'm gonna show you all how to use the theme customizer .
I'm gonna introduce you all to wordpress plugins and then we'll also talk about the divi theme options .
Let's go back to the video .
Welcome back guys .
So in this part of the video , I'll be talking about the theme customizer options , the DB theme options and also give you some good resources on word press plug ins and where to get a logo as well .
The first thing that you'll do is let's access the theme customizer first on the top left , you'll see my blog and the theme customizer .
You can also get there by going to your dashboard .
And usually there's this button here that says customize your site .
That's the same thing .
So it brings you to the same exact place .
So the theme customizer generally controls parts of the website that the page builder normally does .
Not , to be very honest .
I don't use the theme customizer a lot with page builders .
I feel like the theme customizers are becoming a little outdated .
The only thing that I would use on the theme customizer is probably the header , navigation to design the menu and then just the home page settings which we did earlier .
I'll first go to general settings and go to site identity .
Now for the site icon , you might want to add something there .
You'll see how on the top right here , we have this like uh icon and an icon .
If you want to add your icon to browsers , you can select a site icon .
So under media library , I'll just grab a picture of this logo and click on select and just use part of that on the right side , you'll see how this now is part of the browser icon .
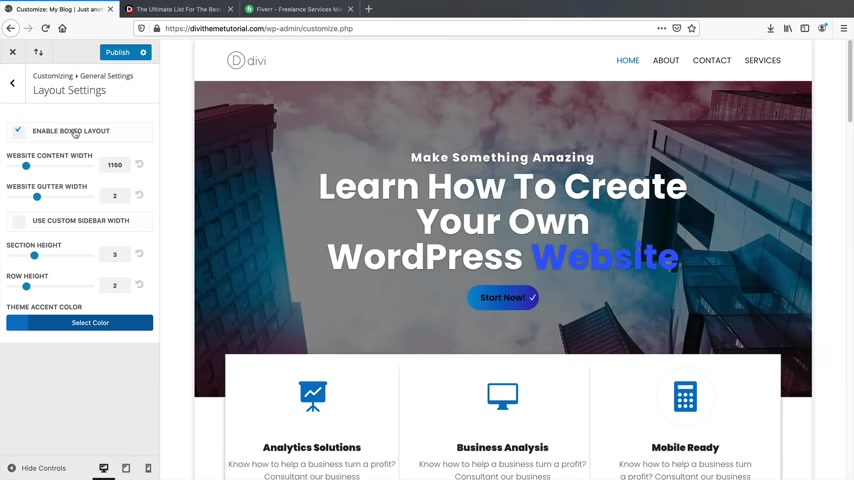
So if you want to add a site icon , you can do that from the theme customizer .
Let's go back here and on layout settings , this is again where you can just control the layout of your website .
So if you want to have like a box with , which is kind of old school .
But I think a lot of , uh , you know , I don't know , I don't know if people still do that or not .
It's uh , I don't know .
I think that's like uh back in the two thousands , right ?
But uh you can enable a box layout uh under the header , navigation tab .
This is where you can customize the menu .
For example , the primary menu bar , you can make this full width , you can change the text size , the menu heights and all the options to customize the menu are in the primary menu bar section .
Next , we have the secondary menu bar .
For example , if you have a dropdown menu , you can design the dropdown background or you can design the font of the actual dropdown menu as well .
Now I'm not gonna go through all of these options .
Personally , I think you're not gonna use any of these .
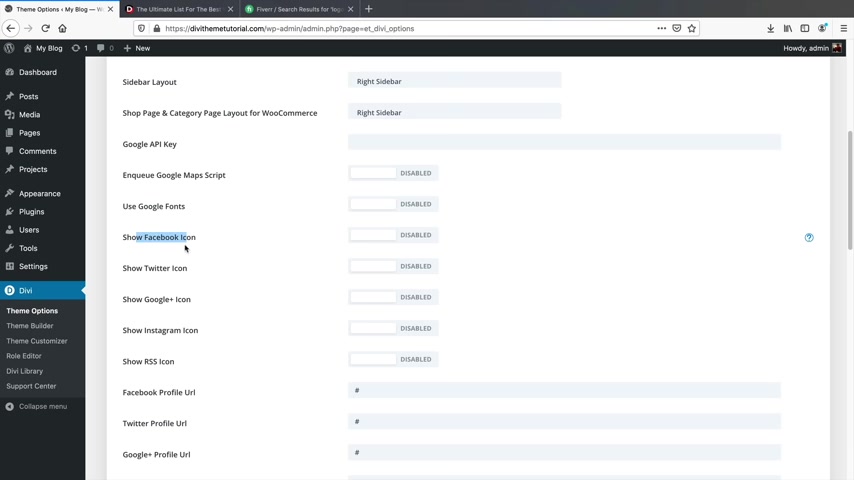
You're probably only gonna use the home page settings , but you can just check these out see if these apply for your websites .
But for most of us , I don't think we're gonna use the theme customizer too much only for maybe just the actual menu .
So let's move on to the DIVI theme options .
I'll go ahead and close this .
Now , when you install Divi on the bottom left , you'll see DIVI and you'll see theme options .
The DIVI theme options allows you to upload your logo .
It enables smooth scroll , a fixed navigation bar and other cool various options .
I'll scroll down .
And let's say , for example , you have those social media icons at the bottom right of the screen on your website , you can enable those or you can disable those if you want to do that .
A really cool feature that a lot of people overlook in the DV team options is the smooth scrolling , which I love .
If you enable the smooth scrolling , it allows your visitors to have a smooth scroll effect on the website like this .
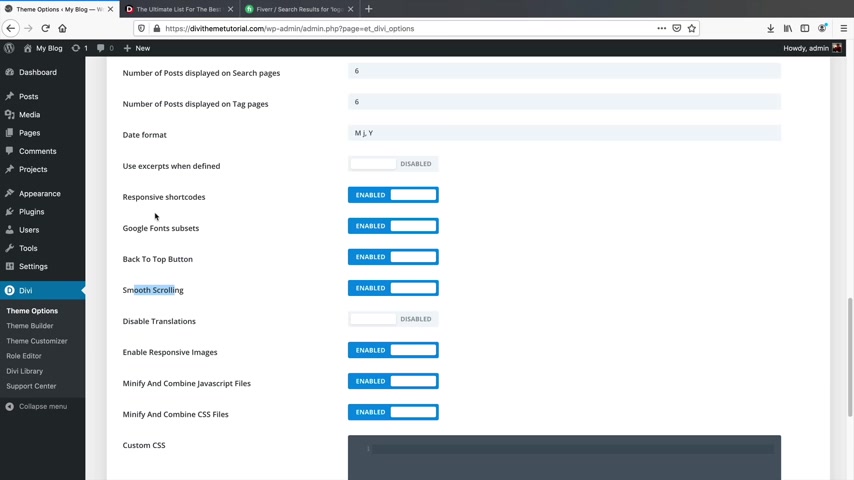
Instead of having it jagged in something like that , the smooth scroll effect , I think makes your site look a lot more professional and it just feels good from a visitor point of view .
You can enable the back to top button , which on the bottom right of the screen on my website , you'll see if I click on it .
It brings users back up to the website .
So the DV theme options , it just has other various options and selling things that you can add on your website that just make it feel better .
Just , you know , give it a little bit more emphasis on design .
Now , if you need a logo , I recommend going to fiver dot com , I'll put a link below to fiver dot com .
Personally , I've seen videos where they recommend free logo makers .
But guys , if you're really serious about your business , you wouldn't mind spending , you know , 5 to 10 bucks on a logo to make yourself look really professional .
Because personally , if you're using free logos , it's just something that you're not really gonna attract people with .
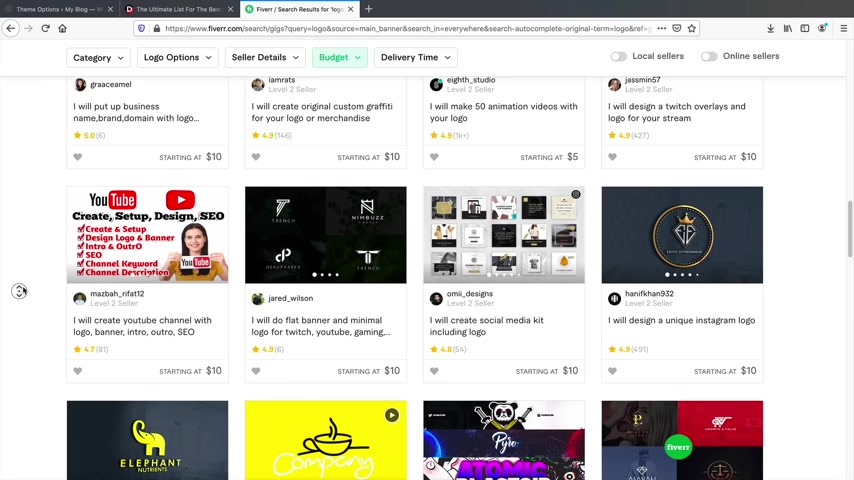
But if you just spend like 5 to 10 bucks on a designer to make a really nice logo , uh you can go a lot farther than that with your business and just remember a logo is a representation of you and yourself .
So if you have a great logo , that looks fantastic .
People will like it .
In fact , I got my logo from fiver dot com .
So my logo on the top left , you'll see .
Uh I got that from fiver .
I found a designer .
We worked together .
I paid it more than five bucks .
Obviously , I paid them around 50 bucks , but I think it was worth it .
I like the logo and I'm really happy with it .
So make sure to check out the DV , the options .
You might find some options in here that apply for you and your website .
Next , let me talk to you about wordpress plugins .
If you go to plugins on the bottom left and you click on add new , you'll have access to over 50,000 plugins .
Essentially .
What plugins are is they are applications for your websites .
Every plug-in has a specific feature and there's pretty much a plug-in for everything .
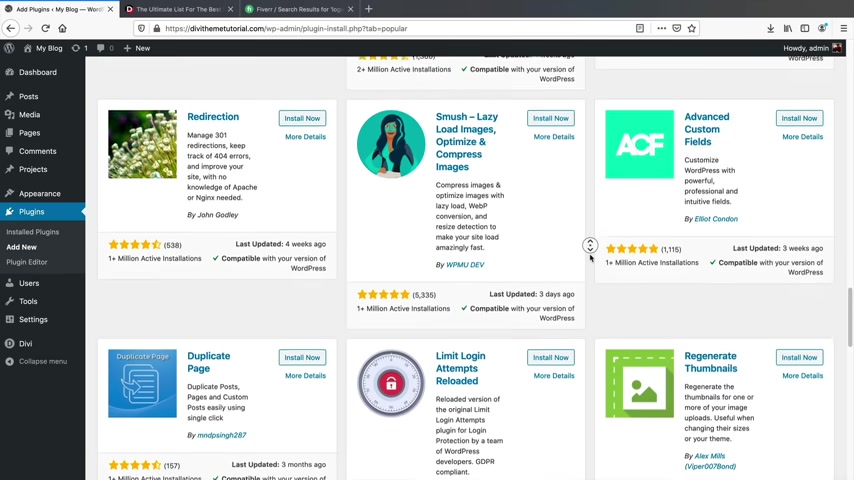
I mean , I have so many tutorials on plugins and all of the features that they offer .
For example , this one will actually reduce all of the image sizes on your website , making your website load faster .
If you feel someone's trying to hack your website , you can install this plug-in , which will limit the login attempts .
So that means if someone tries to log in 10 times , it will ban them from trying to log in .
We have this one which is a cashing plug-in and this one as well , a cashing plug in .
So there is a lot of plugins that you can have on your website and there's really no best plug in .
But there is a good list that I do recommend on my website there .
Wilson dot com under the Wordpress resources .
I do have a lot of plugins that I recommend and page builders obviously divi is one that I do recommend .
These are other wordpress themes .
Now , pop wordpress plugins , I think you would need an seo plug in for your website like yos or rank math .
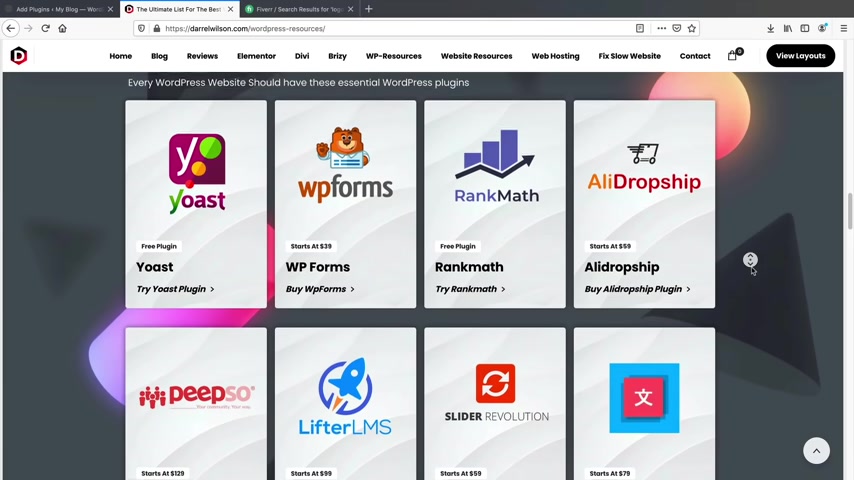
It basically makes your website look proper in the search engine and it just , you know , adds a lot of seo features for your website .
Also something like translate press for those of you who are trying to make a Multilingual website .
You can try translate press and uh e-commerce plugins , uh best optimization plugins personally , I would use WP Rockets .
It's a paid plug in , but you wanna make sure you have a good cashing plug-in on your website So go ahead and check out some of the free cashing plugins .
But again , I would recommend WP Rocket and that's the one I use .
Scrolling down here .
We just do have some other ones and these are booking plugins .
So if you want to convert your website into a booking membership website , these plugins are the ones I recommend and I've spent probably years with trial and error on good and crappy plugins .
So I think I have a good understanding of what good plugins are and these are web hosting companies that I do recommend .

So be sure to check out the list of the resources I put on my website .
That's the end of the DV theme options and the plug-in section of this video .
Be sure to check out the resources tab on my website to make sure that you find some really good plugins for your word press website .
So now that you're all professionals , let's go ahead and talk about mobile optimization , which is a very important part of this video .
So you want to make sure your website looks responsive and good from all devices such as iphones , tablets or Androids or P CS or Macs .
So let me go ahead and show you all how to optimize your website for all mobile devices .
Let's go back to the video .
All right .
Part of people .
Welcome to the mobile optimization section .
Now we have a website here and it needs some help guys it looks terrible and we're gonna make it look a lot better .
In fact , if we visit our website on various devices , this website looks terrible .
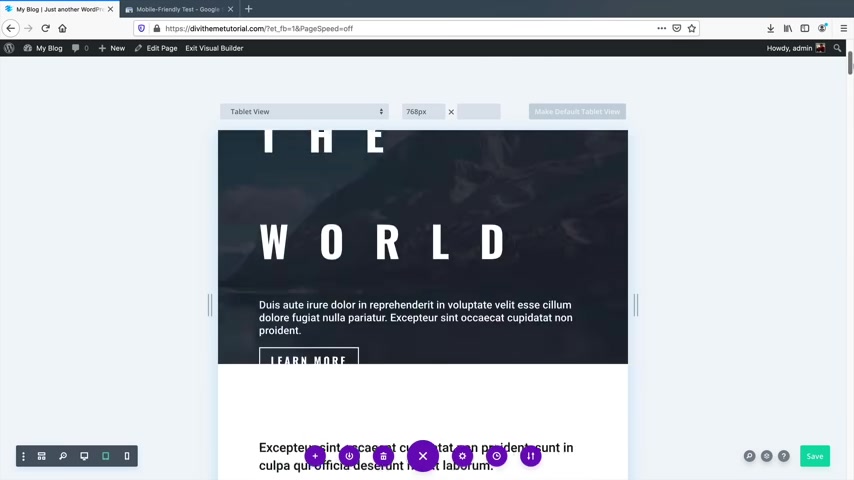
It's gonna go ahead and optimize it for all of the devices under this little purple icon on the left side , bottom left , you'll see this computer , you'll see a tablet , right .
I'll click on the tablet .
Now , this is the view from a tablet point of view .
So I'll scroll up here and this is the view from a tablet .
And also I'll click on the phone and scroll back up and this is what our website looks like on a , on a phone , right ?
So we need some help here .
Now , also on the phone view , you can actively see what your website looks like on specific devices .
Isn't that cool ?
Let's say you want to see what it looks like on an iphone 11 or a Galaxy A six .
And this is a new feature Davy just added .
I mean , those guys are just , they're crazy over there .
I don't even know how they think of all this stuff .
First things .
First , let's click on the desktop view and let's just change this really quick on the desktop view .
So I'll click on the gear icon , right ?
And under this little section , I'll click on that and let's just change this .
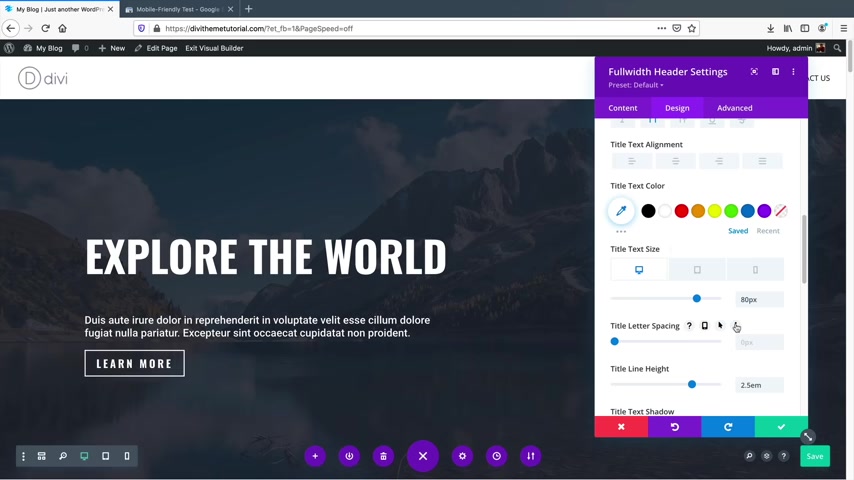
You know , let's just change the letter spacing here .
I'll , I'll , I'll reduce it to normal zero again .
A little bit more , right ?
Something like that .
And then I'll change the line height as well .
Let's just clean that up a little bit .
Right now .
When you edit these like texts or whatever you're editing , you'll see this picture of a tablet and also a phone .
So let's click on the tablet device now .
So let's go back to scroll up here .
It's kind of annoying how it keeps doing that to us on a tablet because now we selected it to 80 pixels .
When you're editing your website , you just want to say , OK , I want this to be maybe 85 pixels , you know , something like that .
And that looks good .
Next , let's click on the phone section and scroll back up .
We have a , we have some work to do here .
First things let's just reduce the size of this text and let's change the height , click on this pencil , right ?
And then for the text size , let's reduce it , you know , let's make it a little bit more simpler , right ?
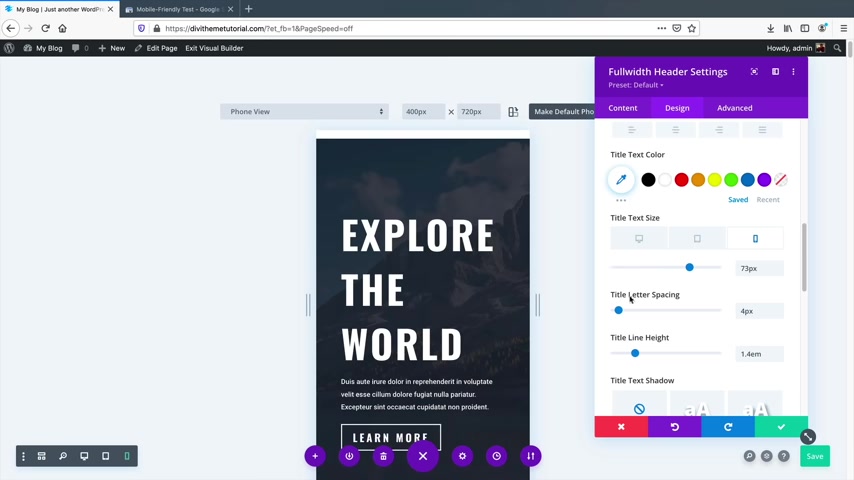
And let's change the line height .
Let's uh there we go .
Reduce it a little bit here .
I'll just refresh it to what it was before .
So I had it at 1.7 before , right ?
And yeah , I think something like that is good right now .
This title text is too small .
Now , this text is , you know , it's good size , but we need to change this one .
So I'll click on this and I'll go back down and under the phone icon , I will increase the size of this something , you know , we , that , that can work , you know , that can work or even that can work .
Now you get that at that point , I would say , OK , that's fine .
So now let's keep scrolling through the website to see what's wrong .
So everything looks good and we have this section and this again , this is too big .
The font is just , it's , it's kind of clustered everywhere and we want to make , make sure that we can change this as well .
Let's go ahead and change that as well .
I'll click on check really quick under this section .
Oops , let's go back and click on the phone icon .
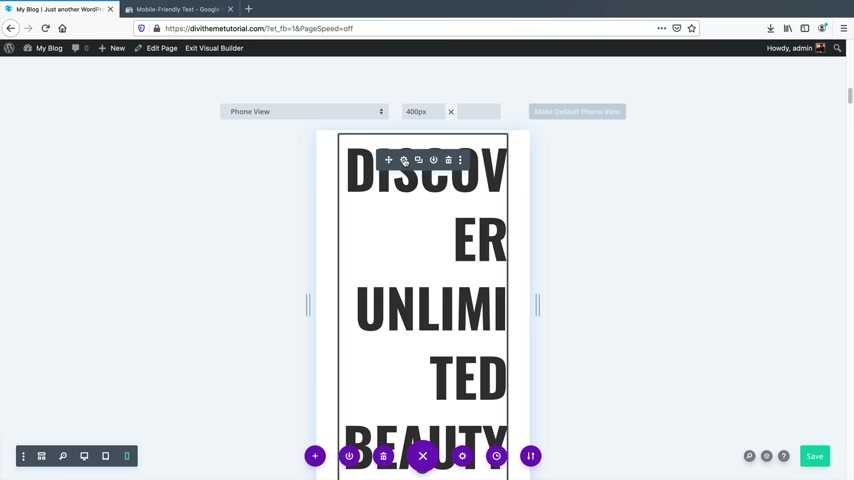
Yeah .
Sometimes the builder just gives you some weird stuff you just kind of work with .
So now you see this section here and this section is just too big .
Go ahead and reduce the size of this for mobile .
So I'll click on the gear icon and under the design tab or I can just click on the , the blue pencil instead of navigating throughout the , you know , the editor scroll down and I'll click on the phone and into the phone , we can reduce the size of this to make it look a lot more cleaner and nicer .
So that looks really cool .
And this section maybe we can change , you know , the si mean , we can change that as well , you know , just , the s is just a little cut off there .
Let's change that as well .
So the design and then we have the tech size , we can just , just reduce it a little bit , you know , just make it look good like that and then scrolling down .
I think everything else looks pretty good .
Now , let's talk about .
OK .
So I know how to optimize my website for mobile , but maybe there's specific sections that you do not need for tablet and phone .
Like for example , if I scroll down here , do I really need this image here ?
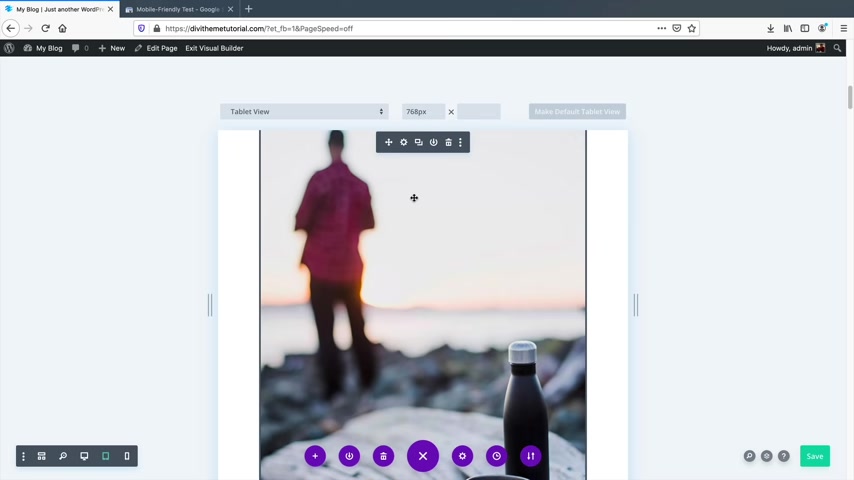
You know , I don't really need it per se .
You know , you might come across images that you don't need .
You know , I don't want this image .
So let's get rid of this image .
I just don't feel like it's necessary for people on tablets .
It's too big and it's just , you know , they don't know what's going on here .
So let's get rid of it .
I'll click on the gear icon and under the advanced section under visibility , I can disable this on the tablets and also the phone and then I will click on check .
So what that means is I want to go ahead and get rid of this section because it's just not necessary for people visiting my website on a tablet or a mobile device .
And you can do that for pretty much everything .
You can go ahead and check out or disable certain modules and you can also disable certain sections .
So let's say for example , this top destination section , you do not want it on your website for mobile and tablet users .
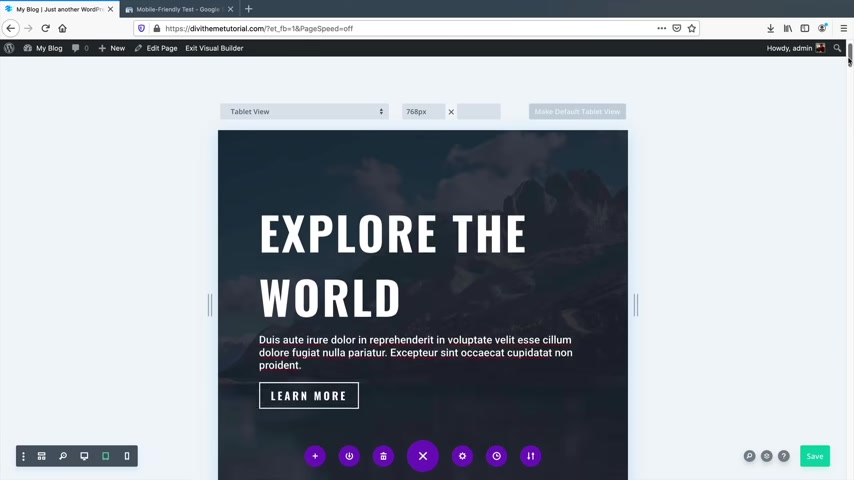
I will click on section settings advance and then for visibility , I will disable this also on the phone and the tablets .
That's how you can kind of disable certain sections of your website for specific devices .
Now let me give you all a very good strategy that I used when I was getting started with the web design and you can use this strategy on your own as well .
For example , we have this section here , right ?
But maybe you don't want this signing page for mobile users and tablet users watch what I do here .
I'm gonna go ahead and duplicate this section .
So now there are two of these sections , right ?
And uh for this one , I'll put explore the world and I'll just leave that .
I'll just leave that like that .
I just think this is good .
However , I want to disable this section for tablet and mobile users .

So I'll click on the gear icon and under the advanced tab for visibility , I will disable this section on the tablet and the phone , right and click on check .
So that means people visiting on this website will not see this on a tablet or a phone .
However , I want to have a section specifically only for mobile users .
So for example , when you visit a website on your phone .
Have you noticed ?
Sometimes it looks different from the actual desktop version , maybe it might look 100% different , right .
That's because a lot of developers feel that it's not necessary to show the home page on a computer and this on a tablet or a phone .
Like for example , if you are selling a product on a phone device , you might want to have a different landing page for that for me to achieve this whole result .
What I'll do is click on the gear icon and click on the advanced tab and go to visibility and I want to disable this on the desktop .
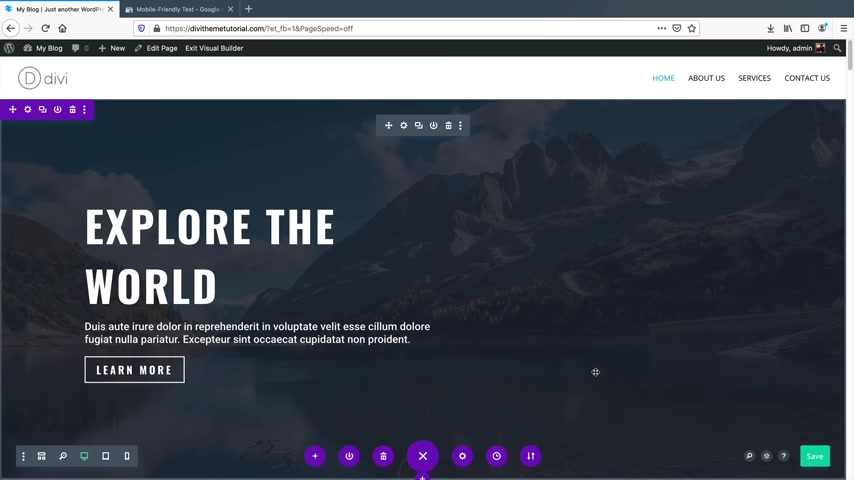
So that means visitors coming to our website on a computer will see this .
Visitors coming to my website on a mobile device will see this instead .
So now you'll see how this looks really cool , you know , for a tablet user and this is disabled .
That's a very key strategy for mobile optimization .
And I think that's a very common practice now , especially with large tech companies who want to navigate their users to a specific part of the website easier .
And now let's go to the mobile friendly test .
So now I will type in my website , the tutor dot com and test this URL .
I'll put this in the description , you know of this video as well .
Let's say you're editing your website and you're just not sure if Google thinks it's responsive .
Well , you can ask them saying Hey , is our website mobile friendly and congratulations .
So your website is mobile friendly .
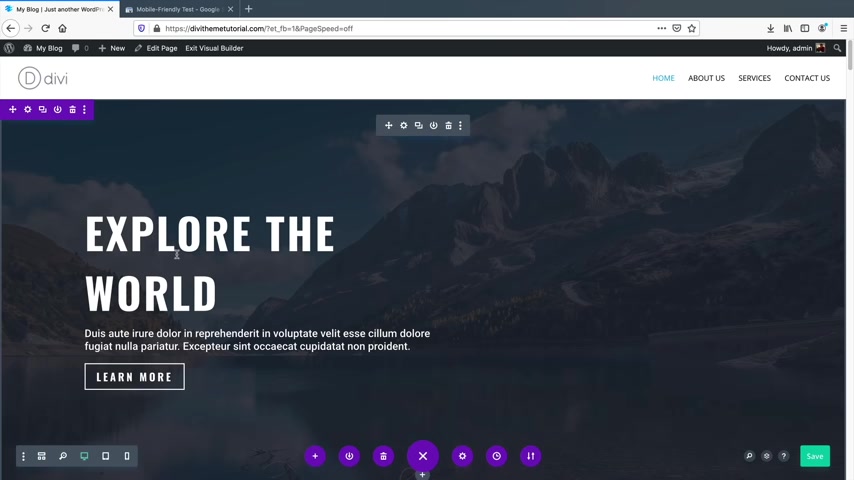
So Google is saying your website is mobile responsive and you'll see how this says register for digital nomad life because remember visitors on a tablet or a phone will only see this page and not the default page of this one .
Now , we know our website is working .
So congratulations .
That was the mobile responsiveness section .
You'll want to go through every single page and make sure your website is mobile responsive .
Congrats on learning how to make your website mobile responsive .
Let's go ahead and move on to the next section .
Hey guys , welcome to my design tip number four .
Now , as you're building your website , you might come into a common problem that your website is running slow .
You're gonna say , hey , Darryl , I built the website using DIVI but now my website is really slow .
What's wrong with Diy ?
What's wrong with my web hosting and generally around 90% of the time , it's neither , it's the images on your website .
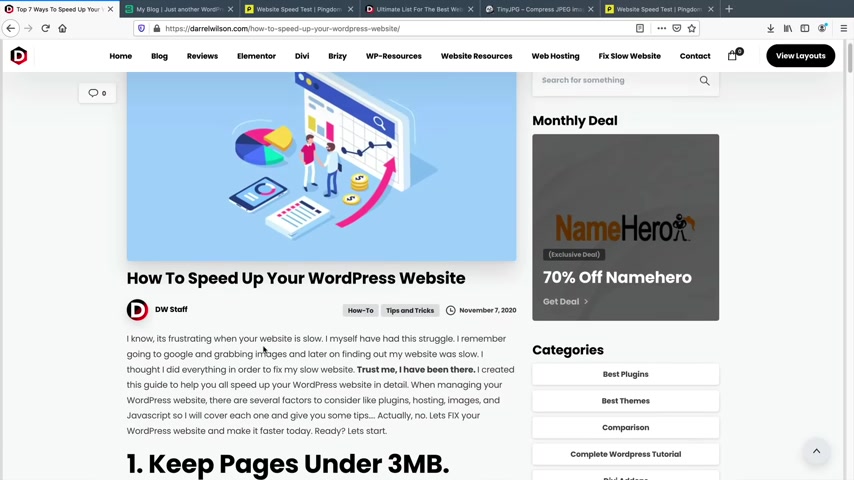
If you go to my website and you go to fix slow websites , I have an article and I just want you to follow each one step by step and I promise you if you follow these step by step , your website will load faster .
Number one , which is the biggest problem for most amateurs is your page size .
You want to keep your page size under three megabytes .
What that means is don't go to your website and just add in random images that are very large because what's gonna happen is that these images will usually be massive and they will slow down your entire website .
If you want to measure the size of your page , you can go to tools dot ping dot com .
I also have this on the ultimate list of resources that you can check out .
It's on my website under the website resources and these are all free .
They don't cost you anything or some of them .
Do .
You gotta pay for fiber ?
You gotta pay for uh theme forest .
Uh Ping is down here .
Ping number is what I use to test the speed of the website .
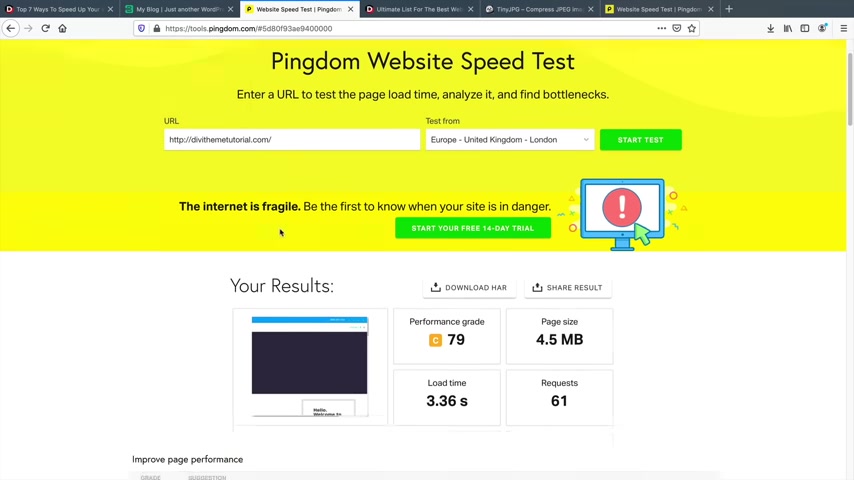
For example , you put in your domain and then you'll see your performance grade .
My page size on this website is 4.5 megabytes .
So as a result because my , I'm on shared hosting , my low time is 3.36 seconds , a little high .
I want to keep that under three seconds .
If I go back to my article here , what other things that you can do is you can you know , get reliable web posting , which you all did image optimization and you can use a tiny JPEG as a great resource .
So maybe a lot of you aren't good but Photoshop and you don't know how to reduce the image size .
You can just drag and drop your images on this website and it will drastically reduce the size of the images speeding up your website for Apple .
I had an image of 714 kilobytes and we reduced it just to 76 kilobytes .
That's another thing about your um or your post , your images should be no more than around 100 kilobytes .
So if your images are more than 100 kilobytes , you probably could do some work and reduce the size of it .
Also add a cashing plug in that makes it .
So your website doesn't have to keep loading everything all over .
Again , every single visitor , it creates a cachet version of it and also reduce the javascript and cs S javascript and CS S is basically all those really cool animations and all those cool graphics and everything that is javascript and the more javascript that you have , the more your website will be slow .
So I made some modifications to this specific website .
I want to retest this specific domain .
So I'll click on save here and you'll see that this is DVT tutorial .
However , I just decided to optimize around five or six images on this website and now I want to retest it .
So I'll retest it .
Uh I am closest to Washington DC and I will click on start test and I'll show you all how to read this chart so you can know what to look for when you are running these speed tests on your website .
OK .
So my results is 3.1 megabytes .
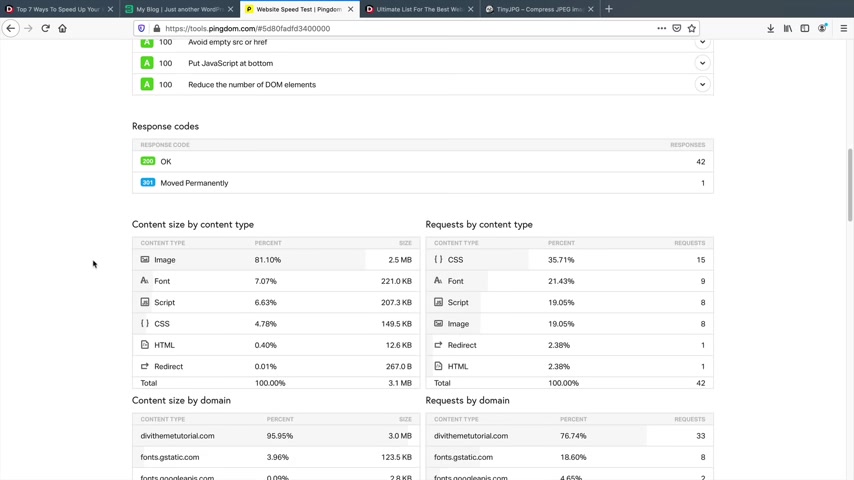
I reduced the paid size .
And as a result , my website is now loading at 1.8 seconds , which is fairly good .
You want to keep your low time under three seconds .
Now , I'm gonna show you all how to read this chart .
We have the image , the font , the javascript and the CS S .
You want to keep the images , try to keep it around two megabytes or under .
I'm a little lazy .
I could have probably reduced this a little bit more .
You want to make sure your javascript is low .
Javascript are those fantasy animations .
And every time you add an animation to your module or you add an animation to something that is javascript .
So just know that it will slow down your website in the long term .
And we have the CS S which we have fairly little and CS S is actually good .
Uh CS S is a lot lighter than javascript .
But the main thing here is you just want to make sure that your javascript is no more than one megabyte .
Your CS S uh you'll probably never get to one megabyte anyways , and your images try to keep it under two megabytes .
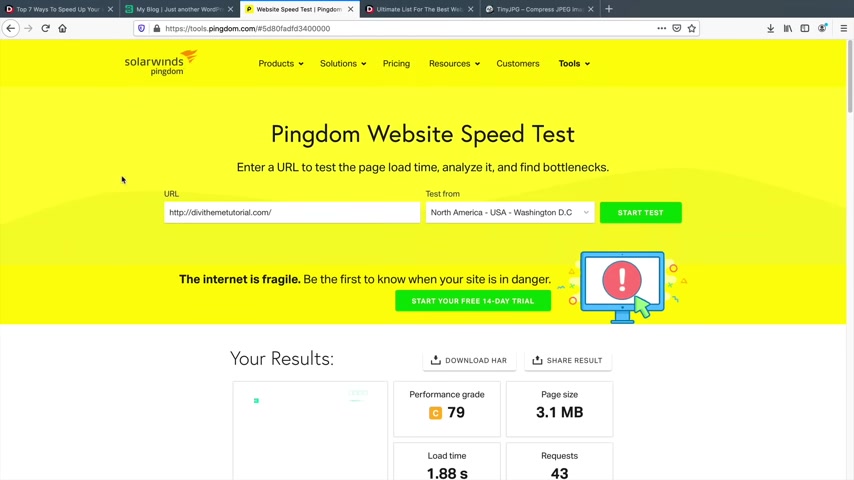
2.5 is a little bit too much , but uh still the websites loading at a decent speed .
So I don't think that's a big cause for concern .
I just find a lot of beginners tend to say their website slow because of wordpress themes or something .
But it's exactly what you put on the website that is the end result of making it fast or slow .
So , check out this guide .
It's a great guide .
I spent a lot of time making it .
I was very thor , I give you examples of my website and other websites on how to make your website with optimal performance .
So remember , no one likes a slow website , always optimize all of the images and everything on your website to make sure your website is loading fast for all your visitors at all times , right ?
You guys made it to the last step .
This is like the final boss of a video game .
So in this section , I'm gonna introduce you all to the advanced features of DEVI in the video , there are some advanced features I didn't cover .
I'll be covering all of the advanced features that Dey has to offer .

I will also touch base on what third party plugins are and I'll introduce you all to the DEVI marketplace , right ?
Party people .
Welcome to the advanced section of the video .
So in this part of the tutorial , I'll be teaching you about how to use the Diy theme builder along with all of the other advanced features that come with Diy such as creating custom headers and footers , custom four or four pages and also custom post pages with dynamic content .
First things first , let's create a new header and a new footer for our website .
Now , on my website Dolson dot com , if you go to the view layout section , you will actually get templates that will help you follow along in this part of the video .
So right here we have custom uh footer layouts .
Now , these were all created by elegant themes and these just create some really nice footers on your website .
If you want to add those and upload them to your websites .
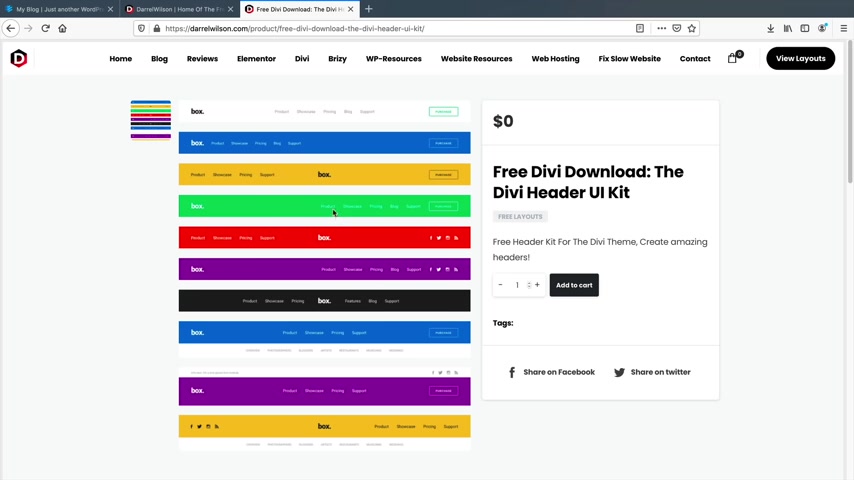
There's also the divi theme builder pack which you can download and have different styles of or four pages or different category pages and so on and so forth .
And also I do have a header U I kits .
So this is the divi the U I kit that you can also download , which just comes with just various header styles for your website and it's completely free .
You can go ahead and download any of those and once you download those or once you , you know , decide to use whatever one you want , let's go ahead and activate the theme builder .
So let's go over here to my dashboard and on the left side , you'll see Divi and go to theme builder .
Now remember essentially what the theme builder is , is creating a custom header and a footer for various parts of the website .
So I'll go ahead and open up a second browser so we can see our work .
So right here , we have global header , global body and global footer .
So let's create a global header .
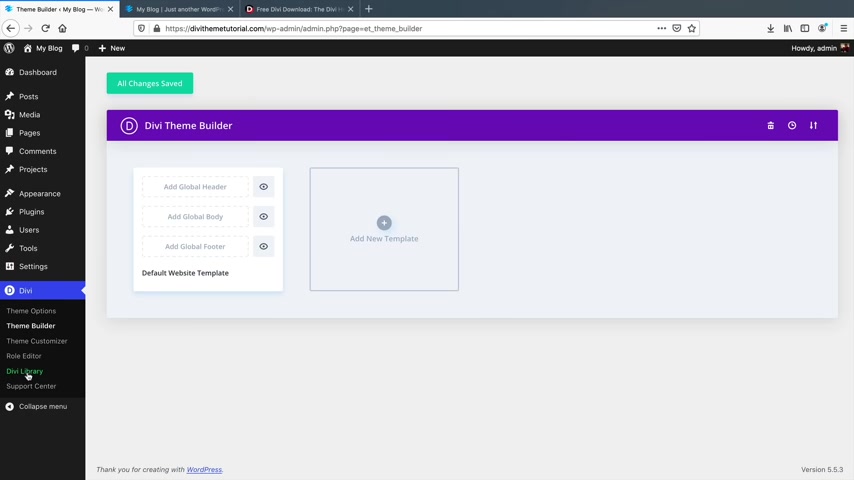
Now , before I do that , I want to upload whatever I downloaded from my website .
So I'll go over here under the Divi library .
I'll click on import and export and imports and I want to choose the file .
Now , I remember earlier how I gave you all that file , the DV agency layouts .
I did have a header in there as well that you can download And I also do have the DV theme builder uh settings that you can download as well .
But I'll just download the DAVI header 32 and click on open and import Divi builder layouts .
OK ?
So now you'll see we have the DIVI header 32 and this is how you can import layouts to your website , like such as a custom header and a footer to apply on the theme builder .
So let's go back to the theme builder and now I'll click on , add a global header and we can add it from the library or build a global header .
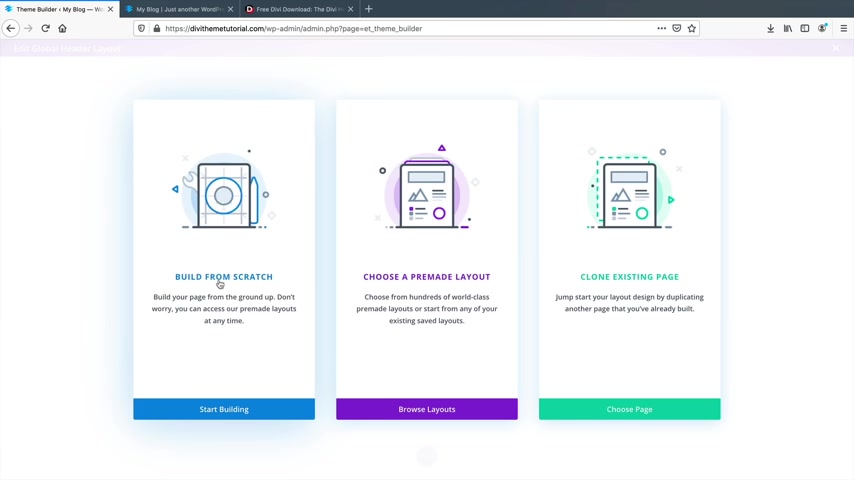
So I'll click on and build a global header and I will choose this from scratch , right ?
I think that's uh standard .
So now you can basically build your header just like you normally would with the modules .
So for example , we can just uh select you know one module here and in the middle , we can type in menu and we can apply the menu there .
So remember we have the menu , the main menu for our websites .
And then you can design this any which way you want , you can center align this and then you can change the background color and you can decorate this outer part .
You can make this smaller and bigger .
So essentially now you can build your header and your footer any which way you want , you can give it a certain background color .
You can add different modules , you can make it as customizable as you want .
However , I don't want to make this part of the video very long by creating a header from scratch .
So I'll be using a template that I uploaded .
So what I'll do is click on the purple buttons and click on this little plus icon and under your saved layouts .
Now you'll see we have that header that I uploaded in my library .
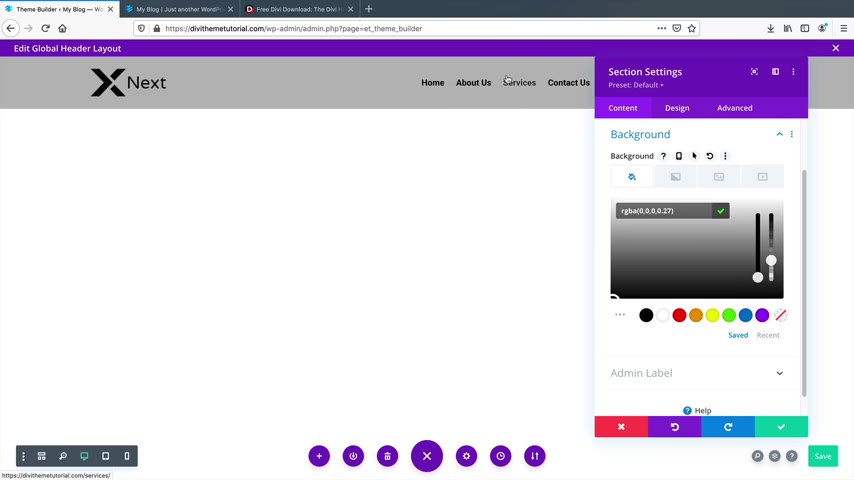
This will be uh 32 right ?
I'll click on that and there you go .
So now we have this header , we have this logo , we have this uh you know , we have our menu and we have this button that we added as well .
And then of course we can add in a background color by clicking on the section settings under background .
And you know , we can apply a specific background to this as well .
So if you want this to be black , we can have it black and then we can maybe even to turn this text to white to make it stand out .
I think I'll do that actually .
So what I'll do is I'll , I'll dim this black , right ?
And then for this section under this gear icon , I want to take this and I want the menu text to be white , right ?
All right , men use text color to be white and then also the logo here .
So for the logo , we can change the logo to anything that we want .
So maybe I probably want to put in something uh lighter , right ?
I'll put in this one essentially .
Now we have our menu .
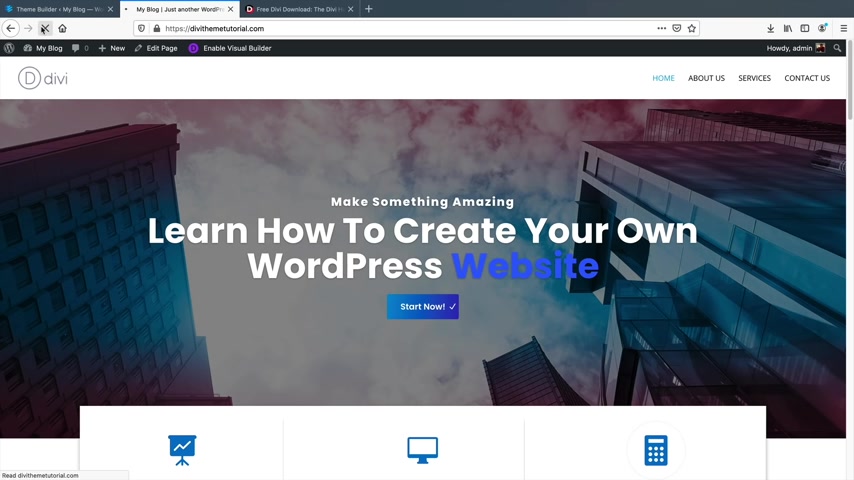
We have this button and we can link this button to maybe our contact page and so on and so forth .
I'll click on close or save and exit , whoops , whoops .
Make sure you click on , save at the bottom , right ?
I thought I did .
So now we have this global header right now with this global header , it's being applied on the entire website , click on save changes , go to our website , refresh the page and there you go .
So now we have this header being applied throughout our entire website .
I'll go to the about us , the services , the contacts and there you go .
I never added the services like , oh guys , I , I was really lazy , you know , maybe I should have , you know , shame on me , shame on me .
But now we have this custom header on our website .
And what you can do is you can just basically change this to any style that you want .
And it'll dynamically update on all of the pages .
So that's how you can achieve a global header .
Now , we can do the same thing for the global footer as well .
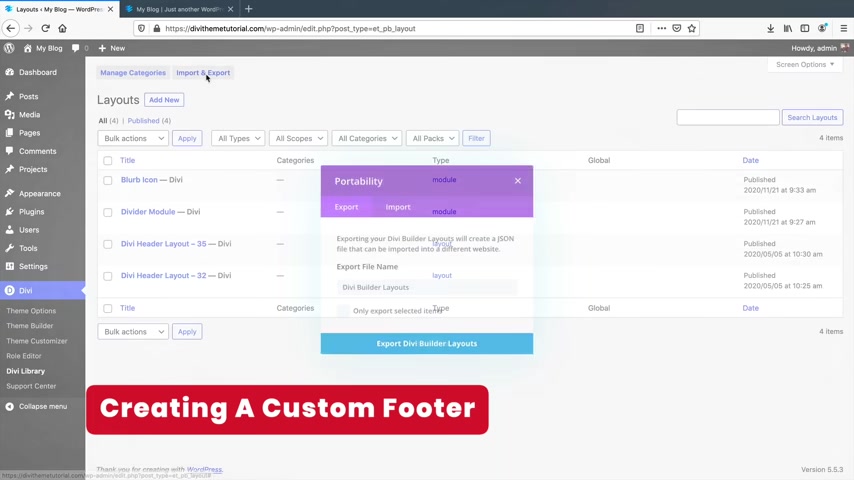
So I'll go ahead and upload a divi footer that I downloaded from my website .
So import , exports , imports , choose the file and under my desktop , I downloaded this Diddy 100 footer pack number six and import that one .
All right .
So we have footer six and again , you can download all these for free on my website .
So let's go back to the theme builder under the global footer .
I will build a global footer built from scratch , close this and I just want to add it to my library .
So let's go ahead and go to my save layouts and footer number six .
And this is now my new footer .
We have these icons here that look really cool .
We have this and then we have , you know , we have our pages and so on and so forth .
Of course , now I can edit this , maybe change this to black , right ?
Because we have our header black .
So I want this to be black too and then click on save .
All right .
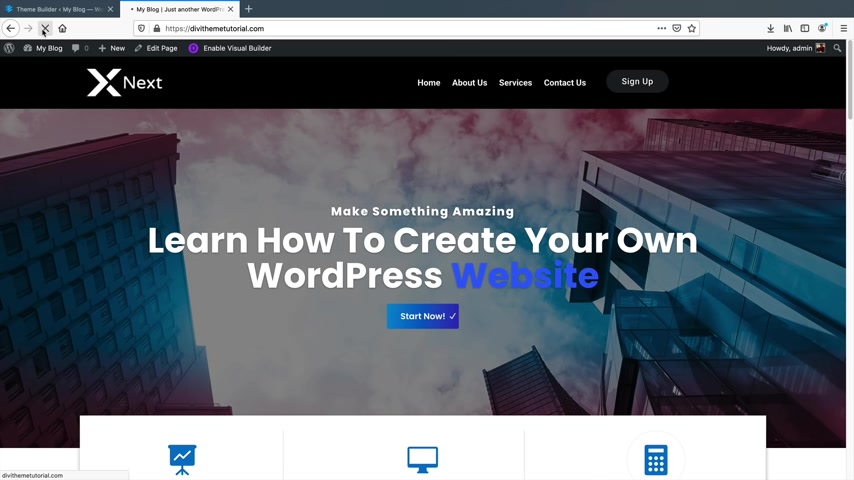
Now let's go ahead and close this , save the changes and let's take a look at our website .
So I'll refresh this page and scroll to the bottom and voila .
So we have this footer .
It looks really clean , really professional .
And we can add anything we want here .
We can link these uh text to anywhere that we want such as our other pages and so on and so forth .
So that is pretty much a quick rundown of the DEVI theme builder .
Pretty simple right now .
Let's get a little bit more dynamic , let's say , OK , Darryl , you know , we have a really picky clients , but for the About US page , they want a different menu and this is very common for squeeze pages where you're trying to sell a certain product .
So I wanna have a different menu for the About Us page .
I don't want to have it for the global .
So let's do that .
I'll go to add a new menu or what , what does that , what does that add a new template , right ?
Add a new template .
Now , I wanna have this on a specific page .
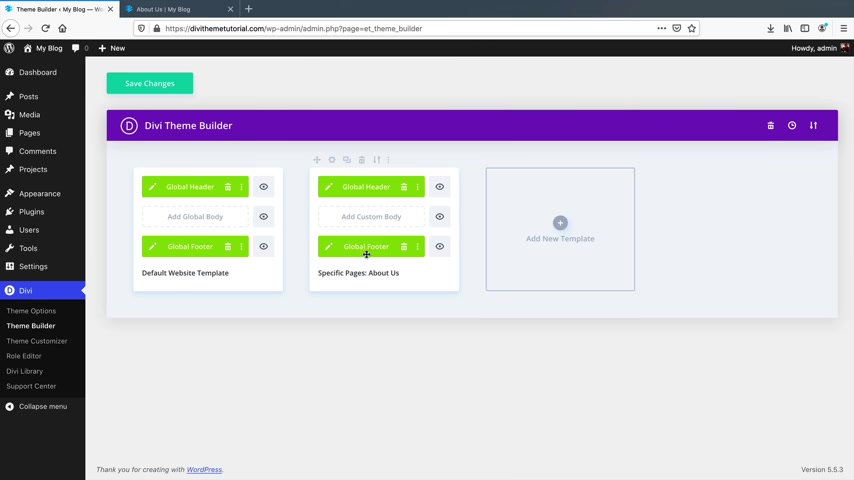
So I want to only have this on the About Us page .
All right .
So just on the About Us page and that's it .
So add a new menu About Us page , sorry , create a template .
So now we have a specific page here , but I want to get rid of this one .
I wanna have a custom header only on the About Us page .
So let's do that .
Let's create a custom header on the About Us page .
So let's go to you save layouts and let's use 35 this time , you know , 35 .
You're coming back , we're , you're back in the game .
So now you'll see , we have 35 here and we can go ahead and customize this by clicking on the pencil icon .
And now you'll see this is the default header that I originally used for the website .
So I say , all right , that looks good .
We can change this , we can edit this and all that stuff .
But you know , I'm lazy .
So I'm not gonna do that .
So I'll just click on save and I will click on close .

Next , I will click on save changes .
And now let's see what our website looks like .
So let's go to our home page .
All right , home page looks good , right ?
Contact looks good .
However , if I click on the about us page , the header should look different and there you go .
So now the header looks different and it's using a different header .
So essentially what you can do with a theme builder is you can keep adding new sections and saying , you know what uh for my blog post , I want a different header for this .
I want a different header and footer and so on and so forth .
So now let's say , all right , dare .
Well , that's cool .
But uh you know , let's go to my website , you know , DV , the tutorial and let's say someone enters in a wrong domain name like something like that .
Now we have this and this is the default with Diy .
This looks really ugly .
You know , I want a custom 404 page .
Let's create a custom 404 page back to our websites .
So let's click on add a new template .
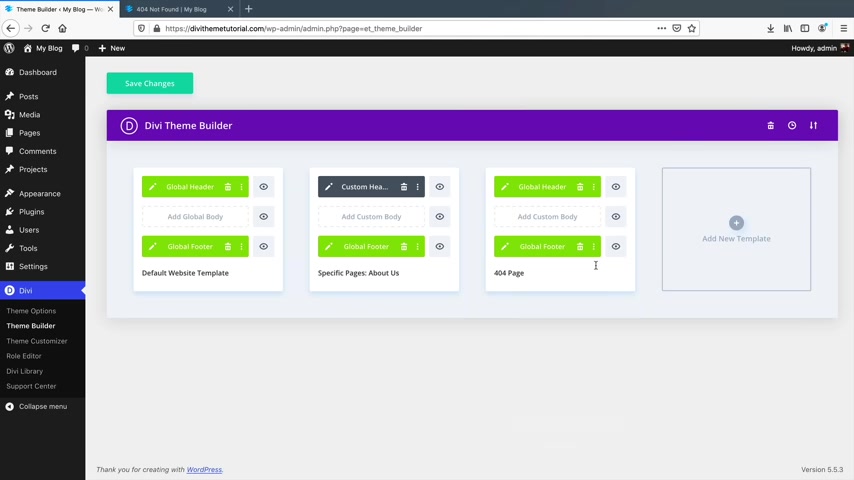
I will scroll down to the 404 page and click on create a template .
So now you'll see we have the 404 page .
Now , you can choose to hide the menu and the footer and only have a custom body .
I think I wanna do that .
Let's just click on , add a custom body and let's just do a build custom body .
Let's see if Davy has any custom 404 pages .
I don't think they do .
You know , I don't think they do but uh choose a premade layout and under the search , let's type in 404 .
No , they don't .
So let's make one .
It's really , really simple , right ?
I'm gonna go ahead and find something really quick .
Uh We'll pick this one and I want to use this layouts when you're using , when you're building your website .
You can just grab sections from certain templates and just use specific part of those sections .
You don't have to use all of the page .
Ok .
So we have Diy for business .
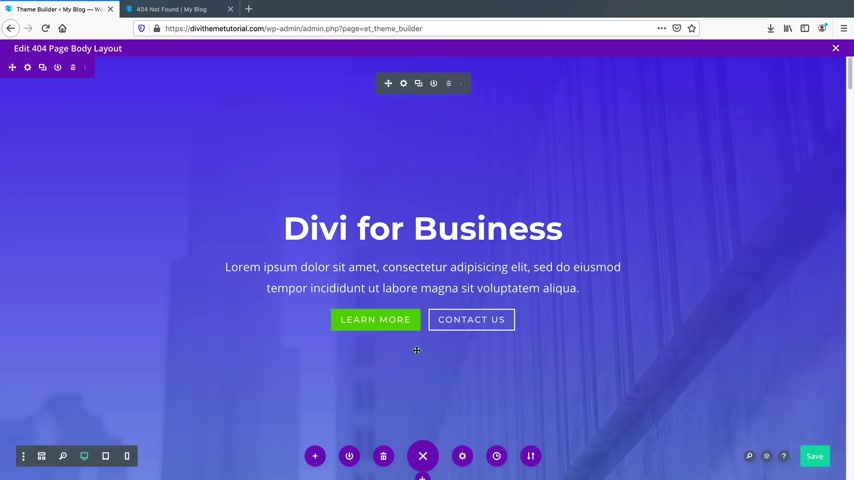
Now you notice how the footer and the header is gone because remember I don't want that and this is just going to say something like lost .
Like are you , are you stupid here ?
Are you stupid lost and then we can redirect them to our home page .
So , what I'll do is , uh , this is the , I think this is the fullest slider module .
So what I'll do is I'll double click on this and I don't want two buttons .
I only want one button and this will be back to home .
Right .
So I just want them to go back to home and for the link , it'll just be the website www dot the tutorial dot com nights and close that and I can get rid of this text .
Obviously , I can design this .
I can , you know , do whatever I want , but I think that's all I want .
Now , there's other parts of the website that we just don't need .
So let's just do this .
Let's just , this is trash , trash , trash , trash , trash , trash .
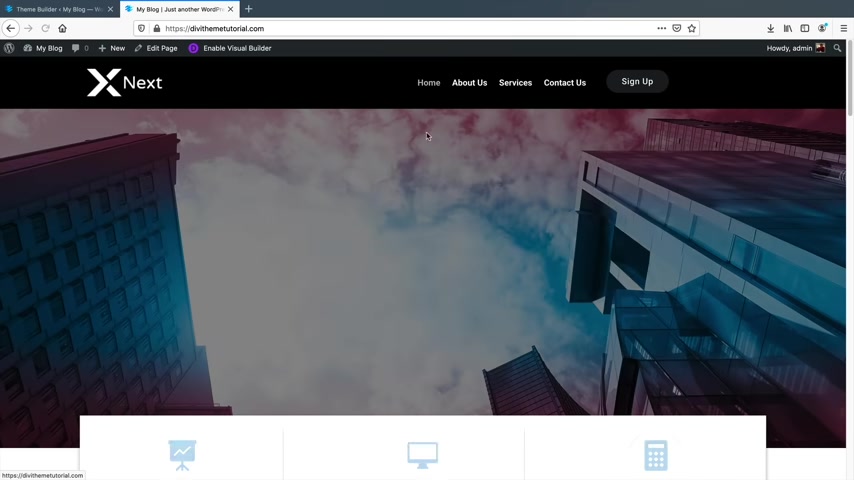
I should make a song , you know , trash , trash and man , that is a lot of sections .
Good .
Good Lord .
All right .
So finally all that stuff is gone and uh it looks like down here .
Is there any padding down here ?
We can check it out .
Is there any padding here ?
Nope , that's about it .
I will click on save .
Ok .
Now let's close this .
I will save the changes .
Now , let's test this out .
So remember I am hiding the header in the footer and I only want the last page to be displayed .
So let's click on home .
Make sure everything's cool , right ?
Everything looks good .
Now , let's type in a bogus URL .
This will be like that enter and there you go .
Are you stupid ?
Are you lost ?
Go back to home and you notice how the header and the footer are gone because I don't want them to navigate to other parts .
I just want to take them back to the home page .
Click on back to home and that's it .
They're back to our home page so you can create a custom 404 page really easily with the DV theme builder .
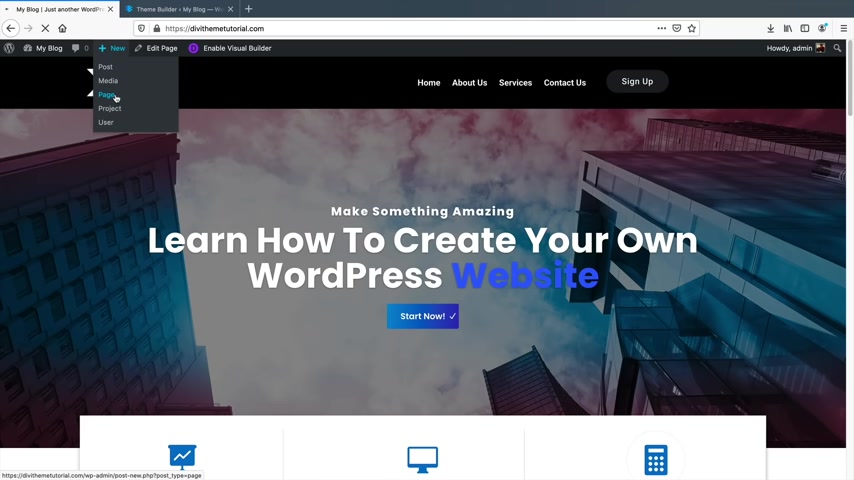
So next , let's talk about posts .
So I'll show you how to create posts with the DV theme builder as well .
But before I do , I need to actually create a page for my blog posts .
So let's do that .
I'll go to plus new and go to page .
Now , you don't have to follow me here .
This is only for people who want to have a blog on your website and blogs are very helpful actually .
So this will be my blog page .
I'll publish and publish , right ?
So now that I've actually created the blog page , I need to assign the blog page as our blog page .
And do you guys remember how to do that ?
You'll go to the theme customizer .
Oh If you , if you remembered , congrats , congrats , remember home page settings and postage .
So this will be blog , right ?
I'll publish that and we need to add it to the menu .
So we need to have a blog on the menu .
So under the menus , main menu for website , I'll go ahead and add the item .
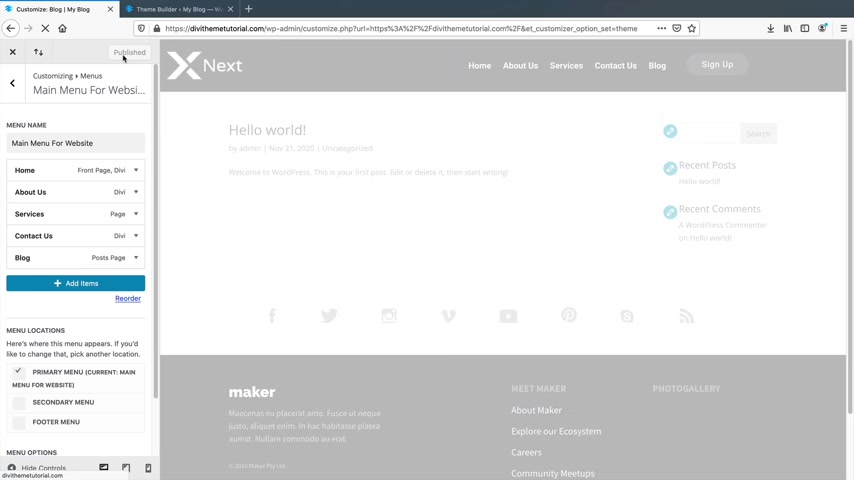
So add the item , the blog , right and publish .
So that's just another shortcut on how you can add the blog or add pages to your menu using the theme customizer .
So I'll close that now .
So now we have the blog page here .
Pretty cool and nothing is here .
So let's create a blog post .
So first plus new and post and 10 things women are good at or no , no , see one .
Here we go .
10 things women , women think they are good at .
Think they are good at .
It's a very controversial post , you know , these posts , they just get a lot of , you know , like 10 things men need to know or five things women need to talk about with their husbands .
You know , those , those topics just get so many clicks .
It's ridiculous .
What we can do is use the default editor or use the Davy Builder .
So I'll click on use the the default editor .
OK ?
So I got some Demi texts there .
That's , that's a lot better .
I went to my secret website and got some Demi text .
Now also I'll click on this plus icon and we can just add something in here .
So for example , we can add it in an image .
So if I click on an image , we can upload an image from our media library .
You know , we can build it like that and so on and so forth .
Now with DIVI , they also have integration so you can add a block and you'll see this Divi layout , so you can insert a Divi layout and insert it inside of your post .
So you can use Divi within the editor .
So for example , load from library and you know , I'll just put in something here really , I don't even know we'll put in foot or six guys .
I I don't want to upload a whole template .
So now you'll see how that has been uploaded .
So you can just , you know , use the builder from inside of the Gutenberg editor .
That's where the integration from Davy comes in very handy because now you can add in full layouts to your posts , right ?
So I can build the new layouts and you can put something in there , you know that you want to add so you can build within the Gutenberg editor .
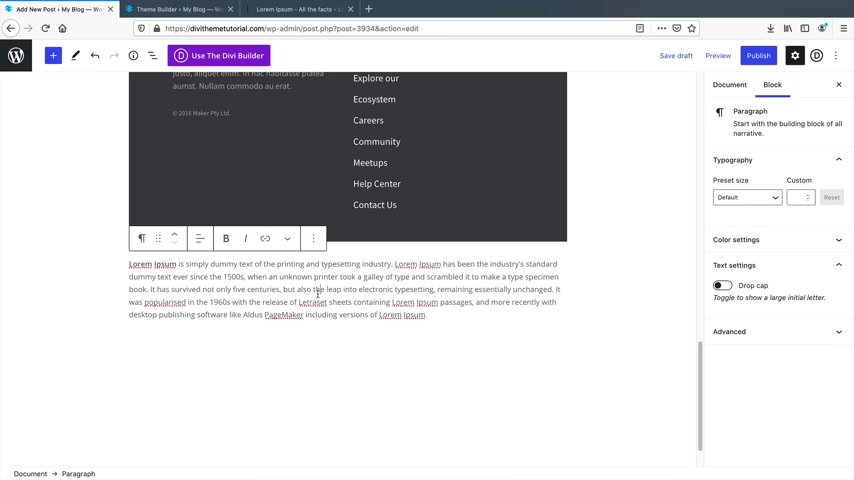
Now , I'm not gonna go into that too much because uh I don't want to spend another hour talking about the blog post , which I easily can .
But uh what I'm gonna do here is I'll just take this copy this and I will just add in a new block of a paragraph and just grab in some texts and there you go .
Now I want to add in a featured image .
So under featured image , I will click on one .
Now , this is the image that uh people are going to see when they see your article .
So I'll put a picture of these images are a little small here .
So again , a bigger one .
Let's see .
There we go .
That's a good one .
We'll put in a picture of this , this happy , happy woman and click on publish and publish .
So now let's click on view the post and there you go .
So 10 things woman thinks they are good at and then you can go ahead and talk about your post and maybe I would probably want to get a better image that is not so pixelated .
You wanna get a probably an image a little bit bigger than 1000 pixels .
Um You know , so yeah , that that'd be it .
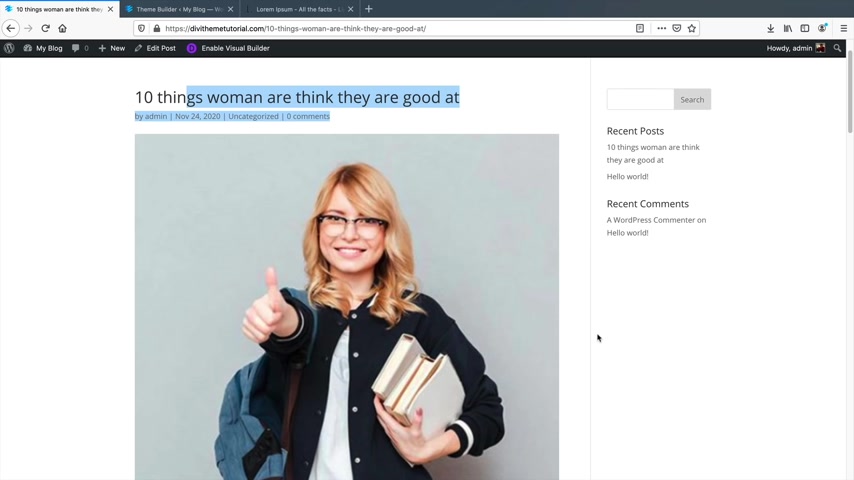
But now let's say this is the default editor , right ?
And you know , it just doesn't look good .
You know , we have all this stuff on the side , it's not creative , it doesn't look good .
We can use the Davy Builder to create all of our posts for us instead of using the default Gutenberg editor .
Quickly show you how to do that with the theme builder .
Let's go back to our theme builder and I'll click on add a new templates .
Now , I want this to be under all posts and click on created templates .
Let's go ahead and select a custom body and let's add one from the library .
I'll type in posts and I do think they have some post page for us guys .
They do have some which are pretty helpful .
Let's go ahead and scroll down .
So you want to find the post pages , for example , this one postage , postage two , post page three , post page four .
I used that one last tutorial last year .
So I'll just select this one .
All right .
And I will use this layout .
OK ?
So now we have all posts .
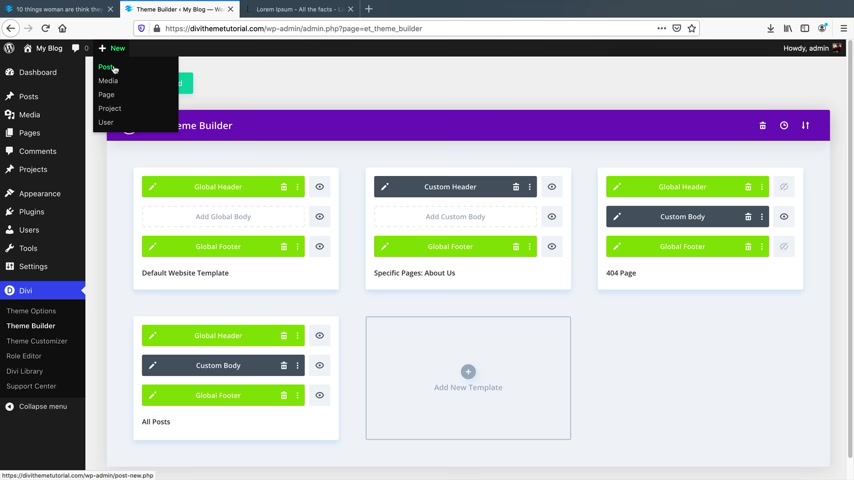
So now this is going to be my default template for all of my blog posts .
Let's check it out , make a new post .
So let's just give you an example of how this works .
And we got to pick on men this time .
Uh Five warning signs to break up with your boyfriend .
Oh , that is a good one , man .
I should , I should have like AAA blog talking about relationships .
I can really get some , some uh some , you know , people to watch my stuff .
So I'll click here and publish and publish .
What I'm gonna do is set a featured image .
So we'll add a featured image of a guy , right ?
That looks good .
And I'll use the default editor and here I'll just type in some , you know , contents , right ?
And that's it .
I'll update it and now let's view the post .
So now you'll see how dynamic content is working .
We have this title dynamically updating five warning signs to break up with your boyfriend .
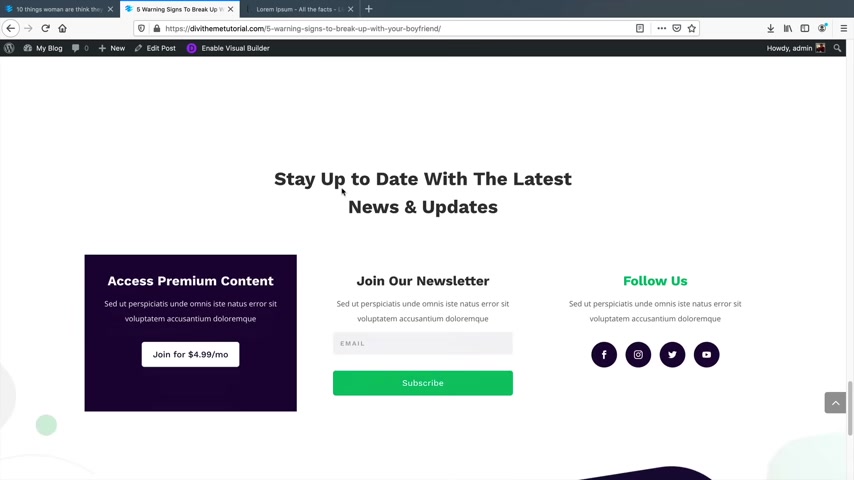
We have written by , we have the actual author the dates and then we have the featured image here , which is a little bit too big and then we have some content here and it just looks really nice , it looks really professional .
This will be like the default way of creating your post and you have other categories and you can stay up to date with other stuff .
So all of this stuff is created by the page builder and it's a default a post template for all of your blog posts .
Now , let's just say , for example , you want to move something around .
If you want to change anything on your website , you can go back to the theme builder .
So let's go to the dashboard divi theme builder and I'll edit the custom body .
So this is the current post template , this is the post title .
And again , you can move this anywhere you want , it'll update dynamically , this is the featured image .
If I click on the gear icon , you'll see that this is an image .
However , to make this dynamic , it's very simple .
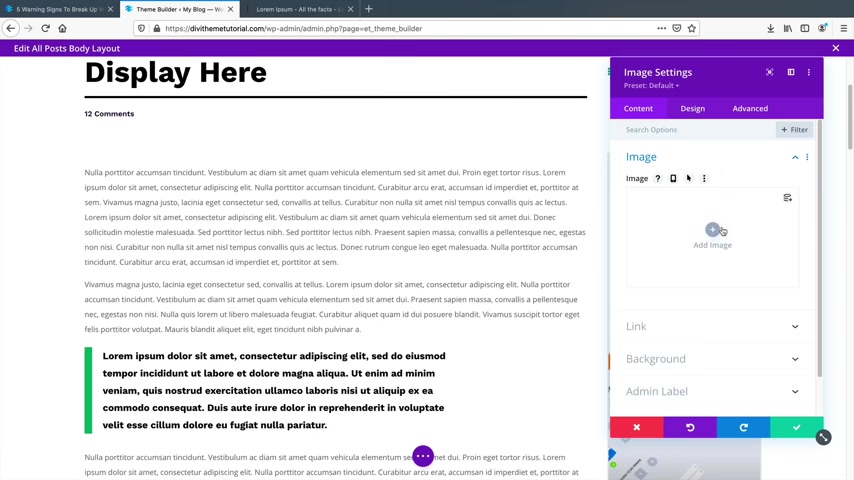
For example , I'll delete this image and um you'll see this on the right side , how this says dynamic or there's that little icon that's dynamic content .
So what this means is you can basically reflect certain images to be here automatically .
Maybe you want the site logo to be here every single time you make a post right , or the featured image or the profile of the author .
So I'll select featured image .
So that means the featured image will be displayed here .
And then over here you'll see that a blurb setting .
However , they decided to add the author of this and maybe you want to add in the logo of your website to update dynamically .
So I'll click on plus , I'll type in image right image now for the image , I want the logo of my website to display here .
So I will put the trash , can click on the dynamic update .
Uh I guess you wanna say , I don't know what that is guys .
It's just a barrel or something .
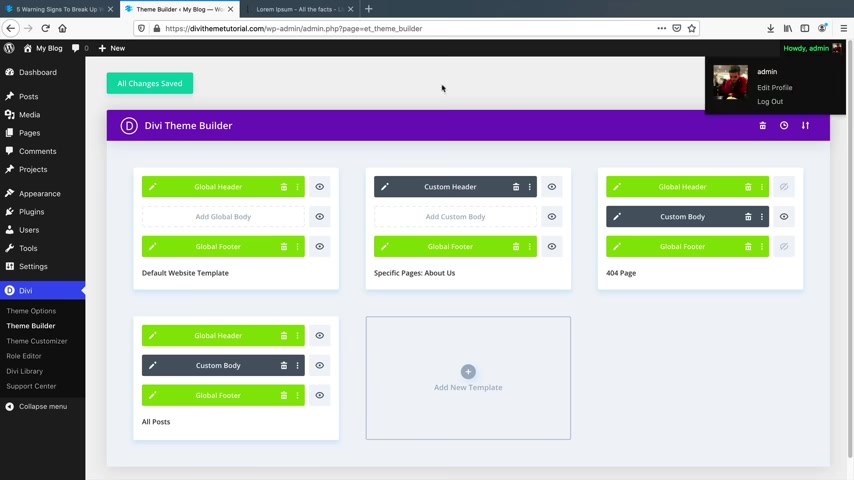
So , and then they'll just put site logo and then I'll click on check and there we go save .
That's how you can use dynamic content with your post .
I hope I was very clear on that .
So remember the Divi theme builder just gives you tons of control and flexibility over your website .
So again , you can add a new templates and say , hey , you know what uh for my category pages for my blog , I want it to look different which you can do uh for your search results , you can change the way your search results look and so on and so forth .
So in a nutshell , that is the Divi theme builder , it's a very powerful tool and it just gives you total flexibility and control over your website .
So now that we talked about the Divi theme builder , let's now talk about the advanced features that come with divi All right , let's talk about some advanced features that come with DV , that can help speed up the workflow of your websites .
Now , you don't have to use these features .
However , I just want to introduce you to some of them just in case you want to apply them to your website .
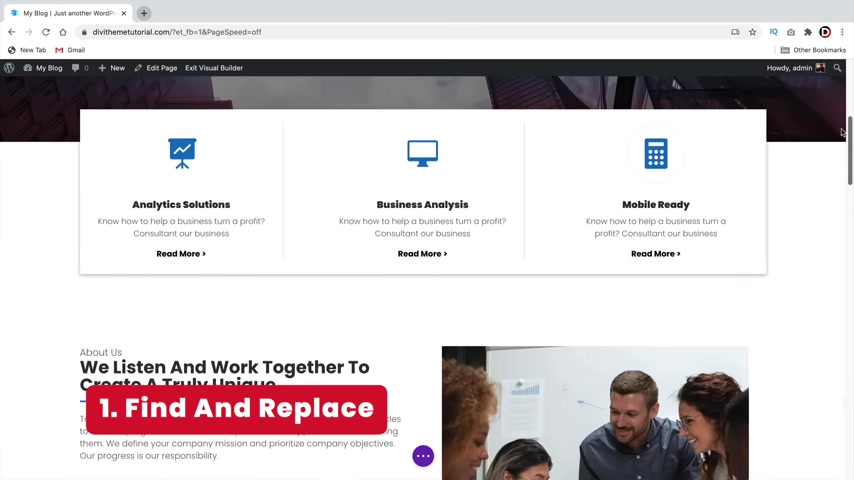
So number one is find and replace .
Now , when you're building your website , you might notice that you have specific colors on your website .
Wouldn't it be nice if you can change all the colors at one time to a different color just to see how your website will look .
So let's do that .
So I'll click on this specific icon .
I'll double click .
I'll go to the design tab and I will go to the image and icon and I'll see the icon color .
Now , this works for any module .
So you can do this for any blue module .
So I'll click on the color .
Now , I have the specific color , but I want to change all of the blue colors here on the page to maybe like green or something .
So I'll right click and I'll click on find and replace .
So now what it's saying is find this color .
So find the blue color and replace it within this page , this column or row to this color .
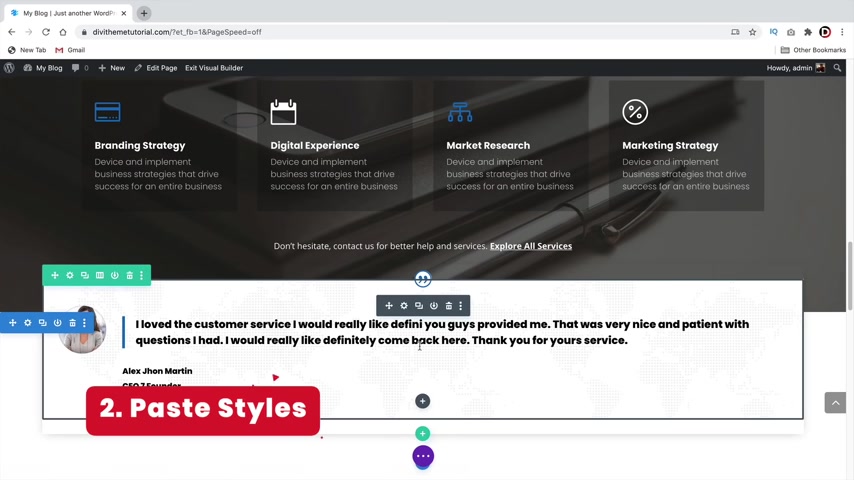
So you know what , let's change this to something like uh this color right here and then once that's done , I'll say replace all .
So I want to replace all of the blue colors with this teal turquoise color and click on replace .
Now let's scroll up and now you'll see how all of those colors that we applied on our websites are now being changed to this specific colors .
It's a very fast way on how to change the design and work flow of your website .
So now you'll see all of these colors that we had are being changed to a different color .
Number two is the paste styles .
So for example , I have these four columns here .
Now I've already modified this column and you know , I don't want to have to do that all over again .
I can right click , I can copy the module styles and then I can paste it within this other column .
All the settings that are being saved on this specific module , we can apply it to other ones .
Another really cool feature is not really advanced feature , but this is the shape dividers .
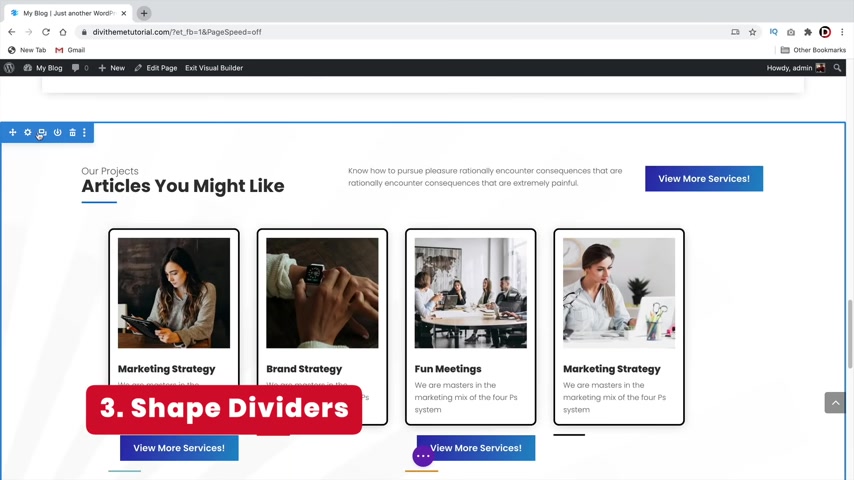
So when you're building your website , you might want to add shape dividers onto your website .
Amateurs love shape dividers .
I'll click on this gear icon and I'll go to the design tab .
I'll see this divider section and under the top section , I can change this divider to something else .
There's a lot of different ways on how you can design dividers .
So we can add it to the top and also the bottom can add a different uh divider style , maybe something like blue or black or something like that .
And there's a lot of different ways how you can customize it .
Uh I don't use them too much , but uh they are very trending and I do recommend using shape dividers just don't go too crazy with them because then again , you have to carry that throughout your website and that can be a little tough .
So shape dividers are really cool .
I'm gonna do something called the bulk editing .
So with bulk editing , you would simply click on a module and hold shift .
So I'll click on this module 1234 , and I'll click on the gear icon .
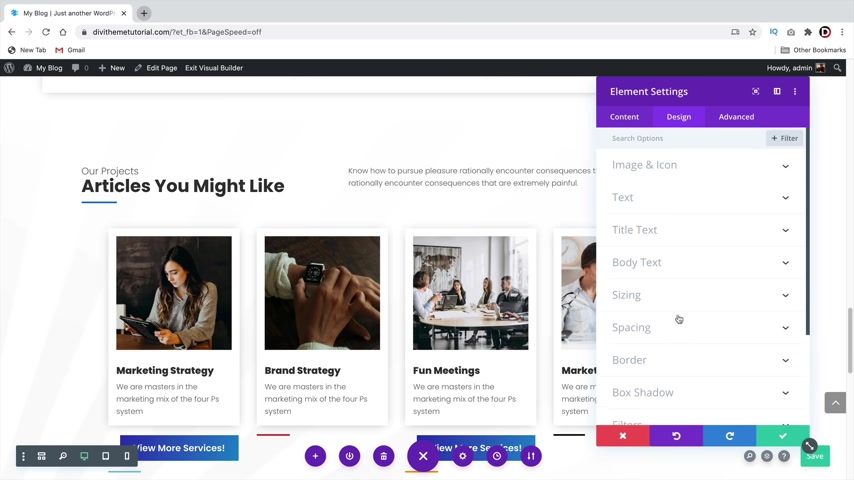
Now , what I can do is I can edit all these modules at the same time .
So for example , if I want to add a specific border to this , I will add in a black border and I will increase the border width and now you'll see how it's being applied to all of the modules .
Pretty cool .
You can apply this to all of the modules .
You just need to hold shift and click on all of the modules and whatever changes you make for one module , it will be applied for all of the modules .
So that is basically called the bulk editing .
And it's a feature that came out sometime this year .
The next feature is called the divi presets feature .
Wouldn't it be nice if you can create modules and they were already preset it and created for you without having you to design everything all over again or duplicating it .
We can do that with the devi presets feature .
So for example , I'll go on this button right here and click on the gear icon .
Now this works for all modules .
You'll see this preset default .
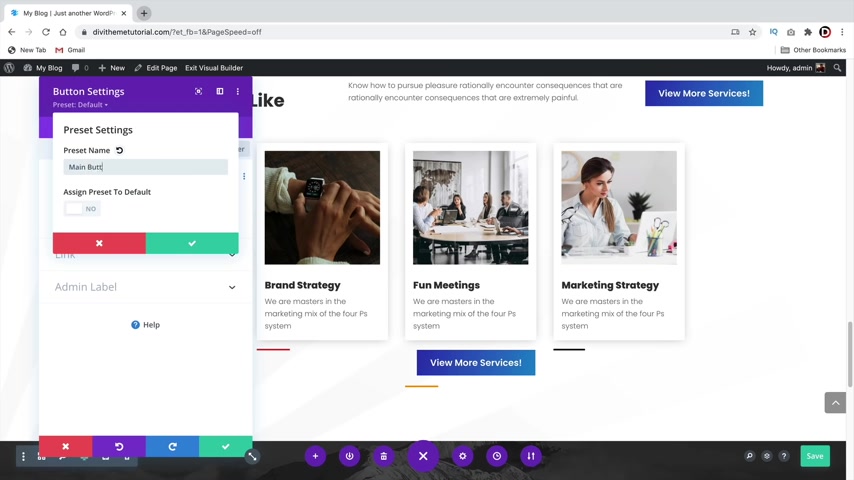
We can click on that and click on , create a new preset from current styles and this will be the main button .
Now , we can assign this button style to other modules or I can assign this preset to default .
Meaning every time you create a button , it will look like this .
So that's pretty convenient , right ?
So I'll click on check and say yes and then we can style that button preset right here , but I'll just click on check and check .
Now let's add a new module here .
So I'll click on the plus icon and I'll select button and there you go .
So now you'll see the button is created for us automatically with this specific style .
So that's a really cool helpful feature .
Now , of course , you can create new styles and you can store them in your presets by going to module settings and then go to presets and you can add another one .
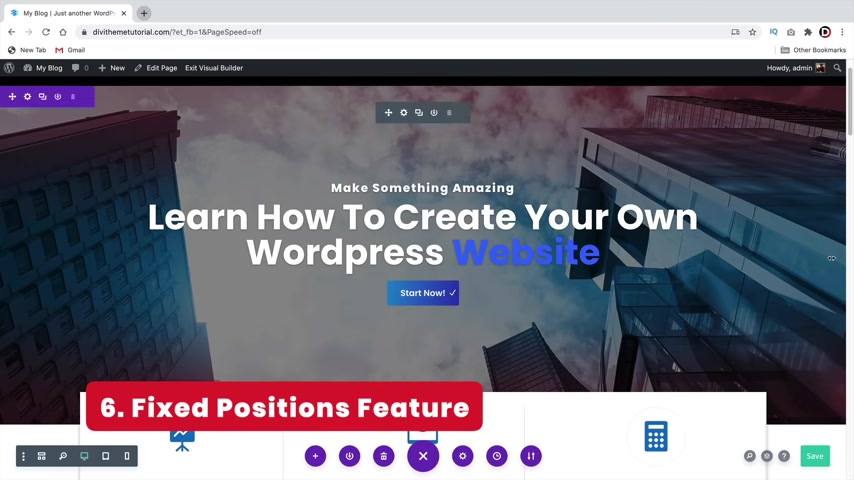
So for example , you can create a , this is like this will be like the black button style or something like that and I'll click on check and now you can design the black button style the button .
You'll have it as a black or will have a white color and then I'll have a black background , right ?
Something like that .
And I'll click on .
Yes , we have the main button , right ?
And then we also there we go main button and we also have the black button style so you can create different presets for different modules and then you can go apply them throughout the website .
Um Yeah , the green button , I just made that because I was just , you know , during my editing time , I just made it just to mess around with things .
But you get the idea here .
So you can have different styles for specific modules and create presets for your modules .
So the next feature which I think is really cool is called the fixed positions feature .
Now there's a few ways on how you can apply this and I'll just go ahead and just give you an example .
So I'll scroll down on my website here and now you'll notice that this button on the top , right ?

Keeps following us it's sticky .
So what we can do is we can have certain sections sticky , we can have module sticky , we can create a sticky feature for pretty much any specific module , column or row .
So let me show you all how I did that .
So for example , I'll click on this module and I'll go to the advanced section under the advanced section .
We have scroll effects .
Now there's different type of sticky effects and there's different sticky positions .
So we have stick to the bottom , we have stick to the top and bottom and we have just do not stick .
So for example , the do not stick is just gonna remain not sticky , right ?
If I click on the stick to top , when I scroll past it , it will stick to the top of the screen , something like that and you can set the actual top offsets right here .
So basically saying I want it to be 100 and 35 pixels from the top .
That's what that's referring to .
So the next option we have is stick to bottom .
Now , this is a very interesting effect and it works on some websites .
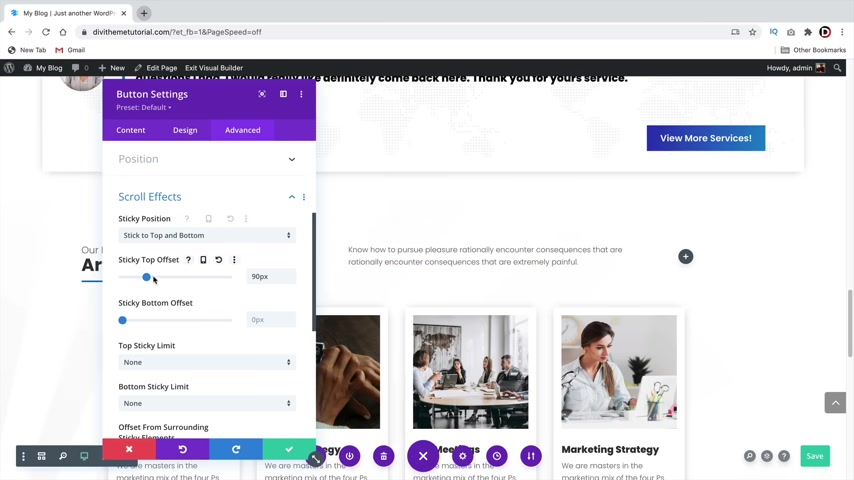
But let's say , for example , we pass the button so you'll see the button .
However , if we scroll up , the button will now follow us on the bottom , right ?
So that is where this stick to bottom comes into play .
And when I scroll past of where I originally put the module , it is now there .
That's just a way on how you can add , stick to the bottom or we can have it stick to the top and the bottom .
So if I scroll down , you'll see how it scrolls to the bottom and it scrolls to the top .
But I have that preset up there .
So I'll reduce that to zero and it'll remain there .
It's a pretty cool effects , we can have that button in there and also there .
Now this is a great feature to have on your blog .
So let's say , for example , you want people to sign up or you want people to do something , it's a really cool effect and you can apply it not just to a specific module , but you can also apply it to a specific row .
Now , what I'll do is I'll apply this with a sticky .
So under the advance scroll effects , I can put this as stick to the top .
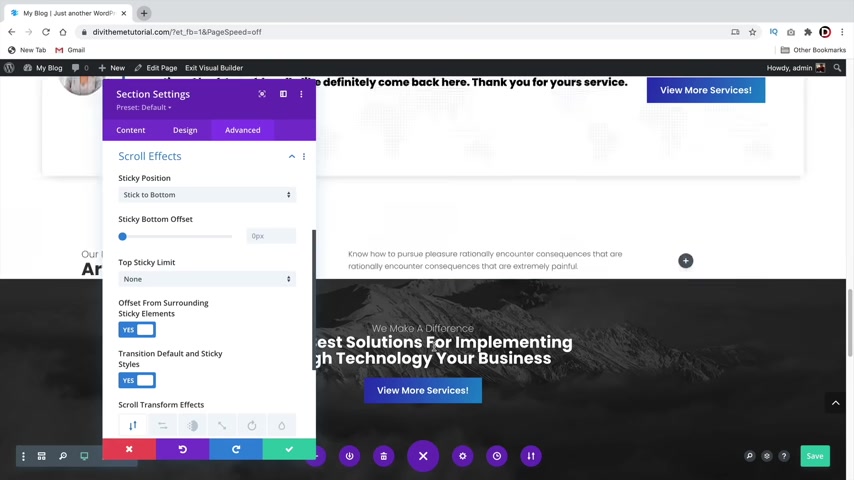
So when I scroll down past this , you'll see here how now it eats up everything because it wants me to kind of , you know , it wants me to click on this and when I scroll up , it's gone and I can do that again , I can do stick to the top and to the bottom .
So the scroll effects , I will put stick to the bottom .
Now you'll see how when I start the website , it loads at the bottom and if I scroll to the bottom , it then fits into place and then everything's normal .
Let's talk about another really cool feature which is the transformation of the scroll effects , scroll effects on the advanced tab .
You might notice that you have these other options .
So you have , you know , the sticky positions , but you can also do really cool things like vertical motion you can have rotating .
Now , I'll just click on this image and you this particular one to give you an example .
So what I'll do is I'll first rotate this object .
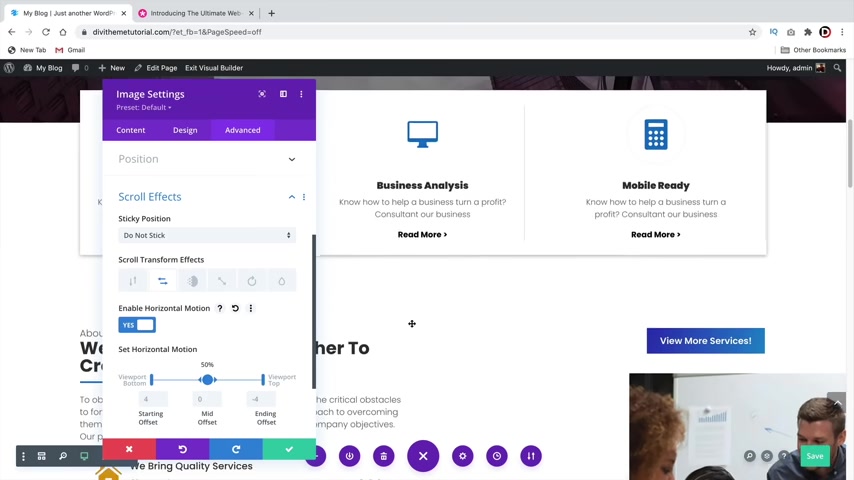
Now , you'll see as I scroll , we can rotate the specific object which is really cool and we can turn that off and saying , OK , I don't want the rotating , however , I want to add vertical motion .
So now basically when I scroll up and down , the object will go into place like that and we can control the viewport bottom and the viewport top by , you know , just selecting something like that .
So now what happens when I scroll down , it'll , it'll come up more at a , you know , at a better angle , you can go through each of these options and find out what you want to do for your websites .
Uh The horizontal motion is really cool and there's a lot of good examples to use it like right now .
So I'll just scroll down and the image will come out of the website and be placed there .
Now , there's various ways of how you can , you know , design this page so you can put the , you know , the end starting off and the mid , starting off .
So for example , I can put it off the screen and then as I scroll , we can have it come on and off like that .
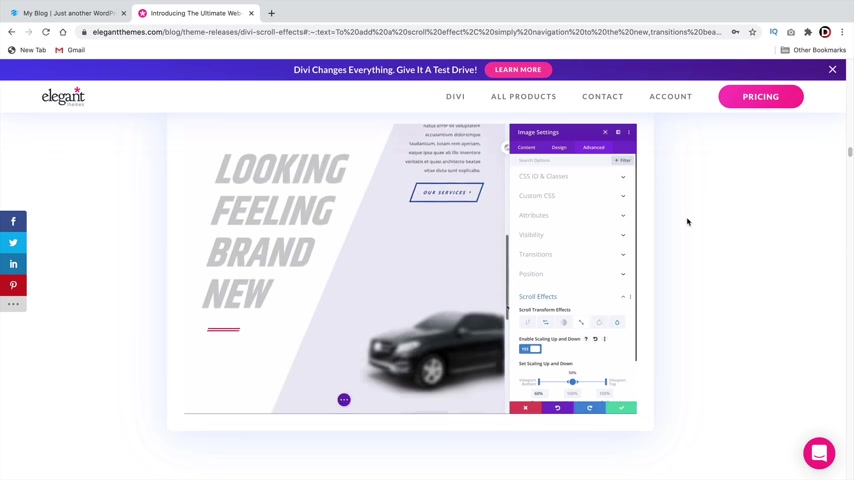
So there's just so many different ways on how you can customize with this section with the transformation effects .
There is actually an article by elegant themes and they do give some very unique styles of how they apply the transformation effects .
So you'll see how they add these doughnuts and the doughnuts roll off the screen as you scroll up and down .
Also , we have this one with the car goes off and on the screen when people rotate off the screen like that .
So as they scroll up and down the car kind of , you know , kind of goes in and out .
So there's just a lot of ways on how you can apply these scroll effects .
Uh Personally , I don't use them too much , but there definitely is a reason to use them .
It's a really cool feature and the scroll effects can really add a lot of nice design and the core to your website .
The next is an amazing feature that I think that you're really gonna love and it's called the A B split testing with divi .
So for example , we have this text right here and we have this button .
Now , how do I know if this text is being effective or not ?
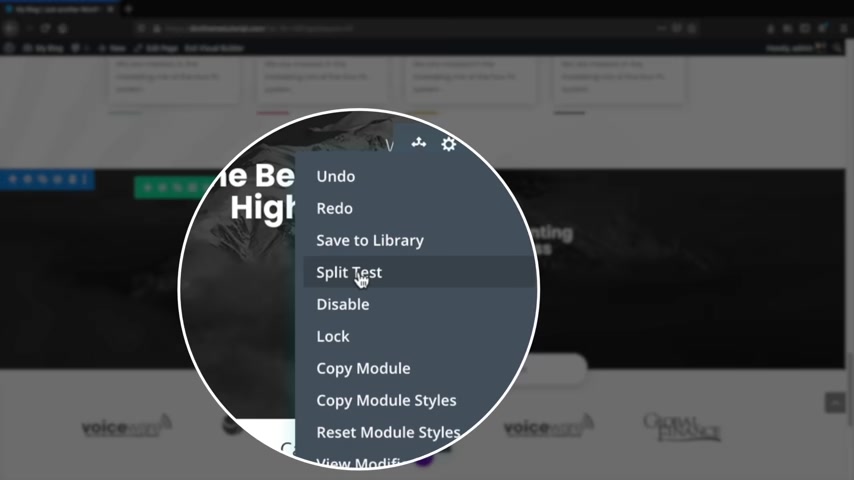
You know , are these people clicking the button because of this text ?
Well , we can A B split test with different versions of this specific text .
I'll right click on this module and click on A B split testing or split testing and then click on .
OK .
I will then click on this button because I want to test this specific button .
So essentially I want to test this text versus this button .
But what I can do is I'll click on this little arrow here and now I'll create a different version of this text .
So I'll click on the gear icon here and then put something like and I'll click on check and then we have two different versions .
Uh I'll go ahead and save this right here and on these little block icons , I'll click on that and I'll scroll down and now you'll see that we have two different versions of the text .
So what you will do is that it will distribute this to different visitors on your website .
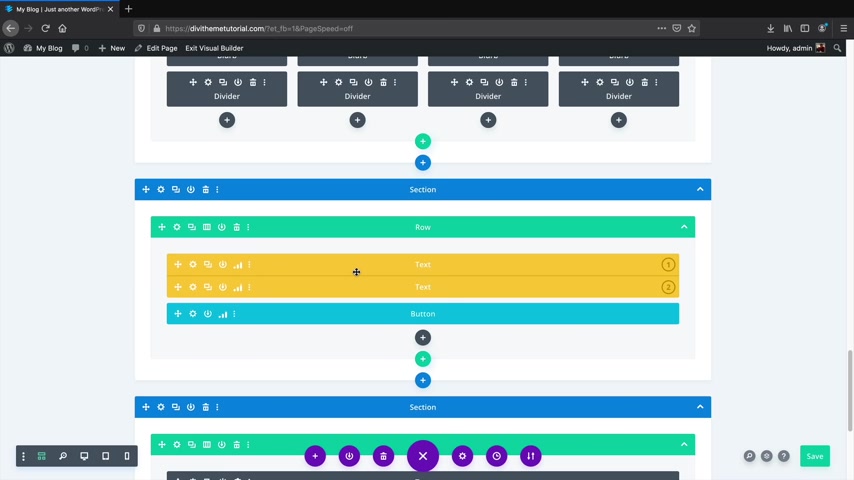
So when you have visitors on your website , it will distribute this text and this text equally to all your visitors .
And they will find out which text is performing better based off this text who is clicking this button .
And again , we can make a third version so we can make a third version .
We can change this to something like um uh 100% money back guarantee and click on check and save .
You can split test every single part of the website to see if something's being effective or not .
And this is great for home pages .
This is great for call to action .
What we can do is we can just wait this out and you can even visit your website on other browsers .
And you will see that the text will constantly change and rotate to other visitors to determine what text is being the most effective .
So let's open this up really quick .
I'll click on these three bars and now you'll see text one , text two and text three .
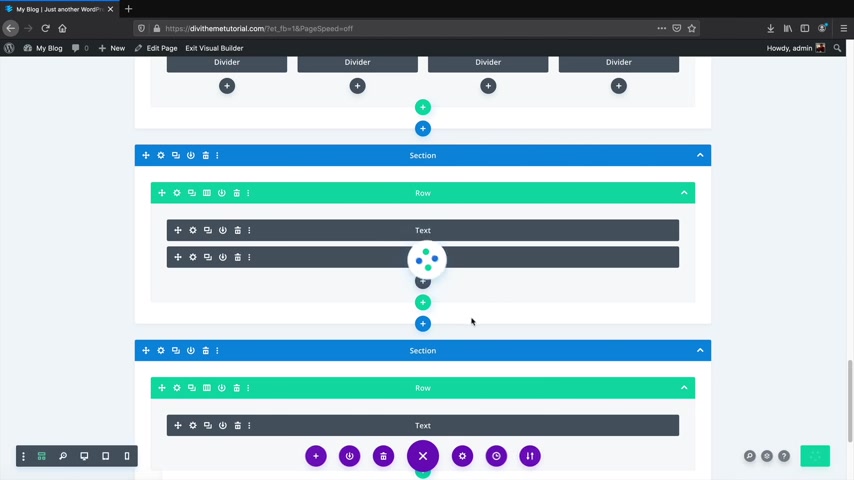
So what this is going to do is that it's going to compare the impressions that the clicks and the click through rate to determine .
Hm , is text one more effective , is text two more effective or is text three more effective .
You can read the reads , the bounces and then they have a goal engagement as well .
So the A B split testing , it's really cool .
It's really helpful .
And let's say , for example , text two is performing the best .
You can end the split test .
Pick a winner , proceed and say , you know what text two had the highest rate of conversions .
So I want to select text two to be the permanent text and that's your winner .
So now text two will be displayed on your current wordpress website .
So that's it .
That's all of the advanced features .
I hope this part of the video was helpful .
Um I hope it wasn't too much for you guys .
So remember , feel free to pause the video , go get a drink , go get a beer and , and come back .
Now that we talked about all of the advanced features with TV .
Let's talk about some of the creative styles that you can achieve with the DV builder .
Next , let's talk about some creative designs in the beginning of this video , I showed you all some really cool animations like this animated clock .
When users scroll on your website or this expanding blurb section or an expanding call to action or a creative divider scroll , you'll see when users scroll on your website , you'll see these uh section dividers that actually move with the actual user , which looks really cool .
There's various ways on how you can design and style it or you have this divi test mask with background animation which also looks really cool .
Now , elegant beams kind of did a poor job at keeping all these together and having records for them .
So what I did is I went back to years on Elegant Thing's blog and I created a blog post and I linked all of these tutorials and layouts on one specific blog post .
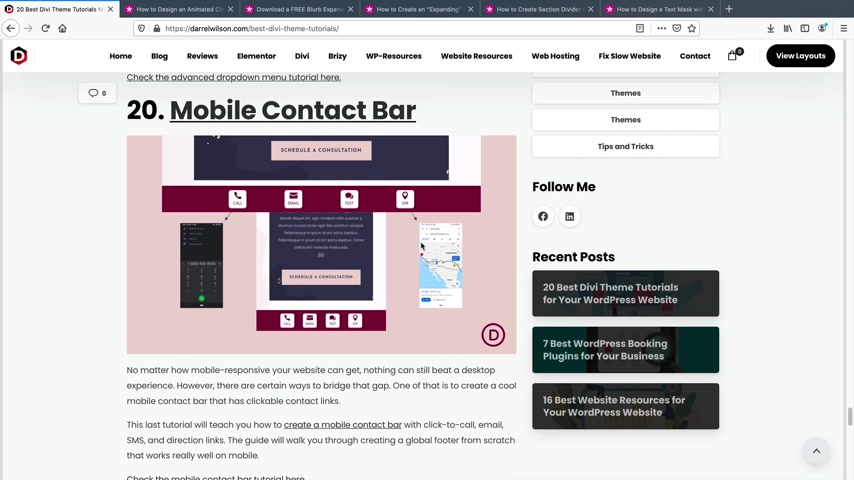
So you'll have access to all of these tutorials in this blog post .
I'll put these tutorials in the description below of this video .
So you can go ahead and download all of these layouts .
Also , some of these are tutorials .
For example , this mobile contact bar .
This is a tutorial where they'll show you how users can click on something and then it'll call on their phone or if they click on this , it'll pull up a Google Maps .
And uh yeah , I just didn't want these to go to waste because they have some really good tutorials and they have some really good stuff and I just wanted to kind of put them all together in one source .
So you don't have to go back and scour the internet and , you know , spend hours of your time and everything .
I wasn't going to make these in this video because I thought it would have been too long of a tutorial and I figured these guys have already showed you how to do it .
So I just wanted to include that in this tutorial .
You are welcome .
Go have fun and download all those free layouts on your website .
OK .
Welcome to my design tip number five .
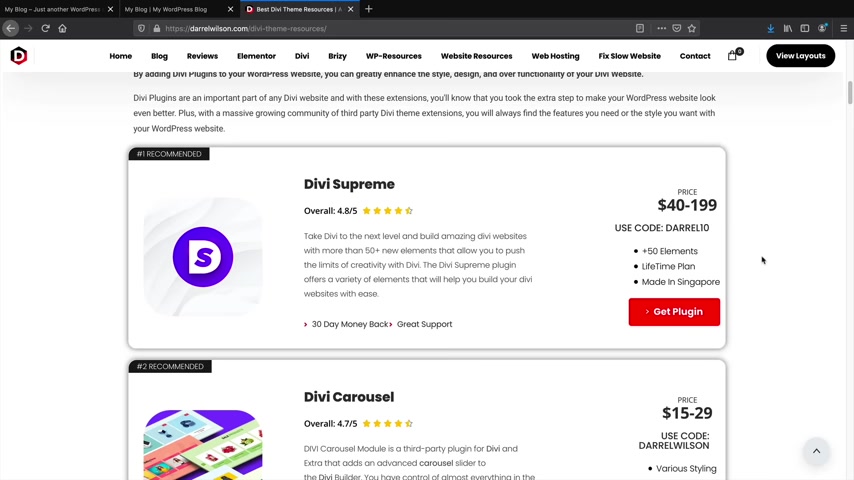
Now , let's say , for example , you're like , I know how to use Divi , I'm really good at it , but you know , I just lacked some design aspect .
I need some inspiration .
I just need some help in order to , you know , make my website vibrant and really good and I want to get some help and ideas .
So if you go to my website under the Divi tab , you'll see the best Divi resources tab that I have .
Now , what I've done is I've compiled a list of a lot of Divi plugins , Divi templates and also Divi child them .
So for example , I'll click on the Divi theme plugins and these are all plugins that are made specifically for Divi .
So we have the Divi Supreme plug-in which gives you 50 more elements to your website like gradient text and other stuff .
We have Divi Carousel , which is a plug in that allows you to have a carousel onto your website with Diy .
And then we have something like a divi mega menu as well , which just gives you a really cool mega menu to your website .
So you can go ahead and check out this list and you might find something that you need .
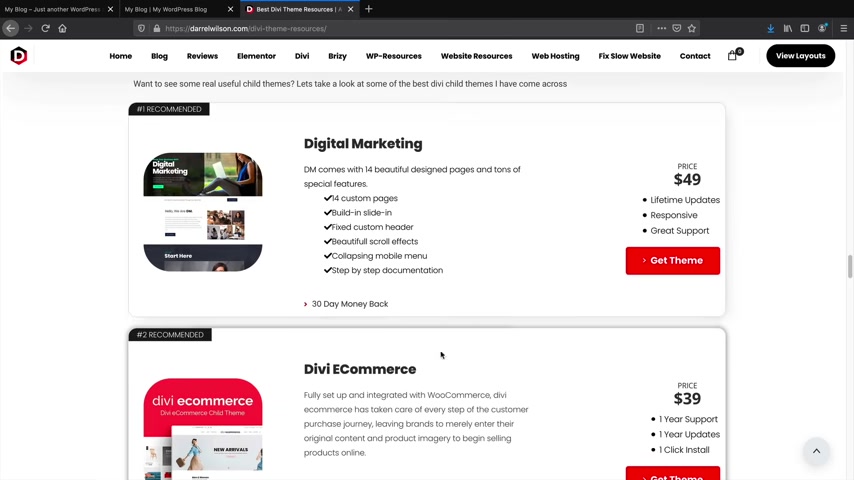
Sometimes , uh you're building stuff and you might need just like one or small plug in and that'll complete your website also for those of you who need templates .
Uh I recommend Divi they have just tons and tons of templates that you can use .
They have more than 1600 templates that you can uh purchase and download on your websites .
Also , Divi Monk The Landing Factory , uh this resource page .
It took me , it took me weeks to , you know , compile and get together .
But um you can find templates DV plugins and also Davy Child themes .
Now , essentially what a Diy Child theme is .
You might come across that a lot and we'll talk more about that at the end of the video .
Essentially what it is is a theme that's created with Diy just with some PHP modification .
It's just basically geared a little bit more towards people for a specific niche like uh Diy e-commerce or digital marketing .
And it just adds new features .
It adds new styles that normally don't come with Diy .
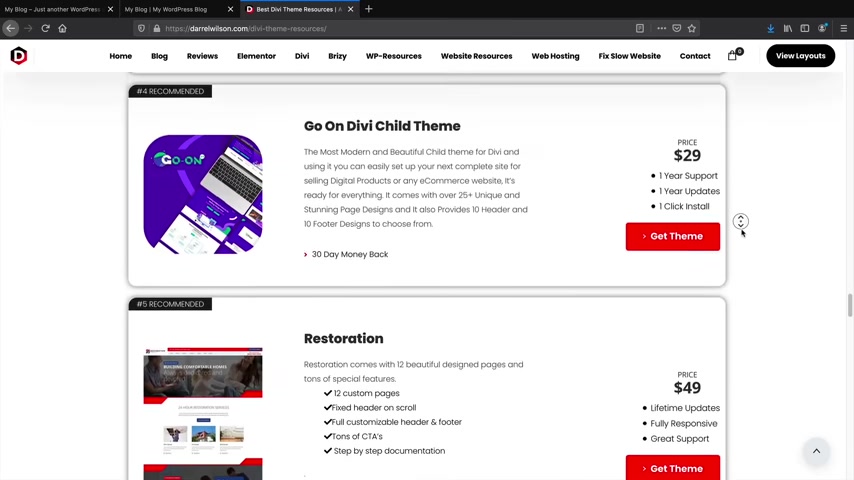
So it just adds a little bit more to your website .
And um if you see something that you like , you can just purchase it and it'll import all of the demo content for you .
So it'll basically , it's basically a premade website just with some small modifications , just to kind of push the design limits of Davi .
If you want to go ahead and check out some of the DA Child themes , you can check that out also memberships and packages , let's say you just see a large list of something that you like .
They have memberships where you can uh purchase a membership and you get access to all of their plugins , all of their themes , everything that they offer like the Diy Space membership and Mark Hendrickson and also the B Super five membership .
Also for those of you who just want some help , you know , with uh you know , and everything else .
Uh All these websites offer membership courses which can really help you with your web design flow .
So go ahead and check out the Divi resources page .
I just spent a lot of time making it just to make sure that everyone out there has a resource for some .
Again , go ahead and check those out .
And that was my design tip number five in case you suck at designing , don't worry about it .
You can always get work and inspiration from other designers .
You guys are gonna love the devi marketplace .
It offers uh plugins for DV templates and child themes and all sorts of goodies .
For your website with that said , let's go back to the video guys .
All right .
So we saved the best for last in this section of the video .
I'll be showing you how to use layouts , how to use DV extensions and also DV , child themes that you might come across on the internet .
Now , if you go to the website and you go to and go to the DEVI marketplace , I'll leave a link in the description below to the marketplace .
You're gonna come across tons of really fun stuff .
You're gonna come across Divi extensions , Davi Towel themes , DEVI layouts and it's overwhelming .
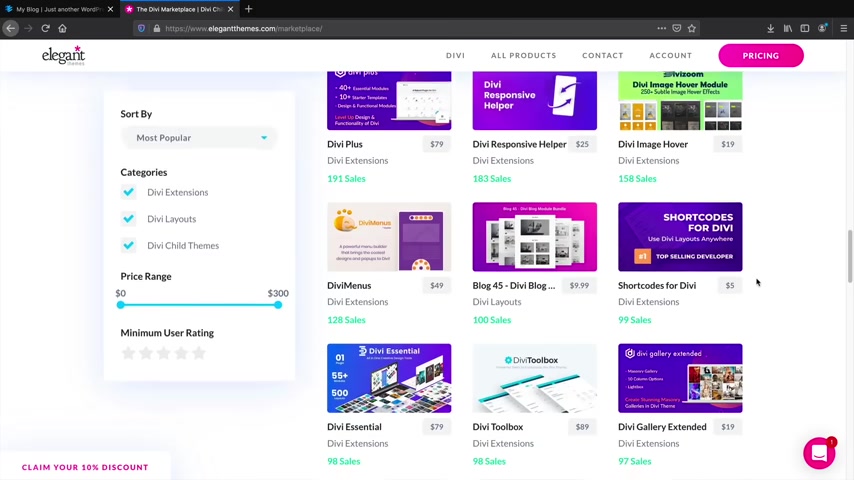
There's so much stuff here and you know , I can't have a video on every single one , but you can just get a general idea of what some of these plugins do .
For example , the DV essential plug-in .
Uh This plug in is the one I used earlier in the demo .
And this gives you access to 55 different modules and it has 500 layouts for those specific modules .
It's really cool .
And in this video , I'll give you an example of this specific plug in .
Now , whenever you purchase a product from the marketplace , it's going to end up in New York account .
So you'll go click on my downloads and if you scroll to the bottom of the page , it'll say your Divi marketplace products and then you can download that specific product that you purchased .
I'm going to use the DV essentials plug-in first .
Just to give you an example of what you might do .
If you come across a divi plug-in plugins , click on add new .
I'll click on upload plug in .
I'll select browse and now I'll select the zip file .
So whenever you purchase these plugins , they're going to be in zip files .
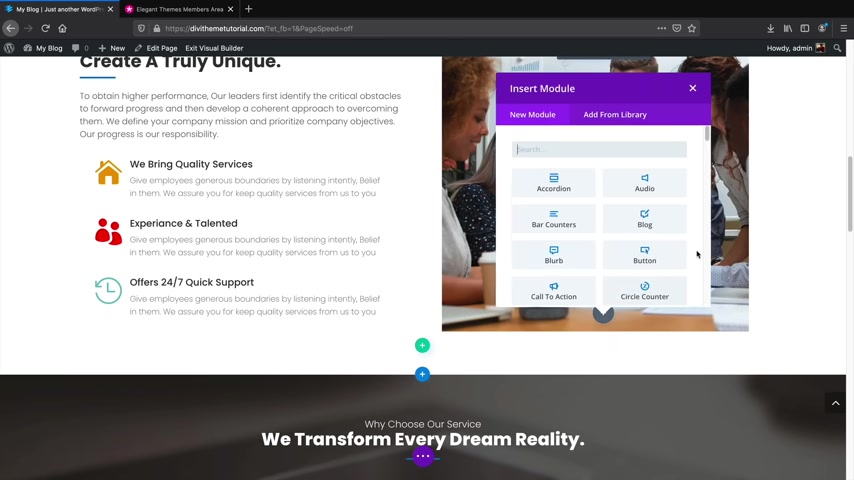
So I will open the zip file and I will click on install now .
All right , cool .
So I'll activate the plug in and now you'll see the DV essentials plug-in is activated .
So everything is pretty much done now .
So I'll just go back to visit sites and now I will enable the visual builder pretty simple .
Now , I can just add different modules to my website , click on the plus module and I'll scroll down and now you'll notice that we have these blue modules .
So we have a flip box .
We have the business hours , a next DV , review a dual button , a next button .
I mean , there's so many different buttons and different things that we can have on our website that are a lot different than what Dibby normally offers .
And this is a bad example because I have to fully customize that .
But let me just give you an example of something that you saw earlier in the video , which was the gradient text .
And they also have a lot of animations .
They have all these really cool modules that you can add to your website text gradients .
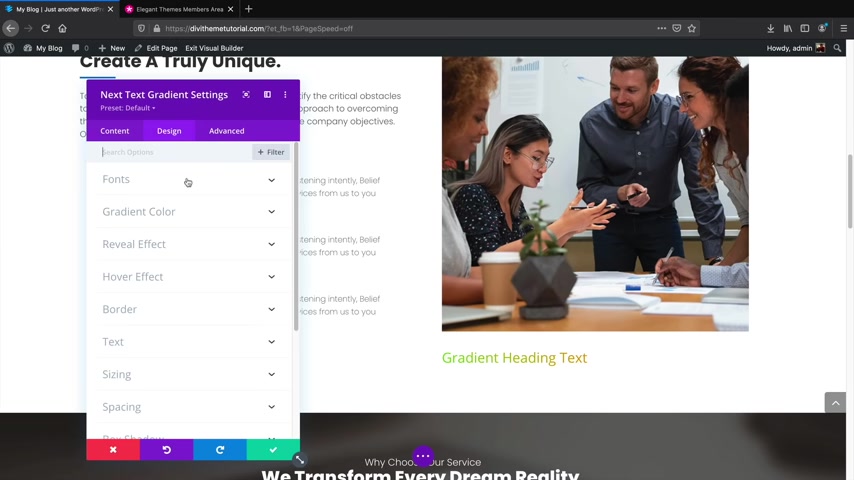
And uh you can design this just like you normally would any other module with the grading color , we can pick a specific grading color and then we can change the direction of it and maybe I would want to change something like the font , right ?
So for the fonts , I think we're sticking with Poppins , right ?
Poppins heavy .
And then there you go .
And you can also control the speed of the gradients .
You can control the direction .
Uh You would use these just as regular Divi modules .
So I'll just drag it up there and uh yeah , you know , you can change the design , the reveal effects .
What's that ?
Uh I think that's when you hover over it .
It adds like a it adds like a something over it and the hover effects grow .
I see that .
Oh That's cool .
That's , that's , that's interesting .
So you have all these cool goodies , you know that they offer .
So , you know , you'd have to just go through a lot of these modules and then just , oh there it goes .
Yeah , that's the reveal text .
It's like a black little thing that pops over it .
So you'd have to just go through a lot of these modules and just kind of , you know , figure out what they do like here .
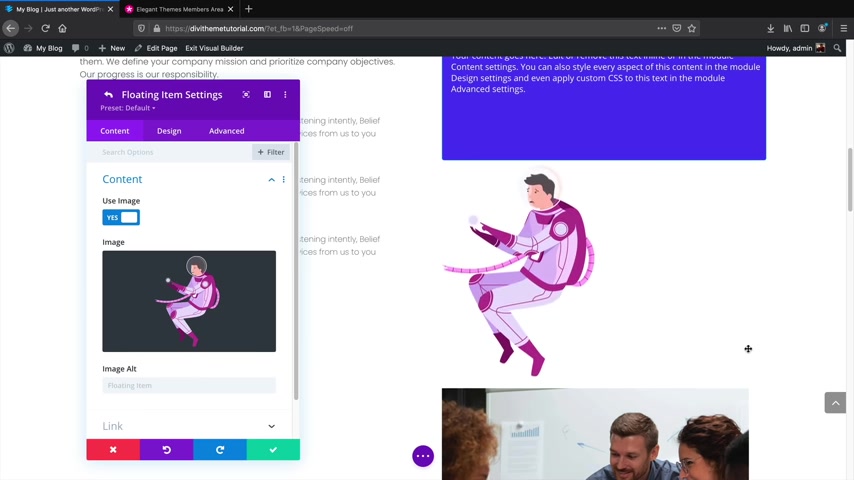
We got this really cool flip box and then we can design the color , we can add uh different icons , we can change the front and the back , a new element .
OK .
Oh It's a floating image .
How cool is that ?
So let's add in an image here .
Let's put in a , put in this guy , put in this guy .
Oh That's really , really cool .
And then we can uh probably customize that more the animation settings horizontal .
Oh Look at that .
That is really , that's really cool actually .
So for this specific plug-in , I do have a discount code .
Uh If you go to the developers normal websites and you go to their products and go to divi essentials , uh I have a coupon code for 20% off that specific plug in .
If you want to go that route .
Now , every developer on the marketplace , they have their own websites .
But at the same time , we want to probably buy it off the marketplace because we want to support elegant themes and we also want to support a lot of these other developers .
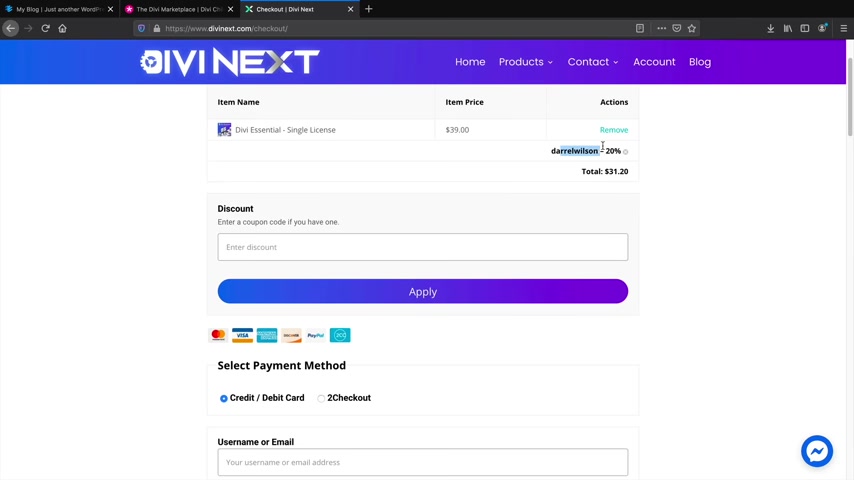
But uh sometimes these guys give me discount codes and they're only good on their websites .
So if you enter the code , Darrell Wilson , you will save 20% off this particular plug in .
So I do have other discounts and offers on my current website for other DV third party uh companies .
So if you want to check that out , just go to the DV tab on my website .
But in general , you can find the most extensions and plugins for Divi on this website and you can see what they do like , for example , the Divi Carousel module , it makes like a , a carousel for your blog post and just gives it , you know , a lot more style .
Also , Devi Supreme is another really good one .
I do have a discount code for them as well on my blog .
And that basically gives you 40 more modules .
However , the devi essentials plug in it gives you 55 modules .
So it does give you a little bit more and I think they're on the same price , 79 bucks and 79 bucks .
So , yeah , so that's exactly how you would upload DV extensions to your website .
All right .
So I showed you all how to upload plugins .
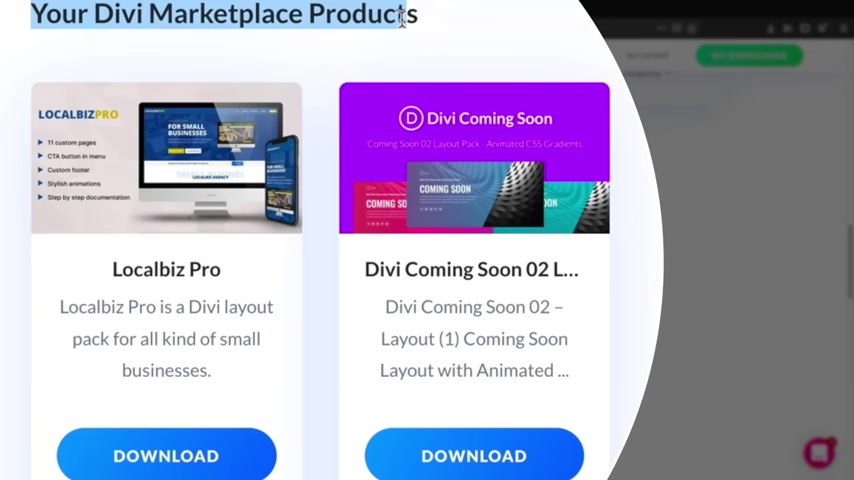
Now , let's say , for example , you want to upload a template that you might come across from the Divi marketplace or from just someone giving out a freebie over here under the Divi layouts .
You'll see that there's just tons of different layouts that you can , uh purchase .
So the one that I purchased just now I just bought this one .
You know , I just , it was just something really cheap .
It's three bucks and it's just a coming soon page .
I'll show you how to upload these to your websites once you purchase a specific layout from the actual marketplace , whether it's this one or this one or , or wherever the product will end up in your account .
So you'll go to accounts , my downloads , you'll scroll down and you'll see your marketplace products .
So you'll click on download and then you will just save the file .
Now , once you save the file , you will receive a zip folder .
And again , the same thing , you will have to unzip the folder and then you'll get the JSON files .
So it's the divi coming soon .

One that I downloaded to upload a layout , just go to your dashboard , you go to Diy and go to Dibby Library .
You will then click on import exports , click on the import tab , click on choose a file and then you will just simply upload that JSON file .
So here it is coming soon and I will import the Devi builder layouts .
All right , cool .
So once that's done , it will be displayed in your layout section of your Devi library .
So let's add it to our website now .
But I'll go over here to my blog visit sites and then I will enable the visual builder .
Then I will go ahead and delete this just to , you know , start from scratch and everything in the bottom of the screen .
You'll see these dots , click on those dots and then click on the plus tab .
So then you'll click on the your state layouts and then you'll go ahead and click on the layout that you wanted to um you know , to upload to your website .
I have the coming soon layout .
So I'll just go ahead and upload this one here .
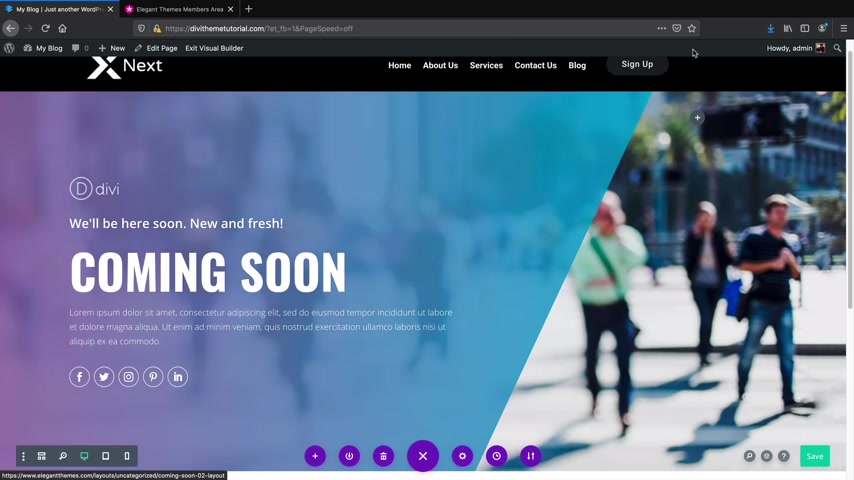
So that's how you would upload layouts onto your website that you might come across from various other websites or Facebook communities or the Devi marketplace .
OK .
So this is the last part of the video and I'm gonna show you all how to upload Divi child themes to your website .
Now , first off , what is a Divi child theme ?
So a Divi child theme is essentially just a layout on steroids .
It basically is a enhanced version of Divi and it basically takes all of the features for DV .
And it adds a little bit more such as different features , different animations , different modules or different javascript .
And it does involve some custom code .
So it is a little bit more useful than a normal DV layout .
For example , we have this Divi e-commerce child theme .
Now you'll notice right away if I scroll down , you'll see that a lot of this is very hard to do with Diy like this line animation .
Also , we have this add to cart now by default , Diy does not offer this right here .
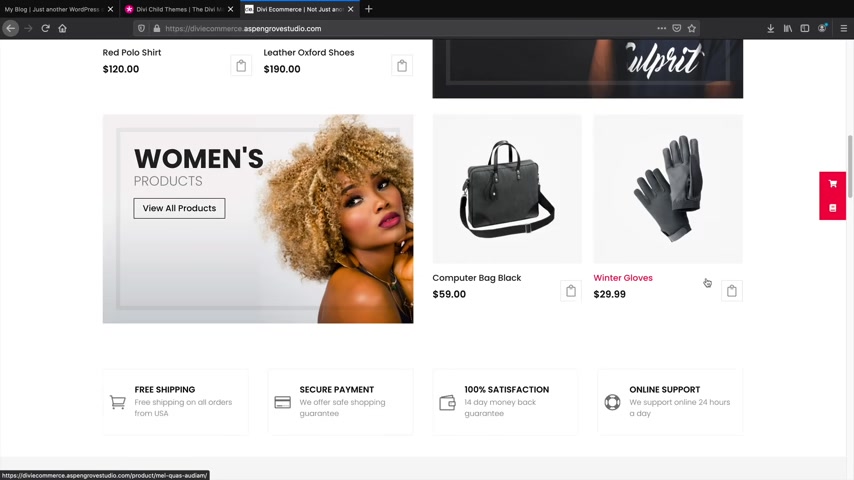
So this was done with custom code and this is what the child theme does .
It just adds some custom code to your websites and it just gives it a little bit more featured and enhancements that Diy normally doesn't offer .
So what you can do is just go through this list and just kind of browse around and shop around and seeing what you like .
Now , I'm just going to upload the Divi Business Pro because that's the one I purchased .
And again , remember all of the layouts that you purchased or child themes will be in the my account section under your marketplace products .
And I will go to dashboard .
I know I deleted my website .
Oh , it's all gone .
So sad .
So I'll go to the appearance and this time we're going to them .
So we're not going to layouts .
Now , in order for child themes to work , Divi must be installed .
So you must install and activate Divi .
Then after Divi is activated and installed , we will click on add new and we will upload that theme that we purchased .
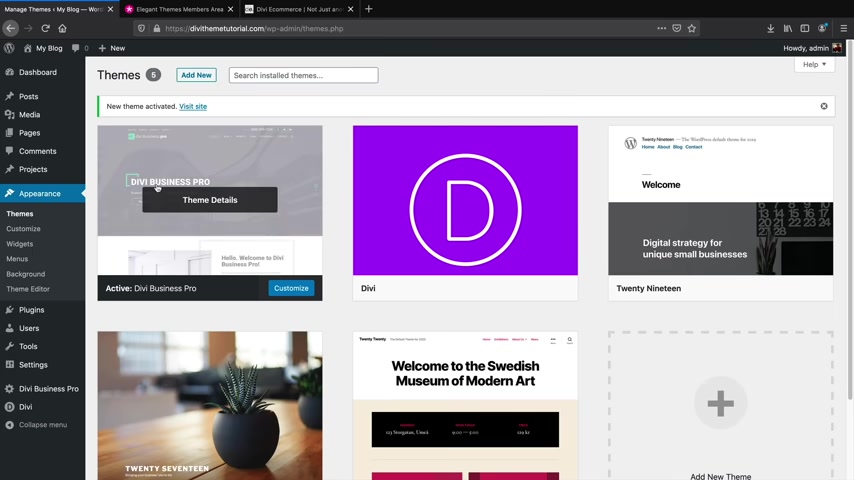
We'll click on browse now , the one that I downloaded was the Divi Business Pro and it will be in a zip folder .
So I will click on install .
Now , child theme recognizes Divi and remember Divi must be installed for this to work .
So next , I will click on activates .
Now , every child theme has a different way of importing the contents .
Some have to upload plugins , some will have an easy demo importer .
So you'll just have to follow the documentation for every single child theme because they are different .
Now , whenever you install a child theme on the left side , you might get a a new setting .
So here I have the DB Business Pro and I want to import the demo data .
So next , it's asking me if I want to import the demo data with a plug-in .
I guess this is their testify plug in , but I'm just going to install it without the testify plug in and I will click on continue next .
It's going to ask me if I want to import all of this information .
So import the images , the pages , the blog post .
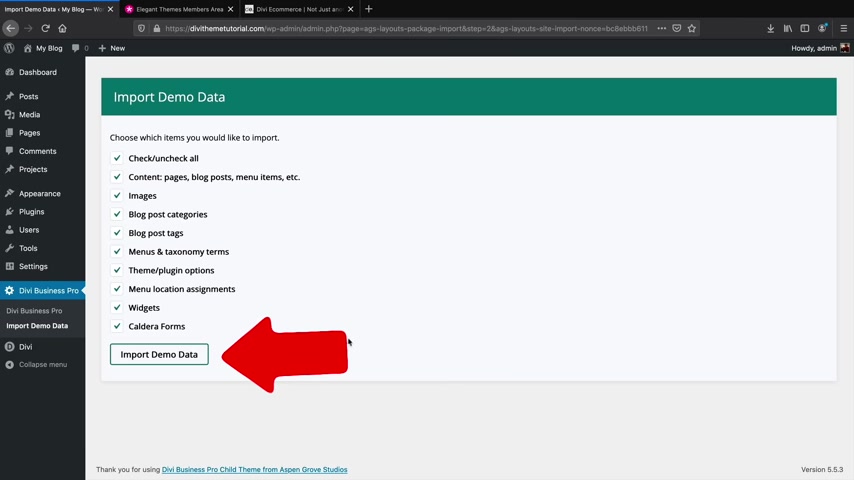
Essentially , it's going to import the entire website for me automatically .
We'll click on import demo data .
All right .
So the import was complete .
Let's just take a quick look at the website .
All right .
So here is the website .
Now , there's different slides you'll notice here .
All the slides on the left side .
See that's kind of where the theme comes into play .
Just adds a little bit more style and the core uh to your website .
So I'll scroll down here and just take a quick look .
We have the images , this really cool project section , we have this image and some text and some more text and our services page with some really cool slides .
So that's a , you know , cool little feature .
So that is pretty much the end of the tutorial guys .
So , congratulations on making it this far .
If there's anything that I missed out about child themes or plugins , feel free to let me know in the comments below .
All right , you guys did it .
Congratulations .
Pat yourself on the back for making it this far .
Now , you have an amazing wordpress website .
You have all the resources that you need .
Now , if you guys have any questions for me .
Feel free to put them in the comments below .
I do my best to get to every single comments .
Of course , I can get to every single one .
But if there's a question I can answer , I'll go ahead and answer it .
Uh Let me know how this tutorial was .
Did I do ?
Good ?
Was I too fast ?
Was I too boring .
Go ahead and let me know in the comments below .
My favorite beer is Melo .
So go ahead and put that in the comments below and just let me know that you got this far .
But until then guys congrats on your new website and I will see all of your party people in the next video .
Guys take it easy .
Are you looking for a way to reach a wider audience and get more views on your videos?
Our innovative video to text transcribing service can help you do just that.
We provide accurate transcriptions of your videos along with visual content that will help you attract new viewers and keep them engaged. Plus, our data analytics and ad campaign tools can help you monetize your content and maximize your revenue.
Let's partner up and take your video content to the next level!
Contact us today to learn more.