https://www.youtube.com/watch?v=v8muOeKoGms
How to Create a Dropshipping Website with WordPresss _ Step-by-Step For Beginners!
What's up ?
My name is Dale from Creative Pro website .
And today I'm gonna show you how to create a drop shipping website like this with wordpress .
It has a really clean design that's built with an easy to use theme .
And this theme is built specifically for drop shipping so that you as a store owner can seamlessly import drop shipping products which I'll be covering later and customers can easily navigate the site , find unique products and check out all through your store and you don't need to have any previous website experience or to know any coding at all .
In order to build this website with me today , I'm gonna walk you through the whole process step by step .
So that by the end of this video , you have a beautiful and fully functioning drop shipping website that's turn key and ready to start making money .
So here's an overview of everything I'm going to cover in this tutorial .
I'll show you how to get a custom domain name and web hosting .
I'll show you how to install wordpress , which is just the free software that we're gonna use to build and launch your website .
I'll show you how to install an incredible drop shipping plug-in and theme that will allow you to import products from a drop shipping website and seamlessly display them on your site .
I'll show you where to get products for your store , how to choose the best products , which ones to avoid and how to import them on your site .
In just one click , I'll show you how to customize your home page to fit your brand .
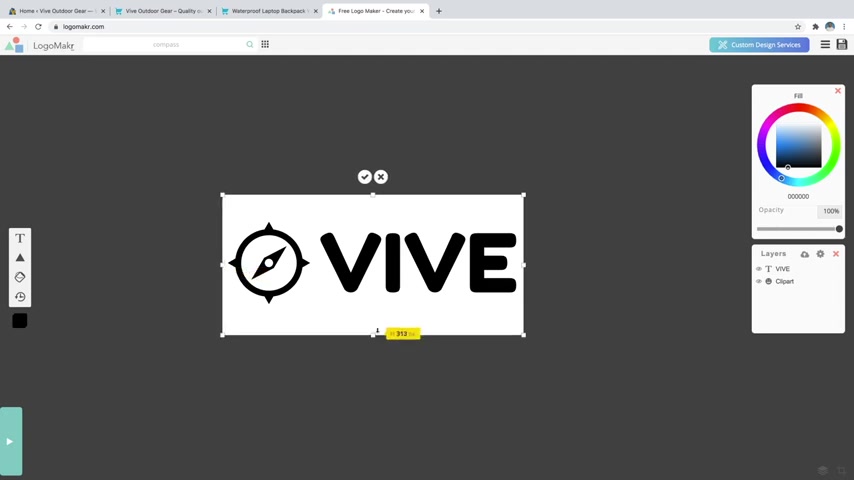
However you like , I'll show you how to create a free custom logo for your web site within minutes , using a free online software and how to display it on your site .
I'll also show you how to set up email notifications for you and your customers for whenever new orders are placed through your site .
I'll show you how to manage those orders easily through the back end of your site as well as how to set up payment methods such as credit card and debit card and paypal so that you can instantly receive money to your bank account or your paypal account .
I'll show you how to set up shipping methods such as free and expedited shipping for your products .
I'll show you how to create a custom .
Thank you , page with an order confirmation for after your customer places an order and how to test payments on your store and process orders all from your computer so that you never have to touch any product yourself .
And there are two common methods of creating a profitable drop shipping store .
There's wordpress and there's Shopify .
In my opinion , Wordpress is way more customizable and it's more affordable .
So that's what we're gonna be using in today's tutorial .
But if you would like to see how to make a drop shipping website with Shopify , then keep an eye on my channel for that as well .
So first what is drop shipping ?
And how does it work ?
Well , drop shipping is a retail fulfillment method where you as an online store owner don't need to keep any product in stock or ship any product to a customer .
For example , you can find a backpack from a manufacturer's website that costs $10 to make and you can list it on your store for $30 .
And then when somebody buys that backpack , the order goes to the manufacturer , well , they'll ship it to the customer and you simply collect a $20 profit for driving the sale .
And the common question is how can you list a product on your website for higher than it costs to make ?
Well , that's because you as a store owner are putting in the work to make the sale for both you and the manufacturer .
So it's basically like a commission because the sale wouldn't have actually happened without you .
And the manufacturer makes their money from it as well .
And I'll be showing you where to find the best manufacturers to get products to put on your store as well as how to look for the best shipping methods possible so that your customers will always be satisfied with their experience .
Ok .
So let's take a look at the website so that you can see the finished product and how it works .
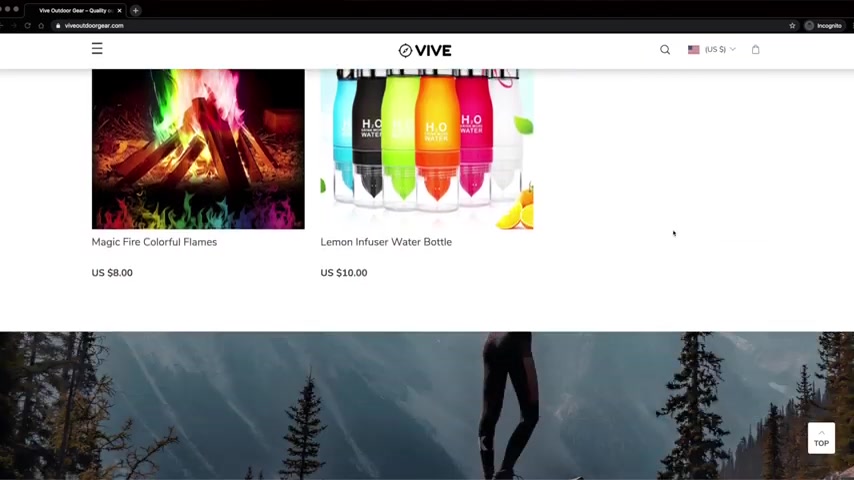
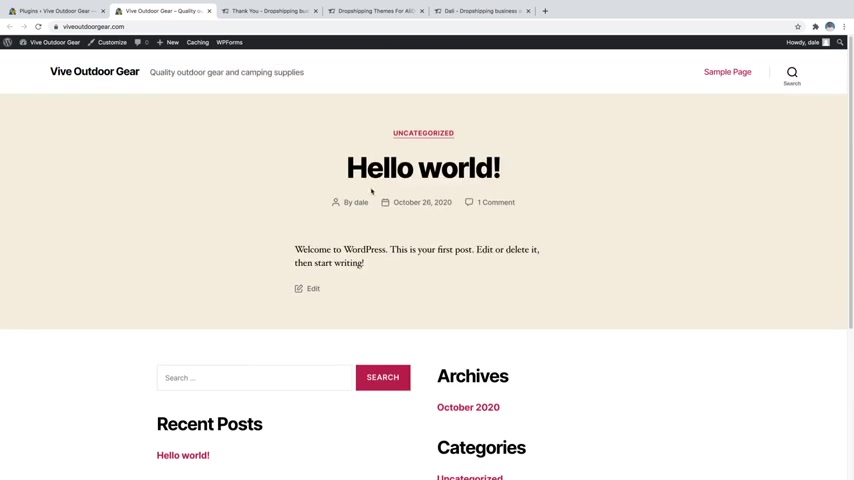
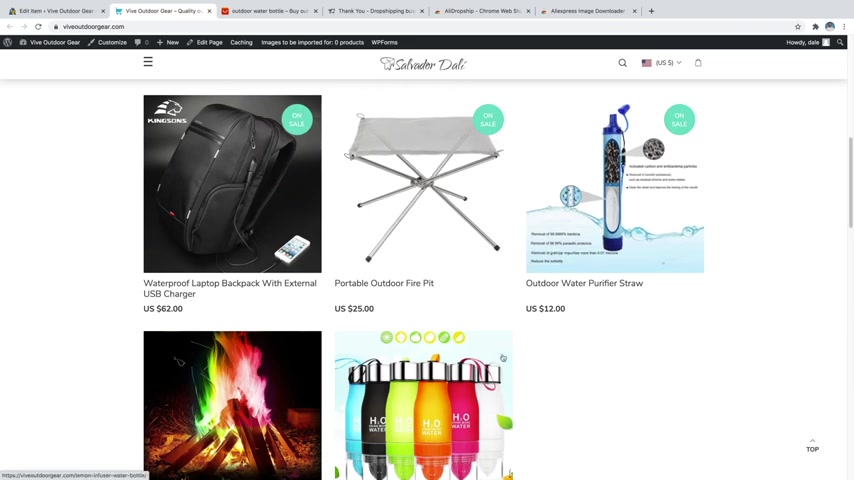
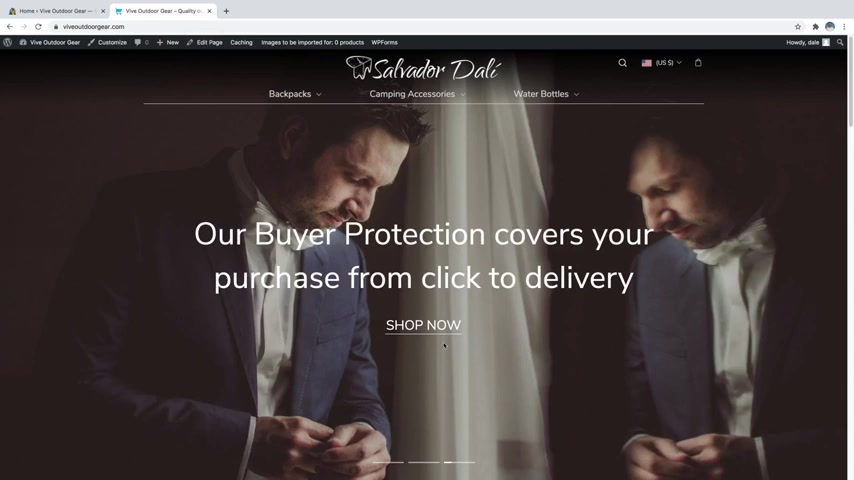
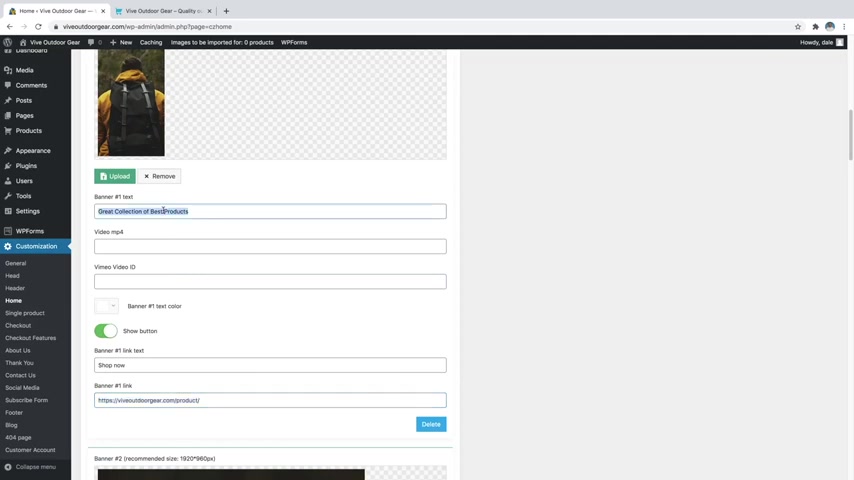
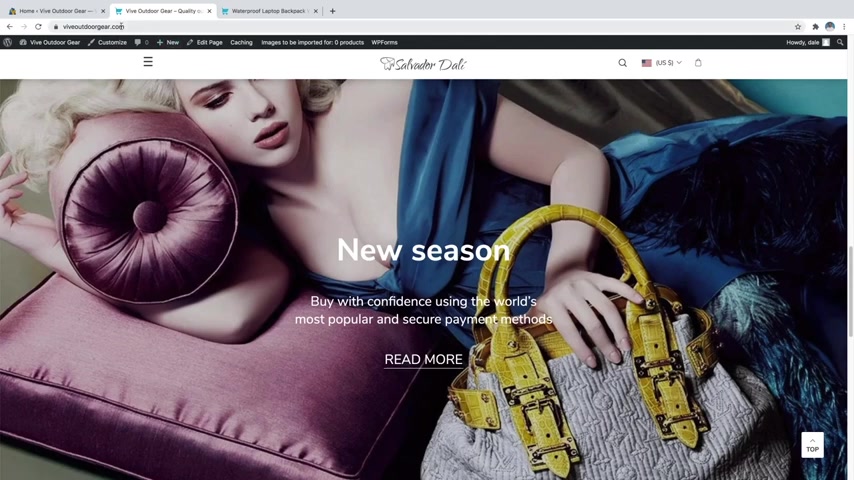
So here's our website that I'm gonna show you how to make .
I'll show you how to create this awesome logo up here to put on your site as well as this menu up here .
That's got a drop down to different subcategories .

It also shows the product within the dropdown menu , which is really cool .
So I'll show you how to customize this menu .
However , you want , you've also got different pages , like contact us about pages , things like that .
You've got a cart up here as well , which there's nothing currently in the cart and I'll show you how to add things to the cart .
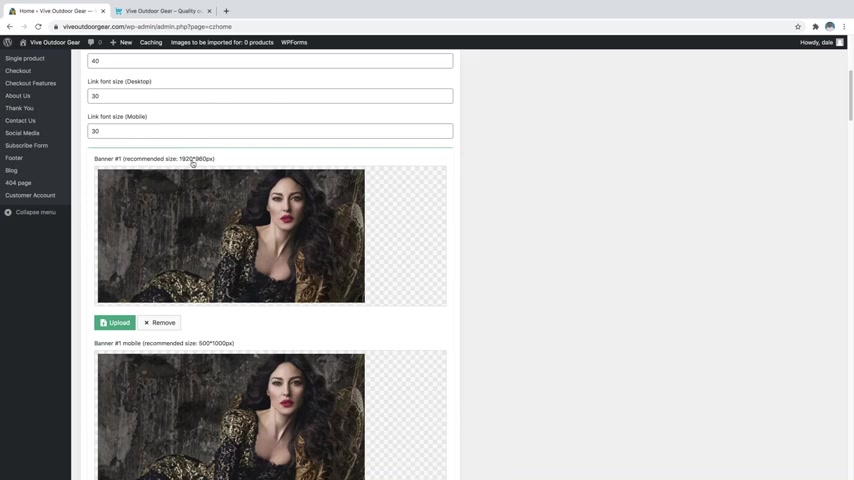
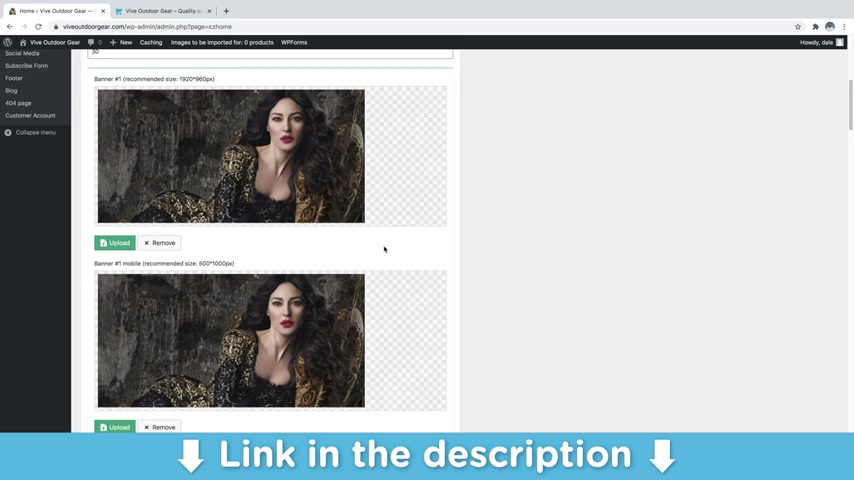
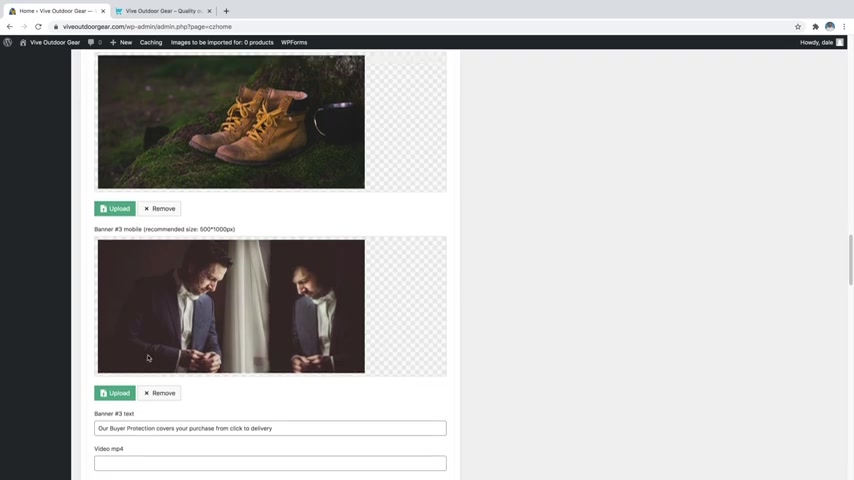
There's a banner over here where you can let these go to different sales and different products on your site .
And I'll show you how to customize this banner .
And if we scroll down , we've got all of our products here , which I'll show you how to get all these products , import them on your site , create specific pricing so that you can receive a markup whenever people were to buy these products from you .
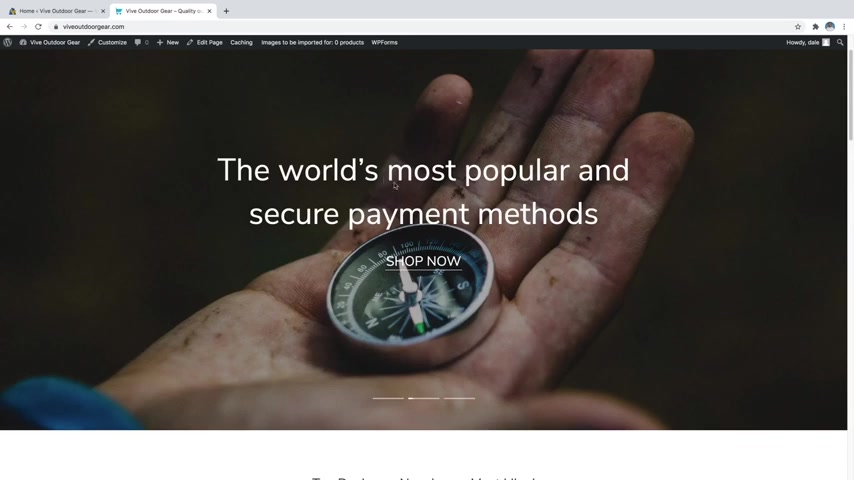
And we've also got our banner over here , which has just got this really cool parallax effect .
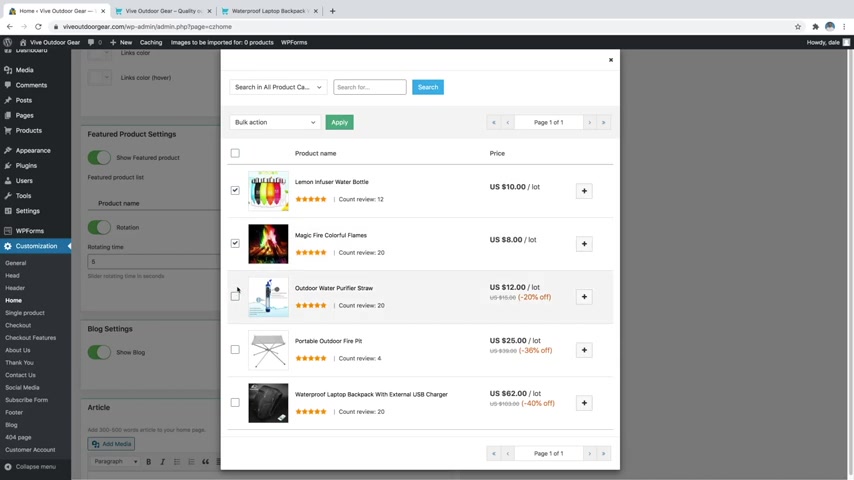
So I'll show you how to customize that as well as a featured product slider , which is gonna show featured products on your site .
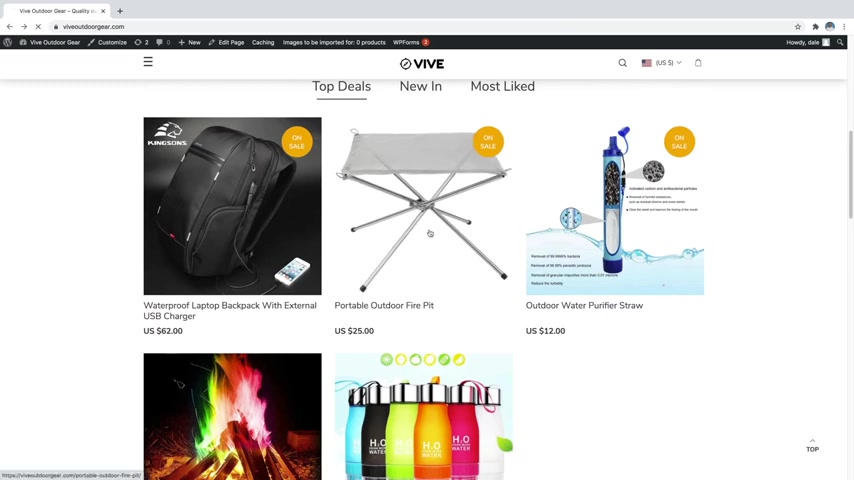
And then down here , we've also got all of our footer elements as well .
I'll show you how to load all these pages , like the about page blog privacy policy , all that kind of stuff all within this tutorial .
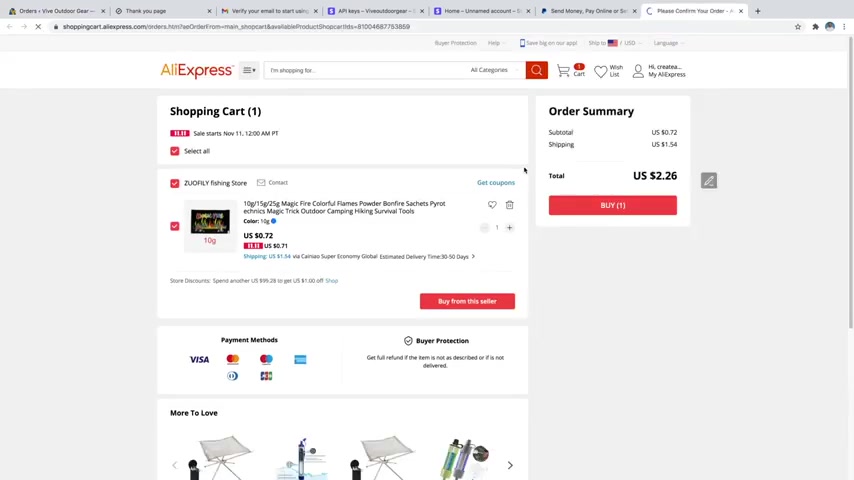
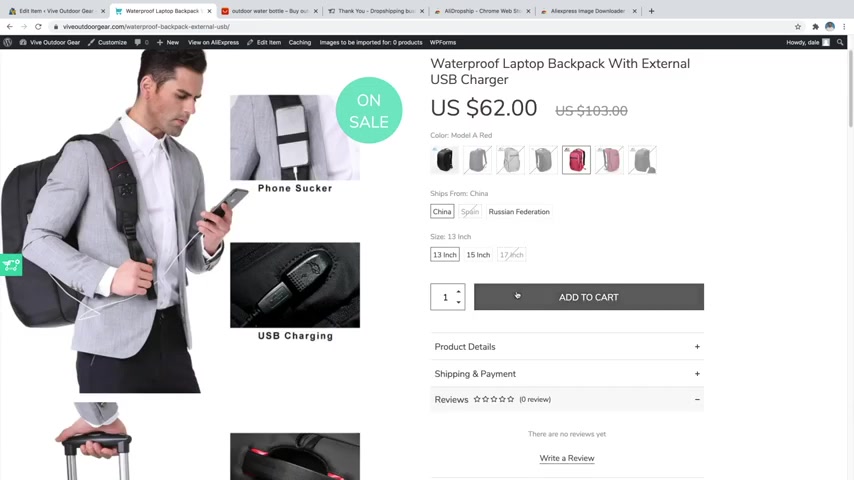
And it's super easy for a customer to come in and add something to their cart .
So if they were to just come in and pick a product , like let's say this one and you can see the product here .
We've got all different product images over here on the left , which I'll show you how to import these instantly with one click as well .
And they can just go ahead and add this to their cart and you can see it's just been added to the cart there and then there's a really cool check out page , which I will show you how to customize this checkout page to have all these trusted stickers on it .
It's all gonna be a one page checkout .
I'll show you how to create the different shipping methods and as well as the payment methods down here .
So that is an overview of the final website that you're gonna end up with by the end of this tutorial .
OK .
So now that you've seen the site , let's jump into building it .
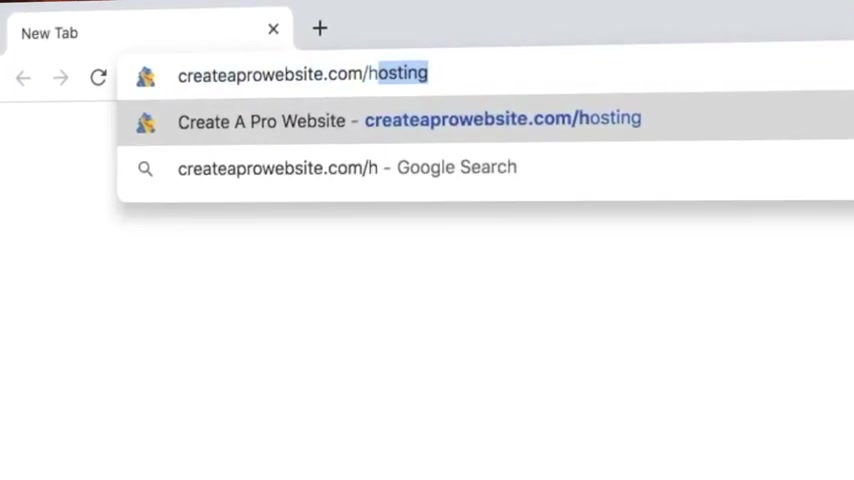
Step number one is to get a domain name and web hosting to do that just click on the very first link in the description or you can go over to create a pro website dot com slash hosting .
And this will take you to a special co branded landing page that I have with host gator dot com .
And host skater is where I host all of my websites .
I have dozens with them because they're fast , reliable and affordable and they offer 24 7 customer support .
So if anything were to ever happen to your site , then you can contact them and they'll have it fixed within minutes .
So there's a few different plans here .
We've got the hatchling , the baby and the business .
Now the baby is what I recommend because then you have unlimited domains .
So it doesn't matter how many you want to buy , you can always add on more under one hosting plan .
And then the business is really only what I recommend .
If your website starts making a lot of money , then I recommend upgrading to the business plan .
But for now , let's just say that you're just starting out .
You want to give this a shot for the first time .
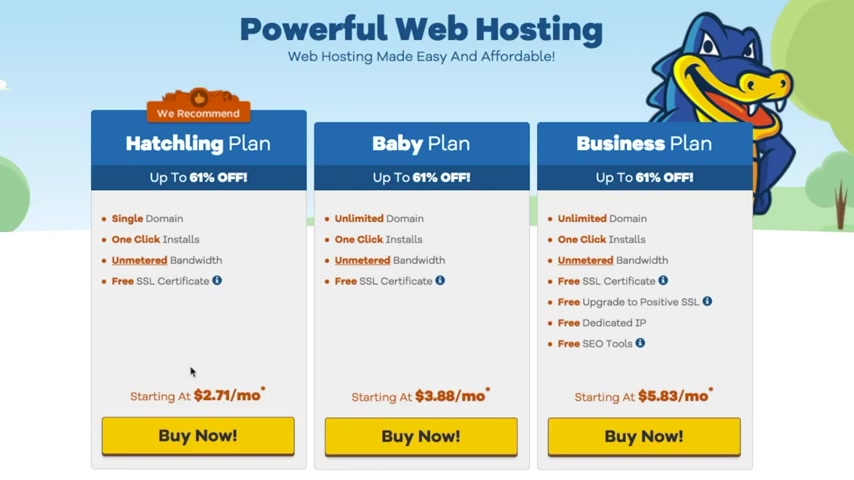
Then you can always do the hatchling plan .
You still get a single domain , a free SSL .
So it's a great plan .
So let's just go ahead and click on buy now .
And here is where you can get a custom domain name for your site or if you already have one , you can just click on this tab right here and hook that up , but I'm going to get a brand new one .
So I'm just going to type in a custom domain that I want to get .
And here you can see in green that it is available and there's a few other options here like dot club dot site , all these , but I really recommend sticking with a dot com whenever possible .
It's definitely the most professional looking .
So let's just go ahead and scroll down and then we're gonna want to make sure that we leave the domain privacy protection checked because otherwise all of your personal information , like your email and your phone number are going to be public and then solicitors will be able to call you and offer you stuff about your website and it's really annoying .
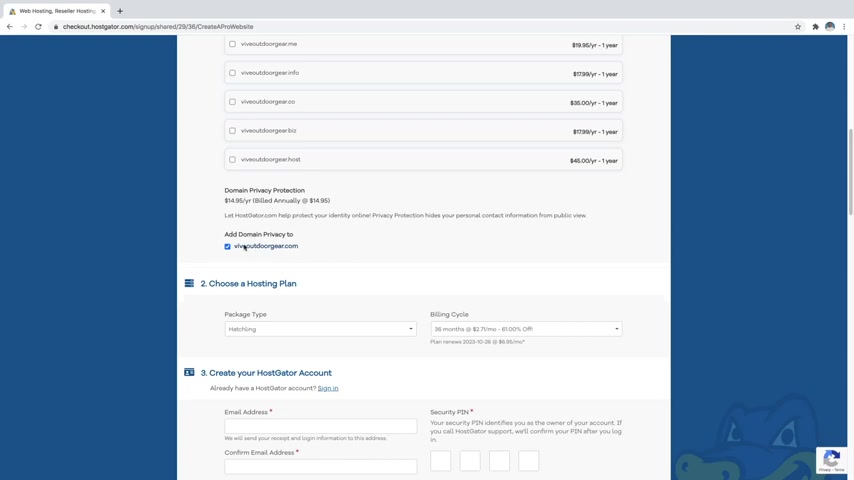
So host gator offers this domain privacy protection to protect your information .
So I highly recommend leaving that checked and then let's just go ahead and scroll down and you've got your hosting plan .
So just make sure this says hatchling or whichever plan that you chose .
And then you've got your billing cycle , which is automatically set to 36 months , which is going to give you the biggest discount , especially if you're using that link in the description .
And then you've also got 12 months , which is my recommendation .
If you don't want to commit to 36 12 months is still a full year , especially if you're gonna be creating a drop shipping store .
It really helps to give it a full year's try and you still is only about $3.95 a month and still a massive discount .
But let's just say that you're just getting started .
You're not quite sure yet .
You want to give it one month and just see what happens .
Then you can always do the one month and it's still gonna be 30% off .
So let's just go ahead and select that one for now and then just scroll down and create a host gator account .
So I'm just going to put in an email and then just a security pin for your account and then just go ahead and scroll down and here we can enter in our billing info to purchase hosting .
So you've got a credit card or you can do paypal if you'd like .
So I'm just gonna go ahead and fill out the credit card information .
Cool .
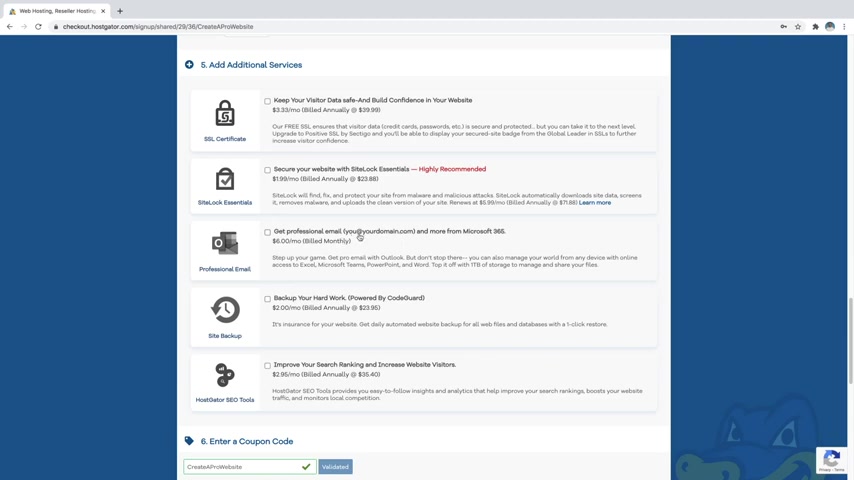
And then just scroll down over to the add additional services section and here we're actually going to uncheck the site lock essentials as well as back up your hard work and make sure that all of this is unchecked because I do actually have videos on my channel that show you how to do these things for free .
So I've got ones on how to back up your site , how to get a professional email , which would be your name at your custom domain name .
Dot com .
So I'm gonna go ahead and put some videos in the description for these things in case you want to do that .
But for now , you can just leave all these unchecked and then just scroll down and make sure that your coupon code says create a pro website , which it does .
And this is what's gonna get you that massive discount that I was talking about .
And this is my affiliate link .
So I do receive a commission whenever you use it , but it also saves you a lot of money .
So it also helps fund these free youtube tutorials that I'm putting out .
So it's just a win , win for both .
But if you don't want to use it , you definitely don't have to , you can still follow along .
But this is definitely going to be the largest discount that you're gonna be able to find anywhere on the internet because I worked it out special with host Gator myself , ok .
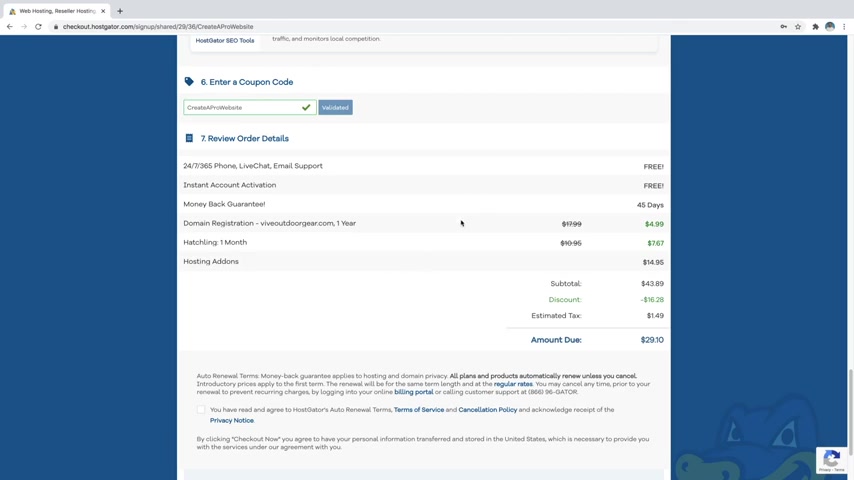
So we can just go ahead and check everything here .
So our domain name went from $18 down to just $5 and our hosting went from 10 95 down to 7 67 .
And this is gonna be a larger discount if you went for the 12 months or the 36 months .
And if you did the 12 or the 36 or anything like that , you're gonna be paying for it upfront , but it will be less money per month .
So now I'm just gonna go ahead and scroll down and just agree to the terms and then click on .
Check out now .
Cool .
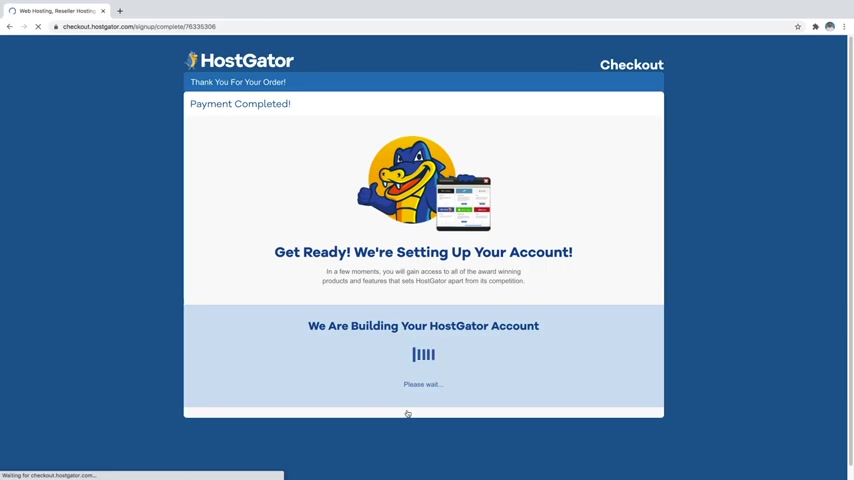
So now host gator is setting up your account .
So just give that a minute .
Cool .
So once you're brought to this page , all you have to do now is just click on view your dashboard and here you can see your hosting plan with your new custom domain name .
Cool .
So now we can move on to step number two , which is to install wordpress .
Wordpress is the free software that we're going to be using to build our site .
So let's just go ahead and get it .
So to do that , just simply click on install wordpress right here and then from this menu , just simply click on install now and then just make sure that you're on the latest version of wordpress , which we are and then just make sure that you have your custom domain name right here with the HTTP S right here and then just go ahead and scroll down and you can give your site a name right here .
And don't worry , you can always change this later .
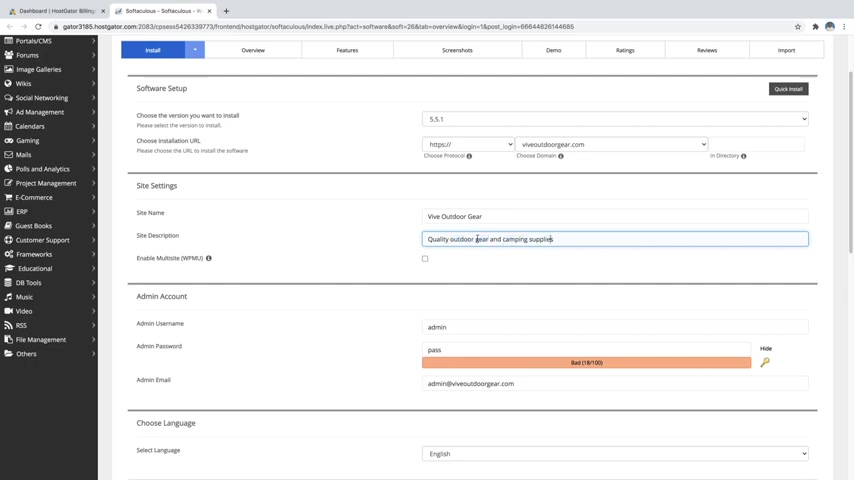
And then just a site description and in the site description , I included a couple of keywords that I might want Google to read like outdoor gear and camping supplies and I kind of worked them into the description .
Ok .
So now we can just move down and go to the admin user name .
We're just going to go ahead and change this to our name and then just create a custom password .
So you can just delete that one and just put in a custom one .
And this is the password that you're going to be using to sign on to your wordpress website any time that you want .
And then the admin email , we're just gonna go ahead and change that to our same email that we use to sign up for host gator with and then just scroll down and make sure that your language is set to whichever one that you want .
I'm going to leave mine as English and then we can just skip the rest of this stuff and scroll all the way to the bottom and click on install .
Cool .
So now Wordpress is installing .
So just give that a minute .
Awesome .
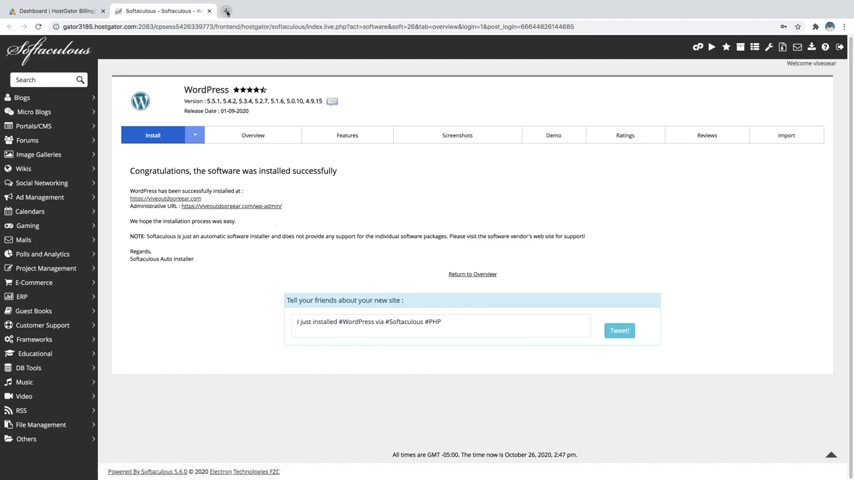
So , Wordpress was successfully installed and this administrative URL here is what you're going to use every time that you want to sign into your new website .
So you could just click this here or the way to really get used to .
It is just to go to a new tab type in your new domain name dot com forward slash WP dash admin just like that and then click enter .
And if you get taken to a page that looks like this , it's because your site has to propagate .
And what that means is that host gator now has to send out your new domain name that you just registered across the entire world to let every server in the world know that , hey , this new domain name now exists and it's live and this process can take anywhere from 30 minutes to an hour and it really usually only takes about 10 minutes for me , but it can actually take up to 24 hours .
So don't panic if you don't see the word press sign in just yet , just refresh the page every now and then or go to this new domain name right here and just check on it every few minutes .
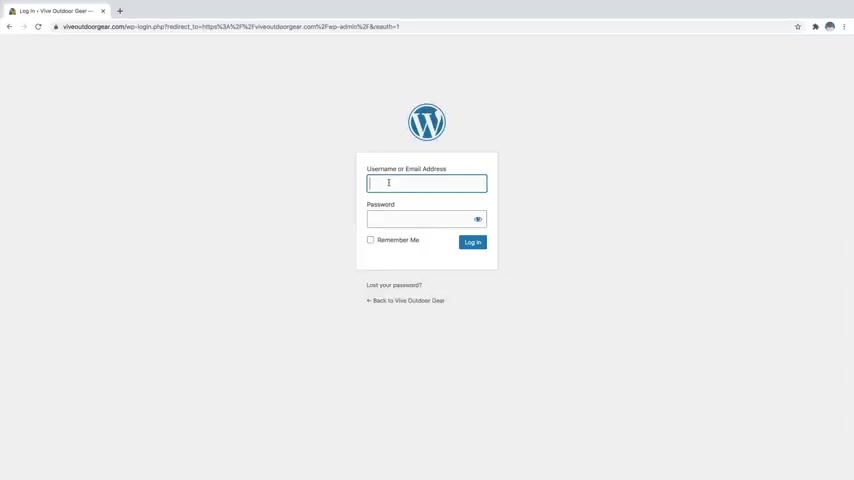
So once you see a page that looks like this , we can go ahead and log in .
So I'm just going to put in my admin name right there and then my password and then just click log in .
And here we are inside the Wordpress dashboard which looks a little daunting at first glance .
So let's just go ahead and hit the X on all of the boxes that you see to kind of clean things up a little bit .
There we go .
That looks a lot better .
OK ?
So now step number three is to configure wordpress settings .
So we're just going to change a few settings in wordpress to make sure that our drop shipping site is gonna work perfectly .
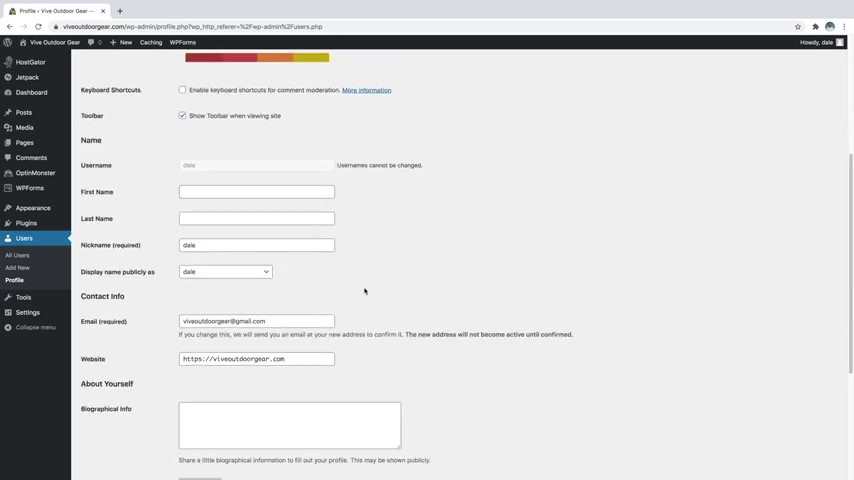
So to do that , let's just simply go on over to users and then go to all users and then just click on your name .
And from here you can change the color scheme of wordpress if you want .
So you can change it to anything that you want .
And it's gonna have a different appearance depending on which one that you pick .
I personally just like the default .
So I'm just gonna go ahead and leave that .
We can come down here .
Here's where you can change your nickname .
If you want the site to call you something other than just your name , you can put that here .
You've got your email and if we come down here , you can put in a profile picture for yourself .
Uh that will show up up here up at the top , right ?
And then you can also create a new password here .
So if you wanted to change your password , you could just click on generate password , just delete that one and then put in a new one , but I like the password that I have .
So I'm gonna just go ahead and leave that and this is mainly just preference stuff .
Now , something that we do have to do is change our permanent structure .
So I'll show you what I mean .
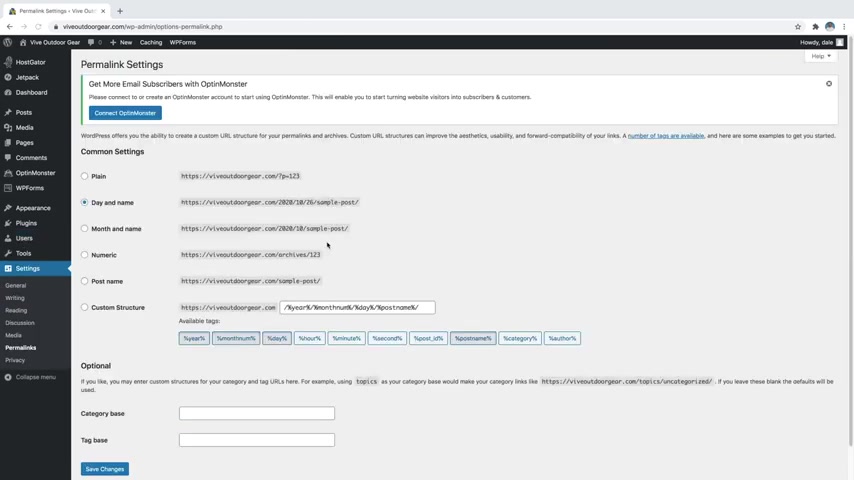
Let's just go on over to settings and then just go over to Perma links down here and we'll just say , yeah , we'll leave the site and then from here we're going to change it from day and name like this over to post name so that it has our domain name and then whatever post is that we create and then just come down here and click on save changes .
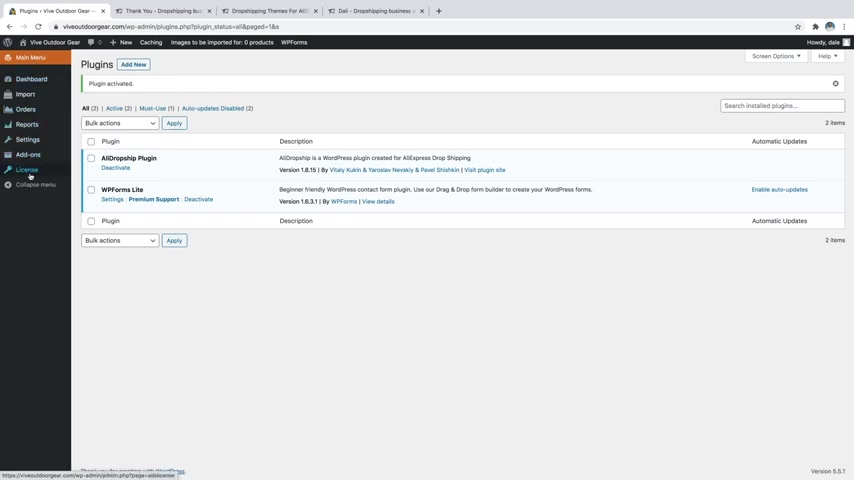
And next , we're just gonna go over to plugins and then go to installed plugins and we're just going to delete some plugins that we're not using just so they're not taking up space on our site .
So we can just go ahead and delete the hello Dolly .
We can delete the ate anti spam .
They're both not even active .
So to delete these , we'll just go ahead and click on these boxes and then just go over to bulk actions and we'll just go over to delete and then just click , apply and just say , ok , there we go .
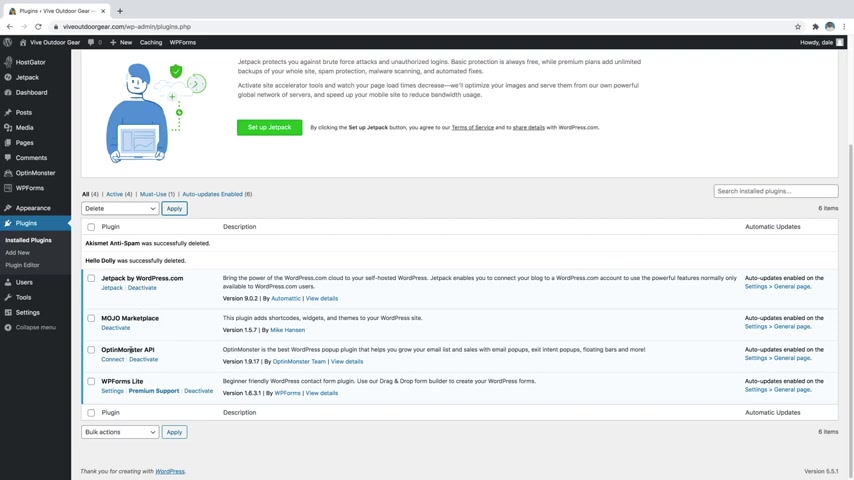
So those are now deleted and we can also deactivate jetpack , mojo and opt in monster because we're not really using those either .
So we're just gonna click on all of these and we're just gonna go to deactivate and then just click on , apply .
There we go .
And then you can delete them also by just simply clicking on each one again , going to bulk actions and clicking on delete and then just click , apply and then just say , ok .
Ok .
So step number four is to install a drop shipping theme and plugins .
So in order to make our website look like a professional store and work well with drop shipping , we need to go get a drop shipping theme .
So what we're gonna do is just go up here to a new browser and just go ahead and type in create a pro website dot com slash ali and then you'll be brought to the ali dropship website .
And what we're gonna do is just click on buy plug in .
So what we're going to be doing is getting the ali drop ship plug in as well as a theme that we can use for our website .
So what we're going to do is just click on buy now for only $89 and then just go ahead and put in your email and then you can put in your card number over here and over here is where you can put in a coupon code to make it cheaper .
Now , it's currently Halloween and they're running a sale which is 35% off .
Now , if this isn't here and you do need to use a coupon code , you can always use create a pro website and then just click on the check mark and then that will save you money as well .
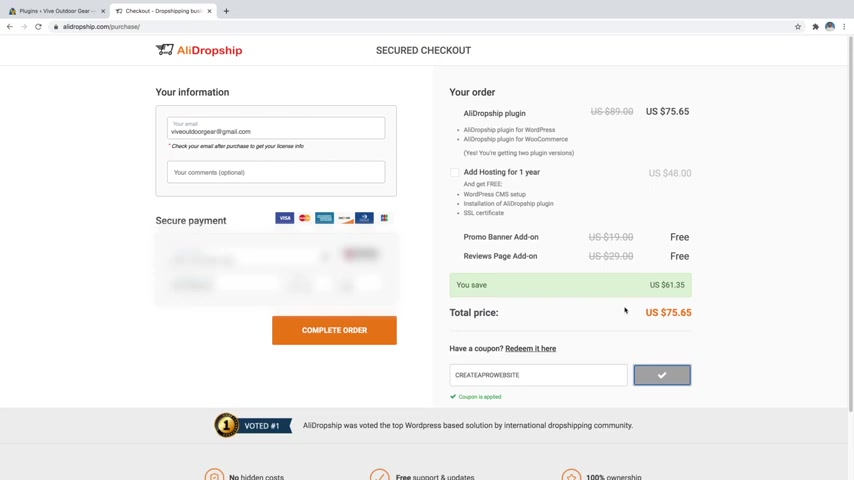
It's currently about 15% off and this is my affiliate link .
So I do receive a commission whenever you use it .
But again , it helps fund these free youtube tutorials and it saves you money .
So it's a win , win for both .
But if there's a better coupon code out there , feel free to use it .
Ok ?
So now just go ahead and click on complete order .
Cool .
Now it says congratulations , you've purchased the ali drop ship plug in and we can just go ahead and skip all these extra offers over here and just scroll down to the bottom and then just say , skip this step .
And then we can also go ahead and skip this as well .
So we'll just scroll down to the bottom here all the way and say skip this step .
They're just kind of giving you some extra offers if you want them .
Ok ?
So now here is your license key which you're going to end up needing .
And here's where you can download the plug in .
So it's going to depend on your PHP version for wordpress .
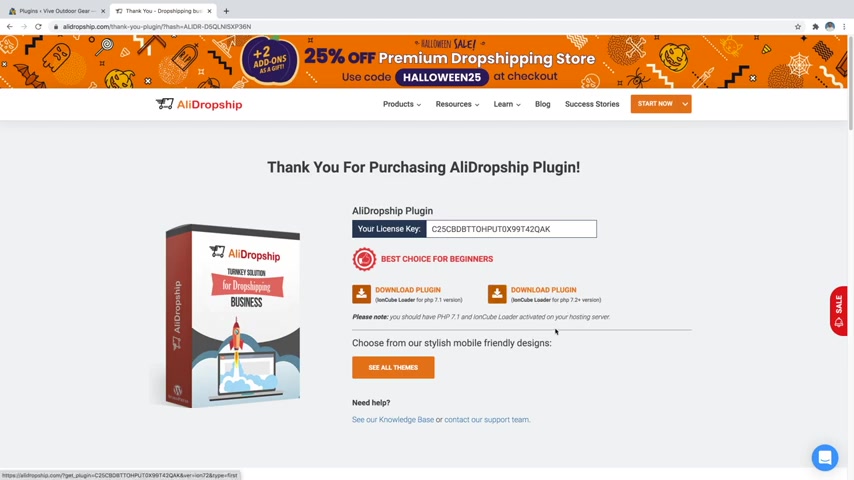
And if you just signed up for wordpress at the beginning of this video , then you're likely going to have the most up to date PHP .
So you can just go ahead and download the plug-in for the latest version and then you can see that just hit my downloads over here and then what we're going to do is click on see all themes and then from here , we can go ahead and select a new theme .
So what we're gonna do is just scroll down and you'll see a bunch of themes here and some of these are going to be paid themes , but there are gonna be some free ones in here .
So let's just scroll down and you can see there's a free one here .
But what we're gonna be using is the Dole theme right here and just make sure that whatever one that you choose , it has the little ali dropship symbol next to it .
So I'm gonna go ahead and go with the Dolly theme .
So let's just click on view details and here you can kind of get a little bit of a preview of what that's gonna look like on mobile and desktop .
And then we can just go ahead and click on download theme .
Cool .
So I just hit my downloads there .
So I'm just gonna go ahead and move these two to my desktop .
Ok ?
So I've got my theme and my plug-in right here on my desktop .
So let's go ahead and get these uploaded .
So I'm just gonna go back over to wordpress and if we currently look at our site right now , so if we just go up to our site name and click on visit site , I'll just open this up in a new tab .
You can see that our site uh looks pretty basic .
So this is like the default to wordpress theme doesn't look good , obviously , not equipped for a store .
So let's go ahead and close that and let's go ahead and upload our new theme .
So we'll just go over to appearance and then go over to themes .
And here you can see all of our currently installed themes .
But what we want to do is add a new theme so you can click this button here or the one up here and then we're just gonna click on upload theme right up here and then we're just gonna choose file , go over to our theme here on our desktop .
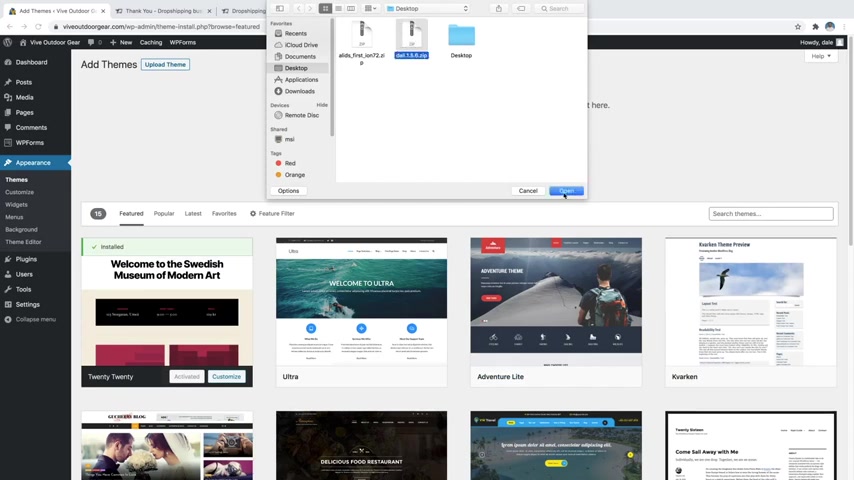
So I'm gonna click on Dolly and click on open and then install now .
Cool .
So that theme was successfully installed .
Now , all we gotta do is click on activate .
Cool .
So now you can see that that theme is now active right here .
So now what happens if we go up to our site and just click on visit site , we'll just open that up in a new tab .
You can see that it's going to say please activate the ally dropship plug in .
So let's go ahead and do that now .
So what we're gonna do is go over to plugins and then go over to add new and then we're just gonna go up here to upload plug in and then choose file and we're just going to grab that plug in here and click on open and then install now .
Cool .
So it was successfully installed and now we can just click on activate plug in .
Cool .
So now that that plug in is activated , you can see that we've got the ali dropship menu over here .
So you can just go ahead and click on that and that's going to change to all the ali dropship stuff .
And if you ever want to go back to the main menu , you can just click on the main menu and switch between them .
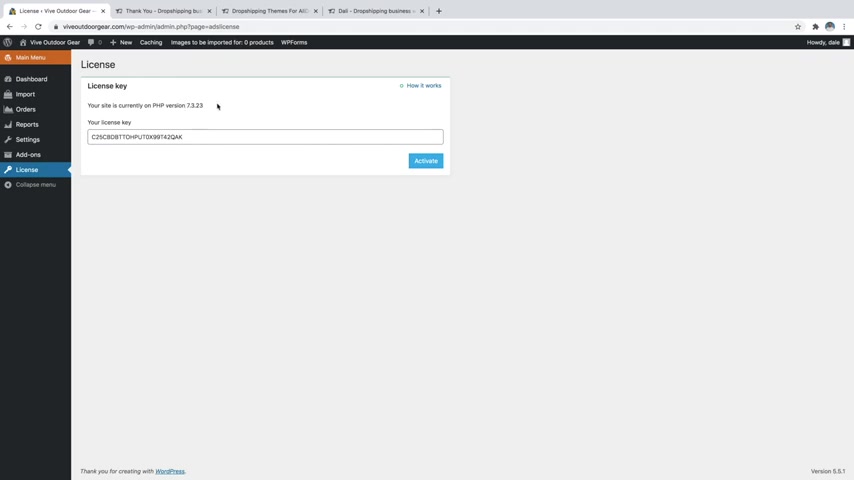
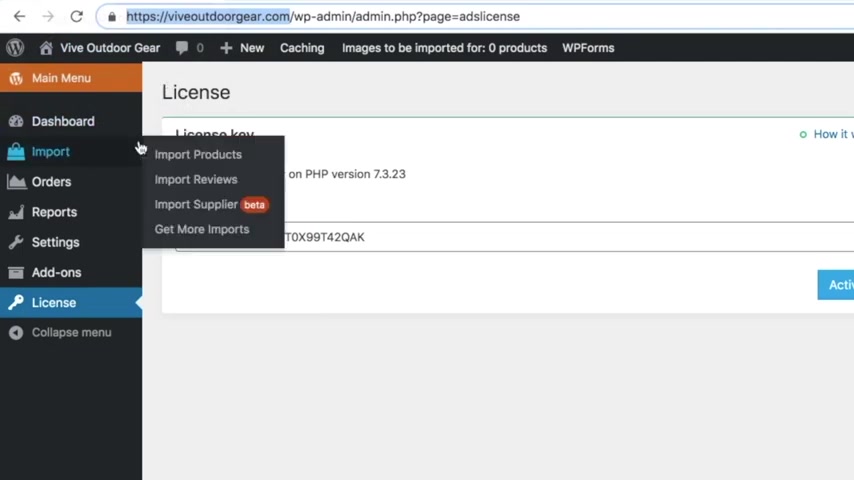
But what we're gonna do is go to Ali dropship and then we're gonna come all the way down to license and click on that and here we're going to put in our license key .
So let's just go back over to Ali drop ship and grab our license key here and just copy it and then come over here and then just paste it in and then just click on activate .
Cool .
So it says , congratulations .
Your license has been activated up here in green .
And if you ever have any problems , then just make sure that your PHP version is up to date , which you can do by logging into the C panel for host gator and you can do it yourself there .
Or what I recommend is contacting host gator support through your C panel and they'll do it for you in less than five minutes .
But if you just installed wordpress with me during this tutorial , everything should be up to date already and this license key is good for one domain .
Now , you can actually switch it to a new domain if you want to , you just have to contact ali dropship and have it uh deactivated and then you could just put it on to a new domain name .
Ok ?
So now the next thing that we're gonna be doing is getting the ali dropship chrome extension .
So let's just go ahead and do that .
I'm just gonna close out of some of these tabs and I'll just open up a new one .
And then in the search bar , I'm just going to type in Ali dropship chrome extension and then just go ahead and click on this one right here .
That's chrome dot google dot com .
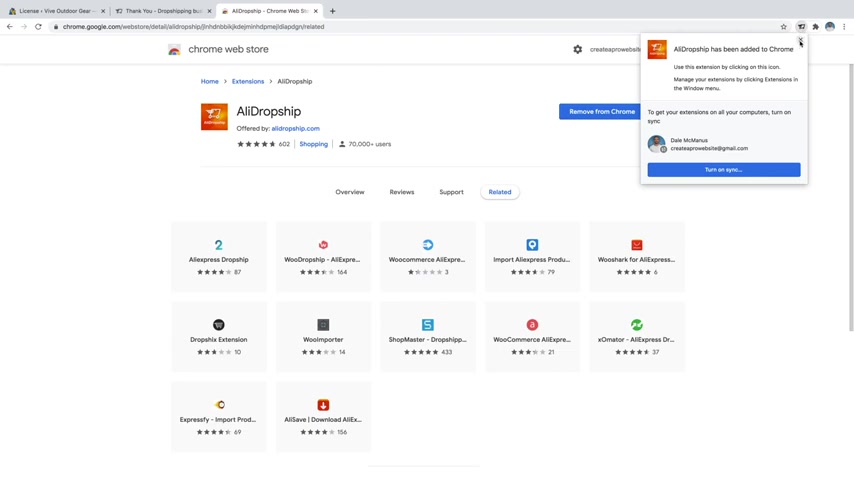
And then we're just going to say add to chrome and then we're just going to say add extension cool .
So it just said Ali drop ship has been added to Chrome .
You can see the little symbol up here .
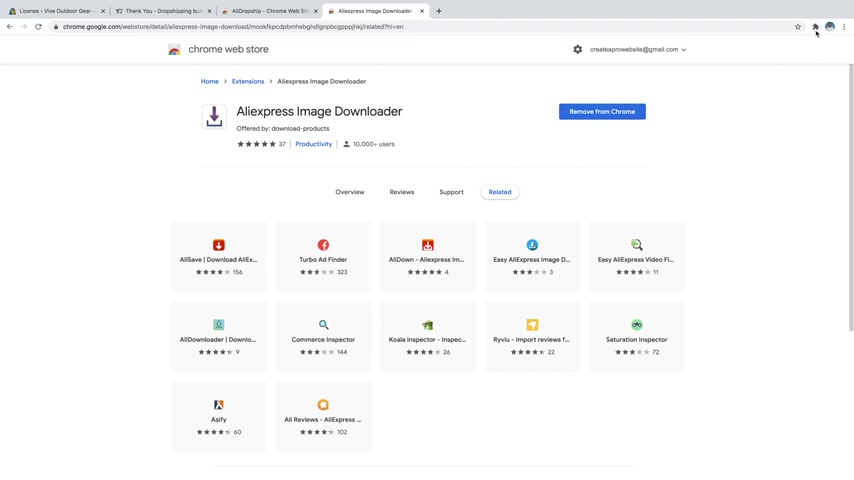
So I'm just gonna go ahead and exit out of that and we're gonna need one more Chrome extension , which is going to be really helpful for importing our products onto our store .
So what we're gonna do is just go up to a new browser window again and we're just going to type in Ali Express image downloader and then you'll see Chrome dot Google right here .
So just go ahead and click on the first one and then you'll see Ali Express image downloader .
Let's just go ahead and add that to Chrome and then just say add ex extension cool .
So now you can see Ali Express image downloader has been added to Chrome .
So let's just go ahead and exit out of that .
So the next thing we're gonna do is actually hook up our ali dropship plug in to our Chrome extension .
So what we're gonna do is just click on the little puzzle piece up here and then we're just gonna click on Ali dropship and then you're gonna see that we can hook up our word press website to it .
So let's just go ahead and grab our URL .
So let's just go back over to our website and we're just gonna go over to our URL right here and we are just going to grab from the HTTP S all the way to the dot com , just the regular URL and click copy and then come back over here and just click on that little puzzle piece again .
Go to Ali Drop ship and we're just gonna put that in here just like that and then click add , cool .
So now it was just added right here .
So let's just go ahead and click on log in and then we'll just go ahead and click on authorize .
Cool .
So now you can see that it has been authorized up here .
So I'll just go ahead and close that .
Ok .
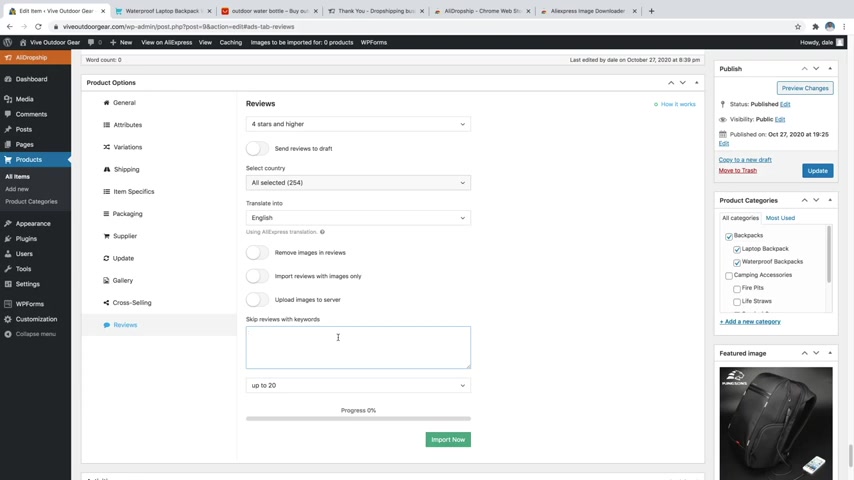
So now let's move on to step number five , which is to import products .
So I'm gonna talk about where to find products as well as the best products to pick and even talk about the best way to structure your store .
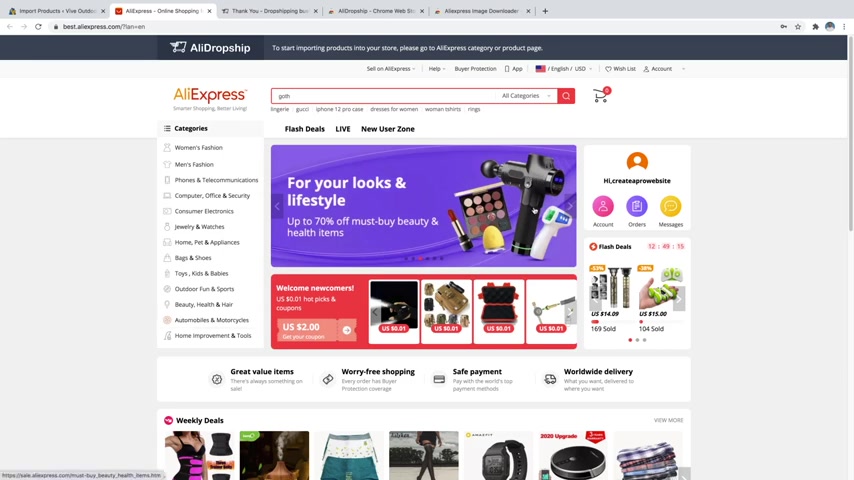
So let's just go ahead and go back over to wordpress first and then underneath the ali dropship menu over here , we're just gonna go over to import and then go over to import products and then we're just going to click on direct import from Ali Express and that's gonna take us over to Ali Express dot com .
Now , if you don't already have an account , just go up here to account and click on join and then you can join for free .
It's super easy .
It takes literally two seconds .
But what I'm gonna do is just sign into my account and Ali Express is gonna be the best place to find drop shipping products .
And you've got all sorts of categories over here for whatever niche that your store is about .
You can find that over here .
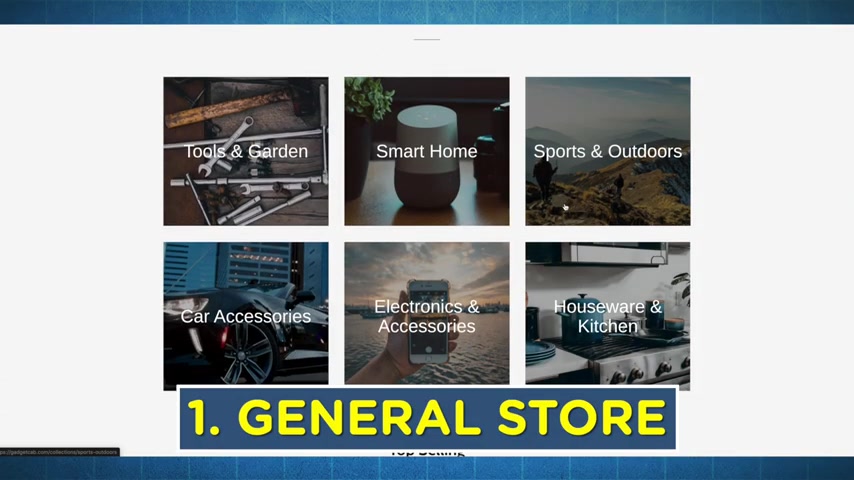
Now with that said , there are about three different types of stores .
The first is kind of like in anything and everything .
Store .
It's gonna be a hodgepodge of just whatever best products are selling right now .
Uh So it could be things like home goods mixed with , you know , clothing , mixed with gadgets and it's just gonna be like this craziness .
Um So yes , you'll be selling like some of the top products , but it's all gonna be mixed together and your store is not gonna look like a legit brand .
So it's not really my recommendation .
The second is a niche store which is gonna be something that I'm doing today like outdoor products .
So it could be anything though , it could be men's fashion , you know , pretty much any one of these categories over here .
You could create a brand within one of these categories and then you've got , you know , a whole bunch of products within that category that you put on the site .
But at least there is kind of an , a whole niche focus and a brand around it .
And then the third store is gonna be product focused .
So it's gonna be focused on mainly one type of product .
So something like this with this massage gun here .
So you could have a whole store based around those massage guns and a few different brands of those massage guns on your site .
And your site would be called something like the massage gun dot com or something like that .
Uh So that's really just product focused .
So let's say that you chose a niche and you want to find products .
So let's just go over here to the categories or you can actually search up here if you want .
Uh No , goth is not my latest search .
This is just kind of like a placeholder that Ali Express gives you .
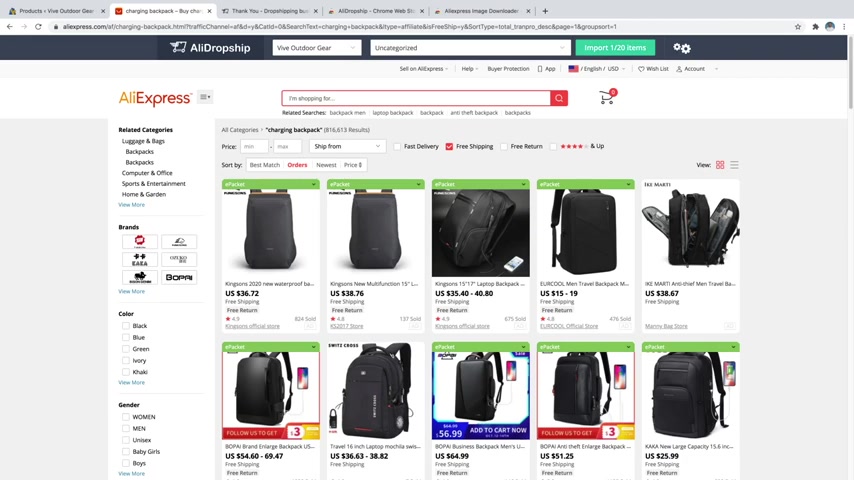
So I'm just gonna go over here to outdoor fun and sports and you can see we've got all these uh subcategories here , fishing , cycling , swimming , things like that .
So you can search for products like this .
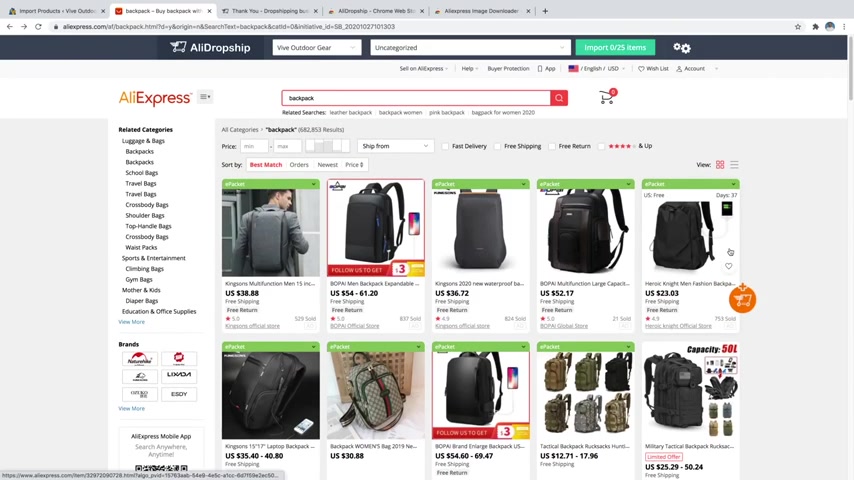
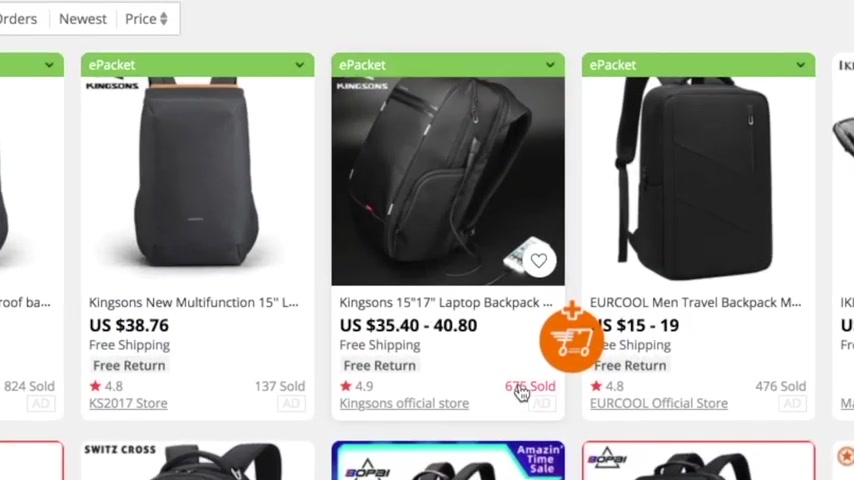
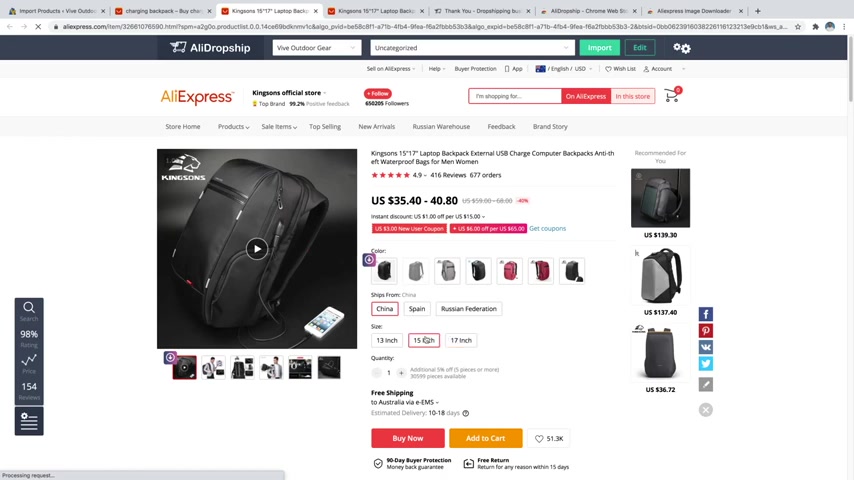
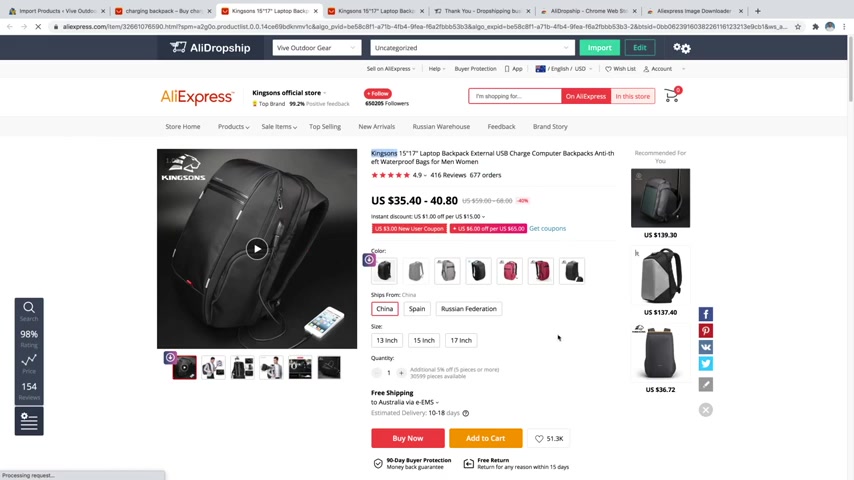
But what I'm gonna do is just go over here and I'm gonna type in , let's say backpack and here you can see that we've got a ton of backpack products to choose from .
Now , what I do recommend doing is staying away from large brand names because people are going to easily be able to find these on the actual brand names website .
So really , why would they want to buy it from you if they can get it there from that legit site ?
Now , I'm not saying that your site is not legit , but it's a little hard to compete with Nike and champion , things like that .
So if you're doing especially clothing , if you're seeing a lot of Nike things like that , try to avoid those large brands .
What you want to do is pick something that's more unique .
Something that the customer feels like they can only get it on your site because they haven't seen it anywhere else .
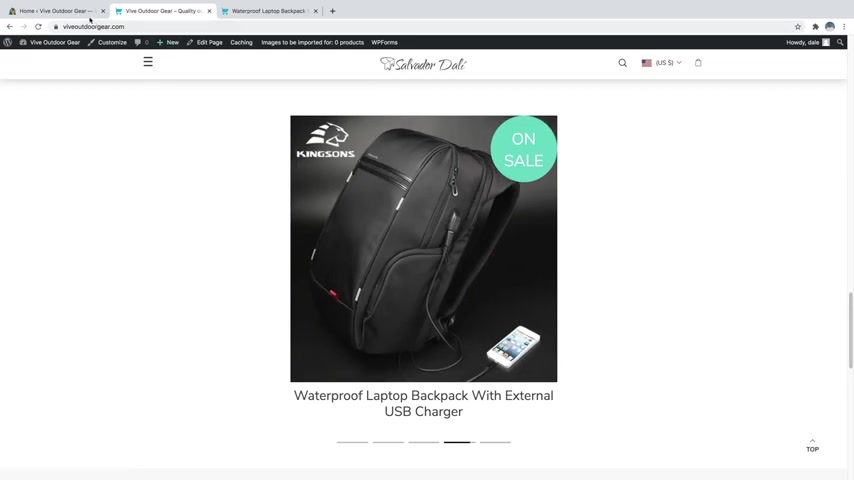
So I really wouldn't want to go with something basic like this backpack or this one because I feel like I've seen a lot of these or even these , we've seen a lot of these backpacks around , but this charging one is pretty cool because I haven't really seen a lot of charging backpacks .
Maybe I live under a rock .
I don't know .
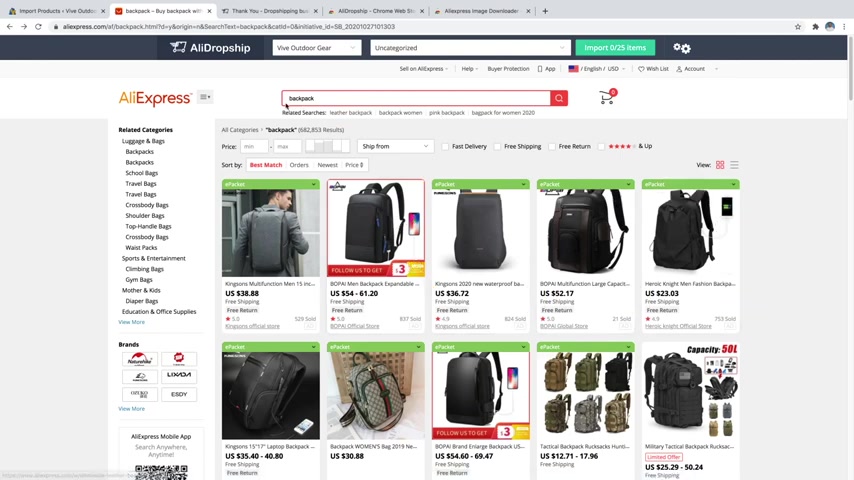
But what I'm gonna do is actually type in charging backpack .
And here we've got a few other options here .
We've got this one here and pay attention to the amount sold .
So there's 675 sold on this one .
It's also got 4.9 sorry stars , not reviews and it says free return .
Um And then we've also got this one that's 1220 sold 4.9 free return .
Uh We've got a few different options here .
So if we just keep scrolling , you can see there's a bunch in here .
This one's 235 sold 263 .
Really try to pay attention to the price as well .
So this one's a bit expensive .
It gets up to $69 and then you're gonna have to mark that up even more on your site in order to actually make a commission .
So I think I'm gonna go with something like this one because it's around $35 to $40 .
And then I can mark that up to around 60 .
And it's also got free returns and a decent amount sold .
So it's proven to actually work people like it , but it's not too high that , you know , it's found everywhere on the internet and then also a high rating .
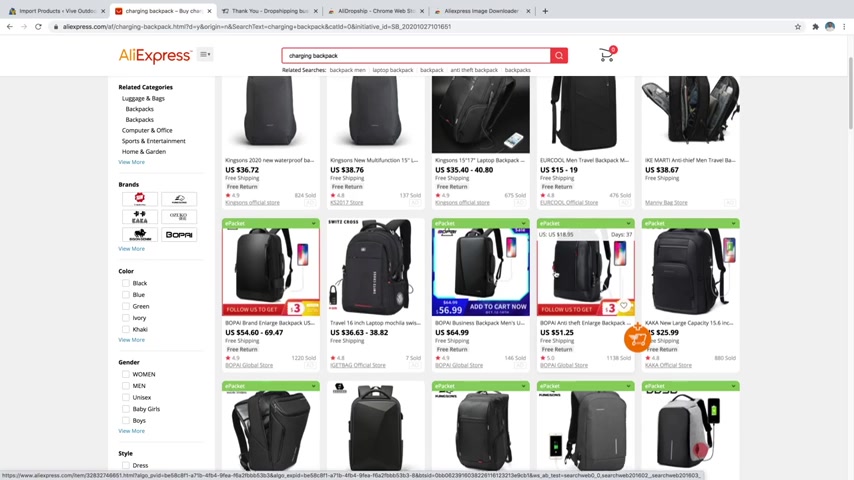
And then the other thing I also recommend doing is whenever you're searching through products , which I should have done a second ago is to search by free shipping and then also search by orders .
That way it'll show you how many orders are on each one .
So you can see that we've got a bunch here with high orders .
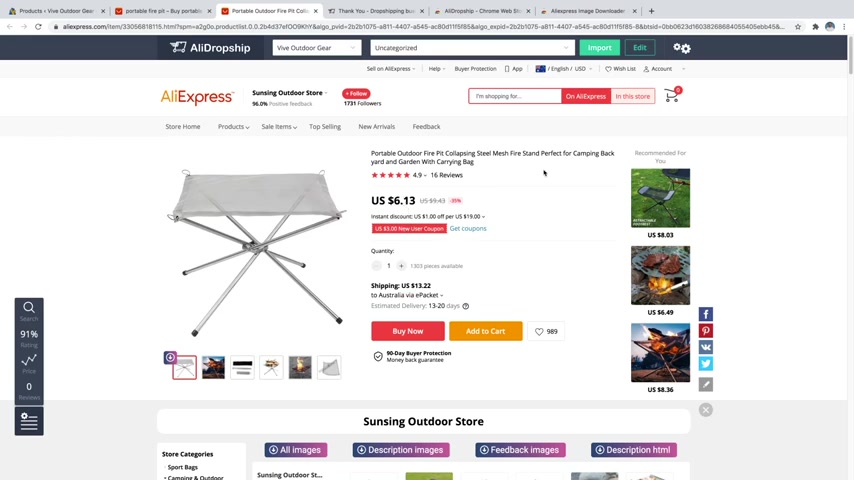
So again , I'm going to go with this one here .
So I'm just gonna go ahead and click on that .
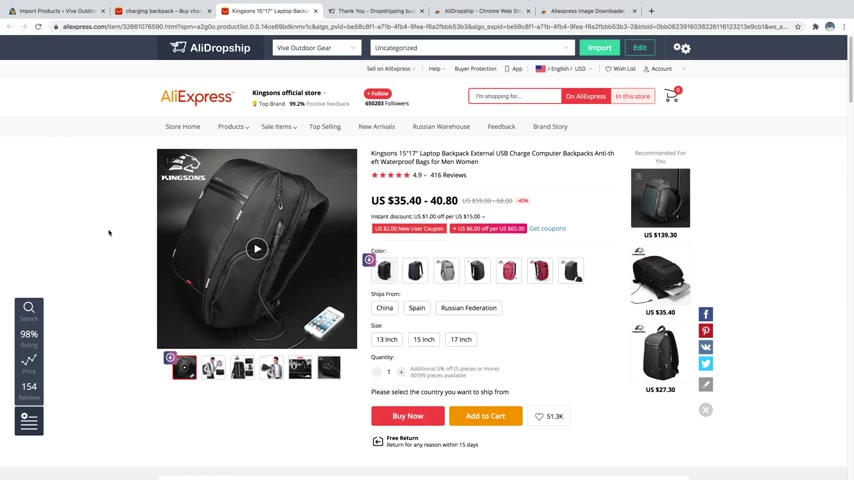
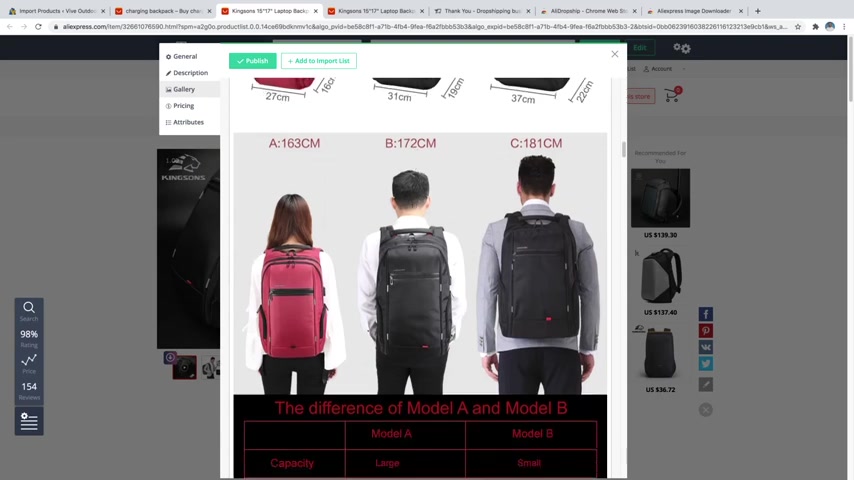
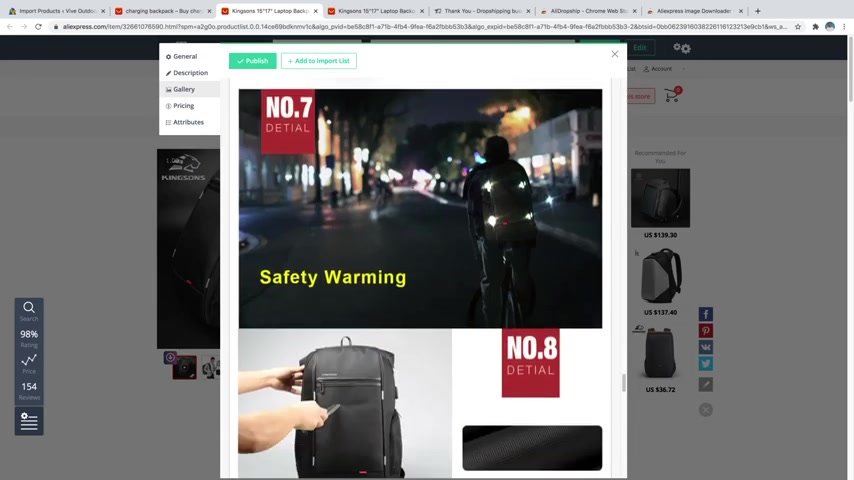
So the very first thing that I'm gonna do whenever I find a new product that I might want to sell is to check the images and videos to see if this actually has some images and videos that are good for actually promoting the product .
So we've got , you know , this kind of close up of the bag here , which is also a video .
And then we've also got the product being used .
So you can see for size comparison , things like that , you know , all the little added features , which if we just hover over this , you can see all the little added features here .
So I think this is a pretty good product .
And the next thing that you want to do whenever you find the product that you want is to check the reviews and the star ratings as well .
So we've got 93% 5 stars that's pretty good .
So we also go check the reviews and just make sure that nobody's really saying anything super negative about it , that's consistent .
So really just looking at first glance at these people seem to be pretty happy about these .
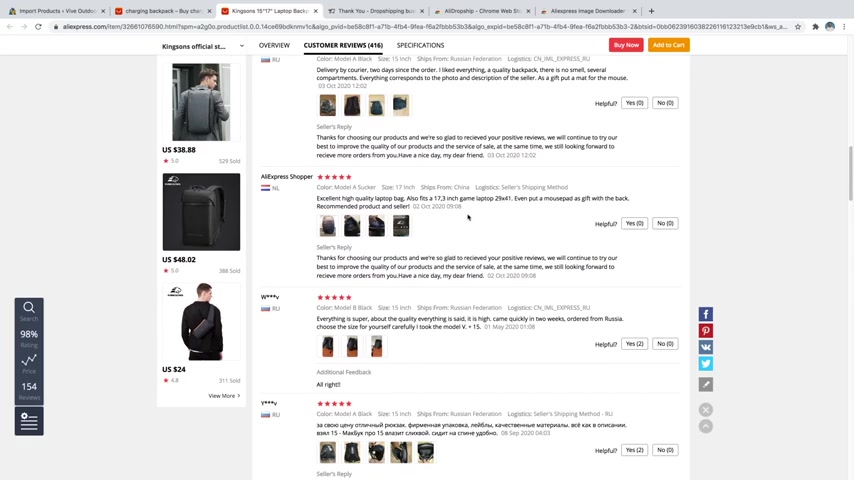
So really just make sure that nothing is kind of sticking out like , oh the , you know , proportions were way off or the quality was way low .
You really want to look out for stuff like that because if you're selling poor products on your website , you're gonna get bad reviews .
Your website is not going to do as well .
It's not gonna rank as well .
Your ads aren't gonna work as well if you want to run ads to it and all around , just a bad look .
So just check the uh reviews down here to make sure that there's nothing standing out in here .
And what we also want to do is check to see if this product is sold by other sellers .
So you can come over here to the little search symbol right here and just click on that and then you can just check to see if this is cheaper on other sellers .
So we'll just say ready go to products and then you can see all of the different versions of it here .
But honestly , it looks like as far as the pricing goes , we've got the best one .
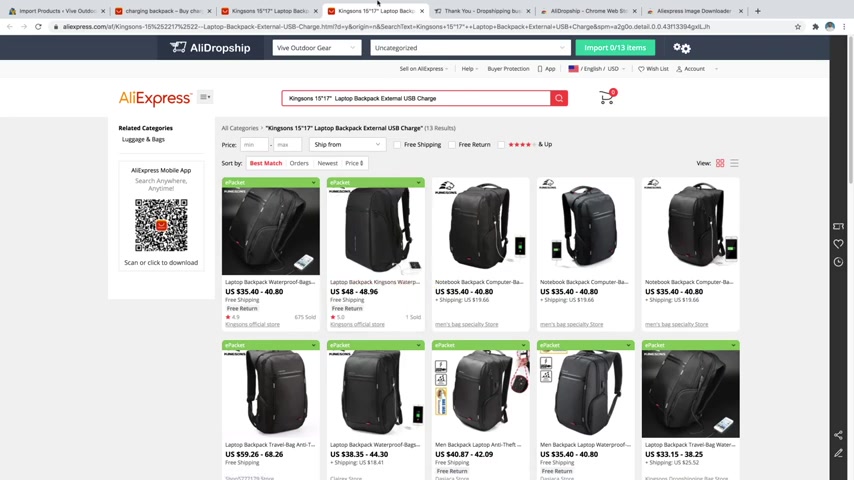
This one says it goes down to 29 but up to 40 but it doesn't have any good reviews or anything like that .
So it really looks like we picked the best one so we can go ahead and close out of that .
You just really want to check the competition , see if there's anything with good reviews and a decent amount sold that's also cheaper , but it doesn't look like there is , we got the best one .
So let's just go ahead and close out of that , go back to our product .
I'll just close out of this .
So the next thing that we want to do is check our shipping .
So what we're gonna do is go over here , it says ships from , we've got China Spain and the Russian Federation .
So if I were to click on something like Spain , you can see that they cannot deliver to the United States , which is where I reside right now .
So it's really gonna depend on where you are right now .
But both the Russian Federation and Spain don't deliver to the United States .
So I would need to select China .
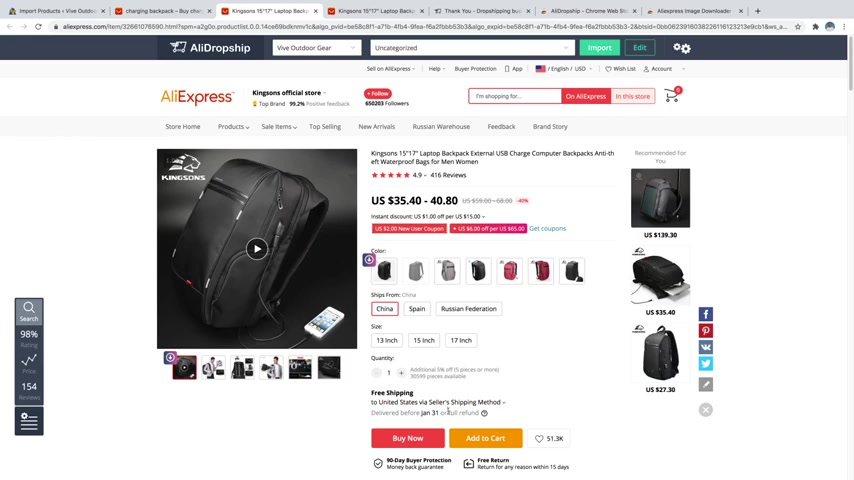
And now you can see down here the shipping method to the United States says delivered before January 31st , which is pretty long , that's about three months away .
So what I'd want to do is actually click in this area here that says to the United States via the seller shipping method .
And I'm gonna change that .
So you can see for the United States we've got just the standard one .
That's the seller shipping method that is before January 31st .
That's way too long away .
Now , we've also got this one which is November 29th , that is about a month away .
It's a bit better but still kind of a long time to get a product .
So you can also select different countries and really focus in on those that have better shipping methods .
So let me show you if I were to type in something like something closer to China like Australia or New Zealand , Australia is bigger .
It's got a lot more people in it .
So I'm gonna go ahead and type that in you can see that .
Now , we've got free shipping , which is 10 to 18 days , 13 to 20 .
These are a lot better .
So I just want to go ahead and select one of those and then I could just click on apply .
So just make sure that you're checking the shipping on all of your products .
And then obviously you'd want to select the sizes that you'd want to sell on your store as well .
And then you've got the colors here as well .
And keep in mind that when you're picking a product , you're essentially also picking a company that you want to partner with .
So , meaning that if they have spotty reviews or really long shipping rates , then it's really not gonna reflect very good on your store because then your customers are gonna get their product way late or , you know , if the reviews are bad , the product is not gonna be very good , it's gonna reflect badly on you , but it's because of this company .
So make sure that you are working with companies that you trust .
Now , you don't have to know a lot about them .
You can really trust the reviews here .
Um And then as well as the orders as well , but this Kingston seems like a great company to go with and then also the shipping to Australia , even the United States 3 to 4 weeks isn't ideal , but it's not terrible .
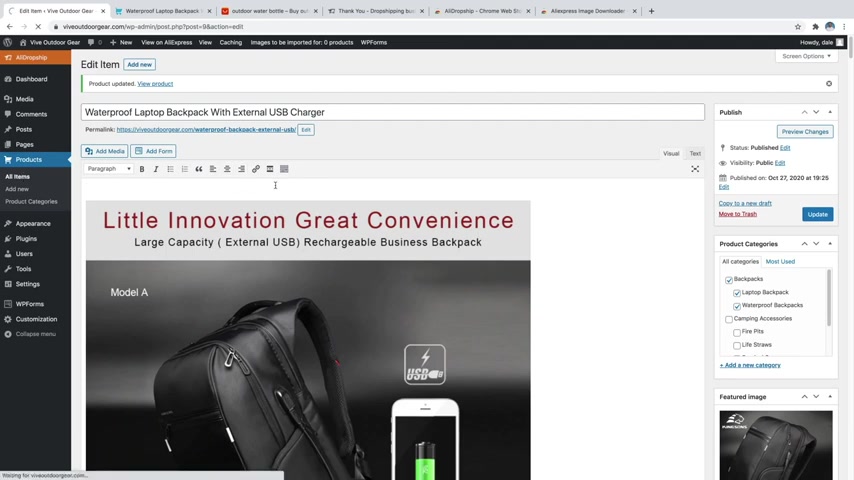
So I think that this is a pretty good product So what we're gonna do is actually just go up here whenever we want to use this product and click on edit .
And the first thing that we'd want to do is just edit our title up here .
So this is actually a pretty long title .
So let's just go ahead and edit that .
We might want to do something like maybe waterproof because this is on my outdoor website .
So waterproof laptop backpack , we'll say with external USB charger and then you can kind of just get rid of the rest of this stuff just like that or you could even just do a waterproof backpack if you want .
This is a laptop bag so I can leave that .
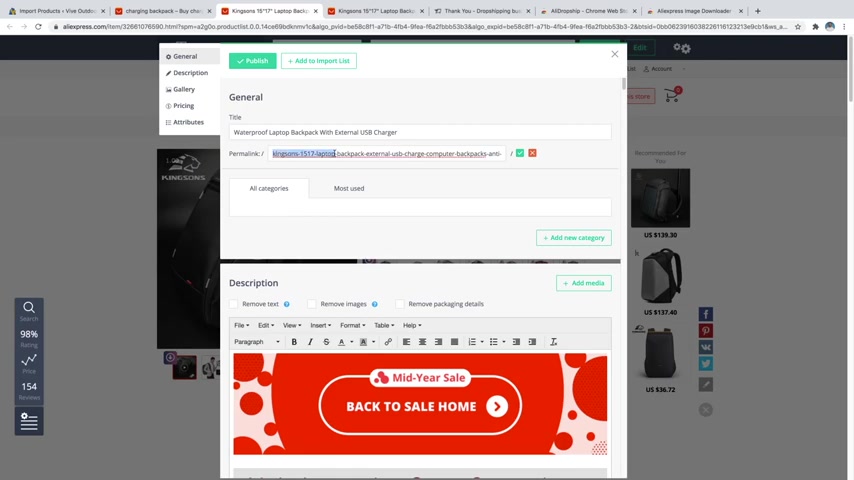
So once that looks good , you'd also want to edit the Perma link here as well .
So I'll just go ahead and click on that and then you can see we've got a lot of words here .
So let's go ahead and get rid of some of these .
We'll just do something like waterproof backpack , external USB and just go ahead and leave it as that .
So make sure that you've got the little dashes in between the words because you can't leave any spaces in a Perma link .
So I'll just go ahead and leave it as that and just click on a little checkmark just to kind of shorten it up a bit .
But leaving , you know , keywords like backpack or waterproof backpack or laptop backpack .
These are keywords that people might be searching on Google .
So they're important to leave in the title .
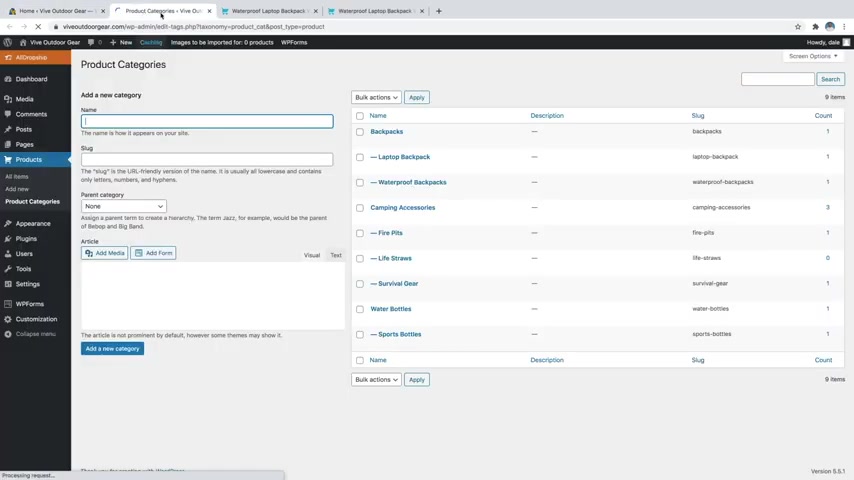
And we can also add a new category for this product .
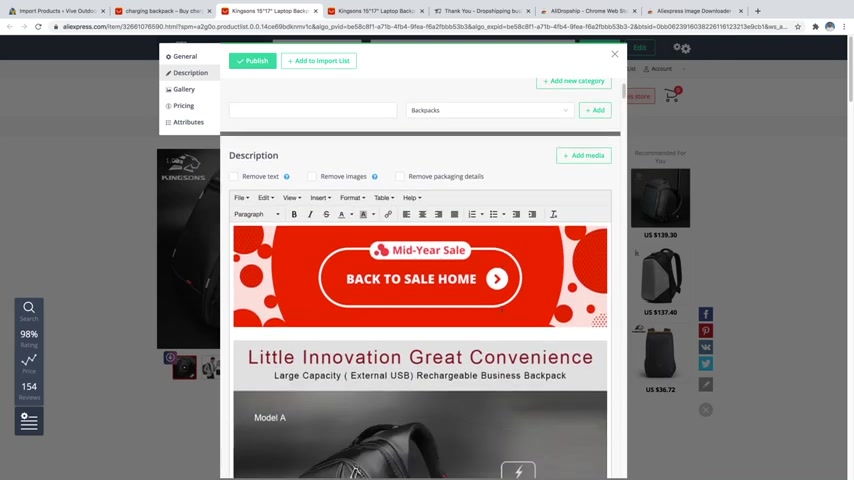
So I'm gonna click on add category and we'll call this , let's say backpacks and we'll just say add and I could even do something like waterproof backpacks .
And then the parent category I would want to put as backpacks .
So that way waterproof backpacks would be underneath backpacks and just click on add .
And then if I wanted , I could also maybe do laptop backpack and then that's also going to be underneath backpacks .
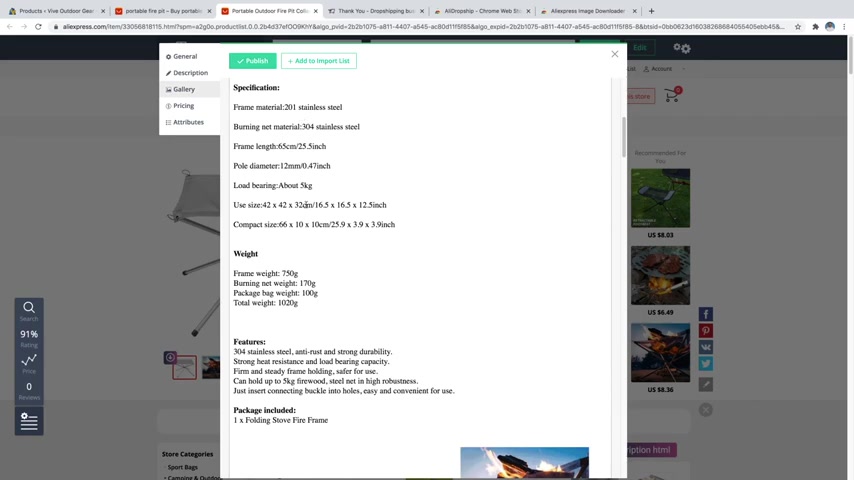
And then we're just going to scroll down some more and here's where you can edit the description so you can get rid of any of the stuff that you want .
So let's say I want to get rid of this mid-year sale thing .
I can just delete that .
And then we've also got this image here .
These images are pretty good .
I'm gonna go ahead and leave these in here , just want to check and make sure that this is all stuff that you want on your site .
So it's got the differences here .
We maybe don't really need these differences between the model A and the model B .
But I do like that .
It has this image of people wearing them .
So I'm gonna go ahead and leave that as well .
Actually , I like all of these images a lot more .
So what I'm gonna do is come up here and we're just gonna get rid of this one .
We're gonna get rid of this as well as this one because I want to go straight into these products or these product photos .
Sorry .
So these look pretty good .
So just make sure that you edit these images and the description in order to show everything about the product that you would want on your site .
So I can maybe get rid of these .
Actually , it's showing that it's anti theft .
I'll just go ahead and leave that and then I'll get rid of this drop shipping image down here at the bottom as well .
So that looks pretty good .
It's a lot of images can maybe get rid of some if I really want to .
But for now , I'm just gonna go ahead and leave them .
We can always edit this stuff later and all of the description stuff is actually in these images .
If you wanted , you could just write a description by just writing it up here in this space up here and just listing all the features of the backpack , the dimensions and everything else .
I'm not really going to bore you with that information .
So I'll just go ahead and leave it the way that it is , but that's where you'd want to put that information if it's not already in these images .
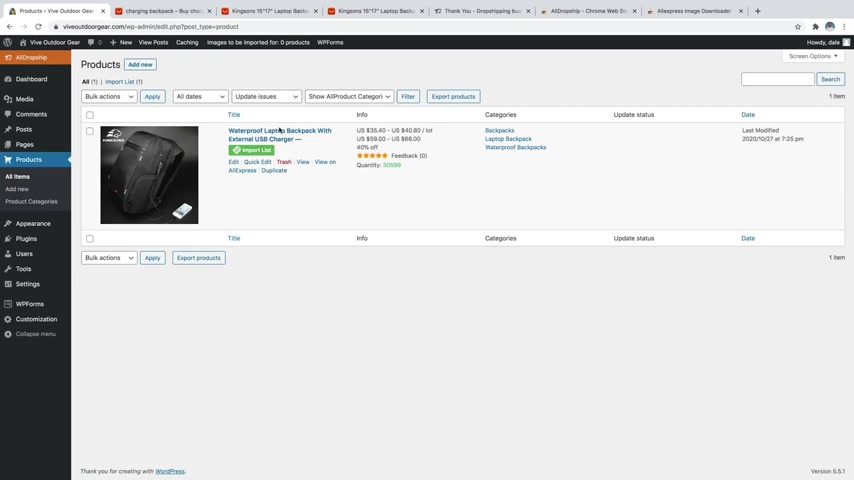
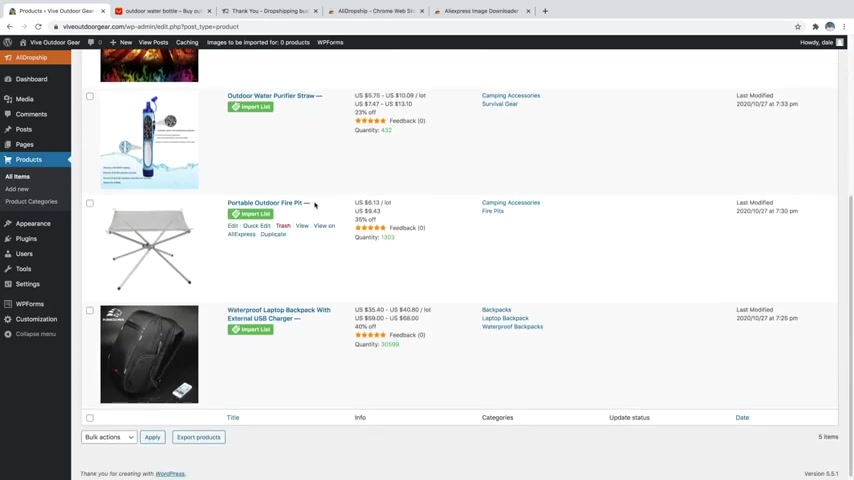
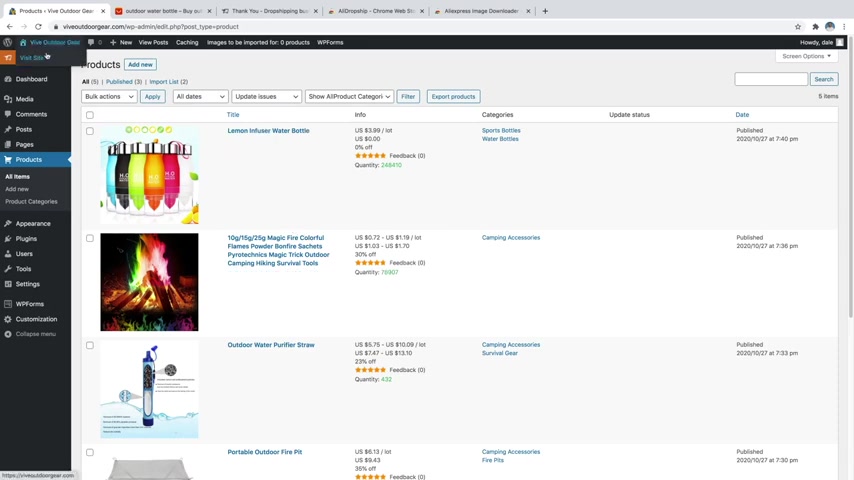
So next thing that we're gonna do is just click on add to import list right up here .
And now if we just go back over to our word press website and then we go over to the main menu right here , we can go down to products and then just go over to all items and you can see that our backpack was imported right here , which is really cool .
And this is unpublished right now .
So it was just added to the import list .
If you wanted straight from Ali Express on your product , you could just go over and publish it if you want it .
Now , I've already added it to my import list .
So you're not gonna see that button up in here .
But what I'm gonna do is just go find a few more products .
I want about four or five products on my site .
So I'm just gonna go ahead and close out of these windows and just go back over to our main Ali Express search and I'm gonna search for another product .
Hey , what's up guys ?
This is an has shake from blog two dot com .
And today in this video , I'm gonna show you how to create the perfect business website using wordpress and Awada theme .
And if you guys watch the complete tutorial , I can guarantee you one thing that by the end of this tutorial , you'll be an expert in creating website using wordpress and awara theme because in this video , I'm gonna show you how to do that the easy way .
OK ?
So without wasting any time , let's see the demo website which we have already created .
So as you can see guys on your screen , this is the demo website we shall be creating in this particular video at the top .
We have a header , we have our icon , our logo over here .
Then there is a menu and an important , in fact , a very important button over here which says get code .
We'll see more about this button later on in this video .
Then we have a full bit slider with a title subtitle and two different call to action buttons and with obviously two different designs .
Then we have a next section which is also a very beautiful section .
This says , do you have a construction project we can help with ?
I can mark that up pretty high and then also check your shipping as well .
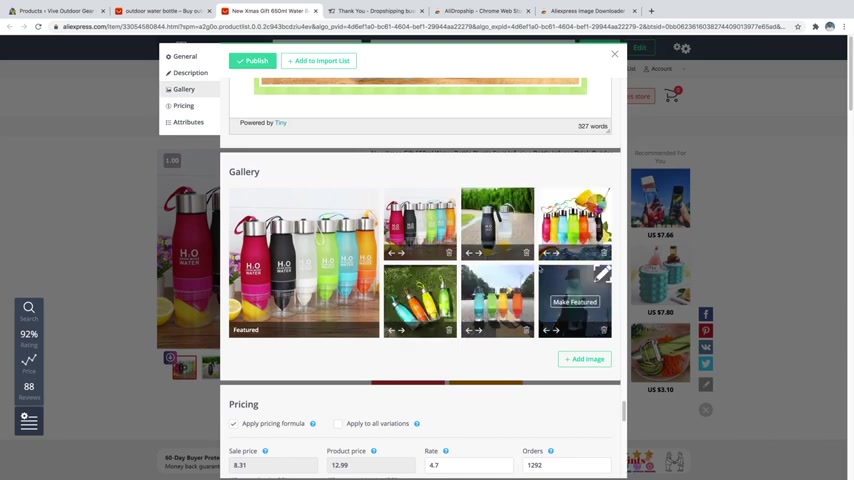
And then you can just go over to edit and then make sure that you add the categories and edit the title in here as well .
So I'm just gonna go ahead and get rid of all of this and just keep portable outdoor fire pit in there or you can do collapsing outdoor fire pit .
I'll add some categories like camping accessories , then I'll do fire pits and then add that to the camping accessories parent category .
Click on add also make sure that you're editing your Perma link .
I almost forgot about that .
So let's go up here portable outdoor fire pit .
We'll just get rid of the rest of this and just click on the check mark .
And then again , you've got your description down here , which I talked about earlier as far as writing it in .
It's got all the specifications here .
You'd maybe want to write a little description about it up here as well .
But I'm just gonna go ahead and leave all of this stuff because I already showed you how to edit this information .
So , what we're gonna do is just go up here and you can either publish or you can add that to the import list .
Publishing will technically make it go live .
But there's really nobody on your site just yet if you're just getting started .
So that's totally OK .
But I'm just gonna go ahead and add it to the import list and then I'm just quickly gonna go back and find a couple more products as well since I've already shown you how to do this a couple of times .
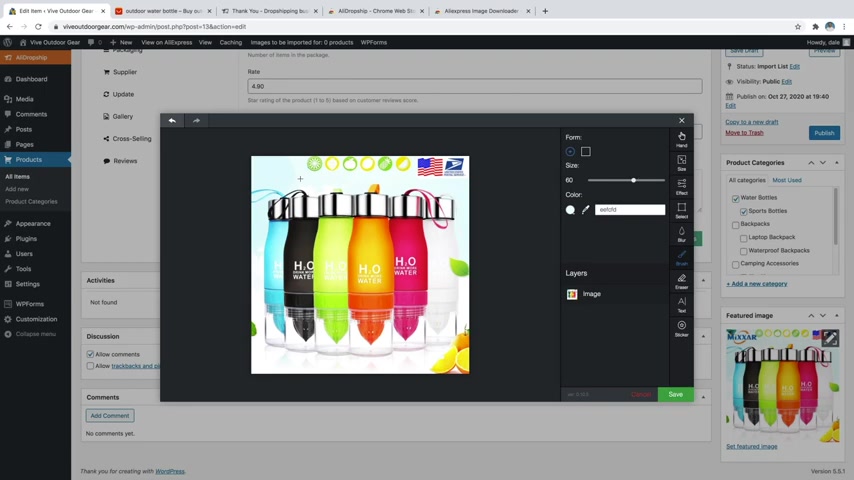
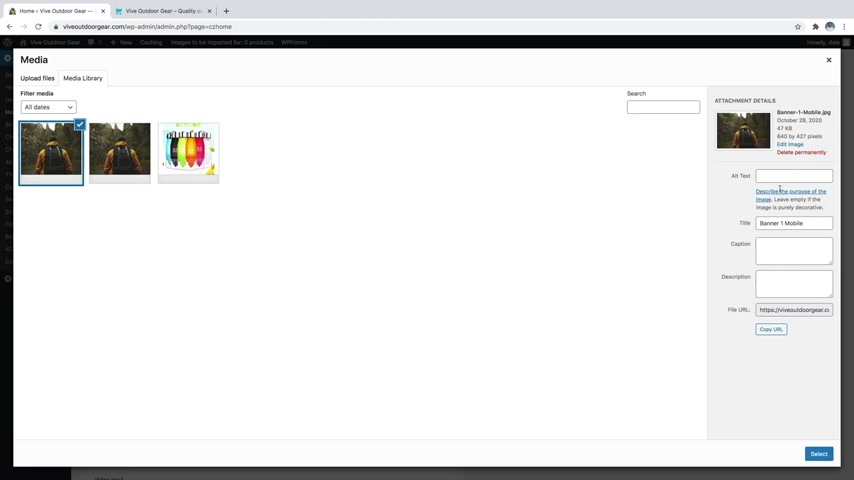
And the other thing that I want to mention is that if you ever want to download these images in order to edit them yourself , you can just click on this button right here and that's going to instantly download them to your downloads folder down there and then you could re upload them on your site after making whatever changes you want .
But also if you want to , if you were to just click on edit and then scroll all the way down to the image gallery at the bottom down here .
So if you wanted to , if there was a logo up here in the top left or you know the top right , wherever it might be , there are no logos really on these images .
But if you wanted , you could just click on the pencil icon and then you would be able to just kind of paint over that logo .
And then you've got a few other editing settings in here that you can use as well .
Maybe you want to blur it out .
It really just depends , you can just play with some effects in here .
But I'm not going to get too deep into this .
Really .
Just removing the logo is more of the important part .
So I'm just going to go ahead and X out of this and we are just going to head back over to our site and let's just refresh this page now that we've got all of our products in here .
So let's just see if they pop up there we go .
So basically , we are just ensuring and motivating the customer or the visitor to just click on this call to action button .
OK .
Then the third section is this one which has a title , a separator subtitle and four different features option with logo .
And if you see with different designs , when you have this , you see different designs , it rotates and then you know color changes and so on .
So we'll see how to create all these things the easy way .
OK .
Then we have this counter .
As you can see when you scroll down the counter starts , you have a logo , a title subtitle which says a counter for example , we have 172 trained professionals .
OK ?
So obviously you can create all these things .
We have a very beautiful background image also .
And as you can see this elegant design , this really looks awesome .
OK ?
We'll see more designs like this in the video .
Then the next section is the explore recent work .
This is basically the portfolio section .
We will see how to create these portfolios .
OK ?
This section basically considers or consists of all the different information related to your website or related to your company .
Then the last one is a map , a very small and beautiful map , you'll see how to do all these things .
OK ?
Now let's see how our portfolio looks like .
So just click on this .
OK ?
So this is how our single portfolio would look like .
OK ?
If you notice guys , we have this same header throughout the website because I think this really looks beautiful .
OK ?
We have a different titles for all the different pages or different portfolios .
Then we also have these two sections in all the pages .
OK ?
But don't worry , you don't have to create these things .
Again and again , there is a great feature in a wada theme .
I'll show you how to just copy and paste in all the pages or wherever you need it .
OK ?
So that is really awesome .
This is how our portfolio looks like .
As you can see at the top , we have the title .
Then we have this small separator , this small separator really beautifies you know everything .
Then we have this very short description about the project .
The end we have these project details over here , the date , client project type contractor .
And obviously you can change all the text from here .
It's all up to you .
Then we have a photo gallery as you can see over here when we have all this everything changes and we can see the animation which is very beautiful .
Obviously , we have more animations , OK ?
So you can change different animations according to your need .
Then the last section on this page is a very important section .
If you see get a code today with this contact form , we'll see how to create this contact form .
OK ?
And we'll see how to create this whole section .
You know , this section is really beautiful .
We can see a background image and then there is a lot , a lot of padding or gap from all the sides .
And then the and in the middle we have this contact form , OK ?
So this was our portfolio page .
This is how our single it looks like .
Now let's see how our about a space looks like .
So again , we have a header with a title subtitle , OK ?
Then we call to action button .
Then at the first section , this is a title separator subtitle and an image related to your website or related to your business .
Obviously , then we have our meet our team section .
So basically you can have your guys , your team over here , so you can have their image , you can have their name , their designation , their social profile and a very short description about them .
Then the next section is the recent work section .
This is the same section that we created in the home page .
So we won't be creating it again and again , we'll just copy the whole section and paste it over here .
That is really easy .
OK ?
This is also the same .
OK ?
All these things are basically , once you create the home page , most of the things will be just copy and paste .
So that would save a lot of your time .
OK ?
Now let's see the services page again .
We have the header with beautiful title subtitle and obviously you can have your own color combination over here .
I have selected this color , you can select different color .
So this is our services .
We have taken this design .
This is the Tabs design as you can see when you click on different tab , a different service comes up .
Ok .
So new homes , tomorrow's home today .
So this is how your services page would look like .
Now , let's see the work page .
So this is our work page .
As you can see a beautiful work page .
These are basically our portfolios .
So we have some big portfolios over here .
You know , we have divided them into two different columns .
Now this is our block page , the articles page .
As you can see this is the thumbnail .
We have the title , some exert author name and all this information over here .
OK ?
And different blocks obviously .
Now let's go to the get code page according to me , the most important page .
OK ?
This page is further divided into two different section .
As you can see this section , we have all the inner location information , our branch information , for example , London office , New York office , Singapore office .

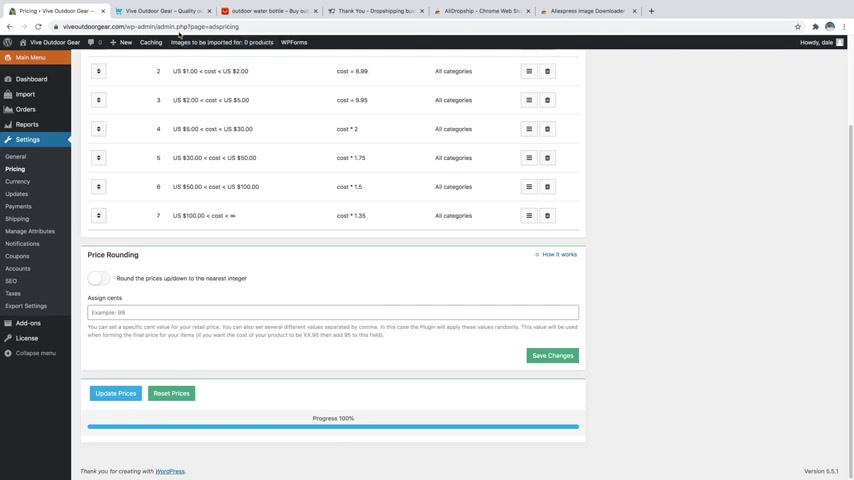
And then let's just go back over to our site and we're just going to refresh the page again and there we go .
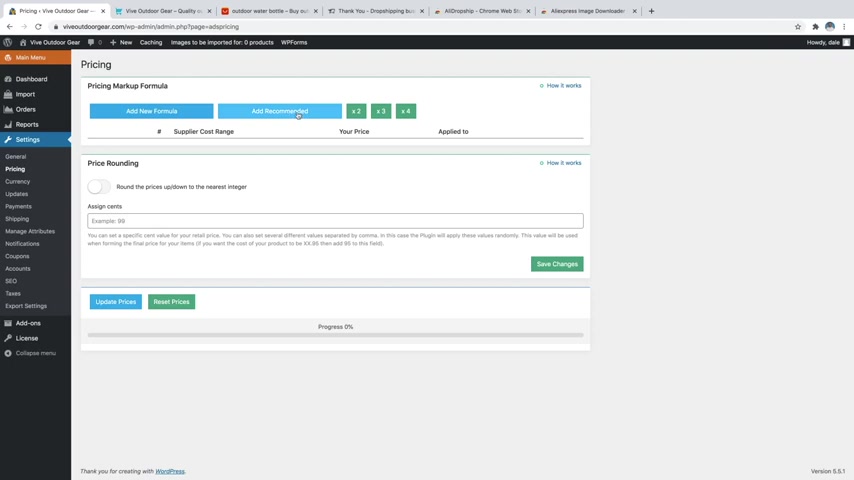
Now , you can see these are all even numbers now which look a lot better .
And let's just say that there's a certain product that you want to mark the price up even more .
So like this one over here , the portable fire pit , I think $12 for this whole thing is kind of cheap .
Uh , so I'd like to mark this up to like $2025 maybe even , possibly more .
So , if I want to do that individual product , I can just go back over to wordpress and I'm just gonna go to the main menu and then I'm gonna go down to products and go to all items and then I'm just going to scroll down to that product and I'm just gonna click on edit and then just scroll all the way to the bottom and you can see that we've got the price here so you can edit the regular product price and then the sale product price .
And here we have a contact form as you can see title , separate subtitle and the contact form at the bottom .
OK ?
Guys , this was a very short demo of the website that we are going to create .
If you understand the concept , if you know how to use the Awada team , then you can obviously create different designs according to you .
OK ?
So let's get started with the website to create any kind of website .
We need two basic things , a domain name and a hosting account for both domain name and hosting account .
I prefer TMD .
So what you can do is just open a new tab type in blog dot dot com slash TMD and press enter once you do so you will be redirected to this particular page .
Now , let's scroll down as you can see here , we have three different plans .
And why do I use T MD ?
And why do I recommend others to use T MD ?
There are many different reasons , not one .
Ok .
And as you can see the difference over here , you can go ahead do your own research and when you're satisfied just come back over here , OK ?
And not only that see many companies give SSD space nowadays , but this company is among the very few companies that gives unlimited SSD space and at this small price .
So this is just awesome .
And it also gives you a free domain .
For example , the domain which I am using dot com is a free domain given by these guys , ok ?
You have premium support C panel , optimum cash and you also have a wild card SSL for example , here , as you can see this green socket , this lock bar and it says http S so you get this for free .
Whereas in the open market , you would have to spend around maybe 40 to $50 just to get this SSD .
So you're saving a lot of money over here .
You have these spam experts to help you , ok ?
Then you have 60 days money back guarantee .
So this is just amazing .
But if you are a host to get a fan , then don't worry guys .
There is a link in the video description below that would redirect to host .
So you can use that link and sign up with host getter .
And I have also given a coupon code over there so that coupon code will give you a huge discount on host .
So make sure you check out the description below .
Ok ?
But I would recommend going with T MD .
You can select any one of these plans .
I would not recommend the summer cloud because it has only one website hosting .
Whereas in rain cloud and storm cloud , you can host unlimited website .
Ok .
So you can have 10 different websites and host them in this same plan .
Ok .
So you don't have to purchase a new plan every time you create a new website .
So you can click on any one of them rain cloud or storm cloud .
I'll click on storm cloud because at present , I'm I'm using this storm cloud option .
So just click on the sign up button .
Now , here you have to type in the domain name that you want for free .
For example , you can type in any domain name .
For example , I'm typing Naha one dot com and just click on , proceed .
Ok ?
Now here you have to enter all the information , the basic information like your first name , last name , email address , phone number and so on .
And the next section is the payment information section you can type in , you know , you can , if you want to make payment through credit card or debit card , then you can use this .
You can also pay through paypal .
So you you you get two varieties for year .
Then this is also a very important section .
The purchase information , make sure you undertake this , ok ?
This is not very important , but if you guys want , you can take mark this , but I rest all the things I would not recommend you to take any one of these .
And if you require any one of these in the future , you can purchase them later on .
But now we don't require all these things .
Ok .
Then we have this promo code over here .
Now , just enter Nayar Yt over there and a double Yaryt and click on apply .
This would give you 7% of this purchase .
Ok .
So basically 7% is the highest highest discount that T MD gives .
Ok .
So you're getting the highest discount possible using my coupon code .
Ok .
Now just stick mark this , I had agreed to the T MD hosting terms of service and click on this check out button .
Oh yes .
Once you do so you'll receive a very important email from T MD hosting .
This email is really important .
It has all the important information like your user name , password , your web servers , your you know control panel link and so on .
So make sure you save all this information somewhere .
You can take a print out of this thing .
You can forward this mail to different email addresses if you want more than one email address .
So whatever you feel is safe , you can do that .
Ok ?
Now what you have to do is click on this control panel link , open this link in a new tab .
Basically your control panel link is nothing but your domain name slash C panel .
For example , if my domain name is Nair dot com , then it is N dot com slash C panel .
Ok .
Then from here , just copy and paste in your user name and password .
Ok .
So paste your user name and password password over here and click on this log in button as this is your C panel .
It has many different options , many different features .
But what you have to do is just scroll down and go to this section .
The SOTA apps install a section and click on this wordpress because now we'll be installing wordpress on our website .
Ok .
Now click on this install now button .
Ok .
Now from your select your domain name .
Ok .
And delete this WB .
Ok .
So make sure the indirect thing here is empty .
There is nothing there in this one .
Ok ?
It should be empty and you can change your site name and site description from here , but we can do this thing later in the website .
Ok .
So it's not necessary we can do it later on .
Now , here is a very important thing you have to choose in your user name and password .
So make sure you choose some really tough uh user name and password , which is very difficult to , you know , guess or very difficult to remember for different guys , not for you obviously , and obviously write down your user name and password , whatever you said or your somewhere that would be really helpful .
Ok ?
Now delete this email address and type in uh email address which you have access to which you use regularly .
Ok .
So make sure you do this thing .
This is also very important .
This will help you in bad times , ok ?
Now , after doing all these things just click on this install button .
And as you can see guys , it took around 4 to 5 seconds to install wordpress on our website .
Now you here you have two different links , your website link and you also have your administrative URL link .
Ok ?
So what you have to do is just click on this link , administrative URL link and open this link in a new tab .
I guess as you can see , you are already logged into your dashboard .
Now , the first thing which I would recommend is to uninstall all the things which you don't require , for example , the plugins and the themes .
So from the left hand side bar , you'll see this plugins over here , just click on that and we don't require both these things .
So just stick my over here .
It will select both the plugins or as many plugins as it is there .
OK ?
Now , from bulk action , first select deactivate , but both the team are already deactivated .
So I'll click on delete , click on , apply .
OK .
Now go to appearances .
Click on this 2015 theme .
Click on delete .
We don't need this same thing for this one .
OK ?
Now we have to install our theme .
OK ?
So as I said to you earlier , we will be using the Avada theme .
So for that open a new tab type in B block two dot com slash Avada .
Ok ?
And press enter , right guys , once you do so you will be redirected to this particular page .
A very important page .
Ok .
Now , here , as you can see guys , Avada is the number one selling theme of all time .
Ok .
It has sold more than three lakhs 50,000 copies .
That is just a just an insane number of my friends .
Three lakh 50,000 of copies have been sold by these guys and you can see they're rating 4.77 .
That is awesome .
More around 20,000 people have rated them .
So this is just amazing .
You have no doubt whatsoever for this theme .
Ok ?
This is just an amazing number one selling theme of all time .
So what you have to do is just have to click on this button which says buy the , buy the I won't be doing that because I have already bought this theme .
So let me show you what comes next .
Ok ?
So once you click on that , buy the button and make the payment , you will get this file or your the down .
This is how your downloaded file will look like , but this is not the file that we have to upload actually , ok ?
What you have to do ?
Open this file , ok ?
And you can extract this file , ok ?
So we'll need the extracted file for this one .
Now , here is the extracted file , just open this .
Now , here you have this Avara theme , open this thing .
And now here you have two different options , Awada and Avada child theme .
So select this Avara theme and now you have to uh make this as the file .
OK ?
So just do that .
And now we have to upload this particular zip file .
OK ?
So come back to your website , click on Ohio which says add new theme .
Now click on this , upload the button , choose file and select that particular file .
OK ?
Now click on open , click on install now guys , by the time the theme is getting installed , you can do a few things .
You can click on that red subscribe button so that you don't miss any awesome stuff that I make .
OK ?
You can also give a thumbs up to this video if you like and you can also check out my other videos all uh after watching this particular video obviously .
OK ?
So our theme has been successfully uploaded .
Now it's time to activate the theme .
So just click on this activate button .
Now , the first thing that you have to do is click on this registration button and register this theme .
OK ?
I have already done that .
So once you do , so you'll say this thing , congratulation , your product is registered .
Now , you will have your key in the theme file .
If you don't find that or if you are finding it difficult to find that file , then you can click , you can just contact the theme creator .
They will be more than happy to help you guys .
Ok .
Now , once you do so click on plugins , now one by one click on install .
Now , install all the plugins audio .
Ok .
Now click on this return to required plug in installer .
Ok .
So I'll pause this video and I'll uh install all these plugins and then I'll come back .
Ok .
Right guys .
Once you install all the plugins , click on over here , which says fusion patch .
Ok .
Now one by one you have to apply patch to all these things .
Ok ?
So what I'll do , I'll click on this apply patch button and we'll fix that problem .
Ok ?
Now I'll fast forward this video just to save your time .
Oh , yeah .
So we are done with this .
Now , what do we have to do ?
Let's see how our website looks like at present .
So how are you and open this visit site link in a new tab .
Whereas this is how our website looks like at present .
If you see the , the fonts are used over here is different .
OK ?
From the fonts , which is used in this demo website , you can see the menu bar , the size of the menu bar is different .
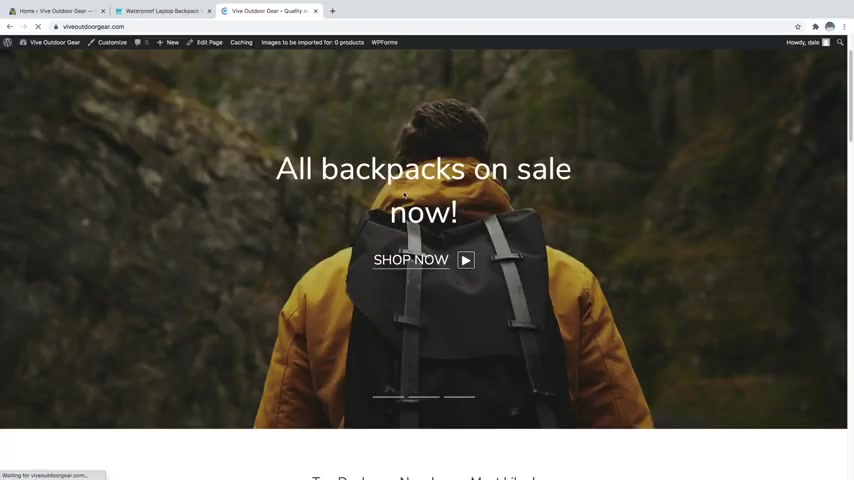
So first it's gonna give me the little , you know , your your changes have been saved up here .
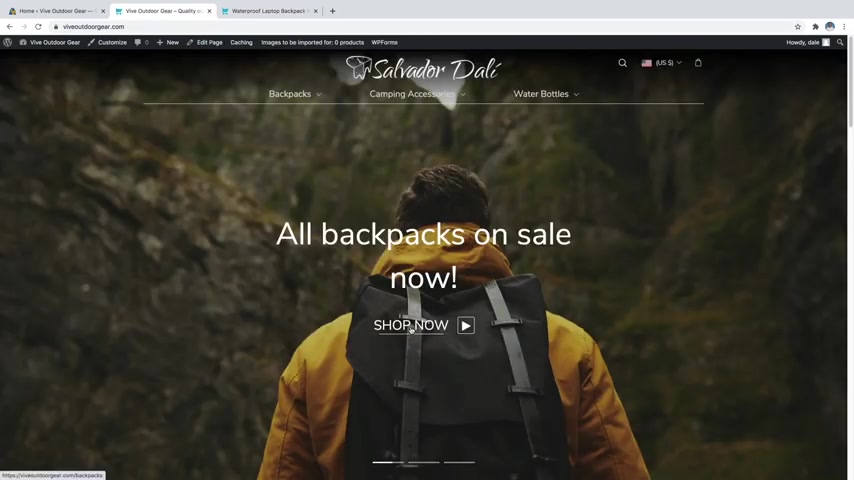
Now , I'll just go back over to our website and I'll just refresh this .
So now it says all backpacks on sale now and then I can just click on shop now and that's gonna take me to the backpack product .
Now , you could also have it , take you to the backpacks category if you want as well .
So I'll just go back over to wordpress .
So if you do want to change it to the backpacks category where you're gonna have multiple backpacks , then let's just go ahead and do that .
So I'll go back up to where my banner number one link was .
That's going to just the one backpack and I'm just going to change this to my domain name slash backpacks .
And naturally , whenever you create a new category , whenever we're actually importing those products from before , whenever you create a new category , it's going to create this page for you .
This size is really small , whereas this is quite bigger and everything basically is totally different .
So let's see some basic settings which we have to do .
Ok .
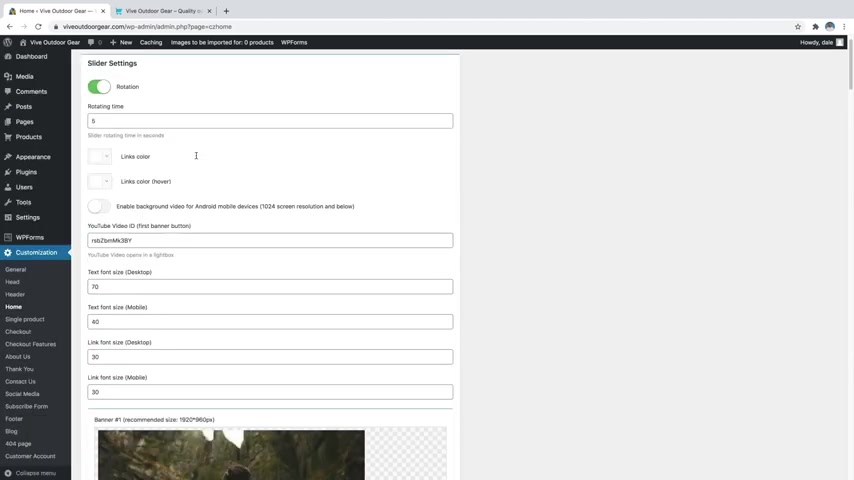
So again , come back to the dashboard and under Avada , you'll see this theme theme options .
Just click on that .
OK .
Now click on this menu button over here .
Now here the main menu , he is set to 84 by default .
Now change that to 1 30 .
OK ?
Now click on this arrow because when you , however any of this menu , you can see a small arrow , you know below that menu item .
OK ?
So the uh that is what that arrow does .
OK ?
Now come back to the bottom till you find uh this main menu typography or typography , whatever you say .
OK .
Now from font family select Monserrat mon ds er rat , OK .
This one from back of font families , select the first one Ariel Hevia Sensi normal 400 letter spacing will be one pixel .
OK ?
So make sure you do all these changes and also make this thing 14 instead of 13 pixels or if you just keep it to 13 pixels that absolutely fine .
There's nothing wrong with that , but I'll just make that 14 .
OK .
Now , here we have main menu of font to color .
So when we have all this menu , we don't have any menu over here .
But for example , when you have all this menu , as you can see the color changes to yellow .
So what you have to do , we have to do that this to yellow .
OK ?
And if you can have your own color , you can select any color , yellow , blue , red and make that color constant consistent throughout the website .
OK ?
So I have selected yellow .
So I'll put that color code over here .
Fine .
Now , click on save changes .
Now , let's change the primary color .
OK .
At present , the primary color , by default , the primary color for this website is this color , the green color .
So I'll change that to a yellow color .
OK ?
So go to this color .
So here , now , here you have this primary color .
As I said , this green color is selected as primary color .
Just open that and you can select any color from here as your primary color .
I'm selecting yellow .
OK ?
So I'll put the same go over here also and click on save changes .
Now let's see some header settings .
So click on this head over here .
OK ?
First one is header position , whether you want your header , top left or right at present .
In this demo website , it is at top , not at left or not at right .
So top is fine .
You can select any one of these if you want .
I have selected the first one .
So make sure you also select the first one .
OK ?
Then slide a position below fine .
Everything is OK .
Click on save changes .
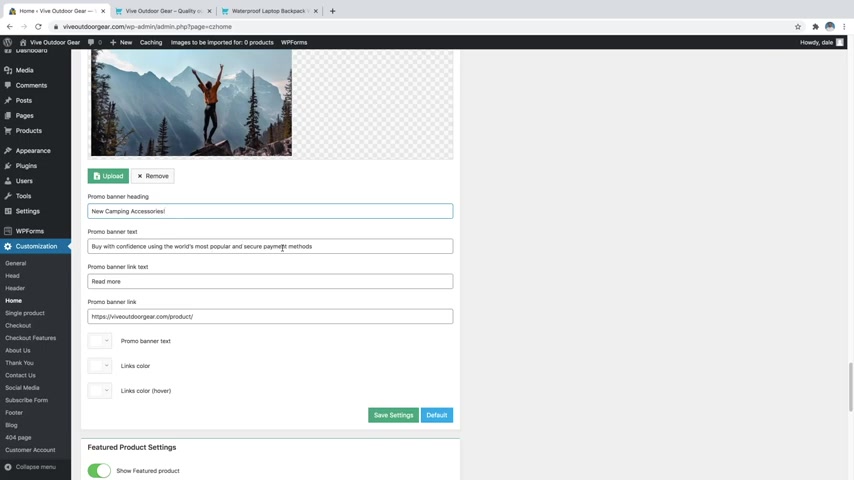
And then the banner text buy with confidence using the world's most popular and secure payment methods .
You could maybe write something about these camping accessories .
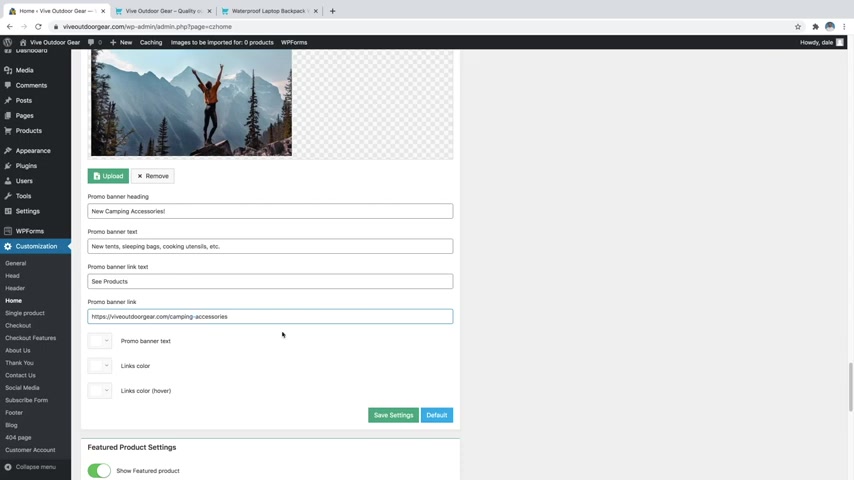
So we could say something like uh new tents , sleeping bags , cooking utensils , you know , et cetera , something like that , cooking utensils just like that .
And then you could also change the link text .
So I could also just say something like c products like that .
And then I would just want to change the link to go to whatever that camping category is .
So that was camping accessories .
Now , under header , you'll see header styling , just click on that .
OK ?
Now if you see over here , our menu starts from here .
OK ?
But in the demo website , it starts way earlier than this one .
OK ?
So what do you have to do , just click on a year and make this thing enable this thing 100% header width .
But if you do 100% header width , your menu , your icon will show up here at the extreme left .
We don't want that .
We want some gap .
So what you can do just type in 4% over a year .
So we want 4% of gap both at the left and at the right hand side .
OK ?
So as you can see there is small gap over here and there is small gap over here , you can increase or decrease this gap .
It is all up to you .
It is not that throughout the website .
Whenever I am using a number , you can play around with that with that number in padding or margin , whatever it is .
OK ?
And select your own thing , whichever you like .
Now click on the save changes button .
Now let's change this Lobo and fab icon .
So I again come back a year and click on this logo button .
Now you can select logo left , right center , whatever you want .
OK ?
And you , what you have to do is just select 20 pixels top and 20 pixels bottom margin .
OK ?
31 is way more .
So just select 20 pixels from here and change this logo , your default logo .
So OK .
So this is the default logo , you want to change this .
So just click on this , remove , OK ?
And upload now upload your own file .
Now the all the images , all the codes , all whatever I have used in this particular website , in this particular demo website , I have given that on my website .
If you go to my website , blog dot dot com , I have given all the resources on that particular website .
OK .
As you can see , this is the one if you click on this .
And by the way , I have given a link which would uh when you click on that link , it will redirect you directly to this particular page .
OK ?
So make sure you click on that link and here you have these images .
Download , when you click on this button , you will download a file .
OK ?
Which would look something like this .
Let me show you something like this .
OK ?
So when you open this file , I extract that file , you have all the images , all the CS S code which I have used in this particular website .
OK ?
So make sure you download this image , you have the T MD link host to get a link .
You have your coupon code for TMD host , get everything .
You have a , a theme link also over here .
And obviously you can again , if you have not yet subscribed to my channel , you can click on this button to subscribe to my youtube channel .
OK ?
So make sure you download all the images .
OK ?
So I have already done that .
So just click on these upload files , select file .
OK ?
Now select that image .
So let's select the lobo image .
So this is the logo image .
OK ?
I click on select , click on save changes .
Now let's select a fab icon by the what , what is a fab icon see from ?
If you see my website over here , there is a small logo at the top .
So that is a fab icon that is very useful .
OK ?
So don't just think that is just nothing a random thing that is not any random thing that is very useful .
OK ?
So just click on this upload button again , upload file and select your own five icon , whatever you want .
OK ?
Now select an image from your and your fav icon should be a square image .
It means the length and the width all should be same .
OK ?
Now click on the select button , now click on save changes .
OK ?
Now a very important thing , as you can see as I said earlier , the the font or the text used over here is totally different from this website .
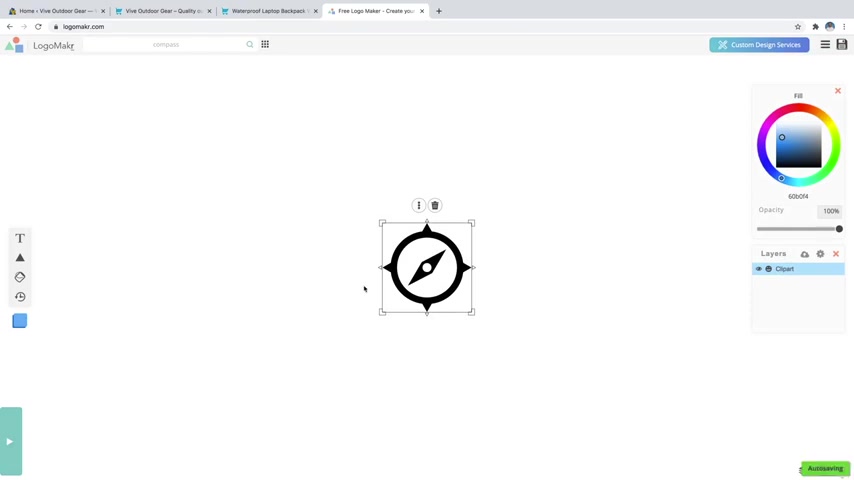
So what you can do is just search for a graphic up here .
So it depends on what your website is about .
Mine's about outdoors .
So I'm gonna type in something like compass and hit enter and it's gonna show me all of these amazing compass images , which is really cool .
So we can just select anyone that we want .
You can also combine multiple images to create your own icon , but I'm gonna go ahead and just select one that I think will work like maybe this one and then you can just resize it by just dragging up on one of the corners .
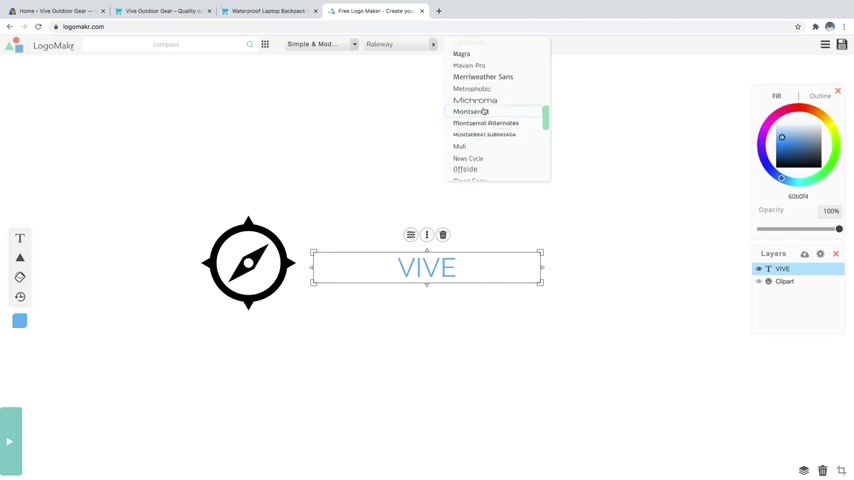
You can move it around by clicking and dragging and you can also change the color over here .
So you've got the hue which is gonna be this outside circle and then you've got the saturation , which is just this box in the middle .
Now , I'm gonna do black for now .
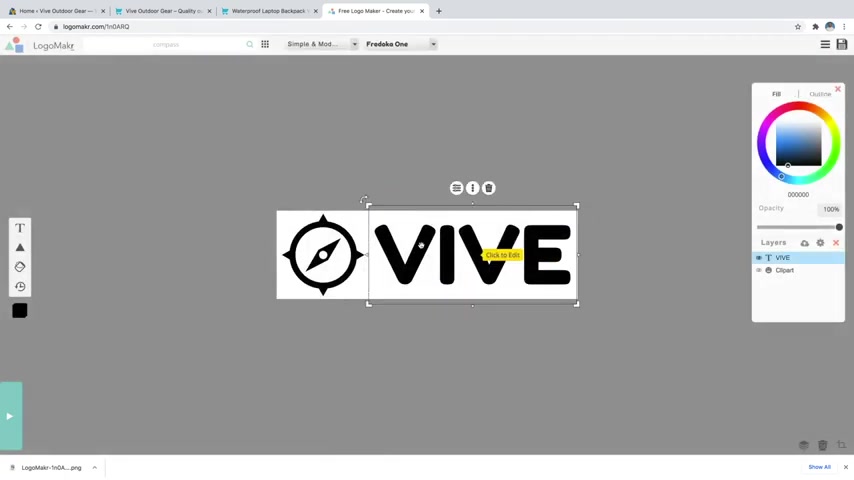
And I'm also going to add some text .
So I'm going to click on the little text button and I'm just gonna type in my company name .
So I'm just gonna do vive and then I'm also going to change the font .
This is just the numbers which I which I have used in my website .
So if you want the exact same font , exact same settings over here , then you can put this number or you can play around with , with this number .
OK ?
Now once you do so just click on save changes .
Now click on this header typography .
So let's change all the header settings .
OK ?
So again , this is H one which is header one .
So just select railway from your font .
OK ?
And back of Fond family Ariel Hea and Fond to weight .
It should be extra bold because that is one the biggest Fond OK .
Extra bolt 800 na font size should be 34 pixels , line height 1.4 which is fine letter spacing should be two pixels .
OK ?
And margin top is fine 0.67 em bottom also 0.67 em .
OK ?
So we're going to click on the little crop button down here and I'm just going to drag this in and maybe drag this out a little bit just to give it a little bit of room and then I'll drag these bottom ones in and the top one .
So it kind of fits neatly on there and then I'll just click on apply crop with a little check mark .
And now what we can do is just click on the save logo button up here at the top , right .
And it's going to ask you if you want to buy the high resolution version for 20 bucks , but you can use the low resolution by just clicking on .
No , thanks .
Download the low resolution file and it's going to be completely for free and the low res file is plenty high enough to use on a website .
You don't really want to have a logo that's super high res because again , the more high res images you have on your site , the slower it's going to load .
So I'm going to say no thanks .
Now let's come to header two settings again , select the railway font from your OK , font family will be same .
OK .
Now , now for all the H two H three H 4h 5 , these three settings will be same .
In fact , these four settings will be same font family back of font family , font weight and style and fond subsets .
OK .
We just have to play around with size .
So H two size will be 32 pixels , OK ?
Line high to um sorry , 32 pixels or year line height will be 1.3 OK .
One pixel letter spacing and you can change uh see all the changes over here .
You know when you change the settings , you can see the changes over here .
Margin top will be zero em and margin bottom will be 0.5 em .
OK ?
As you can see over here .
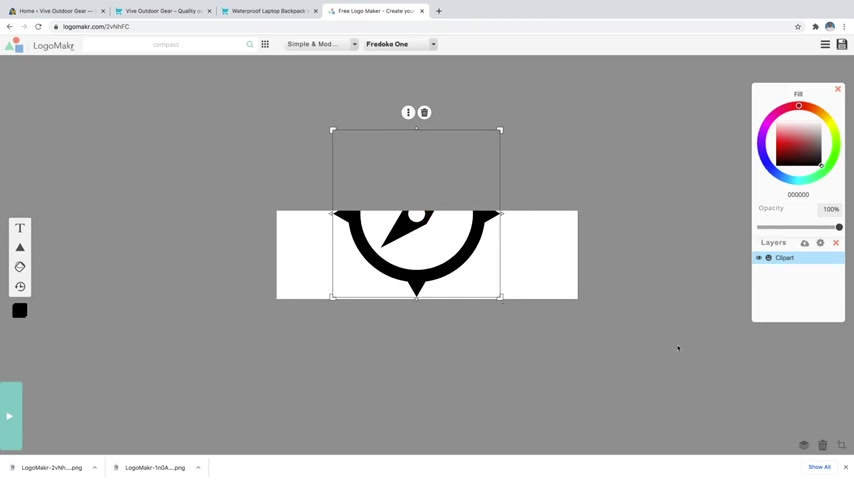
And don't worry , I will show you how to expose it in a second .
So now we're just gonna go back over to crop whenever this gets out of the way , there we go crop and then we're just going to resize this crop and you want this to be as close to a perfect square as you can .
So you can kind of see the values here .
I'm at 4 11 by 4 12 pixels .
So that's what we want right there .
Perfect square with the width and the height you can see in yellow .
And then what you want to do is just center it right around your facon and click on the little checkmark and there we go .
So now again , just click on save logo and then no , thanks .
Download the low resolution file for that as well .
Cool .
So then I can just go ahead and click on the X and now I've also provided these logos in the description for those follow along images as well .
If you do want to follow along with me .
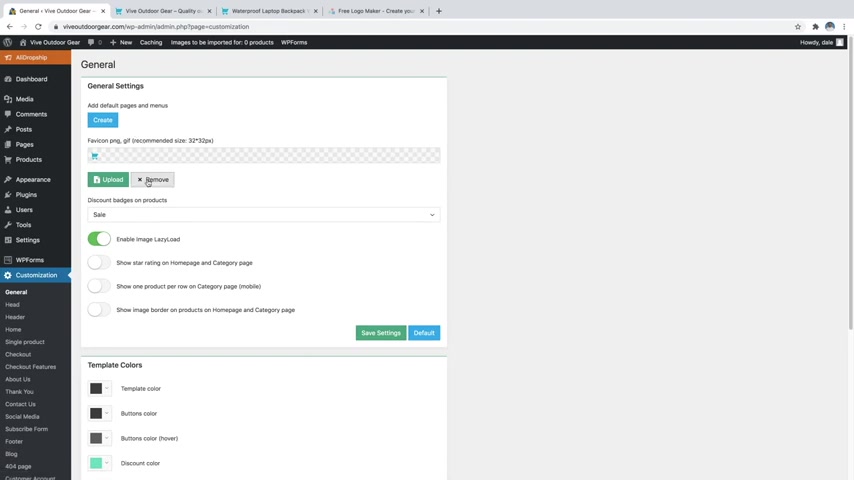
Now let's come to three headings , three settings .
Again , the four settings will be same as I said earlier .
So railway first one aerial normal Latin , that is fine .
Now H three size will be 20 pixels .
So just type in 20 over here , 1.5 is fine , OK ?
Lattice facing one pixel and margin , top margin but should be one em which is fine .
OK ?
Now let's come to H four setting , select the same font Fond family .
This is all fine .
Now , this should be 18 pixels 1.5 line height which is fine , zero letter spacing again fine and rest all these settings over here is fine .
Now let's move on to H five .
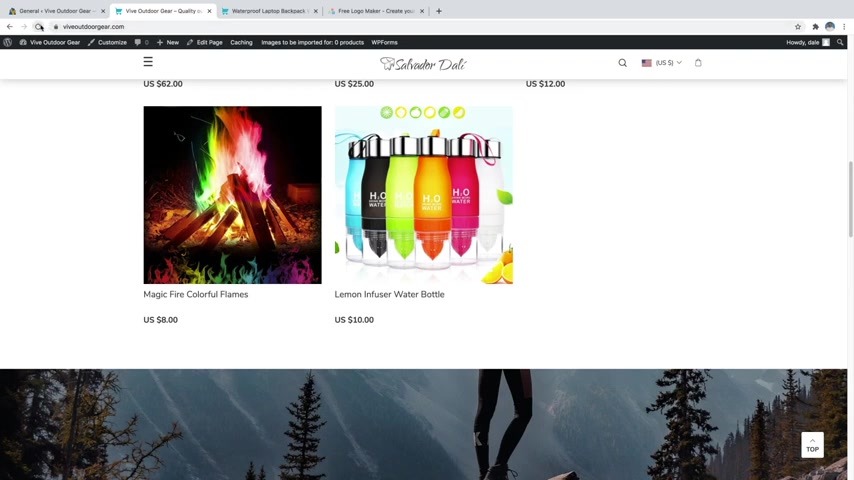
OK .
Now change this fond uh size to 16 pixels line height to 1.4 pixels , 1.4 I'm sorry .
And letter spacing will also be zero a year and this is fine margin , top and bottom is fine .
Now the last one at six again select the same font family , everything is fine .
Now change this to 12 pixels .
OK ?
This this will be 1.2 line height lattice spacing will be one pixel .
Don't forget to type this PX over here .
OK ?
That is very important and decrease this to 0.4 em .
OK .
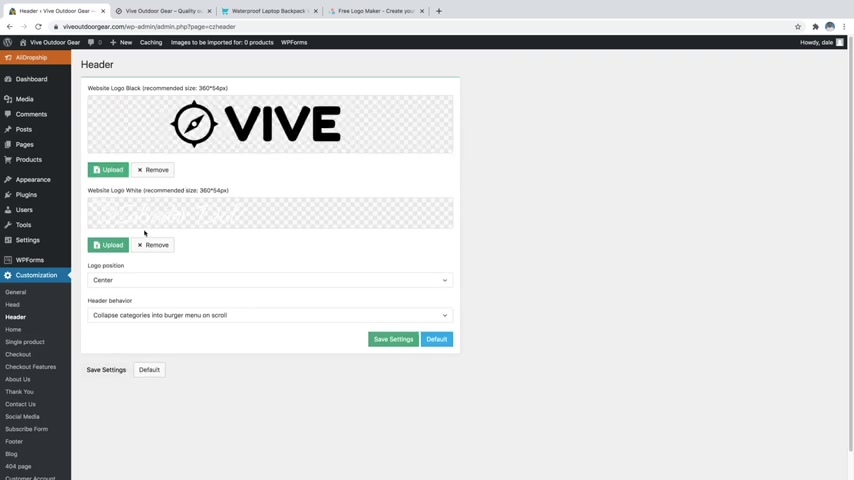
There we go and then just click on crop and then we want to do the same with the white logo .
So I'll just remove this , click on upload and then I'm gonna grab the white logo , say select and then again , just crop the white logo as well , just like that and just say crop .
And then you can also change the logo position if you want it to be in the center or on the left side of the screen if you want , I'm just gonna go ahead and leave it in the center and then just say save settings and then we'll just go back over to our site and I'm just gonna scroll up to the top and refresh the page and there we go , there's our new logo in there which is looking good .
And if we scroll down and then we get that white menu comes up with the black logo which looks really good .
Cool .
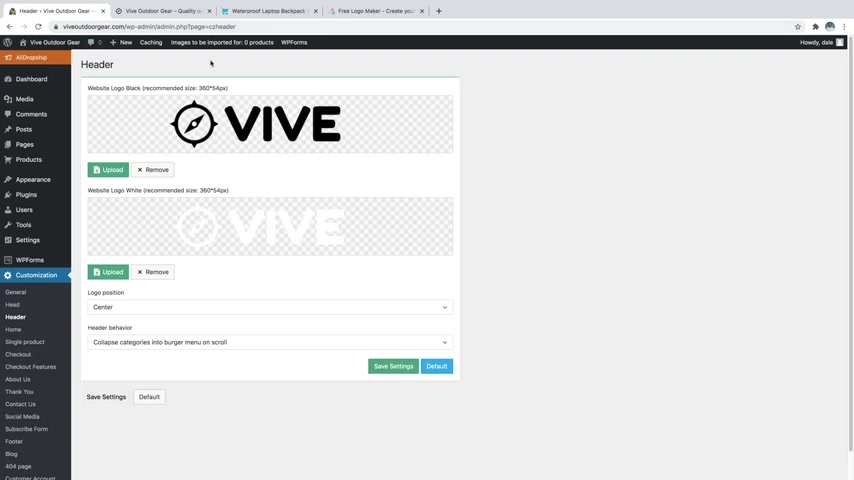
This was very important guys if you want to maintain the same font settings , which I have maintained in my website because if you don't do this setting , the fonts on your website will look totally different from mine .
OK ?
Now , here you have three different settings , post uh title font size , post , title line height , post title , extra font size , OK ?
Just type in 24 pixel for the 1st 1 , 36 pixel for the second one and 30 for the last one .
OK ?
Now click on save changes .
OK ?
So with this , we complete all the basic settings that we needed to do and let's start creating our website .
OK ?
So let's first create this uh slider over here .
So again , come back to your dashboard and here you'll see something called fusion slider .
How are that ?
And select the second option which says add or edit sliders .
OK ?
Click on that .
Now , here you have to add name this slider .
You can name it anything .
For example , I'm naming it just slider .
OK ?
And make sure this width is 100% and you can change the height .
I have used 500 pixels as height .
So you can also have the same settings .
OK ?
Now rest every all the settings or you are fine , just click on add slider .
OK ?
So you should see your slider over here .
Now we have created the slider and now we now we have to add some slides in that .
OK ?
So from your select the first option which says add or edit slides , now click on this add new slide button .
Now let's add this slide .
OK ?
So name anything .
For example , let's name it slide one OK ?
Background type .
It is image as you can see there is an image in the background .
So make sure it is image OK , content alignment .
Here it is center , all the content is in the center .
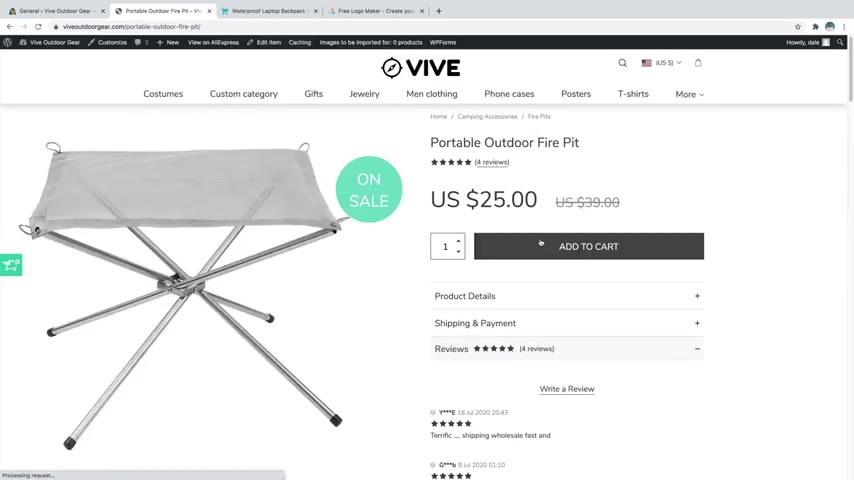
So you can change the color of the add to cart button , the stars up here , this little on sale tab right here .
So let me show you how to do that in case you don't want just kind of like this black theme or maybe this color .
So let's just go back over to wordpress and then we're just going to scroll down inside the general menu which is underneath customization .
We're just going to scroll down and you'll see template colors right here .
So certain ones with the theme and a lot of other free themes is that you really don't need to change the template or buttons color or anything like that , but you can change the discount color .
So we'll just do maybe something like an orange , so I can show you maybe something like this and then just say choose and then just save the settings and then we'll just go back over to our site , I'll just refresh this .
And now you can see that , that little on sale tab is now orange and you can change it to any color that you want .
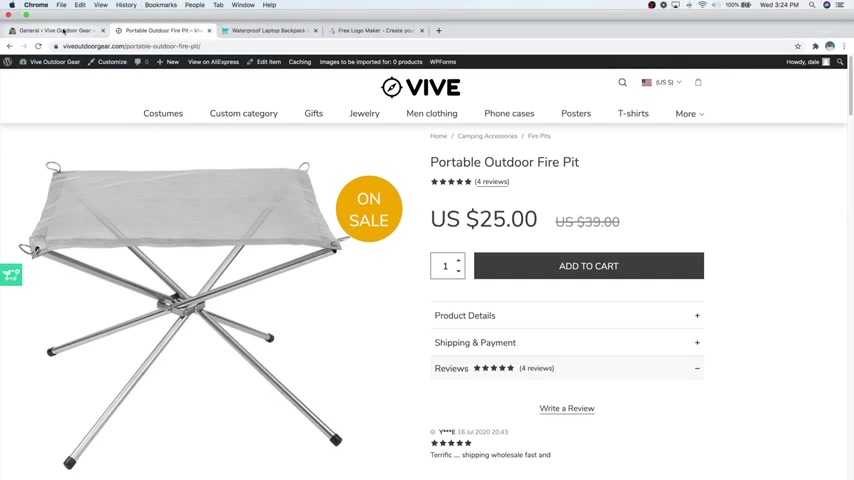
So make sure here it is center now in the heading area .
So this is what you have to type in the heading area .
What do you want to type ?
Just type it over here and before and after this just type in this strong code , OK ?
With strong OK ?
Type in this code , this code will you know just increase the weight of this uh as you can see over here , it is bold , so it will make it bold .
OK ?
Now heading separated , none heading , font size none .
Now heading color as you can see this is white color .
So just type in the code , the code for white color is hashtag three times F or a six times f whatever you want .
OK .
Now we have heading background just uh we don't want any heading background .
So select this no heading background color , no caption area .
So this is what will come in caption area .
OK ?
So just copy this or just type in any text you want over here .
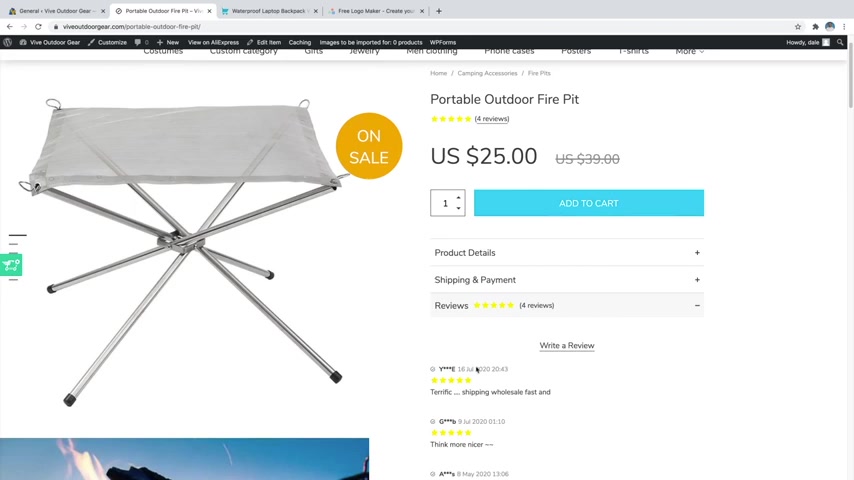
And now you can see that the add to cart button is now blue .
And whenever I hover over , it turns to this kind of dark gray as well as our stars are now yellow , which I think looks a lot better .
It just makes them pop a lot more , really shows off that five star rating .
So I think that looks pretty good .
All right .
So now we'll move on to step number 10 , which is to customize your menu and by the menu , I'm referring to this one up here at the top .
You can see that we've got all of these , you know , categories in here , costumes , jewelry , all that , which we don't actually have on our site .
This is actually kind of like a placeholder that got added .
So we're actually going to remove these and put in our own custom links up here and our menu .
So let's go ahead and do that .
Let's just go over to wordpress and actually , sorry , let's go back here and just go to our home page .
So we can still see that menu and it's gonna be , you know , this transparent one .
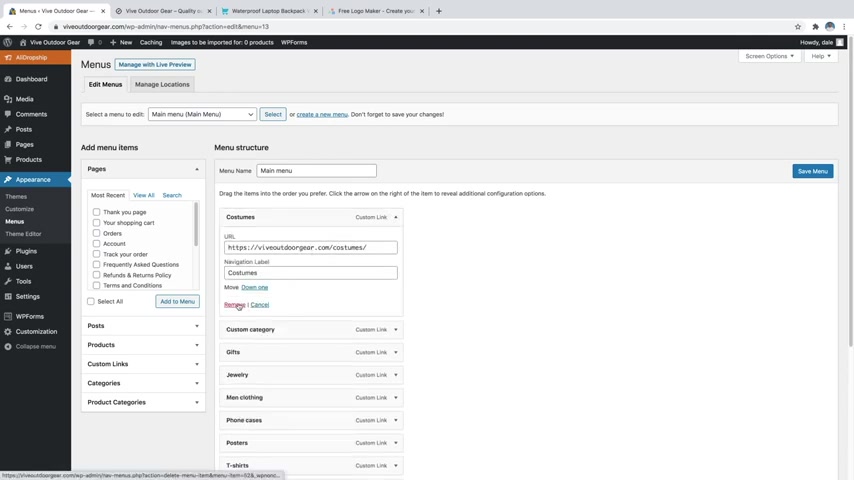
OK ?
Now caption color as you can see this is the yellow color .
So just type in the color code over here fine caption background .
No , we don't want any caption background .
Now here comes the button text over here .
So we have two different buttons .
So as you can see now , let's see all the settings over here .
I will , I will zoom this so that you can see what , what all I am doing over here .
The first one is fusion button link .
So between these two in inverted commas , you have to type in the link where you want this button to redirect to OK ?
For example , when a person clicks on this button , if you want him to redirect to redirect to some page , then you can enter the link of that page .
OK ?
Or if you don't want him to uh link to redirect to anything , just type in this hashtag over there .
OK ?
No color .
It is typed as default , just delete that default and type in custom .
OK .
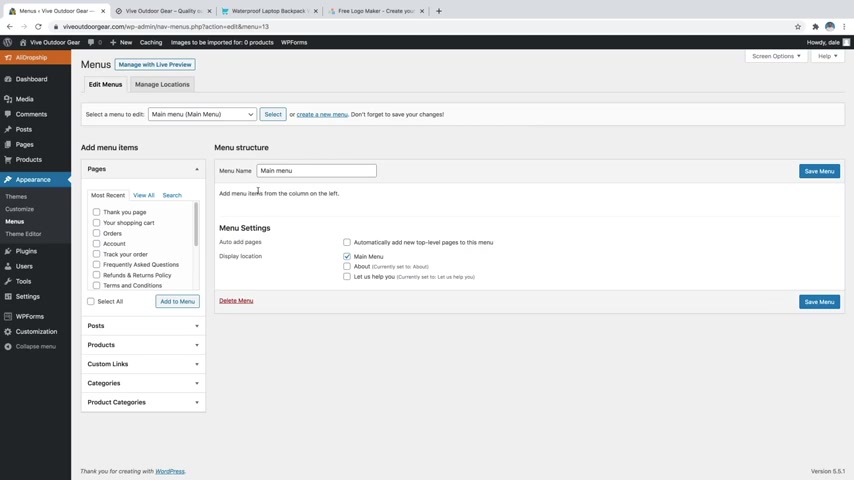
When we type in custom , we have the facility , we have the authority to add our own color .
OK ?
Now size will be extra large .
So just type in X large , OK ?
OK .
Now type shape , just leave all those things title , leave this thing gradient color .
OK .
So delete this pike icon from here and type in the color you want .
For example the gradient color for the first button is black or you can say dark gray .
OK .
So for code for that is hashtag three times three .
OK .
Now gradient however color if you see when I however this it becomes yellow .
So it is yellow .
So delete this pipe icon and type in the code for yellow .
OK ?
Now it is accent color .
Accent is nothing but your text .
OK ?
So text color is white and when I hover this button , text color becomes black as you can see here it is white .
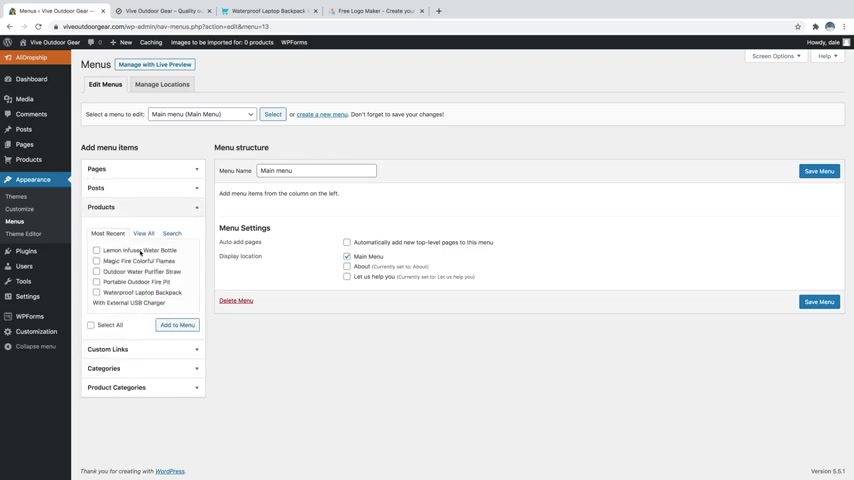
But when I hover this button , the text becomes black .
So let's do those changes in the first uh accent color type in the white code , an accent tower color black hole OK .
OK .
Rest everything is fine border with just make this as zero .
We don't want any border .
OK ?
Now just change this text from your button text .
So it would say button text to a year but we want to say explore recent work .
So just type in explode recent work or whatever you want to a year .
OK .
Fine .
Now , same thing you have to do over here .
OK ?
And OK , just type in whatever you want .
OK .
Custom then size will also be X large for this one also .
OK .
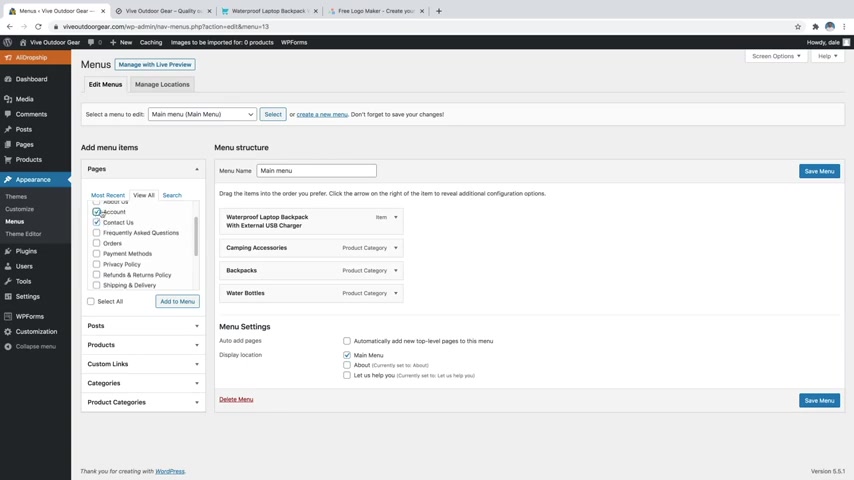
Then gradient color , this is just oppo opposite as you can see .
Uh this is uh the color is yellow .
But when we have this , the color becomes uh black and the text color is black .
And when we hover uh over this butter , it becomes white .
OK .
So let's do those changes .
The gradient color is yellow and when we have all that it becomes black , OK .
Accent color is black .
But when we have all that it becomes white , so cold for white , OK ?
And the this is zero pixels , we don't want any border .
OK .
Now changing the text , this says get a code today , OK ?
So we'll be linking this button to get a code page OK ?
That we'll do later on when we create that page .
Fine guys .
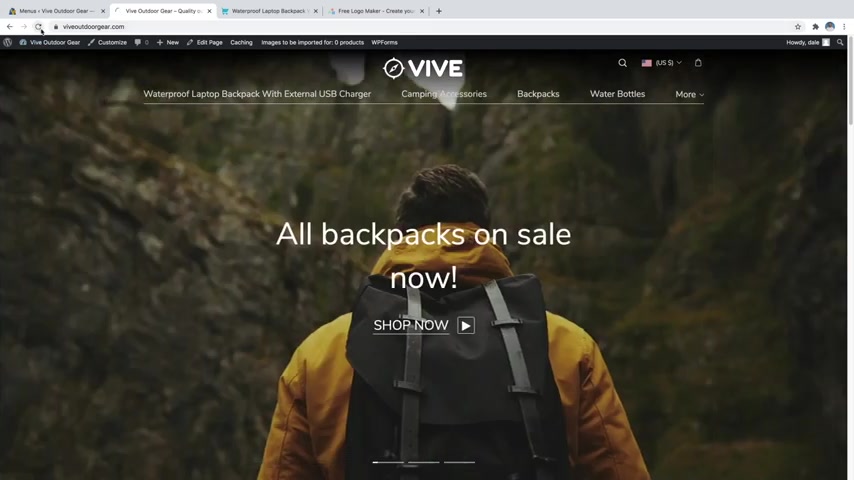
And then I'm just gonna go back over to my site and just refresh and now you can see camping accessories is first .
Ok .
So now for step number 11 , let's create a dropdown menu for different subcategories .
So I'll just go back over here and let's say that I want to add these subcategories here .
Let's go over to product categories and let's also add these subcategories .
So fire pits survival gear , waterproof backpacks , laptop backpack and sports bottles .
Just go ahead and add those to the menu .
And now what I want to do is structure these in a way that they're going to be underneath their parent categories .
So let's say that I wanted waterproof backpacks to be underneath backpacks .
What you want to do is instead of putting it right here , you want to move it over to the right , just a little bit .
So it creates kind of this stair stepper effect .
And now that's going to come up underneath backpacks .
So I'll do the same with laptop backpacks .
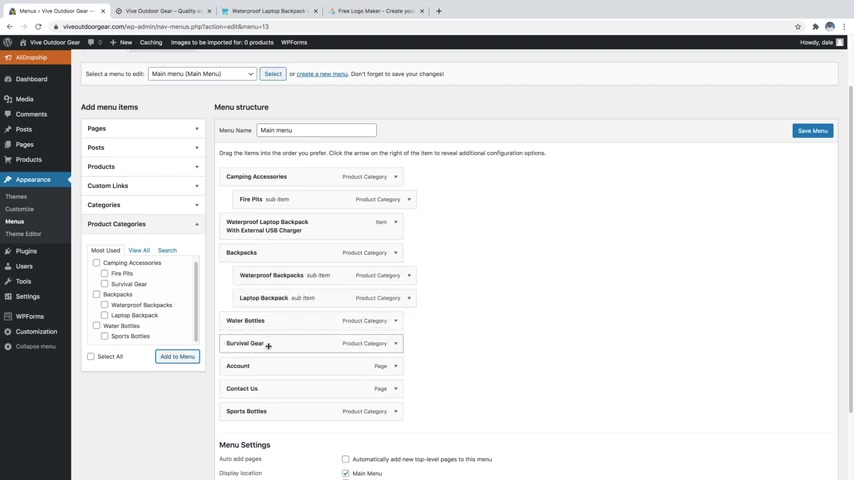
Now just how you select this fusion slider .
OK ?
Now click on this set featured image and upload this image .
OK .
Now let's search for that image where it is OK .
Home slider .
This should be the one just click on open .
OK .
So this is the image , just click on this set featured image .
OK ?
Now click and publish .
OK ?
So with this , we have successfully created this slider .
Now let's create a page and add this slider and start creating all these things over here .
OK ?
So come back to your dashboard and at the left hand side , you'll see these pages .
So how our pages and click on this add new button .
Now let's name this page as home page .
So just type in home page .
OK ?
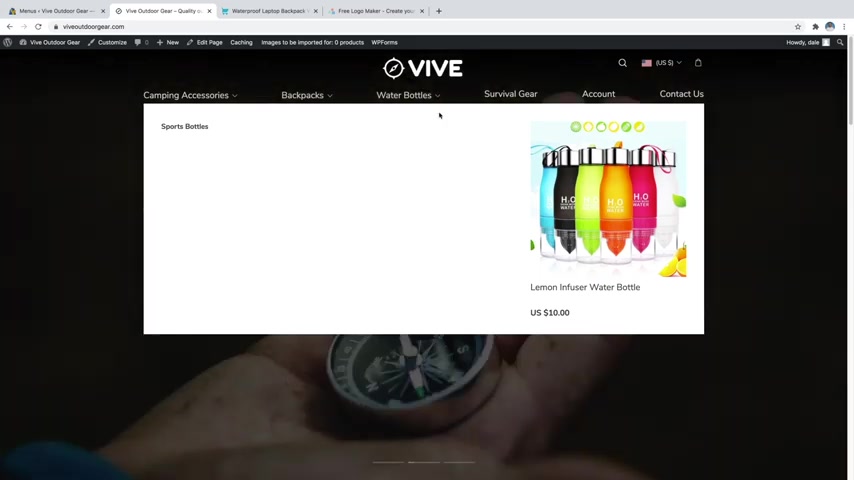
Now from your template , select 100 person with scroll down and you'll see this sidebar option over here at the bottom with under fusion page options , select this select fusion slider .
OK ?
Then select this slider from here .
This is the one which we created .
Now go to this page of option and type in 00 in both the padding top and padding bottom .
OK ?
Now click on this last option which says page title bar , select this and click on hide .
I'll show you what these things are .
OK ?
First one is very much clear when we select this , we see this slider .
OK ?
Now second one is that is by default 55 pixels top and 40 pixels bottom padding .
We don't want that .
We want to make it zero because once you do so you know , you have a lot of gap both at top and bottom .
So we don't want that .
That's why we put zero .
And the third one , we don't want a title bar .
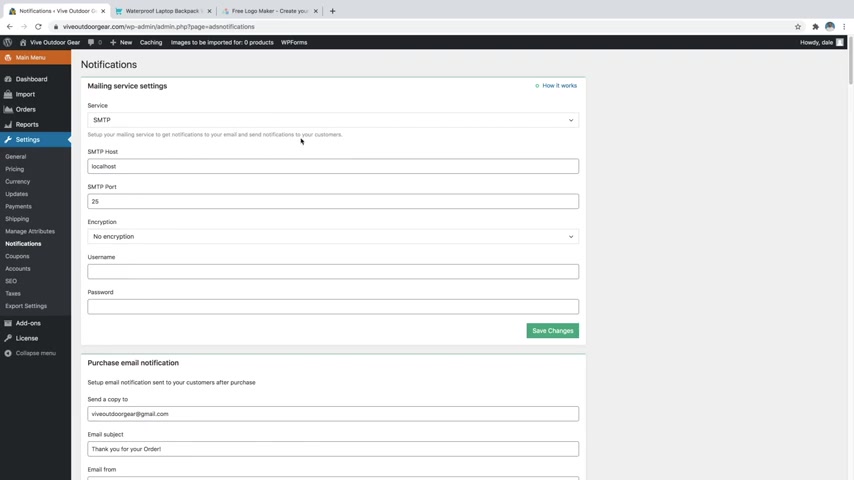
For example , the title of this page is home page .
So what happens ?
You know , when you create , create , create this page here at the top , you'll you'll see home page written .
We don't want that .
We want our menu and directly the slider .
OK ?
So we don't want any gap between that .
That's why we have selected that .
We'll be using that title thing in when we start creating our post .
So you'll see the changes .
OK ?
Now click on this use Fusion builder , a very good feature .
I would say a very strong feature of a water theme is that they have their own builder and which is very good .
We'll see how this works .
This is very easy .
OK ?
So just stay with me .
Now let's see the first section .
This is the first section .
OK ?
Now let's create this section .
Click on this add container .
So basically first let's understand what we are doing over here .
See we are adding a container that is we are adding a section .
OK ?
So what happens first , we add a section ?
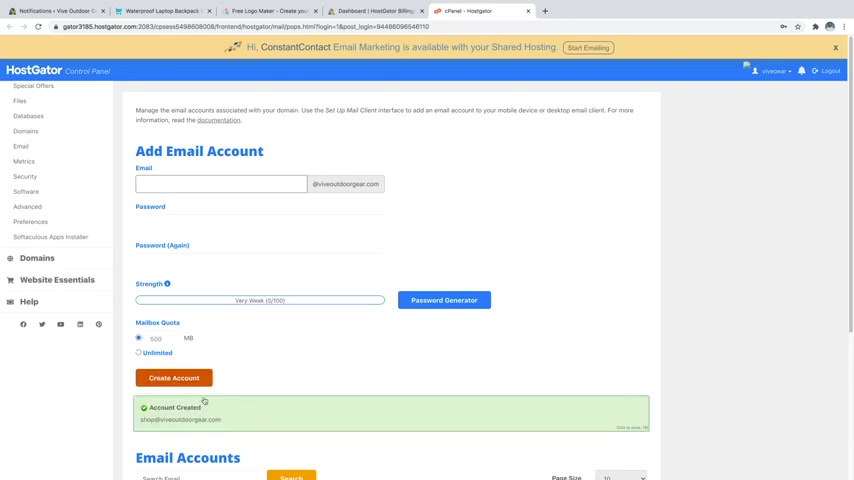
And then for the mailbox quota , I'm just going to change this to unlimited so that we never run out of space and just say create account and there we go that has now been created .
So if we just scroll down , you can see that account right here .
And I do have a video on my channel that I'll also link in the description where you can actually hook up this email here at your domain name dot com over to your Gmail account .
So that anything that comes through this email address will show up in your Gmail inbox .
So I do recommend doing that and I'll put the link to that in the description .
Now , what we're gonna do here is just click on set up mail client and we're just going to be needing some of these settings over here .
So if we just go back over to wordpress , you can see what we need .
First , the SMTP host and the SMTP port , the user name and the password .
So the host is actually just going to be our domain name .
So I'm going to put in my domain name just like that .
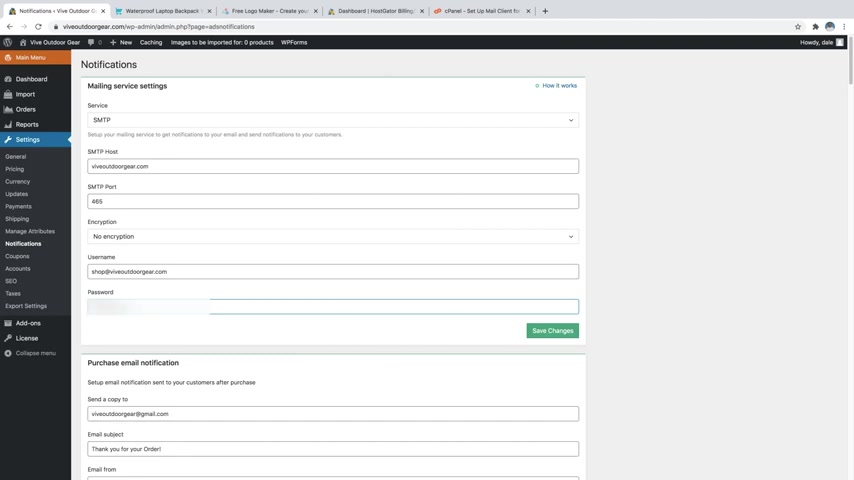
For example , you can consider this as example , for example , this is a slider .
So basically this is a container as you can see see my mouse .
So this whole section OK ?
This whole section is a container and in that container , we can have you know different columns , one column , two column , three column .
And in that container , we can add something thing .
For example , let's come over here .
As you can see , this is a container , this whole section is a container .
And in that container , we have four different columns .
OK ?
So that is how it works .
You add a container and under that container , you add your element , you add your whatever object you want to add .
OK ?
So let's first add a container or a section .
As you can see now you can select what you want to add one column , two column , different types of columns .
So we just want a single column over here because as you can see , we have one simple thing , we don't have 234 things over a year .
So we'll need one single column and we'll done will be done .
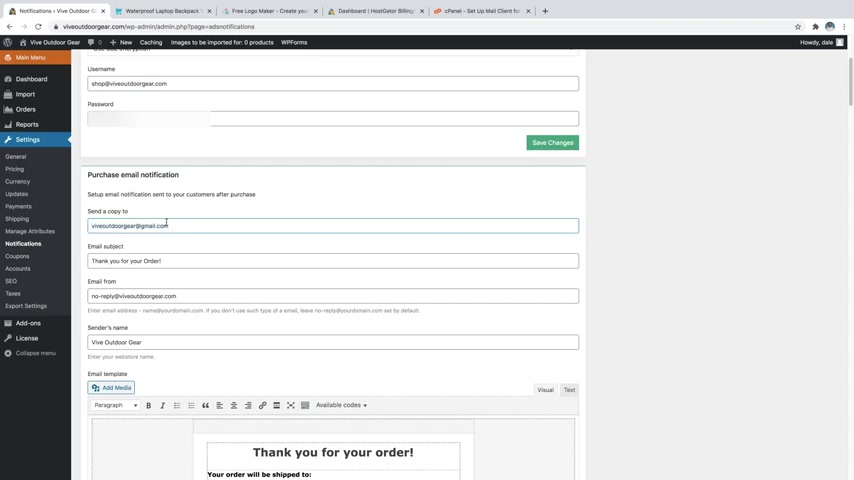
OK ?
Now , in this word , you have to add , you have to add some element .
So as you can see here , there is a simple text .
So we need to add a text for that .
We use an element called text block .
So select this textbook type in over here as you can see my mouse and then select this text block .
Now type in this thing whatever you want to type O here and click on this align center that will align this statement in center like we have here .
OK ?
Now click on this button .
Now let's add this button .
OK ?
So again , click on a container , single column , add element and search for button .
OK ?
Select this one button URL .
OK .
Where you want this button to redirect to now button text , it says get a free code .
So type in get a free code over here .
OK .
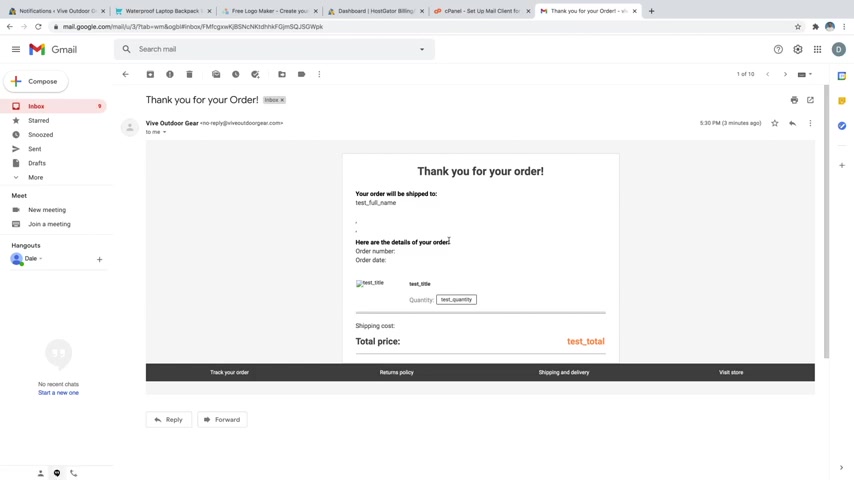
Now leave this as it is alignment center .
As you can see the button is aligned at center , not at left or right .
OK .
Now scroll down unless everything is fine .
Now click on this design section .
Now at present , it is button silence .
Uh default just select custom because we want to change the color of everything .
As you can see over here , the button color is uh black and when we hover it becomes white .
So first one is button color .
So just type in the color code for black , OK ?
And this is gradient top power color .
OK ?
So when we however , this button it becomes white .
So type in white or you can just select this white from here also .
OK ?
So you can do this thing .
Also , you can select this white from here .
It will become white .
Now accent color , accent power color as I said to you earlier .
Also accent is just the text .
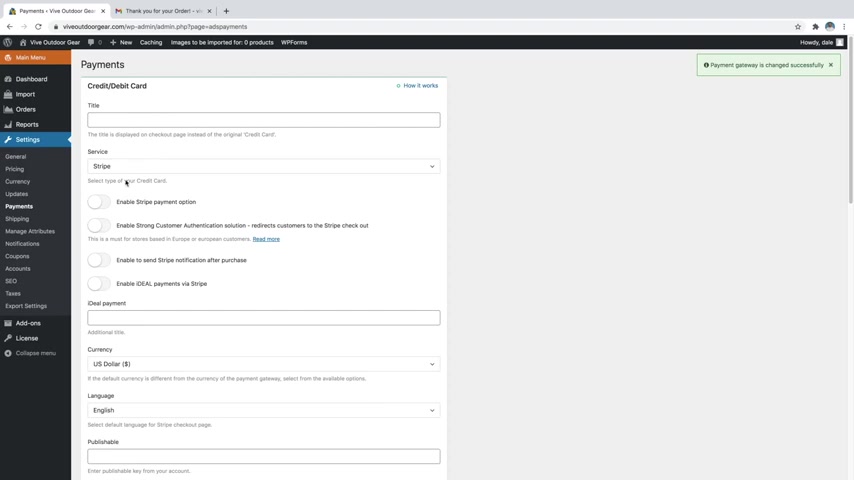
So text color is white and when we have it becomes black .
So accent color is white .
So select white from your how color is black .
So select black from your OK .
Now button type is default button border with make this as two OK ?
For example , when you have this as you can see after this uh white section .
There is a black border , OK ?
And that is two pixels .
If you put one pixel , it will be more thin .
If you put three pixels , it will become more bold .
OK ?
So I have put 22 pixels now button size at present , it is set too large .
You can uh make this extra large .
OK ?
And you can also add , add an icon but we won't do that or you just click on save and you can also add some animation obviously like bounce , fade , whatever you want .
OK ?
From left , from right , from top , the all this type of animation speed of animation .
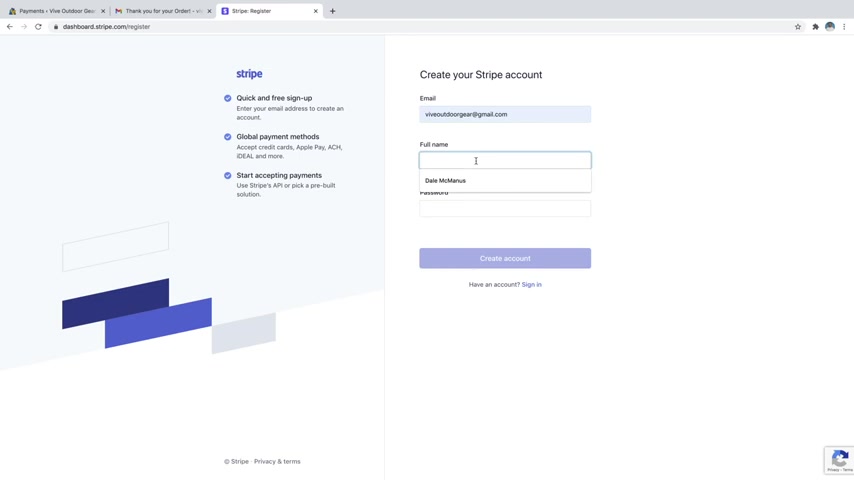
So if you don't have a Stripe account , let's just go ahead and sign up for one .
So we'll just go over to stripe dot com and we're just gonna go down to start now and then we can just go ahead and create an account and I'll just put in my full name and a password and then just say create account .
And here we are inside of our Stripe account dashboard already , just like that .
It's super easy .
So you do need to do a couple of things like verify your email .
So we'll just go ahead and expand that and it's going to say that they sent you a verification link to your email and then we can just go ahead and open up our email and get that .
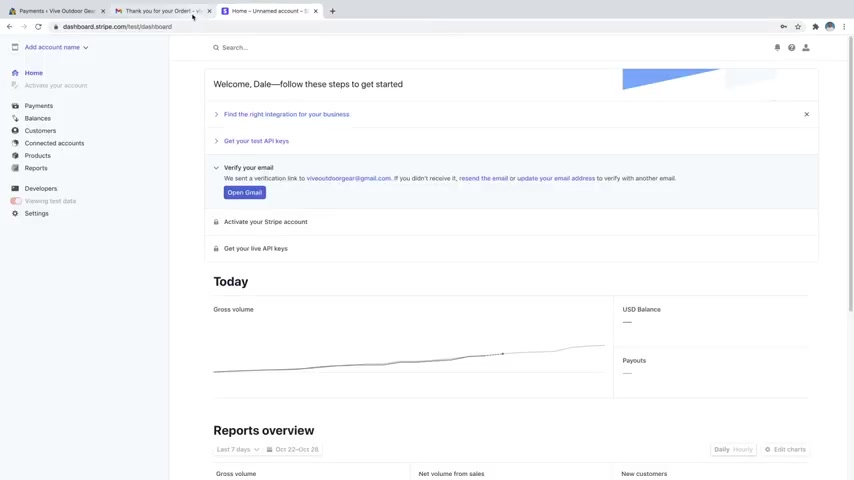
So I'm going to just go to my email , which I actually already have open right here and just go back and I'll just refresh this and you can see that we've got the email right here and then I'm just gonna click on verify email address and then the next thing that we need to do is activate our Stripe account .
So I'm just gonna open that up and then I'm just gonna say , start now and it's gonna ask you for a bunch of stuff for your business .
So I'm just gonna go ahead and put in my information and then just say next and then you would just want to select whatever industry that your store is in .
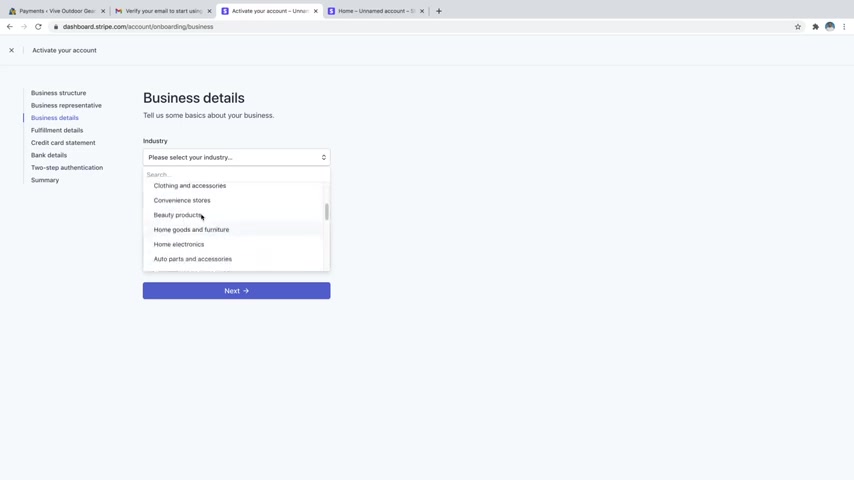
So you can also add animation to all the element .
OK ?
Now , once you are done , just click on save .
Now there is again some more settings to do which is the row and the column setting , but I won't show you that .
Now , first , let's see how this website looks like at present , just click on this publish button .
Now open this link in a new tab .
Oh Yes .
As you can see this is how it looks like at present .
I forgot to put this uh background color over here .
Uh So let's do that .
And I also forgot to put one thing over here because our slider is not a full page slider .
So there's an option for that .
Let's correct these two settings first .
OK ?
So come back to the over here and just click on this container .
Setting in this pencil button .
OK ?
And go to background , select background color and type in the background color which you want .
OK ?
You can select any color from here also and just click on save .
OK ?
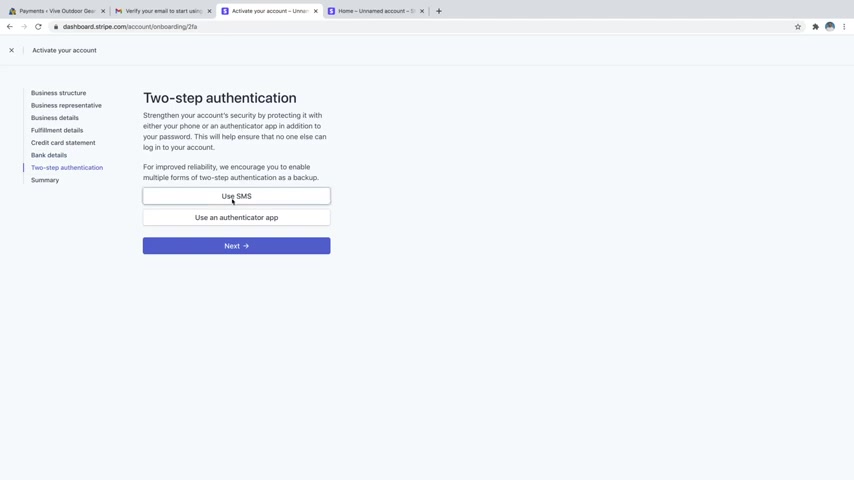
So we could actually just change that to something like vive outdoor gear dot com .
Or you could even just do the Vibe outdoor , which we could do on the shortened descriptions .
We could just do vive outdoor gear or actually , it's not gonna be that long .
So we'll just do vibe and then we'll do vibe outdoor gear as what comes up as the statement descriptor .
And then this is just the shortened version .
So it just says Vibe and then whatever the product is , and then again , phone number and support address .
So again , if you have a po box or something , you'd want to put that in here and then just click next and then you'll just want to put in your bank account details so that you can actually receive this money to your account .
It's gonna be direct deposited to your account and then click on next and then you'll just want to use the two step authentication .
So I'm just going to use the S MS by phone .
So I'll just put in a number , my phone number .
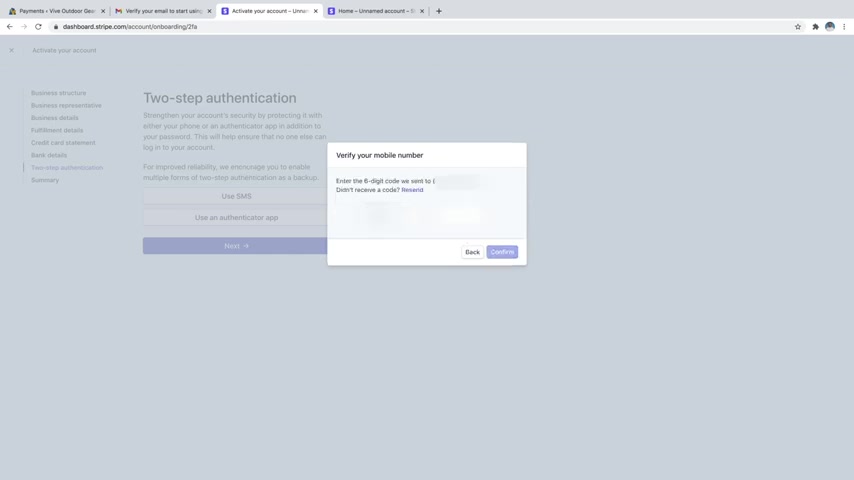
Click on update .
Now , have our fusion slider and select the second option , add or edit sliders .
If you remember we created this slider , just click on this edit button and here there's an option .
Where is that gone ?
OK .
OK .
We hear it is full with slider , just tick mark this button and click on update .
Now again , come back to your website and refresh this page and both the things should be , should be settled now .
OK ?
So we have our full bit slide over here and we have this thing .
But if you see uh in the demo website , this thing goes over to to this section .
OK ?
But here it is not happening .
And also there is some gap at the top in this .
If you see there's some gap at the top , whereas there is no gap over here , we'll see all these things later on .
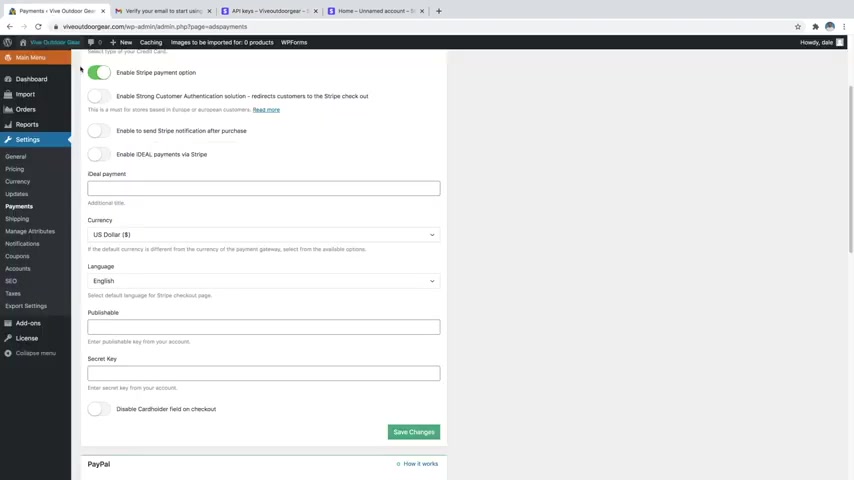
So let's add that .
OK ?
Before doing that , let me do one thing .
Just click on this button , save container .
OK ?
Now we can name it anything .
For example , I am naming it as top one save container .
Now click on this also save container , top two .
OK ?
OK .
Save container , name anything , for example , talk to save container .
Now , why am I doing this ?
See if I if you saw the demo website when we uh when we are doing the tour of demo website , we have used these things in all the pages .
So what we have done , we have saved these settings .
Now when we , when we are , when we create new page , for example about this page then we don't have to create these things .
Again , we'll just , you know , import it from what we have saved .
OK ?
So that is very useful .
Now , let's create this thing .
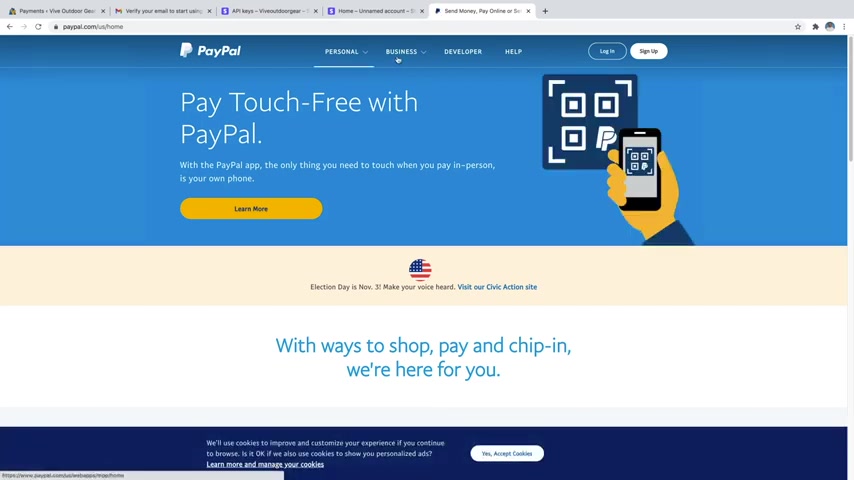
Uh So wherever if you do have a paypal account , which most people do , um it's really easy , you can just go over to paypal dot com and sign up for an account and you could do personal or business .
Um I recommend just starting with personal and then once you start making a lot of money , then you can always go to a business account because they're gonna ask for a bunch of information about your business .
Um But yeah , just make sure that you have an account , then you just want to put in whatever that email is , uh where you want to receive payments through paypal right here and then just go ahead and click save changes and then the cash on delivery is really just if you want people to be able to give cash whenever your item is actually delivered .
But I really don't recommend doing that .
You really want people to be paying for the product before they actually get it .
So we're only gonna do these two options and then before I go show you the site that this is all hooked up .
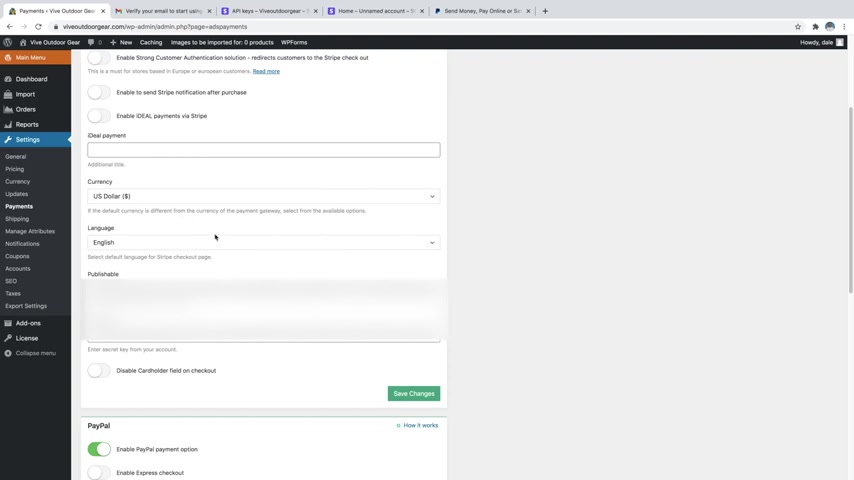
This section , just click on this add container .
Now click on this one column .
OK ?
Now click on this add element and as you can see , it is a text , simple text .
So just type in text block over here , select this add this text .
This is center line .
So just click on this button , click on save .
Now , next we have a separator .
OK ?
So just click on this add element and search element type in separator .
This is the one style is selected to no style .
Just click on that and select single border solid .
Why we are selecting single border solid ?
Because here we have a single line , a single solid line .
OK ?
That's why now go to this design option , OK ?
Separator color , select the color of separator you want OK ?
Now margin put in zero , top margin and 30 bottom margin because you want some gap below this .
As you can see below this separator , there is some gap .
So we want 30 bottom margin border size should be two .
If you put three , then the separator will become more uh more darker .
If you put one , it will become more lighter .
OK ?
So we are putting two that is in middle .
Now separator with OK , put in 200 pixels OK ?
Now alignment is center .
As you can see it is aligned at this center .
That's why alignment is center .
Click on save .
Now , click on again .
Let's put this text to a year .
So let's click on this element .
Search for text block , OK ?
Just type in this text .
Now make this also center align , click on save .
OK ?
Now there is one setting left .
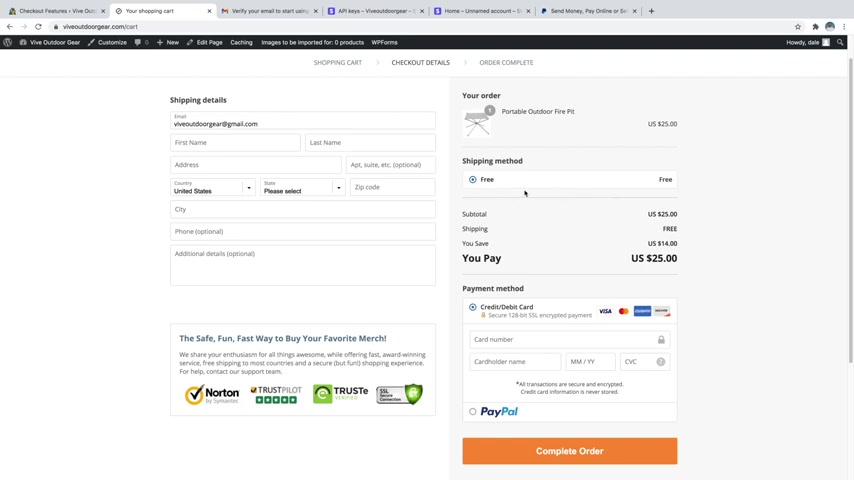
Now , first option is number of columns .
So here we have four different columns .
OK .
So select four over a year type in four over a year .
Now click on this edit button .
So we are editing and creating the first option .
This is the first option .
OK ?
So just click on this edit item .
Now , first one , it asks you for flip box , front side heading .
So this is the front side and when we have all this , we can see the back side , ok ?
So front side heading is buildings as you can see .
So let's type in buildings , OK ?
Now flip box backside heading , so backside adding is actually art fully crafted .
So let's type art fully crafted over here .
Now , this option is flip box front side content as you can see below uh that building three lines that is the front side content and this is the backside content , OK ?

So let me add same content over here also and over here also fine .
Now background color front side as you can see uh front side background color is light gray which is fine .
This is also light gray heading color , front side is black , which is fine here .
Also it is black text color , front side uh is all uh uh light gray fine here .
Also it is light gray .
Now background color backside when we hover here , as you can see the backside background color is actually yellow , not green .
So let's change this just type in the code .
Now heading color backside if you see backside the heading color is black here it is not black .
So let's make it black , select this one .
OK ?
Now text color backside here is you know gray color , select , select gray color over here , select anything like this .
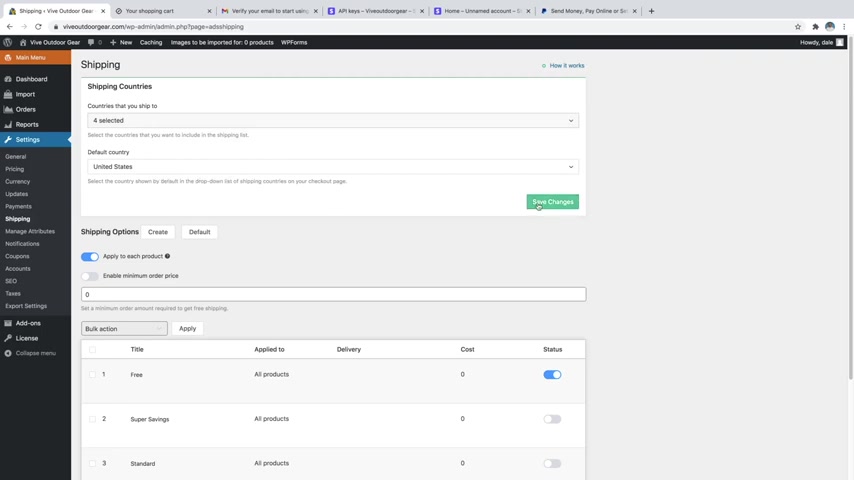
OK ?
Now , border size , we don't actually have any border when if you see there's no border around it .
So just put in zero over here .
OK ?
Now it it is asking you for I can but after about that , there is something called border radius .
OK ?
So just type in around in that OK ?
Because as you can see there is a round , OK ?
Now it is I can , this is the building I can .
So search for building over here .
This is the one scroll down .
OK .
I can color as you can see your I can color is yellow .
So select this I can circle .
Yes .
OK .
If you see I can circle , then I think we don't need this .
Just delete this I can circle .

Background color is black here .
Also it is black .
So that is fine border color is black , fine flip none , rotate I can none uh spelling I can none .
So everything here is now fine .
You can change the an animation from here .
Obviously .
Now click on this save button .
So similarly , you have to create , click on this flip uh add flip box and create three more .
So I won't be doing that because I have showed you how to create that and you know , I won't waste your time and my time doing that thing again and again .
So what you can do is just click on this button , clone items three times and you have all these things and what you can do , just click on this edit button and just change the title and the I can rest .
All the settings will be same .
OK ?
So you're saving a lot of time now , just click on this save button again a bit .
Now again , refresh this page .
So as you can see over here , we have this thing OK ?
Now this also requires some settings that we'll do later on .
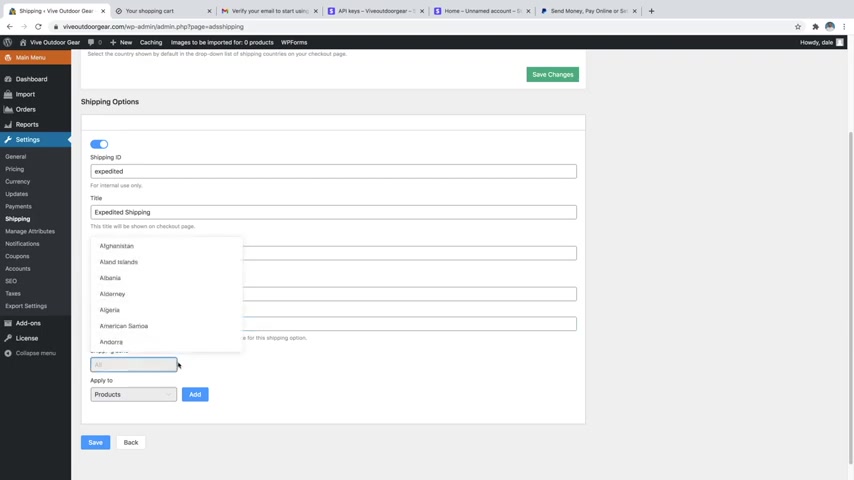
Let's first see the next section .
So this is the next section OK ?
A counter section with some background image and this design .
So let's add that come back to this home page , click on add container , OK ?
Click on this single column .
Now , first element is this one OK ?
This design .
So this is section separator .
So search for section separator , select this style will be big half circle OK ?
And bottom .
OK ?
So for when you are doing this for top , you'll select bottom and when you are doing this for bottom , you'll select top .
OK ?
Background color is white .
OK ?
As you can see this is the background color actually , if you see this , oh , here is the background color .
OK ?
Now everything is fine , just click on save .
Now we have to add this uh counters .
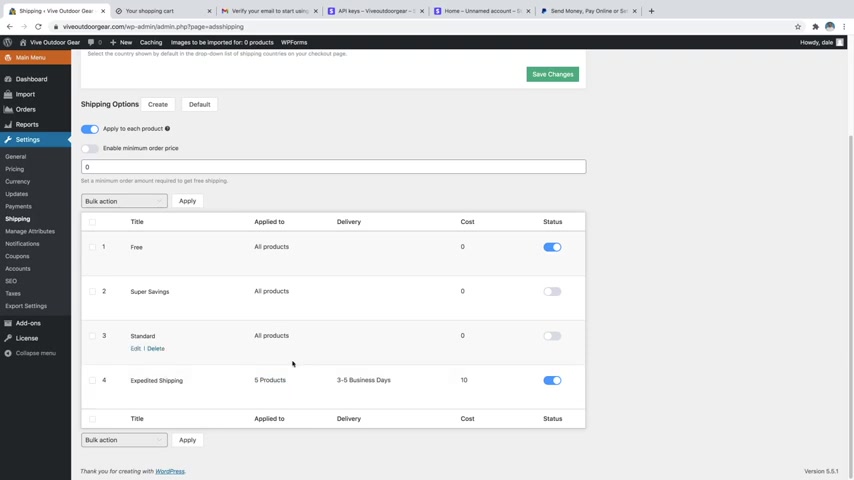
So just click on this add column , single column .
OK ?
Now let's add this counters .
So select add element search for counter counter boxes .
This is the one number of columns .
We have four different columns to select four con uh counter box titled font color .
So here it is yellow .
So let's select yellow from your fine counter box title font size .
OK .
Here it is 50 .
Let's select uh 60 .
OK ?
Counter box I can size if you see I can is slightly bigger than this fond .
So let's select 70 just one size bigger than that .
Now , the next option is Counter box I can top .
So here we have uh the icon at the top .
So obviously here it will be .
Yes , we want the icon at the top counter box body font color .
OK ?
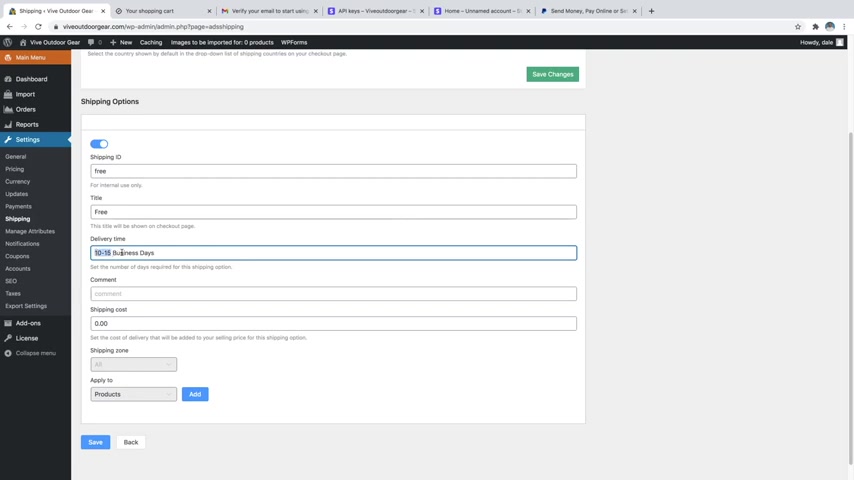
So there is uh this is the body font color .
So here it is white .
So let's select white .
Now counter box body form size 13 pixels is fine , I guess counter box border color .
We don't want any border color .
So just select this and the second one , just drag it to the bottom .
OK ?
Now everything else is fine .
Now click on this edit button to edit or to create the first counter .
The counter value is the first option .
So here we have 3534 .
So let's put 3534 here .
OK .
Now let's select the icon .
Here it is briefcase .
So search for briefcase .
OK ?
Scroll down .
Now your content goes here .
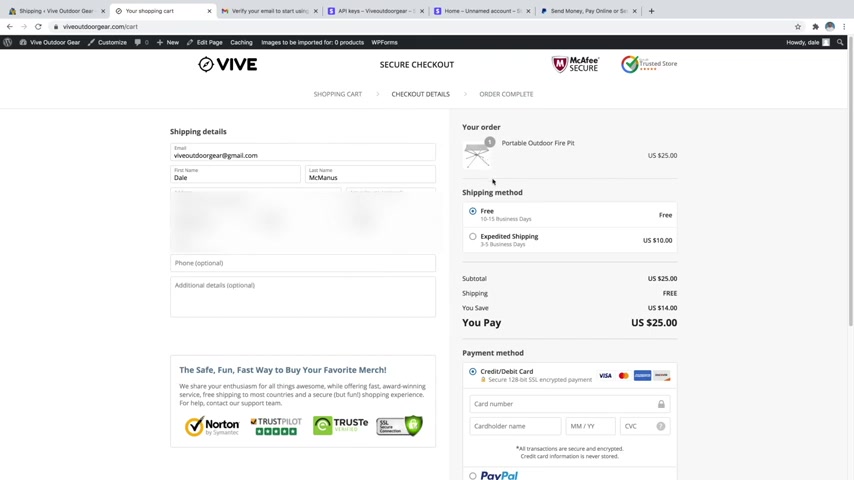
So content is planning application .
So just copy or type in anything you want over a year , click on save .
So similarly you can create four different counters and click on save now .
OK .
OK .
Now let's add this background color , OK ?
This background image .
So for that just click on this pencil button , this container setting go to background , background image , upload image and select the image you want as background .
So let's select this one .
Click on open insert into page , OK ?
Make sure it is center , center , no repeat , fine , just click on save again , scroll up , click on update again , come back to your website refresh and let's see the changes .
OK ?
As you can see this is the counter and we'll also add some padding top bottom later on .
Now let's see the next section .
OK ?
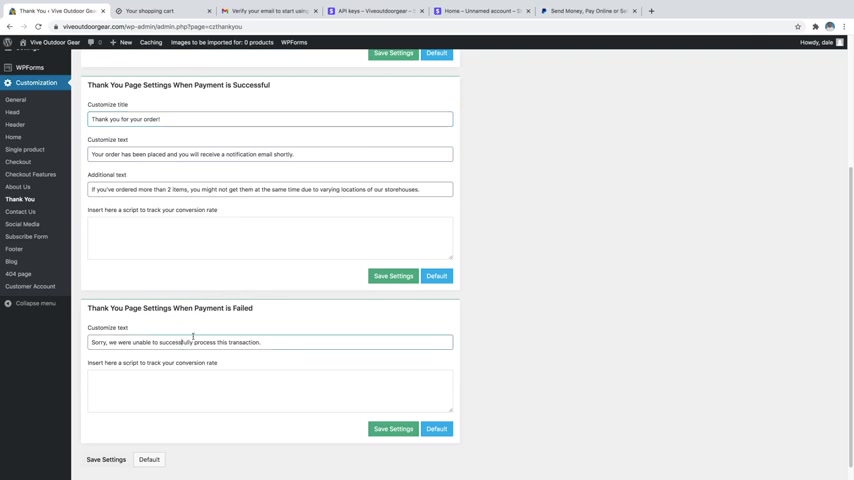
Now after you do so just click on update .
Now refresh this page .
Now , as you can see guys , this looks awesome .
So that's why I didn't do this setting at that time because at that time , I would have just entered 50 clicked on save and you guys would have just wondered why did I put 50 over there .
So this is the reason why now let's take this thing uh about over here .
So let's do that also .
Now select this one , OK ?
This button click on this uh edit button design .
Now go to margin top and put in minus 22 .
OK ?
If you put only 22 OK , then it would come down actually because it would add 22 pixels margin at the top .
So this button would come down , but we are putting minus 22 .
So we are saying move upwards 22 pixels , OK ?
So that would really help minus 22 margin .
Top click on save again , update , refresh this page .
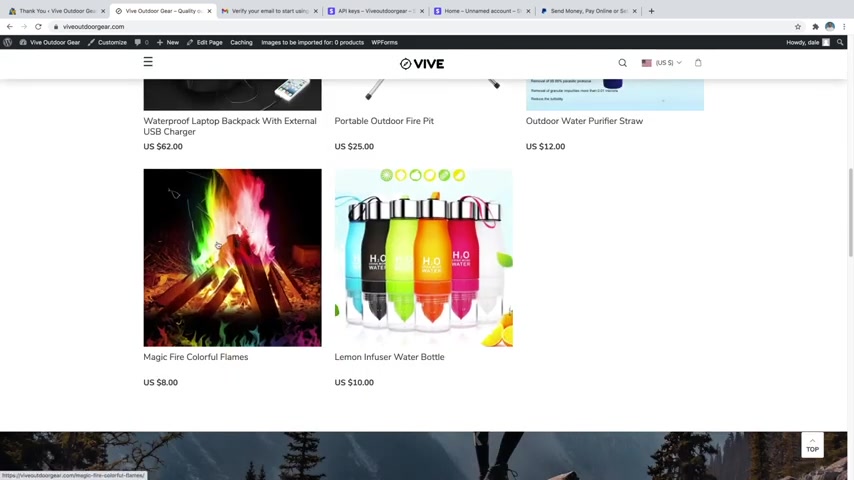
So I'm just gonna go over to my site and I'll just go ahead and add a product .
I'll just do like this magic fire , colorful flames one and I'll just say add to Cart , I'll just do the 10 g one add to Cart and then we've got it in our cart over here .
So now I'm just going to proceed to check out as if I were , you know , actually a customer and then you can see uh that you've got to fill out the information here .
So let's just say I'm a customer , I'm filling out my info .
I would put in my shipping info here and then I would just continue to payment .
So again , I'm just acting as a customer here .
So you can do a test payment though as an owner because what you do is whenever you actually sign up for Stripe over here , uh you're actually able to do a test payment with kind of like their , their test credit card .
It's sort of like a fake credit card that doesn't actually send any sort of money .
It's purely for testing purposes .
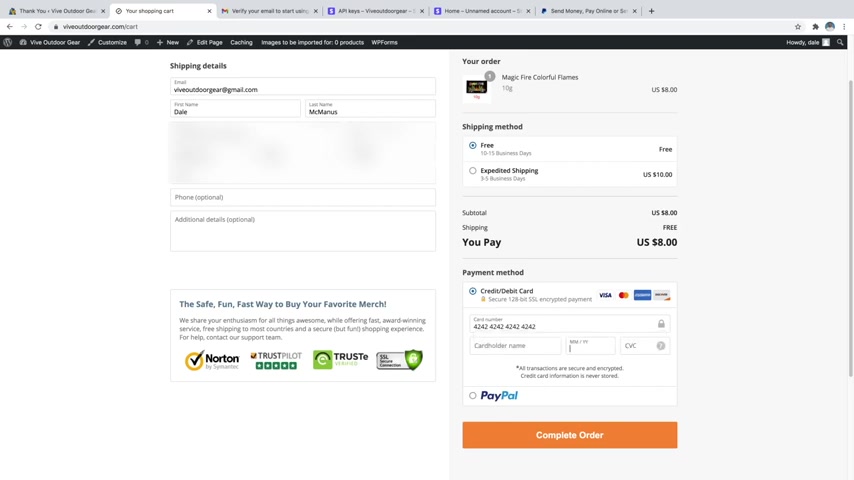
And as you can see over here , we have that beautiful design , OK ?
Now let's add some gap between these two the button and this section over here .
And I also remember one thing , I actually saved that container at that time , but let's delete that container because at that time , we haven't added these settings .
OK ?
So what we'll do , we'll delete that and again , add the container .
But before that , let's add all this spacing over here .
So we'll need some space about this , about this section .
OK ?
So for that , come over here , select this column because we want some space about this select design and select 50 pixels top padding .
OK ?
Now click on save again , click on update , come back to your website refresh and as you can see , we have some space over here .
OK ?
Now here as you can see this looks really awkward whereas here this looks really awesome .
OK ?
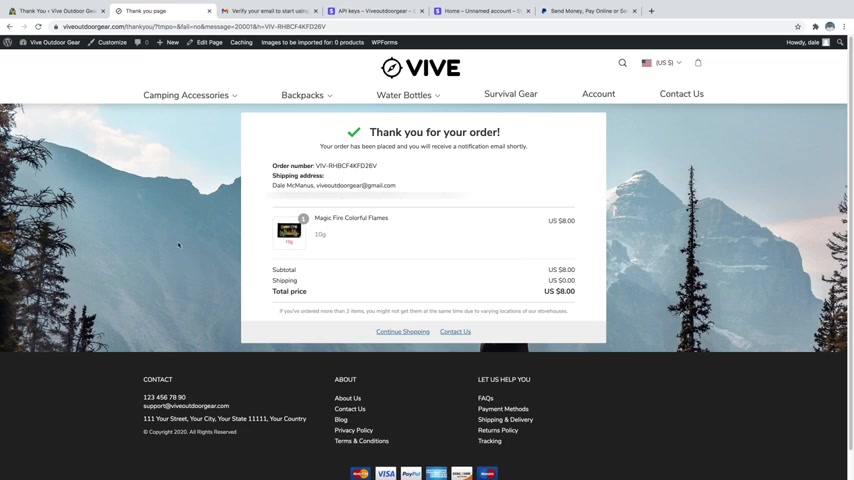
So let's do some changes with this .
Also come back to this page , home page , scroll down , select this section , click on this edit button , OK ?
Design .
Now in the padding uh left and right , put in 8% OK ?
And click on save .
OK ?
And now click on this container setting and make this thing 100% width .
OK ?
And set column a to equal height .
Yes and click on save .
Click on update as you can see now at present , this starts from here .
But why did we do ?
Why we did that 100% width ?
Because we want this to start from here .
But again , we , we said don't start from extreme left or extreme right .
Leave 8% of gap over here .
OK ?
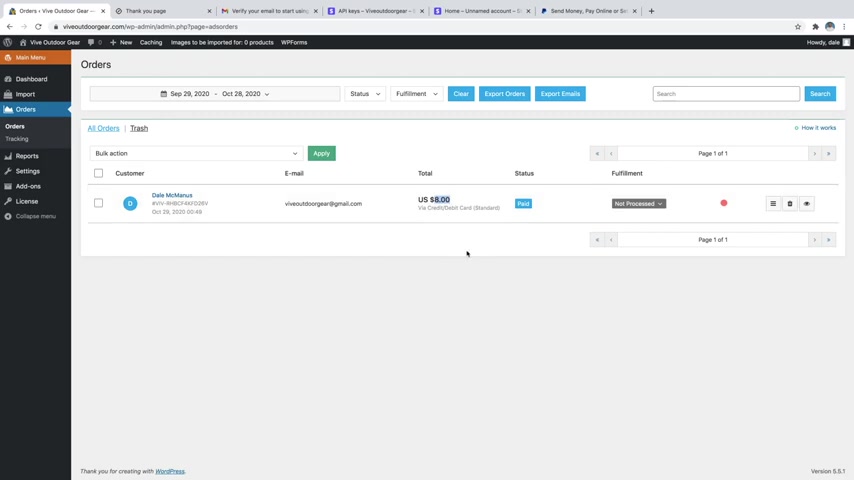
So , on my site , it's up to $8 on Ali Express .
I think it's pretty low .
It's like a $3 product or something .
Now again , if you're selling more expensive products , then those markups are going to be a lot higher and you'll receive a lot more money .
But I'm just doing kind of a cheap product for now just to show you .
So what happens is whenever you get an order as a shop owner , you just go ahead and click on it and it's got the customer shipping details over in here .
And what you'd want to do is just submit this order through Aliexpress .
You can just click on place order automatically and it's going to start auto filling all this information over to Ali Express for you .
And if it doesn't start doing it immediately , there should be a little continue button which you can just go ahead and click on that and you might just have to sign into your Ali Express .
Now , I'm already actually signed in .
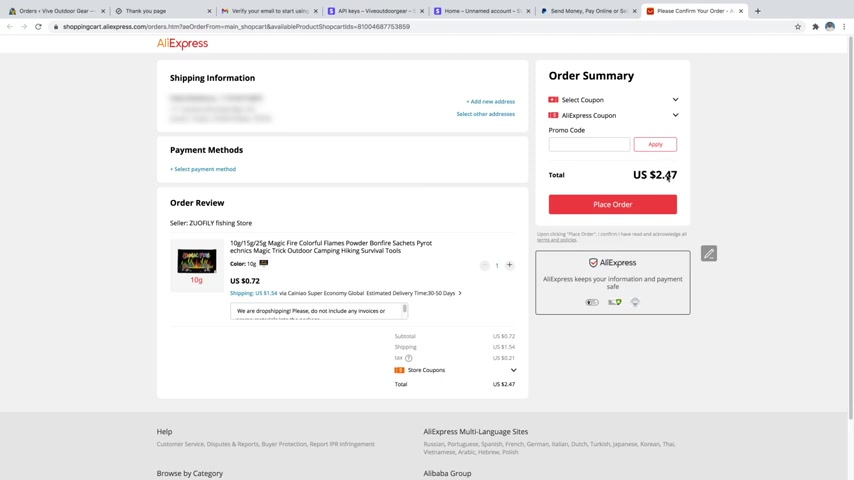
That's why we put all the three , all those three codes , OK ?
I hope you guys understood why we put 100% width and those different paddings .
OK ?
This looks awesome .
Now , now let's add some padding over here also at the top and at the bottom .
So again , come back over here , scroll down , select this section or where is it Counter box .
So we want some padding above counter box and below counter box .
OK ?
Design .
Let's add 90 pixels , top and 50 pixels .
Maybe bottom .
Click on save again , update , come back to the website refresh and we should see the changes now .
OK , guys , as you can see over here , now we have a lot of gap nice looking section over here .
OK ?
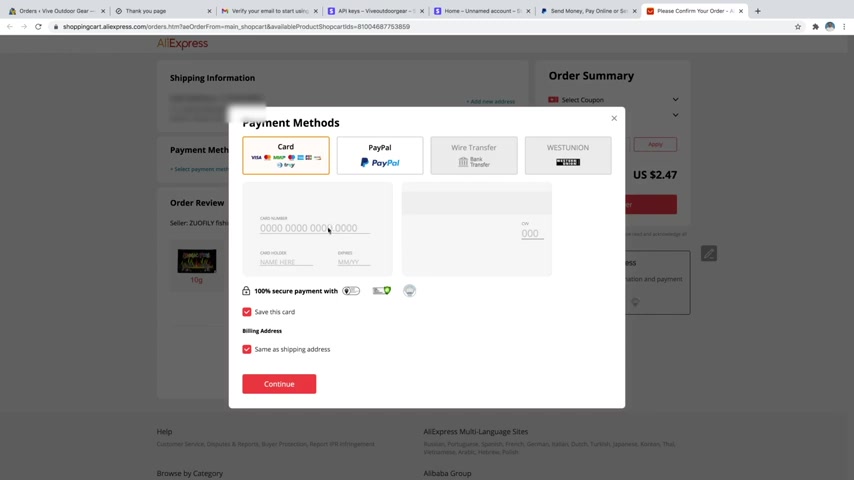
So I hope now you understand why we put those numbers over there .
OK ?
Now let's create these portfolios before creating anything else .
OK ?
So let's start creating these portfolios for that .
Again .
Come back to your website how our portfolios click on portfolio categories .
So first we'll have to create a category , then we'll add a portfolio under that category .
So you can create a portfolio under any name and under any name category .
For example , let me create a commercial category , OK ?
And just click on add new category and you have successfully created a category .
It is that simple OK .
Now under portfolio , just click on add new to add a new portfolio .
Now let's see how a portfolio looks like .
Just click on this Florida Health facility .
OK ?
So this is how it looks like .
OK .
Now let's start adding that .
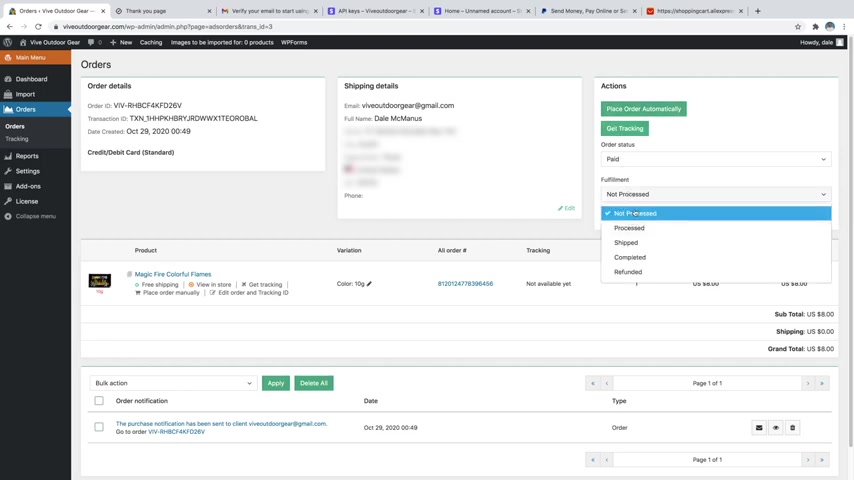
But again , I forgot we had to , you know , copy and copy these things , save these things and we saved the earlier version without gap .
So let's put the title uh Florida Health Facility .
OK ?
Now select this category commercial , you can add new skills tags from here if you want .
OK ?
Now scroll down over here .
OK ?
In the portfolio .
Now let's see all these settings over here , width of the content .
So at present , it is set to full with if it is not set to full width , then then just click on this full width button , use 100% width page , it is set to know but we have to select Yes .
OK .
Show project description title .
No , we don't want that .
OK ?
So show project details .
No , we don't want that because we'll be adding all these things manually .
OK ?
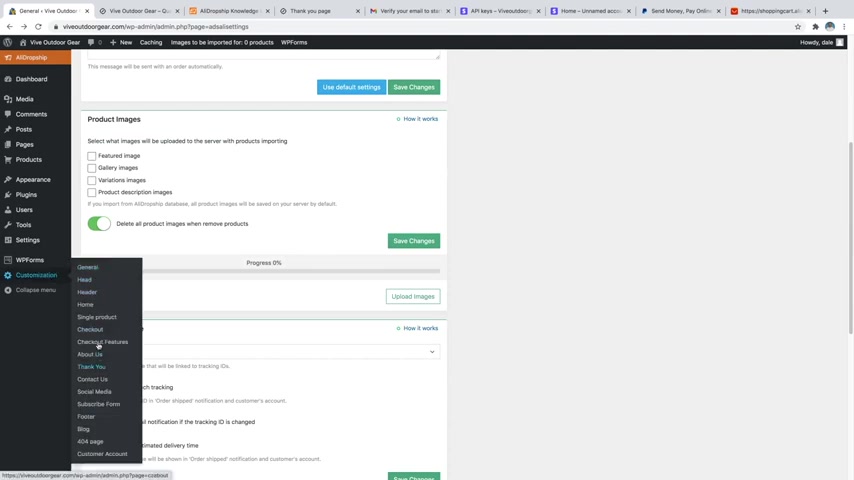
So we don't want all these things disable first featured image .
Yes .
OK .
Then what we have , we have all these things then open link in new windows if you can set this to Yes , show related projects , no hide them .
So show share , share box , no hide them also , then show previous nextag , no hide this thing also .
OK ?
Because we don't need these things .
We'll do , we'll be doing everything with you manually .
OK ?
Then go to page and again , 0% vote the top and bottom padding page title bar , hide this thing .
Now , publish this page .
Now let's first go to the home page which we created this page and copy these both sections and also copy this thing which , which will , which is very important and we will need all these things again and again .
OK ?
So click on these pages , delete this page , sample page .
You don't need this .
So just click on this trash button .

And yeah , we've got an awesome website here with a working menu up at the top .
We've got our banner images here with the little shop .
Now , buttons that go to our various sales that we want .
We've got our products in here , which is really cool .
We've got a promo banner here .
We've got our featured product slider here , which is awesome .
And we've got our footer down at the bottom .
If you do want to set up a subscribe form , you can do that by just simply going over here and going to customization and you can just click on subscribe form and set that up with like mail chimp or constant contact , anything that you want to do .
It's a pretty lengthy process .
It's really something that I should just do an entire video for .
So keep an eye out on my channel for that .
And then we can just add any sort of product that we want to the carts .
I'll just go ahead and click on this and we've got an awesome product page here with the price .
You can see that it's on sale , which is cool .
We've got our reviews in here .
Everything is customized .
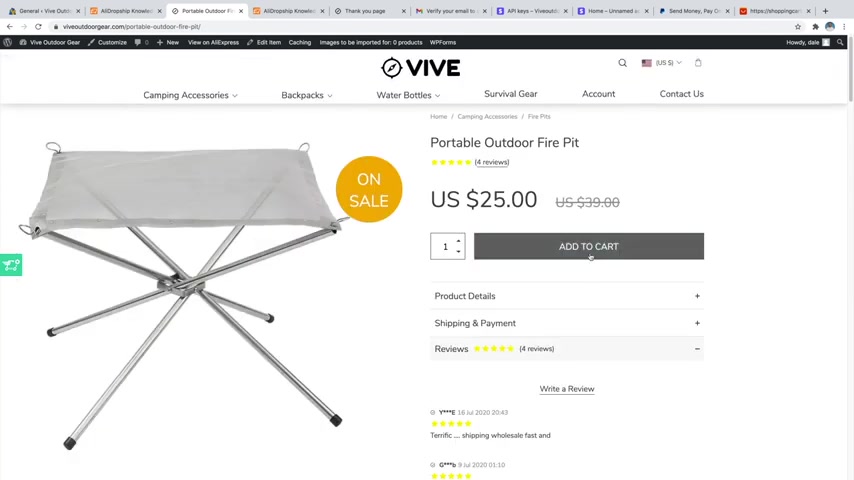
You know , it doesn't start from the beginning , it starts from here and it's ends here .
OK ?
So it is very short .
This is , this has a very short column at the top .
OK ?
So let's do that first .
Then after that , we'll add this title .
So let's delete first and do that setting first .
OK ?
So what you can do just click on this uh setting design .
OK ?
Then here we have this padding .
So under left and right padding type in 15% .
OK ?
Left and right , 15% .
Now click on save , click on update first .
Let's update this page and see as you can see at present it is like this and as you can see now this looks awesome .
We have some gap from both the sides .
OK ?
Are you looking for a way to reach a wider audience and get more views on your videos?
Our innovative video to text transcribing service can help you do just that.
We provide accurate transcriptions of your videos along with visual content that will help you attract new viewers and keep them engaged. Plus, our data analytics and ad campaign tools can help you monetize your content and maximize your revenue.
Let's partner up and take your video content to the next level!
Contact us today to learn more.