https://www.youtube.com/watch?v=gkyG5Bhgu1Y
How to Draw Animal Fur (Cats)
OK , so today I was actually intending to do a video , Uh , a spear drawing of Bruno Mars .
But all I can say is that that didn't go to plan .
So instead , since I have all the , uh , the tripod and the camera set up , I thought I'd treat my subscribers by , um , doing a video about fur .
And and I've been getting a lot of requests for fur today , So I'm gonna be showing you this drawing that I've started and how how I've started to do the fair and how I'm going to be , uh , making it look more realistic .
So I've done another video on fur before , but this one is going to be more related to animal fur .
And it's just gonna be generally better because the last video I don't feel was wonderful .
It was about a year ago when I did that video , and I think I've progressed a lot since then .
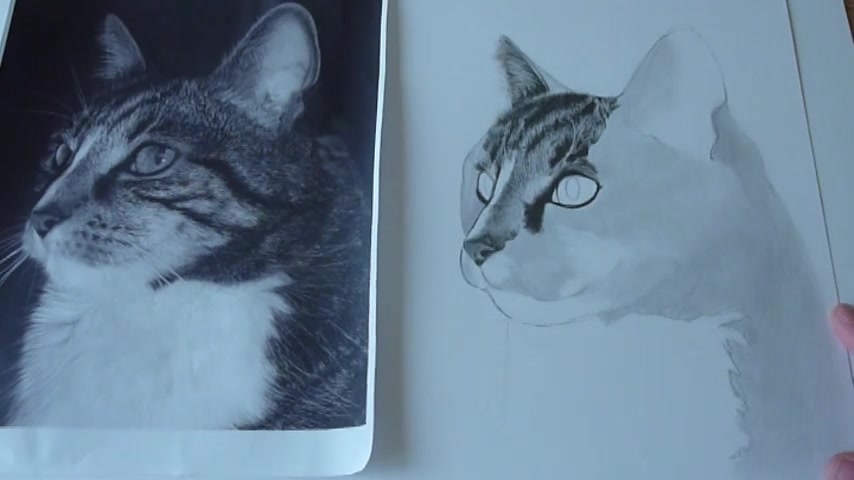
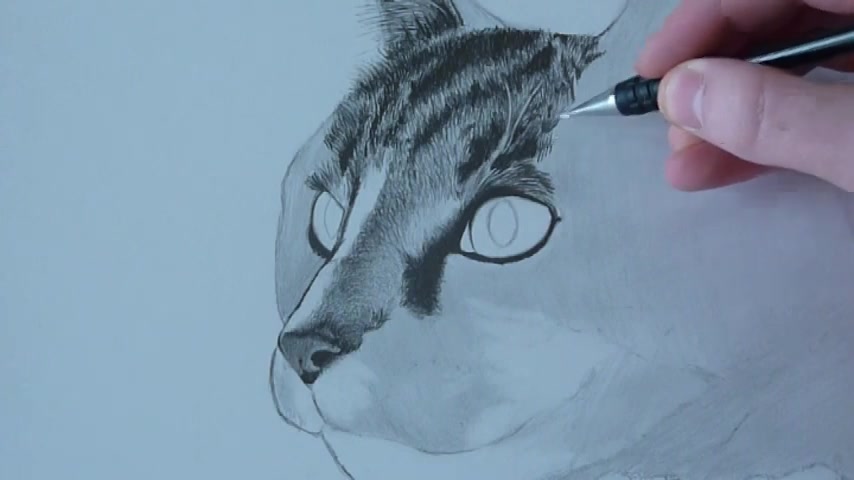
OK , so this is my cat .
And as you can see in the picture , let me zoom out .
We can see in the picture .
It's not quite the same yet .
Now the clear points are around here .
OK , you can see that they're not quite anatom anatomically correct .
But the anatomy is not what I'm going to be working on today , OK ?
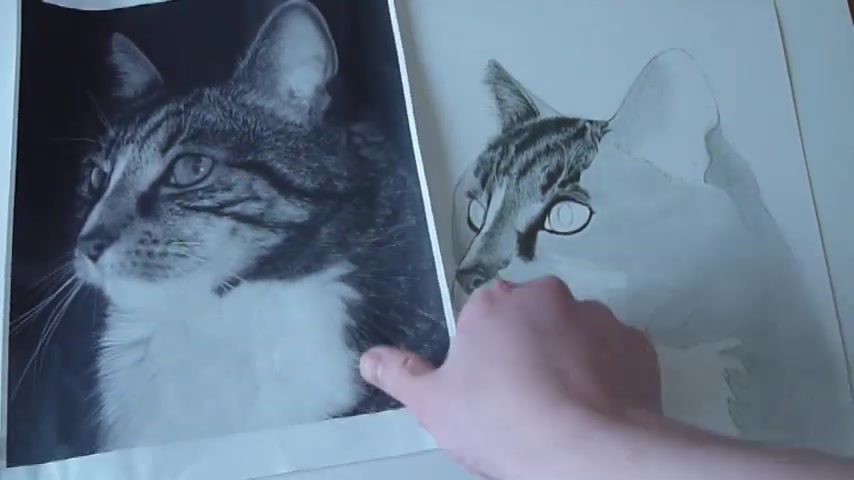
So just let me zoom in .
Sorry about that .
Zoom very slow .
OK , so hopefully you can see a little bit of the detail .
There Something to notice for cats ?
Is that around the nose ?
Um , you can see the the fur is very light .
It's , um you can't notice it as such as individual lines at the moment .
You can If you go even further , you can see that I've drawn each line separately , but it's it's very smooth .
The texture is not as , uh , Bumpy .
I suppose you could say , uh , whereas up here on the forehead , you know , the the hairs really do stand up and you can see a difference in the levels .
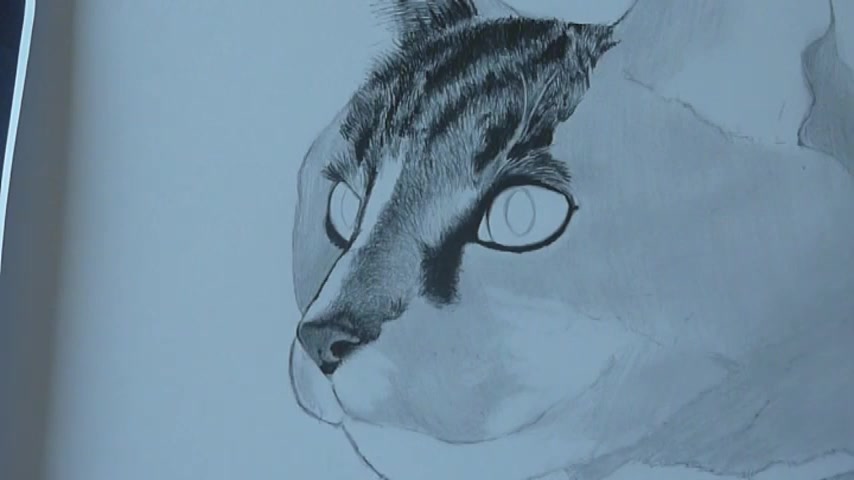
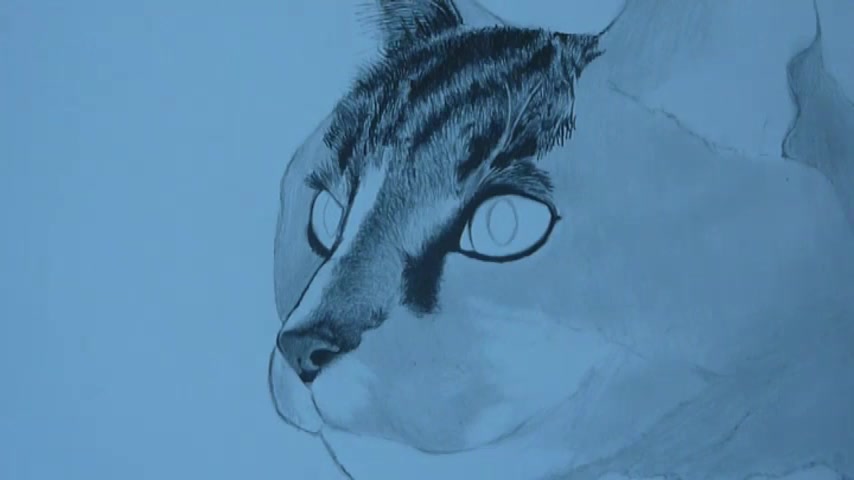
Um , and this is the difficult part .
Really .
This you could , without any practise , start to do this just by doing line after line after line line .
Whereas for this one , even though it follows the same principle , it's just a lot harder to do .
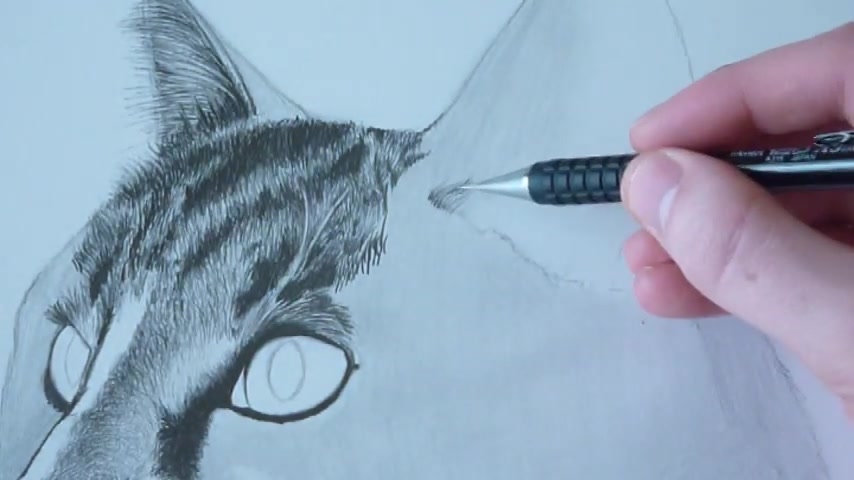
I find So So what I've been doing using mechanical pencils .
As always , these are the best because the point always stays very sharp , and you want every hair to be made from a sharp pencil , some mechanical pencils .
These are the best , and you're just flicking upwards , as you can see here .
Mhm .
Now what I would advise is always do your fare upwards because it's to do with the biomechanics of the hand .
Bring it down .
You can actually get not quite the , um , the line that you desired .
If you're bringing the pencil line down , whereas going upwards , it's generally always going to be what you want it to be .
You can practise that yourself and see if it if it works .
But that's generally what I've found and what science really agrees with .
So take that advice , Um , and just you need to start .
Just do the lines like this , and you can you can see by going upwards .
What you notice is the bottom of the hair , which is where you have pressed the pencil down first , which is slightly larger , actually looks like the root of the hair follicle , so that seems to work really nicely .
Mhm .
Another thing to notice might be to start quite high and then move lower because you want the hairs lower ?
Um , to appear in front of you of you .
Sorry .
In front of the hairs behind .
So these will appear above these hairs above it .
Yeah .
OK , so you're just filling in the gaps .
Really ?
Uh , using this technique , um , and eventually , you should start to see what looks like here .
And then once you've began doing this , uh , and you've covered a large area that said this area , uh , you can start building in the darker tones .
Darker tones .
You could just go over the same line heavier or a few more times , or just around the area .
When you go around the area , it will make it appear darker , like this one .
Try to avoid doing zigzag lines like this .
You want this to be all flicks ?
OK , all right .
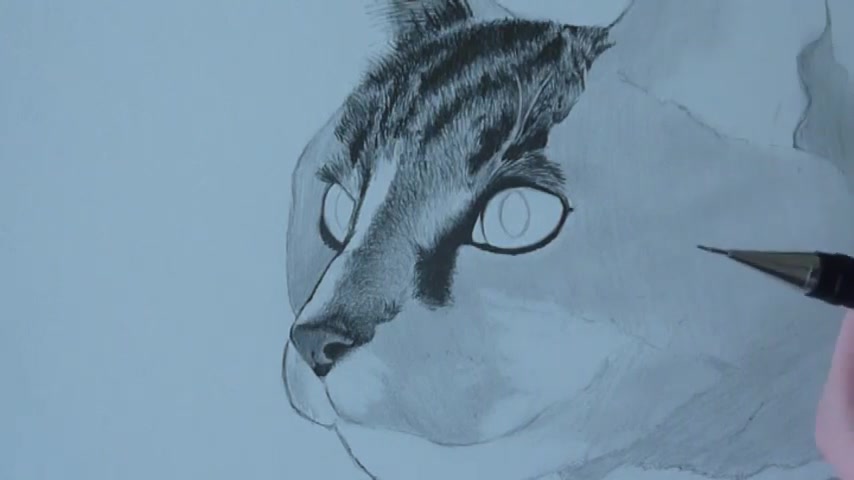
Firstly , I should apologise , because , um , I can't zoom it any further without it .
Uh , defocus .
So , uh , I'm just gonna stay here .
There should be enough detail for you to be able to see what I'm doing now .
I'm gonna be doing the lower part of the year .
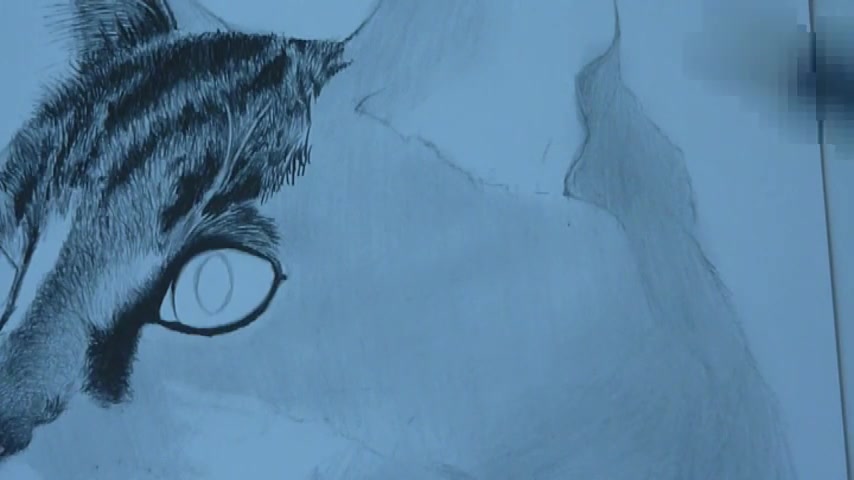
Uh , it's quite simple .
Like I said , you're moving the pen upwards .
You can rest stroke the same line , Uh , the same hair follicle , Uh , more than once , as long as it clearly is the same line .
You know , if you start doing sketches like this and it , you seem it seems like there's a loads of lines next to each other .
It's not really gonna look like hair .
Uh , it's gonna look .
It's hard , hard , really to explain what it will look like .
But basically what I'm trying to say is that it won't look as realistic as what you want to achieve , so keep the lines nice and distant .
Now , these lines are quite awkward because they are coming in moving to the right and then moving upwards .
But it's no problem .
I don't think .
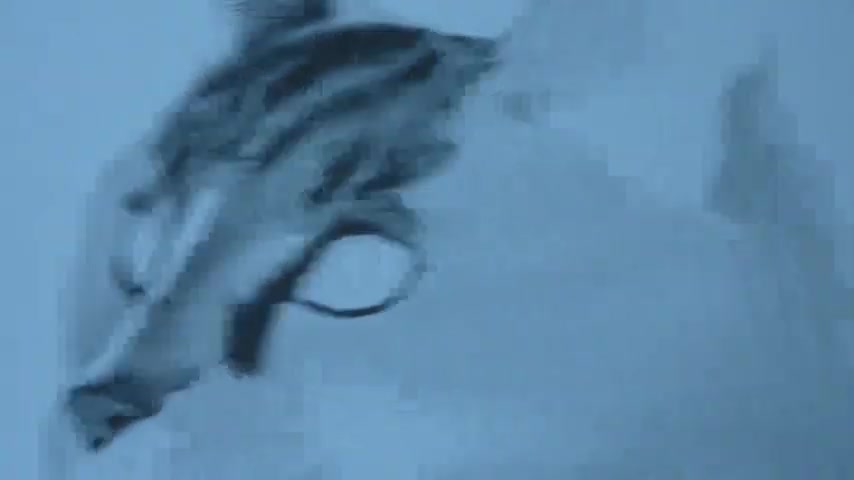
OK , so once you've started doing a fair few lines like this one a Oops , sorry .
Um , you can move on to your darker pencil , which I was using before , and call it the base .
You'll find that the base is generally darker , and in this picture , there is actually a lot of black hair underneath this , So this will continue into the black part of the hair .
Now , to make these hairs stand , uh , apparent .
You can actually sketch some sort of darkness behind it need to ensure enough gap is left between the hairs , though I don't know if you can see what I'm doing , but , uh , hopefully you can get the gist of what I'm trying to achieve , All right ?
And this is obviously just going to be , uh , carrying on all the way down here .
If you start to make a mistake with hair or if you've you've done a dark area , you can use the putty rubber , which I've talked about many times .
Um , and you can just wipe away .
You don't even need to use much pressure providing .
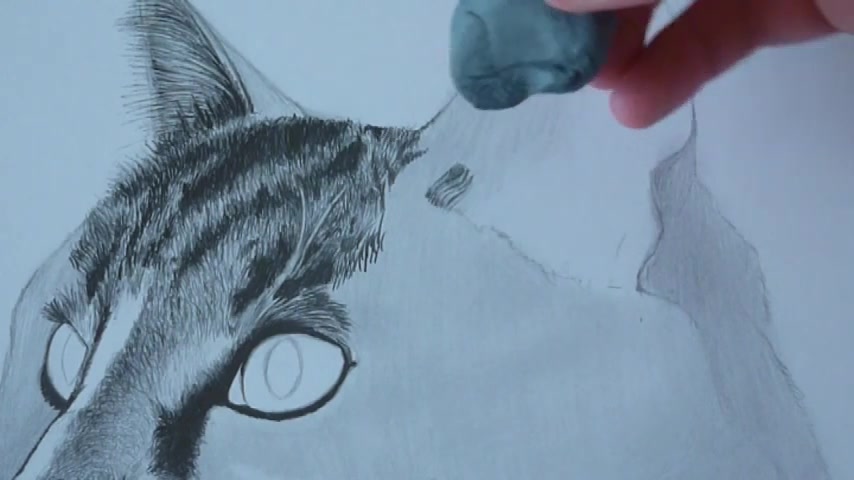
You haven't pressed down hard with the pencil , and it should be lifting off as I think you can see here .
Just make sure there's a fine point and you're not lifting off the whole thing .
Once you , uh , once you've done a lot of hair in one area and you think it starts to get a lot darker , this is a great technique to to highlight some of the hairs , make it look more realistic , more depth and just generally making the the piece look more how it should be in the picture , which is the goal of realism .
All right , so there's quite a few tips there .
Uh , try and give some of them a go , and hopefully that was helpful .
Are you looking for a way to reach a wider audience and get more views on your videos?
Our innovative video to text transcribing service can help you do just that.
We provide accurate transcriptions of your videos along with visual content that will help you attract new viewers and keep them engaged. Plus, our data analytics and ad campaign tools can help you monetize your content and maximize your revenue.
Let's partner up and take your video content to the next level!
Contact us today to learn more.