https://www.youtube.com/watch?v=YXiIIbg89Ws
How to Create An Appointment Booking Website
Hi guys today , we're going to see how you can create an appointment booking website in wordpress .
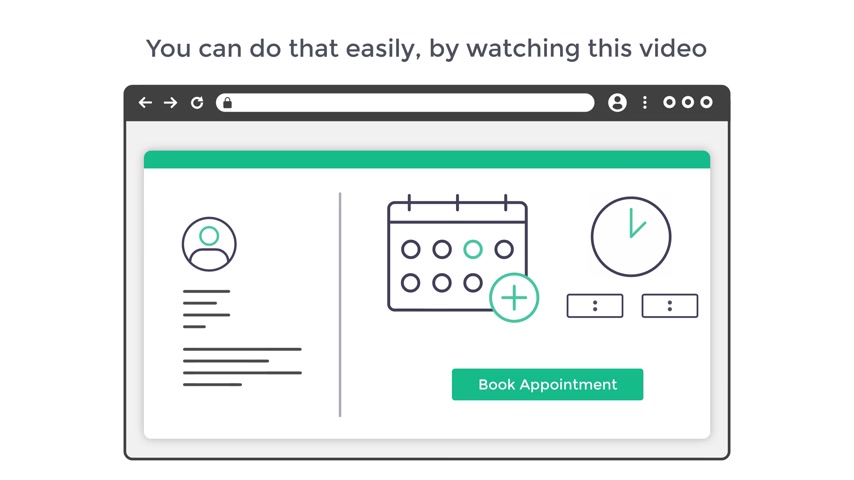
Let's say you have a business or service and you want to create a website where your customers can book an appointment for your service .
You can do that easily by watching this video .
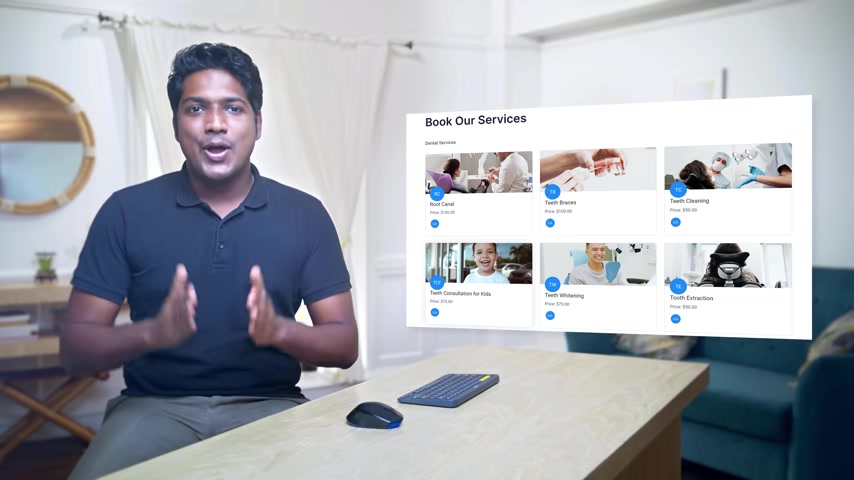
So after watching this video , you will be able to make an upon booking website like this , but you will be able to add your services like this .
And when your customer visits your site , they will be able to choose the service they want .
Now here they can select the date and time they want for the appointment and now they can go ahead and make the payment to book the appointment .
Once your customer books an appointment , you will receive an email notification like this where you can see all the details about the customer's appointment .
And finally , we will also see how your customer can cancel an appointment after booking .

So make sure you watch this video till the end to learn how to do it .
Ok , I'm brand from website learners and let's start creating an appointment booking website .
So we are going to create a website in just four parts .
The first part is to launch a website .
Now , this is where we get a new website live on the internet .
So to launch our website , we are going to do two steps .
The first step is to choose a name for your website .
So to choose the name , just click the link below this video and it will take you to this page .
Now , enter the name you want here .
I'm going to enter dentals solve dot com and then click search .
But you can see that this name is available .
Once you choose your name , you can go to the next step , which is to get this domain name .
And hosting domain is the name of your website which people need to enter to visit your site .
Hosting is the place where your website's files are stored , like your website's images and files .
So to get this domain name and hosting , let's click add to cart and then click continue .
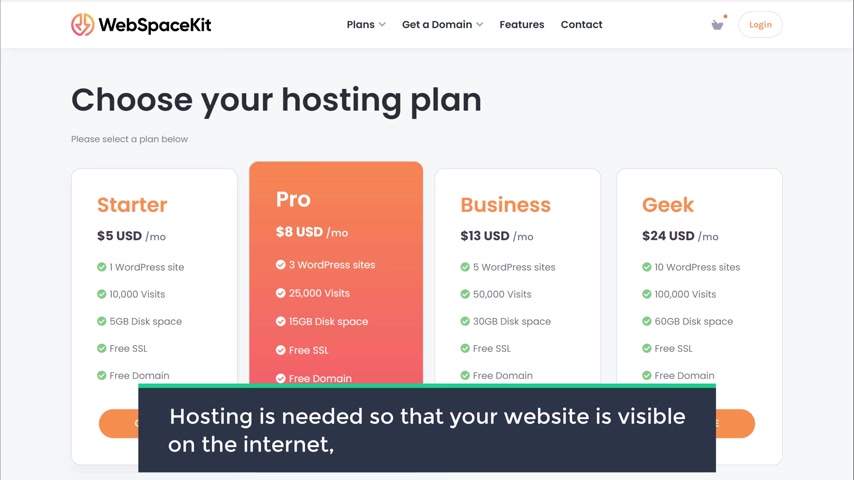
Now here it will ask us to choose our hosting plan .
Hosting is needed so that your website is visible on the internet and can be accessed by anyone .
And as you can see here , hosting provides the space to store your website on the internet .
So based on the number of websites you want to build , you can choose a plan here .
I want to build one website .
So I'm going to choose this plan .
Now , here you can choose how long you want the hosting for , you can choose any length here as you go longer .
You can see that we're getting a discount .
I'm going to choose 12 months and we continue .
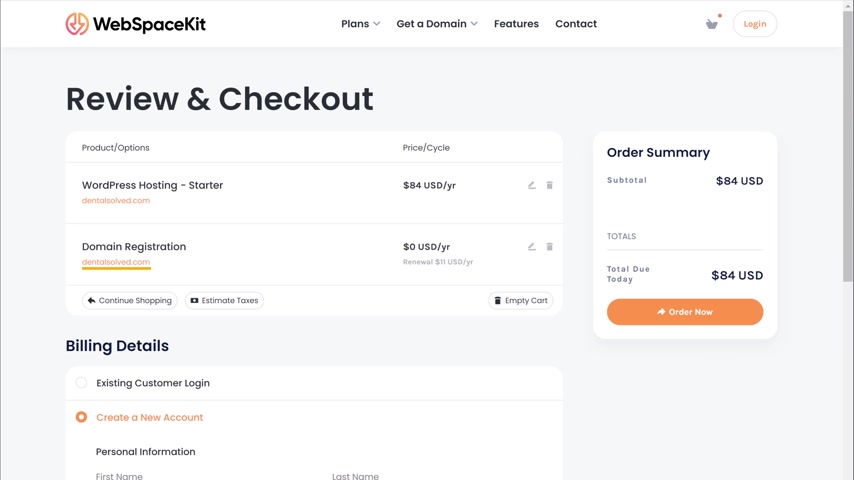
Now here , you can see that we're getting our domain , which is dental sol dot com for free and our hosting .
Now , both of these are valid for one year , which means once we complete this purchase , our site will be live on the internet for one year .
So to get our domain hosting , let's fill up these details .
Now , here , select your payment method , enter your details and click order now .
Ok .
So now we've successfully placed the order and we've got our dominant hosting .
Now , if we queue up , you can see here we have successfully got our hosting and domain .
Ok ?
So once you've got your hosting and domain , your website should now be live on the internet .
So to check that , let's open a new tab now , free type dental soul dot com and press enter .
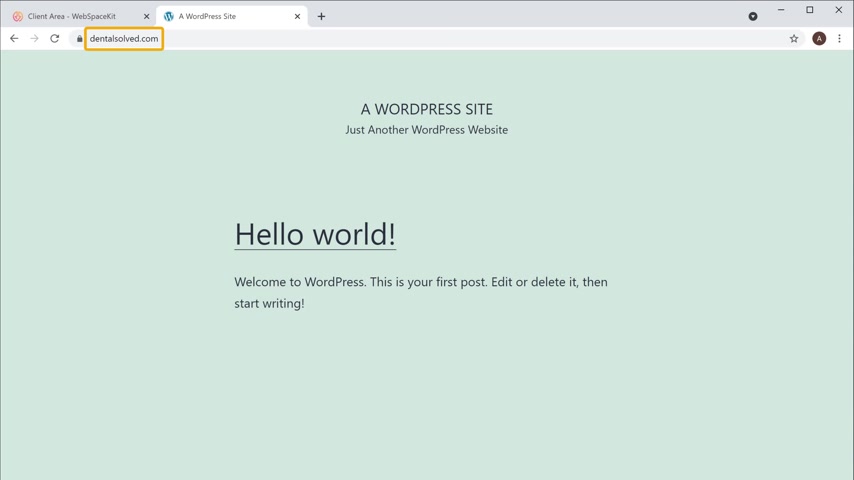
You can see that we have got a brand new website on the name which we selected .
Now , sometimes it might take a few minutes for the domain to become active on the internet .
So if it doesn't work for you , try refreshing after 5 to 10 minutes .
Ok .
So now we've successfully launched our website on the internet .
Once you've launched your site , you can now go to part two of this tutorial , which is to import a sample site .
So to import a sample site , we are going to do four steps .
The first step is to log on to your website .
So to log on to your site , all you have to do is just click here type slash WP hyphen admin after your site's address and press enter .
Now , here you need to enter your user name and password to log on to your worker's dashboard .
Now , once your site is active , you should have received the login details of wordpress in your email .
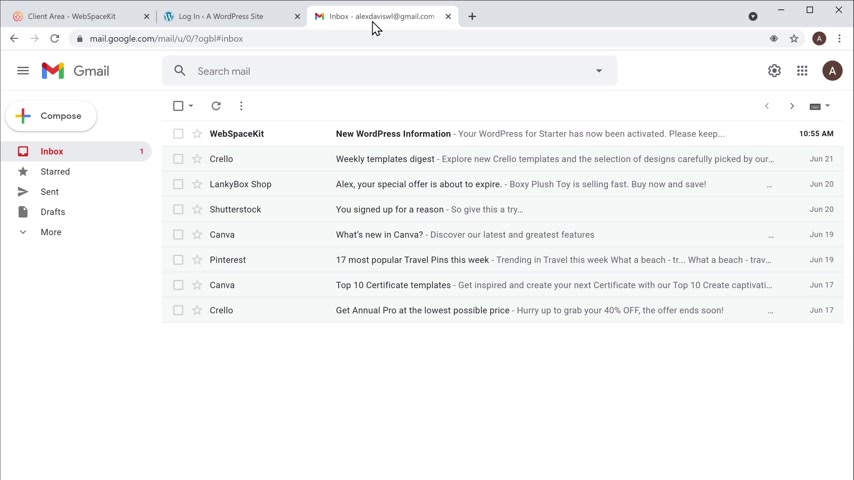
So let's go to Weinberg and you can see we have got this email just open it .
As you can see we have the user name and password .
So let's copy this and paste it here .
Now let's copy the password based in Europe and then click log in .
You can see that we have successfully logged into our wordpress site and this is the wordpress dashboard .
Now , this is the place where you can control your website .
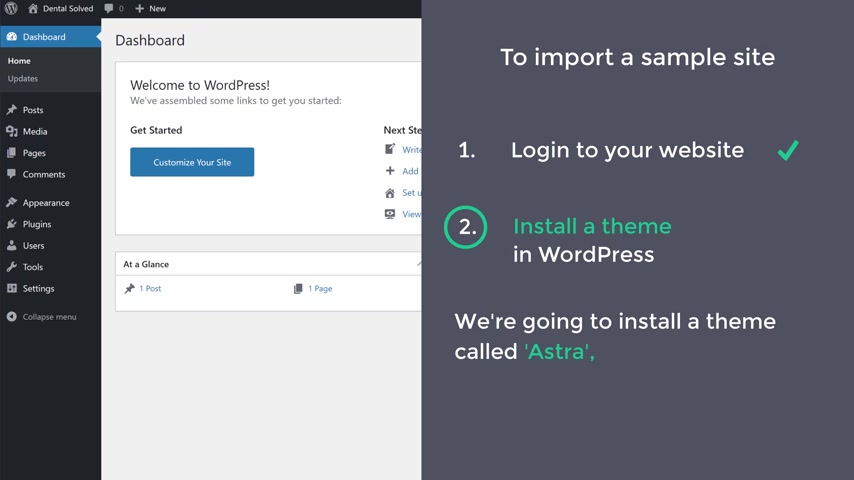
Once you've logged in , we can now go to step two of importing the sample site , which is to install a theme in wordpress .
So we're going to install a theme called Astra , which is going to let us import the sample site .
So to install the team , just go to appearance and click themes .
Now click add new team here , search for a theme called Astra and you will get this theme .
This is the theme which is going to let us import the sample site .
So to install the theme , let's click , install and then click activate .
So now we have installed the Astra theme .
Once you have installed the theme , let's go to step three , which is to choose a design for our website .
So to choose a design , let's get started and it will take you to this page .
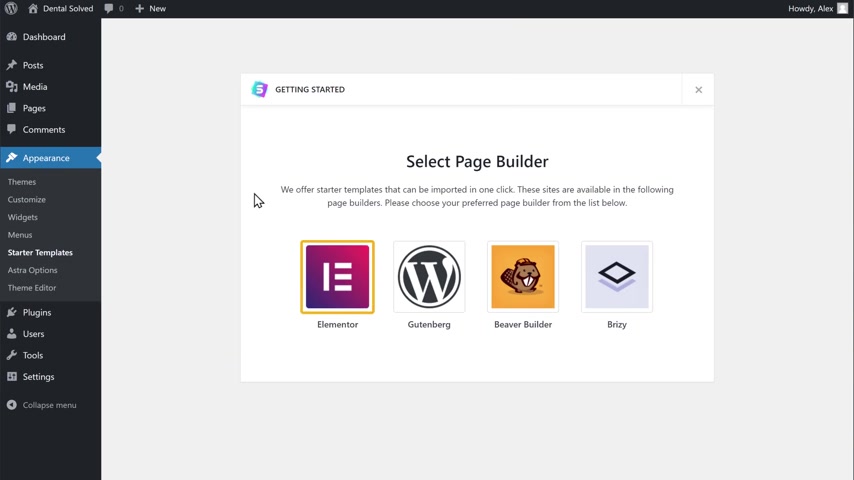
Now , once you're here , just select elemental which will make it easy for you to edit your site .
So let's select that .
And now it will take you to this page where you can see different designs which you can apply to your site .
You can select any design from here or you can go here and search for the design you want .
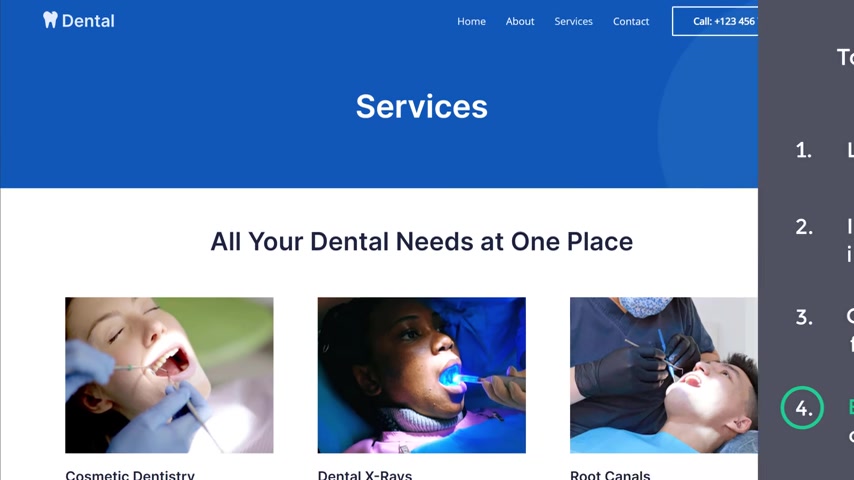
Now , as I want to build a site for dental service , I'm going to search for dental and you will get this design .
So just click on it and here you can see a preview of your site now to import this design into your site , just click import complete site and then click skip .
Now the entire design will be imported into your site .
So now if you go to this tab , you can see that this is our , our site was before it was almost empty .
No free click refresh .
You can see that we have got the entire design into our site and you can also see the website pages which have the sample content in it .
So now we have successfully got the design which we have selected .
OK .
Once you've got the design , we can now go to step four , which is to edit the contents of your site .
So to edit any page on your site , just go to that page and click edit to the mentor .
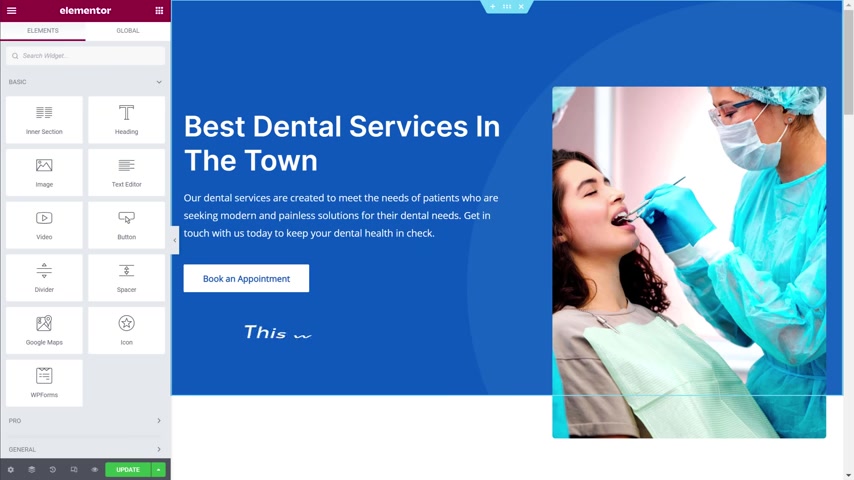
Let's say you want to edit the home page , just click home and then click edit to the element or and now it will take you to this editing mode where you can edit any part of this page .
Now , let's say you want to change this text .
All you have to do is just select the text and enter your own text .
I'm going to type best dental services in the town .
Now , in the same way , you can change any text you want on this page , just select the text and enter your own text .
This works throughout the site .
Next , let's say you want to change this image .
So to change the image , all you have to do is just click on it , select the image here and then drag and drop your image from your computer .
As you can see the image has been changed .
Once you're done with all the changes , you can save this page by clicking update and all the changes will be saved .
Now , if we go back to our site and click the first , you can see that all the teams have been applied .
OK .
So now we have successfully imported a sample site .
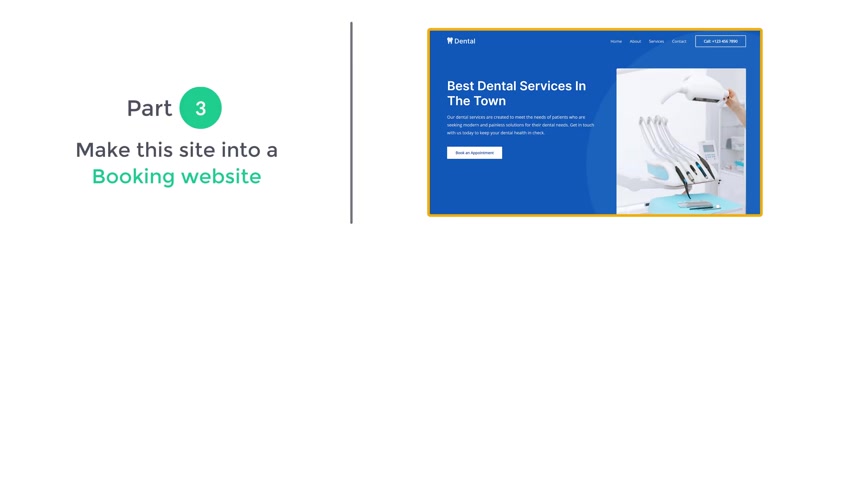
Once you have imported the sample site , we can now go to part three of this tutorial which is to make the site into a booking website .
So to make the site into a booking site , we are going to do two steps .
The first step is to install the Amelia plug in .
This is the plug in which is going to help us convert the site into a booking site .
So to install this plug in first , we need to get the plug in .
So to get it , just click the link below this video and it will take you to this site .
Now , this is the site which is going to help us get the Amelia plug in .
So to get the plug in , click by now , now here you can see we have three different plans which you can choose from .
You can take a look at these features and select the one you want .
I'm going to select this one .
So here you need to enter your email id and click .
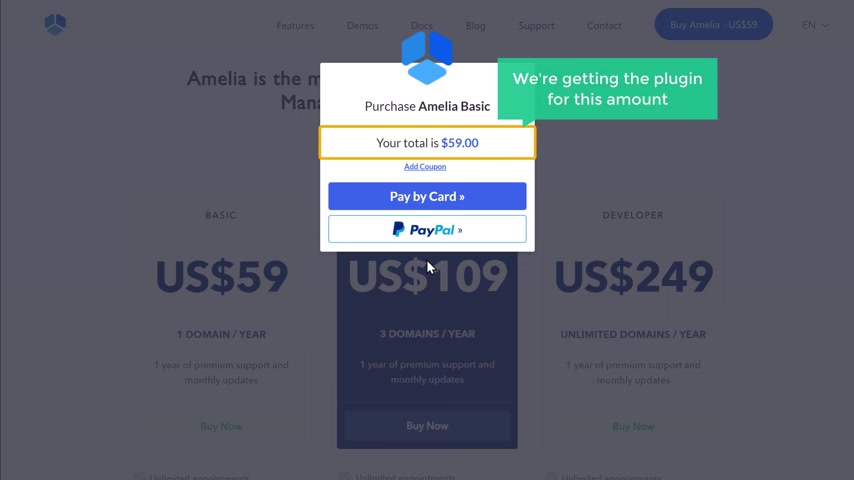
Continue here .
You can see that we're getting the plug-in for this amount .
So let's click , pay , no , enter your details and click subscribe .
So now we have successfully made the payment .
Once you have made the payment , you will receive an email from the plug-in .
So let's go to wine works .
And as you can see , we have got an email .
So let's open it .
As you can see , we have got the option to download the plug in .
So let's click , download and the plugger will be downloaded to your computer now to install the plug-in .
Let's go to our Wordpress dashboard .
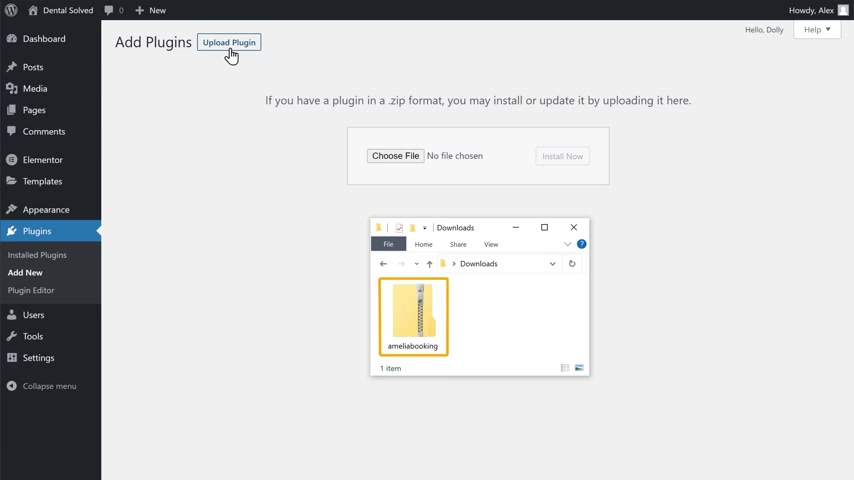
Then go to plugins and click add new now to install the plug in , click upload , plug in and then drag this file and drop it here .
And as you can see , the plug-in has been selected now to install the plug in .
Just click , install and then click activate .
Ok .
So now we have successfully installed the plug in .
Once you have installed the plug in , we can now go to step two of making an appointment booking site which is to set up the plug in .
So to set it up first , you need to add your company details .
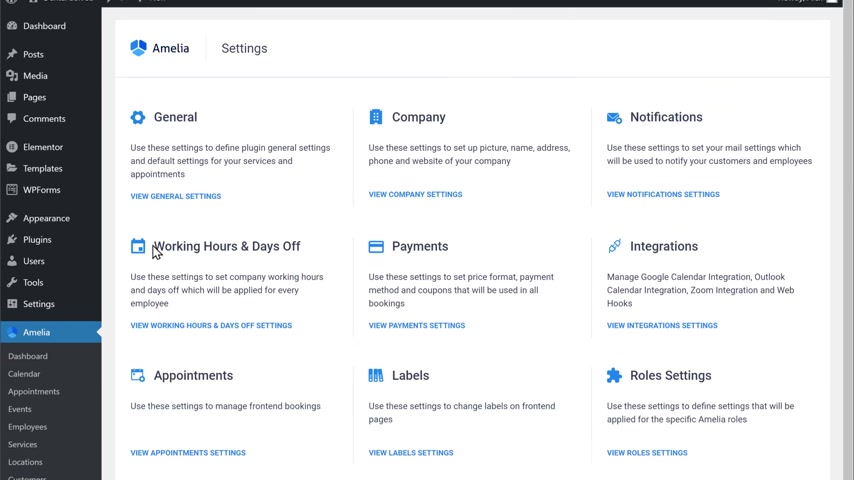
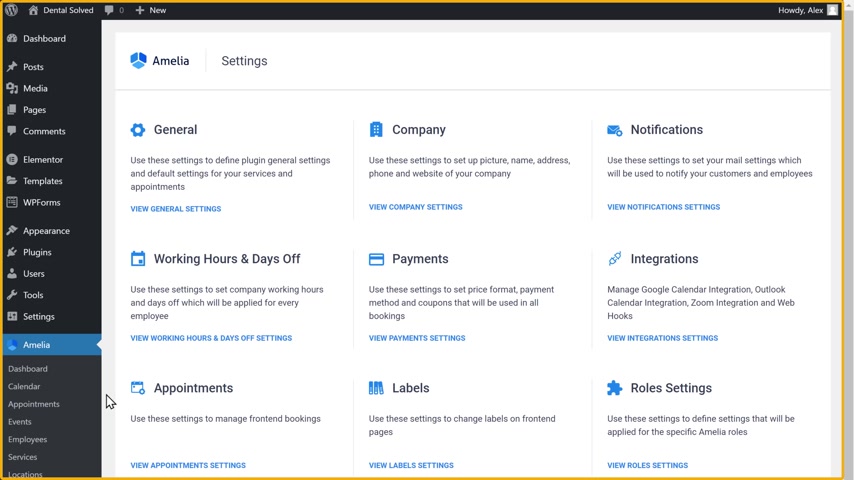
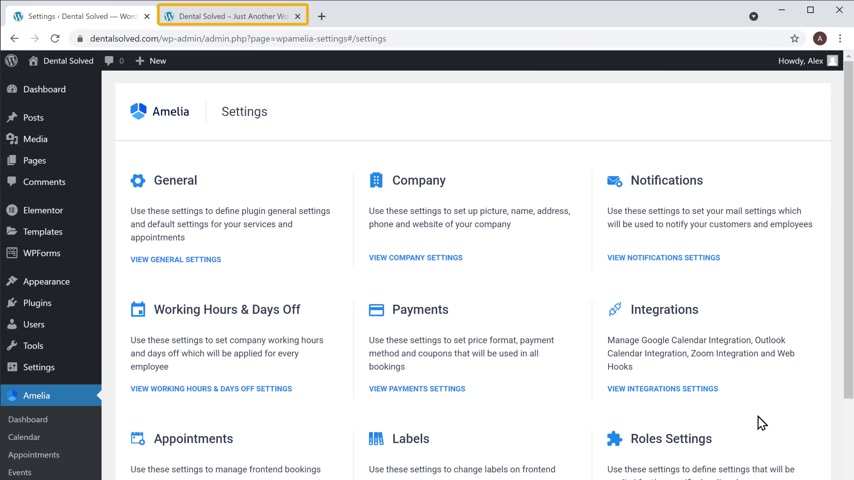
So to add your company details , let's go to Amelia and click settings and you will get this page .
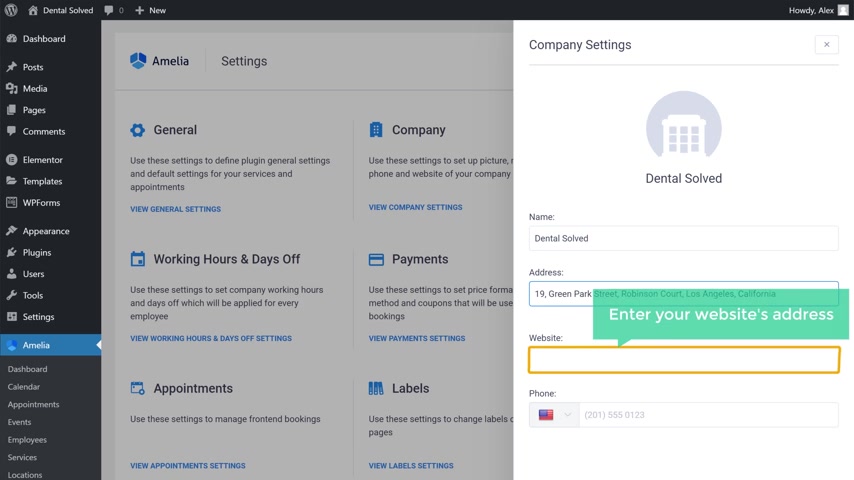
Now , click view company settings and enter your company name here as I'm going to create a dental booking website .
I'm going to enter dental salt and then add your company address here and here you need to enter your website's address and finally enter your mobile number .
Once you have entered all these details , just click save .
So now we have added the company details .
Next , let's set the working as for your business .
So to set the working hours , let's click settings .
Now here you can set the working ask for each day .
So let's click here and select the working as then click save .
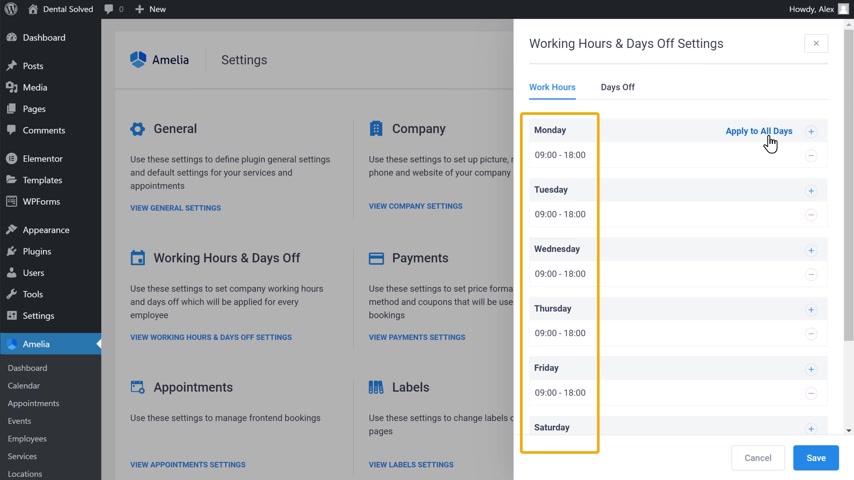
Now , if you won't apply this working after all the days , just click here and it will be applied for all the days .
Once you're done , click save , once you have set up the working as next , let's set up the notification settings .
So to set it up , just click view notification settings .
And do you say it and then enter your email ID ?
Once you're done , you need to enter the admin , email ID here so that the admin will get the email notifications .
When someone books an appointment .
Once you've entered the email ID , just click save .
Ok .
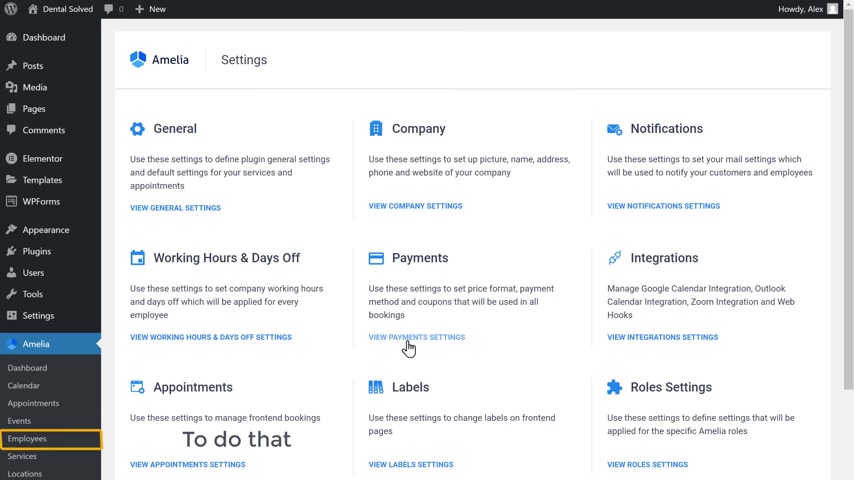
Next , let's go to payments .
Now , if you want to change the currency , you can change it here .
Ok .
So now we have successfully completed the plug in set up .
Once you have set up the plug in , let's go to step three , which is to add the employees to your site .
So to do that , just click employees and it'll take you to this page .
Now , click add employee here .
You need to enter the employee's name and the email address .
Now , if you want to set up the working as for the employee , just click here here .
You can set up the working as and then click save in the same way you can add other employees on your site .
Ok .
Once you're done adding all the employees , next , you need to add the services which you are providing on your site .
So to add the service , just click service and then you will get this page .
Now , here you need to create a category for your service .
So to create it , just click here and then enter the name for your category .
Then click here .
Now you can create all the categories for the services which you are providing .
Once you're done , creating the categories , you can start adding the services .
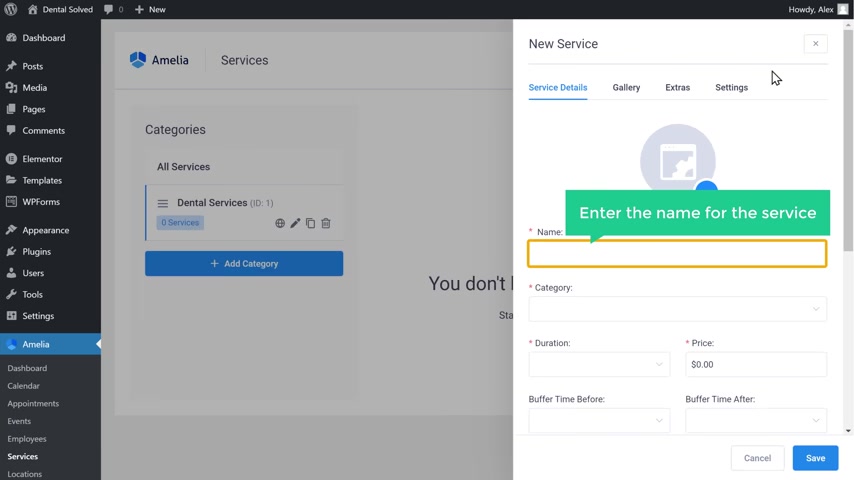
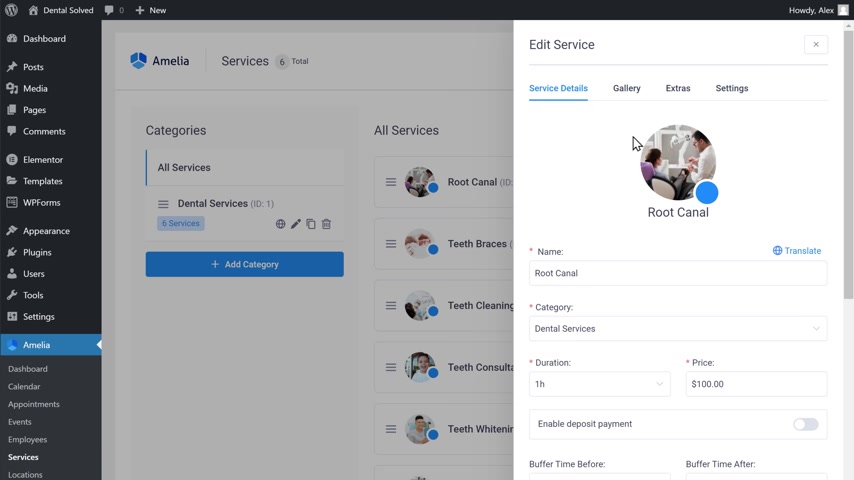
So to add a service , click add service .
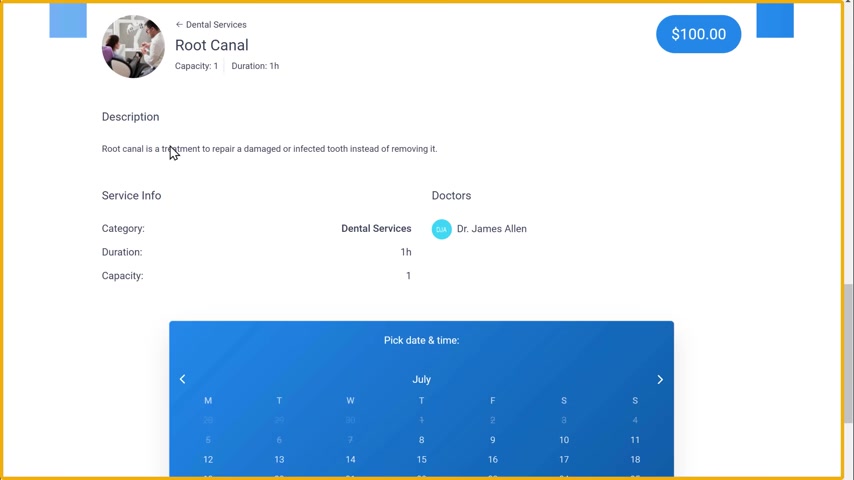
Now here enter the name for the service .
I'm going to enter root canal and select the category .
Now , if you want to add an image , just click here and then drag and drop an image from your computer .
As you can see the image has been added .
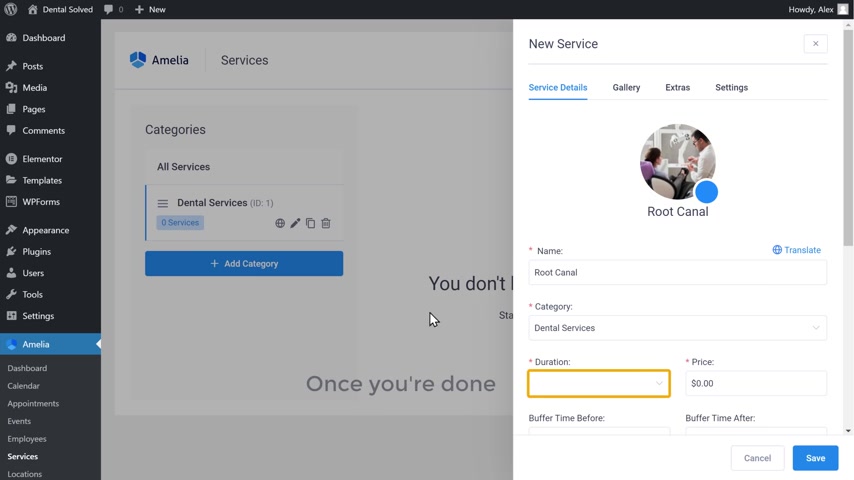
Once you're done , select the duration of your service and then enter the prize .
Now just scroll down , select the employee who is providing the service and then enter a description about the service once you've added the service , click save .
So now we have added the service to the category we created .
Now , in the same way you can add any number of services you want .
OK ?
Once you've created the service , next , let's see how you can add these services to your site .
So to add the services to our website , let's go to this tab and click edit to the element or so just go to the place where you want to add the service .
Let's say you want to add the service here .
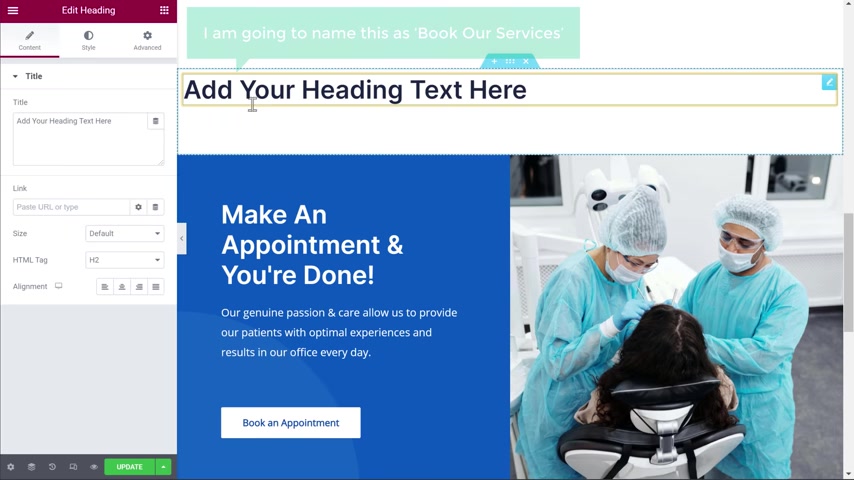
Just go here and select the plus icon to add a new section first , let's add the heading to our section .
So just drag this element and drop it here .
I'm going to name this as book our services .
No , to add the services , you need to insert the short code here .
Just go here and search for short code and then drag this element and drop it here .
Now here you need to enter the short code .
Short code will be available in the description below .
So let's go there here .
You can see the short code .
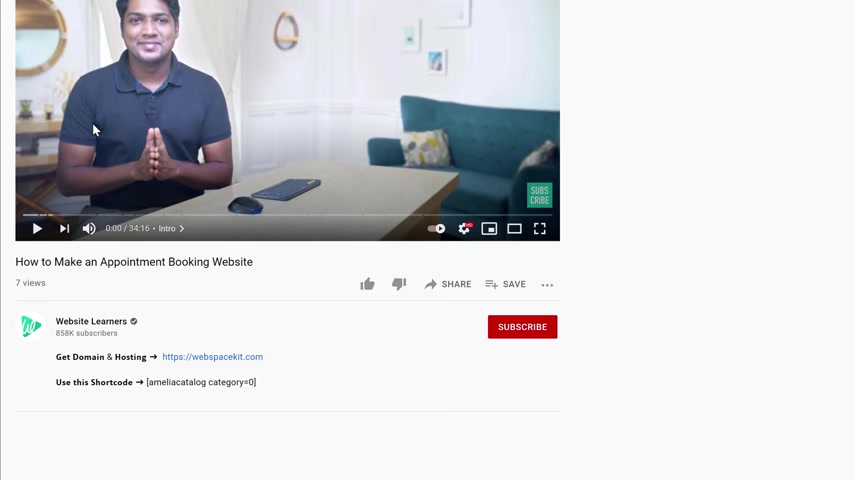
So let's copy the short code and past it here .
Now , the id number of the short code should be the same as the category which we created before .
So to check that let's go to this tab and here you can see that our category ID number is one .
Now enter the same ID number on the short code .
So let's go back to our site and change the ID number 21 .
Once you're done , just click update and all the chains will be saved .
Now , let's go back to our site and take the first .
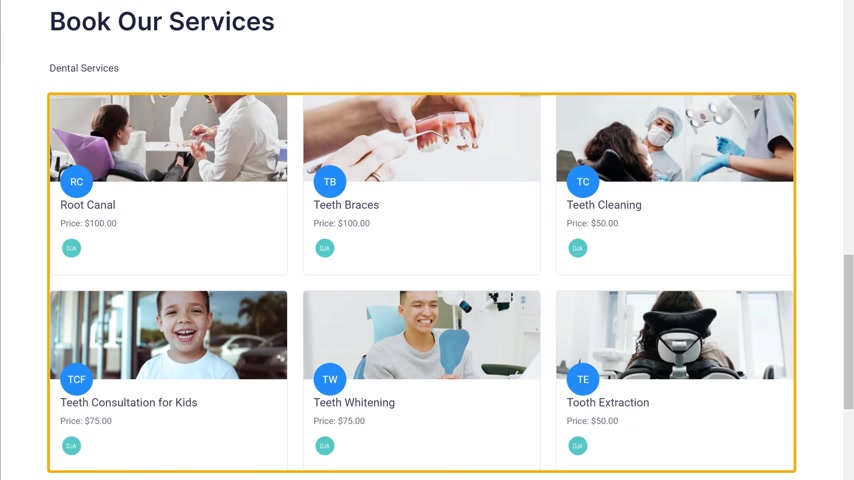
Now , if you scroll down , you can see that the services have been added to our site .
And now if a person clicks on any service , they will be able to book an appointment on your website .
So we have now successfully added the service to our site .
Ok .
Now anyone will be able to book an appointment for these services .
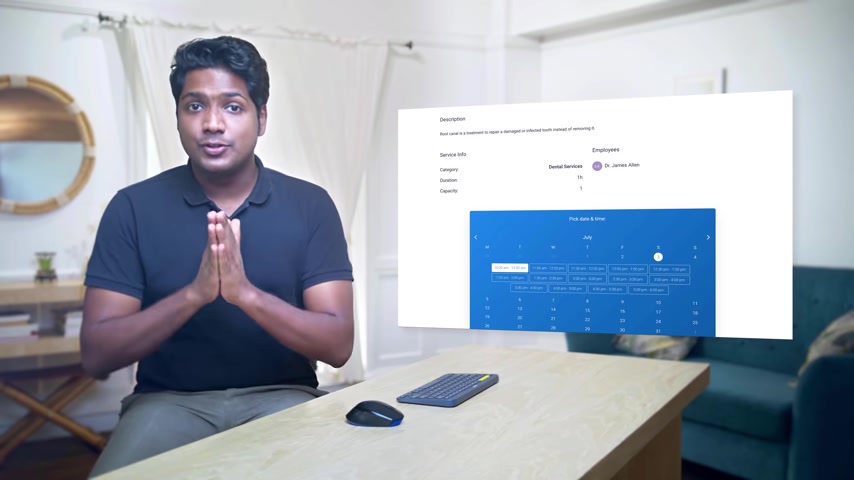
So let's take that just like a customer would do select the service you want .
I'm gonna choose this and you will get this page next , select a date for your appointment , select the available time slot and then click continue .
So to book an appointment , just fill up these details and click confirm .
So now we have successfully booked an appointment .
Now , what happens when someone books an appointment from your site ?
How do you know that you have got an appointment ?
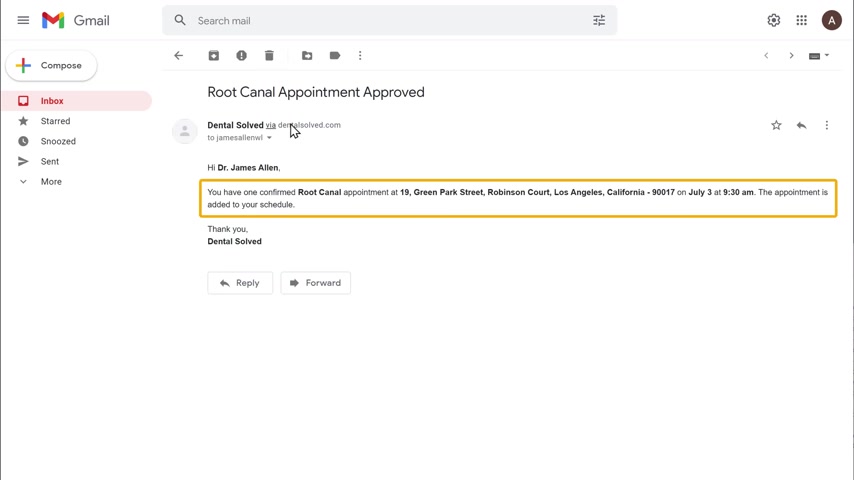
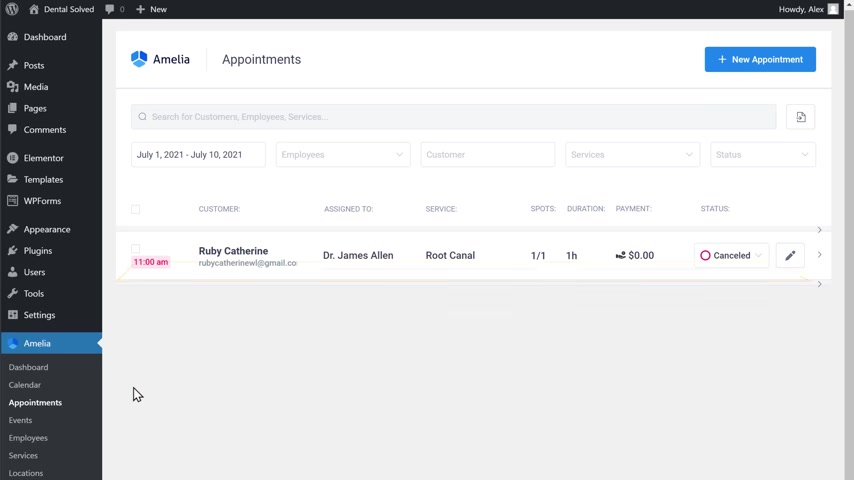
Now , as soon as someone books an appointment from your side , if you go to your inbox , you can see that we have received an email .
So if you open it , you can see we have all the details about the appointment here .
So this is how you can know when someone books an appointment on your website .
Now , you will also be able to see the appointment request in your plug in .
So to see that let's go to our wordpress dashboard , then go to Amelia click dashboard and then it will take you to this page .
Now , just scroll down and here you can see that we have got the same appointment which we received in our email .
Ok .
This is how our customer can book an appointment on your side .
Now , what happens when another customer books an appointment for the same date and time ?
So next , let's try booking an appointment for the same date and time .
Let's go to our side , select the service and you will get this page .
Now , if we select the same date , which we selected before , you can see that that time slot is not available , which means another customer cannot book an appointment with the same date and time .
Ok .
So now by default , when a customer makes the appointment , the booking will be approved automatically and they will receive an email about the confirmation .
Now , instead of automatically approving the appointment , what if you want to approve the appointment manually ?
So next , let's see how you can manually approve when someone books an appointment from your site .
So the manual , you upload the booking .
Let's go back to our dashboard , click settings and click view , general settings .
Now click here , change the status to pending and then click save .
Now let's try to book an appointment .
So let's go to our site , select the service and then you will get this page .
Now select a date for your appointment , then select the available time slot and click continue .
Now just fill up these details , click , confirm and your appointment will be booked .
So now if you go to a wordpress dashboard and take appointments here , you can see that our appointment is pending .
So just click here and approved .
Ok , once you approve the appointment , how will the customer know that the appointment has been approved ?
Now , as soon as the admin approves the appointment request .
If the customer goes to their inbox , you can see that we have got an email saying your appointment has been approved .
So this is how you can manually approve the appointment of your customer .
Ok .
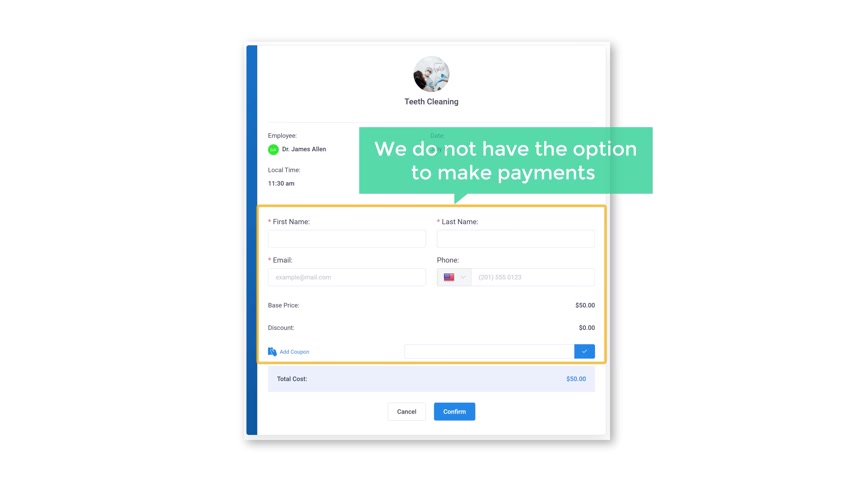
Now , if we look at our form , you can see that we do not have the option to make payments .
So in order to allow your customers to pay for your service , you need to set up a payment method .
So next , let's go to the final part of the video which is to add a payment method to your site .
Now , we are going to use Stripe , which is the popular payment method .
So to add stripe payment to your website , you need to create an account on Stripe .
Once you create a Stripe account , you'll be able to receive payments directly to your bank account when someone books an appointment .
So to create a Stripe account , let's open a new tab .
Then go to stride dot com and press enter now to create your account , just click start now , then fill up these details and click create account .
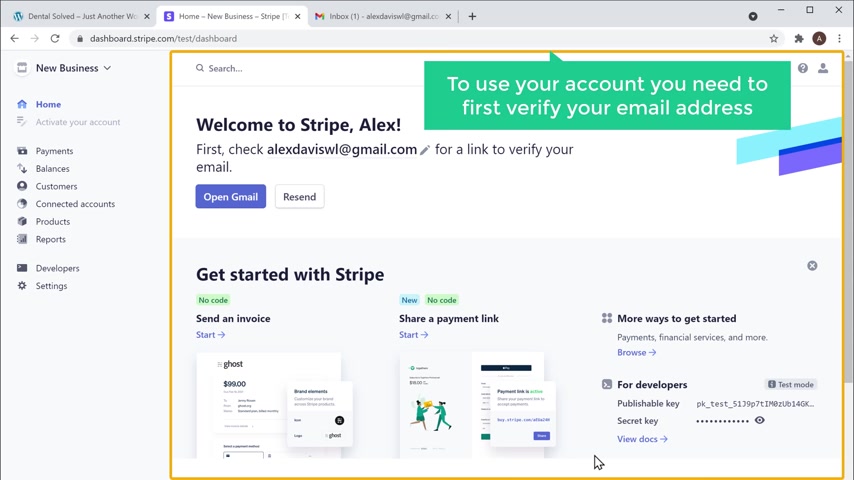
So now we have successfully created a Stripe account .
Once you've created your account , in order to use your account , you need to first verify your email address .
So to verify your email address , you need to click the verification link which was sent to your email .
So to do that , let's go to our inbox .
Now , this is the inbox of the email you entered while creating a swiper card .
So once you go to your inbox , you can see that we have got the verification link .
Let's open it and click , verify .
As you can see , we have successfully verified our email address .
Once you verify your email , in order to receive payments from this account , you need to activate your stripe account .
So to activate your account , let's click start .
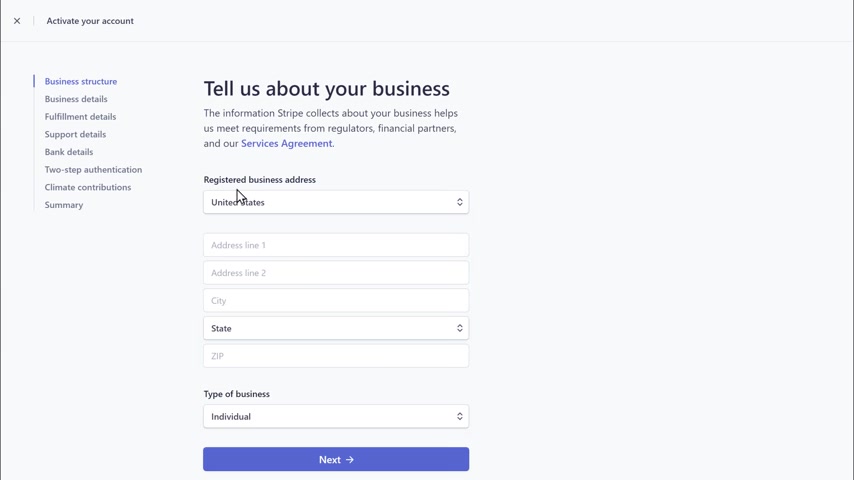
So here I enter your details and click next .
Then enter your business details again .
Click next .
Now here you need to enter your bank details , but you want to receive your payments .
So just enter your bank details .
And now when someone books an appointment from your site and makes the payment , the money will be sent to this bank account .
So once you enter these details , just click next .
So we have now successfully activated a stripe account .
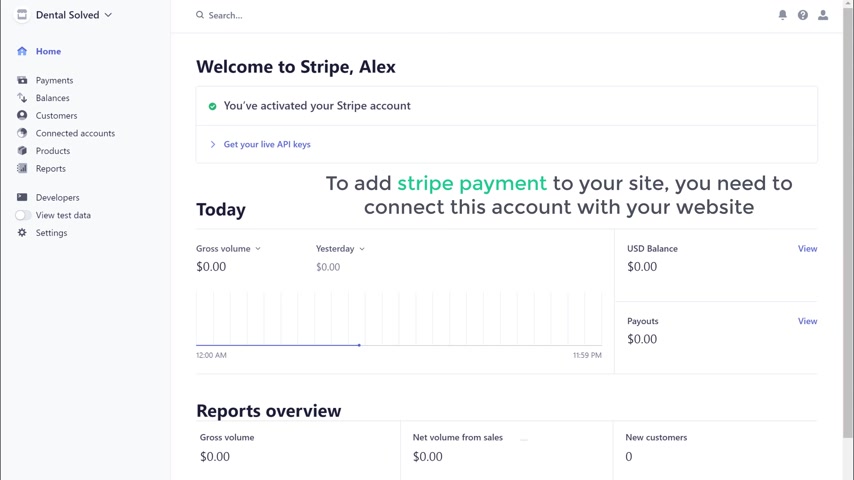
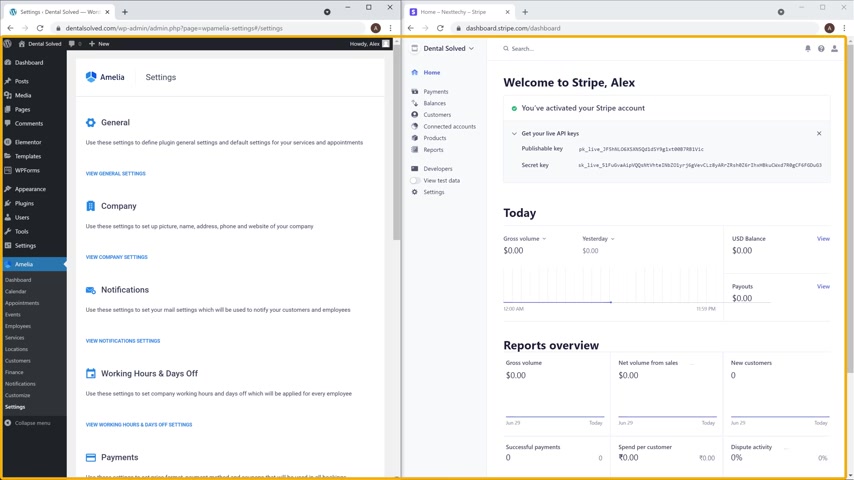
Once you have activated your stripe account , now to add the payment to your site , you need to connect this account with your website .
So to correct it , first , we need to get the API keys and add it to our site .
The API keys will help us to create the type account with our website .
So we get it .
Let's click here and you can see we have got these details .
Now you need to copy these two details and paste it on your website .
So to do that , let's go to our Wordpress dashboard , then go to Amelia click settings and you will get this page now click view payment settings .
And as you can see , we have got a stripe option here .
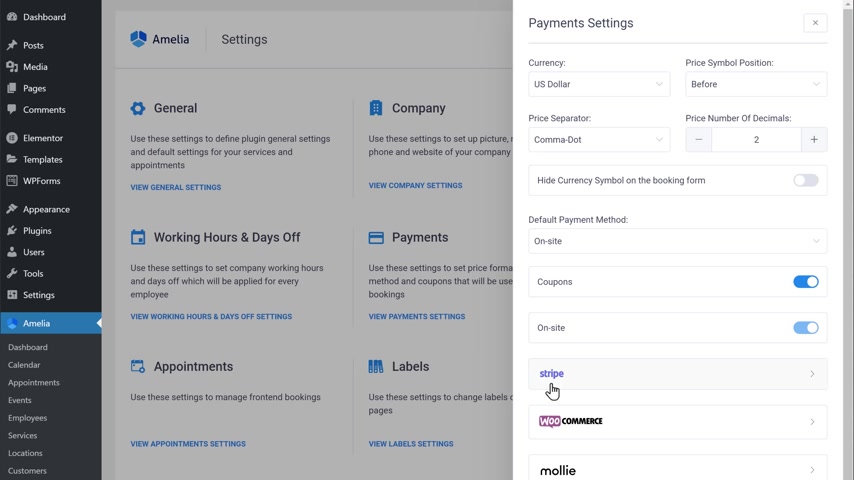
So just click here and enable this option now to get these two details .
Let's go back to stripe copy these details , click here to copy and then paste it here .
Now let's copy this and based it here .
Once you have entered these details , just click save and as soon as you click save , your stripe account will be connected with your website .
So this means our payment setup is now complete .
So now we have successfully added our payment without once you've added your payment method .
Next , you need to set up stripe as a default payment method .
So to set it up , click view payment settings .
Now click here and select type .
Once you select it , just click save .
Once you have set up stripe as a default payment method .
Next , let's see how you can enable stripe as a payment option for the services which we created before .
So to enable it , just click services and you will get this page .
Now , click here , click settings , then click payments and then enable this option .
Once you're done , just click save .
Now , in the same way you can enable Skype for all the services .
So this is how you can enable to type as a payment option for your services .
Next , let's see how your customer can book an appointment .
And make the payment from our side .
So just like a customer would do , let's go to our site , scroll down and here you can see that we have different kinds of services .
So just select the one you want .
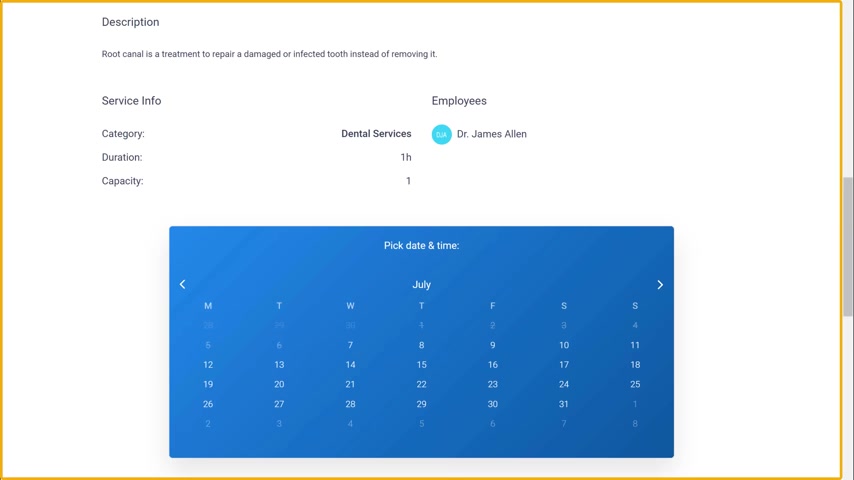
I'm gonna choose this and you will get this page next , select a preferred date for your appointment , select the available time slot and then click continue now to book an appointment .
Just fill up these details .
Now , here you can see that we have got a default payment option .
So to make the payment , let's enter our card details here .
Once you're done , just click confirm , we can see that our payment has been made and now we have successfully booked an appointment .
Now what happens when someone books an appointment from your site ?
How do you know that you have received the payment ?

Now , as soon as someone books an appointment from your side , if you go to your inbox , you can see that we have received an email from Stripe .
Now , if you open it , you can see that Stripe confirms that we have received the payment .
So this is how you can know that you have received the payment when someone books an appointment on your site .
Ok .
Now while booking an appointment , you can see we have the default label here .
Now , let's see how you can rename this label sort of change it .
Let's go to our wordpress dashboard click settings and it'll take you to this page now , click view label settings and here you can change the name of the label .
I'm going to enter doctor and then click save .
Once you're done , let's go back to our website .
Now , if you click refresh , you can see that the name of the label has been changed .
Ok , let's say a person books an appointment on your side .
Now , if they want to cancel it , how can you do that ?
So next , let's see how you can add a cancellation link to your customer's email .
So to add the link first , we need to create a cancellation page .
So to create it , let's go back to our wordpress dashboard , go to new and then click page .
Now here you need to add the title for your page .
I'm going to enter cancellation successful and then enter the cancellation message here .
Once you've added your content , just click , publish twice .
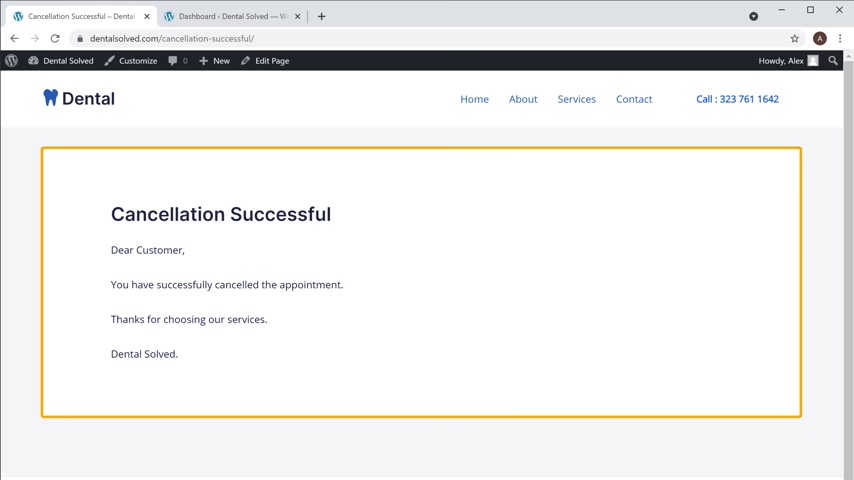
And now if you click view page , you can see that we have not successfully created a cancellation page .
Once you have created the page .
Next , you need to add the link of this cancellation page to the Amelia plug in notifications .
So to do that , let's go to our wordpress dashboard , go to Amelia , then click settings and you will get this page .
Now , click view notification settings .
And here you need to enter the link of the cancellation page which we created before .
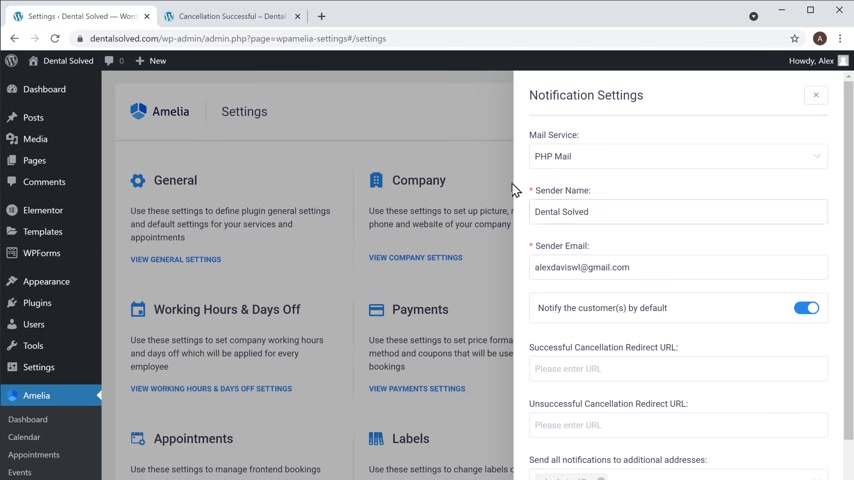
So to get the link , let's go back to this tab , then copy this URL and paste it here .
Once you're done , click save , not all of your customers to cancel the appointment .
We need to add the link to our email template .
So to do that , just click notifications and you will get this page and then click here .
This is the link which we will use to cancel the appointments .

Now click here to copy the link and close it .
Then enter a cancellation message and base it here .
Once you're done , just scroll down and click save .
So if we have not successfully added a cancellation link , once you have added the cancellation link .
Now when someone books an appointment from your site in the approval mail , they will get an option to cancel the order .
Ok .
Next , let's see , your customer can cancel the appointment .
So let's go to our site and select the service you want .
I'm gonna choose this and you will get this page next , select a preferred date for your appointment and select the available time slot .
Then click continue now to book an appointment , just fill up these details and click confirm .
So now we have successfully booked an appointment .
Once you book your appointment .
If you go to your inbox , you can see that we have got an email .
Now , if you open it , you can see that we have got the cancellation link .
Now , if you click on this link , it will take you to the cancellation page .
So now , you know how you can add a cancellation link to your customer's email .
Ok .
Next , let's see how you can view your notifications in the Amelia plug-in .
Let's go to our wordpress dashboard , go to Amelia and then click appointments .
And as you can see , our appointment has been canceled .
This is how you can add a cancellation link to your customer's email .
Ok .
So we have now successfully created our appointment booking website .
Now , let's say you want to add a link to this button so that when a customer clicks on this button , it'll take you to that service section .
Next , let's see how you can add a link to this button .
So to add the link , click , edit to the mentor and it will take you to this editing mode .
Now to make the button navigate to the service section , you need to set up an ID .
So to set up the ID , just click here and then click advanced .
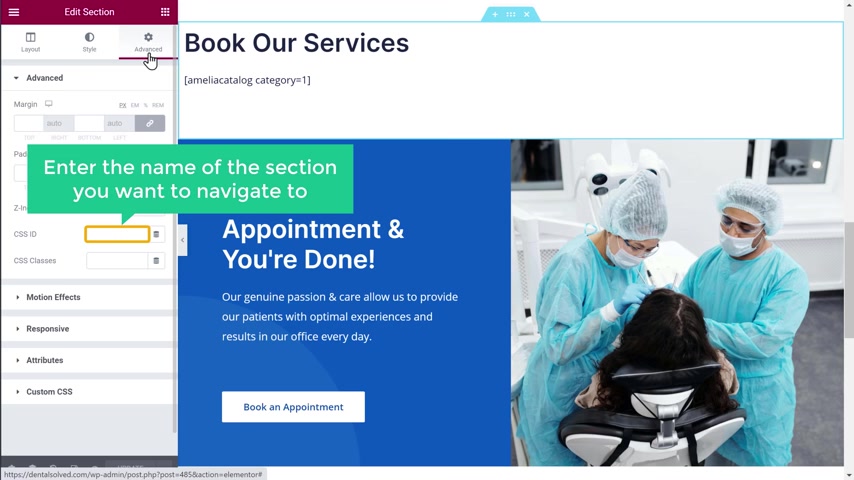
Now here , enter the name of the section you want to navigate to , as I want to navigate to the service section , I'm going to enter services and click update now to add the link to the button .
Just click here and enter the ID we created .
Now make sure you enter the ID with hash .
Once you're done with all the changes , just click update .
Now let's go back to our side and click refresh .
Now if you click on this button , you can see that it takes you to the service section .
So now we have successfully added the link to the button .
Ok .
So now we have a complete opponent booking site which we made in just a few minutes .
This is how you can create an upon booking website using wordpress .
So to make your upon booking site , all you have to do is first launch a site by getting a domain hosting , import the sample site , then make the site into a booking site and finally add the payment method .
So that's the guys .
This is so you can build an upon booking site in wordpress .
Now , if you're ready to start making your website , just click here and it will take you to the page which we saw in the first step , which is choosing your website name .
So just choose your website name and then build your website .
Now , if you want to learn more about wordpress and create awesome websites like this , you can get our makeup or website course by clicking this link .
Also make sure you click the subscribe button to see more videos from us .
So thanks for watching .
I'll see you in the next video .
Take care .
Bye-bye .
Are you looking for a way to reach a wider audience and get more views on your videos?
Our innovative video to text transcribing service can help you do just that.
We provide accurate transcriptions of your videos along with visual content that will help you attract new viewers and keep them engaged. Plus, our data analytics and ad campaign tools can help you monetize your content and maximize your revenue.
Let's partner up and take your video content to the next level!
Contact us today to learn more.