https://www.youtube.com/watch?v=BhDz9xQjjEk
How to Draw a Face - PART 1 The Basics for Beginners
Hello .
My name is Paul Priestley .
Welcome to arch Tutorials online dot com .
Now , today we are going to be looking at how to draw a face .
Now , this is for absolute beginners .
Very , very simple .
But before we start , we need a face .
We're gonna use this one .
It's a bit old and weathered , but it will do .
Now we're gonna look at proportions .
So to do this don't do this at home because this could be a little bit dangerous .
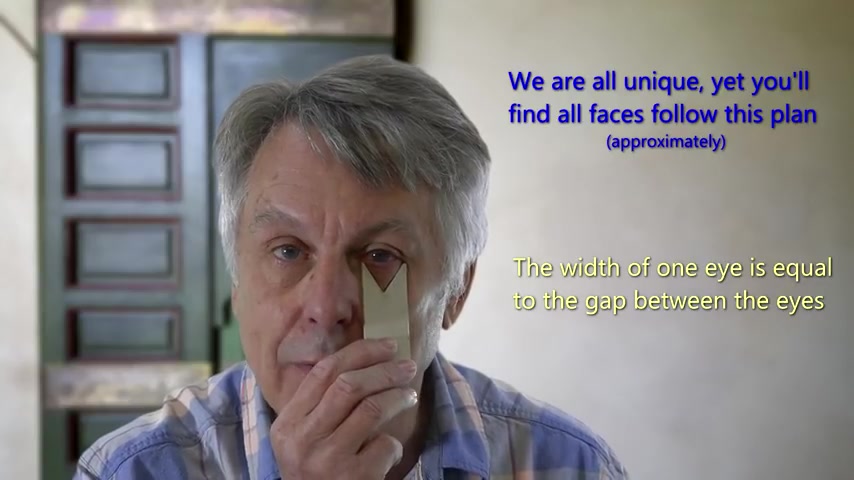
I'm gonna take a piece of card , this piece of card here , and I'm gonna put it either side of my eye like that .
Do you see that ?
Now , if I put it in between my eyes , you notice that it is the same width as my eye .
The gap between my eyes is the same width as my eye , you see , Very important now , second piece of card .
This one here .
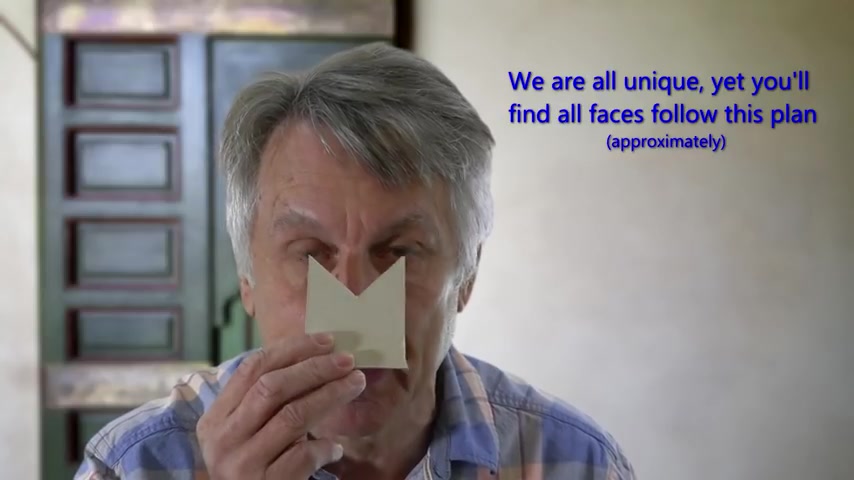
Now , if I put this on my pupils , I'm gonna close my eyes for this bit .
So it's on my pupils .
You'll notice that is an important measurement because it's the same size as my nose .
And if I put it underneath my chin , you see It's approximately the same size as from the bottom of my nose to my chin .
Not only that , if I put it back on my pupils again and bring it down straight like that , it's the width of my mouth .
And if I was to put it here and turn my head , it's approximately the size of my ears , You see , Now there's one final piece of card , which is really important .
This one here .
Now , if I put this here , you'll notice that from the my centre of my eyes to my chin , you see that measurement ?
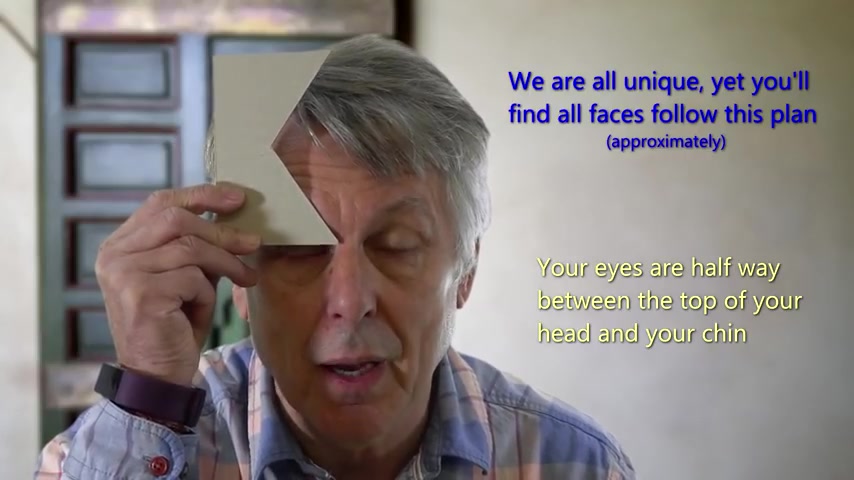
It's exactly halfway down my skull because , look , if I was to do that you see , my eyes are halfway down my head .
Now you need to know these things if you're going to draw a face .
So we're gonna start now by drawing some very , very simple basic faces just to get these proportions right so you can practise them .
And then in the next video , we're going to do some proper drawing the faces .
So let's make a start .
Come on .
I'm gonna use an eight B pencil simply so you can see what I'm doing .
But you can use any pencil you like for this .
It's not a problem .
You'll notice .
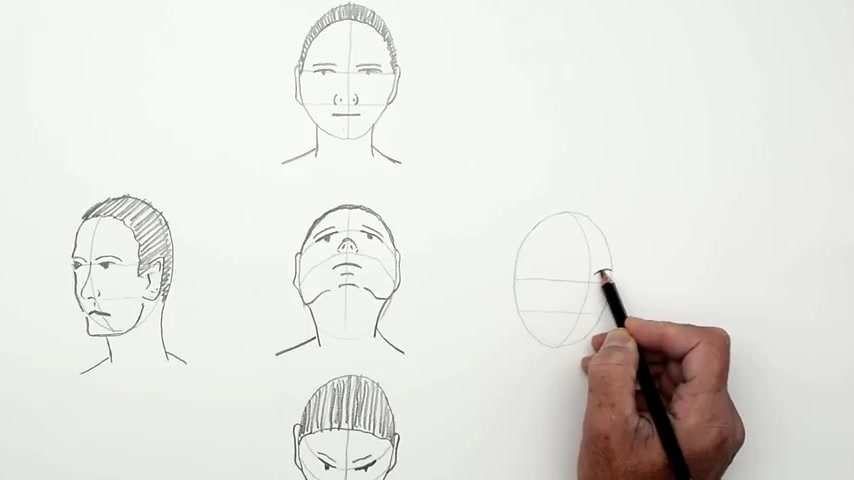
I've drawn a few ovals on here .
We'll go over these in a minute .
Now we're gonna go over the first one .
I'm simply drawing an oval shape .
Don't draw a circle .
It's not good enough .
Draw an oval shape halfway down , if you remember , is where the eyes are going to be .
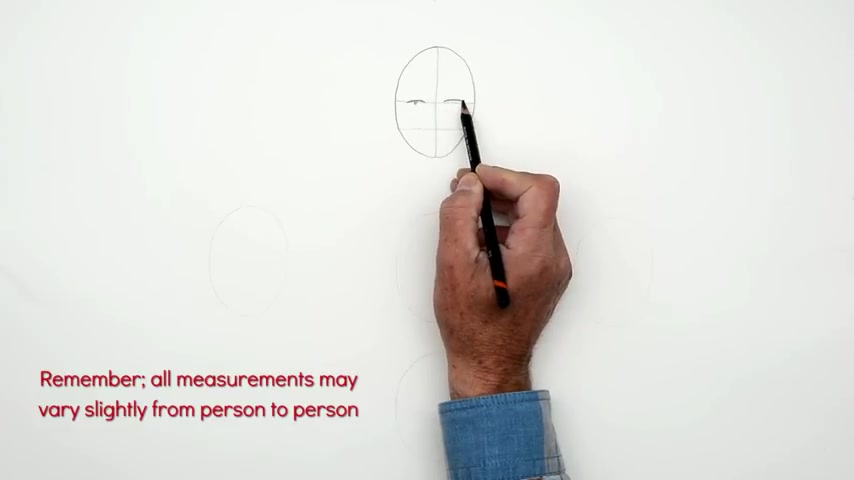
OK , line down the centre just to make sure everything is symmetrical .
Line dividing the area between the eyes and the chin .
A horizontal line .
I'm drawing the eyes .
You'll notice by just drawing a curve and a blob underneath line on top .
We're just trying very , very simple basic ideas to get the proportions right .
Nose , two dots , two lines .
That's all we're gonna use .
All very simple .
Anyone can do this simple line to represent the mouth .
That's all .
Now the important thing is the ears are alongside the top of the eyes .
Bottom of the nose , right ?
Don't make the ears too small .
The neck again .
Don't make the neck too narrow .
If you take a line out from the edges of the mouth , it's roundabout there and then , of course , shoulders would go wider than the , uh , neck and the head .
As you can see , we're beginning to suggest here just gonna suggest some hair on top .
I'll cover drawing hair properly in a later video , But there we have just a very simple face in proportion .
That's what we're aiming for to get the thing in proportion .
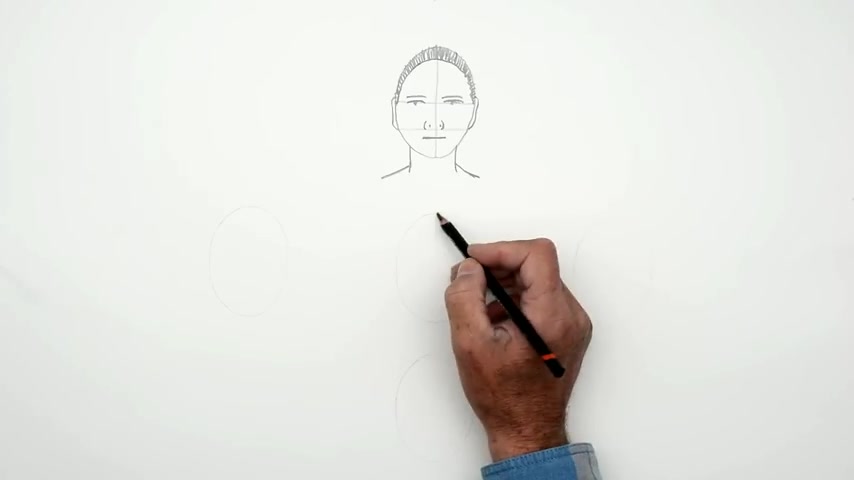
Now imagine this time we're going to draw a face where we are got the face looking upwards .
Now this changes everything .
I'm going to draw the line down the centre , but I'm not gonna complete the oval shape this time .
Now , the centre line is this curve .
You'll see what I'm doing in a moment .
That's the curve for the mouth there .
OK , so the two dots for the eyes , you notice already it looks like the face is looking upwards .
But this time we will be looking up the nose , which effectively is a triangle .
So we're just gonna draw in a very simple triangle shape , put a couple of blobs underneath just to represent the nose .
You see the idea ?
The mouth then just becomes below that and then the chin below that .
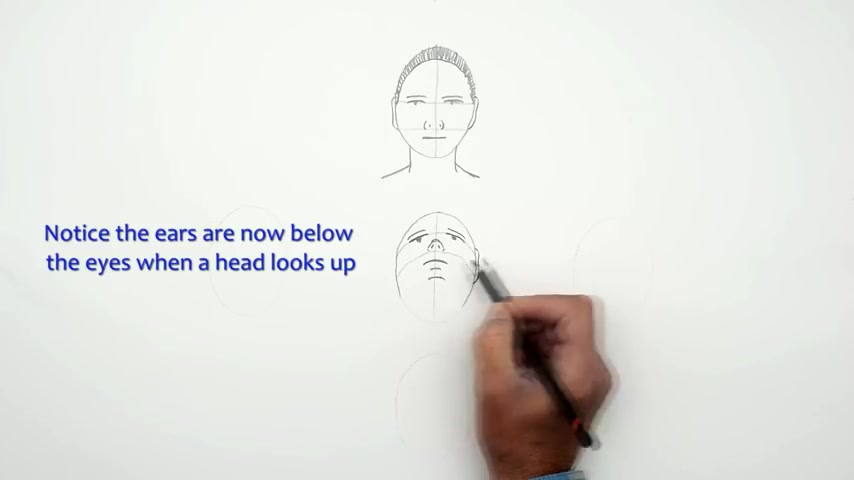
Now , when you've got the head looking up like this .
The ears are now below the eyes .
Can you see where the ears are ?
Can you see There they're below the nose as well and just a slight curve there to represent the jaw .
And you have a face looking upwards .
The neck is now very long and the shoulders are much lower , you see , because the head is looking upwards .
We just suggest a little bit of hair .
You wouldn't see very much there .
So we'll just strengthen that line a little bit along there to see the idea .
Now imagine we do exactly the same thing .
But this time we get in the head to look down .
So this time we're going to get the curves to curve down .
So do the centre line .
This is going to be my centre line here .
You see how it's curving down this time ?
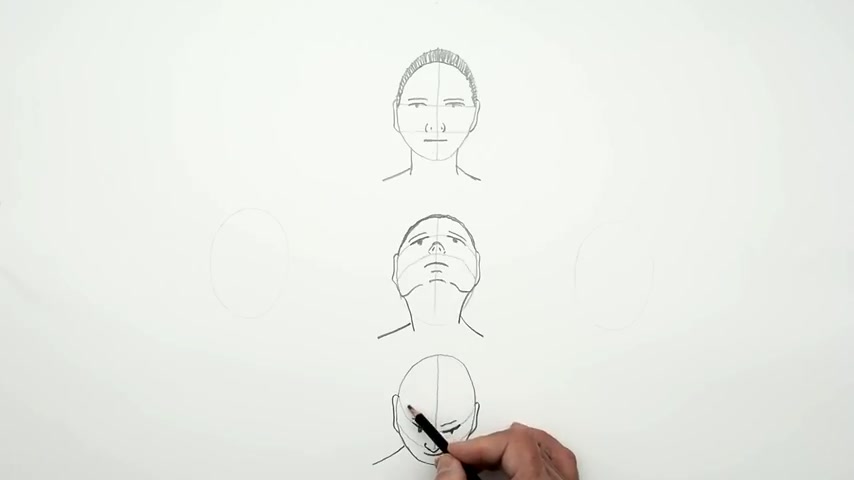
OK , there we go .
So the eyes now are here .
You see ?
Just the simple blob again .
Two dots and a line .
The triangle shape Now for the nose points downwards .
You see little triangular shape .
You see how it does .
And the mouth is just below that .
The ears now are above the eyes , you see , instead of being below the eyes in the previous drawing that makes it look as though we're looking down on the person .
Now , if you've got your head looking down , the shoulders are much closer to the head .
You see , there's no neck .
Now you can't see this .
The best thing to do is actually to get someone to stand in these positions , to move their heads and really look at what happens to the ears and the nose and the necks in relation to each other .
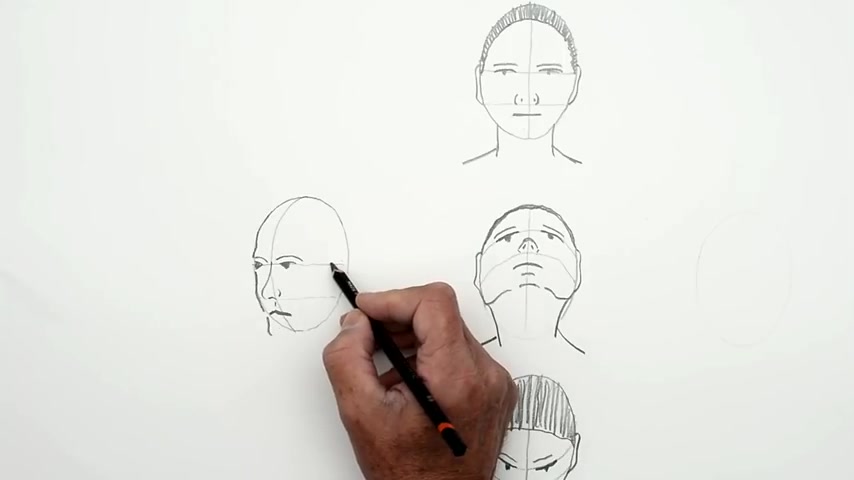
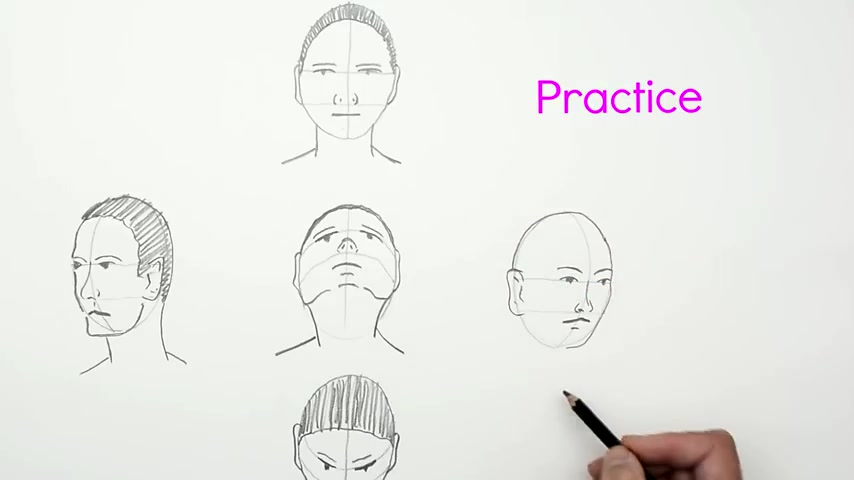
Right in this one , we're going to have the drawing point into the or looking to the left .

Now we draw the oval shape as before , But the centre line this time these are the horizontals .
They stay exactly the same .
But the centre line is curved , Do you see ?
Got the curve to the right .
So what we've got to remember here is the I I'm going to draw now .
We're only seeing part of it .
So it's It appears to be much smaller than the one we can see on the right of the line .
You see , I'm just representing that with a little blob .
But this one larger one because I can see more of the eye again .
Look at a person from an angle .
You'll see what I mean .
We've got the nose .
Just draw a very simple shape for the nose mouth , then would be underneath that you can see there .
We just pop the mouth in OK , small amount of mouth , one side longer , part on the other side .
That's the crucial thing to remember Now .
We'll just draw the shape of the face .
We'll do this properly , as I say in a later video .
When we draw , we do the drawing of the faces properly .
Put a bit of a chin in .
We'll come back to that in a second .
The ears are going to be some way back here , but again see just above that line just below that line , popping the ears .
Now you'll also be able to see a little bit of the back of the head as well .
Here , Um , rather strange jaw there , But not to worry .
So we need to extend the back of the head a little bit because you'll see a little bit more of the back of the head there neck down , and we can see the shoulders , then come down from the neck .
And again you'd extend the shoulders .
You see the idea .
But now the face is looking to the left .
All because we've adjusted that centre line .
Very simple .
You see , just blocking in the hair again .
There not a problem .
Now we'll move to a face looking the opposite direction .
This is exactly the same system .
So you have to just practise these .
Just draw these oval shapes , the two horizontal lines and the vertical line .
This time again , it's gonna be curved the other way , You see ?
Very simple .
So again , the eye on the right hand side of the line is smaller because we can only see part of it .
You see , because of foreshortening effect .
Put in the eyes .
Here .
Look .
You see there , we're doing doing the same thing with the eyes there .
So it's smaller .
Put the nose in between .
Comes down to that second line there , you see ?
Brilliant .
There we go .
So we got the nose suggested in there just very , very simply OK .
The same with the mouth .
We'll just use a simple horizontal lines again .
There we go .
Looks a sad face this woman .
Not to worry .
You see , the line is longer to the left of the line .
OK ?
You just draw the outside of the face , give it a slight little bit of shape and come down for a chin underneath there , up to the top , and then we'll pop in the ears .
You see , the ears are gonna be quite some way back again above that line slightly below the line .
Do you see the idea ?
Take the head right around a little bit more of the head there .
OK , put in the neck and work from there and just finish off with doing their hair as well .
Now , I would suggest you try and practise as many of these as you can do , because in the next video , we're gonna draw the face properly .
Uh , rather than just using this almost cartoon way of drawing it .
But get the proportions right once the proportions .
Right .
You're almost there .
So good luck with your drawing .
Thank you for watching .
I hope you've learned something about how to draw a face in proportion .
In the next video .
We're gonna be doing it properly .
Yes .
Now , if you've liked the video .
Please give the video a like .
If you have really liked the video , then perhaps you could subscribe to my channel .
You can see the channel name down here on YouTube .
If you want to support the making of these videos , then check out my patreon channel , where you'll find lots of interesting rewards in return for your patronage .
That would be wonderful .
Thanks again .
Goodbye .
Are you looking for a way to reach a wider audience and get more views on your videos?
Our innovative video to text transcribing service can help you do just that.
We provide accurate transcriptions of your videos along with visual content that will help you attract new viewers and keep them engaged. Plus, our data analytics and ad campaign tools can help you monetize your content and maximize your revenue.
Let's partner up and take your video content to the next level!
Contact us today to learn more.