https://www.youtube.com/watch?v=QpAhFf4qGis
How to Make a Website in 10 Minutes _ Easy & Simple 2020
What's up guys ?
My name is Dale from Creative Pro website .
And in this video , I'm gonna show you how to make a website in just 10 minutes .
And we're gonna do this in just five simple steps .
By the end of this video , you'll be able to create any website you want using this easy drag and drop method .
So whenever you're ready , let's get started .
Step number one is to get a domain and hosting , hosting and a domain are the two things that you need to launch a website hosting , gives you a place to store all of your website files such as themes , plugins your pictures and videos and more .
It also gives you 24 7 support if your website were to ever go down and a domain is the name of your website .
So to get these , just click on the very first link in the description .
And this is gonna take you to a co branded landing page that I have with host gator to get my viewers a massive discount on hosting .
So what we're gonna do is click on the hatchling plan and this is what I recommend if you're just starting out with making a website .
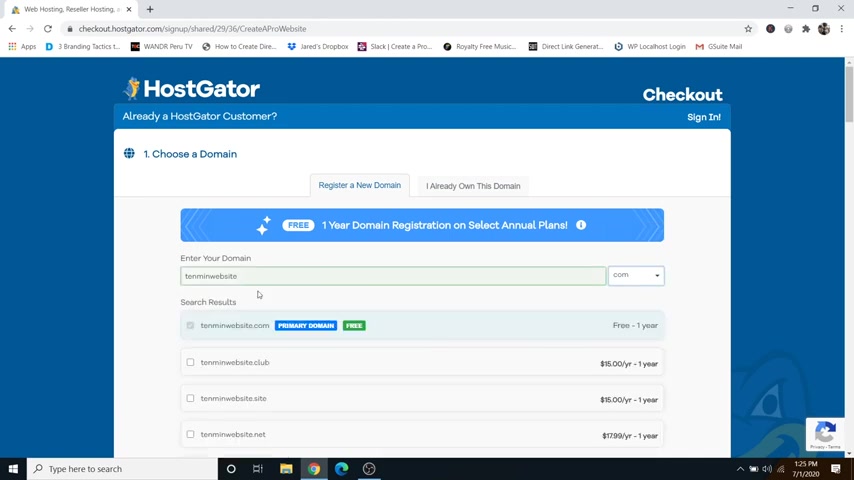
So let's go ahead and click on buy now and here is where you can register a new domain name .
And if you already own a domain name , you can just click on this tab right here , but I'm going to register a new one , which will be 10 minute website dot com , which is available and you can see that here in green and if it's not , it will come up in red and then you can just pick a new one .
So just go ahead and scroll down and you're gonna see domain privacy protection right here .
I highly recommend it leaving that checked .
Otherwise your personal information such as your email or phone number could be out there for people to call and spam you .
So now just scroll down to the hosting plan section and make sure that your package type says hatchling and then choose a billing cycle .
So obviously , the longer that you commit to , the more savings you're gonna get , which is gonna be 61% off .
But if you want to try this out for an entire year , my recommendation is 12 months .
But if you are just starting out , you're not even sure if you want to stick with this or not and you want to try it out for one month , that's perfectly ok too .
You're still gonna get 30% off .
So go ahead and click on that and then we're just gonna choose the user name , which I'm just gonna set as my name and then just choose a security pin and then just scroll down .
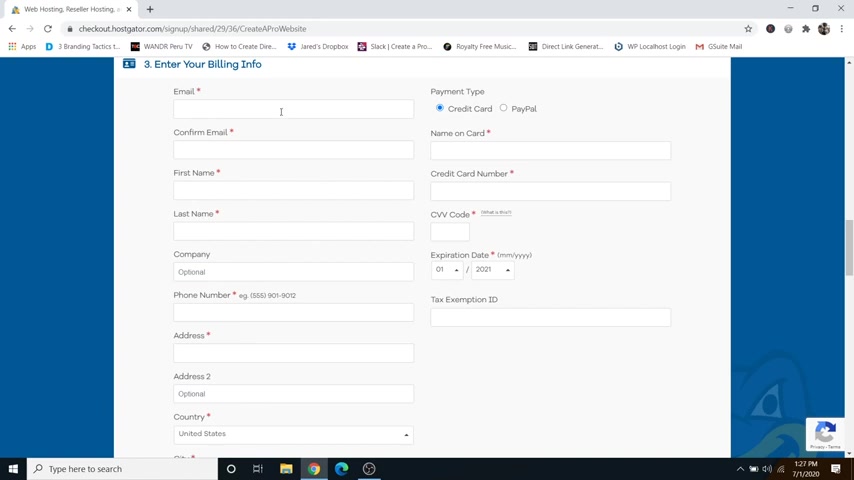
And here is where you can put in your billing info and you can use either a credit card or paypal .
Now , I already have an account set up .
So it's gonna autofill this information for me .
And then you can just scroll down to the add additional services section and I recommend uncheck the site lock essentials as well as uncheck site backup .
I have videos on my channel that will show you how to do this stuff completely for free .
So feel free to check those out .
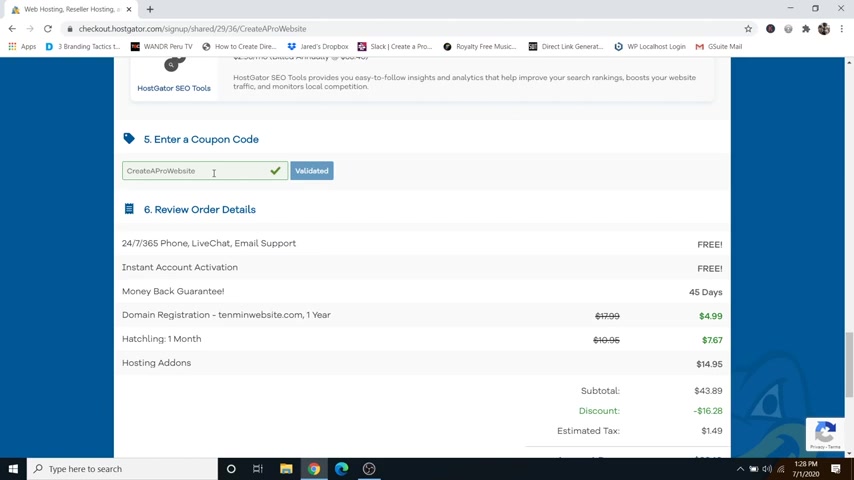
I'll put them in the description as well and then just scroll down and make sure that your coupon code says create a pro website and this is what's gonna get you your massive discount .
Now , this is my affiliate link .
So I do receive a commission off of this , but it helps fund these free youtube tutorials that I'm putting out and it also saves you money .
So it's a win , win for both .
But if you don't like me and you don't want to use it , that's perfectly ok too .
But I guarantee this is the best deal that you're gonna find because I work this out special with host Gator for all of my viewers here at Creative Pro website .
So now just scroll down and you can review your order and then just go down and agree to the terms and then just click on , check out now .
Cool .
So now host gator is setting up your account and this should only take a minute or two .
And once you're brought here to your host gator dashboard , we can now move on to step number two , which is to install wordpress .
So to do that , just simply click on hosting over here and then click on the new domain that you bought .
You can see I have two here , but this is the new one that I bought .
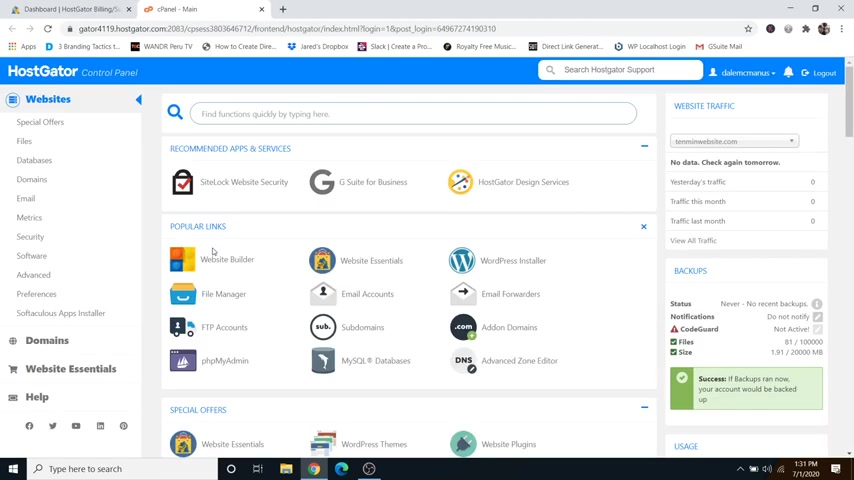
And I'm gonna click on C panel and then from this menu , all you have to do is click on wordpress installer right here and then just choose your domain .
So I'm gonna do 10 minute website dot com and then just click on next and then just give your website a title and then admin user , you can just put your name , first name and last name and then an admin email , which should be the same one that you use to sign up for host gator with and then just simply agree to the terms down here and then click on install and wordpress is installing and it should finish up very quick and just like that .
The installation is complete .
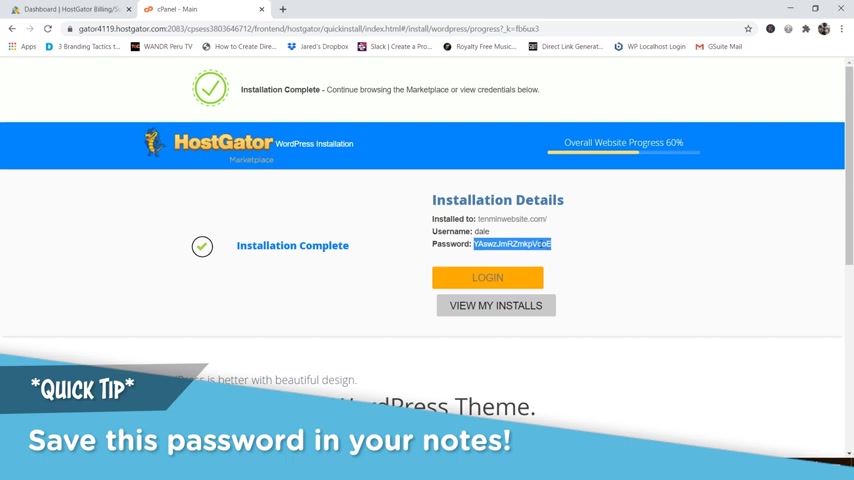
Now , what I highly recommend doing is saving this crazy password that they give you right here , copy it and paste it somewhere on your computer where you'll be able to access it later because you're gonna need it to log in for the first time .
So now instead of logging into your website using this yellow login button , I'll show you the way that you should always get used to signing into your website to edit it at any time .
So to do that , just simply go up to a new tab type in your new domain name and then do forward slash WP dash admin just like that and then click enter .
Now you're gonna be brought to a page that looks something like this because host gator still has to send out your new domain name across the entire world to every server and let them know that hey , this new domain name now exists and this process is called propagation .
And it can take anywhere from 30 minutes to an hour .
They say it could take up to 24 hours , but I've never actually had it take that long .
So every 10 minutes or so just refresh the page and make sure that you get to a log in page that looks something like this .
So go ahead and take a 30 minute break and we'll come back .
OK ?
So we're back and now we can refresh the page and check on our website .
Cool .
So now the site is propagated and we can log in .
So simply just type in your user name and then paste that crazy password from earlier and then just click on login .
Cool .
And here we are inside of the wordpress dashboard , which looks a little daunting .
So let's go ahead and clean it up .
So just click on the X for everything that you see to kind of clean things up just like that .
And now let's go ahead and change that crazy password to a custom one .
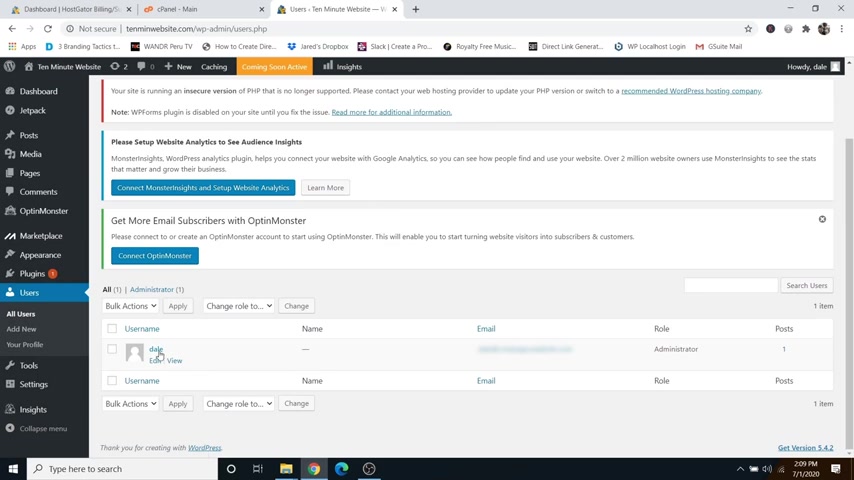
So to do that , just simply go over to users and then click on all users and then just scroll down to your name and click on it and then just scroll all the way to the bottom and you'll see account management and you'll see generate password .
Go ahead and click on that and delete the other crazy one that they give you and type in your own custom one and then just click on update profile .
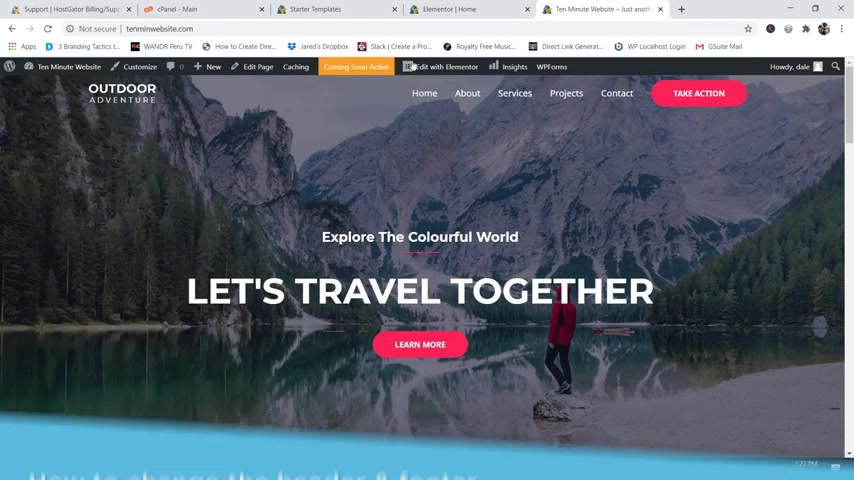
So let's see what our website currently looks like .
So to do that , just simply go up to your website name and go to visit site and I'm gonna open this in a new window .
So this is what our site currently looks like , which is pretty boring .
So what we want to do is move on to step number three , which is to activate a new theme .
And the theme that we're gonna be using is called Astra .
So let's go ahead and get it .
So I'm just gonna close out of this window and then to get a new theme , all you have to do is just go over to appearance and then themes and then just scroll down to the bottom and you'll see a big plus button that says add new theme .
So just go ahead and click on that and then if you scroll down , you'll see a search bar right here and we're just gonna type in Astra and then you'll see astra right here .
So just go ahead and click on install and then just click on activate and now we can move on to step number four , which is to activate plugins .
So with this Astra theme , we're gonna be needing a plug-in that allows us to build our website using drag and drop .
So let's go ahead and get that .
So to do that , just simply go over to plugins and then go over to add new and then just scroll down and you'll see another search bar right here .
Just go ahead and type in Astra and then you'll see starter templates right here and go ahead and install that and then just click on activate .
So this plug in comes with a bunch of designs to choose from so that you can build your website with ease .
So let me show you how to see those designs .
So if you just scroll down here in your plugins library , you will see starter templates right here .
Just go ahead and click on see library and then just select a page builder and we're going to go with mentor and here you can see that you've got tons of websites to choose from and you can scroll through and look at all of these and to view one just simply click on it .
And then from here , you can see a preview of the site if you just scroll down through here .
And then you can also see the other pages that come with that website template .
So whenever you're ready , you can just click on import complete site and then just make sure that all these boxes are checked and then just click on import .
Cool .
So once that's done importing , you can just click on view site and here you can see a full screen view of what the site looks like .
So now we can move on to step number five , which is to customize your website .
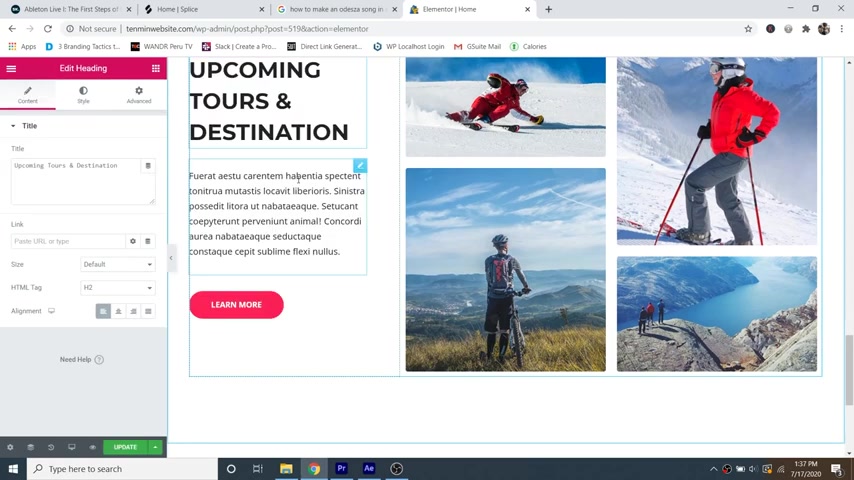
So to do that , just simply click on edit with mentor up here on the top .
And if you hover your mouse over , you can see that there are blue boxes around each one of these elements .
So if you'd like to change the text , just simply triple click and you can change it right there on the screen just like that .
And if you'd like to change the font and the font color and the font size , you can just simply click on the style tab and then you can change that .
All right here .
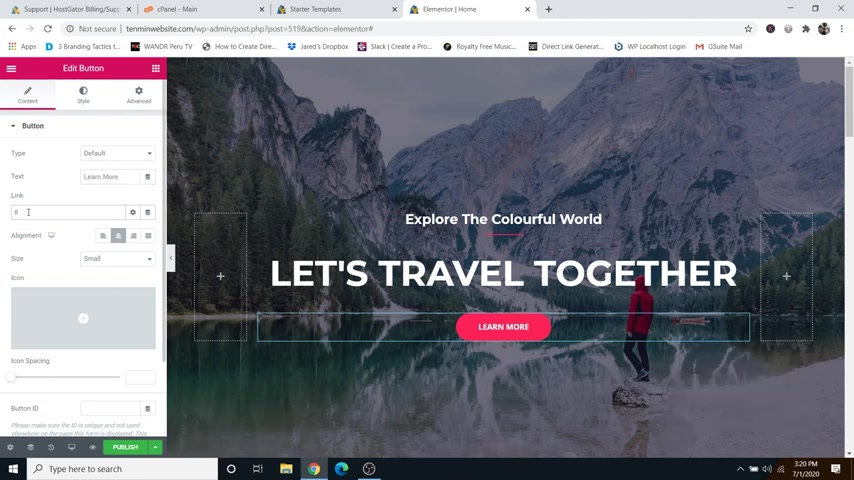
And if you'd like to edit the button , just simply hover over the button and then click on the little blue pencil icon for that element .
And then you can change the text right here as well as put in a link that you want the button to go to .
And you can just simply delete the hashtag and put in any URL here .
And again , if you'd like to change the look and the style of that button , just simply click on the style tab and you can change it all right here .
And if you'd like to change the background image , all you have to do is just go up here to these six dots and click on edit section and then just go over to style and then you can choose a new image right here .
And then all you have to do is upload a new file by hitting select files and you can edit all of the elements on your website .
The exact same way you just click and then you can edit everything over here in the sidebar .
And whenever you want to save your work , you can just go down to publish .
OK ?
So now let's go ahead and look at our website .
So I'm going to open up a new tab type in my new domain .
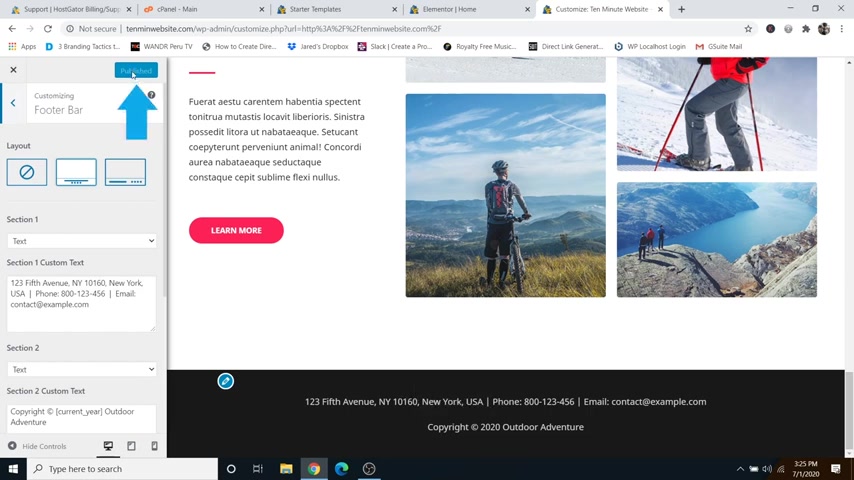
And now let me show you how to change the header and the footer sections of your website .
So right now you can edit this section by using mentor , but the header and the footer are controlled using the theme which is astra .
So let me show you how to change the header .
So simply just go up to the customized button right up here and you'll notice that there is a little blue pencil icon next to the logo .
So just go ahead and click on that and that will take you to the section where you can change the logo and to do that , you can just simply click on the change image button right here .
And if you'd like to change this menu right here , you'll see another button pops up .
Whenever you hover over , you can just go ahead and click on that and you can edit your menu right here .
So you can change the button text here as well as the button link .
And the same goes with the footer section all the way at the bottom .
You can just simply click on this button and edit your footer .
And once you're done with your changes , you can just go up to the publish button to save your work , but I haven't changed anything .
So it's great out .
So that's it guys .
Now , you know how to get a domain in hosting , how to import a demo site and how to edit the content on that site to make it your own .
So if you'd like to get started with making a website like this , just simply click on the very first link in the description to get started with a domain name and hosting and feel free to check out my channel for more awesome website tutorials .
All right , guys , I'm Dale from Creative Pro website and thank you for watching .
Are you looking for a way to reach a wider audience and get more views on your videos?
Our innovative video to text transcribing service can help you do just that.
We provide accurate transcriptions of your videos along with visual content that will help you attract new viewers and keep them engaged. Plus, our data analytics and ad campaign tools can help you monetize your content and maximize your revenue.
Let's partner up and take your video content to the next level!
Contact us today to learn more.