https://www.youtube.com/watch?v=M1gEGLtF1p0
How To Do Pigeon Pose _ The Right Way _ Well+Good

I'm Tess .
This is the right way with well and good .
So today I'll walk you through the right way to do pigeon poses in yoga .
I see a lot of scary variations out there .
So before I teach you the right way , these are some of the common mistakes that I see .
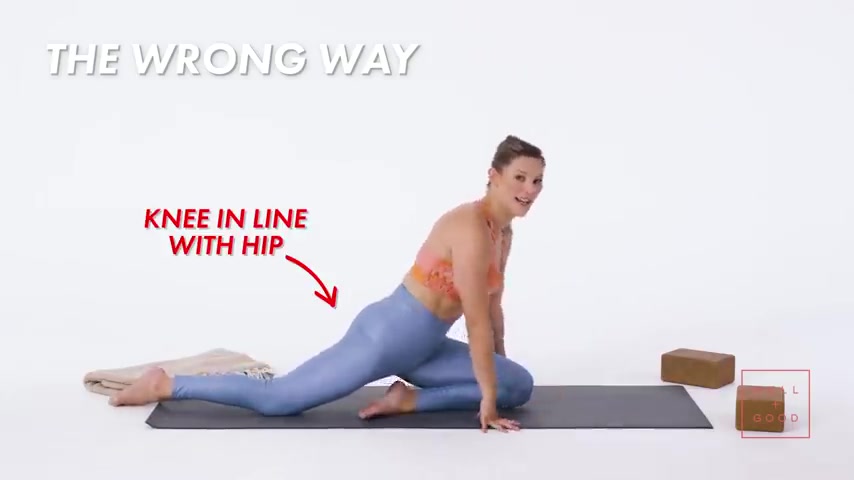
So not starting in down dog and just from the ground up , getting right into it and you'll see a lot of this .
So knee in line with your hip , sometimes I even see someone putting weight on to their hip and then folding forward and this does nothing but really squish your insights .
Sometimes I also see this too with like a foot , really sick and your spine is just all out of alignment .
And the most important thing is to get the head down .
And again , that just does nothing for you .
Pigeon pose is a hip opener .
It's not a knee stretch , it might touch some other parts of your body , but you really want to make it about your hips .

So to do it the right way , I really suggest starting in down dog and working your way into it from there .
So tuck your toes hips up and back , inhale one leg up .
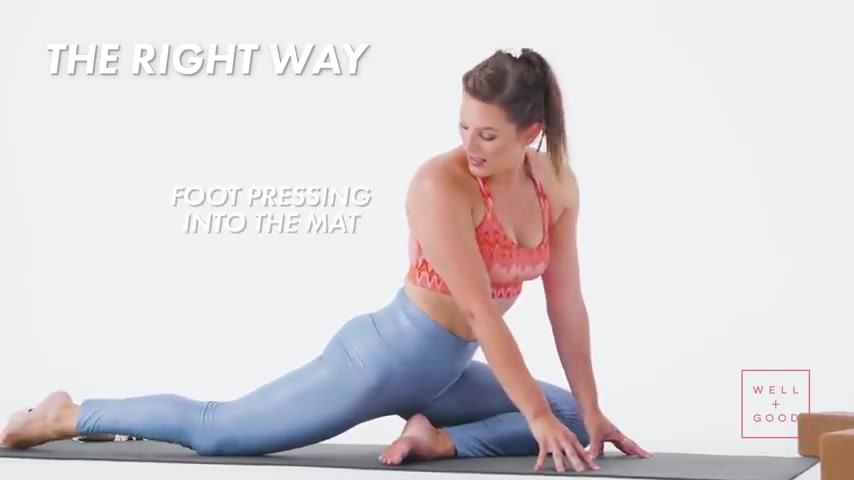
I'm doing my left today and then bringing that knee behind my left wrist , walking my back leg back .
See how I just slid that hip back as far as I could .
And then I'm untucking my toes , pressing into the top of my foot as opposed to sickling my ankle .
So it's active here and then my knee is really outside of my hip .
I always give the cue of trying to bring it to the outside edge of your mat because you can't really go wrong if you're moving it out as opposed to in and then you should be able to prop yourself up on fingertips and stay just like this .
But for a lot of us , we have some space between our hips and the ground .

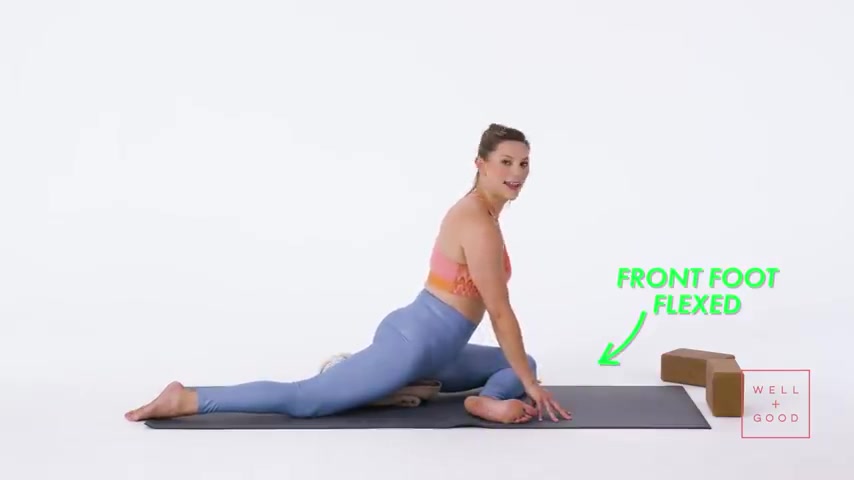
So in that case , fold up a blanket as much as you'd like shove that underneath your butt .
And that way you can sit on top of that .
Just one thing to note too .
In addition to your knee being outside of your hip , ideally , this shin would really be parallel to the top edge of your mat .
And you'd really be flexing that foot to get a deeper stretch in that left outer hip .
If that's not accessible to you be wherever you can be making sure your knee is outside of your hip .
Most importantly .
So my hips feel good and supported once I have that really solid base .
I walk my hands forward .
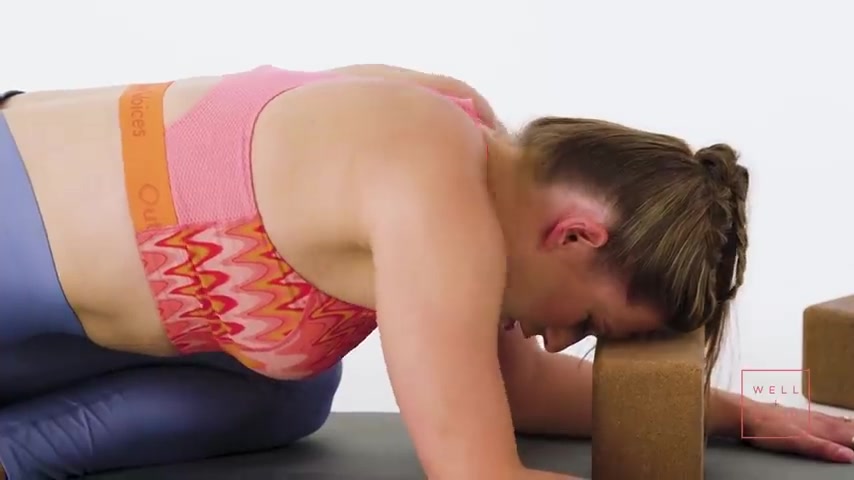
If you're someone who's super flexible , you can just make a pillow for your head , rest your forehead .
I think that a block is your best friend here .

So grab one medium height I think , feels good in your neck , bring forearms on either side of that block , rest your forehead and really melt until you feel your shoulders move away from your ears onto your back .
And once you find that , try to hold it for 10 breaths and by holding , I don't mean scratching your face or scratching your shoulders .
A lot of what I see in class really use every breath to spread through your collar bones , relax your shoulders onto your back and that's your pigeon bones .
So do it on the other side .
Make sure you're even always , I'm tess and that was the right way to do pigeon po and if you'd like more right ways , subscribe to well and Good youtube channel right now and I'll see you on your mat soon .
Are you looking for a way to reach a wider audience and get more views on your videos?
Our innovative video to text transcribing service can help you do just that.
We provide accurate transcriptions of your videos along with visual content that will help you attract new viewers and keep them engaged. Plus, our data analytics and ad campaign tools can help you monetize your content and maximize your revenue.
Let's partner up and take your video content to the next level!
Contact us today to learn more.