https://www.youtube.com/watch?v=YDBVxXe2s2g
How to Draw a Kitchen Cabinet in Sketchup
OK .
In this video , we're going to go over how to draw a uh base kitchen cabinet using sketch up again , I'm using sketch up make and we'll go ahead and get started .
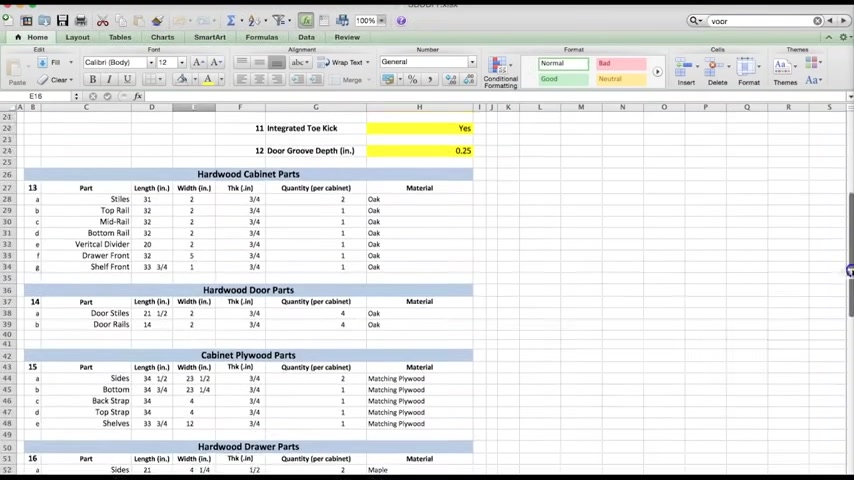
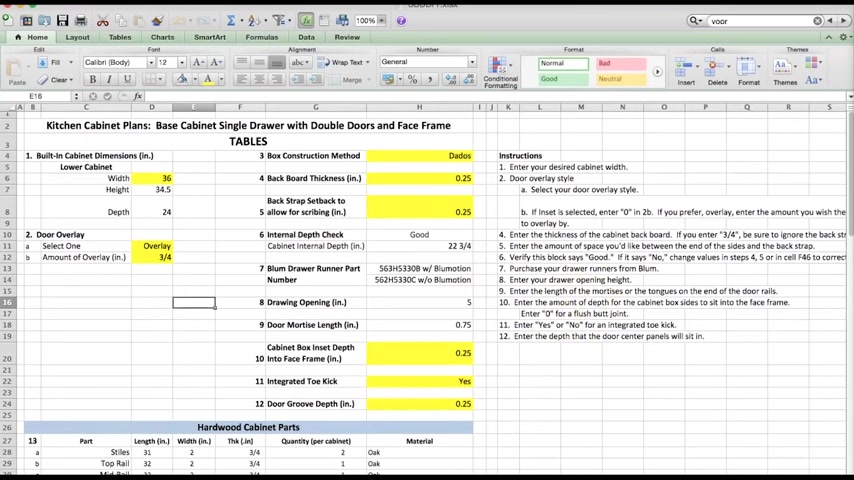
Um Now to come up with the dimensions for the base cabinet that we'll be drawing , I'm gonna be referring to this uh kitchen cabinet plans spreadsheet that I am putting together for all of the subscribers to the cabinets from scratch course .
And I will cover how to use this um spreadsheet in a future video .
So sort of an instructional tutorial on how to use this .
Uh But basically you , you'll be able to put in um pick a cabinet style and put in the dimensions you want and make some assumptions on how it's built .
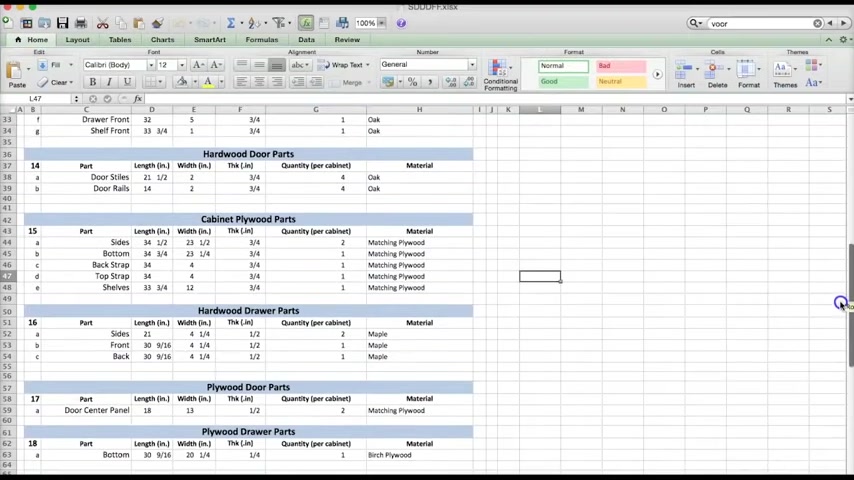
And then you'll get a list of all the parts you need , which you can then put into a um a cuts sheet optimizing program or uh like optimal dot com or just sort of draw them and list them and you know , figure all that out yourself if you want .
Um So we'll go ahead and get started , but this will , will start with a 36 inch cabinet um wide .
And again , it's a 34.5 , standard height , 24 inches in depth .
Um And we'll get into a couple of these little construction methods here .
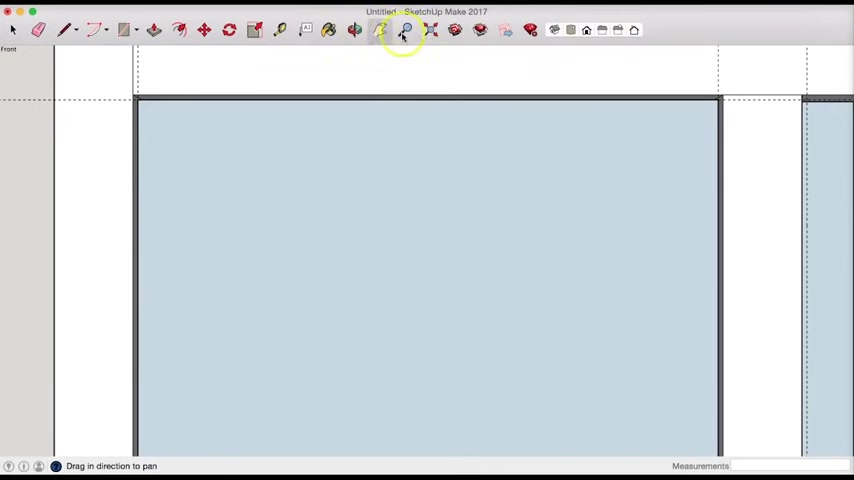
So let's pick a front view .
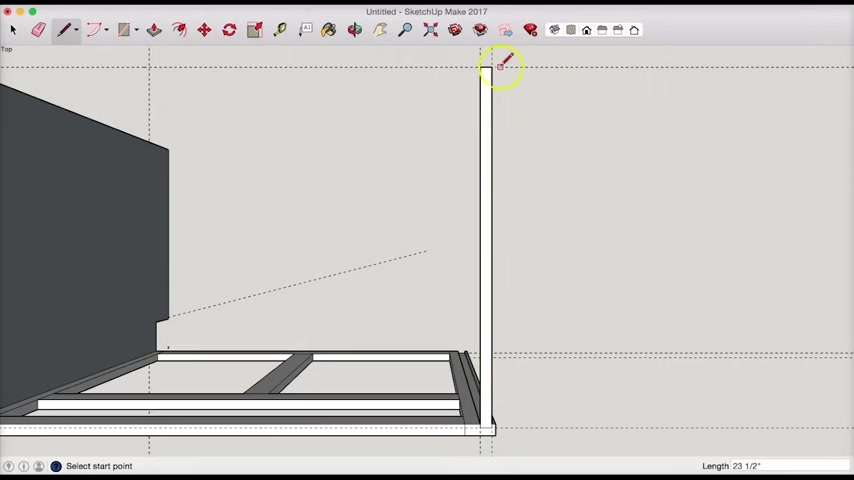
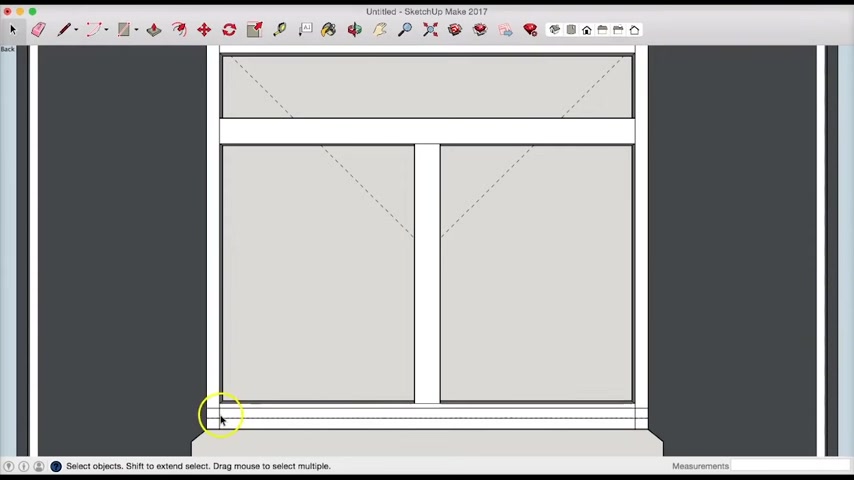
Uh And uh I think what we'll start by doing is drawing uh the face frame .
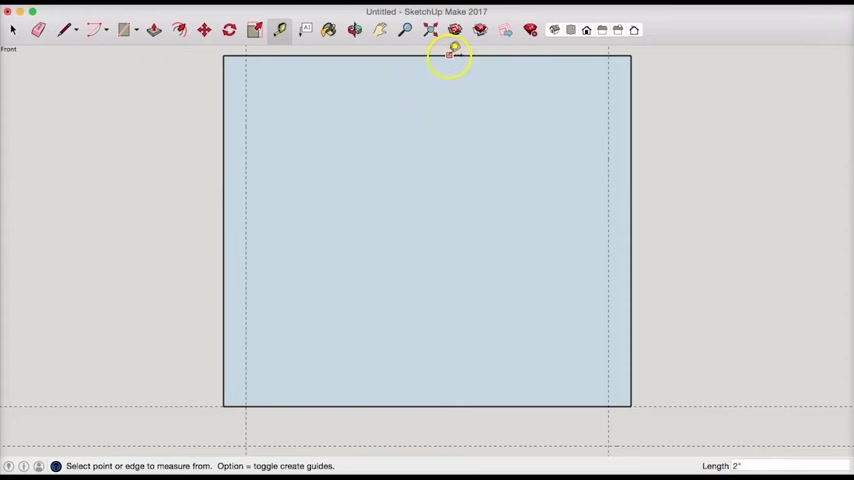
So let's go ahead and um let's just drop box and we'll get started by drawing a box and I'm gonna get rid of the guides .
I'm sorry , I want the guides , but I don't want the axis because that's kind of distracting .
All right .
So we said this is 36 inches , uh 36 inches by oh 36 inches by uh 34.5 .
OK .
Great .
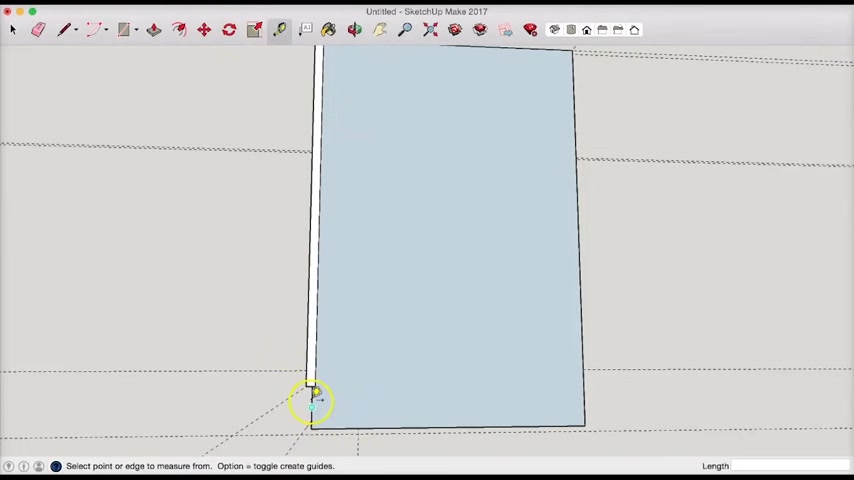
So there's the front of our cabinet .
Now our face frame comes up .
Uh We have a tow kick .
So I'm gonna pull up 3.5 inches .
All right .
I'm gonna draw my pencil and I'm gonna draw a line across there and now I can go ahead and select all this stuff and delete it .
All right .
Um I'm still gonna measure down another 3.5 .
So I have sort of what the bottom of that would look like .
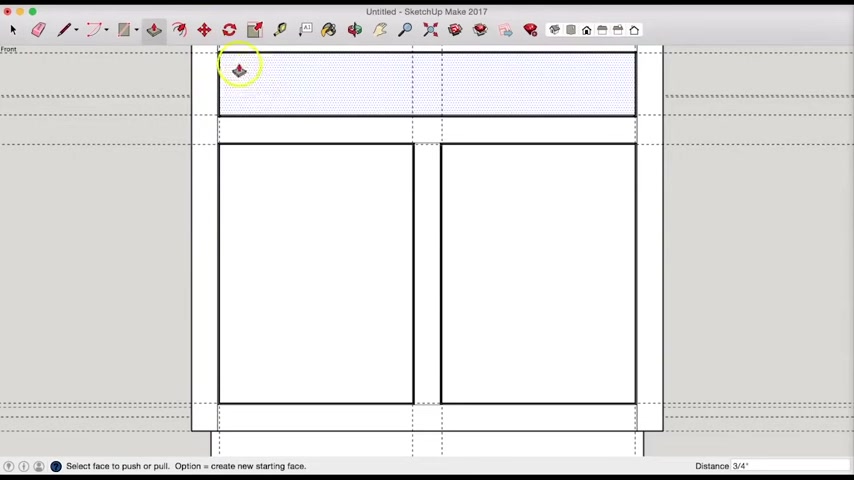
But let's start with our cabinet .
Um Let's go ahead and make uh two inch styles .
All right , put that there and type in two .
And this is a tip , someone on youtube told me is you don't actually have to um select this box down here , you can just uh snap your line and then start typing .
Uh So sketch up , knows you're typing and you're changing that box .
Uh So it'll be two inches down also for the top , we'll do a two inch ray on the bottom .
Uh And I wanna do a five inch opening .
So I'm gonna pull this down to here .
Type in five boom .
Uh This is also gonna be a two inch uh divider .
So type in two .
Let's see .
I want center of this whole thing here .
So I want this , I want this uh center line there .
So what I'm gonna do is start out here .
I'm gonna pull out until I get to my center line .
All right .
And now I have a center line because I'm gonna have a vertical divider .
So I , I did not mention this , but this will be a single drawer uh with two doors .
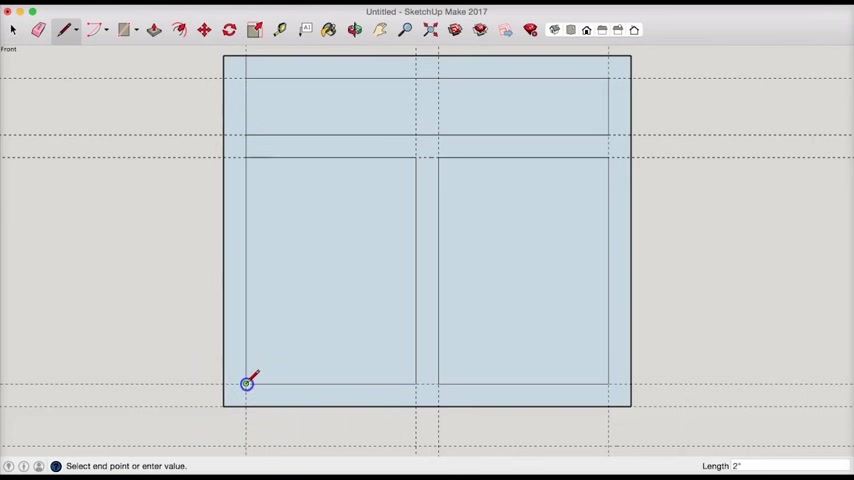
So we want a vertical divider .
So I'm gonna pull this out actually an inch and then I can pull this over two inches .
And right now I can go ahead and delete this guy and we have sort of the layouts of our face frame .
So now what I can do is I can go ahead and draw another rectangle here .
OK ?
For our floor opening , I can draw a rectangle here for our door opening and another one here for that door opening .
Great .
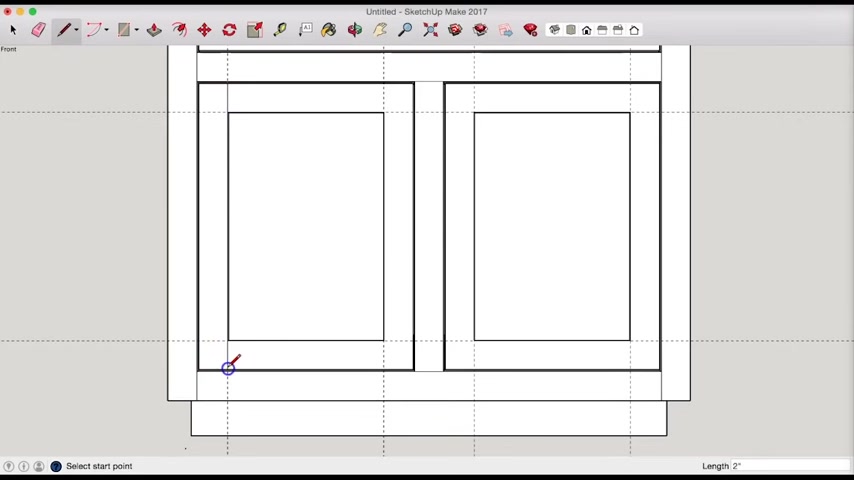
Now , all I need to do is just close off these lines to make sort of differentiate between the rail and the style do that on the right side here .
Um I'm gonna close this top line , close this top line there and I think we're good .
So what I can do is I can start getting rid of some of these guides by selecting them and hitting delete .
We don't need those anymore .
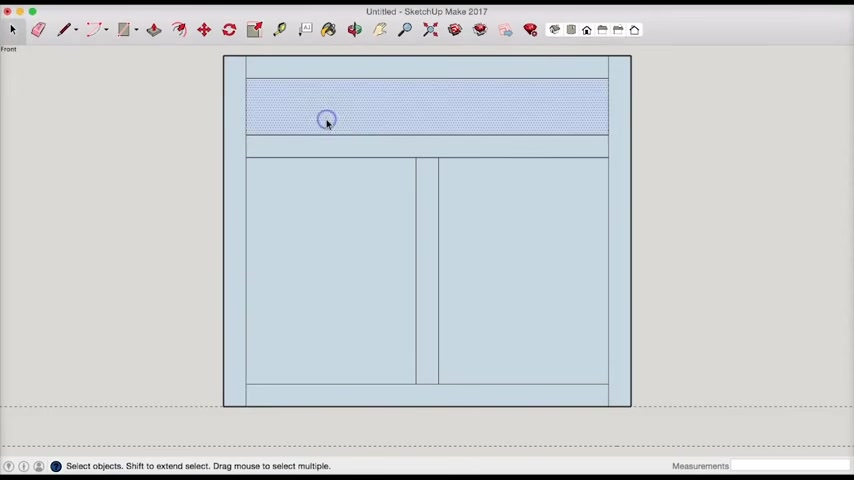
We don't need that guy , that guy we can get rid of .
All right .
So now I can select my surfaces that are holes and just delete them cool .
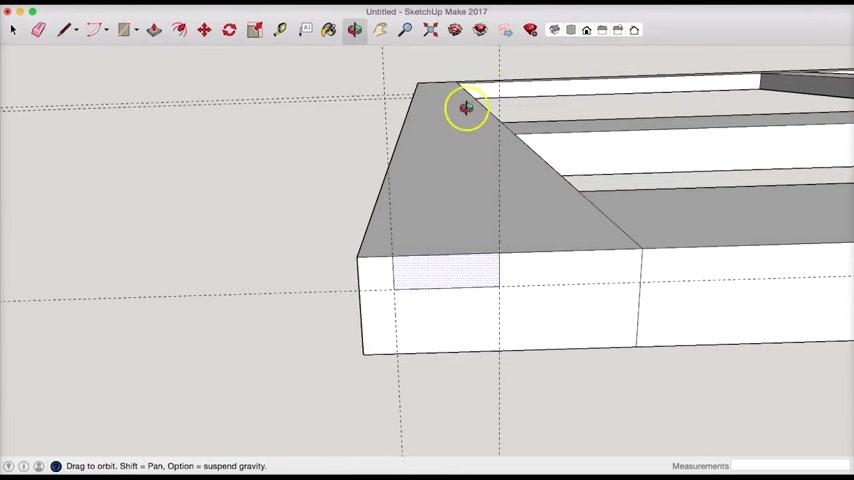
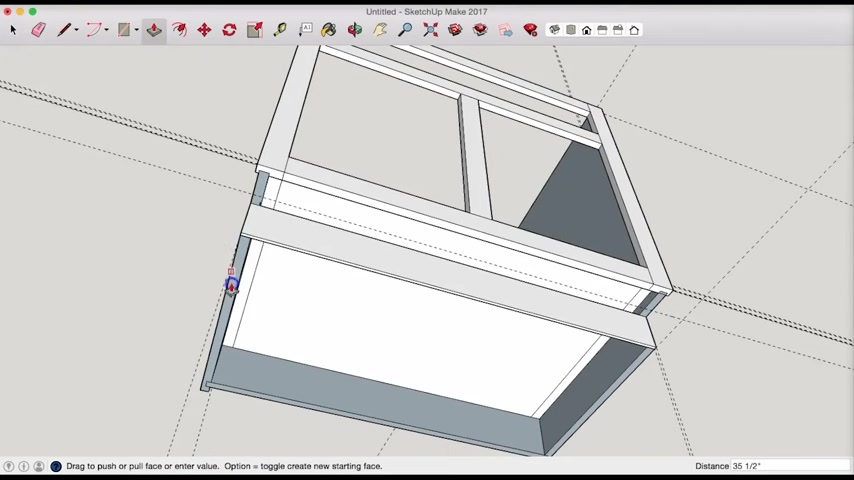
So there's your face frame .
So we need to give it some depth , right ?
Because right now it's just a two dimensional surface .
So let's go ahead and I always like to pull my stuff out by looking at it isometrically because I just think it makes more sense .
So we're gonna pull this each of these pieces out um back into the field by three quarters of an inch .
And I'll start with the furthest piece and pull that out 0.75 .
And then I could just keep doing that and I'll just keep snapping to that 0.75 value .
It's gonna pull out to there , oop , pull out to there in there .
So let's rotate that back to the front and make sure we don't have any hollow surfaces .
Oh Look at that .
They're all hollow .
So you can see what I mean .
It's almost like a shell .
OK .
Now that , that's gonna happen .
That's fine .
So what we can do is we can just draw um a couple .
Oh You know , let me draw this from the front .
Let's draw a couple , take our pencil and draw this closed and this shall start closing the surface here .
Here we go .
It's gonna start closing some of that .
There we go .
All right .
And I'll just redo that line there .
I'm missing another one here .
Uh And that guy there .
All right .
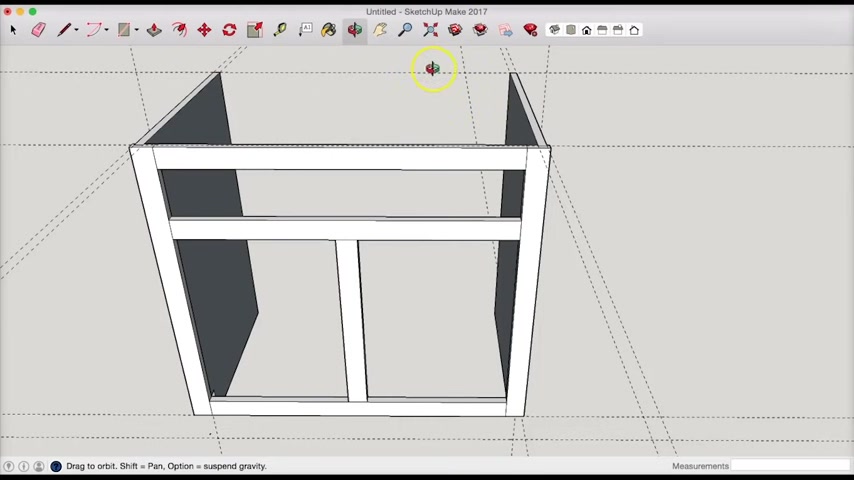
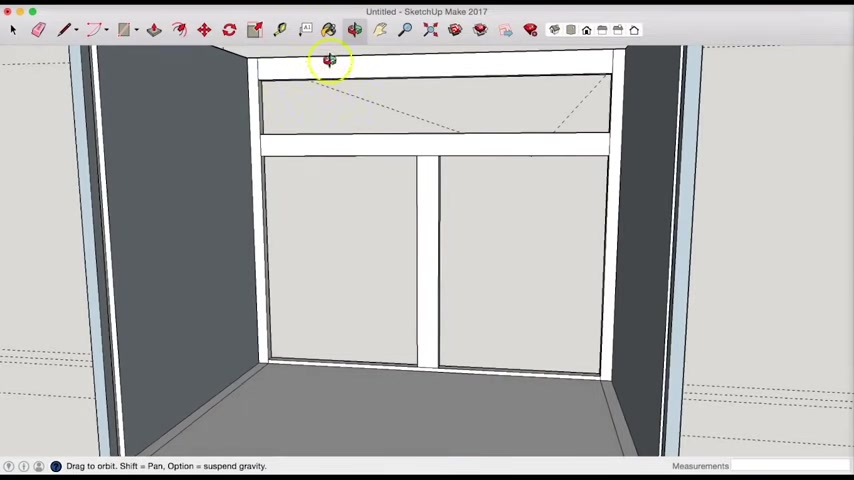
So we separate , we have our top rail , our mid rail , a vertical divider , our bottom rail and a left and a right style .
And if I come around to the back , I can see if it look , it appears to be as much as we can tell a solid surface .
And again , I'm just doing this for some sort of visual representation .
So I'm not gonna worry too much about whether it's actually , I think it's solid .
I don't really care if it's hollow on the inside if it's a shell .
Um So now we can start drawing the box .
We could actually do the doors in the drawer front if we wanted to at this point .
But let's go ahead and , and skip to the box .
So I'm gonna take a top view and zoom in a little bit and I'm gonna shift this over .
Oh All right .
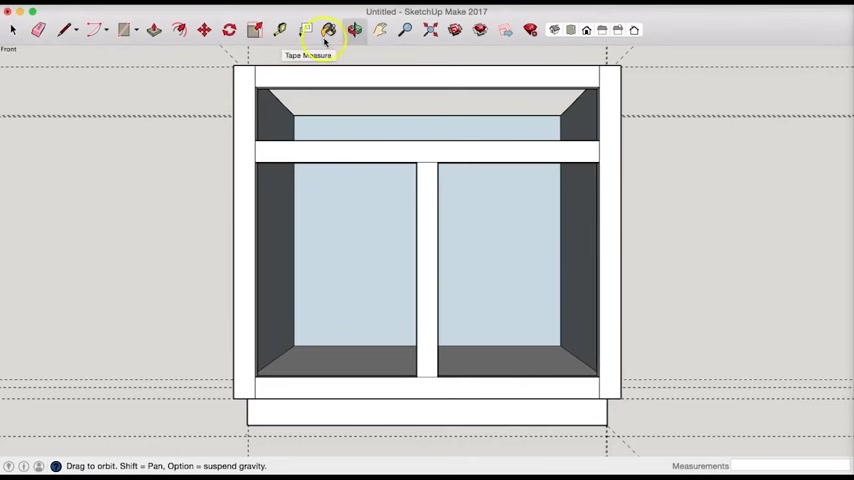
We look right down there and I'm gonna now zoom in to this right So I'm looking down my style and I'm going to click on my measuring tape .
Uh I'm gonna pull in , uh I do a quarter inch .
Ok ?
I always recess my box in a quarter inch and then from this guy , we're gonna pull in three quarters 0.75 .
All right .
And then we're gonna , I , so the way I'm gonna build this particular cabinet , if I were to build it would be to recess it in quarter inch .
OK ?
So this will actually be hollowed out and I'm gonna do that by drawing a box here .
OK ?
Now , I can select that if I want right ?
And I can draw my extrude button and I can take an asymmetric view .
I can change the view a little bit just to see it better .
And what I can do is I can just push that all the way down until it's gone .
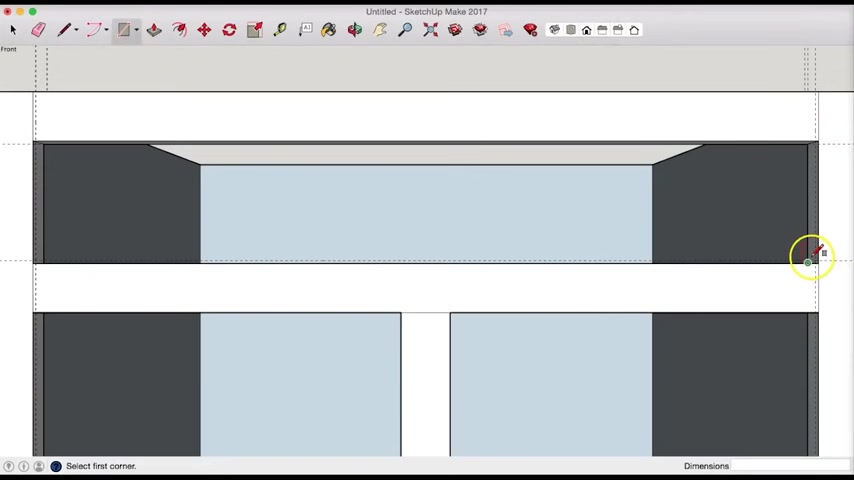
So now I can sink and glue my box into this groove here and I can come down here , slide this down to the next style top and we can repeat that process .
So I'll do it from this view .
So you see it a little better .
OK ?
I'm gonna pull in a quarter of an inch .
So we have a quarter inch overhang , pull this in 0.75 inches , three quarters of an inch .
OK ?
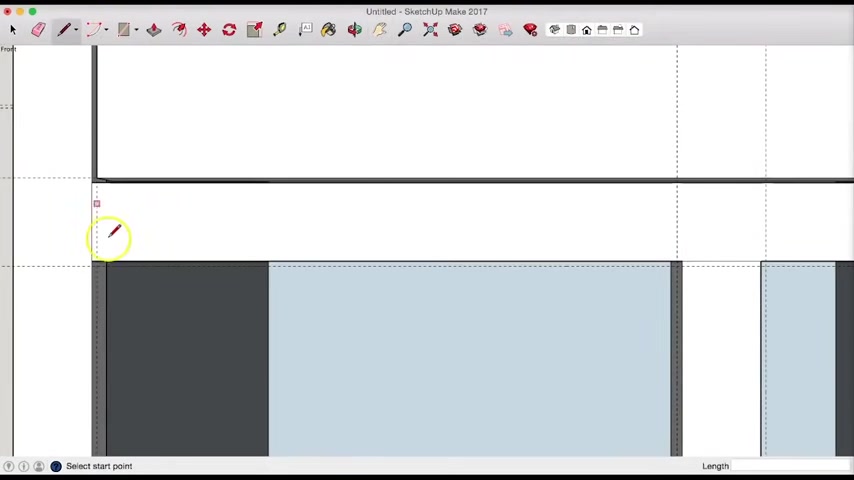
Now I can take my pencil and then draw this rectangle and then get rid of it .
Boom .
OK ?
So now let's take an asymmetric view .
So I click this button here to get a , I think a 3D view .
If I want a front view , I just click that OK , 3D view .
There you go .
And again , I can look at this is the front , this is the back and you can see if I've got those grooves put in there so we could attach our box to our face frame .
So this is almost just like building it in real life .
You know , you're drawing the parts and then you're putting it together .
So let's draw our , I'm gonna take a top view again and I'm going to pull out .
Now , we want the total cabinet to be 24 inches front to back .
OK ?
So you're not gonna see that line , but it's right there .
All right .
So now we know where the back of the cabinet is .
So I can actually just draw a rectangle and let's see if we can make this a little easier .
So to put this in the center and I can draw this by either using a pencil and drawing all four points .
OK ?
Or I could just have drawn a rectangle .
All right .
So now I'm gonna show you what this looks like .
So there's the top two dimensional part of our box and I'm actually gonna pull this all the way down to 34.5 inches .
So it's gonna pass the face frame .
So what I'm gonna do is select this , this face and pull it down and you can see it , it opened up .
Actually , it looks like it's hollowed out , but that's fine .
So I'll let go and I'll just type in 34.5 and there we go .
All right .
Then I'm gonna take a pencil and just close that surface .
All right .
So let's take a look at the front of this cabinet .
Oh , you may have noticed we forgot something , right ?
That's a toe kick .
So we actually have this line that delete that .
So we can do our toe kick .
Now if we wanted to and we might as well because that's not too hard to do .
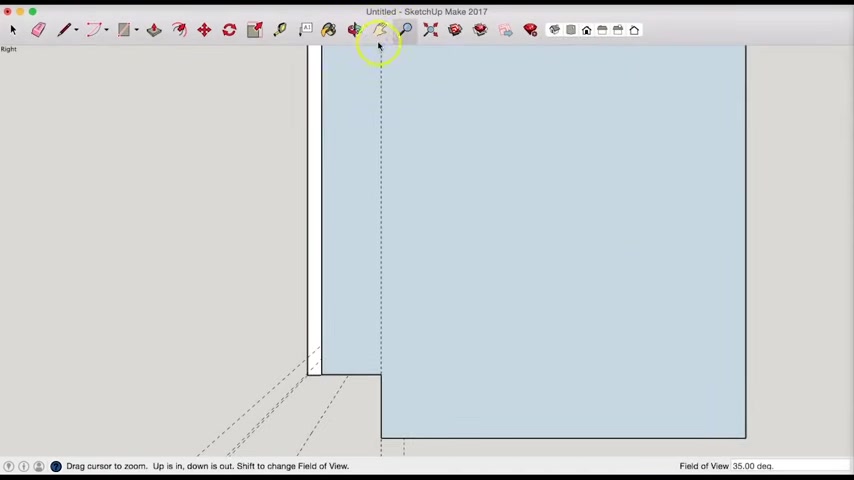
So let's let's do this by selecting a side view .
So you can see this is the one side , this is the other .
So I'm clicking these two boxes and I'm gonna take my tape measuring tool just like I would in the workshop and I'm gonna pull in 3.5 inches up or in and 3.5 inches up and then I can take my pencil tool and I'm gonna make sure I'm drawing this right here .
So I'm gonna rotate it down and I'm gonna zoom in there we go .
Now , I can select that point , this point , that point and then I can just select this surface and get rid of it .
All right .
Looks like this thing came into .
I don't know what that is .
See you later .
All right .
So there's some lines here left over .
Cool .
All right .
Let's take a look at that side view again .
I hit that button .
Cool .
All right .
So we got our to kick and that's the one side .
This is a view from the other .
So we got our side built pretty cool .
So we can go ahead and repeat that from the top and draw our other side .
So I'm gonna zoom in here a little bit to make this a little easier myself .
Centered up pencil tool , 12345 points .
OK .
Great .
Again , I'll rotate it just so I can see it .
I'm gonna select my push , pull , pull it down , 34.5 pencil tool , close the surface by connecting any two points .
I'm good to go there and then I'll select my side view zoom out to see it .
I'll rotate it up .
All right .
And I'll stap my 3.5 lines .
3.5 and oh no , not that one .
We don't want that one .
We want this front one .
Let's zoom in here a little bit .
OK .
Well , that's not right .
We missed the first one .
Let's do this .
Let's select this align here because that's getting in my way .
All right .
Now I want to do from here 3.5 from this light up .
3.5 .
All right .
Now we do , we'll just do what we did last time and that is zoom in a bit .
Move my hand there .
Great .
And now I can just take my pencil tool , get that corner .
Great .
Select the surface , say see you later , select this stuff here or whatever that is .
Delete it .
All right .
Isometric view .
OK .
Let's see , we can rotate this , see how this looks , right ?
It looks like a cabinet looks pretty cool to me .
All right .
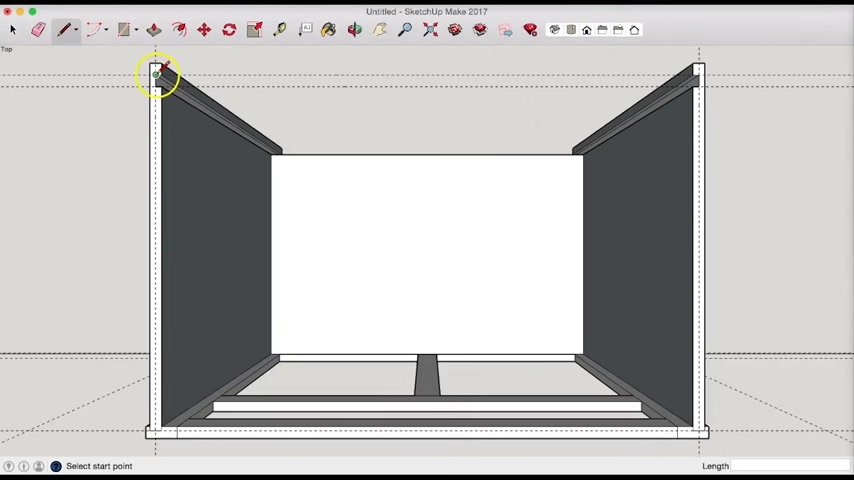
So now let's put our um let's put our backboard in or do we wanna maybe put our back in first ?
Why don't we do that ?
Um So , um , I'm gonna draw this the way I , I built the kitchen cabinets in my first house and that was , I used three quarter inches for all of the plywood .
I didn't use a quarter inch back and then , uh , you know , a separate sort of backs trap .
I used a just a three quarter inch back and it made it a little easier .
It's more expensive .
But logistically , it made it easier because I didn't have to buy several different thicknesses of plywood .
I only needed to buy the three quarter inch plywood and then the half inch for the door .
So let's go ahead and rotate this or we can just take a top view and I'm gonna pull this in from the top edge .
I'm gonna pull in an inch .
Ok ?
And the reason I would do that , let's say if I wanted some to scribe , have some scribe space or three quarters of an inch .
Let's , let's go with three quarters of an inch .
Uh , since my back , I said it would be three quarters of an inch .
We're gonna pull this down 0.75 .
Ok .
And then let's , um , select it .

Come over here .
I can get rid of some of these guidelines .
I don't need anymore like this back .
Like this guy here , I can get rid of those .
Get rid of those .
All right , cleans it up a bit .
Now I can come over here and take my tape measure tool .
Get a red line , pull it in halfway , which is three eights and that's 0.375 or 3/8 .
Now , I can draw uh my box , my little groove here .
I'm gonna take , I can rotate to make sure I do this right .
I'll select the push pull tool and we'll get rid of that .
Great .
So let's repeat that over here .
Tape measure .
Pull that in three eights .
Awesome .
And then we just go 1234 .
Uh We'll do push pull so we can see it , turn it , push , pull that little section .
Cool again .
Let's , let's check it out how it looks uh isometrically .
Well , I'm just gonna zoom out and rotate this around .
All right .
Looks good .
Looks good .
All right .
So I wanted to draw that first .
So we had a clear view of what I'm gonna do at the bottom .
Uh Now let's , so we'll , we'll take a , this is basically a back view .
I'm gonna put the , but you can put the bottom board anywhere you wanted to behind this bottom face frame section .
So let's put it uh a quarter inch down from this lip and I'm gonna zoom in .
So , so I just get a , I'll be able to select a red line here .
So let's say , well , this is selecting three eights .
Let's , let's , let's go with 3/8 whatever it doesn't matter .
And then from here , we'll select this line again .
We just drew and pull it down three quarters of an inch .
So 0.75 .
All right .
Um Now I could delete , um , what I could do is like , put another groove in here if I wanted to , uh and , and then pull it through the groove and you can see all that , but I'm gonna cheat .
So I'm just gonna draw a , um , a rectangle from this corner to that corner and then I'm gonna come in here .
I'm gonna delete these lines .
All right , because they'll get in the way .
Now , I'm going to uh zoom out a little bit so you can see this and I'm going to pull this out .
So I'm gonna select my push pull tool , select this the new section we created and I'm gonna pull it and touch my cursor right there .
All right .
So it pulls it to the edge .
So now let's take a look here .
All right .
So we have our bottom piece basically pulled in and I'm going to just zoom out a bit .
So we have these lines that get pulled out also from our vertical lines .
So you get these horizontal lines on there .
So we're gonna select those and delete those .
All right .
Now , at this point , uh we have our two sides , our face frame .
The only thing we need is our back .
So what I would normally do and what I did when I built my cabinets uh in my first house is I had this back piece go from top to bottom and then this bottom board inserted into a groove in the back .
And since we're drawing a complete cabinet , we actually don't need to show that because it would be hidden anyway .
But what we will do is draw our uh bottom , you know , our backboard and extrude it all the way down and then we can finish up with our drawer , front and door fronts or our doors .
So let's take a top view .
So select top here and all I need to do now at this point is use my pencil tool or the rectangle tool and draw um just a big rectangle here .
And then I can select this surface that I got closed , right ?
And then let's see , let's rotate this .
All right .
So it doesn't , this surface doesn't really exist .
So we'll delete that .
Uh So now I can come around here and now I have that box .
I just drew and I can pull it all the way down and I'm just gonna scoot this out of the way and I want to pull it to this bottom of the surface right here .
So let's go ahead and pull that down right to there and good .
All right .
So let's do a front view .
Zoom out .
Cool .
That looks pretty good isometric view .
Let's just do a quick inspection .
Ok .
So one thing we could add would be a tow kick , toe kick could be pretty easy .
Let's do a side view .
Uh Let's do the other side just because no real reason .
And I'm gonna zoom in to work on the toe kick in that area .
And so what we can do is uh measuring tape and just to see what this would look like , we pulled out 0.25 inches because that's pretty much what it would be .
And I'm gonna take my rectangle tool just going to draw a rectangle .
Let's zoom in to make this easier .
So you can see what I'm doing here .
Uh I could also probably need to snap a line to the bottom of this cabinet .
So I have another corner so I can kind of do it from here out to there .
Great .
There's my toe kick and now I'll just rotate that around so we can see what I'm looking at , right .
I'll just zoom out and we'll grab that to kick section , pull it across until it meets this end .
So I can snap it to anywhere on that line .
I can kind of just hover my mouse over it and it will go to that end .
Great .
So now let's look at it from the front .
Awesome .
And let's do just a quick tour of what this looks like so far .
So we got our back .
Oh , we got an open surface in the back .
So we'll correct that by grabbing our pencil and just uh closing that .
Ok , good .
So we got our backboard in sides .
You can see our joints there , which is , which is how you would see it if you built it this way .
This is what you visually see .
We do have a scribe surface there too .
So we have uh some extra meat behind the cabinet for an uneven wall .
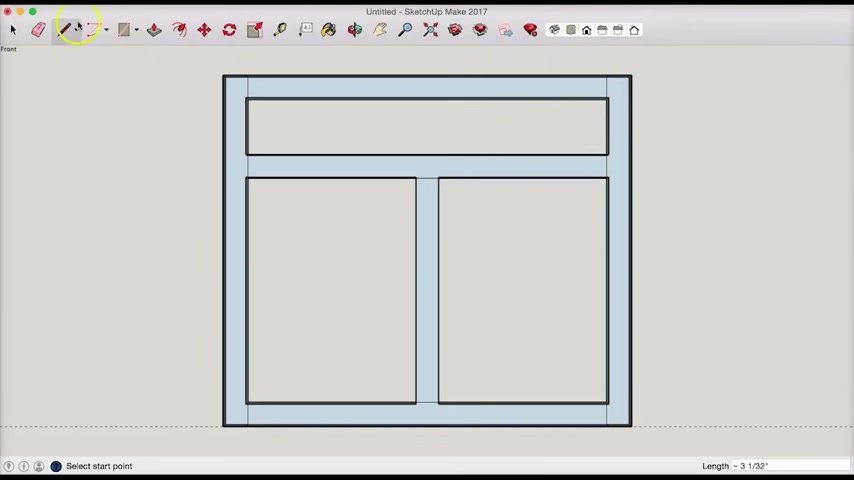
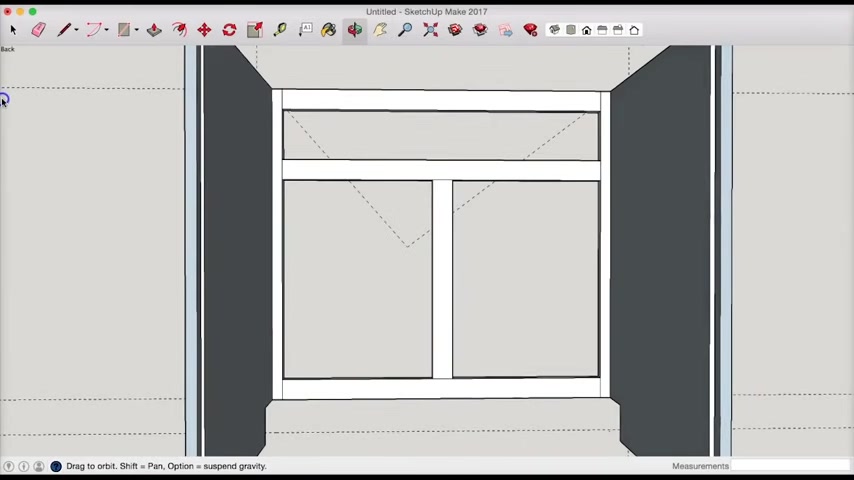
So now let's draw and let's select the front view and let's draw the drawer front .
So we'll just draw a solid piece of wood .
Uh So that's , we're gonna start with a tape measure and I'm going to actually let's make this easier by zooming into the area we're working with .
All right now , uh In our last video , we drew a overlay door , let's do inset so I can show you what that looks like .
So let's go ahead and pull down .
I'm gonna leave an eighth of an inch .
That's 0.125 or 1/8 .
So I'm gonna draw a 1/8 inch , um , sort of measuring tape mark all the way around and I want to pull this out that way .
Oh , there it is .
Ok .
So , now I can draw a rectangle from this little corner , kind of hard to snap to it too , that little corner there .
All right .
So that's really all there is to it for that thing .
But we'll extrude it because it's a , it's not um , three dimensional yet and we'll extrude it to its flush with the back of that face and great , it's not hollowed out .
That looks cool .
Cool .
So we have our little inset drawer there with an eighth inch .
Um , and that might be a bit much eighth inch , but you can clearly see that as a gap .
So that's all I was going for .
And we're gonna repeat that process for these two doors .
So , um , what's nice ?
I already have , uh , when I pulled this 1/8 inch snap line out this little , um , tape measure mark from this edge .

Uh It , it also gave it to me over here , so I'll just have to do it from my inner 1/8 this way .
Oh , try that again .
1/8 in and then one in eighth inch that way and then we'll pull it down and eighth , right and then up from the bottom and eighth as well .
Hey , man , here we go .
All right .
Now again , this is just the only tricky part here is getting this to snap a rectangle to this surface because it's , that's a , that's tricky .
It's also like my rectangle tool grab that .
I wanna grab the intersection and not the end point and it might be easier to do with a pencil .
Not so much .
OK .
So the easy way to do this is just draw four lines .
I'm gonna zoom in even further .
So I can see this .
There's my point so I can just take my pencil .
Get that intersection of snap to it .
Boom .
All right .
Now I can come down here , click on the pencil again and it's still active , which is nice .
So I can come down here .
No , let's get a better view of it right there .
Now , you can see it there .
Pencil again .
Still active .
Come on intersection .
Cool .
I'll grab my hand pencil tool .
Great .
Same thing , pencil tool while we're still active .
Great .
Now I have an issue here because that didn't close .
So let's take a look .
Oh , no , it did close .
I'm sorry .
It didn't look like it closed because it's the same color .
And what I , what I mean by clothes , it didn't look like it closed like a surface .
Um So let's yeah , you can see the one right there .
All right .
Now , what I could do is I can select this uh control C or command C and then command V another one and then I can just sort of copy and snap it in a place right there .
But uh let's see how if we can do that .
What's that ?
Let's do command C command V .
I want a step to the inter section .
Cool .
All right .
So that was two quick doors .
Great .
Now , what we're gonna do is pull them to give them some depth .
So I'm gonna come around to the back , push , pull to the surface , grab this one , go to that surface .
Boom .
All right .
Let's do a front view again .
Um Let's uh zoom out of here a little bit and let's get rid of all .
Uh We have an excess of guidelines we , we uh we don't need at this point .
So I'm gonna highlight those .
Get rid of those .
Great .
All right .
So now let's zoom in a little more and we're almost done here because this is video is getting on a little bit , but we'll um give these doors two inch rail styles to match the cabinet .
So we'll do two .
I wanna make sure we're crabbing that edge to , to grab this one to , to two .
Great .
I think you know how this is gonna look .
Uh I'm gonna zoom out a bit here .
Center that down .
All right .
So now I can draw another rectangle here to here and then another one here .
Yeah , we'll just draw shaker because it's just , it's just a lot easier .
Um And then what we'll do is we'll push those in .
I'll grab that this section and so I can push it or pull it and I'm gonna pull it in a quarter inch and same thing here at 0.25 .
All right .
So now all I need to do is take my pencil and give this thing some vertical lines .
So you can see that these , this door is made of boards and not um , like a piece of plywood that was cut out or something .
All right , cool .
Alright , so let's get rid of our guides .
All right , that's not bad .
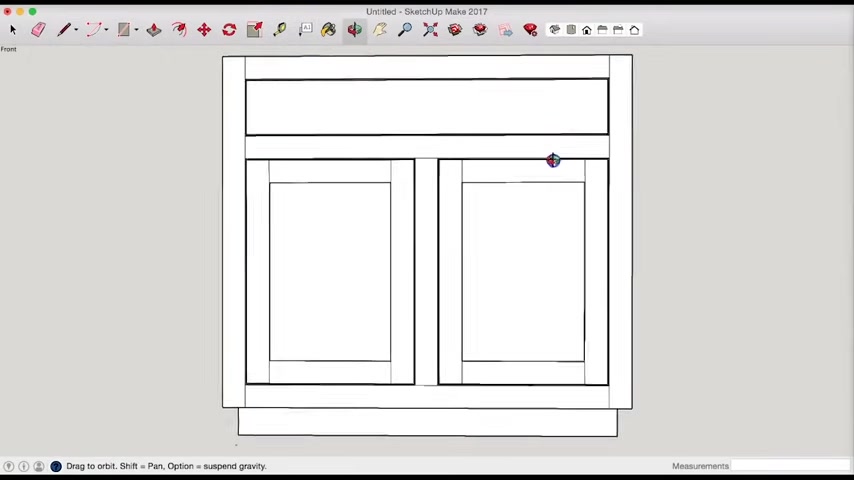
So that is our cabinet .
We drew our base cabinet .
It looks pretty good .
So , you know , if I wanted to , I can , I can save this and upload this to um sketch ups like model uh repository uh and call it like , you know , a 36 inch wide kitchen based cabinet .
Um I could also draw some interior shelves .
Uh Of course , I could draw a drawer box now .
Um but you know , for the purposes of sketch up again and just to , to illustrate the concept and the and the dimensions and how it would all be put together .
I don't really need to go into that sort of depth with that .
Um So this looks pretty good .
Uh And in our next video for cabinets from scratch subscribers , we will go into how to use this .
I'm gonna add actually uh this this these instructions will require a drawing to reference and I'm going to use um close ups of various shots of this cabinet uh to make uh the pictures or the images for this spreadsheet uh to make this easier to use and understand .
But yeah , you'll be able to put in your measurements .
Uh Some of your assumptions on how you'd want to build it and you'll get your complete parts list from this .
And we're gonna make this right now .
I have this for a cabinet , a basic kitchen cabinet with a single drawer and double doors and with a face frame .
So what I will do is make one for our base cabinet with a single drawer , single door .
Uh We'll make one for our corner cabinet , upper cabinets , fame , uh frameless face frames , corner cabinets , uh double wall ovens .
Uh The idea is to really give you guys some , some extra tools so you , so you can build all this stuff yourself .
All right .
Uh We'll catch you in the next lesson .
Thanks .
Are you looking for a way to reach a wider audience and get more views on your videos?
Our innovative video to text transcribing service can help you do just that.
We provide accurate transcriptions of your videos along with visual content that will help you attract new viewers and keep them engaged. Plus, our data analytics and ad campaign tools can help you monetize your content and maximize your revenue.
Let's partner up and take your video content to the next level!
Contact us today to learn more.