https://www.youtube.com/watch?v=7P8qvaO3t_E
How to Make Paper Flowers in Cricut Design Space -- All 10 Flowers!!
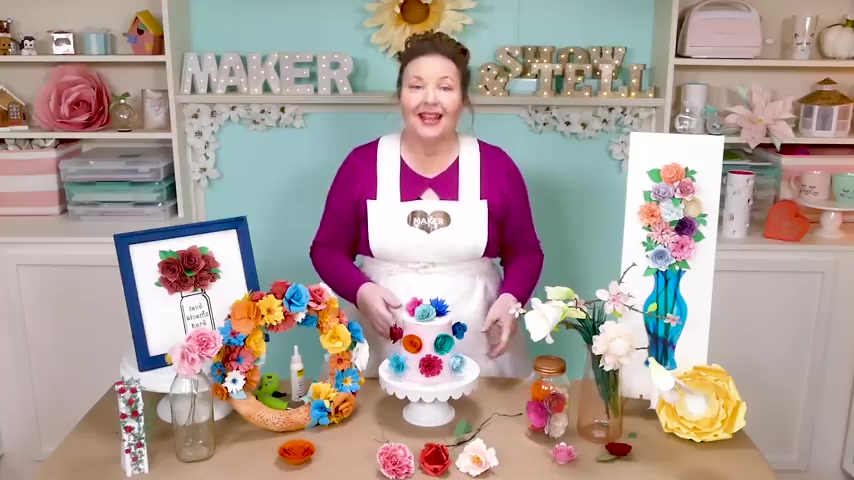
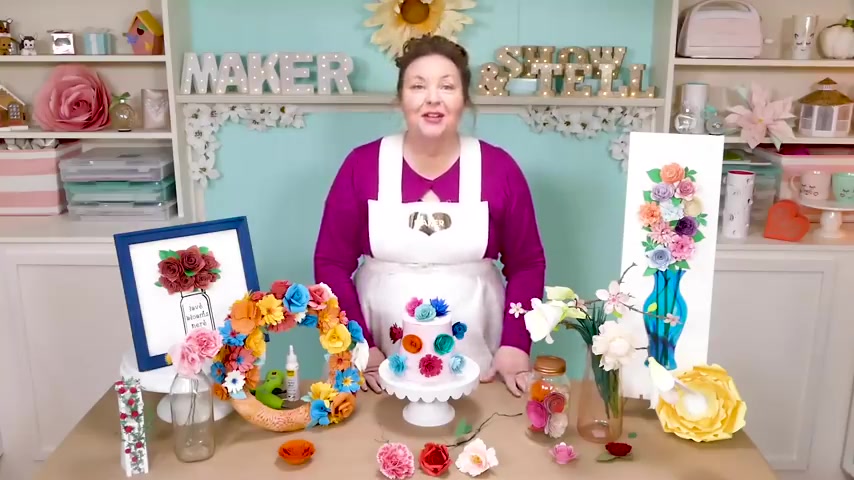
Hello everybody .
My name is Jennifer Maker .
And today we are making cricket paper flowers on the Great Maker Show in Town .
I love , love , love paper flowers .
My very first designs for the cricket were paper flowers .
First , I made a P and , and then a rose and then a carnation .
I've designed so many more paper flowers since then because I just love how we can turn regular card stock into these beautiful works of art .
I believe I've designed over 25 paper flowers at this point in fact .
But did you know that there are 10 paper flower designs , right ?
In cricket access that you can use any time you want ?
They are part of the flower shop cartridge and it's included in cricket access .
So today I'm gonna show you each of those paper flowers .
There's 10 of them and how to assemble them .
Now to make paper flowers , you really just need some card stock a way to roll your flowers in something to keep them all together like glue or something , right ?
And I'm gonna show you the kind of paper that works best for paper flowers because there are some things to keep in mind and watch out for when you're choosing a paper .
I'm also gonna show you with three different types of tools that you can use to assemble your paper flowers .
So cricket's own cooling tool , my homemade cooling tool and a reverse action set of tweezers .
And finally , I'm going to show you um how to use both tacky glue and hot glue .
So you can decide which one works best for you .
So let's head on over to cricket design space so I can show you exactly where to find these 10 flowers and we will get started cutting them right out .
All right .
So there's three ways to find these flowers pretty easily .
The first and easiest way is to actually go to my blog at Jennifer maker dot com and find the cricket paper flowers blog post .
Because once you're in there , I have a super easy , easy , easy link that will take you right to all 10 of the cricket paper flowers .
You just scroll down to step one and click on that link where there it says Jennifer maker dot com slash cricket flowers .
And when you do that , it takes you right to cricket design space and loads all 10 flowers for you see easy peasy , but sometimes you need to actually add a flower to another project .
So let me show you two other ways that you can find these flowers once you're inside cricket design space .
So let's go ahead and click in new .
So we have a new canvas and then click images over on the left and up at the top , you're going to type in the codes for the flowers .
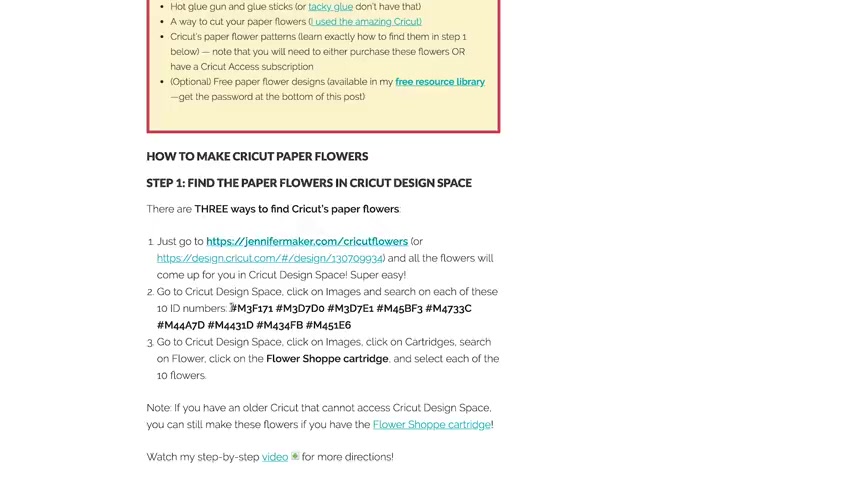
There's 10 different codes and you just type in the code name and press the return key and it gives you , it takes you right to that image and you can do this for all 10 of the flowers .
I actually have all 10 codes in my blog post so that you don't have to go look them up or hunt for them .
But there is another way , I think it's simpler than that .
And if you go into images and click cartridges and search on flower and locate the flower shop cartridge , which is included free in crooked access at the time of this video , then click on view all flowers .
Now you can see everything in that cartridge and then you can just click each of the individual rolled flowers that we're going to do in this video and there's 10 of them and they're all in this one cartridge .
And , um , again , this , this cartridge is included free in cricket access .
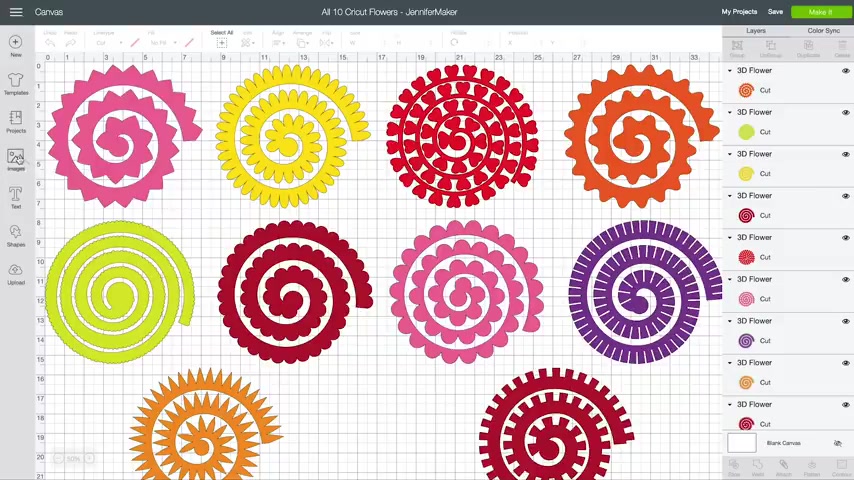
So we're just gonna go ahead and add all 10 of these onto our canvas .
And there they are .
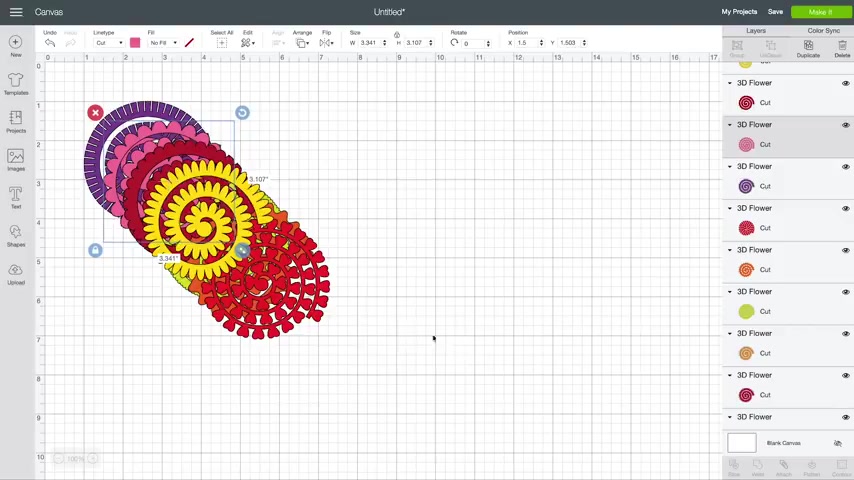
Now when they come in by default , they're , they're not very big , they're about three inches and that's going to make a pretty small flower as you're going to see later in this video .
So a more typical size , the size , in fact that I'm going to be using for my paper flower and vases project , which I'll be talking about in my next video after this , I'm , I'm starting with an eight inch flower .
So if you want to resize all of these flowers , what I recommend that you do is select all of the flowers just like I'm doing here , go to the aligned menu and choose center .
Now they're all on top of each other .
And then we can change the size right now up here at the top to eight inches wide and all of the flowers will resize to eight inches .
And this is an excellent size for making paper flowers .
I recommend this .
And this is what I will be cutting mine out for my paper flowers in a vase canvas project .
So , and of course , you can change this , the colors and everything like that if you'd like to .
But really what matters is what piece of paper you cut it on .
All right .
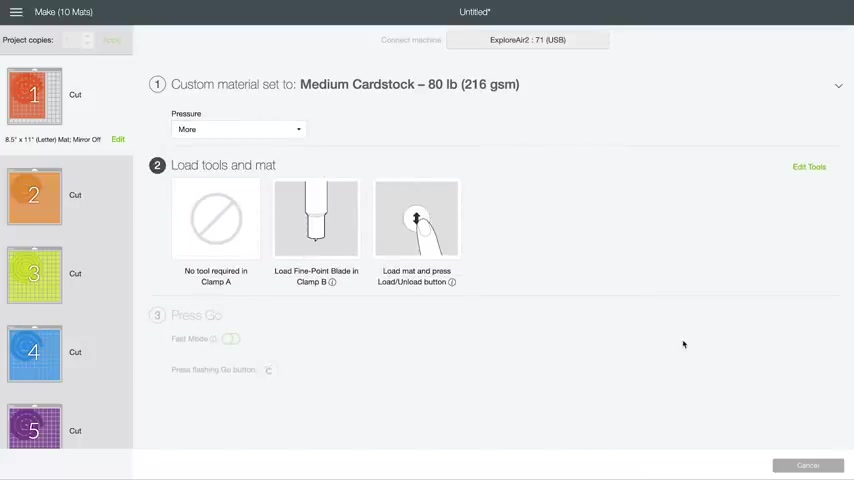
So I'm gonna go ahead and click and make it .
And here's all of our flowers .
We can change to 8.5 by 11 paper because eight , an eight inch flour does fit an 8.5 by 11 inch paper under materials .
I'm going to choose medium card stock and I'm going ahead and set my pressure to more .
Now , let's talk about what kind of card stock because this question comes up quite a bit .
And really , this is step two of our process finding the best card stock for the best paper , really for our project .
So here I have a stack of papers and I'm gonna go through this stack and I'll point out the things that work best and the things that you want to avoid .
Let's start with the things to avoid first .
OK .
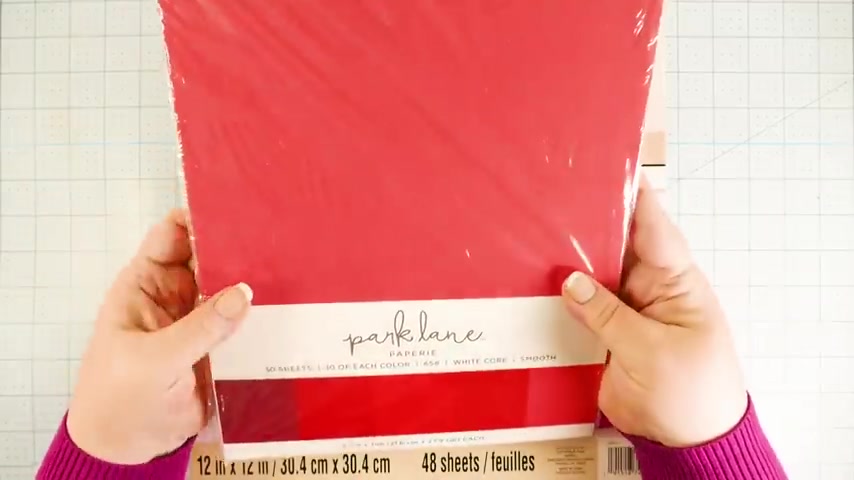
So this paper I got from Joanne's , this is a white core paper that means the inside is actually white and it's usually labeled but not always .
But you can spot it because when you flip it over and look at the side of it , you'll see that the paper isn't as vibrant on the edge as it is .
You know , the actual paper you don't want to use white core , white core will not look as good .
Here is a pet of 12 by 12 paper and you can see on the side it's lighter than the paper itself is .
So even though this one doesn't say that it's white core on the front , it is still not going to work for us .
Now , here is some glitter paper , glitter is pretty , but it usually is only on one side and that's also not going to work well for us either .
So these three types of paper you want to avoid if you can OK , what you want do want to look for are papers that are the same color all the way throughout .
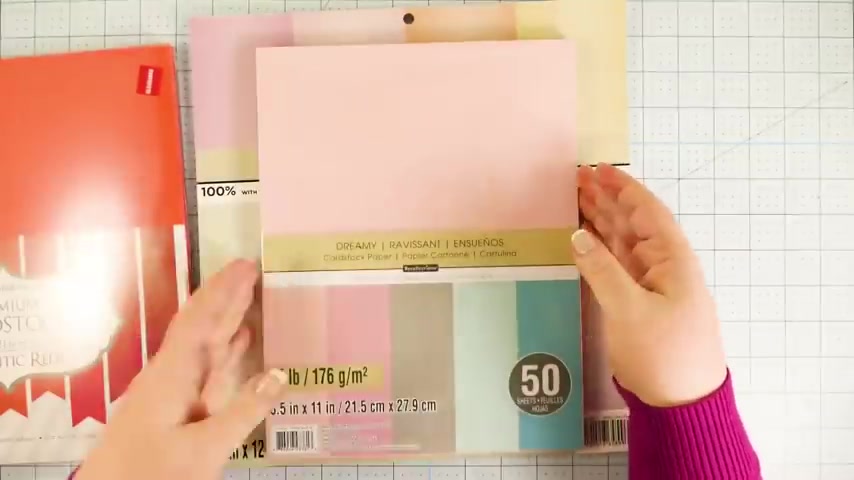
So this paper here I got at Joanne and it has the same color inside is on the outside and you can tell it's just really vibrant when we look at it on the side .
This paper here is from Michael's .
It also nice and vibrant on the side and this is a good paper to use as well .
Now , this shimmer paper , I really like it because it's got a lovely sheen to it , which is great for paper , flowers that makes it look perhaps a little bit more realistic , not as flat , however , it's still a white core paper , but because it's so light and passed out , it'll still work .
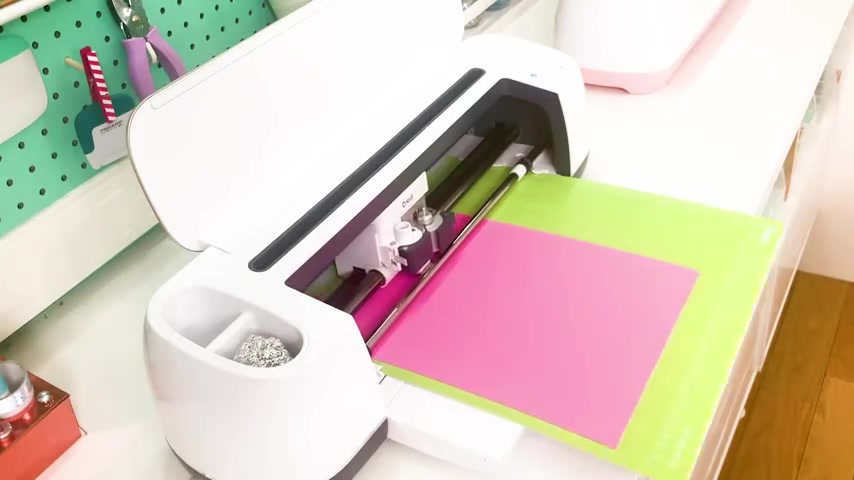
All right , our next step is to cut out the flowers on our cricket .
So I've got my mat loaded up here with an 8.5 inch sheet of card stock .
I'm gonna go ahead and load this in .
You just want to use your regular fine point blade to cut out card stock .
And one of the awesome things about these cricket paper flowers is how simple and quick they are to cut .
They're , there's not a lot of fine details and they'll go really quite quickly , which is good because we're going to cut a lot of flowers out today so that I can show you how each one of these go together .
But something I want to show you is the mat .
So the mat I used here was a brand new nice super sticky mat , which normally I really like , but you can see here how hard it is to get the paper off and in fact , it tears so super sticky new mat , not a good idea .
So instead I went back and I used an older mat that wasn't anywhere near so sticky but certainly sticky enough to , you know , cut my card stock and not have it slip around because the detail on this is really quite fine .
It's , you don't need a super sticky mat for this .
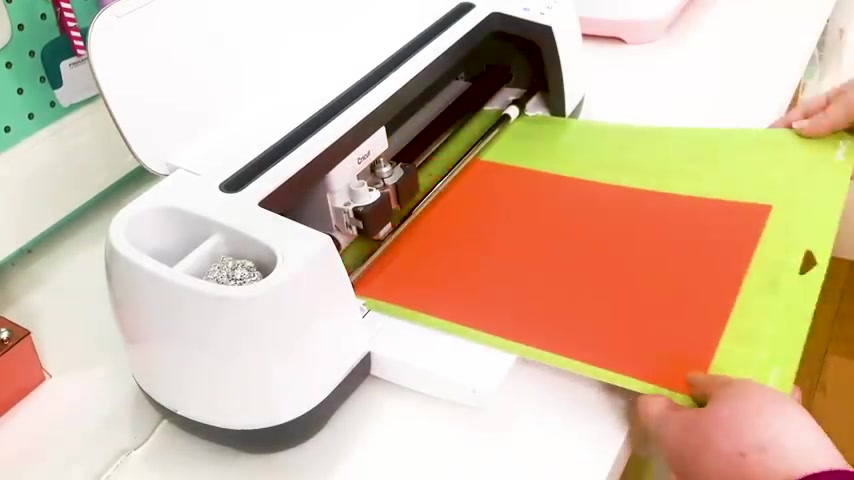
So you will see what a huge difference it will make when I take off the card stock from this mat .
All right .
So there is our cut flower and I can so easily remove this card stock from the mat because it's not anywhere near so sticky .
See , and it comes right off and it's so much easier and faster because you don't have to sit there and like pry off each little bit and worry about it tearing and everything .
So , use a less sticky mat when you're cutting out these paper flowers and you will be so much happier .
All right .
So let's assemble these flowers .
All right .
So our next step is to roll up our paper flowers .
There's three different tools that you could use for this .
The first is the cricket cooling tool , uh which looks like this and it's got a little slot and a little metal tip here the second is my homemade cooling tool .
I have a whole tutorial on how to use this .
It's just a dowel and some electrical tape and there is a slit at the end as well .
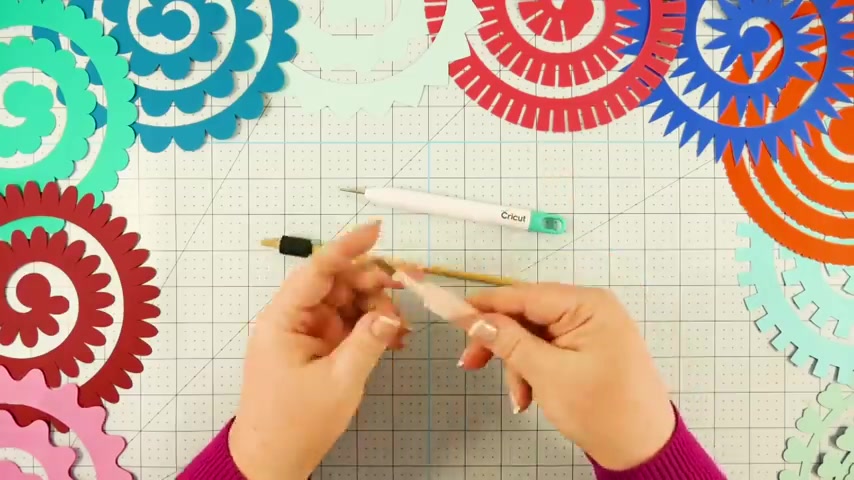
For this one in the third , it's a simple pair of tweezers .
These are reverse action tweezers which makes it a little easier .
But , you know , people use all kinds of tweezers for this .
So I'm gonna show you how it works to use all three of these tools and you can decide which one works best for you .
All right .
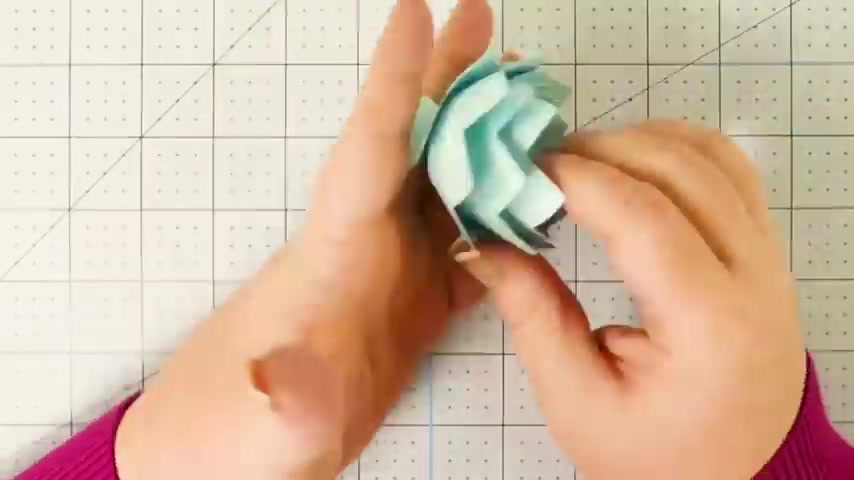
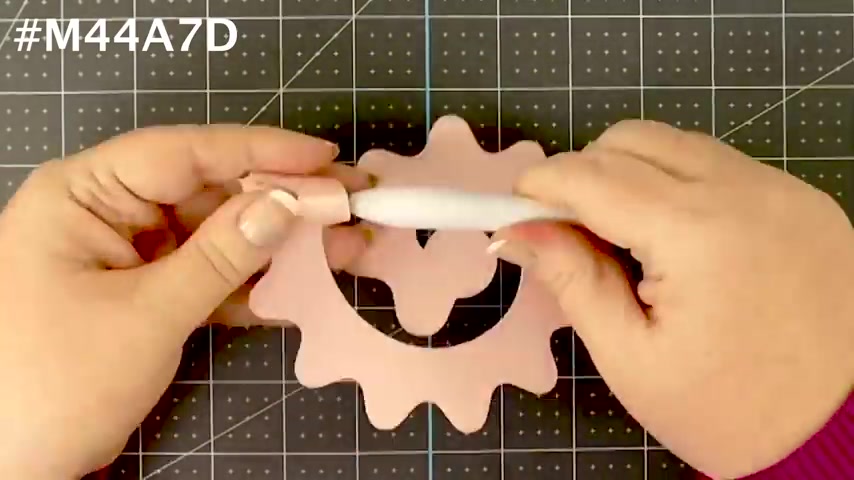
So let's start with our first flower .
I have got all 10 of the cricket flowers right here .
You want to put it in this orientation as you begin just as I'm showing here .
And then you , you put the , the end of the flower into the slot on the end of your cricket cooling tool .
It goes slides right in there and then you start rolling it .
I like to roll it towards me just as I'm doing right here and you just hold the paper in one hand while you roll your tool in the other hand .
And if this is your very first time , just go slow .
Be patient .
You may need to restart it a couple of times .
It's OK .
This is definitely a muscle memory sort of thing .
I've been rolling paper flowers for a long time , so I'm pretty used to it .
Now , the further along you get the harder it's going to get .
So you're gonna want to be really patient as you , as you roll up these flowers because it's gonna want to kind of slip down on the tip there and that is going to happen .
And it's normal .
You , the things you want to avoid are accidentally having it come out of the slot of the tool or having it unravel as you're working at that kind of thing .
So you'll know I'm holding the bud as I'm rolling it because at this point , it's getting harder and harder to roll it up .
But if I hold it , I can kind of keep it into position a little bit better all the way to the end .
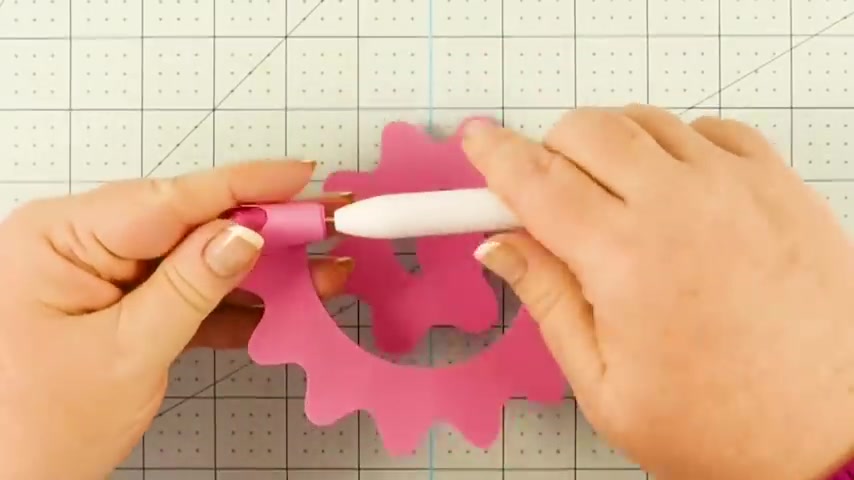
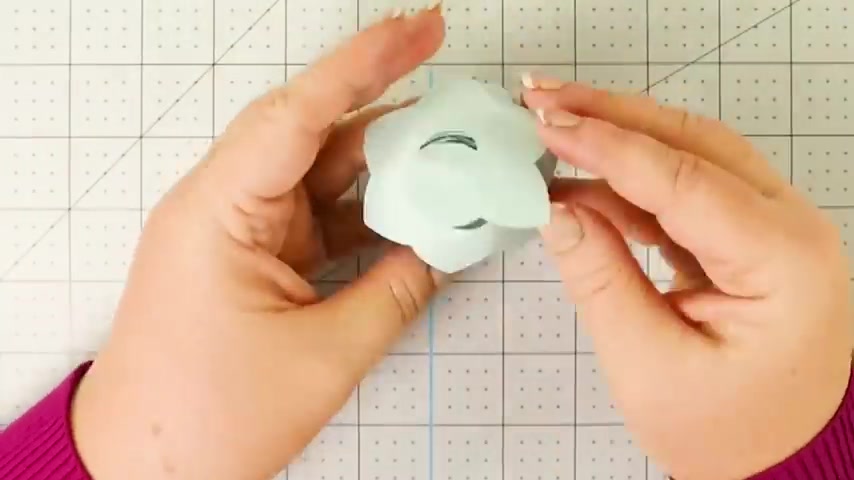
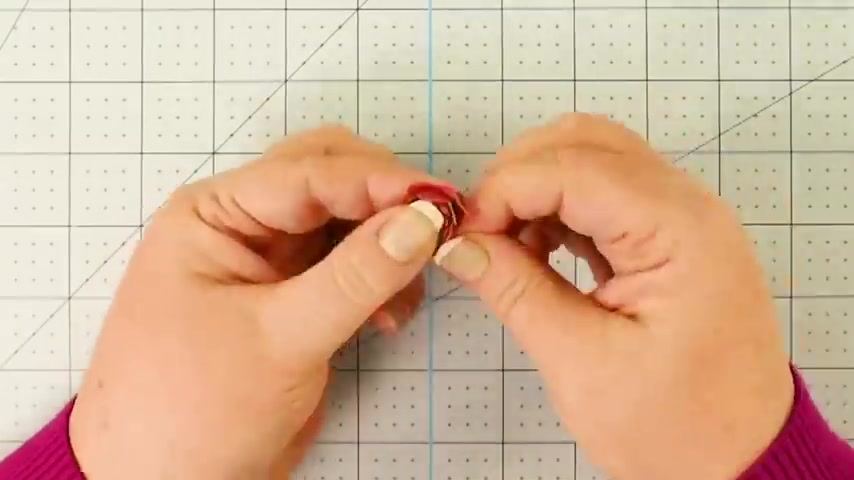
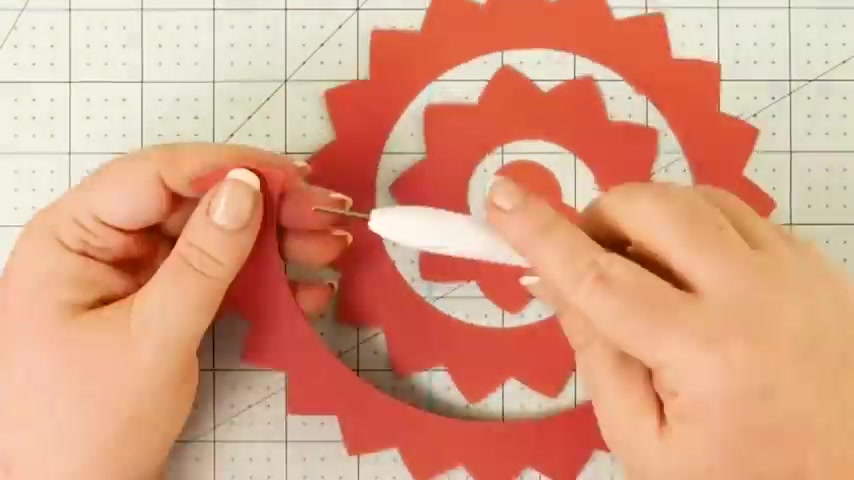
At the end of each of these flowers , there is a , a circle .
You want to stop when you get to that circle , hold the bud and gently pull the scoring tool off of the bud .
You might have to wiggle it a little bit .
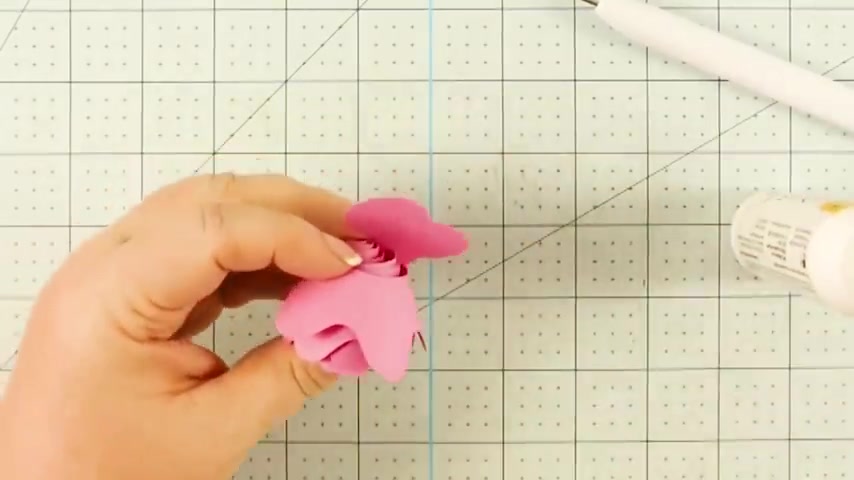
Now , once your flour is off the scoring tool , you need to hold it and allow it to unwind just a little bit as I'm doing here .
Not all the way just enough so that it looks good to you and make sure you're holding it right .
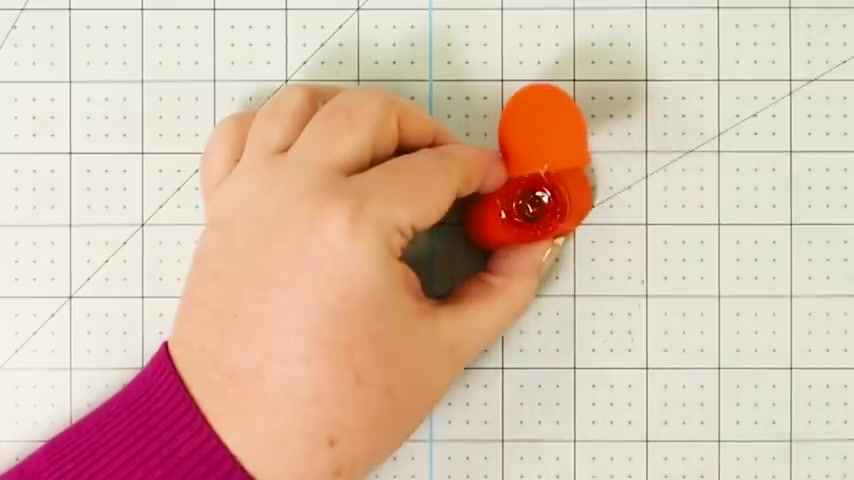
So you , you know , you can decide how much you want it to be open or closed and at the bottom , we need to glue it .
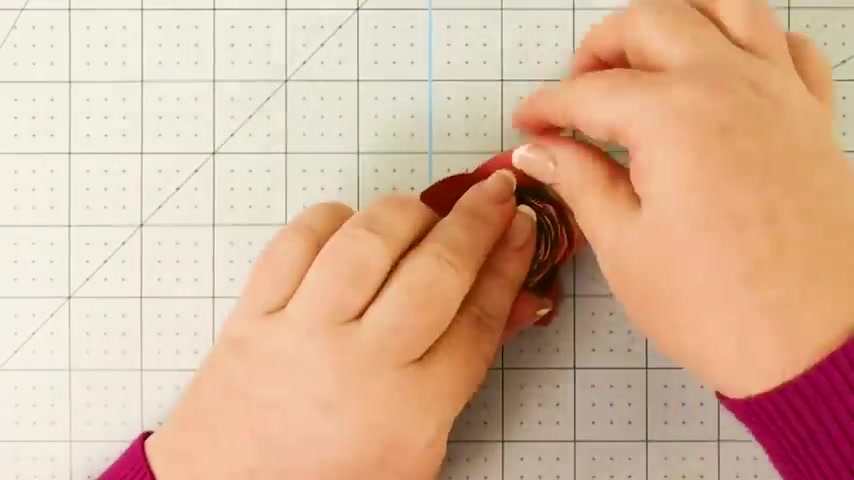
So let's first experiment with using Tacky glue , Techy glue is mostly what I used on my early flowers .
So it's totally viable .
And what you're gonna want to do is hold the bud and so that you can see most of the layers and you want to put the glue in the rolled up section .
You want to try to get glue on all of the edges of your rolled flour .
And then when you've got enough glue there , you fold your circle down onto it and you press and hold everything into position while it dries .
Now , Techy glue will take a little while to dry .
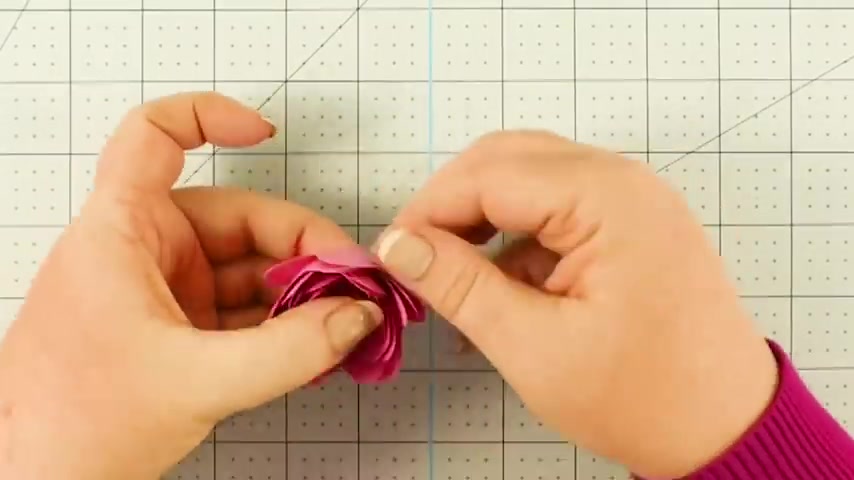
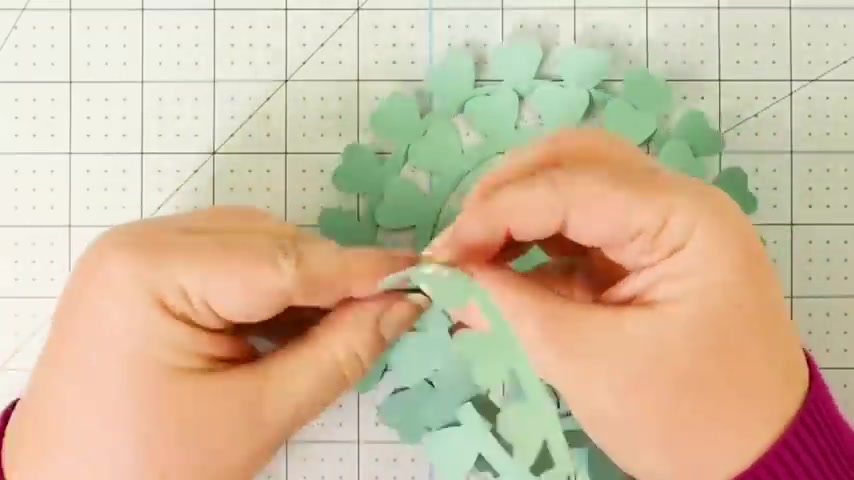
So you wanna hold this and while you're holding it , you can arrange your petals .
So fold them outward or do whatever you'd like to make this flour look good .
Generally speaking with these flowers , you want um fold the flowers outward , you know , you know , really you're not really folding so much as rolling them outward , right ?
You want to experiment , find the look that works best for you and here we go .
That is what your flower looks like .
All right , now , I'm gonna speed up the video while we go through the other nine cricket flowers .
So for this Daisy , I'm going to switch from using the cricket cooling tool to a pair of tweezers .
Now , these are reverse action tweezers so we don't have to squeeze them shut .
You just put the end of the flower on there and then you , you turn your tweezers towards you and holding the flowers so that they roll up onto the end of the tweezers just like this .

And you just want to guide the flowers on there and , and try to keep the base of the rolled flowers , you know , more or less even to the best of your ability , it will get difficult as you get further down , then take out the tweezers .
And if you need to , you can open them up a little bit with the daisy .
You don't have to open them up hardly at all .
You can keep that bud the rolled part tighter .
And then you put glue on the ends and then you put that circle down and then you hold it in your fingers while the glue sets , you can uh push out the pedals .
So that looks more like a real daisy just as I am doing right here .
There we go .
That's our daisy .
That's a nice easy one .
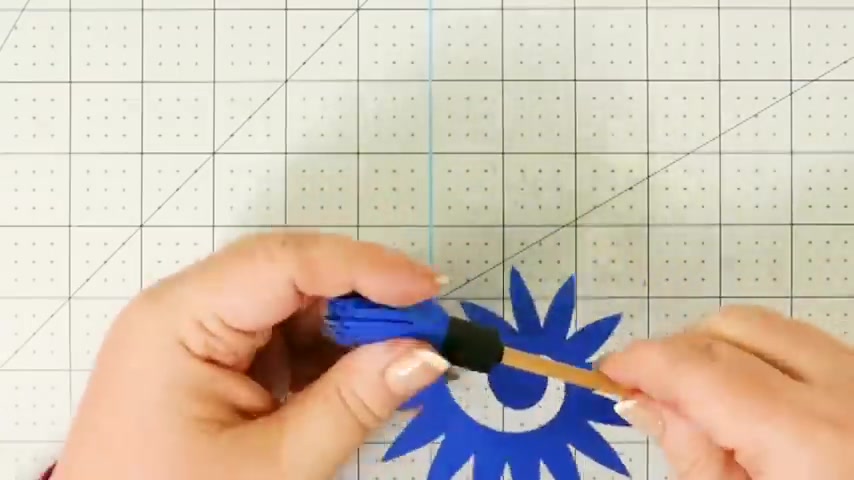
I really like the daisy now for our third cricket flower , I'm gonna switch to using my homemade cooling tool .
So this is just a dowel with a S A slot at the end and some electrical tape .
What I love about this tool is that the electrical tape acts as a guide for the bottom edge of the rolled flowers .
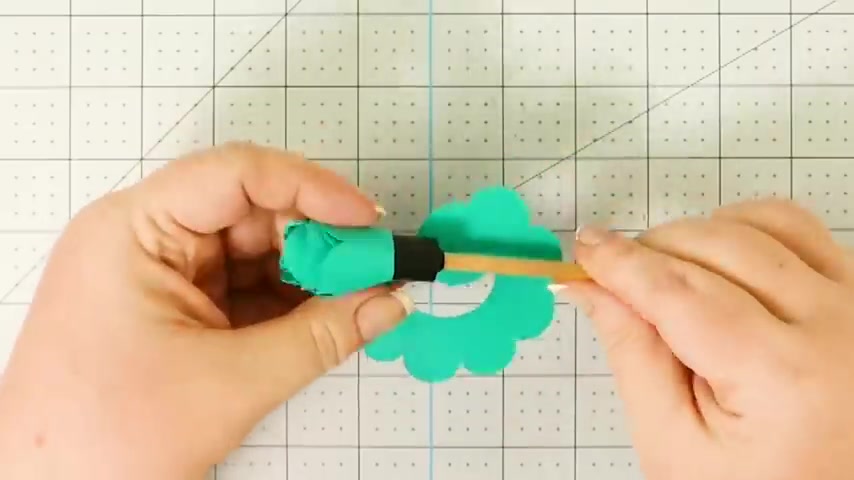
So it can make it easier when you're rolling up your flowers .
They're less likely to slip down on you when you get to the end , you know , want to take a look at your flower and see if it needs to be unrolled a little bit .
Um , in this case , it looks good .
So I'm gonna go ahead and glue it up and it's really too tight and that's one of the problems with these flowers is that I think , I think it's either too tight or it's too loose until you get used to how to make these .
Right .
So it's ok to like , you know , if it seems too tight , it's ok to go ahead and arrange that , get it to where you like it .
I'm trying to get the center a little bit more tightly wound right there , but using the tweezers .
All right .
So here's our fourth flower .
I'm gonna keep using my homemade willing tool because I really like it .
I really like how it helps the flour not slip down quite so readily .
Yes .
So I'm gonna roll this right up and uh we're going to um get to the bottom and pull off the tool just like before .
And we're gonna take a look at the button , let it unroll just a little bit .
So it looks more natural and put that glue on the rolled edges .
Remember you try to get as much glue as you can in there without it being everywhere and um hold the flower as it sets and while it's doing that , roll out your petals so that it looks like a natural flower and one of the issues I see with flowers is that folks aren't rolling their petals outward and it really looks so much better when you can arrange the petals out like a real flower because you know , even like even buds , the flowers aren't completely flat , right ?
They're still curved and everything .
So , all right .
So with this one , I am , go , go ahead and roll it up .
But you can see I'm struggling a little bit with it because it looks best when it's completely like , not super tight , but it's way too loose on the bottom .
Like I'm going to have an issue getting glue on that .
It's just , it's just so loose there , right ?
I can only get glue in a little bit and it's the rolled section is bigger than the circle .
So this is an issue that you might run into as well .
If this happens , you don't have to throw it in the trash can , right ?
You don't have to do that .
You can go ahead and try to glue it like I am here and then roll the center in tighter .
Um You know , so that it , it looks OK .
But if that isn't working , um something else that you can do is is switch from using glue um Techie glue to using hot glue , right ?
So the hot glue will allow it to set much faster and it's thicker .
So it's going to coat the rolled edges better and it's gonna allow you to create your flour quicker and get it into position .
So let's put away this techie glue and get out of a hot glue gun .
All right .
So we've got the glue gun .
Now , remember , uh be careful .
The glue is very hot and because this is a small project and you have to hold it in your fingers while the glue sets , uh you're more likely to burn yourself .
Ok .
So please be careful .
So I'm gonna get this flour rolled back up .
So it looks decent .
Remember everything is fixable .
Really ?
Really ?
I almost never throw anything away .
I can fix almost everything .
And so can you , so we're gonna get this rolled up into good so that we can actually get the glue on it again .
There we go .
That looks good .
Now you see the , the hot glue is just so much thicker and we can get it right on there again .
Be careful with your fingers , right .
If it's too hot , it's , it's gonna be a problem while the glue is setting , roll the petals outward .
So it looks more natural .
There we go .
There's a finished flower .
All right .
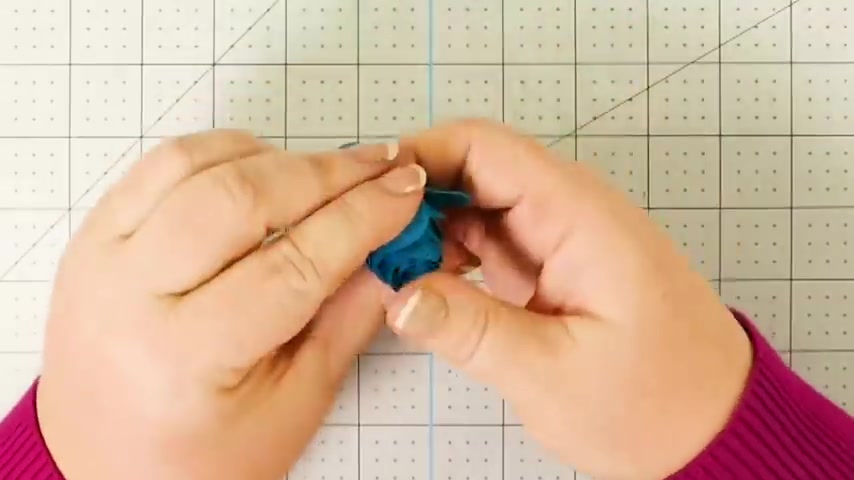
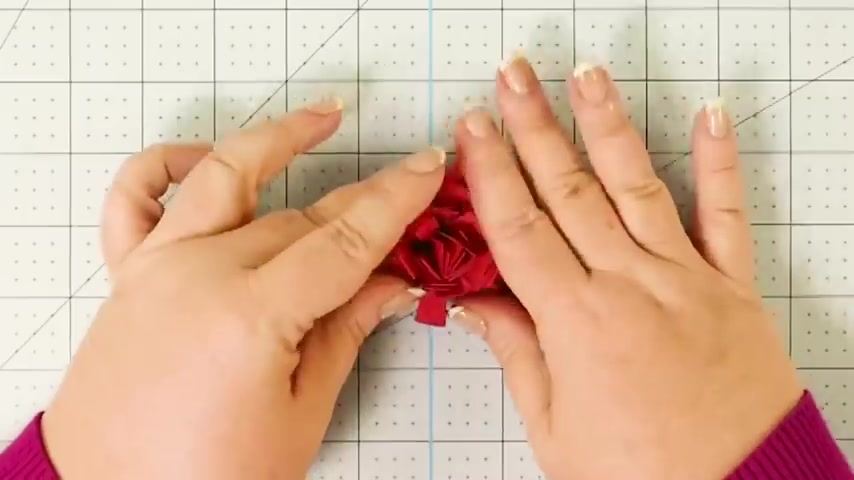
So now let's do this red one that looks a little bit like a mum and this one is nice and easy to roll up because it's all straight edges .
And uh yeah , and we can keep this bud pretty tight because it has um pedals that we can push outward pretty easily , but unroll it just a little bit .
So it looks natural .
You want to hold it as you're , as you're allowing it to unroll a little bit , you know , control it with your fingers so that it doesn't just go and open all the way up and then you'll see how I'm using this surface here .
I'm pressing down on the center so that I don't burn my fingers on the hot glue and that really helps a lot .
OK .
So let's do our pointy flower , pointy pointy petal flower .
And we're gonna roll this one right up again .
I this is , I found this is the best way to roll when you roll it towards you like this .
And because this has nice long pedals , we don't have to unroll it too much .
We can mostly just keep it tight and get that glue on there and make sure you get all the edges .
There we go and use your surface and press it against there so that you don't burn your fingers and open up all the pedals if you're struggling with this at all .
Remember , practice , practice practice .
I've been rolling flowers for a long time .
It's not my first flower did not look very good .
It takes some time .
So don't be discouraged .
Just keep trying .
Now , this age rose is a little tricky in my opinion because while it's really pretty simple to roll up , it's kind of a lot of paper .
So at the end , it gets unruly .
And also it's a very , it's a very wide flower .
If you look at the circle there , it's a pretty big circle compared to the other circles , which of course is our clue that it should be opened up bigger .

So naturally you're going to want to open it up bigger and you're going to find it's a little bit harder to do because it doesn't necessarily want to open up evenly .
Right .
You're going to have some parts that are rolled more than the others .
And I save this one towards the end because it is a little harder to do .
And you'll see , I'm struggling with it right now .
Right ?
It's like this one needs a happy medium between two types and too loose .
Um But if you can't get it right in right in there , then you're gonna want to get it too tight so that you can at least get the glue on the ants .
I don't make this flour very often .
So I'm not well practiced at it , but I want to show you all the mistakes so that you can see what to do when you have an issue as well .
And I will show you we'll go , we'll go through all of these flowers one more time at the end of the video .
So you can see how they should be done properly from the start .
So first we do the mistakes and then we do it right because you know it's great when we have a video with perfect flowers or a perfect project .
But that doesn't help when you can't see how to fix the mistake or what to do when there's an issue .
And even now , you know , I've got this one glued but it's just really , really tight .
It's really just too tight .
So , whatever , certainly not my favorite flower .
But I did it all right .
So another mum type flower .
So we roll this one right up .
I think their rolling is the easiest part .
It's the gluing that I always struggle with .
But again , the more you do , the more the easier it's going to get .
Really .
All right .
So we did get that glue on there .
Are you in the roll section and pushed down on the rows and press it against your surface to avoid burning your fingers and then press your pedals outward .
Here we go .
Now , this next flower which is a rose is the trickiest and that's why I saved it for last .
So you really need to curl your petals before you ever start rolling it up because otherwise it's going to be really difficult to do and it's also not going to roll very well .
A lot of people when they make this flower , they don't do this and it just doesn't look very good at all .
It looks like some weird piece of bit of rolled paper with bits sticking off of it .
Not like a rose , but when you curl your pedals first like this or do something to distress them and relax that stiff paper .
It makes a huge difference .
So I've gone through it and I have curled each of the petals inward and now I'm going to roll it up and because I curled it , it rolls up a lot easier too .
Now , your pedals are kind of , are still a little bit stiff and they , they might want to sort of stick together .
I don't like group together when you're rolling them .

And if this happens , just keep squeezing the bud as you go and it'll keep it curled up into a bud .
That's my best advice for how to , you know , prevent your pedals from all wanting to be on the wrong side .
The advantage to this flower while it's finicky .
It's the most beautiful of all the flowers .
If you can master this one , you can have some gorgeous roses .
So we're just gonna get that glue on there and press it against our surface and get those petals curled in there .
And if you want , if you need to arrange them because they're kind of all stuck together .
This is the time to do it before your hot glue sets and then press your petals outward just like a real flower .
And there we go .
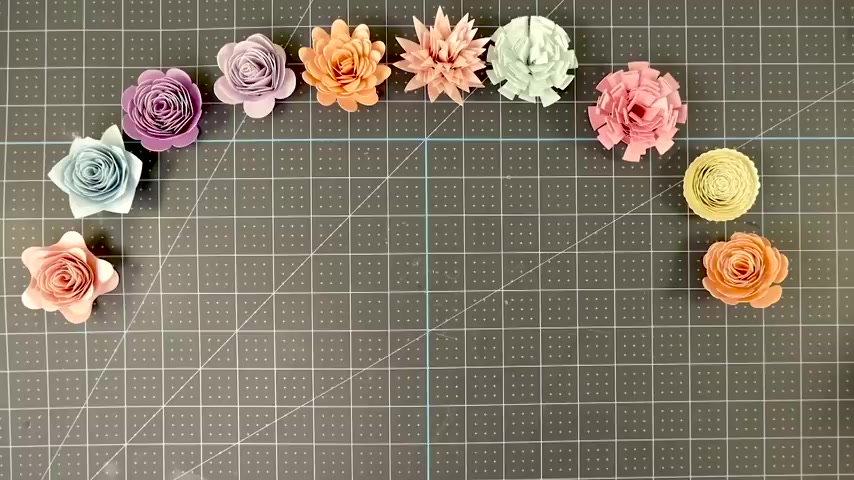
So that is our 10 cricket flowers .
I think that they're super fun and awesome .
So here's all 10 of the cricket 3d paper flowers .
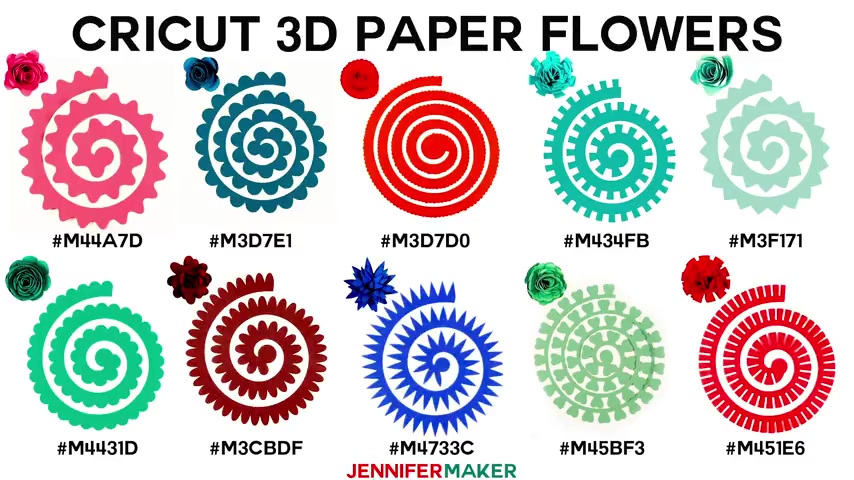
Along with their shape , their finished look and their code in case you need to put them into projects that you already have .
This diagram is also available over on my blog at jennifer maker dot com in case you'd like to book market or print it out .
One of the biggest questions I get is what size should I cut them out at to get this finished size that I want .
So let's talk about that now .
So I cut out 10 flowers at 10 different sizes everywhere .
From two inches , what you see here all the way up to 11 inches so that I could show you the whole range .
So this two inch size , it rolls up into a half inch flower , which is great for things like card and stuff , but probably a bit too small for like Home Decor or a shadow box , unless it was a really small shadow box .
So this is the three inch size and the three inch size rolls up into three quarters of an inch and this is just the next size up .
I'm gonna just go through the whole process .
So I'm doing this very quickly now because you don't necessarily need to see me , you know , go slowly through this .
This is the four inch size and the four inch size rolls right up into one inch .
You're still gonna want to , you know , arrange your pedals and stuff .
So they look good .
The five inch size rolls up into one and a quarter inch .
And , uh , this is a good medium size .
I'm still a little on the small side , but , you know , again , it depends on the size of your project or your canvas .
This is the six inch cut size and the six inch size rolls up into one and three quarters of an inch sized flour .
Our next one is the seven inch size .
Seven inches rolls up into one and three quarters of an inch sized flour .
Here we have our eight inch size , eight inches rolls up into a two inch size flower .
Now , the eight inch is my favorite size because it maximizes the paper of an like an 8.5 by lemon shade of paper .
And it looks great in most like home Decor applications .
So , like on a canvas or a shadow box or as a gift topper .
So eight inches is a winner and that's what I'm doing most of my flowers for my next project .
And all right , this is the nine inch size .
The nine inch size rolls right up into 2.5 inch flour , you know , nine is great , but it doesn't really fit on an 8.5 by 11 sheet of paper .
So it's a little bit tricky in that regard , but let's keep on going up .
This is a 10 inch size , uh , cut flour , right ?
And this rolls up into a two and three quarter inch flour .
But I really think if you're not gonna do eight inches and you want bigger , you might as well just go for the 11 inch size flower because the 11 inch size will maximize your 12 by 12 paper and it rolls up into a beautiful three inch size flower .
If you need to go bigger than this , then you need to actually start looking into giant paper flowers of which I have a whole lot of including roses .

So if you want bigger than three inches , then um check out my giant paper roses and other things like sunflowers and poets and all those sorts of things .
All right .
So here's our sizes and here is the size chart if you want to use , uh refer to this .
I also have this over on my blog if you want to book market or it out so that you have it when you need it .
So there are the 10 sizes of our paper flowers .
You can see how you can use these in different ways just by changing the size of the flower .
Now , I am going to actually use all 10 flowers to create a project .
So if you want to experiment with creating different size flowers , go ahead and do it because I have a project for you and I'll be talking about that in my next video , but you'll still get a sneak peek in this video .
Let's go through all of the flowers one more time .
The right way , I'm going to use the cricket cooling tool because I think that this works best for these flowers .
I am , the paper that I'm using here is a shimmer paper .
Um , so that it gives us a pretty sheen and we're gonna roll these all up and you'll notice as I unroll these , I'm holding them to control them so that they don't open up too big just enough so that I can get them looking natural and then I hot glue them and as , and I press the flower down against the mat and as the glue is setting , I fold out the petals and that is how we do our , all of our flowers .
So we're gonna go through , we're gonna do all 10 right now .
So there we go .
There's all 10 of the paper flowers in shimmer card stock .
Don't they look really lovely ?
I have a project in mind for these .
They're going to be amazing .
I'm gonna put them in a vase and I'm gonna show you what that looks like and we're gonna go over it in another tutorial .
Now , if you let crickets paper flowers , I have more flowers for you to try .
I try to make my flowers look realistic and I trace each petal carefully from real flowers .
I have a pne a rose carnation , a tulip magnolia mum marigold gardenia cherry blossom uh lily .
And um I think there's more too .
Ok .
Yes .
So , and they're all over at Jennifer maker dot com slash paper flowers .
Now , one of the biggest questions I get about paper flowers is what do you do with them ?
I mean , they're pretty and all , but what is their purpose ?
So there's a lot that you can do with them from making cards and gift toppers to home decor .
But one of my all time favorite things to do with paper flowers is make wall decor with uh things like these two canvases here .
You can create a flat vase from vinyl paper or even transparency film and then glue your flowers above it in pretty arrangements .
And I'm going to show you exactly how to do that in my next video .
If you have any questions at all about making crickets , paper flowers or my paper flowers , please leave a comment below or post over in my awesome Facebook group at jennifer maker dot com slash cricket crafters .
And that's it for today .
Remember if you can tell me what you want to make , I can show you how to make it until tomorrow .
Are you looking for a way to reach a wider audience and get more views on your videos?
Our innovative video to text transcribing service can help you do just that.
We provide accurate transcriptions of your videos along with visual content that will help you attract new viewers and keep them engaged. Plus, our data analytics and ad campaign tools can help you monetize your content and maximize your revenue.
Let's partner up and take your video content to the next level!
Contact us today to learn more.