https://www.youtube.com/watch?v=mJoduZAXrtk
How To Turn Your Minecraft - Bedrock Edition Singleplayer World Into A Multiplayer Server For Free
how to turn your Minecraft bedrock edition single player world into a multiplayer server for free .
The first thing you need to do is open up your Minecraft bedrock edition client and then left click on play .
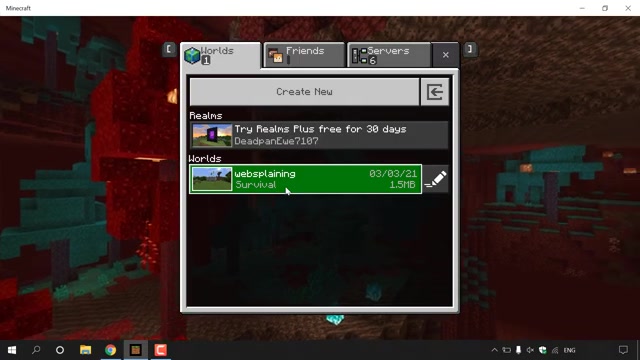
Once you've done that , guys , make sure you've selected the Worlds tab , and then you should see all the worlds that you have created in your Minecraft bedrock edition client .
As you can see , guys , I only have one world that I've created , and it's called webs , explaining .
It's a survival based world .
Now , before we begin the process of turning our Minecraft bedrock edition world into a multiplayer server , we first need to make sure all our items in our inventory have been placed in chests .
This is because when you turn your world into a multiplayer server , your inventory will not transfer over , so you need to make sure it's in chests .
So I'm going to do that .
Now I'm going to left click on the world that I want to turn into a multiplayer server .
So , of course , it's webs explaining to go into that world .
I'll be back with you once I'm in my world so as you can see , I have three items in my inventory .
I have a pick axe .
I have iron ore and I have an apple .
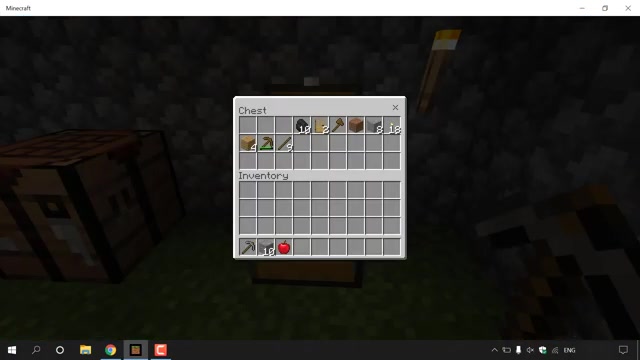
So I'm going to go into my house here and I'm going to deposit the pickax the or and the apple .
Once I've done that , I'm going to hit the X and then I'm going to press escape and I'm going to left .
Click on save and quit .
All right , guys , once you've transferred all your items from your inventory into your chest , you're ready to start the process of turning your Minecraft bedrock edition world into a multiplayer server .
So again , make sure you note the name of your world so mine is called webs .
Explaining Before you begin to turn our Minecraft bedrock edition server into a multiplayer server , we first need to get our world's files .
To do this , I'm going to minimise our Minecraft bedrock edition client here .
Once you're on your desktop , you want to navigate to the search box or left click on the magnifying glass .
Once you're here , you want to type the following percent app data percent .
Once you've done that , guys you want to navigate to the right hand side of your search and then left .
Click on the location of percent app data percent .
All right , guys , once you've done that , just maximise this folder here .
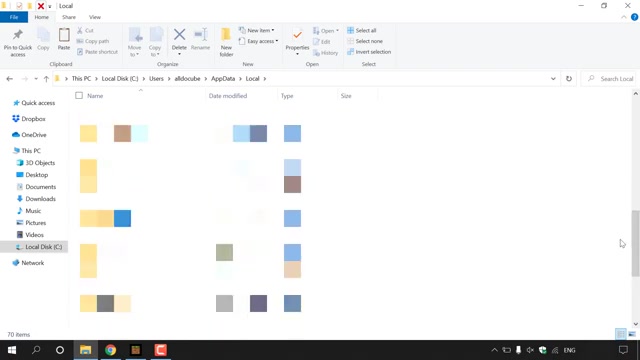
And as you can see , you're in the APP data folder .
The next thing you need to do is double click on local .
Once you're in your local folder , you want to find the folder called Packages .
So I'm just going to look for it now .
All right , guys , I've located packages here , so I'm just going to double click on it to go into it .
Once you're in packages , you want to look for a folder that says Microsoft dot Minecraft and then a bunch of characters afterwards .
So I'm going to look for that now .
Should be towards the bottom .
Right Here it is , guys .
It's called Microsoft dot Minecraft .
And I'm just going to pull this across here just so you can see the full name of the folder and then a bunch of letters , numbers and symbols .
I'm just going to double click on this folder to go into it .
Once you're in your Microsoft dot Minecraft folder , you want to look for a folder called Local State So here it is , guys .
It's the fourth one down for me .
I'm just going to double click on local state here .
Once you're in local state , double click on games and once you're in games , double click on com dot moan .
Once here , you want to look for Minecraft worlds .
So here it is , guys , Minecraft worlds , and I'm just going to double click on that Great guys .
So we're in the correct place now .
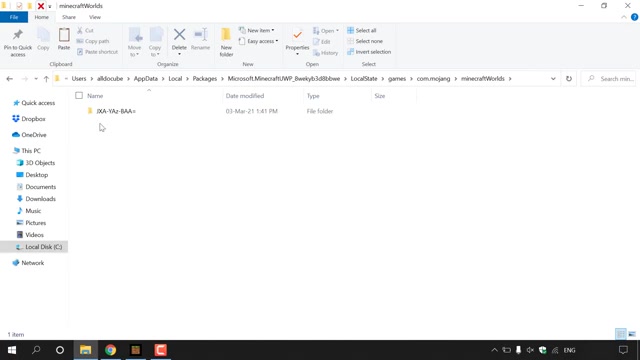
And as you can see , there's a folder here with a bunch of letters and symbols .
If you had multiple worlds in your Minecraft bedrock edition client , you will see multiple files of which will have different letters and symbols .
Of course , I only have one world , so we only have one folder containing all that world's files .
If you're not sure which file contains which world's files , all you need to do is just double click on it to go into it and then double click on level name .
As you can see , guys , the level name is called Web explaining , and that correctly matches our Minecraft bedrock edition client World name .
Once you've confirmed the correct folder for your world , just X out of the level Name TXT .
Document here and then go back .
Great guys .
So now you're back in Minecraft worlds and you should now know the correct folder for your Minecraft Bedrock Edition world .
What we're going to be doing now , guys is making a copy of this folder and putting that copy on our desktop .
So I'm going to left click on the folder that I want to copy , and then I'm going to right , click on it and then click on copy .
Once you've done that , guys , you no longer need to keep the Minecraft World folder open anymore .
So I'm just going to X out of it to go back onto my desktop here .
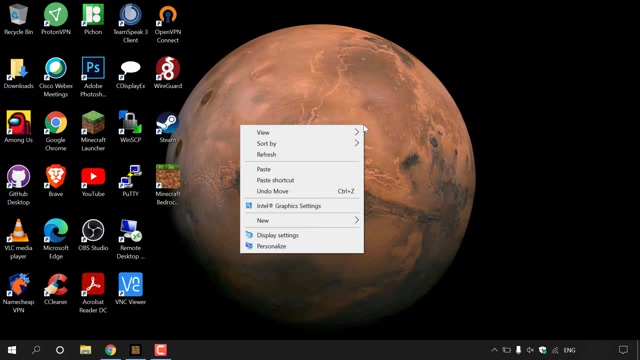
Let's create a new folder to put our world's files into .
So I'm just going to right click on my desktop here , go to New , then go to folder and I'm going to call it Minecraft Bedrock edition server files .
And then I'm going to hit Enter .
Once you've created your folder guys and called it wherever you want to call it , double click on it to go into it .
Once you're in your newly created folder , you want to create another folder within that folder .
So I'm going to right click here , and I'm going to go to New and then go to folder .
The name of this file folder needs to be specific .
You're going to call it worlds and then hit .
Enter .
Make sure it's all lower case .
Once you've done that , guys go into your worlds folder by double clicking on it and then paste your Minecraft bedrock edition server folder in here .
So I'm just going to right click on it and I'm going to click on Paste Great guys .
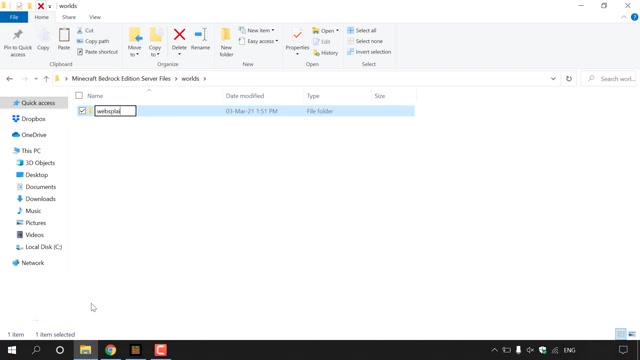
So we have our Minecraft Bedrock Edition single player World folder here that we're going to be turning into our multiplayer online server .
The next thing What you want to do , guys , is rename this folder that contains your Minecraft bedrock edition server files into your world's name .
So of course , my world was called webs explaining , So I'm just going to rename this folder and call it webs explaining and then hit Enter great guys .
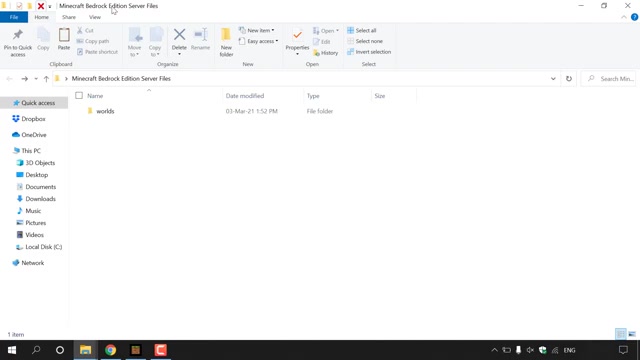
So I'm just going to go back here within that folder to go back into the Minecraft Bedrock edition server files folder .
Great guys .
So you should only have one folder here that is called worlds .
Within that folder you have another folder named exactly the same as your Minecraft bedrock edition single player world that you want to turn into an online multiplayer server .
Now what we need to do is download the server files for our Minecraft bedrock edition server .
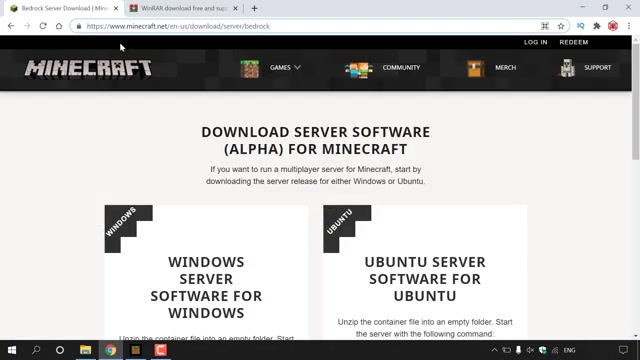
To do this , what you need to do is open up your browser and then navigate to the following address , which is HGTPS colon slash slash WWW dot Minecraft dot net slash EN dash US slash download slash server slash bedrock .
Once you're here , guys , you should be on the download server software Alpha for Minecraft .
Underneath that , it says , if you want to run a multiplayer server for Minecraft , start by downloading the server release for either Windows or B two .
As you can see , guys on the left hand side here , you got your windows server software for windows and on the right hand side here , you got your ubuntu server software for Ubuntu .
Now , of course , guys , we're going to be hosting our Minecraft Bedrock edition server on a Windows operating system , as that's what I'm currently using .
However , if you're on Linux , then you would download the bedrock edition files on the right hand side here for Ubuntu .
All right , guys , back to the left hand side here .
So it says Windows server software for Windows .
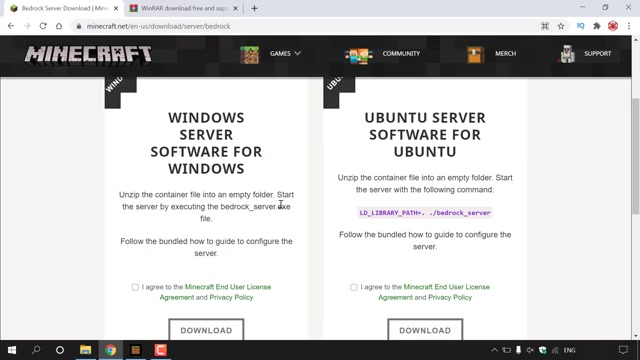
Unzip the container , file into an empty folder .
Start the server by executing the bedrock .
Underscore server dot X file .
Follow the bundled .
How to guide to configure the server .
Great guys .
So what we essentially need to do now is left click on this clear white box to check market , which says I agree to the Minecraft end user licence agreement and privacy policy .
And then all you need to do to download the Windows server software for Windows is left .
Click on the green download button here .
All right , guys , I'll be back with you once the bedrock server files have been downloaded .
Right , guys , if we look to the bottom left hand corner here , you can see that the bedrock server files have been downloaded .
However , it's currently a zip file .
To unzip this file , you will need an extraction tool .
My personal extraction tool on my PC is called winr , which is in the other tab here , and you can download it at the following address , which is https colon slash slash WWW dot win dash R dot com slash start dot html Question .
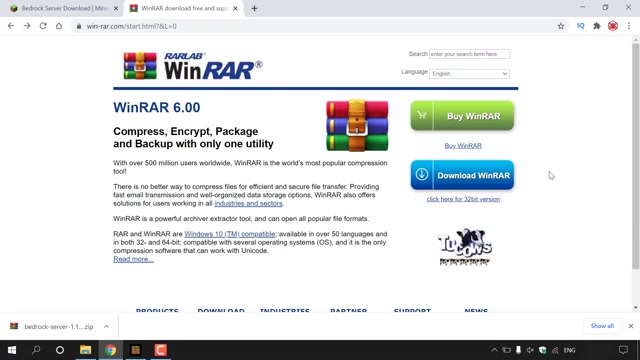
Mark and L equals O , and once you're here , guys , all you need to do is download winr .
If you want to use winr as your extraction tool , if you do not , you don't need to download it .
Also , put a link in the video description of a video I created on how to use winr , and I'll also put it as a card at the top right hand corner within this video .
Great guys .
So I'm going to continue with the video , assuming that you have an extraction tool and what we need to do next is navigate to the bottom left hand corner to our bedrock server files that we have just downloaded .
That's in a zip folder and left click on the arrow here and then left Click on show in folder , right guys .
As you can see , we have our newly downloaded bedrock server 1.16 0.201 0.03 which is the latest version of Minecraft Bedrock edition server at the recording of this video and what we need to do now is cut this zip file by right clicking on it and then left clicking on Cut and move it into the folder on our desktop here .
So I'm just going to minimise my browser again .
So make sure you're in the folder on your desktop that we created .
In my case , it's called Minecraft Bedrock Edition server files , and all you need to do is right .
Click here and then left .
Click on paste .
You should have two files now a folder called Worlds , which contains your bedrock edition single player world files and another zip folder which contains your bedrock edition server files .
All you need to do now guys is right .
Click on the Zip folder that you downloaded and then left .
Click on extract here .
Winrar will then extract the zip file and place all its contents within the Minecraft Bedrock edition server files folder And there we go .
Guys , the extraction has been completed .
We now no longer need the bedrock edition server , so I'm just going to delete it here .
So I'm just going to right click on the zip file here and then left click on delete as we no longer need it The next thing we need to do is change our level .
Name our Minecraft Bedrock edition server to the same name of our single player world that we want to turn into a multiplayer server .
This change needs to take place in the server dot properties file .
So I'm just going to double click on the server dot properties file here .
Windows will then ask you how do you want to open this file and then right at the bottom here It says Always use this app to open dot properties file .
I'm going to uncheck mark this and then I'm going to left click on notepad and then I'm going to left Click on OK , the server dot properties file should be now viewable .
All I'm going to do is maximise this window here and then I'm going to search for level name .
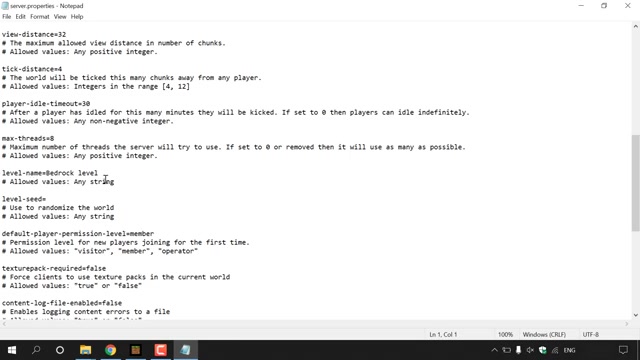
So I'm just going to scroll down here until I find level name .
There we go , guys .
Level dash name equals bedrock level .
That's the current name of our Minecraft bedrock edition server .
This is not correct , and we want to change it to the correct name .
In my case , it's Web explaining , So I'm going to delete bedrock level here , and I'm going to replace it with webs explaining which is the name of my Minecraft bedrock edition world .
Once you've changed the level name , guys , you don't need to do anything else .
Just navigate to the top left hand corner here to file left , click on it and then left , click on save and then just X out of the server dot properties file .
All right , guys , Great .
All that's left to do now is start our Minecraft bedrock Edition server .
To do this , all you need to do is find the bedrock underscore server file , which is a dot XC file and just say double click on it .
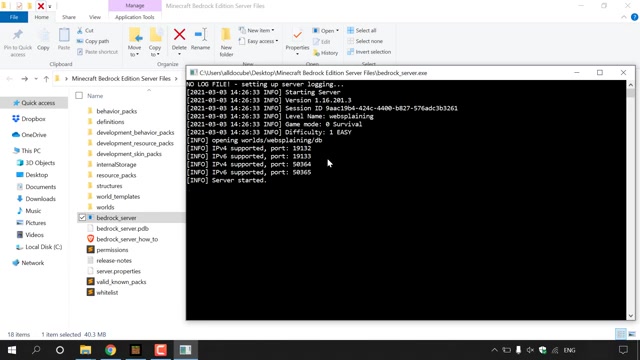
Once you've done that , guys , the command prompt terminal window will open , and your Minecraft bedrock edition server will begin starting on the left hand side .
Here .
You can see that more files have been generated upon starting your server for the very first time .
And there we go .
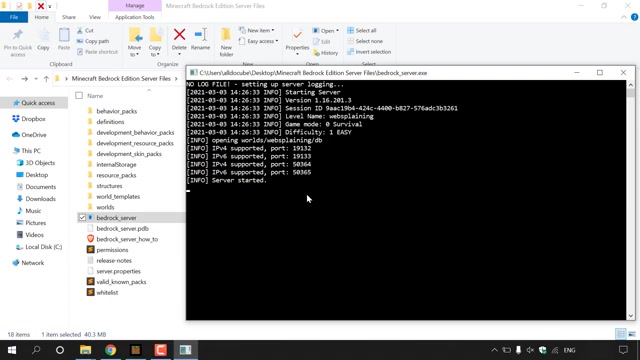
Guys , if we look here , you can see servers started .
Our single player world that's called Web explaining has now been turned into an online multiplayer bedrock edition server .
As you can see , guys above servers started .
You have four ports here .
You have two IPV four addresses and you also have two IPV six addresses .
Not all these ports will work for you , so make sure you find the appropriate port that works for you and your Internet connection .
For me , the IPV six supported port 19133 works for me .
And that's the port that I'm going to be using to connect to my Minecraft bedrock edition server .
Also , guys , another major thing you should know .
Do not close the CMD terminal window as this will cause your server to stop .
So this black box here do not close it .
Otherwise your server will stop and you'll need to double click on server underscore properties again to start your server .
All right , guys , all that's left to do now is to connect to our world .
So all I'm going to do is minimise this command prompt window here and close out of the Minecraft Bedrock edition server files folder here .
Once you've done that , guys , you want to open up the Minecraft Bedrock edition client ?
Of course , I already have it open , so I'm not going to double click on this I'm simply going to left click on the minimised client here on my client here .
I'm going to go back to the main menu and then I'm going to left click on play and at the very top here , you should see worlds , friends and servers .
You want to left click on servers here at the very top , you should see featured servers .
What you want to do is scroll all the way down here to where it says Add server and all you're going to do is left .
Click on add server here in the server name .
Enter the name of your server so my server is called Web explaining .
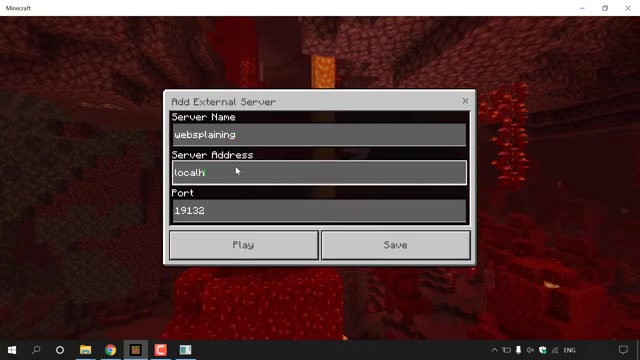
The server address is going to be local host .
Local host will be used to connect to your own server and anyone else connecting to your server using the same Internet connection as you will also need to enter local host .
If they are not using the same Internet connection as you , they will need to connect to your server using your IP address .
If you don't know how to get your IP address , guys , all you need to do is open up your browser , navigate to a search engine of your choice and type .
What is my IP address ?
And you should see a string of numbers there with dots in between .
Copy that .
And give that to your friends or family members .
All right , guys , once you've entered in the server address , which in your case is local host , you need to enter in the port for me , guys , The port I'm to be using is the IPV six port , which is 191 33 for you .
It might be different to connect to your own server .
So I'm going to minimise this and I'm going to change this to 109 133 .
So I'm just going to change the two into a three here and then all I'm going to do is left click on save .
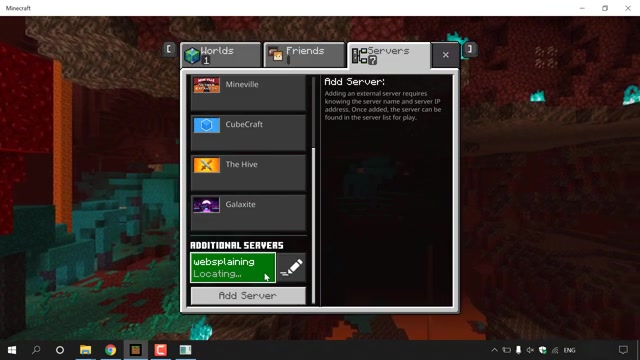
Once you have done that , guys go down to where it says additional servers .
You should see your world's name here to connect to your world .
All you need to do is left .
Click on your world's name and then left .
Click on join server .
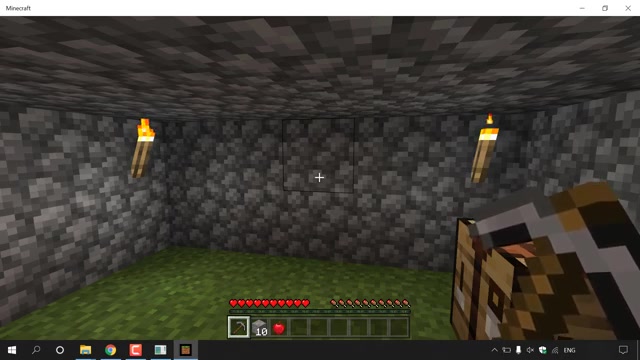
Once you've done that , guys give it a few moments and you'll be connected to your world And there we go , guys , we have successfully connected to our world .
If I just walk over now to my little house here , go to my chest .
You can see that my pickax , my iron ore and my apple are all there and all my other items too , which have transferred from my single player world into my online multiplayer server .
If you want to give yourself operator guys in your CMD terminal window , the black box you want to type space and then the user of your Minecraft character and then hit enter .
This will give you operator privileges on your Minecraft bedrock edition multiplayer server .
All right , guys , that pretty much concludes the video on how to turn your Minecraft bedrock edition single player world into a multiplayer server for free .
If you enjoyed this video , be sure to give it a like comment down below and most importantly of all , subscribe to support the channel .
I'll see you on the next video
Are you looking for a way to reach a wider audience and get more views on your videos?
Our innovative video to text transcribing service can help you do just that.
We provide accurate transcriptions of your videos along with visual content that will help you attract new viewers and keep them engaged. Plus, our data analytics and ad campaign tools can help you monetize your content and maximize your revenue.
Let's partner up and take your video content to the next level!
Contact us today to learn more.