https://www.youtube.com/watch?v=4Ncre-Uup7g
How To Create An eCommerce Website With WordPress 2023

What's up guys ?
My name is Darryl Wilson .
And today I'll be showing you guys how to create a professional and modern ecommerce website , step by step and you don't need to know any sort of coding or have any experience whatsoever because everything in this tutorial is done with a simple drag and drop builder that makes it super easy to build your e-commerce website .
And as you guys can tell this website looks great .
So if you've always wanted to learn how to create an e-commerce website for the very first time and you're kind of tired of the run around , then this tutorial is for you .
So by the end of this tutorial , you guys are gonna know how to create your own e commerce website .
And you're also gonna be become a wordpress experts .
And this e-commerce website you guys are gonna make today is gonna look super professional and modern and your visitors are really gonna enjoy shopping on your new e-commerce websites .
So today I'll walk you through how to make an e-commerce website to fit your business needs .
Now , you can sell any type of product you want on your e-commerce website .
You can sell clothes , your own personal branding products , coffee electronics , you can sell any type of product you want with no restrictions .
Plus your designs are gonna look very similar to popular online retail stores like Sony Apple , Live , Lark , Abercrombie , and Fitch and American Eagle .
We will be using modern trends that multi million dollar companies use to make sure your website stands out and keeps up with today's website trends .
Plus you guys will have access to hundreds of templates where you can easily import a section or even a complete website , right on your new e-commerce websites .
In just a few clicks , you can simply import a block or template , adjust it and you're on your way to create your new e-commerce websites .
Now , this video might take a few hours of your time .
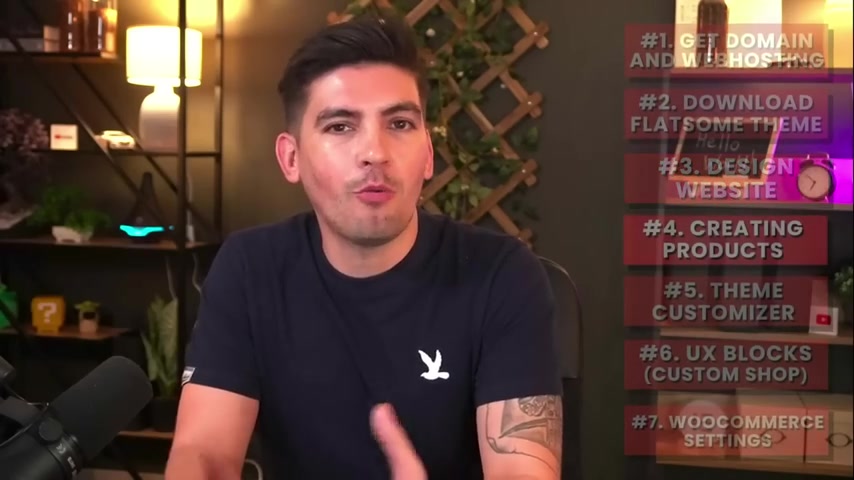
So let me give you all a five minute overview and show you what you're going to learn today in this tutorial .
All right .
So let me give you guys a five minute overview about this website , walk you guys through the website and show you what you're gonna learn today in this video .
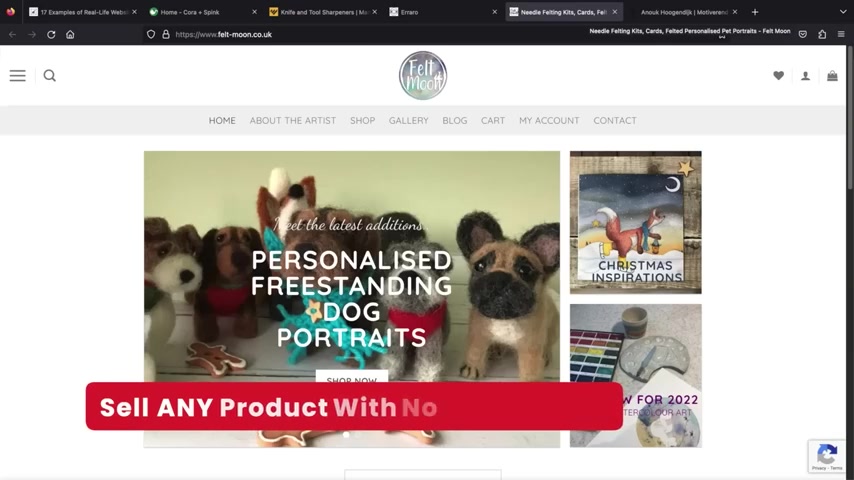
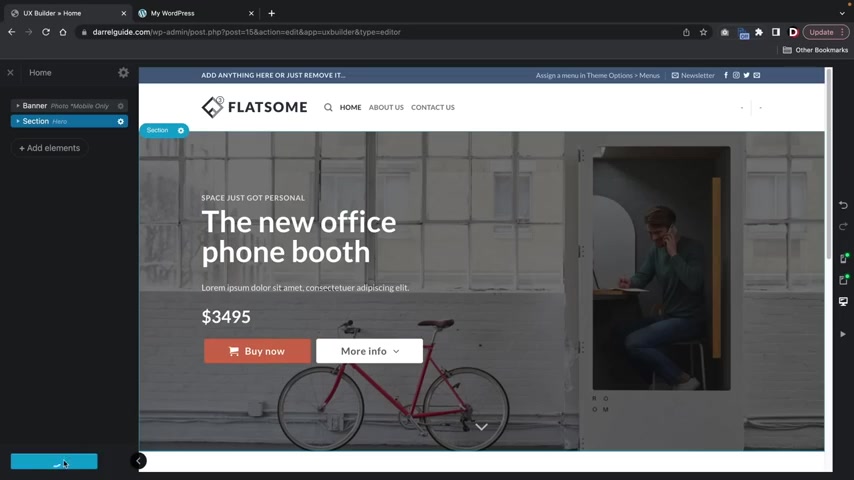
So here is our landing page , right ?
It's a beautiful landing page .
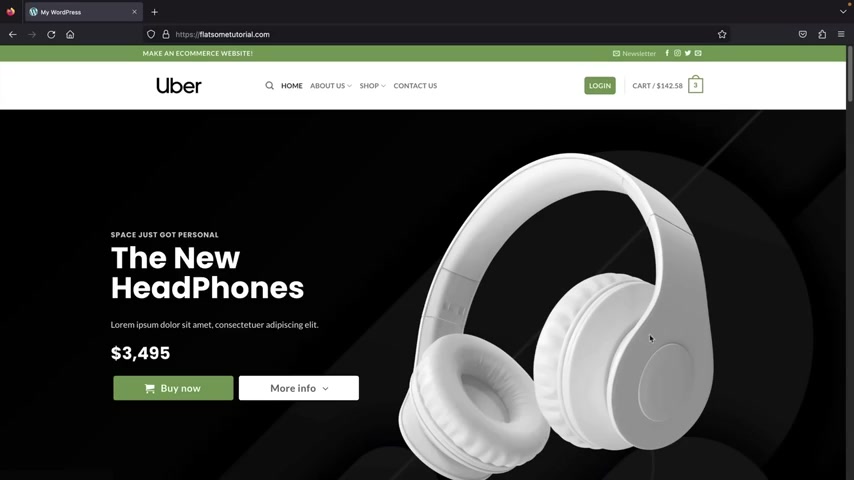
Uh Here we have just some call to action buttons .
We have our cart here at the top , right where you just can actually uh see all the items in their cart and they can also click on , check out and purchase the product right away on your e-commerce websites and then scrolling down here , we have the Upsell section .
This is just to reinforce more confidence for your shoppers .
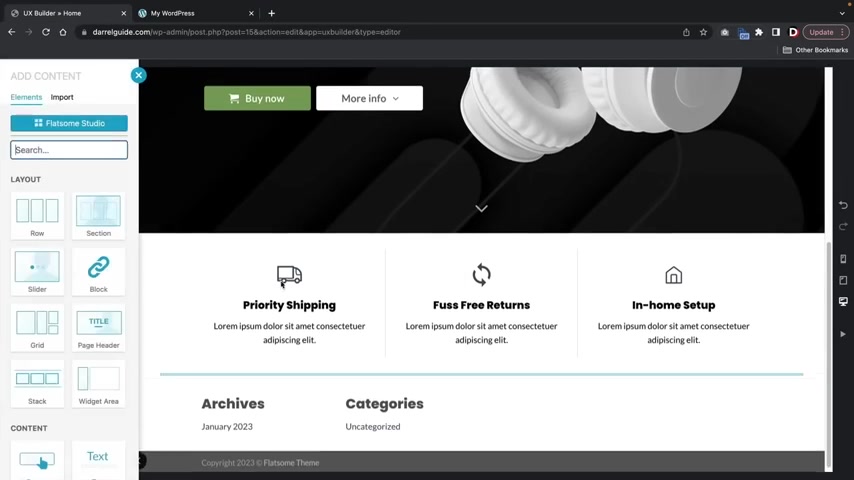
So like , you know , something like priority shipping free returns and in home setup .
And then below that , we have categories .
So let's say , for example , you guys are selling products and you have specific categories .
Like here we have cameras , we have speakers and this can be something else like lenses or something like that .
I'll show you how to create product categories for your e-commerce websites .
And then below that , we just have our products .
So you'll see that we have various products and you guys can actually style these products in various ways .
Here's one various way in how you can sell your products .
And then we have our push style .

We also have a style called bounce and then we have an overlay style .
There's a lot more to choose from and I'll talk more about this later in the video .
Now you guys can create as many products as you want and you can be as customizable as you want .
Next , we have our sign up for newsletter where users can actually put their email address and this will actually go directly into your email list .
I'll show you guys also how to set one up just in case you don't have one .
And then below that , I just added it , you know , this countdown timer .
But you know , you guys can modify this and change it .
I just put it at zero for now , but I'll show you guys how to modify it in the video and then we just have more products and you can basically make these like , you know , like the manager , special products or if they're not selling , you can discount them to try to get rid of them or something like that .
So I'll show you how to create this section as well .
And scrolling down here .
We have our blog posts .
So we have like the best laptops , the best camera money can buy and how to be more productive with yourself .
And then below that , we just have some general up sells maybe companies you work with and then we finish it off with this footer here at the bottom .
A really beautiful footer .
We have categories .
We have some more up sells for users who are still not sure we have a newsletter and then other various information here at the bottom .
So let's go ahead and go back to the top .
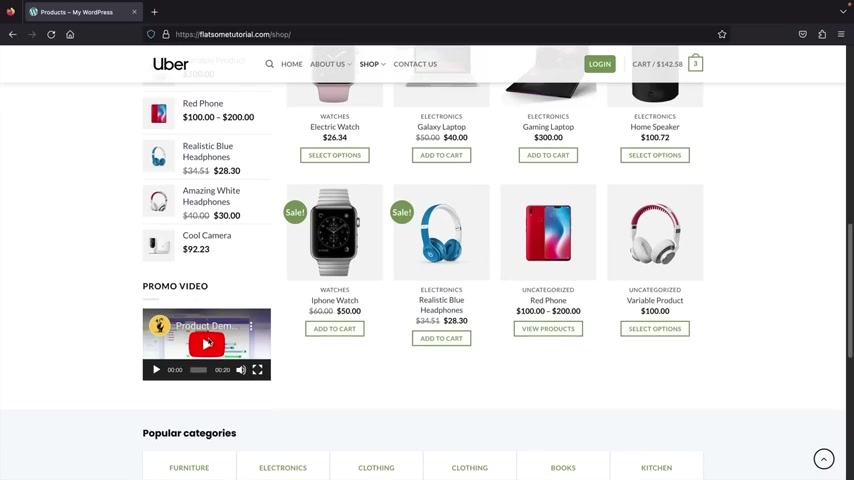
Now , let's take a look at our shot page .
So I'll go ahead and click on the shot page .
Now , you guys can create various shot pages with this theme .
You guys can actually create ac some shot page from scratch just like this one .
And as you guys can tell it's really slick , right ?
We have the sales banner here .
We have a filter by price so you just can filter by price .
We have products here on the left side , we also have a really cool promo video .
So if you guys have promotional videos or something that you want to demonstrate for your products , I'll show you guys how to set all this up today in this video .
Let's go ahead now and click on a product .
So I'll click on this variable product right here .
Now , here's an example of one of our products , this is called a variable product .
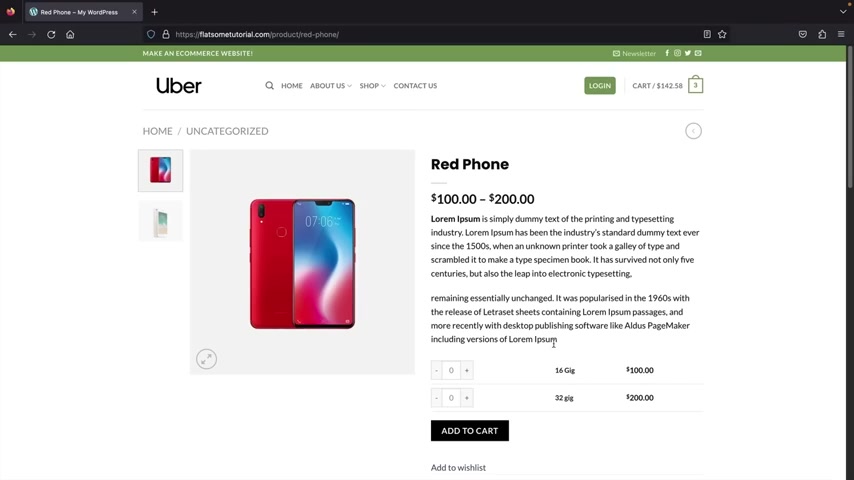
And here we have the title of the product , the price , the description , and then here we have variables .
So if you guys do have something like size or color , I'll show you guys how to create variable products for your e-commerce websites .
There was also something called group products and group products are ideal for something like iphones where if you're selling a product and you have maybe specific sizes within that product , uh that would work really good for like iphones or computers or something with memory .
So I'll show you guys also how to create group products in this video .
So I'll tell you what , let's add this to the cart and purchase something .
So here I'll click on add to cart and then here I'll click on a view cart .
So here is our car page and I gotta be honest , this is a really clean car page here at the top .
We have this navigation where it shows people the steps that they're going to take to make it really easy for users to navigate on your e-commerce website .
Here on the left side , we have products and users can actually increase the quantity here .
And if I click on update cart , you'll see it'll reflect the price on the right side .
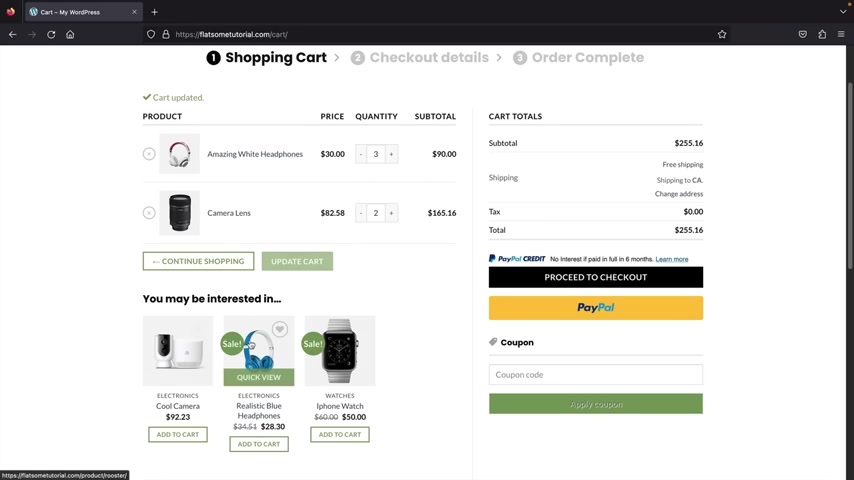
We also have our shipping and I'll show you guys how to set up shipping and tax in this video .
And then below that , we have some cross sales where you can recommend additional products when users are about to purchase something at checkouts .
So now I'll proceed to checkout .
And lastly , we have the checkout details .
Now , this is a live e-commerce website and even yourself , you guys can actually access this website and run a live test transaction to understand how easy the checkout process is for your customers .
So go ahead and fill out my billing details .
All right .
So after we entered in our billing details , I'll just scroll down right here and I'll just put in the demo credit card number .
So I'll put in 424242 , right ?
Don't worry guys .
It's , it's not a real credit card , right ?
And all you guys can actually use this same credit card number .
Uh This is used for test purposes only and then here I'll put in A CV C here .
What's really cool is you'll be able to actually have your customers save their credit card information on your e-commerce website .
So whenever they come back , they can just go ahead and purchase something without the need to find their credit card all over again .
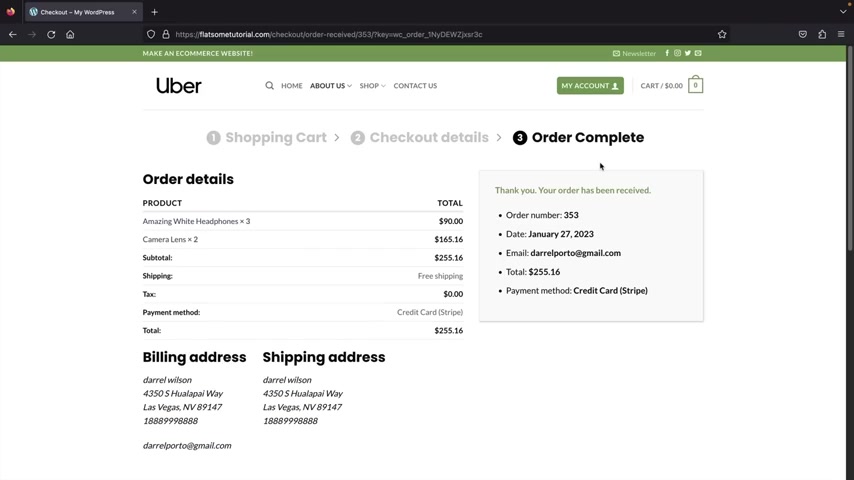
And then once we're done with that , I'll click on place order and that is it .
Your customer has now made a successful purchase order on your e-commerce website .
Now , you will also get an email notifying you of a new sale and your customers will automatically get an email notifying them of their purchase receipts .
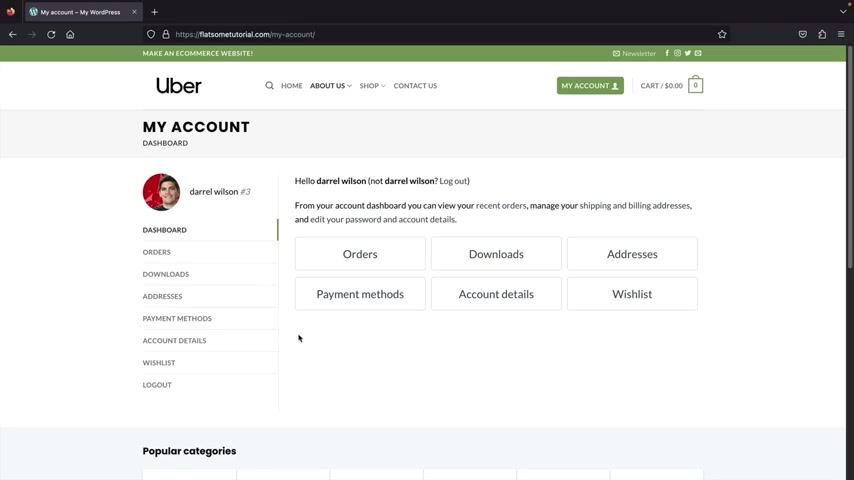
Now , before I show you guys the emails , your customers will automatically get an account created for them where they can access their dashboard , they can view their orders , they can update their payment methods and also update their address .
So I'll go ahead and click on dashboard .
So here we have a really nice overview of the customers accounts and here they can view their orders , their downloads , their account details and so on and so forth .
So over here , I'll click on orders and here you can see that the order is in the accounts where they can actually view what they've purchased .
Also over here under payment methods , they can always go ahead and update their credit card here or add another payment method and under account details .
If they ever want to adjust their name or their email , they can do all of that right here from within their dashboard .
Now , let's go ahead and check our email to verify that the purchase receipt was sent .
So here is the email that is automatically sent to all your customers once they have purchased something on your e-commerce website .
And if we scroll down , you'll see that we have the product , we have the quantity and then we have the price of their products and then we have the billing address and also the shipping address .
So here is the email sent to you notifying you of a sales notification .
Now , you guys can actually design and customize this email and I'll talk more about that a little bit later in the video , but here is the product , the quantity , the price .
And then right here , this will tell you where to ship the product .
So as you can tell , it's a great looking e-commerce website , it's very easy to navigate .
And by the end of this video , you guys are gonna have a website that looks just like this or even better .
So I do hope you guys have enjoyed what you saw so far .
And with that said , let's go ahead and get started and create your e-commerce website with wordpress .
Hey Barney people .
So I just want to let you guys know that me and my team , we did spend a few weeks making this video to make sure it's well structured and easy to follow .
So all of you have a good learning experience from watching this e-commerce tutorial .
So do me a favor .
Can you guys like this video ?
And if you guys have any comments or questions about ending in this video .
Feel free to let me know in the comments below .
And with that said , let's go ahead and start with this video .
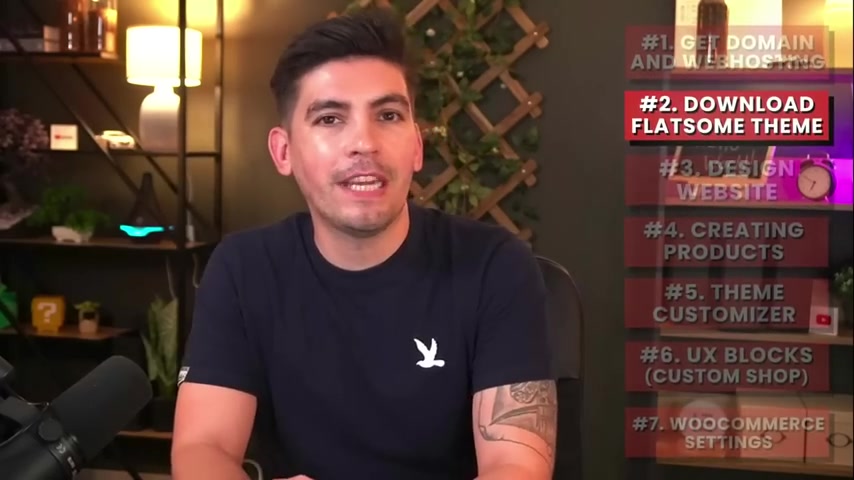
Now we're gonna break this video down into four different sections in section one , I'll teach you how to get web hosting .
And a domain .
A domain is the web address for your e-commerce website .
Like my ecommerce website dot com and web hosting will host your website online 24 hours a day .
We also do have an exclusive discount for all of you that you will only find on this youtube channel where you can get web hosting for as little as $2 a month .
In section two , I'll teach you how to create products .
I'll show you the fundamentals of how to create different e commerce products .
I'll walk you through how to create a simple product and that means it has no variables just as simple as the carts .
I'll then show you how to create a variable product .
A variable product has multiple options such as size or color and then I'll walk you through how to create a group product .
Woocommerce group products are a combination of one or more products that you can buy together as a single product .
You can also use group products for specs within a product .
For example , if you're selling iphones , you might be selling different iphones with different storage capacities like 1 28 gigs 2 56 gigs or 5 12 .
In section three , we'll complete the website .
We will fully customize and design your website and also introduce you all to the theme customizer .
And by the end of this section , you're gonna understand how to full design every aspect of your wordpress websites .
In section four , I'll introduce you all to the Woocommerce settings .
Woocommerce is a free plug in that we are going to use to create our e-commerce websites .
It is the most popular e-commerce platform in the world .
I'll show you how to adjust your taxes , adjust your shipping , integrate multiple payment gateways like paypal and Stripe and you'll be on your way to accept credit card payments right after watching this video .
Now , I wanna be very transparent about the fees in this video .
You guys will need to purchase web hosting and that's what keeps your website online 24 hours a day , but we do have an exclusive discount for all of you that will make it really affordable to build your e-commerce website .
We will also be using the most popular e-commerce Wordpress theme called Flats Flat is an Ecommerce theme that is dedicated to making e-commerce websites and is the most popular wordpress theme on Theme Force and with good reason , it has tons of features .
It's constantly updated to bring you the most modern e-commerce website available .
The Flat on theme costs around $59 and this is a one time fee and you get lifetime access .
So you'll never have to pay month by month like other various e-commerce alternatives .
So in the long run , you're gonna save a lot of money with this video .
So with that said , let's go ahead and get started .
Let's first go to step one .
Now , there is a link in the description of this video .
It'll take you to a page to purchase web hosting , ok ?
And this is hosting dot com .
Now , hosting dot com is one of the most affordable and also fastest web hosting providers available .
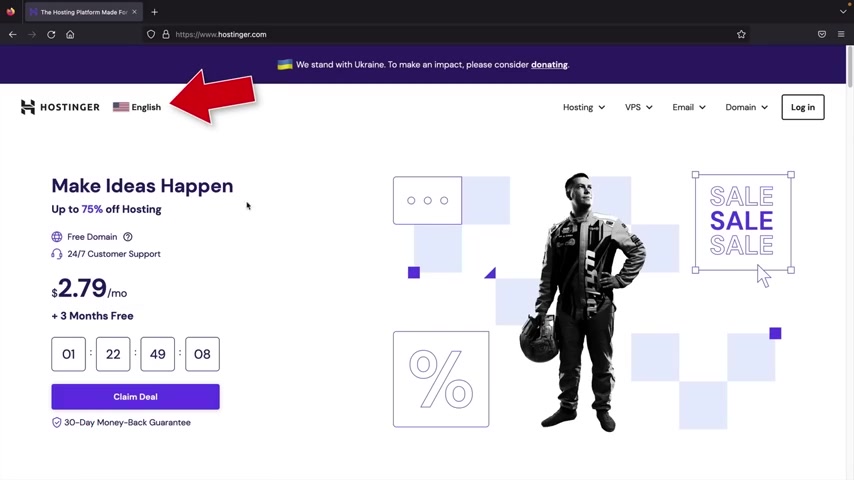
Now , if you guys want to change the language of this website , you guys can actually click on the language tab right here and you can select your specific language .
So if you speak uh Spanish , you can change it to Spanish or Portuguese or uh any language that you guys choose .
So go ahead and select your language .
Now , once you guys are here , uh we're gonna go ahead and pick a hosting package .
Now , one thing I also do want to say is that this page changes quite often .
In fact , they probably change it once a month .
So if the interface looks different , don't worry , don't panic .
This happens quite often .
But you'll go over here under web posting and then you'll click on web hosting .
Now , we're gonna go ahead and scroll down right here and we're gonna see some hosting packages .
We have the single , the premium and we have the business web .
Now , I would personally recommend going with the premium web hosting because this has the best value .
You can host 100 websites .
It has a lot of storage and it allows tons of monthly visitors .
Uh This one right here , I would not recommend because you can only host one website .
However , for those of you who want to upgrade to the business web where it gives you a little bit more performance and it allows more visitors .
You guys can also do that as well .
But I'm gonna go ahead and select the premium web hosting .
So right here , go ahead and click on add to cart .
All right .
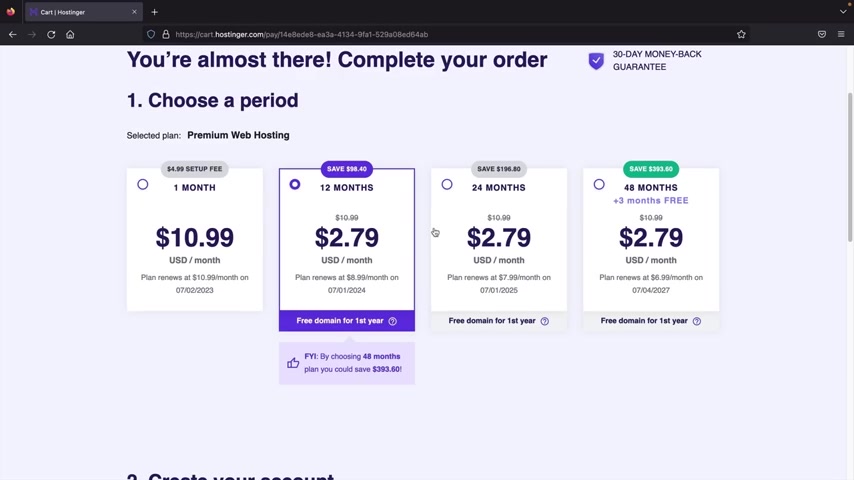
And once you guys do that , we're gonna go ahead and scroll down right here and you're gonna see different pricing options .
Now , this is referring to how , how long do you want to host with hosting or ?
So , we have one month , 12 months , 24 months and then we also have 48 months .
Now , in my personal opinion , I would always go with the higher plan because this is going to renew at a higher cost later .
So you want to lock in that price while you have the opportunity .
I'm also gonna give you guys a discount code where you can save even more money for your web hosting .
But just to get started out , I'll go ahead and select 12 months and we're gonna scroll down right here .
Now , you're gonna go ahead and create your account .
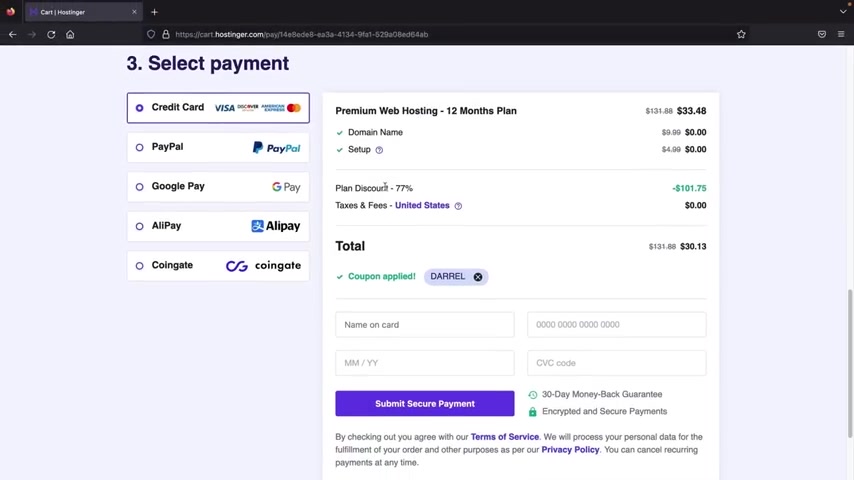
So right here , you're gonna put your email address and after you do that , we have uh the payment method so you can pay with credit card , paypal , Google pay , uh Cryptocurrency and also Alipay .
Now , here it's asking if you have a coupon code and I do so right here under have a coupon code .
If you guys enter the coupon code , Darrel and press apply , you guys will save 77% on your entire purchase .
So for a year of hosting , all you're gonna pay is around 30 bucks , which is great value because hosting here is very affordable yet .
It's also very fast .
Go ahead and put in the , the coupon code , Darryl .
And once you guys do that , you guys will go ahead and select your method of payment .
So if you want to pay with a credit card , you'll put in the name , the credit card and so on and so forth .
Or for those of you who want to use paypal or other payments , you guys can go ahead and select the payment method right here .
So , what I'm gonna do here is I'm going to go ahead and purchase a hosting package and I'll meet you guys on the very next page .
All right , great .
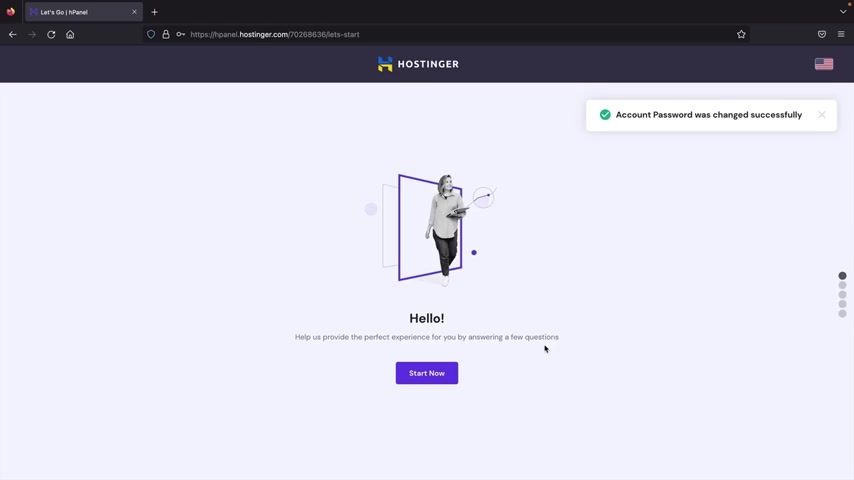
And once you guys create an account , it'll then prompt you to their set up wizard .
So right here , I'm gonna go ahead and click on start now and here they're asking some basic questions .
So they're asking who are you making your website for ?
I'm gonna put , I'm creating it for myself .
Now , they're saying , who is creating the website ?
Well , I'm gonna click on , I'm building it myself .
What type of website do you want to build ?
Well , I'm just gonna put a business website here .
They're saying , do you need help building your websites ?
I'm gonna click on .
No , thanks .
Now , you guys can actually skip this by clicking on these uh skip and create an empty websites .
So right here , it'll say create a new website .
We'll click on select and now they're asking what kind of website and we're gonna select wordpress .
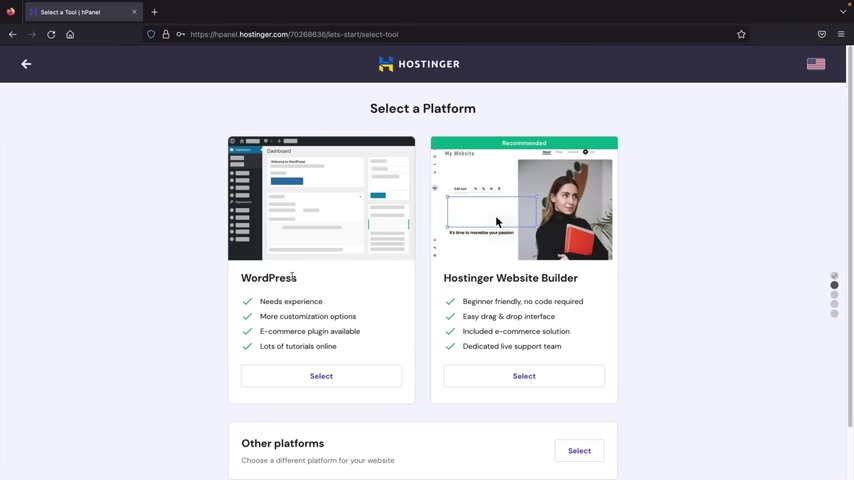
Wordpress is the most popular C MS on the internet and it actually powers 46% of the entire internets .
So right here , we're gonna select wordpress and now we're gonna enter in an email and then a administrative password .
Now , make sure you guys write this down because these are the login credentials that you guys will need to use in order to log in to your websites .
So go ahead and enter your password and then click on continue .
Now , it's basically asking you if you want to add in plugins to your website , we can do all of this later .
So for now , we're gonna go ahead and click on skip .
I will manage plugins later next .
They're asking us for a theme , however , we can do all of this from the back end and skip this .
So click on skip , I don't need a template .
Now , we're gonna go ahead and select a free domain name .
So right here , I'll click on select next , we're going to enter in our desired domain name .
So go ahead and enter in the website that you would like to choose .
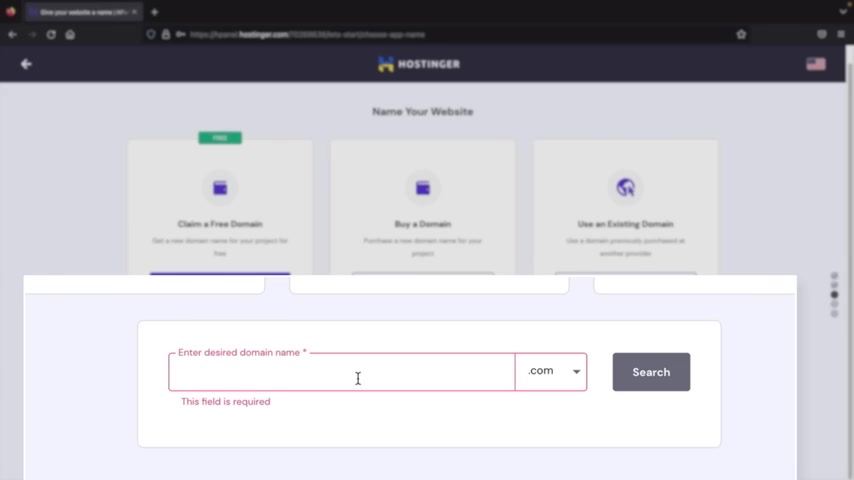
So for example , my cool website dot com or whatever it is is the name of your business .
You're gonna go ahead and put that domain name right here .
So I put in Darryl guide dot com and then I'll click on search and see if this is available .
All right , the domain is available .
So just make sure that your domain is available .
And once that's done , you'll click on continue next , I'll go ahead and click on finish set up .
Now it's going to propagate and build your website to make sure that you can build your own wordpress website .
Now , it's gonna ask you a few questions and these questions are important because it'll actually pick a server that's closer to your location .
So your website's even faster .
So for country , I'm gonna go ahead and select United States .
Next .
You'll put , if this is a personal or a company , I'm just going to leave mine as personal and then click on next step .
Now it's gonna ask you to put in some contact details .
Now , these are actually required for icann policies .
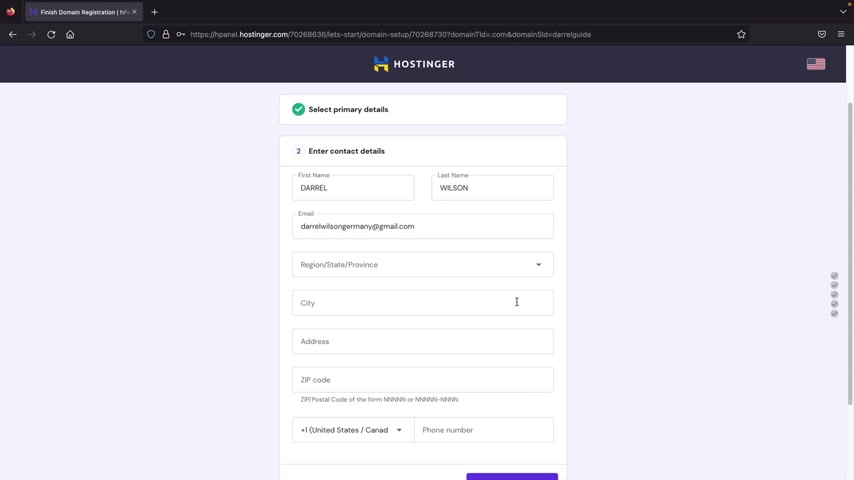
Basically , whenever you register a domain , the icann registration wants to know whose domain this is just in case later if you want to sell it or if you want to uh give it to another company , this is where the contact information comes into play .
So I'm gonna go ahead and put in my information here .
All right .
And once you guys enter your contact details , you'll then scroll down and click on finish registration .
All right .
So just give this part maybe about a minute and it's going to propagate your new website .
All right , cool .
So your website is now officially online .
Now , before we edit our website , I do want to introduce you all to the control panel .
So before we go to edit website , let's click on manage sites and this is gonna take you to your new C panel and this is where you can adjust your server settings and any settings that you want for your web hosting .
All right , cool .
So this is your actual hosting , your dashboard and this is where you can get more information about all of your websites .
So we can see that this is our dashboard .
We have our hosting package , our domain .
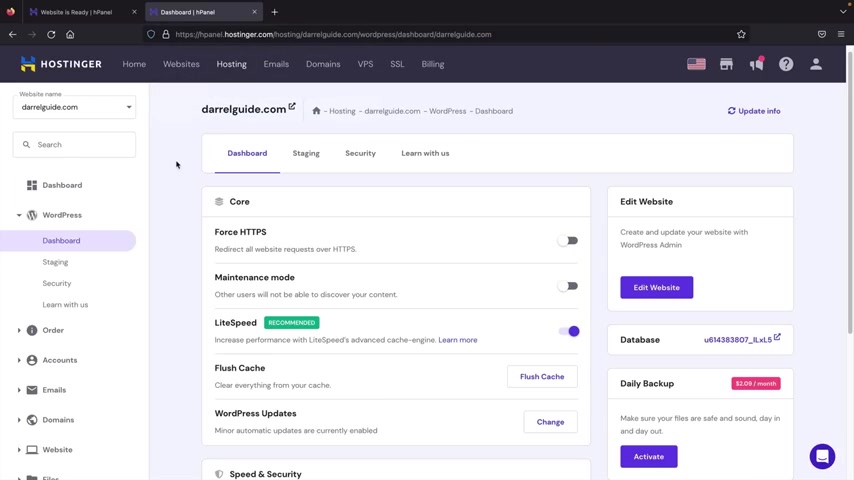
And if you wanna take a look at some of the information right here , you'll click on wordpress and you can click on dashboard .
So here are just some general options that you guys can apply to your wordpress websites .
What I want you guys to do here is actually install the SSL .
The SSL is this little green padlock that you see whenever you visit a website right now , our website is not secure .
So we don't have a padlock .
So I want you guys to install one on your website and don't worry , it's completely free to do that .
We're gonna go ahead and scroll down right here and here it says SSL certificates .
I want to install the SSL certificates .
So go ahead and click on install here .
It's asking us which domain I want to select my new domain that I entered and then click on install SSL .
Now , hosting is going to automatically install the SSL on our websites .
So let's click on close .
All right , great .
So right now , our SSL is installing on our website to make sure our website is fully secured .
Now , here at the top on the right side , whenever you guys want to log into your wordpress website where it says edit website , you'll just go ahead and click on edit websites and this is going to log you in to your new websites .
So go ahead and click on edit website .
All right .
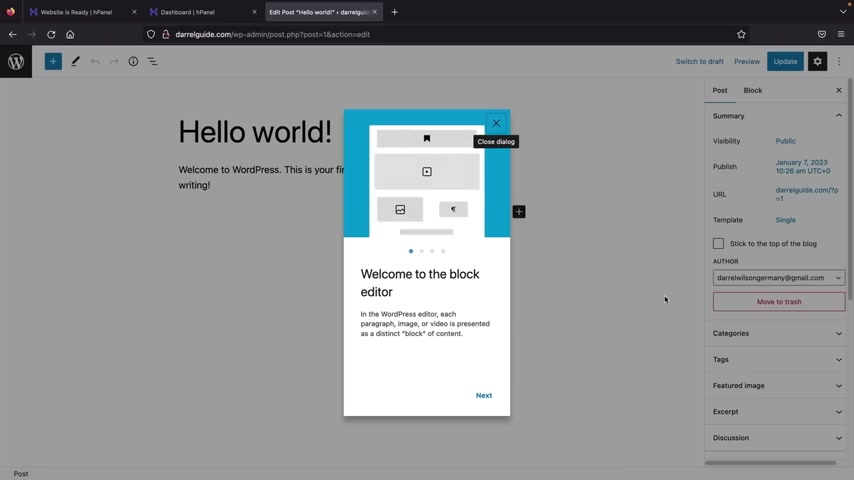
And congratulations .
This is your new websites now , right now , it's taking us to build a post .
But what I want you guys to do is go ahead and close this and then click on the W icon here at the top left and then right here at the top left , go ahead and click on dashboard .
Now , this is your current wordpress dashboard and this is where you guys can adjust all these settings and where you can configure everything about your wordpress website .
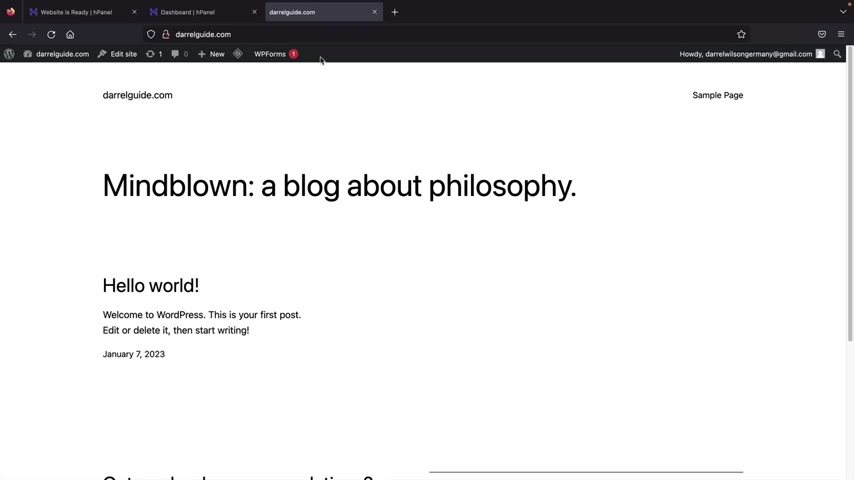
Now , if you want to see what your website looks like right now on the internet here at the top left , you'll click on visit sites and this is your new wordpress websites .
I know it's a little bland , a little boring , you know , it's using a default theme , but not to worry , we're gonna make this website look fantastic .
Now , let's go ahead and log back into our website .
Now , if this Black Bar disappeared on you , all you have to do is click on refresh and then this black bar will basically let you log back into your website .
So right here , I'll click on dashboard .
That bar actually did not show up .
All you have to do here is just type in dash WP dash admin and that actually logs you right back to your Wordpress websites .
And from here , we can edit and build the websites .
Now , before we go any further , we also need to confirm our information with hosting and we also need to verify our domain .
So whatever email that you guys use to sign up , go ahead and check that email .
All right , great .
So once you guys log into your email , you're gonna see some emails from hosting .
So here it's gonna ask us to verify your email address .
So first , let's go ahead and verify our hosting your account .
So I'm gonna click on verify email address and then I'll click on verify email and fantastic .
We have successfully now verified our hosting your accounts .
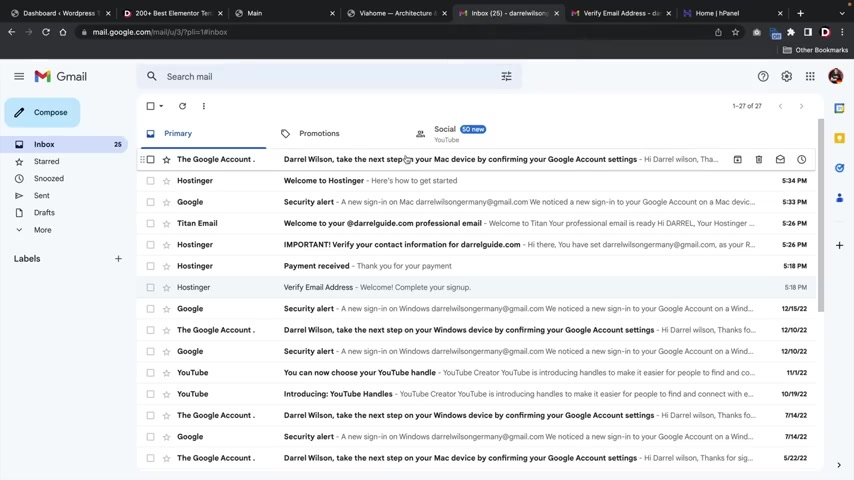
So let's go back over here to our email and now we need to verify our domain name .
Now , this is required for all domains no matter where you host because this is required for icann policy .
So right here where it says , verify your contact information , go ahead and click on this email from hosting and then all you have to do is click on this link right here and then it should take you to an email verified and it has successfully verified your domain name .
Now , this is very important because if you do not verify your domain within seven days , they will suspend the domain .
So just make sure that you guys click on this link , it's very important .
So let's go back to our wordpress website .
All right .
And as you guys can tell our SSL is now fully installed .
So it just takes a few minutes .
And if we visit our sites , you can see that our SSL is fully secured .
All right .
So let's go ahead and go back to our dashboard .
Now , before we go on any further , let's go ahead and adjust some of the general settings over here .
You're gonna see settings and you're gonna see general .
Go ahead and click on in general .
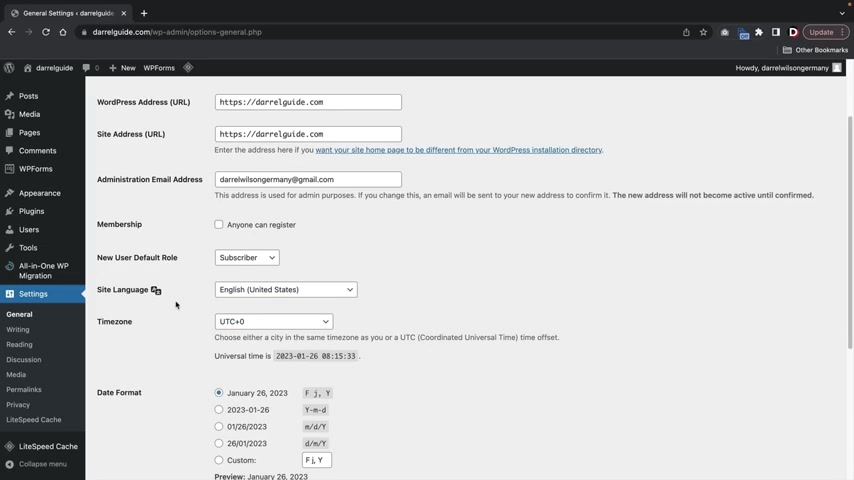
And from here , we can go ahead and adjust some of the general settings for your wordpress websites .
You guys can also change things like the site language , the time zone , uh the date format as well .
Now , if you guys ever want to change your email to log in , this is where you're going to uh change the email .
So you'll go ahead and input any email that you want .
You'll go ahead and confirm it and this will be the new email that you guys will use to log in to wordpress .
Once you guys make those changes , you'll scroll down and click on save changes .
The next one is the Perma links right here .
You'll click on perm links .
Now , this is actually very important and most people overlook this .
But uh for the perm link structure , you always want to set this to post name .
Now , the reason why you do this is because you want it to say your website , you know , slash about us or slash contact us .
Not a bunch of this numbers that don't really make any sense like the dates and stuff like that .
So uh go ahead and select post name and scroll down and click on save changes .
All right , great .
Now let's go ahead and go back to our dashboard , right .
Congratulations .
You guys got your domain and hosting and our website is online and all ready to go .
Now , in this next step , I'm gonna show you guys how to purchase and download the flats theme the flats .
Some theme is the number one best selling e-commerce theme for Wordpress .
It has tons of features , tons of templates and it's really easy for beginners to adopt this new theme right away .
Now .
I also do want to remind you guys that purchasing flats is a one time lifetime payment and that's much better than alternatives where they make you pay every single month because that can get very expensive .
So in the long run , you're gonna save a lot of money purchasing and using the flats thing .
So let's get started .
All right .
And the next step is we are now going to download and purchase the flats theme .
The flats theme is the number one most popular Woocommerce theme on Theme Forest for wordpress .
Now there is a link in the description of this video and it'll take you to a page to purchase the flats theme .
Now just to give you guys a general idea of the flats theme .
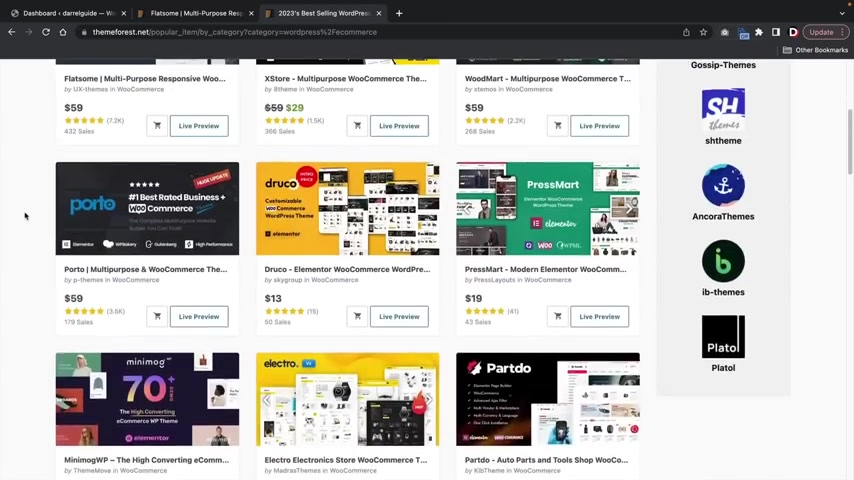
The flats theme has remained the number one best selling Woocommerce theme on Theme Force for Woocommerce websites .
Here's a bunch of various themes as you can tell , but flats some has remained number one for like years already because it offers tons of templates .
It's really easy to use .
It's completely drag and drop and most beginners can adopt this right away .
So let's go over here to the flats theme now right here .
You're gonna see buy license .
Now , the great part about the flats theme is that this is a lifetime plan .
So you will only have to pay this once and never have to pay again versus alternative platforms where you have to pay a subscription .
And I know it really sucks .
But with thoughts , this is a lifetime one time payment .
So you'll go ahead and click on add to cart and then you'll click on , go to check out .
And then from here , all you have to do is go ahead and click on and pay secure and then you guys can make your payment with credit card via paypal checkouts .
Now , once you guys have purchased this , I will go ahead and meet you in your customer portal where I'll show you how to download it .
All right .
Great .
Awesome .
So we have now purchased the flats theme to download flats .
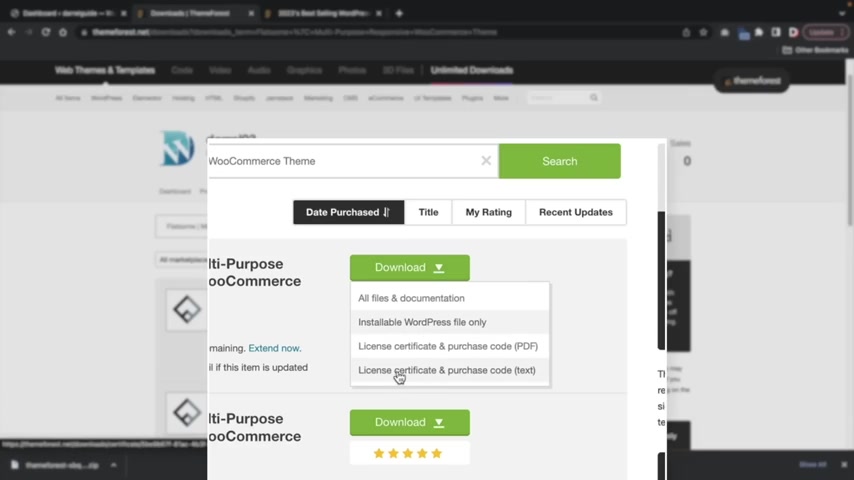
All you have to do right here is click on download and then click on install the Wordpress file only .
Now it's going to download a zip file onto your computer .
Also , you will need the purchase code in order to activate it .
So go ahead right here and click on the license certificate and purchase code and then just go ahead and download that .
Now , let's go back over here to our Wordpress website and now we're going to upload those files onto our Wordpress websites .
So over here you're gonna see appearance and themes at the top , you're gonna see add new .
Now , before we upload the theme , let me just give you a general rundown of what is a wordpress theme and how it functions on your website .
First , let's talk about what is a wordpress theme .
Every website you make with wordpress requires a specific wordpress theme without getting too techie .
A Wordpress theme is a general style and layout of your current website .
Each wordpress theme has different options and the theme customizer .
The options can range from a header and a footer builder , different blog post layouts , controlling the width of your website , like a block or a full width or specific e-commerce features like product layouts or different shot page layouts .
A Wordpress theme generally controls the layout and style of your current Wordpress website .
A Wordpress theme does not build the website itself , but it's more of an outside shell for the page builders and a starting point to build your wordpress website .
So that's a general rundown of Wordpress themes .
A lot of these themes over here in the Wordpress repository are free themes .
However , they're very limited and they don't give you the flexibility and control uh that pro themes give you .
So let's go ahead and upload flats some .
So up here you'll click on upload theme , choose the file and now we're going to upload the zip file that we downloaded from Theme forest and here is the file , it says theme forest and you can see flats on multipurpose or click on open and then I'll click on install now .
All right , great over here .
You'll see activate .
Go ahead and click on , activate .
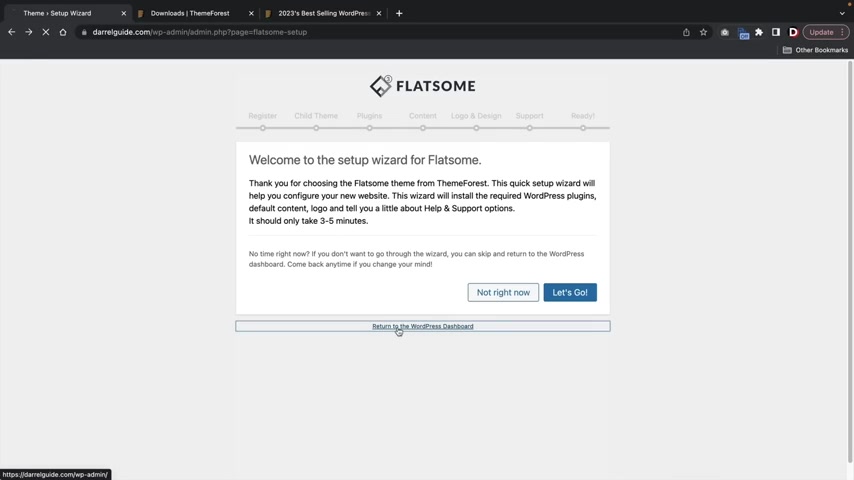
All right , cool .
Now , this is a setup wizard for flats some , but I don't want to use the wizard because we can activate this at any time that we want .
So here you're gonna see return to wordpress dashboard .
Go ahead and click on , return to Wordpress dashboard .
All right .
Now over here you guys might see notices that want you to activate plugins .
We'll do this in just the bits .
But for now you can go ahead and click on dismiss this notice on the left side , you're gonna see flats .
Su So over here let's click on flats and now we're going to enter our license code and what this is gonna do , this is going to activate the theme so we can now use it on our websites to access your purchase code .
You guys will go ahead and find it on the notepad that you downloaded from your theme for accounts .
So it'll look something like this .
I'll go ahead and shrink this down , scroll down and it's gonna show right here .
So it'll say item purchase code and then it'll have your full code .
You're gonna go ahead and take that code and then just paste it right there and then click on register .
So I'll go ahead and paste my code .

All right , cool .
So now the Flats theme is fully registered on the website and now we can use it to build our e-commerce website .
Now , if you guys ever come across like errors or something goes wrong on your website , which sometimes might happen , you guys can actually contact flats and they will log in and fix any errors that you guys have on your wordpress websites over here .
You'll click on support and we'll scroll down and at the bottom right here , you're gonna see contact author .
All you have to do is tell them the issues that you're having .
They'll go ahead and ask for your log in credentials , they'll fix any issues .
So if you guys do come across errors during the video , you guys can always contact flats and they'll fix any errors that you have on your websites .
Pretty cool .
So now that we have flat installed on our domain , let's just take a quick look at our website and see what's changed .
So now you'll see that we have the flats logo .
We have a uh blue bar at the top where we have some social icons and the website is slowly coming along .
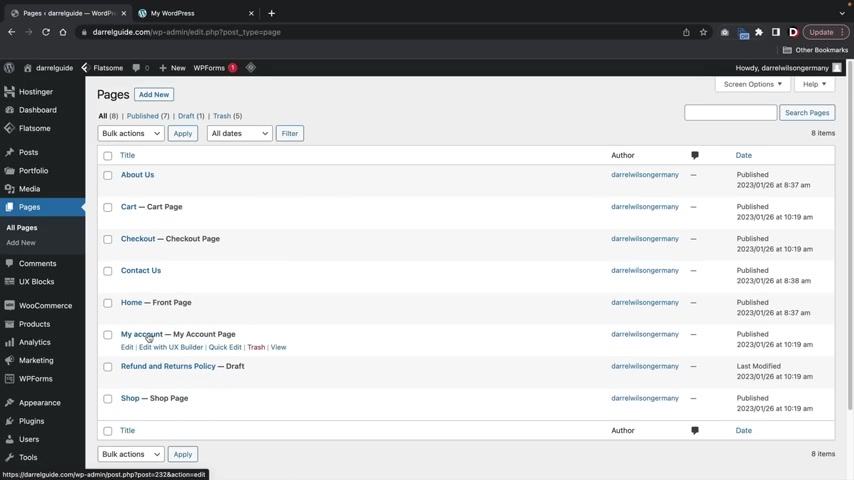
But let's go ahead now and create some pages for our websites .
Let's go over here to dashboard and over here you're gonna see pages and let's click on all pages .
Now , these two pages come by default with wordpress .
So we don't need to have these so we can go ahead and click on this , move to trash and then apply .
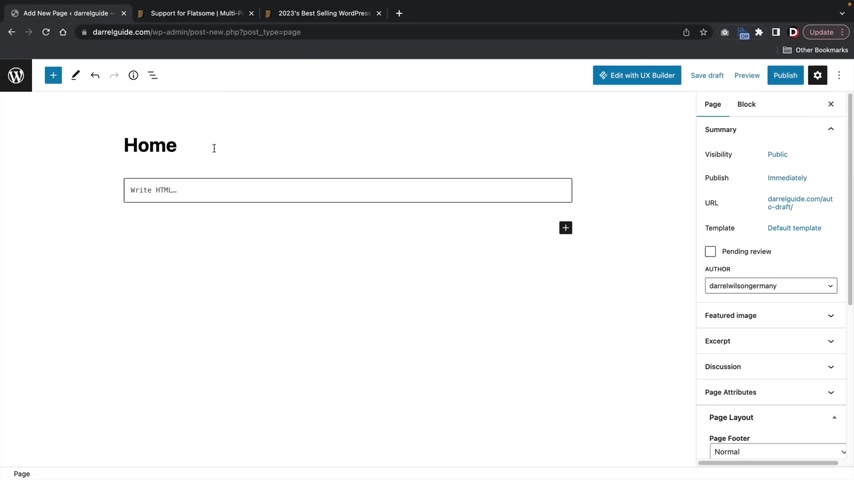
Now let's make our own pages .
So over here , I'll click on add new and then I'll type in home and this is our home page .
I'll click on publish and publish and now let's make another page .
So over here , add new page .
This will be our About us page .
I'll click on publish and publish , add new page and then we're gonna do our contact us page , publish and publish .
All right .
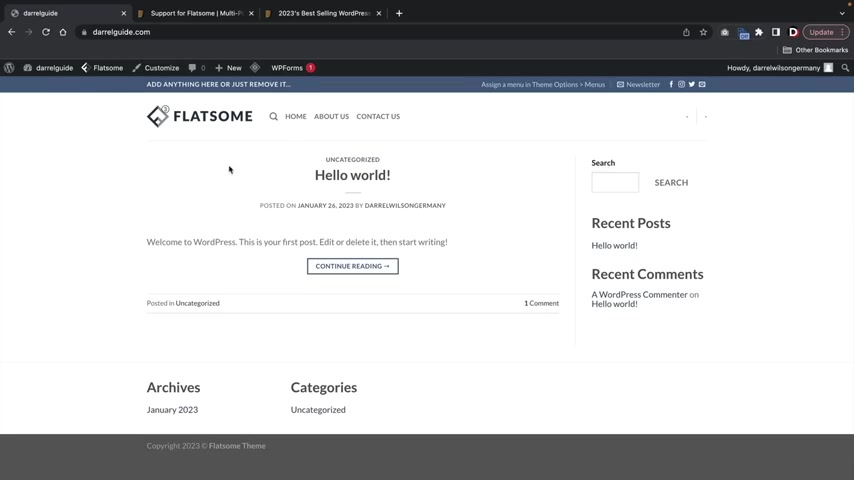
Now let's take a quick look at our website over here .
So let's go back to visit sites and you're gonna see that the pages don't appear because we need to create a menu .
So let's go now and create a menu .
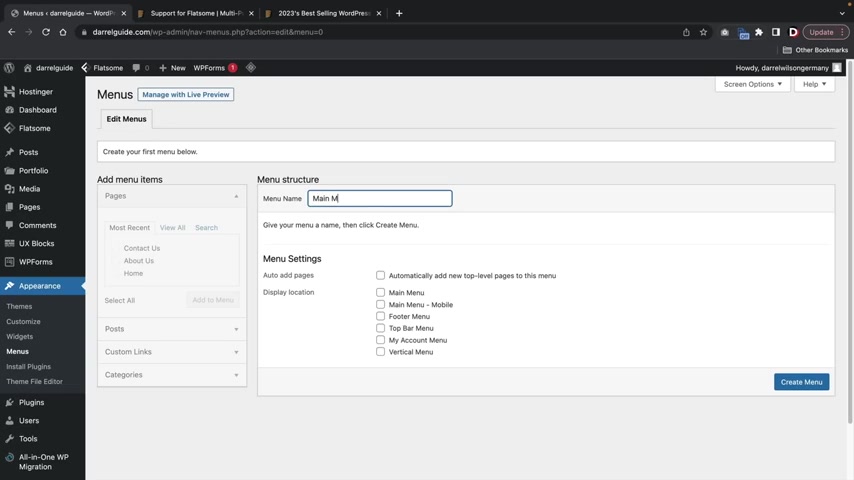
Let's go back to our dashboard appearance and then we'll click on menus now with wordpress .
Every website needs a menu .
So this will be like the main menu .
I'll click on the main menu and then I'll click on create a menu .
So here we have a list of our pages .
Just go ahead and click on all these .
I know we have two home pages , but I I'll just explain why we have two home pages .
So here you're gonna see custom link .
This is the one you want to delete .
So we just want our pages .
A custom link is pretty much anything , right ?
You can make this like a Facebook uh link or a Twitter link or whatever by just saying like , oh my Twitter page , you know , and then here you can just link your Twitter .
So , all you're doing here is just like a , a link where you can link them to any website that she wants .
But I'll go ahead and click on the custom link , scroll down and click on remove .
So now we have the home right here , the about us and then the contact now that we have the pages , I'll just click on the save menu .
All right , cool .
I'll take a look at our website and just make sure the menus appeared .
So now you see we have the home page , the About Us page and the contact page pretty simple .
So now click on the flat logo to go back to our current front page .
Now , I don't want this to be our front page anymore .
I want the home to be our home page , but you guys might notice that this Perma link pops up .
So I need to assign the home page and to do that , we're gonna click on the theme customizer .
So up here , click on customize .
Now , we're gonna come back to the theme customizer a little bit later in this video where we can basically design the header and the footer and just sort of change the structure a little bit .
But the theme customizers are not used that much anymore honestly .
But uh here you're gonna see home page settings , you'll see a static page .
And now I want to sign the home page as our current home page .
I'll click on publish and then I'll close this .
All right , great .

So now you'll see that , but click on the logo here that this home page is now our current home page and all that's ready for us now is to start designing this with the flat builder .
So the next thing for us to do is to start designing this page using the UX Builder here .
You're gonna see edit page .
But if you hover over it , you're gonna see edit with UX Builder .
The UX builder is the flat primary builder .
So go ahead and click on edit with UX Builder and now we're going to turn on the builder to start customizing our website .
So now we're going to design the website using the flats and builder .
The flat and builder has just tons of templates , premade websites , block sections that make it really easy to build your e-commerce website .
And after using the flat theme for like an hour or so , you guys will definitely get the hang of it .
So let's get started .
All right .
So let's get started .
Now , before we upload blocks and templates and stuff like that , let me just give you a quick crash course on how to use the flats on builder here , you're gonna see add elements and if I click on this , we'll now see that we have elements on the left side where we can add in , you know , page headers or buttons or anything else that you want to add .
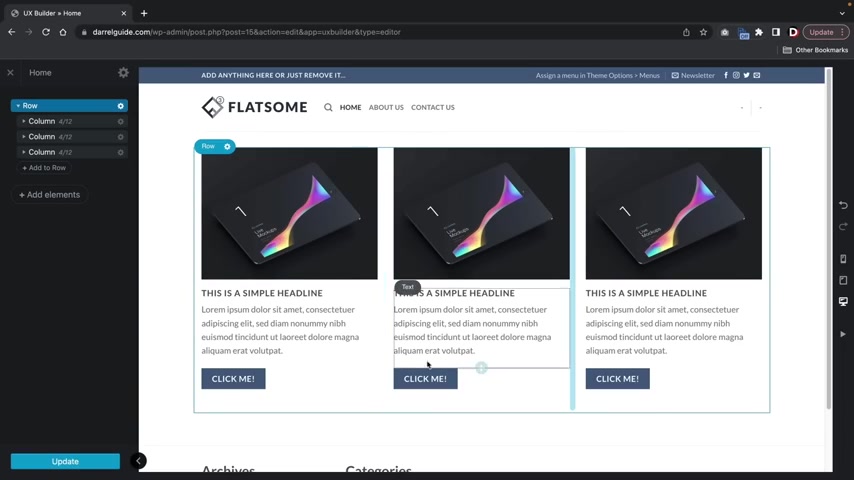
But I want to add in rows in this section .
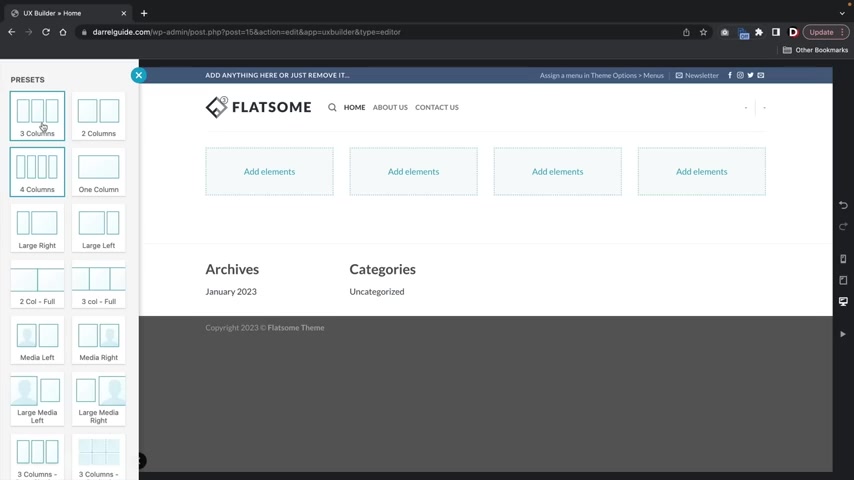
So over here , I'll click on row and now you'll see that we have presets .
We can have a two column row , a three column , row , a four column row and so on and so forth .
But I'll just select a three column row in the bottom .
I'll click on apply .
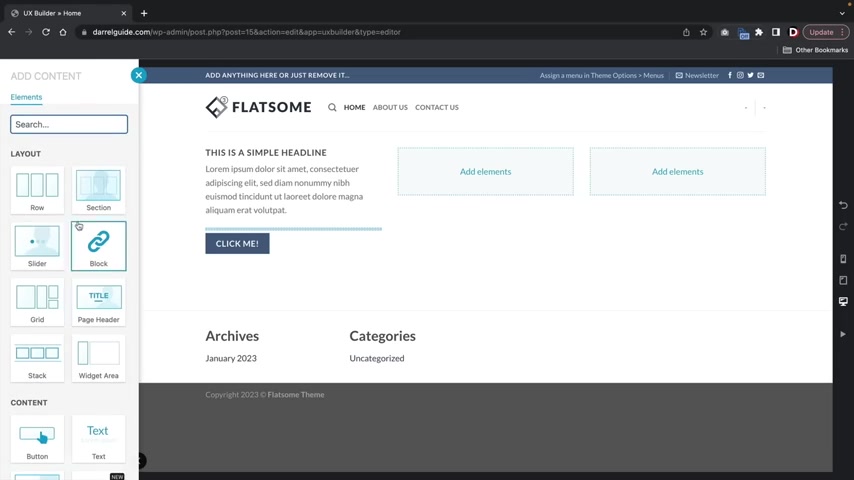
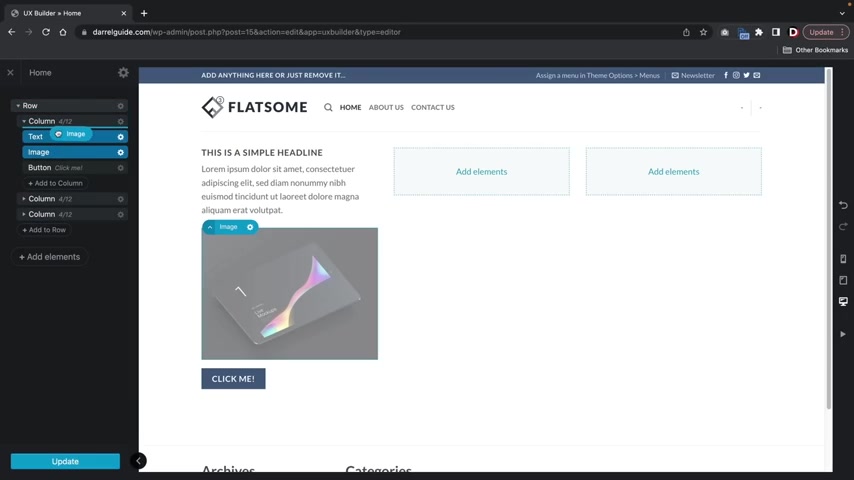
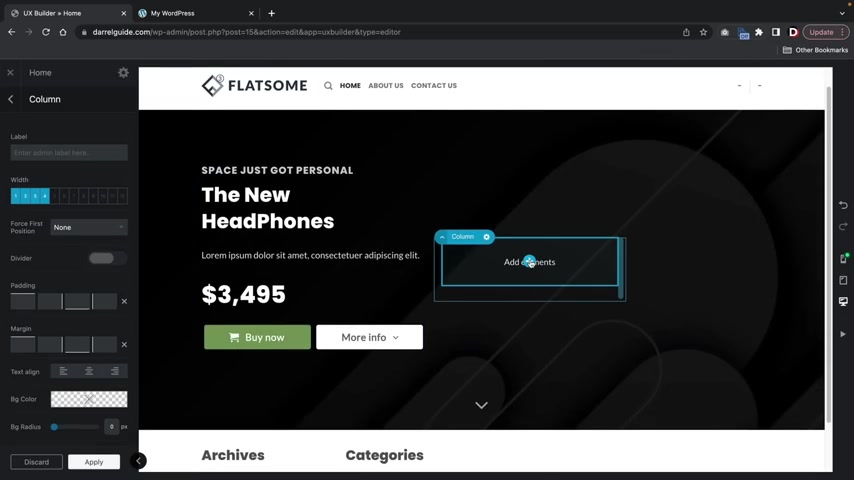
Now , we can add elements inside of these columns .
So I'll click on add elements and let's say , for instance , I want to add in just some general text here .
I'll click on text and they have different presets as well and they do this because they want to make it more convenient for you guys to just make something really fast .
So I'll go ahead and do a paragraph with a sub headline and let's say you want to add a button below this , right ?
So I'll just do the same thing .
We'll add a button and then we have a cool little presets where we can just , you know , get some design inspiration here and just uh yeah , we go , I'll use that one and I'll click on apply .
And if you want to add something , you'll see that we have this plus again and this is where we can keep adding in elements within this specific column .
So now maybe I want to add in like an image , right ?
But I don't really want to go look over here for everything so I can just type it in right image , all right .
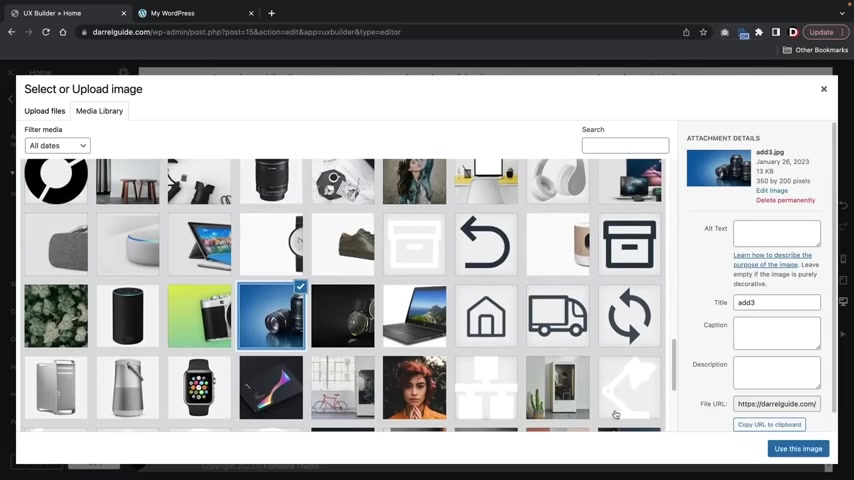
And then over here under image , I'll click on select media and then we can upload an image .
Now from here you guys can upload images onto your website .
So I'll go ahead and click on select files .
And here I have a folder I actually have this folder for you guys in the description that you guys can use to follow along as well .
Uh I'll show you guys how to upload it in just the bits .
But I just want to give you this demonstration where now we have this image , right ?
And over here on the left side , you're gonna see that we have a row , you know , we have column , text image and I can rotate these , right .
So I can drag and drop .
If I hold on the image , I can drag it above the text , right ?
And here we have the button and I can move the button , you know , above the text or below it and stuff like that .
So this is where you can drag and drop elements onto your websites .
If I want to just basically close this , I can just collapse it .
And now you'll see that we have the row , right ?
And then we have our three columns right here .
So now we can do the same process all over again , right ?
But I think you guys understand now , right ?
We just go ahead and you know , click on something and then we can go ahead and design it .
But um let's just go ahead and delete this really quick and let me just give you guys some quick shortcut tips .
Now , if I want to get rid of this column , I can right click and just delete this column .
So now you see that we have just two columns and I can do that again if I want .
And now I can actually duplicate this column .
So right here , you'll see column .
If I right click , I can duplicate this and then I can go back and do it one more time .
So I'll go back here and I will duplicate it just like that .
So that's just a quick rundown of how to use this builder .
You guys can pretty much use elements here by clicking on the plus anywhere on the column section .
And this is where you can add in elements .
Now , if you guys want to create a new section here at the bottom , you'll see that there's this plus right here and this is creating a new section from scratch , right ?
And now we can create like a new section in a row just like we did in this previous section here .
But let's go ahead now and get rid of all this .
So I'm just going to say , you know what I just want to start all over again .
Here at the gear icon , we're gonna go ahead and see this clear content .
This will delete all the content on the page .
So click on clear contents , click on .
OK .
And then we can start from scratch all over again .
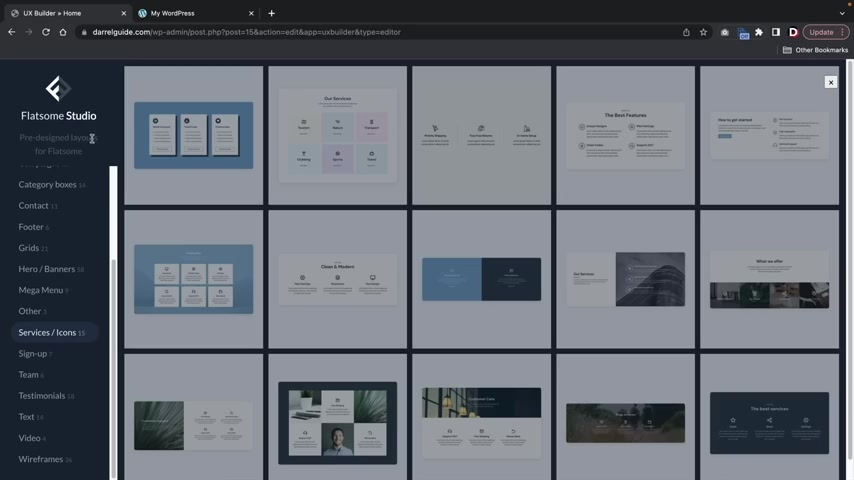
Now , here at the bottom there's templates , but uh we can access the flats studio which offers much more templates than that .
Here , you'll see add elements .
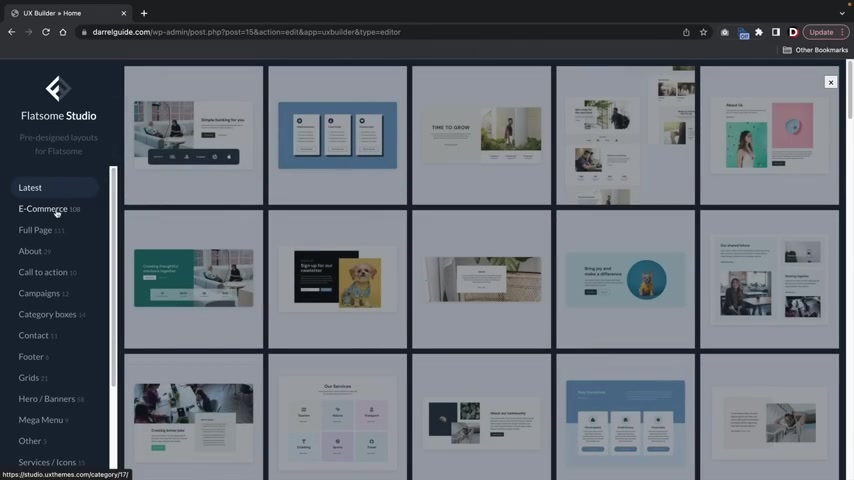
And since we don't have a road to work with , we now have this Floss studio and here we can go ahead and import complete templates and also blocks onto our websites and they actually categories this , right ?
So here you'll see that they have e-commerce and they just have tons and tons and tons of different templates that we can go with , right ?
Uh Also they have full page and this is basically like the entire full page is designed for you .
Now , if you guys want sections , you guys can actually uh click on tabs like the call to action or uh campaigns and you guys can use specific sections and just add them to different parts of the website instead of actually using like their premade templates because you don't want your website to look the same like everybody else , right ?
So I'm gonna select e-commerce and I'll just show you guys how to quickly import the templates and then I'll just show you guys how to delete it again .
So over here you'll see that we have this interior rights and it's gonna ask you if you want to import the images .
I'll just say yes , because we can always delete those later here .
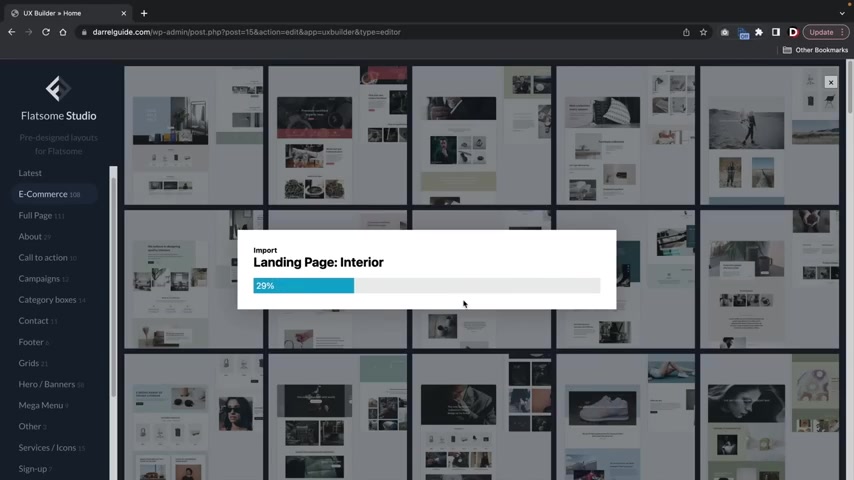
Click on start and now it's going to import the entire page for us including the images .
All right .
And now you'll see that it has fully imported the templates and we can just go ahead and modify and make any changes .
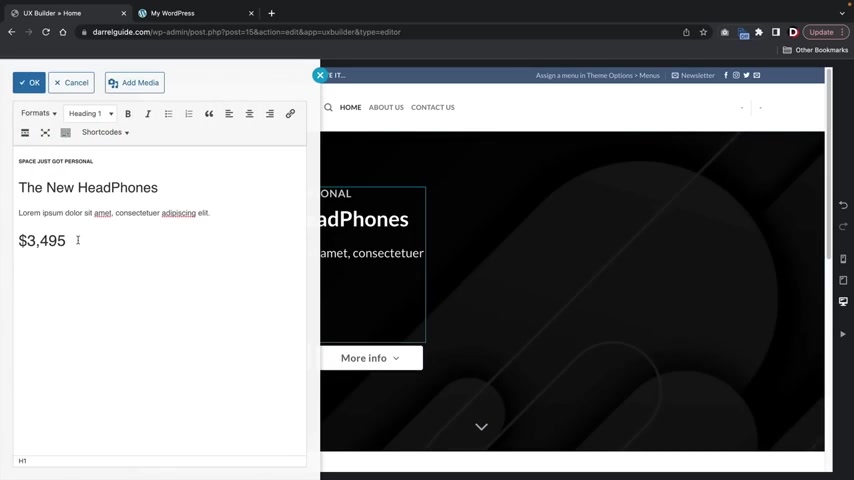
So for example , if I want to change this text , I'll just double click right here and then we can change this text to like our new e-commerce websites and then I'll click on .
Ok .
Now , for every element that you guys use with flats , it has a styling tab .
So for example , this is a text module and with the text module , we can design the font size , we can change the line height , right ?
So if you want to customize or style any of the elements it's going to display here .
Now , for every element , the styling tab will look a little different .
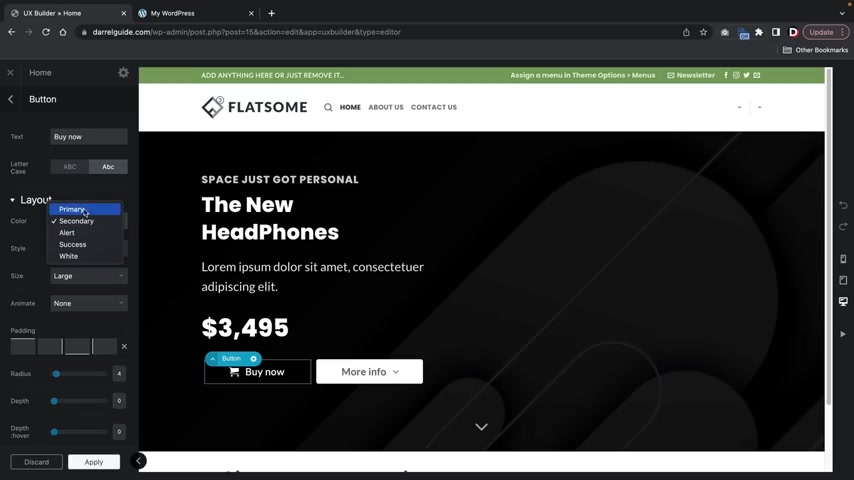
For example , if I click on a button right here , you're gonna see more options , right ?
And this is just different ways on how to design your elements .
So for example , if I want to change a letter case here , you'll see that , that we have an option to change a letter case , we can also change the actual text , right ?
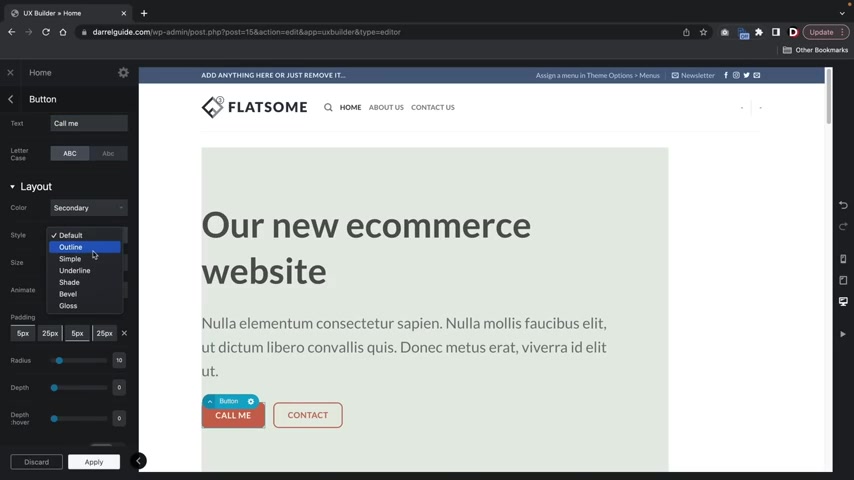
So like call me , right ?
And then for style , there's just different ways on how to style this .
You'll see that these are just basically presets where it'll help you , you know , design and customize the website a little bit faster .
And then over here we have animates where you can animate the button .
So it'll like fade and up .
But you guys will have to actually apply and then close it and to see it actually animate unfortunately .
But uh this actually creates animations for like specific elements and stuff like that and then radius and all these other options right here .
You guys can mess around with these .
This will pretty much just make it like circular and add more depth and so on and so forth .
So let's go ahead and just scroll down right here and let's just say you guys want to maybe even dragon elements , right ?
This is a dragon drop builder , so I can just take this and I can move it over here and you'll see where that blue line is .
And if I drop it now , I'll see that it basically moves , you know , it moves around and stuff like that .
So we can go ahead and do this for pretty much any element if you guys want to just like , you know , drag and drop this and put it over there and take this and drop it over there and just keep scrolling , just keep scrolling and let's just say , hey , I wanna add a button right here , you know .
So let's click on the plus throw in a little button there and there you go .
Cute little button , right ?
Pretty easy , right ?
So , uh everything looks good to me , right ?
But the only thing that I would change here is I want to fool with websites .
So to change the overall structure of your website here at the gear icon at the top , you're gonna see templates and I want to make this a full width , meaning I want this to stretch all the way across the websites .
So now you'll see that this does stretch a little bit across .
Uh this right here is just the design of this template , right ?
They're going for this kind of like abstract , broken kind of style .
But um yeah , you'll see that it is now full width and stuff like that , but it looks great , right ?
So now let's talk about how to add in sections , right ?
Maybe for instance , you guys want to add like a new section right here below this , but you don't want to have to use like the basic presets like the row and the section and stuff like that here , click on flats , some studio and let's say for instance , I want to just add in one quick section in between that .
So here I have category boxes and I'll just throw in uh what we got over here .
We got some , let's do this one .
Why not ?
Let's gamble here .
You'll go ahead and import this three column row .
And now we have a beautiful three column row and of course , we can go ahead and you know , move this around , we can change the background image and so on and so forth .
So you guys can go ahead and add in as many sections as you guys want to your websites using the actual flats studio blocks just in case you guys don't want to use like a full on template , which I think many of you might not want to .
And I totally understand , but this is how you can pretty much import blocks really quickly on your website .
So you guys with me , you guys good .
You guys can tell it's really easy to build your website , you know , drag and drop really simple stuff .
Anyone can do this .
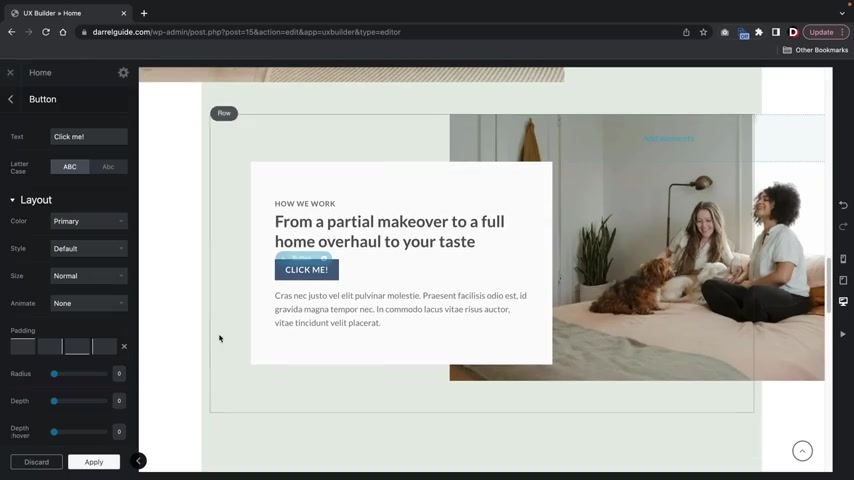
Now , let's go ahead and build this page right here .
This is a two column row , right ?
We have text button and then our second column , we just have an image .
I mean , that's all we really did here and we just added in this really nice uh beautiful black abstract background .
So I'll go ahead and show you guys how to create this section .
So let's do it .
Let's go ahead and delete this whole section , so clear contents and let's start from scratch .
Now , what I did was I actually took parts of a template that I wanted and I deleted the other ones so you guys can just go use the flat studio and just kind of like steal sections and just delete the rest .
Right ?
So here under e-commerce , we're gonna scroll down , just keep scrolling , just keep scrolling and you guys are gonna come across this one right here .
It is called the single product focus .
I'll click on imports and then I'll import this .
Does this page look familiar ?
Well , it should because it's actually this landing page .
All I did was I made some modification , changed the colors and I added in that image right there .
Now , I want to get rid of these sections below that .
So I don't want to use these other sections right here .
So what we can do is just go ahead and click on the little gear icon and delete gear icon , delete , right ?
So now I'm just basically deleting all the parts of the website that I don't want .
So now all we have is this section .
Let's go ahead and save our progress here or click on update and that's gonna save our progress .
Now , the first thing I wanna do is I wanna give you guys those images so that you guys can upload and follow along in this tutorial here .
We have the gear icon and we have the option to click on options .
However , you guys can always just go ahead and right click and go to options .
It's kind of like a shortcut , right ?
So uh this is actually editing the background of this section .
You guys can see that but let's change this image , you know , I don't like this guys .
I mean , it's cool but you know , I , I just don't want it , you know .
So over here I'll click on change media and you'll see that a lot of these images uploaded .

When you guys import the templates , you guys can choose to delete these if you want or just keep them doesn't really matter too much .
Like for example , I can just click on this and just delete , you know , if you don't want them in your library , right ?
But over here , I'll click on upload files , select files and you're gonna see a folder called media library exports .
I'm gonna take all these images right here and I'm just gonna upload them to the websites .
You guys can actually download this folder .
There is a link in the description where you guys can upload these demo images and we can use this to , you know , create products to add in backgrounds and all sorts of stuff .
We have designed these images specifically for this video to help you guys , you know , follow along and make this as easy as possible .
So let's just give this like a minute .
All right , cool .
So I uploaded these images .
I also included a lot of images for you guys just to play around and mess with like if you want to use this as your background or this is your background .
Uh We did include some images just to help you guys get started , right ?
But the one I want to use is this one right here .
It is the slider one .
All you'll do is click on this and then you'll click on , use this image .
So we're just gonna make some quick changes here .
I'll just uh open the text editor .
Now this is the heading one , text , right ?
And you're gonna see that this says paragraph , right ?
And this one is heading one and heading six and so on and so forth .
Now , we can create presets .
So let's go ahead and click on .
Ok .
Now let's go ahead and create some presets before we go on to this because uh as you can tell if you try to change the actual font size , you're gonna see it changes the font size for everything .
But maybe you guys just want to have specific sizes for specific uh presets , right ?
So let's go ahead and go to apply here and let's just say this really quick .
Now let's go back to our theme customizer .

So I'll go ahead and click on the X and let's go to dashboard and we're gonna go to flats some and let's click on theme options .
So now we're gonna set presets for the colors and also for our text .
So over here you're gonna see style and you're gonna see topography .
Now you're gonna see this font is for H one H two H three H five H six titles .
So I want to use Poppins .
Right .
So let's go ahead and go to Font Family and I want us to like pop ins and I want this to be bold as well .
So I like the bow Poppins .
Bold is just , it's so like , I don't know , everyone loves it .
It's , it's really nice .
So we're gonna select 800 I don't know , Poppins Bowl .
It's just so like , it just looks really good .
You know , I , I don't know , like Poppins Bowl just , it looks amazing .
Right ?
And here is like the base font , which is like just like the default fonts .
So we can actually select a , a default font for that specific font right here .
So if you want to use , we can use that and then we can , you know , make that , that size a little bit smaller .
And if we scroll down , you'll see that we can also edit the base fonts right here .
So we can change that to like or any other font and then we can adjust the size of the base font as well .
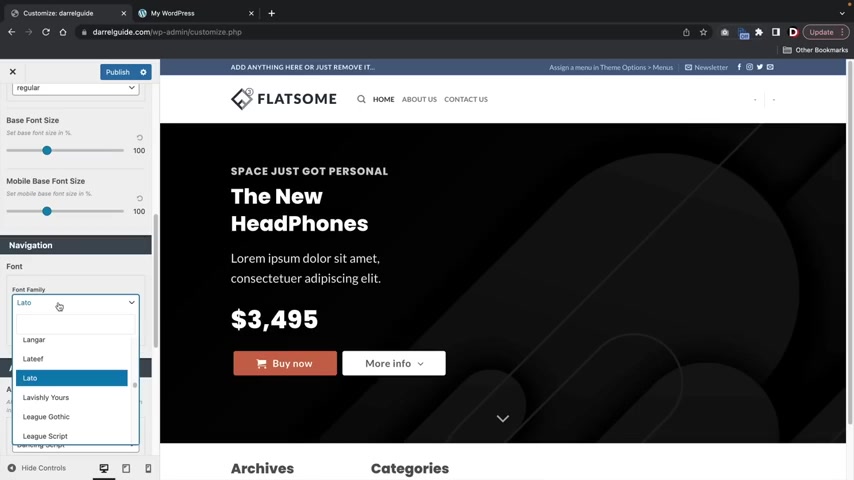
And then for the navigation , which is up here , we can go ahead and adjust that as well .
So I want to change that to Poppins and then you'll see at the top right here that this font now changes because this is applying to our menu .
So that's pretty much it for the fonts .
You can see that we now have set up a default font for our websites .
But now I want to select colors now with fonts , some , we can use uh presets and specific uh shortcuts .
So instead of actually searching for colors , we can just say I want this to be the primary , I want this to be secondary and this to be the success color .
But for the primary , I want to change this and I want to change this to a green .
In fact , I want to change it to this screen right here .
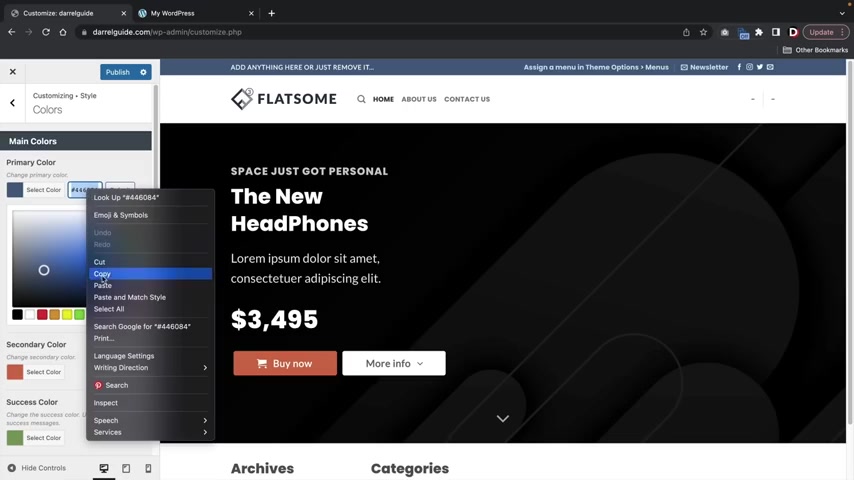
So I'm gonna go ahead and just copy this and go to the primary color and I'm gonna paste that in there and you guys can actually make presets right here .
You'll understand a little bit more about where these apply as we build the websites .
But if you want to create like a color palette right here , like you want to set the specific color you guys can see mine is like white , black and green .
Um You guys can go ahead and select those there , right ?
Uh I'll just go ahead and select for the secondary color .
I'll just make that black .
OK ?
And here you'll have more options where you can change like the headline colors , the base colors and then also like link colors as well .
All right .
So I'm gonna go ahead now and click on publish and let's now go back to the UX builder .
So I'll close this , I'll click on visit sites and Now , let's go back to the edit with UX Builder .
Now , right away , you guys probably noticed this button changed right here .
The button changed because we are now using presets .
So if I click on the button right here , you're gonna see color and now you're gonna see primary secondary alert and success .
This is just like we did earlier , remember how we actually set preset colors .
This is where those are going to apply .
So I'm gonna select the primary , which is this green color that I selected and there it goes .
So now you'll see that uh this is where you can select preset colors for all of your elements .
Now , the next thing I wanna do is I want to adjust the size of this text I showed you guys how to select presets , right ?
But we can actually set the size of specific text within this box .
So right here , open text editor and you're gonna see this toggle toolbar .
What this allows you to do is this allows you to pretty much uh change the actual font size of this .
So here we have font sizes .
I'm gonna make this a little bit smaller , right ?
So I want this one a little bit smaller , this one I like it big .
So we can actually leave that here in our font sizes .
You can , you know , you can make it bigger and bigger and bigger or smaller and smaller and smaller .
So I'll go ahead and click on .
OK ?
And I'll see that uh this is a lot smaller because I didn't want it large .
You know , I want this header to be a little bit larger and this one to be a little bit smaller .
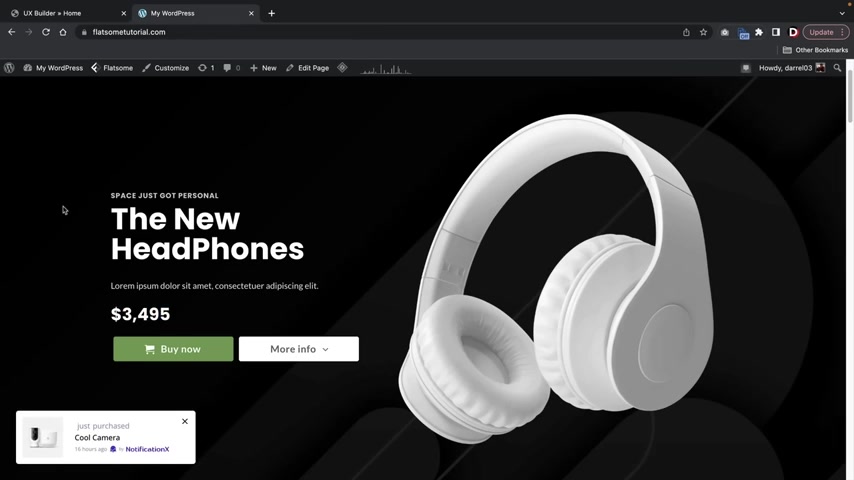
Now , let's add in this image over here on the right side .
So to do that , you'll see we have this plus icon where we can go ahead and now find an image , right ?
So over here elements , I'll type in image and let's go ahead and click on select media and now we're gonna scroll down here and we're gonna find the headphones .
It's gonna be , let's see where it is .
I just passed it , I think .
Yeah , right here it is the background Hero PNG and I'll click on use this image and here is our image .
Now the image is a little bit small , right ?
I want to actually make it a little bit larger and there's a shortcut .
So what we can do here is you'll see this little bar right here .
I can actually stretch this and make this row larger , which will result in making the uh image larger .
So I'll go ahead and click on this and I'll hold it and I'll just drag it over there .
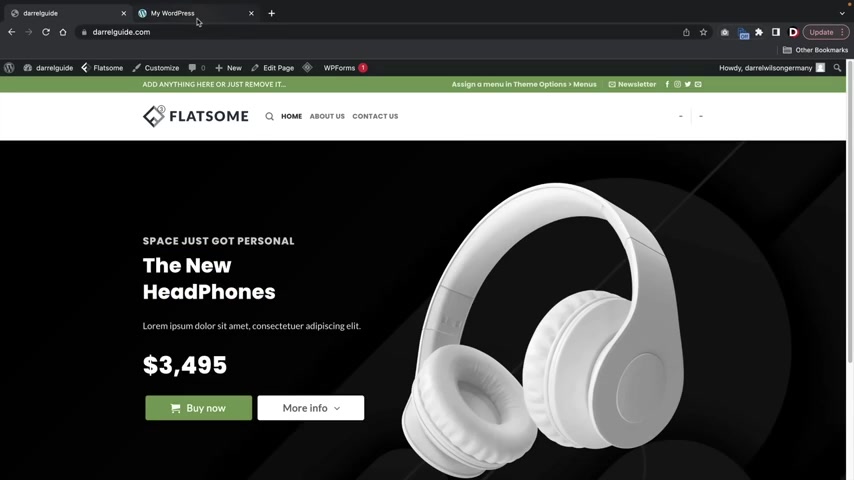
And now you'll see that we now have a beautiful landing page that we created in just a few minutes .
So uh this landing page looks great and congratulations .
We now have a landing page which is probably the hardest part to make .
So now let's save our progress here at the bottom .
I'll just click on updates and if you guys just want to take a quick look and we now have a beautiful lighting page that we created in just a few minutes .
This is actually the hardest part of the website to make .
So if you guys got this down , the rest of the website will be a complete breeze and it looks very similar to our other lighting page .
All as we did here was make this text a little bit bigger and that is the only difference .
So you guys know how to make that bigger .
So , on your own time , you guys can go ahead and do that .
But uh now that we know how to make the lighting page , the rest of the website is gonna be really quick .
So all we're gonna do is insert these sections .
Now , I'm gonna do my best to speed up this video .
So now that you guys have a good understanding of how to use the UX builder , uh we can now go ahead and speed this up and just start inserting sections .
But you know , I'm a perfectionist really quick .
So I wanna make this a little bit bigger .
So we're gonna make this just a little bit bigger here .
Let's just do like 100 and 15 , ok ?
That looks better , right ?
100 and 15 .
Good .
Now , let's do a little bit more , you know .
Let's , let's do 1 30 .
All right .
1 30 .
All right , we're good .
We're good .
All right .
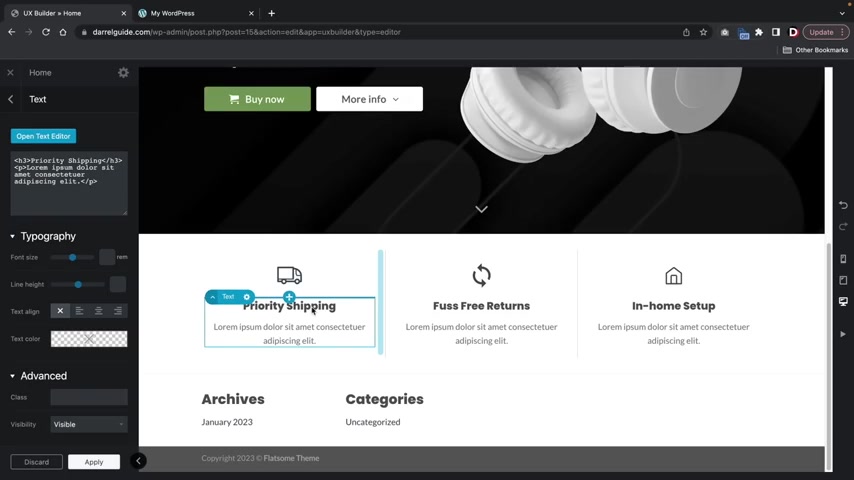
Now we're gonna scroll down and I wanna insert this section .
So let's go over here and we're gonna use the flat studio and this is the services and icons and it's this section right here .
It is the shop benefits .
I'll import this and then I'll go ahead and import this section and there you go .
Now , the great part about the presets like we use in the theme customizer is you guys can see the font already is changed for us .
And all I did here was I just basically made this a little bit more darker , right ?
I want the text a little bit more black to be consistent with our color .
So over here text color black , black .
Wait , wait , wait , there we go .
Wait , wait , wait , wait .
Whoa , whoa , whoa All right .
There we go .
And then uh we'll do it one more time and there we go .
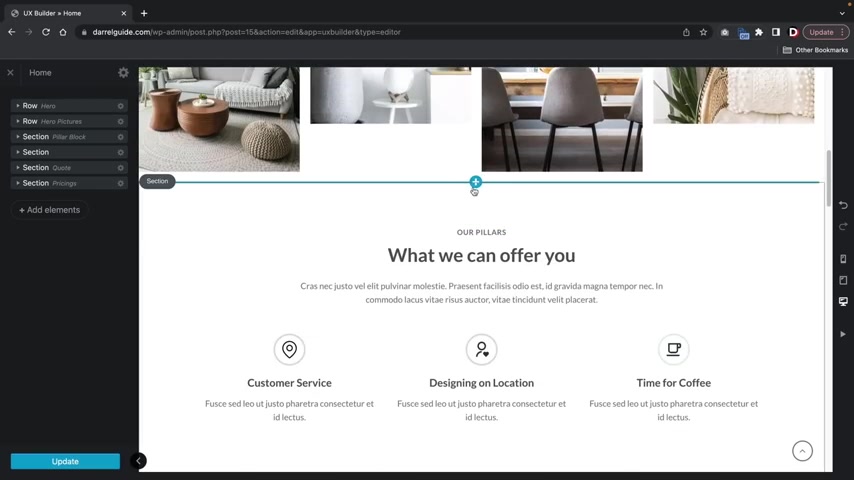
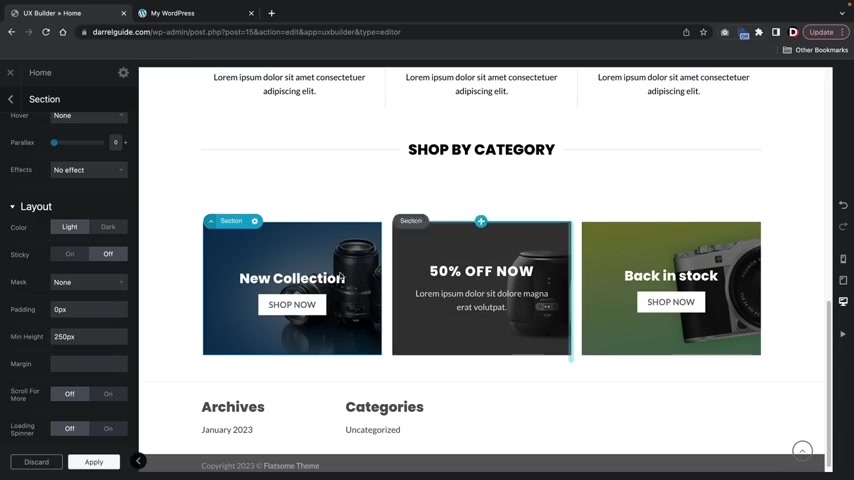
And the next section is this shop by category , right ?
So this is a text which I use to introduce the next section .
So instead of actually using the flats studio , I'm gonna click on the plus icon here , click on a section , but I don't want to use a preset .
So I'll close that and I want to add an element here .
So I want to add in the , I think it's called like the title center .
That's what I used .
It's one of these right here .
Title , right ?
And here's the title .
And what I did was I just put shop by category , right ?
So we'll do shop by category , shop by category .
And here we can change the tag .
Remember earlier how we adjusted these .
So I'm gonna select H one make this uh block right here , right ?
I don't want an icon , you know , but I do want it centered in the middle .
So for the style I wanna click centered and now you'll see it says shop by category .
And now it's just waiting for us to insert the next section .
So over here , I'll insert the next section flat , some studio .
So now let's insert the next section here is the hero banner section and this is the section that I uh got the uh block from .
If I scroll to the bottom , you're gonna see this one right here .
It is called the e-commerce three column info boxes .
I'll click on import .
All right , perfect .
And all I did here was I just added different backgrounds to this , you know , I don't want to use the default ones , but these are actually pretty nice .
Like I'm not gonna lie , they look pretty good , but I want to add in my background .
So I'll right click , click on options and you'll see over here how I added this camera .
So let's go ahead and add in the camera change media or find the camera .
I think it's uh down here a little bit more .
There is the camera use that image .
And for the next one , I use this black screen right here and then the camera on the right side .
So here are all click on options .
So now we're gonna find the black speaker .
So you'll see over here how uh I've selected it , use this image and then we'll do it one more time over here .
Options change the media and now we're gonna find that .
I think it's like a yellowish background .
I use with a camera .
Here we go .
It says green yellow gradients and I'll click on and use this image .
Now , remember you guys can go ahead and mess around with these settings right here .
These are just styling options , you know .
So for example , if you want to add in like an overlay , you can add an overlay in the background .
This actually really helps for the text to display .
So for example , I can , you know , put it on that one , you'll see that the text displays , then you have like different effects like we have snow where you can make it snow really cute , you know , I do , I do like that a lot .
Uh You have confetti so it's really cool sliding glass , sparkle and then like rain and stuff like that .
So yeah , they have a bunch of really cool ones , you know .
But um don't get too crazy with them , you know , I know it's really fun but , uh , you don't want your website looking like , you know , a bunch of moving stuff everywhere and , you know , but yeah , uh , you guys can also , you know , go through these right here and just mess around with them on your own free time really quickly .
What I want to talk about is the shape divider .
So if you guys wanna add shape dividers , you guys can do that for every section .
For example , here , the divider we have like an arrow , right ?
And I'll go ahead and fill this just to give you an example .
So what it does is it pretty much introduces the next section with like a little like design animation , right ?
You have that I think they have clouds right ?
Or curve , right ?

You can do like a curve curve invert .
So it's like the other way , you know .
And uh yeah , there's just a bunch of really cool styling options and um you know , we can spend another hour talking about this , but I think at this point , you guys understand that uh you guys can go through this and just learn how to style this on your own free time .
All right , let's go ahead and now go to product categories and then now we're gonna do products finally .
So the next section we're going to add in a title again or we can right click on this and duplicate this and then we can drag and drop this bad boy right there .
How , how cool is that ?
Right ?
All right .
Now we're going to start making products and to do that , we need to install a plug in .
So let's do that .
Let's go over here and click on apply and updates .
We'll close this and now let's go ahead and go on to the next section .
We are now gonna start making products for our website .
So now we're gonna make products .
And the great part about wordpress is there's no restrictions on how many products you guys can make .
You guys can make as many products as you want and sell anything that you want other platforms .
They actually limit you on products based off like your plan and stuff like that .
It's a bunch of crazy nonsense .
So we're gonna go ahead and teach you guys now how to make products for your e-commerce website .
So in this next section , I'll show you how to create a simple product , a variable product and then also a group product .
So let's go back to the tutorial .
All right .
So let's now move on to creating products .
Awesome .
Let's go over here to our dashboard and we're gonna go to uh plugins and click on add new and we're going to install the Woocommerce plug-in .
The Woocommerce plug in is the most popular uh plug in for e-commerce websites with wordpress .
This is the plug in , right .
Here , you'll go ahead and click on install now and then you'll click on activate .
So when you guys install the Woocommerce plug in , it's going to prompt you with a setup wizard , but we can adjust all of these settings in the general settings of Woocommerce .
So I want to go ahead and skip this .
So right here , I'll click on skip setup store details .
Now , as soon as you install the Woocommerce plug in , you're going to actually get some pages that are automatically created for you .
You're gonna get the shop page , the account page and then also like the checkout and the carts .
And if you guys want , you guys can add these pages to the menu .
So over here , we'll go to appearance and click on menu and under the view all tab , we can now add in the shop .
And if you want , you can , you know , throw in the my account if you want and stuff like that .
So I'll go ahead and adjust this .
We'll put the contact at the bottom .
But you know , I I'll make the my account like a drop down , right ?
I think that's uh I think that makes more sense .
Let , let's do that .
And if I click on visit site , you'll see that we now have the shop , but it's empty .
And then we also have like the my accounts and this is where users can actually go ahead and have access to their products or their uh shipping details or whatever , so they can go ahead and access everything from right here .
So now let's make some products .
So to make a product , we'll go to our dashboard here and under uh products .
First , let's click on all products .
Whenever you guys create a product , it'll be displayed right here , but I'll go ahead and click on create products .
Now , we're first gonna create a simple product .
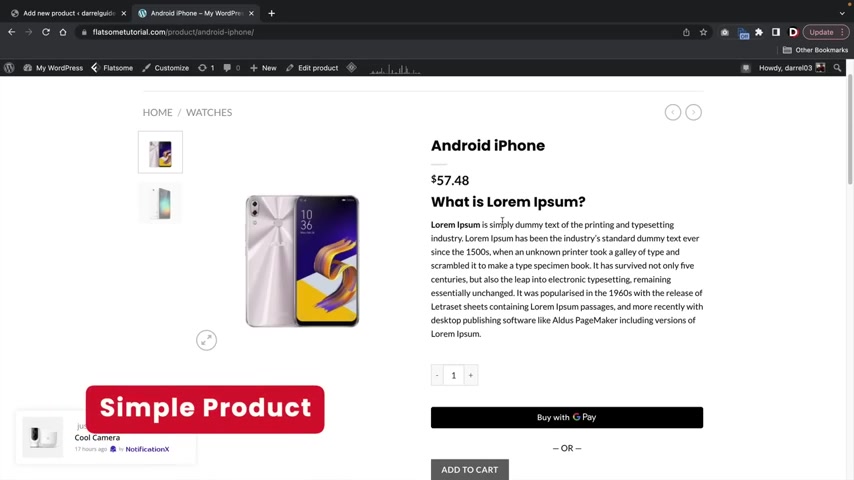
So let me explain what a simple product and what a variable product is .
So this right here is an example of a simple product .
A simple product has no variables , right ?
So it's pretty much like a stand alone product with no options at all .
So this is an example of a simple product .
And the next product we'll create is called a variable product .
A variable product has variables such as size or color .
For example , here we have these headphones , right ?
But let's say we have these headphones in like blue .
You can also add variables like size and this is ideal for like t-shirts such as small , medium or large .
So I'll show you guys how to create a variable product as well .
The next product is called a group product .
A group product is a product with various sizes within the actual product .
For example , let's say you're selling iphones , some iphones might be 16 gig and some might be 32 gig .
This is an example of a group product and I'll show you guys how to create all three .
All right .
So let's get started .
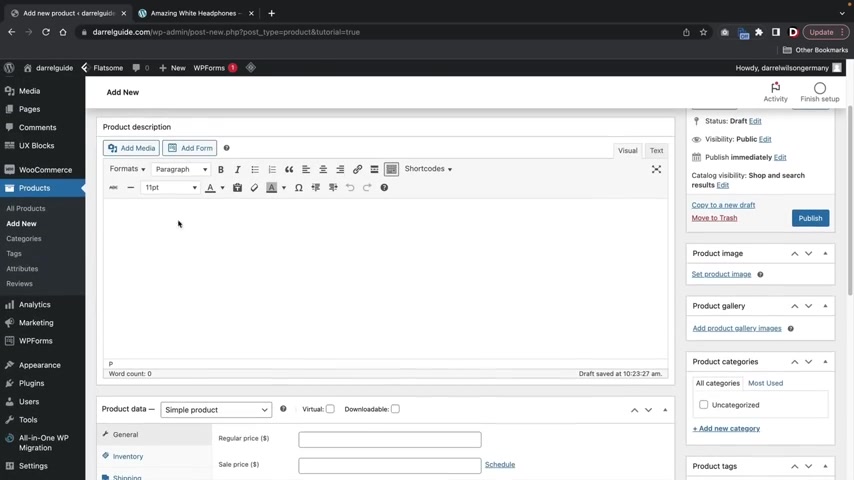
Now , what is the name of your product ?
I'm gonna put in amazing white headphones and here you have the product description .
Now , this is the long tail description .
So this description is gonna appear here at the bottom .
This is ideal if you want to include things like the material or where it's made from or just like the technical details .
So I'll go ahead and just uh paste that in there .
Next , we have product data .
Now , this is a simple product .
Now , you guys can also sell downloadable products , virtual products .
And um there's other products you guys can create , but I will make a separate video that goes into every single product in detail .
And I'll put that in the description below .
But I think most of you guys are just gonna use a simple and also a variable product .
A group product is something where if you have specific sizes within the actual product , for example iphone sizes , you might have like a 16 gig , a 32 gig and a 64 gig .
So next we have product data and I'm gonna select a simple product because we're just creating a basic , simple product here .
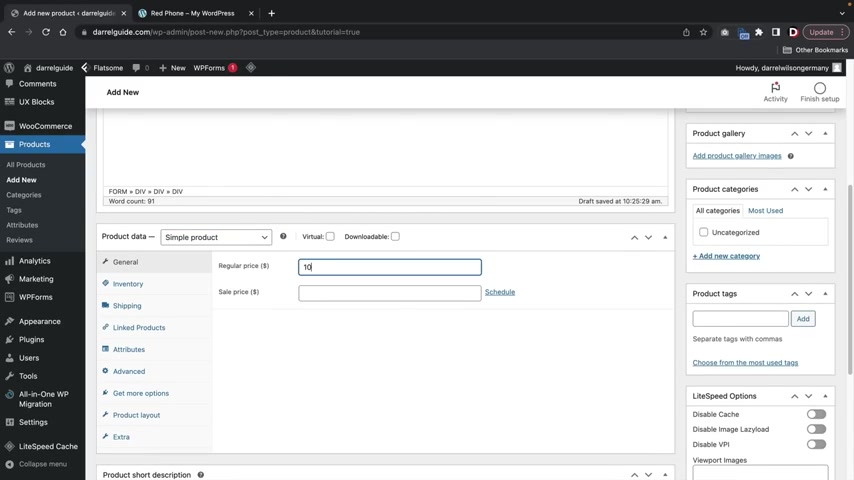
We're gonna select a price .
You guys can also select a uh sales date , right ?
So if you want to have like this on sale from a specific date , we can go ahead and select that here .
So for example , I'll say this product is on sale between the 27th and the 31st .
Here we have inventory .
If you guys have skew numbers , you guys can enter that here .
If you guys want to actually show people how many you have in stock , you can actually select that here .
This is optional .
You don't have to do this .
But if you want to create some sort of scarcity where you're saying we only have 30 left , you can go ahead and enable that .
There .
Here we have the back orders where you can allow people to purchase this product even after it has sold out .
And then also we have the low stock threshold .
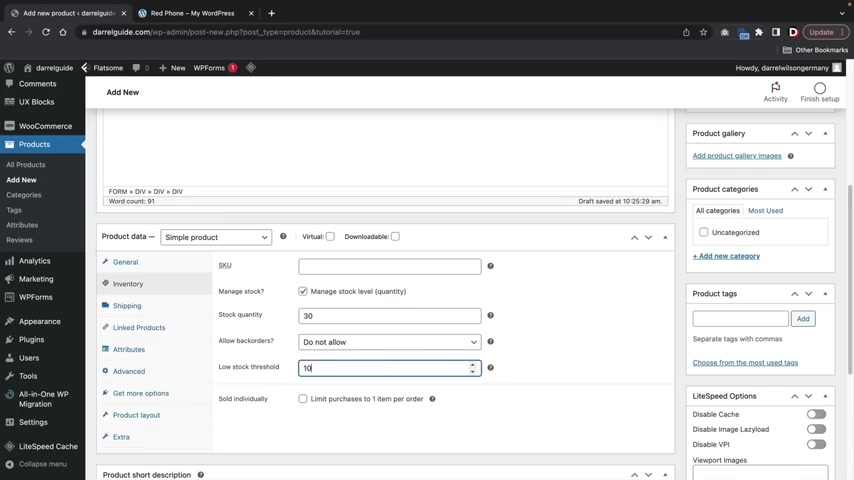
This is gonna notify you when you start running low on the actual product .
So I'll say send me an email after we hit around like after we only have 10 left .
So then you'll , you know , have time to actually go ahead and purchase uh more from your supplier or whatever .
Here you have sold individually .
I don't recommend doing this .
This will make it .
So this product cannot be purchased with other products .
There are some case uses for it , but for typical e-commerce websites , you're not going to select that .
Here .
We have shipping .
You guys can actually select the weights and the dimensions of your product here , linked products .
So here we have up cells and then we have cross cells .
So here we have the Upsell .
And once you create products , you can actually recommend other products when users are viewing other products .
For example , here we have the red iphone .
If we scroll down to the bottom , you're going to see related product .
This right here is an example of an Upsell .
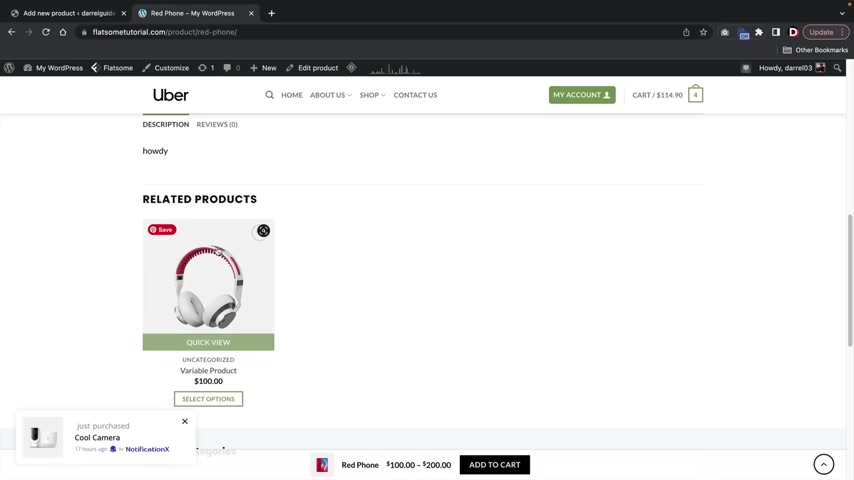
So when someone is currently viewing this specific product , it'll display right here up sells are ideal if your product has accessories that you might also want to recommend .
The next one is called a cross sell .
So a cross sell is products that you recommend at checkouts .
For example , here you'll see you may be interested in and then you'll see these products , you can add cross cells .
So when people add something to the cart , you can also recommend these other products as well .
All right .
So we'll come back to this in just a little bit .
Next , we have attributes .
This is for variable products .
So we don't need to do anything here .
And then you have some advanced options where if someone did purchase this , you can actually send them a purchase note .
Like thank you for your order .
You can enable reviews and here you have a menu order .
This is for themes that don't allow or I'm sorry that don't have a specific way of structuring products , but fat theme does .
So we don't need to really mess with this .
And the next one is get more options .
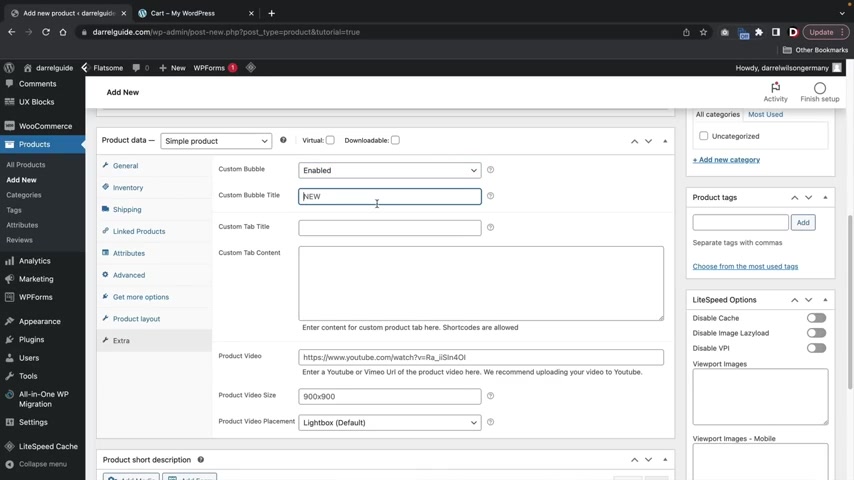
You guys don't need to anything here uh Here you have product layouts , which we'll talk a little bit more later in the video and then you have extra here .
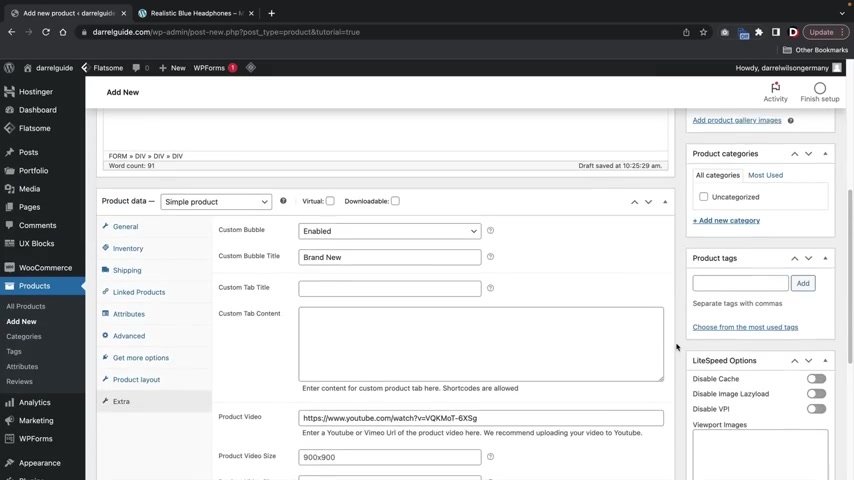
You guys can add extra features to your product .
So for example , if you want to have like a custom bubble , you can you know , say something custom like , you know , brand new or something , right ?
Brand new .
You guys can also put in like youtube videos .
So if someone actually views the product , they can actually click a little light box and a video can display for your product .
So I'll go ahead and pay something there .
Now , here you have the product short description .
This is actually the most important description .
So for example , if I go over here and click on a product , this is the short description .
So it's the main description of the product .
So you want to put something that really stands out .
So I'm just gonna use some demo text right here and just go ahead and you know , pay something in , I'll go ahead and you know , I'll make this look a little bit cooler .
I'll put in some buttons right ?
Like made in usa best quality .
Super amazing .
I I don't know you guys can , you guys can you know , get it right ?
But you guys can actually use some of these tools right here to design the actual uh short description .
Now , on the right side , you're going to see that we have some options .
We have the product image .
So I'm selecting the white headphones .
So I'm gonna go ahead and set product image and just use like the white headphones , right ?
So I'll grab these headphones here and here we have product gallery .
So for example , if you guys have multiple images of your product , you guys can actually have users skim through the other images .
So let's just imagine that uh you know , we have different angles of the actual headphones , right ?
I think we saw them right here .
There we go .
All right .
And then here we have product categories .
So this is gonna be headphones .
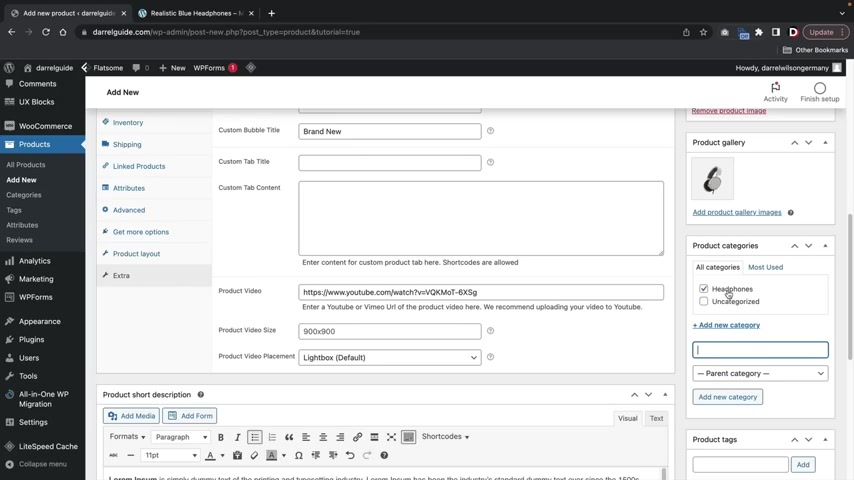
Product categories are very useful because if a user actually clicks on a specific category , it will display all of the products within that category , making your website really easy to navigate .
And then here we have tags , right ?
Like a headphone electronics .
And I think we're all ready to rock and roll .
I think that's it .
All right .
So now that that's done , let's go ahead and click on publish .
You guys can actually create product pages from scratch , but we'll talk more about that a little bit later in the video .
So right here , let's click on view products .
And here we go , we got your product , we have amazing white headphones , we have the description , you can see our bullets and we have different uh product gallery images .
And here we have the youtube video , right ?
So if you click on this , it'll actually play a video .
So if you have some sort of presentation that you want to display for your products , you can add a video there .
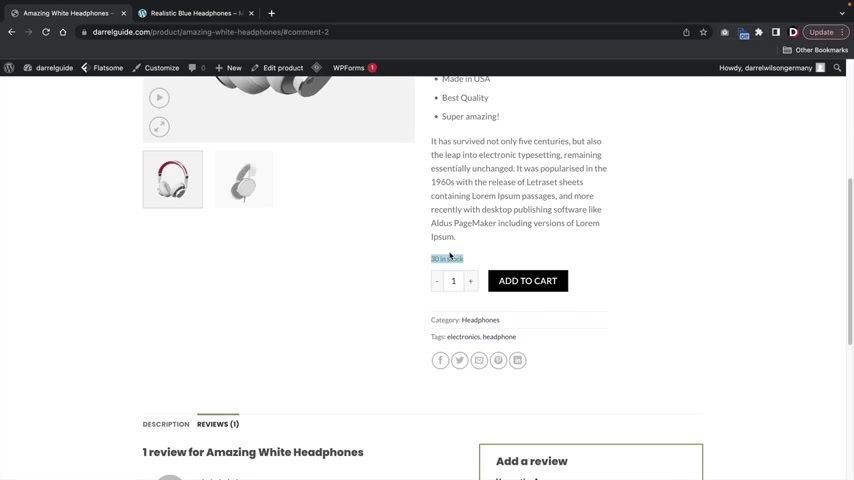
And we also have that cool little brand new banner that we added in the advanced options that is not required .
You guys don't have to add that in , but it's just an option just in case you guys might want to .
And if we scroll down , you will see that we have the description here at the bottom .
And then people can actually leave reviews for your product like best item and then click on review .
There is also options where people who have only purchased their product can leave reviews as well .
So that's pretty much it .
Oh yeah .
And right here 30 in stock , remember how we set the manage level .
We have the category and then we have the uh tags .
So for example , if if I click on headphones right here later on once we create more products for that category , they will all be displayed right here and you can even add the category to your menu to make it really easy to navigate for your visitors .
So , congratulations .
We have now successfully made a simple product .
Now let's make a variable product .
Let's go over here to plus new and click on products .
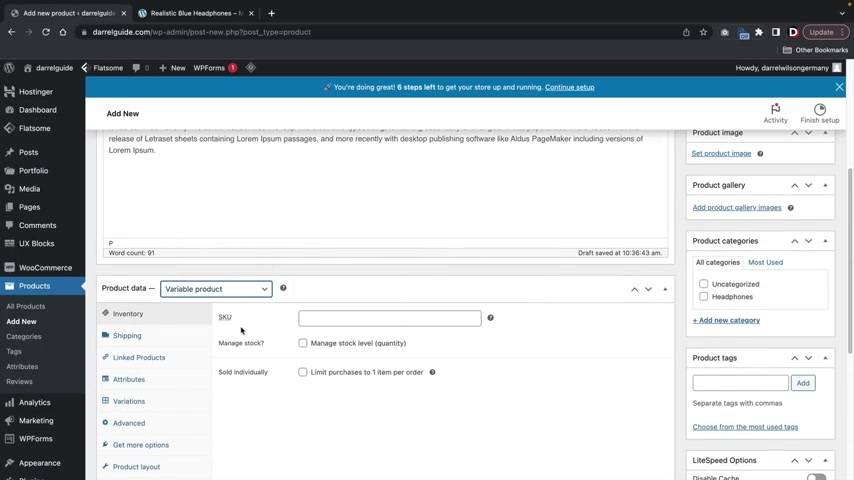
So we're now gonna make a multipurpose headphone , right ?
So multi multipurpose headphones , right ?
Sorry , I'm I'm not a literate .
I it's just hard for me to type on the keyboard when I'm looking down and I have a microphone in front of me .
So it , it's a , it's a little hard , you know .
Uh I'll go ahead now and speed this up .
So this is our long tail description , right ?
And we're gonna add some short description down there .
Here we go .
All right .
OK .
Now , right here for product data , we're gonna select variable products .
You guys might notice the price disappeared .
Not to worry , we're gonna go ahead and add in some um attributes .
So what do you wanna add for your product ?
Do you want to add size , color weight ?
Well , we can add it here .
So I'll put in size .
We've got small and now we have this little sign above the enter sign .
It is a bracket sign .
So you'll go ahead and hold shift and then press the button above the enter sign .
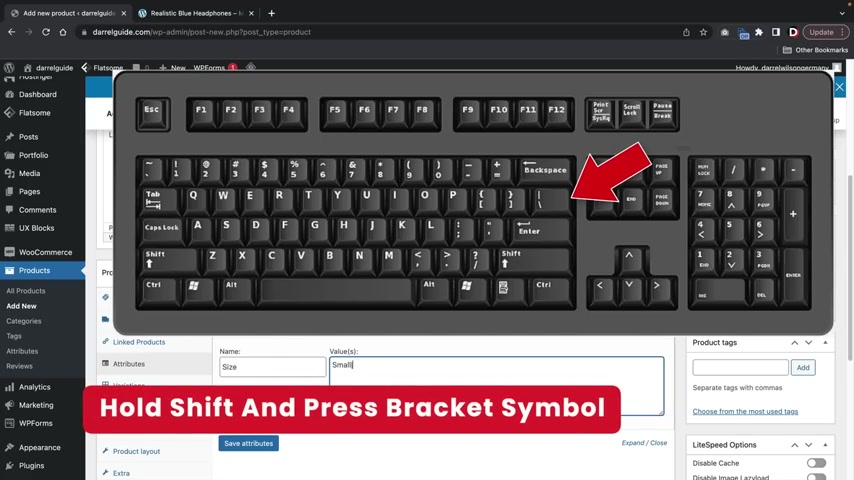
I'll go ahead and leave it on the screen so you guys can actually see what I'm doing and then we'll do large , right ?
So now we have small and large here .
I'll click on use for variations and then click on save attributes .
We can also do something like color .
Let's go to add color , I'll do whites and blue , used for variations .
Now , we're going to add these variations to the product .
So here under the variations , I'll select create variations from all attributes and click on go and what that's gonna do that's going to add all the variations together .
Now , for the small whites , what do you want this to cost ?
And what image do you want to display ?
Well , I obviously want white headphones to display , right .
So I'm gonna find the white headphones , right .
How much does the white headphones cost ?
Well , the small ones , they cost 50 bucks and that's it .
I'll go ahead and just break this down .
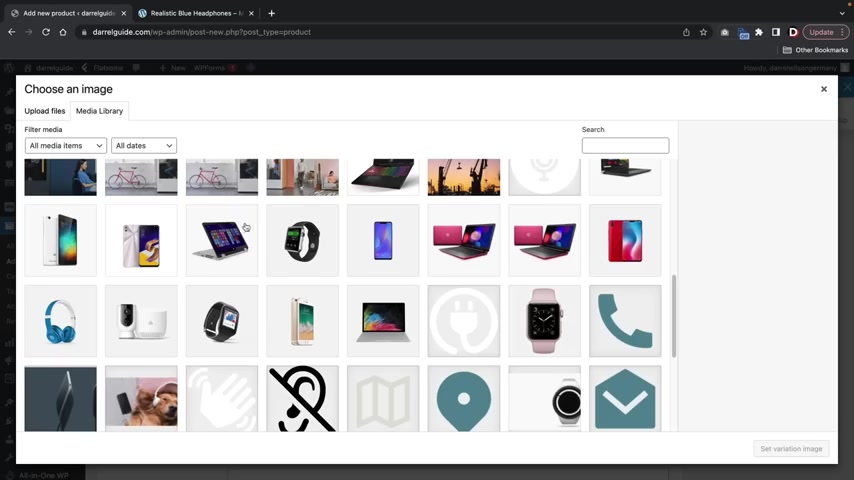
Now for the small blue , we're gonna go ahead and put in the blue headphones now , right ?
And the small blue cost 50 bucks as well .
And these are very similar to the other options , right ?
You guys can obviously add a sale price .
You can put in the dimensions and the weights and all this other information .
Uh , let's go ahead and close that .
And now we have a large whites .
The large white is gonna cost 100 bucks , right ?
Because it's a larger , you know , that means it's gonna cost more money .
So we're gonna put 100 bucks and the same thing for the blue , right ?
And this also costs $100 .
Variable products can take a lot of time to make , you know , they , they're no fun sometimes , you know , I had a , an e-commerce website once I had like 200 available products and it took a long time , you know , but that's really , uh , that's just what it takes .
Now here , I'm gonna select headphones , right ?
Because we've already created a category for headphones , product tags , headphones , blue white .
And now we're gonna select a product image , right ?
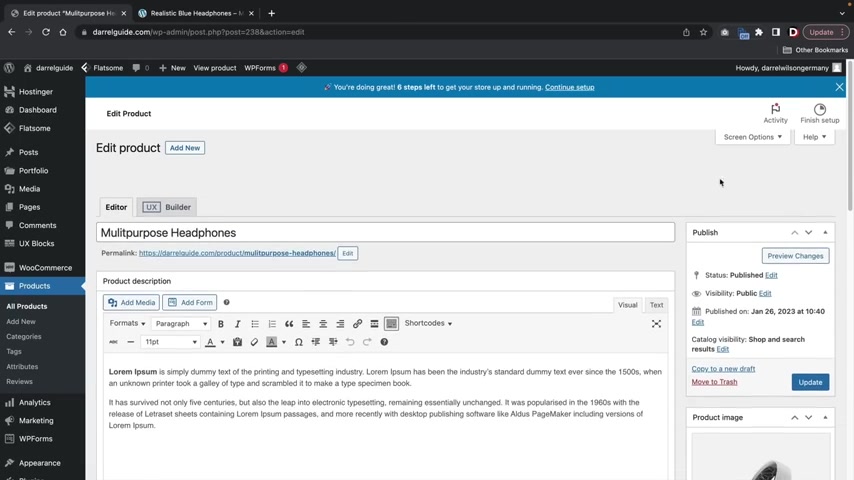
So what is the default image that I wanna use ?
Well , you can either choose blue or white , it doesn't really matter .
So here you're gonna see under variations how this says default form values .
So what is the default value you want selected ?
So I'm gonna put a small white , right ?
So basically when people see this product in the shop , what I want them to see .
Well , I'm gonna make them see a small white headphone first .
Uh I don't really need to add product gallery images you can if you want , but it's not really necessary because they're gonna see it anyways .
And I think that's it .
Let's go ahead and uh let's go ahead and take a look here here .
I'll click on publish .
Now , if you guys missed one thing , if you guys missed the price or if there's something that you did not fill out properly , this product will not display and it will not be allowed for people to check out .
All right .
So I just want to give you guys a quick little notice here .
Let's click on view products .
All right .
And here's an example of the variable product .
So you'll see that the small white is selected by default , right ?
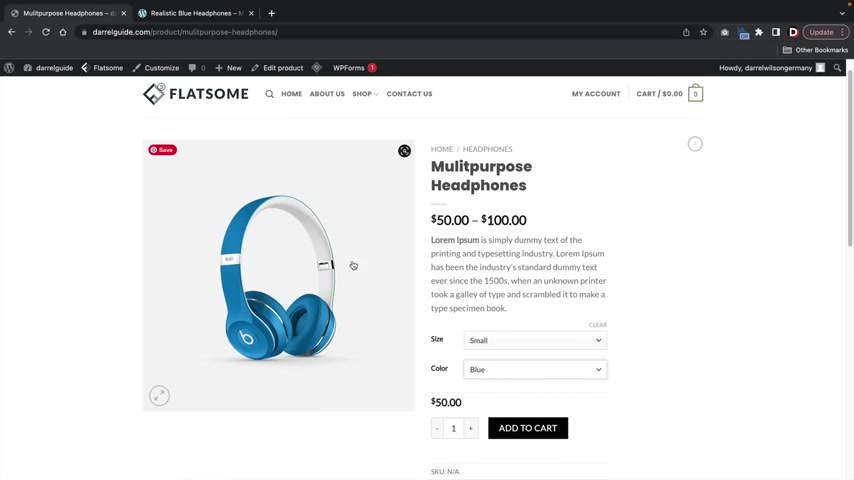
And if I change this something like blue , you'll see that the product also changes .
And if I select large blue , you'll see that the price also changes from $50 to $100 .
And we can just , you know , keep rotating this and you'll see that uh it fluctuates according to what we said it to .
So , congratulations .
That's how you guys create a variable product , variable products .
They do take time to make .
And if this adds a car does not display for you , that means you probably forgot to add the price somewhere on one of your variables .
So now let's go ahead and create the last product which is called a grouped product .
Let's go over here to plus new and we'll go to product .
Now , group product are actually a little awkward to make , you know , um at times it can be a little confusing but not to worry , I'll run you guys through on how to do this .
Now we're gonna do the iphone , the Cool iphone here .
Cool iphone .
OK ?
And just like before you know , we'll go ahead and add in some description .
But this time I'm gonna select grouped product right there .
Here .
We're throwing some description , right ?

Throwing some description .
OK ?
Here we go , description and there we go .
And I'm gonna add in a product image of an iphone and at this point , that's all we're really gonna do .
So we're just gonna add the title , the description and the image for .
Now let's go ahead and click on publish .
OK ?
So now we need to create the actual sizes for the iphone .
Let's do that up here .
Plus new products .
Now the first iphone is about 32 gigs .
So I'm just gonna type in 32 gigs and we're not gonna add in any description whatsoever .
How much does this cost ?
Well , the 100 gig iphone costs $100 .
Now , over here on the right side , you're gonna see catalog visibility .
You wanna click on , edit here and you want to make this hidden , ok ?
And then I'll click on , ok ?
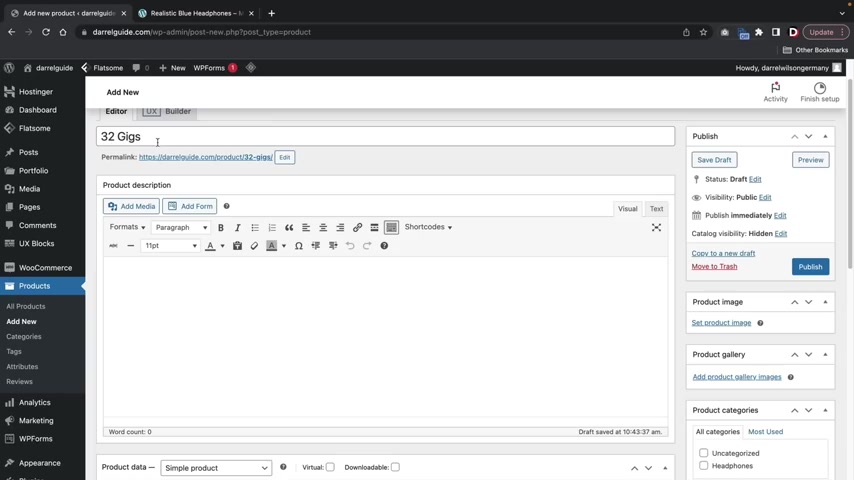
The reason why we're doing that is because these are going to be sub products for the main product .
Just give me a second .
You guys will understand it just a bit .
So I'll go ahead and click on publish and we're gonna make one more .
We're gonna make 64 gigs , ok ?
64 gigs .
And this costs $200 and we're going to make sure this is also hidden and publish and that's it .
And now we're gonna go back to our main product , which was the cool iphone and we are going to add those products uh within this , right ?
So we're gonna scroll down and here you're gonna see linked products .
We are now going to select 32 gigs .
All right .
And then we also have the 64 gigs , right ?
And now we're going to click on updates now that we added those products inside of the group product here .
I'll click on view products and there we go .
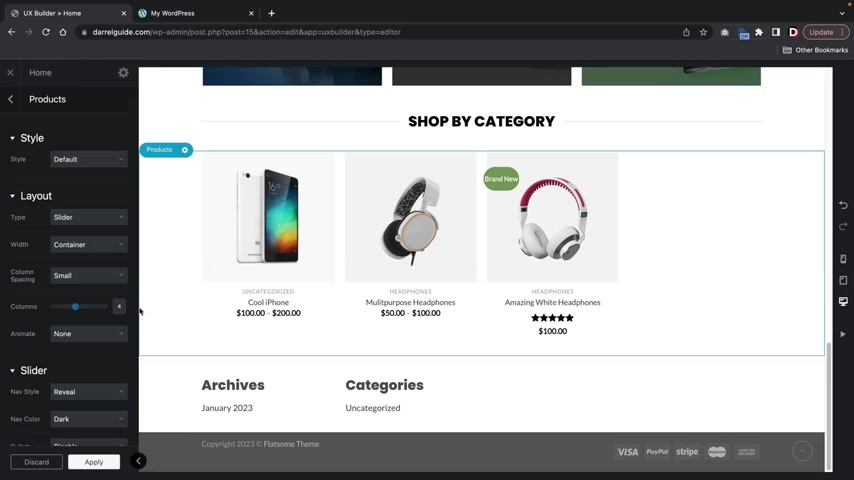
Now , you'll see that we have the group product here where we have a 32 gig iphone that costs 100 bucks and then we have the 64 gig which cost $200 .
So , congrats , we have now created a group product .
Now , really quick , all of the products that you guys create will automatically be sent to your shop page .
We will go ahead and mess around with this a little bit later .
But uh I want to add these products to the actual home page that we have the products right here .
So you'll see that we have all the products displayed right here .
Let's go ahead and add that in .
So to do that , let's go back and turn on the builder .
So over here , I'm gonna go find the plus .
There we go and I'm gonna type in products .
So now you'll see that we have products and there's different presets you guys can pick , you know , there's like on sale .
All right , and they'll click on apply .
Now , the cool thing about is you guys can actually set specific styles for your products .
For example , if you want to change the style to like normal , you'll see that this is normal .
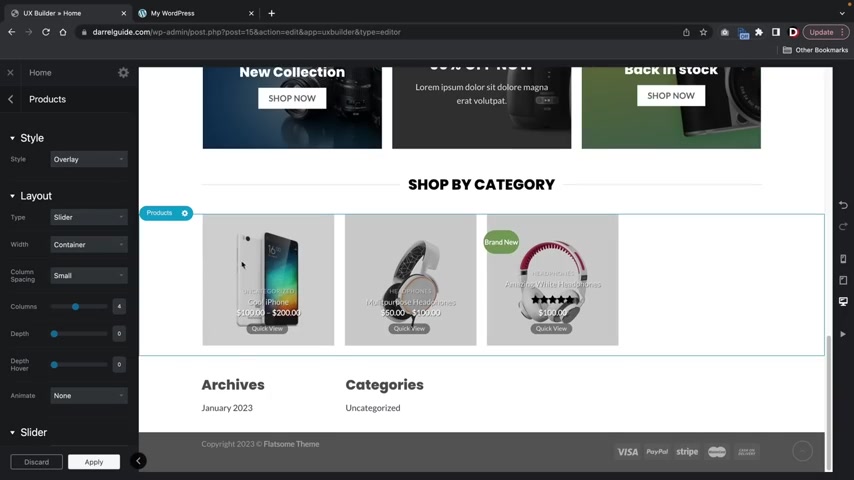
If you want to add an overlay , you'll see that there's now an overlay with a little bit more description above the products we have shade , we have vertical .
It's kind of weird .
Yeah , the label .
All right .
I mean , these can be used for various uh types of products , right ?
It just really depends on what you're selling and that's why I pick flats because it's very multipurpose .
But uh I like push , I think push is really cool .
But if you guys do use push , you'll see that the quick view is kind of behind the title unfortunately .
But um if you guys want to go ahead and , you know , take that out , all you'll do here is under the box section , you can like take out quick view or you can take out the rating or you can go ahead and turn on and off some of the features for the product .
And these options right here are to basically add in like animations .
So if you want to like fade into the left , you'll see that uh a beautifully fade into the left and then you guys also have other various styling options right here .
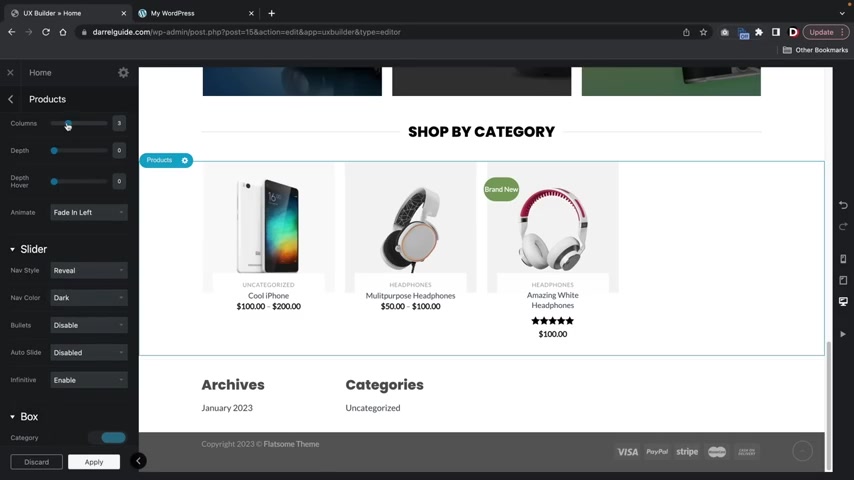
So you guys can go ahead and mess around with these on your own free time .
And over here we have columns .
So if you guys want to select like , you know , a three column row or even two columns and stuff like that , you guys can mess around with all these settings right here and customize this to your liking at the bottom .
You can adjust the text .
So you want to put the text on like the middle or you wanna make the size difference or you want to have a specific background color .
You guys can go crazy and knock yourself out and mess around with all these options right here .
All right , great .
So now that we added some products , let's go ahead and keep going here in the demo website , you'll see that we have a four column row and you know , we just basically made a products display .
But once you guys create more products , you'll see that they automatically propagate right here on your home page .
The next section was just a sign up , right ?
So we have a sign up form .
Now , if you guys want people to like , subscribe to an email list , I'll show you guys how to set that up here .
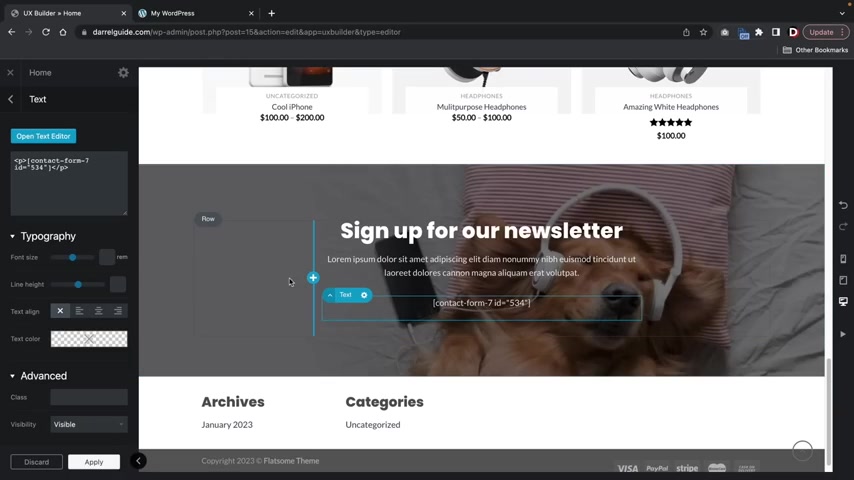
Let's go ahead and go to flat studio and we're gonna scroll down and we're gonna find sign up and I use this one right here .
The call to action newsletter .
I'll go ahead and quickly import this .
All right .
And I want to give it my uh you know , I want to carry my color scheme .
Oh , actually , that's too much .
Let's go ahead and actually upload an image instead , right ?
That's , that was too much green .
You know , I'll go ahead and select a media image and I think I used the dog , right ?
I think I use a dog here .
I use this one right here and I want to add an overlay , you know , it's a little bit too .
Uh There we go .
See now the text is easier to read .
And over here you're gonna see that we have this short code .
The reason why we have this short code is because we need to install a plug-in called contact form seven .
And then we're gonna integrate a service and I'll show you guys a list of services that are available .
Let's go over here to our dashboard .
Now , over here under the appearance section , you're gonna see install plugins .
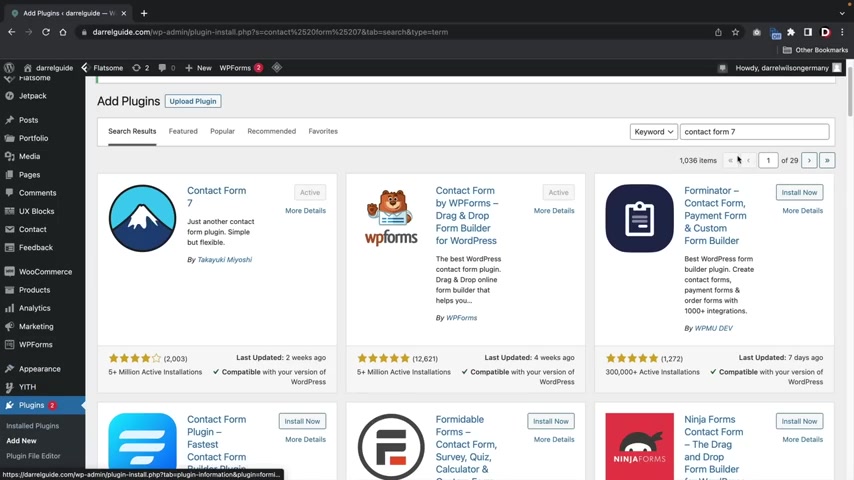
These are the necessary plugins that um flat some recommends we can go ahead and install these like this right here is a contact form .
This is social login and this is the woocommerce wish list .
So I want to install these two here also really quick .
If you guys want to know the name of the plug-in , it is called contact form seven .
So over here under plugins and add new if you type in contact form seven , this is a plug in that we actually use to embed the contact form and also the email subscription list .
Now on the left side , you're gonna see this contact pop up .
Let's go ahead and click on contact .
So this contact form can be used to actually send contact forms directly to your email inbox .
And it can also be integrated with other platforms to capture emails for an email list over here under integration .
So they do offer two integrations , they have send and blue and also constant contact .
I'm gonna show you guys how to set this up with send and blue .
There is a link in the description of this video .
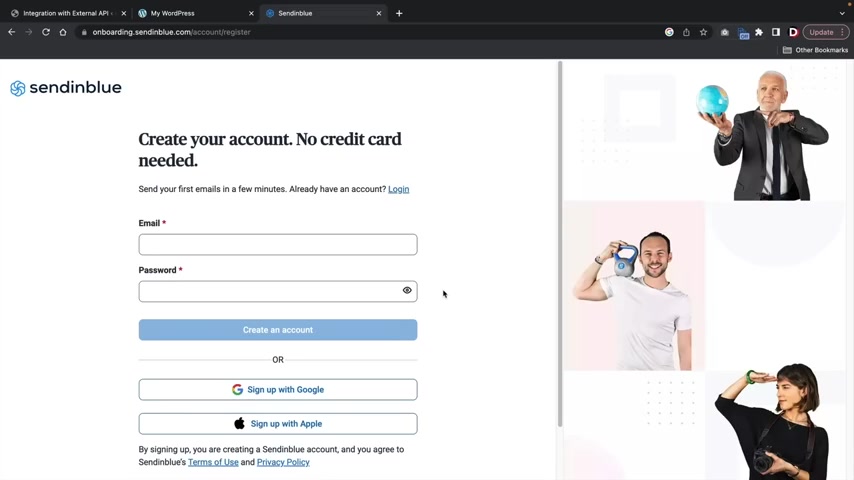
It'll take you guys to the send and blue website .
So this is send in blue dot com .
You guys can actually start with a free trial and you guys can sign up and this company will actually store all of your email subscriber list and then you can send them email blasts and you can mark it to your audience .
So go ahead and click on , sign up for free .
Now , I already have an account with these guys .
So all you're gonna do here is just go ahead and make an account and then I'll meet you in the customer portal .
If you guys don't want to have an email subscription list , you guys can actually skip to the next section .
But for those of you who want to add it to your websites , I'll walk you through how to do that .
All right .
And this is send in blues dashboard .
Now , I'll probably be having another video that talks about this .
But let me just quickly show you guys how to actually create lists and then how to send emails to those specific subscribers over here .
You're gonna see contacts .
Now , the first thing that you guys will need to do is create a list , right ?
That's basically saying , where do you want these people stored ?
Well over here , you'll see that we have lists and you're gonna add a new list .
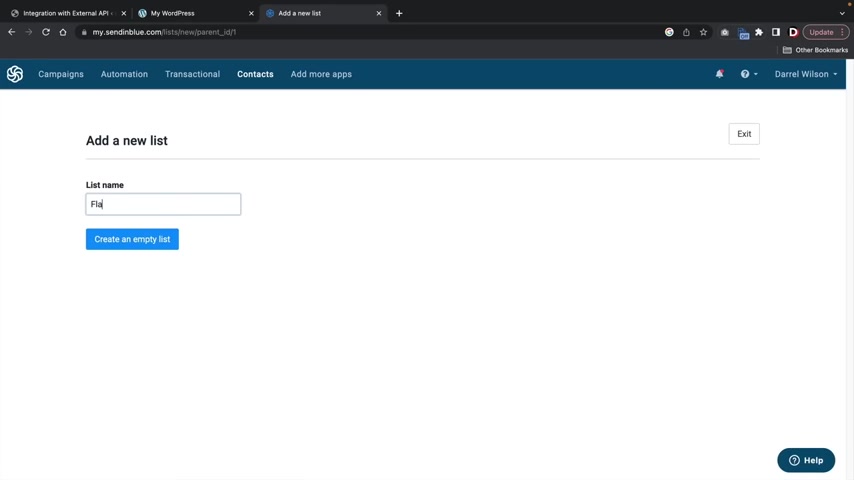
You'll see that I have various lists here over here .
I'll click on , add a new list and this will be for like flat , create an empty list .
All right .
So now you'll see that we have our list right here , but uh we don't have any subscribers .
So sad .
Now , once you guys actually get subscribers over here under the campaign section , you guys can actually click on create an email campaign and then you can send a list to that specific uh group , right ?
So for example , uh newsletter , right ?
Newsletter , create a campaign and here you'll see where it says add recipients .
So you'll just go ahead and select that specific list , right ?
So you'll see here how we have the flat list , but we don't have any contacts yet .
So once you guys actually get some contacts , you guys can just go ahead and go through the process here and then send an email blast to those specific subscribers .
But I'm just going to click on saving quits because this is gonna be for a whole another video .
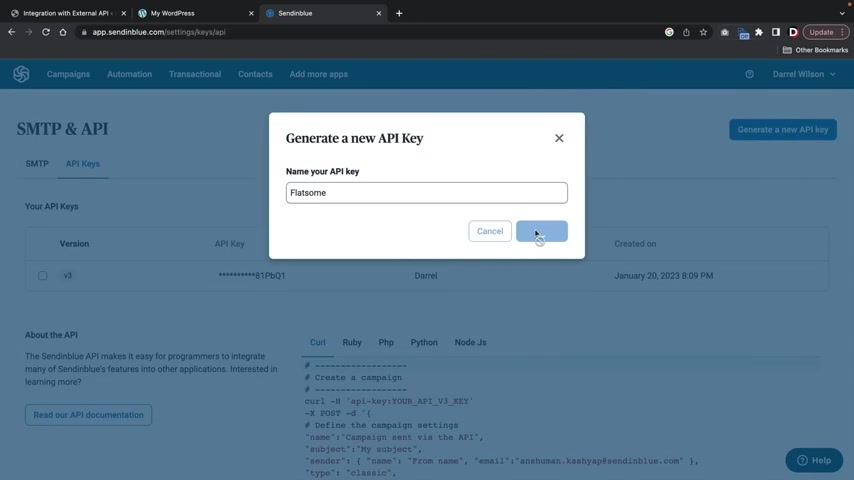
I don't want to spend too much time talking about send in blue .
But all we're gonna do over here is go over here to SM BT and API and we're just gonna copy and paste an API key and that's it .
So over here you'll see API keys .
Now you guys can always generate a new one .
I've already created one , but I'll just make a new one here and this is for flat sum , I'll click on generate and this is the key .
I'm going to have to paste and that's it .
So set in blue , set up integration , paste it there , save changes and we are done .
You'll now see that set in blue is active on this website .
So now let's go over here to the contact forms and we're gonna make a new form .
So add new and this is the sign up .
Next .
We're going to go over here and click on form .
Now , all I really want is their name and their email address , right ?
So I'm gonna go ahead and get rid of the subject and the year message because we don't really need to add that , right .
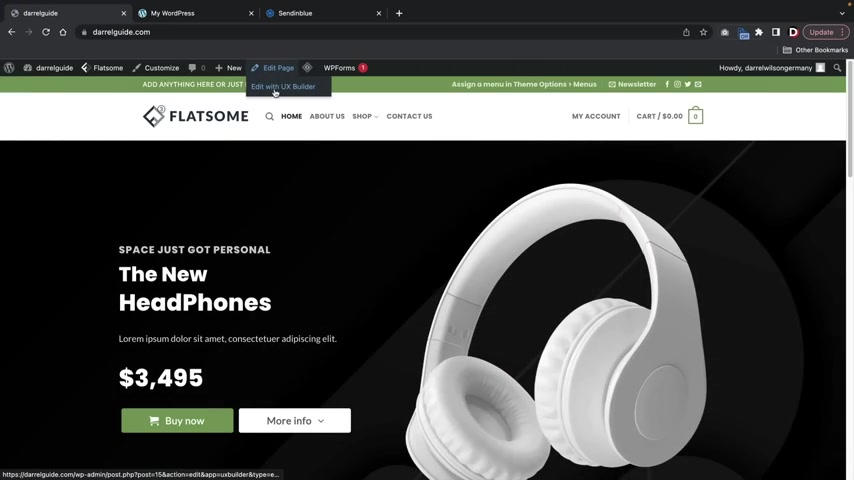
So we have the year name , the your email and then the submit button over here , you'll see send in blue .
This is where we're going to now integrate it .
So I'll click on add form , we'll click on flat some and then I'll click on save .
We also have the message section .
So next we have the messages section and let's say , for example , someone actually subscribes to your email list .
You guys can change this to like , you know , thanks for subbing or something like that , you know , and this is the actual uh notice that we display .
Once users have actually subscribed to your email list here , I'll go ahead and click on save and now you'll see that we have this short code .
However , Flaum is fully integrated with this contact form .
So you don't need to actually copy and paste it .
You can just go ahead and click on edit with UX builder and the form will be displayed in the contact form elements .
So go ahead and scroll down here and here you're gonna see the the contact form for select form .
We can now select the sign up form .
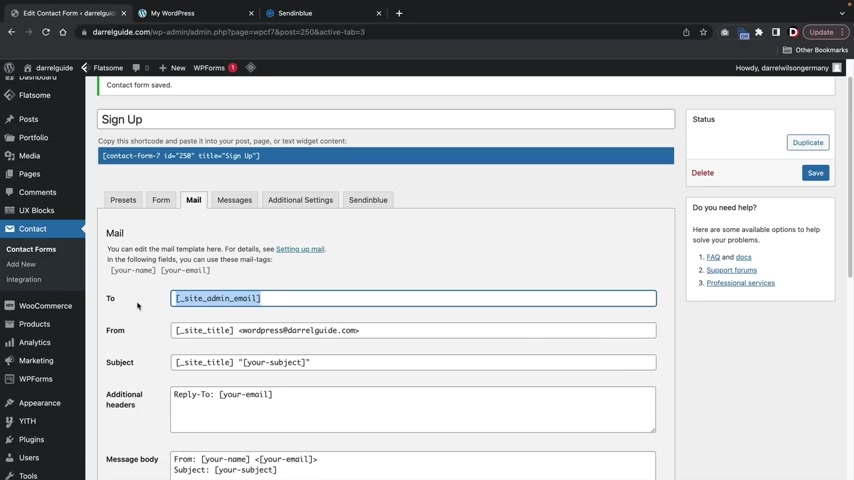
We have your name , your email and then submit .
You guys can also just put like , you know , your email and that's it .
You don't even have to put name if you don't want to , that's strictly up to you .
Now , there is something I do want to mention whenever you guys actually get a user to sign up , it'll actually display in your account right here .
However , it will also send an email notifying you of a new subscriber and it could get a little annoying if you constantly get emails from your actual website saying someone subscribed .
So what you guys can do is for the site admin email .
You guys might want to put an email here that you don't use too much because it's going to constantly notify you that someone has signed up , right ?
So put in like Darrell Porto at gmail dot com and then I'll click on save and I'm gonna make a quick change over here for the form .
You know , I just want your email , you know , just , just give me the email that that's it .
That's all I want .
Just give me the email .
I don't really care about your name , you know , I don't think they care either .
They just want to get deals and stuff like that .
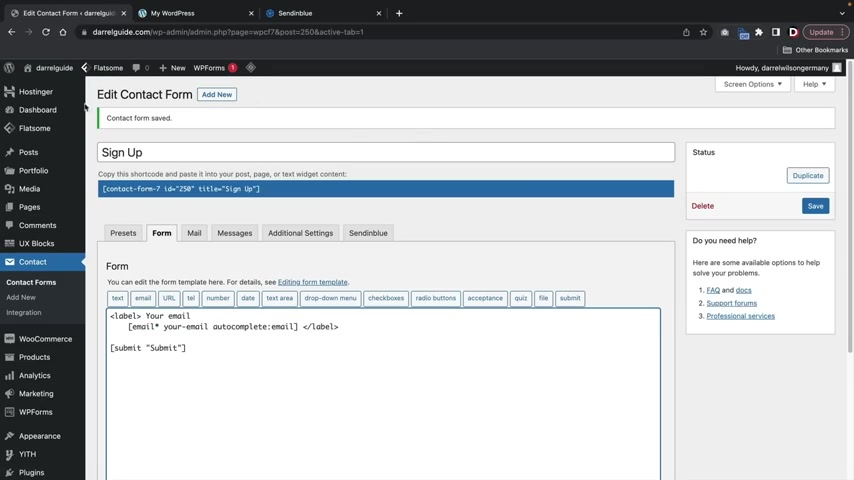
So uh yeah , I'm just gonna put your email and then submits and now let's go back to our uh builder and turn it back on .
So edit with UX builder .
And if we scroll down and I click on this , you will now see under select form , we have the option for sign up and there it is , you know , your email , you guys can actually find this widget by going over here to add elements .
I believe it's here somewhere .
You know , it's like called CF something here it is .
So this is the actual elements .
So if you guys can't find it , you guys can just click on the form , contact form seven elements and it'll display right there .
So let's go ahead and test it to make sure this is working .
I'll go ahead and close this , click on update .
Now , I'm gonna put it in the email .
So it puts flat at AOL dot com .
So I'll put an email flats at AOL dot com and click on submit and over here under contacts and lists , you will now see flats , some has one contact .
If I click on it , you will then see flats at AOL dot com .
So you guys can see that we fully integrated it with , send in blue .
All right .
So real quick , let's just go ahead and make the rest of the websites and you guys don't have to follow me here .
I'm just going to just show you guys how I did this .
Uh Here we have our , I think it is the title , right .
We're gonna go ahead and find the title .
You guys can't find it .
You can just go ahead and click on search and we got the search is gonna be centered and we're gonna make this black , right ?
So the color is black and I wanna add in some padding .
You guys can see that this is a little bit too close to the top .
So for a margin top , I wanna add on like 30 pixels or something like that , right ?
You guys can also add in like , you know , space at the bottom as well .
And I wanna make this just a little bit bigger and below that we added in a countdown .
So countdown .
So I'm gonna select a row right here .
And the reason why I'm selecting row is because I wanna be able to control the size of the actual element .
So I want to drag in that element within the actual row .
So add elements and now we're gonna find the countdown .
All right .
So now I'll see it looks very structured and then you guys can select like the actual year and it's gonna create like this specific countdown timer .
So here you guys can go ahead and adjust these to your liking next up .
I'm going to add in some products so products and then of course , we can adjust the styling for these products as well .
All right , now I want to add in a blog section , so I'll go ahead and click right there .
So now we're gonna add in blog posts over here .
I'll click on blog posts and this is where your blog post will all display .
We're gonna create blog posts in the next section .
It's really quick .
So um it's pretty much the same thing as making a page except it's just a post , right ?
But uh we'll do this after we finish the home page .
Next , we're going to add in this section .
And I just use like a basic uh you know , I just use a flat studio here and I believe I used over here under testimonials .
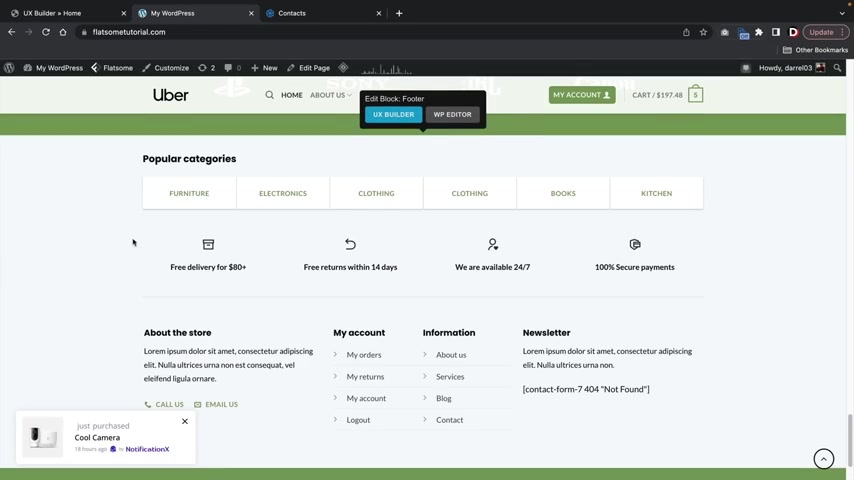
I selected the banner with simple logo row .
I'll go ahead and import this .
All right .
Cool .
And then I just changed the background right to our uh to the background that we've been using and that is pretty much it for the home page .
We will talk more about how to create the footer a little bit later when we talk about uh blocks where we can insert blocks into different parts of the website .
But overall , we have completed our home page .
So congratulations .
Let's go ahead and click on apply and updates close this really quick .
All right .
So I just mentioned earlier that you guys can create blog posts .
And over here you'll see that we can create posts and this is very similar to like making pages , right ?
So this will be like top 10 best products for your office .
And then you can just go ahead and put in some , you know , description .
So I'll go ahead and type something in here to some demo contents .
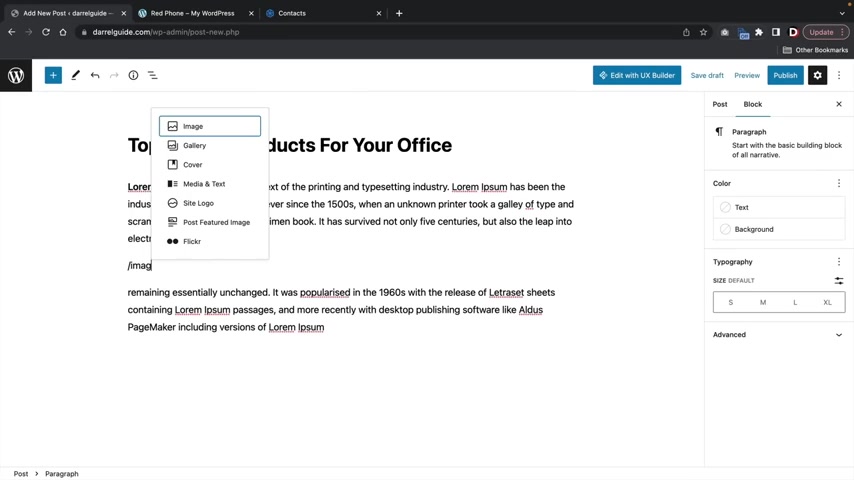
Now right here , I want to put in an image so I'll type in dash image and then we can just insert an image here , you know .
So if you want to like add an image like in between , you know , stuff like that , you can do that and then I can just modify that and then we'll press enter and we'll just keep uh keep , keep putting some content .
There we go .
And on the right side under post , we can add in a featured image and also create categories .
So under categories , this will be like electronics , I'll create a new category .
And then for the featured image , this is the image that represents the article .
So I'll just go ahead and uh put in like just like a stock image here , click on set featured image and we are done now , this is using a different builder , it is called Gutenberg and this is like the default builder with wordpress , but this is your post .
So we have the top 10 best products for your office .
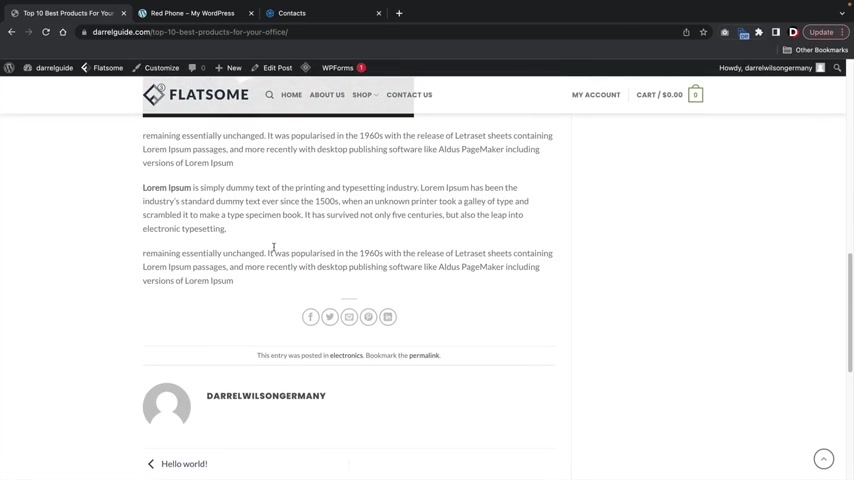
And then we have some text , we have the image and then we have , you know , more description , we have the admin and then we have some social sharing here at the bottom .
So pretty cool .
And that's how you guys can create a post .
Now , if you go to home right here , all of the posts that you create will automatically be propagated here at the bottom .
So every time you guys make a post it'll display right here .
Really nice , really easy to navigate for your visitors .
Now , the only thing we need to do here next is just make an About us page and a contact page .
But what I'm gonna do here is just use a template guys .
I I'm really lazy , you know , I don't want to make everything from scratch and I think you guys are pros now .
So I'm just gonna go ahead and go to the studio and just import a quick template here .
I'll just click on the abouts and I use this one right here .
Imports and then I'll import this one .
Now .
The only thing I need to do here is I want to make this full width , right ?
So over here under templates , I always want to select full width .
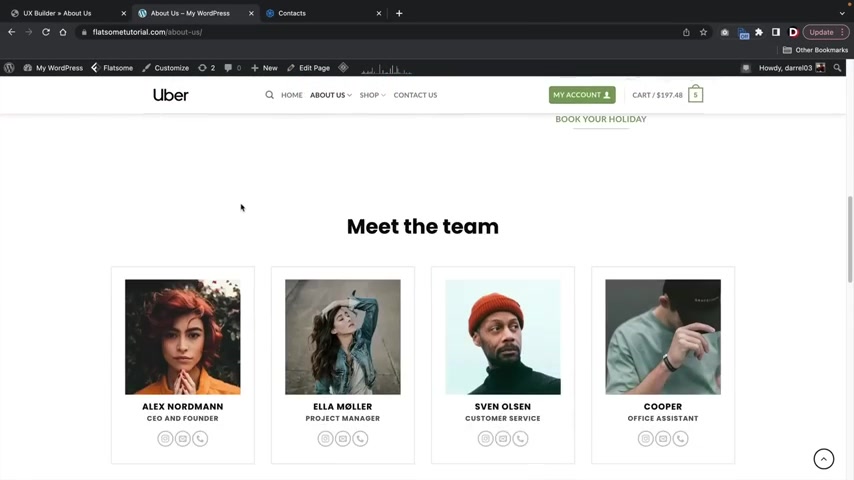
And if you guys look at my other website here , it's very similar .
All I did was I just basically added in this image .
I made this text darker and then I added in like these images right here .
So let's do that here .
I'll just right , click options , change media and we're gonna find that gentleman that was smiling , you know , the green shirt actually matches our uh our color .
And here I'll just change the position now for the color here .
I want this to be a little bit darker , right ?
I don't like that faded gray look .
I want it to be a little bit more aggressive and look black right there .
And then this one right here .
So that looks a little bit nicer .
And this one you might want to change , right ?
Because we have balloons and stuff and we can just add in something like an office , right ?
Or something like that , you know , and then also change this to black and then here we have meet the team .
Now , sometimes these images might not actually properly import from flat as you guys can tell .
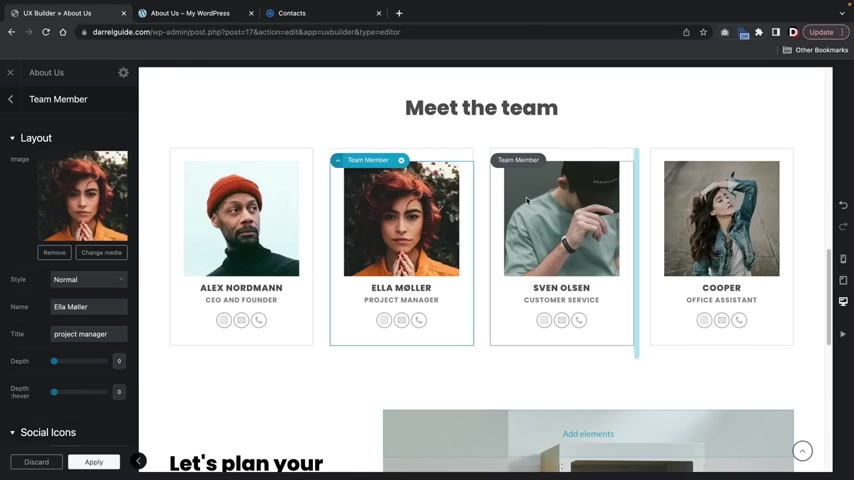
So just add in your own , you know , just click on change media and just go ahead and add in my own images .
I think I use this guy right here .
All right .
And then I went ahead and I added in those images and I'll just make some quick tweaks .
I wanna make this text a little bit black .
Uh This one right here , I just modified that and then this one I want to carry that green theme that we have just to make it more consistent .
And as you guys can tell , we have made a really nice looking about us page in just a few minutes .
So let's go ahead and now make the contact page .
I'll close this , contact us .
All right .
So I'll go ahead and turn on the builder and I want to simply import another template .
They have a lot of nice templates to pick from And I don't find a reason to really rebuild everything from scratch because I'm kinda lazy .
So I'm gonna go ahead and pick a quick template right here .
I'll import this hiking contact page and then I'll click on start .
All right .
So now the first thing is I want to make these templates full with and this image doesn't really work well .
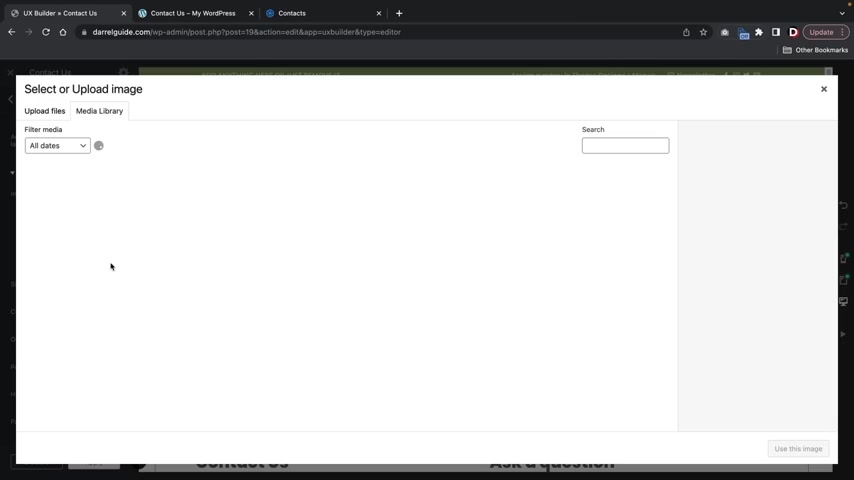
You know , it's a nice image but you know , we're selling electronics and that's talking about hiking .
So I'm going to replace that with .
Uh I have various images you guys can pick , but I'll just uh select this one .
All right .
And I'll just reposition these headphones really quick just to make it look a little bit more modern .
There we go .
And then right here we have the contact form .
Now , when we actually installed the contact form , it created a default contact form for us where it has everything already set up .
If you guys do want to edit that , you guys can go back to the actual plug in and modify that to your own liking .
But um this will actually do just fine and this will also go right to your email inbox .
But uh here we'll just go ahead and maybe change the color here , right ?
I wanna make this black and make this block as well .
You guys can also adjust these icons and change them .
Now , we're gonna walk you guys through how to use the contact form , adjust the bits , but let's move on to the next section .
Now , the next thing I wanna do is I want to add in a map .
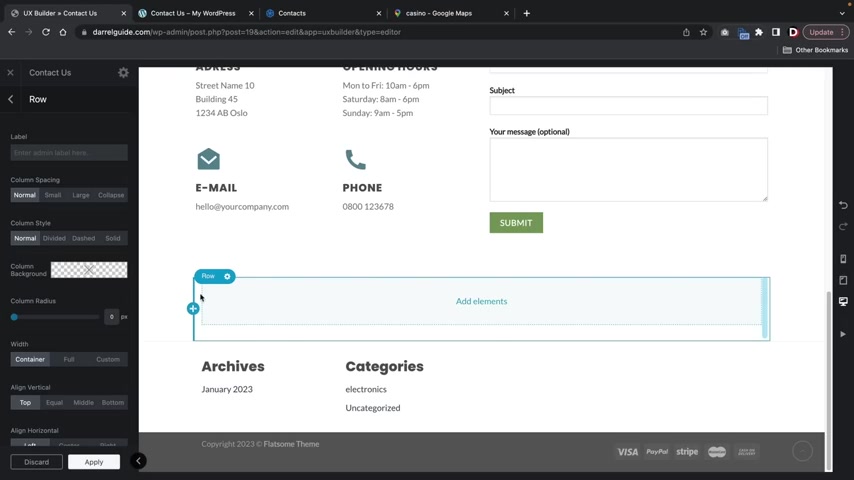
Now , there was a map there earlier , but I deleted it .
So if you guys do see the map , just go ahead and right , click and delete the map and I'll show you guys how to use the embed from Google Maps .
It's much better .
It works a lot more and it's easier to control .
So under the add elements , you're simply just going to find a text .
So I'm gonna add in a text right here and here you'll see open text editor , but I'm just gonna leave that .
I want this section .
This is the actual visual section .
So I'm going to backspace all of this and now I'm going to go to uh Google Maps .
All right .
Now , let's say , for example , your office is , you know , you'll just type in your office or somewhere that you want to showcase and I'm going to display that .
So I'm gonna go to the Venetian Casino right here and I'll click on share .
And here we have embed a map and I can make this small , medium or large .
I'll just do large , I'll click on copy html .
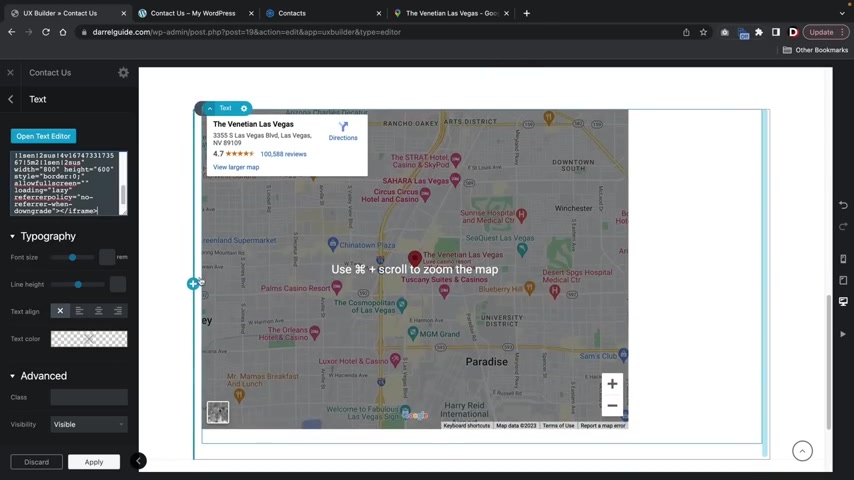
We'll go back over here and we'll just paste it in there and now you'll see that , uh , the map displays really nicely right there and obviously we can control the size of this as well .
So if you guys want to control this and if you guys want to uh move it around , you guys have all the options right here .
All right .
So now that that's done , let's go ahead and click on updates and let's go ahead and close this .
Now , what we can do is we can test this contact form now , uh to find out which email that you guys are using , you'll go over here to the contact , the contact forms and here we have the contact form one and under the mail section .
So whatever email that you guys use to sign up with wordpress , it's going to send it to that specific email .
If you want to change it , you can actually type it in manually .
So for example , I want all the emails from that contact form to go to this specific email address and then click on save .
So now let's go ahead and test out our contact form .
All right .

So we're gonna put my name , Darrell Wilson , your email we're gonna put dad at A O dot com .
Howdy there .
Hey , this is from flats some and then I'll click on submit .
All right .
Thank you for your message .
It has been sent .
So now let's go ahead and check my email .
Go up here and there it is .
It came right away .
So Darryl guide Howie there and here is the actual email it was sent directly from the contact form from our new websites .
So now our website is fully integrated and people can send you emails right to your inbox , right ?
And before we go on to the next section , I just wanted to touch base on just some general options that you guys might want to add to your menu and also talk about the blog one more time .
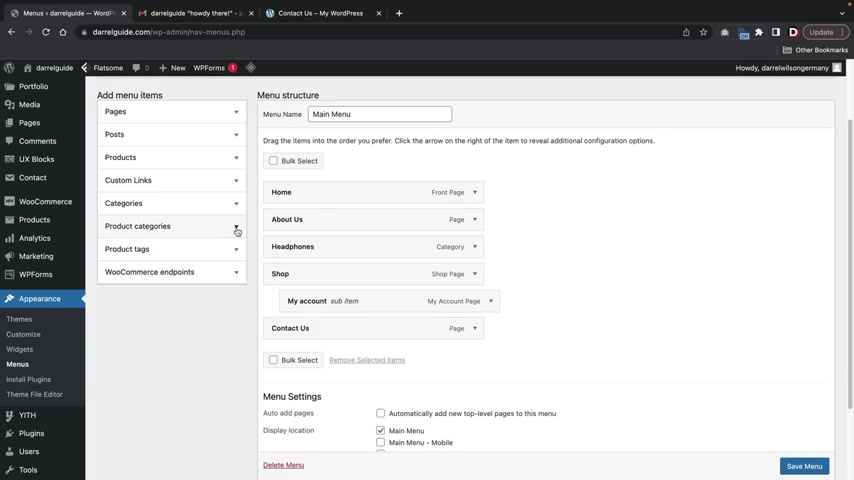
So over here , let's go to our dashboard and over here we have appearance and menus now that we have like different uh product categories and you know , stuff like that , you guys can actually add those to your menu as well .
So over here we have product categories and if you want , you know , you can even add those product categories to your menu .
You know , this is optional .
You don't have to do that , but I just want to showcase where you can add this .
You know , also for the blog , you can actually add in the blog categories to your menu as well .
And you can even add like the actual post that you created on your menu .
So once you actually use Woocommerce and you create product categories and then post categories .
You can add all those to your menu as well .
Making it a little bit easier to navigate .
What I have seen is some users actually put in the categories below the shop .
So then like they can actually see all the categories and just go directly to those products .
So I'll go ahead now and click on save menu , right ?
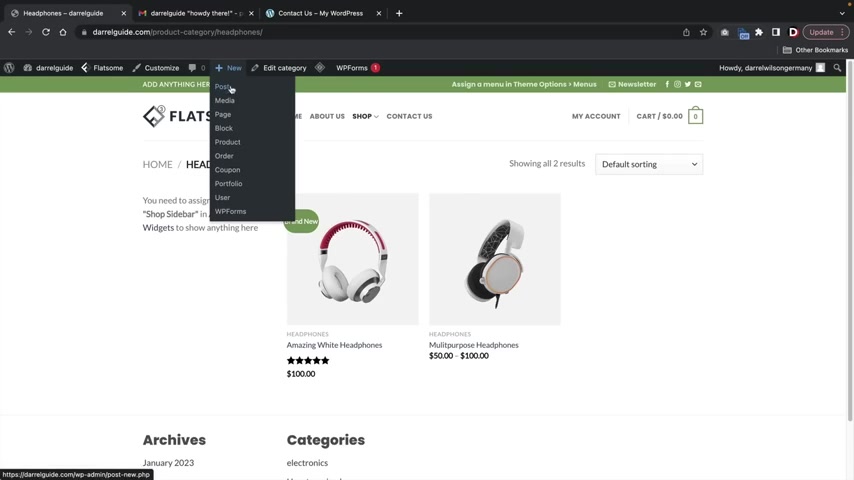
And over here under the shop , if I go to headphones , you will now see that the product categories display right there .
Now , the last thing I wanna do is I want to create a page that all the blog page .
Now , the last thing I wanna do is create a page where all the blog posts will propagate automatically .
So let's do that here .
I'll go to plus new and page and this is like the main blog page , right ?
So this is blog and publish and publish .
And I'm gonna go back to the theme customizer now and I want to assign that page as the actual blog page .
So over here customize homepage settings , the post page , this is the blog page .
Now , now I can also assign the menu here from the theme customizer and it's kind of a shortcut , but I don't like using it too much here on our menu .
You'll see our main menu .
I can actually add an item here and I can add in the actual blog page .
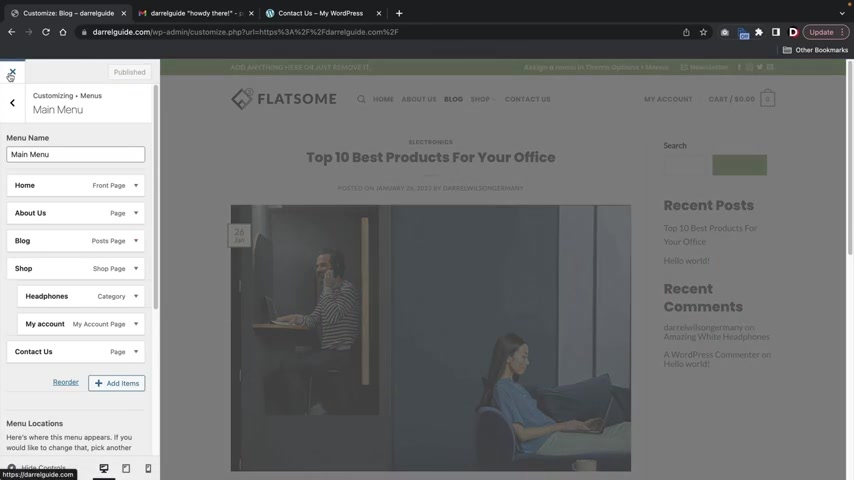
So here you'll see the blog and I can like put it right over here and click on publish .
I mean , that's another way to do it .
You don't have to do it like that .
But it's , you know , I just want to show you that uh it's there , right ?
And if I go to blog , you will see that all the blog posts that we create will be propagated right here .
Well , party people , I told you guys this was easy .
We fully created the website , we designed it .
So now let's move on to the next section and talk about the theme customizer .
So as you guys can tell , using the flat theme is pretty simple , right ?
You guys can just enter the section , delete it , you know , upload a new one and vice versa .
Now , in this next section , I'll be introducing you all to the theme customizer .
The theme customizer controls various parts of the website , like the header , the footer , the shot page , and also the custom product page .
You guys may or may not use a theme customizer .
It really depends if you want like ac someone that you can build from scratch or if you just want to use the plots and defaults , which also look really good .

So let me go ahead and show you guys the theme customizer .
All right guys , welcome to the theme customizer section .
So this part of the video I'll be explaining a little bit more about the theme customizer .
We did touch base on the theme customizer , but I want to go ahead and talk a little bit more about it and all the features and styles I can offer for your website .
So when you open the theme customizer , you agree with several options and these options control various parts of the website .
Now , the first thing that we're gonna talk about is the header builder .
The header builder pretty much allows you to build a custom header uh using these drag and drop elements .
Uh For example , right here , you'll see we have button one and I'll take this and I can drag and drop it and then you'll see how it appears up there .
We can take it and even put it in between the menu right now .
There's the button or we can take it and put it uh at the end of the actual uh menu right here and then the button displays .
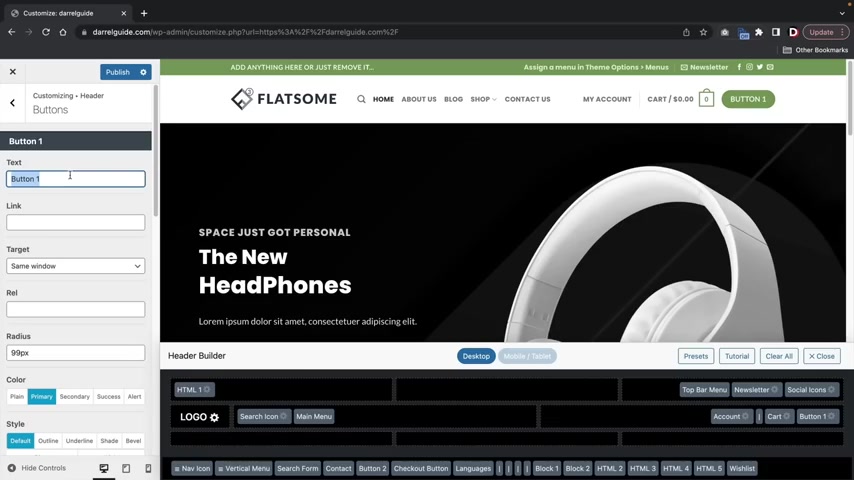
Now , if you guys want to go ahead and design any of these elements , all you gotta do is click on it and then here you can go ahead and design any of the elements .
So for the text I'll put by now and then I'll go ahead and put in like the link for the shop page .
So you guys can pretty much drag and drop any of these elements right here onto the actual um you know , on to the menu and then you can design it as you want .
Also , there's these little , I guess you wanna say like dashes and these are just dashes where you can basically , you know , just add little dashes in between .
Now , if you don't want to use a specific menu , you guys can just basically get rid of everything in that row and then that row will disappear .
So for example , if I want to get rid of the top bar , all I need to do here is just , you know , take all of these icons and drag them off and then that bar will disappear .
But you guys do have three rows , you have the header , bottom , the main header and then you have the top header .
So if I add something in the header bottom , what's gonna happen here ?
Is that uh something else is gonna display , right ?
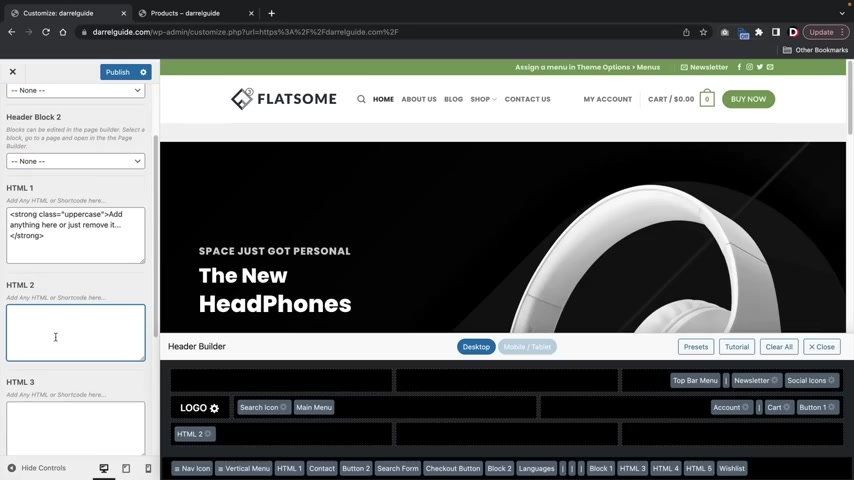
So I'll just use HCML two and now you'll see that we have this third row and html can be anything , right ?
We're gonna talk more about blocks in the very next section .
But uh you guys can add like html code here .
You can add the Google Maps here .
I mean , you can even just type something in here and then it'll display there at the top or um sorry , not the top but in the bottom row , right ?
And then you can take this and drag it up there and then that will make the row disappear .
So you guys can go ahead and mess around with this on your own free time .
It's pretty easy to understand .
It's very fluid and I think after maybe using it for like , probably like , I don't know , five minutes , you guys will definitely get the hang of it also .
There's presets .
So if you guys are too lazy , you guys can just click on like a preset here and it'll just make like a preset header for you right now .
These options here , we have like the logo .
This is where you guys can upload your logo .
If you guys don't have a logo , you guys can go to a website called fiber dot com .
I'll leave a link below in the description where you guys can uh upload your logo right here and then you can also adjust the logo position .
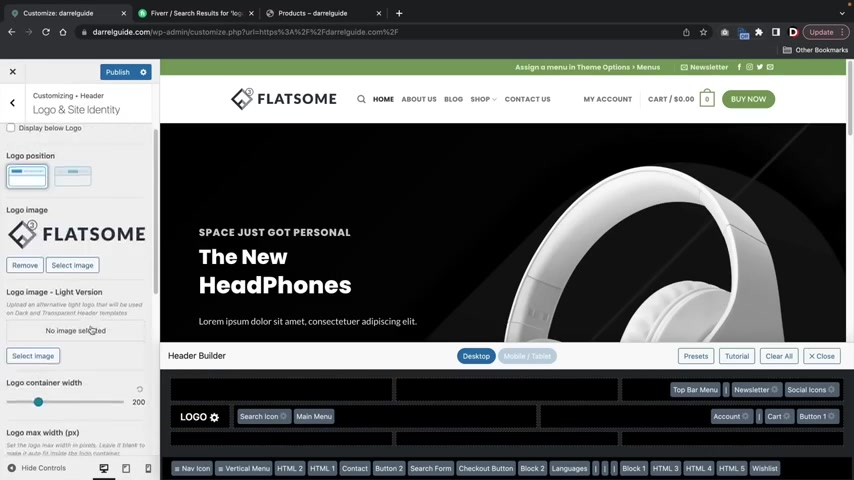
But if you have already made like a custom header , I wouldn't recommend doing the logo position because I mean , you can just , you know , drag it there normally just using the regular elements .
So this is fiber dot com and you guys have probably seen me talk about this website before in the past , but you guys can get a logo for like as little as like five bucks over here .
I will go ahead and uh use some filters and you guys can see these guys can make some really nice logos for like as little as like , you know , 10 bucks , 30 bucks .
And so on and so forth .
So uh I'll go ahead and leave a link to this website in the description below of this video and you guys can upload your logo there once you guys have got a logo created for you and there's just more soling options here .
But one that's actually important is the site icon here at the top .
You notice that a fiver has this little green circle .
If you guys do want to add a site icon , you'll have to go ahead and add it here .
So for instance , I'll just use this one and it gives you a quick preview of how this looks in the uh as a browser icon , right ?
So I'll crop that and then you'll see at the top .

We now have that really cute uh site icon for our e-commerce websites .
I'll go ahead and click back here .
Now , these options right here .
These are pretty much just referring to every element right here .
So you don't need to actually go through every single one of these .
Uh For example , if I click on accounts right here , it's just gonna take you to that , that section , right ?
And if I click on down here , it just brings me back .
So these are just referring to the elements .
So if you do want to style the elements in the header builder , this is how you guys would do it and they have , you know , tons of options and ways on how to style it .
You guys can just go through this .
But , uh , I like that one .
Yeah , I like that green one right there .
It looks pretty good .
But if we do that , we gotta get rid of this button .
So let's , let's do this .
Let's get rid of that button .
See , now , now I'm , now I'm getting sidetracked and then we're gonna put that on the end over there .
There you go .
I think that looks a lot cleaner .
All right .
So that is the header builder in a nutshell .
Next , let's talk about style .
So the style is just basically global fonts , right ?
Global colors .
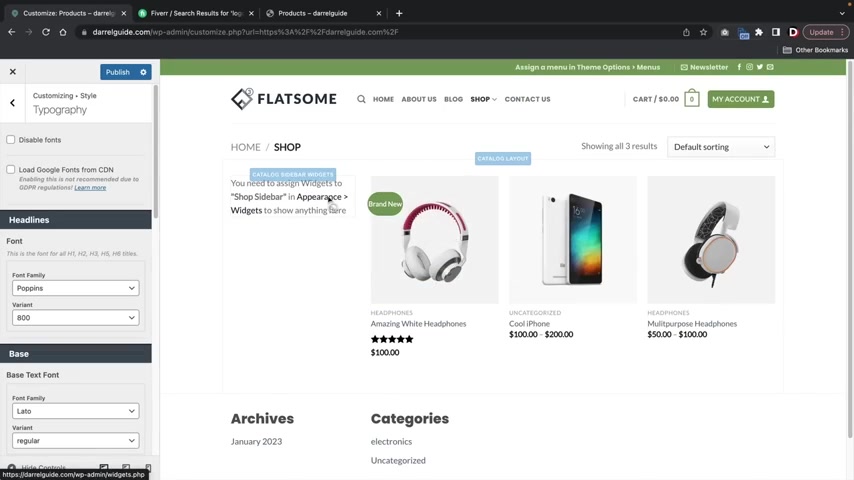
And we did touch base on this a little bit earlier and this allows you to pretty much add a global font and style for all of your websites .
Now , a lot of this actually displays on pages that you cannot usually edit like the shop page , right ?
Or the product page .
So if you guys do use this , just keep in mind that it does reflect a lot of the other pages .
We'll talk more about the shop in just the bits .
So next we have like the colors and like we talked about earlier , the primary color is like a global color .
And you can actually use these settings in the actual page Buller .
And then you have like the base , which is like the base color for like the normal text .
I wanna make that black actually .
And also the headline color .
I want to make that black as well .
You'll see how it directly influences like headers in parts of your website , like the product page and the shot page and other various parts .
And uh yeah , you guys can go ahead and just , you know , design this as you need .
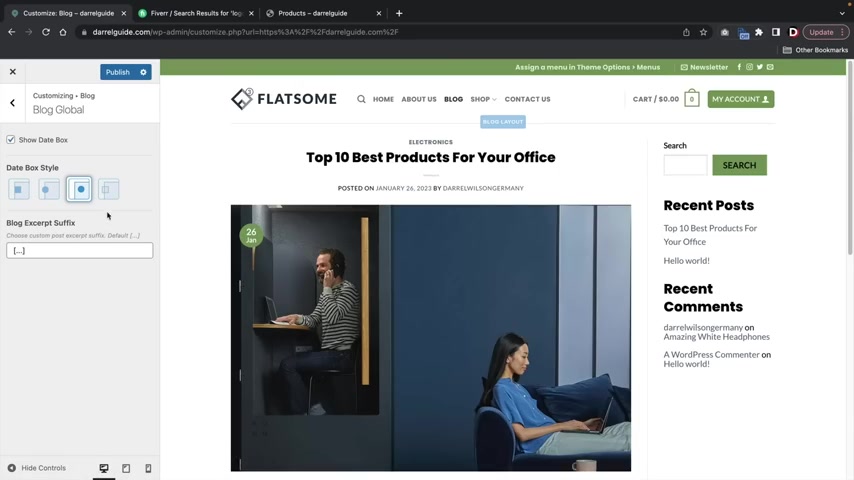
Like for example , the a a cart buttons , the sale bubbles like this one here and other various options like the review stars where you can even change like the review star colors to something else .
You'll see how they turn red .
And uh yeah , so you guys can just look at this and know pretty much what they do after you guys mess around with it , you guys will probably just get the hang of it .
All right , let's go back .
So next we have the blog and here we have some options to further design and customize the blog page here .
You'll see .
We have that date icon .
But if you want to move like the data box style , you guys can go ahead and move it .
Also .
We have the blog layouts .
So you'll see right now , we have a right side bar , but we can actually say , you know , I don't want a sidebar or we can put the sidebar on the left side or on the right side .
And then here you guys have like post layouts where you can actually change the actual post .
I really like this one right here .
I feel like this is so simple to read , right ?
We have the image , the description and then we have the uh continue reading .
But in so I'm gonna leave mine right there .
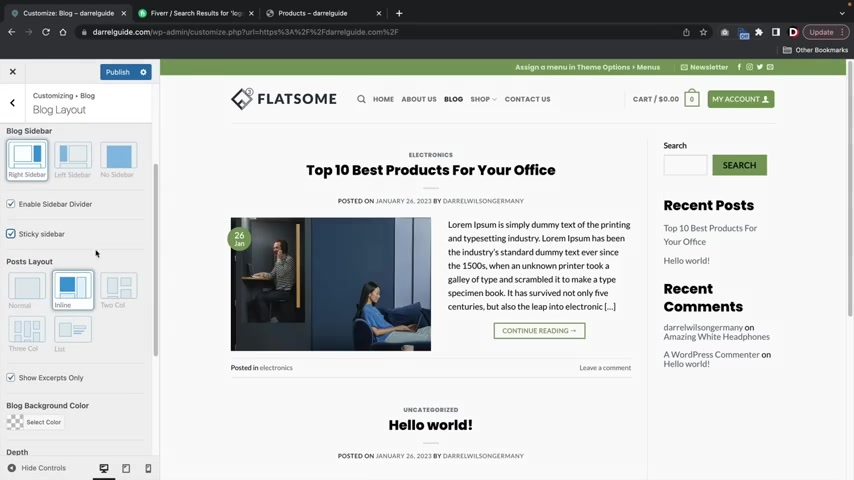
And then you guys have some other general options where you can adjust the alignments .
And this is actually really cool sticky sidebar .
This means the sidebar right here will actually stick with you as the user scrolls .
So if you have a lot of blog posts that that actually might be helpful .
So next , we have the blog archive and the blog archive affects pages like categories and also search where you can also uh add a specific style for those pages as well and the single post .
Now this is actually when you click on one .
So if I click on something right here , you can actually change the layouts for this actual post , right ?
So I've seen like a lot of blogs don't really use sidebars too much .
In fact , I think they're kind of venturing away because uh this just looks a lot more cleaner , right ?
See top full .
Take a look at that .
Oh , that's actually pretty cool .
And they also have in line which uh yeah , that's also really nice .
And then you have some options where you can take out the category .
So if you don't want the category to display , you can remove specific options from your blog posts .
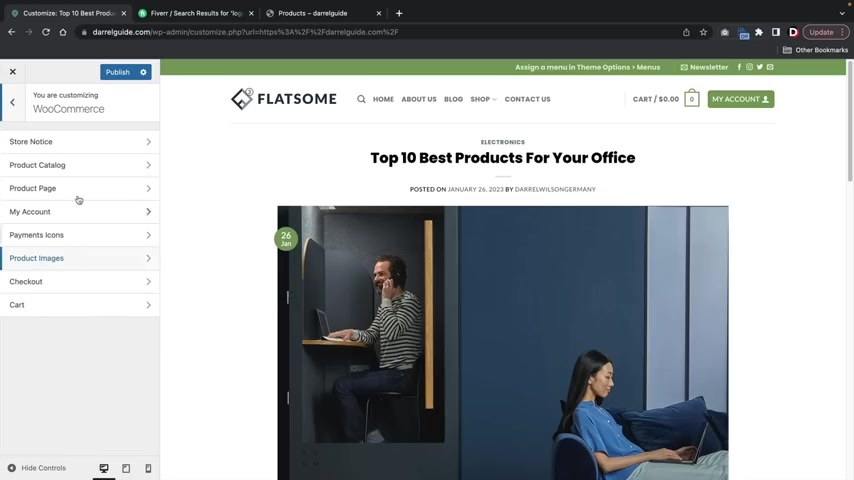
All right .
So that's pretty much it for the blog .
Now .
Let's talk about woocommerce .
This is actually very important and this is gonna reflect a lot of the product pages and shot pages if you guys decide not to make a custom one .
But uh let's just go through this really quick .
So a store notice this is basically enabling an option here .
I think it's like at the bottom right there it is .
So you'll see that there's this , there's this uh little notice right there .
This enables the store notice , then you have the product catalog .
So let's go ahead and go to our shop page , right ?
And here you can actually create different layouts and different structures .
So this is basically gonna customize all parts of the actual shop page .
Now , this is using the theme customizer .
However , you guys can also use the page builder with blocks to make your own shop page .
If you decide not to use the theme customizer , you do have a few options .
So I'll , you know , I'll , I'll show you guys how to customize that a little bit later .
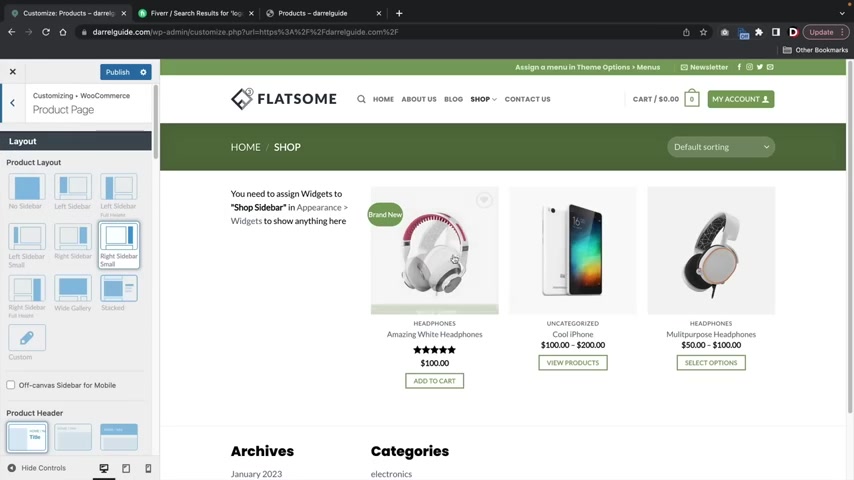
But uh this option right here here is pretty much just referring to the actual uh product page where you can add all sorts of really cool features and make your shop page look a little bit more friendlier and make it look a little bit more uh for your business .
All right .
So let's go ahead now and go back .
So we talked about the product catalog and we also have product page .
Now , let's assume someone actually clicked on a product , you can actually design and customize this product page as well .
So if you want to adjust these different styles , you can see we had a right side bar or no sidebar .
Um , but there's obviously tons of them , right ?
I mean , you guys can add tons of different options .
Now , there is custom and this is for people who decide to use blocks and we'll talk more about that a little bit later .
But that's again , if you want to have a custom uh product page and shot page using the actual flats , some builder and then there's other various options which I'm sure you guys can just go ahead and just , you know , check out and you guys can sort of understand what these options do .
All right .
And then we have like the my account section .
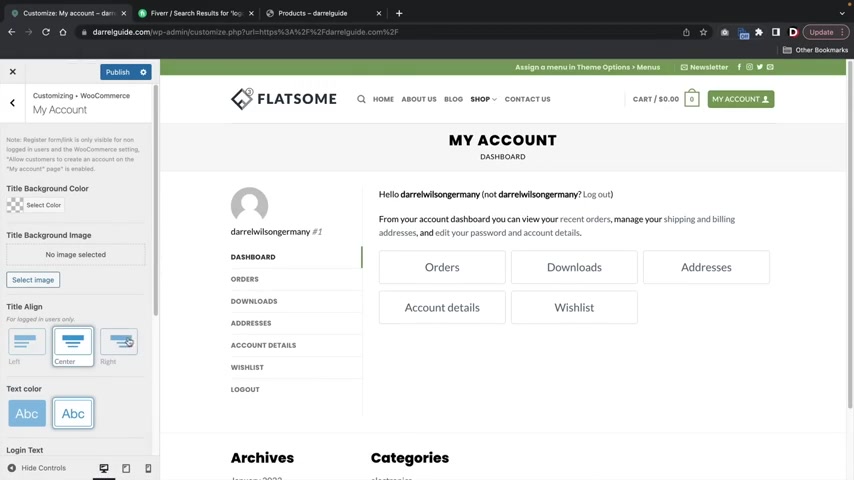
So if I click on the my account , you'll see that we can now customize this section .
So you'll see we can make the centered and then we have other different selling options for this specific page .
Payment icons , payment icons are referring to the icons at the bottom of the screen and you can add more or you can take some away if you choose to do .
So , the next one is pretty important .
This is the checkout page .
Now , they have three different layouts .
We have the default one , right ?
We have the simple and then we have focused , I like focused .
I feel like this actually just makes people check out as fast as they can .
And I I kind of like the setup they have going on here .
You guys can also make specific options and fields required , right ?
So let's say for example , you you're basically saying you guys must have an address , right ?
So they cannot proceed for payments unless they give you their address , which you know , that makes sense .
And then the phone number as well .
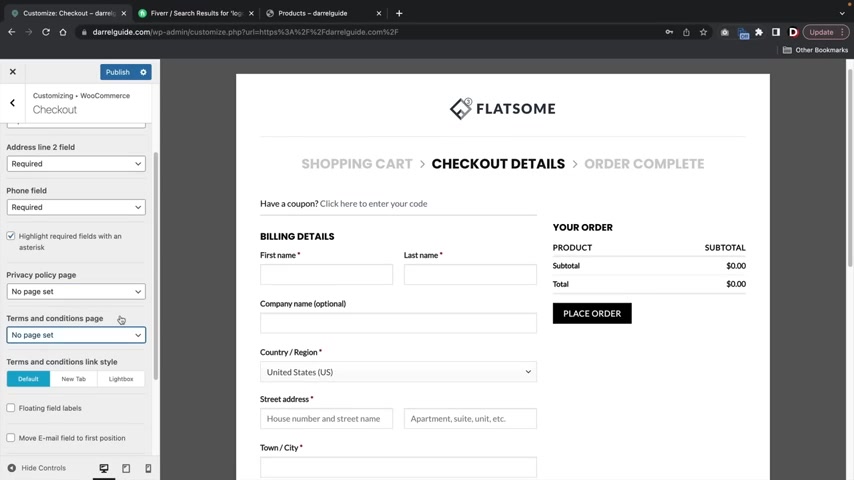
If you guys do have a privacy policy in terms and conditions , you guys can create one in the wordpress dashboard and then assign that as your privacy policy page or your terms and condition .
And once the users actually purchase something , they will have to check a box where they agree with the terms and conditions .
I'll show you guys a cool website where they'll actually create one for you and then they have other various styling options like sticky side bar and stuff like that .
So , uh yeah , that is the checkout form and then you have the cart as well .
If I click on the shopping carts , we have various options as well .
So it's pretty much the same thing , right ?
We have simple default and then we have focused for the uh carts and then we have different selling options .
So this is when someone actually adds something to the carts and they're redirected to the cart page , you can customize it here as well .
So next , we have the overall layout of the actual websites .
And if you guys did not edit it within the page template settings , you guys can edit it here as well .
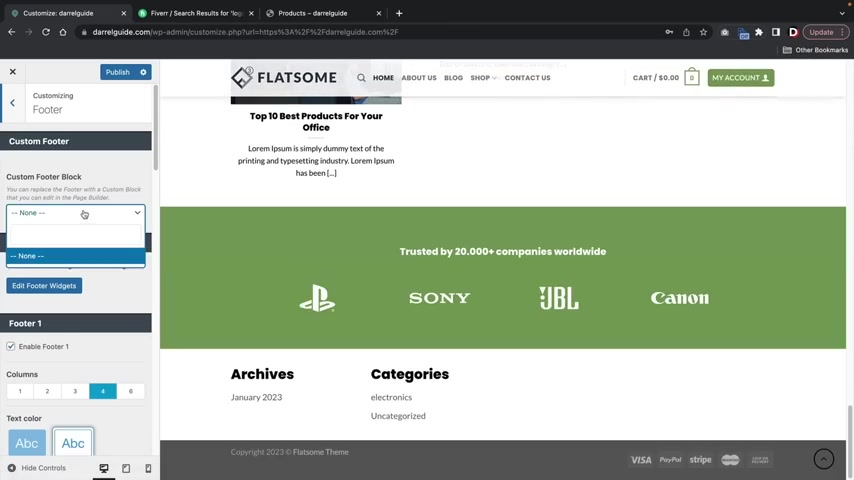
And this is a global setting which will apply to the entire websites .
And the last one I really want to talk about is the footer .
So let's go ahead and scroll down here to the footer .
Now , in the very next section , we are going to basically create the UX blocks and I'll show you how to insert those .
But for those of you who just want to use like the default widgets , you guys can use those and they work just fine .
So for example , we have the edit footer widgets and here we have footer one , right ?
And we have different blocks , but I'm just going to delete these and show you how to create your own foot from scratch .
So let's go ahead and add a widget and I wanna add it in some like product categories , right ?
We have product categories and now you'll see that the category display right here .
You guys can also display products .
So maybe you have like best selling products right here .
We have the product list at the bottom and we got some products .
Cool .
And we can also do something like pages .
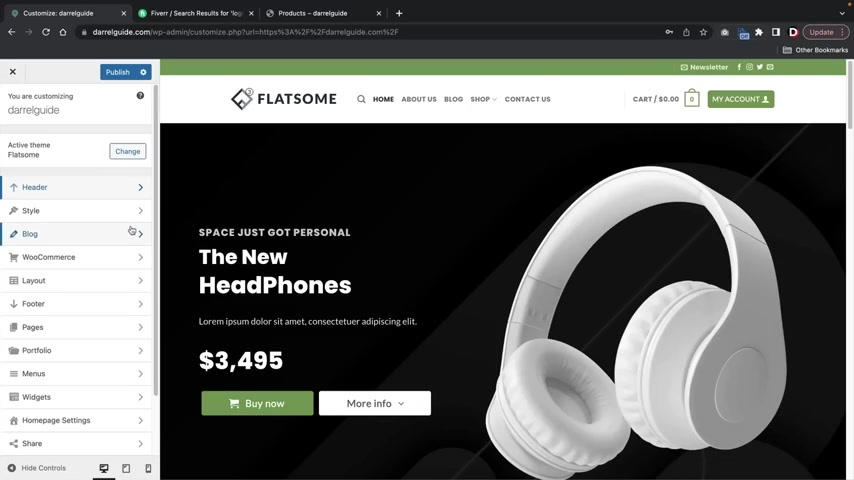
You know , I've talked to this like this one web design company and they say that a lot of users actually scroll to the bottom here and look for pages right away .
You know , I , I've never used them , you know , to be honest , but apparently people use them and then they have like other options where you guys can just , uh , you know , uh , check out they have tons of widgets , like , you know , product lists and recent comments and all sorts of stuff .
So this is how you guys can create a footer on your website using the default footer widgets .
And that is pretty much it for the theme customizer .
The theme customizer controls various parts of the website that normally don't involve the page builder .
So once you guys make all the changes that you want , you'll go ahead and click on publish and then this will save all the changes that you made in the theme customizer .
So next , we're gonna talk about the UX blocks .
Now , the UX blocks allows you to build parts of the website using the flats and builder .
For example , you guys can build like a custom header , a custom footer , a custom shop page and also a custom product page that you can build from scratch using the flats and builder .
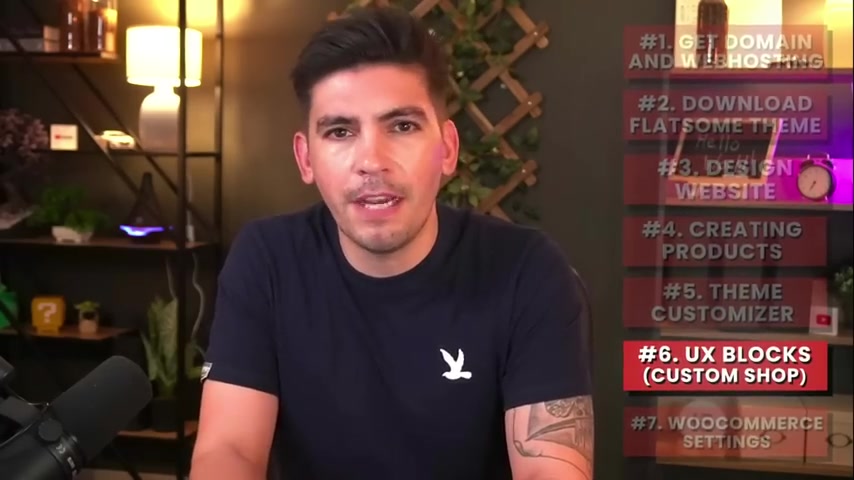
This is not required because you guys can control these pages using the theme customizer .
But some people might want to build these pages from scratch and flats gives you that flexibility .
So in this part of the video , I'll go to the UX blocks and show you how to build these pages from scratch .
All right .
So now let's talk about the UX blocks .
The UX blocks are actually a big part of flats su with the UX blocks , you guys can create custom headers , custom footers , custom shop pages , custom product pages , all sorts of different parts of your website , use the U blocks .
So let's go ahead and click on add new .
And what we're gonna do is we're just gonna create a basic footer and we're gonna use a template that flats has to offer .
So this is my footer .
I'll go ahead and click on publish and then I'll click on UX Builder .
Now , I'm gonna click on add elements flat , some studio and then we're gonna find the footer section .
So here we have footer and I use this specific footer on my demo website .
So I'm going to import the e-commerce Metal Footer .
All right , cool .
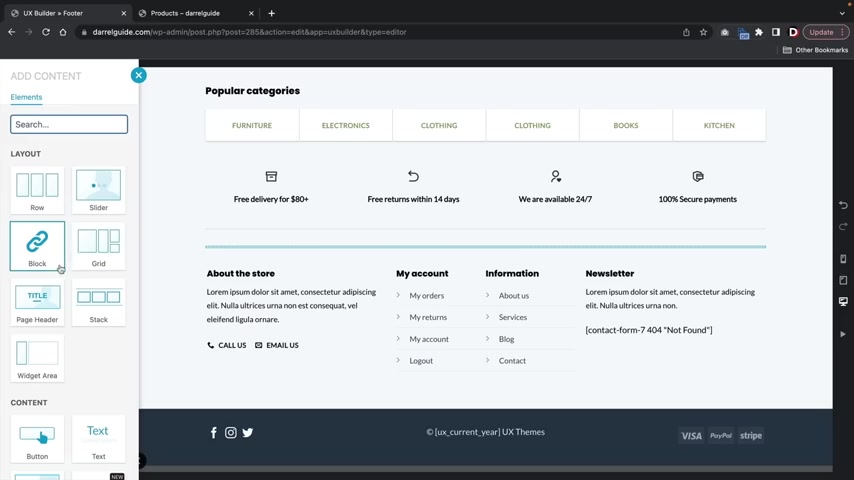
Now , you guys can actually customize this and design this .
You know , you guys can add elements , you can drag and drop stuff , so you can pretty much add to your actual footer that you're building .
So let's say for instance , you want to add like a new section here and you wanna add an elements like a , a page title or something like that , you guys can go ahead and add anything that you want and build this footer .
However he wants .
Now , since I've already showed you guys how to use the page bill and everything .
I'm not really gonna cover , you know how to do a photo from scratch because obviously you guys can use some of their premade templates to speed up the process .
But uh once you guys actually build a footer from scratch , however you want , you'll then click on update .
Now , we're gonna take this UX block and we're actually going to insert it in the websites .
So over here we have this short code .
Now , I'm gonna take this short code and we're gonna put it in the theme customizer .
Ok .
So here we go .
We have the footer and now we have the custom footer block .
Now , we can go ahead and select the footer .

And if we scroll down to the bottom of the website , you are then going to see that the original footer with widget has disappeared and this is now our primary footer .
All right , great .
So now you'll see that the custom footer block is now taking effect and the original footer that we had has disappeared .
So that's how you guys can make a custom footer .
It's really simple and all you gotta do here is just click on publish and then that is your new footer for your website .
All right .
So now let's talk about how to build a custom shop page on my demo website .
You guys probably noticed that we have this custom shop page and you might have also noticed that we're using the page builder for our default shop page .
Now , all I did here was I just wanted to add a banner here and I added products and I added a sidebar on the left side .
So let me show you guys how to set all this up .
So over here we have a new and I want to go ahead and make a shop page .
I'll publish that and then I'll turn on the UX Builder and let me just walk you guys through on how to do this .
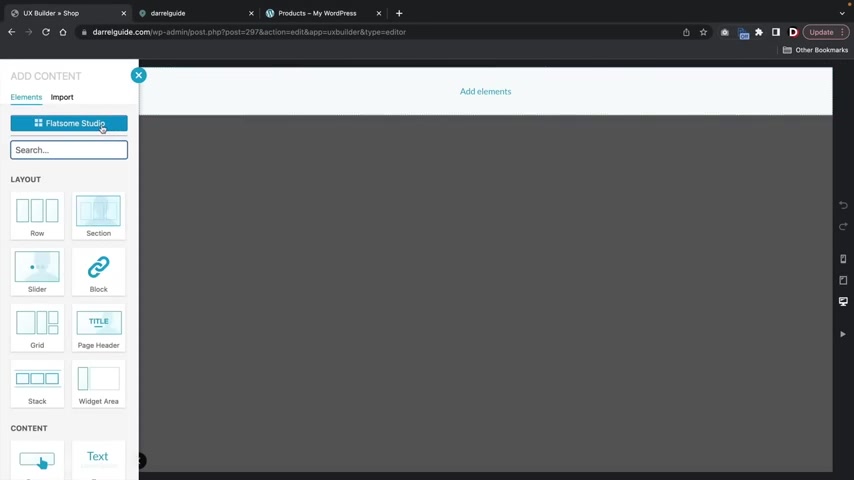
So I first wanted to just make a banner , right ?
So I just want a quick banner .
So I'll just , you know , grab a banner from the flat studio .
All right .
So I'll go ahead and click on banners and I wanna use this Black Friday deals right here .
I'll go ahead and import this and I wanna add in that little cute little snow thing I got going on , you know , I , I thought that was pretty cool .
We'll do snow , right ?
So this is the actual banner and I'll reduce the padding .
I wanna put zero because just to make it a little bit more smaller , right ?
And below that , you'll see that we have products .
So we have a two column row , right ?
Two columns .
And uh here I'll go ahead and , and walk .
So here we have a two column row .
We have one column with products and one column with the sidebar .
Now we're going to add in another section now , uh Right here , I'm gonna click on add elements and we're gonna add in a new section and this is gonna be a two column row .
Here's some presets , but uh I don't want to use those .
So here we go , add elements .
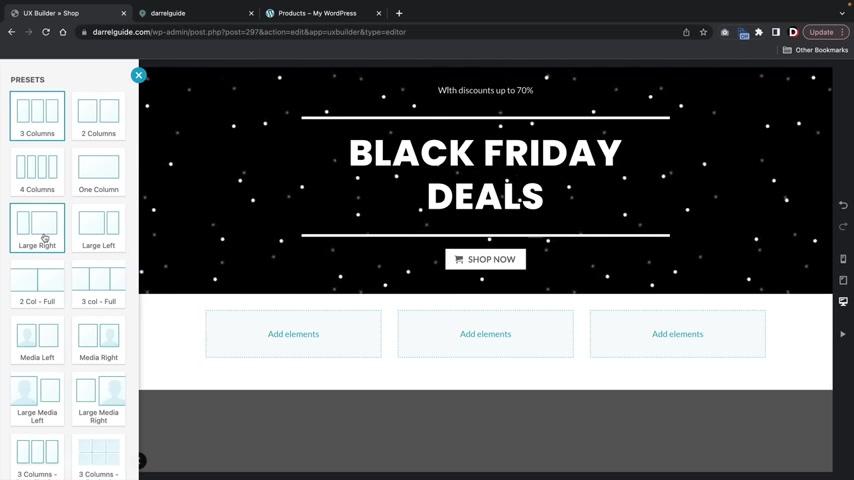
We'll put in a row right here and then I want this row a little bit more skewed , right .
So I wanna have like a small side on the left and I wanna have a large side on the right .
So right here we have uh large , right ?
OK .
And for my elements , I'm gonna add in the widget area , right ?
And I'm gonna select the sidebar of shop side bar for now , we'll come back to that in just a bit .
But um yeah , we're just gonna leave it as this as the shop side bar and for the elements over here , I'm gonna put products .
All right .
And what we can do is , you know , we can add in more products and stuff like that .
We can design this .
And if you guys want , you guys can keep adding in more , you know , like , for example , if you want to add something below this , like a promotional banner or you wanna just keep building your shop page , you guys can keep building it because all your products will display here as you upload more .
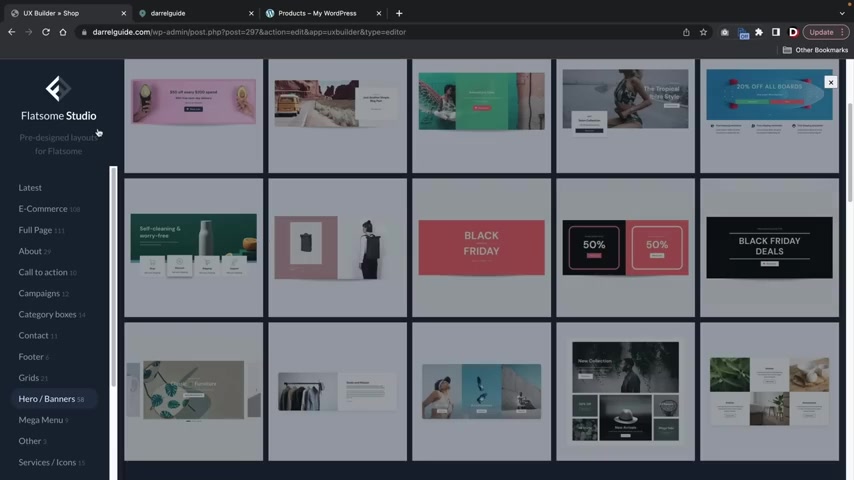
So for example , over here in add elements under the studio here in your campaigns , I'll just insert you know , I'll just insert like another banner or something like that .
And then even below this , you guys can even add more , right ?
So you can even add more products below that and so on and so forth .
But uh this is a custom shot page that I made from scratch .
And let's say , for example , I want to assign this as my new shot page .
Well , let's do that here .
I'll click on apply and updates and then I'll close this .
I'm now gonna take this short code and I'm now going to insert this in the theme customizer .
So let's go over here to our theme customizer .
And now we're gonna go to our Woocommerce product catalog and we're going to scroll here .
Ok ?
So we have a few options here .
We have the shop page header and the shot page content .
Now , the shop page header is referring to the header , the shot page content is referring to the actual catalog layout .
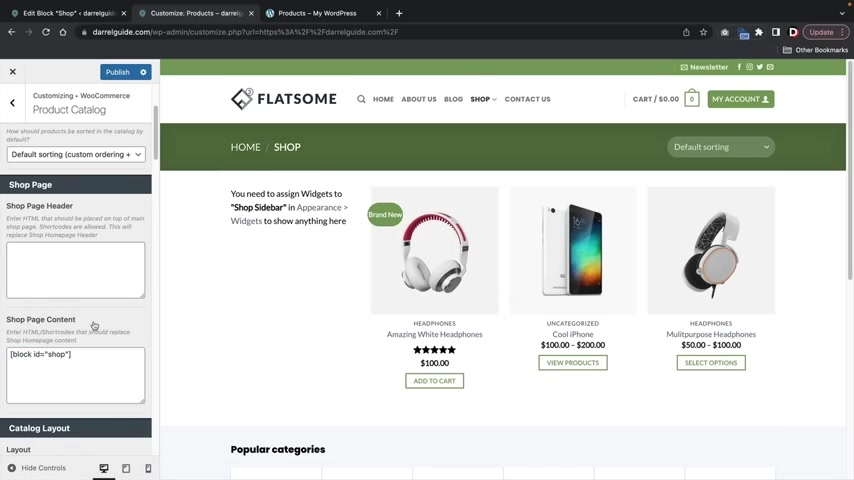
Now , for example , I'll go ahead and paste the actual shop in the shot page contents .
And what that's gonna do is that that's going to keep the actual header for the theme .
It's also going to replace the actual products on the page and this is now our current shot page .
Now , if you guys want to create an additional custom header , using the page builder , you would go back and you would make another header or another block .
And once you make that block , you would then insert that block there and that will disable this specific theme header for your actual website .
All right .
So I hope that makes sense .
So now you'll see that we have a beautiful custom shop page that we can fully design and customize .
Now , let's go ahead and click on publish here .
Now , you guys might have noticed how on the left side , we don't have anything , right .
The reason why we don't have anything is because we don't have any widgets on our shop side bar .
So over here under widgets , you'll see shop side bar and now we're gonna add some widgets .
So let's first add filter by price , right ?
Filter by price .
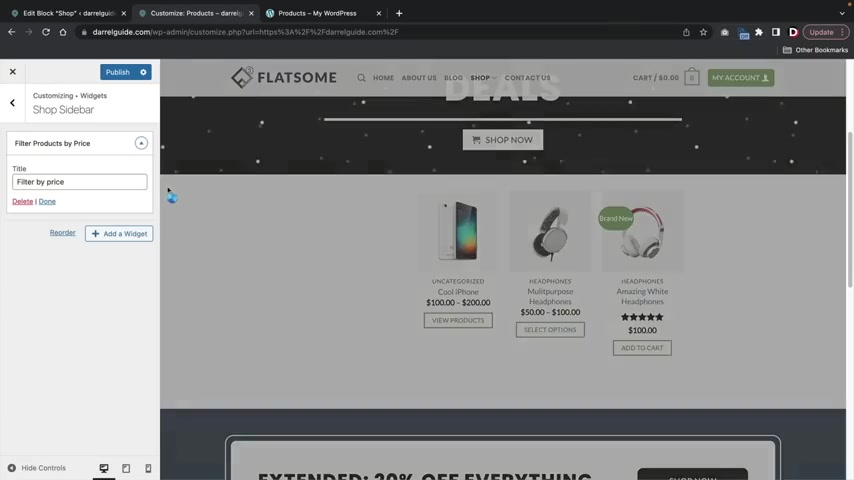
And this allows people to filter by price .
We can also add in product categories , rights , product categories .
I think over here , let's see what I did .
I added a banner , right ?
So we can also add an image , rights , an image and I actually gave you guys an image that we can use .
So I'll just go ahead and insert this little cute banner that I made and I'll drag and drop that and put it up there and let's see what we got next .
Next we have , let's see .
We got a promo video .
So if you guys wanna add like a youtube video , they have like a little uh you know , they have like a little video player where you can just go ahead and copy and paste a youtube video .
So I'll click on , add a video and here I have insert from URL .
I'll just go ahead and paste in my youtube video .
All right , and click on add to widget .
Now , you can also give this a title if you want like , you know , video promo or something .
You don't have to , it's not required .
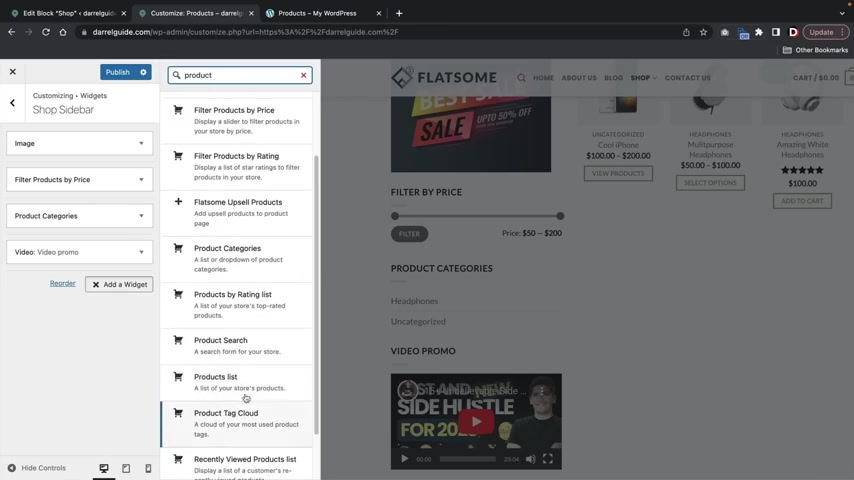
But uh if you just want like some sort of like little , you know , headline there , you can just go ahead and add it there .
And then also I'll add in some products you might want to add in like the best selling products .
So here we have a , you know , product list and there's a few options .
So we have like , uh you know how many products to show , how do you want to display these and you have some other various options here .
So I'll go ahead and close that .
But uh I don't like the product categories .
I'm gonna get rid of that , but I do like everything else .
So I think right now , I think that looks pretty sharp , right ?
We have a really nice looking shop page and you guys can see that we can fully customize this and design this however we want .
So let's close the theme customizer and just take a quick look .
All right .
So now if you go to our shop page , you will now see that this is our new shop page where we can fully design and customize uh our shop page .
So at any time , if you guys do want to edit the shop page , just go back to the UX blocks and that will enable you to customize your shop page .

Now , if you guys want to get your website looking a little bit closer to the demo , all I did here was I added the block in the header section and I just made the actual sidebar a little bit smaller .
So let me just walk you guys through on how to do that really quick .
So for the uh shop page header , I just pretty much put the short code there and then I , you know , got rid of it because I didn't really want to use that header and then I click on publish and then I'll go over here to the actual uh se the widget over here and then I can actually go over here to the block section and I'm just gonna make this smaller and that's it .
That's all I really did .
I'll go ahead and click on update and now if I go to our page and close it and there you go .
So now I'll see that our shop page looks identical to the demo .
All we need to do is just add in more products and once you add in more products , it'll look identical .
Now , if you guys did make some changes , but it didn't look like it .
All you gotta do is use this plug in right here to clear the cache .
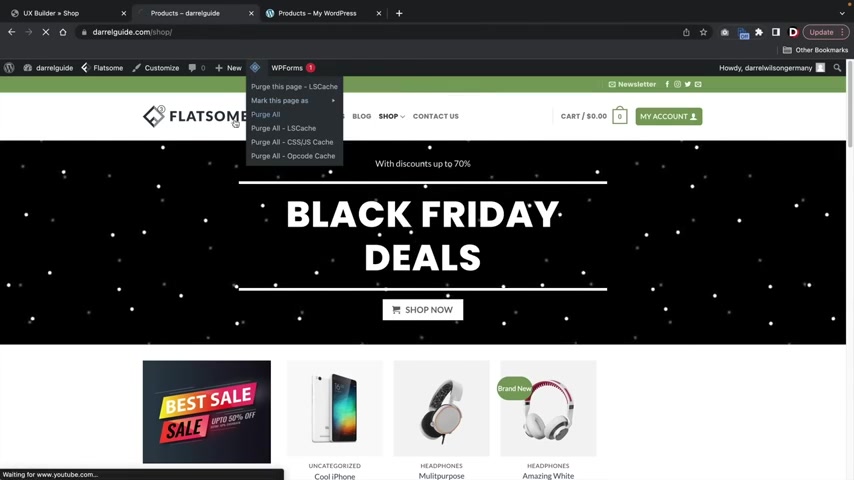
Uh I was actually using this and I actually had to pause the video because it wasn't saving .
But after I actually purged the cash , uh then everything worked fine in case you guys aren't aware , cash is basically storing memory in your browser .
And sometimes when you're building websites , the browser thinks that you are using like old versions of your website .
So when you clear your cache , it will show all of the changes that you have made for your websites .
Now , the last thing I wanna talk about is custom product pages .
You guys can make a custom product page from scratch using the flat some builder .
Now , I've already made a video dedicated to this .
It's about 10 to 15 minutes long and it goes through all the fundamentals of how to create a custom product page .
It is actually two years old , but I recently checked it and it's still very current .
So uh you guys can see a lot of people are liking it and a lot of people uh they really like this video .
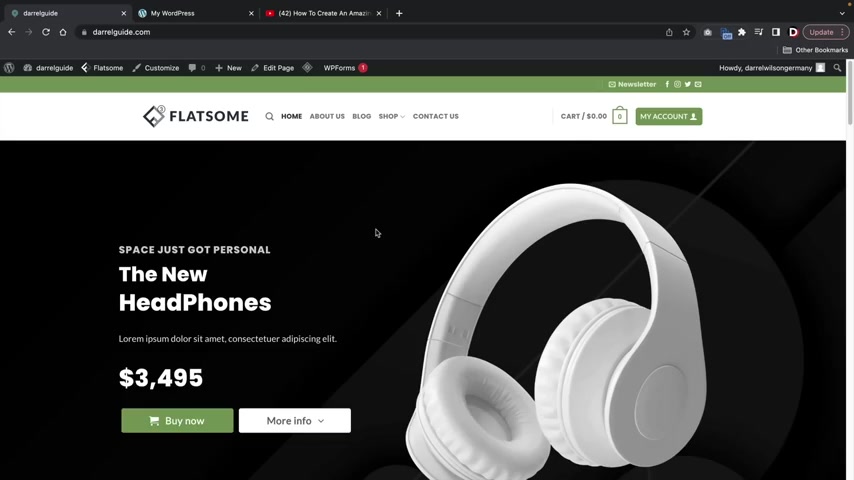
So even though the video is a little old , I might make a new one , but uh I'll refer you to this video right here and this will show you how to create a custom product page using the UX builder for the flats theme , right ?
Party of people , we have now completed the website part of this video .
So by now , you guys understand how to fully customize and design every aspect of your websites .
Now , I'll talk about how to get paid .
So let's talk about the Woocommerce settings .
All right , guys .
Now , before we go to the last section of this video , I want to quickly introduce you all to woocommerce plugins .
Now , over here on my demo website , you guys probably notice that on the bottom left , there's this sales notification and this actually pops up unless users know that people are purchasing products on the website .
The great thing is that this really encourages a social atmosphere and can really help uh bring more revenue for your websites .
In fact , just by having that you increase the odds of you making a sale by 10% which is pretty good .
Also , you might notice that this product right here has product add-ons .
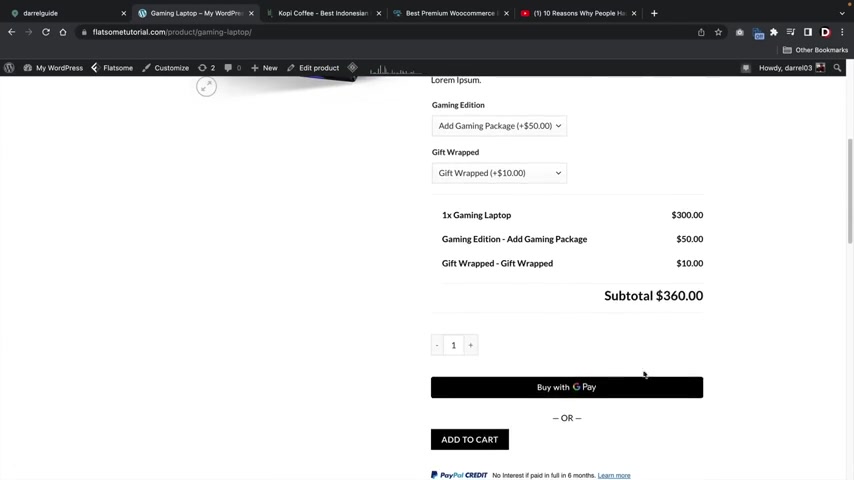
Uh for example , let's say you're selling a laptop , right ?
But uh you know , maybe you're selling a gaming edition , you know , or something else and you wanna , you know , add $50 more for a gaming edition and you also want to charge for something else like , oh , we'll gift wrapped it for you for $10 or a golden graving for $10 or whatever for five more dollars .
Uh product add-ons are probably one of the best things to add to your store because people are already purchasing this product and for them to actually just , you know , select the button and buy more .
It's very convenient and easy .
And then this actually adjusts with the total price and then people can just add it to the cart and purchase the product .
Now , let me go ahead and show you guys some Woocommerce plugins .
I'll also show you a really good resource on how to get Woocommerce plugins for really cheap .
So let's go over here to our dashboard and I first just want to demonstrate where these plugins are and how they work .
So for search plugins , I'm just gonna type in Woocommerce .
Now , those are plug-in for pretty much everything , right ?
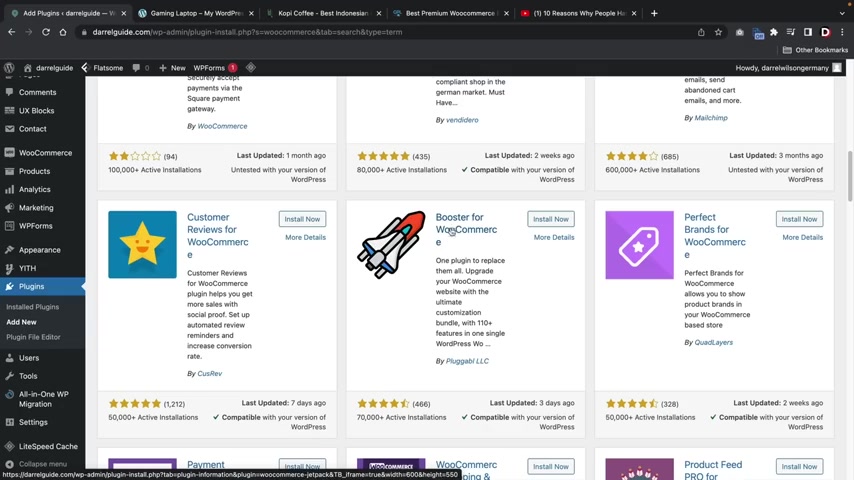
We have PDF and packaging slips , Facebook for Woocommerce , uh mailchimp , which is email marketing .
We have booster for Woocommerce , which has like 100 and 10 plus features .
It's actually really incredible what this thing does .
It has like so many unlock features .
You have a checkout editor , we have gift cards , wish list , check out manager field and the list goes on .
So on your own time , you guys can go ahead and install these free plugins and use these on your websites , but most of them have pro versions .
So just keep that in mind .
Oh , I actually have this one right here .
I have Pinterest for Woocommerce .
I actually use this to track the sales coming from Pinterest to my e-commerce websites .
And uh I actually use that plug in that's really , really helpful .
But the one that I installed on my other website was called sales notifications , sales notifications .
And I use this plug in down here .
It is called notification X .
So I'll go ahead and just install this .
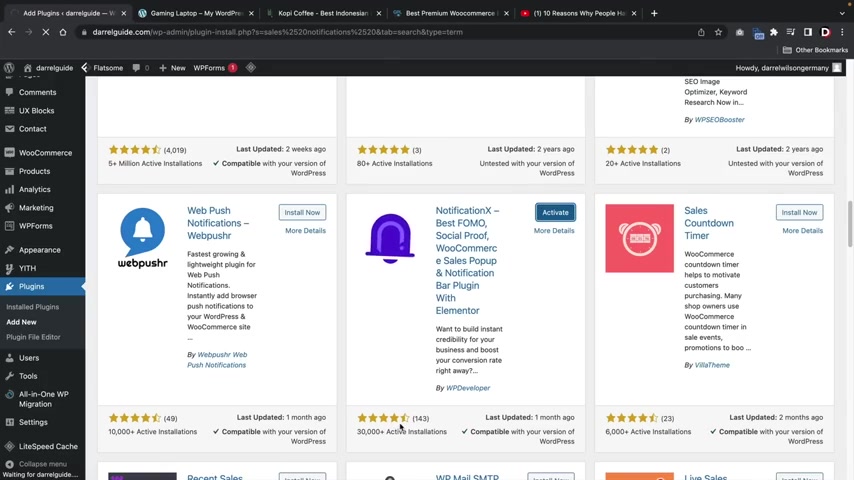
You guys can see it has 30,000 active installs with a lot of positive reviews .
Now , here we go .
So I'm just gonna select sales notifications , select for Woocommerce and then uh I'll just click on next here .
They have a few designs like I mentioned earlier .
They do have pro versions where it's just , you know , better styles and stuff like that .
But I'm just gonna select the default one for now and then click on next here .
I'll put show everywhere or you can , you know , restrict , who can see it or where they can see it .
I'll click on next and then I'll click on publish and it's that easy .
You guys will also see that uh it does provide a click through rates and it shows you total clicks .
So just by having this , you guys can see that this will increase engagement on your website .
And maybe if people did see people purchase that one product , they might be curious and they might click on it and find out more about that product .
Now , I wanna talk to you guys about the product add-ons .
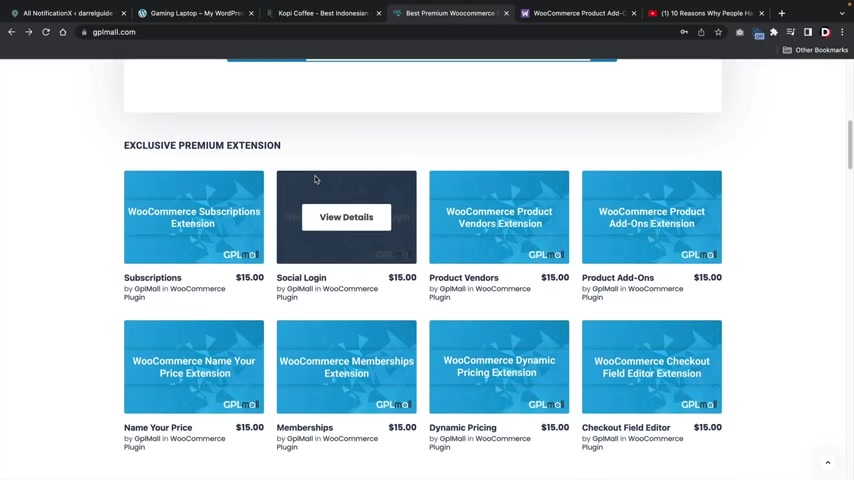
Now , Woocommerce has tons of plugins .
In fact , my e-commerce website , we have Woocommerce product add-ons .
We have the Woocommerce tracking , uh plug in .
We have memberships and we also have subscriptions However , those plugins can go from anywhere between 50 to $250 a year , which can be very expensive for your e-commerce websites .
Uh Just to give you guys as an example , this is the product add ons plug in for roo commerce where it's billed annually at $49 .
The other plugins can get a little pricey .
In fact , I made a video about this and I was basically , um you know , I was basically talking about how the subscription model can get very expensive and how a lot of developers might not always update the plugins , which leaves a lot of people in an awkward position once they have purchased it .
Now , there is another alternative you guys can do .
And that is purchase plugins from GP L websites , GP L websites .
Actually resell other authors plugins .
They are looked down and frowned upon in the community because they are reselling other people's products .
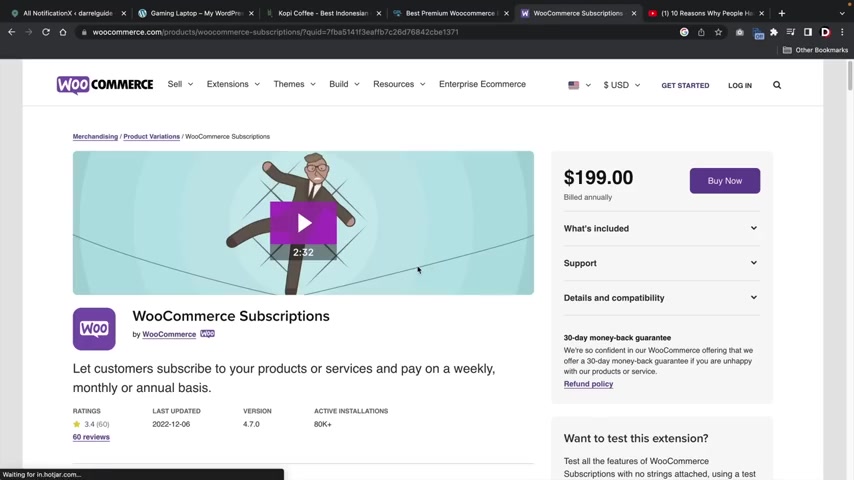
Uh However , I find myself using these websites because when I first get started with wordpress , it's really expensive to go around purchase all these plugins because some of these plugins can cost $250 a pop .
And if you want to just get like a sample of it , you're forced to buy it .
So , what I would do here was I would always purchase these uh plugins from these websites .
And then once I found myself using it on my Ecommerce store , I would then buy a license from the original developer because I do want to support them at the same time .
Now , Woocommerce offers many of the plugins here .
But uh a lot of these plugins can get very expensive .
And as a new user , I just want to let my audience know that these plugins can get really expensive .
And there is an alternative that you guys can always use GP L plugins .
So I would always recommend , you know , try out the GP L websites , see if they work for you .
And then if you find yourself relying on that plug in and using it , I would then buy a license from the original developer .
So if you guys do want to check out GP L Mall , I'll go ahead and leave a link below .
I'm not in affiliates .
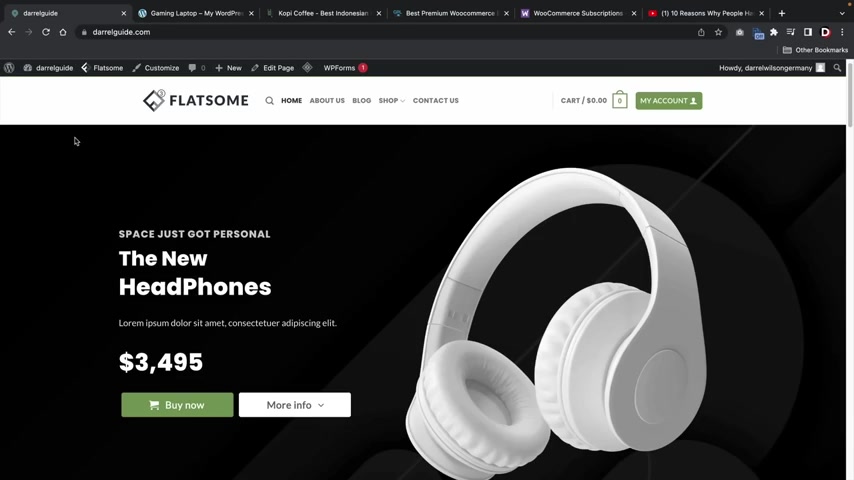
I don't make any money if you guys buy these plugins .
But I feel like that's one of the best alternatives for new users who are getting started with Woocommerce .
So now let's go ahead and go to the last section and let's talk about the Woocommerce settings .
So let's go ahead and move on to the next section .
All right guys , welcome to the Woocommerce section .
So in this part of the video , I'll be showing you how to use the Woocommerce settings .
I'll first talk about the general options .
We'll then talk about how to integrate uh taxes , how to adjust your shipping .
And I'll also show you how to integrate payment gateways like paypal and stripe .
So let's go through the Woocommerce settings and I'll show you how to set all of this up .
All right , party people in this part of the video , we'll be talking all about the Woocommerce settings .
So we'll be talking about how to add payment gateways , adjust your taxes and shipping and all that good stuff .
So , over here you're gonna see Woocommerce and let's go over here and click on settings .
Now , this part is important .
You want to go ahead and put in your store address .
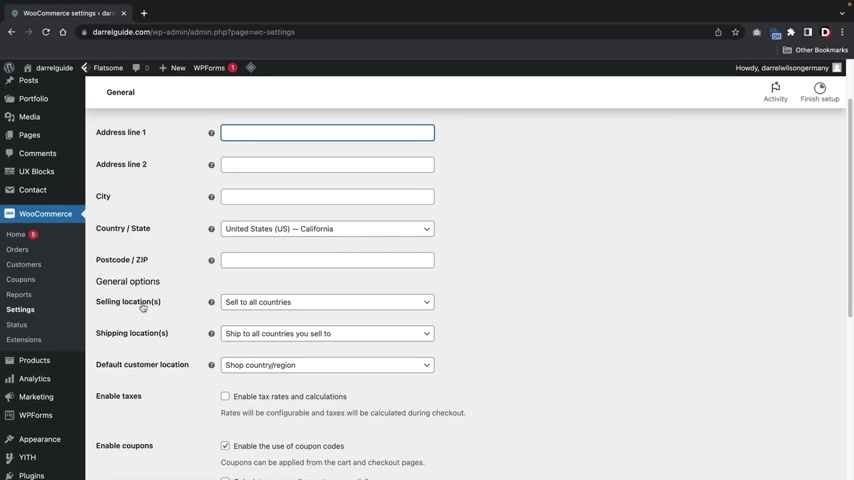
The main reason why is because you need to tell Woocommerce where your store is located and also tell them , you know where you're selling to and the shipping locations and so on and so forth .
So let's go ahead and first put in our address .
I put in my address here .
Ok ?
So once you guys put in your address , we have some other general options .
So now we have selling locations .
So who are you selling to ?
You can select all countries , all countries except for and then sell to specific countries .
So for example , if you want to sell to all countries , you can select all countries if you want to sell to all countries .
But maybe one country has like really bad policies .
You don't wanna like , you know , sell to that specific country .
You say we're not gonna sell to , I don't know who's the bad guy .
We're not gonna sell to , we're not gonna sell to Belgium , right ?
So uh you can do that or you can say I only want to sell to these specific countries .
So since right now I'm in the United States , I'm gonna put United States and then we have Canada next to us .
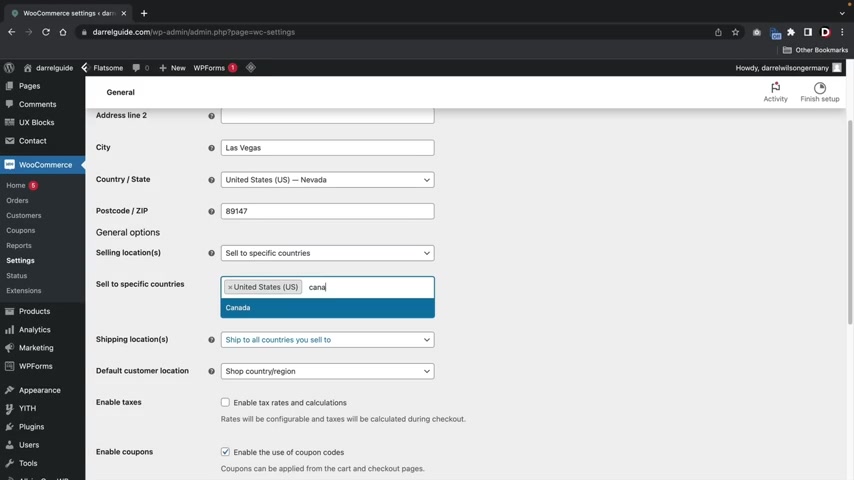
So I also want to sell to Canada , right ?
And then we'll go ahead and also put Mexico here .
So I'll say I'm only gonna sell to Canada , Mexico and United States .
And if you only want to sell to one country , you can just go ahead and say , you know what , I only want to sell to the United States or you know , put whatever country that you want wherever you're from next , you have shipping locations .
So do you wanna ship to all the countries you sell to ship to all countries , ship to specific countries and then disable shipping and calculations .
But uh this right here will apply to whatever you put when you select the sell to specific countries , right ?
Because you are only selling to United States here .
You have a default customer location , you have GEO locate and then you have uh the page cashing support .
Now , what I found here is you should probably just do country and region because if people are using a VPN , this is gonna give you guys a lot of headache .
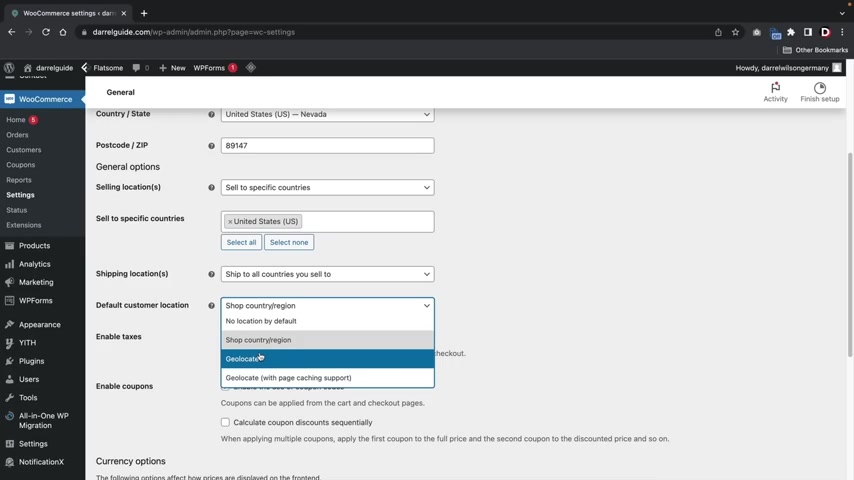
So basically , if people are using a VPN , which a lot of people do , it might show them in a different location and it might give them different shipping rates and different tax rates and so on and so forth .
I want to enable the taxes .
So I'll check that and I also want to enable the use of coupon codes .
Next , you have currency options .
So whatever currency you guys want to accept , you'll just go ahead and select it here .
You can see they have tons and tons of currencies uh that you guys can select .
Once you guys select those options , you'll click on save changes .
Next , let's click on products .
So the products general section just basically says , you know what weight unit do you want ?
And dimensions units and do you want to enable reviews ?
Those are probably the most important options from this section .
Um I know like in Europe and I know in Asia and pretty much everyone in the world , everyone uses kilograms , but we in America use pounds and ounces .
You know , that's just what we use and we also use inches in yards and stuff like that .
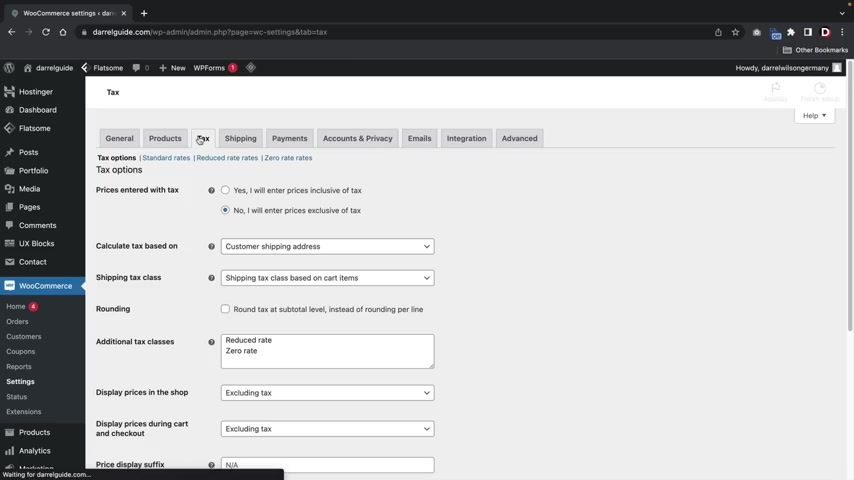
So depending on what country you're from , you might want to select specific weight units and dimension units .
If you guys want to enable reviews , you can do that .
This is what I was talking about earlier .
So reviews can only be left by verified owners .
So only people that have purchased your products can leave reviews .
I highly recommend that you guys check that because people around the internet can just come to your website and leave negative reviews and they've never even purchased the products .
So make sure you guys have that checked here .
Click on save changes next , let's do tax .
Oh , we all love tax .
So in this part , I'll show you guys how to select specific taxes for specific regions .
Right now , you guys have some general options , right ?
And this is basically saying , do you want to calculate tax based on their shipping address , their customer billing address or their shop address and so on and so forth ?
Now , if you guys are from the United States , I'll be showing you how to have automated taxes and shipping that will really help you guys out .
We're gonna install a free plug in .
But if you do want to have a manual tax rates , I'll show you guys how to set all that up .
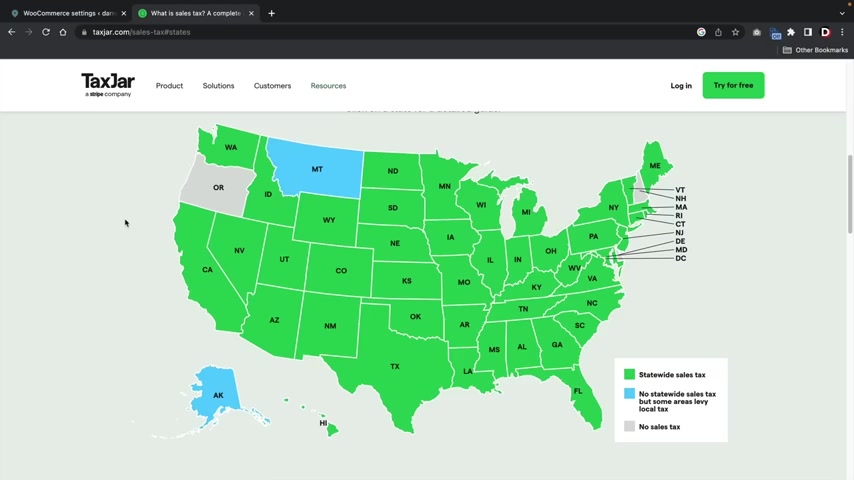
So let's go ahead and select a tax rates here .
I'm gonna select standard rates .
Now , there is an additional resource you guys can use that will really help you guys with taxes .
This is a website called tax dot com .
And what you guys can do is actually find out the tax rates for every single state .
And uh for example , Nevada has a 6.85% sales tax .
So what we can do here is click on insert row and the country code .
I'll go ahead and click on this really quick .
Now , depending on now , the country code is going to be us , right ?
So us United States and the next is the state code .
You guys can actually go over here and see all the state codes right here .
OK ?
So I'll put NV , and I'm just going to give a global rate of Nevada .
A what is it ?
It's a 6.85% .
OK .
So six point 8 5% .
And this is basically saying , uh do you want a tax on top of the shipping ?
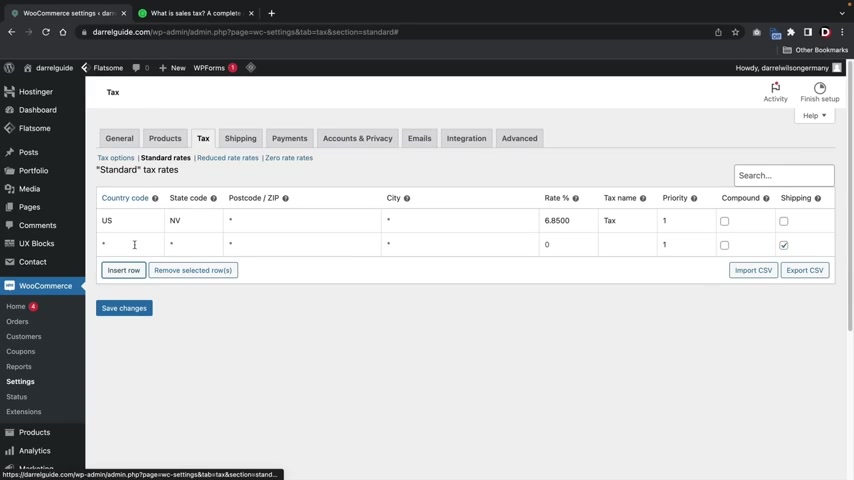
Some states do require this and some states don't .
So you might want to look at your uh state and see if , if that is taxable or not , but I'm not going to uh tax on top of my shipping and then I'll click on save changes .
So great .
There you go .
We have now inserted a tax rate for our states .
Now , let's say you guys are in a different country .
Well , we can actually tax specific country specific rates as well right here .
I'll click on country code .
So this website will actually show you all the country codes .
And what we can do is select specific tax rates for those specific countries .
So who should we pick ?
Let's go ahead and pick , uh let's go ahead and pick Japan .
All right , we're gonna pick Japan .
All right .
So it's JP .
So the abbreviation is JP .
So we're gonna go over here and put JP .
So whatever country you're from , you might want to find out what is the tax rate for your specific country ?
But I'm just going to imagine that Japan has a 5% tax rate .
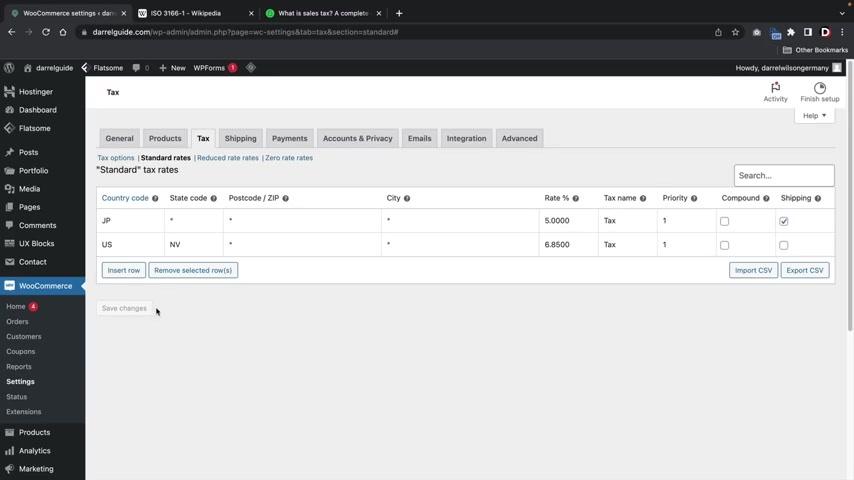
So over here and put 5% and then I'll click on Dave changes .
Ok ?
So as we can see , United States for people in Nevada are being charged a 6.85% .
People in Japan are being charged a 5% .
Now , let's say , for example , um you want like a fall back , right ?
So I have United States here , right ?
And we only have Nevada , but what happens about the other states ?
Well , we can just put United States , right ?
And people in the United States will be charged a flat tax rate of like 8% or something , you know , and uh we can just save that , right ?
So this is basically saying people in United States will be charged 8% .
However , people in the state of Nevada will be charged 6.85 and then people in Japan will be charged a 5% tax rate making it , you know , making it easier to understand .
So that is pretty much the standard tax rates .
Now , there is one exception and that's where you can have reduced tax rates or zero rate areas .
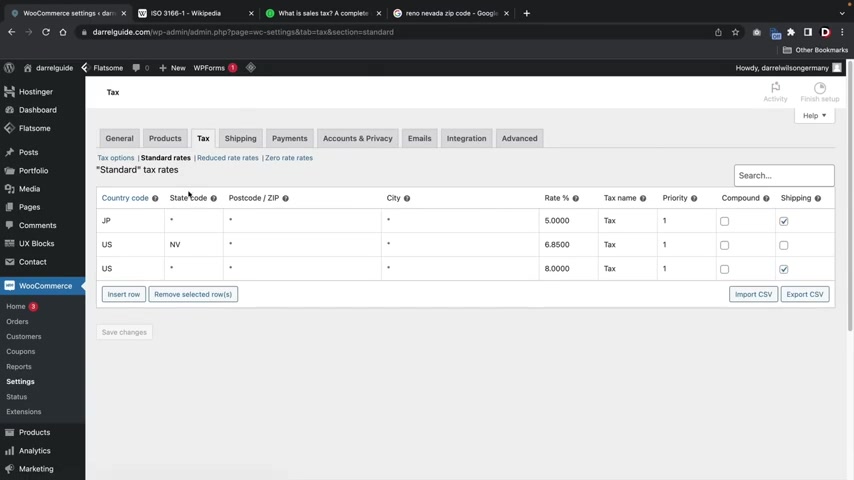
Now , let's say , for instance , Nevada , right ?
Uh Nevada has this sales tax .
However , in Reno , Nevada , they actually have like a 5% tax rate or something like that .
It's a little bit smaller .
So what we can do is we can actually target specific areas and give them a different rate .
So for example , also like the United States country code or I'm sorry , state code NV .
And then for Reno Nevada , I'm gonna select the zip code for Reno Nevada .
OK ?
I'm gonna put it in there and then we're gonna put Reno .
Now for Reno , I'm gonna say , you know what uh Reno's getting a 4% tax rate , you know .
So I'll go ahead and insert the row and then save the changes .
All right .
So now what I'm basically saying is people who purchase my products from this specific region in this state are going to be subject to a 4% discounted rate versus people in the whole state of Nevada .
They're gonna be charged 6.85% .
So that is pretty much taxes summed up .
It's pretty easy to get started .
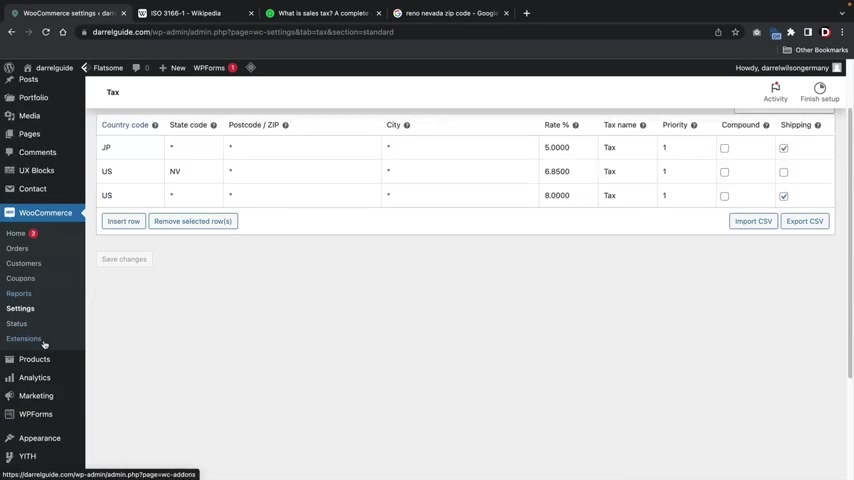
And once you guys actually make your rates , uh , it's very easy for it to be more automated .
Now , let's talk about how to create automated taxes because if you are in the United States , setting up your own taxes is gonna be a nightmare , right ?
So , uh let me show you guys a plug in really quick .
That'll actually automate everything .
So over here , I'm gonna go to search plugins and we're gonna type in Woocommerce shipping and this is the plug in that we're gonna use .
It is called Woocommerce Shipping and Tax I'm gonna click on install now and then activate .
Once you guys do this , you guys will have to sync this up with Jetpack .
Jet pack is an additional plug in that just basically gives you analytics and stuff like that .
It's not really that useful , but it's just they require it guys .
You know , I'm just , I'm just the middle man , you know , I'm just the middle man .
So let's go ahead and install jetpack and connect .
Now , once you guys sync it up , it'll want you guys to create an account .
Printing account is free .
Does not cost you guys anything whatsoever .
So I'm gonna go ahead and create an account and then log in .
All right , great .
I'm gonna go ahead and dismiss this .
Now , I have synced this all up .
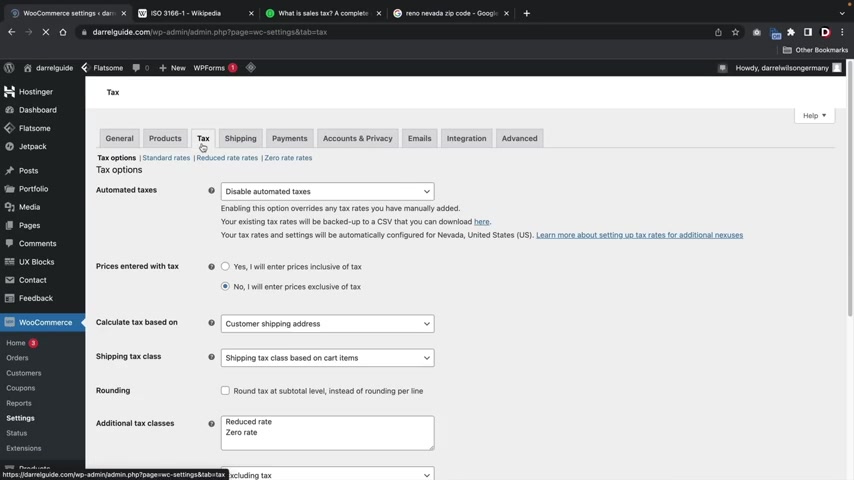
So we're now gonna go to the Woocommerce settings and now we're gonna enable automated taxes .
It's really simple .
There's actually an option where you just check a box and it's done .
So now you'll see that there's this automated taxes where you can actually enable automated taxes making it really easy to set up your taxes .
So I'll scroll down and I'll click on save changes .
All right .
Congrats .
So now we have set up our taxes .
Now , let's go ahead and talk about shipping here .
Click on shipping .
Now , shipping is pretty easy to get started with right here .
I'll click on add a shipping zone .
Now , where do you want to ship to you're gonna put that region right here .
So I'm gonna put United States , right ?
United States and we have United States right here .
So United States , there we go .
I'm gonna close this box .
It gets a little annoying .
Now , I'm gonna select , add a shipping method and we have a few options .
You guys can do flat rate free shipping or local pickup .
I'll just first do flat rates and I wanna charge a flat rate for my shipping .
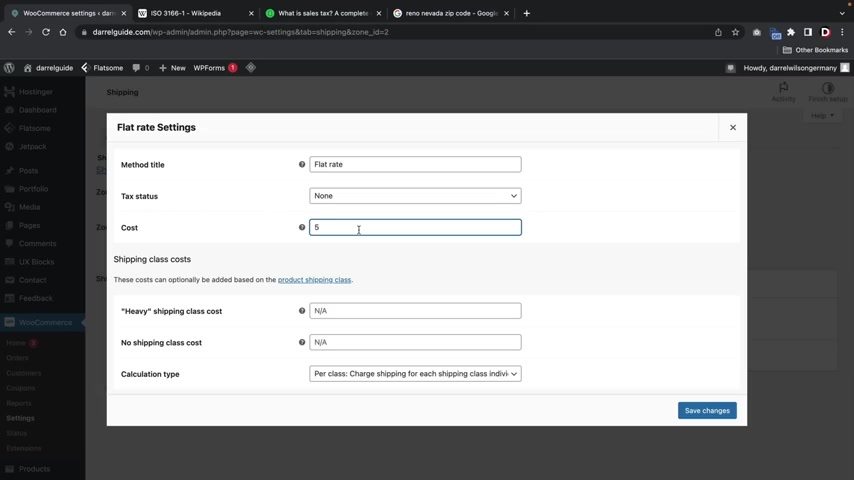
So right here I'll click on edit and now we're gonna select a flat rate of $5 right ?
And that's it .
This section right here .
You probably don't see it yet and I'll get to that in just a bit .
But for now , I'm just basically saying that my shipping rate is $5 .
Is this taxable ?
I'm gonna put , no .
So I'm just gonna charge a $5 shipping rate and then click on save changes .
All right .
Now over here in my cart , I've already added something and you can see that the flat rate is now $5 .
You guys might want to check with the post office and find out how much shipping costs because it does fluctuate .
Now , let's say , for example , you guys wanna add free shopping for people who spend a specific amount , right ?
Maybe people who spend more than $100 you want to give them free shipping .
So right here , we have a chipping method and we can now select free shipping here or click on add a shipping method and then I'll click on edit .
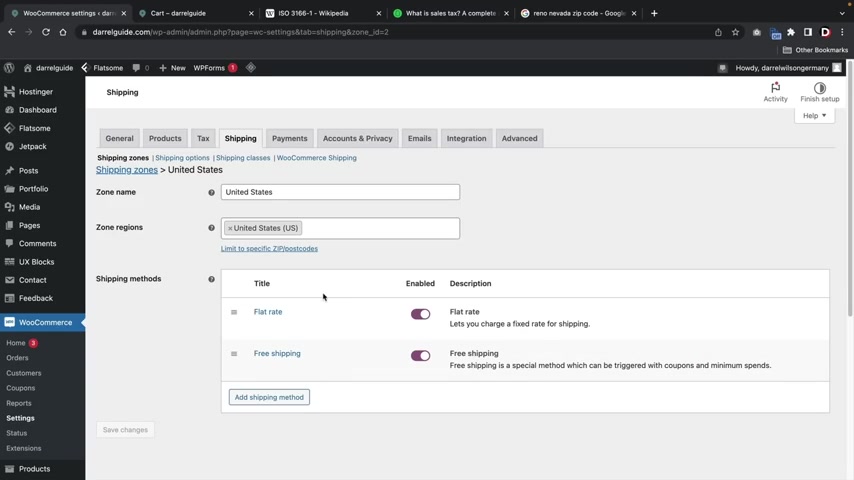
Now , free shipping requires what a valid shipping coupon , a minimum order amount , you can put coupon or amount or both , but I'm gonna select a minimum order amount of $100 and then click on save changes .
Now , you guys can just offer free shipping for all of your customers if you want to do that by just deleting the actual flat rates .
So it really depends on how you want to approach your shipping .
You guys can have flat rates or you can offer free shipping .
Now , there's one more that I want to select and that is shipping rates without a region .
So over here , let's click on shipping zones and here we have United States .
However , sometimes people might purchase my product outside of this region .
So I want to select like a fallback policy just so that , you know , I don't lose business .
And we charge shipping if people are not in specific regions that we set , right .
So I'll go ahead and select , add a shipping method and a flat rates and I'll just charge people like , I don't know , like 10 bucks .

So if someone from Mexico buys my product that I didn't plan upon , I'll say , you know what ?
I didn't set the shipping rate for them .
But hey , I don't want to lose business .
I'll charge them $10 if they're willing to accept that and then click on save changes .
So let's go to shipping zones and let's summarize .
So we are selling in the United States as a flat rate of around .
I think it's $5 .
Right .
However , if people spend more than $100 they get free shipping .
Now , if somebody outside of the United States buys our product , they'll be charged a shipping rate of $10 .
So just remember , you guys can always add more shipping zones and you can select as many countries as you want .
However , if you guys decide to do that , just remember that in the general settings , you guys must add the country over here , sell to specific countries .
So for example , I'll put in Canada , right ?
So I'll put in Canada and then I'll go ahead and click on save changes .
I'll go back to shipping and then I'll click on add a shipping zone .
So now I wanna select one for Canada , right ?
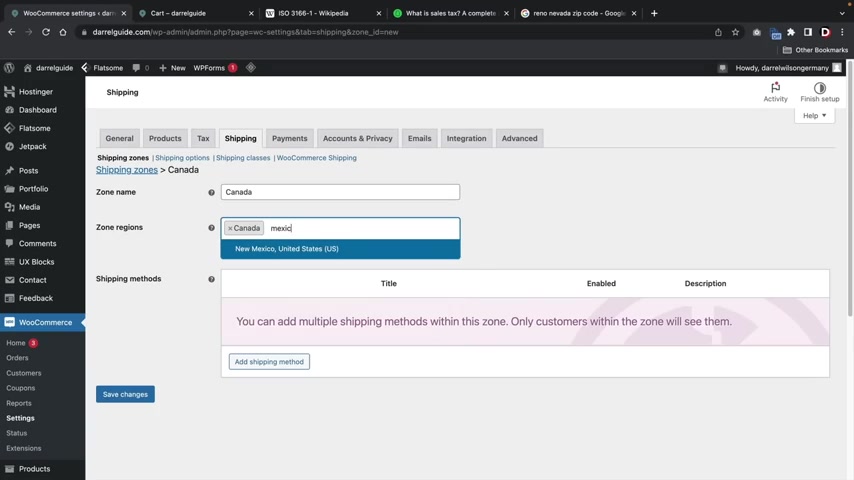
And I'll type in Canada here and you'll see that Canada appears .
However , if I try to sell to another country , that's not on my list like Mexico , you guys will see that Mexico isn't available , right ?
Only New Mexico uh same with like any other country , right ?
Like uh Germany or something , you know .
So you'll see that Woocommerce does not allow you to select Germany because you have not added Germany to the options where you put , sell to Pacific countries .
So we have Canada and people from Canada are gonna be charged a little bit more because it's farther .
So also , you know what , you guys from Canada , uh , you'll be charged like , uh , I don't know , $9 .
Right ?
And then I'll click on save changes .
Ok .
So just to summarize people in the United States will be charged at flat rates and they also get free shipping .
If they spend more than $100 people in Canada will be charged $9 and people not covered by my other zones .
I believe that they'll be charged $10 right ?
So that's how you guys can create shipping zones for all of your products , for your e-commerce websites .
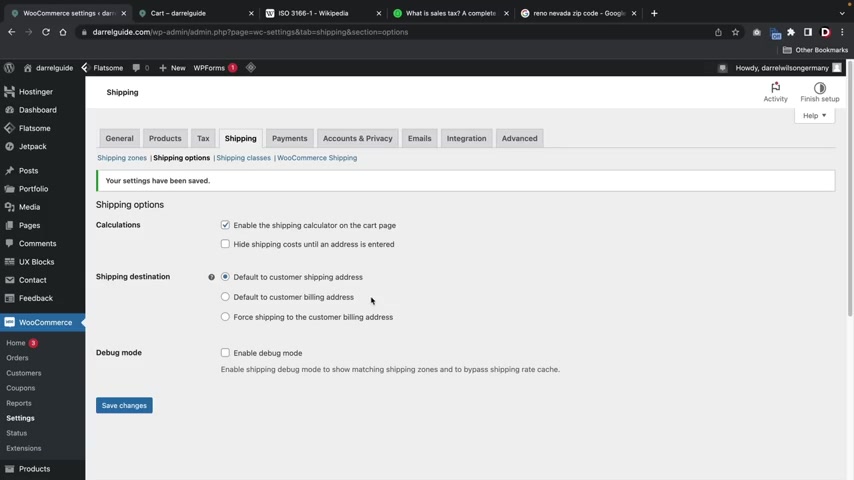
So next , let's talk about shipping options and there is one important option here that I want you guys to select here .
You have default to customer shipping address , make sure that you guys actually have that checked and click on save changes .
I'm not sure why Woocommerce has billing address set by default because uh , billing address is the actual address of the credit cards holder address , but maybe they don't live there .
Right ?
People move all the time .
So you want to select shipping address .
Next , we have shipping classes .
Now , shipping classes are actually pretty important , right ?
Uh I'll go ahead and get rid of this and I'll start from scratch .
So here I'll click on , um , well , I'll just click on shave shipping classes just to start fresh and then I'll click on add a shipping class .
Now , a shipping class is something that you might want to charge extra shipping for specific products .
For example , if you guys are selling refrigerators and then someone buys an iphone on your website , you're gonna have drastically different shipping costs .
So that's why they created shipping classes .
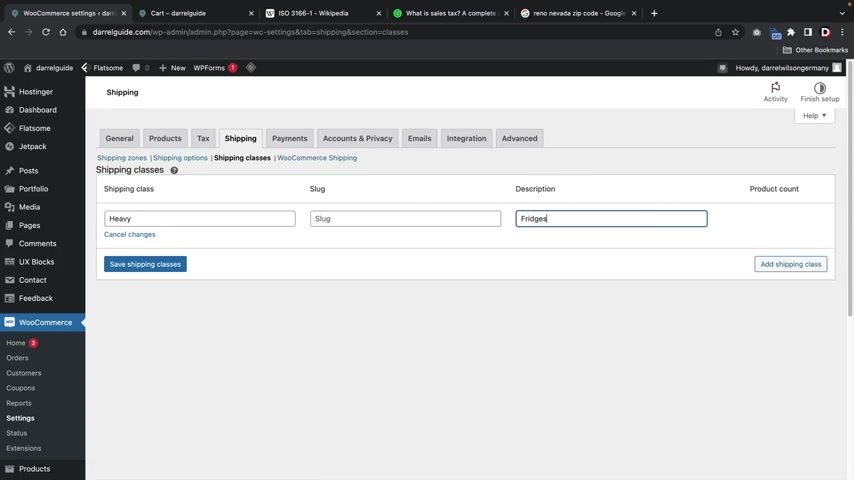
So over here I'm gonna put heavy , right ?
And for example , you know , description for your reference , this is like fridges , you know , or something really heavy on my e-commerce website , you know , something abnormally uh more heavier .
So it'll cost more for shipping .
So I'll go ahead now and click on save shipping classes .
All right .
Now let's go back to shipping zones .
Click on the zone right here .
I'll click on United States and then I'll click on flat rates .
Now , what I'm saying here is if we assign the heavy category two specific products , how much are we gonna charge ?
Well , we're gonna charge $50 because uh that's pretty heavy and we need to charge a uh shipping rate of $50 for really heavy products .
Ok ?
So I'll go ahead and click on save changes .
Now , we need to assign that heavy category to our product , right ?
So let's go over here to visit sites .
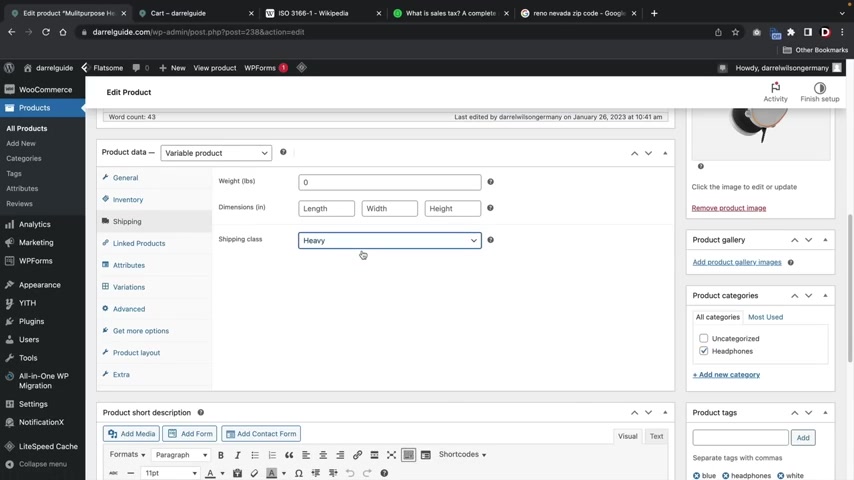
I'll go to my shop and then I'll select uh these headphones .
Let's just say these headphone guys are like super heavy , ok ?
We'll just , we'll just imagine that .
So here I'll click on edit product and I'm going to scroll down right here and where it says the shipping , I now want to assign the shipping class to heavy .
So basically what I'm saying here is this product is really heavy and they're gonna be charged $50 for shipping because uh , this product is way more heavier than other products .
So then I'll click on update .
Next , I'll click on view products and we're gonna add this to the cart .
I'll add this to the carts and I'll click on view cards .
Ok .
So let's summarize the Amazing White headphones is subject to a $5 shipping rates .
However , the multipurpose headphones that cost $50 is subject to a $50 fee .
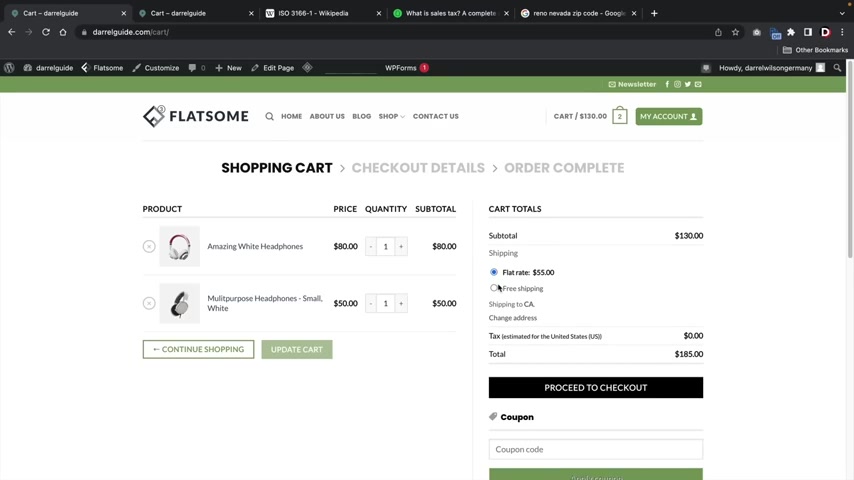
Uh If people actually purchase that product because we assign the heavy category .
Ok .
So let's summarize here .
The Amazing White Headphones has a $5 shipping fee .
However , the multipurpose headphones is subject to a $50 shipping fee because it is in the heavy category .
Now , if you guys decide to do this , you guys might want to disable the minimum order amount gets free shop because you can see that the customer uh can now get free shop .
So you might actually lose money in that ordeal .
So if you do have really heavy products , you probably want to disable the free shipping if they reach a specific amount .
But um this is how you guys can add shipping classes to your product .
It's a great way on how to save money if you guys are selling multiple products with different weights .
All right .
So now that we talked about shipping , let's go over here to accounts and privacy .
We'll do payments at the very last .
Now , accounts and privacy .
Pretty much lets users create an account during checkout .
I recommend selecting that .
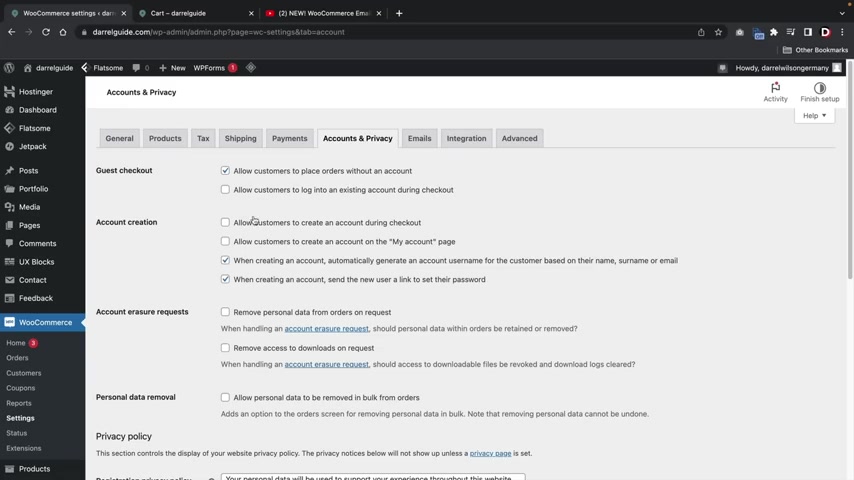
But if you guys wanna have guest check out or you wanna force users to create an account when they're purchasing something , you guys are going to select all that here .
So allow customers to create an account during checkouts , allow customers to create an account on the my account page .
I recommend having all these checked because that will allow users to create an account and then you can actually , you know , capture their information and then you can market to them later here .
You guys have some account , erase your requests and then you have some personal data removal and all this stuff .
I'm not really too familiar with about this .
This is relatively new .
It's been out for about a year .
So um if you guys do want to uh remove access to downloads on requests or any information , you guys can check those boxes there .
But I'm gonna go ahead and scroll down here and then click on save changes over here .
We have integrations .
This is doesn't apply to us and then lastly we have the advance and if you guys don't know what you're doing , don't select anything on this page .
Ok .
Now let's talk about emails .
Now , emails are actually really important .
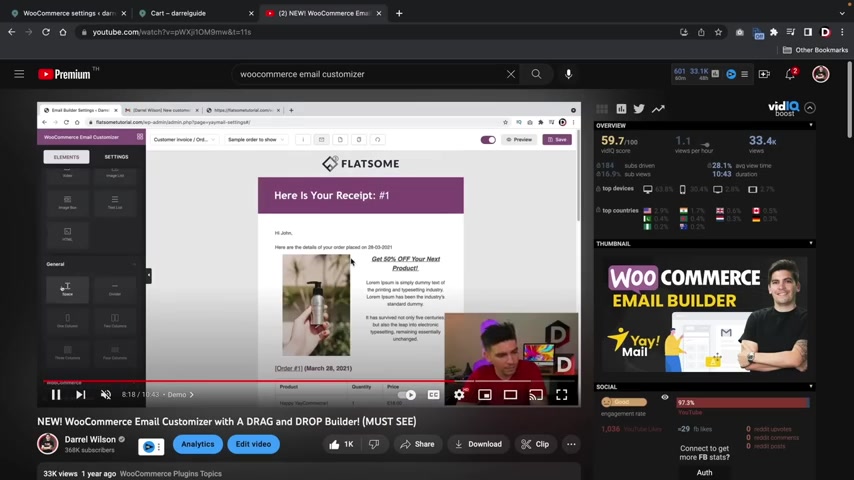
You guys also might need to know AC ML code in order to edit these uh email templates .
And that can be very hard , right ?
However , there is a free solution , you guys can go ahead and use a free plug in and I actually made a video on this plug in right here .
And as you can see that it's completely drag and drop and you can decorate the whole email using a drag and drop builder .
You can uh change the colors , the fonts and make it look like your brand and all that cool stuff .
So you'll see here .
Uh I'm just like kind of like messing around it .
I'm going through with it , but I would recommend watching this video .
I will leave this video in the description below and I highly recommend to use this product because it's completely free and it does a really , really , really good job .
All right .
So check out this video and use that plug in .
It'll save you a ton of headaches and it'll make you look a lot more professional .
So now let's talk about the best part about this video is payments .
Now , we're gonna use two specific type of payments .
We're gonna use paypal and we're also gonna use Stripe .
Now we need to install a plug-in in order to activate those payment gateways down here .
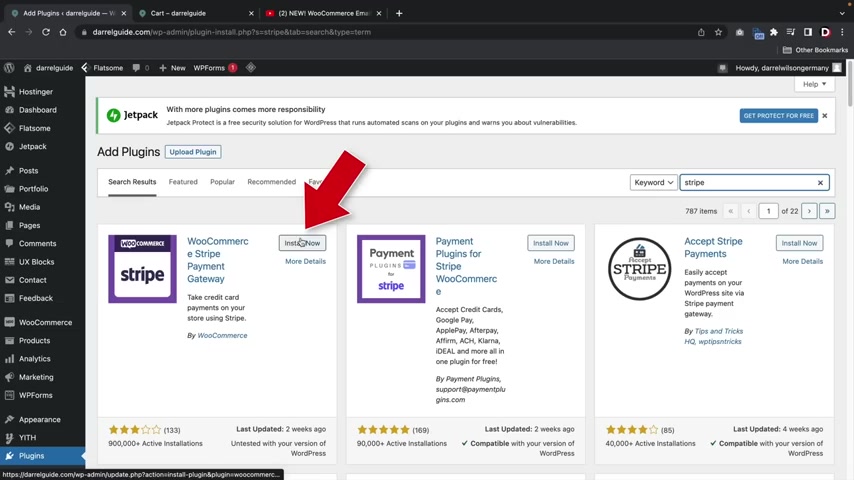
You're gonna see plugins click on , add new .
Whoops .
There we go .
Wait , wait , wait , wait , wait , wait , hold on there .
There it is .
Ok .
Add new and we're going to type in Stripe and we're going to install this plug in .
It is the Woocommerce Stripe payment gateway .
Go ahead and click on install now and then click on activate .
Ok .
Now we're gonna install one more over here .
Click on , add new again and we're gonna type in paypal this time .
Paypal and Stripe are the most popular payment gateways , like probably on the planet .
They are really popular because they're really easy to use .
They're very cheap and they're just so convenient because they're accepted all around the world .
Here .
You have the Woocommerce paypal payments .
Just go ahead and install that and then click on activate .
All right , cool .
Now let's go ahead and talk about both payment gateways .
This is stripe dot com stripe dot com is a free service and all you guys need to do is sign up and make a free account .
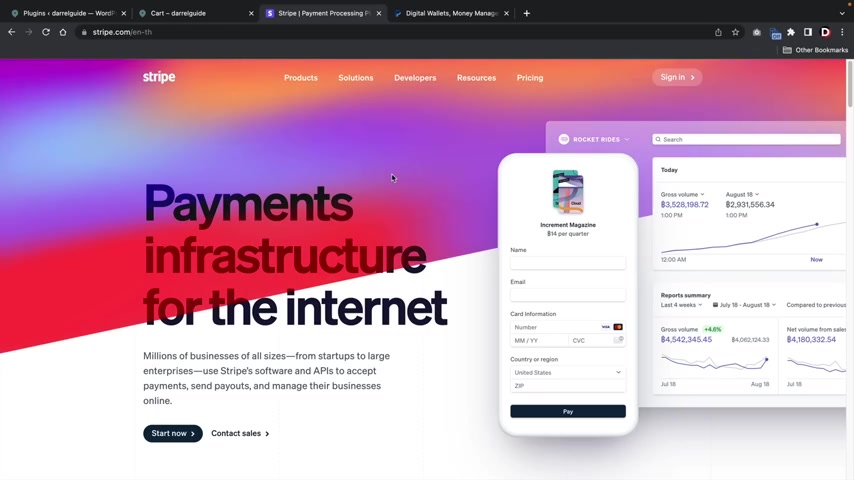
They have a charge of like 2.9% and that is standard for all payment merchants in the industry .
However , there is no credit check and it's completely free to get started and they will deposit money directly into your bank account right away .
Now , we're gonna use this payment gateway and we're also going to use paypal , as you guys know , paypal is probably one of the most popular global merchants out there .
If you guys are doing business in other parts of the world , uh companies like stripe are a little restricted in parts of like the Middle East and some parts in South America .
But paypal is accepted all around the world .
So you can use this for pretty much every single person on the planet .
So I'll show you guys how to integrate both of these onto your e-commerce websites .
Once someone purchases something on your website , the money will go to these merchants and then they are going to deposit it into your bank account .
So let's first start with Stripe .
Now you guys will need to make a free account with Stripe .
I already have an account with Stripe .
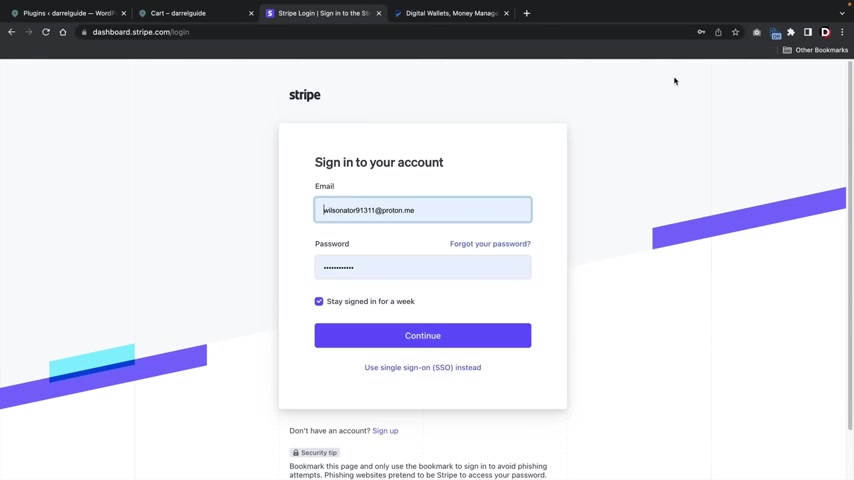
In fact , I use this on my website Dar Wilson dot com and that's where we make a majority of our income and all the money goes to our Stripe accounts and you know , that's how we make money .
We use Stripe too .
So I'm gonna go ahead and log into my demo account and I'll meet you in the dashboard .
So here is my current Stripe account .
You guys can see that we are selling templates on my websites and you know , this is all the analytics .
So you'll see that this month we made around , you know , $8000 .
And um yeah , everything is going really well .
So this is my current uh so this is my current Stripe accounts .
You guys can see that we have a balance of almost $7000 and our net sales for this month is about , you know , almost seven grand , you know .
So it's , it's doing pretty well .
Now I'm gonna switch to my demo business and I'll walk you guys through on how to integrate this .
All right .
So here we go , you know , this is my demo account , but it is connected , we have connected this to a bank account and we went through the process of actually giving them our documents and everything is all set .
Now , it's really easy to integrate this .
All you're gonna do is like click a button and you're done .
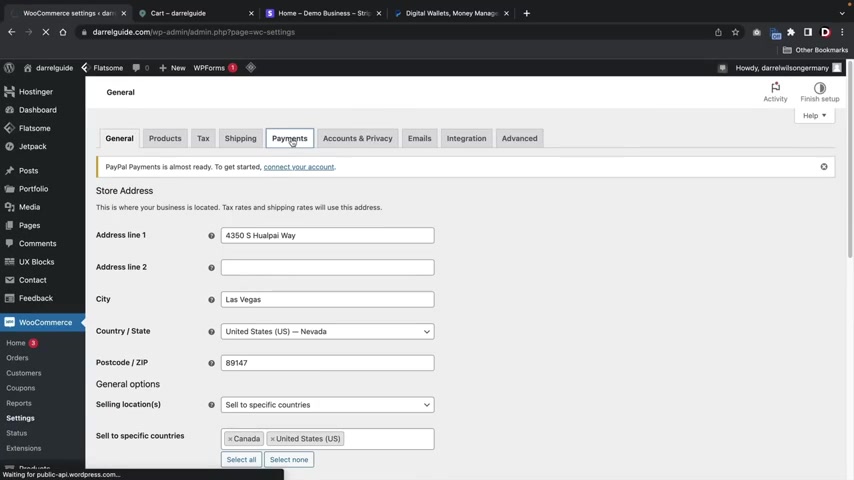
It's so simple .
So over here woocommerce settings , we'll click on payments and I first need to turn on stripe .
So when I turned it on , it's gonna walk me through like a setup right here .
Here .
It's saying create or connect an accounts .
I'll click on connect an account here .
It's saying , OK , which account do you want to connect ?
So I'm gonna connect my demo business and then I'll click on connect .
So now our account is synced up .
However , there's a little bit more to do here .
I'm gonna scroll down and you're gonna see that uh everything is enabled but the web hook is not , we need to go ahead and take this .
You are all right here and we're gonna copy and paste this into stripe .
Once we do that , we're then gonna get back a uh secret key which we are going to insert on our website that I fully connect it .
So let's go back over here and I'm gonna click on developers and then here we have web hooks .
I'm gonna click on add an end points .
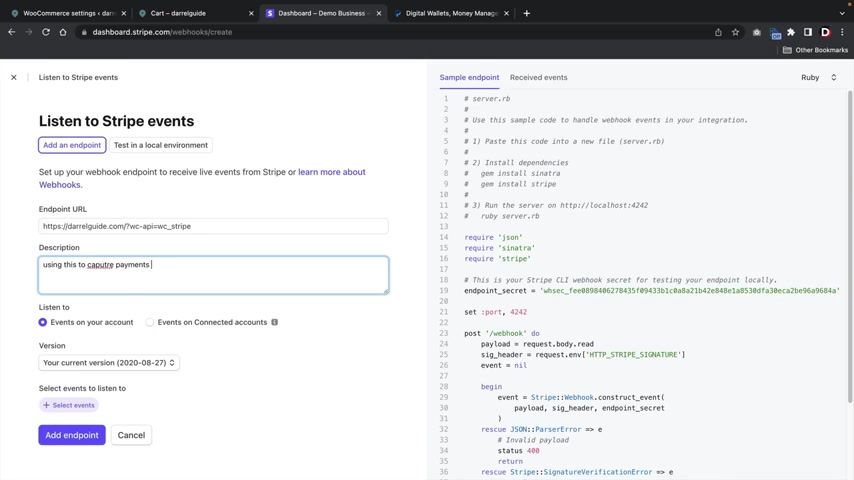
You are now going to paste that URL right here and you're gonna tell stripe what you're using this for .
So I'm using this to using this to capture payments , payments on my e-commerce website .
Sorry guys , I can't really type that well , because I got a microphone in front of my face .
But uh there you go .
Now , right here , you'll see select events , click on select events , click on charge and then click on , select all charge events , click on add events , scroll to the bottom and then click on , add the end points .
Once that's done , you are now going to see these signing secrets .
All you gotta do is click on reveal and you're just gonna paste this in there into your websites .
So over here we're at our websites , I'll click on edit account keys and now we're going to paste that web hook right there and then I'll click on save live keys .
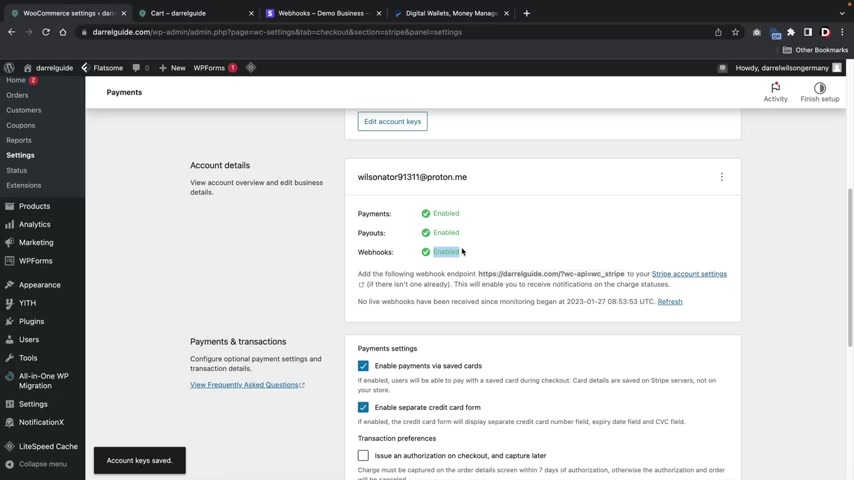
And if we scroll down , you will now see that our website is fully enabled and this is now a legitimate e-commerce website that can now start accepting credit card payments on our website .
So , pretty exciting , you know , congratulations .
Now , you guys might notice here how when I clicked on edit account keys , there is live and there's also test mode .
If you guys do wanna use test mode , all you gotta do is go over here and click on test mode and go through the same exact process .
So now basically I'm saying that this is all in test mode and you know , you would actually go over here , you know , you would , you would paste your API keys , you know your publishable key , your secret key , you would do the web poke and you do the same exact process with the test mode .
You guys can actually just see how it looks like , you know , from a test point of view , no credit cards are required and it just gives you a better idea of how like the transactional process will take place .
So on your own free time , feel free to check out test mode , it's free and it's really easy to get started with .
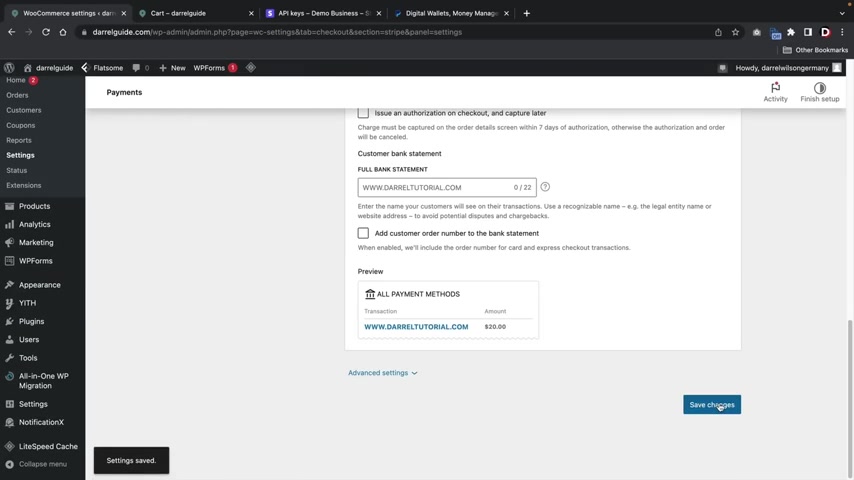
So now that I showed you guys how to enable stripe , I'll scroll to the bottom here and I will click on save changes .
Now , there is one other important thing that I didn't mention was the bank statement .
So when people actually buy something on your website , what do you want it to say on their bank statements ?
We all puts like uh Darryl's goods , you know , Darryl's goods , you know , just , just so they remember , right ?
Just so you don't get charged back and stuff .
Charge backs are the worst .
But uh hey guys , it happens to everyone sometimes , you know .
So uh yeah , that's that .
So now I showed you guys how to do Stripe .
Now let's talk about paypal .
So let's go over here to paypal , right ?
And I'm gonna activate paypal right now .
Before we select paypal , we need to create a paypal account .
Now , I want to be very transparent when you go to paypal and you click on , sign up , you guys need to select a business account .
Ok ?
So this does not work for a personal account .
It must be a business account .
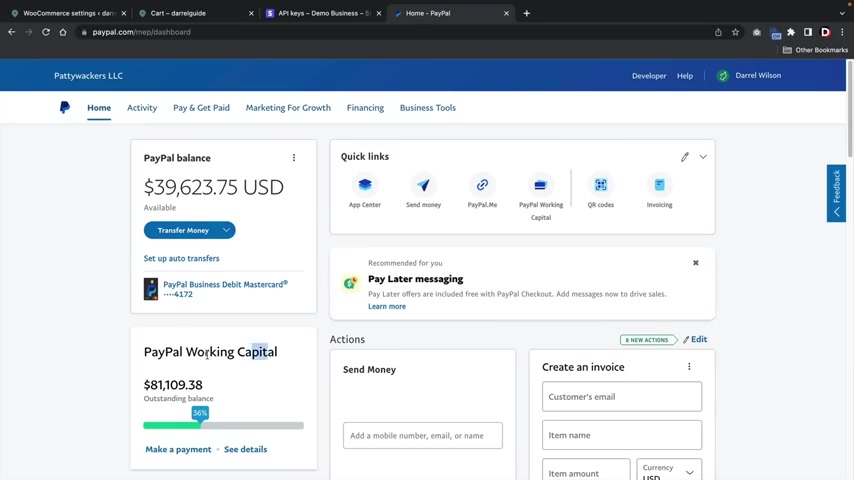
The great part is paypal no longer charges for a business account , I believe like a a year ago or two years ago , it was $40 a month .
However , now it is completely free .
They do not charge you anything whatsoever .
So that's really cool .
So go ahead and make a business account and once you guys do that , I will meet you in your own paypal dashboard , right ?
So here is my paypal balance .
You guys can see that we have almost $40,000 in this account and we have some paypal working capital stuff .
And uh yeah , this is my current paypal accounts .
Now , what I wanna do is I want to actually sync this up with my paypal account , right ?
So right here , I'm gonna select , accept all major credit cards and then click on activate paypal .
Now , once you are logged in with paypal .
It's going to actually uh know that on your browser by your cache and then you'll just go ahead and connect this .
So go ahead and click on next .
All right .
And once you guys log into your paypal account , it'll want you to connect paypal with woocommerce .
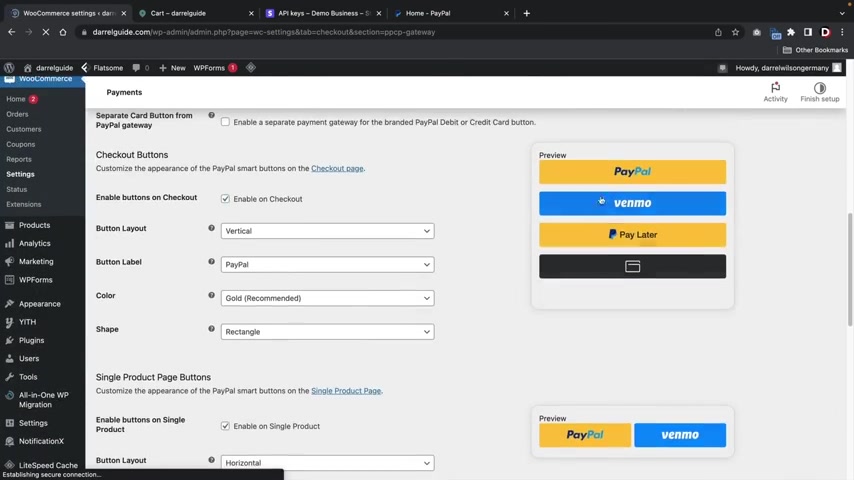
So go ahead and click on agree and connect and that's it .
You are now synced up with paypal .
So right here , go ahead and click on , go back to Woocommerce .
Now there are some options that I recommend that you guys check because um what it's gonna do is that it's going to basically start recommending all these other different uh payment merchants and services on your website that can get really annoying .
Uh Right here , we have standard payments .
Let's go ahead and first enable the paypal gateway , right ?
However , I want to get rid of all these right here because these are actually going to display on like your products on your at the cart page and all these unnecessary pages .
So for example , I want to disable this on single products .
You guys can choose to have that on products .
But I just find that kind of annoying , you know , it constantly tries to get people to , to buy stuff on every product page which I don't know , I just feel like it's it's kind of spammy .
Also , we can hide this on the carts .
So basically what I'm saying is I only want to select like the checkout process on the actual checkout page .
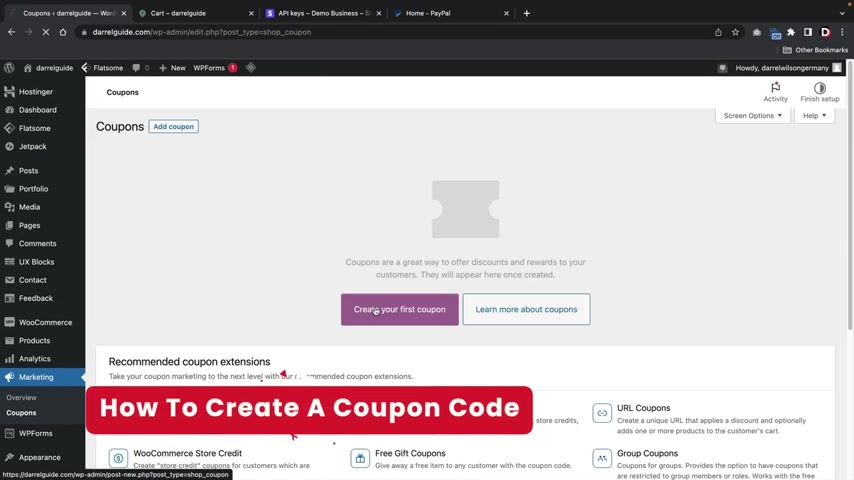
So I wanna basically let people uh buy only on the checkout page and no other page , right ?
So once you guys select that , we will scroll to the bottom and click on save changes .
All right .
And the very last thing is we are now going to apply a coupon code and then we're gonna have a live transaction on our website .
So over here you're gonna see marketing and then we have coupons .
Now we're gonna create a coupon really quick and we're gonna make it free so that we can actually just , you know , check out on our website using a free coupon code .
So here I'll type in free .
Now we have a few options .
We have discount type , which is the dollar amount and then we have the percentage discount .
So right here you can see that there is a discount type and there's a few different options .
We have percentage , fixed carts or a fixed product discount .
The percentage discount will give the total percentage discount in the carts .
The fixed car discount is a dollar amount or you can give a specific amount uh discount for a specific product .
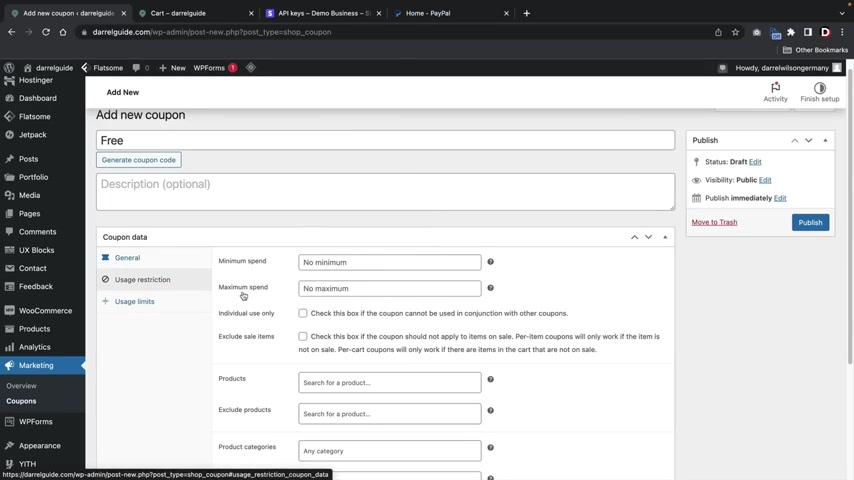
But uh I'm gonna select percentage discounts .
Now , how much does this discounts give ?
Right .
Well , we can put like 10% discount , right ?
Or 20% or 30% .
Does this also grant free shipping ?
Sure , why not ?
When does this coupon expire .
Well , I'm gonna put it on the 31st .
Here we have usage restrictions .
So what is the minimum spend ?
Well , I'll , but they must spend at least like , I don't know , 20 bucks , no maximum .
Right ?
And then here you guys can actually put specific products or exclude specific products .
You can even go a step further and exclude categories or add specific categories .
This is ideal .
If you guys have like a brand new product and you don't want to offer it on sale , you guys can offer pretty much all your products on sale except for your new products .
Here , we have usage limits and this is basically saying , how many times can a person use this coupon or how many times can this coupon be used on your store , period ?
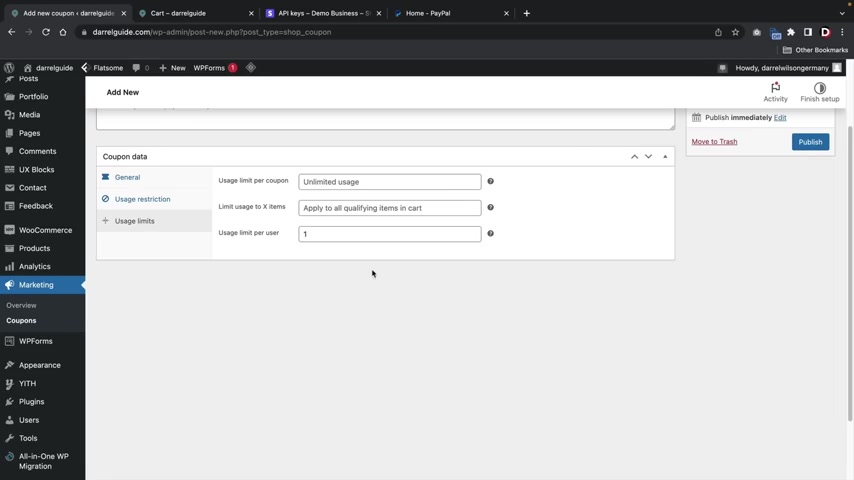
So I'll say , you know what , uh this has unlimited usage , but the same person can only use this coupon code one time , right ?
And then I'll click on publish .
All right .
So that is a coupon code .
Now , what I'm gonna do here is I'm gonna make one more .
All right .
So I made my other coupon code , which is a 100% discount .
So let's go ahead now and test it out .
So we're back at our cart page and if I scroll down , you'll see that we can add a coupon code .
Now , the current price is 1 85 .
However , if I put in free , we should get a 10% discount .
So it went from 1 85 to 1 72 and it took off $13 off of the original amount .
Now , let's go ahead and use the other coupon code which was test .
So tests .
Now this is a 100% discount , right ?
So now you guys will see that it basically offers a 100% discount on the products .
However , we do have an issue here and that is the shipping is still applied .
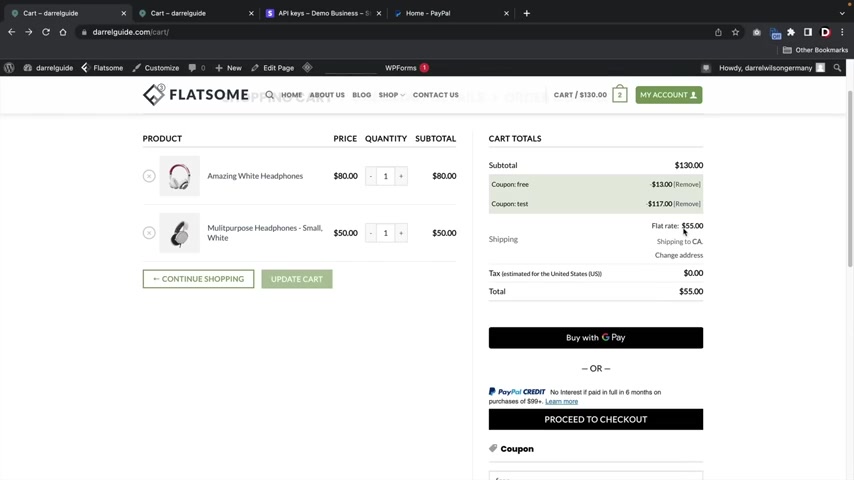
If you guys do want to actually uh give them free shipping as well , you need to select the option for free shipping in the coupon section .
So for example , on my test coupon , all I gotta do here is select the allow free shipping and then click on update .
You guys will also need to select a free shipping method .
Remember earlier how there was a requirement for free shipping ?
Well , you guys will need to adjust that in the shipping zone section .
So we're back at the shipping section where we have free shipping and all I gotta do here is click on edits and then we're going to go over here and put a minimum order amount or a coupon .
All right , and then click on save changes .
All right .
So let's test this out .
I'm gonna go ahead and go back over here and I'll put in tests , click on apply coupon and then you'll see that the user has free shipping available .
Where they don't have to pay for shipping .
So I'll go to proceed to check out and here is our check out details .
So the user will then go ahead and fill out their billing information .
All right .
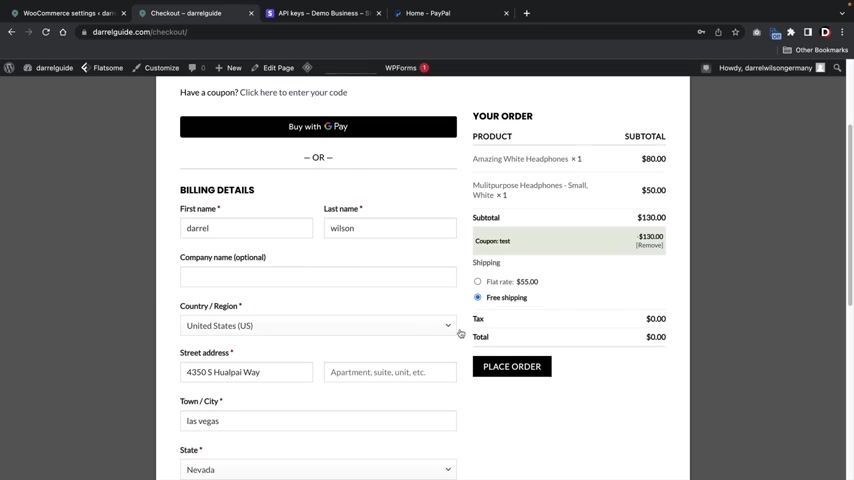
And once the user has selected it , they will then click on place order .
And that's it .
This is the check out page where it shows the user uh all the information , it shows them what they purchased .
And it also has the email right here and look at that at the bottom left .
It just told everybody that we actually purchased uh this product right here .
So that's also pretty cool .
So , congratulations .
That's pretty much it .
That's how you guys can add payment gateways and have fuel purchase products on your e-commerce sites .
Now let me run you guys through a live transaction and show you guys how that works .
Now , I actually want to adjust some things I don't really like this , buy with Google Pay .
And I also had to put something here in order for flats to recognize this as a um address , right ?
So I want to go ahead and change that .
So let's do both of those really quick and we'll also add a terms and conditions page and you'll be on your way .
So over here under payments , I'm going to uncheck this because I just don't like that .
I feel like it's kind of annoying and now I'm going to go run a test transaction here on stripe .
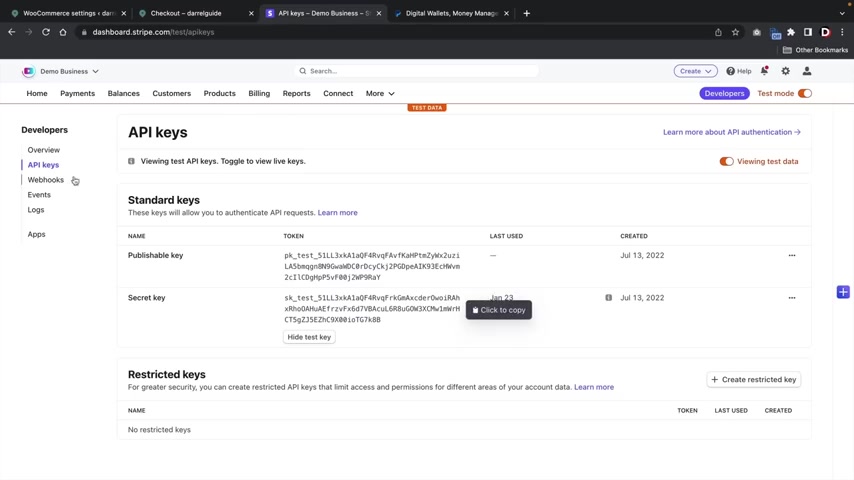
So I'm going to enable test mode , edit account keys .
And I'm gonna go over here and I'm just going to uh copy and paste this so the publishable key and then also the secret key .
And then over here we have our web hook .
So I'm gonna do the same exact thing here , right ?
I'm gonna speed this up a little bit web hooks , add endpoints , paste in that put demo .
We're going to select an end points , charge , select all charge events , add events and then add an end points .
I'll then get the signing secrets , copy that , go back and then paste that in there and we are all set and done .
Now , the next thing I'm gonna do is I'm gonna create a page for my terms and conditions .
You guys can use this website and this will actually just automatically create one for you guys and you guys can kind of mess with it and edit it to your liking .
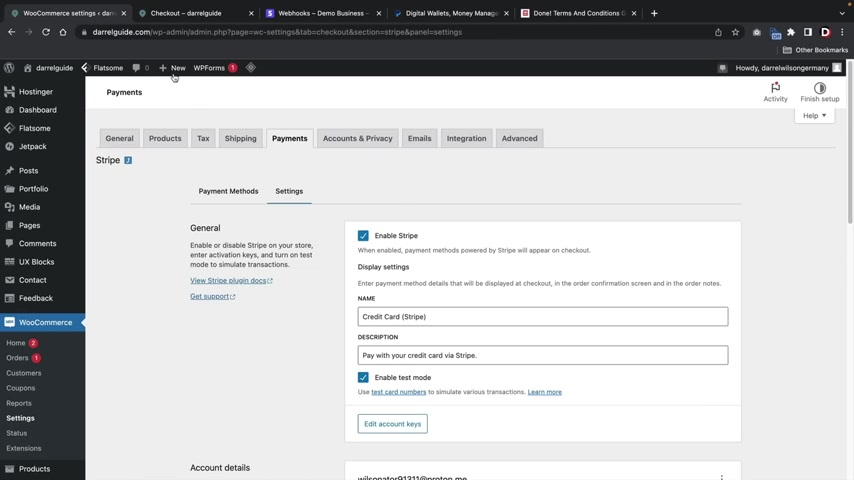
But I'll put , you know , flats some here flat , some , we're gonna put our websites and then I'll click on generate my terms and conditions .
I'll go ahead and copy this text to clipboard .
We'll now go back to my website and we're gonna make a page here .
So we're gonna make a page for our terms and conditions .
You guys can also do the same thing for your privacy policy .
So this is the terms and conditions I want to get rid of this block here .
I , I don't know why it keeps adding in that block and I'm just gonna paste this in there .
All right , cool .
You click on publish and publish .
Now , we're gonna go back to our theme right here and we're going to go to the theme customizer and we are now going to assign that , uh , that people have to check that .
So here under Woocommerce , the checkout section .
Now here I wanna make some things optional , right ?
So I'm gonna make all these optional just in case there's no problem when people are actually uh filling out their billing details .
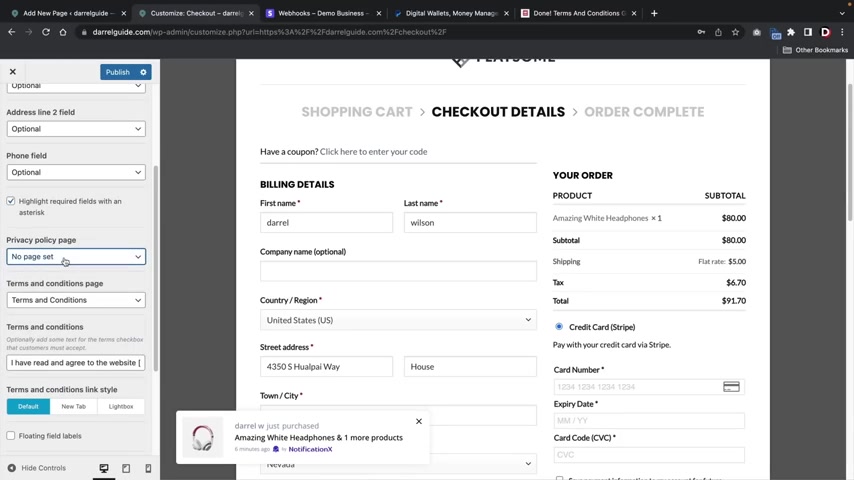
And then here for terms and conditions page , I'm just going to select the terms and conditions .
So they will be forced to have a little check box .
Once they actually uh purchase something on my website , you guys can do the same thing for the privacy policy as well by just making a new page and then selecting the privacy policy .
I believe this website actually has a privacy policy generator as well right here .
They actually have one where you guys can like , you know , mess around with and edit .
So I'll go ahead and leave this website in the description of this video so you guys can mess around with that .
But uh going back to our website here , I'm just going to publish this and let's run another transaction and have a uh you know , show you guys the whole process of how that works .
So let's go back over here to our shopping carts and here I'll just click on , proceed to check out right and here we have the credit card .
So we're gonna enter our demo credit card right .
There we go .
Our secret credit card .
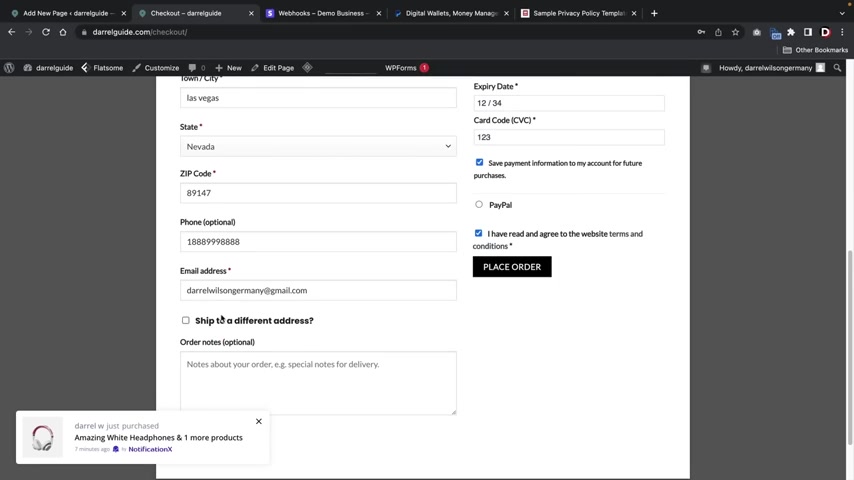
We're gonna put in a dates and then an A CV C here , I'm gonna click on save payment information for future account purchases .
This will actually save the user's credit card onto your e-commerce websites .
Also , you guys might notice here they have to actually select , I have read and agreed to the terms of service .
Here , we have the ship to different address .
I'm going to uncheck that because I want them to ship to this address and then I'll click on place order .
Oh , I gotta get rid of that and then click on place order and congratulations party people .
We have now made a successful order .
So that's how again you guys can have people purchase products on your websites now that you guys know how to do that .
There is one more section that I want to showcase and that is the order section .
So whenever people purchase something right here , all your orders will display under the Woocommerce order section .
And uh here you guys can get more information about the actual person who purchased the product , what they purchased .
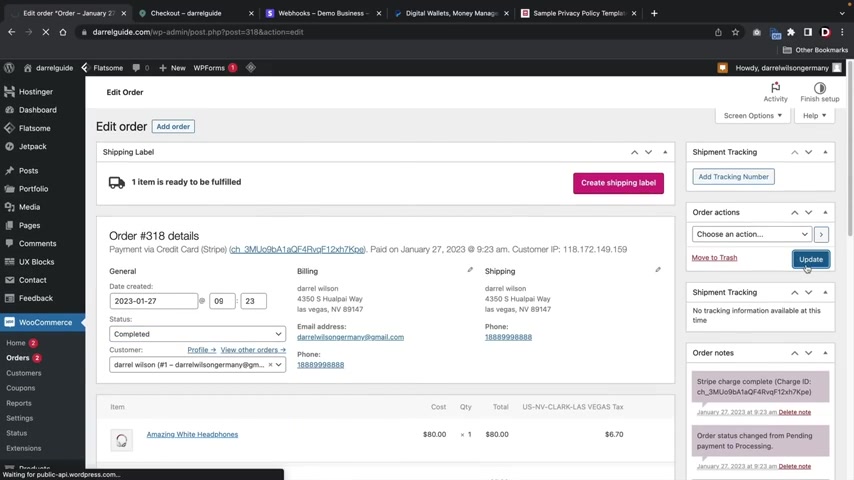
And you guys can actually set this to uh completed by saying , oh , we shipped the product and then we'll just go ahead and update that .
Also .
You guys can add a shipment tracking if you guys have the Woocommerce tracking shipping plug in installed .
Uh , that is outside of Woocommerce .
It does not come by default .
But if you guys do that , so you guys can add your , um , you know , your tracking there .
So customers will be emailed tracking information about their product , right ?
Party people .
Well , congratulations on making your new e-commerce website .
It's a really exciting thing , you know , when you start selling your own products and stuff like that .
Now I'll be having a follow up video that shows you guys how to properly market your e-commerce websites .
I started an e-commerce website called kopi co dot com and I'll show you guys exactly what we did to start making sales .
I did not advertise it at all on youtube whatsoever .
And after probably like three months , we made around $1000 in sales .
So make sure to subscribe like this video .
And if you guys have any comments or questions , feel free to let me know in the comments below .
I'll do my best to get to them , right .
No promises , but I'll do my best .
Ok .
My name is Darryl Wilson and I'll see all of you party people in the next video , guys take care
Are you looking for a way to reach a wider audience and get more views on your videos?
Our innovative video to text transcribing service can help you do just that.
We provide accurate transcriptions of your videos along with visual content that will help you attract new viewers and keep them engaged. Plus, our data analytics and ad campaign tools can help you monetize your content and maximize your revenue.
Let's partner up and take your video content to the next level!
Contact us today to learn more.