https://www.youtube.com/watch?v=MV1RAob4duE
How To Create An eCommerce Website with WordPress and Elementor 2023
What's up party people ?
My name is Darrell Wilson .
And today in this video , I'll be showing you all how to create an e-commerce website with wordpress step by step .
Now , me and my team have been spending weeks making this e-commerce tutorial .
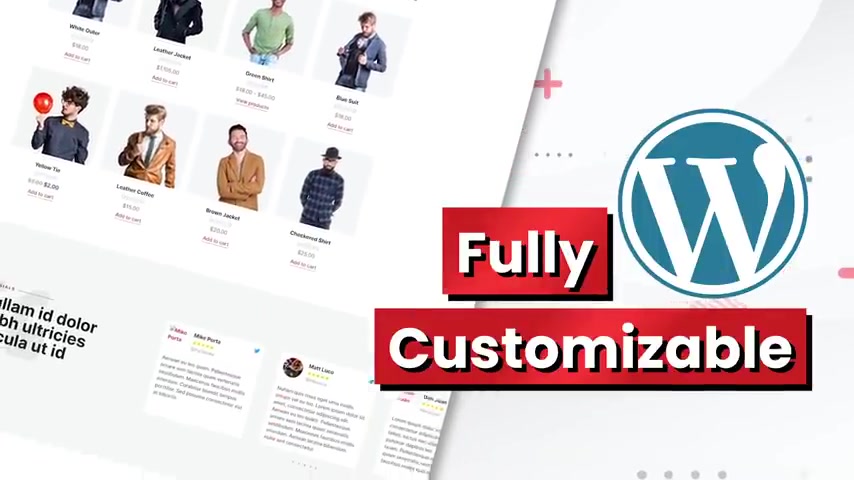
So both beginners and all Wordpress users can create professional e commerce websites that look great that you can fully customize in this video .
You will also learn how to use the element or page builder and all of its features , which is currently the number one most popular drag and drop page builder for wordpress .
We've also prepared a detailed marketing guide to drive traffic and help you get your first sale for your e-commerce website all for free .
So sit back and relax and let me show you guys what we will cover today in this e-commerce tutorial .
All right .
So today I'll be showing you step by step on how to create an e-commerce website that looks really professional , yet modern .
And the great part about this video is you don't need to know any sort of coding or html because we will be using a drag and drop builder that makes it really easy to build your e-commerce website .
And as you guys can tell this website looks great and you will also receive this template for free just for watching this video .
So today , I'll be showing you how to design and customize every part of the website to fit your business needs .
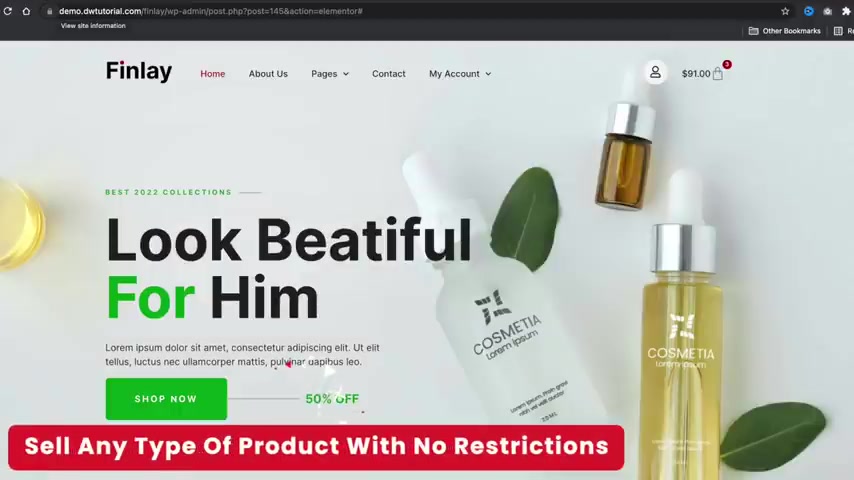
Now , you can sell any type of products you want on your e-commerce website .
You can sell clothes , fashion products , jewelry , animal supplies , you can sell anything you want on your e-commerce website with no restrictions in this video .
I'll be showing you how to create your e-commerce website with wordpress and mentor .
The popularity of wordpress is great .
Wordpress now powers more than 42% of the entire internet powering more than 500 million websites worldwide .
In fact , Wordpress is used by popular websites like Mercedes , Benz Walt Disney Playstation and even the Angry Birds .
So you will be using the most popular platform to build your e-commerce website .
Mentor is the leading dragon drop page builder for Wordpress .
It is now used on more than 5 million websites worldwide because it's super easy to use and completely drag and drop .
So after learning mentor , you can pretty much make anything with wordpress .
Here are some users who watched my previous videos and have now created their own personal e-commerce business using the same page builder and platform that I'll be showing you how to use today in this video .
So with all that said , let's take a closer look at the website that I'll be showing you how to make today in this video .
All right .
So this is the e-commerce website that I'll be showing you guys how to make today in this e-commerce tutorial .
I'll also be giving you guys the demo images and this whole layout for free to help you guys follow along in this e-commerce tutorial .
Now at the top left , we have our logo and this is where you can put your logo for your e-commerce website .
If you guys don't have a logo , don't worry about it .
I'll be showing you a really cool resource on where to get a logo for your e-commerce websites .
And then here we have our pages , you know , like the home , the about the contact , the my accounts and everything .
And then on the right side , we have the customer log in where they can log in and see their orders .
And on the right side , we have this uh carts where they can click on it and view the items in their carts .
Now , here the user can click on this and they can go directly to their accounts dashboard .
So from here , the user can see their recent orders , they can manage their shipping and their billing information and they can also update their payment methods on your e-commerce website .
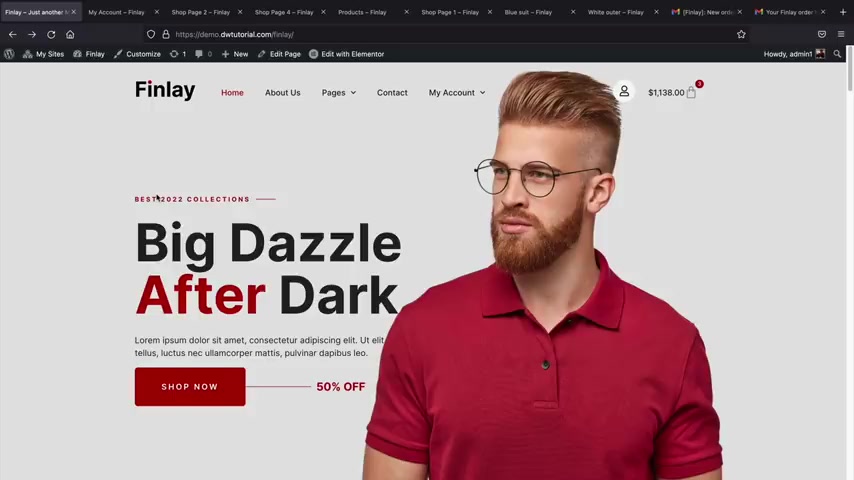
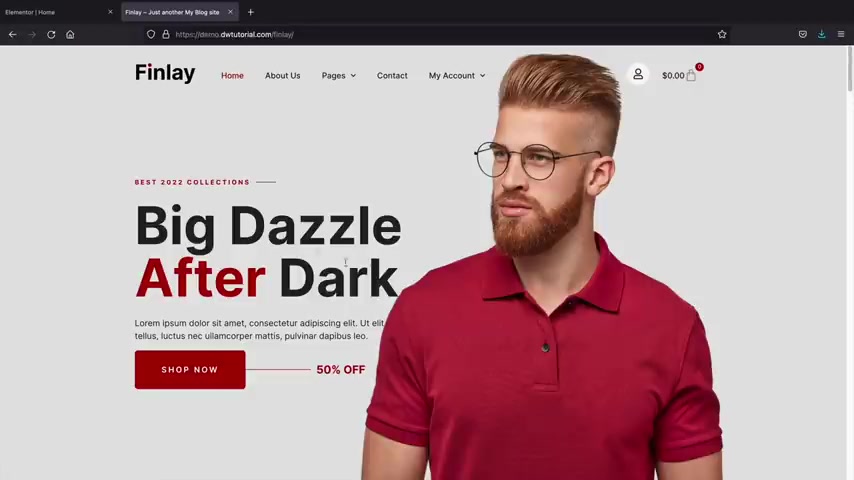
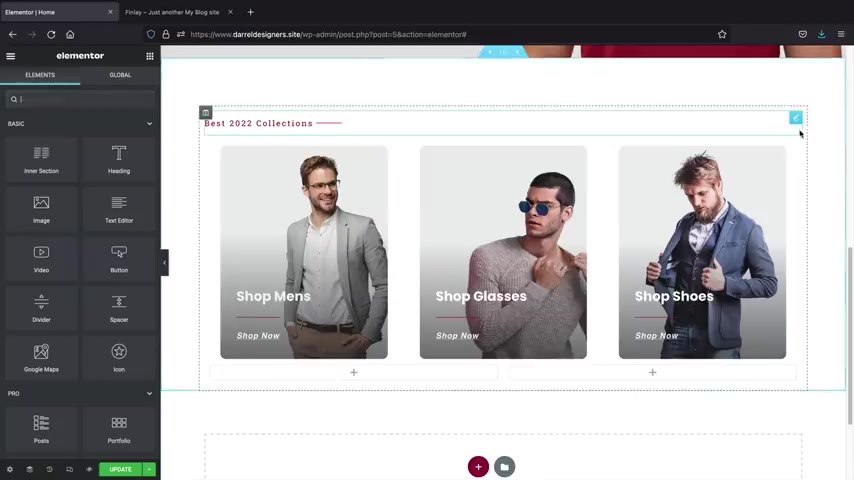
Next , we have our landing page and this is just a really clean landing page .
We have this nice image here to reinforce what we're selling .
We have this text where you can , you know , change this to big sale or whatever you want to change it to .
And then we have this shop now button where users can click on this and go directly to their uh you know , to the shop page and then scrolling down here .
We have product categories .
So let's say , for example , you have product categories like men's , women's and children's , you can categorize your products where if they click on this , they'll be redirected to that specific product category .
So I'll show you how to set that up .
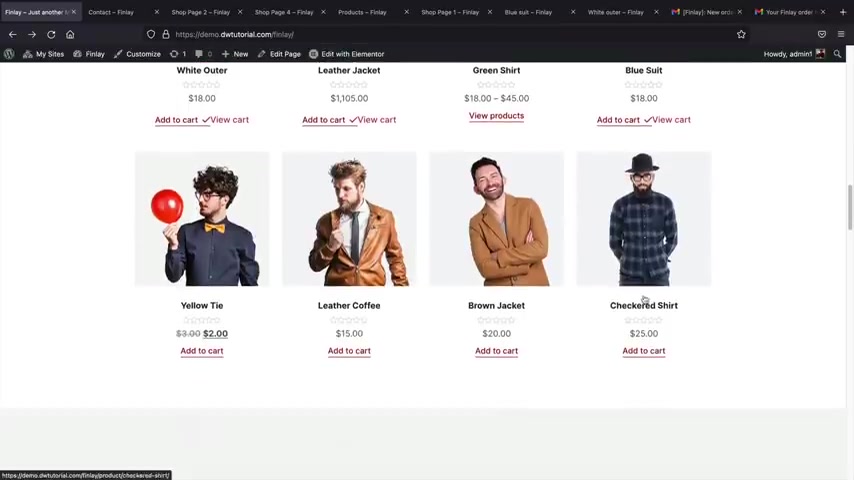
Let's go ahead and keep scrolling down here and then we have just our basic products .
So this is just our products that we are listing on our sites .
So , you know , I'm selling leather jackets , green shirts and stuff like that .
So you can kind of see how users can uh you know , click on this and then they can add this to the cart and then this will update in their carts .
So next , we have testimonials and testimonials are very important because this gives you social proof , letting people know that like , you know , you're not a scam and , and people are actually buying on your tour and stuff like that .
So those are always good to have on your site .
And then here I just added this like flash sale .
So if you wanna run sales where you're basically telling people that this is only good for a specific amount of time .
Uh I went ahead and added that so I'll show you how you can , you know , add this for your e-commerce website and then it keeps growing down here .
We have just some icons so these could be like your brands .
Like , for example , if you're selling Nike shoes or Adidas or uh Puma , I don't know if they sell those anymore .
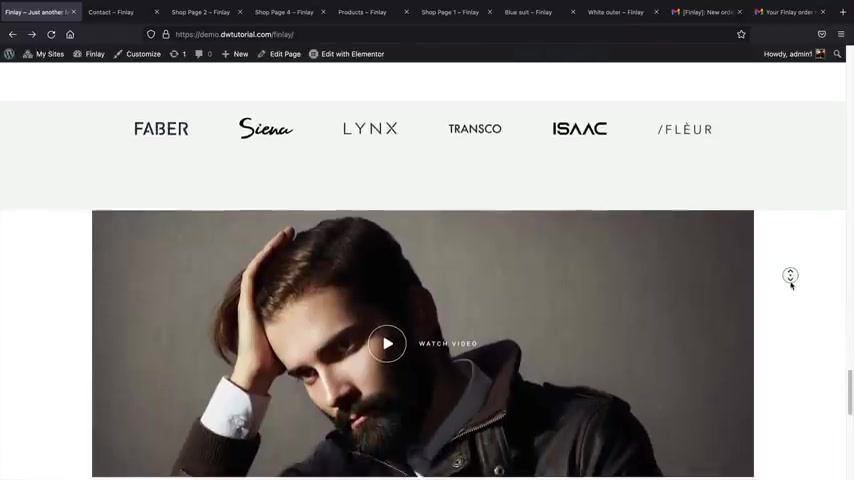
But uh you know , you can , you know , you can add those to your store , you know , just to give them an idea of the brands that you sell .
And then below that , we have this video where users can click on this and have a pop up of a video , you know , to display your products and showcase them a little bit more in detail .
And then here we have some , some icons just to reinforce the buyer , you know , like money back guarantee uh delivered in 24 hours , you know , free shipping , you know , all , all that good stuff .
And then at the bottom here we have this really nice footer where we have this um you know , our photo at the bottom with our subscribe box .
And then we have this Instagram widget where we have our Instagram here where they can click on this and go directly to our Instagram .
And then we have these credit cards here at the bottom just to add some more , you know , style and the core to the website .
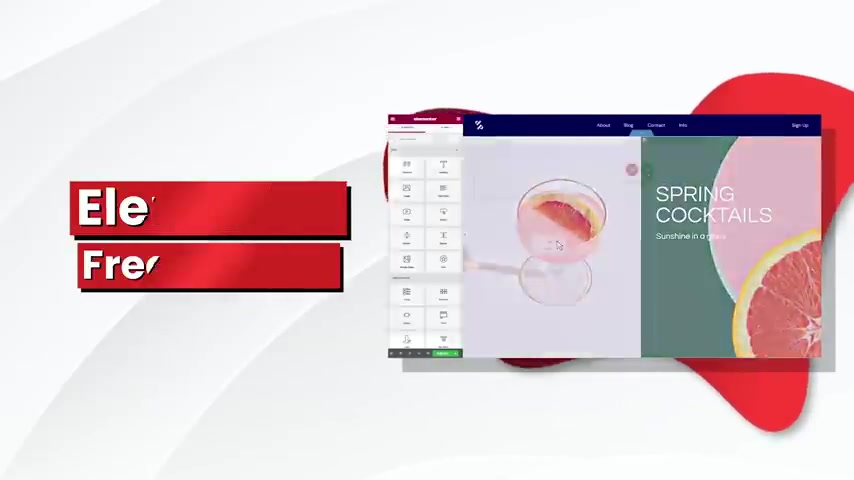
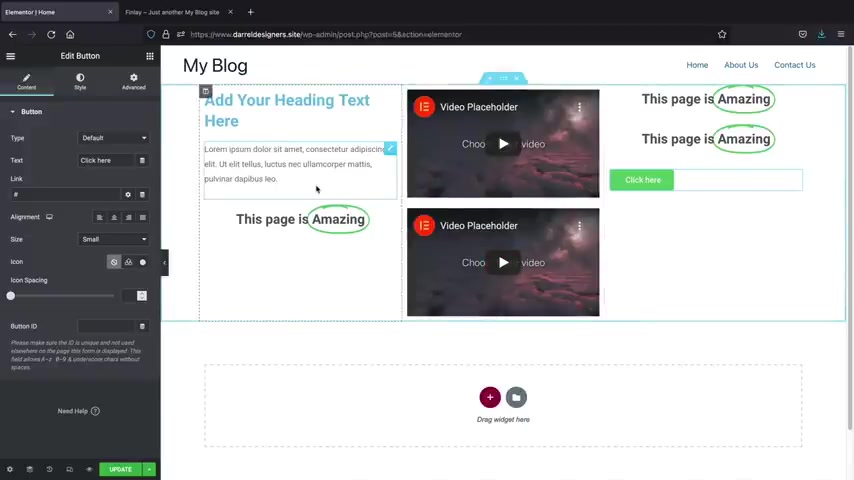
Now , I did mention that we are using a dragon drop builder to build out your e-commerce website .
So for example , if you wanted to make changes to your e-commerce website , you would just click on the text and then type it in .
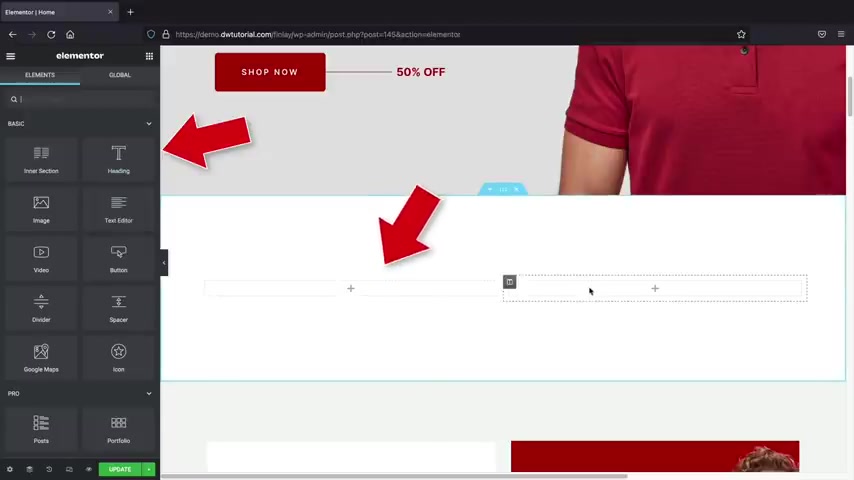
So here I type in big sale today and then I'll scroll down here on the left side , we'll have these elements tabs and we can drag and drop these elements onto these columns .
So for example , I can drag and drop this heading text and then change the text and then we can keep dragging in elements .
So I will take an image module and here I can put in images .
So if you have images that you want to upload to your website , you can just insert them directly onto your site and then keep dragging and dropping elements onto your e-commerce website .
So here I'll drag an A button also for those of you who have youtube videos , you can use these video elements and then drag it directly on your website .
And then users can go ahead and play videos right on your e-commerce website .
Now , your e-commerce website will be fully optimized for all devices .
So we'll first optimize your website for the desktop and then we'll optimize your website for all tablet users .
And lastly , we will optimize your e-commerce website for all mobile devices .
So anyone visiting your website on an Android or an iphone will have a good shopping experience on your e-commerce website .
Now , this demo website is available in the description below this video .
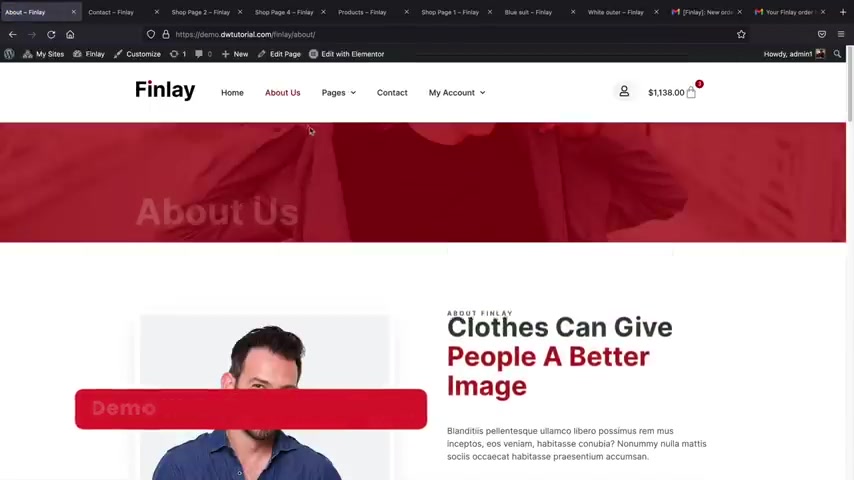
So if you guys just want to go ahead and check it out , you're more than welcome to like here is the About Us page where we're gonna go ahead and walk you through on how to set up an About Us page on your site .
You know , it's really clean and it lets people know what your site is all about .
And I think when people see about us pages , they get more connected to your brands and saying , all right , you know , these guys work really hard creating this product and you know , we really appreciate that .
And then here we have the contact us where users can go ahead and send you messages , which I'm sure you guys will love support , you know , emails .
But uh you know , everyone has to have it so you can put your uh your visitors can put their name , their email and then send you a message and this will go directly to your email inbox .
And then here we have a address of where we are located and some frequently asked questions .
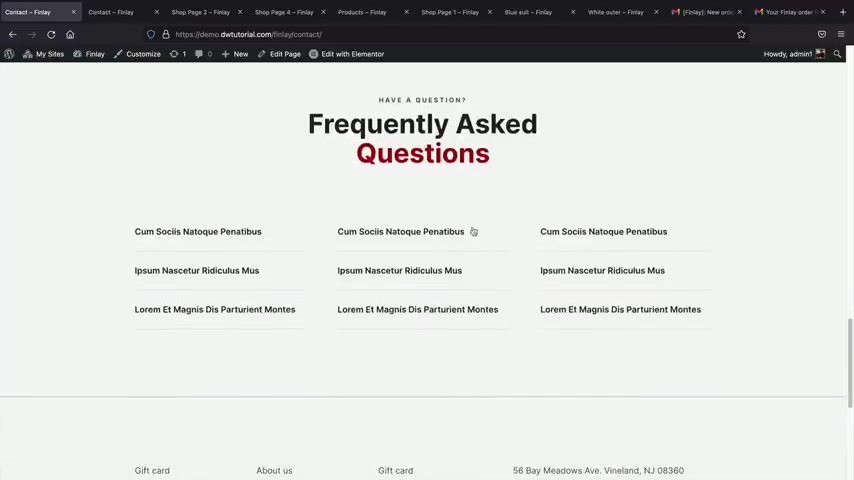
This is really good to have because this can actually save time with emails because um you know , maybe they're asking about a specific product .
You could just say , yeah , the product is , you know , this or we offer refunds or we don't offer refunds .
So you can add this to your , um , you know , your contact page .
And then here again , we have the footer at the bottom of the website .
So next , let me show you guys our shop pages .
Now , we have created four free shop pages for you guys .
So no matter what kind of niche you're in , there's definitely something for you .
Here's our first shop page and we added these products right here and then we have our favorite products on the right side and they're kind of highlighted here to kind of maybe increase uh engagements for your e-commerce store .
We also have our best selling items and then below that , if we keep scrolling , we have product categories .
So let's say , for example , you know , they just didn't find out what they're looking for , they couldn't find it .
Not to worry .
We finish it off with some uh product categories here at the bottom .
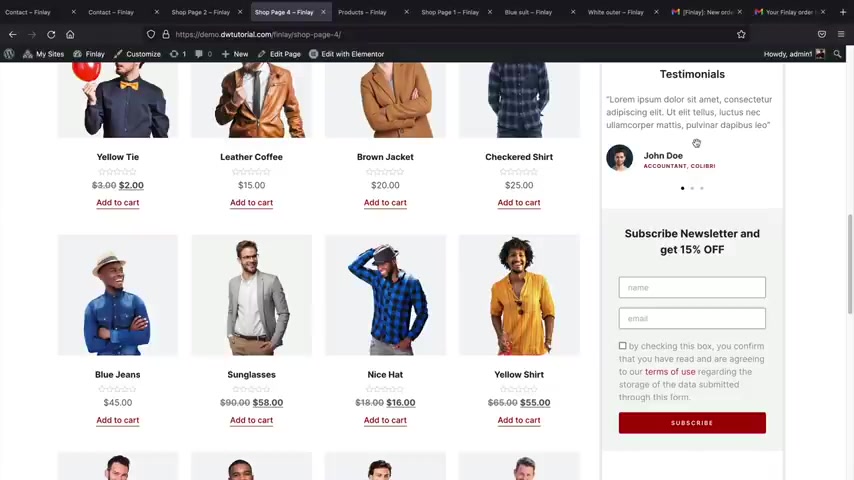
The next shop page is shop page four where users can just get greeted with this banner and if they click on shop now it'll take them down to the products .
And on the right side , we added just a lot of up sells and testimonials to kind of increase engagements for your store .
Uh You know , maybe people , they see these testimonials from Twitter or something and they're like , oh man , that's cool .
I want to go buy it now , you know , like , who knows ?
Like you never know .
You know , and then here we have the subscribe newsletter where they can uh subscribe while they're shopping on your store .
So it's a nice shop page .
The next is shop page three .
So this is the next shop page and this is more geared for people who have a larger store .
So I'll go ahead and click on shop .
Now , on the left side , we have filters .
So we have filter by price .
We can filter by color .
They can also search for products if you have a very large store .
And they can also search by product categories here on the left side and then scrolling down here .
We have some product categories .
So this can be something like again , like , you know , women's Children , men or iphones or something .
So they can shop by product categories by just clicking on this and shopping , you know , directly for categories on your site .
So let's go ahead and take a look at the next page .
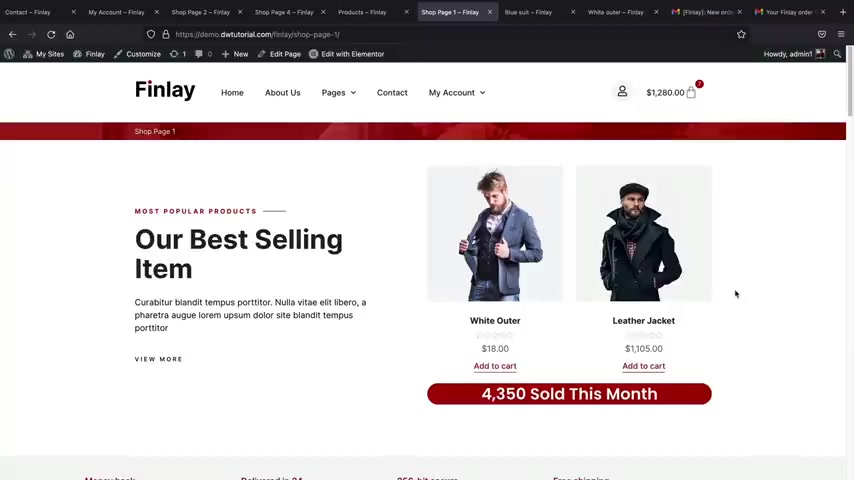
So next we have shop page one and this is geared more for uh directly selling certain products .
So here we're just kind of showcasing these products .
We're really trying to Upsell them saying these are our best products .
We have how many were sold .
And then we have these icons here reinforcing it saying like yeah , delivered in 24 hours money back guarantee .
So you can just add your products here and just kind of highlight them on your e-commerce websites .
And then below that , we just added some more , more products here below that just in case that they wanted to keep browsing around .
Ok ?
So now that I showed you guys the shop pages , let me quickly show you all the product page .
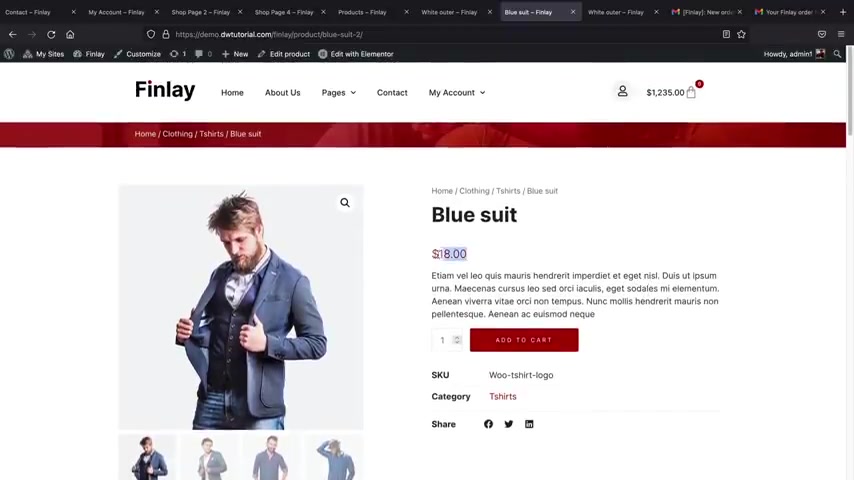
Let's go ahead and click on one of these products and this is one of the product pages .
And on the left side , we have like the title of the product .
We have the price and then we have some description .
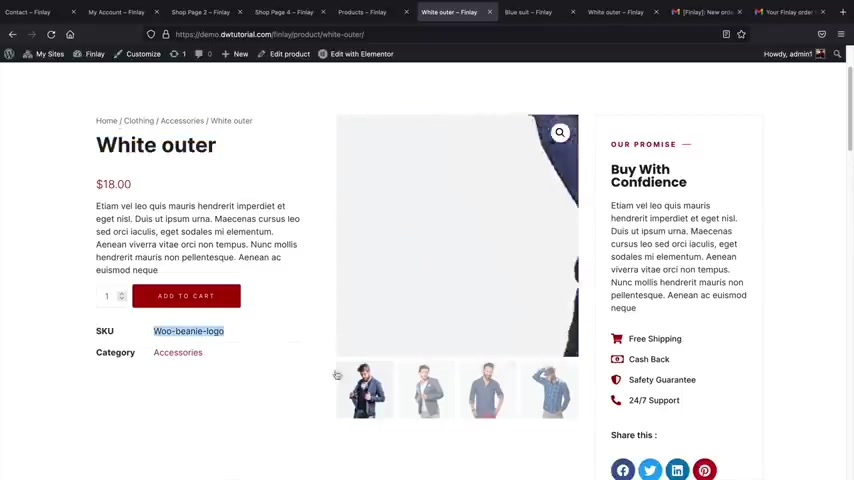
We also have like skew numbers and the categories that are in and in the middle , we have the product where we can kind of get like a better view of it .
And then also if you have different images of the product , you can add more for the product gallery .
On the right side , we added this little Upsell banner where users can kind of take a look at it saying , all right , buy it with confidence , you can talk about your refunds , free shipping , cash back and also support .
And then also we added some social icons here uh right below that .
And then below that , we added some description for the products and just additional information .
And this could be something like , you know , made in , you know , India or made in America .
And then below that , we have related products where we have products that are related to the current product that they are viewing .
Next , we have the original product .
So this is just another product layout and this is something a little bit more ideal , right ?
So we just have like the title of the product , we have the price , we have some description , you just can just click on add to the carts and then just add the product directly to their cart and then they can share this as well to their favorite social network .
And then below that , we have some more information like additional information .
Uh we can see reviews for the product and just some general description about the product and stuff like that .
And then we finish it off here with the related products there at the bottom .
So now that we added this product to the cart , let's take a look at it .
Let's go ahead and click on a view carts .
So this is the shopping cart and this is a custom shopping cart that I'll be giving you guys for free in this video .
And we have these steps , you know , we have step one , the shopping cart , step two , check out and then step three order completes .
And then below that , we have a list of all the products .
Now you guys can also create your own coupon codes and you can apply the coupon codes and give them like a 50% discount or a 20% discount or whatever discount you want .
I'll walk you guys through how to create coupon codes uh for your e-commerce websites .
And then below that , we have like these credit cards and you know , ssl protection just to kind of , you know , reinforce the buyer about uh our store and then I'll click on , proceed to check out .
Ok .
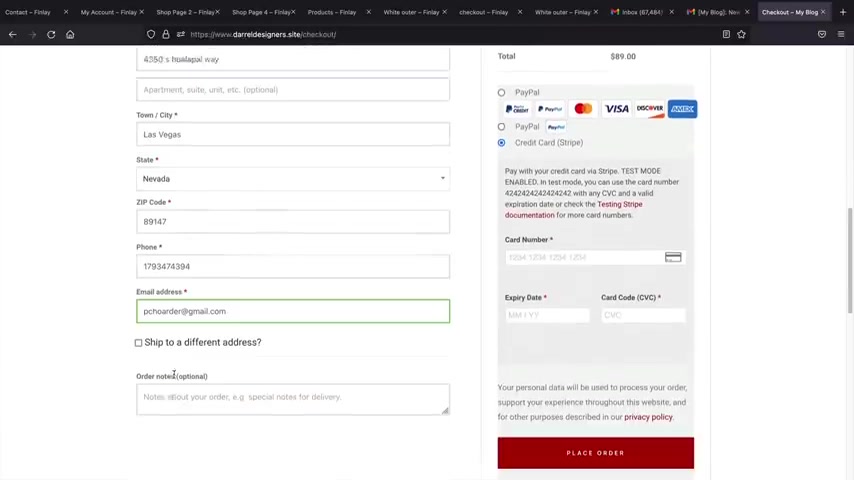
So this is the last step and this is the checkout step .
So you'll see that uh we are currently on the checkout step and the next step is order completes .
And if we scroll down , we'll see our billing information on the left side .
So here they can input their , you know , their name , they can put their address , they can also put their phone number and email address .
They may also ship to another address like if it's like their girlfriend or something and they want to send it to someone else .
They can always do that on the right side .
We have the payment method so they can pay with paypal or credit card .
So here I'll enter my credit card , my real credit card .
I'm just kidding guys .
It's , it's , it's a test , you know , it's a test mode .
You know , I , I do get emails from users saying uh that I left my real info on youtube and I was like , no , it's in test mode .
So once the user inputs their card information , uh they'll then click on place order and that's it .
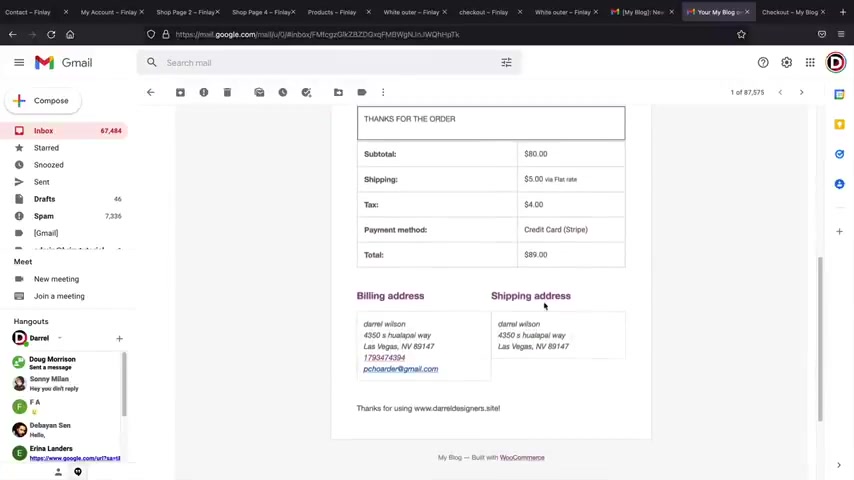
So now your customers will be brought to a Thank you page and here they can see what they've purchased uh the product and also they can see the tax and shipping and total .
Now , once the user has purchased a product on your e-commerce website , both parties will be notified via email .
So for example , I'll go to my email .
So your customers will automatically get a confirmation email notifying them of their purchase or they will see what they bought and they can see their billing and their shipping address .
And you will also get an email notifying you of a new order .
So it'll tell you that someone has purchased something on your website and then you might want to ship the product to their shipping address .
Well , party people , I hope you guys enjoyed what you saw .
You know , it's a really clean e-commerce website .
It's really simple to navigate .
It comes with a free starter template and will be making this website with free tools .
So on a more personal note , guys , you know , off the script and everything .
We worked so long and hard on this video , we spent weeks making these starter templates and also creating an outline that step by step .
That's also really easy to follow .
So I really do hope you guys enjoy this video .
We've also created this tutorial for both three elements for users and pro users because we realize not everyone wants to upgrade .
So we will be showing you how to use elementary free version yet .
We'll also be showing you how to use the pro version just in case you guys decide to upgrade .
So you guys ready .
Let's go ahead and create your e-commerce website with wordpress .
So we are going to build your new e-commerce website in six simple steps and we will use this checklist throughout the video to help you follow along in this e-commerce tutorial .
All right .
So for step one , we will get our domain and web hosting .
A domain is the web address for your e-commerce website .
So for example , your e-commerce website dot com or pets R dot com .
Then we'll install wordpress onto your domain and then adjust the general settings .
Step two , design , the website .
We will design and customize your new e-commerce website with the element or page builder .
Now , we have geared this video for both free and pro users .
We will first start out with the free version of Element to , to help first time users build their e-commerce website .
Then later in the video , I'll show you how to use the Element or pro version and all of its features to extend the power of your e-commerce website .
Step three will create products .
After you get comfortable with the page builder , we'll move on to step three and we will start adding products to your e-commerce website .
I'll show you how to price your products , create categories , add product descriptions and also upload your images .
Step four , the theme customizer .
I'll introduce you all to the theme customizer and plugins .
There's a ton of free plugins that can help enhance your e-commerce website to convert more sales .
So I'll cover some of these in the video and Step five , an intro to elementary pro .
I'll be introducing you all to the element or theme builder .
I'll show you how to build custom headers and footers , custom shot pages and custom product pages that you can fully customize .
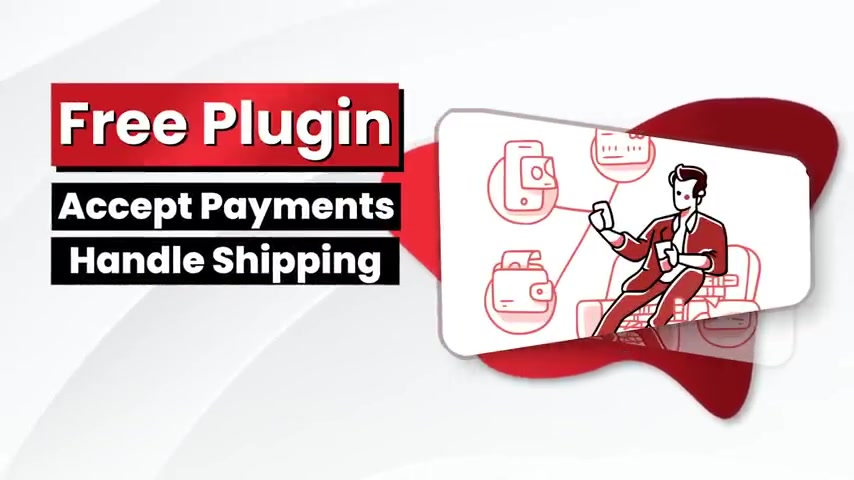
Step six , the Woocommerce settings .
Woocommerce is a free plug in that can be used to accept payments , handle shipping and taxes for your e-commerce website .
I'll show you how to automate your taxes , set up shipping and accept credit card payments from anywhere around the world .
Step seven marketing .
So after you get your e-commerce website up and running , we'll then go through the marketing guide on how to make your first sale with your e-commerce website .
Now , there is a link in the description of this video and this will take us to step one , which is to purchase web hosting and welcome to name here dot com .
Now , I've been recommending name here dot com for years and people love it .
In fact , this month alone , we have had zero down time with name hero .
So you will have a really reliable websites and also our low time is under one second .
So we do test these servers to make sure that the websites are fast and uh reliable .
So you guys will have a really good deal with name here dot com .
Now once you guys get here , go ahead and click on get started .
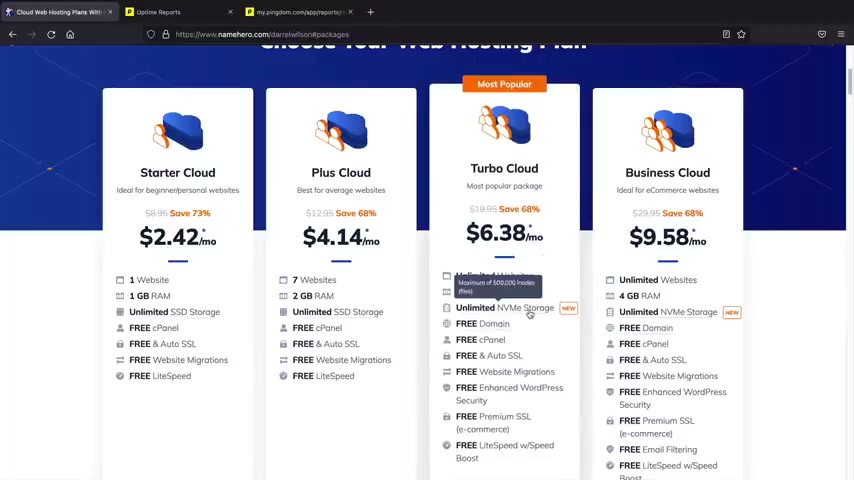
Now , now we have four different plans .
We have the starter cloud , the plus cloud , the turbo cloud and the business cloud .
Now , it really depends on your budgets , but I recommend the Turbo cloud because with this , you can host unlimited websites .
You also do get access to the new ND storage , which is gives you a little bit more performance uh for your website .
But uh go ahead and just select the package that works best for you .
Obviously , I'd probably go with the Turbo Cloud because you do get more performance .
But if you're on a budget , you can always go with the starter cloud or the plus cloud as well .
And once you guys select the package , you'll go ahead and scroll down and then you'll click on order now .
All right , cool .
So next we're going to enter in our domain name .
So a domain name is the web address that you're using .
So for example , name here dot com , you can see here .
I was kind of messing around with this .
So we have a drones R us dot com .
You can put anything that you want .
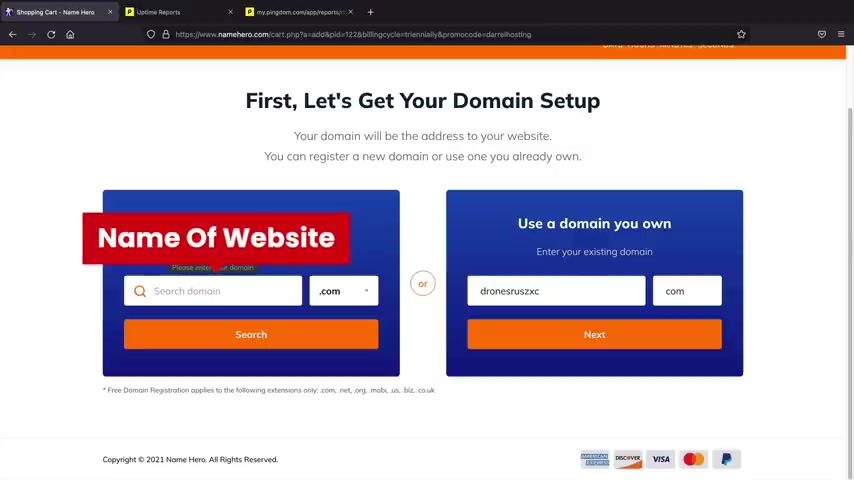
So this would be the name of your website for your ecommerce website .
For example , I'll just do ecommerce tutorials , the Z and search .
Oh , hopefully it's available .
There we go .
Yeah .
So you guys also do get a free domain with name Hero .
So that's pretty cool .
You guys save yourself another , I think it's like 14 bucks a year .
Uh Once you guys select the domain , you know , give it some thoughts .
I know it's , you know , it's personal , it's your website .
So give it some thoughts and once you're here , you'll click on continue .
All right .
Next , we need to select our building cycle .
Now , uh , personally , I recommend one year , uh , one year , you still get a large discount and this will also help you decide if this is for you or not .
So , go ahead and select one year or a billing cycle that works best for you and we're gonna scroll down here .
Now , there are some up sells and personally , I don't think you really need any of these up sells .
Uh A lot of these are available with free plugins and stuff like that .
So , uh I wouldn't recommend any of them .
Uh We do get a free SSL with name Hero .
That's pretty cool .
And we do need that to accept credit card payments on our website .
So that's another pretty cool reason uh , to sign up with name Hero here .
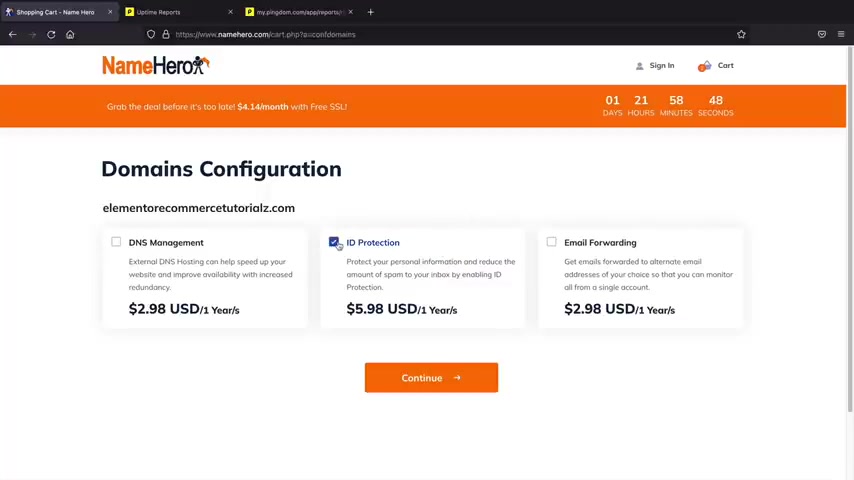
I'll click on continue on the right side .
Now , this I do recommend I recommend getting the ID protection and this will protect your personal information from spammers and companies trying to sell you all sorts of stuff .
Trust me guys .
If you don't have that checked , you're gonna get emails for Viagra from Seo companies from uh all sorts of really crazy companies .
So uh I recommend the ID protection .
Uh Once you select that , you'll click on continue and for a year of hosting with name Hero , depending on your package , you can see you're paying less than $100 for the entire year .
So you do get a really good value with name hero dot com .
And here you can see we have the hosting package , we have our domain registration and you guys did save quite a bit of money uh using that link in the description of this video .
Now , once you guys are here , we'll go ahead and scroll down and you'll need to create account .
So you'll put in your first name , your last name , your email , your billing address , all this good stuff .
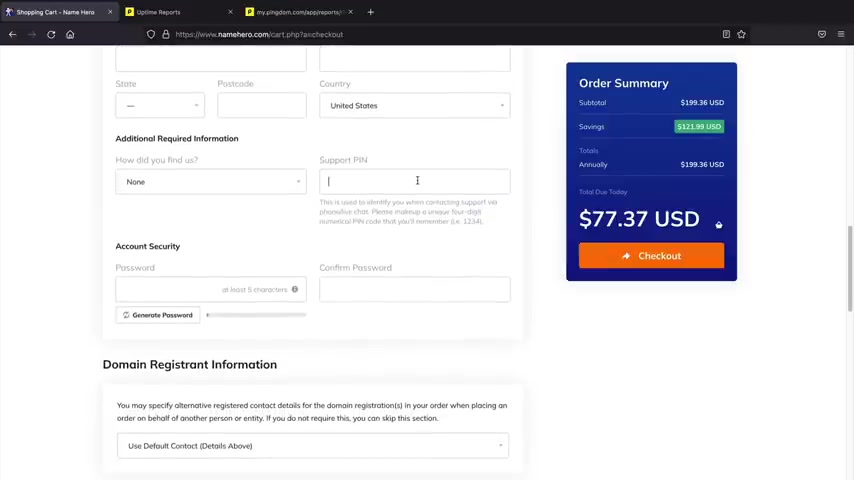
I'm sure you guys have seen these uh screens many times on the internet .
Now , one thing I do want to mention uh try to write down your support pin .
Uh This will actually help verify .
Um Once you need like help or something , they'll ask you for your pin .
So they'll verify that it's you who's making the phone call or messaging them on live chat .
And also keep scrolling down here .
You can pay with credit card and paypal and coin base .
Oh Cryptocurrency and also uh credit card looks like they have it twice here .
But yeah , it doesn't really matter .
So you'll go ahead and select a uh payment method that works best for you .
And also , you'll go ahead and fill in these payment details and make sure to enter in your social security number .
I'm just joking .
It's a joke .
There's no social security needed .
And uh once you're done with that , you will click on .
I have read yada yada yada and I'm sure you guys will read the terms of service , right ?
And once you're done with that , you'll click on the checkouts and I will meet you in the customer portal .
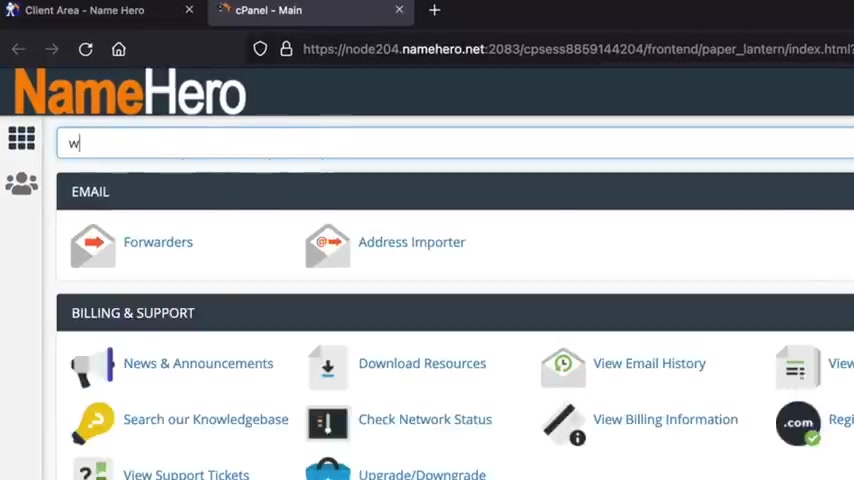
All right , and welcome to your new dashboard .
So this is your current dashboard .

As you guys can see , I had many different packages , many domains and I also have tickets with name hero and they really helped me out with all of my problems .
So this is just your interface on the left side , you can see your hosting packages .
These are your current domains , you can always register a new domain , uh also billing .
So if you want to see your payments or you wanna add funds or you wanna adjust your payment method , you can do that here and also the support .
So if you guys run into something weird , I know with websites things just kind of get weird sometimes .
Uh you guys can always open a ticket here and they will help you out with all your problems and they are pretty fast .
I mean , I think maybe under one hour they can help you guys with all your problems .
So once you guys are here .
Let's go ahead and install wordpress onto our new domain .
You'll first click on my cloud .
Now , here we have hosting packages now , you should probably only have one here .
So just go ahead and click on your hosting package .
And next , we're going to see this log into C panel .
Go ahead and click on login to C panel .
All right , cool .
So now we're going to go ahead and install wordpress onto our domain .
So up here , we'll type in wordpress .
Here we go .
We have Wordpress Manager by Soulus .
We'll click on this .
All right .
And from here we're going to install wordpress .
You guys can see I have many installations of wordpress already , but right here you'll click on install and now we're going to look for the domain that we purchased .
So right here , you have the choose domain section .
So you'll probably see your domain that you purchased .
I'll just go ahead and select this one , but you're going to select the domain that you purchased and for the protocol .
Make sure this is htps , which is the SSL now for Indi directory .
Make sure nothing is here .
All right , I don't know why that's there by default , but oops , oops , but uh make sure nothing is there because that will install your domain onto like your website dot com slash something and you don't want that there .
Yeah , just don't have that there .
Make sure that's make sure that's empty now for the admin user name .
Go ahead and give yourself an admin user name and a password .
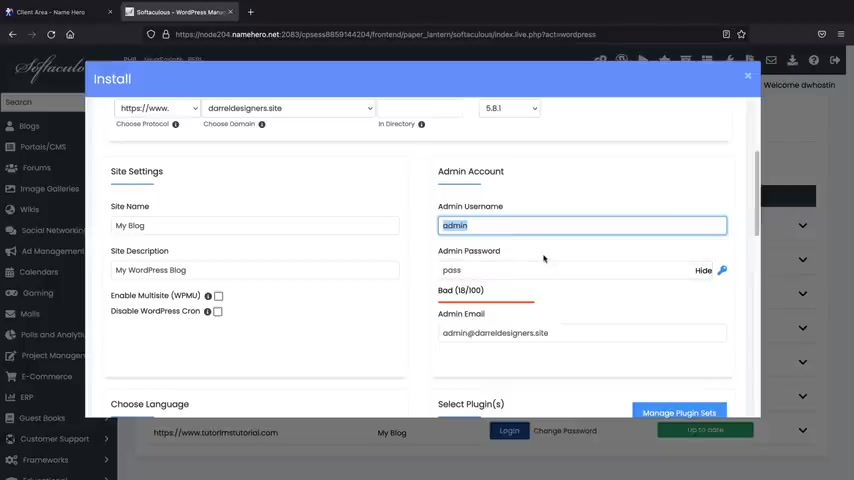
And this is what we are going to use to log into the website .
So whenever you want to build your website , you're going to use these login credentials .
So make sure you write these down , I'll just put admin , never put past guys .
Uh Make sure this is something unique .
I'll just put uh Paddy whack and your admin email .
Make sure that this is an email that you have access to .
Because when you forget your password , they will send this information to your email .
So I'll put in my , my gmail account here , my famous PC hoarder , which I do get tons of spam .
And below that , you can always select your language , we can always adjust the language as well uh inside the wordpress dashboard and I'll show you how to do that in just a bit and we're gonna keep scrolling down here to the bottom .
They have these other themes they want us to use , but uh we're not going to use these and right here you'll click on install .
Yeah , they said 3 to 4 minutes .
That was not 3 to 4 minutes .
Right now .
Here we have install wordpress and this is the administrative URL administrative URL .
So just go ahead and click on this link and this will log you in to your website .
All right .
Awesome .
So now we have a wordpress installed and our website is now live on the internet .
And if you want to see what your website looks like right now on the internet at the top left , right here , you'll just click on visit sites and this is the current theme that they are giving us and it is really bland , really boring , ugly , but not to worry , we'll make it look really good .
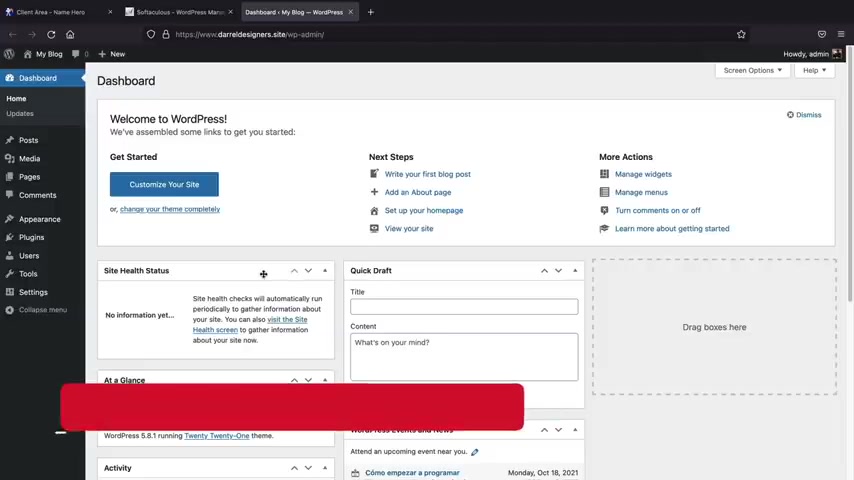
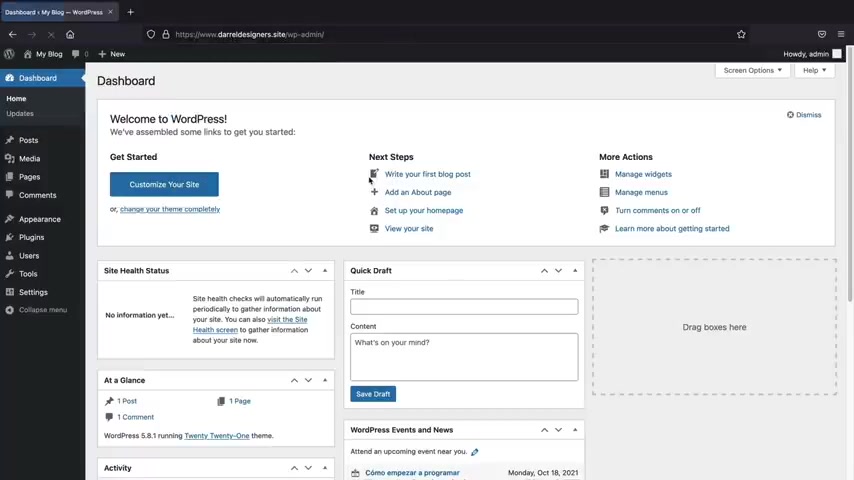
So to go back to your dashboard , go ahead up here and click on dashboard now that we have our website online .
Now , let's go ahead and adjust some of these general settings .
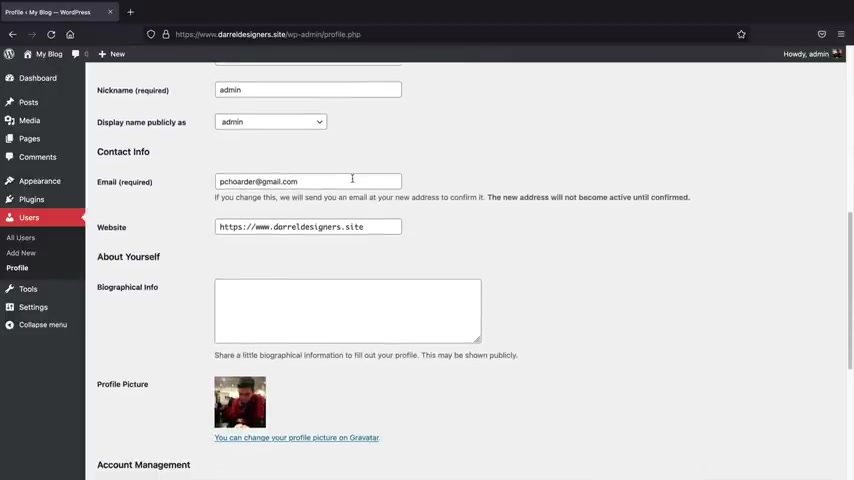
The first thing we wanna do is go to users and click on a profile .
Now in the future , if you guys ever lose your password or if you want to change the color scheme , this is where you're going to do it .
Uh , I think for this video we're gonna use midnight .
I just like midnight .
It's really easy to see .
Uh , these other ones are just really , really tacky .
I mean , this is , that's way too much , you know .
So , yeah , I think we're gonna go at midnight .
I just like that .
It's a lot easier to see .
And uh , we're gonna scroll down here now , you can always adjust your email .
So , uh , you can always change your email and remember this is important because if you forget your password , the password will be sent to that specific email .
So you can always adjust that at any time .
And below that , we have a new password .
This is where you're going to uh change your password .
So for wordpress , if you ever want to change your password , this is where you're going to do it .
And once you've made all the changes that you want , you'll go ahead and click on update profile .
Now , let's say , for example , you guys speak a different language on the left side .
Right here , we have settings we'll click on in general .
Now , here you can enter your email or you can update it at any time .
So if you get a new email address and you want to update it , you would do that right there .
And below that , we have the site language .
Now , if you change this , uh this will actually apply to the back end .
So you can put any language that you speak .
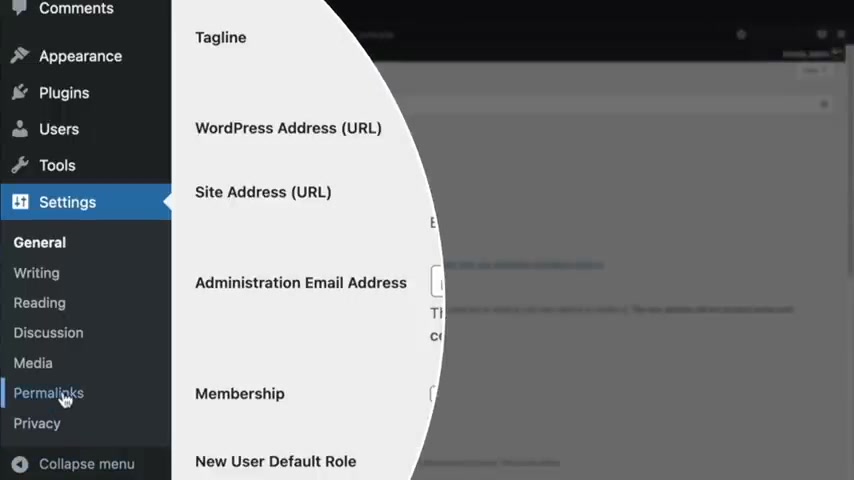
So if you speak Spanish , Portuguese , Arabic , Hindi , whatever you can adjust the language or your uh back end options .
And below that , we'll go ahead and click on save changes .
The next thing that we need to do is we need to adjust our Perma links on the left side , you go and see Perma links .
Now , here we have a few options , but you want to select this as post name .
And the reason why we do this is because when you go to a website , you see like you know your website dot com slash shop , right ?
Not like all this , you know , numbers and it just looks really cluttered and ugly .
And the post name option is the best for seo purposes .
So once you select the post name , you'll scroll down and click on save changes .
All right .
Now , let's say , for example , you guys want to log in and log out of your websites , maybe you're at a friend's house and you wanna , you know , mess around with wordpress .
Uh First , what I'll do is I will log out .
So right here , I'll go ahead and click on , log out .
So right now I'm logged out of my website and there's no way for me to enter it .
So whenever you want to log into your website and make changes , you'll go to your address , bar and type in dash WP , dash admin and press .
Enter from here .
You guys can enter in your login credentials that you guys use to install wordpress .
So I believe mine was admin and it was Paddy W right , Paty W we can always take a look here , remember me and log in .
So that's how you guys can log in and log out of your wordpress website .
So you can pretty much work on your website from any location .
All right .
And the next thing we're going to do is we're going to install a wordpress theme .
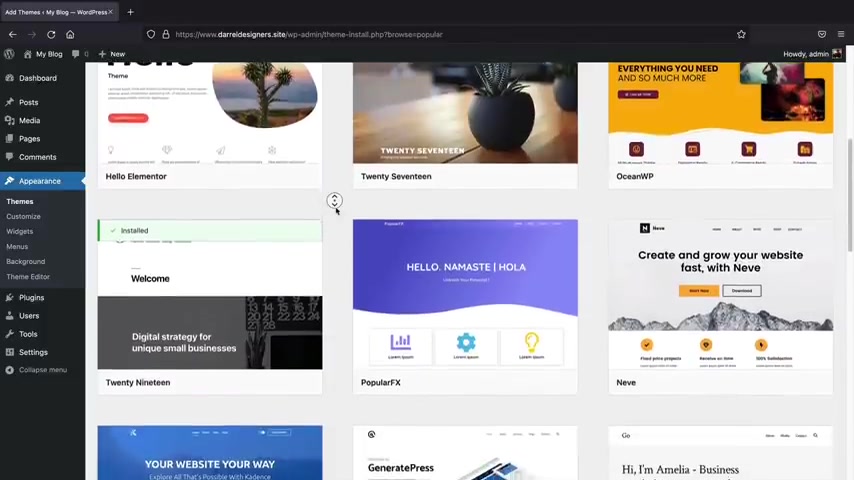
So on the left side , we have appearance and themes .
Let's make it , let's make our site look a little bit better because we have this default green and it's just , it's not working , you know , it is not working on the top right here .
You'll click on add new and here we'll display a list of wordpress themes .
Now , essentially what Word wordpress themes are is they are kind of like the structure of your websites .
However , with today's page builders , uh a lot of these themes are becoming less and less important and the page builders are doing most of the work .
Um So you guys like , uh I know you guys see all these beautiful demos , but most of this is done with the actual page builder .
But the theme that we're gonna be using for this video is Astra .
So this is it right here .
It's Astra .
You can also search for it by typing in a STR A and it should display right here , Astro .
There we go .
So go ahead and click on this .
You guys can see it has a lot of positive reviews .
It's actually the most popular free wordpress theme because it's , it's pretty simple .
It's really lightweight on the top right here .
You'll click on install .
So now we're installing it on to uh our Wordpress website and then we'll click on activate .
All right , cool .
So now we have installed Astra onto our website .
And if you want to see your website on the top left , you can see visit sites and you kind of see here how the entire website has sort of changed and adjusted depending on the theme that we picked .
Now , the next thing I want to do is we want to create some pages so that we can start using the page builder , right ?
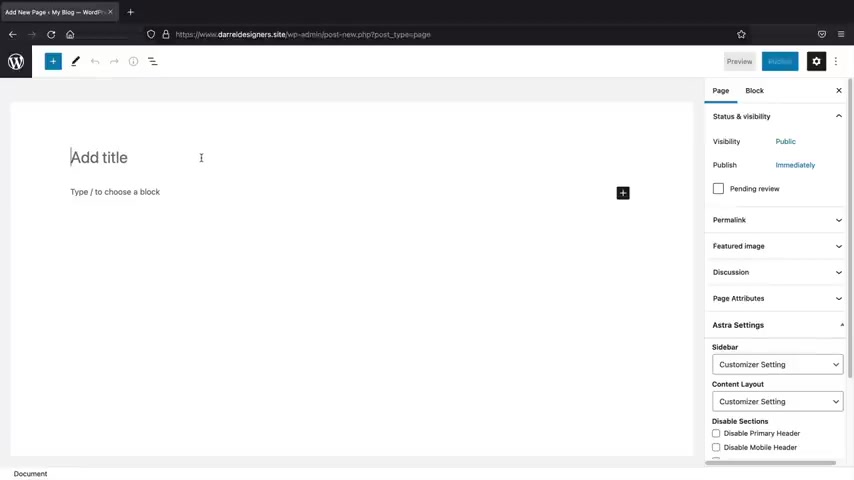
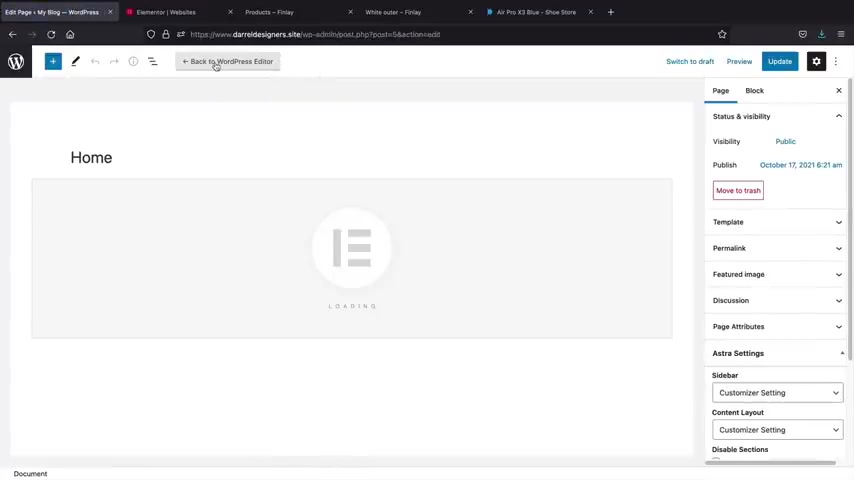
So let's create some pages on the top right here under plus new , we'll click on page now .
This is pretty basic .
So uh what page is this ?
Well , I'm gonna close this little welcome box .
This is our home page and up here , I'll click on publish and publish .
Now , let's say , for example , you want to make another page , I'll click on this little word press , little dash and here's our current pages .
So you can see we have the home page and we also have these other two pages that were created by default , but I , I don't want to use these pages .
So I'm gonna go ahead and click on these and we're going to move this to the trash and delete it .
So that's how you guys can always delete pages .
Now up here we have a new , let's create the about us , right ?
Supposed to be like the about us and on the top right , publish and publish and let's do that one more time .
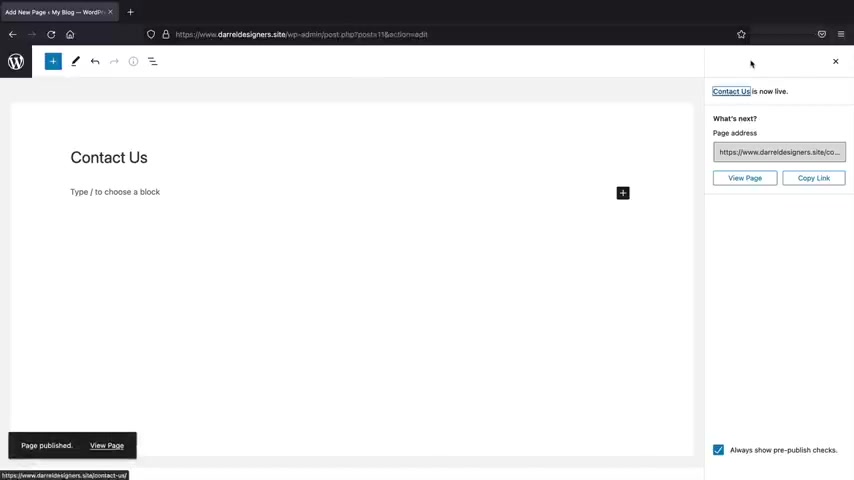
Now let's make the contact page , contact us and publish and publish .
All right , cool .
Now we need to assign these to the menu .
So if you notice on our website , we don't really have a menu .
So if you see it , we don't have a menu or we do have a menu , but it's just not really adjusted .
Well , I mean , the home is on the back .
Let's now create a menu .
Let's go to our dashboard and under appearance .
We'll click on menus .
So I'll go ahead and give your menu a name .
I think menu one is just something , you know , you guys can see main menu for website , whatever .
It doesn't really matter if this is not visible to anybody .
And I'm going to click on create menu here .
We have those pages that we made .
You can see all of them under view .
All , go ahead and add all of these .
I know we see two home pages and that's OK .
I'll explain that in just a bit and I'll click on a menu .
So this is a custom link and this is the default a link that it creates for us when you install wordpress .
So I want to get rid of this .

So whenever you want to like get rid of something on your menu , just go ahead and click on this , drop down arrow and then remove it .
And now we can adjust this by dragging and dropping like that .
And this is the primary menu .
So I want to select that and I'll click on save menu .
All right , cool .
Now let's go to visit site and now you can see that we have our pages .
So we have the home page the about us page , the contact us .
Pretty cool .
Now , what I wanna do next is I want to assign the home page as a home page because if you notice we go to our website right here , uh and we press enter , it brings us to this random page and this is not the home page .
So let's now assign the home page as our home page on the top right here .
We'll click on customize .
This is the theme customizer and we'll talk more about the theme customizer a little bit later .
Uh In chapter , I believe it's chapter three , we'll talk more about the theme options , but we just need to make one small setting here under the home page settings at the bottom .
Go ahead and click on this and I want to select a static page and here I want to select the home page as our home page and then I'll click on publish and now we can close the theme customizer .
Next , let's move on to the next step and let's install the page builder in order to build out our e-commerce websites .
Now , there is a free version and there is also a pro version of this page builder and I'll explain the differences between both in the next section .
Now , there is a link in the description of this video and I'll take you to a page to purchase the pro version .
You guys can also get there by going to Durra Wilson dot com slash mentor .
Now , this is an affiliate link .
So it does give me a small commission and helps me and my team make these layouts for you guys all for free because there's a lot of work behind our , behind our templates .
Now , I'll go ahead and scroll down here and explain these pricing plans .
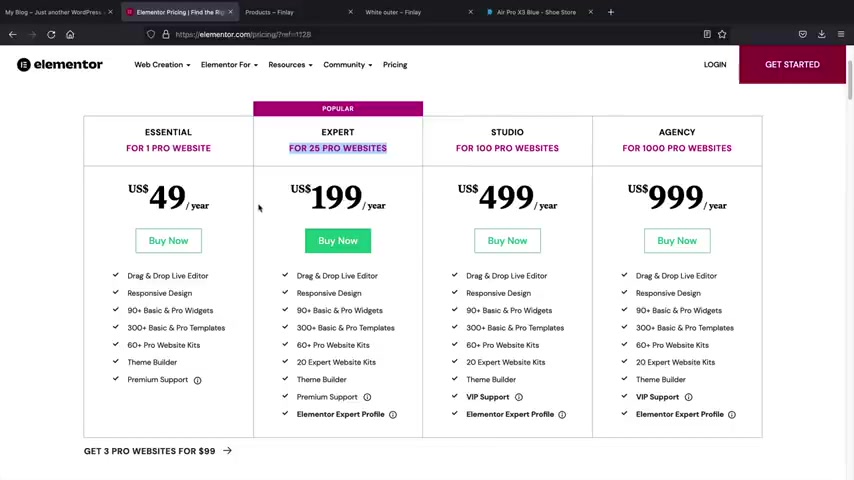
So they have five different pricing plans .
And the biggest difference is that uh they're for a specific amount of websites .
So the essential is for one website .
There's also the pro it looks like they , they kind of hit it .
But um that is uh three websites for $100 and there's also the expert plan .
Now , one thing to note guys that this company does give you a 30 day money back guarantee for any reason whatsoever .
So even if you buy it and it doesn't work out for you not to order , you can always get your money back .
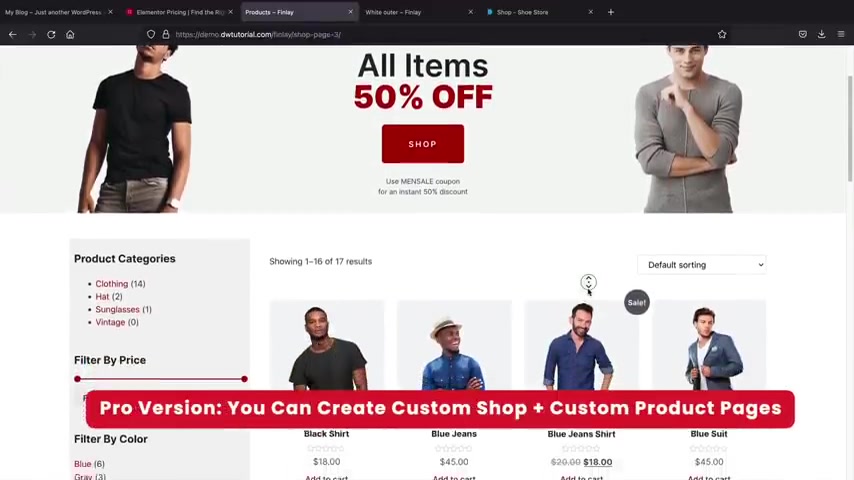
Now with the pro version of to uh you can create a custom shop page like this .
So you'll see that the demo here , we have this really nice custom shop page .
We've I actually created four custom shot pages for you guys and you guys can check this demo in the description of this video .
Also with the pro version , you can build out this custom header at the top and also have a custom product page .
So you'll see that this is a custom product page that we specifically built for you guys for this video .
Now , if you guys do decide to use just the free version that will still work out pretty well because you can have a shot page that look like this where you just have a list of the products .
And then also you can click on the product and this would be just the default free version of mentor .
So it still works .
You can still build an e-commerce website with both the free and the pro version .
However , I'll be installing the pro version on the websites .
I would probably go with the expert plan because that gives you enough websites and $20 guys is really not a lot of money , you know , because look how much Starbucks I drink every day .
I spend probably 10 bucks today on Starbucks .
So , but uh , go ahead and purchase a plan that works best for you .
I don't think the studio or the agency is , you know , ideal for beginners .
Definitely not .
That's a lot of websites and that's more for people like me who manage various uh websites .
So , uh , go ahead and click on buy now .
All right .
And then you'll go ahead and fill out your information , your billing information and all of this stuff .
And yeah , I think you guys can pay with a credit card or something .
I don't have a discount code so they don't really give up discount codes for elements or pro unfortunately , but you'll go ahead and put in your credit card or you can pay with paypal right here and then I will meet you guys on the very next page .
All right , cool .
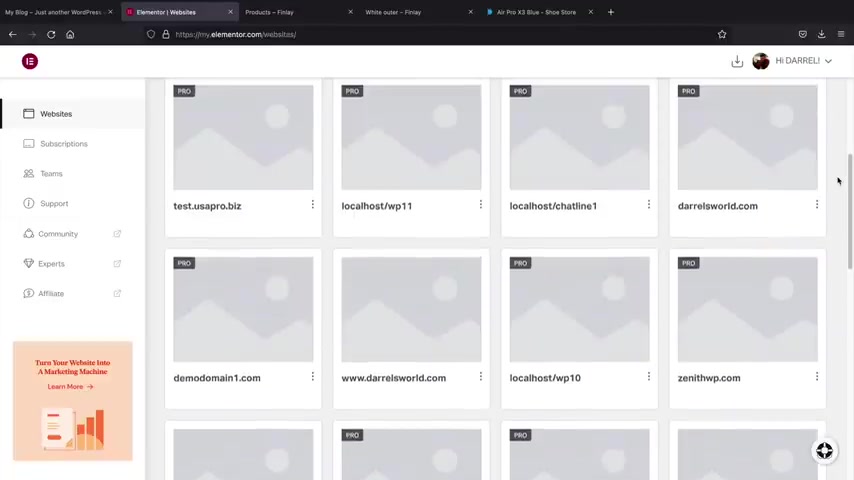
Now , once you guys purchase elementary , you guys will be brought to your uh element or dashboard and you guys can see , I do have a lot of different websites here .
So you know , the plan for me , you know , I obviously host a lot of websites .
But once you guys get here , you can just go ahead and click on this little download button and this will allow you to download Element or pro .
So go ahead and click on Element or pro and I'll save this .
Now , let's go back to our website and let's upload element to onto our uh websites .
So first let's go ahead and go to dashboard and then we'll go to plugins and then we'll go to add new .
Now , if you're looking for the free version of Element to , you'll go right here and type in element to and this is the plug in that you'll need to install .
So you can click on install now and then you'll click on activate .
All right .
So there is a mentor .
Now , for those of you who want to go with the pro version , you'll then go ahead and click on add new upload , plug in browse .
And then right here we have elements for pro .
So I'll go ahead and open that and install now .
All right .
So now we'll go ahead and click on activate , plug in next .
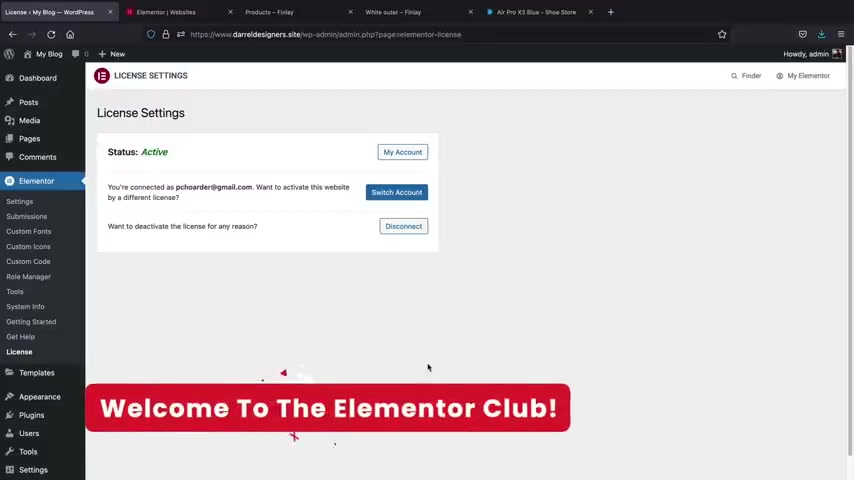
You might need to connect your elements or pro license .
So right here , just go ahead and click on connect and activate .
They're just going to link your account that you created with the website .
So you'll see that this just connects to their websites .
So I'll click on , activate .
All right .
Awesome .
So now we have installed element or pro .
Now there is two more plugins that we need to install .
So go back to plugins and click on add new .
Essentially .
What plugins are guys , plugins are like applications for your website .
So you know how for your iphone , you guys have an application for your bank or for uh you know , if you want to have a better camera filter or whatever , there is an application slash plug-in for pretty much everything .
For example , this one can migrate your website .
This one is security .
You know , a lot of these plugins guys , I haven't really used a lot of them , but uh they do have tons of plugins .
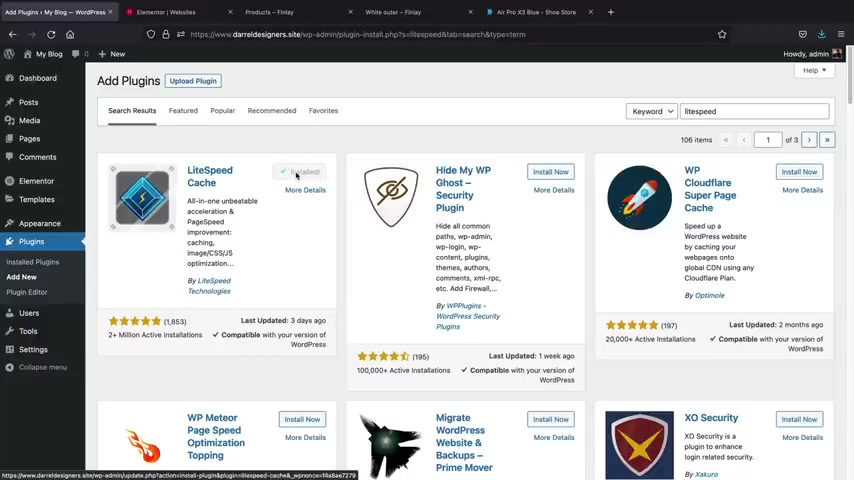
Now , the plug in that I want you guys to install is this one right here called lights speeded cache .
You can go ahead and go up here and type in light speed cache .
Every website needs a cashing plug-in .
A cashing plug-in essentially makes your site a lot more faster .
Go ahead and click on install now and in case you're brand new .
Um Whenever you make changes on your websites , uh you might want to cash your website because then that will actually make sure the changes are saved or just appear to be saved , you'll get it later , but go ahead and click on activate and I want to install one more plug in .
Go ahead and click on add new and here we're going to type in essentials .
This is the plug in that we're going to use and go ahead and click on install .
Now .
The essentials add-ons plug in are just basically giving you a lot more elements for element or so it just gives you a lot more uh more modules to use and it just gives you a little bit more uh you know , playing room with your builder .
So go ahead and click on activate now .
There's a short set up wizard .
So let's go ahead and just click on next .
Now , there's just one thing that we need to add here and this is mainly for the free users .
So right here , click on product grid and click on next here .
We're just going to click on next .
We're going to skip this and we're also going to skip this .
These are just additional plugins that they want us to install .
They're trying to sell us .
But uh yeah , I don't want to use those and then I'll click on finish .
All right .
So now we're ready to build our website .
Let's go ahead and go back to pages and click on all pages .
Now , we first want to design the home page .
So this is our home page .
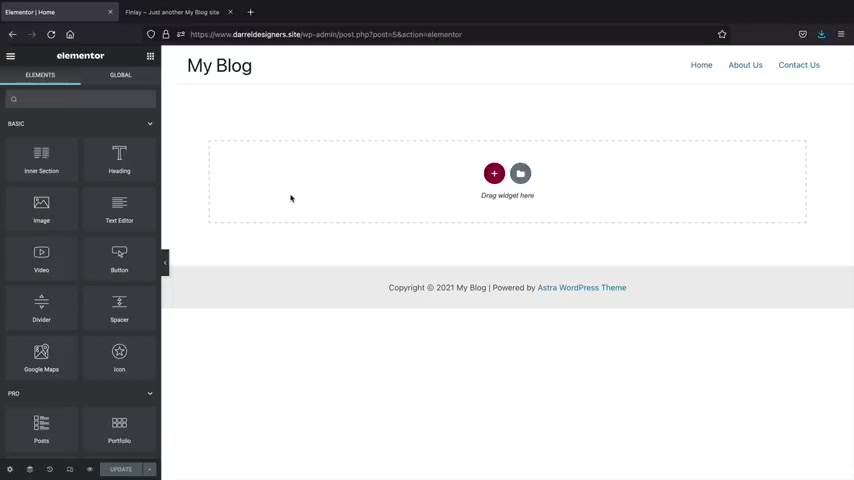
I'll click on edit and now we're finally ready to use Element to on our site .
So at the top right here , click on edit with Element to All right , party people get your thinking caps on because I'm gonna go ahead and explain to you how everything works with this builder .
Now , one thing I want to go ahead and get rid of this right here .
This is their little um Upsell thing .
Just click on .
Don't show this again and click on submit .
They're just trying to get us to buy stuff .
We don't , we don't want that .
All right , congratulations .
You guys now have your domain and hosting .
It's pretty simple right now .
We can go on to step two where we can start designing our website using the elements or page builder .
It's really easy to get started after probably 10 minutes of using it , you'll , you'll get the hang of it .
So let's jump into it .
Let's first talk about the page builder and how everything works .
Let's say , for example , you want to create columns , right ?
So we'll click on , add a new section and then we have specific columns .
So we have 1234 and you can just click on like for example , the three column row right now , we have three columns and then we'll click on these little elements tab and now you can drag in elements in these boxes .
So for example , we have this heading , text , click on this again , we have this text editor and then also we have a button here like that .
All right .
So you can just kind of like see how this works .
You guys can drag in a video .
Uh You can also uh you know , dragon whatever .
Now these are pro elements .
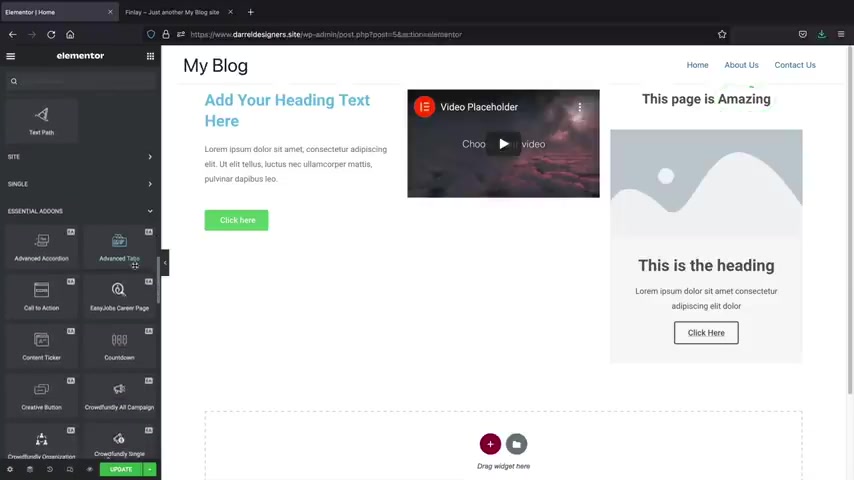
So if you did purchase the pro version , you guys can use some of these pro elements , like animated headlines where it has that little animation and then they do have uh some other ones like the call to action call to action is pretty good .
You can just kind of drag it right there with that little blue thing .
So that's how you can kind of drag in elements .
Now , the plug-in that we installed was called the Essentials add on plug in .
And if you scroll down right here , you're gonna see essential add-ons .
So these are the additional elements that you get with .
Um mentor and you guys can use this , you know , if you want to , you know , explore and mess around maybe like the info box .
They have like an info box and they're just different elements and you know , they just all have a unique style because I just want you guys to have a little bit more control with your e-commerce website .
Um Here we have like a tool tip box .
I don't know what that is .
See , you know , a lot of these guys , I don't even know what they do .
I'll be very honest , but uh that's just the basics of taking elements and dragging them on to your page .
Now , I know this looks terrible , but not to worry .
So let's say for example , I want to delete an element , I'll right , click on this pencil and delete it right , right , click and delete , right , click and delete .
Now , I can also duplicate elements by right clicking and clicking on .
Duplicate , right .
And it'll just go ahead and duplicate that uh here , duplicates and then duplicates and then we can also take these elements and drag them around as well .
So we can just click on that little pencil icon and then just drag in those elements pretty much anywhere we want .
Now , let's say , all right , Darryl , this looks terrible .
Let's just uh let's let's get rid of all this .
We'll click on this little X bar at the top and that will delete the entire section .
So go ahead and click on delete section .
All right .
So that's just the basics of element or that's how you would drag in modules .
Now , just to be clear , every module has three different sections .
We have the category , I'm sorry , the content section which actually controls the elements itself .
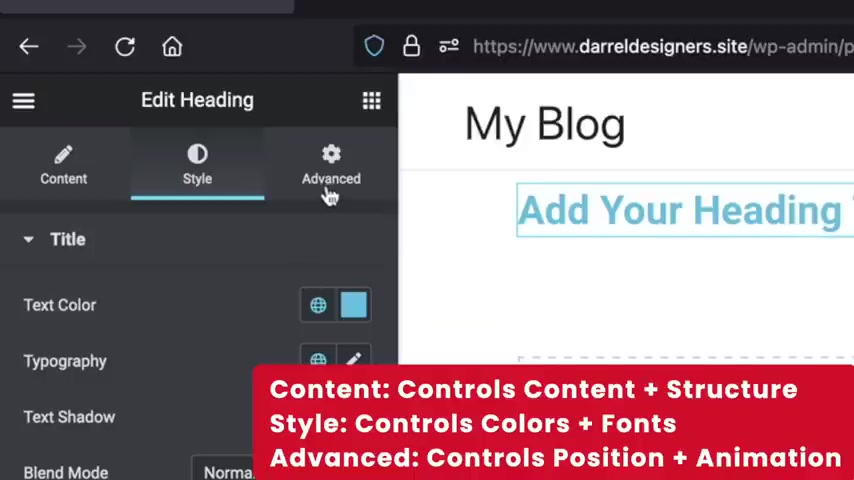
Then we have the styling tab which controls the actual style of this element and then we have the advanced tab , the advanced tab will actually change the position of the specific uh elements .
So for the emotion effects , you can add an animations like fading in and you can kind of add these for your elements and every element you can do this .
So it doesn't really matter which element that you use .
There is these options for every specific element .
So just to be clear , every element has the same tabs .
Uh For example , the button , we have the content where you can change the the , you know the text , the style , which changes the actual color and then the advanced tag , which changes the position and also motion effects and just other options like if you want to have a border or something like that .
So that's just like the basics of the page builder .
Now let's go ahead and build out this page right here .
So with this page , we have a two column row , right ?
We have one column and two columns and we just have a very large uh background image .
So let's go ahead and do that .
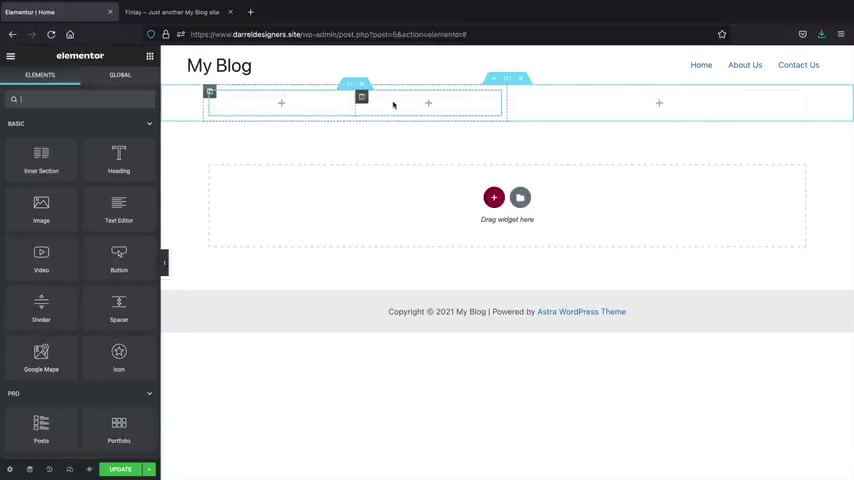
So first I want to click on this little uh adding new section and then I'm gonna click on this two column row right .
Now .
What I want to first do is I want to click on this element tab and I want to drag in this intersection like this right here .
OK ?
Now I want to delete this one column because we have two columns and I only want one right like that .
The reason why I use the intersection was because you'll see a little bit later , the intersection gives us a little bit more control like we can change the height and everything .
But for this tab , we don't have those options .
So that's why I'm using the intersection .
OK .
Now , first I want to add in a background image .
Now there is demo images for all of you guys in the description below of this video .
So first let's click on this edit section tab which is the six dots for this big section .
And then we'll go to style and then we have the classic and then we have image .
So this is where we can upload images as our background .
You may also go ahead and adjust a specific color if you want to use just like a one color , you can do that .
But I think most people today use images for their backgrounds , right ?
So I want to go ahead and get rid of that by just reducing the opacity like that .
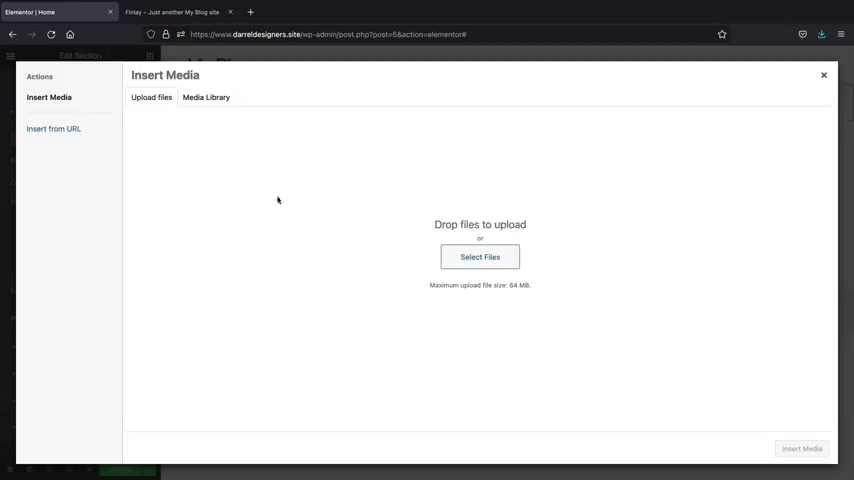
So for image , I'll click on choose image and here we can go ahead and upload files .
So you'll click on select file and there's this image folder right here called image folder .
And what you can do is you can go ahead and uh click on all these images right here and upload them to your wordpress websites .
So you'll click on all the images and then click on open .
Now , all the images are being uploaded to your website .
So you can use any image that you find on the internet and you can also upload your images uh to your media library .
All right .
So the images have finally uploaded .
Let's go ahead and add in a background image first .
So we'll scroll down and find that guy with the red shirt .
This one right here .
I'll click on insert media .
Now you might notice here how this background isn't really stretched .
So I want this to kind of be full width .
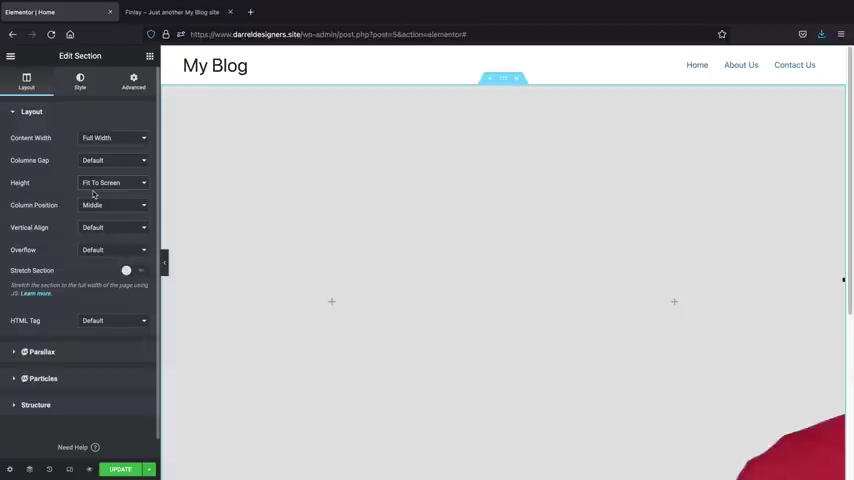
So what I'm gonna do is go to layout right here and then for the content width , I want this full width and I also want to fit this to the screen .
So you'll see height right here .
It says fit to the screen .
This allows this to basically fit to the entire screen for all devices .
Now , you might notice that when you upload your image , it's kind of hard to position it .
So this is the image but uh I want to position this in a specific manner .
So for the signs , I want this to be cover and if you want to adjust your image , you can move it around like this or let's see , let's see here .
There we go like that .
You can also do custom and move the image around to where you want .
Uh just depending on , you know , if you do upload an image and you want it in a specific way , you can go ahead and upload it right there like that .
So that's just basically how we can have a background image for us to work with .
Now , let's add in some elements .
So we have these two element tabs right here .
Uh What I first want to do is add in a divider module .
Now you'll notice right here how we have two columns .
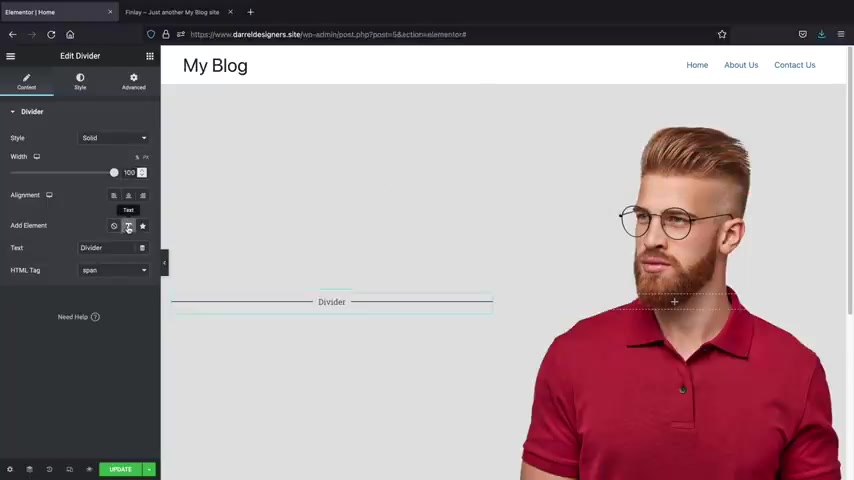
Now this is a divider module , a text module , a text module and then a button module .
So let's add in those in .
So I'll go ahead and go do search widget and just find divider right divider and I'll put that in .
Now , I wanna click on this little text .
So I just want to give this some design , you know , because I , I just don't want to start putting in random text .
I want to kind of introduce this section .
So that's the whole point of all this .
So let's go back over here .
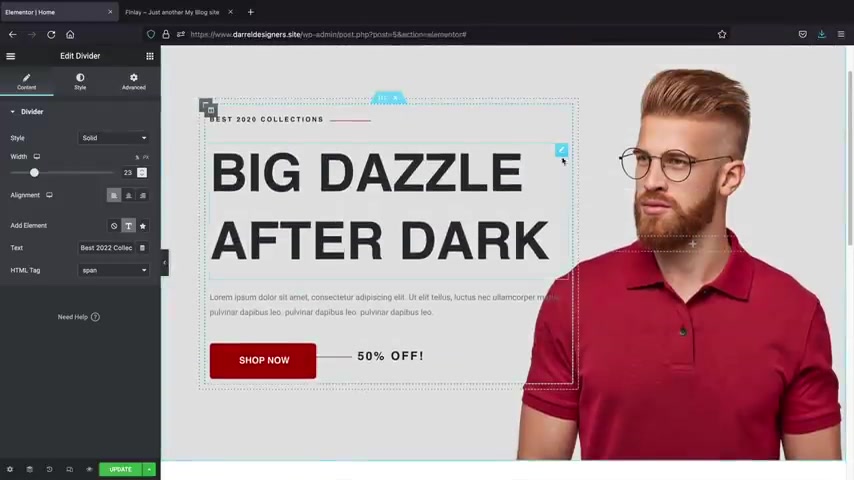
So for the text , I'll put in something like best 2020 collections and then for the style now we can go ahead and adjust the style here .
So for the color I want to use a specific color code .
Now I'll leave this color code in the description of this video .
But the color code I'm using is ad 0000 and it's just this really subtle red color it's not like too red , but it's just like a very small , faint red .
And for the tech section right here , we can go ahead and adjust this text .
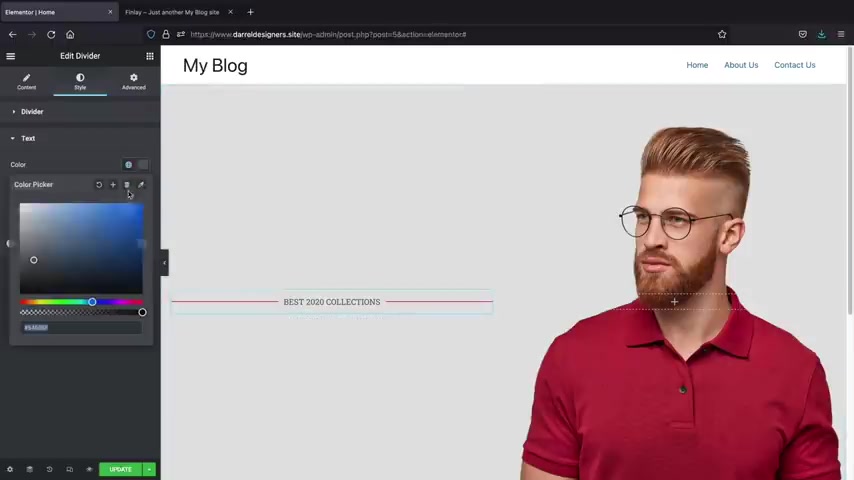
So for the color , I'll leave it as some sort of black , you know , just like a very faint black and the topography .
This is where we can change the fonts .
Now , I personally recommend to use maybe 1 to 2 fonts on your website , do not use more than that because then the website looks very tacky .
You'll see on this website how I'm only using one font .
I'm actually using two .
So this is inter fonts and then this also is inter font , but this right here is Poppins font .
So it's very , you know , it's very faint , very subtle , but you can kind of , if you look at it closely , you'll see the differences .
But your first glance , you probably won't be able to , you won't be able to tell .
So over here , I'll put an enter , enter , this is the font that we're using and I'm gonna make this 12 pixels .
It's very small , you know , and then the weight .
Now the weight is this like the fatness of the actual uh you know , of the , of the font .
So we can make it skinnier and fatter or something like that .
And for the transformation , I want this all upper case .
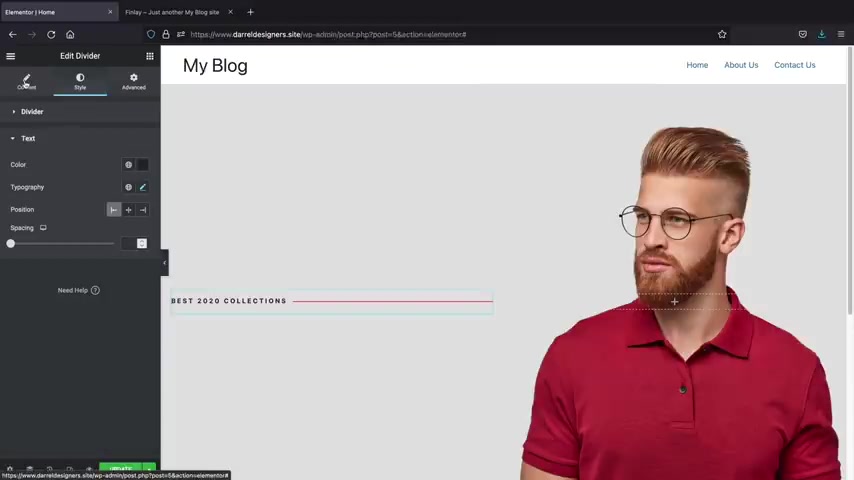
So I wanna make sure that these are all upper case and then we can adjust the line height here .
So you can see how we can kind of mess around with the line height .
I'm gonna put 1.5 and then for the line spacing , we can also adjust this as well .
So you can add in more spacing like that .
And I want to add in just like three .
I kind of wanted to like stretch it across a little bit just to give it some , you know , design and stuff like that .
Now , for the position , we can actually move the text in a specific position like that to kind of just , you know , give it some to core , you know , actually for that uh line height , we're just gonna leave that blank , you know , I think that looks a lot better .
Yeah , let's leave that blank .
Now let's go back to the content section .
So now I want to adjust the width of this line because it's just too long , right ?
So let's go ahead and reduce that something like that , right ?
That looks a lot better .
And now I say that's about done , right ?
So let's not in the next section .
So I'll go ahead and click on the elements tab and now I can add in either a heading text or if I'm using the pro version , I can use the animated text , which essentially just allows us to add two different colors .
So that's just the main difference between both of those , but we can just use a standard text for , for now to get started and I'll just type in , I don't know , big dazzle after dark and we can adjust the alignments of this .
However , we're already kind of aligning to the left so we can just leave it there .
And for the style , I wanna keep everything consistent .
So I wanna keep this like a subtle black , right ?
And I wanna use inter font again .
So over here we'll change this font family again to enter , right , enter , but I wanna make this a little bigger .
So let's let's just kind of push it up just a little bit .
We'll do like 98 pixels and for the weights , I just want a little bit more fatter , right ?
Just a little bit more fat .
All right .
So I think that's pretty good .
Now , one thing you might notice that this is actually kind of scrunch , right ?
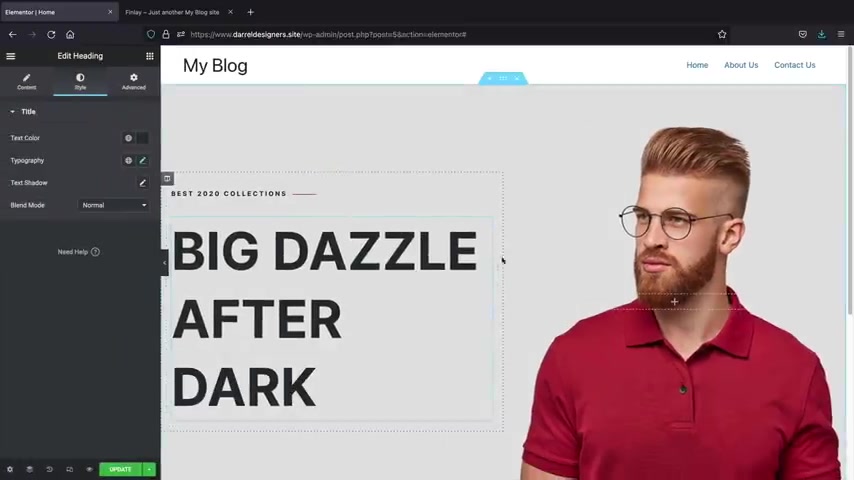
This text is all the way to the left side and also this row is just not really working out well .
So we can actually adjust the actual uh width of everything .
So let's go back over here and click on the edit section tab and go to layouts .
And I wanna keep this boxed , you know , maybe we should have done full with .
So now it's more of a box layout and I also want to go ahead and give this more space to work with .
So let's say , for example , I want to have even columns or uneven columns .
I'm gonna go ahead and put this up to like 60 you know , 63 or something .
There we go , something like that .
So I think that does look better .
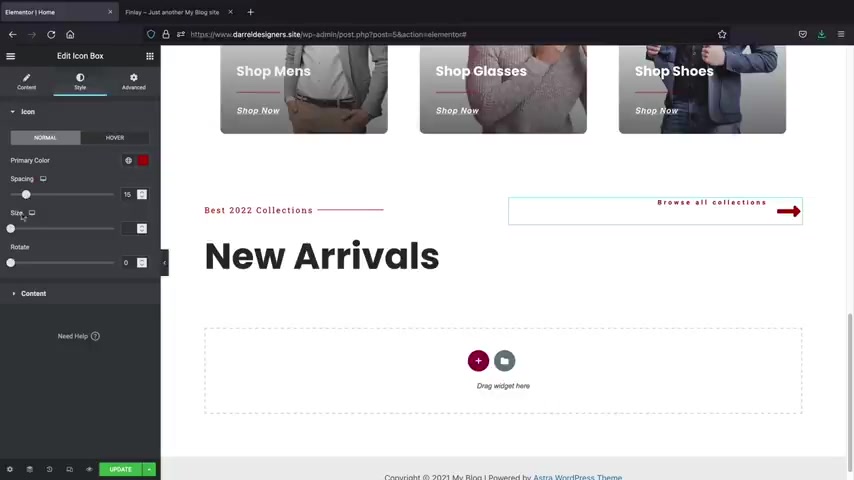
Now , the next step we're going to add in this little text .
Now what this does that , this just gives it kind of something to work with , you know , so we don't want just big text , we need that filler text .
So let's click back on the elements and drag in a text editor .
Now we can add in , you know , if you want to copy more text , you know , just to kind of give it some more uh you know , more .
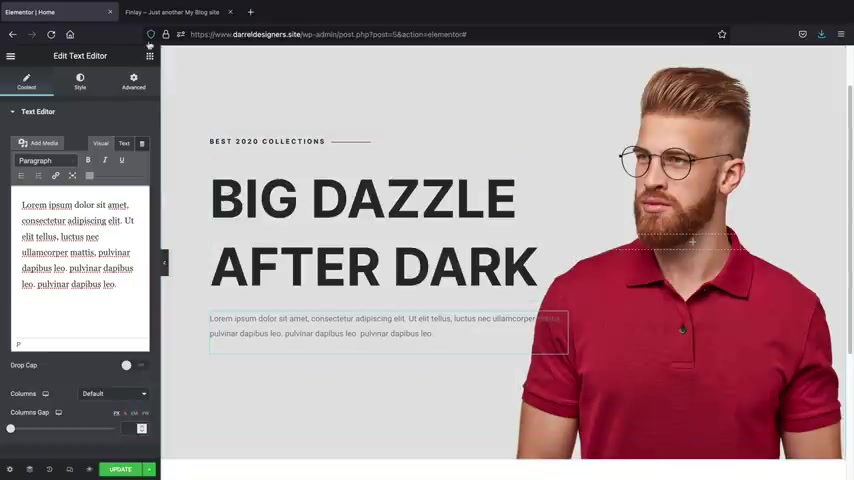
I guess you wanna say , I , I like to call it filler text , you know , because we're just using it just to kind of fill in space , you know , just to give it some structure and now we need to add in the button and this is also a divider .
Now , this is more of an advanced strategy .
So if you are using elementary for a while , uh this will be sort of something that you might not have known about .
Let's click on these little elements tab and I'm gonna first drag in this button .
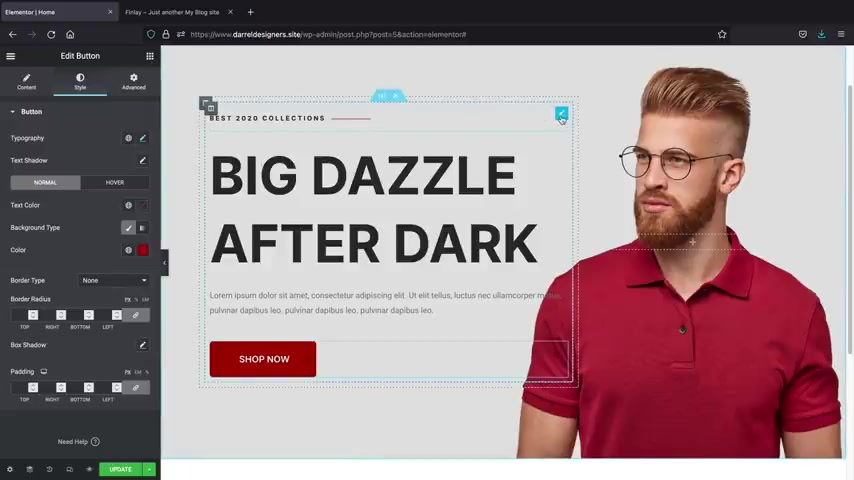
Now , let's first go ahead and design this button .
Now this link , we can link later on to our shop page .
But for now , what we'll do is I'll just put in something like shop now , right ?
Shop .
Make sure it's upper case , right , upper case shop now .
And I want this extra large now you can adjust this button at any time um in the advanced tab .
But let's do that a little bit later .
I don't want to jump into the advanced section because , you know , a lot of us don't really need to , we don't need to go there but uh click on the style tab and then we have topography .
So I wanna keep this consistent .
Let's change this back to enter , right ?
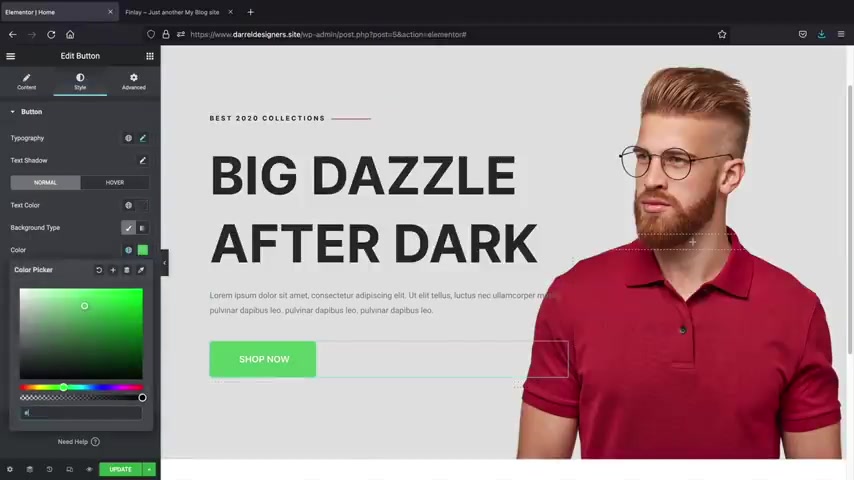
We , we , we , we got to stay on track here , you know , we'll keep it going and then we can do something like 600 a little bit fatter and here we can adjust the , the text of it .
So I'll just put something like , I don't know , 16 or 15 or something like that .
So that looks pretty good and you want to use the same color code .
So remember when you're making your website , the colors that you introduce on the home page , you need to carry this throughout your website .
This is your brand , right ?
So our brand color is black , red and is gray color .
And if you go through this website , we kind of just carry it throughout the entire site .
And even when you , when I scroll fast , it just looks like it's the same website because a lot of amateurs , they tend to use a lot of different colors and that's a quick way to make your site look really tacky .
So , just be consistent with your colors , right ?
So here we go , I'll do a 20000 or ad 00000 .
All right .
And there you go .
So there's our button .
Now , there's one thing that we also need to do as well and I want to add in a divider .
Now , I'm gonna go ahead and duplicate this because I'm lazy .
You know , I don't want to make that from scratch all over again .
There's no reason for us to do that .
So I'm gonna take this and I'm gonna drag it here .
Now , elements are by default doesn't allow us to stack elements next to each other , which is kind of a bummer .
However , we can do that in the advanced options .
Now , this is an advanced tactic and this is something that you guys can use if you want to stack elements together .
So first , I'm going to click on this button and go to the advanced tab and for the positioning , I want to make sure this is in line auto .
All right .
Now , I'm gonna do the same thing for this divider .
So click on the divider advanced and then positioning with in line auto .
There you go .
So now you'll see that uh it's kind of scrunched , you know , we need to , we need to do a little bit more work .

But overall , you can see how this is now kind of uh closer to the button .
So let's click on this little divider and let's go to contents .
Now , I want to really adjust the width of this because we need to kind of uh you know , just give it more breathing room .
So click on the pixel and let's see if we can kind of push it across .
There we go like that .
So this is percentage and this is pixel or pixels .
Yeah .
So next let's change the alignments .
So click on style and text and I want to change the position of this to write like that very similar to what we have right here .
Now , you guys might notice here that it's not 100% the same and that's just because maybe we're off a few pixels , but overall it's the same exact structure .
But uh here I'll just put in something like 50% off , right , 50% off and maybe that's too much with .
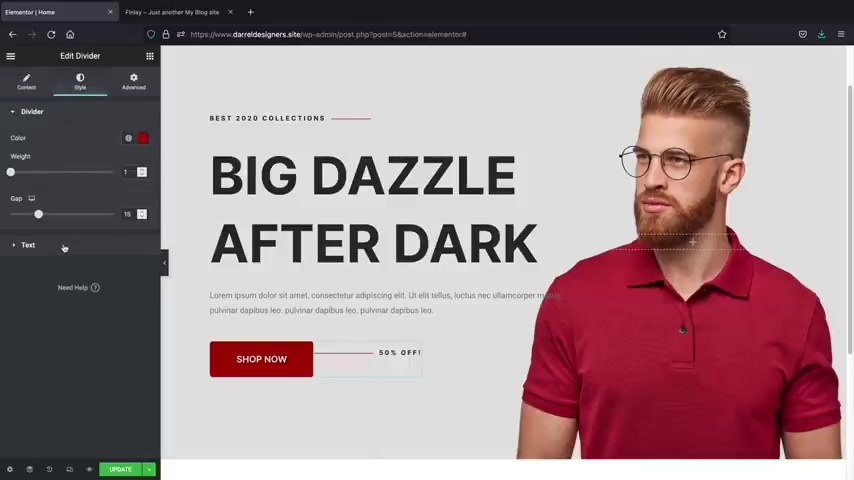
Now , you know , we can reduce that and we can also probably make the text bigger , you know , because the text is a little bit too small .
So we can adjust that in the style section , topography and just make it a little bit more bigger like that .
All right .
So that's pretty much it guys .
The landing page is done .
Now , you guys have probably seen this and you know , this is a great looking landing page and I'll explain why we did this .
You know , we , we added the divider just to kind of give it some uh you know , give it some style and decor and also introduce the brand because this brand , we're now going to introduce it on to several different sections throughout the websites .
Now , if you guys are using the pro version , you can use the pro elements right here of the animated headline and this is essentially the same thing .
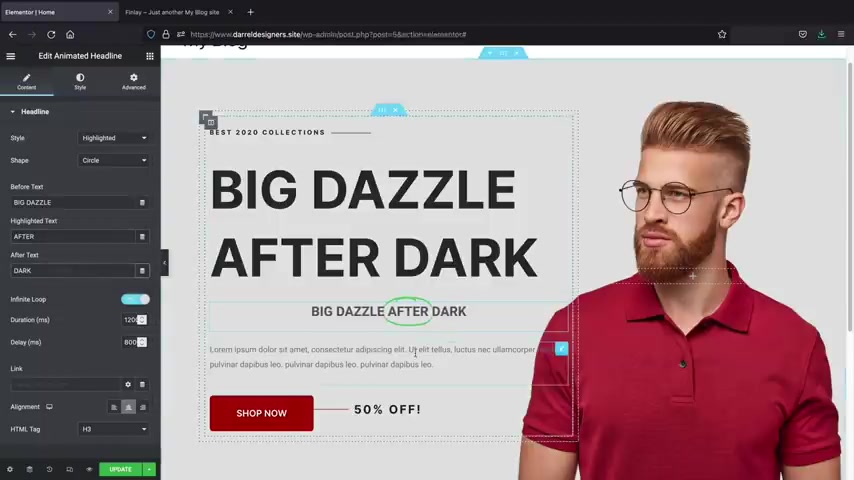
So what I did right here is I just put big dazzle and then after dark and what you can do is for the after on the style tab for the headline for the uh was it the animated text , you can change the actual font and color of this ?
So for the text color , you can just kind of change it to something else right there .
So I think we use like 80 80 0000 , right ?
And for the shape , we can do something like underline , you know , something like that .
And we can also change the color of that underline as well .
So uh we can do like 80 000 again and then we can adjust the font as well .
So just remember the style tab is where you can adjust the topography .
So here you'll just go ahead and adjust the text as well .
And then you guys get the point so we can just uh you know , change the colors and everything .
And also remember uh you can change the alignments to left .
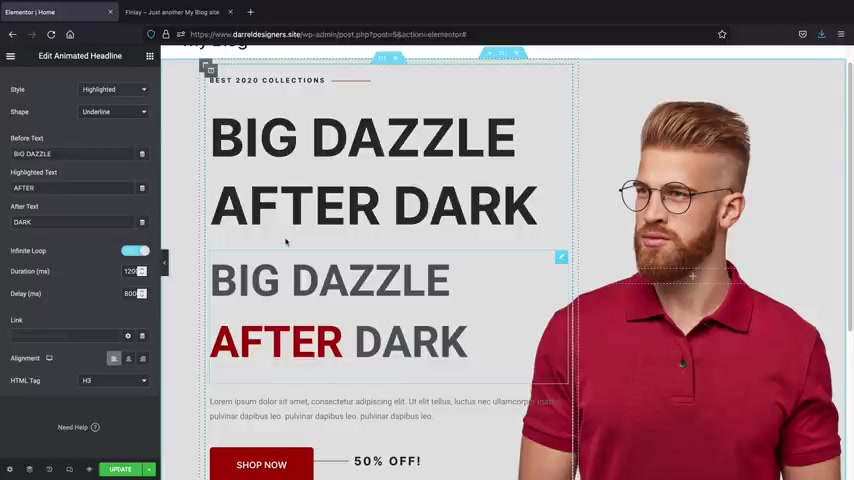
So that's just if you're using the pro version and you want to have access to that specific color .
So that's how you guys can kind of add those different color brands to uh your home page .
So hopefully that was clear , right ?
Pretty sure you guys with me still , everything's still good .
All right , let's move on to the next section and I'll be very honest with you guys .
When we made this part of the website , we did not realize it was too advanced for beginners .
So what we decided to do instead was we actually made you guys a new section that you guys can edit and customize .
Now , you guys will also get this for free in the layout that I'll be providing you all .
But I'll do that a little bit later .
Now in the image porter that you guys downloaded , there is a JSON file .
So let me show you guys how to import layouts .
So here you'll see this add template button .
And first let's talk about blocks , maybe you guys might be interested in some of these blocks now with elements or pro uh you do get access to all of these blocks .
So let's say , for example , um I'll click on this call to action section right now .
I don't know why they're black and white guys , you know , I wish they were colored .
You know , it's just , it's just , I don't know why they did that .
It's really ugly , you know , it's just , it's just something they did that just , I don't know , it just whatever , you know , but you can go through these categories here and they have specific blocks that you can choose and all you need to do right here is click on insert and there you go .
So now it inserts that block right here and you can change this text to , to whatever you want .
Now , you've already kind of get an idea of this .
So now you can go to the style tab , you can change the colors and the fonts and also if you want to change like the animations or the padding , uh we can do that right here .
Now , we'll talk more about padding a little bit later .
Uh That's just adding in space , but I'll give you some ideal um you know , ideal instances of when you would want to use it .
But uh I'll go ahead and delete this and those are the blocks .
So just keep in mind that if you do get stuck with design and you need some help , they do have some blocks that you guys can use and these blocks are , they do have some blocks that are free as well and they do also have pro blocks .
But uh yeah , I just wish they were colored and you know , that's that .
But let's say for example , you want to upload a layout .
So right here you'll see this little import template tab , click on this and click on select file .
Now , this is the file that I gave you guys .
It's just called , um It's going to be called the about section .
So that's , that's it right there for some reason , it just looks like that , but you'll click on that file and click on open .
All right .
So this is called the middle section .
I'll rename it in the folder for you guys .
Don't worry here .
I'll click on insert and click on .
Yes .
All right .
So let's go ahead and scroll down here and there we go .
Now we have this really nice section .
Now you notice here how we kept this brand consistent we added in this divider section and here we have three different categories .
So these are gonna be for your product categories .
Let's say for example , you're selling uh shirts , glasses or you know , shoes or yeah , shoes , you can go ahead and link them later to your product categories .
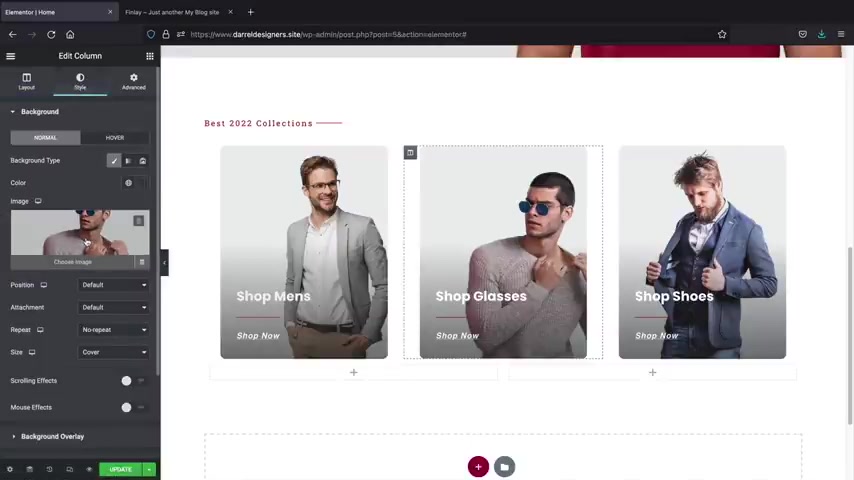
Now you can adjust these images by just clicking on the column tab and going to style and here you can adjust the actual image .
So if you want to have an image of a product , you can go ahead and do that .
Now , this section is very unique .
We use the background overlay right here to kind of add in this black um you know , overlay .
So now you'll see that we have this white text .
But if we don't have this overlay , what happens is the text looks really bland and it's really hard to read .
So for example , I'll just click on background overlay here and just give you an example .
So here , you know , I'll just go ahead and get rid of it and now you'll see this text is really hard to read , right ?
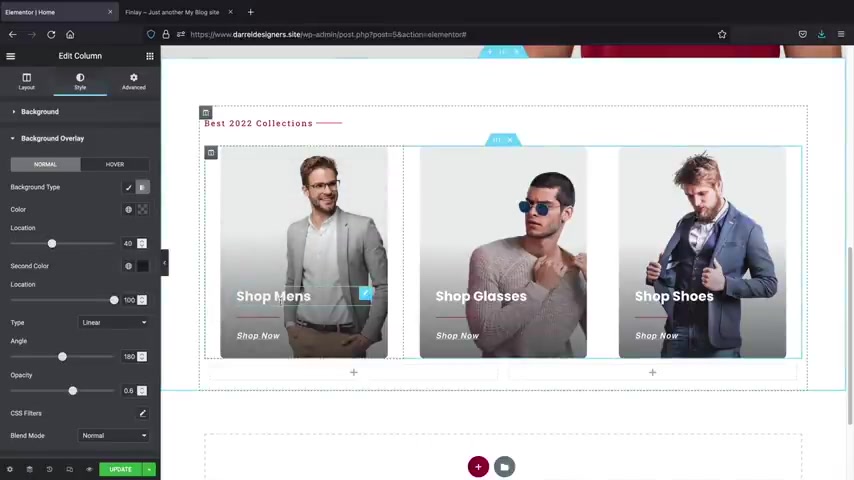
So we added in this really subtle overlay here and you can kind of control it to just kind of help the user uh read the text better because we don't want to add black text because black text on these kind of images just doesn't really look well .
So the black overlay did look a lot better .
And let's say , for example , you want to link your products on here .
Now you notice that these are not buttons .
So this is actually a text module , right ?
So this is a heading text , however , you can link them to another part of the website .
So this would be like your products page , you know , or like , you know , www dot you know , Darrell Wilson dot com .
And this now turns into a link .
So you'll see how the cursor now has this link button .
So that's how you can use pretty much any element to link them onto different pages .
Now , remember there's really no right or wrong way to use these elements , whatever look and style that you can achieve .
That's really all that matters .
All right .
So have fun with this , you know .
But uh yeah , that's that .
Now , let's move on to the next section .
So let's go ahead and scroll down past this .
Now , we're going to insert this little brand thing we got going on and this right here and also the title , this title , I'm using a different font , but that's just something that I just did , you know , just because , but uh let's go ahead and right , click on this and duplicate this .
So we got two of these .
Now we need to enter a new section here .
So let's go ahead and click on a new section .
Now , this is a two column row , right ?
We have one column and we have two columns .
So let's add in a two column row , right ?
A two column row , go ahead and delete this column here .
And now I'm gonna drag this .
Remember , I'm really lazy .
So we're going to drag in this elements like that .
Now , we can also do the same thing for this text , you know , if you're really lazy and you don't wanna , you know , add in the colors and the fonts again , we can just go ahead and duplicate this as well and we can just drag this element down using the mouse cursor and this will be like new arrivals , new arrivals and then just adjust the text as needed .
So obviously , this text is too big .
So we can just make it a little bit more smaller and I do like the pop ins , you know , that's definitely a no , no web design , but I just really like the pop ins .
I just feel like it really stands out .
And also here we need to kind of adjust this width right there like that .
So I think that looks a lot better .
Now , we're gonna talk about padding .
So you'll notice here how this is just too close to each other , you know , it's too close and we need space .
Now , let's talk about padding .
So first let's click on this little six dots and we'll go to the advanced tab .
So padding is space , right ?
So let's say , for example , I want space on the top section .
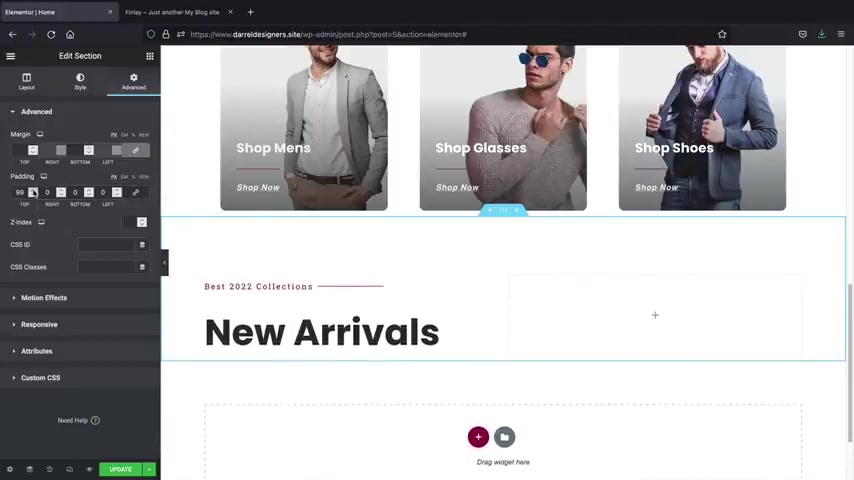
I'm gonna unclick this link values and now we're gonna add padding like that and maybe what's , what's a good patting ?
90 100 I don't know , 100 100 good , right ?
What do you guys think you guys can let me know ?
So yeah , that's that .
And over here uh this is actually an icon .
So um let's go back over here to the elements tab and I use icon , however , you guys can use anything that you want .
So I use an icon box like this and I just kind of altered it a little bit .
So I just used an arrow .
So with this icon box , you get access to all these different icons and I just typed an arrow like that and I got rid of this subtext , you know , we don't need it , right ?
And here I just put in browse all collections .
So I'll just type that in browse all collections and you might notice here how we need to adjust this .
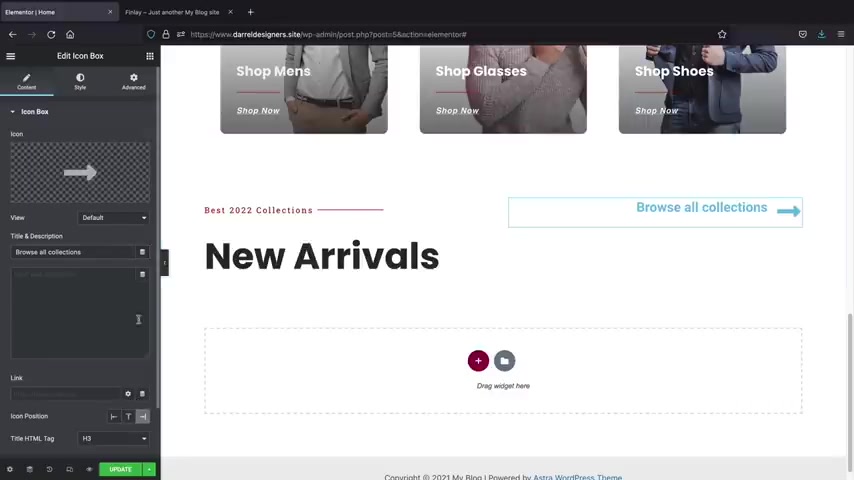
So I want this to be on the right side like that .
All right .
And then from the style tab , now we can go ahead and design the color and everything .
So we have this like , I guess you wanna say like , oh no , we have the red , sorry .
So 80 0000 and then also for the uh content as well , we can adjust this with ad 000 .
Now , obviously this text is a little bit too big .
So we need to reduce the size of also the icon and the text .
Now the description , we actually got rid of that .
So we're only using this just to kind of add some , you know , just add some design and everything to our page .
So here I'll go ahead and reduce this , right , maybe like 10 pixels 12 .
And then I want to have letter spacing .
So I just want to really stretch it across to kind of , you know , give it some design right ?
And then we need to do the same thing for the icon box because the icon box is way too large now .
So we can go ahead and reduce the size of the icon box by going over here to size and just kind of making it look like that , you know , something like that .
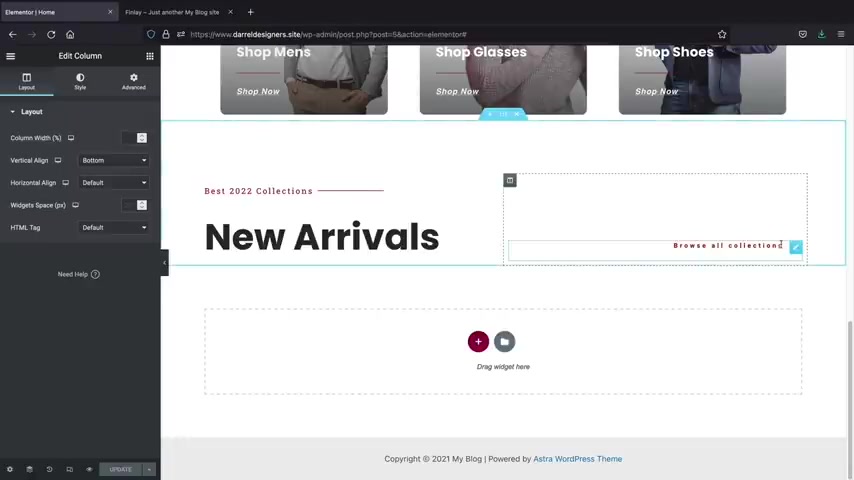
Now , also you might notice that this is kind of not aligned properly .
Now , there's two ways we can do this , we can add in padding .
However , if you add in padding , um it'll have some responsive problems with different devices .
So you want to use the column section .
So for the column section , for the vertically aligned , maybe you can put it at the bottom here , right ?
Think that works right ?
Or we can adjust it in the middle or you know , they have so they have a few different options .
But I think bottom works the best .
Just remember if you add padding and margin to stuff like that , it could look a little weird on specific devices .
So now that we've actually done that part , let's click on update and save our progress .
Now , just remember just like we link the text to a different part of a website , we can click on the little pencil icon and under the content section , we have this link section so uh we can link them later to our shot page once we create it .
So we're not necessarily creating buttons , but we're just creating different styles of buttons .
I guess you can say to kind of add some more to core because I don't want to have big buttons everywhere .
It doesn't look good , you know , looks kind of weird .
Now , let's go ahead and move on to the next section and let's finally make some products .
It's pretty simple right after you mess around with element or for a little bit , you'll get the hang of it .
So now that we finish , step two , let's go to step three .
And now let's create products for your Ecommerce store .
Now we're first going to create a simple product and then we'll jump and we'll create a um a variable product which has more variations .
After we create products , we will then jump back to the website and we'll finish designing the rest of the home page .
So let me explain the difference between a simple product and a variable product .
A simple product is a product with no selection .
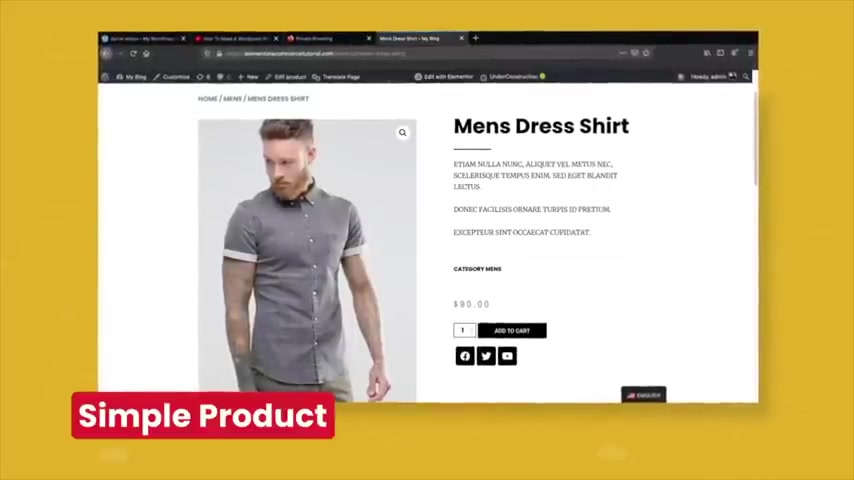
There is only the ATAC Cart button .
There are no sizes or styles available .
This is an example of a simple product .
Next , we have a variable product .
A variable product allows you to have multiple variables such as size or color for your product .
For example , you might be selling a t-shirt that t-shirt might come in specific colors or sizes .
So that is an example of why you'd want to have a variable product .
All right .
So let's move on to the next section and we're going to now create products for our e-commerce websites .
You guys ready ?
Finally , let's go back to here and go to exit to dashboard .
Now we're going to install a free plug in and this free plug in is incredible .
It gives us the option to have automated taxes .
To have shifting to add coupon codes and all sorts of good stuff over here in our plugins .
We'll click on add new and we're going to search for a plug-in called Woocommerce .
Many of you guys probably already know about this plug in .
It's the best one .
You know what's really funny , this plug-in does , what Shopify does for free .
In fact , on Shopify Pro Plan for $300 a month .
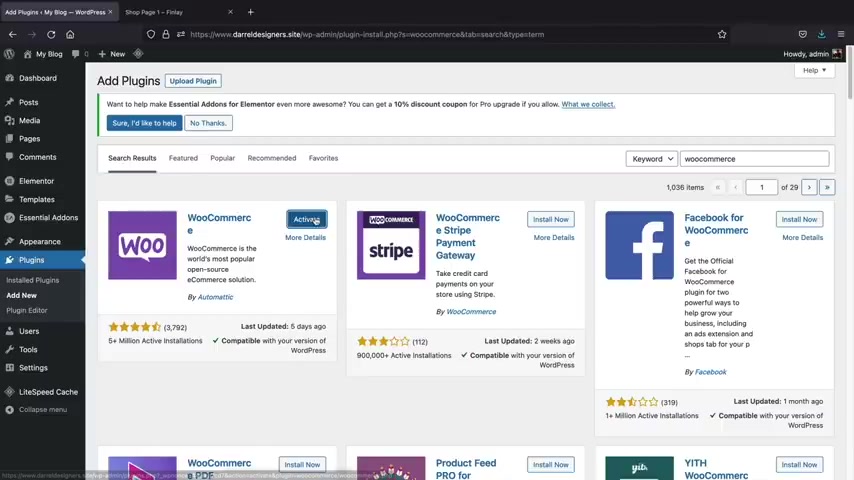
Woocommerce does all of that for free .
Those poor souls .
They don't know , they don't know .
But it's our secret , you know , don't tell them , you know , we , we got , we get the free stuff that other people pay monthly .
So go ahead and click on install .
All right .
And once it's done , you'll click on activate .
Now when you first activate the Woocommerce plug in , they're going to prompt you to fill out this uh wizard .
However , we can skip all of this because we can fill all this out in the Woocommerce options .
So scroll to the bottom here and click on skip , set up store details .
Uh If you choose to allow personal data , you can do that .
I'm gonna put .
No thanks .
All right .
So now this is our , I guess you wanna call it the Woocommerce Store Online headquarters .
Now , one thing guys is they change this interface a lot .
So if this screen looks different for , you know , a few months from now , this tutorial is still up to date , they just tend to move stuff around and adjust their interface uh quite often .
Now , we can just skip all this .
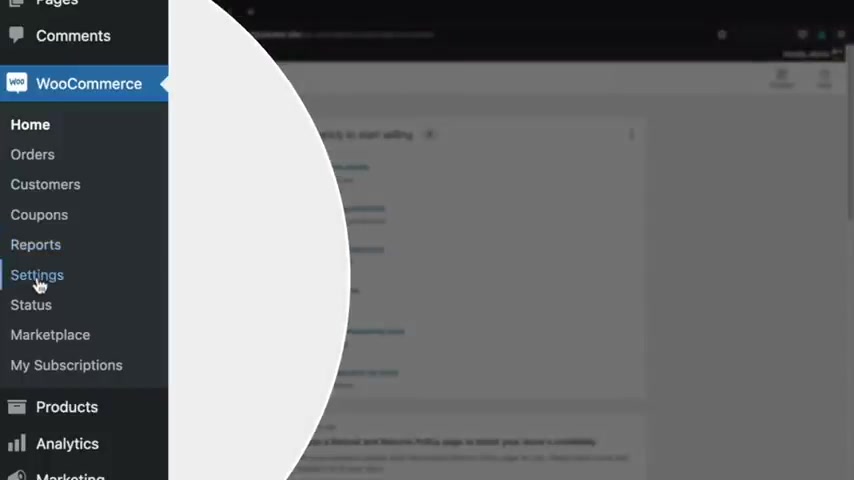
We're gonna talk more about this in the settings tab .
So here we have the Woocommerce settings and this is where you can enter in like your store address , you'll see all the products .
So whenever you create products , uh you can adjust like the product section here uh shipping , this is where you can adjust the shipping rates , payments .
This is where we can adjust payment gateways like Stripe paypal and other um you know , stuff like that .
I'm gonna go ahead and click on .
No , thanks .
Get rid of this .
These guys are really annoying .
You know , they're , they're always asking us to leave reviews and stuff and then this is the accounts and private .
I'll talk more about um privacy policies and stuff like that where we can add , we'll add it on the theme a little bit later in the theme customizer section .
This is emails and um I do have videos on how to make customized , really nice emails .
We'll talk more about that a little bit later .
But uh yeah , that's just a quick little rundown of the woocommerce options .
We'll come back to this a little bit later in like the last chapter I believe .
But let's create some products .
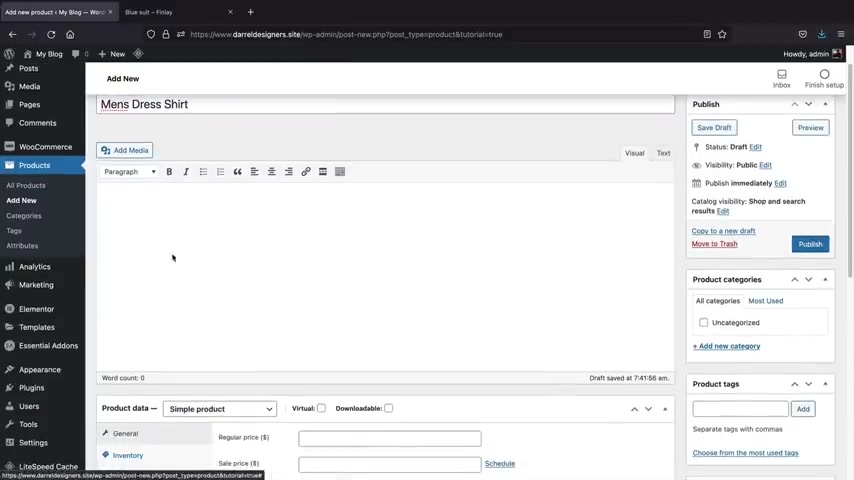
So here we have products and we'll click on all products .
Now , whenever you create any products , they'll be listed right here .
However , we don't have any products .
So let's go ahead and create a product , click on create product .
All right .
So go ahead and give your product a name .
So this is going to be men's dress shirt for me .
I'm gonna dismiss this .
This is just a setup wizard .
Now , this right here is the long tail description .
This will display actually right here at the bottom .
So you'll see we have these tabs that displays at the bottom right there .
So this would be something about like maybe your material or something that's really not that you know , they need to know like dimensions material , something like that .
So I'll just put in some demo text for now , I'll put demo , right ?
And we're gonna scroll down and now we have two products .
Now for this part of the video , we're first going to create a simple product and the next step , we will then create a variable product .
There are other products that we can create .
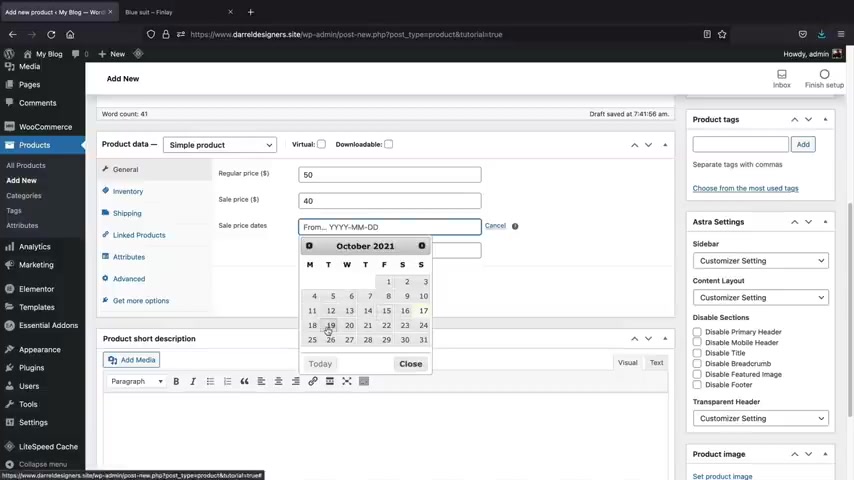
But I do have a for another video on Woocommerce and I will leave that in the description below of this video if you guys want to check it out .
So first , let's put in a price , right ?
This is uh 50 bucks , but uh we can schedule a sale .
So uh right now it's on sale for $40 and we can select a sale date .
So this is on sale from the 19th to the 26th .
Now , let's say for example , you guys are also selling digital products here .
You can click on virtual and downloadable .
Oops , let's go ahead and open that up and then you can add a file here .
So let's say , for example , you're just selling like a PDF or something , you can click on , add a file , choose the file and then upload that specific file to the product .
But I'm actually selling a physical product .
So I'm gonna go ahead and uncheck those .
That's just if you are selling uh digital products , next , we have inventory .
So here you can enter in your SKU number , right ?
And here we have managed stock .
Now , managed stock will show the quantity of the products .
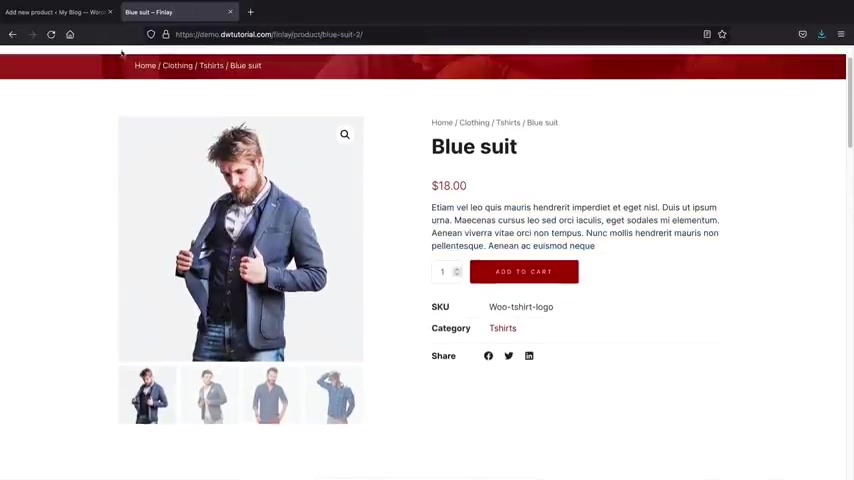
So for example , right here we have the product .
Now , if we turn on the managed stock , it'll tell users how many products we have in stock .
So that's just a tactic of if you want to create like scarcity or something , but I'll just put 20 .
Do you want to allow back orders for this product ?
I'm gonna say no , no , thank you .
Here , we have shipping .
Now you can enter in the weights and dimensions of the product if you choose to do that .
Um I'm not going to just because it's a shirt and this video can get really complex , you know , for shipping refrigerators or something like that .
But uh I'm just going to leave that uh blink link products .
So next we have up sells and we also have cross cells and I'll explain the difference between both an Upsell is a product .
I'll give you an example here .
Scroll down an Upsell is a product that you recommend when someone is viewing a specific product .
All right .
So when someone clicks on this product , we can recommend additional up sells Amazon dot com .
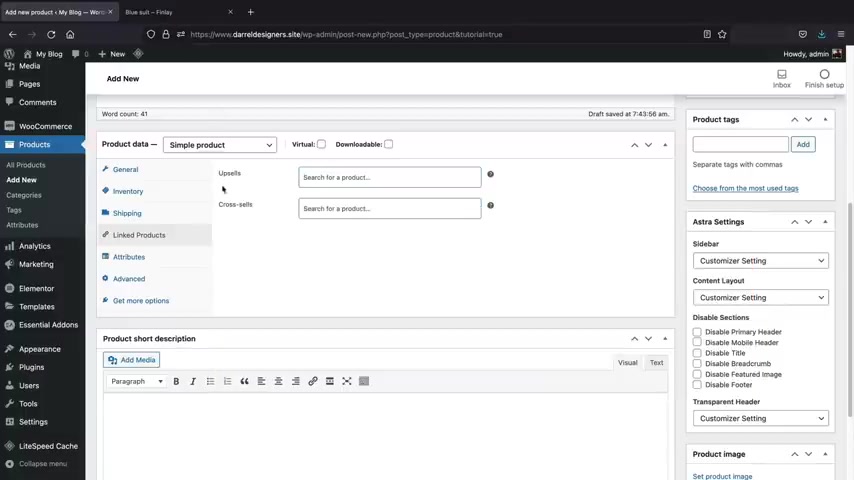
Does this , they offer uh various up sells when you purchase something or add something to the cart ?
A cross sell is something that you recommend at checkout .
For example , here we have this image and you'll see right here how we have what you may also be interested in .
So when the user is checking out , you can recommend additional products at checkout .
It might be something that you might want to uh offer to accommodate specific products .
For example , if you're selling a shirt , you might want to offer pants or a belt .
So that's an example of what a cross sell is .
It's recommending products at checkouts attributes .
We're gonna skip this because this doesn't apply to simple products advance .
You can leave a purchase note saying thanks for the order , right ?
This is just a purchase note .
When someone purchases it , it will display a purchase notes .
You can also enable reviews for products .
So just like we have on uh our other website here , I'll go ahead and go to our uh our shop page .
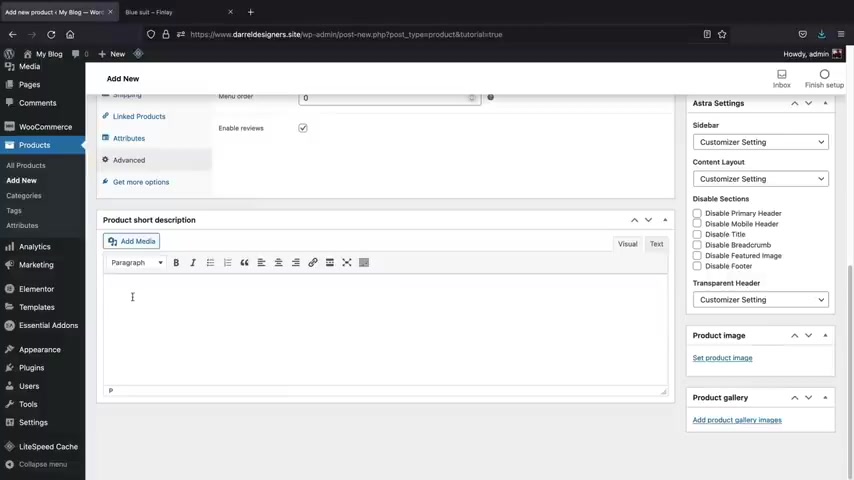
So here we have our products and you can see we have reviews enabled .
So if you want to have reviews enabled , you can have this checked .
If you don't want reviews enabled , you can have it unchecked .
Now , this is the product short description , the short description will display right here .
Now , this is the primary description of a product .
So make sure it's important , make sure that it stands out and make sure you do fill it out because this does get picked up by search engines .
So uh just make sure it looks good .
You know , here , I'll go ahead and just put in uh just some demo contents .
Next , we need to add a image for our products .
So on the right side , you'll see product image , click on set product image and I'll just put in an image of uh this guy right here , set product image .
Now also , let's say , for example , you have additional photos of this product here .
We can add more photos to the product gallery and , and this one here .
Oh Wait .
So we got this one and this one .
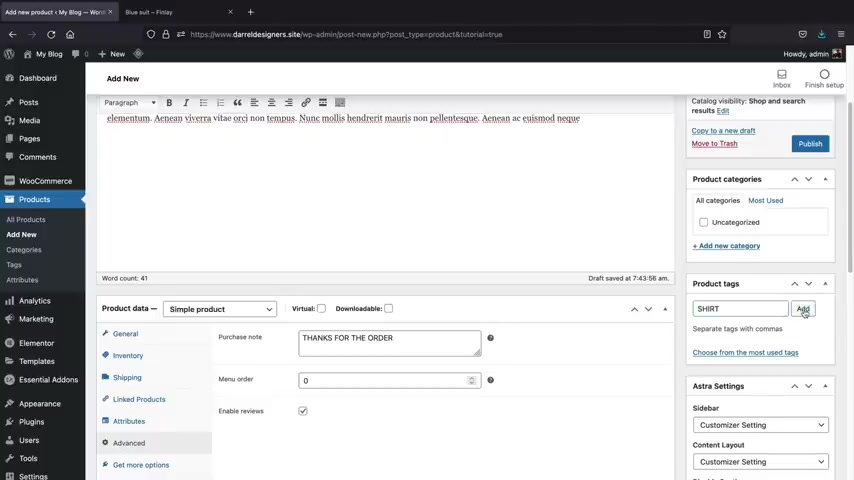
Can I hold shift or control , take that one off ?
So we got these two .
So I'll just add these two as a photo gallery .
I'll click on add to gallery and we'll scroll up .
And there's one more thing that we need to add , we can add tags , tags are essentially ways where users can find products easier .
So this will be like shirt , right ?
And also I'll do like men's So here we go , shirt and then men's right , you can add these tags .
Now , we need to enter product categories .
Now , product categories are very important because we can display specific categories on different pages .
For example , we have this shop page right here and you'll see on the left side how we have product categories .
Now , if I click on this hat category , this will then display all the products with hats .
So that's why you'd want to categorize your products because then this helps users navigate easier .
So for example , we have sunglasses or clothing .
So this could be something like men's , women's kids or whatever , you can also even have filter by color .
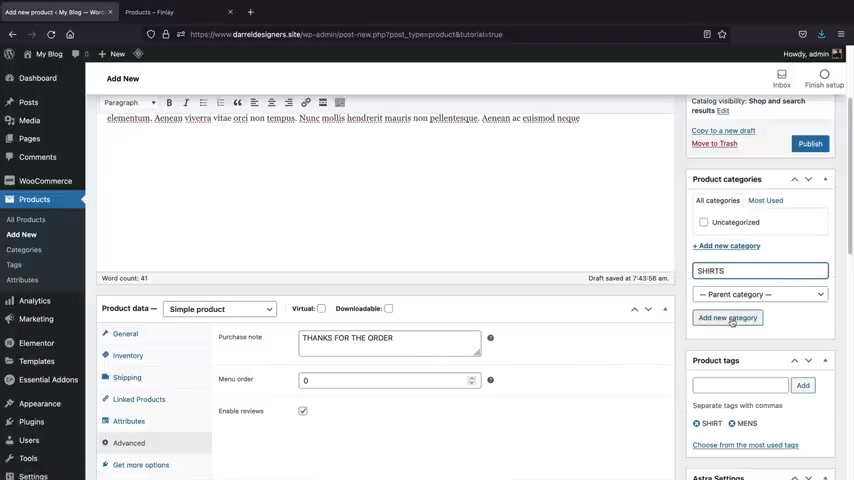
So there's just a lot of different ways on how you can implement uh product categories on your sites .
So right here , we'll go ahead and put in men's or we'll just do shirts and we'll add this new category and that's it .
I think we're all ready to rock and roll .
So once you are ready with your product , you'll then click on publish and we have just created our first product .
So let's go ahead and take a look here here .
We'll click on view products .
All right .
So here we have the um I guess you wanna say bread crumbs at the top .
We have the title of the product , we have the price .
Then we have the description .
Now , remember the description will display down here .
OK .
So this is the short product description , right ?
And then we have the in stock available and this is referring to this section right here at inventory , OK ?
And then below that , we have the skew number and then we have the description here at the bottom , this description is displaying from here .
OK ?
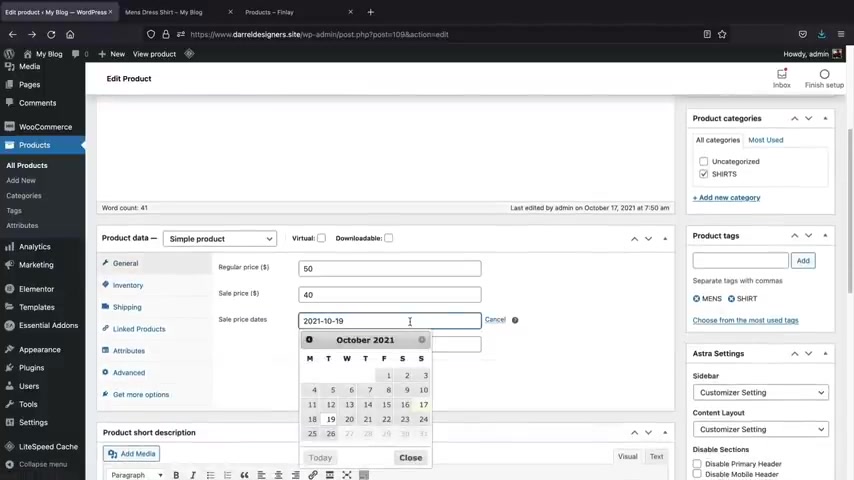
So that's where basically all that is referring to .
Now , also , you've seen that our sale is not displaying because it looks like I didn't put the correct dates because I think it's the 17th today , right ?
So , or for me , but I'll just put the 16th .
So this will make the sale live , right ?
So now I'll click on update .
We'll go back to our products , I'll refresh the page .
All right .
So now we have the product on sale and we also do have this little uh sale banner .
So that's pretty cool .
Now , this product right here , we have a lot of empty space and it's also to the left .
So we can adjust that in the astra theme customizer .
So go back to your product and we'll scroll down here .
Now for the astro settings , we can have no sidebar , right ?
And we can also change the content layout .
Now , I just want this to be like a like maybe box , you know , you can kind of go through each of these and see how uh big it makes it or how it fits your store .

But I'm just gonna select box right now .
And go back and click on updates , then we'll go back to our products and we'll refresh the page .
So I'll refresh this page and there you go .
So now we have this product , it's in the center and it just looks really clean .
You know , also , if it did not change , you might need to clear your cache .
So that's why you install this cashing plug in .
And here we'll just click on purge all sometimes when you're working on your website and things don't save .
It's not necessarily the website .
It's a cashing problem .
And that's probably the number one biggest problem is people think that um the website's being weird .
And I said , no man , it's the cash .
You got to clear the cash .
So this is an example of creating a simple product .
So we don't have any options , but it's something very standard .
It also looks really clean .
Now , let's move on to the next product and let's create a variable product .
So let's go over here to plus new and we'll click on products .
We can add a product and pages from the plus new section or from the back end .
It doesn't really matter .
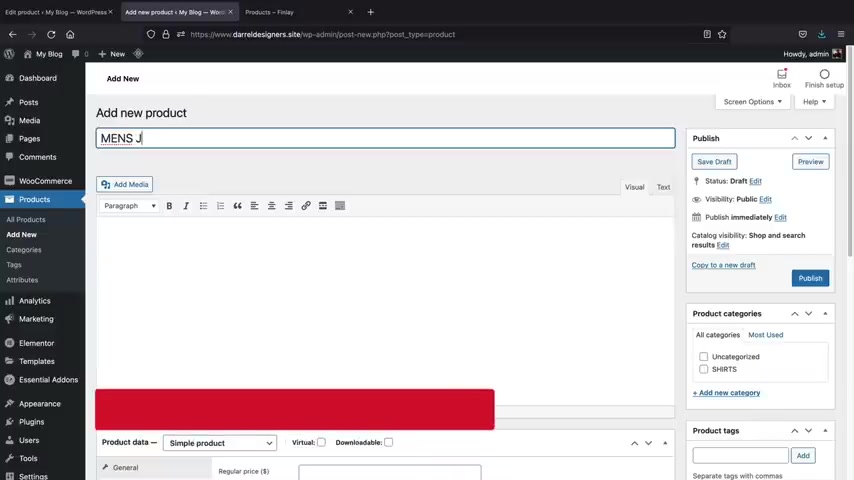
Let's go ahead and close these boxes and this will be men's jacket .
Now here , we can just put in some description right now for the product data .
We're going to select a variable product this time and you might notice the price disappeared .
Not to worry , you know , we'll mess around with that in just a bit .
We can also go through these other options again .
But uh I think now you guys kind of understand a lot of these .
However , I do want to add up sells now .
So now we have products right to kind of add up sells .
So I'll put , was it the men shirt , something like that ?
Men's dress .
Now , we don't have any other products for cross sales .
But hey , why not ?
I'll just put in men's again , just to give you a visual of what these are and how they will look on your store .
Next , we're going to go to attributes .
So we need to add attributes and essentially attributes are something like color and size , right ?
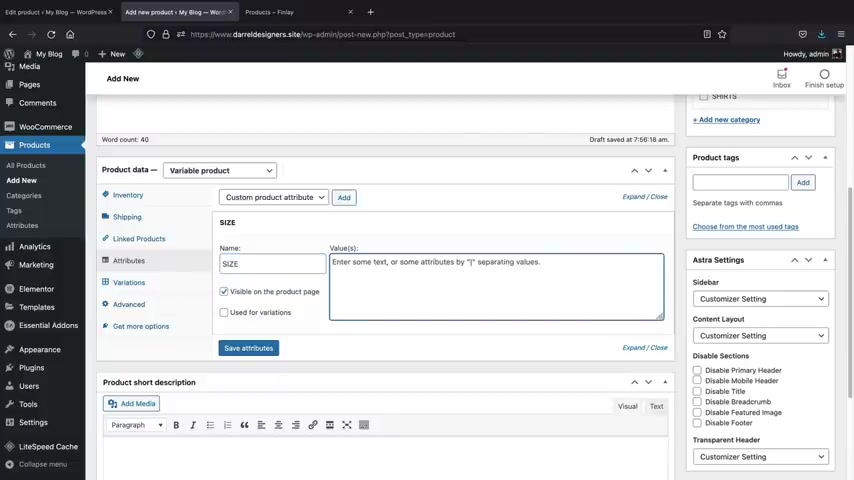
So let's add in some attributes here or click on add and this will be size now under , under the value , I'm gonna put small and large .
No , no medium .
All right .
We got no medium .
We just have a , you know , just small and large and , uh , we're gonna click on use for variations and click on save attributes .
Next , we're gonna enter in color .
So if you have different colors of your product , you can enter that here by clicking on add color and we're gonna do blue , blue and brown .
Now , this button right here , I'm sorry , this little bracket , this is above the enter sign and you need to hold shift and press that , uh , bracket sign .
I'm not sure why .
But that's what we use to basically uh I guess to make new values .
So uh that's what Woocommerce wants .
So I'm just the middle guy here , you know , I just , I just report whatever they , they tell me to do .
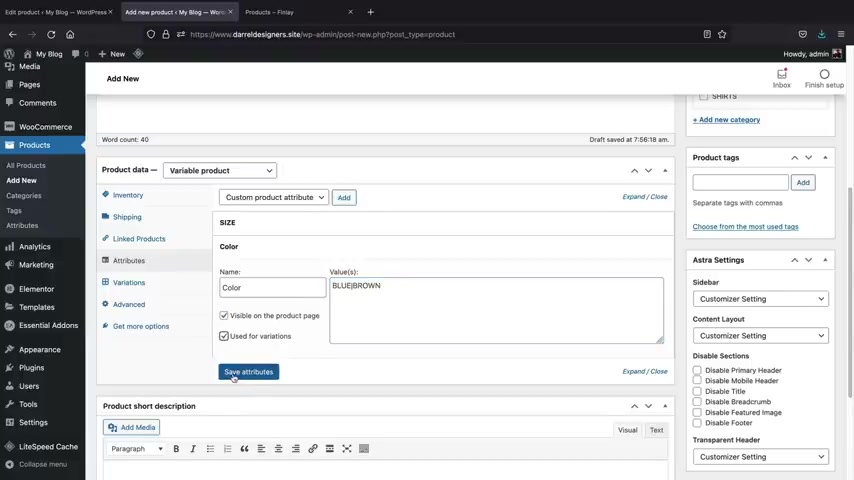
So now that we have that we'll click on , use for variations and click on save attributes .
So we have size and color .
Now we need to apply the variations to these attributes .
So click on variations and under the variation , we'll click create variations from all attributes and click on go .
Just say yes , just say , OK , they're like , are you sure you want to do this ?
Yeah , we're gonna do it .
All right .
So now we have four different attributes or variations .
We have small blue , small brown , large blue and large brown , right ?
So for the small blue , we need to enter an image , right ?
So for the upload image , you'll need to put in a a blue whatever , right ?
This is the blue one and then you'll go ahead and put in the price and the sale price for each individual variation .
Now , I'll be very honest with you guys .
Variation products take the longest to make and they're very annoying .
But uh you might wanna hire someone .
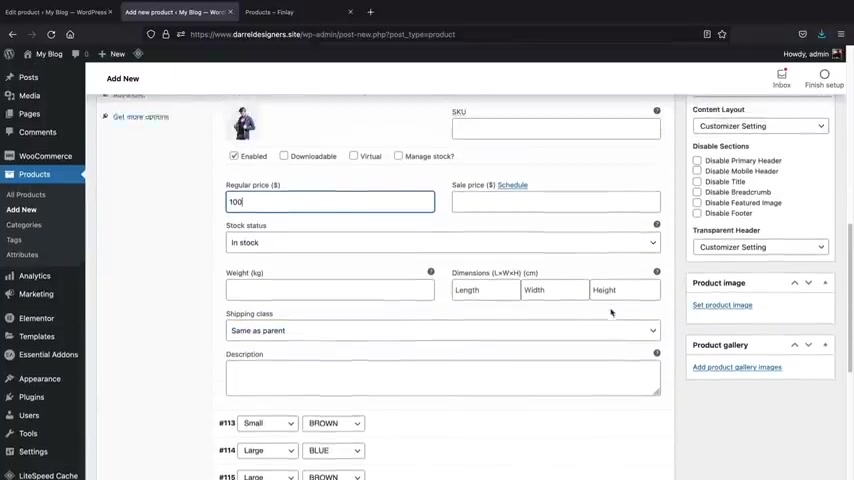
If you have like 100 products , then you might wanna hire someone to do this because it can be very time consuming .
But I'll just put the regular price of $100 right .
And uh that's pretty much it .
Now , if you do not have a price guys , the variation product will not work .
Ok ?
So you must have a single price or a regular price or else it's the entire thing , the entire pyramid falls down .
All right , just to be very clear and then you'll do the same thing for the small brown .
So you need to have an image and then you need to also put in a price as well just like that .
And then large blue here , I'll put in a uh blue , right ?
Or no ?
Do we enter the brown ?
Did I mess up here ?
No , no , no .
Oh yeah .
Here I did with small blue , right ?
Small brown , right ?
Small blue , OK ?
100 bucks or large blue .
Here we go .
And then also the large brown , large brown , OK ?
And then 100 bucks .
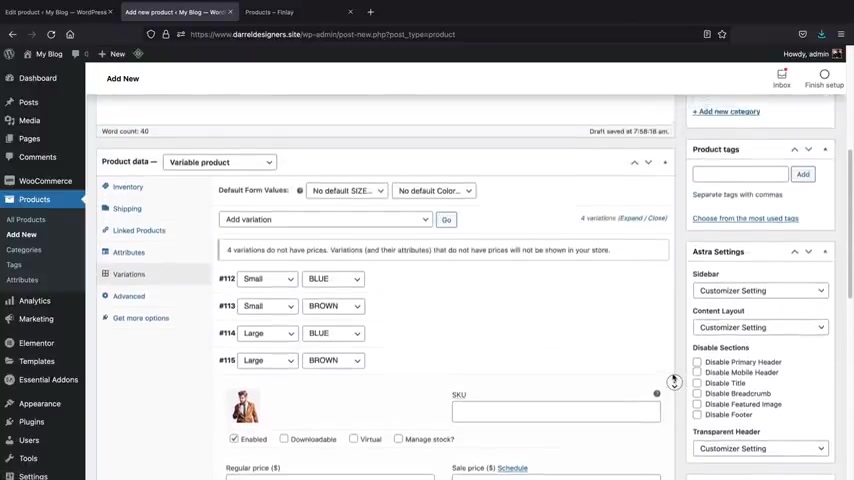
Now this is where you're going to enter in uh the product short description .
Next , what we'll do is we will add in a product image right .
Now , the product image will display on the shop page .
OK ?
So um this is gonna be like uh you need , you need an image to basically represent the product .
So we're gonna select this product image .
Now , let's say for example , they click on this product , right ?
Which image or which value do you want to display by default ?
Well , we can display the lar or the small blue or the large brown .
So you can kind of go through here and set what you want by default .
So this is the default value when someone clicks on the product and then for tags , we'll just put in jacket , I don't know , right jacket and this is a jacket .
So we'll create a new category for jacket and I think we're all ready to go .
So let's go ahead and take a look at this product .
Let's click on and publish and let's just hopefully everything went good .
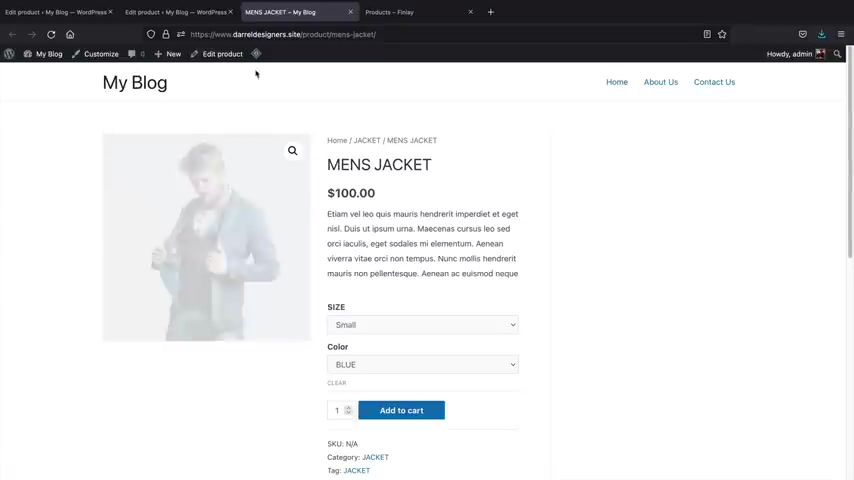
If anything goes wrong with the variation products or variable products usually just won't display .
So let's go ahead and take a look at the products .
I'll open this in a new tab .
All right .
So here is an example of the variable product man .
It's really annoying .
We gotta , we gotta change that back .
We gotta , we gotta keep doing that here .
Uh And we , when we create a custom shop page guys , we won't have to do this all the time .
But for the free version , uh if you are using the free version , uh you'll need to do this uh for each product .
So we'll do like a box , right ?
OK .
And then we'll go back to update and now let's just refresh this page .
Give it that better clean look and looks really nice .
So let's take a look .
We have the products now we have small blue because that's by default right now .
We have large blue and large brown .
So now you'll see how the image changes , right ?
And people can kind of , you know , zoom in on the guy and you know , stuff like that and you'll see how small brown also just displays , you know , like that .
So yeah , that's an example of a variable product .
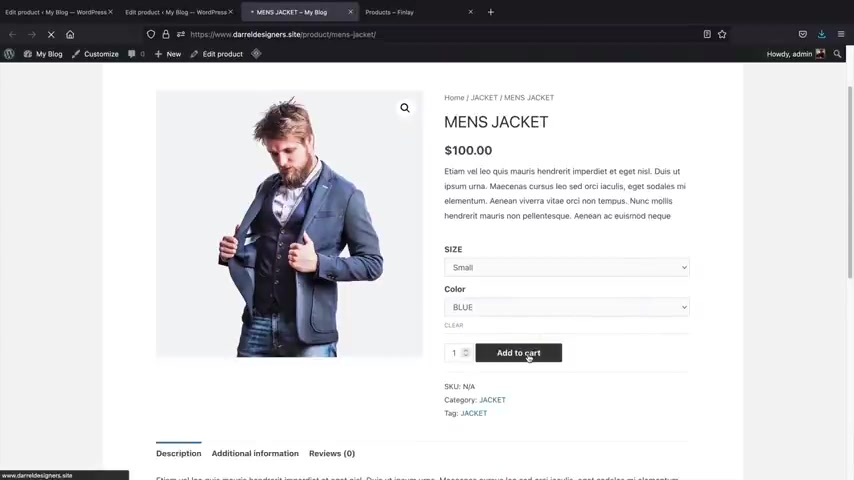
This is probably the most difficult thing to make for beginners .
I totally understand .
But uh yeah , it just takes a little bit of practice .
Now , let's say , for example , we scroll down here .
Now we have the Upsell .
But you may also like , so that's an example of an Upsell , let's say , for example , we add this to the carts .
So I'll add this to the cart , right ?
And then click on view the carts .
This right here is an example of a cross sell .
So we're , we're recommending products at checkout .
All right .
So you might want to strategize your cart and kind of , you know , strategize your products based off of what you are selling .
So if you're selling a jacket , you might wanna sell jacket cleaner or buttons or something , you know that people can use with the jacket .
So congratulations .
You guys .
Now know how to make products .
Now , let's add these products to the rest of the home page , which we were designing from the start .
So let's click on the home tab .
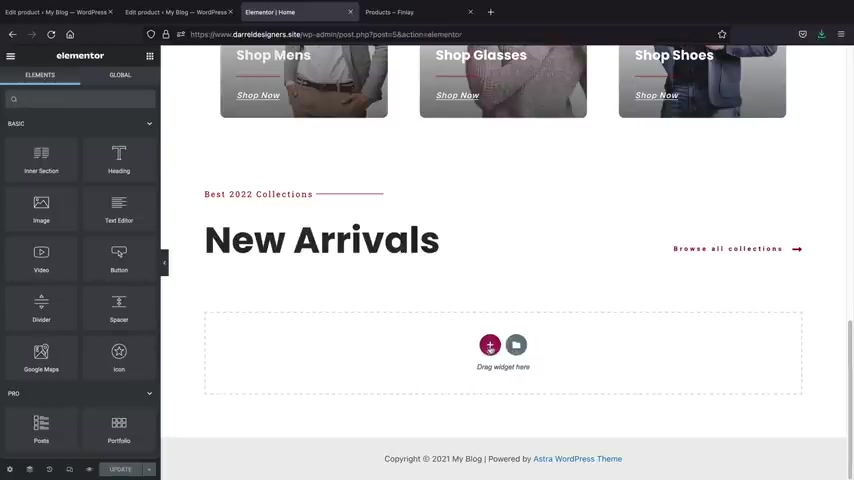
Now we'll click on edit with mentor .
All right , and we are going to scroll to the bottom of the page here where we're working on and right here , we're going to enter in a new widget .
So let's click on , add a new section and we'll just enter in this fourth section , click on the elements tab and I will type in products and here we can enter in the products .
Now , this is an element or pro widget .
So we'll take this and we'll drag it and now you'll see that we have our products being displayed and you can adjust the columns and also the rows .
So if you just want like a , you know , three columns and three rows , we can adjust it also the page .
So let's say , for example , you have many products and you don't want to display all the products .
We can display like a little uh a page here at the bottom where they can scroll to different uh you know , pages and see your products under the style tab .

We can now style these products , let's say , for example , you know , by just like you guys probably know already , we can just , uh you know , adjust the , the color and we can go to the font as well by changing this to like enter , right , enter and then we can go ahead and customize the ratings , we can adjust the star size , the spacing the price and also the regular price as well .
So you do have a lot of customization and options and I'm not gonna go through this , you know , all the way because I think at this point , you guys know how to customize this and design it to your liking .
Now , if you are using the free version of element to , we can actually use the uh essential add ons grid .
So we'll type in grid here and this is the product grid .
And I got to be very honest , personally , I do like the product grid a little bit more because it has a little bit more of a style to it .
So I'll click on the plus and click on the little uh one row , right ?
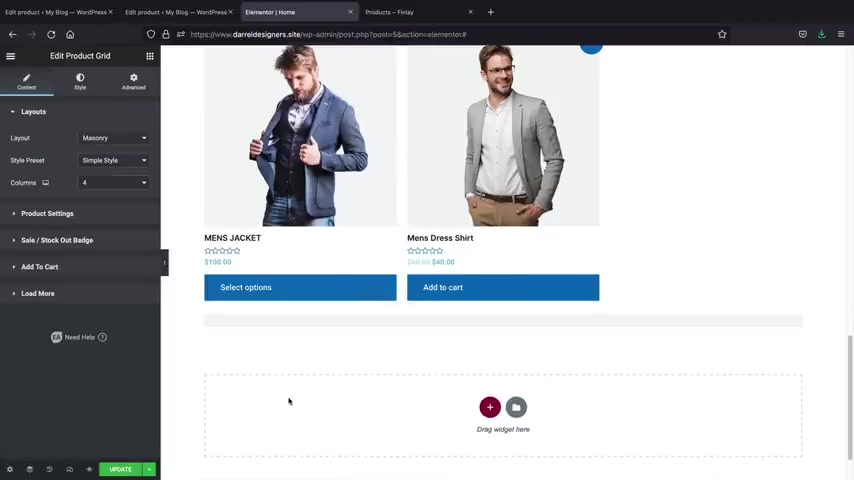
And we'll type that in one more time grid and then I'll drag in this element .
Now , the reason why I like the grid more , I just feel like it just looks a little bit better , you know , and there are different layouts that you guys can use .
Like there is a list grid and there is also a view grid and there's also masonry which is kind of like a really blocky choppy style .
And then here you have different styles .
So you have like reveal style .
Uh There's a bunch of different presets here .
You know , you guys can kind of go through these and check these out like that's presets , eights .
I do like that .
It's kind of hip and remember you can design and customize every single element .
So for example , the at of carts , you can adjust that by going to the style section and then you can adjust all of this right here , like the button , the sale badge style of the color and topography .
So you can adjust everything to your liking .
And you know , there is a little bit of work that we probably need to do to make this look exactly like the demo .
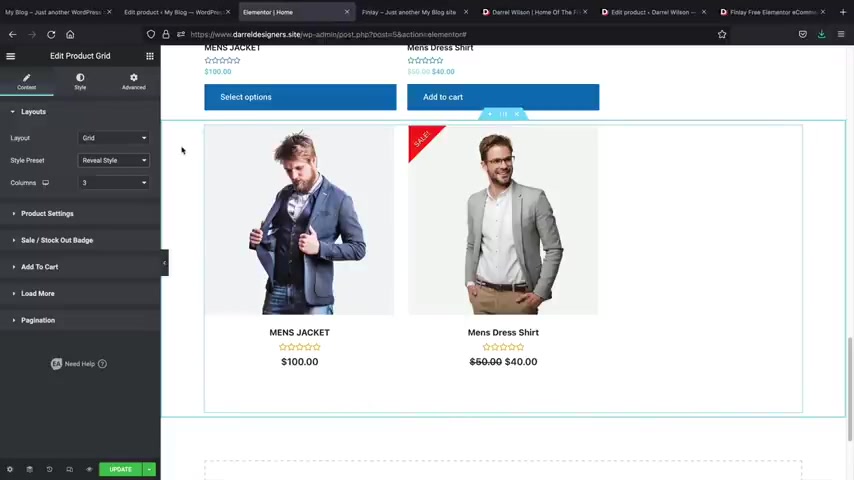
But I think you guys now know a little bit about this to kind of go on your own , you know , your Merry Christmas way and you guys can design this to your liking .
So , uh personally , I do like the um I do like the essential add on a little bit more .
I just feel like I like the presets .
They are pretty cool and uh that's just my personal opinion on that , but you can use either .
So this is the pro element and if you're using elements or the free version , you can go the essentials grid route .
All right .
So that's pretty much how you can add products to your home page .
All right .
So now that we are comfortable with adding products and you guys have some experience with the page builder .
Let's go ahead now and import the demo content .
So now I'll be giving you guys the home page , the About Us page and the Contact Us page and showing you how to import them correctly onto your website .
Because I think at this point you guys have experience on how to use the builder and it might just be practice that you all need and you guys can probably , you know , just fiddle around with stuff and you can get the hang of it .
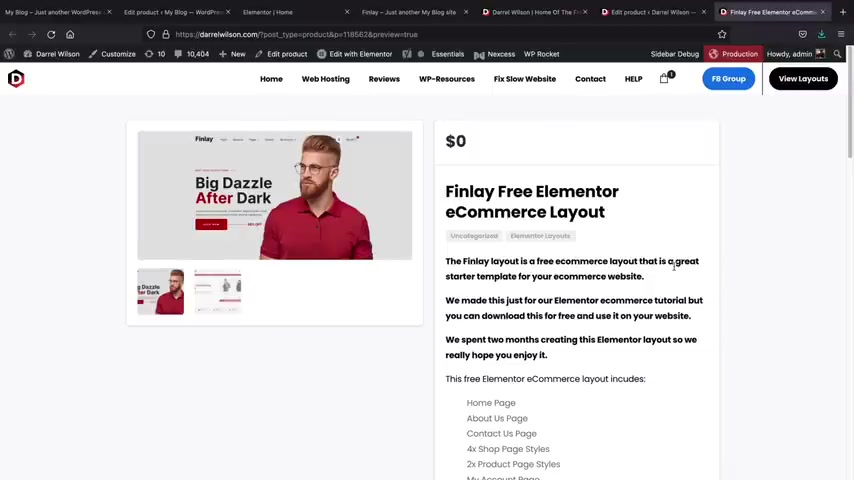
But if you guys go to my website , I'll leave this link in the description of this video .
There is a product called the Finley Free Elements or e-commerce layouts .
Now , this is completely free .
It's a digital download and it has a zip file that you guys can download .
Look how many comments I have here 10,000 comments , you know , like , I mean , they're pending , you know , I , I just haven't approved them yet .
So you'll go to this page and you'll add this to the cart and then you'll go to view the carts and you guys can download this product for free and then you'll just go to proceed to checkout and then you'll place the order .
Now , remember this is completely free .
So this layout does not cost you anything at all .
Once you do that , it'll say , all right , cool .
You have the layouts and here is the downloads .
You'll just click on the Finley right here and this will download as a zip file for all of you .
So click on , ok .
Now once you guys down the layouts , all you need to do is open this zip file , you'll just double click on it and then you'll see Finlay .
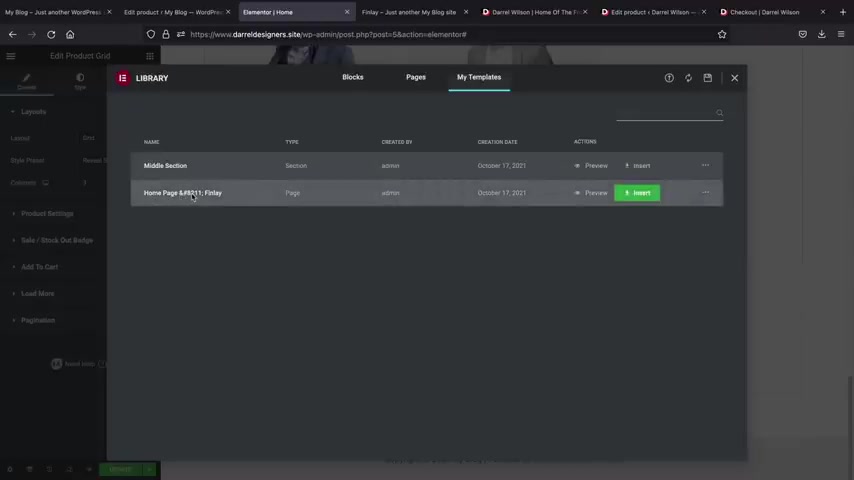
So I'll go ahead and double click on this .
Now , this contains all the pages for all of you So it has the home page , the About Us page .
Um And these are the other pages that we'll talk about in just a little bit when we talk about the theme builder .
But uh all we need to do is import like the home , the about and the contact us .
So let's do that .
Let's go ahead and make this a little bit bigger .
So what I'll do is I'll click on this little folder and we can upload this and I'll select the file , go to my desktop , open the Finley and then I'll select the home page and then I'll click on open .
All right .
So here is the home page .
I'll probably fix the title there .
I'm not sure why that stuff comes up , but , uh , I'll mess around with it and make it a little bit more cleaner .
But , uh , here I'll just click on inserts and now we're going to insert the home page on to the website .
All right .
And here is the website .
So we'll go ahead and scroll down .
Now , this is the demo that I created for all of you .
Now , this right here is available because I have the pro version installed .
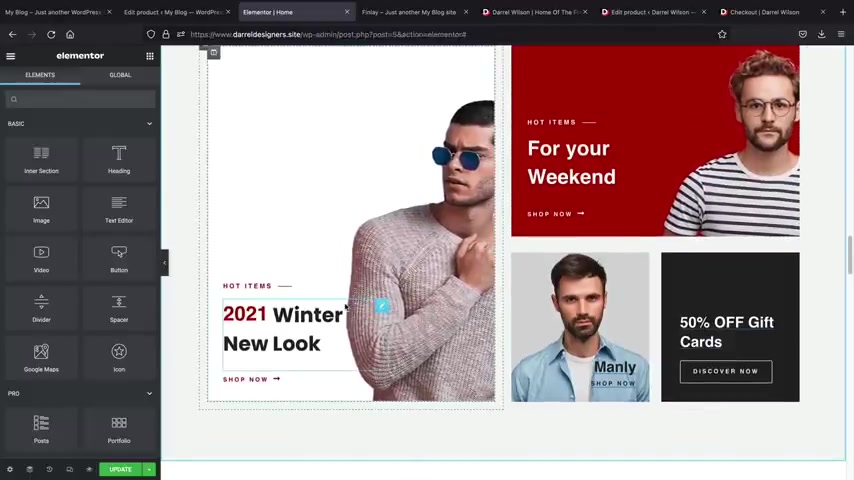
If you have the free version installed some of these titles and also boxes might not display .
So you'll just need to go ahead and enter in like the heading tech and then just go ahead and edit it there because this is using a pro element So this is the animated headline .
So this is only available for the pro version , but you can substitute it with just a normal heading , right ?
So you can still use the layouts .
Don't think like , oh I forgot about the free users .
Like no , we we made it for both free and pro users .
And here is the new arrivals , you have our products and right here also if you guys are using the free version , uh these will not display because these are the reviews .
However , you guys can use the essential add-ons , reviews .
So for example , they have reviews and other reviews that you guys can use to substitute it .
All right .
So I just wanna make that clear because I don't want anyone to leave me nasty comments saying when you just want you just want us to buy the pro and I said no , I I made it for both people here .
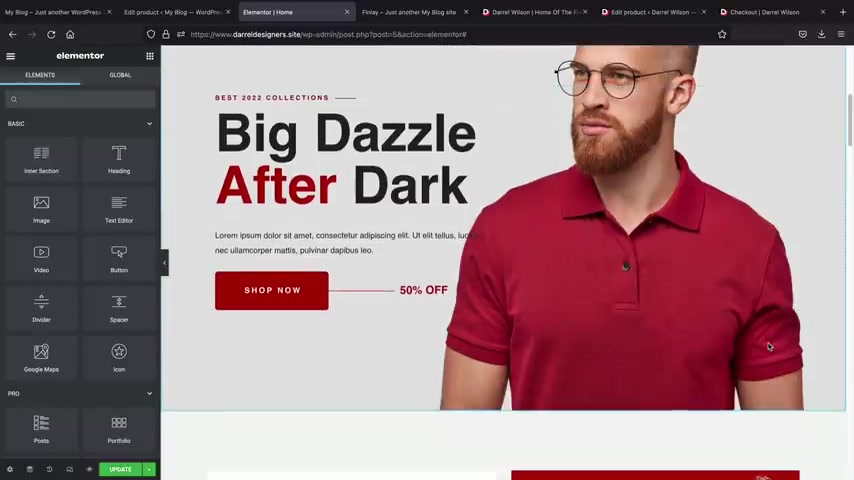
We have the countdown and we have this other little section uh for free users as well .
This may not display .
So you'll just need to go ahead and go to the countdown and then just put in the countdown , widget right here and then you can adjust this in the style tab to give it that specific look that I have , right ?
I'm so nice .
I thought about free and pro users .
How about that ?
And we'll scroll down here and everything looks good .
So yeah , that's your whole new websites now .
What I can do is I can go ahead and delete everything .
Now , I know that's a big waste of time .
But uh you know , we already have everything .
So I'm gonna delete this .
I want to keep this section .
I'll show you guys how to drag and drop sections .
Uh This section here , I'm gonna delete it and I'll delete this section and delete this and that's pretty much it .
Now , let's say , for example , I want to take this section and I want to drag it down .
You can click on edit section and hold this .
All right , I'm holding it and using the mouse cursor and I want to drag it right there .
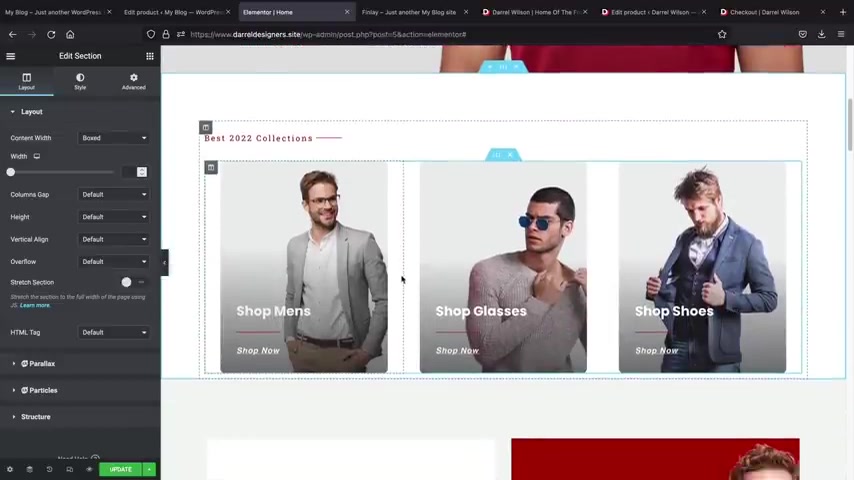
And now we can see that it's below there .
So you can use this section to introduce your product categories or you may use this section to introduce your product categories .
So that's how we basically created this section and now you have a whole layout all for yourself .
Now , you might notice here that this guy's head is kind of chopped off , but uh it's actually not , we just have a transparent header on the other website .
So uh we'll talk more about the header in the very next section , but uh that's pretty much it .
So at this point , you guys now have a fully completed a home page that just looks great and you also have products on your home page .
Now , let's do the same thing for the about us section .
So next , let's go to the About US page .
So we can actually exit to the dashboard and then we'll go and we'll import the layouts for the About US page .
So let's go back to the wordpress logo .
Now , we can actually use the finder , but uh we'll talk about that in a little bit .
Uh We actually need to uh edit with elements or first .
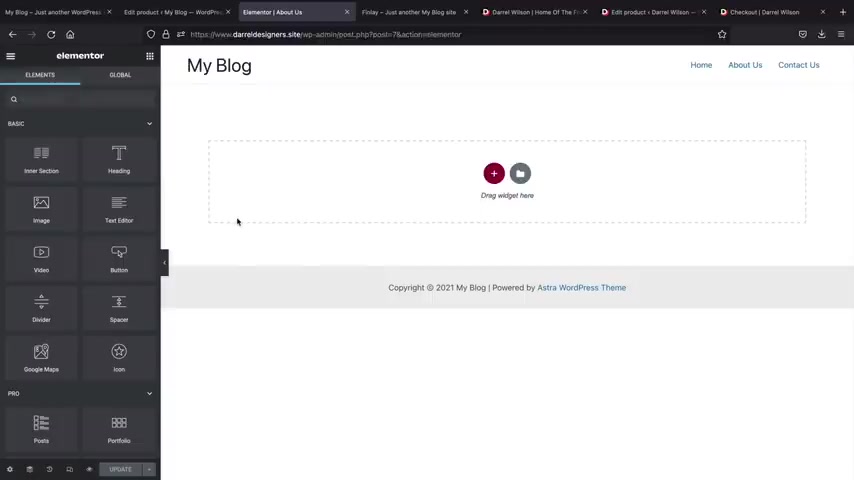
But uh here we'll see the About us page and click on edit and then click on edit with element or and now we'll do the same thing here .
So we're gonna click on this little folder icon and then we'll upload the JSON file .
There we go and now click on select file and I will import the about a section and now I will insert the About us page and click on .
Yes .
All right , perfect .
So now you'll see that we have this about us page .
It has imported correctly .
You guys can kind of go through this design , see how we did everything and then kind of mess around with it .
Um I'll have other videos that are a little bit more advanced , but I just didn't want this video to get too long because we do add some really cool techniques and styles to make this specific about us page .
Now , if you are using the free version , you'll just need to replace this heading text .
So you'll just need to put it in right there and then you'll just need to place the text because this again is a pro element .
So uh yeah , you'll just need to add in heading text .
Not too much work .
We did everything for you guys just replace the text .
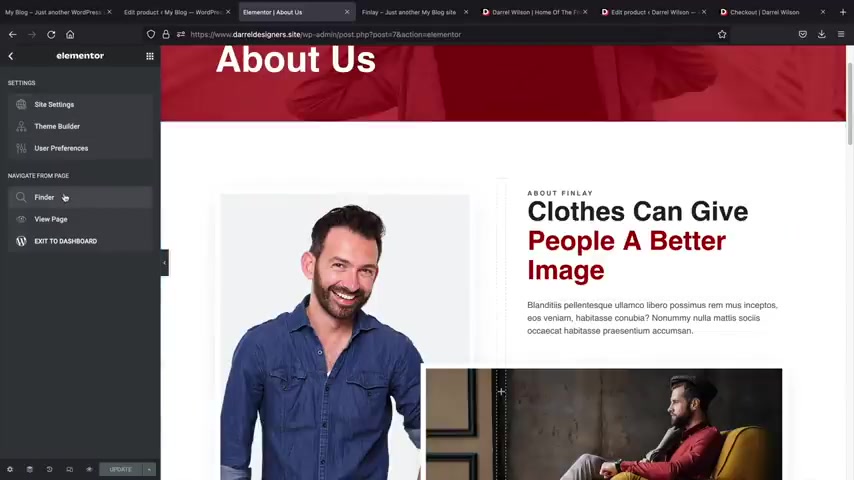
So next , let's click on update .
Now , let's say , for example , you want to scroll through pages without closing everything .
You can actually use the finder right here under finder .
For example , if you want to scroll to the home page , I'll just go to home and then click on home and the finder will actually go and jump to the home page .
So this way you don't have to keep closing everything and opening everything back up .
You can say , oh , I want to go to the home page and then I'll go to the About Us page .
So the finder is actually pretty helpful now to get the pages to show up in the finder , you first have to edit the page with mentor .
So uh we should be able to find our About Us page .
But if you go to contact , it will not be available because we need to first edit the page with mentor .
So let's do that .
That's just a shortcut .
You know , I'm sure you guys are probably seeing these and like , oh what is this stuff ?
So let's click on contact us and we'll click on edit page at the top and now we'll click on edit with mentor .
All right .
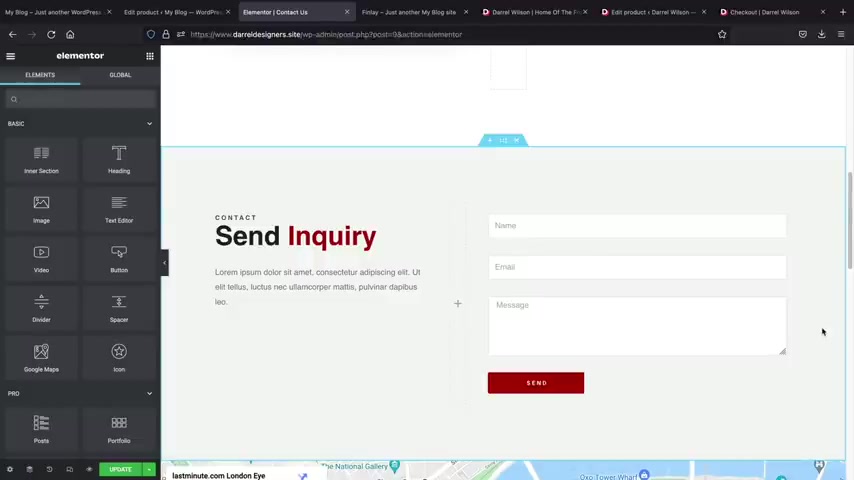
So now let's go ahead and import that layout .
So let's click on the folder icon , click on import templates , select file and now we import the contact us and click on open next .
We'll go ahead and insert that layouts and click on .
Yes .
All right , cool .
So now we can take a look at our contact us .
Page .
Everything looks good .
Everything looks clean and yeah , everything imported correctly .
So I hope you guys really enjoy this layout .
You know , we spent months or weeks making it .
Actually , we spent two weeks making it just for you guys .
Now , there is one thing that I do want to talk about and that is the contact form .
Now , if you were using the free version , unfortunately , the contact form is not available .
However , you guys can actually use a plug-in called WP forms to create a contact form on your website .
Now , this applies to both free and pro users .
So let me go ahead and just show you the contact form really quick here , I click on exit the dashboard and go to the wordpress logo .
All right .
So from here , we're going to go to plugins and go to add new .
Now , this does apply to both free and pro users because sometimes with the elements or contact form , depending on just random server settings , sometimes you may not get the email or may go to spam .
So over here just type in WP forms and now you can install this plug in here .
It's called contact forms or WP forms .
Just go ahead and click on install .
Now .
The great part about W forms is it integrates really well with element or in fact , they do have an integration that works specifically for mentor .
So go ahead and click on activate .
Now .
On the left side , you'll see WP forms , just click on all forms .
Now , I think they created one for us by default .
Actually .
No , they did not .
So just click on and create a form and you can just enter a simple contact form .
You know , I'm not gonna go through the basics and the advanced part of A P forms , but you can essentially build your own contact form uh from .
So I'll just click on a use template for this simple contact form .

And here you can kind of drag in elements like you can add in a phone number here .
Uh You can put check boxes and stuff like that like this would just be like a phone number , right ?
Phone number number .
Uh oh who , who , who , who there , there we go .
And then we'll just click on save and then we'll just exit this because we actually added everything we want .
And then here we have this little short code , but let's just go back to our sites under visit sites and then click on the contact us .
Now we'll click on edit with mentor and we will scroll down and I'll just add the contact form , maybe I'll just add it down here , you know .
So if I type in forms , you will now see WP forms widget .
So this works specifically for mentor and I can take this and just drag it down here and for the form , I will then select the simple contact form that we created .
So I'll put in my first name .
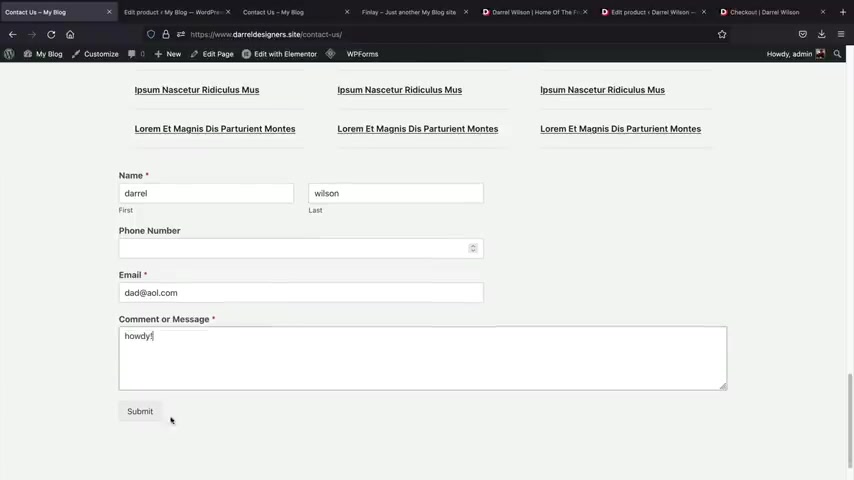
So here we go .
How and then I'll submit the form .
So there is the simple contact form notification and there you go .
So now we have received that email from our website .
Now , one small thing that we also need to add to our menu is the pages that we created .
So now that we have the home , the about and the contact when we installed the Woocommerce plug in , some of the pages were automatically created for us .
So now we need to assign those to the menu , you know , like your shop page and your category page and your my account page or whatever .
So let's go right here to the appearance and click on menus .
Now , here we have pages , right ?
So for example , there are accounts , you know , the checkout the cart page , you can now assign these to the menu .
I think just maybe the my account and the shop page is good enough , right ?
So let's go ahead and put the shop right there and then maybe we can even put the my account there .
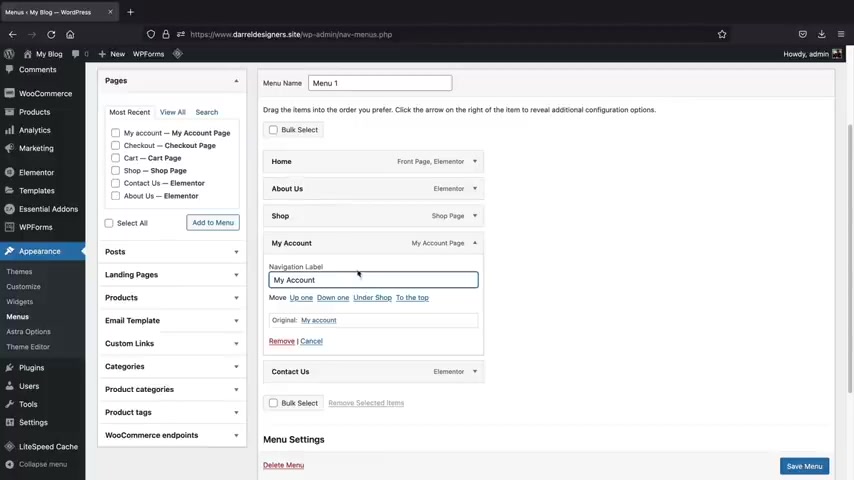
Now , one other thing too is I want the a capitalized just because in , you know , in web design , that's what we do .
I don't know why it's , it's just how everything works .
So I wanna go ahead and click on this arrow and I want to capitalize that .
A , you can also change the title for your pages .
So let's say for example , your page is about us , you can change that to just about if you wanna , you know , if you want to approach that route and then we'll click on save menu .
All right , cool .
So now we have the home , the about the shop , the my account and the contact .
So if I click on this , your users will have full access to the shop and they can click on my account and this is actually created automatically for you .
So now you can see the orders , they can see their account details and this is created automatically for all your customers where they can see their orders , they can update their payment methods and all that really cool stuff .
Ok ?
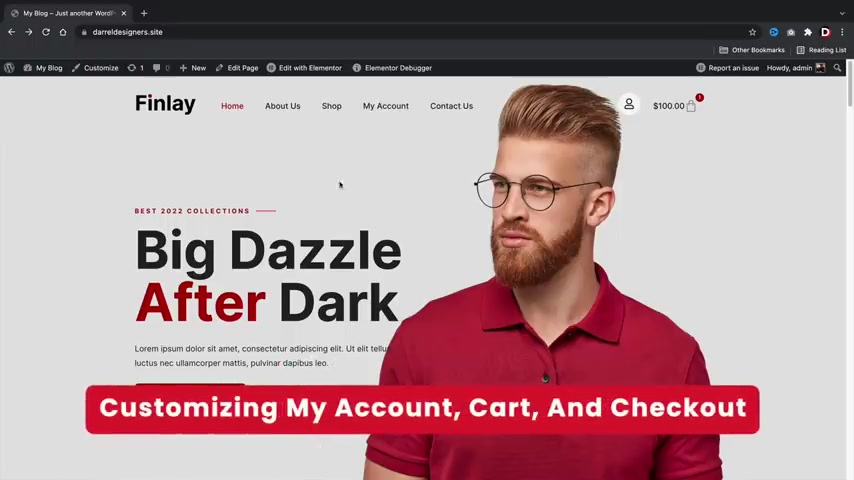
So now that you guys have a good understanding of how to design your website , I do want to talk about the my account , the checkout and the cart page as well .
We do also have templates for you uh for those specific parts .
Now when you install the Woocommerce plug in , it'll automatically create your Cart page and your checkout and also your my account .
Now , I just want to walk you guys through really quickly on how to design this page .
Now , you can design and customize all of the pages and we do have templates for you guys as well in the uh in the folder that you guys can download on my website .
So first thing is if you want to get rid of this carts , you'll go to edit page .
Now , during the creation of this video as well , elements or pro released a new feature for the my accounts .
I'm sorry for the carts and the checkout .
And I'm going to just show you guys the feature just so you guys understand what it does .
Uh But first off , let's go ahead and disable this title on the bottom , right and click on update .
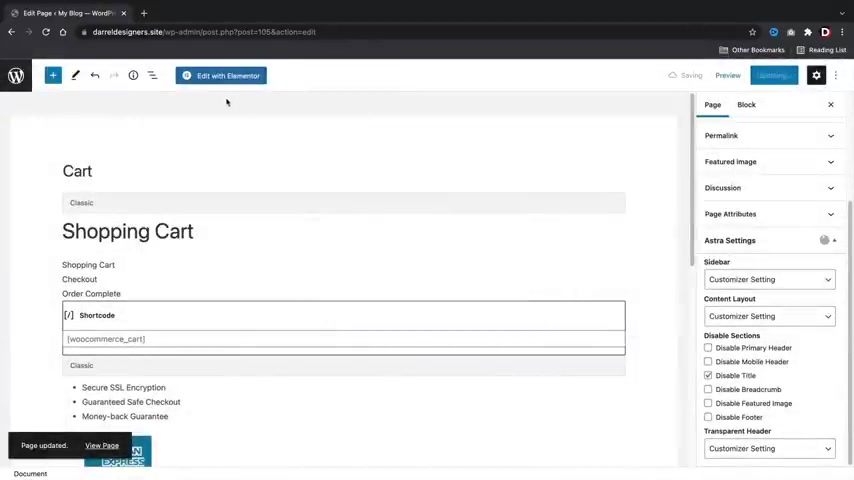
Now , if you want to edit the Cart page , all you'll need to do is at the top , you're gonna see edit with element to go ahead and click on edit with mentor .
And this will actually allow you to start designing and customizing your cart page and you can do the same thing for the checkout and also the uh my accounts .
So here we have the cart page .
Now , I'm using a um a template that I used .
So for example , uh the template that I gave you guys in the folder , you guys can upload it here by just going to upload select files and doing the same thing we did before .
So you'll see here how we have the Cart page and this is the checkout .
And also we do have the my account there as well .
So I can just click on open and insert this onto my uh cart page .
So here we go .
We have the cart page .
Oh , wait , now , here it is cartage insert and I'll click on .
Yes .
All right .
So this is the cart page and of , and of course , you guys can fully customize this .
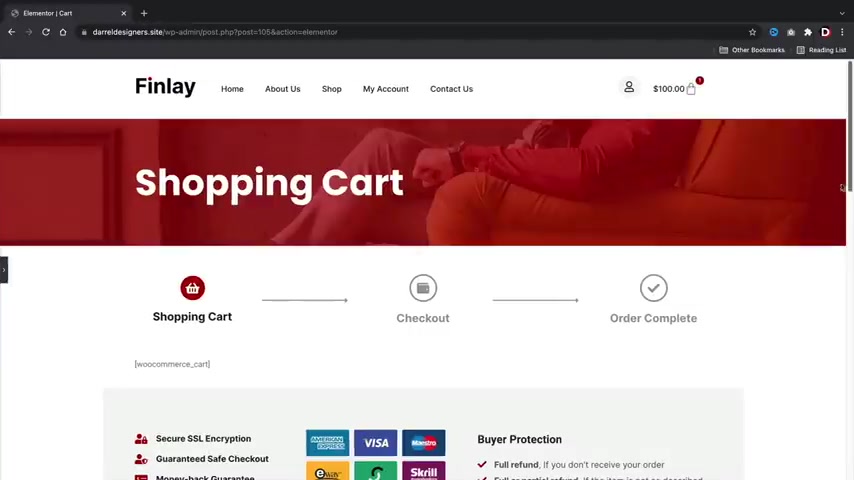
Like for example , if you want to stretch this section full width , we can say it wants to stretch this section all the way and then it'll be a full with uh uh shopping cart .
Also , we do have that other previous shopping cart and you guys can go ahead and delete this and delete this and delete that and delete that because we already have this .
Now , I do want to point out something else that a lot of people don't know about element or is you can actually change the fonts and the colors within this short code .
So for example , if I click on style here , you'll see text color , right ?
I can change this text color to like green or something , right ?
Like a green and you'll see how this all changes to green .
Now , remember these are controlled by the theme customizer .
OK ?
So to change the button and the font for the products , you'll do that through the theme customizer and also , here we have the topography .
You can go ahead and change this to whatever you'd want .
Now , while you're working on it , I'll be very honest .
It does get a little glitchy , you know , it does kind of hide it sometimes .
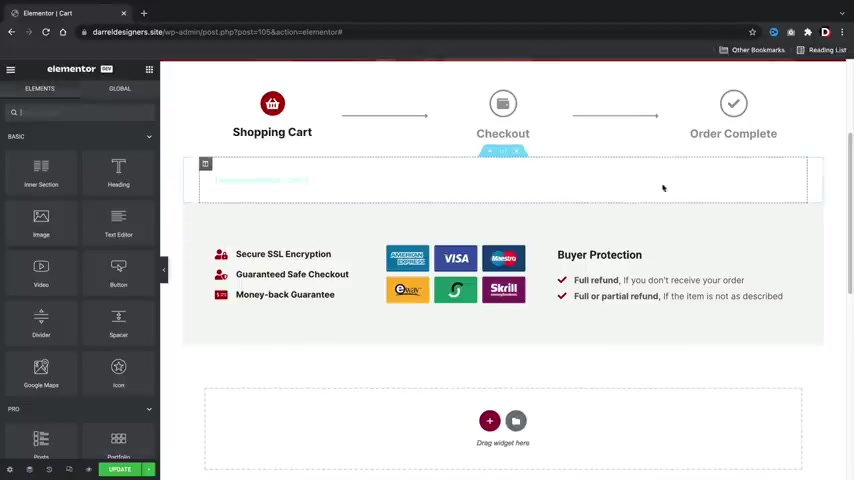
But uh here I'll change this to bold .
So you guys will get a better example .
Here we go bold and I'll just like click around , just click on the website and then it will re propagate .
So it , it does that sometimes .
And uh if it does that , just click on it and then you can change it .
So this is how you can go ahead and change the fonts and the colors for the uh uh cart .
You can also do this for the my account and also the checkout .
I also do want to talk about the checkout page as well .
So you can go ahead and customize the checkout page the same way you customize the Cart page .
So I'll go ahead and click on , proceed to checkout and this will bring you to the cart page .
Now , sometimes guys , when you are using uh you click on edit with Element mentor and nothing happens .
You actually need to click on edit page here and this is the way to actually edit the checkout page .
I know it's a little weird but uh there is some sort of bug sometimes where you click on it and it doesn't work , you'll just click on edit with Element or here , once you click on edit page and this will then allow you to edit the page with Element to also make sure to disable the title at the bottom , right ?
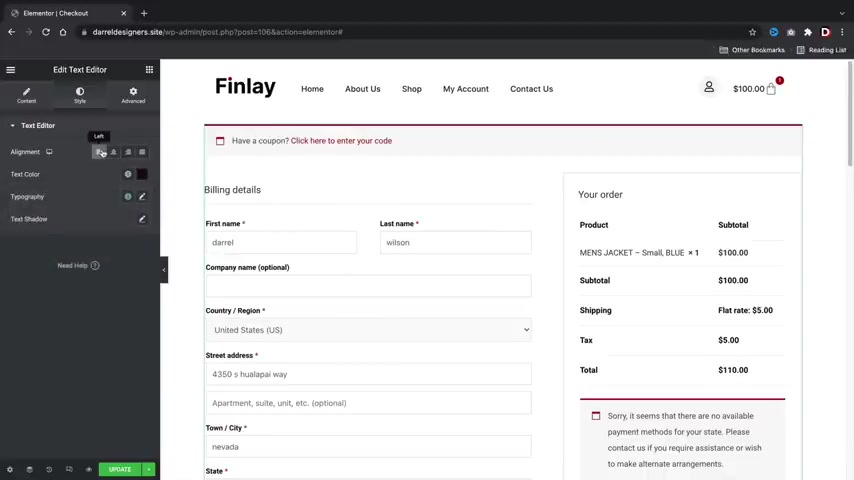
That will get rid of that .
Uh It'll get rid of this , check out , um check out title .
So I'm gonna click on updates and I'm gonna edit with mentor .
Ok .
Now , just like we did before how we can change the font and the colors for the Cart page , we can do the same thing here for the actual uh checkout page by going to style and then again , we can adjust the colors and we can change the font here .
Now , you guys um the free users can have this feature .
So uh you don't have to be a pro user in order to change this feature .
However , uh elements or pro does now have a cart widget as well .
So here they have a new cart widget and just remember this is in beta guys .
So they're having like a sticky right column .
Uh They're adding in like a bunch of different features where you can , you know , uh add colors to this section or this section or this section .
So you will have a lot more customization with the Cart page .
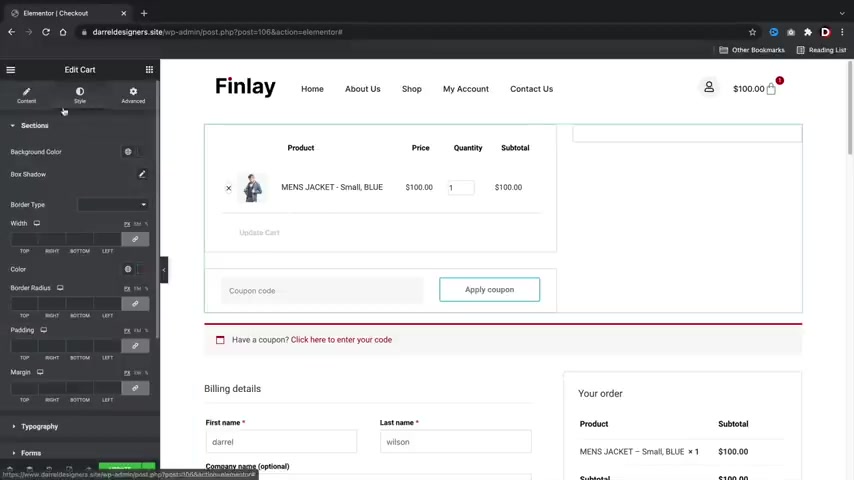
So uh for example , just like we did before uh the car totals , you can change the car totals to something else .
You can change the text and uh you know you can kind of mess around with these options here on your own free time .
Now , I'm probably gonna make another video dedicated to this because uh we can talk about how to make a really nice check out for with this probably in another hour , but I don't want to make this tutorial too long .
And also this is in data at the time of making this video .
So I don't want to touch base on it too much because it's not yet in a stable release .
So uh I'm just going to skip this , but I just want to introduce you to this that this is gonna be available for pro users .
So I'm gonna go ahead and delete this section now and then I'll click on update .
All right .
In this part of the video , I'm going to quickly touch base on mobile optimization .
Now , mobile optimization is very important because there are more mobile users than desktop users .
So you really want to make sure that your website looks good for all mobile devices .

So let's go ahead and run you through on how to optimize your site for mobile .
First click on edit element to and now we're going to optimize this site for mobile .
So now we have these icons here at the bottom and this says responsive mode .
So let's click on responsive mode .
Now , this is what your website looks like on a desktop view , what it looks like on a tablet view and this is the view from a mobile device .
Now , the layout that we created for you guys , we have optimized it for mobile .
So it'll look good for all devices .
You can see that everything looks really nice , everything looks really clean and uh yeah , you'll just need to go ahead and go through this and make sure that everything looks really nice .
Now , let's say for example , your site is not optimized for mobile .
And I want to show you guys quickly on how to adjust things and how to change things for your mobile devices .
So the first thing is let's optimize this site for tablet .
So let's go back to the site that we were creating on and we're gonna click on responsive mode .
So now I wanna click on tablets .
So you'll see here how this looks pretty clean .
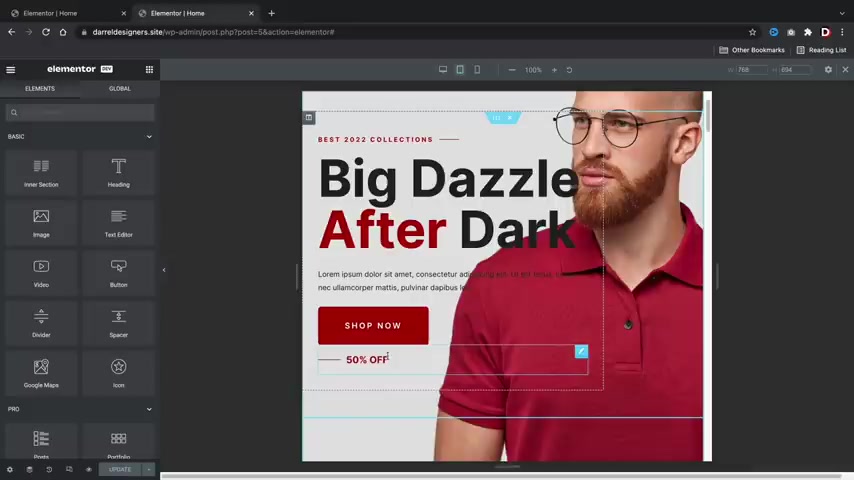
However , the 50% off doesn't really look good .
And in fact , it's broken , we can actually hide specific elements for specific devices because sometimes you just don't need to have specific elements on mobile devices .
I'm gonna go ahead and click on this on the pencil icon and I just want to hide this .
I want to hide this for tablet users only because I just feel like this just doesn't really , you know , we just don't need it to be honest .
We just want the the shop now button so to hide in elements for devices , click on the advanced tab and then we're gonna click on responsive and I want to hide this on tablet and I probably also want to hide this on mobile as well .
So now you'll see that this has that uh gray out field where uh this will now not display for the tablet or the mobile .
Let's keep scrolling down here .
So this is actually not bad .
I mean , I think this section looks good .
I mean , for tablet users , it's definitely not bad .
And um I think that this looks just fine .
Uh This section right here might be a little bit too big .
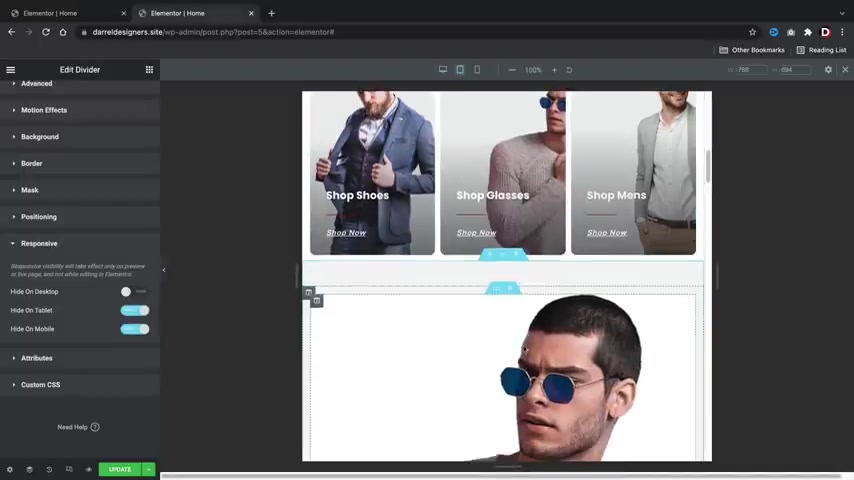
You can see all these sections might be too big .
In fact , we probably don't even need this section because we already have the product categories here .
So let's hide this entire section .
Now , I'm gonna click on these six dots right here .
Go to the advanced tab , go to responsive and I want to hide this for tablet and we're going to come back to mobile .
I don't know how it looks yet on mobile , but let's just go ahead and optimize it for tablet first and then we'll come back to it .
So now you'll see this whole section is grayed out and that makes a lot more sense .
Now , let's say , for example , you guys want to change the position of this , I'll click on this pencil icon and then for the alignment , you can see tablet is selected and we can change alignment over here , you know , to the left side , to the right side .
Now remember we are adjusting this only for the tablets when we are in responsive mode .
So uh this will not reflect on the desktop version .
So next , we have this section here and we have a few options on how to optimize this for mobile .
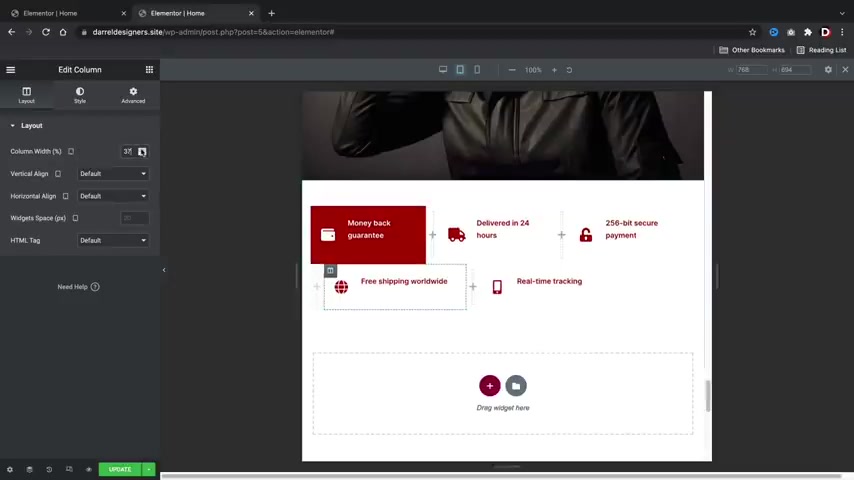
Number one , we can just disable specific boxes , you know , for mobile devices or we can stretch out these two bottom rows to make it look more , you know , more structured and more proper .
Let me go ahead and show you guys how to extend these rows really quick .
I'll click on this little column here and now you'll see that for tablet , we have this tablet devices selected .
So now we can kind of push , push this to kind of , you know , make them have like more of a , you know , more of a structured style .
So here you'll see for tablet as well , we can push this and just kind of leave it like that .
So you do have an option to make it , you know , make it look a little more structured or you're gonna say , you know what that just doesn't work out for me .
Uh I just want to hide this again so we can go ahead and hide these columns by clicking on the column and doing the same thing as before going to responsive and we can go to hide on tablet as well .
So that's just an option if you know , if , if , if , if you're making a website , don't think that you have to disable options .
You can change the position .
You can kind of change the size of the text as well to make it more responsive .
Now , also really quickly , uh I wanna click on edit intersection here and there is an option where you can inverse sections .
So here we have the inverse tablet where we can inverse stuff .
And this is actually pretty useful if you guys have images with texts that are , that are stacked up against each other , sometimes you can switch it around and see if that works out for you .
So that's just an option that I just want to introduce you guys to and then just keep scroll to the bottom of the page and just kind of keep looking for uh fixes on your e-commerce websites that you can optimize for mobile .
Now we went through the tablets , let's go ahead and go through the mobile device .
So the mobile section is a little bit more important in my opinion , because there are more mobile users , there are tablet users .
But uh let's just say for example , you want to edit a specific section .
Uh You can now see that we have the um the mobile preview selected .
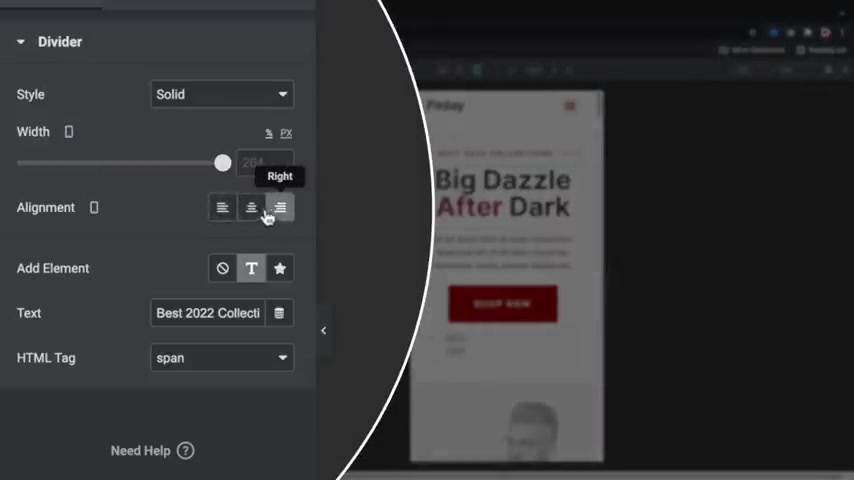
So you can adjust the alignments for the phone device .
Also , if you click on style and go to text and topography , you'll then now see that we have the option selected for mobile .
So you can change the size of the text for mobile device .
So if something like too big , which happens a lot , you can adjust it here on mobile .
So you're just gonna go ahead and scroll down .
Now , we went ahead and we disabled that background image because you can see here how the background image just doesn't really fit well because it kind of stands out alone .
So we went ahead and we hid that .
We also hit the 50% because remember earlier how it just was below the button and it just didn't make a lot of sense .
Now , I can actually put this maybe above the button and then maybe center align its and um enable this , you know , on the website again .
But I just felt like this was just a lot more cleaner and it just looks a lot more friendlier , you know , we have the shop now button .
So , uh over here as well , we can now see that these are stacked on top of each other and this looks clean , you know , it looks pretty simple .
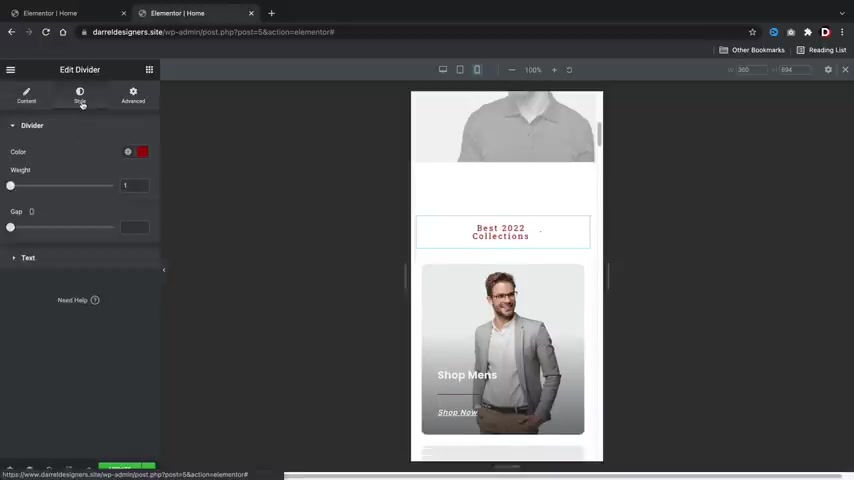
But uh this section right here , you know , it's a little confusing , you know , it doesn't look well , so we can adjust this .
So let's click on the pencil icon here .
And uh you know , there's a few ways on how we can do this , you know , we can align it to the center and maybe we can even change the text or the width , you know , like that's , or we can say , you know , what's um you know , I want to change the text to a different size , you know , maybe we can , you know , push it like that .
But if you do that , you want to change the width as well .
So just remember that uh when you are optimizing it , you have this mobile preview here and this allows you to just optimize it for a mobile .
So I do think that is a lot nicer than what we had before .
All right , and this keep scrolling down here .
We have this section now we disabled this for tablet devices because it just didn't look well , it was too big , but I think this looks a lot nicer , you know , it's more structured , it's more compact and I do like the like the the way this looks uh this section as well .
It looks pretty good .

You can see this section is a center align that looks a lot nicer .
Uh We could also , you know , center align this section as well for mobile devices .
So I'll click on the column icon here .
And for the vertical line , I want to put this as middle and also center .
So now that kind of centers it for the mobile device and this keeps growing down .
And I think that's everything , you know , I think that looks good .
Everything else is uh these are all structured really nicely .
I do like that .
So there's just some small modifications that we could have done to make this a little bit better .
But overall , I think you guys get the points .
I think you guys can understand how to optimize your site for a mobile .
Uh I'm gonna go ahead and make this a lot larger now by uh of course , I'll update this and now let's go back to responsive mode .
So let's just take a quick look at the site just to make sure that everything is still correct .
Uh Right away , you'll notice that the best 2020 collections is still on the left side .
However , for the mobile device , we put it in the center , remember .
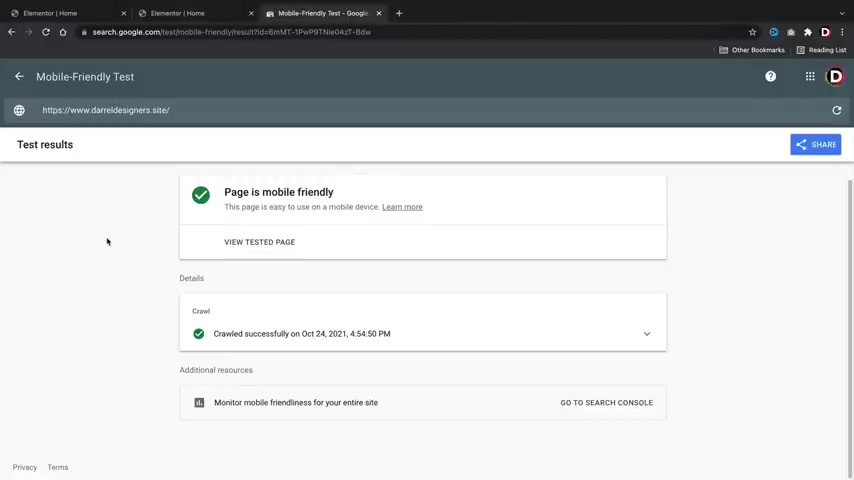
So uh it , it only reflects on the uh mobile devices .
We keep scrolling down .
Sometimes guys , I gotta be honest , sometimes when I'm working on element or in rare cases , it'll actually mix up the um it'll actually mix up the mobile and the desktop .
If that ever happens , just go back and change it again .
Sometimes it might be weird .
But uh overall , you should see it work just fine .
So now if you , you guys are still not sure if your site is properly optimized for mobile Google actually has a mobile friendly test where you can insert your URL and you can get tips from Google to see if your website is optimized for mobile .
So , what I'm gonna do is I'm going to copy this and I'm going to paste this here and let's see if our demo website passed the test .
All right , cool .
So now you can see that the website has passed the Google Mobile Friendly test .
So it says that this page is easy to use on mobile devices .
And guys , that's very important because there was a new algorithm update that says if your site is not mobile friendly , they will push you lower down in the rankings .
So you really want to make sure your site is optimized for mobile devices .
I really hope you guys enjoyed this section .
I showed you guys how to customize the cart , the checkouts and also the my accounts .
I've also showed you guys how to optimize your site for mobile .
Don't forget to like this video and let's go ahead and move on to the next section .
All right .
So your website's coming along , you know , it looks good .
We have products and uh we , we're , we're , we're progressing here .
So let's move on to step four and let's go ahead and introduce you all to the theme customizer .
And I'll also touch base on what plugins are now .
The theme customizer controls parts of the website that the page builder might not .
So let me go ahead and show you guys a little bit about the theme customizer .
All right .
So in this section , I'll be talking all about the theme customizer .
I'll also be touching base on plugins .
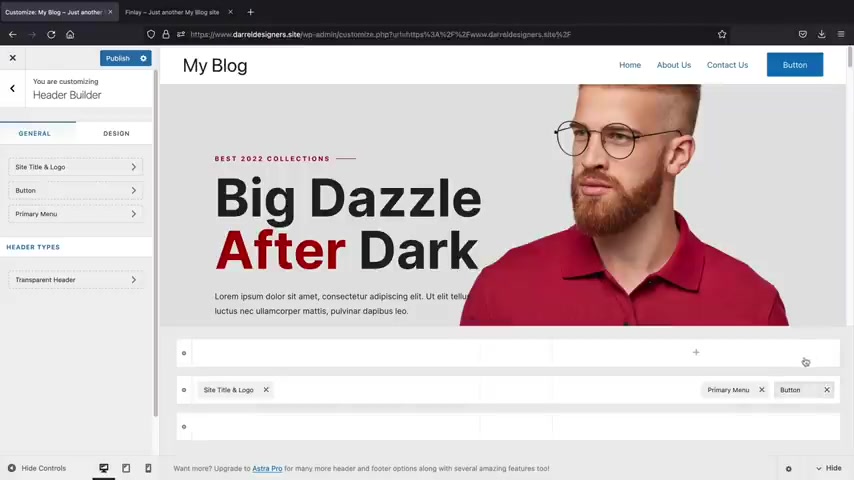
So to access your theme customizer , you'll click on customize here at the top .
Now , in short , the theme customizer controls parts of the website that the page builder normally does not .
For example , we have this header and we can adjust this header using the theme customizer .
It also controls parts of the blog and also the shop page as well .
But let's just go ahead and dive into the header first .
So here we have uh the header builder and here we can go ahead and build out a custom header .
For example , if you want to go ahead and add a widget , you'll click on the little plus and you have some widgets to go through .
Now , this is the free version of Astra .
They do have more elements in the pro version , but you don't really need to buy the pro version .
To be honest , let's say , for example , you want to add a button , right ?
So I'll take this button and I'll uh here we go , I'll drag it over here behind the primary menu .
So now you'll see that we have a button here and we can design this button by just clicking on it .

And here you can change the text and you can also put a link maybe to your shot page , right ?
So for example , this is my website and here I have the shot page .
I'll just grab shot page one .
This is my demo websites and I'll copy this and then I can go ahead and paste that link there like that .
Now , you can always design this button as well .
You can design the text color , the background color and you can also give it a border radius .
So you can have it a square or also a circular style if you want to go that route .
And these are just design options .
So you can kind of design the padding , make it larger and stuff like that .
So let's say , for example , you want to add another element , you'll just click on the plus section and then maybe here we can add in like uh I don't know , like social icons or whatever and we'll place that uh right over here , right ?
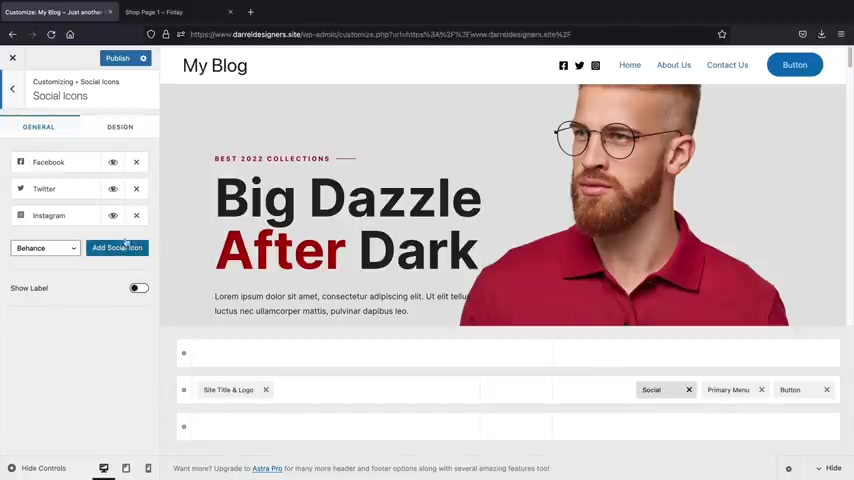
Yeah , I mean , whatever , you know , you guys get the point and then if we click on the specific elements , we can then go ahead and add in more social websites and then uh we can design this as well under the design tab .
So you can design and customize this any which way you want and for the design or I'm sorry , the general , you can always add in more social .
I uh I guess I wanna say social media websites or social apps or whatever you wanna call them .
So yeah , you can go ahead and go through those options .
You can also do something like show label , which I believe it shows the actual uh website .
So Instagram , Twitter , Facebook and stuff like that .
Now , this actually might be more helpful on a different row because you can see how this row is just too cluttered .
So I can take this and drag it to the top like that's and what that will do is that will create a new row .
And then also you can design and customize each row color .
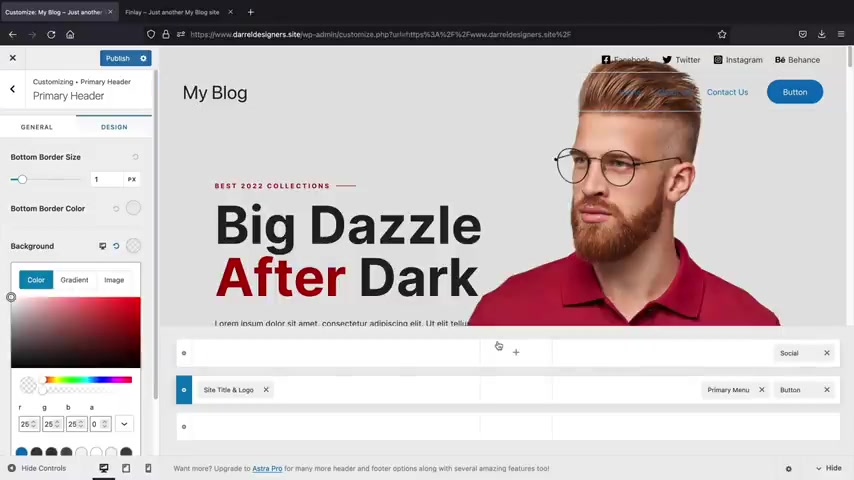
So for example , we have this top row now , right , if I click on this gear icon right here , uh we can go to the design section and here we can design and customize it with the background section .
Now , let's say for example , you want a uh transparent menu very similar to our demo here .
So let me go back to our home here .
We have this transparent menu .
So there's nothing there , right ?
We can do this for uh our our menu right here .
So uh if you click on the backgrounds , all you need to do is reduce the opacity of the backgrounds to zero .
So for example , I can take this and drag it all the way down and now you'll see that uh we have these icons here and now this is transparent and you can do the same thing for this middle row .
So for the middle row under the design tab , you can go to the background and just make that zero again .
Now you might notice how we have this little tiny border and that is from this here .
So you can just change that to zero and that gets rid of the border .
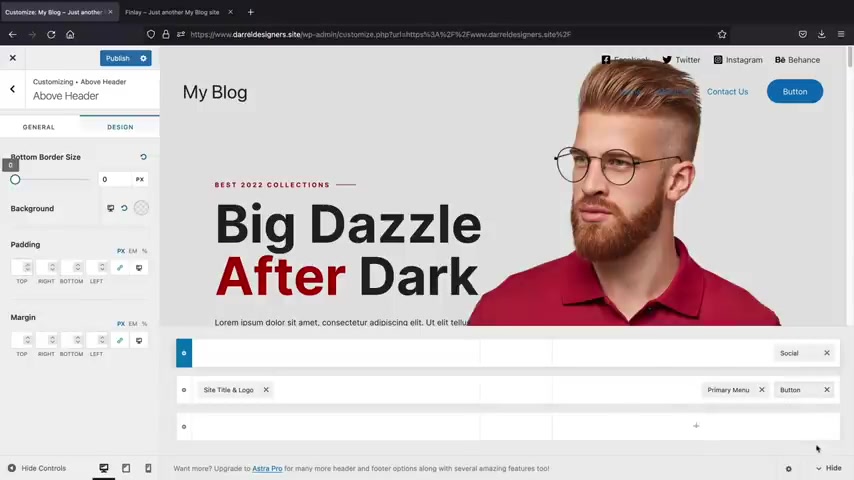
So now there is no border .
So you can do that for the first one and also for the second one by just removing the border like that .
And if we look at the website , now you'll kind of see that .
Uh it looks very similar to our other website just because we move the image a little bit .
But uh overall , it's pretty much the same exact thing .
Now , if you do want to add in a gradient on your background , you can click on gradient here and let's first go ahead and turn this color back on here or the background color , the opacity .
There we go , you can add an A gradient which essentially just uses like a two colors , you know .
So you can see here how now the menu is gradient .
So you can add an ingredient , you can also add in an image .
However , uh you might have to have a really good image that'll work because uh it'll just look really stretched out and really ugly , but you still have the option to do that .
Let me go ahead and change this back to zero .
That is just not working .
Oh There we go .
And actually let's just change it back to white .
I like white .
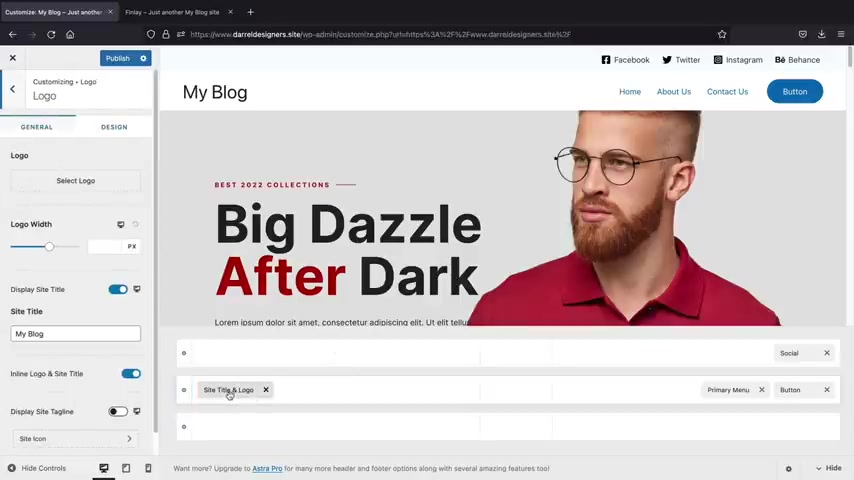
I think white looks a little bit nicer .
Here we go , change that back to whites .
And also uh we'll go ahead and show this and we'll do the same thing for the second menu here and we'll change that also back to whites like that .
So , yeah , you guys get the idea .
Now , here we have site logo , a site title and logo .
Now this is where you can upload your logo .
Now , uh I do not recommend getting free logos .
You might have seen videos saying get a free logo .
Uh You cannot use those logos legally because you cannot copyright them .
And uh yeah , so they're pretty much useless .
I recommend going to websites like fiver dot com .
You guys can go to uh my affiliate link right here .
I think I do have a discount code .
I think I'll leave it in the description .
It's like 10% off your first order , but you guys can get logos for little as $5 .
So uh do not use free logos because you cannot use those uh in the real world .
They're just kind of like for fun .
Go ahead and get rid of that .
But uh here you just type in logo , right ?
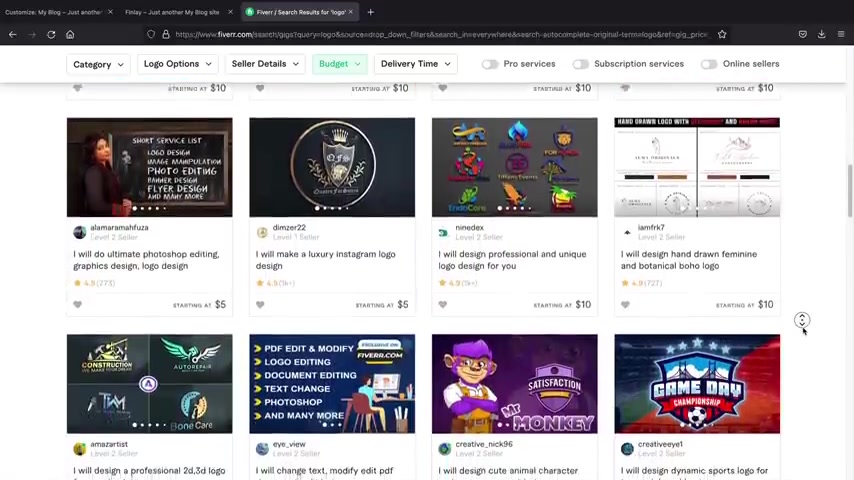
And then you can actually set your budgets to something like uh 0 to 10 bucks , right ?
And these guys are actually really good , you know , to be honest , I got my logo from these guys and you can see that they make some really nice logos for little as $10 and just make sure that it's a unique logo , make sure they're not giving you that they've , you know , a logo they've given to 1000 other people because then your logo is really not unique .
So yeah , you can go ahead and check that out .
It's a great resource to get logos and actually get help for your website as well .
So now that you guys understand a little bit about the menu , we can go ahead and go on to the next sections .
So these other ones are just very , you know , very , I guess you wanna say like uh ideal like blog , you can adjust the blog here .
We're not going to really cover the blog in this video because um that can really make this video another one hour long , but we're just going to skip the sidebar and the blog .
Uh But I do want to talk about the footer and also the commerce section , which is the shop page .
So first let's go to Footer Builder .

So when we click on a footer builder , it now takes us to the bottom of the page .
Now you notice on this website right here , if we scroll to the bottom , we have , this is our footer .
Now , this is a custom footer that was created with the elements or pro version and we will cover the theme builder in the very next section .
So we can have custom headers and footers with the pro version .
However , you can also use the theme .
Some people decide to use the theme , whether you're a pro user or free user , you can still use the astra for uh your footer .
So for example , you know , we can put in HTML one and this is just text , don't let html scare you .
This is where you can just put in text like uh here , I'll just grab in some demo text and this can be like about us , right ?
So this can be something about your company or whatever you want to talk about .
You can also align it like that .
And then here you can add in another widgets or a html .
So a widget is essentially blocks now .
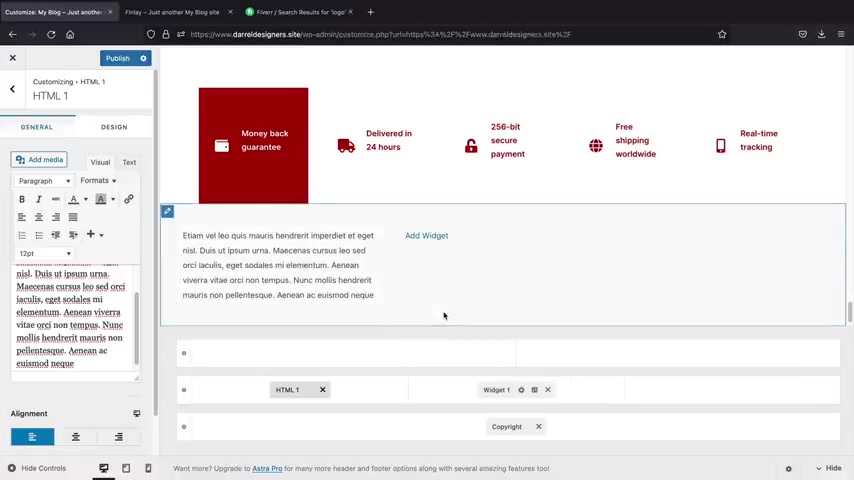
So there was a large update with wordpress and they are now kind of phasing out uh widgets with blocks or they're calling them block widgets now , but they're essentially blocks .
So let's click on , got it now .
Blocks are just basically widgets except they're using sort of uh the Gutenberg uh blocks as well .
But uh let's say , for example , you want to add in something here like an image , you can just put in an image here .
Maybe this can be like a link to something I don't know , you know , whatever , you know , there's , there's a lot of widgets and stuff like that .
And also you can keep doing that through other various parts .
So here widget too and you can go ahead and add a block and this can be like a paragraph , maybe something like about us , right ?
Or I don't know something like that .
So about us and then you can talk about your company or whatever you want to talk about , stuff like that .
Now , there are other various widgets that you guys can use .
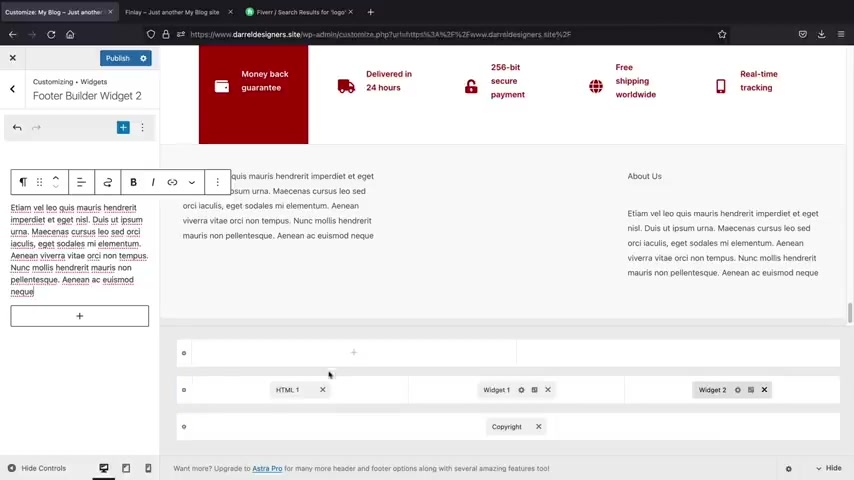
Like there's a Facebook like box , there is a lot of other widgets that you can download for free in the plug in section .
So that's kind of why I introduce these at the same time because they kind of go hand in hand .
But uh , yeah , just like get it with the header , you know , in the footer , you can add widgets and stuff like that .
So just kind of mess around with this on your own free time , get comfortable with it .
But uh that's how you can design the footer with the Astro theme .
Now , let's talk about the actual shot page .
So let's go ahead and go back and we have Woocommerce and if we click on Woocommerce , let's go and scroll up .
Let's click on product catalog .
So the theme customizer also allows you to customize the shot page if you decide to use the default shot page .
So you can uh take out reviews .
For example , we have like these ratings , you can take out the ratings .
Um , the add to carts , you can move that around to somewhere else .
You can have a specific amount of columns .
You can also disable the sidebar if you don't want to have a sidebar .
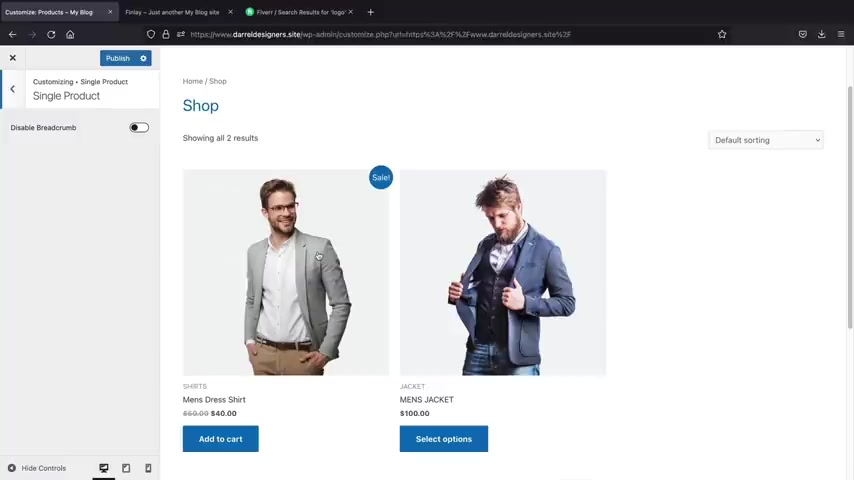
So there are just some few options here that you guys can kind of go through and check out uh for your shop and also it works for single products .
So for single products as well , if you click on this , you can disable breadcrumbs .
So you don't want bread crumbs , you can go ahead and disable the bread crumbs , which essentially was just these links right here above the uh title .
So there's just a , just a few options here that you might want to go through .
Also store notice .
This is actually pretty cool , let's say , for example , you have a sale , you can enable the store notice and this would be something like uh gets 20% off , 20% off uh the store with coupon code Darrel , right ?
And you can add a store notice here at the top .
Now let's go to the cart page .
So with the cart , you can enable or disable cross cells if you choose to do that .
But let's go to the checkout now .
So the checkout is the last form that people go to and there is a few things here .
I do want to talk about .
You might need to add in a terms and conditions page .
So for example , if someone buys something on your website , you might want to create your own terms and conditions page and also a privacy policy page as well .
Now there's two websites you guys can use , you can use this one , its a free terms and conditions generator and all you need to do is just input your information .
I will leave links to these in the description of this video .
They're free resources .
You just need to make sure that you enter in your information .
Also the privacy policy , you can go ahead and input your information and it will generate your privacy policy .
So once you create your privacy policy and also your terms and conditions , all you'll need to do is assign that page to this specific part .
So I'll go ahead and create a page really quick .
All right , I'll go to plus new and page and then this will be like my privacy policy or maybe even terms and conditions and I'll just paste it in there like that and then I'll publish and publish .
And now if we go back to our privacy policy page , we can then assign the privacy policy page to this .

So what that means , they'll have to actually check mark that they've actually read the privacy policy and they'll have to check mark as well the terms and conditions page .
And uh yeah , so that's just a few things that you can add to your e-commerce website .
I think you might really want to think about your terms and conditions because if someone buys something and then they have a problem , you know , maybe you can say , well in the terms and conditions we don't offer refunds or , or that's really up to you and your business .
Now these other options right here are pretty much just not really needed too much because again , the page builder controls most of the work .
Now , one thing also as well .
Uh I didn't really upload my logo now right here under select logo , I can upload the logo in the images I gave you guys .
Uh I use this logo that we created right here and I'll just select that and we can crop that image , but I kind of want everything to display , click on crop .
And now we need to adjust the size of this logo because it's a little bit too big .
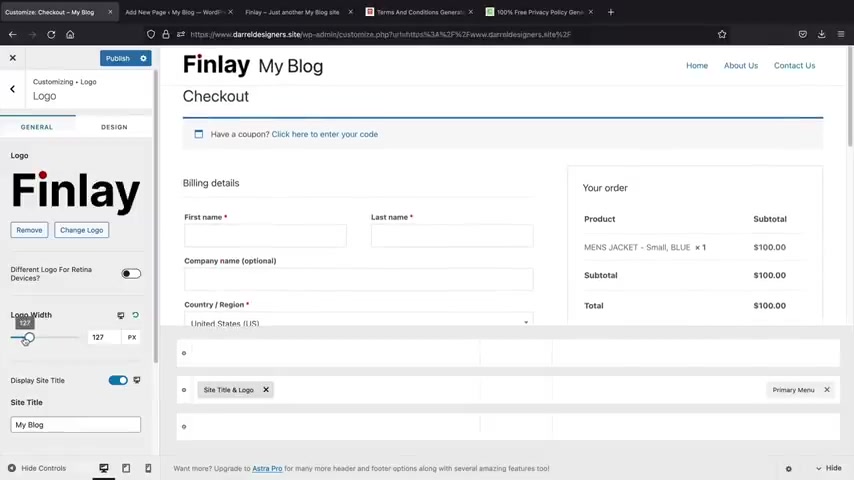
So let's go ahead and reduce the size of that .
A lot smaller .
That's perfect .
And then also we will take out the display site title .
So we don't really need that as well and then we'll click on publish .
So in a nutshell guys , that is pretty much the actual theme customizer .
Um Just go through some of these options , see if they apply to you .
But essentially this controls the shot page , it controls the header and footer and also the archive pages which is like the blog archive and your categories and stuff like that .
Now let's go ahead and talk about plugins really quick .
So let's go ahead and close this .
So in short guys , plugins are basically applications for your e-commerce website .
However , I do want to give you a word of caution , do not add too many plugins because that might cause conflict and errors , try to keep your plugins under 10 per websites .
So for example , under search plugins , I'll type in notifications and there are tons and tons of integrations with Woocommerce and plugins .
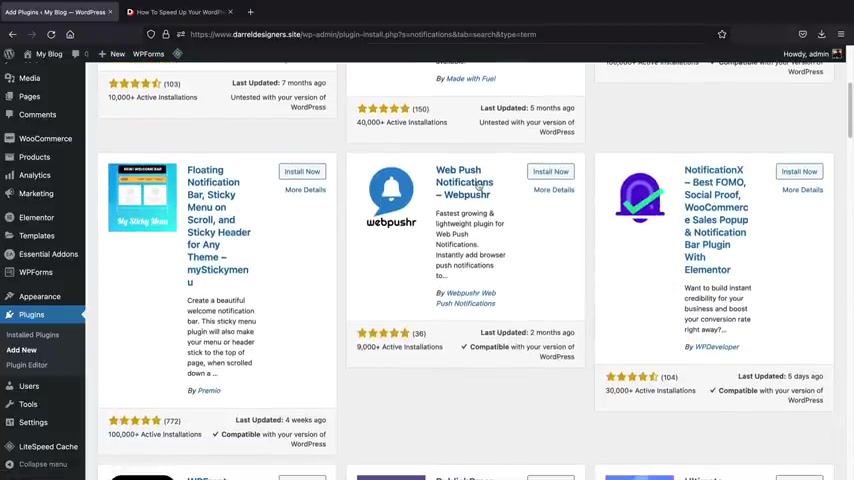
Like for example , we have this uh floating notification bar which adds a bar at the top .
We also have a push notification .
So you ever been to a website where you have to accept push notifications .
Well , you can have that on your website .
Also , this one right here notification X .
This will allow sales pop ups on your website .
And if you can click on screenshots to get an idea here , you guys ever been to those websites where it says like , oh , hey , you know , someone just purchased something you can see here how this plug-in will actually add that to your website .
So there are just tons of plugins to go through .
Now , some of these plugins , they also add widgets .
So when you install a plug-in , it'll create widgets for you as well .
But um really quick , let me just go to live chat really quick .
If you guys want to have live chat on your website , you can also just type in live chat .
And there again is tons of plugins out there with live chat .
Uh , chat is probably one of the more popular ones also , uh talk .
This is also a really popular one .
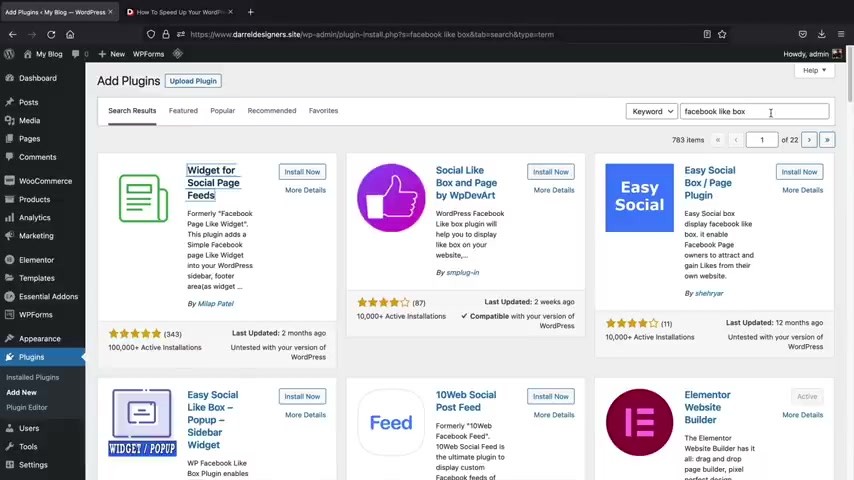
And again , this adds live chats to your website .
Now there is one plug in .
I do want to talk about really quick and this is the email customizer .
Now , to be quite honest , the default emails with Woocommerce are very , very ugly and you guys can use ya mail .
This is a really cool plug in that I found and you guys can install this and use this on your website .
So what this will do is that this will take your boring ugly Woocommerce emails and it'll turn them into something a lot more modern and nicer .
And the great part is you guys can fully design and customize the emails that are sent to your customers .
So for example , yay mail , I'll click on , start customizing now .
You don't have to do this .
I'm just giving you a brief kind of example of how all this works .
So here is our current uh email and this is what's being sent to all of our customers .
And with this plug in , you can go ahead and change like the background color to kind of match your brand .
So I think we're using like that ad 0001 , right ?
Or something like that .
I think , I think that's it , right ?
This one or is it that it ?
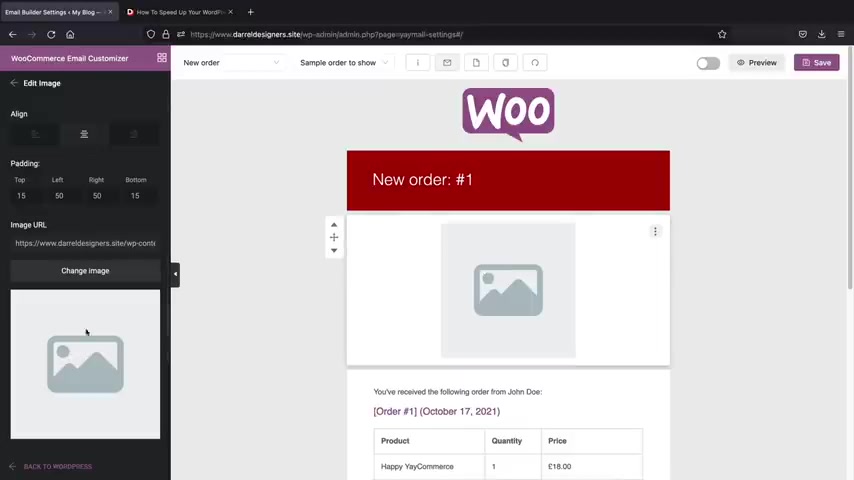
I don't know , it's something like that .
So we can kind of modify and design and customize our uh our email box .
So for example , if you want to add in like an image , we can drag an image there and then upload it .
Maybe here we can , you know , change the image , add something and you know , it's a drag and drop builder .
So you guys can kind of understand how all this works and then align it and it's very similar to element or now we can click on that and then maybe even add in , you know , a text list or something .
So I'm just introducing you all to this plug in because I think that uh these default emails are pretty ugly .
And with this , you can change the font , you can change the color and you can customize the emails to match your brand .
So that's just something to look out for .
So , plugins are very helpful .
They're a big part of wordpress and uh with no plugins , uh wordpress would be very limited , but there's more than 50,000 wordpress plugins .
So there's usually something to meet for everyone's needs , right ?
Party people .
I hope you guys enjoyed this part of the video .
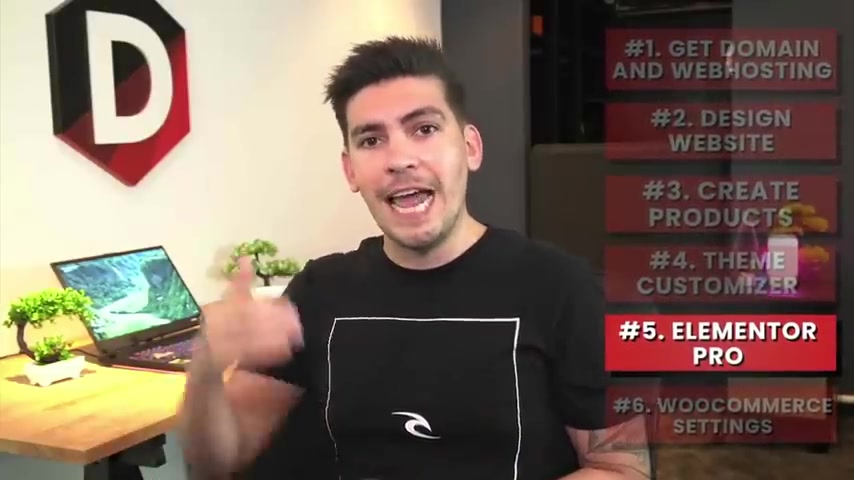
Now , in this next section , we are going to introduce you all to the Element or theme builder .
Let's go .
So your website's coming along pretty nicely .
Let's move on to step five where we'll be talking about the Element or Pro version .
Now , if you guys do decide to purchase Elementary Pro , we do have a link in the description of this video .
If you guys do decide to use it , it does help us to continue to make these tutorials and layouts for you all for free .
So for the Element or pro version , we'll be first creating a header and a footer and then I'll be showing you how to create a custom shop page , a custom product page and also a custom product category page for your e-commerce website .
You guys ready .
Let's get started .
So let me explain the theme builder .
Every theme for wordpress has a preset style for your shop page and your blog and other various parts of your website , you cannot edit these normally and these are prebuilt by the theme .
That's why there are so many different type of wordpress themes .
However , the elementary theme builder allows you to build each page with the builder from scratch .
Regarding of the theme settings .
Basically , you can completely build any page from the ground up , overwriting the theme settings just in case you want to fully customize every part of the website with no restrictions .
I find many people tend to do this because they want to match the color scheme and the design of the website .
So it all matches up in the end .
All right .
Welcome to the elements or theme builder tutorial .
Now , in this part of the video , I'll be explaining how to use the elements or theme builder .
I'll be showing you how to create custom product pages , custom shop pages and custom headers and footers .
For example , you'll see here how we have this header with a transparent menu .
Now , notice if you go to another page here , how it's now a uh white background .
So this was all done with the elements or theme builder .
We actually have two specific headers on this website .
Also , if you go to our shot pages , I'll just go to shot page three .
You'll notice that this is a custom shot page .
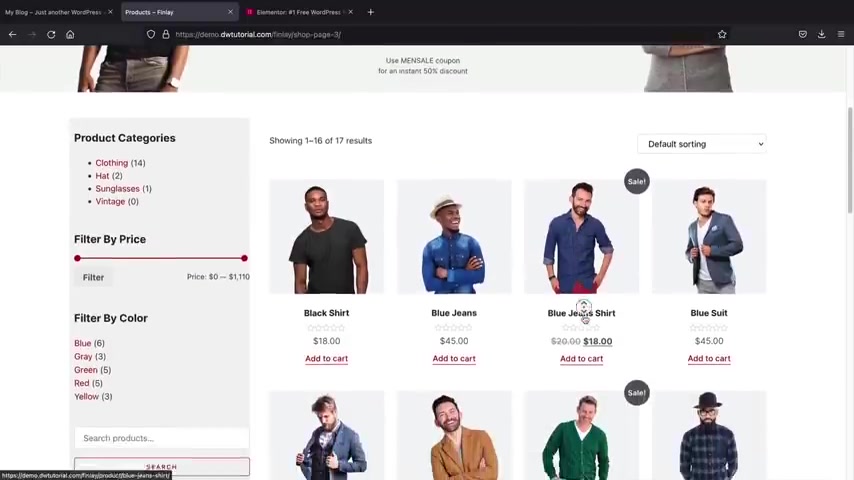
So here we have our products , we have this custom uh sidebar at the end .
And uh yeah , and we do have a few shop pages .
So this is shop page three and this is another shop page that we created .
So um you'll see that we have products and we have this really cool uh sidebar right here , not necessarily filters , but we just decided to add in promotions for this .
So it just really depends on what the user wants .
So you can either have the sidebar widgets or promotional uh sidebar , also the product page .
So uh the elementary theme builder can create custom uh product pages as well .
And we will actually give you guys these templates for free in this video just to help you guys , you know , follow along .
And also it's like it's appreciation for you guys watching this video uh this far .
So uh yeah , you will receive two different uh product pages and also uh four different shop pages .
Now , in order to get the elementary theme builder , you guys will need to purchase the elementary prover version .

So if you guys go to any of their plans and you purchase them , uh You guys will get access to the theme builder .
So the theme builder is included in all of their plans .
Uh You guys can use our link in the description and it does help us to continue to make these tutorials for you guys all for free and give you guys free stuff , you know , and free free designs and you know what design is not cheap guys .
It's really not , but let's go ahead and just jump into it .
So here we go .
Well , first go to our dashboard and the first thing that we're going to do in this video , we will first create a custom header and a custom footer using the elements or theme builder .
All right .
And we will scroll down to templates and click on theme builder .
Now , we're first going to just make a standard header and footer .
And what I want you to do is click on this um new theme builder .
This is like the old one .
It's depreciated and it's been depreciated for about a year already , but uh they still have it , but just go ahead and click on , try it now .
All right .
So now you'll see that we have this header and footer and all of these um different pages .
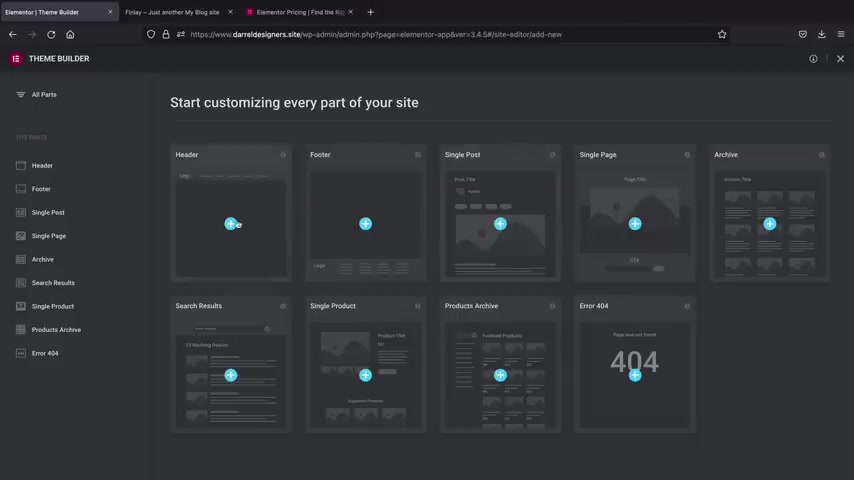
So the theme builder essentially will create a specific uh style for specific pages .
Let's just first start with the header .
So I'll click on this plus icon .
Now , we also have access to a lot of these really cool templates that elements here has provided us .
So uh they do have quite a bit here and you guys can just kind of go through some of these and check it out .
Uh What I'll first do is I'll just keep this very basic .
I'll just uh click on insert and I'll just give you a brief overview about the theme builder and how it works .
So now you'll notice that we have this specific header right now .
You can design and customize this just like we did on the current websites .
So you can click on this and you can go to the style tab and you can change the colors , the fonts , uh the padding , you can add an animations just like you're building a normal website except now we can do it for the menu , which is uh which is pretty cool .
Now , also when you're using the theme builder , you will have access to new elements .
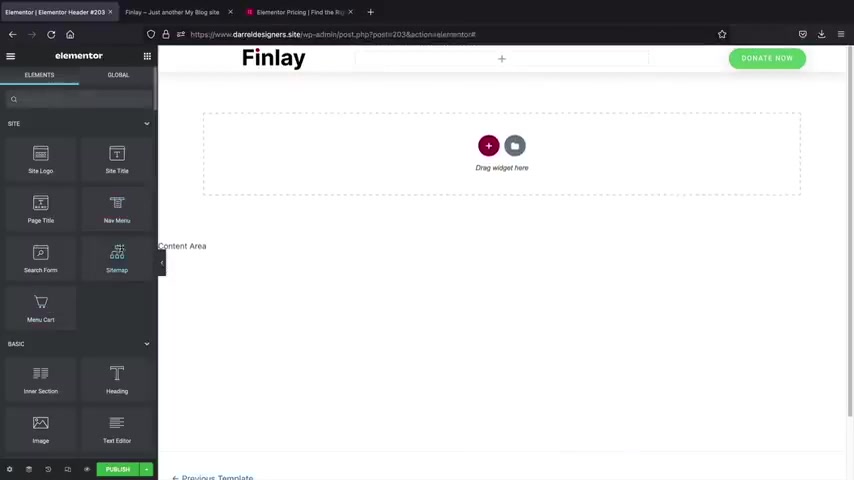
You notice right here , how we have site , logo , site , title , page title , and also a NAV menu .
Now , the nab menu is pretty important .
So this is the actual menu .
So I'll delete this .
And let's say for example , you created a menu , right ?
And you want to apply that menu to the actual header .
Now you'll see that the menu that we have created or that I have created in my website is now available .
Now , if you have different menus , you can display different menus for your uh header .
You can also have specific headers for specific pages if you want to be very dynamic .
So , you know , we can change this to vertical .
I don't think that would look good .
Yeah , that that would not look good here , you know , but uh you know , we can change it to uh over line .
I think that's where it goes above , you know , yet that doesn't really work out , maybe just underline and then change the color to our brand , right ?
Something like some sort of red .
That , that's , that's the hover option .
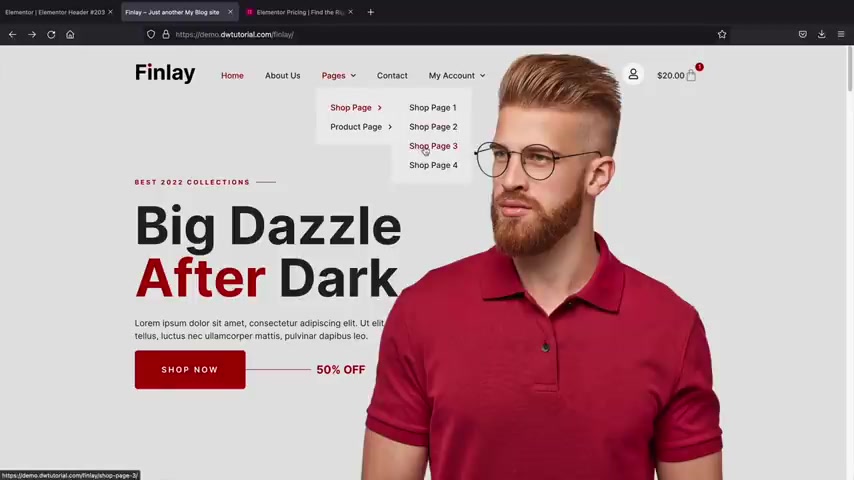
So here we have hover and now we got to change that to like black or something that , that looks just terrible .
So that looks a little bit better , right ?
So you can see how we can , you know , design this and stuff like that .
Now , also here we have this button and this can go directly to your shop page .
Now , if you don't know how to do that , we can go to our demo website here .
And uh for example , I just pull up a shot page that I created and uh you know , I'll just copy this link and then you just go ahead and paste that link in there like that .
There we go .
So that's pretty much it .
And then you can paste that link and then if they click on that , they will then go to this specific shop page on your website .
Now , there is one element here that I do want to talk about .
I'm gonna quickly go ahead and delete this and this is , this is the menu cart .
Now , let's say , for example , people are shopping on your e-commerce website .
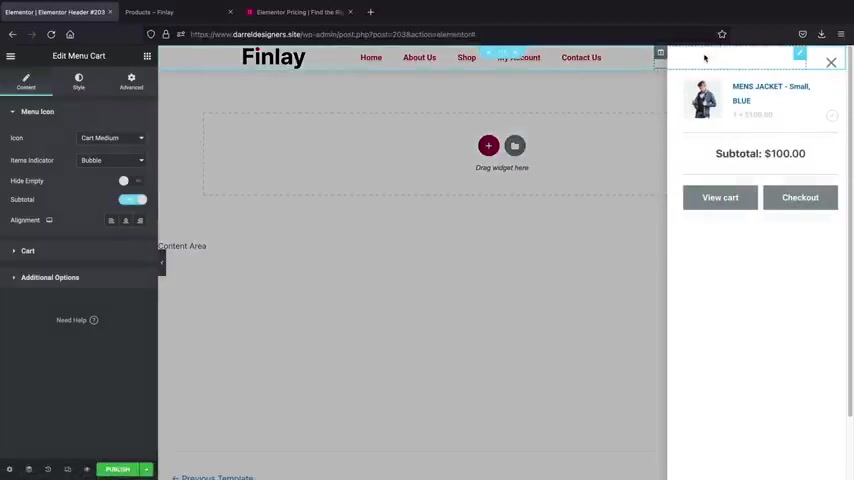
You really want to make sure that you have your menu cart available because , uh , when people add them into the carts , they'll get this really cool little like pop up here and they'll kind of notify them of what's in the cart for your Ecommerce store .
And just remember , you can fully customize this .
There is tons of options here to make it uh you know , bigger to change the position .
And also you can change the style , you can make it bigger or smaller and all these other cool options .
So that's just a quick little rundown of how to use the , the element or theme builder for your header .
Now , let's say , ok , well , we created this .
How do we actually apply this to the website ?
Right ?
Well , let's do that on the bottom right here .
We have publish .
So go ahead and click on publish .
Now , when you click on publish , you'll get this display condition .
So where do you want this header to be ?
Well , we can go ahead and decide where we want this header .
So here click on add condition .
So here we have the entire site , right ?
Or you can say I want it only on the Woocommerce pages .
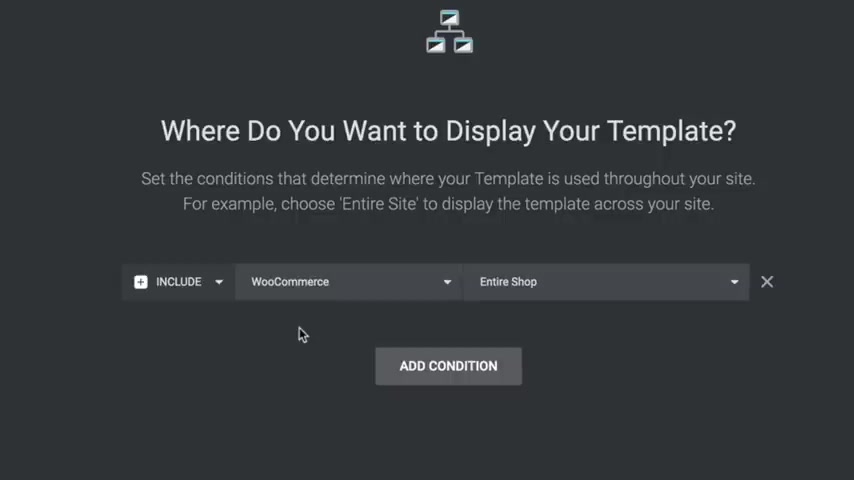
So for example , I want to take this header and apply it only to the shop page and then we can create an additional header for the landing page or whatever , you know .
So there's a lot of different ways on how to approach this .
However , I will just go ahead and put on uh entire sites and click on save and close and there is our new menu .
Now , of course , we need to make some changes to it .
We need to add some padding to the top and the bottom because it's too , it's too thin , right ?
But if you go to any page on our website , we will now see this menu uh across the entire website .
So yeah , you can basically add a custom header and then we can also add a custom footer , which we will do in the very next section .
So let's go to the dashboard here and it's the same thing , you know .
So for the theme builder , we'll go and click on that and for some reason , we have to keep clicking on , try it .
Now , I don't know why guys .
Sorry .
That's , it's out of my control , you know , I'm , I'm just the messenger here and then we'll click on footer and click on the little plus .
So now we can go ahead and use some of these footers right here .
So they have a lot of different footers and all you would need to do here is just go ahead and insert that footer on to your site and then do the same exact thing for the uh the footer .
However , I did create a header and footer for all of you that I would like you guys to import to help , you know , make your site a little bit more consistent with the brand .
So right here , we have this little uh import , right ?
And we'll click on select file now in the folder that I gave you all , you will see a header and a footer builder Jason .
So go ahead and click on open .
Now we see the footer .
So go ahead and click on inserts .
All right .
And here is the footer that we have created for you all .
So we have these columns and we have an email , subscribe , we have some social icons .
We have this really cool section here which is call to actions .
And what we did to be really creative is we did not want to use a plug-in .
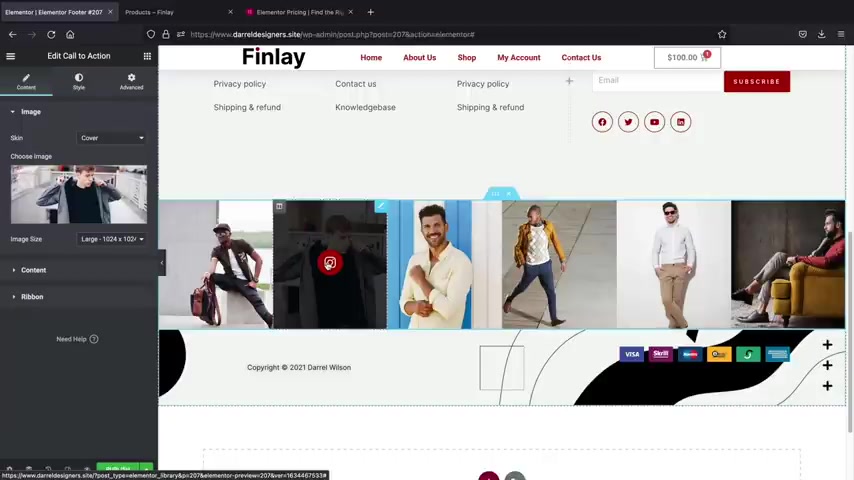
So we kind of use a call to action here and we added in the um I guess you wanna say the call to action uh hover .
So when you hover over it , it will then show the specific element .
Now , what you can do here is you can link these to your uh your social , uh I guess your , your social profiles by going over here to contents and going to link , right ?
So here you can link your social profiles .
So that's just a really creative way how we thought to introduce um you know , social platforms without using a plug in .
Now , there is one other thing too .
So we just use icon this here and all you need to do guys is just go ahead and link them to that specific page .
Remember earlier how I said there's really no right or wrong way to do this .
It's just really all about what gets the job done .
We use the icon list because the icon list is the most responsive .
We use the text modules .
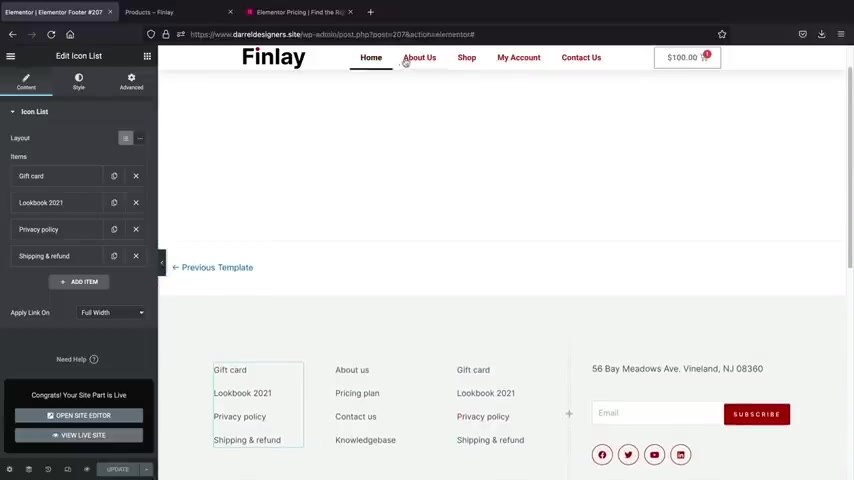
But when you have a bunch of text modules stacked against each other on different devices , it doesn't always come out the best .
So that's why we use that specific uh module .
So yeah , I know we're really , really creative there .
But uh you're welcome .
And here we'll click on a publisher at the bottom and the same thing , you know , I just want to display this on the entire website .
I don't think people would want different footers on different parts of the page that really just wouldn't look good .
Now , we actually added this to the bottom of the website , but I also do want to use the template that I created for you guys in the header .
So let's do that .
Let's go back over here to dashboard .
Let's not look at the website yet .
I don't wanna , I don't want to show you .
Let's , let's make sure let's add the both header and the footer and then we'll , we'll uh we'll take a look there .
So here we go , try it now and then for the header option .
What I'll do is I'll go ahead and delete this because uh this is just just , it's just , it's just not working out , you know , it just looks bad .
We're not , it's not working .
Instead , we're going to import that header template that I created for all of you .
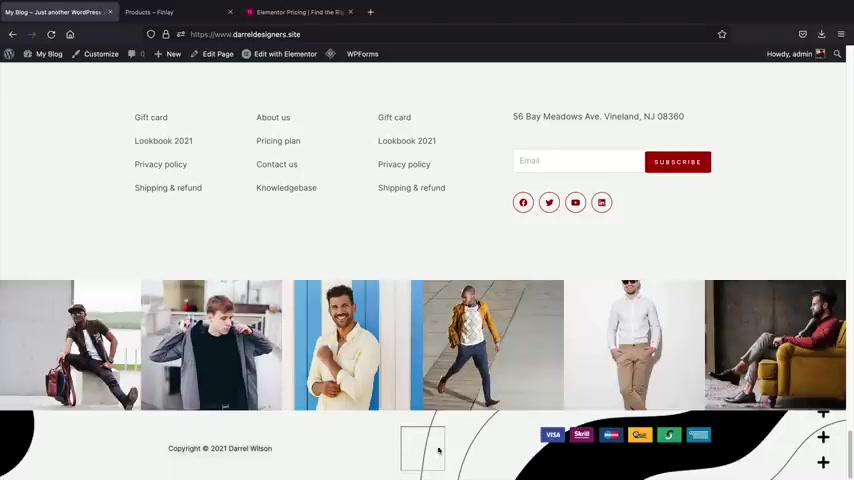
And uh yeah , that'll look a lot nicer than the current one .
So here we go , I'll click on import templates , select the file and select the header theme and then open it .
Now we'll go ahead and go to the uh where is it ?
The header and insert that ?
All right .
And next , we'll just click on publish and we will add this on the entire websites , save and close .
All right .
Now , this looks a lot like the demo , right ?
I mean , the header would just made such a big difference .
So now we have this landing page here at the top and we also have this really creative footer here at the bottom .
I'll probably fix this guys .
Sorry , I , I don't know what that's about some , you know , something weird , you know , but you guys get the point , you guys can easily just delete that or change it or whatever .
So now that we've created a custom header and footer .
Now , let's go ahead and create a custom shop page , right .
So we go to our shop page .
Uh We'll now see that we have the header at the top right here and we also have our footer here at the bottom .
But the problem is this just doesn't really fit well .
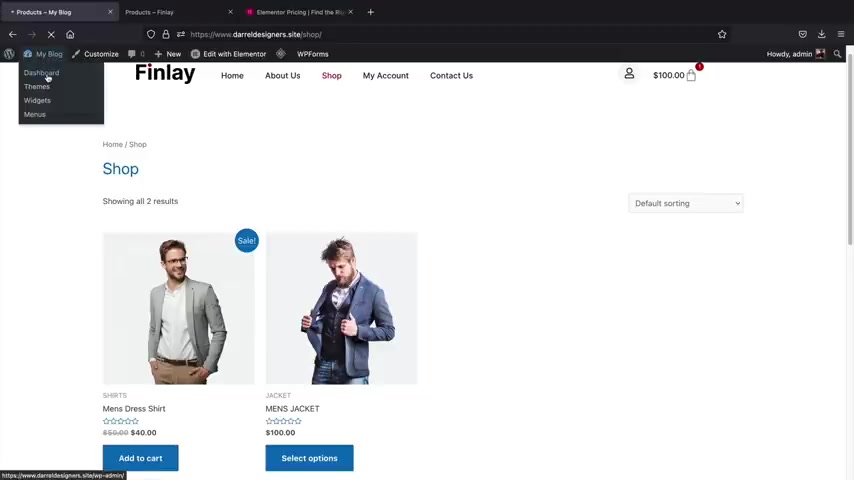
Now it just doesn't sit well .
We need to kind of make it look more modern and need to kind of add in like the style that we're using , right ?
So let's go ahead and go to dashboard and then we'll go to templates and theme builder and we'll go to try it now .
Now , just like we did for the header and the footer , we can now do this for the shop page .
So let's click on add new and we will see it's called the product archives .
That's what they call it , the product archives .
So go ahead and click on product archives now or does give us some default templates that we can use from .
Um However , you know , for this part , we're not going to use their templates .
These just don't really look well .
Um I , I think they're not as creative .
I'm not trying to brag I'm just saying , I think the templates that I made look a lot better than this .
So let's go ahead and upload the templates that we created .
So here I'll click on imports , select the file and the one I use is the uh we'll use shot page three .
I mean , there's shot , there's four shot pages here .
I'll just grab three , you know , why not ?
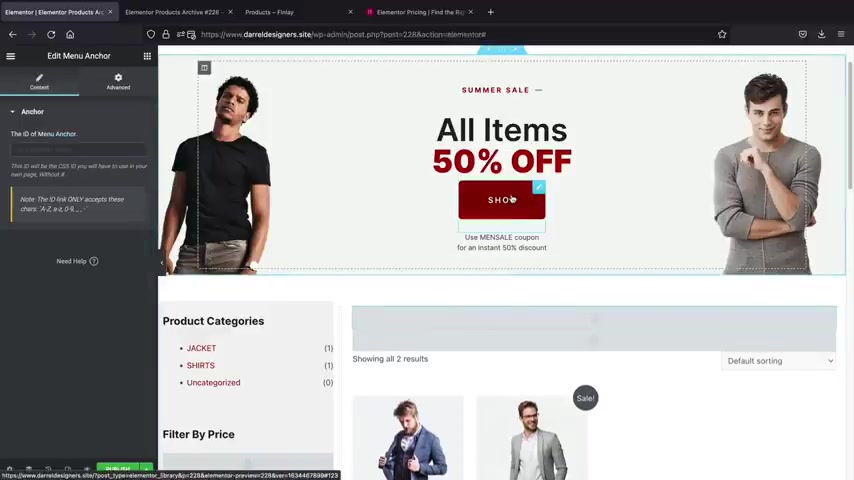
And here we have shot page three and I'll click on inserts .
All right .
So this is the shot , page three and all you need to do here is you can go ahead and just design and customize this to , you know , whatever , whatever you want to add .
So you'll see right here that this is an edit menu anchor and I'll just go ahead and just give you a quick overview of this .
So a menu anchor , let's say , for example , you want someone to scroll to a specific part of the page .
When they click a button , right , you'll go ahead and put in like a number , right ?
So a number sign and then maybe 56 or something like that .
Now over here , you will then change this to 56 .
So that means if they click on this button , it will then drag them down to the shop page .
So that's what I did right there .
I added in this menu anchor .
So when they click on shop right away , it automatically takes them down here where they can just go ahead and start viewing the products .
Also on the left side , you notice how we added in the product categories , we added a filter by price .
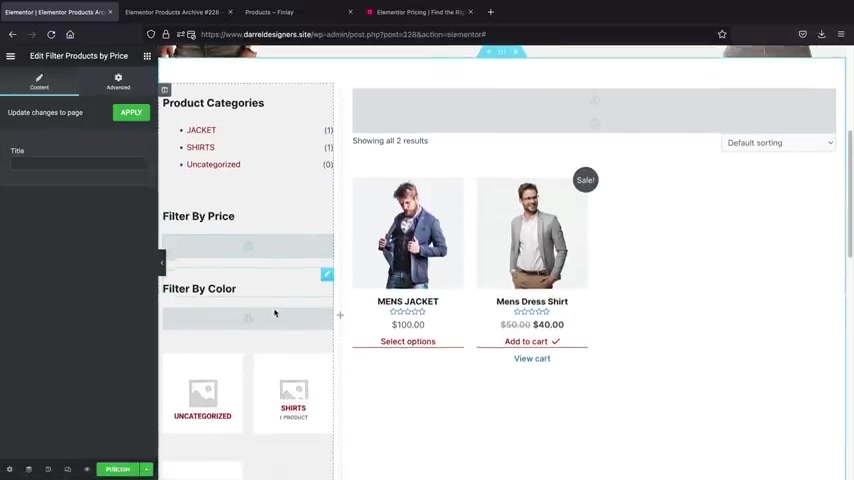
So over here , we have uh product categories , right ?
Product categories .
So we use the product categories and also the filter by price that allows people to filter by price .
And uh yeah , so you can kind of add specific elements or widgets to this page if you choose to do that .
So I hope you guys enjoy this shop page .
You know , we did create four for you all .
So on the demo website here , uh this is the current shop page and it just looks better when there's more products .
Now , also you might notice how these categories have images .
If you go to your products and you go to categories , uh you'll then see a list of your product categories .
From here , you click on edits and you can actually assign an image to that specific um category .
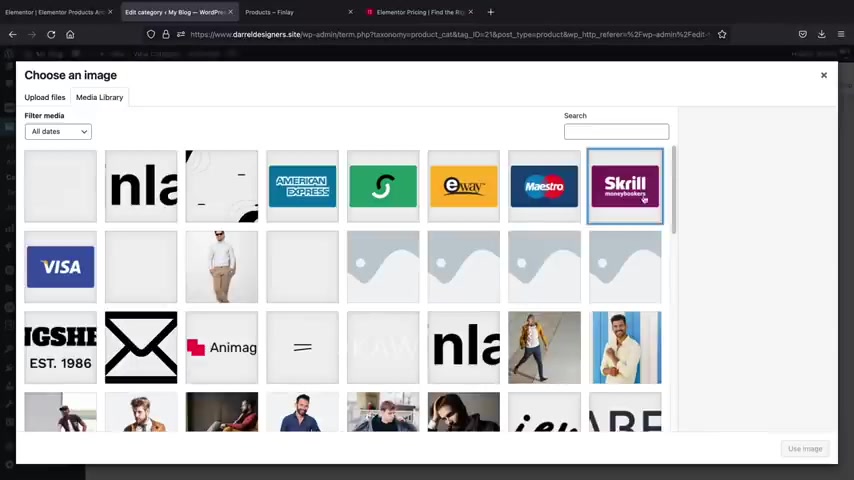
So for example , right here , we'll just add in a category or an image like that's and then we'll update it and then from there , when they see that specific category on your website , it will then display .
So that's how we achieved uh that specific style .
And look , we added images to each product category just to give it some more design and decor because um you know , it's a really nice looking shot page .
We just wanted to really emphasize it and just make it look as good as possible .
Now , let's say , for example , you want to add another shot page on your store for maybe a different product category , right ?
Let's do that .
So you guys can go ahead on your own free time and just go through the shot pages , add whatever you want .
Uh Again , we have created AAA few for you guys .
So we do hope you guys enjoy these uh free uh shop pages .
But uh let's go ahead and just go back here before we go on to the next section .
Let's just publish this .
So here I'll publish it and I wanna add a condition .
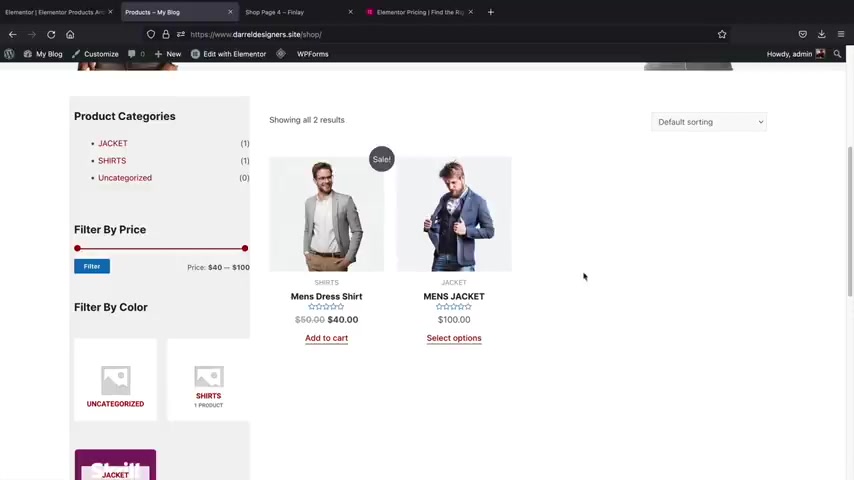
So for example , right here , this is going to be our shop page and that's it .
That's pretty much all we have to do and then click on save and close .
And now we can go ahead and go back to our website right here .
And now if you go to the shop page , you will then see that this is our new custom shop page .
Now , whenever you create products automatically , they will be displayed right here .
Now , there are some few touches that you might need to do and this is controlled by the theme .
So for example , uh on the theme , you might need to change this to a specific um of a color just because I don't want people to say this wasn't what you showed me in the demo , you know .
So under the global under the color section , you can actually change the color palette here to black and that should change all of the buttons here uh to that color .
So that's how we achieve that .
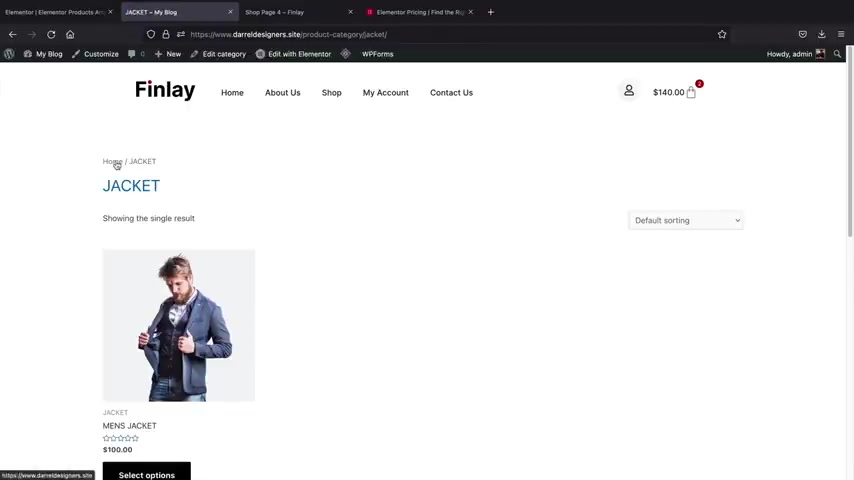
So in the theme customizer , if you're using the widgets , you will need to go ahead and adjust the theme color to kind of match that style .
So now let's say , for example , we created our shot page , right ?
However , we also have different product categories .
Maybe you want to add in a different page for different product categories .
For example , if I click on jackets here , it's actually going to revert us to the old default uh uh category page because we haven't assigned a product category page to these specific products .
So we can do that for all of the product categories .
Or you can go ahead and assign a specific shot page for every single product category and be as customizable as you want .
So let's do that .
Let's go ahead and go to our dashboard here and we'll go back to our theme builder and let's go to try it now again .
And from here , we're gonna go to product archives and just click on plus under product archives .
Now , instead of using these templates , we'll go ahead and use the templates that I provided you all .
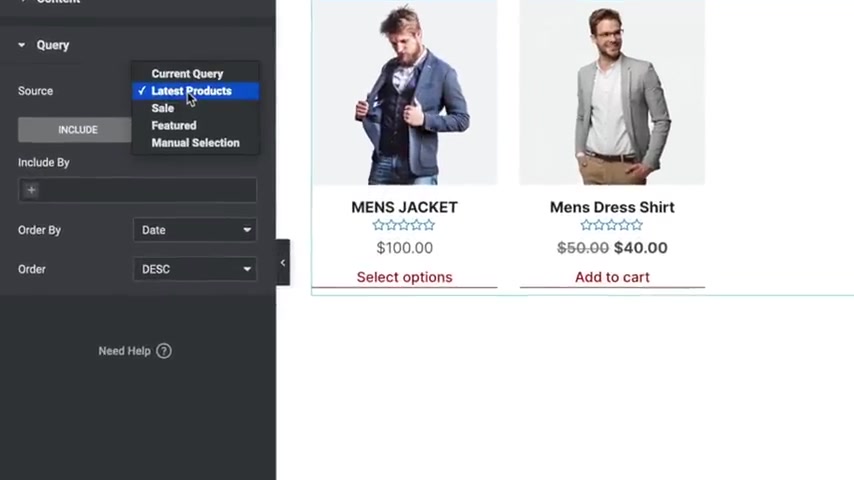
So let's go ahead and import one of those templates , select file and we'll just use uh I don't know , shop page , shop page four this time .
Why not ?
All right .
And then I will insert shop page four at the bottom .
OK .
So we have shop page four and this is going to be our new shop category page .
However , there is one thing that you need to do in order to modify this layout to meet your specific needs , we first need to click on the products here and we need to actually add the category to this page .
So this is going to be the Jackets category , right ?
So over here we have include by term and we're going to enter in jackets , jackets , pot of categories , jackets .
There we go .
So what this means is whenever you add products to the jacket category , all of those products will be displayed right here for you guys .
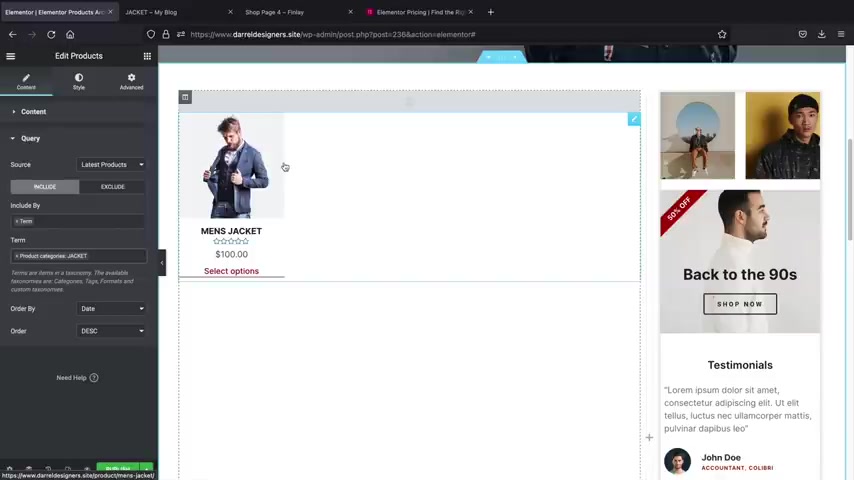
So it'll automatically sync up to your store and it will automatically upload those products to the correct page , right ?
So let's go ahead and click on publish here and now we're going to add a condition .
So now it says all product archives , however , we don't want product archives , we want to have product categories this time .
And I wanna select jackets , right ?
Because jackets is our uh product category for this page or whatever .
So here we'll click on save and close .
Now , let's go ahead and go back to our websites and first let's just go to the shop page , right ?
And let's clear the cache , make sure uh you know , make sure everything refreshed .
Now , let's say for example , we are on this page , right ?
And now we'll click on jackets , we will then see that this is our new Jacket page and all of the products that we create four jackets will be displayed right here automatically .
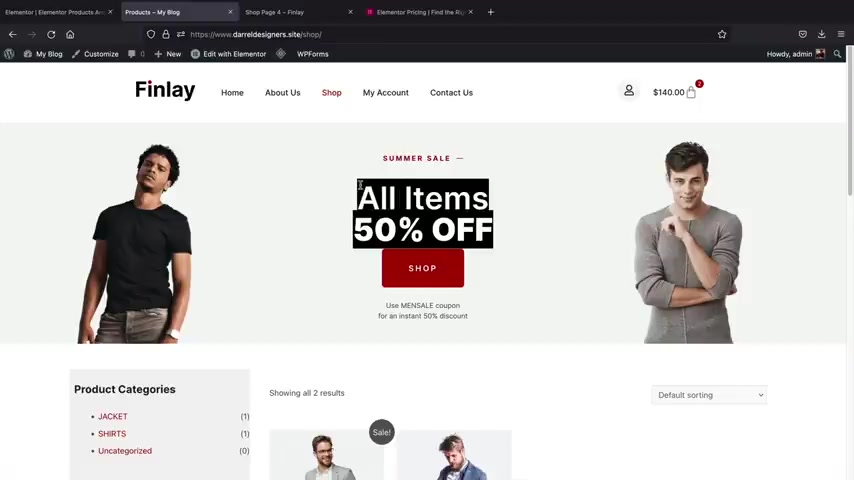
So you can mix in that shop pages or you can use the same shop page for your entire websites and then maybe just change the title to jackets or to uh shoes or whatever for each specific product category .
I did that last year .
But this year I decided to actually just create four different shot pages just in case you want to have some diversity over your shot pages .
So now that we know how to create a custom shop page and a custom product category page , let's move on to the next section and create a custom product page .
Let's go back over here to the dashboard and now let's create a custom product page .
So let's go under templates and theme builder .
I'll click on try it now .
So next , we'll create a single product .
So here we have single products and we'll click on the plus icon and here they give us some templates to choose from and these are actually not bad , but uh the fact that they're only cupcakes just kind of makes them uh weird .
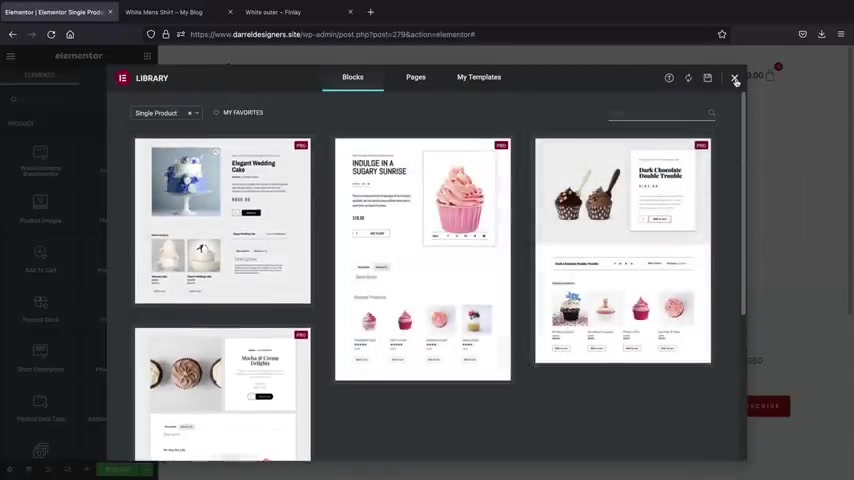
But I'll just go ahead and just give you a visual example of how to create your own custom product page .
And then we'll use the demo again and I'll dissect it and explain how I did everything .
So the first thing I wanna do is create a two column row , right ?
And now that we have the um theme builder open for their products , we now have new elements .
So for example , we have the bread crumbs , which are these right here .
So I'll go ahead and just add in some bread crumbs , right ?
Some bread crumbs .
Next , I'm gonna add the product title .
So this is the title of your product , right ?
So Men's Jacket , it does give you a good visual .
Next , I'll enter the price .
So here we have the product price .
So this is the price of the product and then we need to add some description , right ?
So over here , let's click on this and we'll find the product description .
So the short description , I'll actually put that above the price and then below that , we'll add in the ATAC cart button .
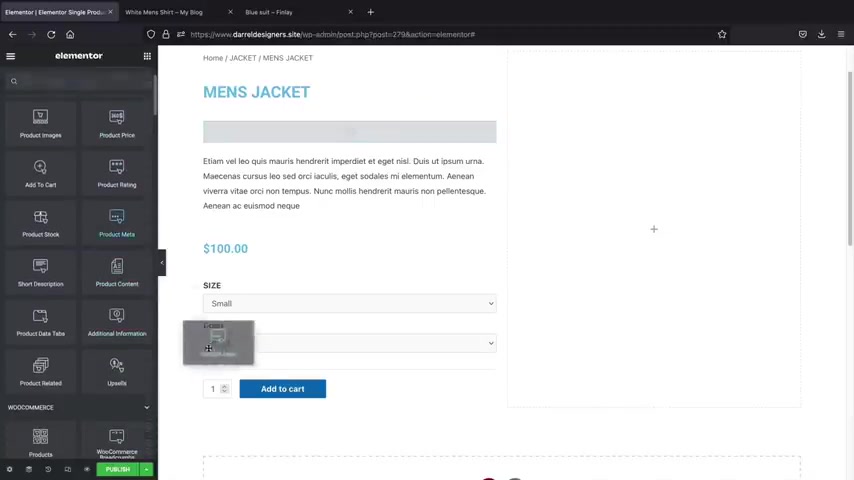
So this is the ATAC Carts , we can also add in the product rating .
So product rating , maybe we'll put that uh right there .
So if you do have ratings , uh they'll be displayed right there and remember you can adjust all of this like the star color , the fonts and everything else .
But I'm just giving you the overall structure .
Next , I want to enter in the uh metadata .
I believe that's what it's called , right ?
The metadata like this is like the category and the skew number and all that stuff .
And on the right side , I want to insert the featured image .
So let's click on these dots and here we have product image .
So this is going to be the image of the actual product .
Now , one thing is that uh this is too close to the top of the screen .
So under the edit section , we'll click on the advanced tab and then we'll add in some padding here to the top .
So make sure to unlink this and let's add some padding here to the top .
I don't know , maybe 100 I think 100 is good .
Right ?
And then we'll also add maybe some to the bottom .
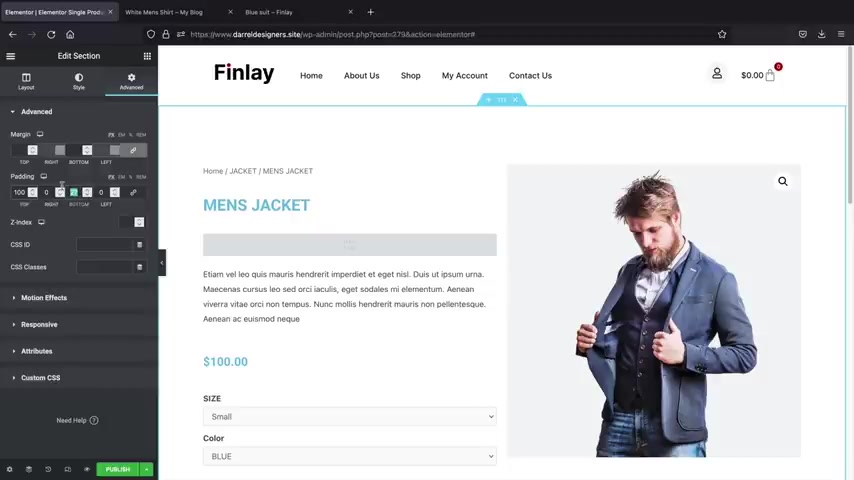
We'll add like 50 .
All right , cool .
So now that we have this , this looks pretty good .
And then maybe below here , you can even add in the elements or widgets .
Uh For example , you can see on this page uh we just added like a a social icons .
So if you want to add in social icons , you can do that drag that there and then maybe you can add in like a an image of like your uh your shoppers approved or something or you know , whatever you want to add in .
But yeah , that's that .
Now in this next section , I want to add in uh some additional information and also the up sells .
So here we have additional information or we can even enter in product data tabs , product data tabs and that also display digital information .
And then below that we can enter in the up sells , right , which are recommended to other products .
All right .
Cool .
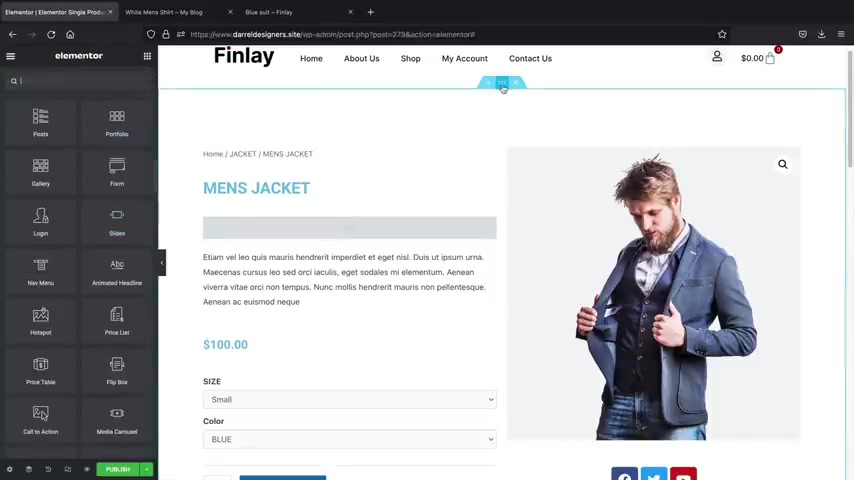
So that's pretty much it at this point .
This is a custom product page and you can customize everything .
So you can drag in elements , you can mix and match elements , you can change the background color to anything that you want .
You can even use gradients , you know .
Uh and this can be your new product page .
So that's just an example of how to create one from scratch .
So I'll go ahead and clear that .
Now , once you're ready , you can go ahead and click on to publish .
So now I want to assign this specific product page to our current products .
So for add a condition , we can select products or we can even do a custom uh product category .
So for example , products in specific categories , we can create a template for that .
But I'm just gonna , you know , just select products and I'm not gonna get too crazy .
I just think that we should only have one layout for all the products and I'll click on save and close .
Now , let's go ahead and test this out .
So I'll open up my website in a new tab .
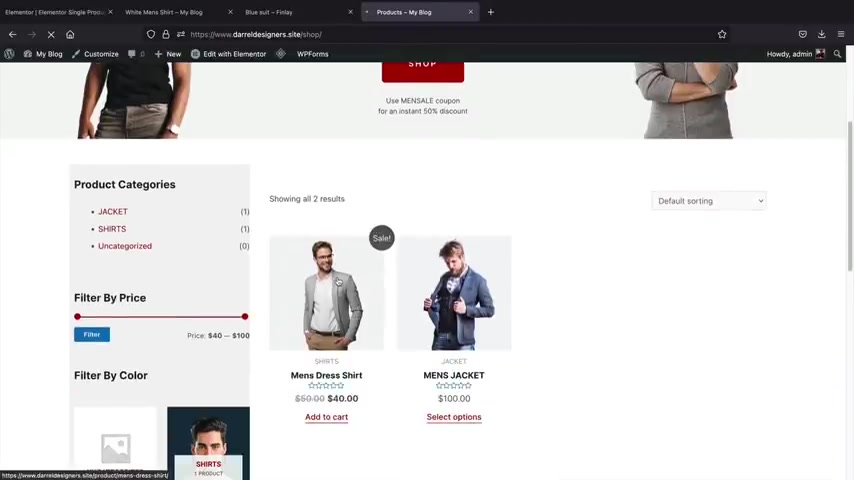
I'll click on shop and I will click on any product and there you go .
So now we have our custom product page and it looks great .
Of course , all we need to do here is change the fonts and the colors , but everything is appearing , everything looks really good .
So we have our description .
Now we don't have the additional up sells and that's probably because we don't have enough products on our , on our uh e-commerce websites .
But once you add in more products and you assign them , they will display at the bottom , very similar to this right here .
You'll see at the bottom .
Uh we have our related products .
So just make sure to add in up cells and then the Upsell products will be displayed at the bottom of the page .
Now , let's say , for example .
All right , Darryl , this looks nice , but uh I want to use one of the templates .
I'm glad you guys asked .
Well , let , let's use a template .
We , we'll delete all this and uh we'll use one of Darryl's templates .
So I'll click on added templates and I will insert this next , I'll click on select file and I'm just going to select um we have two , right ?
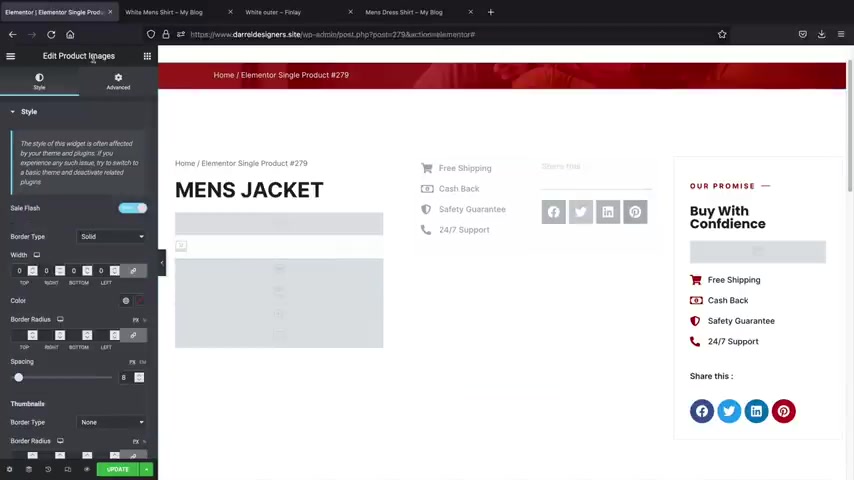
Uh I'll just select the first one .
OK ?
And this is our product page .
Now , I know it looks a little weird .
Uh But that's just because there's nothing to propagate yet .
But uh here we have the product title , right ?
We have the product rating , we have the product images and then the product price , we have the short description .
So that will uh display here .
And then we also have the ATAC carts and then the product meta right here , we have the product images .
Now , you might notice that this section right here is grayed out .
So you'll see that this whole section is grayed out , we grade out specific sections because on mobile devices it just doesn't display well .
So for example , let's say you have a section that just doesn't fit well with mobile devices yet you feel like it looks good on desktop .
I'm gonna click on edit the intersection and under the advanced tab , we'll go to responsive .
So you'll see here how we hid this on the desktop yet it only displays on tablet and mobile .
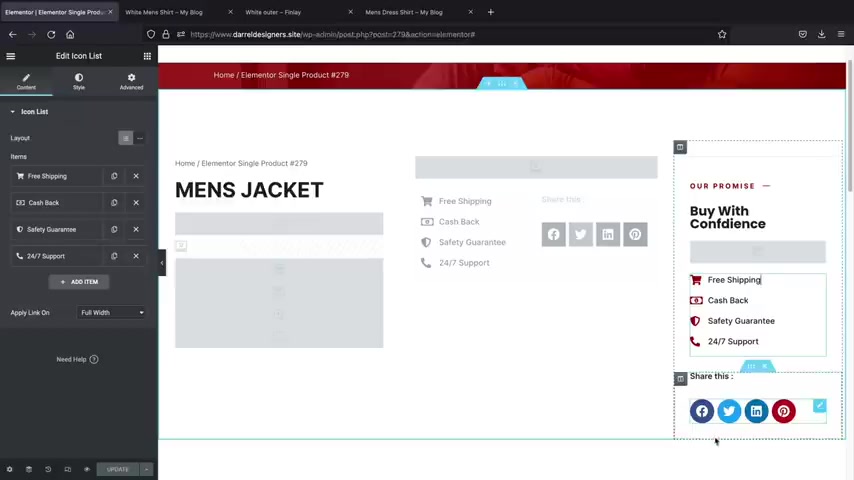
So you can basically hide specific sections for specific devices just in case you feel that it's not really suitable for like either the computer or for tablet or mobile .
But uh that's how we created this section .
It's a three column row .
Uh We mix and match elements using some of the elements from the home page .
And then we use this uh short description and then we added in this icon list here at the bottom .
And if we STC down here , uh we added the additional tabs , right , the product data tabs .
And then here we added the product related .
So let's go ahead and assign this to our uh page .
So it'll go to display conditions and I want to add this to all of the products .
And then I'll just find any product , it doesn't matter which one I select because uh the product template will be assigned to all the products .
And there you go .
So now we have the product here .
We have the title , the price everything looks really clean , it looks really nice .
So I do hope you guys enjoy this product page .
Um Here's the description and then also if you do have up sells , they will be displayed right there .
You can feel free to take the up sells out or you can add anything you want in there .
So that's how you guys can create a custom product page for your products on your e-commerce website , right ?
Party people .
I hope you guys enjoyed that part of the video .
Hopefully it wasn't too boring , but now you know how to fully customize your shop and also your product pages as well .
Feel free to use any of these templates to help get you guys started with your e-commerce websites .
Now , let's go ahead and move on to the next section where we're going to talk about the Woocommerce settings .
So the Element or Theme builder allows you to build really nice shot pages and product pages on your e-commerce website .
So now that we talked about the Element or theme builder , let's move on to step six .
We'll be talking about the Woocommerce settings .
The Woocommerce settings is where we adjust our shipping , our tax .
And also we , we can have coupon codes and all sorts of stuff .
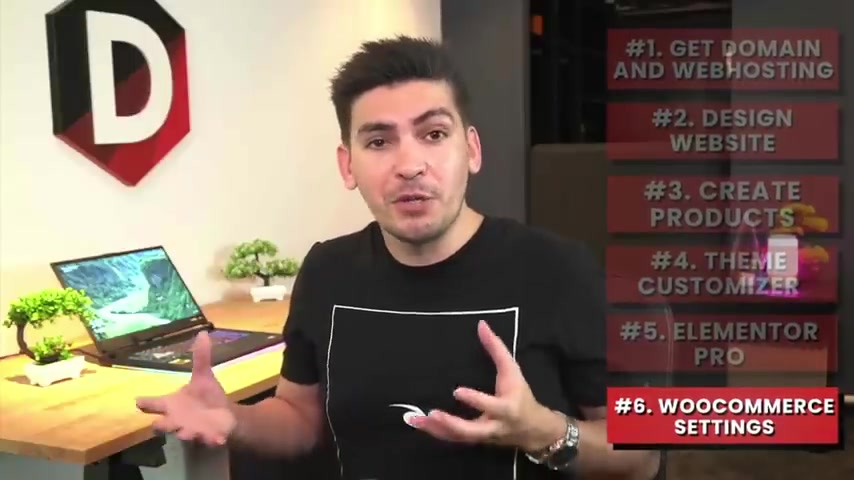
I'll also be showing you how to implement payment gateways onto your e-commerce website , so you can start accepting credit card payments on your website .
Are you guys ready ?
Let's get started .
Ok .
So in this part of the video , I'll be explaining how to adjust the Woocommerce settings .
So I'll be going through tax shipping and also how to accept payments on your e-commerce websites .
So first let's go ahead and go to our dashboard and we're going to go to the Woocommerce setting options .
So Woocommerce and click on settings .
So I did just get this notice , I guess they moved coupons around .
So I'm going to remove this coupon menu .
Uh They added coupons somewhere else , but uh we'll talk about that a little bit later .
So I'll click on settings here .
First .
Let's enter in some general information about your store .
So where is the store located ?
If you are a brick and mortar store , then you want to go ahead and select a location based off where you're from now , where are you selling to ?
You have a few options here .
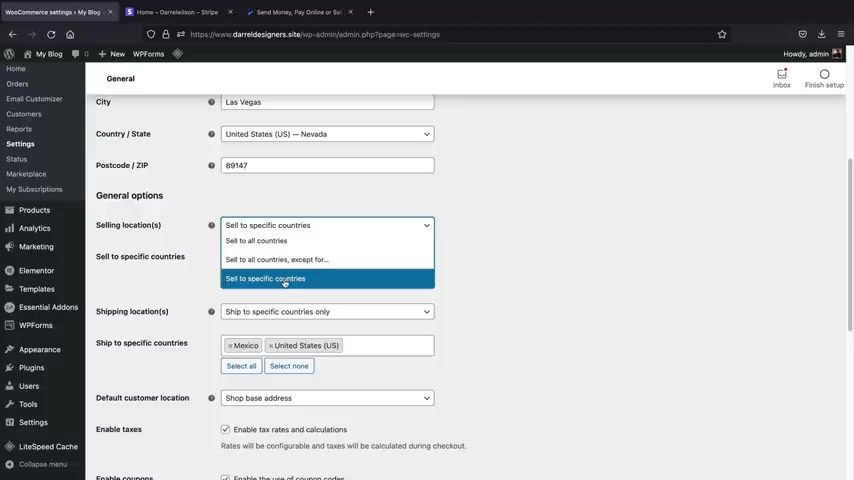
You can sell to all the countries you can sell to all the countries except or sell to specific countries .
Now , since I'm a business in the United States , uh I want to sell to specific countries only and here you can list a list of the countries you want to sell to .
So for example , if you only want to sell to United States , you can say I want to sell the United States and then also I want to sell only to Canada , right , Canada and also Mexico because they are the closest to my shop .
And here you have shipping locations .
Now , if you want to ship to specific countries or all the countries , you can select that here as well .
So I'm gonna say , you know what I want to ship to specific countries only .
So I wanna only ship to the countries that I can sell to .
Right .
I mean , that makes the most sense .
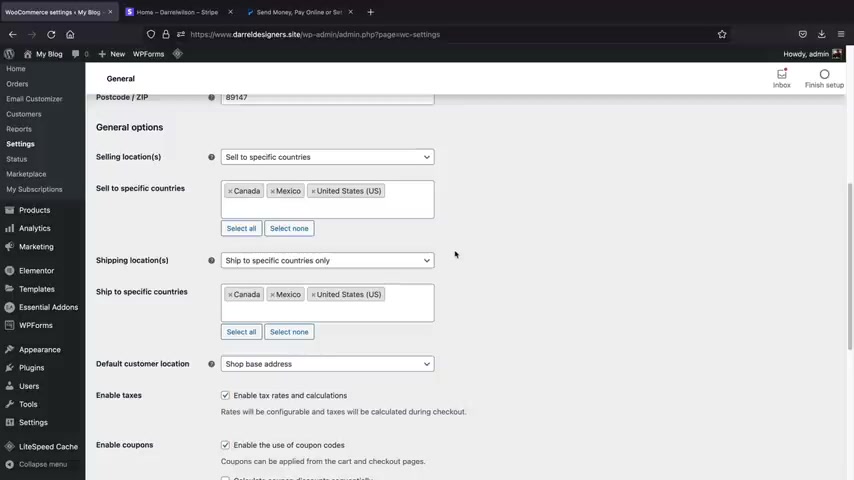
So I'll put , uh I'll put Canada here , Canada and I like that so I can sell only to these countries and then I can ship to only these countries .
Now , if someone tries to buy something that is not in these countries , they'll be blocked .
And this is a good idea because if someone really far away maybe from the United States , like in uh I don't know Lithuania or something , they try to buy one of our products that shipping is just way too much to deal with .
So I just choose not to do business with them .
So that's why you want to select specific countries .
And then here we'll go ahead and scroll down .
You want to make sure that you enable taxes and also enable the use of coupon codes because I'll be showing you later how to set that up and then scrolling down .
We have the dollar , right , the currency .
You can select your currency here , I'll leave mine as dollar and then click on save changes .
This notice is really annoying guys and there's nothing I can do about it .
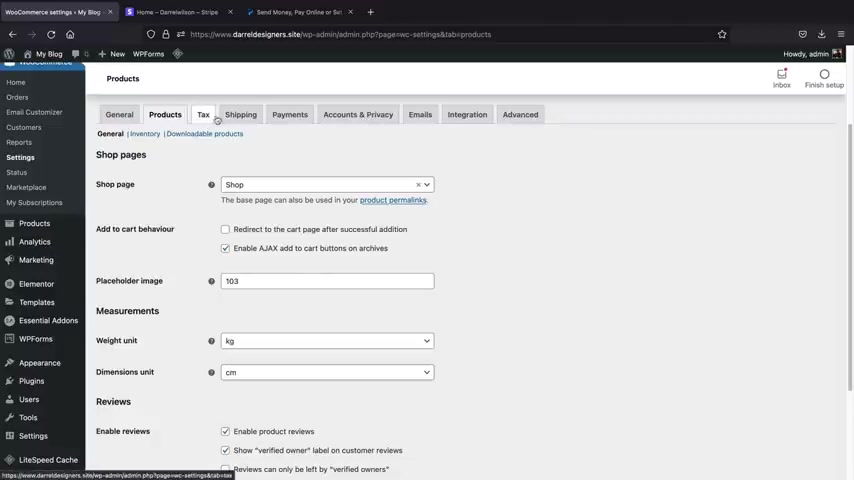
Basically , they're just letting me know that coupons moved over here to marketing and for some reason , they just keep display this notice .
So just , just bear with me .
There's nothing I can do about it .
Uh But now let's go to tax .
So next , let's click on products from the product section .
You can change the measurements and you can also enable reviews on your products if you choose to do that .
And that's really up to you .
If you want users to vote on your products , you can do that .
Uh We're gonna skip tax for now and we're gonna go to shipping , we'll come back to tax a little bit later .
All right .
Now , the first thing that we're going to have to do is we need to add a shipping zone .
So basically , what do you want people to pay for specific shipping zones ?
So let's add a shipping zone and this one I'll just put to United States for this shipping zone , United States and for the region , this is going to be the US .
So for me , what I'm saying here is this is going to be the cost for shipping in the United States and I will add a shipping method .
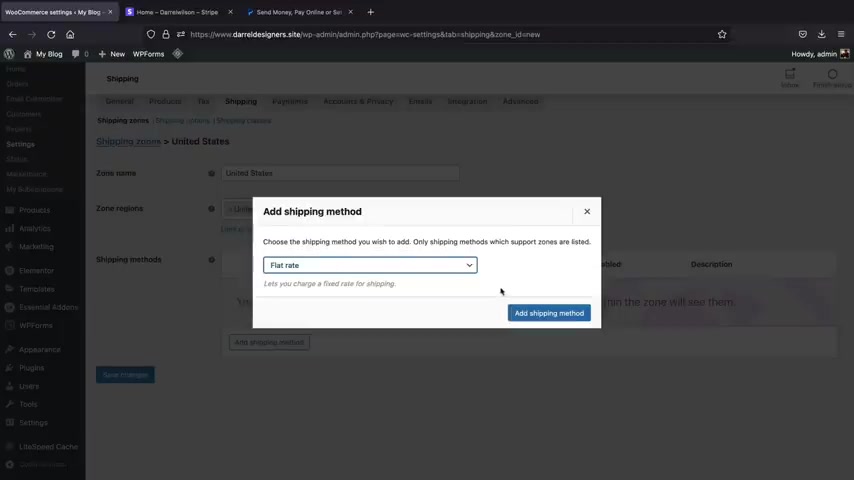
Now , we have a flat rate , free shipping or local pickup .
For this example , I'll select flat rate and click on add a shipping method .
Next , we need to apply a price for the flat rate .
So how much does this cost Well , let's click on edit and we have the flat rate , right ?
And is this taxable ?
I'm gonna put no .
And then the flat rate for shipping in the United States is $5 and then I'll click on save changes .
So now you'll see that we have the United States as our shipping zone and then we also have this other option which I'll talk about a little bit later .
But uh you notice here how we don't have Mexico or Canada .
So we need to add them to this because we allowed shipping to Mexico and Canada .
So let's click on add a shipping zone and for this section , I'll do Mexico and Canada , why not ?
This will be Mexico and also Canada .
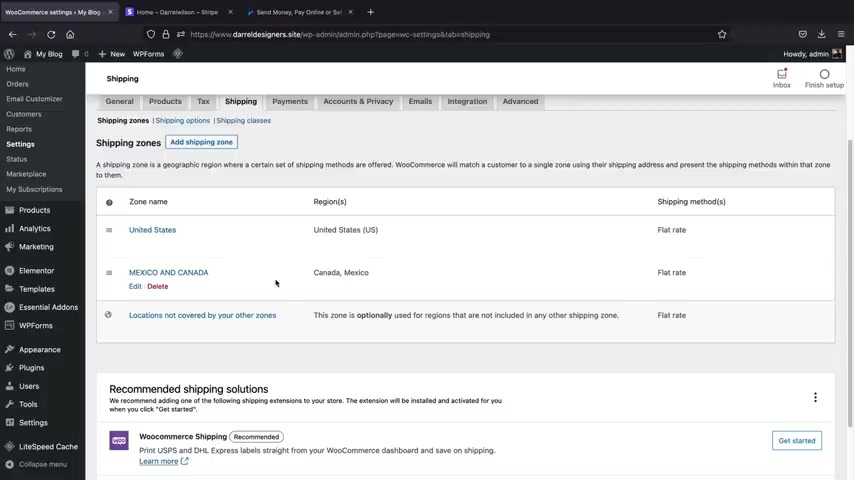
And now I will add in a shipping method , a flat rate fee and we're gonna charge them .
I don't know , what should we charge them ?
Let's charge them 10 bucks .
So they're gonna be charged $10 for shipping .
That is not taxable and I'll click on save changes .
Ok ?
Now let's take a look at our shipping zones again .
All right .
So at this point , you can see what's going on where USA is being charged $5 and then Mexico and Canada are being charged $10 .
Now , let's say , for example , you are selling in Nevada and somebody from Nevada buys your product , right ?
Maybe you don't want to even charge them shipping because the shipping fee will be a lot less .
So let me show you all how to assign free shipping for specific regions .
So I'll click on add a shipping zone and for the zone name , I'm gonna put in Nevada for the regions .
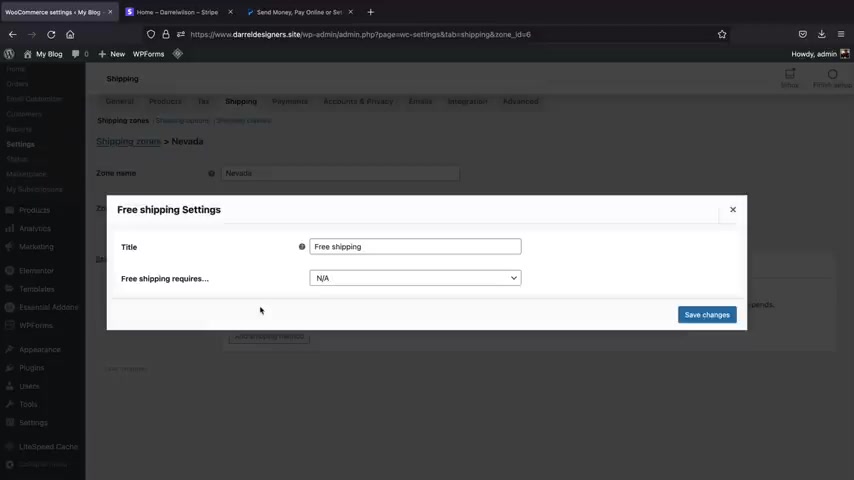
We're gonna select Nevada here and then I will add a shipping method and here I'm gonna select free shipping .
Let's click on , add a shipping method .
Then I'll click on edits under the free shipping .
So free shipping requires what we can set specific conditions for free shipping .
For example , a minimum order amount .
That means the user must spend at least $50 on our store .
If they hit $50 then we will give them free shipping .
You can also do a minimum order or a coupon or both .
It's really up to you .
We'll create coupons a little bit later , but uh you can create coupons for free shipping , but I'll just select a minimum order amount of $5 and then click save changes .
All right .
So now let's go ahead and go back to our shipping zone here .
All right .
So now let's clarify .
So people in the United States will be charged $5 right ?
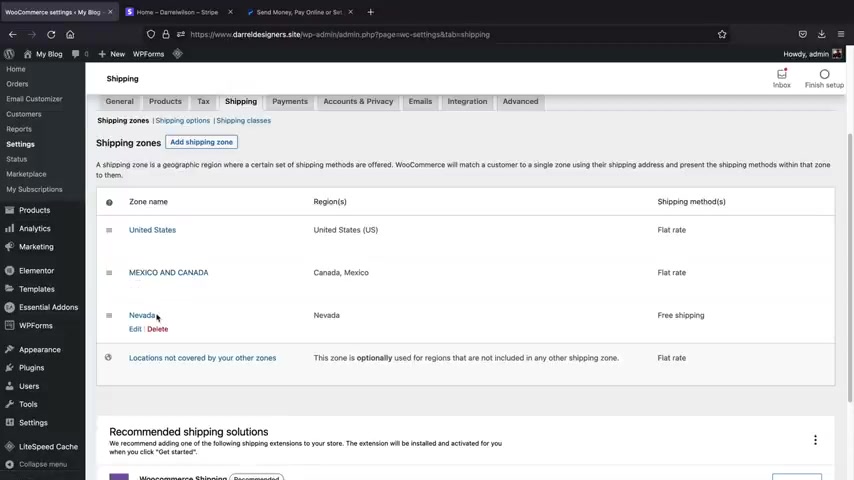
People in Canada and Mexico will be charged $10 for shipping .
However , people in Nevada will get free shipping if they spend a little bit of money on our store .
Now , let's say , for example , somebody buys something maybe on the tip of Mexico or maybe uh somewhere around the country that we didn't set the options for and there was some sort of accident , right ?
We can select the locations not covered by your other zones .
So let's click on this right here now for flat rates , I'll click on edits and I want to select a cost of $8 .
So what this means is , let's say , for example , someone buys something on our store that we didn't assign , they will be charged $8 as a flat rate because sometimes accidents happen , you know , sometimes it does happen .
Let's go to click on shipping zones and that's it .
So our shipping is now configured .
Now , shipping can be very dynamic .
You know , you can ship based off of weight off of quantity .
And there are other plugins like the Woocommerce table rate shipping plug in .
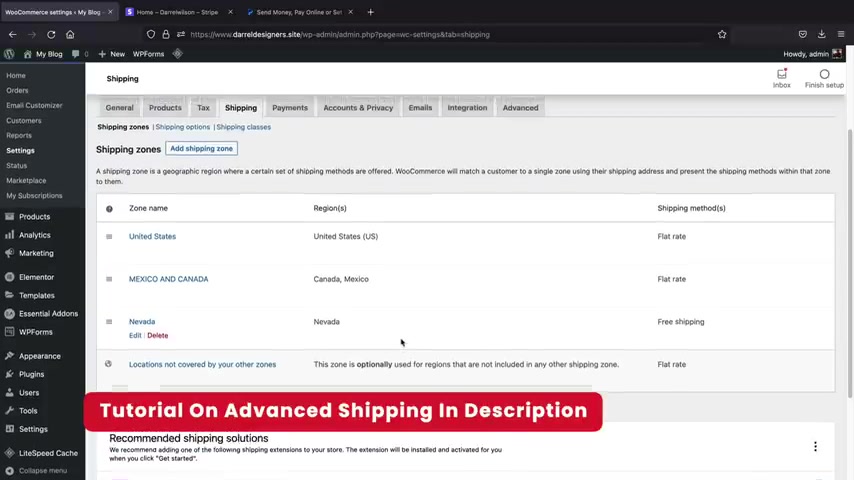
And I have a full tutorial on that in the description below .
It's about an hour long and it talks about how you can ship based off of weight off of quantity off of uh dimensions .
I mean , it gets really , really advanced , but uh this is kind of like the basics of shipping .
So that's how you guys can kind of assign shipping to your e-commerce website .
Next , we have accounts and privacy in here .
You can allow guest checkouts or you might want to allow users to create an account on their my account page or during checkouts .
Also , you have account erasure requests and this is like a removing personal data from your store and then also inserting your privacy policy and your uh checkout uh forms here as well .
So that's what that is referring to .
So next we have email notifications and I did recommend the plug-in called Ymail , which can help you customize your emails for your e-commerce website instead of using the bare html because uh it's really not suitable for beginners and most people will have no idea what they're doing .
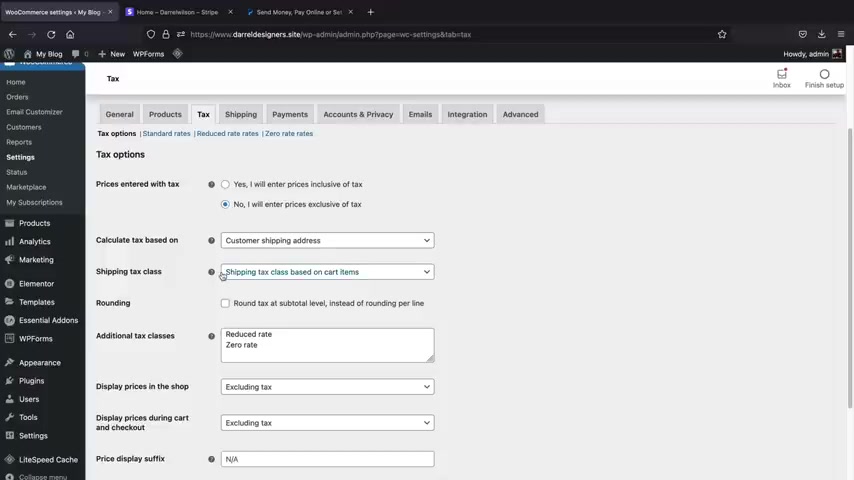
So , uh I recommend using the mail plug in in order to customize your email forms .
So the next step is we're , we're going to install some plugins for our e-commerce store like payment gateways and also a plug-in to automate our tax .
Now , if you're in the United States , we can have automated taxes on our websites yet .
We can also set specific rates uh depending on what country we're dealing with .
And I'll talk about that in just a bit .
But first let's install a few plugins .
So let's go to plugins and go to add new and under search plugins .
We're first gonna enter in Stripe .
So we're going to install some payment gateways and we're also going to install some plugins for tax .
So this is the plug in .
It is called the Woocommerce stripe payment gateway .
Go ahead and click on install and activate .
All right , and then go back to plugins and add new .
And now we're going to enter in paypal , just type in paypal .
Now , paypal .
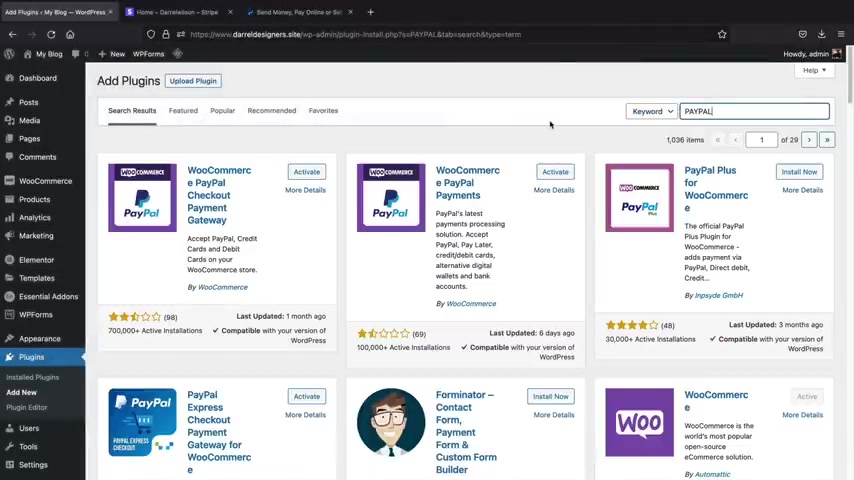
Is probably the most accepted payment merchant in the world .
So you can be using paypal from any country .
Now , I do not recommend the new extension Woocommerce created before this video .
I tested it out for about a day and there was just too many glitches and errors with it .
And as you guys can tell , people are just not happy about it and I really just don't even think it works .
So , uh what we're gonna do is we're going to install this plug in here .
It is called the paypal Express Checkout by Web Toffee .
So let's go ahead and install and activate this plug in .
Ok .
And we need to install one more plug in .
So click on add new and we're gonna type in Woocommerce shipping , woocommerce shipping and this is the plug in that we need .
It is the Woocommerce shipping and tax and it does have a lot of active installs .
So it has 1 million active installs .
So go ahead and activate and install this as well .
Now , when you install the Woocommerce shipping and tax , you will need to sign up with Jetpack .
Jet pack is a free service that will automate the tax calculation and also help you print out shipping labels for your products .
So let's click on activate Jetpack and connect .
All right .
So you might need to make an account with jet pack and I already have an account .
So just go through the process of creating a free account with jet pack and then it'll bring you back to your dashboard .
All right .
So now that we have those installed plugins , we are now ready to go back to the Woocommerce settings .
So let's go to Woocommerce and click on settings .
All right .
Now we'll click on tax .
So if you were in the United States , we can now add automated taxes .
Now , these are provided by an API from tax dot com and tax dot com will go ahead and automatically configure the tax rates for whatever store you are working in .
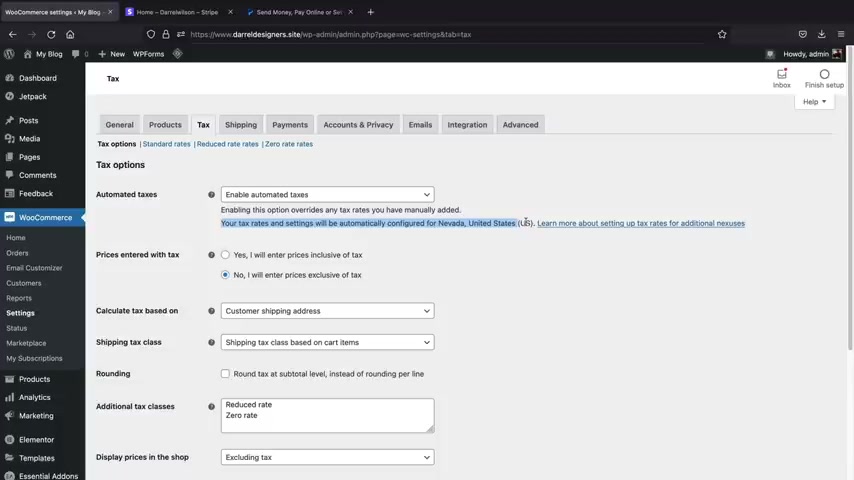
So you'll see right here how it says your tax rates and settings will automatically be configured for Nevada United States .
Now , even if you are in another country and you have a client that you are uh working with , you can use this plug in to help automate their taxes for them .
However , let's just say , for example , I don't want to have automated taxes and also people watching this from other countries might want to create their own tax rate .
So let's do that here .
I'll click on standard rates .
So the first option is country code .
Now , you can find your country code by just clicking on that link and it'll give you all the country codes .
So uh you have some for Aruba , which is a w you have them for Bangladesh , India , Cambodia , uh Costa Rica .
And here are all of the country codes .
So no matter what country you're selling from , you can just insert the country code there and that will assign the tax rates .
So , yeah , that's where you can find the country codes .
However , I'm just going to enter in us for United States .
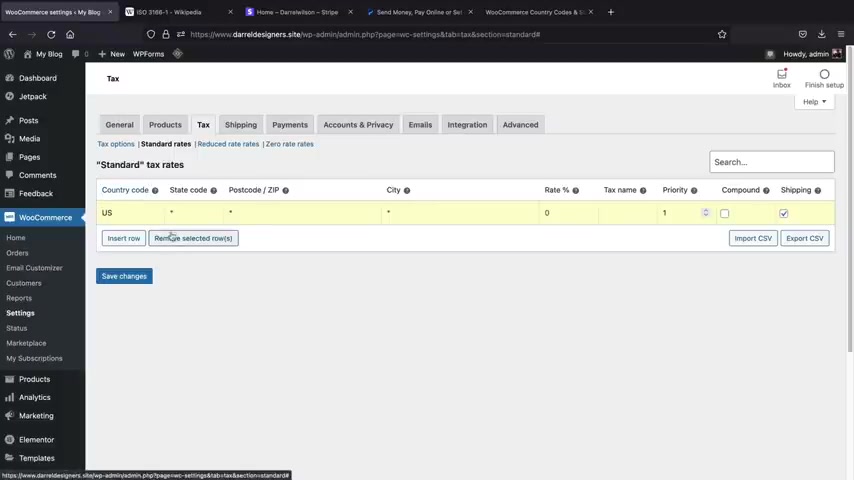
Now , if you're in the United States , you can actually set a specific tax rate for specific states as well .
Now , depending on where you're from , you need to either charge tax based off where you are or where you are shipping to , to .
But I am not a legal expert on this .
So you might want to consult your accountants about that and all that .
Uh Mumbo Jumbo .
But uh let's just say , for example , I want to have a 5% tax rate for the United States .
Do you want to add tax on top of the shipping ?
Do you also want to compound that as well ?
Well , I'm just going to say no , so I don't want a tax on top of shipping and then I will click on save changes .
All right , cool .
So now we have a tax rate for the United States .
But let's say , for example , we also want to have a tax rate for Mexico and then the tax rate for Mexico is going to be 8% and I don't want that to be on top of shipping and then I will uh save the changes .
All right .
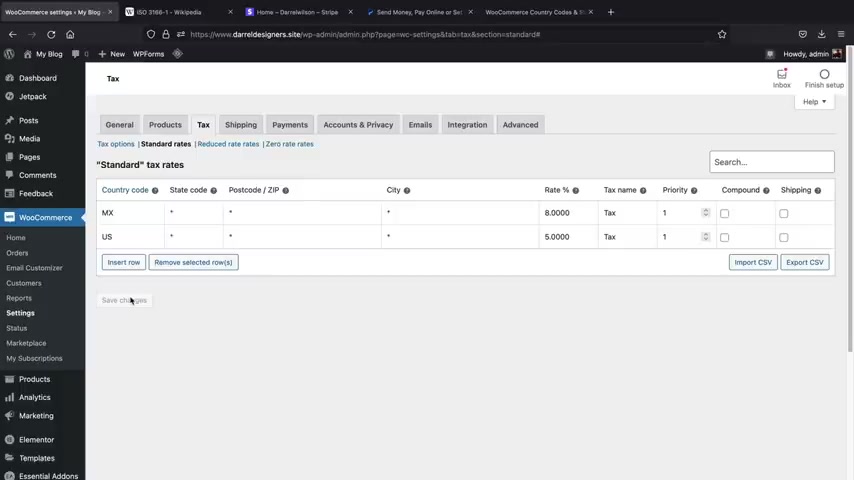
So now that we have a tax rate of 8% for Mexico and also a tax rate of 5% for the United States .
So this is how you can assign specific tax rates for specific locations .
And you can even go in more detail and go based off of states and even zip code or specific cities if you want to do that .
But that's just an overview of how you can add taxes to your e-commerce website .
Next , let's integrate some payment gateway .
So let's accept credit cards on our website .
Now , there are two websites that I recommend for this .
This is Stripe and also uh paypal as well .
Now , if you're in the United States or Europe or even South America , uh stripe is accepted everywhere .
So first go ahead and go to stripe dot com .
Now stripe dot com is a free service .
It's free to sign up and it does not cost you anything at all to get started .
There is a transaction fee of around 2.9% but I believe that is standard for all merchants .
In fact , uh Shopify charges at least 5% .
So you are getting a large discount if you use woocommerce also make sure to sign up with paypal .
Now with paypal , you will need to have a business account .
So there was a recent uh policy change where personal accounts can no longer accept payments on e-commerce websites and you must have a business account in order for this to work and there is a monthly fee for paypal .
So uh if you want the free alternative , you can go with Stripe .
But just remember that uh paypal is accepted worldwide .
So Stripe is only accepted in specific regions .
But uh you might want to add both to your website just so you can accept payments everywhere .
So first let's add Stripe to our e-commerce websites .
Now , we'll go over here to payments and since we installed the plug-in , we will now have some options for a stripe .
So this is it the stripe credit card .
And then here I'll click on manage .
Now .
Stripe is probably the easiest to get set up with .
I mean , it's you just have to copy and paste , uh copy and paste stuff and that's pretty much it .
So we want to enable Stripe and then here we have the test mode and then we also have live mode .
So let's say , for example , you want to run test transactions , you'll click on enable test mode .
If you want to enable live real transactions , you will uncheck that .
And now this will accept live payments on your e-commerce website .
So go ahead and go through the process of creating an account with stripe .
It does take a little bit of time .
You'll have to create an account , you'll have to link your bank account .
They don't really ask for any sensitive information except of a place to transfer the money to because uh they're holding your money .
So they need a place to transfer it .
And once you are done with that , it'll bring you to your stripe dashboard .
So this is my current dashboard and you'll see that you have payments here and it'll just give you all the information that you need uh about your store .
But first , let's click on this test mode here at the top .
Right now , this is test mode .
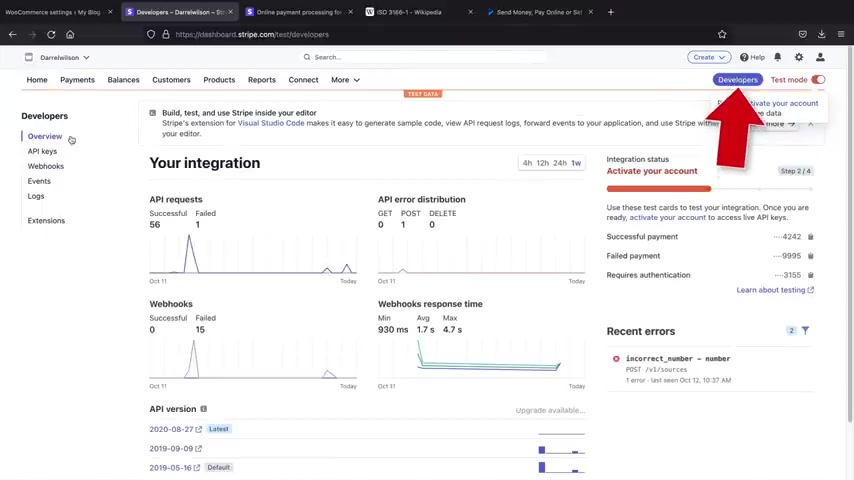
And for developers , I'll click on this developer tab on the left side , we're going to see API keys .
Now , this is the publishable key and also the secret key that we need to copy and paste this onto our e-commerce website .
So first , I'll go ahead and take this publishable key and I will paste that .
But first , let's make sure this is in test mode .
All right , there we go .
And then for the secret key , it will reveal this and I'll copy the secret key and then I'll just paste it in there .
Next , we need to add a test webhook secret .
So just go ahead and click on this link right here that says stripe account settings and it'll bring you to this page right here .
So next we have web hook end points .
Now , all you need to do is just copy and paste this .
I'll copy this and then click on this link and this link will open up a new browser in your window .
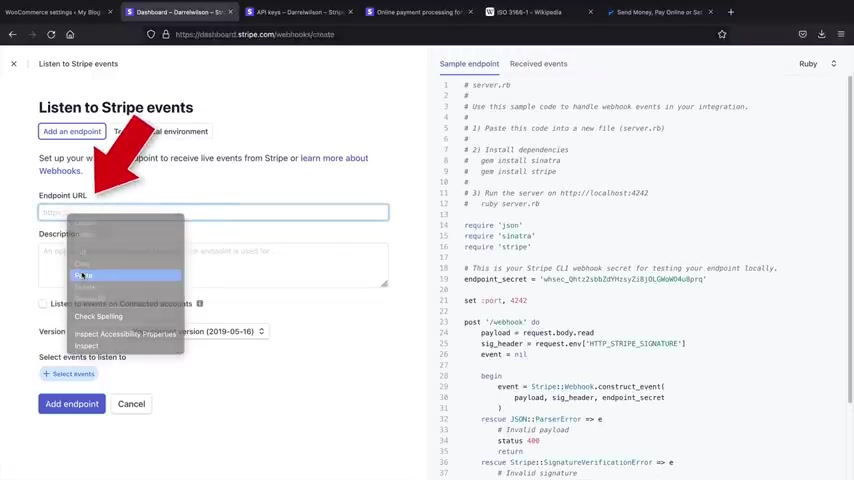
So it'll bring you to the developer section first , let's add an end point So click on , add an end points and then paste the URL that gave you right here .
And we're going to basically say why we are using this web hook .
So this is used to capture payments .
Cap .
Whoa whoa whoa whoa whoa we capture payments next .
We need to select an event .
So select events and this is going to be charge .
So we're gonna click on charge and I want to select the uh charge captured .
So basically I'm saying uh this is going to be used to charge credit cards and charge uh you know , so we make money .
So what I wanna do next is scroll to the bottom and click on add events and then we're done .
So click on add endpoint .
All right .
Next , it'll say signing secret .
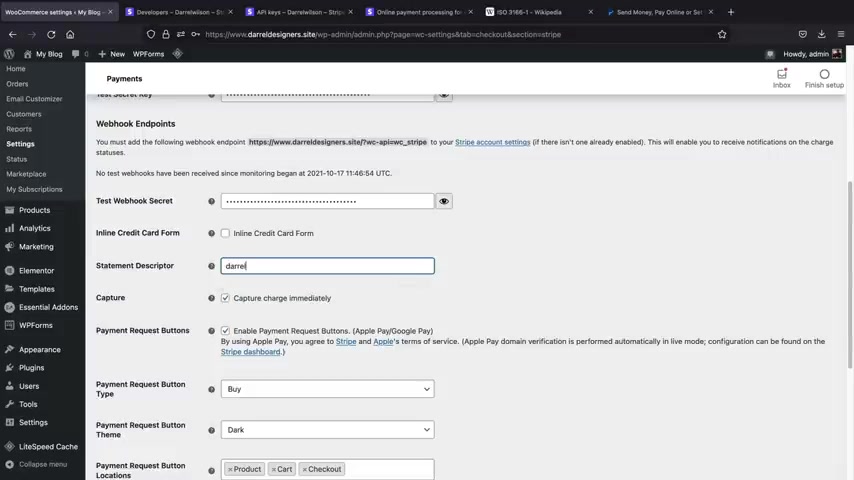
So click on reveal and this is what we need to copy and paste on our e-commerce websites .
So we'll go back to test web poke secrets and then we'll paste it in there .
Also , this is the statement descriptor .
So when they buy something from your website , you might want to tell them that this is your store , right ?
So this will be Darryl Designer Store .
So this will appear on their credit card and I wanna make sure this captures immediately .
So we want to charge them right away .
Now , this is also an online credit card form .
It's just another way to display the um the way to capture payment .
So they , they do have two different forms you can use here .
We have enabled payment requests .
So you can use Apple pay and also Google Pay if you prefer that or you can disable those if you choose to .
But uh go ahead and scroll down here and then I'll click on save changes .
All right .
So at this point , I think we're ready to run a test transaction .
So let's do that .
Let's go ahead and buy something on our store and I'll just click on shop .
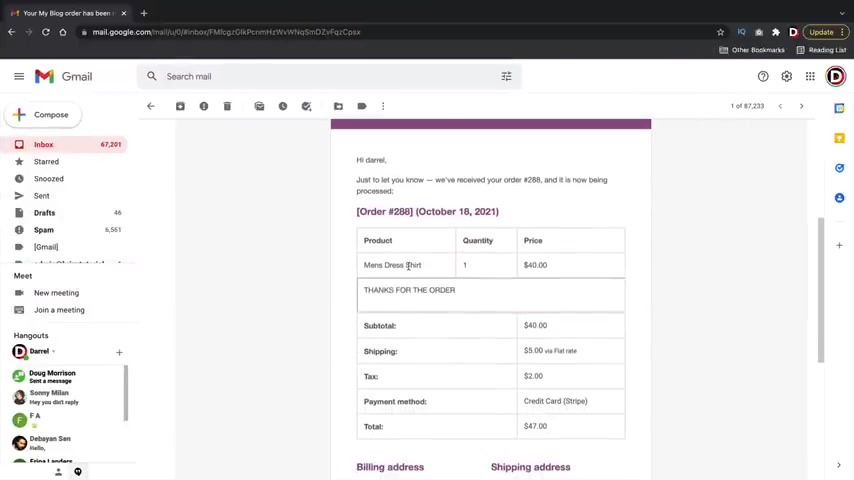
I will add this to the cart , view the cart , proceed to check out .
Now , this is for test purposes only .
So people have messaged me saying , hey , Darryl , uh you put your credit card on the uh you know , on the website , but you'll answer this for test mode enabled only and then we'll scroll down .
I will save this and click on place order .
All right , cool .
So this is the checkout page .
Now , this is the page that your customers will be brought to after they have purchased your product .
You can always go ahead also and check your email and you will also get this .
Thank you for your order where you will see the product that they have purchased and the price and the billing and the shipping address .
Next , let's go to our stripe account to see if the payment has been captured .
Let's go over here and we have two payments successful , but uh a quicker way to look at this is just going to payments here and going to succeeded .
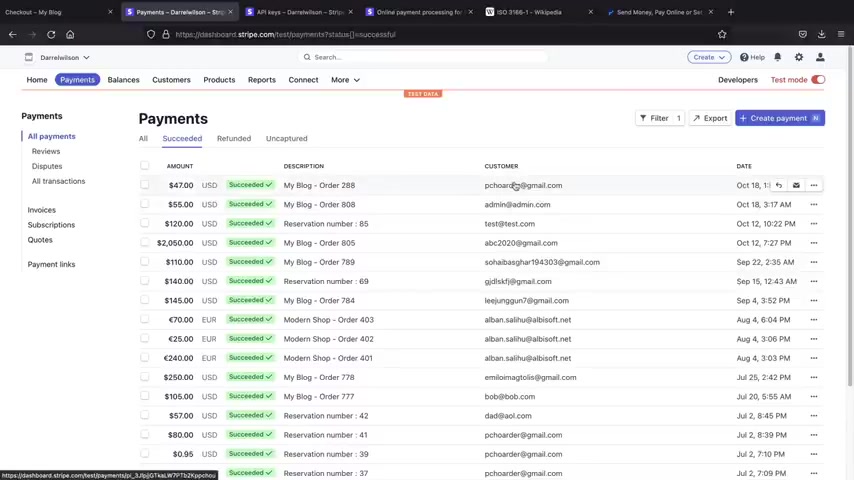
And now you'll see that the $47 payment has been captured and everything is working and is connected with Stripe .
So that's how you can integrate Stripe with your uh e-commerce website .
Now , when you're ready to take live payments , all you have to do here is uncheck this test mode and then you'll go to developers and you'll do the same exact process .
So go to API keys and then instead of copying and pasting the test , you will do this with the live .
So let me go ahead and run you through that really quick before we jump into paypal .
So here is the payments for stripe .
So under the payments tab , we will then uncheck test mode .
Now we're going to enter in the credentials for the live transactions .
So I'll go ahead and copy and paste this , just make sure test mode is not enabled and we will do the same exact process , reveal the live key .
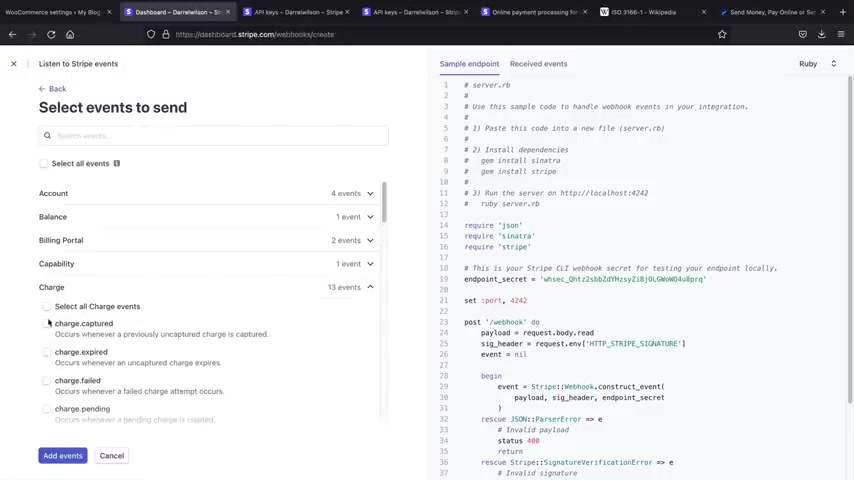
And then also we're going to do this one more time .
So I'm going to copy this , open up these trip account settings and then we're going to do this one more time .
I'll add an end points just to make sure you guys get it .
I don't want you guys to be like , well dare you didn't show us how to do this for the live one .
You know which , which I do get , I get nasty comments sometimes but I understand it can be frustrating .
Uh you know , when you , when people leave steps out .
So uh but this will just be uh used to accept payments , right ?
And for the live events , we'll do the same exact thing .
We'll click on charge and charge captured and then click on add events and then add the end points .
Once that's added , we will then reveal this and we will copy and paste this on to our website and we are done .
So at this point , your website can now accept real live credit cards on your e-commerce website .
And uh guys , please don't buy anything .
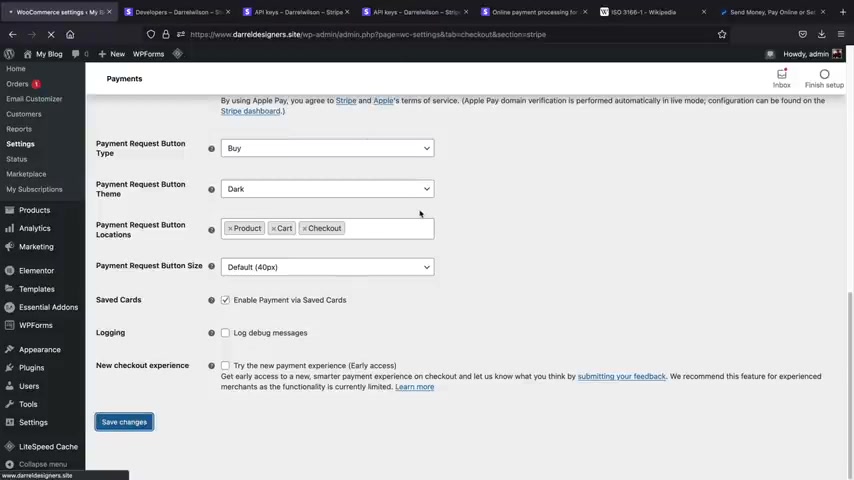
I get a lot of people who actually really use their credit cards and they buy stuff .
I don't know if it's a joke or not , but people really spend money and I have to refund it and it's like it like , you know , it's just for the toll purposes .
So please do not buy anything .
Uh So that's how you can integrate stripe onto your e-commerce website and there's no monthly fee , it's all free .
They just take a small transaction .
Now , let's integrate paypal onto our Ecommerce website .
So let's click on the payment tab again and we'll scroll down and we're gonna find paypal express .
I'm going to click on manage .
Now , I do like this plug in a lot better than the A lot better .
Does that make sense ?
A lot better .
No , I , I like this plug in better than the default one because it's , this was a lot easier .
All you need to do here is just copy and paste your credentials .
It's really , really easy to do this .
So for the environments , let's just do live mode , right ?
And now it's saying get your API credentials .
All you need to do is copy and paste your three API S into these boxes and you are all ready to rock and roll .
So let's click on the sandbox .
Now , you'll need to first log into your paypal account so they can redirect you to the correct settings .
So let's click on and log into the dashboard and I will log into my paypal account .
All right .
So this is my current paypal account .
So you guys can see I got some , I got some cash there .
We got 77 Gs .
So we'll go to the Woocommerce settings .
Now , uh make sure that this is under live mode and uh click on the live API credentials .
Now , I'm gonna open this in a new tab .
All right .
And now it should redirect you to your API credentials .
Now , all you need to do here is click on the show and then it'll show your user name , it'll show your password and also your signature .
So for example , for the user name , I'll go ahead and copy this and then I will paste it right there and then you'll do the same exact thing for the live API password and also the live API signature .
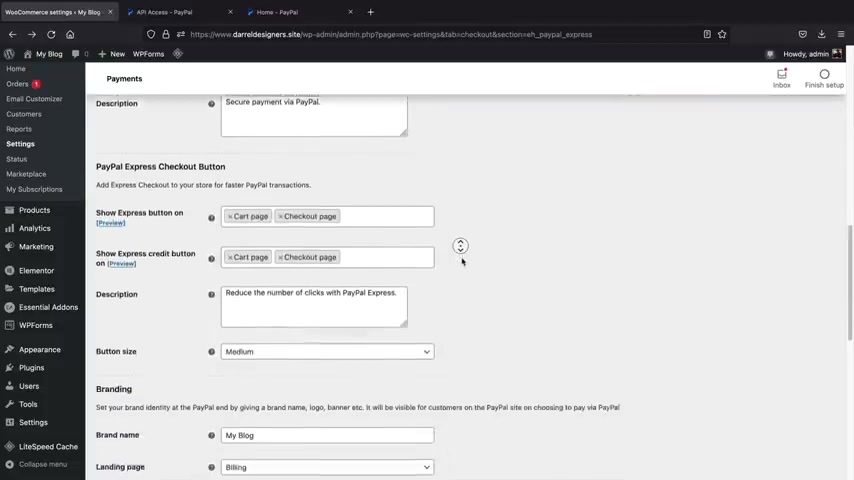
Once you do that , you'll go to the bottom and then you will click on here we go save changes and that's it .
Now , you can start accepting payments from paypal on your e-commerce website .
Now , they do have a pro version .
I'm not really sure if you want to check it out .
But if you guys do , I will leave a link to it in the description below of this video .
So let's quickly summarize .
We went through all the tabs , we went through the general , the tax , the shipping , the payments , the accounts .
So I think at this point , you're a little bit more familiar .
There are some other things that you want to check out like for example , your orders tab .
So this is like the general overview about your order .
So you'll see that we have this shipping information .
You can change this to uh payment pending payments or uh processing or completed whatever you want to set that to and then you'll click on update and that'll kind of let your other admins know that .
All right , the status is done .
Uh The product is now complete .
Everything's good to go .
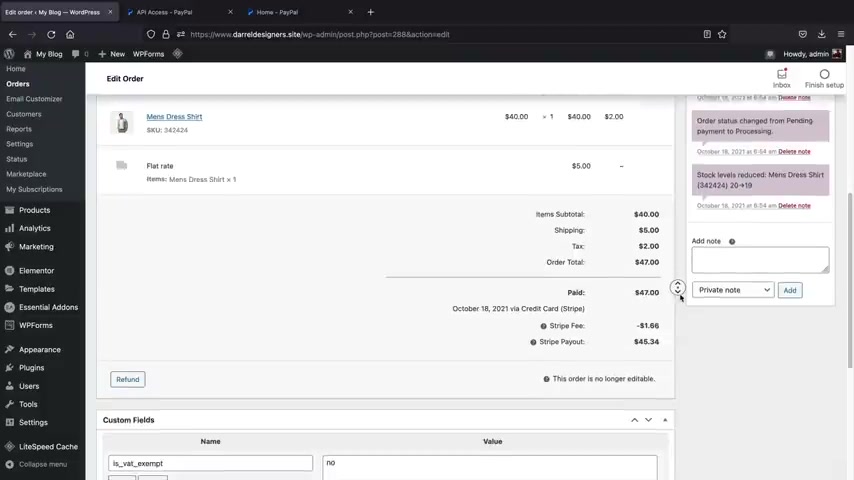
Uh Also if you scroll down here , you'll see the order notes , the price , you can add a private note and also you can even refund the order right here by clicking on the refund button .
And since this is now connected with the API you'll just click on refund and it should refund the purchase .
So that's how you know , refunds are dealt with .
People .
Ask me about that quite a bit .
Also , if you need help with shipping labels , you'll click on create a shipping label and it can actually help create a shipping label based off the dimensions and based off the origin of the address .
Now this is probably set for another video guys .
I'm not gonna go through the shipping labels because we can talk about this again for another hour and I want to speed this video up as much as I can because I don't want this video to get too long .
But uh that's how you would uh create shipping labels for your uh ecommerce websites .
You also have the reports and the reports will let you know about if someone has uh purchased something on your site , you'll see that uh you know , we have some sales here .
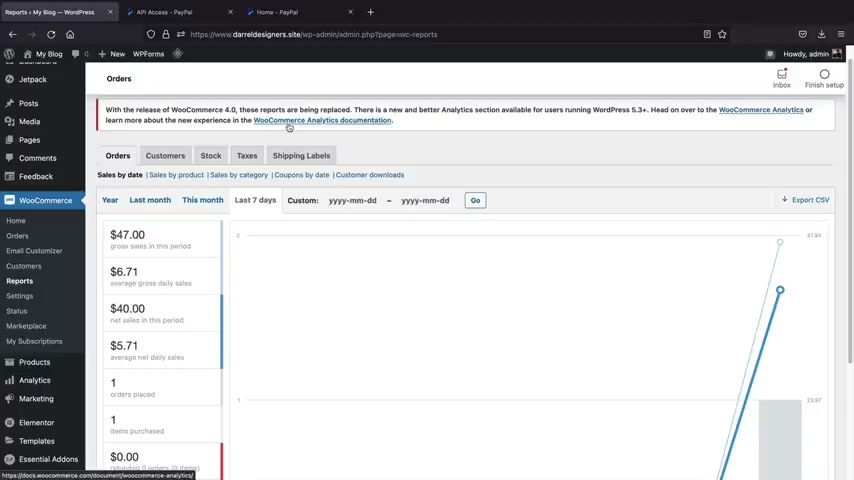
It looks like this is being replaced by Woocommerce Analytics .
Um That's gonna be something new .
So maybe when that comes out , I will talk about that .
Now you'll see this marketing tab and they recently moved the the coupons to marketing .
So just go ahead and click on marketing and coupons and we'll create our first coupon .
So go ahead and give your coupon a name .
I'll just put Darryl .
Now , which kind of discount does this give ?
You can have a percentage discounts , a fixed dollar amount discount or a fixed product discount .
So this is a dollar .
So for example , this is a $10 off coupon .
That's what the fixed cart discount means .
However , if you want to offer a percentage , this is now 50% off your entire order and you can set this to allow free shipping and also give this an expiration date .
So this expires on the 26th .
The usage restrictions , you can have the minimum spend .
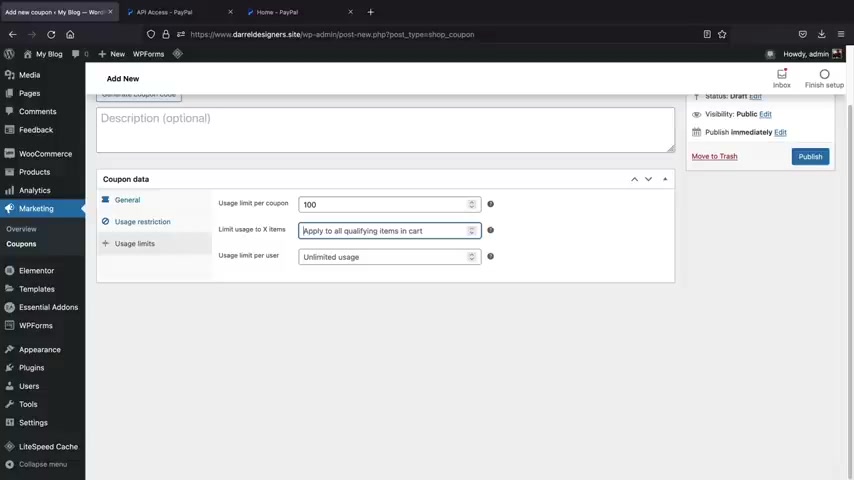
So that means they must spend at least $25 and you can exclude this or enable this for specific products , for specific product categories and so on .
Usage limits .
How many times can this coupon be used ?
Well , uh I'll just say 100 times , how many times can this be used for a specific item ?
You can select that specific item there .
Now also how many times can a specific user use this coupon ?
I'll just say like uh two times , that's it .
That's all you get , you know , and once you create your coupon , you'll click on publish , right ?
So we have $100 in the carts .
And uh here we can enter the coupon code of Darryl and then click on apply coupon code .
Now , this should apply a 50% discount to the product and there you go .
So now we have $50 off the coupon .
So part of people that is the woocommerce settings in a nutshell .
Just go ahead and mess with the settings .
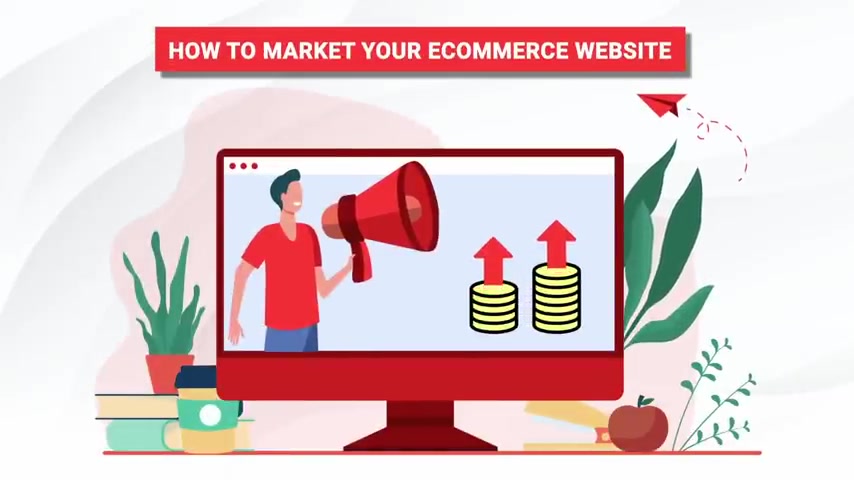
But , uh overall , I think you'll get the hang of it .
Now , in this next section , I'll be showing you all how to market your e-commerce website and how to start making money with your site .
Let's go .
Now , let's talk about how to market your e-commerce website so it can help you make money .
I'll be breaking this section down into five different chapters and giving you steps for each chapter .
Don't forget this blog post is available on my website .
So feel free to refer to it at any time .
But I'll be talking about the most important steps to follow for each chapter .
Chapter one , focus on your website optimization .
First .
Don't rush your marketing strategies right away .
If you ignore your website , then you're just wasting your money on marketing .
You will not be able to convert anyone if your website isn't optimized properly .
Ask yourself this question .
If you bring 1 million visitors to your website tomorrow , what would they say ?
How many of them would actually buy something or would your customers leave because of how your website looked ?
Step one , proofread your site's content .
You might think you can get away with typos and grammar mistakes .
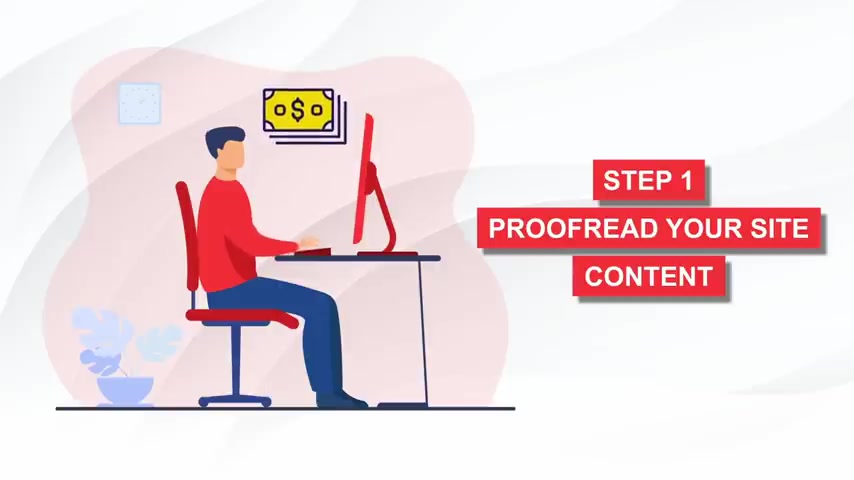
But the worst thing that can happen is that you miss out on a sale just because you spelled something wrong .
This happens , just double check your website and make sure it looks good .
Step two , make sure to link all of your social profiles for free engagement .
What you can do to amplify the reach of your website is to bring all your social profiles together and share your content on all of your networks as much as possible .
This is a great way to build trust and establish your e-commerce website .
Step three , start your on page seo the on page seo is probably the most important factor when optimizing your website , optimizing your website tells users what your website is all about and represents your business in the Google search engine .
I do have two videos with rank math and Yos that will show you how to submit your website to Google and also index your website in the Google search results for free .
This is a must do for all e-commerce websites .
Step four , capture emails .
It's free money .
Emails are a great way to communicate and sell to your audience that already have an interest in buying your products .
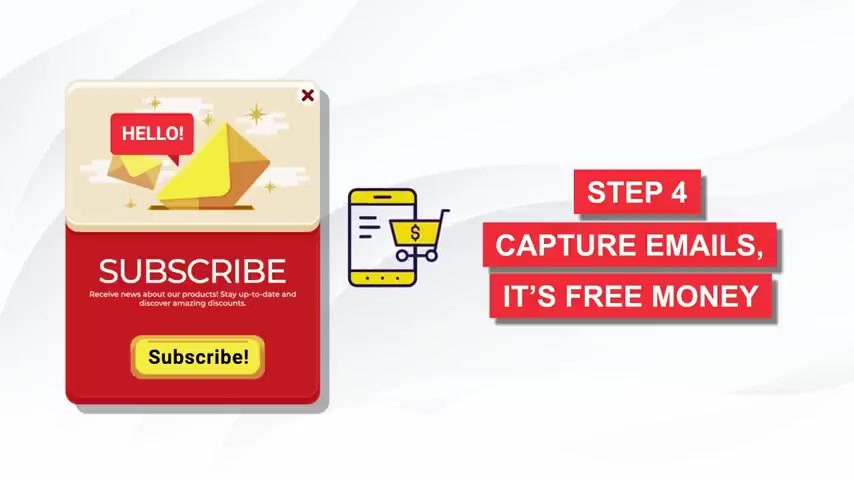
Always add a subscribe box to your e-commerce website .
So you can remark it to those customers who are already interested in your products .
I have a full video on email marketing with mailchimp and I will leave that in the description of this video .
Step five , keep your website low time under two seconds .
How dumb would it be if you lost money because your website was slow .
Nearly 70% of customers admit that paid speed affects their buying decision .
In fact , the probability of bounce rates increases , which means people leave your website by 32% .
If the website loads from 1 to 3 seconds longer , make sure your web pages are under three megabytes for each page for optimal performance .
Chapter two , the golden rules .
Before creating a marketing campaign rule .
Number one , start with free organic options .
It's very easy to get sidetracked and start spending money on marketing campaigns that you have little experience with .
Relax and start with all the free organic options .
First , before you think of spending any money , we will talk more about this later .
Rule .
Number two , growing your business takes time .
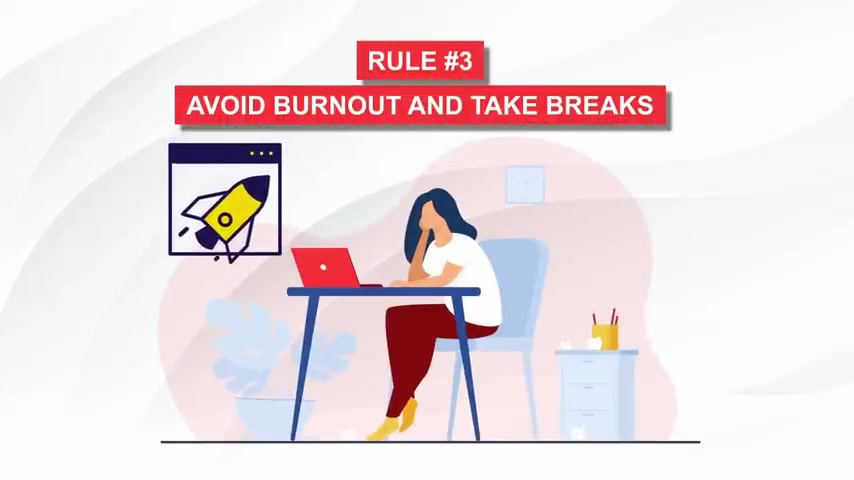
You should never expect to make millions of dollars overnight .
It's unlikely that you'll be able to gain tons of traffic and hit six figures in a week .
Growing an e commerce website takes time .
But as long as you're consistent with your business , the sales will slowly pour in .
Rule number three , avoid burnout and take breaks .
Although it's important that you continue marketing your e-commerce website , that does not mean you should do it 24 7 .
If you're feeling drained and burned out , take a break , your website will always be there and you want a strong head to manage your store rather than feeling burned out .
Next .
Let's jump into chapter three .
How to start your organic traffic marketing campaigns the right way .
Step one , create and establish your social presence .
Spend the time to create social profiles for your e-commerce business .
Completely fill out all the options available to establish your social presence that includes all social networks that you think are relevant to your business .
Remember , even if there is no one active on your page or engaging with your business at the start , that's perfectly fine .
The point here is to show that your business is alive .
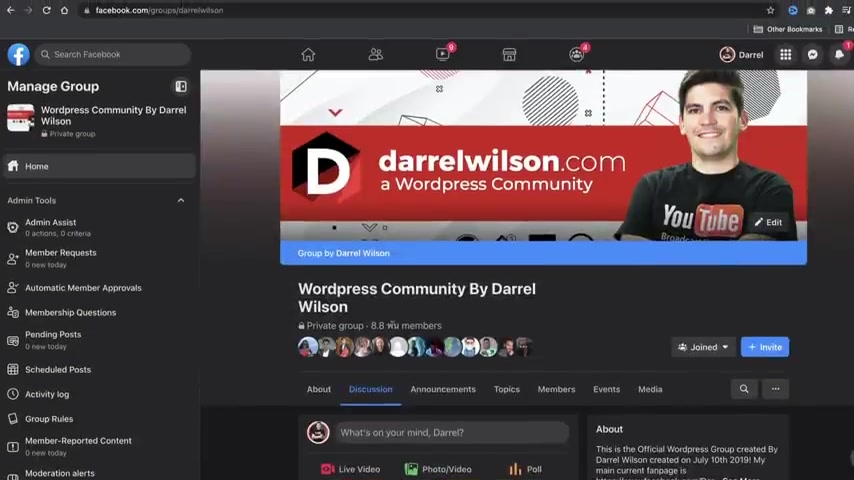
Also , you might want to create an active community that will attract the attention of other customers .
Step two , find as many classified and listing websites as possible .
Listing your website and classified and listing websites would give people who are interested in what you're offering a chance to find out more about your e-commerce websites .
This also helps give your website more exposure and helps users at the same time .
Step three , register on review websites for higher exposure , review websites have high domain authority and appear high in the Google search results .
This is why you should take advantage of them and list your website .
When a review website lists your website in their directory , you also gain high quality back links that helps boost your online presence .
Step four , start content marketing on your blog .
The main advantage of content marketing is that it has long term benefits .
When you create quality content for your blog search engines will naturally boost up your ranking and organic traffic will start to increase in the long run .
This is the easiest way to make sales .
Remember there is no better traffic than organic traffic step five .
Sign up with affiliate programs to get people to sell your products for you .
Affiliate marketing is finding websites that would want to promote your product or service in exchange for a commission .
For example , if you're selling a product for $100 on your e-commerce website and a blog recommended that product and converted the sale .
The partner referring that product would get a commission of 5% .
You would have received $95 and then a referring affiliate would get $5 .
You can also set your own commission rates as well .
This is a great way to get established blogs with high authority to start talking and promoting your e-commerce websites .
And this can ultimately help boost the popularity of your ecommerce store .
You can find affiliates by going to share sale dot com CJ dot com and also click bank .
I'll leave those links to those websites in the description of this video .
Step six , negotiate a referral system with other websites .
A good strategy that more e-commerce websites are doing is reaching out to websites that sell related products or services and offer discounts for each other .
For example , let's say you're selling men's dress shoes , men who purchase dress shoes might also be interested in briefcase .
Since you can't sell briefcases for whatever reason , then you should reach out to a briefcase website or business and offer to exchange links and even a coupon code to work with each other , working with other websites to get back links and help get the word off your e-commerce website is a great strategy on how to bring long term sales for your business .
Chapter four , paid marketing strategies .
Now , once you have exhausted all possible means to market your store organically , then it's time to maybe consider using some paid marketing strategies .
However , you should only consider paid marketing once you have made 100% effort into all of the free methods as possible .
Step one off page Seo , the truth is you can do seo yourself and avoid spending anything .
But to be honest , on page seo takes a lot of time and effort and you're better off paying someone to do it for you as for finding someone to do this for you .
It's quite simple .
Go to freelancer dot com or upwork dot com , then find an seo company preferably from India , pick 10 to 15 keywords , including your business name , negotiate the payments and then wait for the results .
I have more information on how much to spend and also what keywords to use on my website .
Step two , influencer marketing , influencer marketing is all about product reviews .
Influencer marketing is when a popular figure talks about you or your products and shares it with their audience .
This is an ideal tactic and is often very effective .
You may need to look for someone who is well known in your target market .
You can also check influencer marketing platforms like influence he and a mighty scout to find an influencer that best fits your needs .
Step three Google display network campaigns .

This is great for branding ever been to a blog and seeing those image banners on websites that recommend a service or product that you may have visited .
This type of marketing refers to the space on websites that you can find display marketing for all sorts of things .
Google will show these images on random blogs throughout the internet and is a great way for branding .
Google .
Display ads are pretty cheap and they're great for branding purposes .
Step four Facebook ads , but start slow .
Facebook ads can be very inexpensive and is a great way to reach customers that are interested in your brand .
Facebook allows you to search based off interest and demographic data .
Just don't spend too much money , start with the budget of $5 a day just to get started .
Next .
Let's move to chapter five and we're going to talk about marketing platforms that you might want to avoid .
Let's talk about how to protect yourself .
Remember , these advertising platforms don't care about you .
This is business .
So let's talk about some platforms with poor conversions that you might want to avoid .
Number one banner ads on websites .
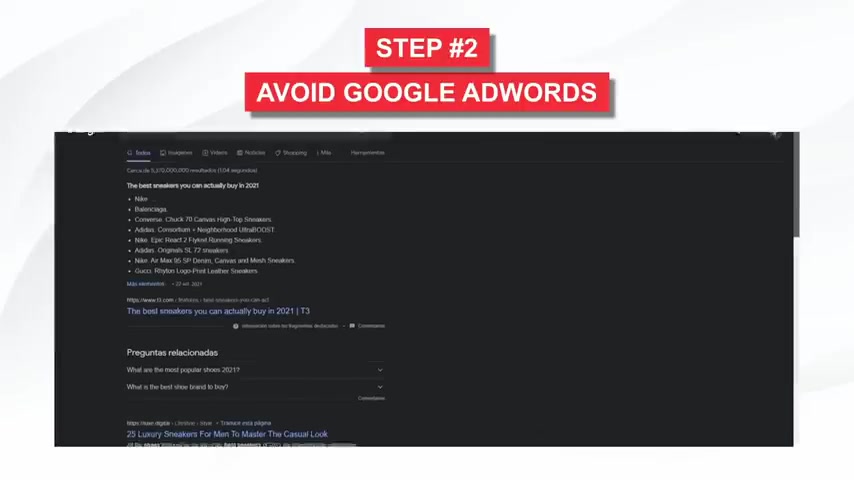
These are those annoying banners that you see on the side bars of websites , people who use these ads are usually from large corporations with massive budgets to waste banner ads have the worst click through rates .
Usually less than 1% .
They are just better ways to spend your money .
Number two , avoid Google ad words and go with Google merchants .
Most beginners burn through their budget in seconds and it was hundreds of dollars with Google ad words .
It's a quick way to go through your budget without getting any conversions .
If you want to run some ads on Google , you should better use Google shopping ads .
Instead , these will display your products , the price and reviews in the search engine .
It's a more visual way to advertise .
And I do have a video on how to set this up and I'll leave that video in the description of this video .
Number three , just avoid Twitter .
I do believe some businesses should have Twitter accounts .
It's a great way to communicate with their audience to let them know about announcements and updates .
However , when referring to paid marketing , Twitter has some of the lowest rois in the market out of the most marketing studies .
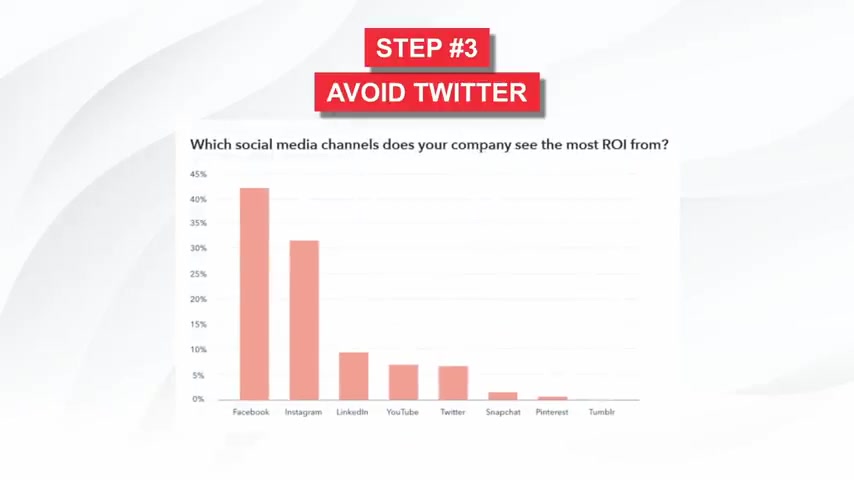
Twitter has had the lowest return on investment compared to any social website on the internet .
Twitter is mainly geared for war and people like to rage and rant on this platform .
It's just not the best place to spend your money with such low rois .
And finally , let me give you my personal opinion .
Should you list your products on marketplaces ?
I know it's tempting to go the easy route and just list your products on marketplaces like Amazon , you may think it's not a bad idea and you don't stand to lose anything by doing this .
But the truth is these marketplaces are very competitive .
You will find yourself racing to the bottom with prices because large sellers who buy direct from manufacturers can offer super competitive prices .
For example , Amazon will charge you a 15% fee for selling electronics or watches .
So if you're selling a similar product at $100 the most you can make is 85 bucks .
But also remember you need to include shipping , which makes it even worse .
Now , the main reason why I don't like these websites is because they hide you and they hide your brand , they suppress your store and don't give you visibility because users may then just go visit your website instead of buying from Amazon .
I think you should focus on you and your store instead .
So don't start with marketplaces and just focus on building your brand .
All right , congratulations on your e-commerce website .
See , I told you guys this stuff was easy but man , we spent weeks making this video , uh we were going back and forth with the design and uh with my designers , we were like changing images and fixing stuff .
Uh So I really hope that this e-commerce template really helped you guys out .
Also , I really hope this video brought a lot of value .
You know , we also made this marketing guide with our content writer and we really went step by step to really uh you know , nail everything to make sure it was perfect .
Also , let me know how I did , you know , was this tutorial fast ?
Was it too slow ?
Was it all over the place ?
Let me know in the comments below .
I I don't take it personal guys .
I really don't take anything personal over the internet .

Uh Also make sure to like this video and uh until then I will see all of you party people in the next video guys take care .
Are you looking for a way to reach a wider audience and get more views on your videos?
Our innovative video to text transcribing service can help you do just that.
We provide accurate transcriptions of your videos along with visual content that will help you attract new viewers and keep them engaged. Plus, our data analytics and ad campaign tools can help you monetize your content and maximize your revenue.
Let's partner up and take your video content to the next level!
Contact us today to learn more.