https://www.youtube.com/watch?v=Bzr1Pf2EotM
2023-07-11 07:12:28
The Best Homemade Artisan Bread Recipe _ How to make Open Crumb Rustic Bread _ Crusty white Bread
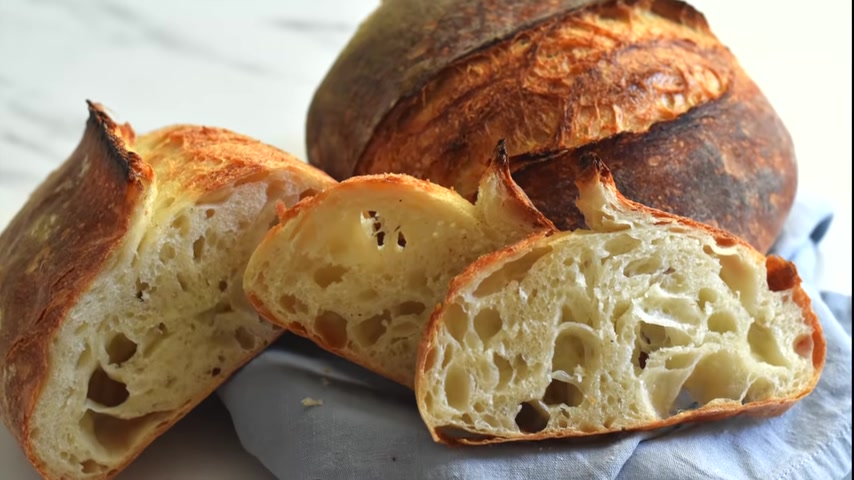
This homemade abatic artisan bread has an amazing golden caramelized crunchy crust with a beautiful light and airy open crumb inside .
You will love the chewy texture and wonderful flavor of this bread .
In this recipe , we are using a unique method and technique .
We use 80 person preferment or bigger to make our bread , which is slowly fermented , which gives that delicious flavor to our bread .
And while making this bread , the actual hands and time that we need to work with the dough is only less than 15 minutes .
And so we can make this bread with the least effort .
And in this simple bread recipe , we use only five basic ingredients , flour , water , salt , yeast and the special ingredient that works wonders is time .
So we'll prepare the pre ferment in the evening and we'll make the bread the next day morning .
So in this video , let's see how easy it is to make this wonderful and flavorful bread .
So let's start by preparing the bigger or pre ferment into a bowl .
I'm adding some warm temperature water into this .
I'm adding a very little yeast .
It's difficult to measure using a kitchen scale as it's only about 0.1 g by bread .

And so it's better to say it's a two pinches of yeast or almost one by twelveth of a teaspoon stir and dissolve it in water .
And now I'm adding flour into this and using the rare end of a wooden spoon , I'm mixing them together until it forms a shaggy mass of dough .
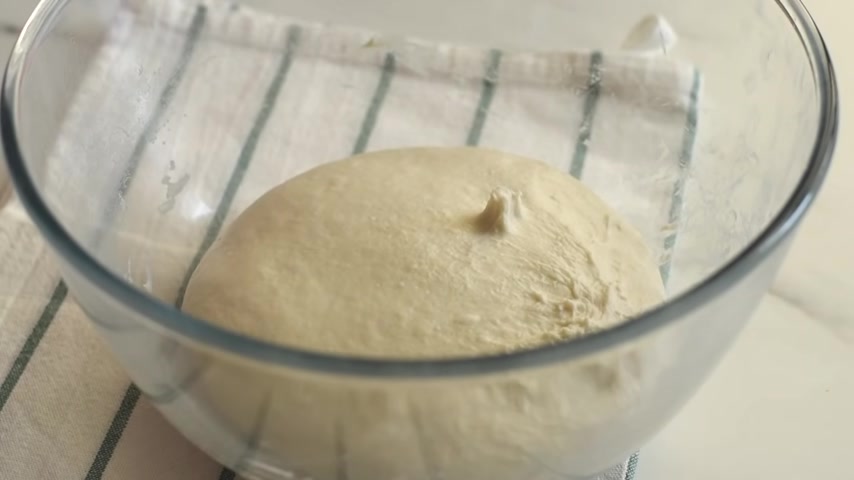
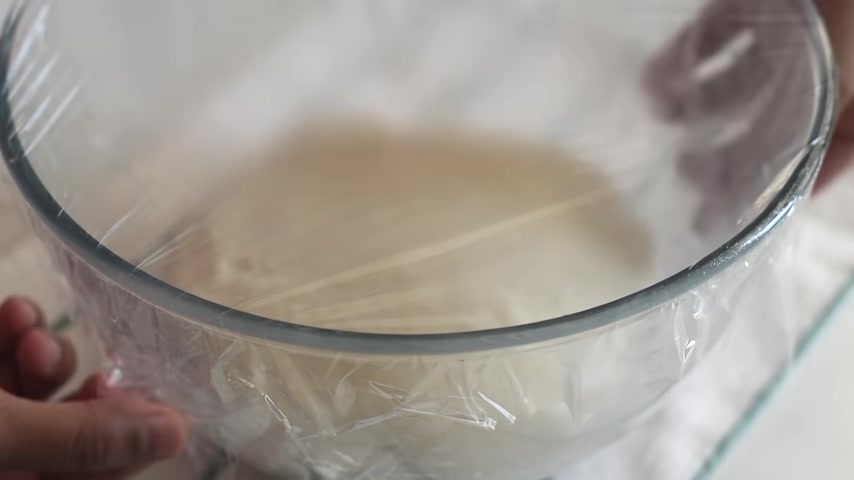
We don't need to need the dough , but it just make sure there are no dry patches left behind and now cover it with a cling film and let the do sit in slowly ferment for about 10 to 16 hours .
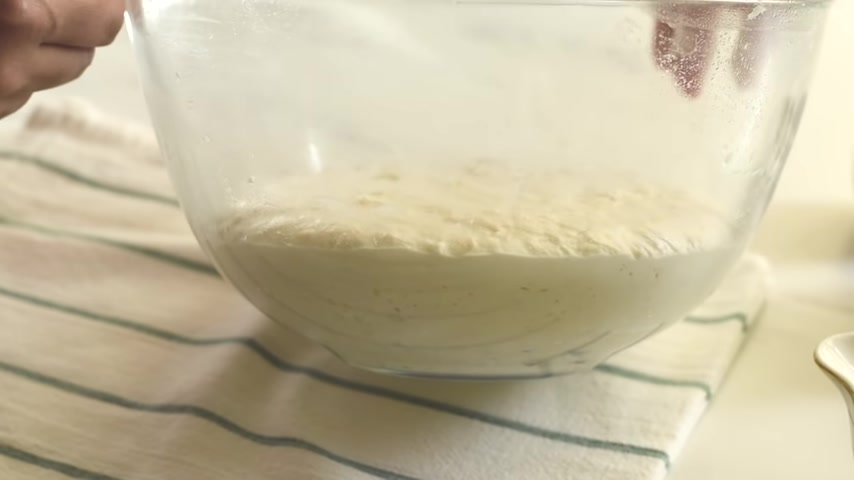
So it's been 14 hours and you can see a do has worsen slightly and it's best to use when it is at this stage , when the rise is at its peak just before it starts to collapse and before bubbles are starting to form on the surface .
So what we are going to do now is to prepare a small bread dough .
So into a small bowl , I'm adding some water 1/4 of a teaspoon of yeast instead until it gets dissolved and then a mading flour and combined to form a dough .
I'm sprinkling the salt on the surface of our prefer preferment .
And now I'm stretching the stove and spread it evenly on the surface of our preferment .
And now let's combine them together to form a homogeneous dope .
Now , our bread dough is ready and let it proof for two hours .
And in between this two hours of proofing time , we will try to strengthen the dough so that our bread dough can make a light and airy bread .
So it's been 45 minutes .
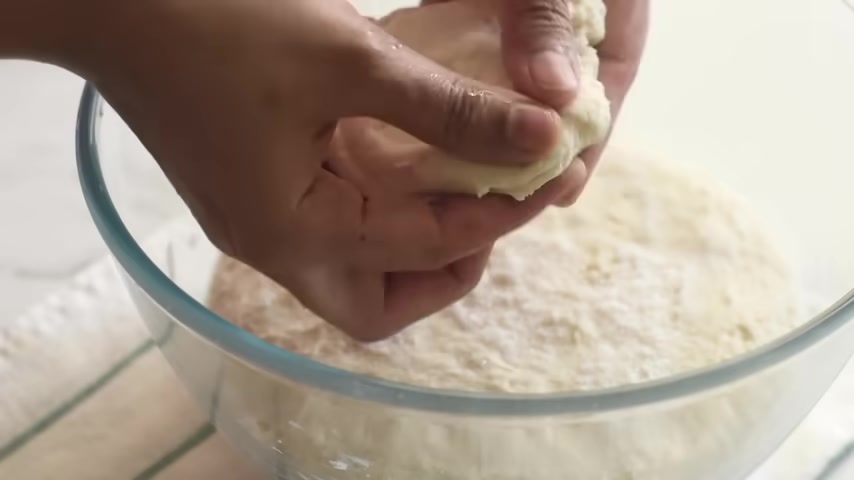
And now you can see Andre dough is very sticky , but when her hands are wet , it will not stick to her hands .
So don't forget to dip your hands in water before working with the dough to strengthen the gluten strands of our dough .
We are going to stretch and fold the dough .
So stretch the dough from one side and fold it onto itself and then turn the pol 90 degree and then repeat the same on all four sides and now cover it again and let it sit for another 45 minutes .
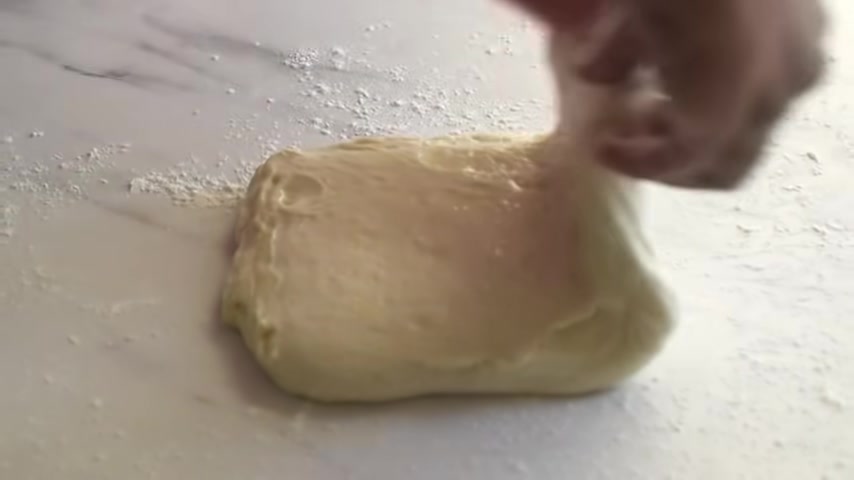
So after 45 minutes has slightly and now using a wet bowl scraper , I'm detaching the dope from the sides of the boil and then transferring this to onto lightly wet surface and now stretch the door to form a rectangular sheet and then fold one third of the dough from bottom and then from the top and then from both sides .
And this will help to give more strength and shape to adult .
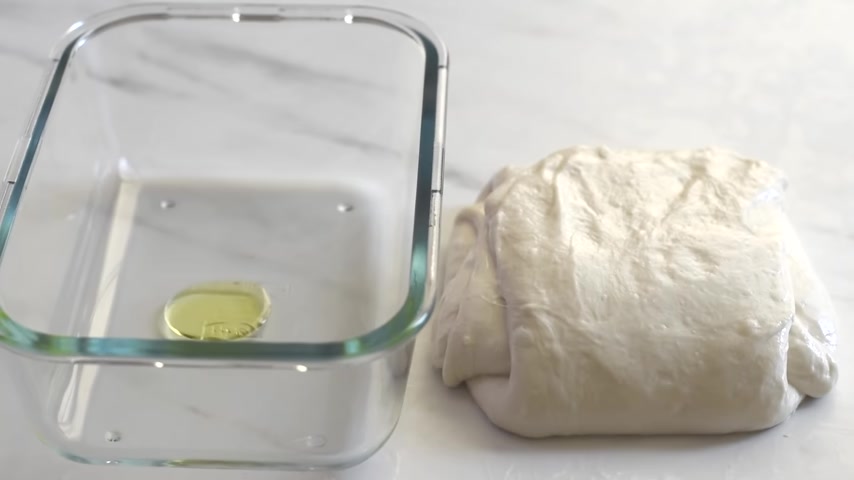
And now let's place it on another bowl .
I've applied some oil inside so that it will be easy for us to release the dough and now cover it again and let it sit and rise for another 30 minutes .
So while the dough completes its proofing , let's prepare our proofing basket where we will prove the finely shaped dough .
We can use a Banton , which is ideal .
But as I do have one , I'm using a rectangular loaf pan .
And here I'm testing a kitchen towel with some rice flour .
As a rice flour is a gluten free flour .
It will prevent the dough from sticking to it .
And now our proofing bowl is ready .
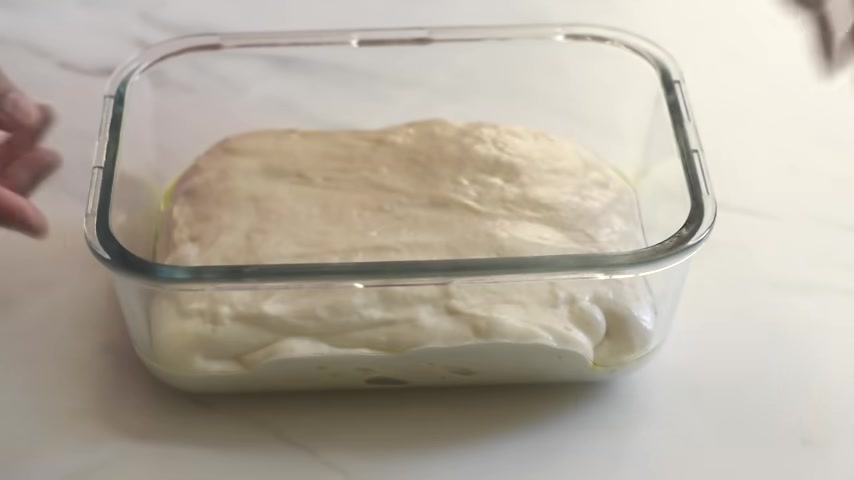
So after 30 minutes A has arisen slightly and now let's take it out .
I'm sprinkling the top with some flour with the help of a dusted scraper .
I'm scraping it from the sides of the dish so that we can smoothly transfer the stir onto the work surface .
And also don't forget to dust the work surface with a flower so that the dough will not stick to the work surface .
So now let's shape our bread .
We are not going to do any fancy shaping , just roll it from both sides and pinch the seam together so that it will hold that shape and then place it onto the proofing panel with the same side on top and again , for creating more surface tension and bringing the ends together and printing just like stitching the edges .
And now it's ready for proofing .
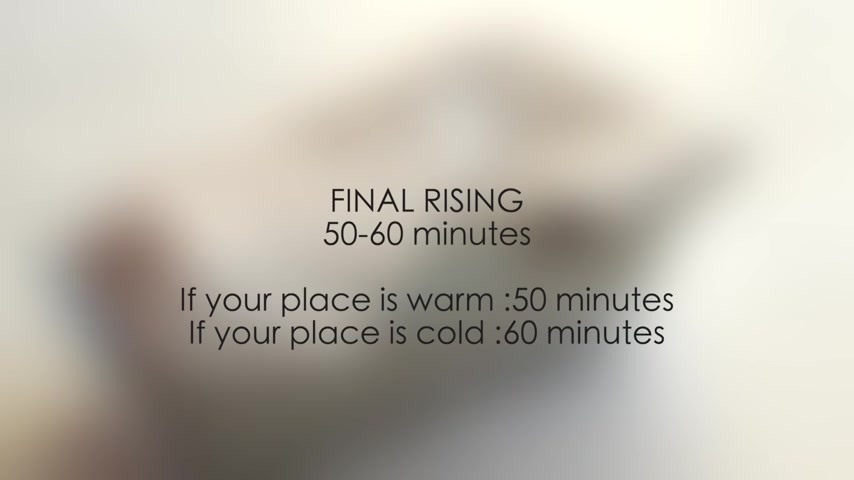
So cover it and let it sit and rise for 50 to 60 minutes .
And after 15 minutes , our dough has a sin and now it's ready to go into the oven .
So carefully , flip it on to a parchment paper and test off any extra flour on top .
And now , at this point , I took out the preheated oven dish from the oven and carefully place the bread dough on it with the help of a sharp knife or blade or with the help of a lame .
We can score the pre and I'm placing the lid bag and it's ready to go into the oven .
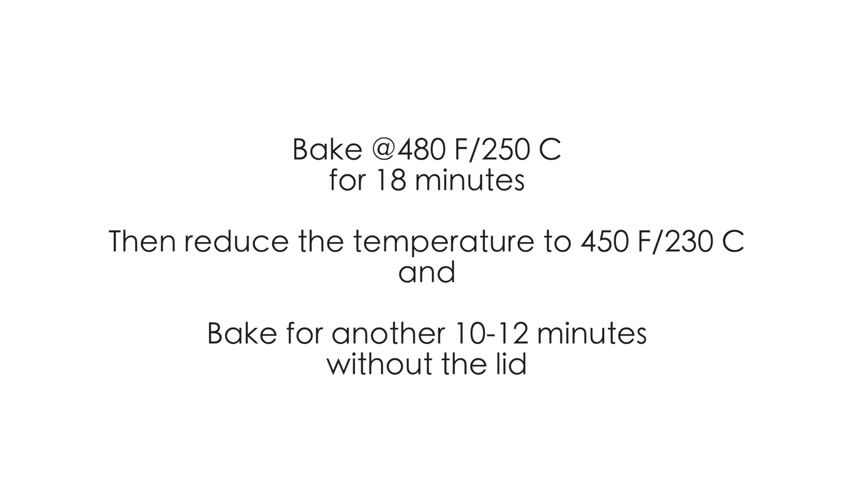
So bake it at 4 80 F or 2 50 C for 18 minutes and then reduce the temperature to 4 50 F or 2 30 C and bake for another 10 to 12 minutes of without the lid .
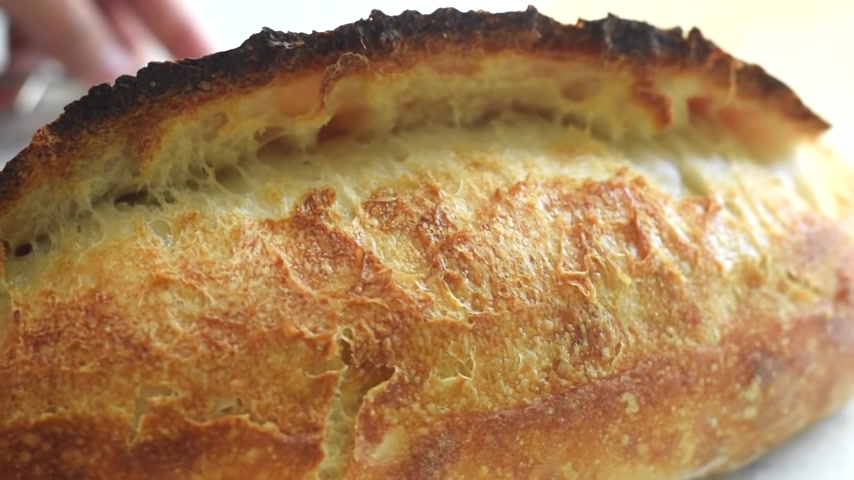
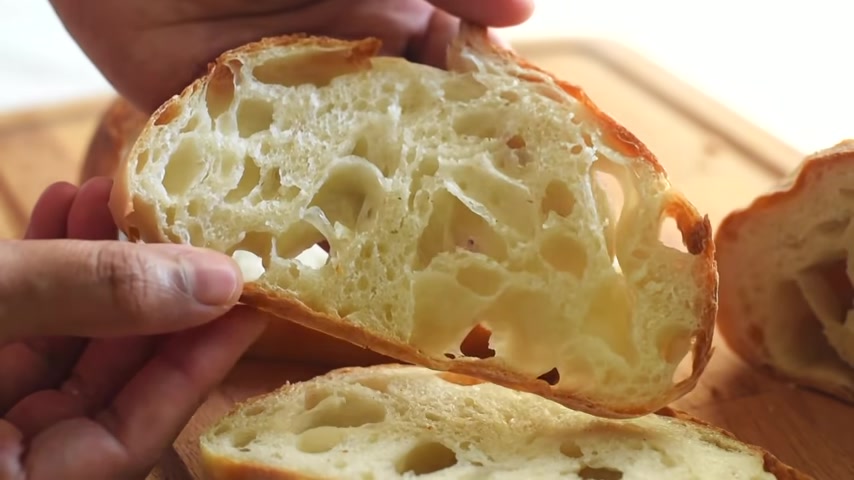
And after baking , we will get a beautiful loaf of bread .
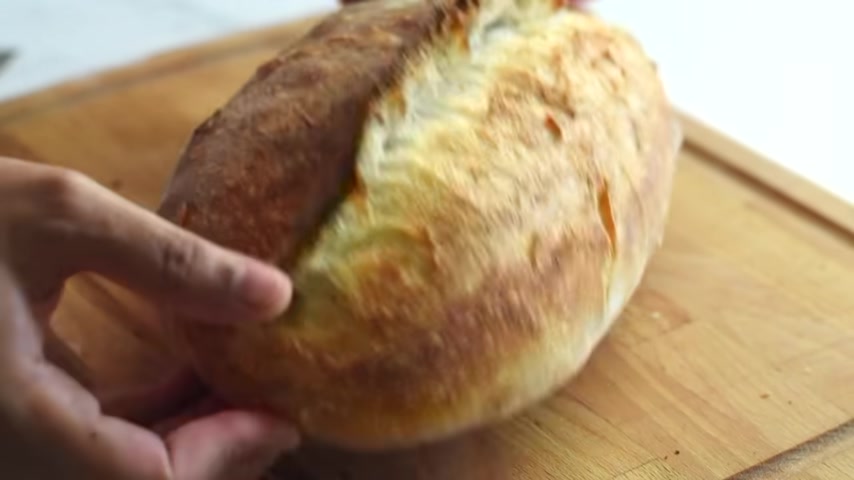
It has got wonderful oven spring and I love the Crest to have a very deep caramelized golden color , which gives a nice and nutty flavor , which is , is so incredible and the has a fine crunchiness which is is so good and you can see the inside of our bread is so light and airy and as her bread dough has proved slowly , it has got amazing flavor .
Our bread is so delicious .
We can have it even with some plain butter .
And I have worked on this recipe to make it simple and easy to make at home .
I hope you like this recipe and I hope you will make this at home .
And I'm pretty sure you will love this bread .
If you like this video , please keep your valuable thumbs up and please don't forget to share this recipe with your friends and family who love homemade bread .
And thank you so much for your love and support and thanks for watching this video .
See you next time .
Partnership
Are you looking for a way to reach a wider audience and get more views on your videos?
Our innovative video to text transcribing service can help you do just that.
We provide accurate transcriptions of your videos along with visual content that will help you attract new viewers and keep them engaged. Plus, our data analytics and ad campaign tools can help you monetize your content and maximize your revenue.
Let's partner up and take your video content to the next level!
Contact us today to learn more.