https://www.youtube.com/watch?v=E7e1snYDVWE
How to play guitar chords - Absolute beginners guitar lesson.
Before attempting this tutorial , you may need to go through the tutorial reading chords and scale maps .
You might also want to download the PDF of the first month of the GCH Guitar Academy guitar course .
This is completely free and can be downloaded from the website at WWW dot guitar hyphen academy dot com .
The first open chord will attempt is E minus seventh .
This is probably the easiest chord you can get to play E minus seventh .
Simply get the first finger and place it on the second thickest string in the second .
Fret , then strum all the strings of your guitar .
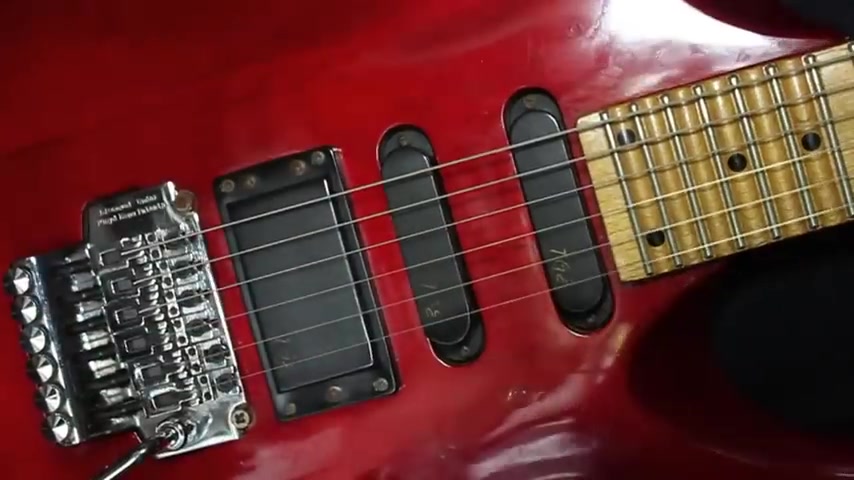
You might want to try this slowly so you can hear each individual note ring out if the notes don't ring out .
If you have any muted tones , you need them to find out why .
If it's the fingered string , then you need to press harder .
If the strings , which aren't ringing out haven't got fingers on , then it's because your finger isn't upright enough on the strings .
You might need to move the thumb around the back of the guitar to bring the finger onto its tip .
This means the finger won't overlap onto other strings and the chord should sound clean .
Attempt this a few times until you can get the cord clean .
Then take the finger off and put it back and try again .
Half the battle is getting the court in the first place , so it's a good idea to practise removing the cord , reapplying it and so on and so forth .
Once you're happy with your E minor seventh chord , we can move on to a slightly harder chord .
The E minor chord .
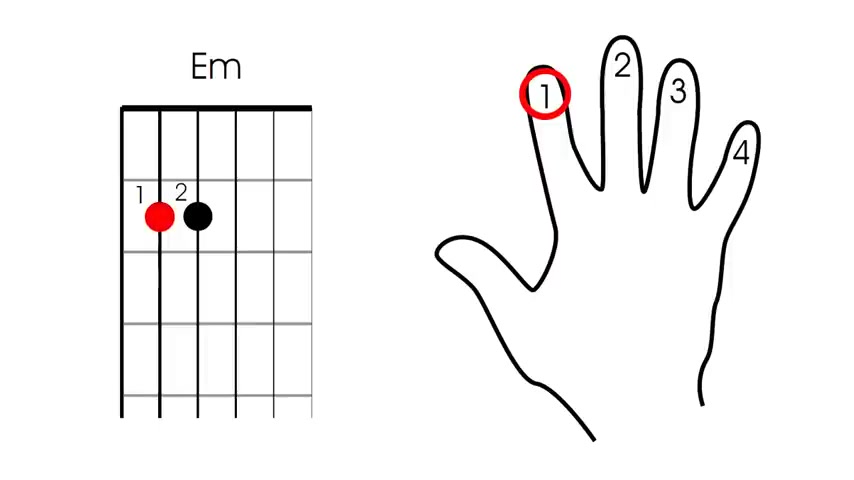
This cord has two fingers .
The first finger goes in the same place as it did with E Minor seventh on the second threat of the second thickest string .
The second finger goes next to it on the second threat of the third thickest string .
You can now strum the chord in the same way you did with the E Minor seventh , trying to hear each individual string ringing out and in the same way as you did with the E Minor .
Seventh .
Adjust the fingers until the cord is clean , then remove the cord completely and reapply it , checking if it's clean , do this several times until you feel you can get the cord quite quickly without dead strings .
Once you can play these two chords cleanly , you can move on to the first full chord exercise , which has AC , an a minor and a G seventh .
At this stage , when you get a new chord , it's a good idea to work through your fingers numerically .
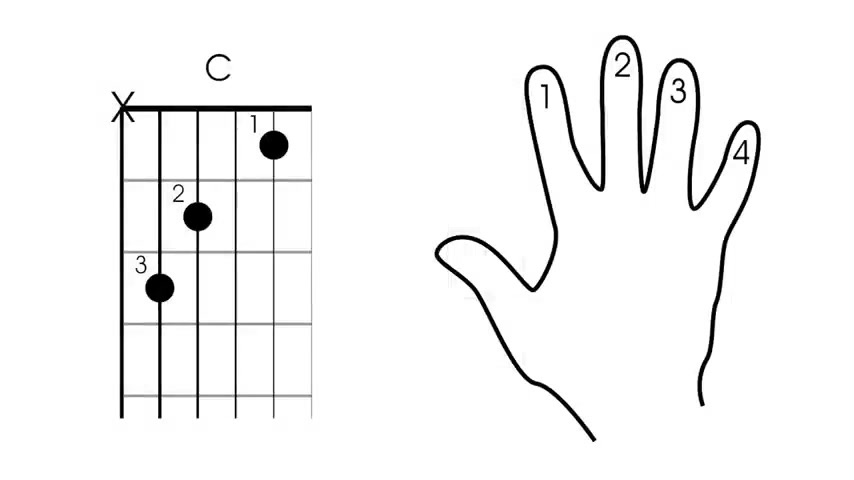
So apply the first finger first , the second finger , the third finger and the fourth finger .
To simplify things , we'll refer to the strings as their numbers .
The first string is the thinnest string , and the sixth string is the thickest string .
So to play C , we put the first finger in the first threat of the second string .
We put the second finger in the second threat of the fourth string , and we put the third finger in the third fret of the fifth string .
When strumming the sea chord , we don't play all the strings .
We miss the thickest string and play the top five strings .
Once you're happy with your C cord , we can move on to an a minor .
The difference between AC and an A minor is only one finger , so the 1st and 2nd finger can remain in place .
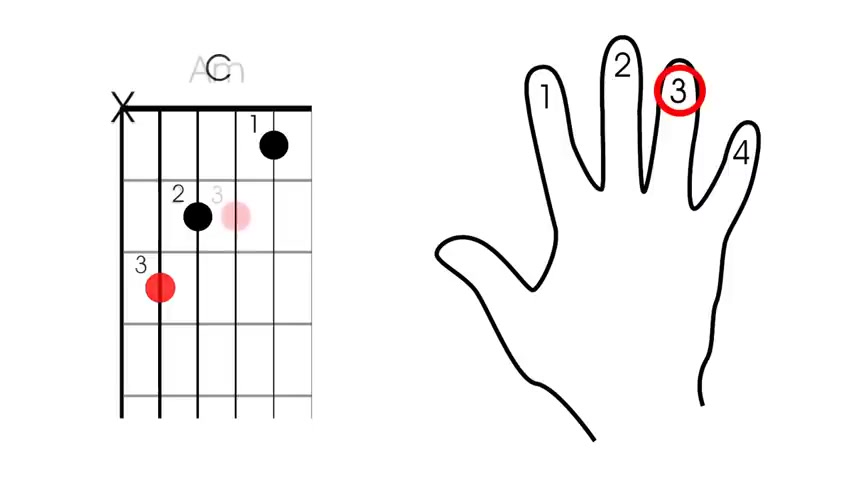
We simply remove the third finger from the third fret of the fifth string and move it across to the second fret of the third string .
This process can then be reversed , and we can go between the C and the A minor and the C and the A minor until you feel comfortable with the two chords .
The final core shape in the first exercise is G seventh .
Unfortunately for G7 , you have to remove all the fingers and reapply them .
However , you can see a similarity between the G7 shape and the ceased shape to play G seventh .
Then we put the first finger in the first fret of the first string , the second finger in the second of the fifth string and the third finger in the third fret of the sixth string .
To play G7 , we strum all the strings .
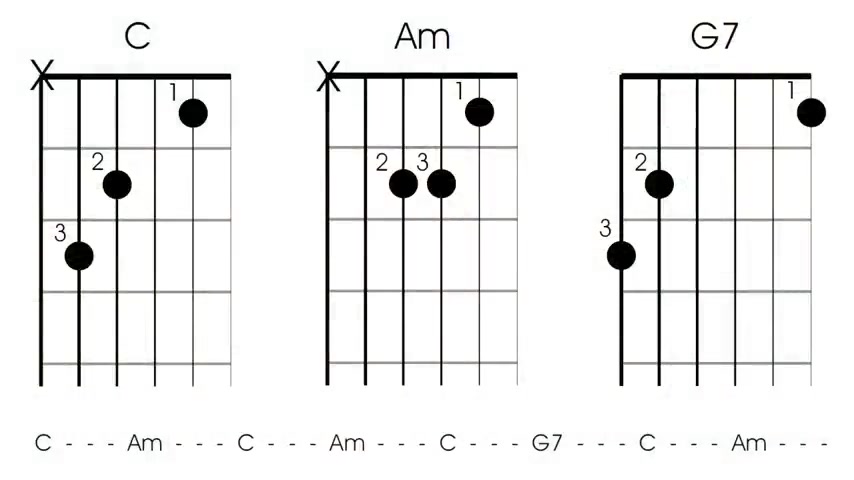
Finally , you can put together the whole court exercise in the order illustrated .
When you're happy with that court exercise , you can move on to the next one
Are you looking for a way to reach a wider audience and get more views on your videos?
Our innovative video to text transcribing service can help you do just that.
We provide accurate transcriptions of your videos along with visual content that will help you attract new viewers and keep them engaged. Plus, our data analytics and ad campaign tools can help you monetize your content and maximize your revenue.
Let's partner up and take your video content to the next level!
Contact us today to learn more.