https://www.youtube.com/watch?v=OI2-6Ps2Hcc
Homemade crusty loaf, with or without a dutch oven

It's bread .
It's just a basic loaf of crusty bread , flour , water , yeast and salt .
It resembles a French , but I'm not calling it that because I don't want to arouse the gatekeepers .
I think I've worked out a particularly easy procedure for baking these at home .
You don't need a pizza stone .
Having a Dutch oven helps , but I'll show you an alternative if you don't and there will be almost no measuring .
We're going to cook with our senses .
All you need is time mostly unattended .
It's a leisurely weekend project the night before baking , we're gonna make a pool .
I get a mixing bowl into that .
I'll put about a cup of water .
2 40 mils .
The only reason I need to roughly measure the water is .
So I know how much salt to put in later , but not tonight .
A pre ferment like this pool , I is generally made with a tiny amount of yeast .
I'm not even measuring it .
It's just a pinch , maybe two pinches .
I like yeasty breads , but too much yeast in a tall bread like this creates a risk that it might overproof and deflate .
Plus a lot of yeast inhibits crust formation .
I want a really crispy brown crust .

Now , flour , any kind of bread flour will do all purpose would be ok .
It just won't rise quite as well in the oven .
And if I have some around I do like to mix in just a little whole wheat flour into plain breads .
Maybe 10% of the total flour .
It makes the bread look prettier and give a little dimension to the taste .
And no , I'm not weighing out my flour or measuring it in any other way .
I'm just stirring it enough to get a pudding like consistency .
A little whole wheat flour in there .
The whole wheat flour probably has more micronutrients to feed the yeast though .
I have no idea if that would make a difference here .
That looks like pudding or maybe a very thick pancake batter .
No salt yet salt could maybe interfere with the fermentation and gluten development .
That's it .
That's pool .
I , I won't even bother taking that wooden spoon out and cleaning it yet we're gonna need it tomorrow .
I'll just cover that with a damp towel to keep it from drying out and let it ferment overnight at room temperature .
Nice and slow because it doesn't have that much yeast in it .
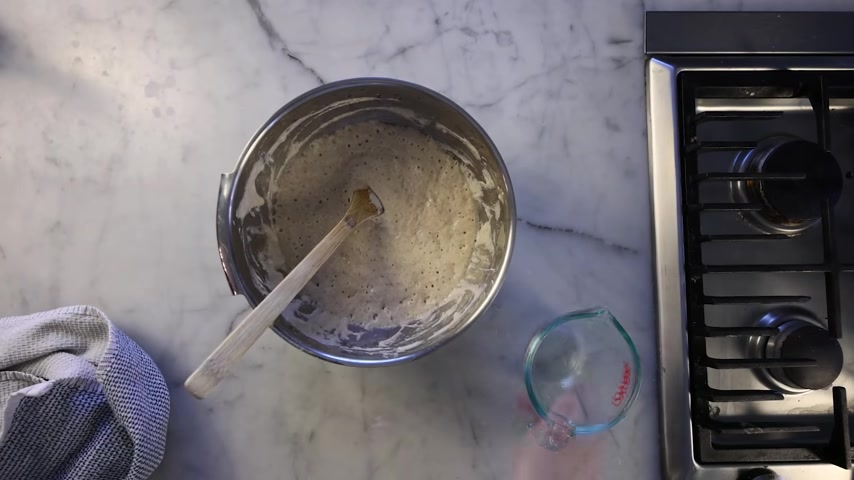
That slow fermentation brings some really nice kind of caramel notes to the finished bread probably from starch degradation .
Here we are the next day , about 12 hours later , I think anywhere from 8 to 24 hours would be fine .
You might get different results within that window , but they'll all be good .
I've seen people use Polish for anywhere between 2060% of their total dough mass .
I guess I'm gonna use it for maybe 40% here .
Another cup of water .
2 40 mils or so in the bowl with that .
Again , I'm just roughly tracking the water quantities that I know how much salt to put in for a relatively high hydration bread like this .
I generally like about a teaspoon of my normal Morton kosher salt per cup of water .
Remember I've got two cups total in here .
So that's two teaspoons , maybe 10 g of salt total .
If you're using a finer salt , the equivalent volume measurement might be a little smaller because it's denser .
But then again , I have no idea how salty you like your bread .
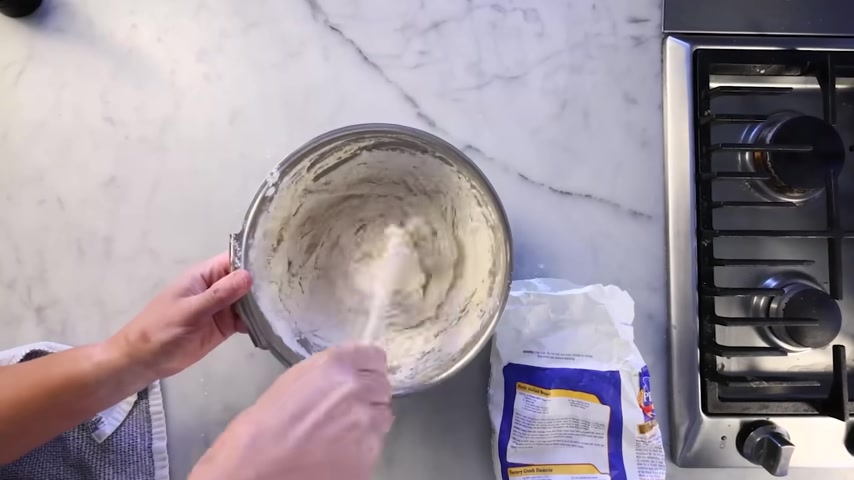
So I see no point in giving you a highly precise measurement be conservative , especially if you're gonna be putting some salty things on your bread later time for more bread , flour .
And no , I'm not measuring it .
My new favorite thing is to let the spoon measure for me .
I will simply stir in as much flour as I can stir in with a stout wooden spoon .
And I don't mean every last particle I could possibly jam in there .
I just mean as much flour as I can easily stir in .
That gets you a really good hydration for an easy to work , not too sticky , but still basically no need dough as a matter of personal preference .
I find it much more enjoyable to cook with my senses .
Instead of having my head down in a written recipe and a scale and all that .
I also think the amount of flour you need is gonna depend on exactly the kind of flour you're using .
And I don't know exactly what kind of flour you're going to be using .
For example , higher protein flowers , absorb more water and protein content is not something your gram scale is going to tell you about .

So I say at least try just letting your senses guide you get in as much flour as you can get in with the spoon , which won't be nearly as much as you could need in with your hands .
I'm not gonna touch this at all yet with my hands and I still won't take out the spoon .
We're not done with it .
I'll cover this up , let it ferment , let the flour hydrate and need itself through the magic of autolysis for an hour or so .
Now , if I'm gonna eat all those carbs later and still hit my macro nutrient goals for the day , I'm gonna eat a high protein breakfast from the sponsor of this video Magic Spoon cereal .
It's all the cereal flavors you love from childhood .
But on totally grain free , high protein , low carb , little crunch os .
Oh , hello .
That's the new honey nut flavor .
I've been waiting for this to my delight .
This flavor has some real honey in it .
So yeah , it's got one measly gram of total sugars per serving , but it's still only four net carbs and a whopping 13 g of protein .
These other flavors have zero total sugars .

All magic spoon flavors get most of their sweetness from a clever blend of low cal sweeteners like alos , which is my favorite and the primary substance of this stuff is milk protein rather than wheat or corn .
I choke down a couple of protein shakes a day .
This in contrast I actually enjoy use my Lincoln code in the description and you can save $5 on your own variety box , Fruity cocoa , peanut butter , whatever flavors you want , they ship in the US Canada and the UK .
Now too go to magic spoon dot com slash Ragu and use code Ragu to save $5 .
Try the honey nut .
Thank you Magic spoon .
Alrighty .
Now that the flour has hydrated for about an hour , the surface of the dough is shiny .
That means it can take a little more flour now and if I give it a little more , it'll be easier to work less sticky .
But if you're a real cowboy go for the super sticky dough .
That's what the pros generally do .
Again .
As much flour as I can easily get the dough to take with just the spoon .
Speaking of which , thank you for your service spoon .
I'm finally done with you .

I'll cover that dough and let it ferment again for about an hour or so until it's noticeably puffier .
It doesn't need to fully double in size yet .
Just be kind of puffy .
Now , I'm gonna Sprinkle on some flour purely to keep the dough from sticking to my hands .
I'm gonna do the stretch and fold maneuver that is typical of French Bote .
Get it released from the bowl .
A dusting of flour all around and grab one side and pull it out until just before it starts to tear , then fold it back in , rotate like 90 degrees and repeat , pretend it is a square stretch out each side of the square as far as it can go without tearing it and fold it back unless you're working with a super wet and sticky pro level dough .
The last side is gonna be kind of tough to stretch .
Don't force it .
Just do what you can .
Now , I'm just going to reposition this so that all the seams are on the bottom and the smooth surface is on the top and then cover and let rest again for maybe 20 minutes .
Come back when you get a second , repeat the folding procedure all over again .
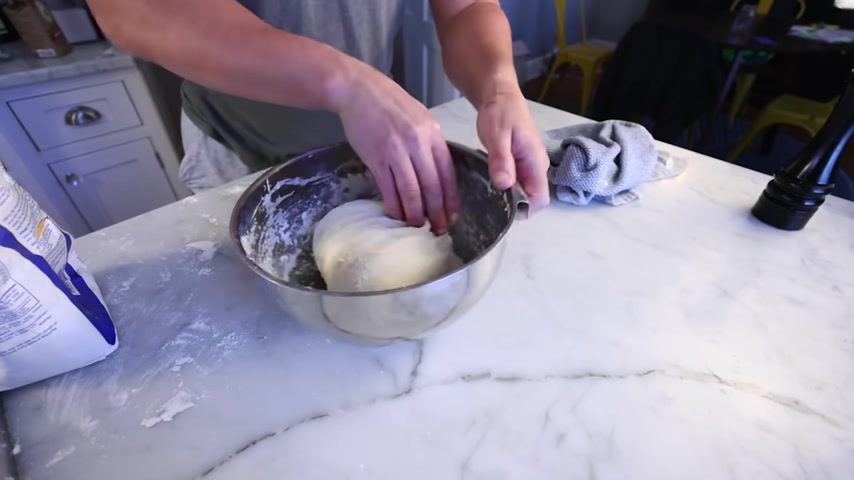
What we're doing here among other things is building up a nice tat skin on the surface of this dough .
A skin that will retain gas in the oven and help the loaf puff up nice and tall .
I think people generally do this down on the board , but the bowl is big enough and it keeps the mess contained .
You could probably do this folding procedure just one time .
But lots of classic recipes tell you to do it like three times that probably results in better flavor , more fermentation time and a stronger gluten network from the extra needing that this effectively is we'll do our final stretch in about another 20 minutes time to think about baking vessels .
A big heavy oven safe pot with a tight fitting lid is probably the best commonly available option for home bakers .
But again , if you don't have a Dutch oven , I'll give you an alternative later , you won't have to clean the pot at all .
If you line it with parchment paper , this also helps you lift the finished bread out at the end , just smash it up into a ball , open it back up again and it will lie perfectly in the pot .

Best tip anyone's ever given me time for the third and final stretch of this dough again , pull each of the four sides of the imaginary square out and fold it back in again .
Then I'm gonna pick it up , gather the seams together on the bottom and lay it smooth side up right in the pot .
People usually preheat the pot in the oven and then transfer the proofed dough straight into the hot pot .
I think that's a tricky and messy maneuver that can be easily avoided .
I'm gonna let this dough proof right in here for about a half hour covered with the towel , the lid , I will preheat inside the oven .
Might as well .
People bake crusty breads like this at temperatures between 4 5500 F .
My has given me better results at 500 .
So that's what I'm doing .
That's 2 60 Celsius .
But lots of people go a little lower .
A half hour later , the oven is rocket hot and my dough is nice and puffy time to score it .
The pros use razor blades .
I think a good serrated bread knife does .
Ok at home .
As long as you are swift about it , a quick confidence slice through the surface .

Now watch this next one .
I'm gonna lose my confidence on it .
See , I didn't move fast enough and the knife kind of snagged .
The goal is to create some slits on the surface that will allow the loaf to expand more in the oven from internal steam pressure .
But you want to do so while pushing as little of the yeast gas out of the dough as possible .
That's why you want it to be a quick , elegant rump again .
I went too slow and the knife snagged .
Oh , well , good enough now , rather than try to transfer this delicate dough into a rocket hot pot without bashing it up and degassing .
I'm just gonna leave the dough right where it is and give the pot a head start on the stove .
My beefiest burner on max , I'll bring the hot lid over from the oven to trap the heat .
Check how much darker it is when it's hot .
Don't touch that .
I will touch the sides of the pot because when the pot feels really hot , I've given it all the head start .
It needs a super hot pot .
Helps the bread to puff up while it's still malleable though .
If I had a really slow heating electric burner , I'd probably just skip this step .
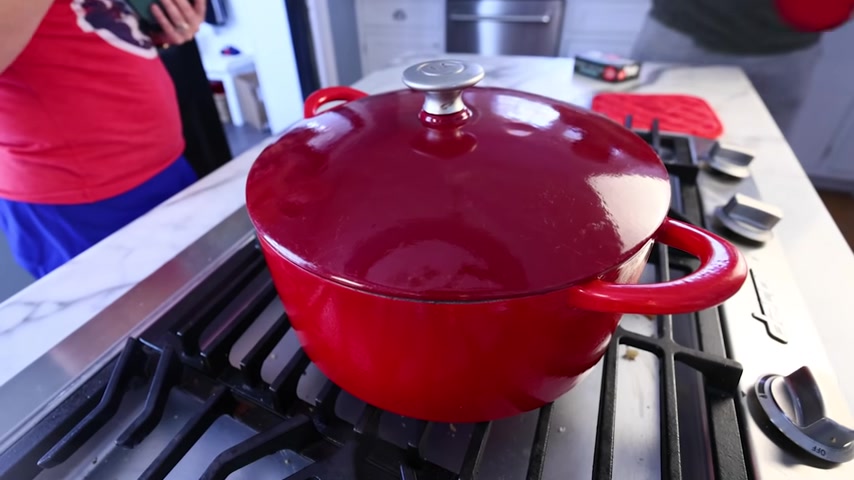
I think the hot heavy lid is a lot by itself in the oven .
The pot will trap steam as the loaf bakes , this mimics the effect of a professional steam injection oven .
Steam will keep the surface of the dough from getting too hard , too fast , which would restrict the growth of the loaf .
I want it to be as puffy as possible .
So I'm going to leave it alone to steam for about a half hour .
I find that's a pretty safe minimum .
Half an hour later , I will very carefully remove the lid and you'll see how the loaf has steamed up .
The steam also does some chemical magic to the starch on the surface that enhances browning in the later stages of baking .
It's the same reason you boil bagels and pretzels before then baking them .
I'm going to give this another 10 or 15 minutes of dry heat uncovered to brown the surface .
I do find it helps to drop the temperature a little bit at this stage .
I'm going to 4 50 F 2 30 C .
If I don't do that , I tend to get some surface burning by the time the inside is done .
I think thermometers are great for testing the inside of large breads and large things .

Generally , you can get a much more reliable reading than you'd get in a small thing , especially with a cheap thermometer .
Anything in the neighborhood of 200 F 93 C is fine .
Some people prefer it a little lower .
Some people prefer it a little higher .
It should be a little too wet on the inside right now and a little too dry and hard on the outside because as you let this cool , the moisture level will equilibrate across the whole mass water on the inside will push outside and the crust will soften , but it'll still be real crispy .
It's cooled for about an hour and check out the blistering on that shiny surface .
You do not get that without some amount of steam in the bake and check out the brown craggy peaks around where we scorch .
People call those ears cut with a serrated knife and hear the crispiness .
Now , behold the inside .
That is not the lightest crumb ever achieved on a bull type loaf , but it's not bad .
I'll smear some softened butter on that and give it a whirl .
It's funny .
I usually bake extremely high yeast flat breads that could probably never bake this tall or as brown .
I'm used to tasting the fermentation , but this tastes more like wheat .
A very clean wholesome taste .
A classic for a reason .
And of course , the best reason to bake bread yourself is to have it really fresh , which is a rare and special treat .
Now say you don't have a Dutch oven .
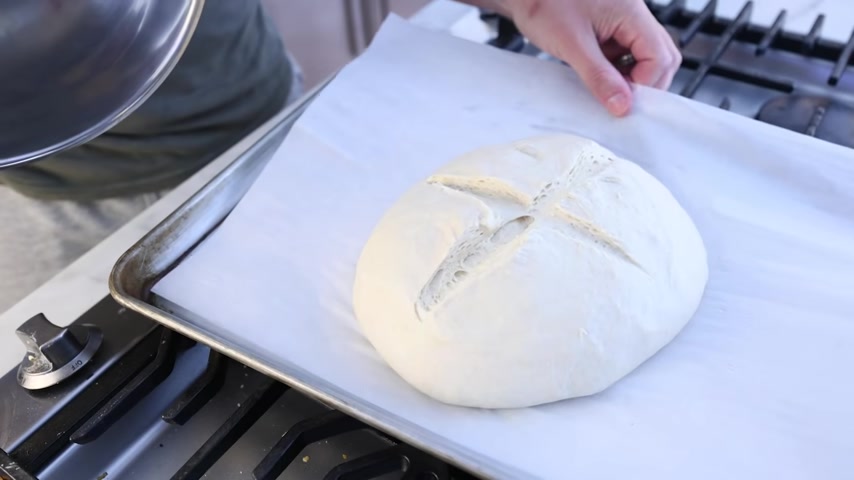
Let's do the same thing on a sheet pan .
My dough is ready for its final half hour proof to keep it from drying out .
I will do it with the heat safe metal bowl under which I plan to bake it half an hour later , the oven is preheated to 500 F 2 60 C .
The dough is puffy .
I'll score the skin .
Honestly , it's a lot easier to do when it's not down in a pot bowl back on and do not let it touch the sides .
If it touches the bread will bake into the bowl and bond with it .
And then when you go to take the bowl off , you'll end up destroying the loaf in the process , which is exactly what happened to me here .
Follow me on Instagram .
For more amusing fails .
Based on my tests , there's no real point in preheating this rig .
It's all light cheap aluminum , which has very little thermal mass .

It doesn't retain heat the way a big iron Dutch oven does but the dome will retain steam here in the oven .
I'll check back in , in a half hour , very , very carefully removing that hot bowl that did stick a little to the bread but not as bad as the last time .
And you can see the steam allowed the bread to puff up real nice .
But that thinner metal did not radiate as much heat onto the surface .
So it needs some help browning in the last 10 or 20 minutes .
I'm not gonna lower the oven temperature this time .
Instead , I'm just gonna turn on my convection fan .
It's ok .
If you don't have one , just crank your oven to max power in that case , just for the last 15 minutes or so to brown .
That crust that looks pretty nice .
I'll take its temperature circa 200 F 93 C is good .
That was just over 45 minutes total in the oven .
Let it cool .
And as soon as I start sawing into this one , I can feel the crust is not quite as thick and crispy as the one we did in the Dutch oven .
And the interior feels a little more dense .

We didn't get as much oven spring as we did in the Dutch oven with its incredible thermal mass , not as much internal steam in the early stages of baking to puff things up , but this is still way better than any crusty loaf I've ever attempted in a home oven without some kind of dome or other steaming agent steam is everything .
Thanks a lot to fellow youtube cook , Brian Lagerstrom who gave me some great baking tips on the latest episode of the new Adam Agua podcast , which is available wherever you download pod .
If you believe my bull to be bad , you'd better blame Brian .
It took me like four takes to get that last line .
Are you looking for a way to reach a wider audience and get more views on your videos?
Our innovative video to text transcribing service can help you do just that.
We provide accurate transcriptions of your videos along with visual content that will help you attract new viewers and keep them engaged. Plus, our data analytics and ad campaign tools can help you monetize your content and maximize your revenue.
Let's partner up and take your video content to the next level!
Contact us today to learn more.