https://www.youtube.com/watch?v=bcQeeIwA_E0
2023-07-09 14:32:12
How To Make A Guitar Case
Lately , I've been thinking if you're gonna put in a lot of trouble to build a custom guitar , shouldn't that guitar have its own custom made case ?
I think so .
So let's make one .
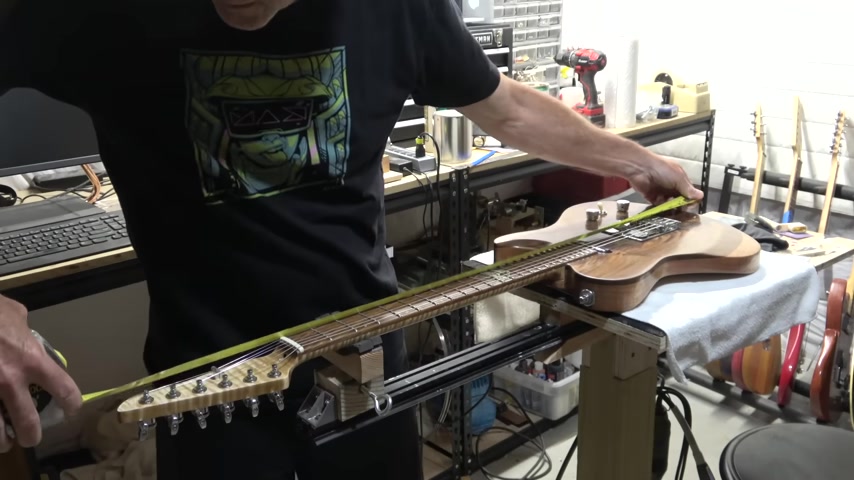
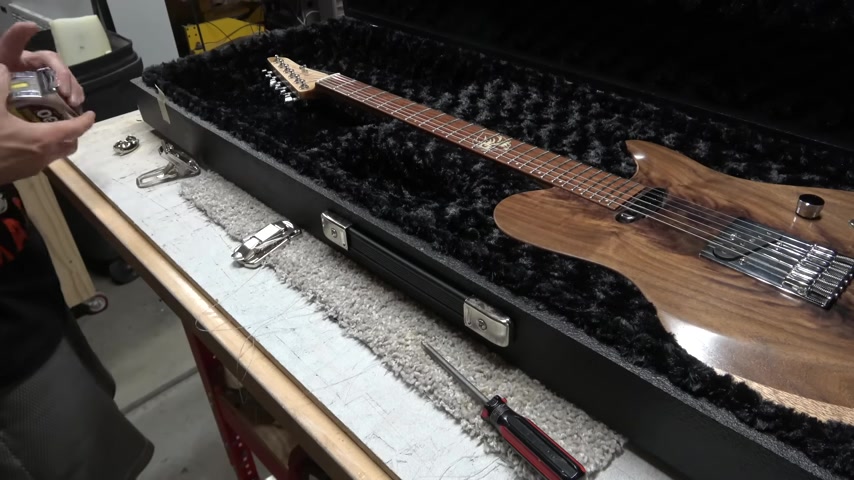
The first thing I have to do is determine the size of the case .
And I'll do that by measuring the length and the width of the guitar .
In this case , the guitar is 39 inches long and 13 inches wide .
I'll add three inches to both those dimensions and that gives me the overall outer dimensions of my case , 42 inches long and 16 inches wide for the height of the case .
I decided that since a guitar is about two inches tall , I could probably use a four inch wide board for the sides .
The wood that I'll be using for the sides of the case is one inch thick , four inch wide , pine .
In actuality , the dimensions are three quarters of an inch thick and 3.5 inches wide .
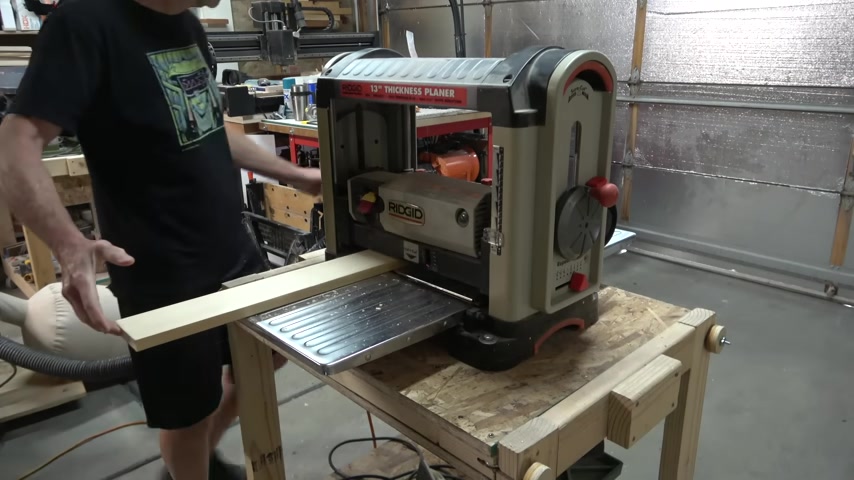
However , I'm going to play this wood down to a final thickness of about a half an inch .
Since the case is going to be 16 inches wide , I'll cut two end pieces , both exactly 16 inches in length to assemble the size of the case .
I'm going to use a simple butt joint .
And that means when I measure and cut the length of the sides , I have to account for the thickness of each end piece , I'll measure and mark the length of each side at 42 inches .
Then I'll subtract the thickness of the end pieces twice .
So if those end pieces are half an inch , that means that the 42 inch long side will actually be cut at 41 inches with the ends and the sides cut , I can lay them out and then check to see how my guitar is going to fit inside the case .
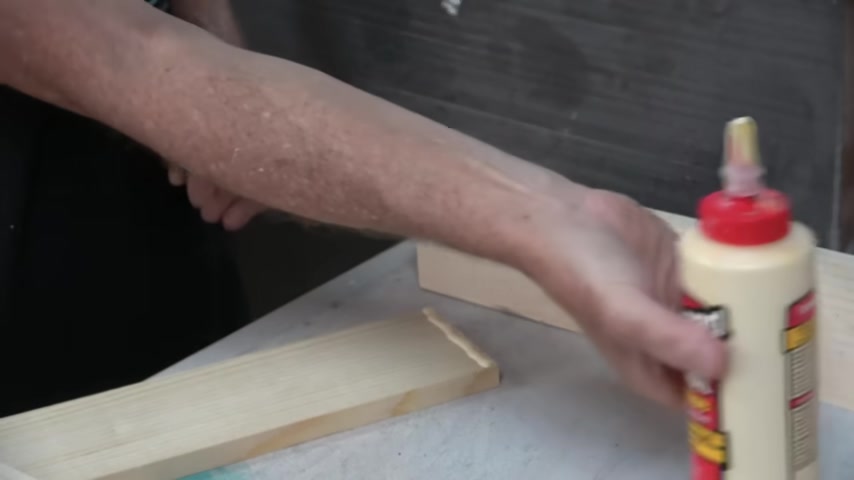
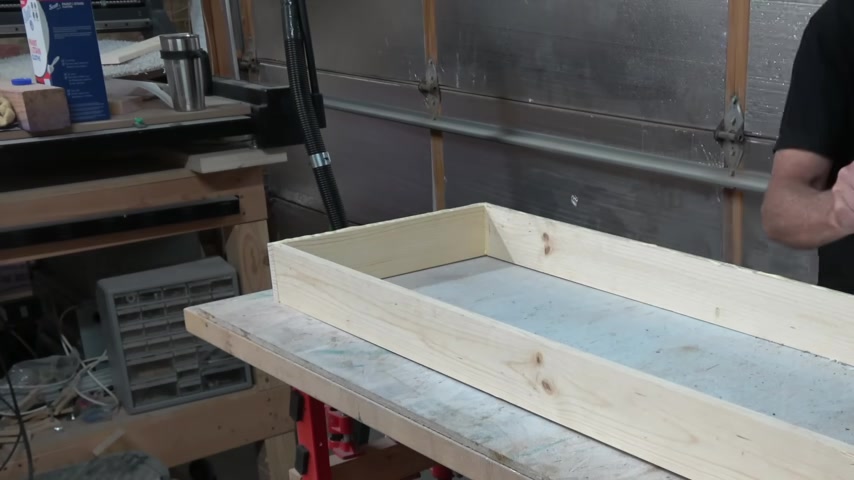
Then I'll glue the end pieces to the ends of the sides and secure them with brads to make sure that the box is square .
I'm measured diagonally from corner to corner .
And since the glue is still wet , I can shift the shape of the box until those two measurements are exactly the same .
The top and bottom of the case is going to be made from quarter inch thick plywood , which is going to be cut to the same dimension as the overall dimensions of the case .
So 42 inches long and 16 inches wide .
Oh , and I'm gonna save the scraps because I'll be using those later as you'll see both the top and the bottom will be secured to the sides of the case with glue and brad nails , the entire assembly of the case should be done fairly quickly .
That way I can add heavy weights to the corners of the case which will press it down flat to the work bench .
And then once the glue is dried , it should be straight square and flat .
Even though I'm gonna be using a thick viscosity coating for this guitar case .
I want to fill in every flaw that I can find on the surface .
And that includes nicks , dings , gouges , scratches , seams , nail holes , that sort of thing .
And to do that , I'm using paste wood filler and a putty knife .
And after the fill had dried , I use my random orbital sander and 2 20 grit sandpaper to get everything .
Really .
It's a good idea to round over the edges to protect them from damage .
So I used a trim router with a half inch bearing , guided round over bit .
Now , you're probably wondering how do I open up the case ?
Well , that's pretty simple .
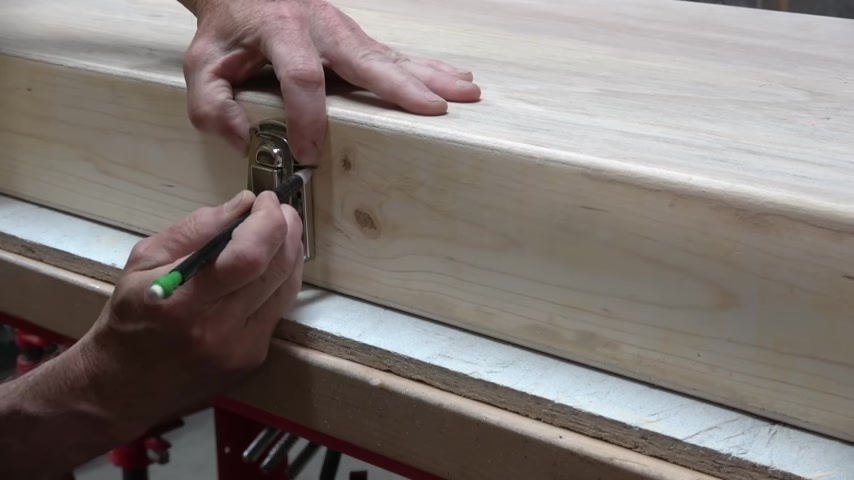
First thing I did was I placed one of the latches in the center of the side of the case .
And then I took a pencil and marked where the latch separates .
Next , I took a ruler and measured from the bottom of the case to the line that I marked .
And that measurement is how far I positioned the fence from the blade on my table .
And this is the tricky part cutting all the way around the perimeter .
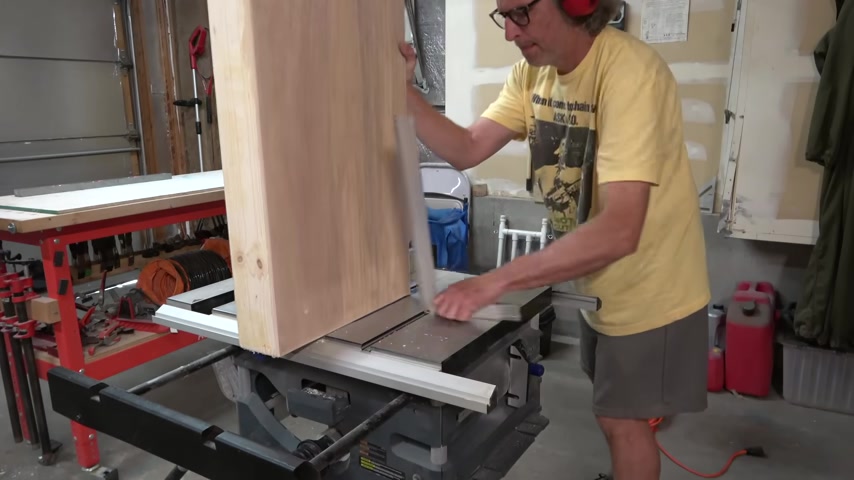
So I used a large machinist square to make sure that I kept the box perpendicular to the table saws platform .
And then I just cut all the way around the perimeter of the box .
That's how you open it up .
So now you know how I turned a closed box into a case with a lid that can be opened .
Now , just to make sure everything lines up .
It's a good idea to mark which ends go together before applying my coating .
It's a good idea to give it one last touch up with some sandpaper to make sure that the entire surface is perfect and it's important to wipe down the surface completely with the tack rag to remove any remaining dust .
The product that I'm applying to this case is called dura .
It's a water based low odor coating product .
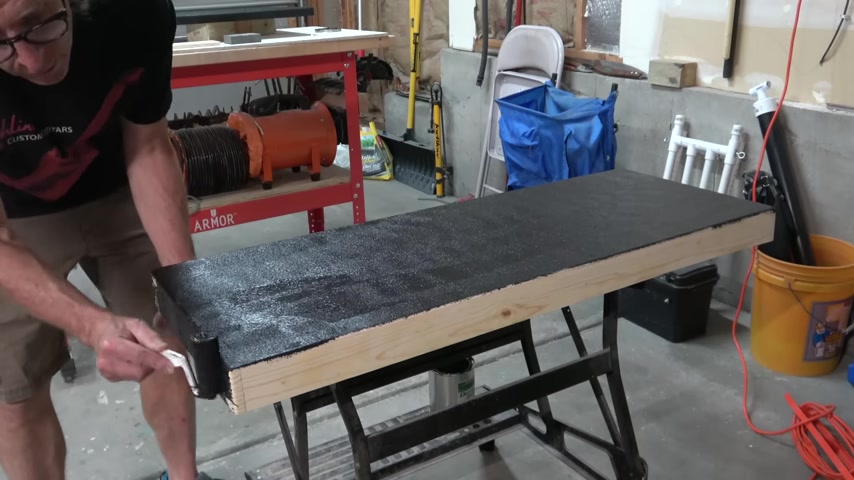
It's a lot like truck bed liners , the kind that you can roll spray or brush onto a truck bed .
However , this product was specifically formulated for guitar cases and ad speaker cabinets .
Once it's dry , it forms a very durable coating that can resist almost any kind of abuse .
Applying it is simple .
You just use the supplied roller to apply a thick heavy coat , then you'll let that dry for a couple of hours and apply a second slightly thinner coat .
The texture is achieved with the roller and to get a consistent texture .
After it's applied , you roll over the surface using very light pressure , just the weight of your hand and the roller itself .
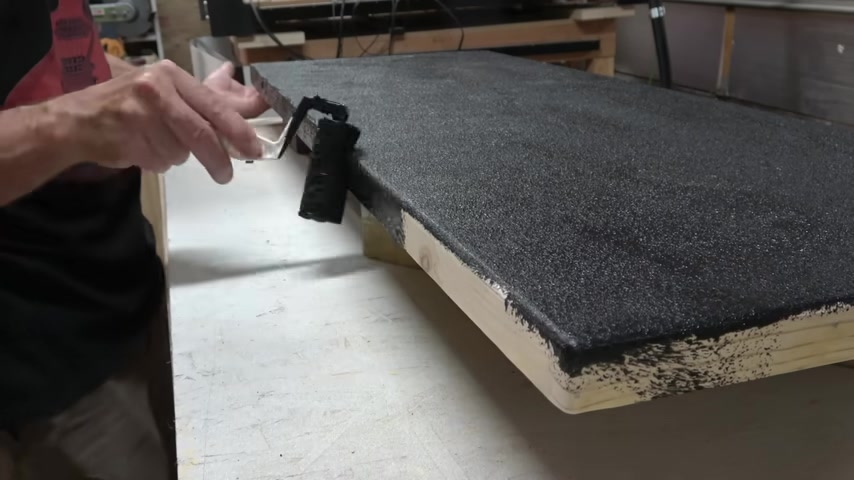
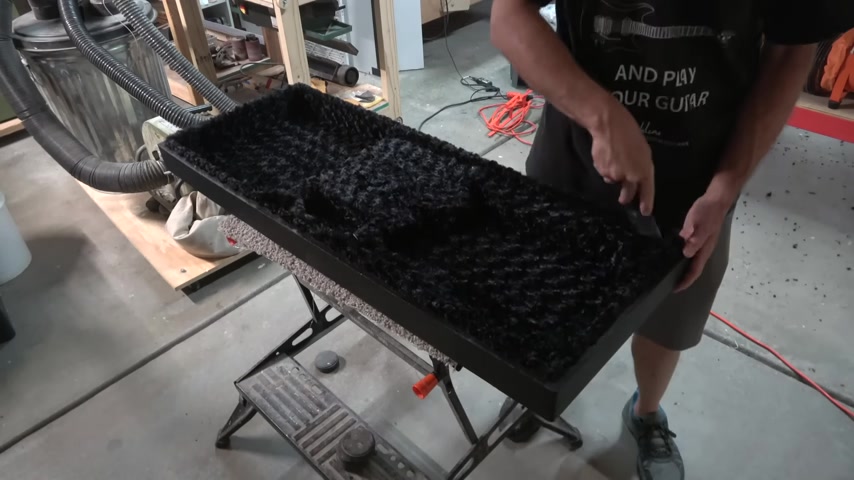
And that will give you a consistent uniform texture that won't show any edge marks to help seal the case from the outside elements .
Once the lid is closed , I use the scrap plywood that was left over from cutting the top and the bottom .
In order to make inserts which will go around the perimeter of the inside of the bottom of the case .
And those inserts will extend up above the bottom of the case by about a quarter of an inch .
What I did next was I used the inserts as a template to cut strips of my faux fur that I'm gonna use to line the inside of the case .
And then I would wrap those inserts with that faux fur before installing it into the case to glue the fabric to the wood inserts .

I'm using gorilla glue spray adhesive .
There's a bunch of different kinds of adhesives and glues that you can use .
Uh no matter which one you decide to go with .
I highly recommend that you test it on all the materials that you're gonna be using in this case .
The next step was to glue those inserts into the lower half of the case .
And I'm just using some lock tight construction adhesive to do that .
And then once the inserts were glued in all the way around , you can see how they stick up above the edge of the case by about a quarter of an inch .
And once the lid closes , that will provide a nice seal to prevent outside elements from getting into the guitar .
Before I continue with this video , I wanted to remind you to like , comment and share this video as a way to support my channel .
If you would like to do more , you can either click the thanks button down below and leave a tip in the amount that you choose or you can visit my youtube store , which is displayed below the description for this video .
Oh , and don't forget to subscribe to my channel .
So you won't miss any future guitar building videos .
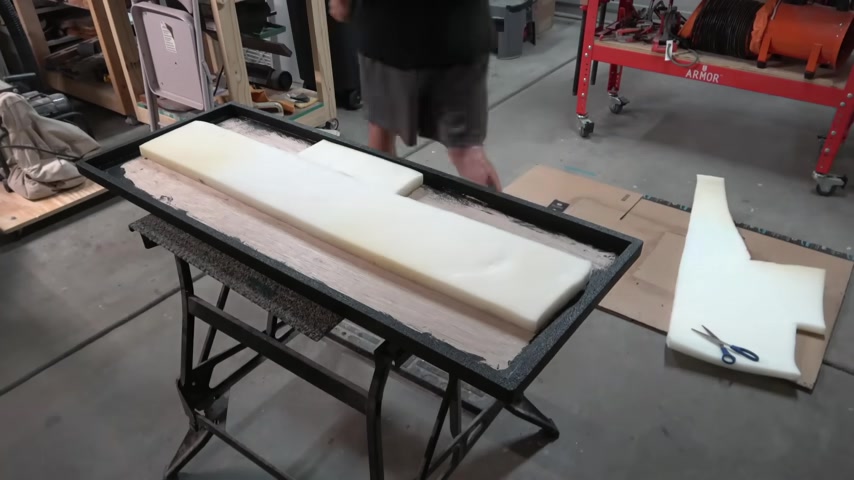
Now it is time to focus on making a custom insert to hold the guitar and I'm gonna make it out of foam .
So what I did was I took the elements that I used to carve the guitar on my CNC machine and I use them to create a 3D model of the insert that's going to fit into the bottom of the case .
And this is gonna hold the guitar snug and firm so that it doesn't shift around inside the case when it's being transported the material I'm using to make .
The insert is a piece of two inch thick formula which is extruded polystyrene .

And you can purchase this at most of your big Box Home Improvement Centers and it's really nice stuff to carve on the CNC machine .
Of course , if you don't have a CNC machine , you could certainly do this with a router and some homemade templates .
The insert fits perfectly into the case and I double check the fit with the actual guitar .
Now it is time to line the inside of the case with that faux fur .
So I started cutting pieces that I needed and sprayed the back of the material with the gorilla glue .
Then I placed it inside the case .
And the nice thing about gorilla glue is you do have a little bit of working time , but once it's down , it's gonna be down for good .
Then I took a large piece of the faux fur and placed it over the insert and then cut it down to size , making sure that I kept it a little bit larger than it needs to be .
That way the fur will fit nicely into the insert .
Then I coated the entire piece of foam with some gorilla glue .
Gorilla glue works best if you apply it to both surfaces .
So naturally , I sprayed it to the back of the faux fur that I'm gonna be using to line the case .
Then I laid that piece over the insert and began tucking it into position .
And the nice thing about this faux fur that I'm using is it's somewhat stretchy .
So it conforms well to the shape .
Then of course , I had to trim away the excess the insert was then placed into the case and I used a putty knife to tuck the excess fur , uh , into the case between the insert and the edges .
And as you can see the guitar fits nice and snug .
That's a custom case for the lid .
I use softer , uh , urethane foam and I just cut a strip that I could place in the center of the top of the lid and that's gonna , uh , lay down flush against the surface of the guitar and we'll keep it from moving .
And I'm just gonna hold this in place using some double sided carpet tape .
Then I added a second piece along the edge and that's gonna cover the accessory pocket .
I use the lid of the case as a template to cut my faux fur to the correct shape since I don't want glue on the inside edges of the case lid .
I covered those with some masking tape .
A liberal amount of the gorilla glue spray adhesive was applied to the inside of the case .
And then I applied the glue to the back of my faux fur material to improve adhesion .
It's a good idea to let the adhesive tack up for about a minute before bringing the two pieces together .
That's especially true on larger pieces .

And once I had the fur tucked into the inside of the lid , I grabbed an Exacto knife and trimmed away the excess .
And then once I removed all the masking tape , I was completely finished with the inside of the case .
Now it is going to be time to move to installing the hardware on the outside the hinges I'm gonna be using for this case are small 90 degree hinges and these can only open a total of 90 degrees .
So I don't need to use a strap between the lid and the bottom of the case I measured and marked the center of the case as well as each end with a piece of masking tape .
I positioned the hinge so that the top edge of the bottom of the hinge is flush with the top edge of the bottom of the case .
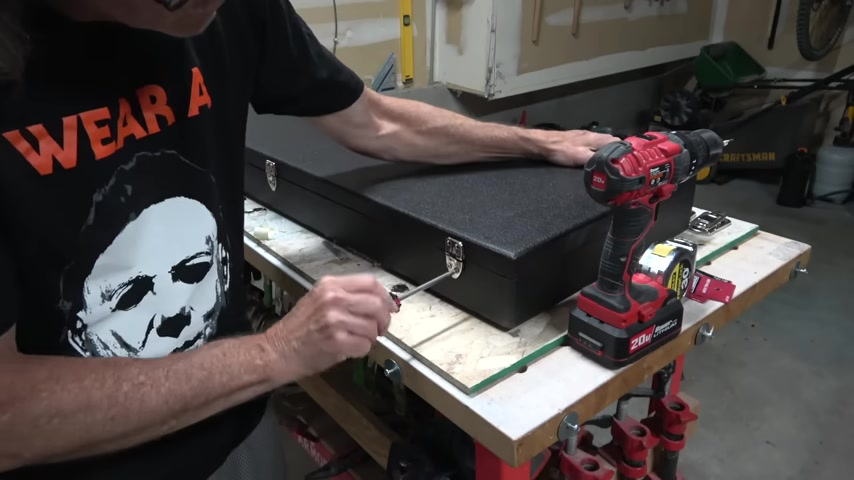
Then I drill a pilot holes and installed it with screws .
You'll notice when you purchase this hardware , it doesn't come with any mounting screws .
And that's because some people like to use screws while other people like to use rivets .
So you're on your own as far as the deciding what kind of hardware you're gonna use to mount your hinges , latches and handles .
Since I want to position the handle right where the case is balanced .
I used a length of PV C pipe to determine where the balance point is with the guitar inside the case .
Then I mark that so that way I can determine where to place the handle .
The handle I chose is designed to lay flat against the case when not in use , which means the end brackets will move in and out .
So to mount it , what I had to do was position the handle and then I drilled a pilot hole to mount one of the end brackets .
And then when I installed the other bracket , I made sure that they were as close together as they can be positioned .
That way I can pull the rubber handle out .
When I go to lift the case , I'll be using three latches to close this case , one at each end and one near the center to position the ones at the end I measured in about three inches .
Then I place the bottom of the latch against the side of the case so that the top edge of the latch is flush with the top edge of the bottom of the case .
The top portion of the latch is latched into place and then the top and bottom halves of the case are squeezed together before I drill the pilot holes .
The latch at the other end is installed in the exact same way .
Now , the latch at the center is not actually installed in the center , it's placed , um , just beyond the handle .
So it can actually be installed on either side of the handle .
It doesn't really matter .
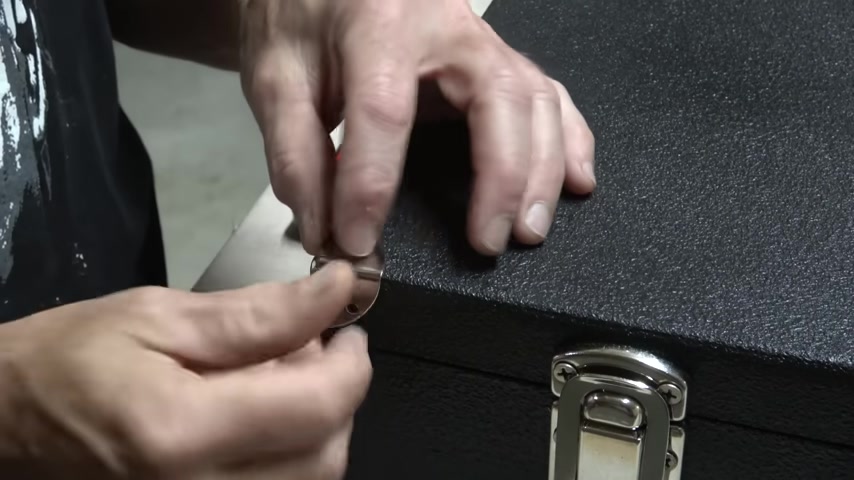
I'm using really simple corner protectors which are held in place with three screws and that completes the construction and assembly of a custom guitar case .
It's a really nice way to complement a custom guitar that you've put a lot of work into building .
Partnership
Are you looking for a way to reach a wider audience and get more views on your videos?
Our innovative video to text transcribing service can help you do just that.
We provide accurate transcriptions of your videos along with visual content that will help you attract new viewers and keep them engaged. Plus, our data analytics and ad campaign tools can help you monetize your content and maximize your revenue.
Let's partner up and take your video content to the next level!
Contact us today to learn more.