
https://www.youtube.com/watch?v=YZW3pkIR-YE
2024-09-30 13:58:37
EASIEST Way to Fine-Tune LLAMA-3.2 and Run it in Ollama
Last week , meta released 3.2 , which is a new family of 4 different models , including multimodal models .
And they're pretty impressive both for language and vision tasks for their respective sizes .
But you know what's better than that ?
It's your custom fine tune llama 3.2 .
That's exactly what we're going to learn in this video .
We will use unslaught for fine tuning .
Then I'll show you how you can run that fine tune model locally using Olamo , because what's the point of a fine tune model if you can't run it locally .
But before then , let's have a quick look at the release blog post .
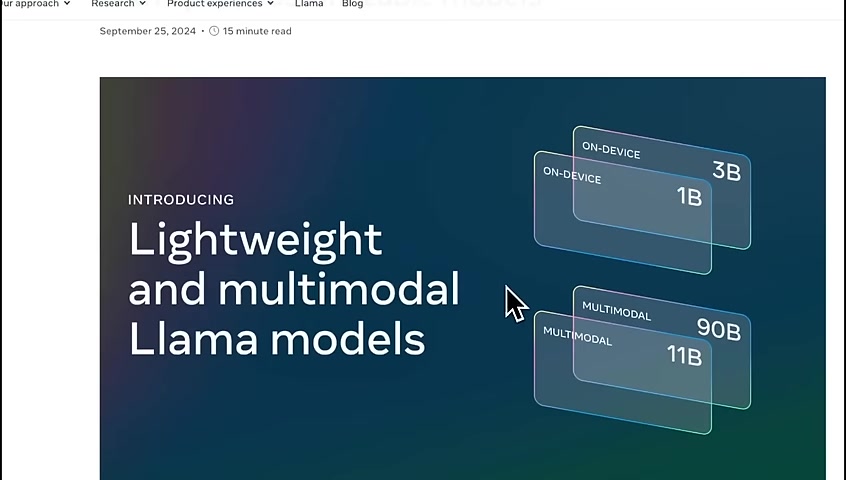
This new release has 2 sets of models .
1 are lightweight , which is 1 in 3,000,000,000 model , and the other set is multi model with 11900000000000000 .
There is no 405 b this time .
Meta is moving away from the standard 7 or 8,000,000,000 models .
Now they have 1190000000 instead of 8 or 70,000,000,000 model .
But I think the most interesting one are the 1 in 3,000,000,000 models because you can run them on device .
We will look at the 119000000000000000 models for vision tasks in another video .
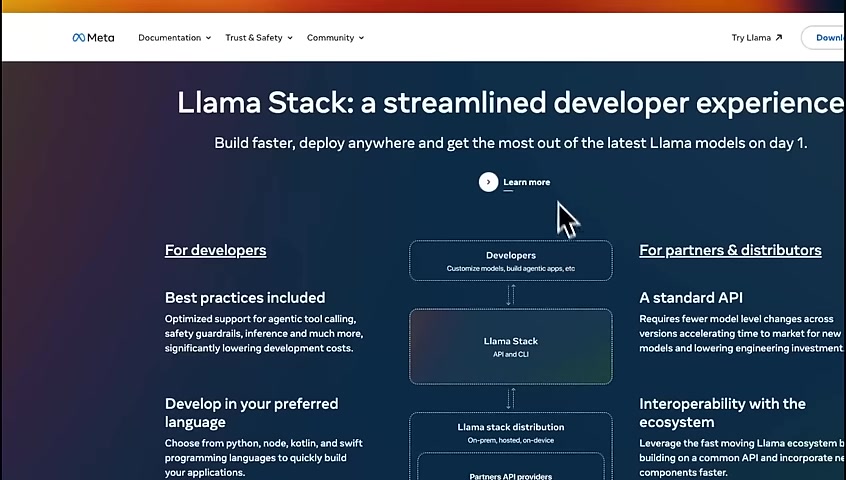
Apart from these models , meta has also released llama stack , which is their opinionated version of how developer experience should look .
It's great to see that these model providers are now building tech stacks for deployment .
Let's talk about how you can fine tune , one of these smaller models on your own dataset .
And then I'll show you how you can run this locally using olamma .
Fine tune llama 3.2 .
We will use the official notebook from the install team .
I have covered variations of this notebook in my earlier videos for fine tuning other variants of lemmas .
This is going to be a quick recap of those notebooks .
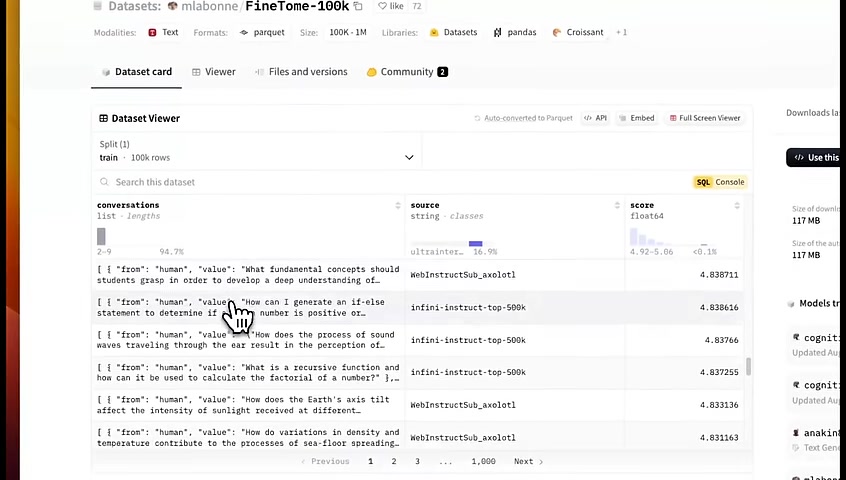
1st , we need a dataset , to fine tune the model on .
For this example , we're using the fine Tom dataset , which has 100,000 examples .
So it's a relatively huge dataset , and it has multi turn conversations .
This dataset is collected from multiple different sources .
So I think it's a very good candidate if you are a fine tuning , Relaym in general .
But if you're fine tuning this model for your own specific task , you will just need to provide your own dataset .
And I'll later on show you how you can structure your dataset .
First , we need to install unstopped , and they recommend to use the nightly version , which is basically the , the latest version .
Unstopped uses a fast language model class for dealing with LLMs .
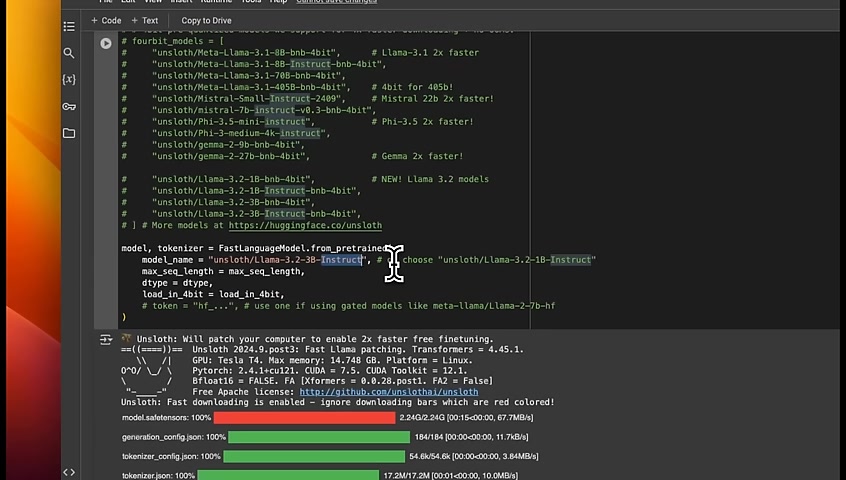
We're going to load the lambert 3,230,000,000 instruct model .
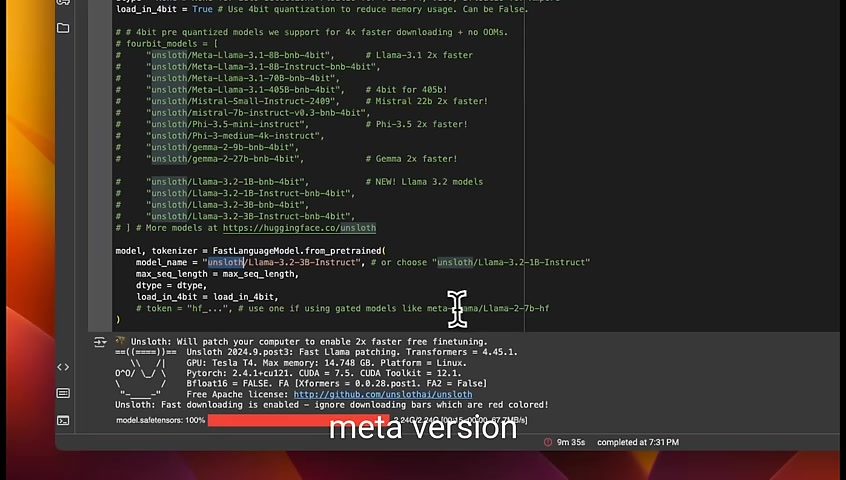
We're using this model because it's a relatively smaller model that you can potentially run on , on device such as on a smartphone .
Another thing to highlight is I'm using the uninstalled version .
You can also use the llama version directly .
You need to provide your hugging face , token ID and accept their terms and conditions .
The 11,090,000,000,000 models are not available in all regions , and that has to do with its , vision capabilities .
So you need just need to be careful .
Unstalk currently does not support vision models yet , but hopefully , they will , add support soon .
When you're loading the model , you need to define 3 different parameters .
The first one is the max sequence length .
In our case , we are setting it to 2048 .
This number is dependent on your training dataset .
Look at your training examples and see the maximum sequence length available in your dataset .
And I recommend to set it to that .
But setting it to a higher value will also need more GPU VRAM .
You need to be careful of that data types , you can set it to floating point 16 or 8 .
But if you keep it none , it will automatically select depending on your hardware .
We're going to be using the 4 bit quantization to reduce the , memory usage or memory footprint .
So here we're loading both the model as well as the tokenizer .
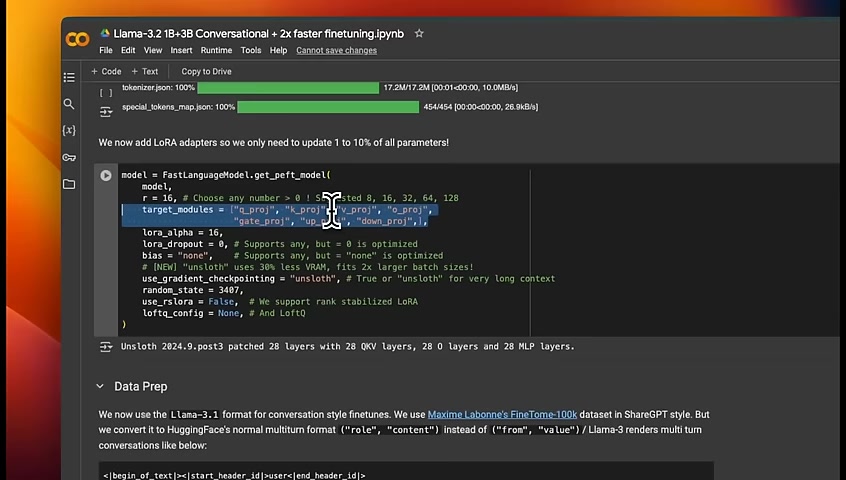
Next , I'm adding LoRa adapters .
We are not using full fine tuning , even though the model is pretty small .
We're adding LoRa adapters .
These are different modules that we are targeting .
We train completely separate modules and then merge it with the original model weights .
There are a couple of other things to keep in mind .
1 is the r or rank .
This determines how , parameters are going to be in your LoRa adapter .
If you set it to a high number , this will give you much better , fine tuning or the performance is usually going to better .
But again , you're , fine tuning a large number of , just in your lower adapter .
So that will mean that you will need more , resources in terms of VRAM to fine tune , or train the lower adapters .
So usually 16 or 32 provides you , good compromise between the memory footprint and the performance .
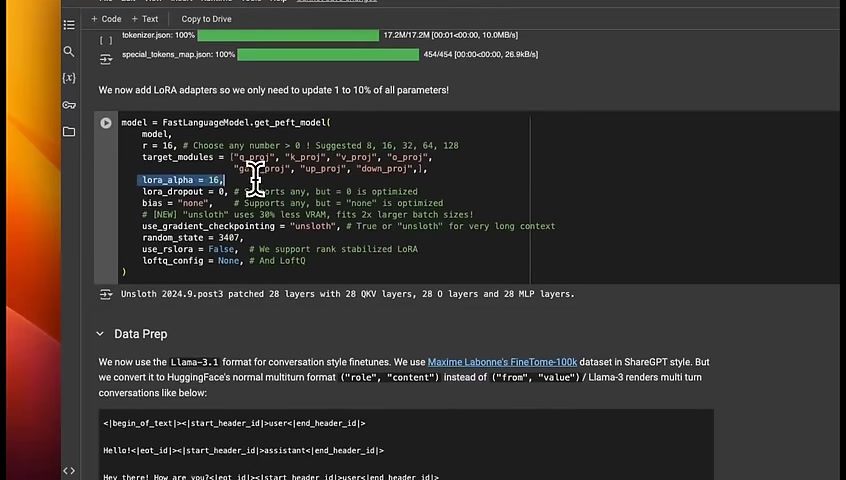
Another thing is the impact of this LoRa when you are merging it back to the original weights of the model .
So that is set through the LoRa alpha .
Now some points on the prompt template .
So here's the prompt template that the lambda 3.13.2 uses .
You need to make sure that your dataset that you're providing in order to find you in the model actually followed this specific prompt template because we're using the instruct version of the models for fine tuning .
If you are fine tuning the base model , you can provide your own template .
But if you're working with instructor chat version , then you have to follow the template used by the model itself .
The prompt template expects role and content .
But here , you can see that the dataset we're using actually uses another format , which is from human .
And then I think there is from GPT .
Right ?
So it's uses a different prompt templates .
So we'll need to adjust this prompt template .
And for that , you can use the get chat template class or function from uninstall .
Basically , we provide the token and use the prompt template from lemma 3.1 , which is , similar to 3.2 .
And that will take all the datasets and , convert it to our specific prompt template .
So here we are loading the dataset .
Now we need to go from this , which is from system , and then you provide the value or from human or from GPT to the role based approach .
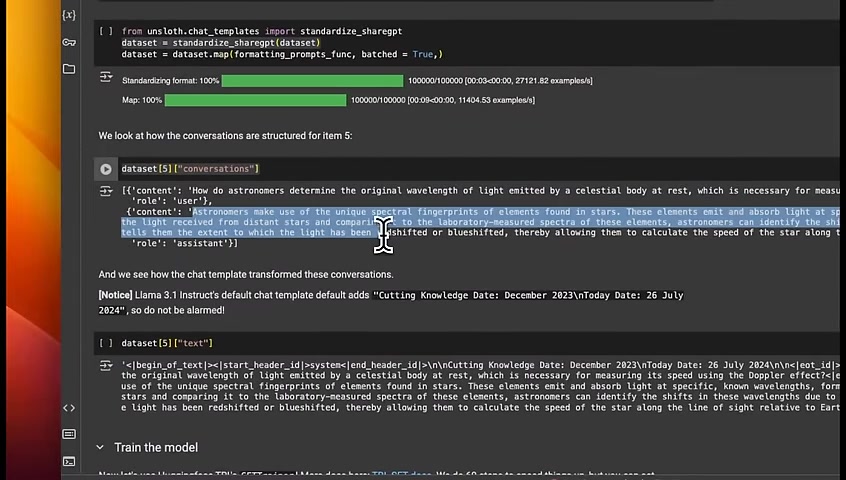
Everything should be converted to role system , role user , and role assistant .
We do that through the standardized shared GPT , function that we just created .
Now if you look at , some example conversations here , you can see that we went to the content .
So here's the content .
Then here's the role .
Role is user , and that's the , question asked by the user .
Then we have a role of assistant , and this is the response generated by the assistant .
When you're formatting your own dataset , you will have to follow the specific prompt template in order to fine tune a llama 3.1 instruct version .
Another thing is that the llama 3.1 instruct default chat template adds this specific sentence in the system instruction .
So it's actually telling the model that its cutoff training date was in December 2023 .
And it adds today's date to be , July 26 .
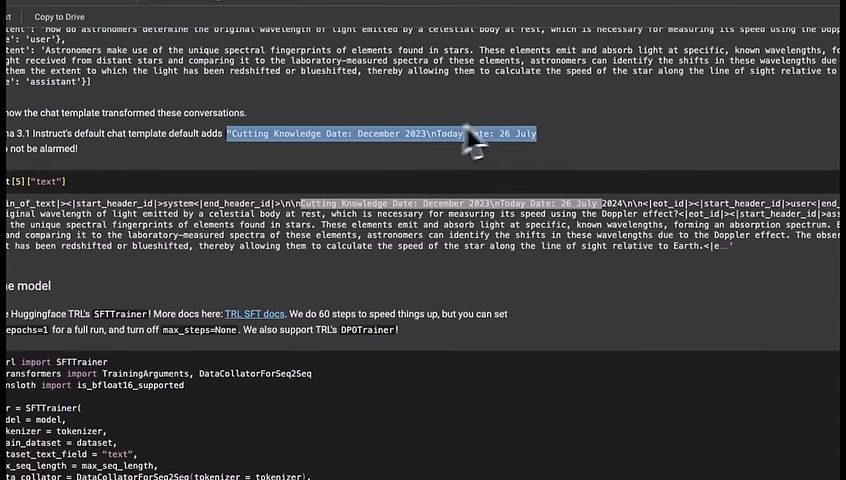
So if you see something like this in the responses from the model , don't be alarmed because that's just part of the system instruction .
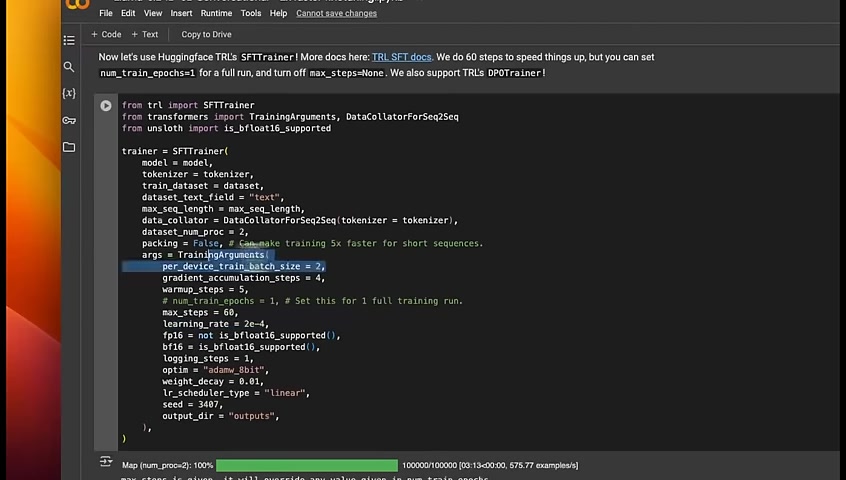
And later on , they actually mask this for now in order to train the model , we are using the TRL library from hugging face .
And we're going to be using the supervised fine tuning trainer because we are doing supervised fine tuning in this case .
So we provide the model name , the tokenizer .
These are coming from the unstopped .
Then we provide our dataset .
We also tell it which column to use as basically our prompt template that we have already formatted .
We added a text column to the data and the maximum sequence length in the training dataset .
Now here are some other , specific parameters .
A couple of things which I want to highlight is if you set the number of epochs .
So for example , if it sets to 1 , it will go through the whole dataset at once only during training .
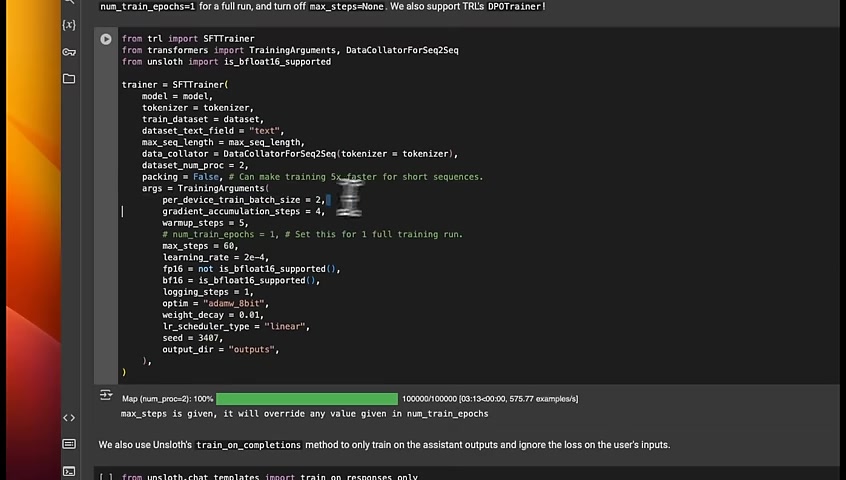
But a 100,000 examples are pretty huge dataset .
So that's going to take a while .
That's why we set the max steps to 60 .
You can either set the max steps or , you can set the number of , epochs .
Now what's the relationship between the two that is determined by our batch size ?
In order to get the total number of steps in an epoch , you can divide the size of the dataset by the batch size .
For example , if you have 100 examples , if you divide it by 2 , you get a maximum of 50 steps in the epoch .
We're just running it for 60 steps step steps , which is the fraction of the total number of steps possible for 100,000 examples .
The reason we do it is because we don't want to run it for a long time .
I just want to show you an example .
And that's why you probably are not going to see a greatly trained model in order to get really good training output .
You definitely want to run it for a lot longer .
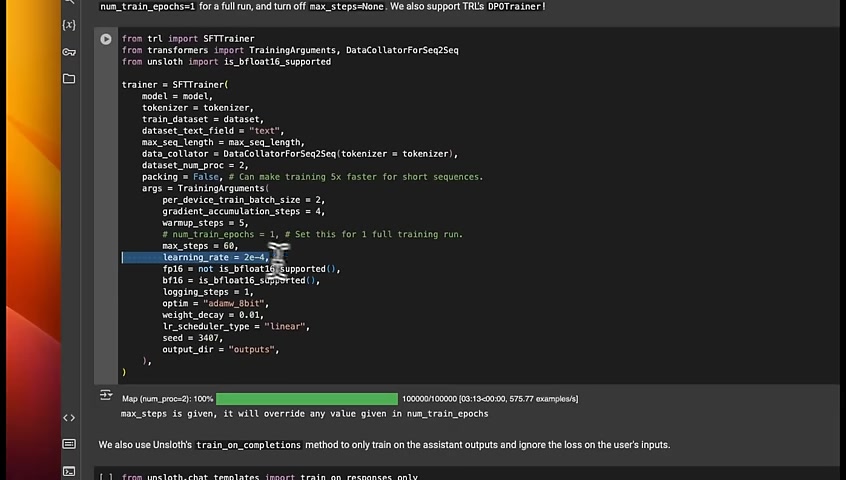
The learning rate determines the speed of convergence .
If you set it to a high number , the training speed is going to be faster .
But the training might not converge .
You usually want to find a sweet spot where the learning rate is small enough that it converges , but that will also take much longer to train .
Okay .
One more thing that you want to train the model on the output , not on the inputs .
So that's why you want to calculate the loss of the model on the output from the assistant , not based on the inputs from the user .
So the model should see the user input , generate a response , and then compare the output with the original or gold standard output or ground truth .
And that's where you compute the loss .
So this section takes care of that .
It forces the model to only use the output for , computation of the training loss or the test loss , depending on if you have a test dataset .
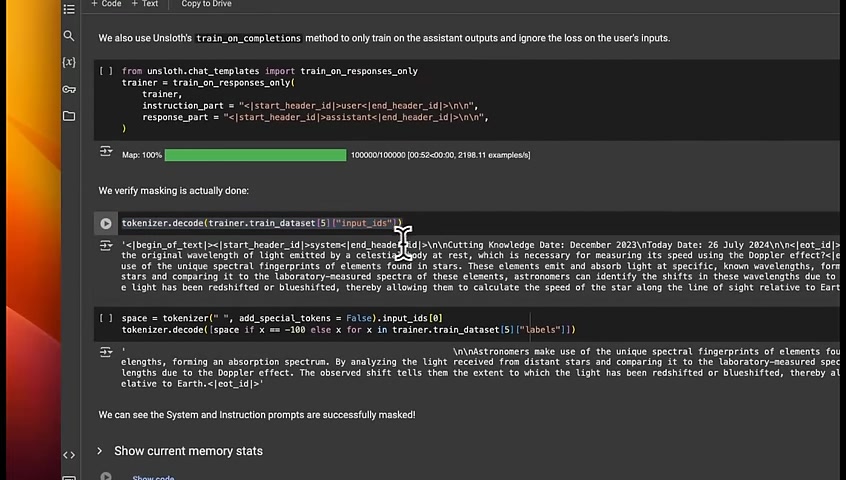
Now you can look at , how the tokenized version of the dataset looks like .
You can see that we have clearly added the system role .
Here is the well formatted user input , and then we have the well formatted assistant response .
And this is the dataset that we will use to train our model .
Want to get rid of this part , which is the , system message part .
You can mask that .
Here , we're masking that .
And now you can see that you don't really see the original system message .
You only see the output the model is supposed to generate .
Okay .
Next , we'd call the train function on the trainer that we created .
You can see that the loss goes down , then comes up again .
The reason is that we're running it for a very small number of steps .
Probably we can play around with the learning rate as well that will control the speed of convergence .
These are different parameters that you need to play around with .
If you're using bigger batch sizes , you can set the learning rate to a relatively higher value .
But bigger batch sizes will also depends on the available GPU vram that you have .
So there has to be a compromise between these hyperparameters that you are working with .
Okay .
So after this training , you can see that if we run , this specific , prompt on the train model , then here's the response that we get .
So here we see the system message , but we'll have to mask that ourselves in terms of the user input .
Here's the user input .
Continue the Fibonacci sequence .
So we provide the Fibonacci sequence , and then the response generated by the model is here .
Now you can also stream this if you want .
Here's an output of the stream response , which basically does the same thing , but in a streaming fashion .
Okay .
Once you train the model , you can either push this to GitHub or , store it locally .

I'm mostly interested in how we store the g g u version of the model because I want to load this in Olama and run it locally .
For that to work , you just need to call the save pretrained g g u f , provide the model name .
I'm calling it model under , 3,000,000,000 , provide the token and the level of quantization .
Since it's a relatively smaller model , I want you to run it in , 16 bit floating point precision .
Keep in mind , this step will take quite a long time because it has to first download and install LAMA CPP and then convert , this model to dguf format .
So here's the model that I downloaded from Google Colab .
If you run the training locally , you are going to see unslaught in FP 16 g g u f .
I downloaded the model from Google Colab .
Now let me show you the rest of the process .
Next , let me show you how to run that train file locally using olama .
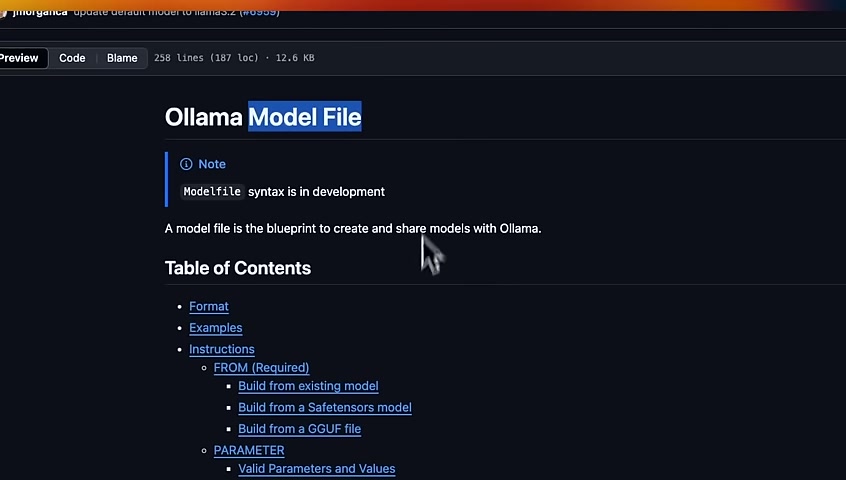
Olama uses the concept of model file , which is basically a set of configurations that you will need to provide for olama to use a model locally .
There are a number of different things you can use .
So there's an instruction called from where you tell it which model to use .
You can set different , parameters such as temperature , max context window , and so on .
You can also provide the full prompt template for the model .
Here is a quick example .
If you want to use , Nava 3.2 with different configurations than the default , you're going to say from Nava 3.2 here , they're changing the temperature to 1 .
The context max contact window is changed to 4096 , and you can also provide a simple system instruction .
If you go to any model on Ollama , you can see this template .
If you click on this , this will be the model file used by any model available on Ollama .
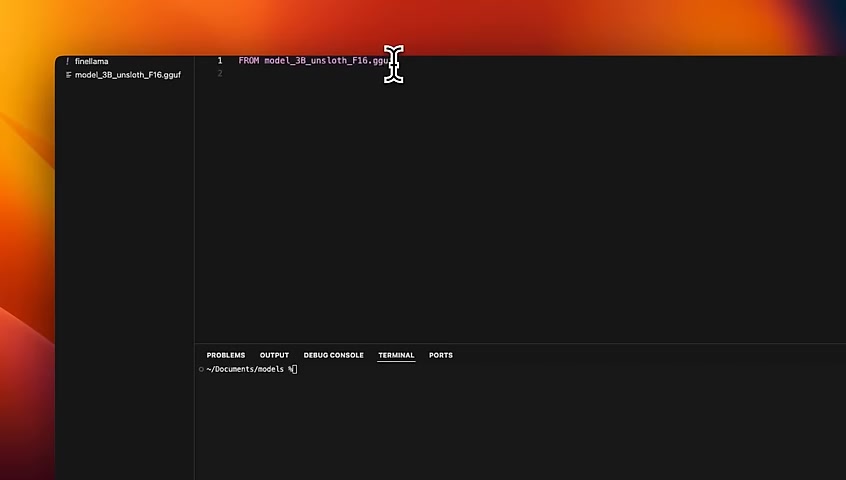
I have downloaded the gguf file that was created after , fine tuning the model on , Google Colab notebook .
You just want to look at the file that is , dotgguf .
The download in here and then created another file called file llama .
In here , I'm saying from and then providing that model name with , g g at the end .
So this is basically the model file that we're going to be using .
We can also include a template that will define the prompt template .
But since it's already in the tokenizers , I don't need to do that .
You can also define the system prompt , but in this case , we want to mask it .
So I'm not gonna add that either .
Now you need to have olama up and running .
After that , you need to provide some details to create this model in olama .
We type the command olama create , then what you want the model to be called .
So I'm going to call it .
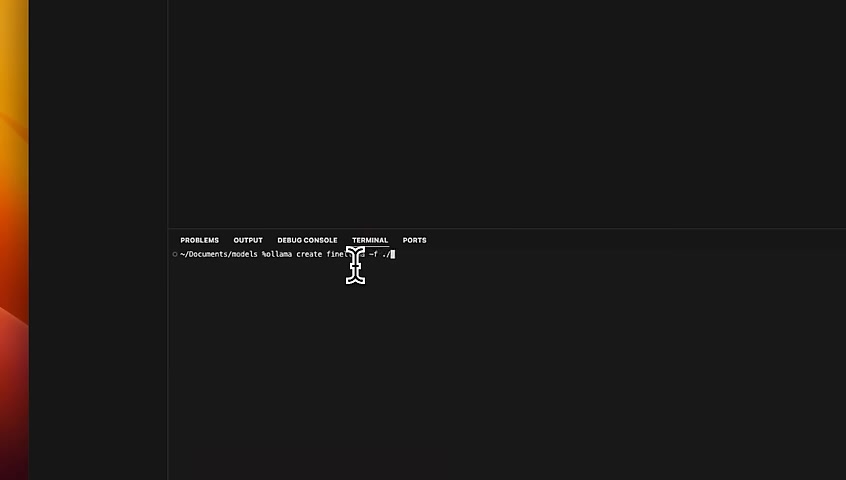
Then you can use this dash f parameter , and you need to provide the path of the , model file that we created .
So it's in the same directory .
When you click on it , this will , start transferring the data .
And if everything goes well , it will create a model file for us .
It's using the template from lemma 3 instruct .
Seems like everything is successful .
Now we can run our model .
But before that , let me show you if this shows up in the model list .
So here we have the final Lama .
This is basically the model that we just created .
I have a whole bunch of other models that I have already downloaded .
And now in order to run this model , all we need to do is just type olama run .
And just like any other olama model , we just need to provide the name .
Now it's a 3000000000 model , so it's going to be extremely fast .
If I say hi , you can see , that it generates responses great and pretty quickly .
Alright .
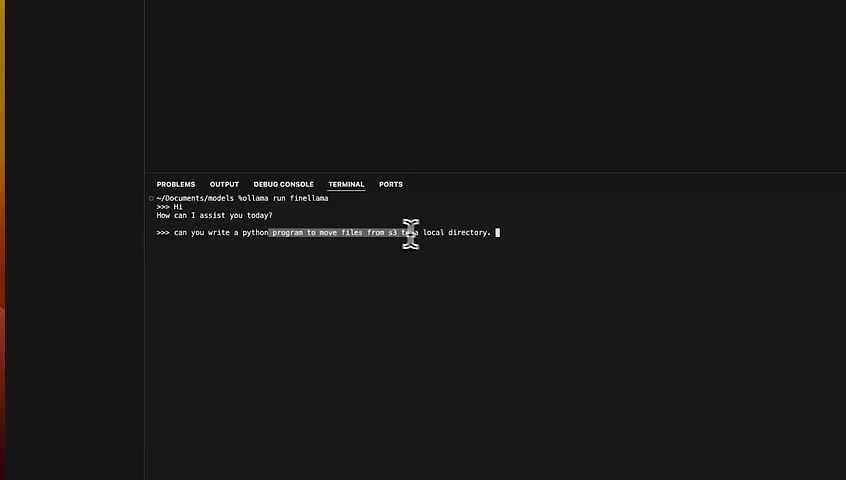
So I'm going to ask it to write a program in Python to move files from s 3 to a local directory .
And you can see it's really fast because it's just a 3000000000 model that is running completely locally .
That's the fine tune model that we just fine tune .
Okay .
So this was a quick video on how to fine tune llama 3.2 using onslaught and then run it locally on your own machine using Ollama .
I hope , this was helpful .
I'll put a link to the , Google Colab in the video description .
In this video , I only focused on the 3,000,000,000 .
Same approach will apply to the 1,000,000,000 model .
For , 1190000000000 models , the approach is a little different because it has , adapter for the , vision component .
So the same approach probably is not going to apply .

But I'm gonna be creating some videos specifically focused on the vision model because I think there are , some great applications there specifically for vision based drag , which is a topic I'm personally interested in .
If that interests you , make sure to subscribe to the channel .
I hope you found this video useful .
Thanks for watching .
And as always , see you in the next one .
Original video
Partnership
Are you looking for a way to reach a wider audience and get more views on your videos?
Our innovative video to text transcribing service can help you do just that.
We provide accurate transcriptions of your videos along with visual content that will help you attract new viewers and keep them engaged. Plus, our data analytics and ad campaign tools can help you monetize your content and maximize your revenue.
Let's partner up and take your video content to the next level!
Contact us today to learn more.