https://www.youtube.com/watch?v=NVNzuF2UUrI
2023-06-14 19:31:00
Most Common DIYer Electrical Mistake - Don't Let This Be You!
How's it going ?
You guys , it's Scott with everyday home repairs .
And today I want to help you avoid the number one mistake .
I see D I wires do when they're jumping into electrical .
The mistake comes from when you need to connect stranded wire to solid core wire .
This is extremely common in light fixtures such as vanity lights , ceiling lights .
I have one right here which is an led recessed wafer light and inside the junction box , all your connections are going to be stranded with your neutral hot and your ground .
You will also see this with a lot of the smart switches that are becoming more and more popular .
And why this is so important is because a loose connection can equal at minimum additional heat in your junction box which might lower the life of , of these connections and at maximum can equal arcing or a short , which can be a fire hazard .
So let me quickly show you how to connect these two together with a simple wire net and what the best practices are .
And then we'll finish off with actually my preferred method , which I think is perfect for D I wires .
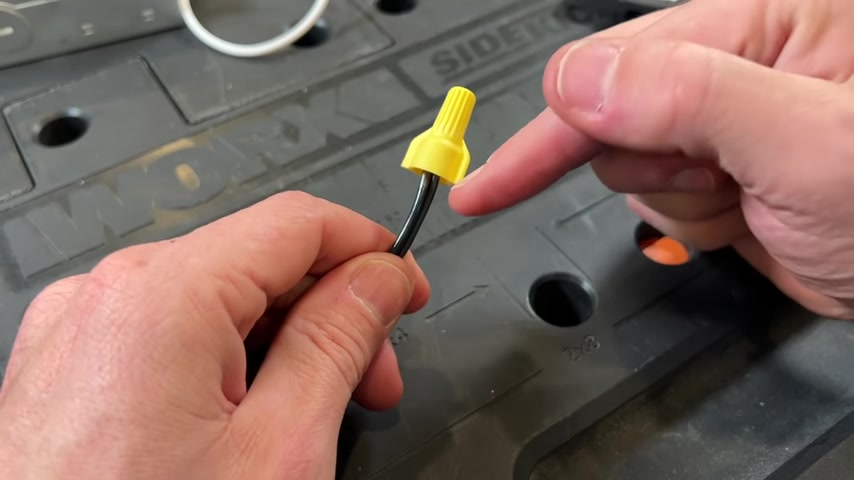
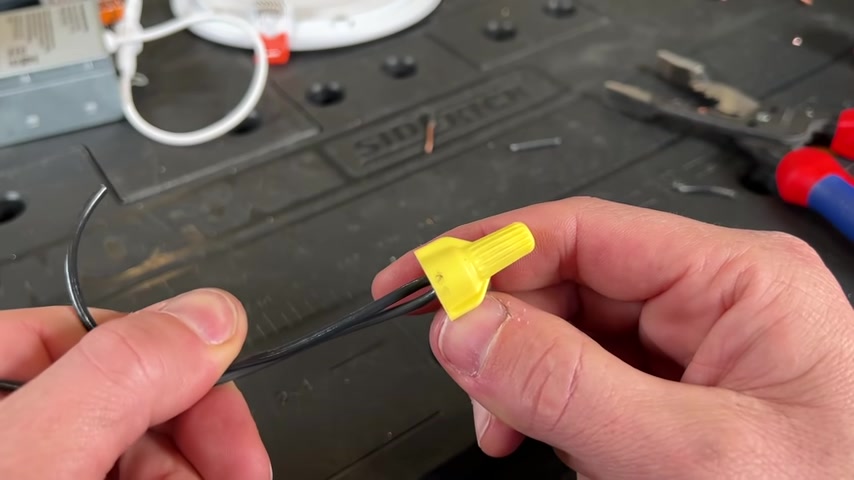
So here's the example of a common failure .
The wire net is connected , I don't have any exposed copper .
It feels pretty tight and where the wire net is biting into the wire .
But then many people forget to do a pole test .
So if I pull , I can already see that the wires coming out and there the stranded came out and I had a very weak connection .
Now , the wire net still connected on , but that's because it was biting into the solid .
So here's the example , you can see the wire net actually was just biting into the solid core and then the stranded was just getting wrapped around the solid core .
But really with a very loose connection , this is a classic failure point and something that can be avoided with a simple technique .
Let me show you how .
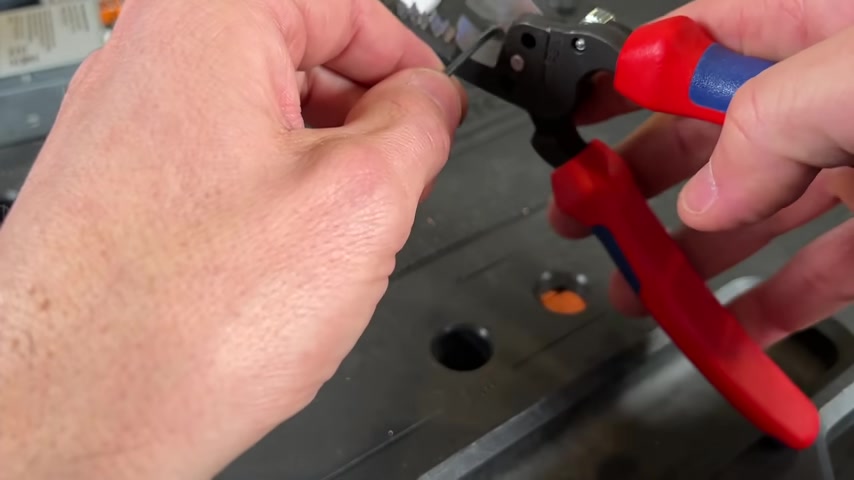
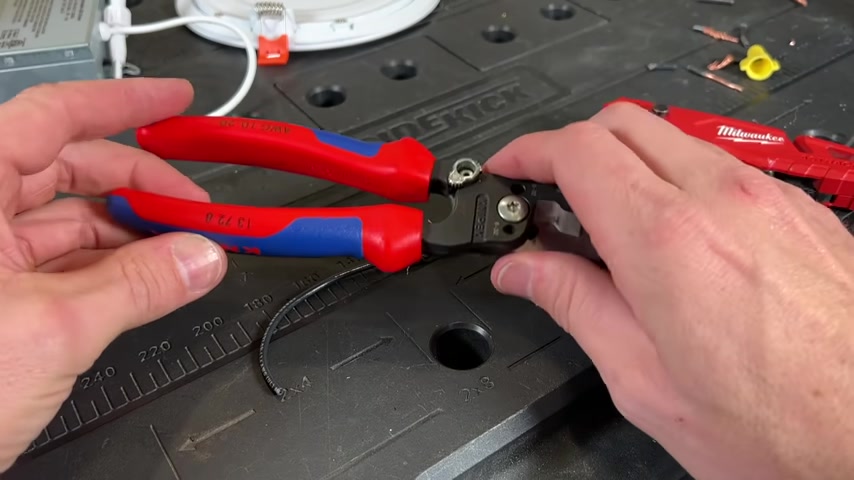
So first up , we're gonna strip off some new wire and remember in your wire strippers , you do have the gauge call outs for stranded and then on the opposite side for solid .
And those will be different stripping holes depending on if you're doing stranded to solid .
Now , this is 14 gauge .
So 14 gauge solid would be here and usually I'll be stripping three quarters of an inch or maybe just a little bit more .
You'll pull that straight off , you will not pull it at an angle and you shouldn't wiggle the strippers too much because that can cause damage to the copper itself .
Now , that's especially true with stranded because stranded can , you can break off some of those strands , right ?
And then you'd be lessening the current capacity of that wire .
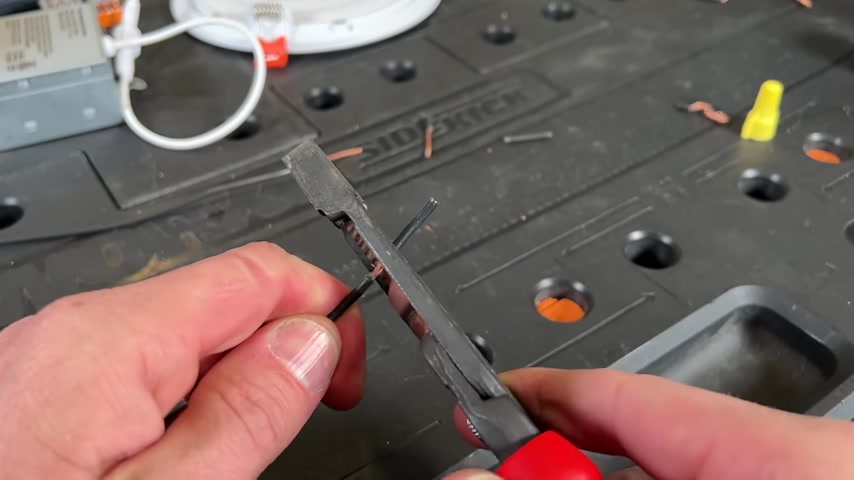
So 14 gauge here and again , we're going to do about three quarters to an inch again , pulling straight out .
See sometimes if you , if it's a little bit harder , you can go to the piece of insulation that no longer has any wire in it , you can pinch down on that piece of insulation and then pull it the rest of the way off .
Now , for the stranded , it is nice to put a little bit of a pre twist on there just to make sure you don't have any frayed wire .
Then the correct approach is pretty simple and this is going to ensure you get a nice strong connection between the stranded and solid .
What you want to do and what we did wrong last time is we just put the wires , we just put the wires within the wire net .
And what ended up happening is the solid actually led the stranded .

So the wire net actually just bit onto the top part of the solid and the stranded just got wound loosely around the solid core .
That is not what you want .
You want to actually do the opposite .
You want to lead with the stranded .
You can really do only about an eighth of an inch and that's gonna be enough often when you have solid core wire , many professionals will pre twist , they'll pre twist the wires together prior to putting the wire nut on .
Even though the wire net manufacturers usually call out to not pre twist and to let the wire nut or a wing nut like this do the work .
All right .
So now once we have that folding on , we can look down inside , you can see the stranded is much higher up and is biting into that wire nut .
So that same pole test is not going to pull the wire out like it did last time .
So you can kind of yank on these all you want and it's just not gonna happen .
Now , a correctly installed wire net is really hard to beat in terms of price and the proven durability , the challenge is it does take a little getting used to .
So if you're starting off on your electrical project , I actually have a better solution and it is the connector I've been using for the last year .
Let me show you one quick note .
If you guys are ever looking to expand your tool collection , you're kind of building out as you build up your diy skills and projects .
You can look down in the description , you'll see our Amazon store .
It has things like my favorite utility knife , which is the Milwaukee Fast back .
You'll see my go to wire strippers which are now this hybrid set from Kics , which are a great brand but they're a little costly .
So sometimes I will put kind of the higher end and a more mid tier that I also prefer , you'll see the pictures , you can kind of run through it quickly and see if we have a recommendation for tools .
So just something to check out and you'll see that in all of our different videos .
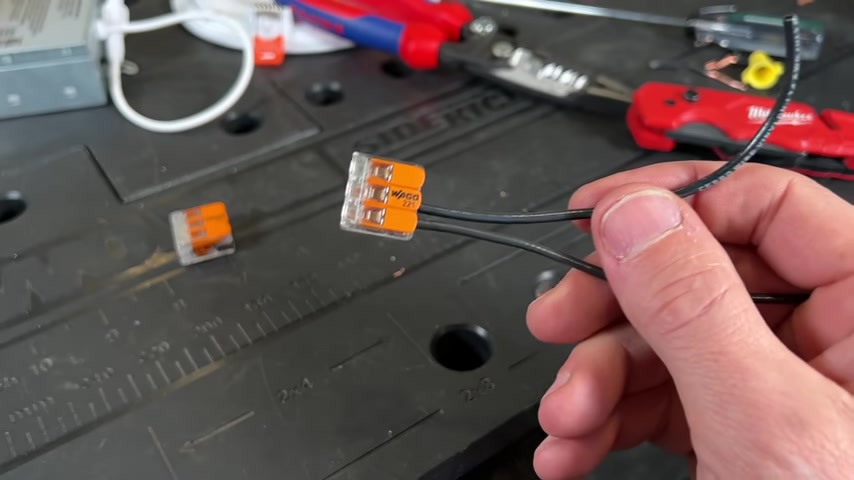
So now on to the connectors that I recommend these connectors are called A wa 221 .
If you've seen any of my other videos , you've seen these connectors because they are my go to now these are both three wire connectors .
They are called lever nuts .
They are not push in connectors , do not be confused with something like this , which would just be a push in connector .

These are a little bit different why I prefer these , I think especially for D I wires , you can get a more consistent connection using the wao lever nuts than you can with the wire NT considering you're only doing so many electrical projects a year .
So you don't get a lot of reps with the wire nuts , which it does take a little time to get used to them .
The smaller wa 221 , which you can get two pin , three pin , five pin .
Those are the ones I carry on me all the time .
This goes up to 12 gauge and then the bigger one can actually go up to 10 gauge .
So the smaller , which has the smaller envelope which is easier to fit in the junction box is by far what I recommend and why I recommend these for D I wires you will see .
So we open up our two slots here by releasing the lever , we place our solid core in .
You'll see it through the housing , it's fully seated .

And that chrome bar there is actually the bus bar .
So I'll close that lever and that secures that wire in place .
Then with a pre twist on the stranded just to make sure I don't have any stray strands that get caught up .
I'll also see that in and the big thing is 22 ones are approved for stranded , not just solid core .
There's some confusion out there .
There's also some confusion seems like a lot of pros say that these cannot handle load .
I'll put a link in the description , the silver symbol which is a great youtube channel .
You you guys should check out did a load test and went three times the the rated capacity .
So it went up to 60 amps and the wa did generate heat but had zero issues once it cooled down , still fully functioning .
And that was even after three times the rated load .
So as long as it's installed as you see here with the wires fully seated , the wa is going to stand up to the test of time .
And actually over in the European markets , things like the wao lever nut are much , much , much more common than wire nuts .
And that's just because it's a solid consistent connection .
And here's an example of that , this is a 221-613 , which can handle 10 gauge .
And we have 14 gauge stranded wire in the middle .
I know others have commented that the levers are loose and they are loose , but that actually does not release the wire .
So we can show here the lever looks like it's starting to come released , but it's actually just some play within the levers .
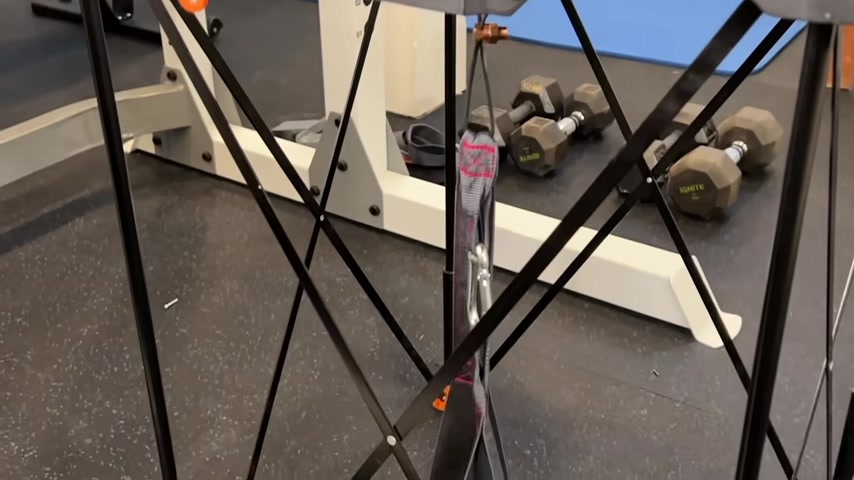
And if we zoom out here , you'll see my little cheap test rig and that shows that single stranded wire holding £25 of weight without failing , you could push back a little bit on costs .
These are gonna be quite a bit more costly and cost you 5 to 10 times more than a standard wire nut .
But for us D R wires that aren't doing a ton of jobs , we're not doing commercial jobs .
I don't think that cost really makes a huge difference .
Why I also like the I use them on like temporary light fixture at renovation projects because they're reusable .
You can take them right off the wires are not damaged , you can reuse those .
They're just a great overall connector and I do highly recommend them .
So now , you know , if you're installing that ceiling light or vanity light , you just want to use the standard wire notes in the package .
No problem .

Now , you know how to safely connect up stranded to solid .
But if you have a few projects ahead of you , I do recommend getting yourself some wa 22 ones .
There's some sample kits that have 23 and five pins .
You'll see that down in the description and I just think it's a great starter kit for D I wires to see if you prefer these type of connectors .
Now , if you want to see other best practices and just things to avoid when you're swapping out outlets around the house .
Check out this video right here , I'll walk you through three issues .
I actually found in a newly built home in my area .
So thanks for joining us on this video and we'll catch you on the next one .
Take care .
Partnership
Are you looking for a way to reach a wider audience and get more views on your videos?
Our innovative video to text transcribing service can help you do just that.
We provide accurate transcriptions of your videos along with visual content that will help you attract new viewers and keep them engaged. Plus, our data analytics and ad campaign tools can help you monetize your content and maximize your revenue.
Let's partner up and take your video content to the next level!
Contact us today to learn more.