https://www.youtube.com/watch?v=NNHXOIVCX1M
2023-06-14 19:15:41
Weed-Free Driveways and Sidewalks - The Ultimate Solution!
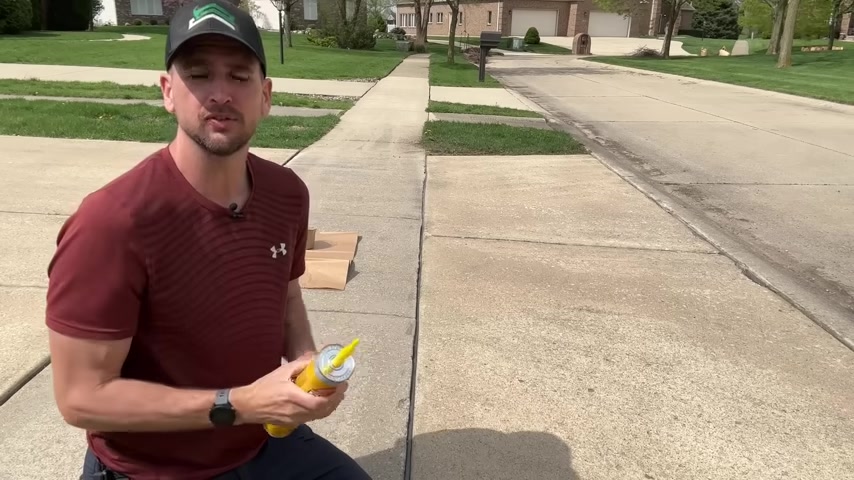
How's it going ?
You guys Scott with everyday home repairs .
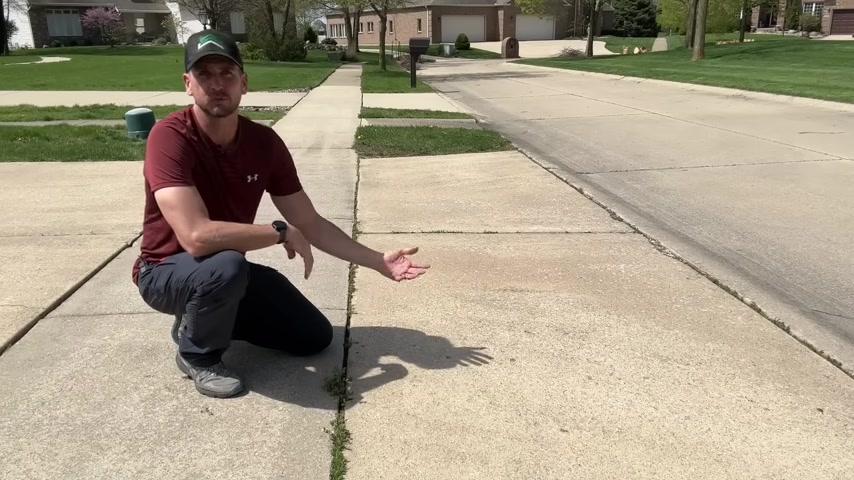
I want to help you address a super common meat inside them in the growing season around our house .
And that is where you have an expansion joint , maybe on your driveway or your sidewalks or maybe it's just a crack that's formed over time and you keep getting grass weeds or really any other type of vegetation that just keeps growing up through that .
It don't matter how many times you pull out these weeds or you spray them , they just come back in a couple of weeks .
So two of my main culprits here right at the entrance of my driveway that I'm going to address today .
One , we're going to clean this up and get a semi permanent solution .
This should solve your problem for an entire season .
But then two , we'll put in the permanent solution .
We'll knock this one off your to do .
So you can focus on those other projects around the house .
So let's jump into it .
Now , it could be as simple as this .
We just need to dig out the grass and weeds .

You could use an old flathead screwdriver like this , it's going to be pretty labor intensive and you want to really dig down to get out those roots as well .
Now , if you do have a string trimmer , you can kind of go across these expansion joints like an edging operation where you're not only cutting down the vegetation , but you're also kicking out some of that soil or debris that's within the expansion joint itself .
But even with using your string trimmer , you're probably going to be left with something looking like this where you still have quite a bit of soil built up .
And this is kind of like a planter box .
It's pretty perfect for vegetation .
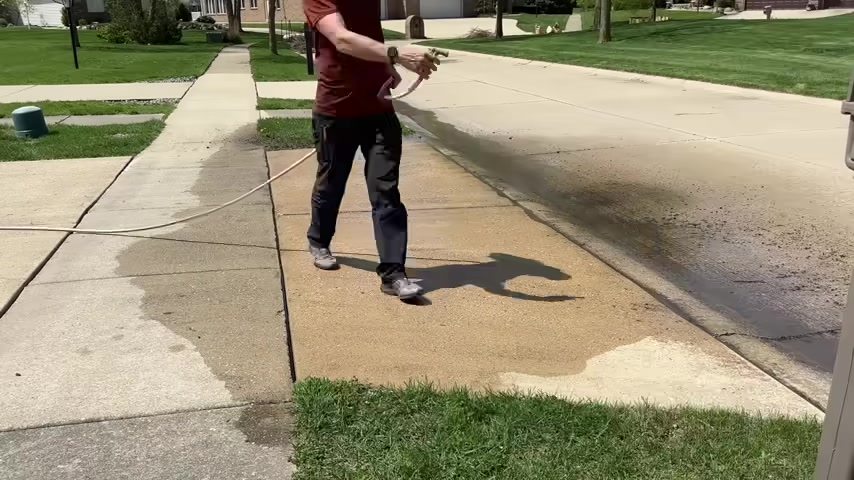
So to make sure we do not have that ideal scenario , go ahead and grab your garden hose and work your way down the expansion joint , shooting the stream right down the expansion joint where you're able to actually get out quite a bit of that material where you can dig down a couple inches below the concrete surface , start from your high side and then work that dirt down to the low side , this low side being the street in this case .
So I'll work the rest of the dirt off of that surface and then move on to my second expansion joint , taking your time and really just let the water do the work .
If you shoot that stream right down the expansion joint kind of horizontally , you'll see it start to hit the hard surface of that packed soil .
Now do be careful because this can blow back at you and get you wet or muddy in the process and then you'll slowly work your way down .
And this will make quick work of all of that dirt , debris and soil in these expansion joints , cleaning everything out .
And then after a little dry time , we'll be ready for the next step .
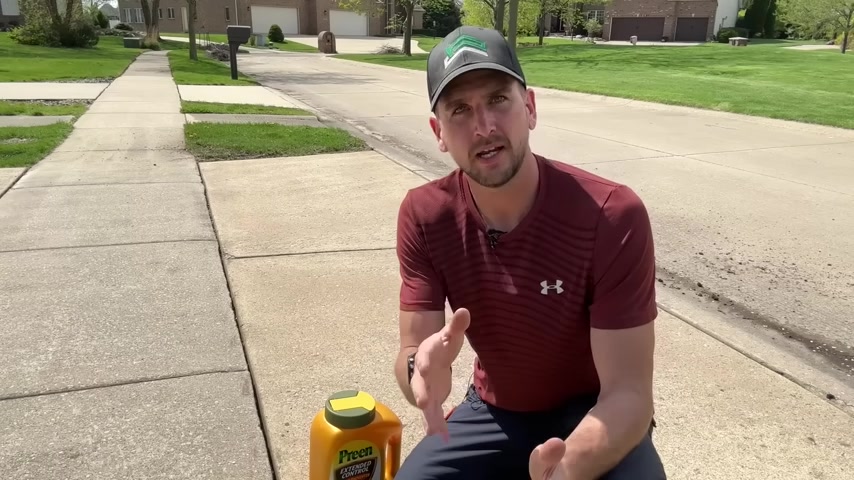
So now things have dried out and for that temporary solution , what should last you ?
About six months is just now sprinkling in some pre into this actual expansion joint .
Now , if you need a reference , you can look at the link below this video to our Amazon store and in the exterior section , you'll see this product and the other products that we feature throughout this video for your reference to use on your own projects at home .
So we'll just go through and Sprinkle this out , letting it sit in that crack .
And then really is it now for this temporary solution when it rains again , more dirt and debris will fill back in this expansion joint .
But the pre Granules should stay in that soil helping to prevent any of those weeds growing by killing it at the root .

But for that permanent solution , let's go ahead and actually seal off these expansion joints , making sure no water or light gets into the expansion joint that would promote any of that weed growth .
You want to check and see what the actual gap measurement is you can use a tape measure , but I just use a carpenter's pencil because it's actually half inch by a quarter of an inch and just makes for a good reference .
Now , for mine , it's mostly a half inch .
So that means that I would want to get Backer Rod , which is the first step in this process of 5/8 of an inch .
But also it's good to have some , a little bit larger .
So I'll get 5/8 .
That's the small one there , five eights in diameter and three quarters of an inch because you want the backer rod to be tight in the actual gap when you press it in place .
So I go through and use that carpenter's pencil again just to press that backer rod down .
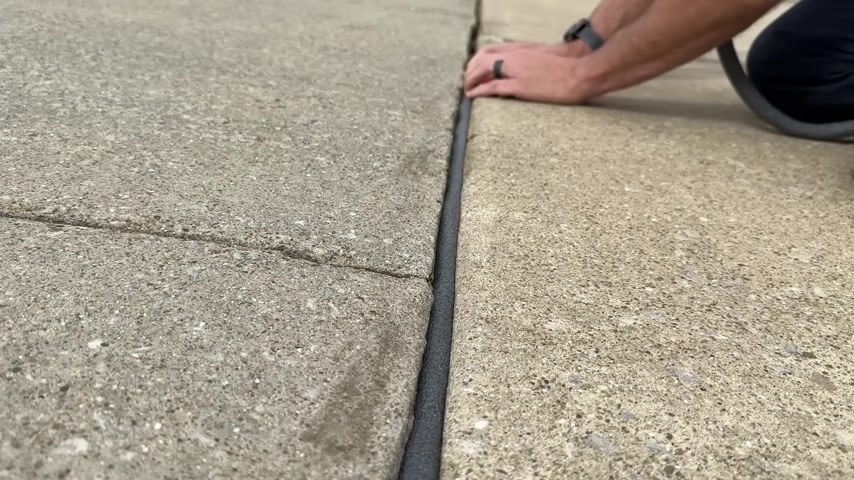
And really what you're trying to do is get the backer rod consistently about a quarter of an inch below that concrete surface , the lower of the two concrete surfaces .
So I can just slide that carpenter's pencil along .
Remember it's one quarter of an inch .
So it makes again for just a good reference mark .
Now , stress again needs to be tight in the gap .
If you do not make your back rod tight in the gap , you would get something that looks like this with the back rod actually floats up and the sealant goes around it and does not equal the end product that you want .
So I'll go ahead and keep going through with my 58 of an inch backer rod and I'm leaving small sections open , those sections are a little bit larger .
So I'd come back through with the 38 , sorry , three quarters of an inch backer rod filling those in where needed .
Now , you want to press those two sections that interface of back rod together .
Please remember , we don't want to leave any holes which can cause issues to the final fit and finish .
So like most projects , success is really in the prep work .
So if that backer rod is in place , it's firm , it's not going to float up to the top .
You're ready to put on your ceiling .
Two different products I use , I use ac a self leveling product whenever I have a completely horizontal surface and no slope .
This is a great product that's held up for me for multiple years on some of the other cracks that I've repaired on this channel .
Also , I really like the Tramco Vulcan 45 SSL .
I'm actually going to use that on this one crack right in the middle because it has a little bit of a slope where I would not want to use the ska because the SCA will pull to one side if you're not careful .
And again , you will find those at our Amazon store for your reference .
I'm using the 29 ounce tubes .
But just know if you have a smaller job , you usually can get the standard 10 ounce tubes as well .
And the Remco is a limestone .
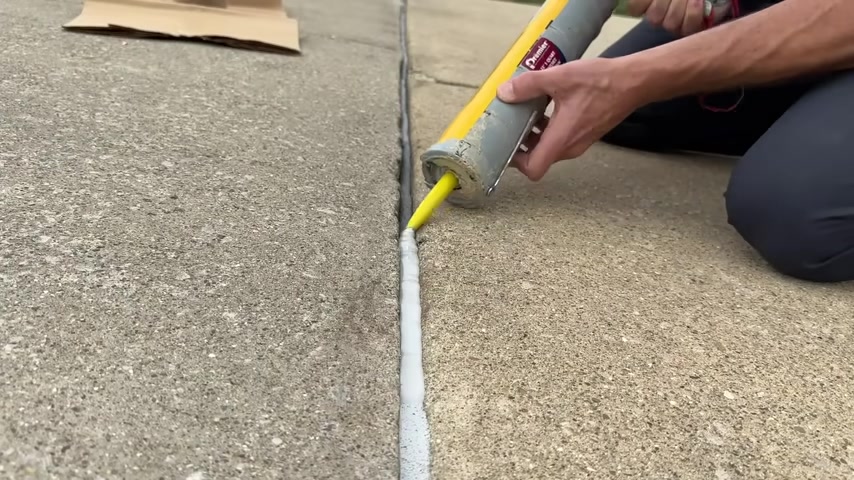
It's not ideal mixing and matching colors , but I also show you a trick to help blend those into your driveway itself .
Now , starting off , you'll just want to take your time and I do kind of support the tip of the cock tube on the concrete , which helps me evenly apply .
This is self leveling so it will settle down .
It doesn't have to be perfect in terms of your application .
Now , it is so windy outside today as I am actually sprinkling on some sand pretty much right away .
Usually I'd want to wait 30 45 minutes to let it set up a little bit and then I'd Sprinkle on the sand .
But today because I don't want sticks and leafs and petals and dirt to blow into the cock and then get stuck in there .
I'm placing sand on it pretty much right away .
Now that sand is gonna help to blend .

So that's a key of since I had the gray Sica , which I'm using in these longer cracks and then I had the limestone trem co the sand is gonna help that blend in and you'll see it in the finished product .
You want to take your time .
I have got a few issues in the past , ran into a few issues when I was trying to apply this in direct sunlight when it was about 80 F or higher what I've seen is it can bubble a little bit and then just your overall finish isn't the best .
So it is about 65 F outside .
It's super windy , which is not ideal , but applying that sand on top does help to minimize the amount of things that are going to blow across and then stick into that cock while it's setting up .
Now , I'll complete these two crack Sprinkle on that sand and then I will get the Remco product out .
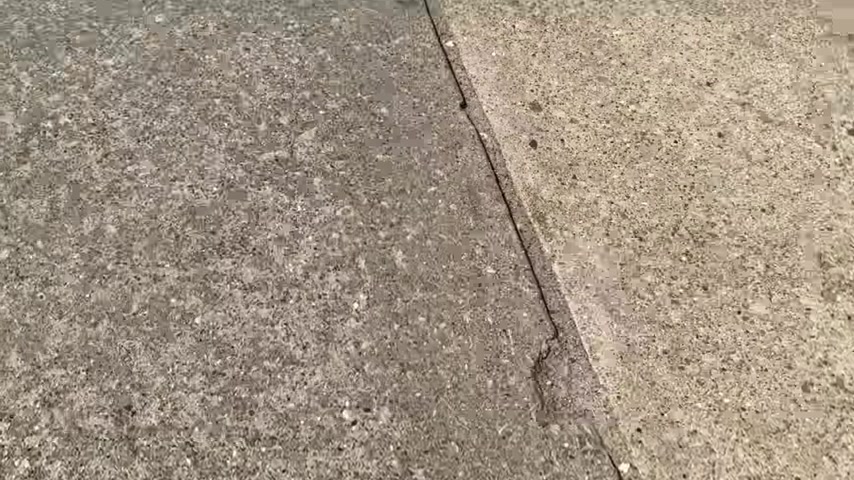
I wish I had a 10 ounce tube because this is just a nice short little run to put the trem co but here's the finished product and you'll see how it blends in the sica with a thin coating of sand on top of it really helps blend that into the driveway and then transitioning to that perpendicular crack there , which is the Remco 45 SSL and limestone , which looks pretty great .
Now , believe it or not a normal pool noodle is just a monster backer ride .
So if some of your cracks are irregular in shape and larger than one inch in diameter , check out the video right here and I'll show you how I use the pool noodle to fix a large crack at one of my rental properties .
So thanks for joining me on this video and we'll catch you on that next one .
Take care
Partnership
Are you looking for a way to reach a wider audience and get more views on your videos?
Our innovative video to text transcribing service can help you do just that.
We provide accurate transcriptions of your videos along with visual content that will help you attract new viewers and keep them engaged. Plus, our data analytics and ad campaign tools can help you monetize your content and maximize your revenue.
Let's partner up and take your video content to the next level!
Contact us today to learn more.