https://www.youtube.com/watch?v=Y-N1N829TkM
2023-06-14 19:09:15
How to PROPERLY Fix Deep Scratches & Paint Chips on Your Car!
What is up guys , so of Canadian Rider here today , I'm gonna be walking you through how to properly fix the deep scratches that you find on your car .
Audi R A .
It's pretty good in general , but there are some deep scratches .
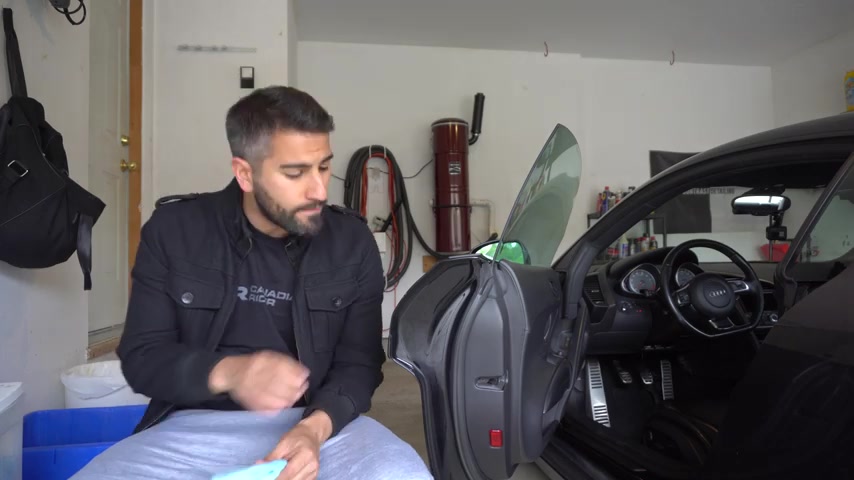
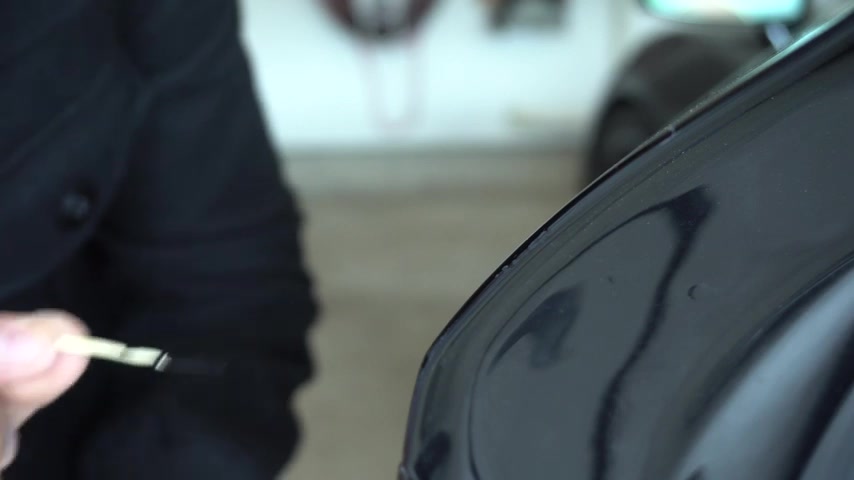
I do want to address and one is on this door .
So you open up the door and you're gonna see some damage here on the edge of the door panel , missing paint here , missing paint here and missing paint here .
And , um , these are actually deeper , they've gone into the paint into the primer .
So what I'm gonna be doing is showing you how to actually fix that properly .
As a professional detailer of over seven years experience .
I've used a lot of different methods to kind of address stone chips .
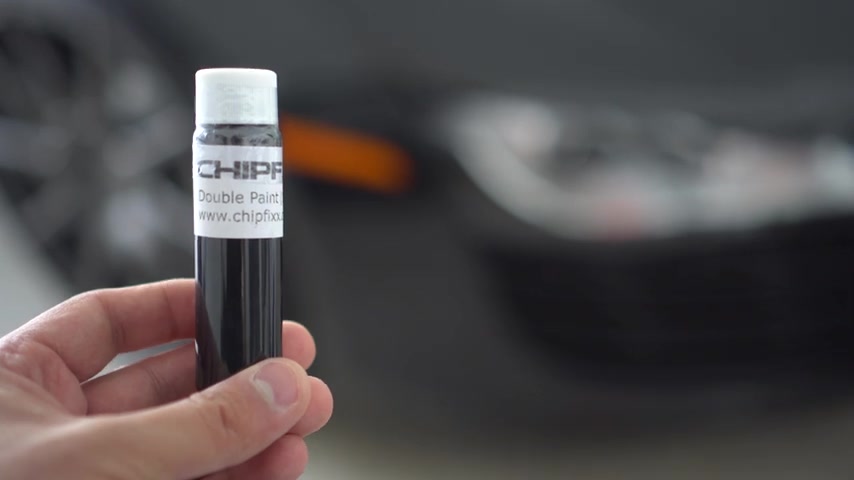
Um , and the best thing that I found is the Chip Fix kit .
So I'm gonna be using the Chip Fix kit to go ahead and address this .
I've used it on my Audi R A before a lot of little chips the front of the hood before I actually apply my three A paint protection film .
I use the chip fix kit for that and I'll link the card above so you can see that video to fix the minor stone chips on the front of the hood .
But here I want to show you how you can actually address the deeper kind of gouges and chips inside of your paint with this example .
And another one I'll show you .
So I'm going to be using that kit as well .
So what I'm going to do first is I'm going to take the Leveler solution , which is included with the kit and that's going to help clean out anything , all the oils that are inside of the chip to ensure that the paint bonds really strongly and correctly .
This is going to ensure that the paint chip that we're going to actually fill is clean of any contaminants or oils so that the paint that we're going to introduce can actually bond to the surface of the chip .
The next thing I want to talk about is the paint chip actually , I'm filling .
So right here , I have the color matched version for my car , the 2008 Audi R eight in my hands here .
And this is from chips .
One thing I do want to stress and point out is that this is not your normal touch up paint .
The solid count on this paint is actually higher than your O E M touch of paint .
What does that mean ?
That means it's actually going to stay in the chip better .
It's gonna not be as leaky and as watery , what that's gonna do is help you keep the paint inside of the chip and help build up the chip .
So typically , if you think about a chip , especially a chip like this is that it's kind of deep , it kind of wet in into the surface of the paint .
This is going to help keep the paint higher level inside of the chip .
So it's smooth with the surrounding surface of your clear coat end of your paint .
So I'm gonna go ahead and open this up .
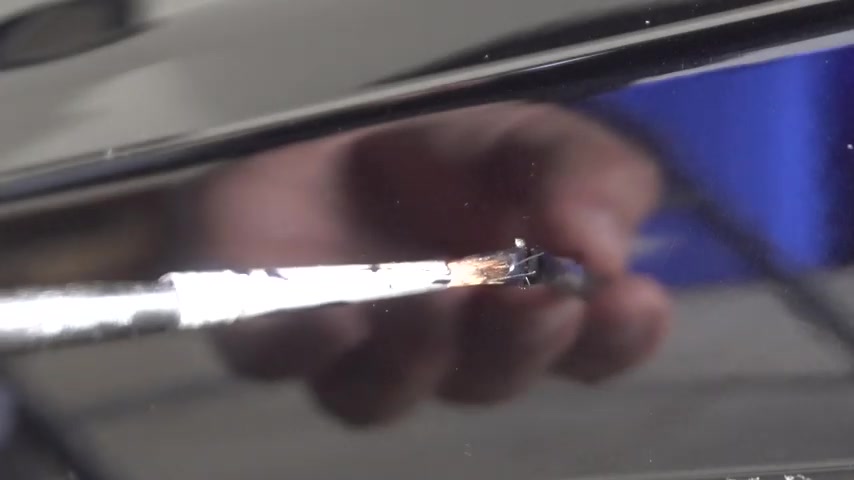
And what we're gonna do is use a toothpick in this case to just gently put the paint in inside of the chip inside of the paint .
So what we're gonna go ahead and do is use the toothpick here and the paint um and gently apply the paint um to the , to the chip or to the damage .
So here we go , I'm getting some paint on the tip of the .
Now , I'm gonna try to make sure you guys can see this .
So I'm gonna try to go on the side here , but we just want to fill up the chip , um just like that , just fill it up just like that nicely .
Not too much paint , but that extra solid count that's gonna help in this paint is going to make sure that it stays there .
So there we go .
I almost have full coverage there .
I'm gonna get a little bit more paint , um ensure the full coverage and kind of let it I work there .
So there you go .
So I'm very comfortable with this .
This looks like I'm just gonna do a little bit of this .
Make sure it's all even there we go .
That , that's great .
So what it , what's done is the extra solid count is it's raised above the chip and what we're gonna do and the next step is with the Leveler solution , remove all the excess paint , but keep the paint that's on the chip in there .
So then there's just this one last guy here , ok ?
And that , that chip is now fixed as well .
So what we wanna do now is wait about 3 to 4 minutes .
It depends on the temperature and the humidity in your area .
So I'm gonna let this go ahead and stay for maybe five minutes .
And then we're gonna come back with the Leveler solution , which I'll talk about to go ahead and remove the excess paint , but keep the paint inside of the chip .
So we've waited about three minutes here .
Typically , you would actually wait one minute , but it is kind of cold here right now .
So I wanted to make sure that the chip had enough time to dry with the paint .
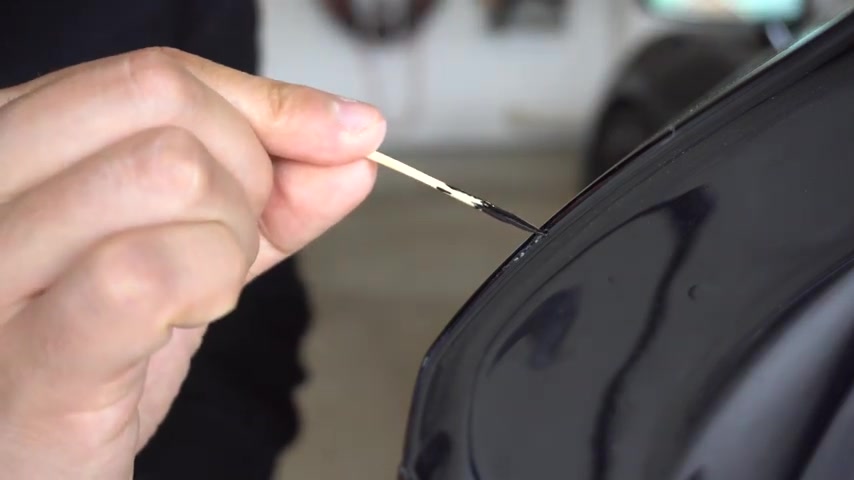
Now , I'm gonna take this leveler solution here .
So this is a really important solution because this is what's gonna take out all the paint that's excess from around the chip in the area , it's gonna remove it , but it's gonna keep the paint within the chip still intact there .
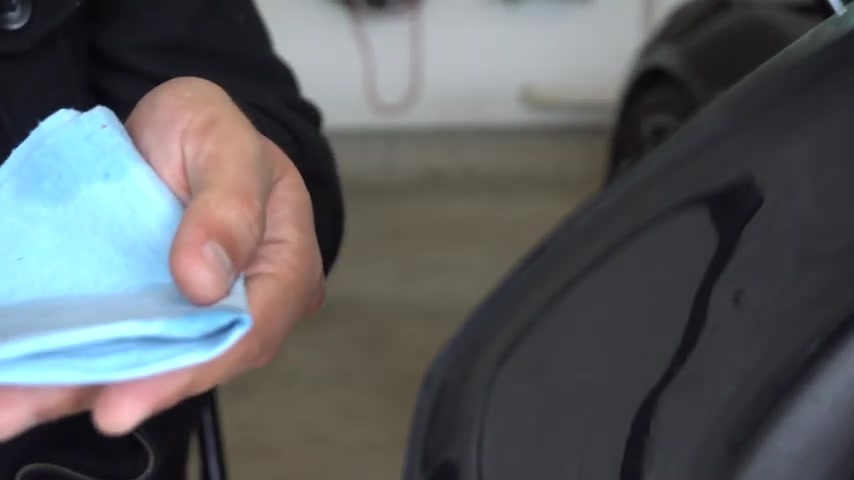
So what we wanna do is open this up , take a little bit um on your shop rag .
So they supply you with a shop bag with the kit and just apply a little bit like that there on your shop bag , you don't need much .
And what you wanna do is gently wipe around the chip area to remove the excess while keeping the pressure , very light and keeping the pressure off of the actual chip .
So I'm gonna take this and we're gonna go ahead and I'm gonna try to do this the best way I can to show you guys what I'm doing .
But I'm gonna lightly massage over the chip area and down here too and look if I go ahead and look there , we have some excess paint that's coming off of the chip .
So what we wanna do is also try to get around here a little bit and it looks like I need a little bit more of the solution .
There we go .
And I'm just gonna gently rub around the chip .
OK ?
And gently here .
OK .
And gently here .
So it's taken off the excess .
Now , you don't want to do this too much .
You don't want to take off too much of the paint or otherwise it is not going to stay in the chip .
So there we go .
That is a much better repair than you typically typically would get , um , from any kind of other paint chip repair .
So I've gone ahead and removed the excess paint and left the paint inside of the chips .
So one thing that's impressive with this chip repair and it's because of the paint is that high solid count and its ability to actually minimize the metal or that primer from signing through .
And that makes it look like a very clean uniform repair where the paint doesn't look like inside of the chip that it's a lighter color because of the higher solid account , it's actually minimizing all of that metal and primer from shining through the paint chip and actually making it much more uniform in the final finish with the surrounding paint .
So the first one was really a deep gouge .

This is a really deep chip in the side blade of my Audi R Raids .
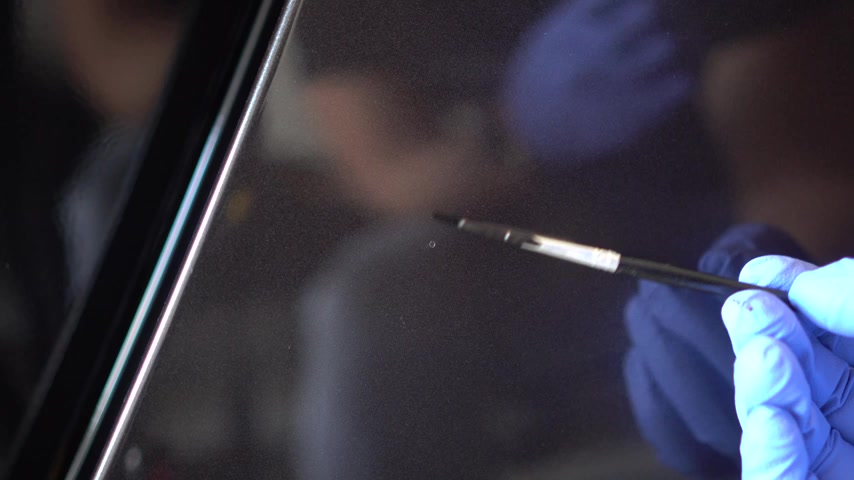
So I'm gonna show you guys again , I'm going to take a brush in this case .
Now , just dab it over the chip , you know , take the Leveler solution , put a little bit on the rag , the blue shop towel that they provide you and all you're gonna do is lightly rub it on again , simply um with the shop towel and the solution and it's going to dissolve the remaining paint from around the chip .
And this is going to do a really good job and this is a really deep chip , right now and I'm putting light pressure on and I'm rubbing it back and forth , back and forth , back and forth .
And you can see that paint starting to dissolve and there it is , it's pretty much half dissolved onto the blue shop towel .
And now you see it finally coming apart and what's left is going to be the paint chip filled in with the color paint matched to your car .
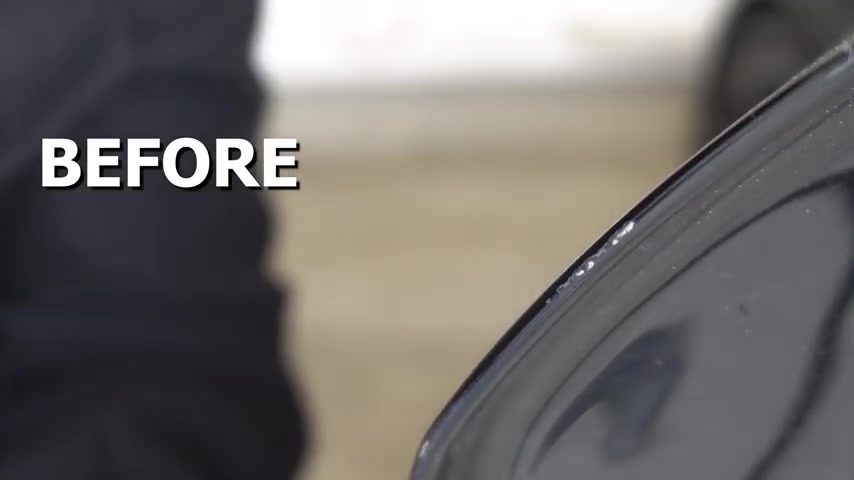
And in this case , my side blade and you can see , look at the before that is supremely visible , look how deep that chip is .
And after , so you still see a bit of the indentation here after because the chip is so deep .
So all you have to do is let it dry and then reapply the paint again to the paint chip .
So here I go , I have the paint brush on , man .
I'm just dabbing it a little bit onto the chip and trying to get some height trying to get some build up over that chip to fill it in as much as possible .
So I let it dry for another five minutes and I go again with the Leveler solution and I'm rubbing side to side .
Here's a circular motion to get that excess paint off .
So remember , you do want to make sure it has enough time to dry .
So that way you're not just retaking off that paint .
So here you go again , it's built up a little bit more .
Now , now it's even harder to see um compared to the first application and you can repeat this process again and again and again .
So this is the before , again , on the side blade of this deep chip .
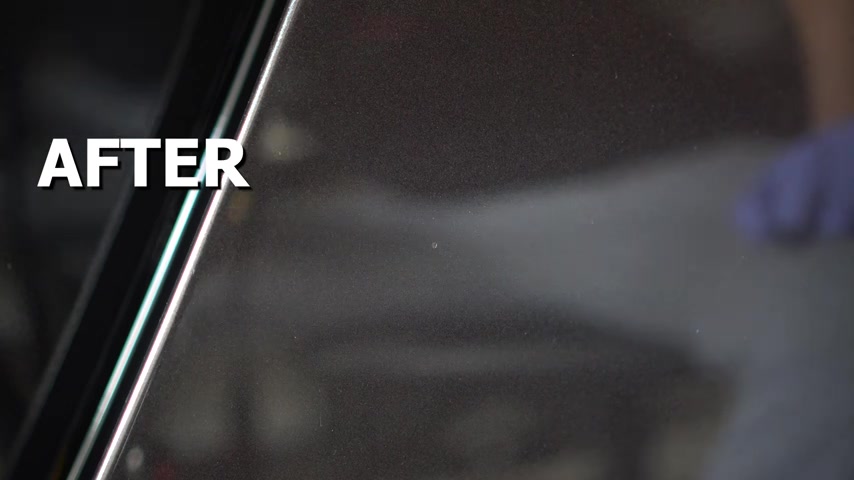
And this is after that's after two applications , you could possibly go for a third application , maybe wait 5 to 6 to 78 minutes and you could get a really good result .
But that's a really amazing result on the side blade here from a deep chip .
And from the previous one I showed you is that deep kind of gouge or scratch on the side of my door .
That's how you properly fix deep scratches or stone chips on your car .
If you have any questions , leave them down in the comment box below .
Make sure you guys thumbs up this video , subscribe if you haven't .
And I'm also gonna be putting the chip fix kit , description link inside of the description box down below .
So make sure if you're interested in that product , it's in the description box and go ahead and check it out .
It's really worked for me as you can see in the results of my 2008 Audi R eight wonderful results .
And I previously did again that road rash video and it really cleared up the front of my hood before the paint protection film application .
So I love this thing .
It's been really helpful for me .
I hope that this video helped you guys as much , make sure again to subscribe and I'll see you guys in the next video .
Partnership
Are you looking for a way to reach a wider audience and get more views on your videos?
Our innovative video to text transcribing service can help you do just that.
We provide accurate transcriptions of your videos along with visual content that will help you attract new viewers and keep them engaged. Plus, our data analytics and ad campaign tools can help you monetize your content and maximize your revenue.
Let's partner up and take your video content to the next level!
Contact us today to learn more.